Eduard 1:72 F6F-3 Hellcat
Discussion


I made some navigation lights by heat stretching clear sprue, then dabbing the ends into the flame to bulb the ends:

They fit into chamfered holes I drilled in the fuselage spine and tail cone.
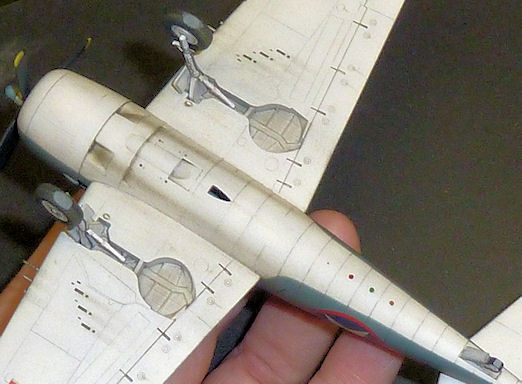
Also flattted the tyres to simulate some weight on them. My preferred method is to roughly flat them before fitting to the model, then put some wet & dry on a surface plate, and place the model on it with one wheel at a time on a corner of the abrasive. Then hold each wheel in turn while circling the abrasive underneath:
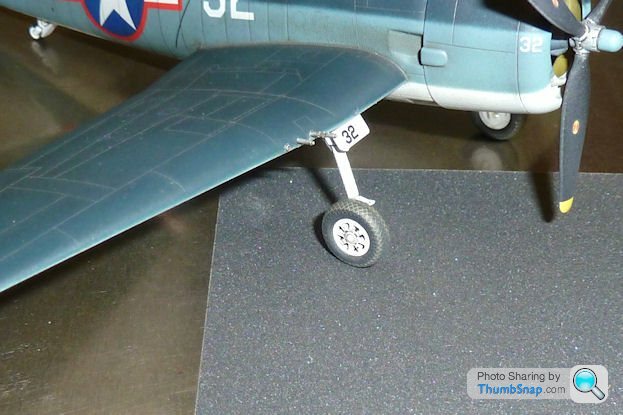
This is an easy way of ensuring pretty much spot-on parallel and level flats:
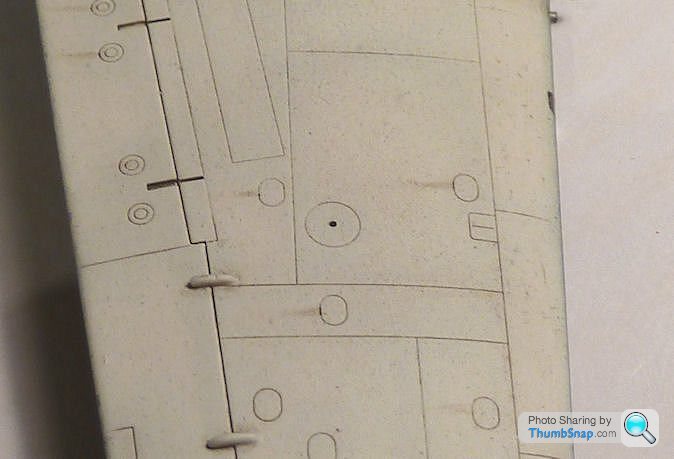
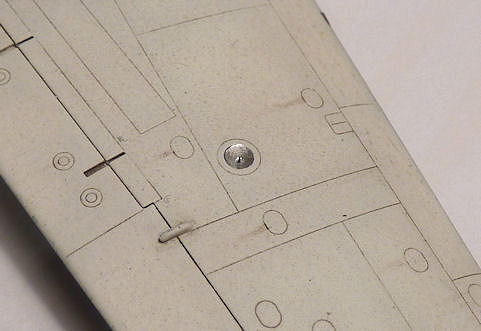
Also noticed that the stbd. wing landing light was missing - probably for an F6F-5 variant of the kit. I used a method I tried on my Curtiss Hawk model, which looked good. First, drill a small hole in the centre of the lamp - this is where the fillament will go:
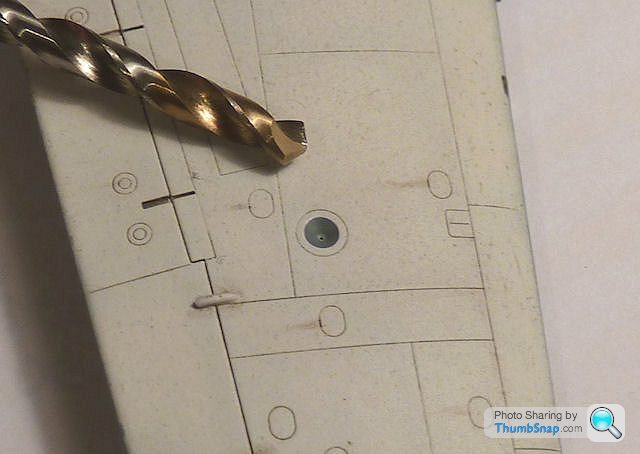
Then make a shallow conical cut with a much larger drill - this forms the reflector:
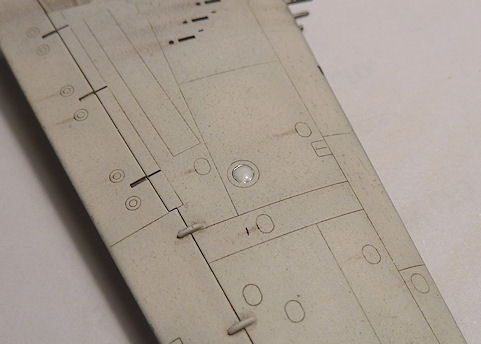
Paint the depression silver, and glue in some black stretched sprue into the small central hole to form the fillament:
Then fill the whole lot with canopy PVA to form the lens:
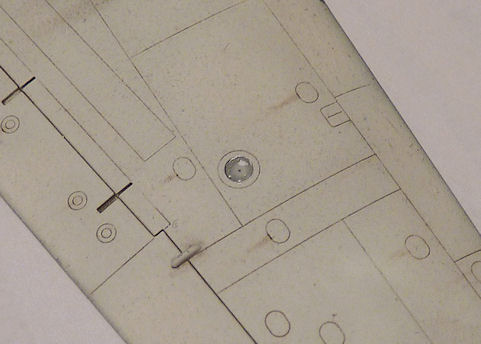
Whan this is set, it dries clear (it's not quite there yet in the photo, but you get the idea):
They fit into chamfered holes I drilled in the fuselage spine and tail cone.
Also flattted the tyres to simulate some weight on them. My preferred method is to roughly flat them before fitting to the model, then put some wet & dry on a surface plate, and place the model on it with one wheel at a time on a corner of the abrasive. Then hold each wheel in turn while circling the abrasive underneath:
This is an easy way of ensuring pretty much spot-on parallel and level flats:
Also noticed that the stbd. wing landing light was missing - probably for an F6F-5 variant of the kit. I used a method I tried on my Curtiss Hawk model, which looked good. First, drill a small hole in the centre of the lamp - this is where the fillament will go:
Then make a shallow conical cut with a much larger drill - this forms the reflector:
Paint the depression silver, and glue in some black stretched sprue into the small central hole to form the fillament:
Then fill the whole lot with canopy PVA to form the lens:
Whan this is set, it dries clear (it's not quite there yet in the photo, but you get the idea):
I used the spare Eduard masks included in the kit (excellent fit):
...to make a direct comparison between the original and vacform canopies:
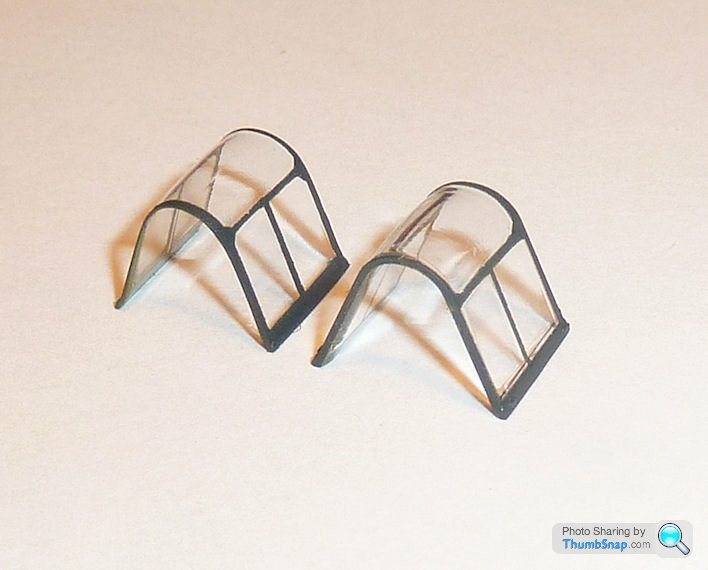
The kit version isn't too bad, but the more delicate looking vacform canopy shades it. As usual, the thinner vacformed acetate also gives less distortion to any features underneath.
Also used some stretched sprue for the aerial wires (I'd already drilled a hole for the flying wire socket in the fuselage side, and fitted a sprue stub), and some buff painted PVA blobs to form the insulators at each end:
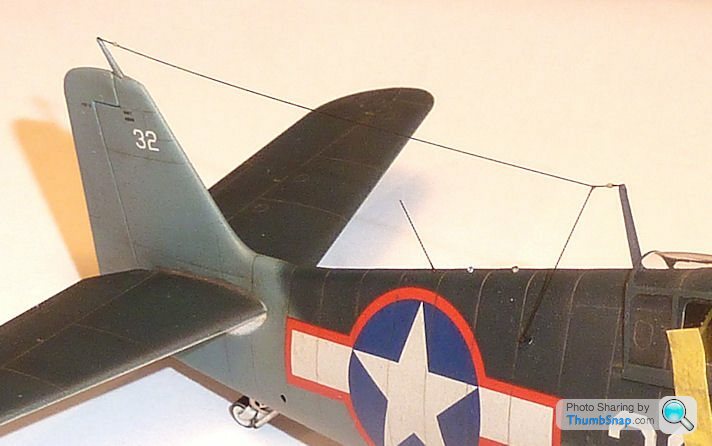
Once the canopy glue is set and the masking tape removed, it'll be finished.
...to make a direct comparison between the original and vacform canopies:
The kit version isn't too bad, but the more delicate looking vacform canopy shades it. As usual, the thinner vacformed acetate also gives less distortion to any features underneath.
Also used some stretched sprue for the aerial wires (I'd already drilled a hole for the flying wire socket in the fuselage side, and fitted a sprue stub), and some buff painted PVA blobs to form the insulators at each end:
Once the canopy glue is set and the masking tape removed, it'll be finished.


Finished pics...
Grumman Hellcat F6F-3, VF-16, USS Lexington, Hawaii, Septemebr 1943:

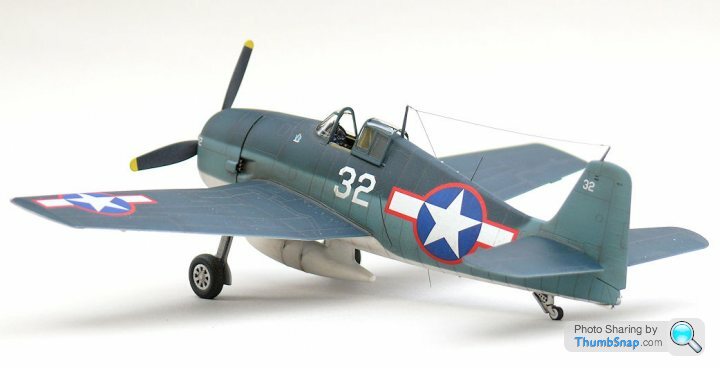
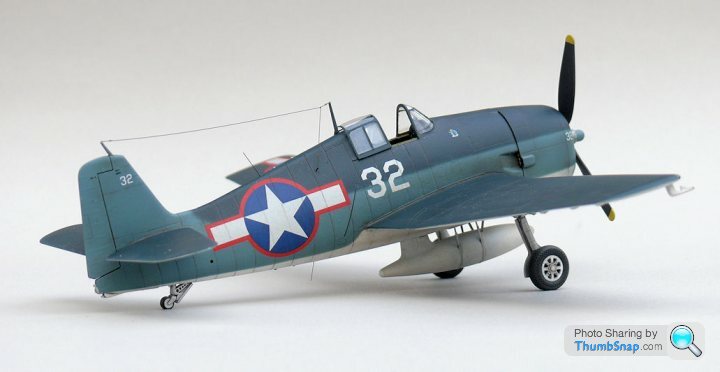
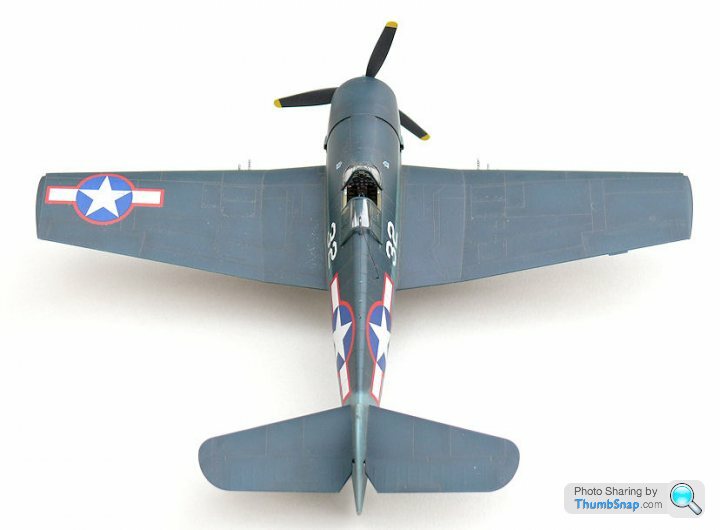
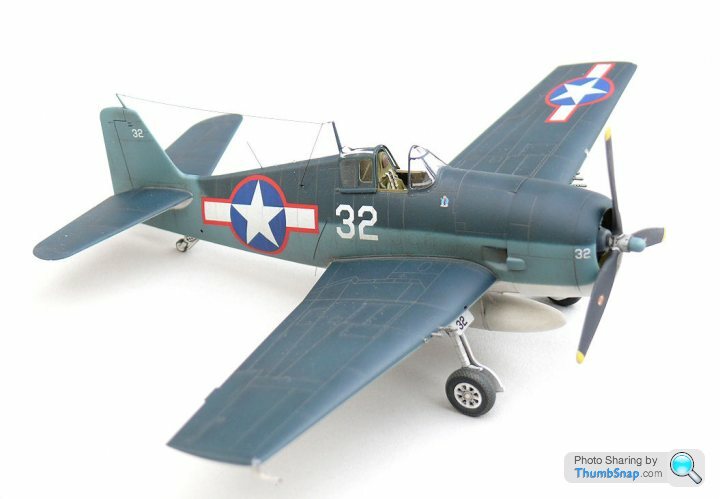

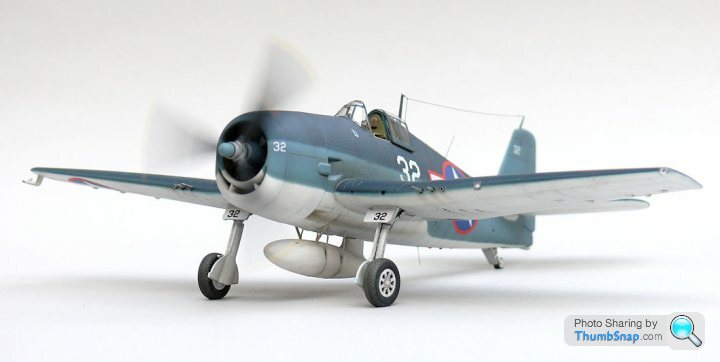
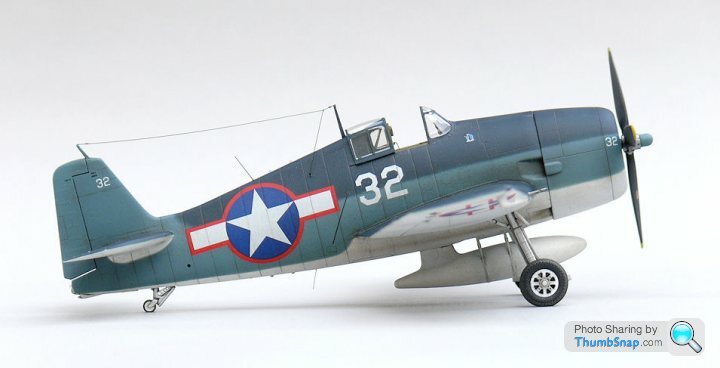
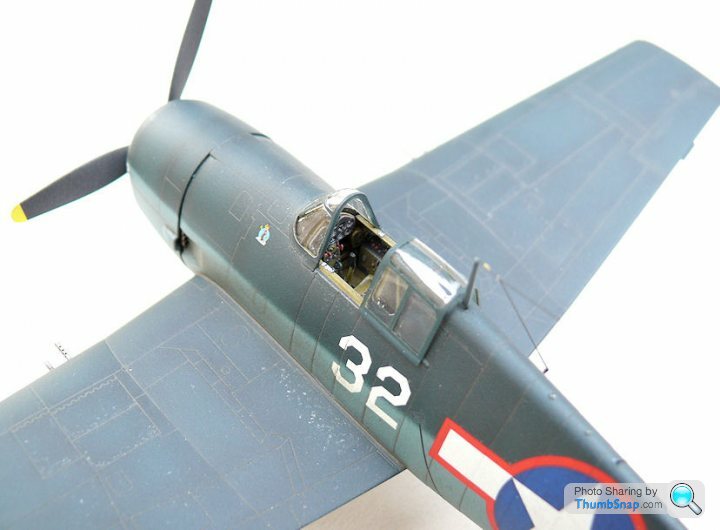
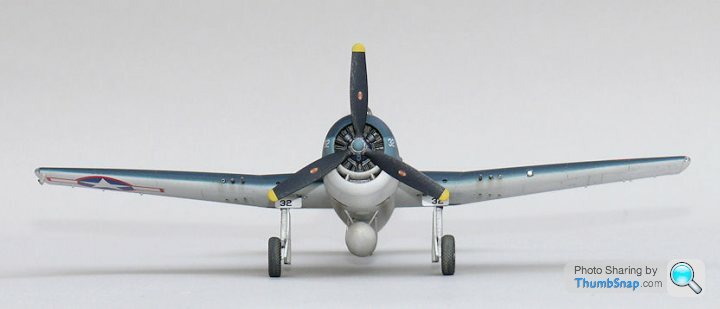
Modifications to kit included:
Scratchbuilt clear styrene landing / navigation lights.
Little Lens identification lamps.
Stretched sprue IFF & VHF whip aerials.
Master Model Brass gun barrels.
Aerial wire stub in fuselage side.
Lead wire wheel brake pipes.
Pitot tube vane (scrap photo-etch).
Drilled out tailwheel drag brace.
Squadron vacform canopy.
Flatted tyres.
Drop tank filler cap decal.
Drilled out exhaust stubs.
Acetate gunsight.
Thanks for watching!
Grumman Hellcat F6F-3, VF-16, USS Lexington, Hawaii, Septemebr 1943:
Modifications to kit included:
Scratchbuilt clear styrene landing / navigation lights.
Little Lens identification lamps.
Stretched sprue IFF & VHF whip aerials.
Master Model Brass gun barrels.
Aerial wire stub in fuselage side.
Lead wire wheel brake pipes.
Pitot tube vane (scrap photo-etch).
Drilled out tailwheel drag brace.
Squadron vacform canopy.
Flatted tyres.
Drop tank filler cap decal.
Drilled out exhaust stubs.
Acetate gunsight.
Thanks for watching!
Edited by dr_gn on Saturday 31st October 12:01
Ayahuasca said:
Pah, can I suggest for your next effort that you fit hinges to the control surfaces and hook up linkages to the control column and rudder pedals?
Yeah you can suggest it...I did see a Hellcat model - not sure what scale - where the guy had cut the wings and made fully operational wing fold hinges.
HoHoHo said:
Lovely and I enjoy your classes in 'how to do it', many thanks 
What's next?
Glad you like it.What's next?
Next up is the Tamiya 1:72 Zero to go wth the Hellcat, plus I'm still figuring out the best way to finish the woodgrain Mosquito. I got side tracked with that because of some family health issues, but hopefully it'll be complete soon.
Gassing Station | Scale Models | Top of Page | What's New | My Stuff