Airfix 1:72 Me109E-3 Starter Kit
Discussion


I think dr_gn did the test build for this. Here's my attempt:
First point is that it went together really well, but I'm not sure I'd give it as a first kit since there are a lot of very small and delicate parts (aerial, pitot tube, counterbalances, rudder pedals) that would end up snapped in short order. In the end I didn't fit the pitot tube or the aileron counter balances, as the model will be part of a WW2 exhibit at a school, but did add brake lines to the undercarriage. It does however, boast positionable rudder, flaps, and engine cover along with a three piece posable canopy that would give options similar to a 1:48 from not too long ago.
Talking of the pitot tube, the instructions have the fitting prior to placing the decals. This makes fitting the Luftwaffe cross on the underside of the starboard wing very awkward, as it covers the hole, so I would recommend leaving the pitot tube to last so the decal can be placed easily (and also reducing snap-off opportunities for fumbling fingers).
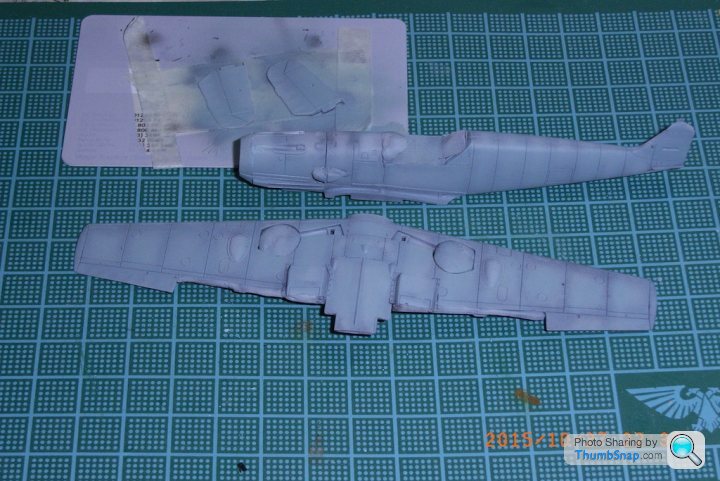
The only fit issue, similar to that reported by dr_gn is the fuselage to wing assembly. The wings have to be aligned precisely to ensure the wheel bays line up, but without trimming the cockpit tub, the fuselage is too wide to fit in the slot. [NOTE: When dry fitting, it goes in the slot just dandy until the cockpit tub is fitted as this splays the bottom just enough to prevent the wings fitting.] A simple shave of the cockpit tub allows the fit - but you must do this before gluing the fuselage assembly together, otherwise it will be a much trickier job.
I didn't use the supplied paints as my first attempt to open one resulted in green hands. Another note if a younger modeller's present - open the paint for him/her, and well away from the model.
Anyhow, onto the gratuitous photos:
1. Checking the fit (thanks dr_gn for highlighting this as a potential issue):

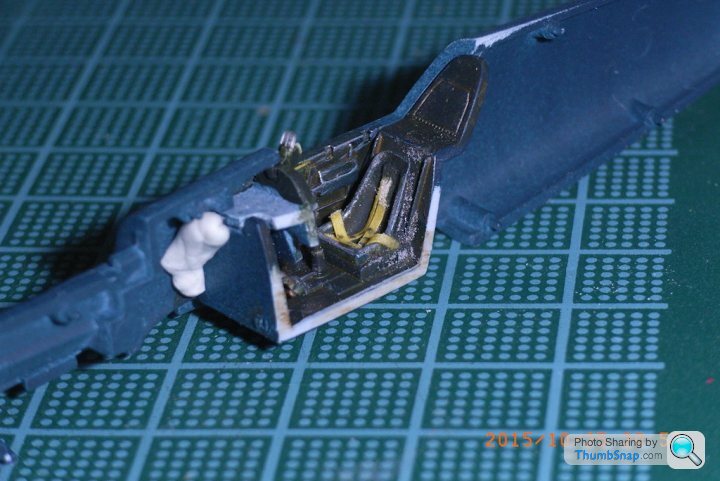
2. Cockpit close ups:

3. Pale blue base coat over pre-shading (As an experiment, I tried painting prior to final assembly for simpler masking):
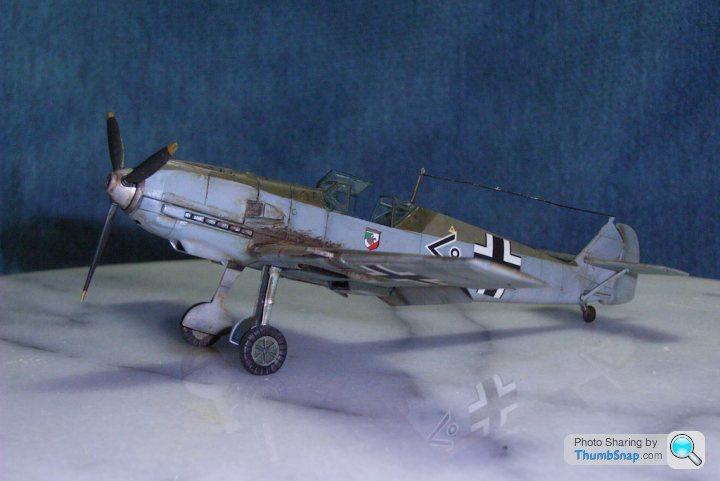
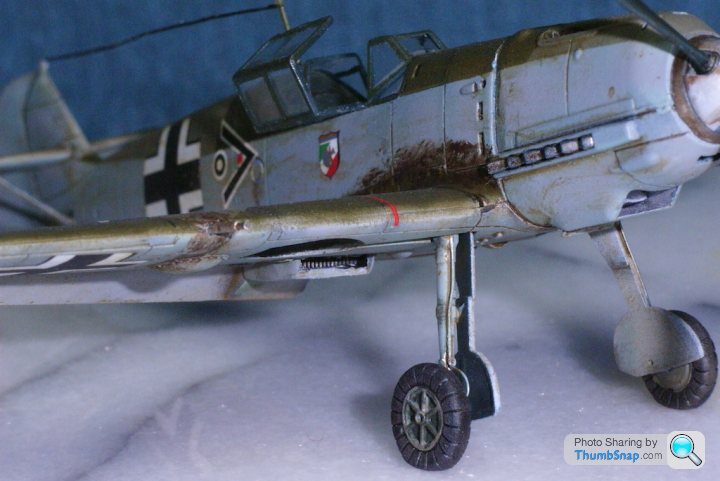
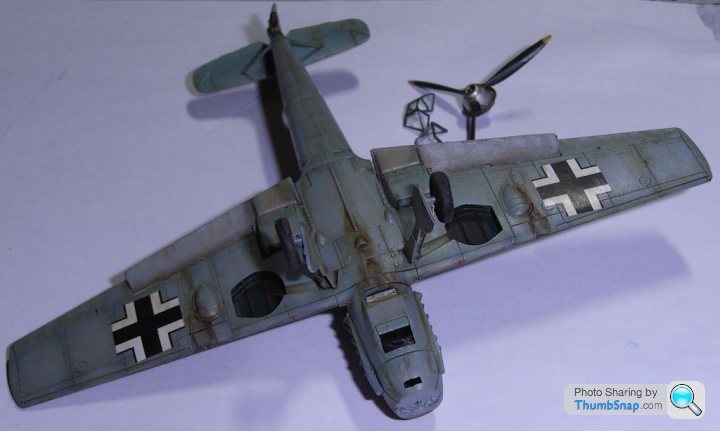
4. Final reveal:

First point is that it went together really well, but I'm not sure I'd give it as a first kit since there are a lot of very small and delicate parts (aerial, pitot tube, counterbalances, rudder pedals) that would end up snapped in short order. In the end I didn't fit the pitot tube or the aileron counter balances, as the model will be part of a WW2 exhibit at a school, but did add brake lines to the undercarriage. It does however, boast positionable rudder, flaps, and engine cover along with a three piece posable canopy that would give options similar to a 1:48 from not too long ago.
Talking of the pitot tube, the instructions have the fitting prior to placing the decals. This makes fitting the Luftwaffe cross on the underside of the starboard wing very awkward, as it covers the hole, so I would recommend leaving the pitot tube to last so the decal can be placed easily (and also reducing snap-off opportunities for fumbling fingers).
The only fit issue, similar to that reported by dr_gn is the fuselage to wing assembly. The wings have to be aligned precisely to ensure the wheel bays line up, but without trimming the cockpit tub, the fuselage is too wide to fit in the slot. [NOTE: When dry fitting, it goes in the slot just dandy until the cockpit tub is fitted as this splays the bottom just enough to prevent the wings fitting.] A simple shave of the cockpit tub allows the fit - but you must do this before gluing the fuselage assembly together, otherwise it will be a much trickier job.
I didn't use the supplied paints as my first attempt to open one resulted in green hands. Another note if a younger modeller's present - open the paint for him/her, and well away from the model.
Anyhow, onto the gratuitous photos:
1. Checking the fit (thanks dr_gn for highlighting this as a potential issue):
2. Cockpit close ups:
3. Pale blue base coat over pre-shading (As an experiment, I tried painting prior to final assembly for simpler masking):
4. Final reveal:

Nice job there!
I'm nearing the end of the same kit myself, however I'm going for the Battle of Britain style scheme with the yellow nose / tail / wing tips. Interesting that you mention the fit of the wings to the fuselage, as although mine was snug it snapped together beautifully, in fact the whole kit has. I was expecting gaps in the fuselage and wings along the joins but they all surprised me with the quality of fit.
EDIT: I've just seen that this kit is the 1/72 version, mine is the 1/48, which may explain the differences in build ease!
Edited by Brigand on Thursday 12th November 13:03
Hi Eric, That matches my thoughts too, a lovely kit but somewhat delicate for a starter.
I was surprised at the flexibility of the kit given it was an entry level Starter Kit complete with custard pots (though, after the first one opened up rather enthusiastically all over my hand, I stuck with Vallejo's nice and easy dropper bottles).
Glues were Revell's Contacta Liquid, and Humbrol's Clear Fix for the canopy. And I use a nail pad from Boots - it's a 1"x1"x4" foam block with four grades of abrasive, one on each long side; old ones are useful for holding components on cocktail sticks steady.
Primers were Citadel's Incubi Darkness, a dark green/turquoise; I used this for the interior, wheel bays and canopy before the RLM70 (dark green) top coat. It meant the canopy was green on the inside without my having to mask that too. And Model Mates's Matt Light Grey for the general exterior.
Paints are Vallejo Model Air through an Aztek airbrush (retarder medium is essential), Klear coated and then washed using Winsor & Newton 'Cotman' water colours (8ml finger size tubes that are about £2.50 each) before a final clear and then VMA matt vanish. The washes remain water soluble for hours, which is an advantage for rework and blending (I used raw umber and sepia - the burnt umber is good too as it has a red tint) but you have to Klear them to fix the effect (use an airbrush - a brush just wipes it away). I have an old brush I cut at 45' to create stipple patterns.
sad61t said:
Primers were Citadel's Incubi Darkness, a dark green/turquoise; I used this for the interior, wheel bays and canopy before the RLM70 (dark green) top coat. It meant the canopy was green on the inside without my having to mask that too. And Model Mates's Matt Light Grey for the general exterior.
I'd have thought the interior and wheel wells would be RLM02 (Light Grey Green). If you apply the interior colour locally to the canopy before anything else, then it automatically becomes the correct colour for the internal framing (assuming it's the same as the interior!). Of course it appears slightly differently due to being viewed through plastic, which is why when internal canopy frames are prominent, I usually mask and paint from the inside.Hi dr_gn, Yes, RLM02 would have been better. I had an end of October deadline (10 day build altogether) so It was very much a case of choosing a colour and going with it, but in hindsight the instructions do spec Humbrol 31 for the interior surfaces. As the kit came with a colour scheme cut down to only the four supplied colours, I based the internal colours on the Swiss G-6 and some photos of museum exhibits when I was looking up the brake line layout and saw one that had the deep part of the bay in green and the shallow part (for the leg) in pale grey.
sad61t said:
Hi dr_gn, Yes, RLM02 would have been better. I had an end of October deadline (10 day build altogether) so It was very much a case of choosing a colour and going with it, but in hindsight the instructions do spec Humbrol 31 for the interior surfaces. As the kit came with a colour scheme cut down to only the four supplied colours, I based the internal colours on the Swiss G-6 and some photos of museum exhibits when I was looking up the brake line layout and saw one that had the deep part of the bay in green and the shallow part (for the leg) in pale grey.
If it looks good, it looks good. I mistakenly painted the dark green bits of camo on mine totally the wrong shade (too dark), even though I had the correct colour to hand. End of the day, nobody seemed to notice.pattyg said:
Fantastic model OP. Here's a gratuitous but poor picture of the real deal in the Deutsches Museum, Munich.

You can see the canopy on that aircraft is different from the kit version: One of the distinguishing external features of the E3 was that they were originally fitted with a thinner framed, radiussed edged canopy. The Airfix E3 model still uses the more angular E4 version. having said that, many E3's were retro-fitted with the later canopy in the field, so it might be right for that particular aircraft.sad61t said:
Here's a photo of the aircraft in the field (literally!):

I queried the canopy too; apparently by the Battle of Britain most of the earlier E series had been upgraded to the E-4 series' canopy, but without the armoured headrest. (The headrest is in the kit, but not fitted.)
I think the head armour was fitted, but many pilots subsequently removed it to increase rear visibility.I queried the canopy too; apparently by the Battle of Britain most of the earlier E series had been upgraded to the E-4 series' canopy, but without the armoured headrest. (The headrest is in the kit, but not fitted.)
Gassing Station | Scale Models | Top of Page | What's New | My Stuff