Airfix Hurricane 1/24
Discussion


dr_gn said:
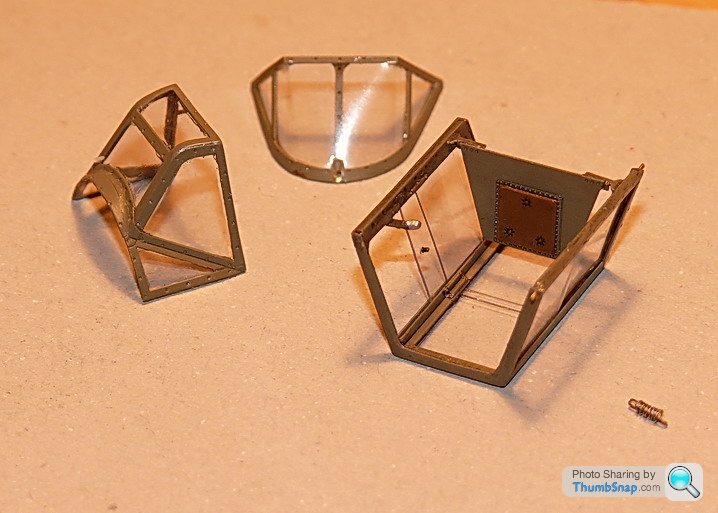
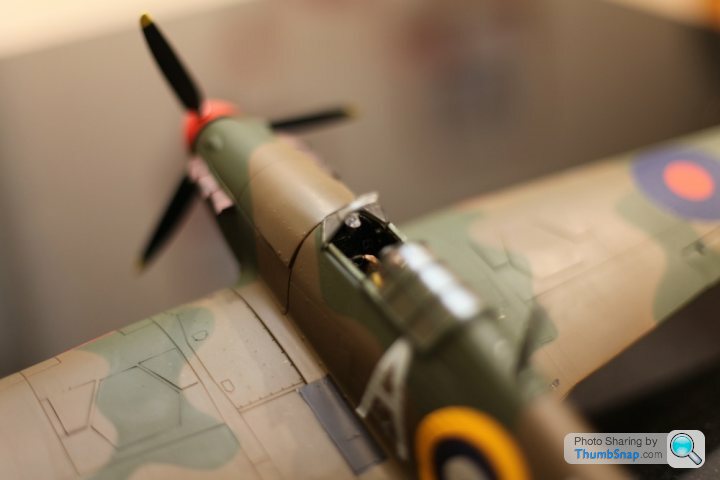
If you prime the canopy, you see the primer colour through the glazing when it's finished. Unless the 'real' interior colour happens to match the primer, then it will be wrong. TBH at 1:24 I'd probably spray the internal framing as well as the outside.
Simple answer is I don't prime the canopy framing - it's not worth it.
That is axactly the case and I can se white on th einside of the canopy.Simple answer is I don't prime the canopy framing - it's not worth it.
So do you tend to leave the canopy off until you absolutely have no choice or do you mask, spray and then glue in place and then over mask again?
HoHoHo said:
dr_gn said:
If you prime the canopy, you see the primer colour through the glazing when it's finished. Unless the 'real' interior colour happens to match the primer, then it will be wrong. TBH at 1:24 I'd probably spray the internal framing as well as the outside.
Simple answer is I don't prime the canopy framing - it's not worth it.
That is axactly the case and I can se white on th einside of the canopy.Simple answer is I don't prime the canopy framing - it's not worth it.
So do you tend to leave the canopy off until you absolutely have no choice or do you mask, spray and then glue in place and then over mask again?
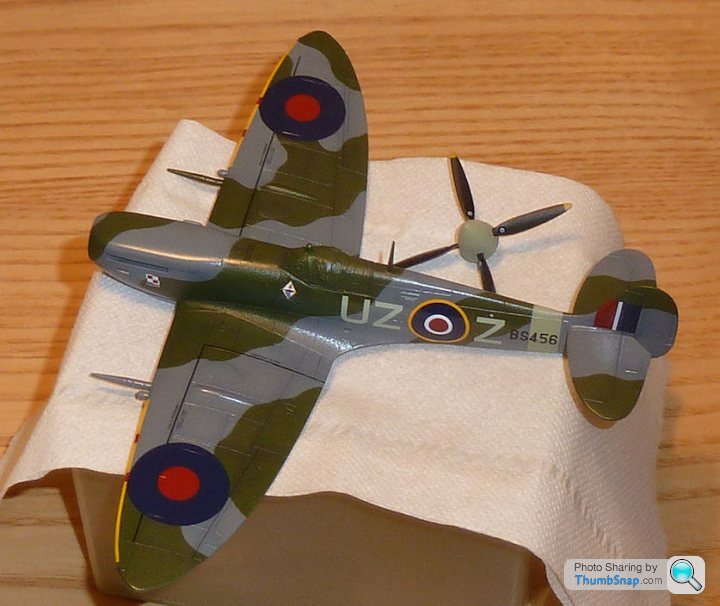
For a 1:72 one-piece closed canopy, I'd fit it after priming the airframe, mask it and immediately spray it with cockpit colour, then complete the camo as normal e.g. Spitfire:
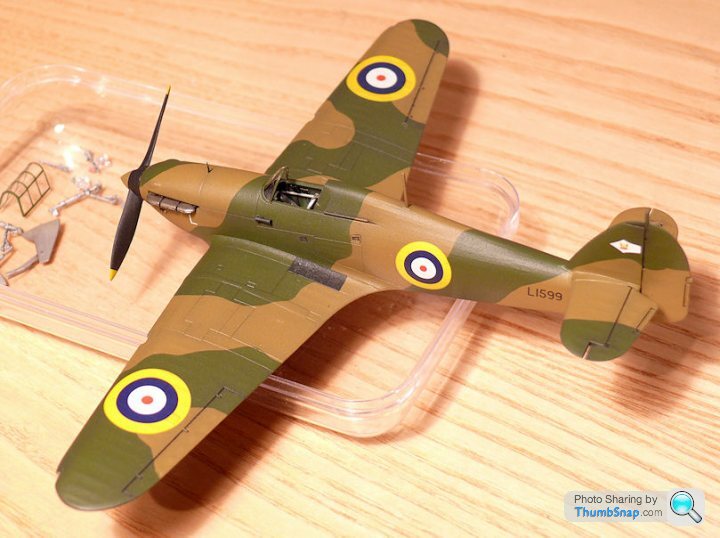
For a 1:72 two-piece closed canopy I'd paint the sliding part separately, but otherwise as above. Simple reason is that if you screw up the canopy painting, at least it's not attached to the rest of the aircraft and you can correct it without any risk of damaging your newly painted model. e.g. Hurricane:
For 1:72 open cockpits, I'd do the above for the fixed part of the canopy (usually the windscreen), but obviously leave the sliding canopy off and paint it separately. If any of the internal canopy or windscreen framing was clearly visible, (when open) I'd locally mask the inside of the canopy and spray in interor colour so that it looks matt, rather than the gloss you get when seeing it through the plastic. This usually only applies to the first hoop of the canopy, e.g. Malcolm Hood Mustang:
Of course there are always the exceptions, which in my case was the Tornado GR.4, for which I made the entire canopy from scratch (vacformed), and fully detailed it inside and out. This was becasue when open, it's all clearly visible:


...and the Airfix Gladiator which somehow has a one-piece, open canopy (-ish). Luckily the internal framing isn't too visible, so no internal masking is needed:
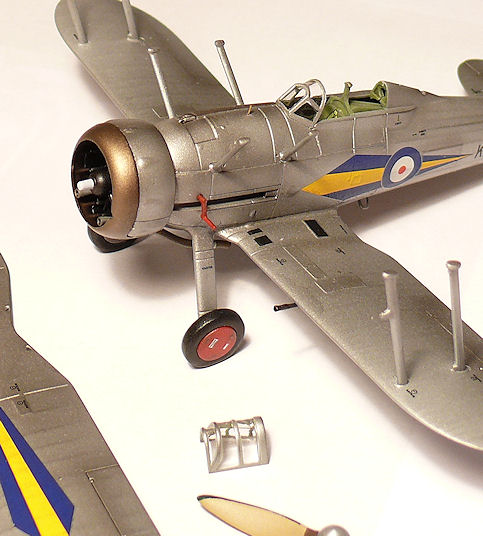
For 1:32 or larger I'd go with masking the whole thing inside and out, since invariably the canopy would be open, e.g. Bf.109E-4:
I think that 'covers' everything

Edited by dr_gn on Thursday 3rd December 19:36
No probs - canopies are one of the things that can make or break a model.
On yours, why not try getting a cocktail stick, dampen the end in Vallejo thinners and run it around the periphery of each panel, to see if you can flake/abrade the edges of the paint off (I often do this at 1:72 for light overspray errors).
Then re-mask and respray a coat of top colour, which would hopefully cover the exposed edges? It's the kind of thing that might work if you set aside an hour to just concentrate on getting that part right. All correction attempts like this come with a risk, but if it goes wrong you can send off for another canopy.
dr_gn said:
No probs - canopies are one of the things that can make or break a model.
On yours, why not try getting a cocktail stick, dampen the end in Vallejo thinners and run it around the periphery of each panel, to see if you can flake/abrade the edges of the paint off (I often do this at 1:72 for light overspray errors).
Then re-mask and respray a coat of top colour, which would hopefully cover the exposed edges? It's the kind of thing that might work if you set aside an hour to just concentrate on getting that part right. All correction attempts like this come with a risk, but if it goes wrong you can send off for another canopy.
I think it's certainly worth a play that's for sure.On yours, why not try getting a cocktail stick, dampen the end in Vallejo thinners and run it around the periphery of each panel, to see if you can flake/abrade the edges of the paint off (I often do this at 1:72 for light overspray errors).
Then re-mask and respray a coat of top colour, which would hopefully cover the exposed edges? It's the kind of thing that might work if you set aside an hour to just concentrate on getting that part right. All correction attempts like this come with a risk, but if it goes wrong you can send off for another canopy.
Will revert re that.
Thanks.
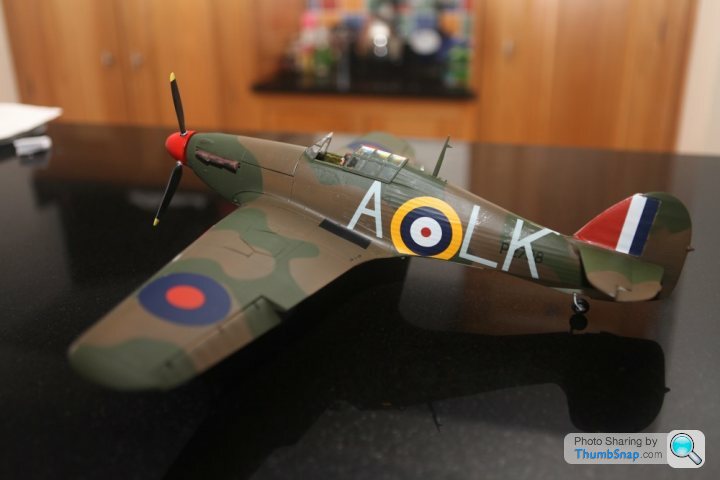
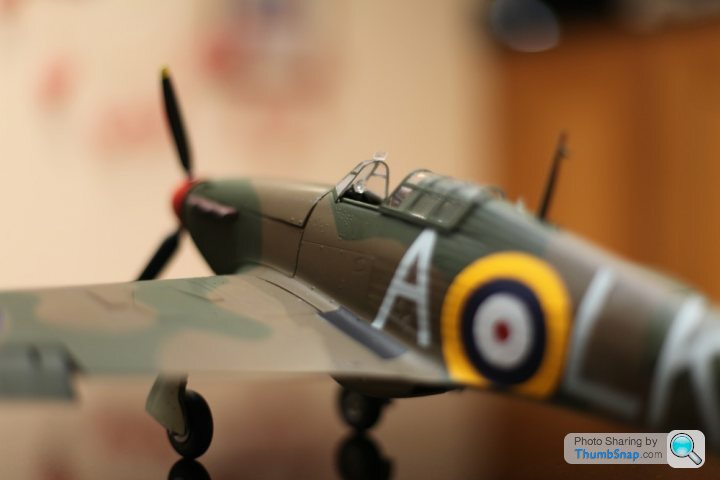
FFS the decals are on however on the sides they are supplied in one piece for the two individual letters and the clear part of of the decal has gone silver on both sides  I have tried to help matters spraying with a matt finish but that hasn't done any good whatsoever.
Frustrating but I'm sure there's a good reason and yet another learning curve!
Pics to follow shortly.
I have tried to help matters spraying with a matt finish but that hasn't done any good whatsoever.Frustrating but I'm sure there's a good reason and yet another learning curve!
Pics to follow shortly.
HoHoHo said:
FFS the decals are on however on the sides they are supplied in one piece for the two individual letters and the clear part of of the decal has gone silver on both sides I have tried to help matters spraying with a matt finish but that hasn't done any good whatsoever.
Frustrating but I'm sure there's a good reason and yet another learning curve!
Pics to follow shortly.
Hmmm, unfortunately it's not the topside of the decls that's the problem, it's the undersides, so no amount of varnish will solve the silvering issue. I have tried to help matters spraying with a matt finish but that hasn't done any good whatsoever.Frustrating but I'm sure there's a good reason and yet another learning curve!
Pics to follow shortly.
I'd try and remove the decals somehow - maybe high-tack adhesive tape, or dissolving with Microsol. If this doesn't work, then very lightly abrade the surface with went & dry, repaint and try again with a new set of decals. You could repaint using a lighter brown while you're at it?
The best way to pretty much guarantee no silvering is to place the decal, preferably on a gloss/satin surface, and then wick a small amount of Klear behind with a paintbrush. This will fill all the tiny air pockets between the decal carrier film and the paint surface. apply Microsol to the top of the decal and leave for a while.
dr_gn said:
HoHoHo said:
FFS the decals are on however on the sides they are supplied in one piece for the two individual letters and the clear part of of the decal has gone silver on both sides I have tried to help matters spraying with a matt finish but that hasn't done any good whatsoever.
Frustrating but I'm sure there's a good reason and yet another learning curve!
Pics to follow shortly.
Hmmm, unfortunately it's not the topside of the decls that's the problem, it's the undersides, so no amount of varnish will solve the silvering issue. I have tried to help matters spraying with a matt finish but that hasn't done any good whatsoever.Frustrating but I'm sure there's a good reason and yet another learning curve!
Pics to follow shortly.
I'd try and remove the decals somehow - maybe high-tack adhesive tape, or dissolving with Microsol. If this doesn't work, then very lightly abrade the surface with went & dry, repaint and try again with a new set of decals. You could repaint using a lighter brown while you're at it?
The best way to pretty much guarantee no silvering is to place the decal, preferably on a gloss/satin surface, and then wick a small amount of Klear behind with a paintbrush. This will fill all the tiny air pockets between the decal carrier film and the paint surface. apply Microsol to the top of the decal and leave for a while.

On this occasion I'm not going to strip the decals, I'll leave as is and hang in Sammy's bedroom. The model whilst I'm quite pleased with the result doesn't warrant more work. However what it does do well is being used as a training exercise.
I've taken photos and I'm just waiting for Aperture to rebuild itself.............seems everything is throwing a wobbler at the moment.
My next model is a 1:144 A380 which I've started along with a Vickers Vanguard. I'll post some images but its too late for the build thread.
I find it amazing that a hobby that some make look so easy is actually quite difficult to get really good results.
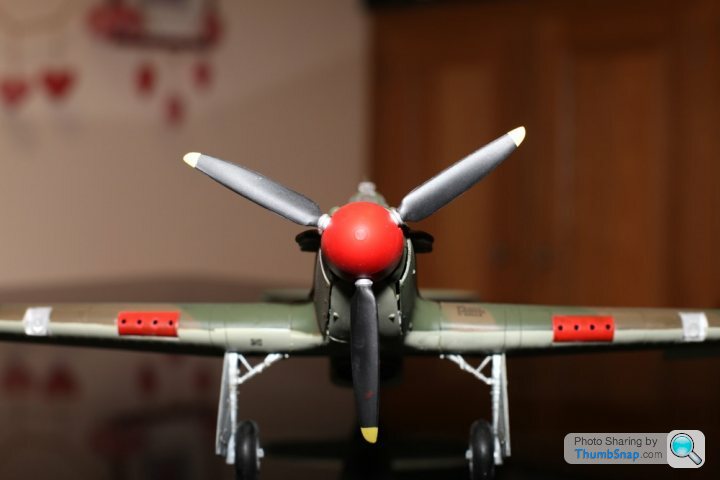
On a side note, Sammy is thrilled with his new bedroom model and Mrs. HoHoHo would like to know why the RAF placed targets on the side of their aricraft

HoHoHo said:
dr_gn said:
HoHoHo said:
FFS the decals are on however on the sides they are supplied in one piece for the two individual letters and the clear part of of the decal has gone silver on both sides I have tried to help matters spraying with a matt finish but that hasn't done any good whatsoever.
Frustrating but I'm sure there's a good reason and yet another learning curve!
Pics to follow shortly.
Hmmm, unfortunately it's not the topside of the decls that's the problem, it's the undersides, so no amount of varnish will solve the silvering issue. I have tried to help matters spraying with a matt finish but that hasn't done any good whatsoever.Frustrating but I'm sure there's a good reason and yet another learning curve!
Pics to follow shortly.
I'd try and remove the decals somehow - maybe high-tack adhesive tape, or dissolving with Microsol. If this doesn't work, then very lightly abrade the surface with went & dry, repaint and try again with a new set of decals. You could repaint using a lighter brown while you're at it?
The best way to pretty much guarantee no silvering is to place the decal, preferably on a gloss/satin surface, and then wick a small amount of Klear behind with a paintbrush. This will fill all the tiny air pockets between the decal carrier film and the paint surface. apply Microsol to the top of the decal and leave for a while.
On this occasion I'm not going to strip the decals, I'll leave as is and hang in Sammy's bedroom. The model whilst I'm quite pleased with the result doesn't warrant more work. However what it does do well is being used as a training exercise.
I've taken photos and I'm just waiting for Aperture to rebuild itself.............seems everything is throwing a wobbler at the moment.
My next model is a 1:144 A380 which I've started along with a Vickers Vanguard. I'll post some images but its too late for the build thread.
I find it amazing that a hobby that some make look so easy is actually quite difficult to get really good results.
On a side note, Sammy is thrilled with his new bedroom model and Mrs. HoHoHo would like to know why the RAF placed targets on the side of their aricraft
Presumably it's the Revell A380? It's a nice kit IIRC- I built one for my son and fitted cabin and navigation lights to it, powered with a 9v battery. Looks good at night.
FWIW I think that as soon as you add airbrushing to building a model, the whole process becomes 10x more difficult, but the results are - sometimes - 20x better.
Edited by dr_gn on Friday 4th December 19:36


dr_gn said:
I looks pretty good to me - I assumed you meant the entire decal was silvered, not just a few spots.
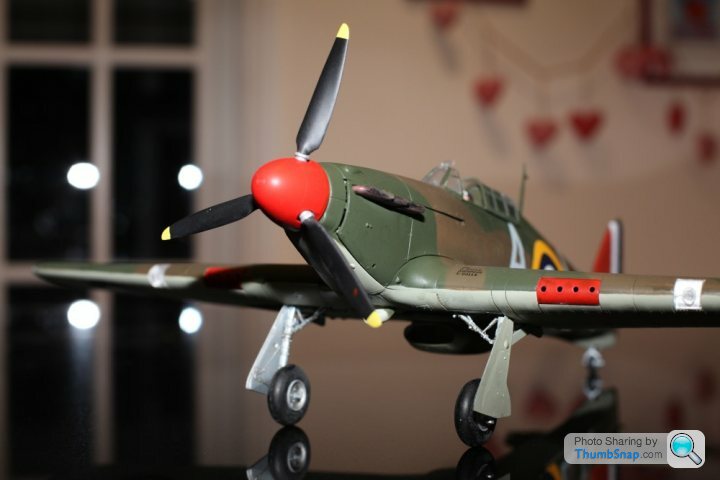
The brown looks better in those photos too.
Sorted - good job
Hi GThe brown looks better in those photos too.
Sorted - good job
It wasn't the entire decal, just the cl;ear element between the letters.
I will have a play with weathering, I did pin wash the panel lines underneath but haven't gone any further. As you say, the brown looks better and I suspect it was a combination of an iPhone photo, taken in my man cave and also some red light from the heater playing tricks. It's not as dark as it first appeared which is good

Am I happy with the result?
Yes. Currently it's a learning curve and like anything the more you play, the better you get

Gassing Station | Scale Models | Top of Page | What's New | My Stuff