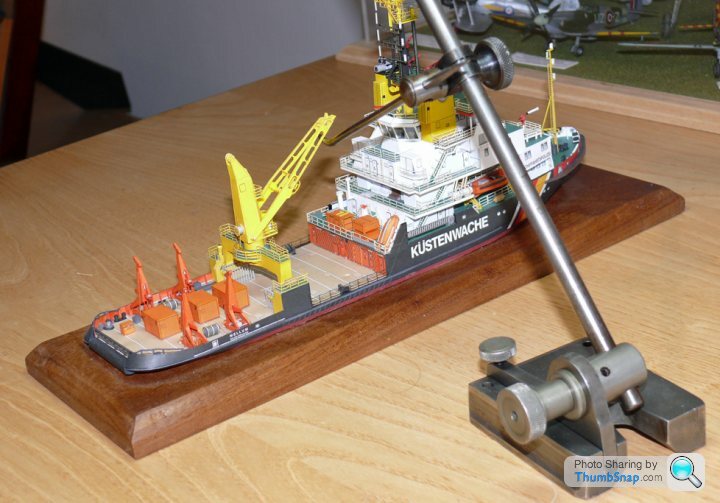
1:250 Scale Paper Model: Multi-Purpose Vessel "Mellum"
Discussion


I know it is a dumb question but will there be a crane to hoist that RIB into the oggin?
After asking I suspect it may be whatever gets to sit in that circular housing in front of the containers
Anyway, just wondered is all
It does make an impression, I really do like these paper models and you seem to be well on top with them

nice one G
After asking I suspect it may be whatever gets to sit in that circular housing in front of the containers
Anyway, just wondered is all
It does make an impression, I really do like these paper models and you seem to be well on top with them
nice one G
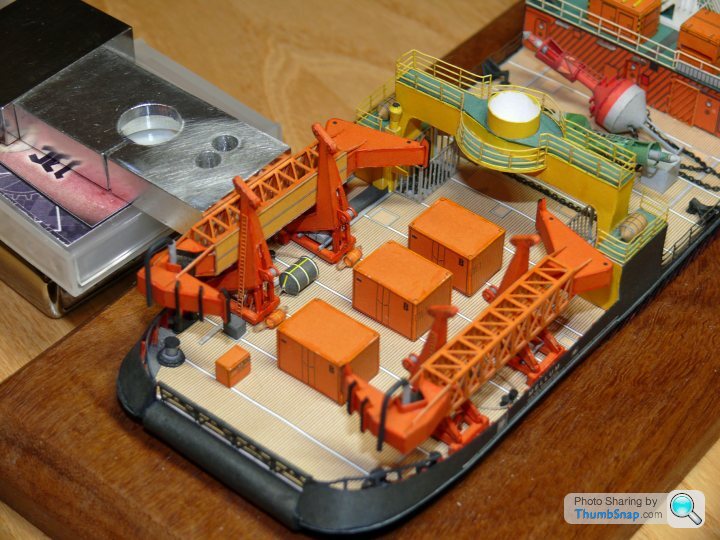
Here is the crane, with the jib being held in place while the glue sets:
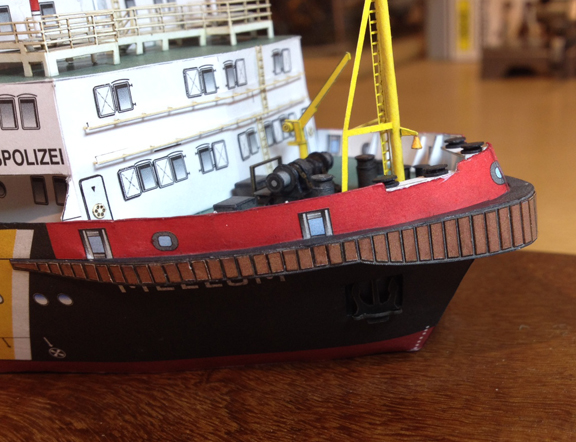
Both gangplanks were too long, so had to have a section cut out:

Side strakes cut out and fitted:

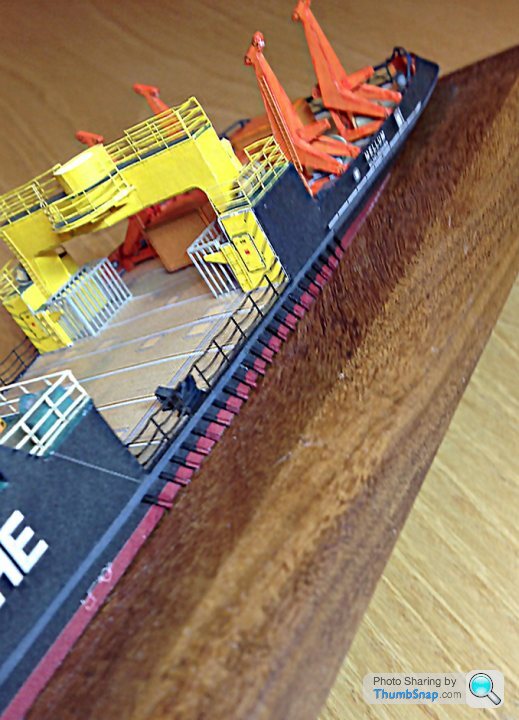
Same with the bow bumper blocks:

Pretty tedious to cut each individual piece out and then paint around the edges...
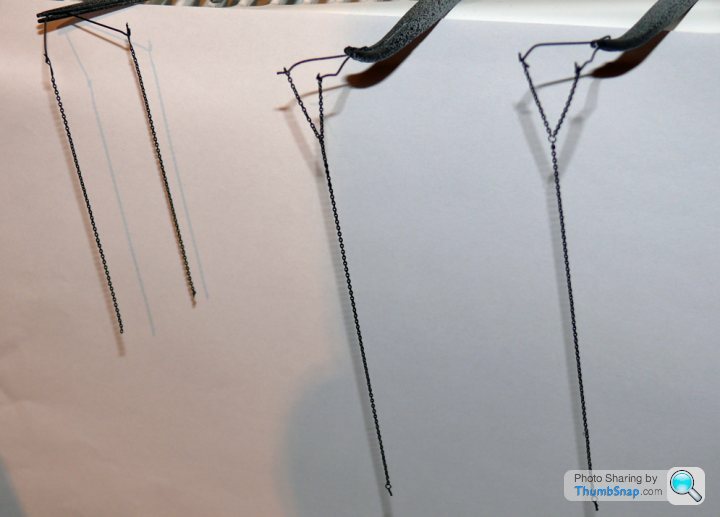
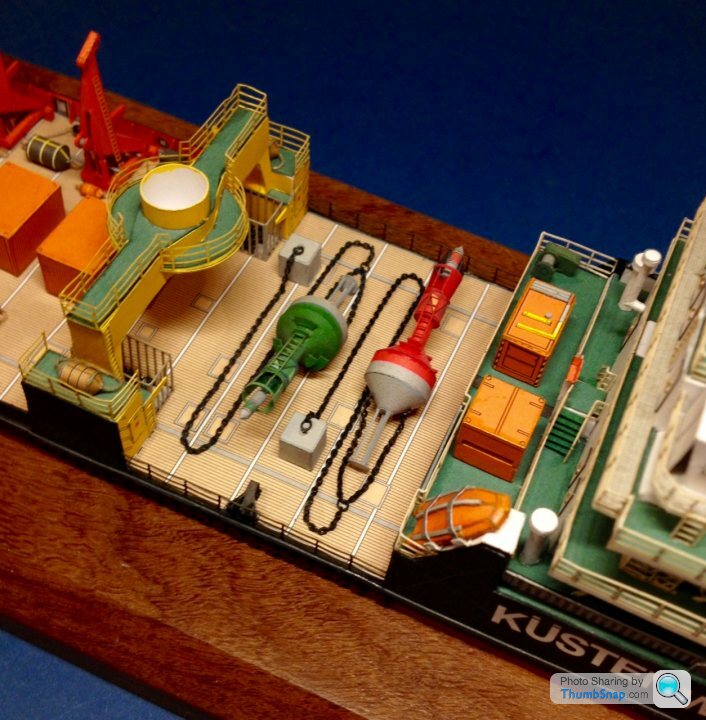
Then the buoy chains, which I got off EBay. Unfortunately HMV dont sell spare lengths of laser-cut card chain, so these are some of the few non-card bits of the model. all the other built kits I've seen have the chain attached directly to the lower ballast plates, but I'm pretty sure that's wrong; they should attach to padeyes welded onto the lower cones, so they need "Y" bridles:

The eyelets at the ends are twisted lead wire, and the "Y" rings are sprue. Primed and sprayed black, before a dusting of gunmetal weathering powder:
Then attached them to the buoys and anchor blocks:


Now to glue them in place on the deck...
Both gangplanks were too long, so had to have a section cut out:
Side strakes cut out and fitted:
Same with the bow bumper blocks:
Pretty tedious to cut each individual piece out and then paint around the edges...
Then the buoy chains, which I got off EBay. Unfortunately HMV dont sell spare lengths of laser-cut card chain, so these are some of the few non-card bits of the model. all the other built kits I've seen have the chain attached directly to the lower ballast plates, but I'm pretty sure that's wrong; they should attach to padeyes welded onto the lower cones, so they need "Y" bridles:
The eyelets at the ends are twisted lead wire, and the "Y" rings are sprue. Primed and sprayed black, before a dusting of gunmetal weathering powder:
Then attached them to the buoys and anchor blocks:
Now to glue them in place on the deck...
So tonight I completed the rigging, any TBH it looked spot-on. So then I masked the windows and base, and gave it a coat of Matt varnish (as I did with the trawler, to seal the paper and normalise the finish). After a few minutes, a pure white haze appeared on all the black printed parts, including the entire hull. I tried to correct it using Klear, weathering powders and various other things, but to no avail. It's basically scrap. Unbelievable, but that's the way it goes sometimes! But thanks for all the positive comments over the course of the thread! I'll be back!
Oh no!
I watched your build with nothing but awe for the skill and effort you have put in to it, sorry to hear this, utterly gutted.
As a last resort have you tried a hair dryer/heat gun on a low setting? It works for polish on furniture when it is applied in to cold an atmosphere. The effect is somewhat dramatic when it first goes white from the 'chill' but can be remedied with heat. Must be worth a try?
Best of luck.
Gassing Station | Scale Models | Top of Page | What's New | My Stuff