1:250 Scale Paper Model: Multi-Purpose Vessel "Mellum"
Discussion


Thanks guys!
Matt varnish can easily ruin a model, and it's usually the final step in a build. I should have heeded my own advice a bit more and done some more through trials on similar materials, but then again, it worked fine before.
I've not binned it, HMV said they'd send me some new hull sides, so I'm pondering peeling the old ones off and doing it again. Maybe a miniature steamer would loosen the pva enough to dis-assemble it?
One side is marginally acceptable, the other is terrible. It's just that it could and should have looked so much better.
Einion Yrth said:
You've possibly lost a years work, and you're already planning the next build? Respect! (and yes, I'm trying to be humorous. Must be a complete b'stard.)
This one perhaps?http://cp.c-ij.com/en/contents/CNT-0011213/index.h...
---
I jest. Canon stuff, whilst free is not a patch on HMVs kits. Their trains are great though
Ha ha ha ha ha...ha. Steamer.
So after evaluating things a bit more, I've ordered another kit. I'm going to peel off the hull sides (becasue for some reason, they were the only things to be affected). Hopefully I'll be then left with a "skin" of torn paper, over which I will glue the new sides. The thickness difference will probably end up about 50% more than standard.
I've also considered scanning the new sides and printing on to thinner card, which might be better. i'll have to get permission from HMV though I guess.
Assuming this works, I'll also open up the holes in the hull sides for the mooring ropes, something I wish I'd done previously. If all goes to plan it should end up more or less as it was. If it doesn't work out, I've not really lost anything.
BTW I tried the Humbrol spray varnish on the spare hull sides I had left from the "Wuppertal" Trawler (for the "Nurnburg" version), which are exactly the same black as for the Mellum. It worked perfectly, and gave a beautiful flat finish. There you go.
Port Side:
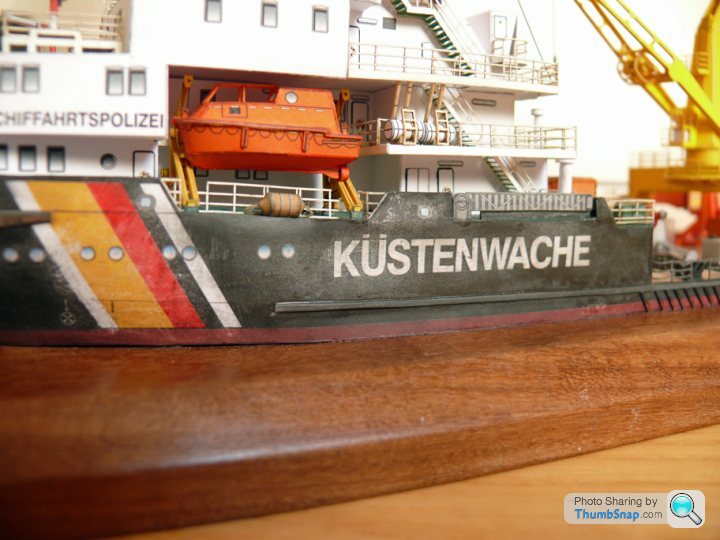
Starboard Side:
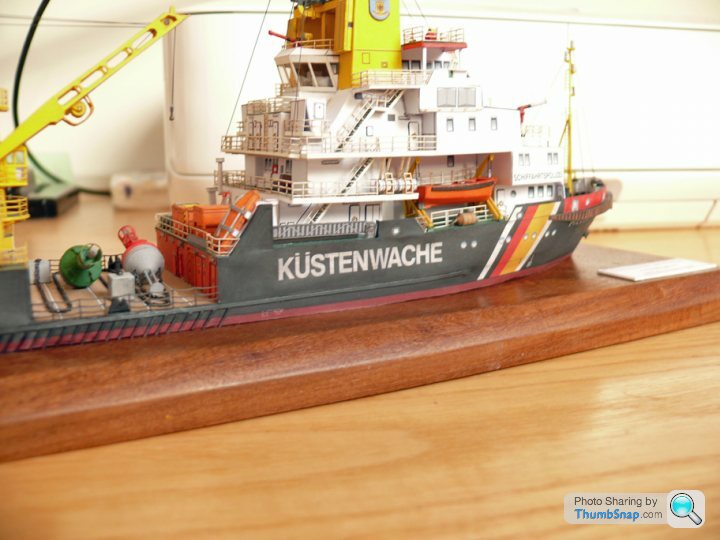
The images are after "corrective work". the Starboard side is almost acceptable, if I'd been after a weathered finish, but since the topsides are pretty much pristine, it looks a bit odd. The port side is a lost casue though.
So after evaluating things a bit more, I've ordered another kit. I'm going to peel off the hull sides (becasue for some reason, they were the only things to be affected). Hopefully I'll be then left with a "skin" of torn paper, over which I will glue the new sides. The thickness difference will probably end up about 50% more than standard.
I've also considered scanning the new sides and printing on to thinner card, which might be better. i'll have to get permission from HMV though I guess.
Assuming this works, I'll also open up the holes in the hull sides for the mooring ropes, something I wish I'd done previously. If all goes to plan it should end up more or less as it was. If it doesn't work out, I've not really lost anything.
BTW I tried the Humbrol spray varnish on the spare hull sides I had left from the "Wuppertal" Trawler (for the "Nurnburg" version), which are exactly the same black as for the Mellum. It worked perfectly, and gave a beautiful flat finish. There you go.
Port Side:
Starboard Side:
The images are after "corrective work". the Starboard side is almost acceptable, if I'd been after a weathered finish, but since the topsides are pretty much pristine, it looks a bit odd. The port side is a lost casue though.
I don't post in this section often, but I follow these threads avidly. Like everyone else, I'm gobsmacked at the level of skill involved. And I too was upset for you when you first posted. However, that looks eminently salvageable. And if anybody could do a near flawless recovery........
Murph7355 said:
I like it like it is! It looks "weathered" - bit of dilute brown to look like rust and job jobbed.
The starboard side does look weathered, but the port side just looks what is - a complete Iuck up. You can't really tell from the photos, but it looks a bit daft with only the hull weathered and the top sides pristine. I can't weather the top sides properly because there's too much stuff in the way now to do a proper job.I have the scalpel at the ready now, so wish me luck. If it doesn't work I guess I'll have to just glue it to a shelf with only one side visible!
I'm glad I used water soluble PVA now! The hull sides are in two halves, so becasue the rear section isn't too bad, I've carefully soaked and peeled/scraped/picked the front section off. The rubbing strip partly spans both sections, so when that's back on, it will help to blur the interface slightly:

I know it looks terrible, but I think if I can cut the new side accurately enough, with a bit of doubling and dodging, it might just work.
I know it looks terrible, but I think if I can cut the new side accurately enough, with a bit of doubling and dodging, it might just work.

Remember I said I'd tried the Humbrol spray varnish on the spare hull sides I had left from the "Wuppertal" Trawler, and that it had worked perfectly?
I had a look after a day in the airing cupboard and guess what?

That is *exactly* how all the hull sides of the Mellum looked before I tried to correct them. Now you can see why I was a bit shocked...
I had a look after a day in the airing cupboard and guess what?
That is *exactly* how all the hull sides of the Mellum looked before I tried to correct them. Now you can see why I was a bit shocked...
I wonder if thinned down acrylic varnish (water based stuff you'd get from b+q type places in a metal tin) would be a safer bet, airbrushed on in light coats, rather than a "hot" spray can.
Gutting to see though, I've been following this build for ages, clear coating models always scares me, to the point I have left some of my models un cleared if they have particularly complicated decal jobs, for example the Tamika Porsche 911 gt1, took me weeks to do that scheme!
Gutting to see though, I've been following this build for ages, clear coating models always scares me, to the point I have left some of my models un cleared if they have particularly complicated decal jobs, for example the Tamika Porsche 911 gt1, took me weeks to do that scheme!
Gassing Station | Scale Models | Top of Page | What's New | My Stuff