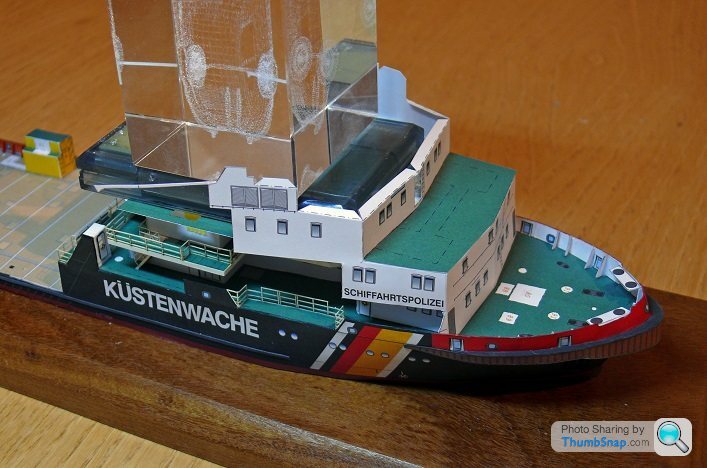
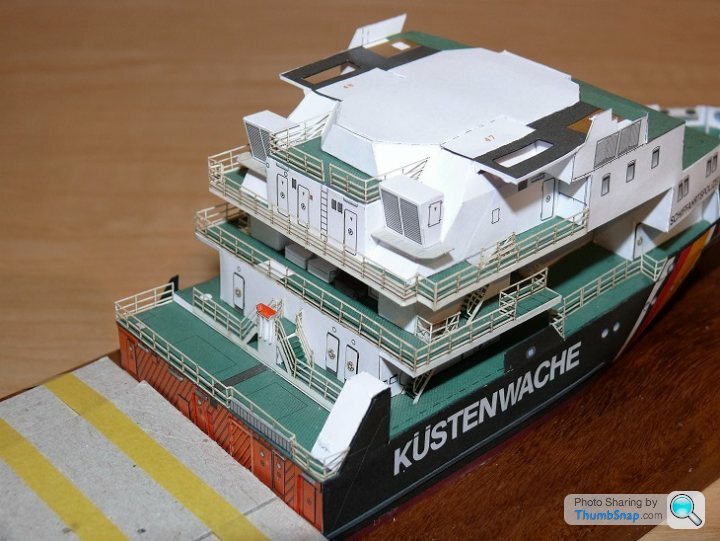
1:250 Scale Paper Model: Multi-Purpose Vessel "Mellum"
Discussion


robemcdonald said:
How do you manage not to show the edge of the paper after you've cut it out? Having seen my efforts you'll know it's something I struggle with.
By the way this is awesome. I'd love to see how well you could make one of the Yamaha models.
It's vey simple - just get some water based paint, mix it to the right colour and paint it along the edges with a fine brush (and whatever other white bits you think might show through once assembled). Once the paint is completely dry, pva sticks to it just as well as to printed paper. The beauty of water paints over felt tips is that you can - to a degree, remove any errors with a damp paintbrush.By the way this is awesome. I'd love to see how well you could make one of the Yamaha models.
I also sometimes brush over an entire substructure with Tamiya weathering powders of the appropriate colour. It tends to blend the parts together and make the joints less obvious.
Hope this helps.
dr_gn said:
robemcdonald said:
How do you manage not to show the edge of the paper after you've cut it out? Having seen my efforts you'll know it's something I struggle with.
By the way this is awesome. I'd love to see how well you could make one of the Yamaha models.
It's vey simple - just get some water based paint, mix it to the right colour and paint it along the edges with a fine brush (and whatever other white bits you think might show through once assembled). Once the paint is completely dry, pva sticks to it just as well as to printed paper. The beauty of water paints over felt tips is that you can - to a degree, remove any errors with a damp paintbrush.By the way this is awesome. I'd love to see how well you could make one of the Yamaha models.
I also sometimes brush over an entire substructure with Tamiya weathering powders of the appropriate colour. It tends to blend the parts together and make the joints less obvious.
Hope this helps.
Maybe one day....
robemcdonald said:
dr_gn said:
robemcdonald said:
How do you manage not to show the edge of the paper after you've cut it out? Having seen my efforts you'll know it's something I struggle with.
By the way this is awesome. I'd love to see how well you could make one of the Yamaha models.
It's vey simple - just get some water based paint, mix it to the right colour and paint it along the edges with a fine brush (and whatever other white bits you think might show through once assembled). Once the paint is completely dry, pva sticks to it just as well as to printed paper. The beauty of water paints over felt tips is that you can - to a degree, remove any errors with a damp paintbrush.By the way this is awesome. I'd love to see how well you could make one of the Yamaha models.
I also sometimes brush over an entire substructure with Tamiya weathering powders of the appropriate colour. It tends to blend the parts together and make the joints less obvious.
Hope this helps.
Thats some amaziing detailing , Im impressed.
dr_gn said:
Guys - I don't get it: All I'm suggesting really is painting along the edges of the paper with the same coloured paint as the part. What's difficult about that? 
I can barely tie my own shoe laces first time out! When I see your stuff, and especially against something for scale, it's truly staggering. That rib against the pound coin is immense. Unless you're a leprechaun I can't even begin to fathom how you folded/built that, let alone painted the edges of paper to ensure they don't show. I suspect many others think the same

I don't use a magnifying glass, just a decent lamp.
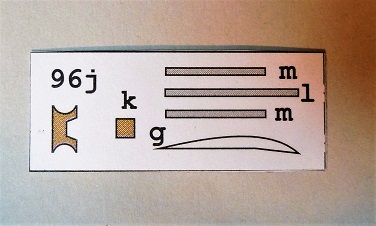
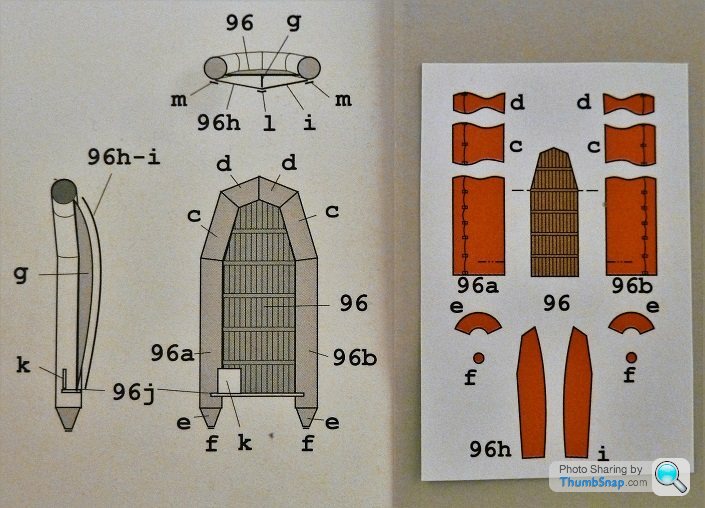
Most of the parts aren't too small to cut out with small scissors, or failing that a scalpel. The sides were just cut out and wrapped around a small drill, and glued along the join to form tubes. All the parts are pretty much self-jigging.
The small circular "f" parts were about 2mm in diameter, but these looked far too big stuck on the ends of the sponsons, so I found some scrap orange paper from another part and punched them out at 1mm diameter using a punch and die set, so there was no cutting at all needed for those.
If you havent met dr_gn you won't realise he has microbladed fingertips and stereohypervision which makes all this awesome precision inevitable
or I am talking utter b ks as usual?
Any way, just butting in to congratulate him for his and junior doc's successes at Cosford
Certificated excellence from both again
Well done, nice to see you lot again at the show
b
or I am talking utter b
ks as usual? Any way, just butting in to congratulate him for his and junior doc's successes at Cosford
Certificated excellence from both again
Well done, nice to see you lot again at the show
b
perdu said:
If you havent met dr_gn you won't realise he has microbladed fingertips and stereohypervision which makes all this awesome precision inevitable
or I am talking utter bks as usual?
Any way, just butting in to congratulate him for his and junior doc's successes at Cosford
Certificated excellence from both again
Well done, nice to see you lot again at the show
b
Nice to see you too Perdu. We always try to seek you out at model shows: Its good to interact with a normal person at these events.or I am talking utter b
ks as usual? Any way, just butting in to congratulate him for his and junior doc's successes at Cosford
Certificated excellence from both again
Well done, nice to see you lot again at the show
b
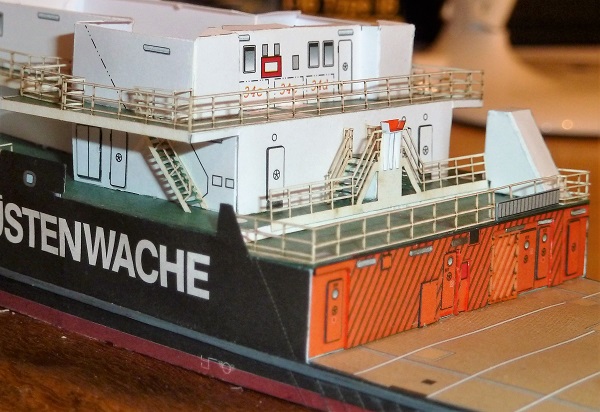

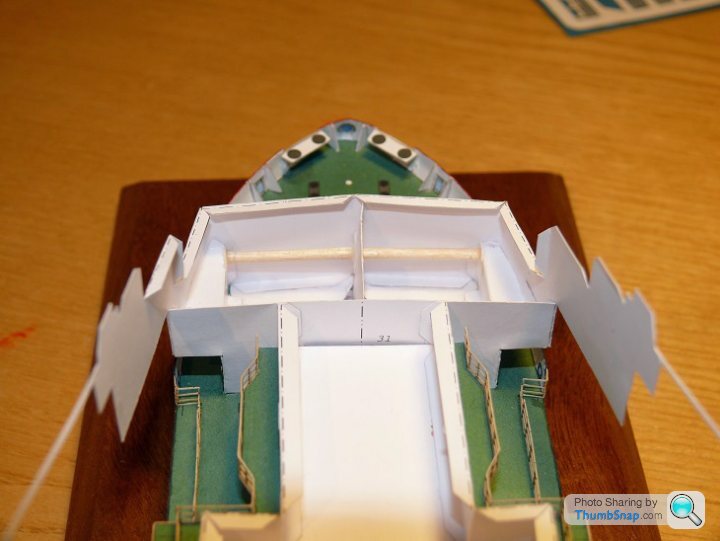
There have been quite a few fairly big fit errors so far, and they are not easy to correct once the parts are cut out. Since you have to glue the decks pretty much as you go, and some parts span several decks, there is no room for adjustment. Strange really - the trawler was almost spot on in this respect, and it's the same scale and same designer. It's a good challenge though.
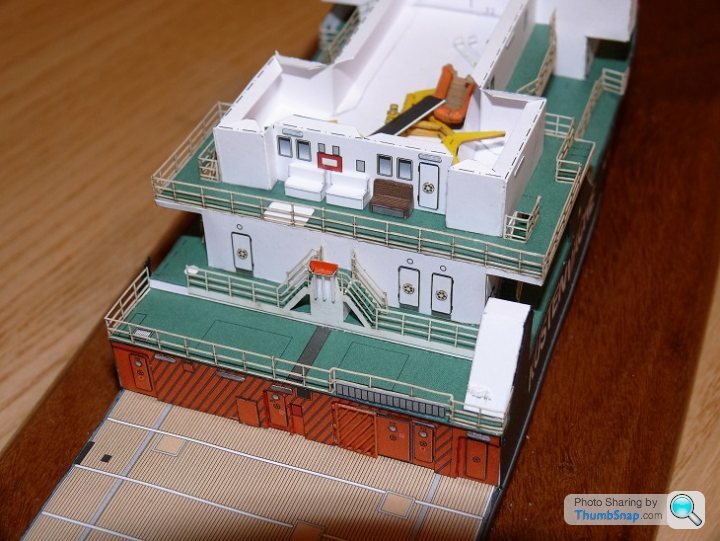
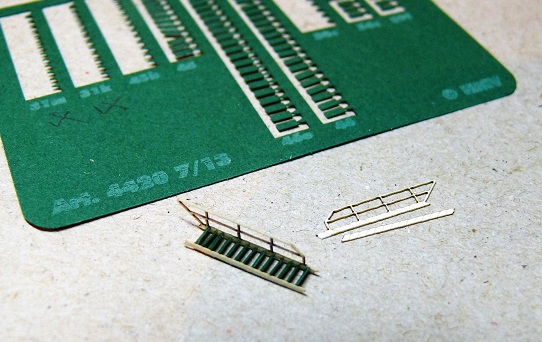
So here's...even more steps. This time built with the 'aid' of the cute little step jig:
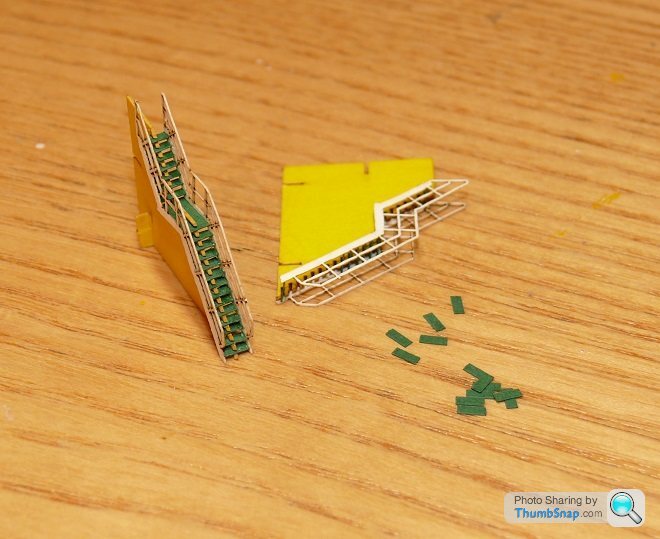
As with the previous model, there's no indication of how to use it. If you assemble it as - apparently - intended, its too wide to be of any use since it's impossible to apply glue to the end of the treads without also applying it to the jig. If you use it as a single piece as I did, it doesn't really hole the treads in place.
Anyway here they are finished:
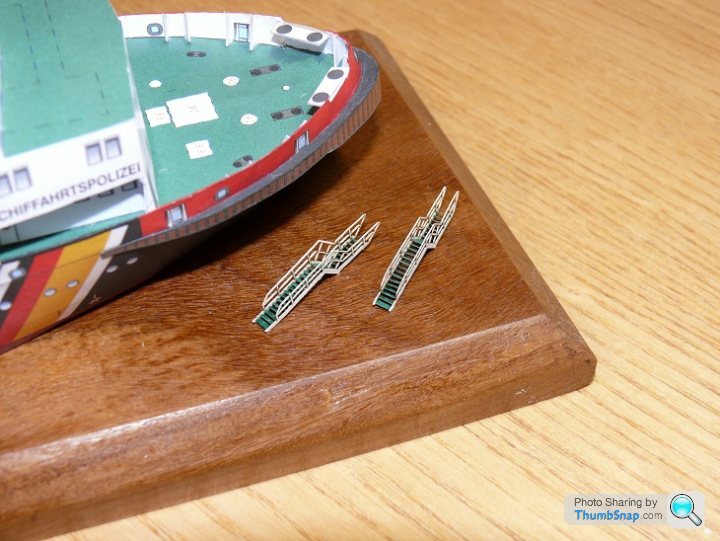
and fitted:
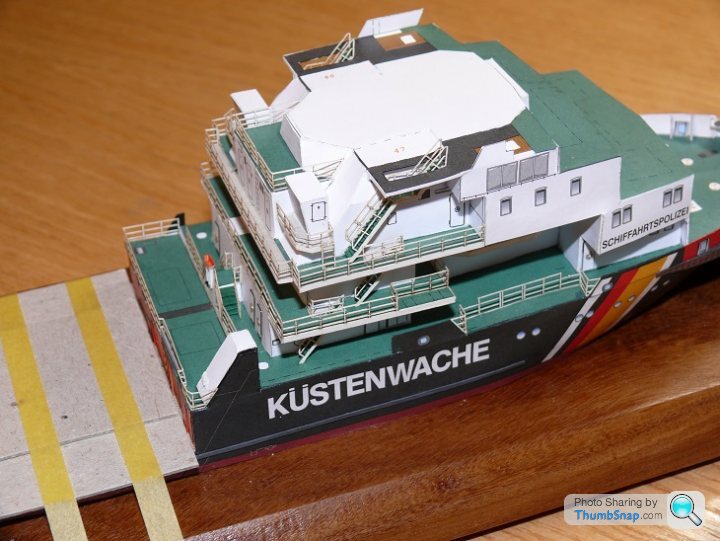
You might notice I had to extend them by one tread in order to get them to fit parallel with the other two flights already fitted. This model really is filled with small flaws that add up to be a real pain in the arse.
As with the previous model, there's no indication of how to use it. If you assemble it as - apparently - intended, its too wide to be of any use since it's impossible to apply glue to the end of the treads without also applying it to the jig. If you use it as a single piece as I did, it doesn't really hole the treads in place.
Anyway here they are finished:
and fitted:
You might notice I had to extend them by one tread in order to get them to fit parallel with the other two flights already fitted. This model really is filled with small flaws that add up to be a real pain in the arse.
Gassing Station | Scale Models | Top of Page | What's New | My Stuff