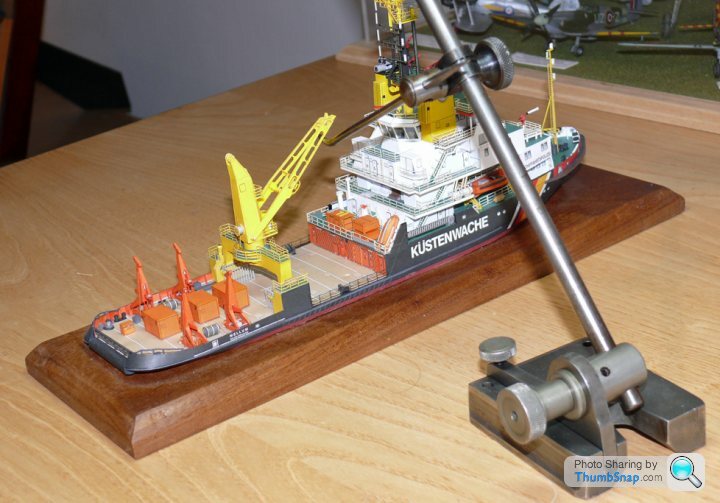
1:250 Scale Paper Model: Multi-Purpose Vessel "Mellum"
Discussion


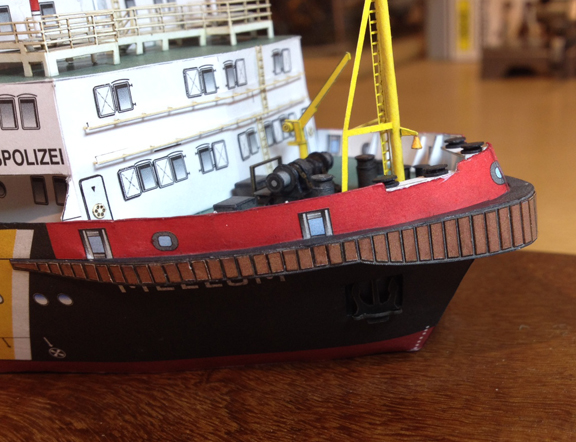
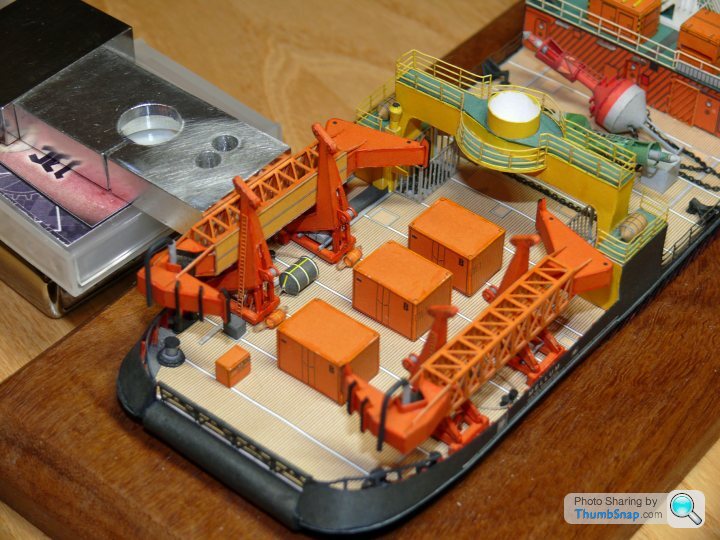
Here is the crane, with the jib being held in place while the glue sets:
Both gangplanks were too long, so had to have a section cut out:

Side strakes cut out and fitted:

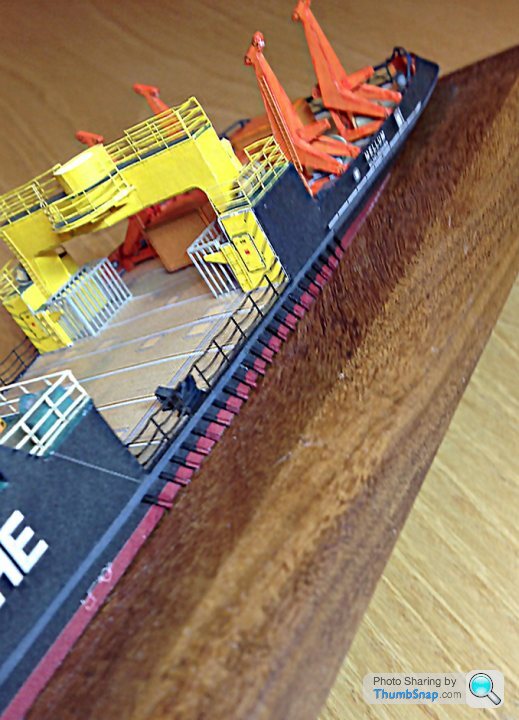
Same with the bow bumper blocks:

Pretty tedious to cut each individual piece out and then paint around the edges...
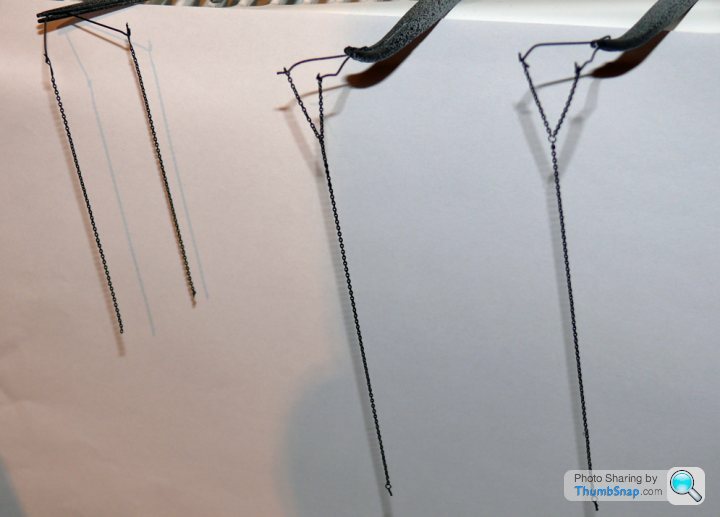
Then the buoy chains, which I got off EBay. Unfortunately HMV dont sell spare lengths of laser-cut card chain, so these are some of the few non-card bits of the model. all the other built kits I've seen have the chain attached directly to the lower ballast plates, but I'm pretty sure that's wrong; they should attach to padeyes welded onto the lower cones, so they need "Y" bridles:

The eyelets at the ends are twisted lead wire, and the "Y" rings are sprue. Primed and sprayed black, before a dusting of gunmetal weathering powder:
Then attached them to the buoys and anchor blocks:


Now to glue them in place on the deck...
Both gangplanks were too long, so had to have a section cut out:
Side strakes cut out and fitted:
Same with the bow bumper blocks:
Pretty tedious to cut each individual piece out and then paint around the edges...
Then the buoy chains, which I got off EBay. Unfortunately HMV dont sell spare lengths of laser-cut card chain, so these are some of the few non-card bits of the model. all the other built kits I've seen have the chain attached directly to the lower ballast plates, but I'm pretty sure that's wrong; they should attach to padeyes welded onto the lower cones, so they need "Y" bridles:
The eyelets at the ends are twisted lead wire, and the "Y" rings are sprue. Primed and sprayed black, before a dusting of gunmetal weathering powder:
Then attached them to the buoys and anchor blocks:
Now to glue them in place on the deck...
 I've not made any progress on my model, currently wiped out with a heavy cold and don't seem to have the concentration to continue with it at the moment
  I did buy the laser cut detail set though
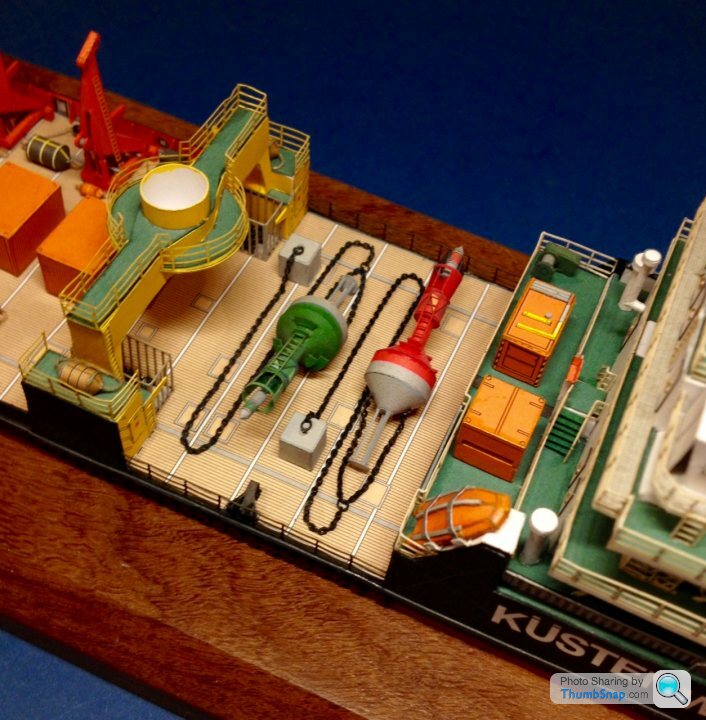
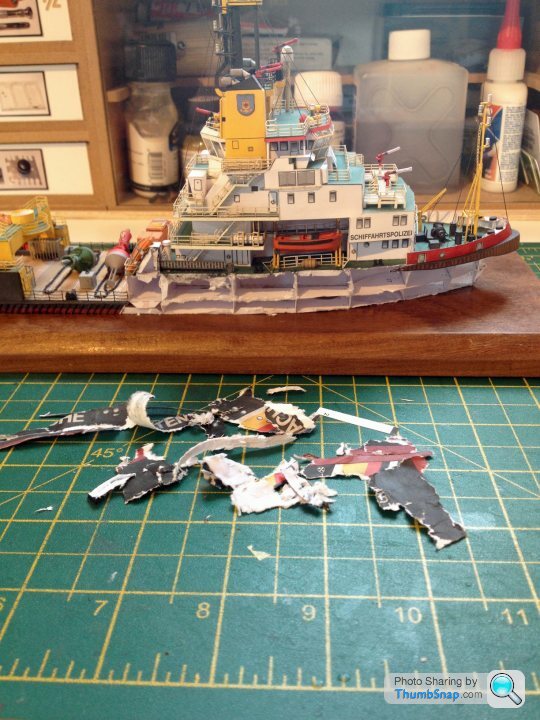
So tonight I completed the rigging, any TBH it looked spot-on. So then I masked the windows and base, and gave it a coat of Matt varnish (as I did with the trawler, to seal the paper and normalise the finish). After a few minutes, a pure white haze appeared on all the black printed parts, including the entire hull. I tried to correct it using Klear, weathering powders and various other things, but to no avail. It's basically scrap. Unbelievable, but that's the way it goes sometimes! But thanks for all the positive comments over the course of the thread! I'll be back!
Thanks guys!
Matt varnish can easily ruin a model, and it's usually the final step in a build. I should have heeded my own advice a bit more and done some more through trials on similar materials, but then again, it worked fine before.
I've not binned it, HMV said they'd send me some new hull sides, so I'm pondering peeling the old ones off and doing it again. Maybe a miniature steamer would loosen the pva enough to dis-assemble it?
One side is marginally acceptable, the other is terrible. It's just that it could and should have looked so much better.
Ha ha ha ha ha...ha. Steamer.
So after evaluating things a bit more, I've ordered another kit. I'm going to peel off the hull sides (becasue for some reason, they were the only things to be affected). Hopefully I'll be then left with a "skin" of torn paper, over which I will glue the new sides. The thickness difference will probably end up about 50% more than standard.
I've also considered scanning the new sides and printing on to thinner card, which might be better. i'll have to get permission from HMV though I guess.
Assuming this works, I'll also open up the holes in the hull sides for the mooring ropes, something I wish I'd done previously. If all goes to plan it should end up more or less as it was. If it doesn't work out, I've not really lost anything.
BTW I tried the Humbrol spray varnish on the spare hull sides I had left from the "Wuppertal" Trawler (for the "Nurnburg" version), which are exactly the same black as for the Mellum. It worked perfectly, and gave a beautiful flat finish. There you go.
Port Side:
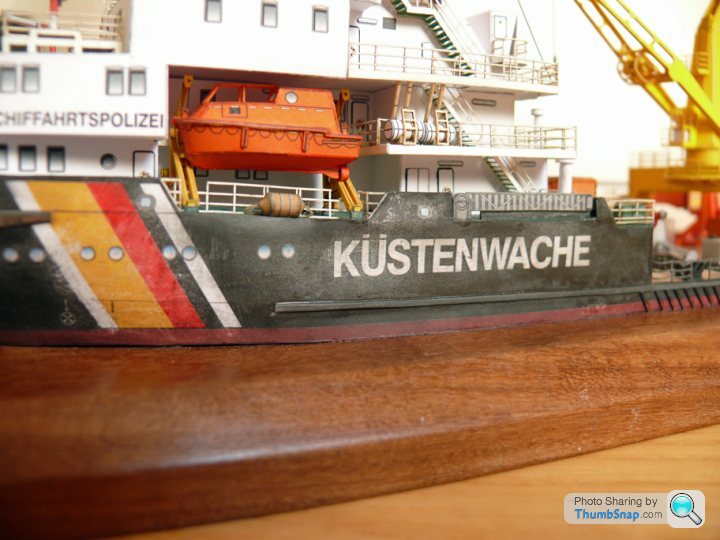
Starboard Side:
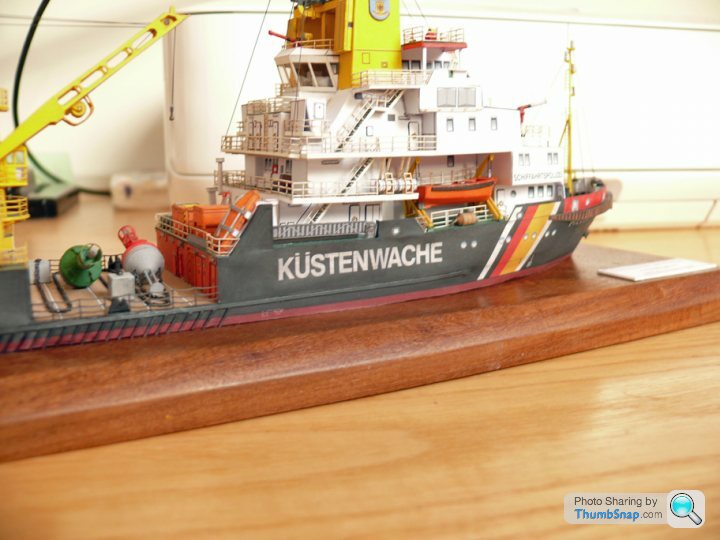
The images are after "corrective work". the Starboard side is almost acceptable, if I'd been after a weathered finish, but since the topsides are pretty much pristine, it looks a bit odd. The port side is a lost casue though.
So after evaluating things a bit more, I've ordered another kit. I'm going to peel off the hull sides (becasue for some reason, they were the only things to be affected). Hopefully I'll be then left with a "skin" of torn paper, over which I will glue the new sides. The thickness difference will probably end up about 50% more than standard.
I've also considered scanning the new sides and printing on to thinner card, which might be better. i'll have to get permission from HMV though I guess.
Assuming this works, I'll also open up the holes in the hull sides for the mooring ropes, something I wish I'd done previously. If all goes to plan it should end up more or less as it was. If it doesn't work out, I've not really lost anything.
BTW I tried the Humbrol spray varnish on the spare hull sides I had left from the "Wuppertal" Trawler (for the "Nurnburg" version), which are exactly the same black as for the Mellum. It worked perfectly, and gave a beautiful flat finish. There you go.
Port Side:
Starboard Side:
The images are after "corrective work". the Starboard side is almost acceptable, if I'd been after a weathered finish, but since the topsides are pretty much pristine, it looks a bit odd. The port side is a lost casue though.
Murph7355 said:
I like it like it is! It looks "weathered" - bit of dilute brown to look like rust and job jobbed.
The starboard side does look weathered, but the port side just looks what is - a complete Iuck up. You can't really tell from the photos, but it looks a bit daft with only the hull weathered and the top sides pristine. I can't weather the top sides properly because there's too much stuff in the way now to do a proper job.I have the scalpel at the ready now, so wish me luck. If it doesn't work I guess I'll have to just glue it to a shelf with only one side visible!
I'm glad I used water soluble PVA now! The hull sides are in two halves, so becasue the rear section isn't too bad, I've carefully soaked and peeled/scraped/picked the front section off. The rubbing strip partly spans both sections, so when that's back on, it will help to blur the interface slightly:

I know it looks terrible, but I think if I can cut the new side accurately enough, with a bit of doubling and dodging, it might just work.
I know it looks terrible, but I think if I can cut the new side accurately enough, with a bit of doubling and dodging, it might just work.
Remember I said I'd tried the Humbrol spray varnish on the spare hull sides I had left from the "Wuppertal" Trawler, and that it had worked perfectly?
I had a look after a day in the airing cupboard and guess what?

That is *exactly* how all the hull sides of the Mellum looked before I tried to correct them. Now you can see why I was a bit shocked...
I had a look after a day in the airing cupboard and guess what?
That is *exactly* how all the hull sides of the Mellum looked before I tried to correct them. Now you can see why I was a bit shocked...
lufbramatt said:
I wonder if thinned down acrylic varnish (water based stuff you'd get from b+q type places in a metal tin) would be a safer bet, airbrushed on in light coats, rather than a "hot" spray can.
Gutting to see though, I've been following this build for ages, clear coating models always scares me, to the point I have left some of my models un cleared if they have particularly complicated decal jobs, for example the Tamika Porsche 911 gt1, took me weeks to do that scheme!
I don't know. I usually do a test coat on some scrap model these days. The odd thing is, the trawler was sparayed in exactly the same way, and it was perfect. Then I use the same spray on a spare piece of hull, and that happens. In the past few months I've used Humbrol Matt on a Polikarpov, FW190 and Lavochkin La-7, all without issue. My son's FROG Macchi 202 was however a disaster, resulting in a similar frosted effect.Gutting to see though, I've been following this build for ages, clear coating models always scares me, to the point I have left some of my models un cleared if they have particularly complicated decal jobs, for example the Tamika Porsche 911 gt1, took me weeks to do that scheme!
Next time I'll - as you suggest - use some matt through the airbrush. I have had problems with matt varnish through the airbrush in the past though.
So both sides were torn off, the edges cleaned up, and new sides cut:
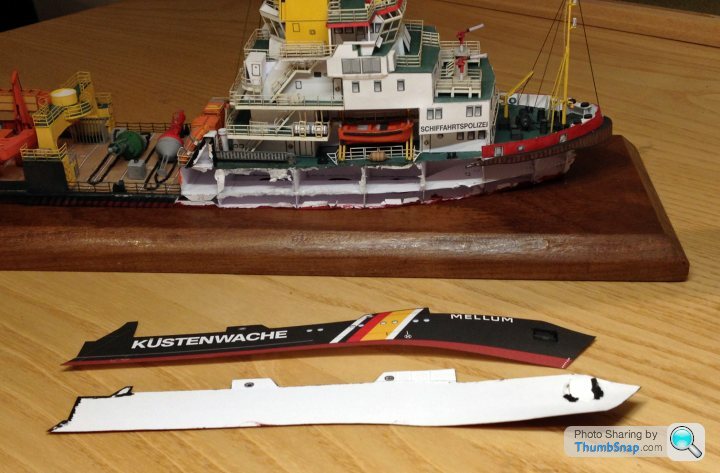
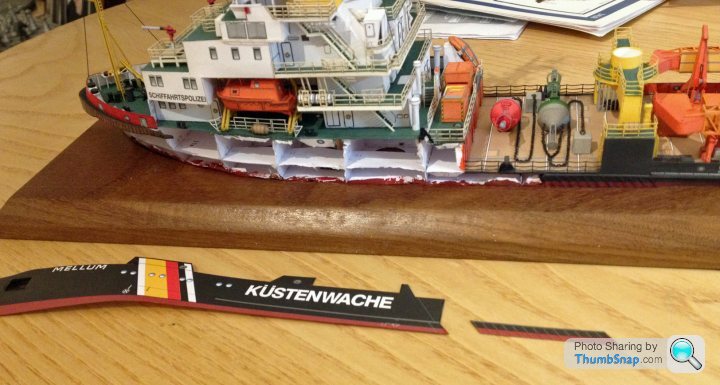
This time I've opened up all the ports in the deck sides for mooring lines etc., something I meant to do last time, but forgot. i've also tried to get a better fit betweenthe lower hull and the base. Every cloud has a (very small) silver lining...
This time I've opened up all the ports in the deck sides for mooring lines etc., something I meant to do last time, but forgot. i've also tried to get a better fit betweenthe lower hull and the base. Every cloud has a (very small) silver lining...
perdu said:
Well OK maybe not Huddy but I think you could be back on track for Cosford, how about it?
Silver lining or did something 'out there' make this happen, I wonder

Hows the weather looking for Sunday now, round here its fairly OKish
Weather should be OK I think. Going to Doncaster model railway exhibition today...Silver lining or did something 'out there' make this happen, I wonder
Hows the weather looking for Sunday now, round here its fairly OKish
shortar53 said:
Are you going to varnish the hull this time, or leave as is? I'd be tempted to not risk it
My OCD won't allow me to leave it in-varnished, however a trial last night with Galeria Matt did leave a residue st first which went after s subsequent coat. It'll be Russian roulette time, but I want to nail this one.Gassing Station | Scale Models | Top of Page | What's New | My Stuff