'O' Gauge Model of Heaton Lodge Junction
Discussion


I suppose the question is when does a train set become a model railway. Anyone I know is banned from calling Heaton Lodge a train set. £7k is a bit optimistic I think..
Anyway...
the junction itself is now mounted in the frames as you can see. I'm now over the next month going to add the scenery including the banks obviously, water culvert, some relay boxes and a load of other stuff..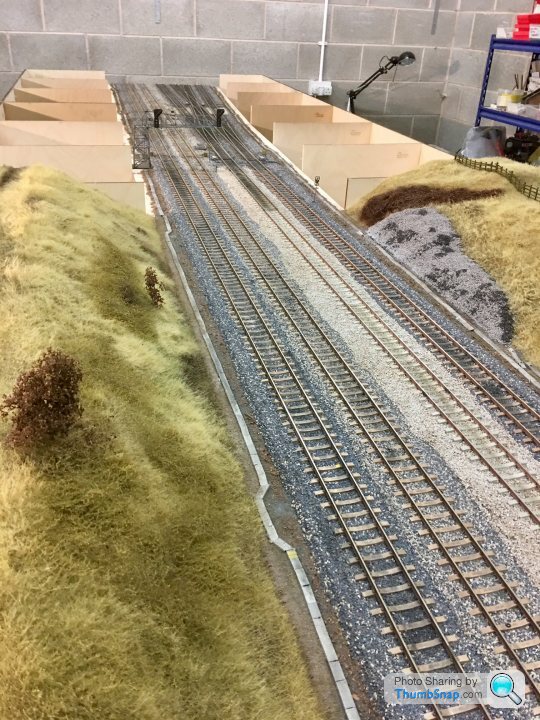
Anyway...
the junction itself is now mounted in the frames as you can see. I'm now over the next month going to add the scenery including the banks obviously, water culvert, some relay boxes and a load of other stuff..


RichB said:
So looking at that image you clearly have to cut down the frame's ribs/formers (or whatever you describe them as). How do you prevent saw dust (again excuse the course description) getting all over the work you've already done? 
That's right Rich - I just unlatch the completed section and move them apart. Inevitably dust gets everywhere but nothing a vac can't sort. I had a disaster last night as one of the completed boards fell off the trestle when I was lifting the new boards on. It fell onto its side then before I could prevent it went upside down crushing trees and smashing walls and fences. I wasn't best pleased but a lesson learned. I won't try and move finished boards on my own again

Thanks spamcan and everyone else much appreciated.
To be truthful I've never actually ever completed a layout before but I did practise for 18months or so getting the techniques right before the build started.
Racing Pete - yea I know about the peco static grass. Trouble is they blend it themselves whereas I like to make my own mixtures to suit from a few different manufacturers. Its what you like I suppose.
It's been a while since I've updated so here goes..
Right now I've been working on board 13 (48ft-52ft) of the 160ft total length so a way to go yet.
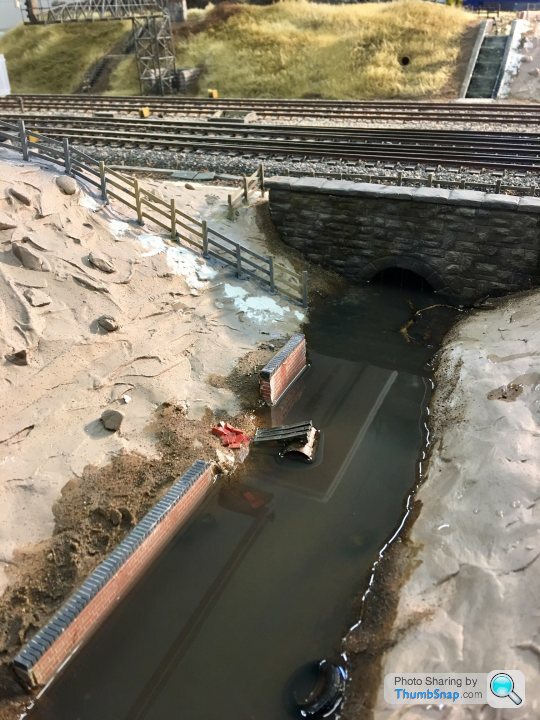
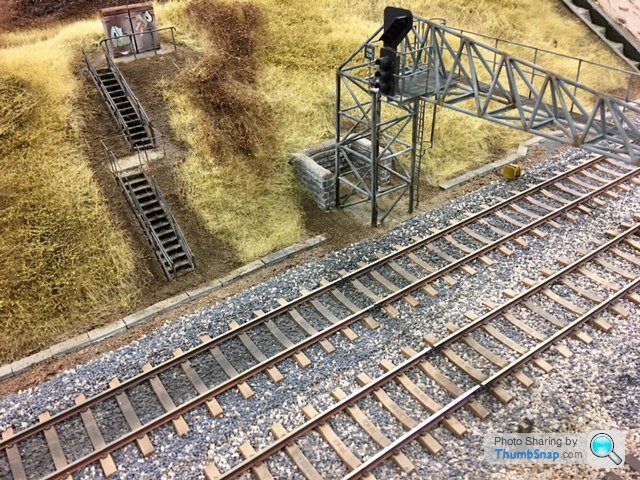
This board has the beginning of a huge double junction and a few engineering structures which consist of a storm water culvert each side of the track, some steps up to a couple of relay boxes mounted high up the embankment & a lot of hand built fencing which follows the contours of the land.
Basically it's taken 5 times more work to finish this section but almost there now..Here's some pics.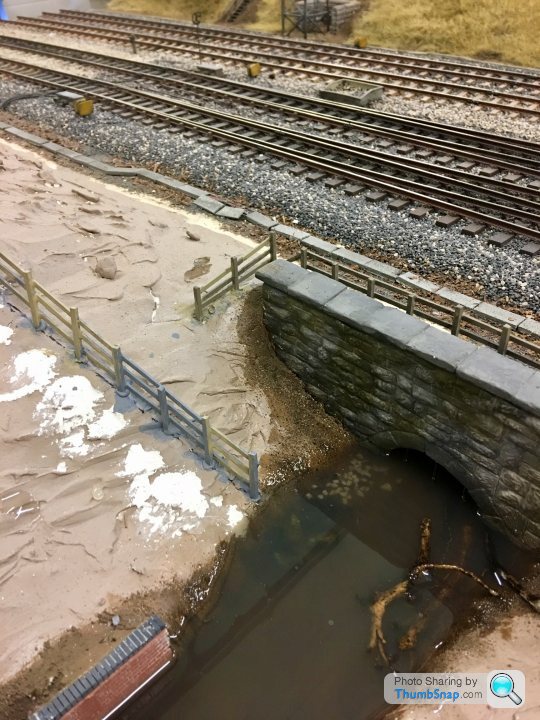
Right now I've been working on board 13 (48ft-52ft) of the 160ft total length so a way to go yet.
This board has the beginning of a huge double junction and a few engineering structures which consist of a storm water culvert each side of the track, some steps up to a couple of relay boxes mounted high up the embankment & a lot of hand built fencing which follows the contours of the land.
Basically it's taken 5 times more work to finish this section but almost there now..Here's some pics.
I can't see any pics I've loaded on my desk top..however..yes indeed that is a new product by Woodland Scenics called Deep Pour Water. It comes in two parts that you mix and is partly transparent as you can see. It allows you to put submerged objects in the 'water' and dries rock hard over 24hrs. Have to say I'm really pleased with the look - I've still to add some ripples etc.
The mouth of the culvert is cut from plywood and covered in DAS clay about 3/4mm thick. This is allowed to dry then every stone is carved. On some stones I add an extra blob of clay and file it to mimic those rough cut stones often seen.
Once dry its painted in a variety of watercolours.
Cheers for the interest
Simon
Bit of an update thanks for the interest..
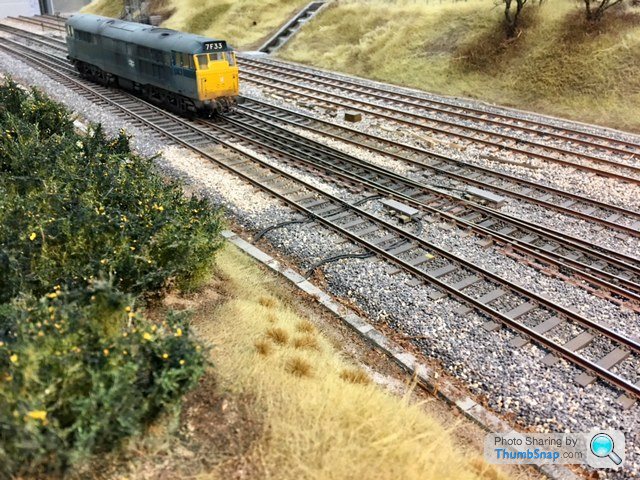
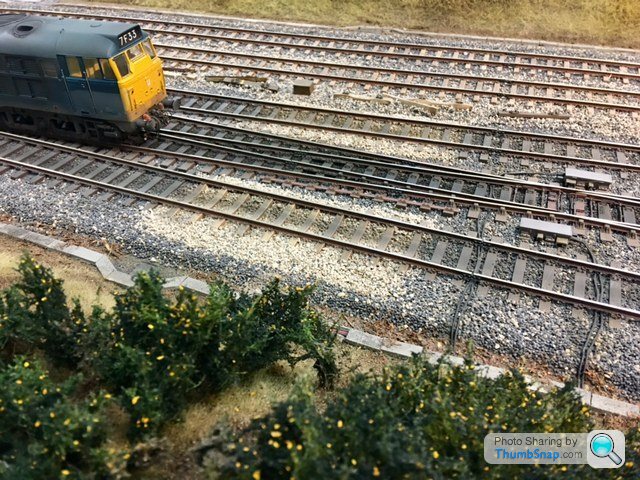
Been working on the 8ft section that includes the junction as on previous recent posts. This section is finally complete taking about 4 times as long as the previous 8ft which is just straight track and grass embankments.
As you can see this has culverts, walls and a few other civil engineering bits all of which I scratch built.
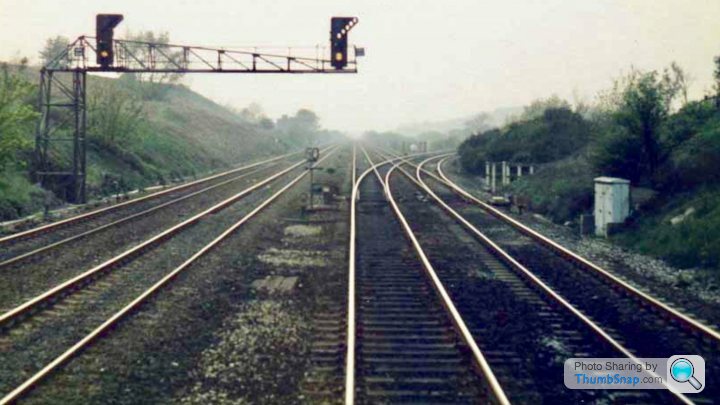
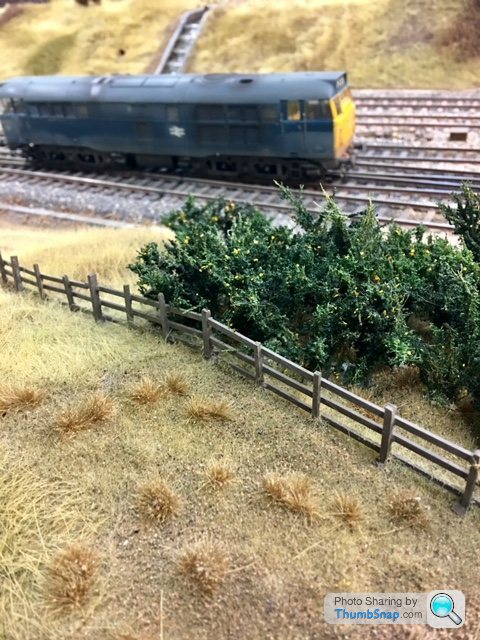
The gorse was difficult to replicate until I found a range of medium bushes from Polak models in North Yorkshire. These I sprayed with matt varnish and sprinkled dark scatter to get the right colour. The gorse on the real Heaton Lodge Junction is in the same place on the model as is everything else
Been working on the 8ft section that includes the junction as on previous recent posts. This section is finally complete taking about 4 times as long as the previous 8ft which is just straight track and grass embankments.
As you can see this has culverts, walls and a few other civil engineering bits all of which I scratch built.
The gorse was difficult to replicate until I found a range of medium bushes from Polak models in North Yorkshire. These I sprayed with matt varnish and sprinkled dark scatter to get the right colour. The gorse on the real Heaton Lodge Junction is in the same place on the model as is everything else


Thanks for the kind comments.
I think realistically it will be two years yet.. The finished model will be at the Warley model railway show defo in 2020 but possibly in 2019.
Long term plans are to have it in its own building which would be open to people to come and view a few times a year.
Simon
I think realistically it will be two years yet.. The finished model will be at the Warley model railway show defo in 2020 but possibly in 2019.
Long term plans are to have it in its own building which would be open to people to come and view a few times a year.
Simon
Gassing Station | Scale Models | Top of Page | What's New | My Stuff