'O' Gauge Model of Heaton Lodge Junction
Discussion


RacingPete said:
simonspider said:


If only we all had the room to do something like this... I'd love to do something based on the Didcot-Oxford-Banbury-Leamington route, set in the early '70s pre-Tops period (it's one of the routes I sign and a favourite), alas I just don't have the room, even in 2mm or 4mm, let alone 7mm. I like the period you've chosen to model too, the early - mid '80s seem to be forgotten by some.
Great work, looking forward to seeing more of this.
RacingPete said:
Would love to know some of the techniques you use to recreate this scene, such as the road, puddles etc.
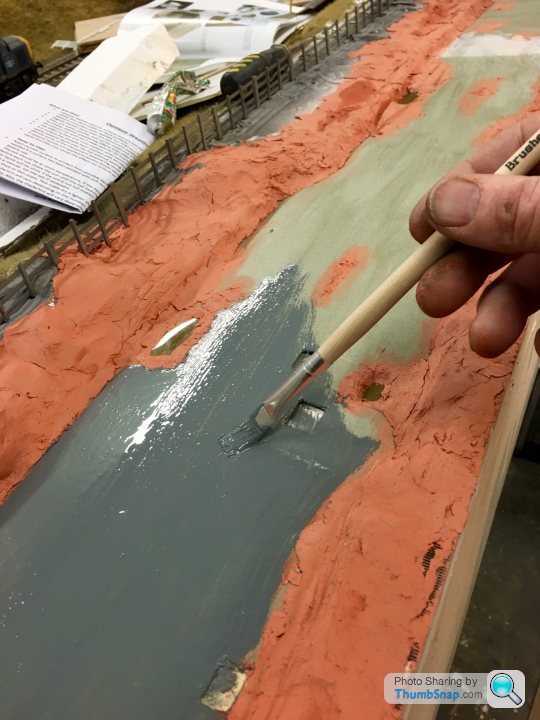
There's a superb book by a chap called Gordon Gravett called 'Modelling Grassland and Landscape detailing'. Most of what I use is from that.The roads & potholes are pretty easy.
Cut the road shape from 5mm ply you want and use that as a template to cut a piece of thin card (1/2mm)to the same shape.
The camber is quite noticeable and that is created by gluing a strip of foamboard of thicker card onto the ply down the middle, running the length of the road.
Next step is to cut holes where you want the potholes or puddles.
Puddles are from a sheet of perspex painted on one side greeny brown then bits broken off with a pair of pliers. Grates/manhole covers can be bought - painted a metal colour too.
Glue the grates & puddles direct to the ply (puddles with the unpainted side up) underneath the holes you have made in the card. Then glue the card to the ply at the edges only, creating the camber.
Using a paintbrush paint the card with Shellac (get it on amazon) this seals the surface and drys in minutes.
Use Das clay to fill in the gaps between the height of the road surface and the puddle/pothole level.
Once dry use Humbrol Dark Admiralty grey No 5 in Gloss (not matt) and paint on neat using a paintbrush.
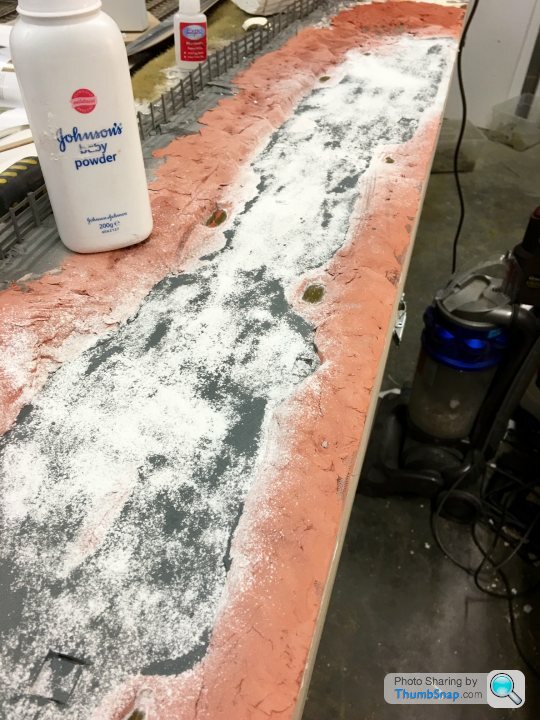
Before its dry sprinkle talc thickly over the surface so you cant see the paint, leave to dry.
Hoover off with a vac when dry and use weathering powders to weather the surface with a dry brush - I like the Vallejo range especially Dark Slate Grey.
That's really it apart from sprinkling fine chinchilla grit (pets at home)
 to mimic broken gravel. I paint this a darker colour first.
Also sieve real earth from the garden - drying it in the oven first (don't tell the wife) until its very fine and glue this down at the edges..

Oh and many thanks everyone again for the kind comments. There's always frustrating periods when things go wrong so much appreciated.
There will be a book on the making of Heaton Lodge once its completed.
Pic here of the grates etc. Spray them with Halfords grey primer then paint brush on Humbrol metallic steel or iron colour..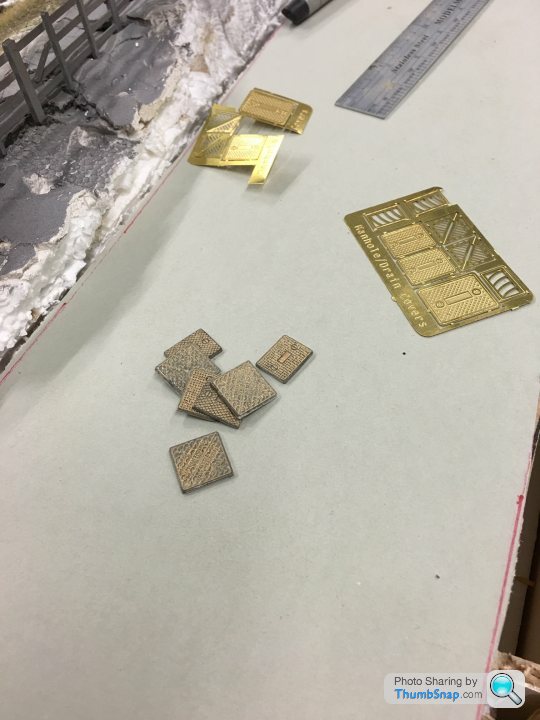
There will be a book on the making of Heaton Lodge once its completed.
Pic here of the grates etc. Spray them with Halfords grey primer then paint brush on Humbrol metallic steel or iron colour..
simonspider, I did reply to a thread a while back - wonder if this is of any help mate?
http://www.pistonheads.com/gassing/topic.asp?h=0&a...
http://www.pistonheads.com/gassing/topic.asp?h=0&a...
bomma220 said:
simonspider, I did reply to a thread a while back - wonder if this is of any help mate?
http://www.pistonheads.com/gassing/topic.asp?h=0&a...
It was, thanks very much! http://www.pistonheads.com/gassing/topic.asp?h=0&a...
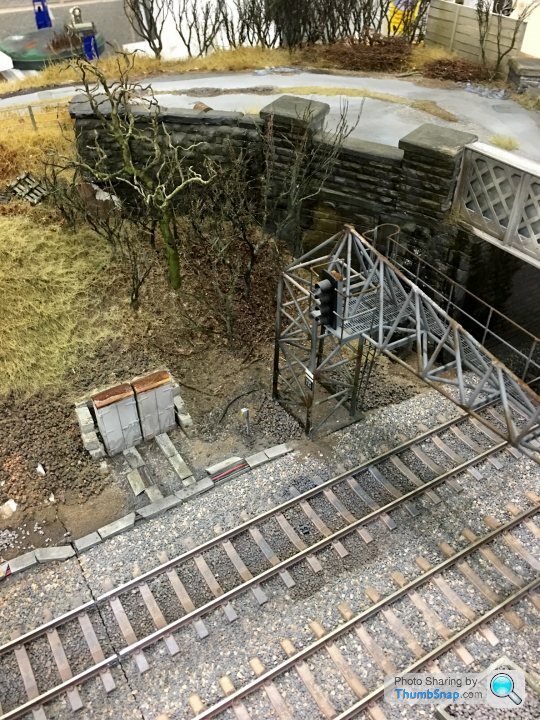
Tomorrow British Railway Modelling magazine are coming to do a photoshoot for the next issue on the 5 completed and 2 semi completed boards. So they are upstairs at the office for now
What you can see in these pics is less than a fifth of the total length when HL will be complete. The junctions and double junctions start at board 14 fair way up the track.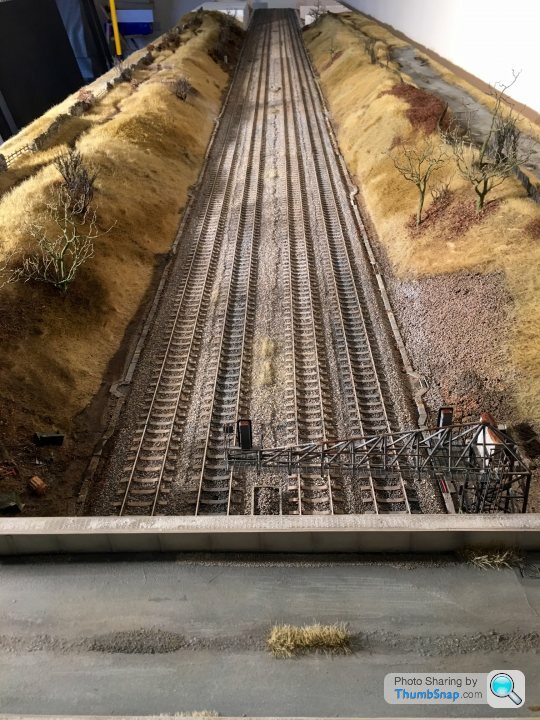
What you can see in these pics is less than a fifth of the total length when HL will be complete. The junctions and double junctions start at board 14 fair way up the track.
Gassing Station | Scale Models | Top of Page | What's New | My Stuff