Hasegawa 1:72 Polikarpov I-16
Discussion


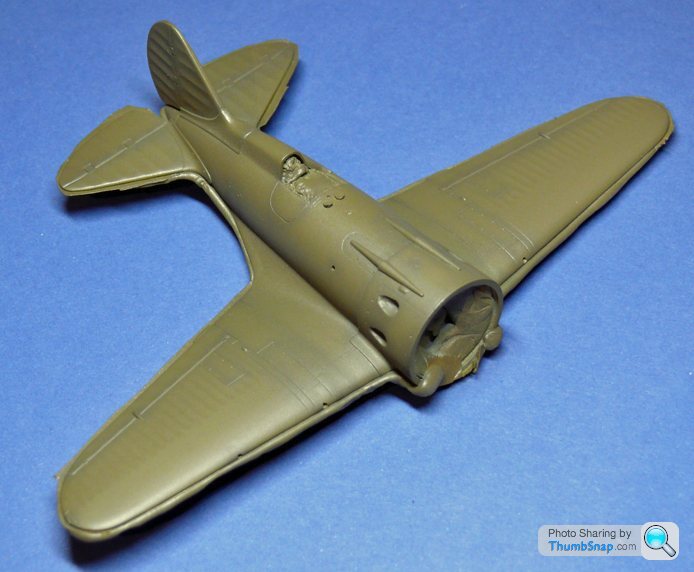
For some reason, this time around there were some prety major gaps where the wings meet the root panels:

In this case - which is quite extreme - I opted to make some plastic card shims, dissolved into place with liquid cement. This makes re-scribing a bit easier, since you're not trying to scribe rock-hard/crumbly filler.
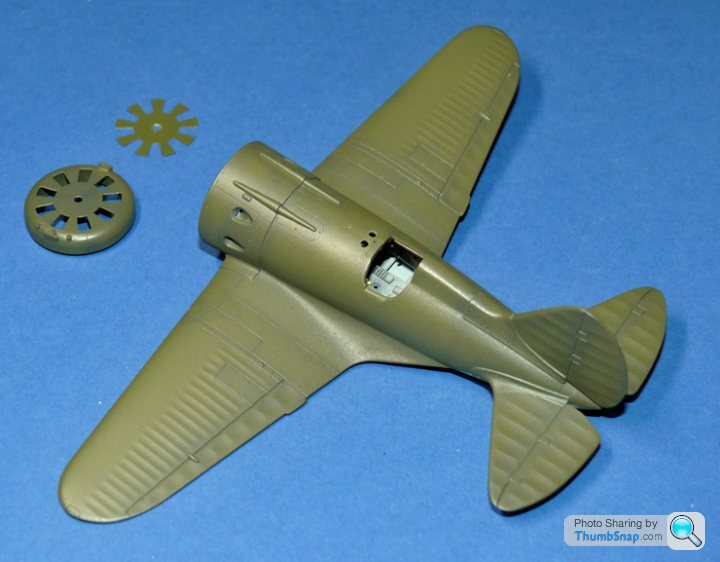
I made a better job of the hollowed-out exhaust stub teardrops this time. after drilling/scraping the moulded-in stubs, I was left with a rough, scored surface. I've coated them with a thick layer of Mr.Surfacer, which has smoothed the whole thing out much more effectively. Just need to sand the excess from around the periphery of the teardrops now. Once this is done, it will be on with some long-awaited paint.
Also visible is the insert I (re)made for the fuselage venturi, the hole for which was way too big for some reason.
In this case - which is quite extreme - I opted to make some plastic card shims, dissolved into place with liquid cement. This makes re-scribing a bit easier, since you're not trying to scribe rock-hard/crumbly filler.
I made a better job of the hollowed-out exhaust stub teardrops this time. after drilling/scraping the moulded-in stubs, I was left with a rough, scored surface. I've coated them with a thick layer of Mr.Surfacer, which has smoothed the whole thing out much more effectively. Just need to sand the excess from around the periphery of the teardrops now. Once this is done, it will be on with some long-awaited paint.
Also visible is the insert I (re)made for the fuselage venturi, the hole for which was way too big for some reason.

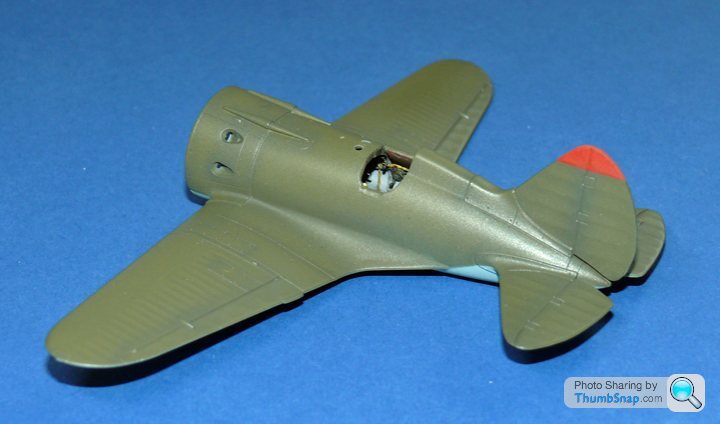
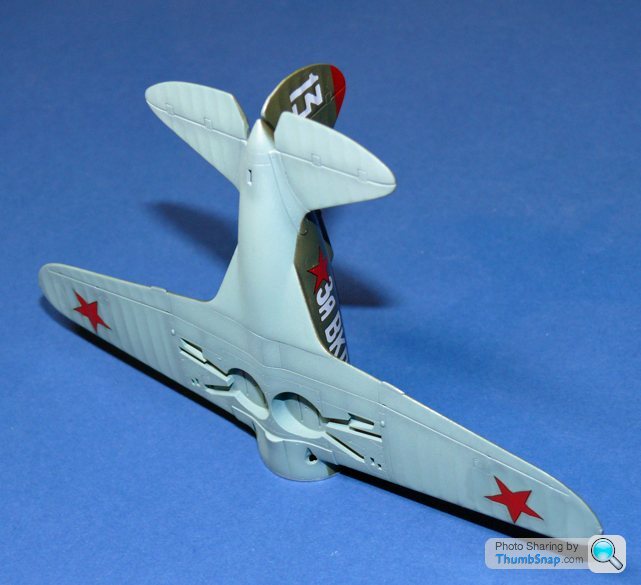
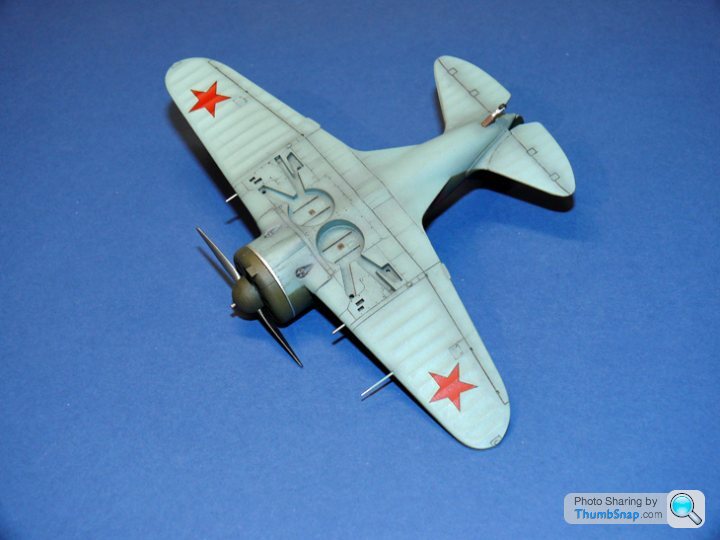
Soft masked with blu-tack and upper colour applied with a bit of a preshade:
Bit of minor corrective work on the leading edges, and a red fin flash to apply, then on with RedFirecracker's custom made decals...
The seam issue didn't happen this time when using Tamiya liquid cement; must have been the Humbrol glue, all of which has now been binned.
Bit of minor corrective work on the leading edges, and a red fin flash to apply, then on with RedFirecracker's custom made decals...
The seam issue didn't happen this time when using Tamiya liquid cement; must have been the Humbrol glue, all of which has now been binned.
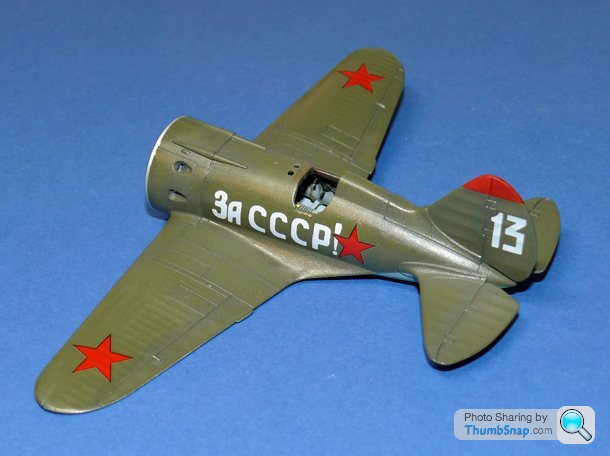
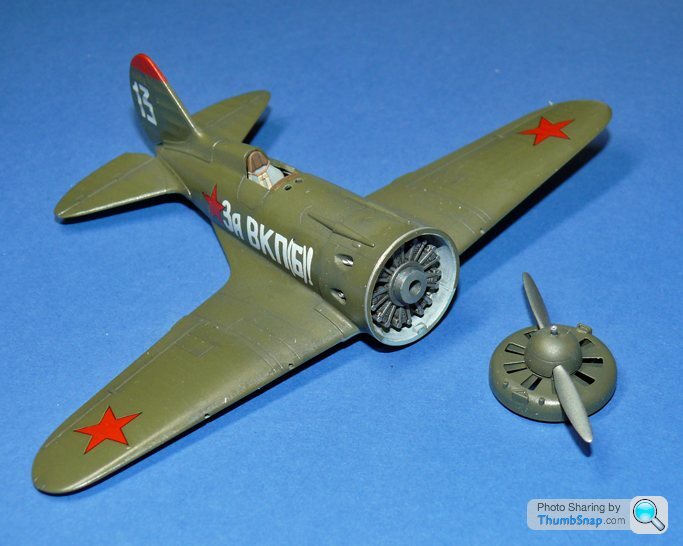
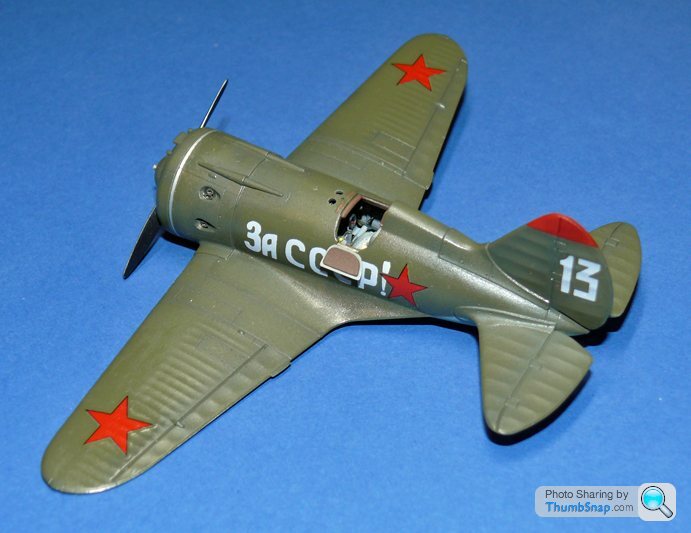
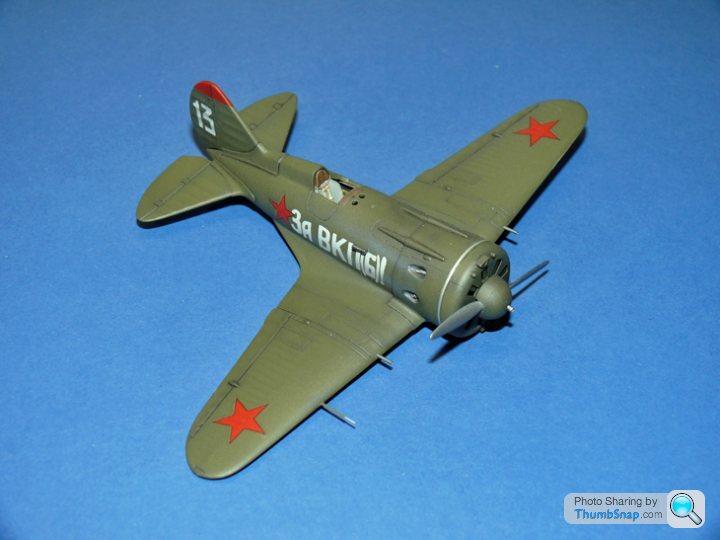
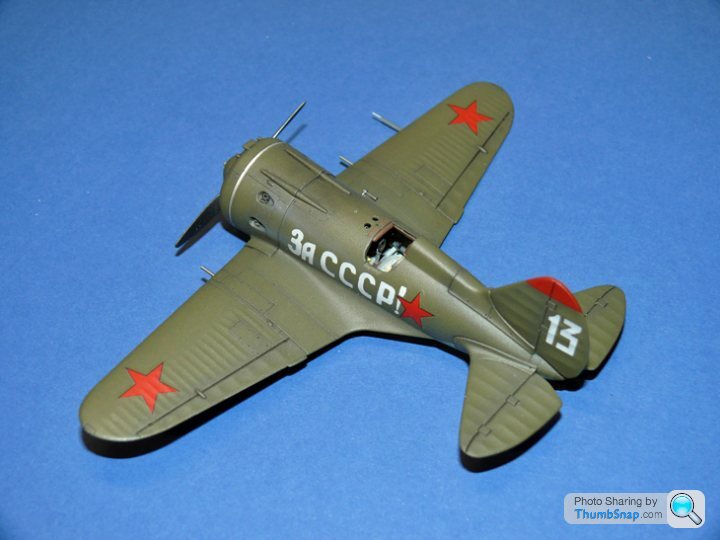
The Hasegawa decals went on OK, although they're a bit thick and the stars are slightly our of register, with an unsightly white edge to some of the lines:
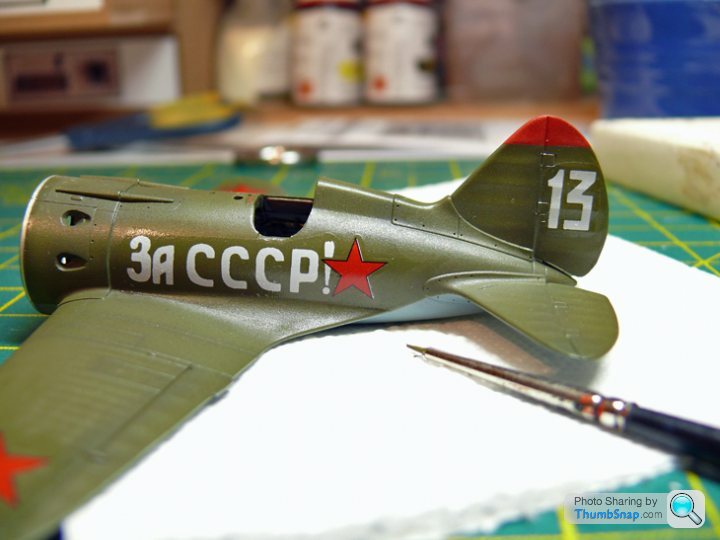
A couple of minutes with a very fine brush and some base colour soon corrected that:
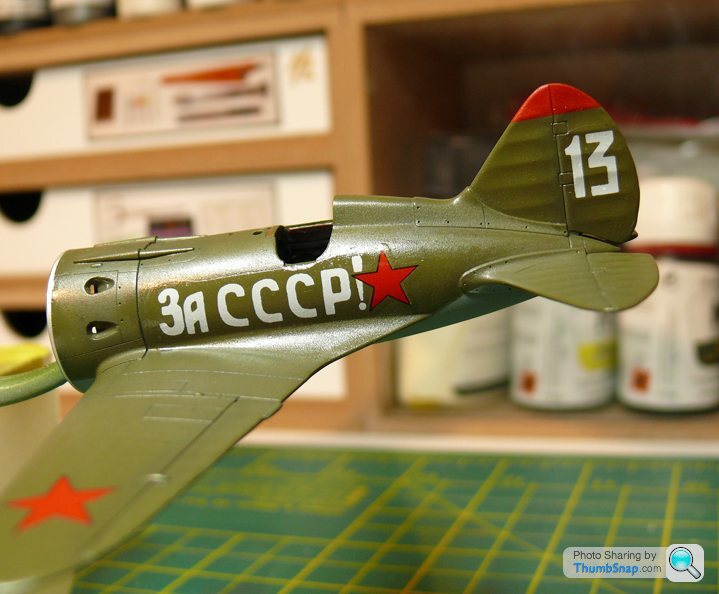
RedFirecracker's custom made decals (all the white text) were, as usual, spot-on in terms of fit and in this case opacity. They're not solid white, which means the base colour partially darkens them. I'd normally overspray with tamiya smoke to reduce contrast, but it won't be needed here:
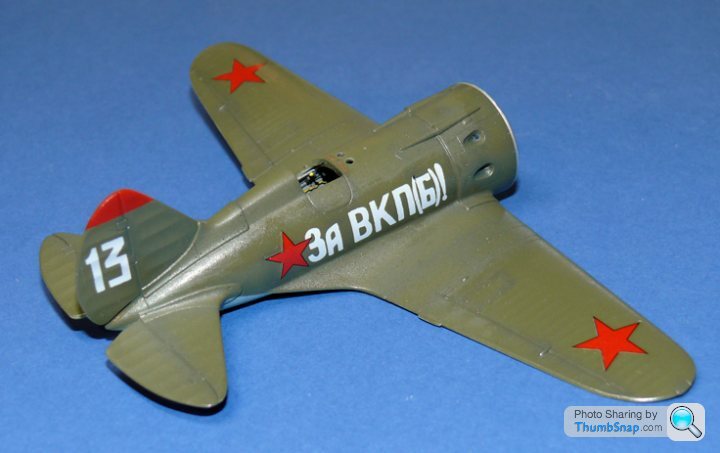
The decal borders and different patches of reflectivity on the model will disappear with the final matt coat (at least they usually do!).
Next job, fit the exhausts, cockpit crash pad and give it a dark wash.
A couple of minutes with a very fine brush and some base colour soon corrected that:
RedFirecracker's custom made decals (all the white text) were, as usual, spot-on in terms of fit and in this case opacity. They're not solid white, which means the base colour partially darkens them. I'd normally overspray with tamiya smoke to reduce contrast, but it won't be needed here:
The decal borders and different patches of reflectivity on the model will disappear with the final matt coat (at least they usually do!).
Next job, fit the exhausts, cockpit crash pad and give it a dark wash.
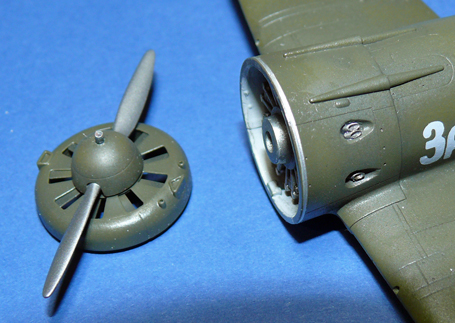
Araldited the exhausts into place, followed by the engine, which needed the gearbox gutting off so that the modified cowling/propeller would fit:
Also fitted the seat, scratch-built crash pad and control column, and test fitted the scratchbuilt cockpit door. This needs a bit more work in terms of fitting latches and weathering. I'm glad I spend so much time detailling the cockpit and opening it up a bit - I'm surprised by how much is visible.
Now for a dark wash.
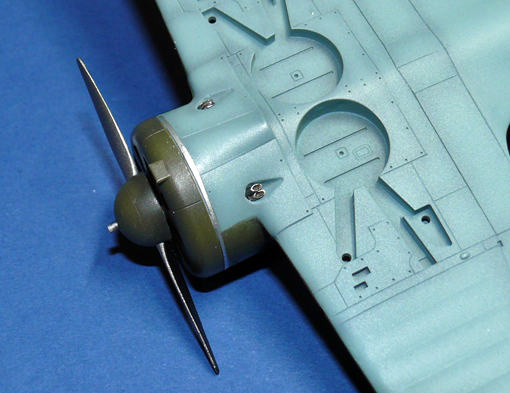
Dark wash, airbrushed exhaust stains and a bit of Tamiya weathering powder now brushed over it. Also fitted the scratchbuilt brass pitot tube and guns, and the drilled-out fuselage venturi. I touched in the wheel well leather retraction cable boots with brown as well. A coat of Humbrol Matt normalised everything, so it looks a lot better now:
Usually it would be finished at this point, but I've not figured out how to make the best job of the u/c leg covers. The Eduard etch is beautifully rendered, but doesn't fit, so I'll probably make some kind of hybrid with the kit items. Then the windscreem which is way too thick, and could do with a vacformed version. I ain't paying £10 for one though, so might have to break out the home made vacform device again.
Usually it would be finished at this point, but I've not figured out how to make the best job of the u/c leg covers. The Eduard etch is beautifully rendered, but doesn't fit, so I'll probably make some kind of hybrid with the kit items. Then the windscreem which is way too thick, and could do with a vacformed version. I ain't paying £10 for one though, so might have to break out the home made vacform device again.

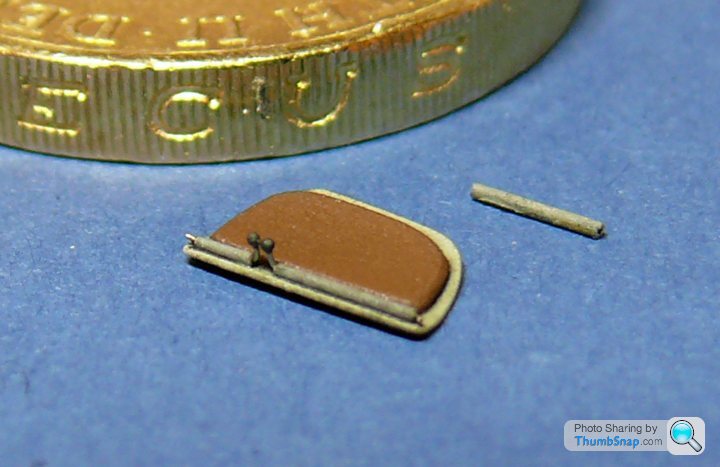
Got around to detailing the scratchbuilt cockpit door by making the latches out of brass tube and fuse wire. The knobs are dots of painted pva. I couldn't resist trying them, and they did actually work before they were weathered:
It's added a bit of interest anyway. Also added the gunsight, which I think is a bit simpler than it should be, but there you go:
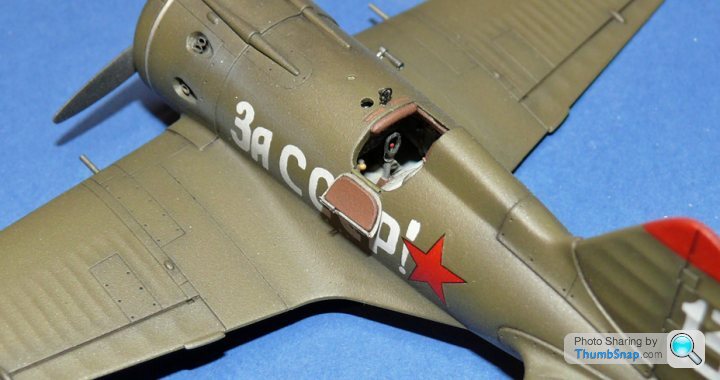
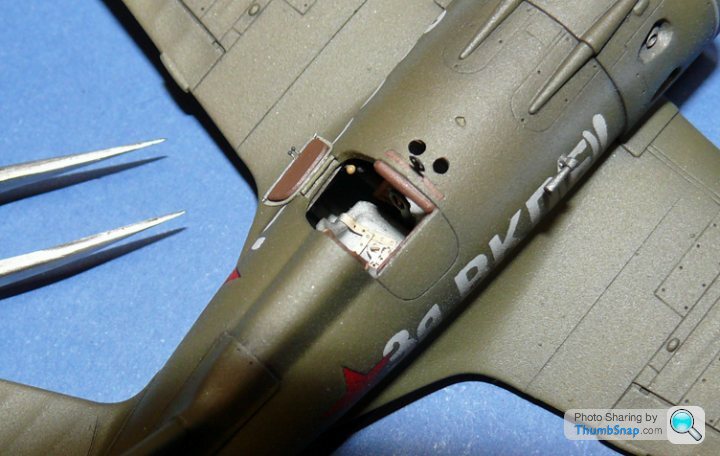
It's added a bit of interest anyway. Also added the gunsight, which I think is a bit simpler than it should be, but there you go:
Edited by dr_gn on Sunday 6th November 21:35
Nice work, but I fear for your eyesight doing all that tiny stuff!
Question - this is not a criticism - all photos I have seen of model a/c, no matter how detailed, look like models and not real a/c because the 'grains' of the paint seem too big (not sure if I am explaining this properly). Is there a way of combating this effect?
Question - this is not a criticism - all photos I have seen of model a/c, no matter how detailed, look like models and not real a/c because the 'grains' of the paint seem too big (not sure if I am explaining this properly). Is there a way of combating this effect?
Ayahuasca said:
Nice work, but I fear for your eyesight doing all that tiny stuff!
Question - this is not a criticism - all photos I have seen of model a/c, no matter how detailed, look like models and not real a/c because the 'grains' of the paint seem too big (not sure if I am explaining this properly). Is there a way of combating this effect?
On solid colours, I've only ever noticed the effect in close-up photos (or on just about every metallic paint finish model car I've seen). Photos of models invariably magnify every tiny error (each of which is already effectively mangnified 72x in this case!).Question - this is not a criticism - all photos I have seen of model a/c, no matter how detailed, look like models and not real a/c because the 'grains' of the paint seem too big (not sure if I am explaining this properly). Is there a way of combating this effect?
It's very rare to see a photograph of a 1:72 or 1:48 model and not be able to tell it from the real thing - there are loads of subtle cues that all add up. On the other hand, large scale (1:18, 1:12) cars shot in a "studio" type environment can often be indistinguishable from the real thing.
Gassing Station | Scale Models | Top of Page | What's New | My Stuff