1/12 Porsche 917k - MFH
Discussion


A superb kit and a beautiful bit of modelling! One question though regarding the real machines... with regard to the resin parts, were they not affected by the high engine temperatures...?
Very tempted to try one of these kits at some point, it's decades since I've built any cars, must make amends. I'd be sorely tempted to go to town on the weathering if I get one, it's something I've always enjoyed doing much more than building the kits themselves. I watched 'Le Mans' again the other night for the umpteenth time and noticed how filthy the cars and internals became during the race.
Very tempted to try one of these kits at some point, it's decades since I've built any cars, must make amends. I'd be sorely tempted to go to town on the weathering if I get one, it's something I've always enjoyed doing much more than building the kits themselves. I watched 'Le Mans' again the other night for the umpteenth time and noticed how filthy the cars and internals became during the race.

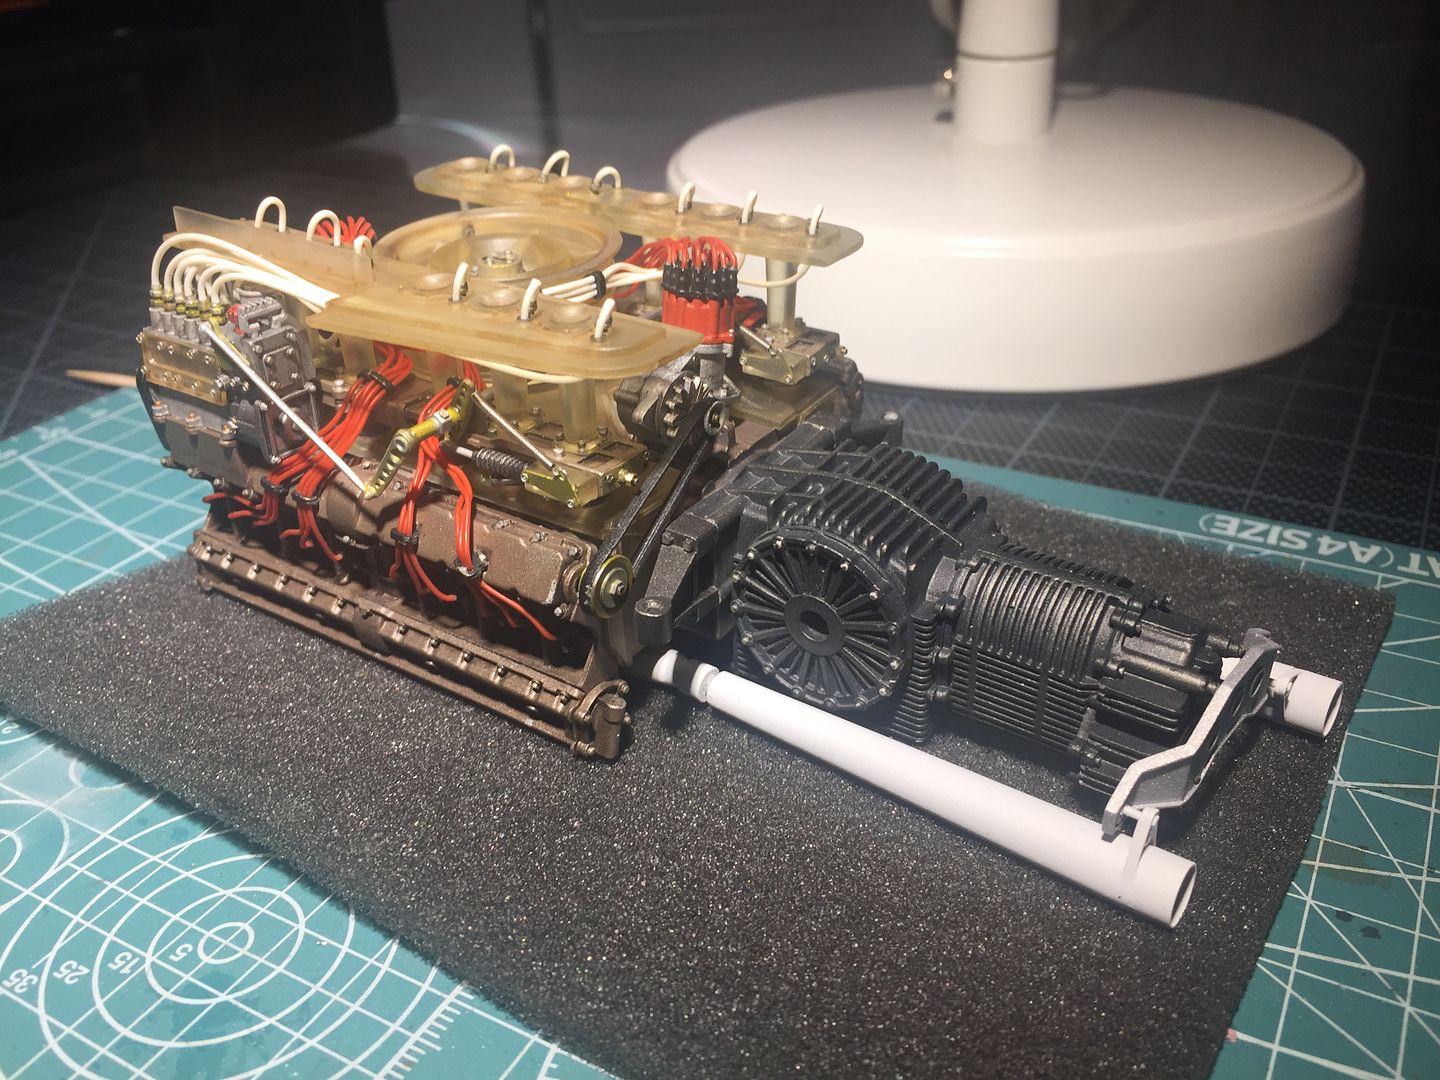
..anyway, got a bit done over the holiday weekend.
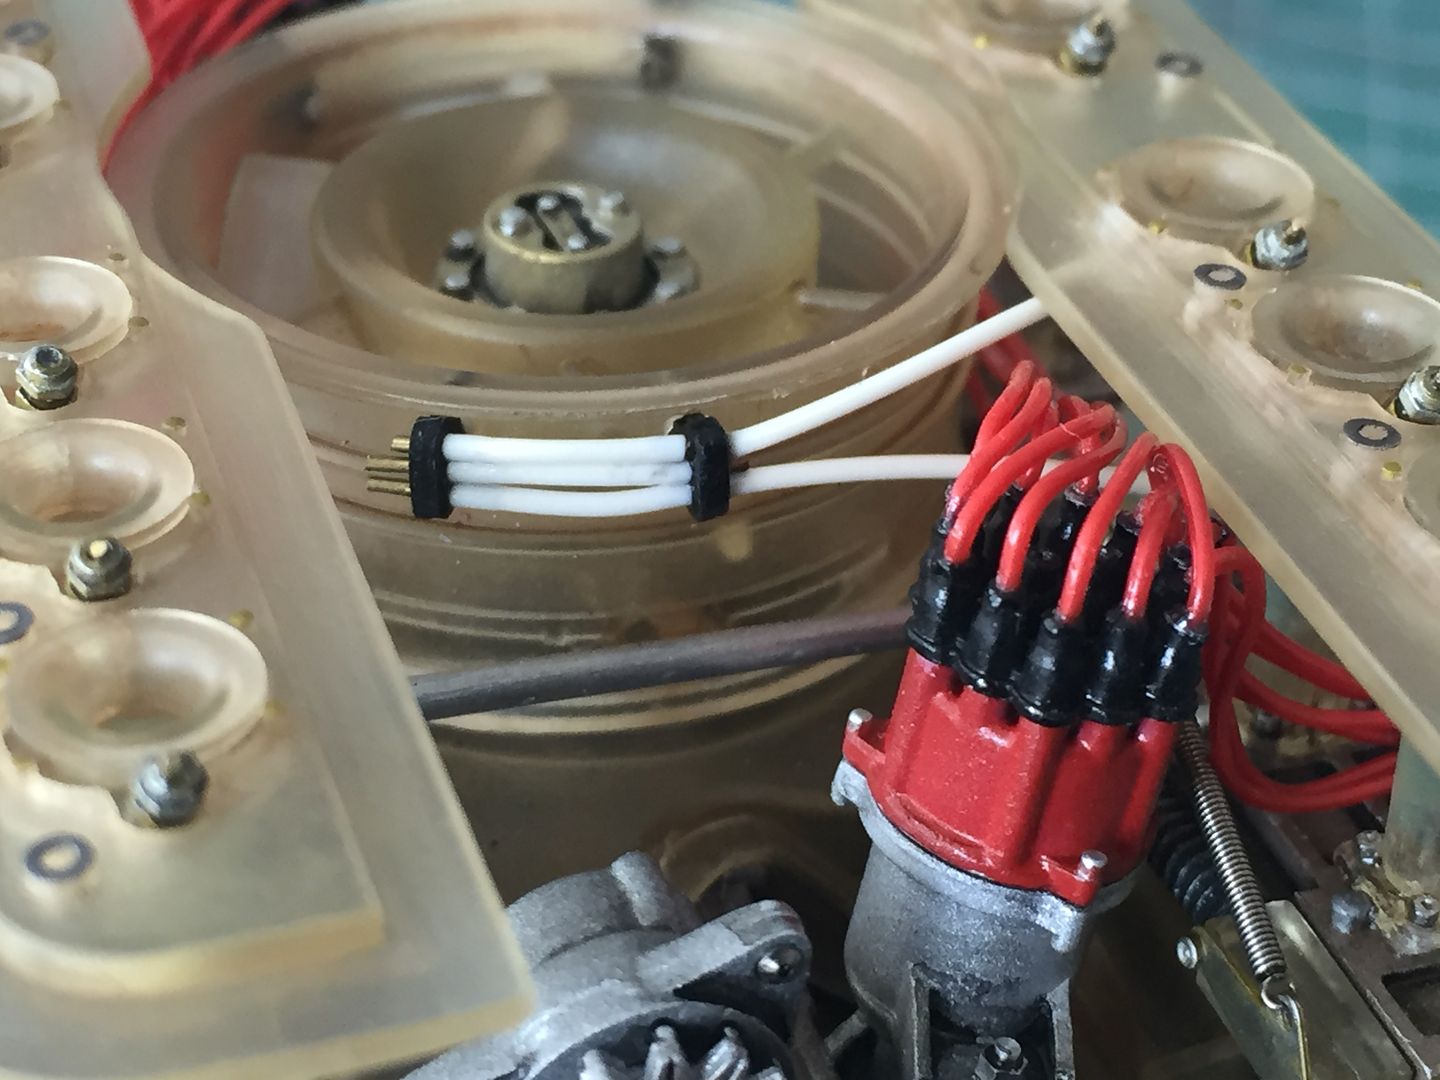
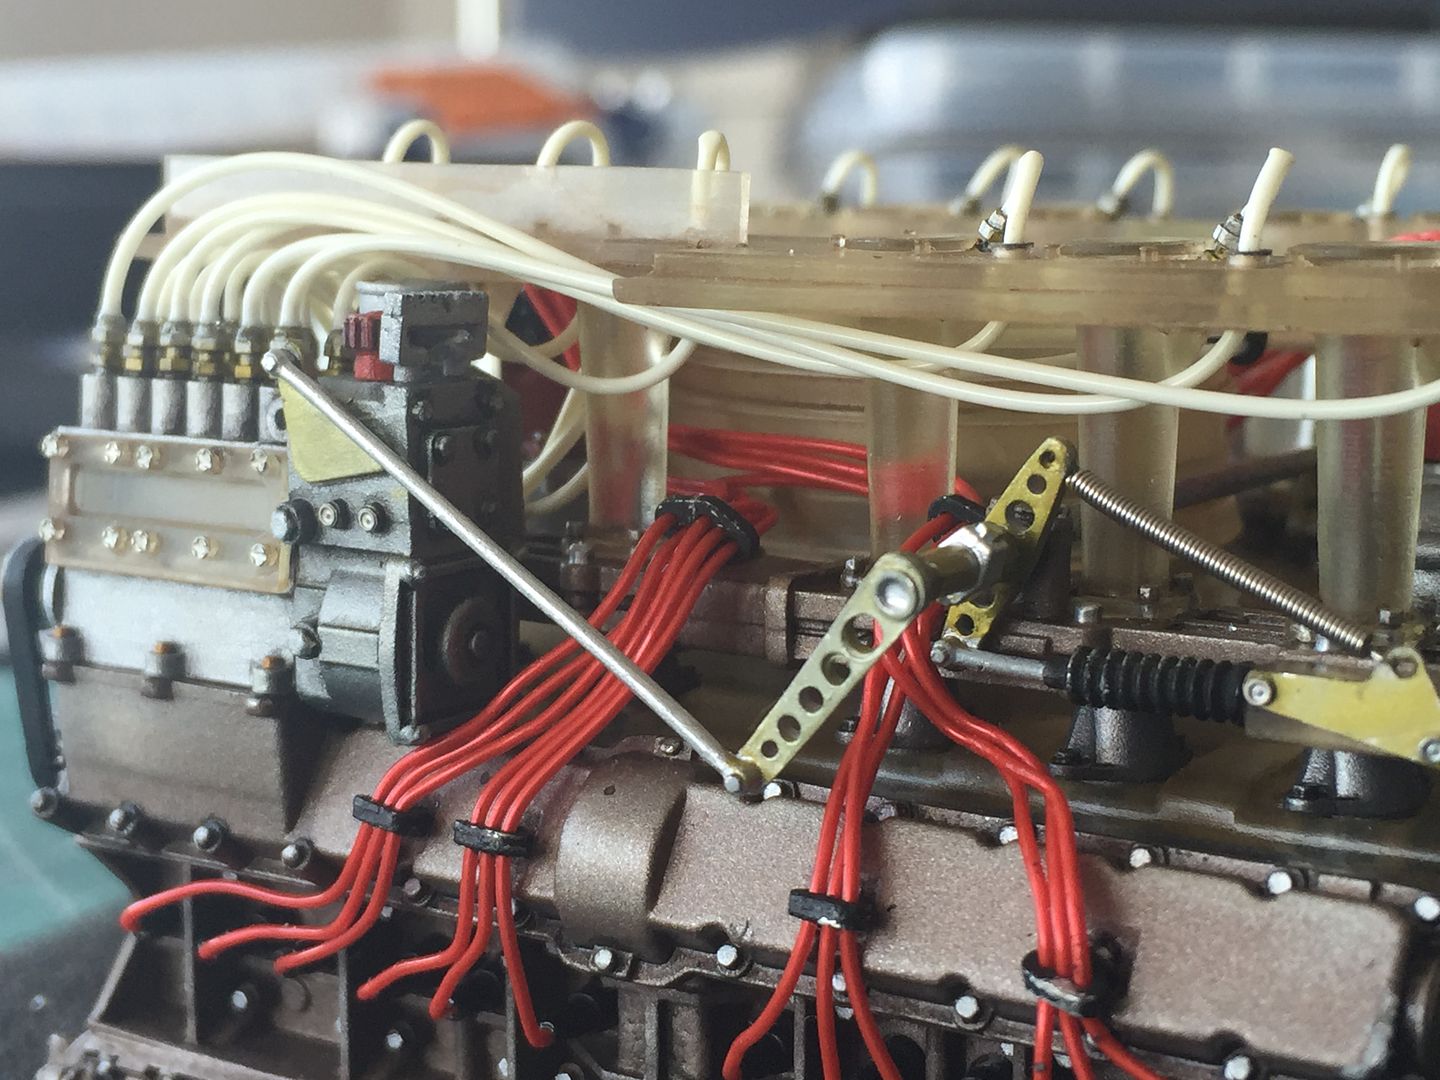
Wired the other side, and managed to fit the shroud with less swearing on this side...
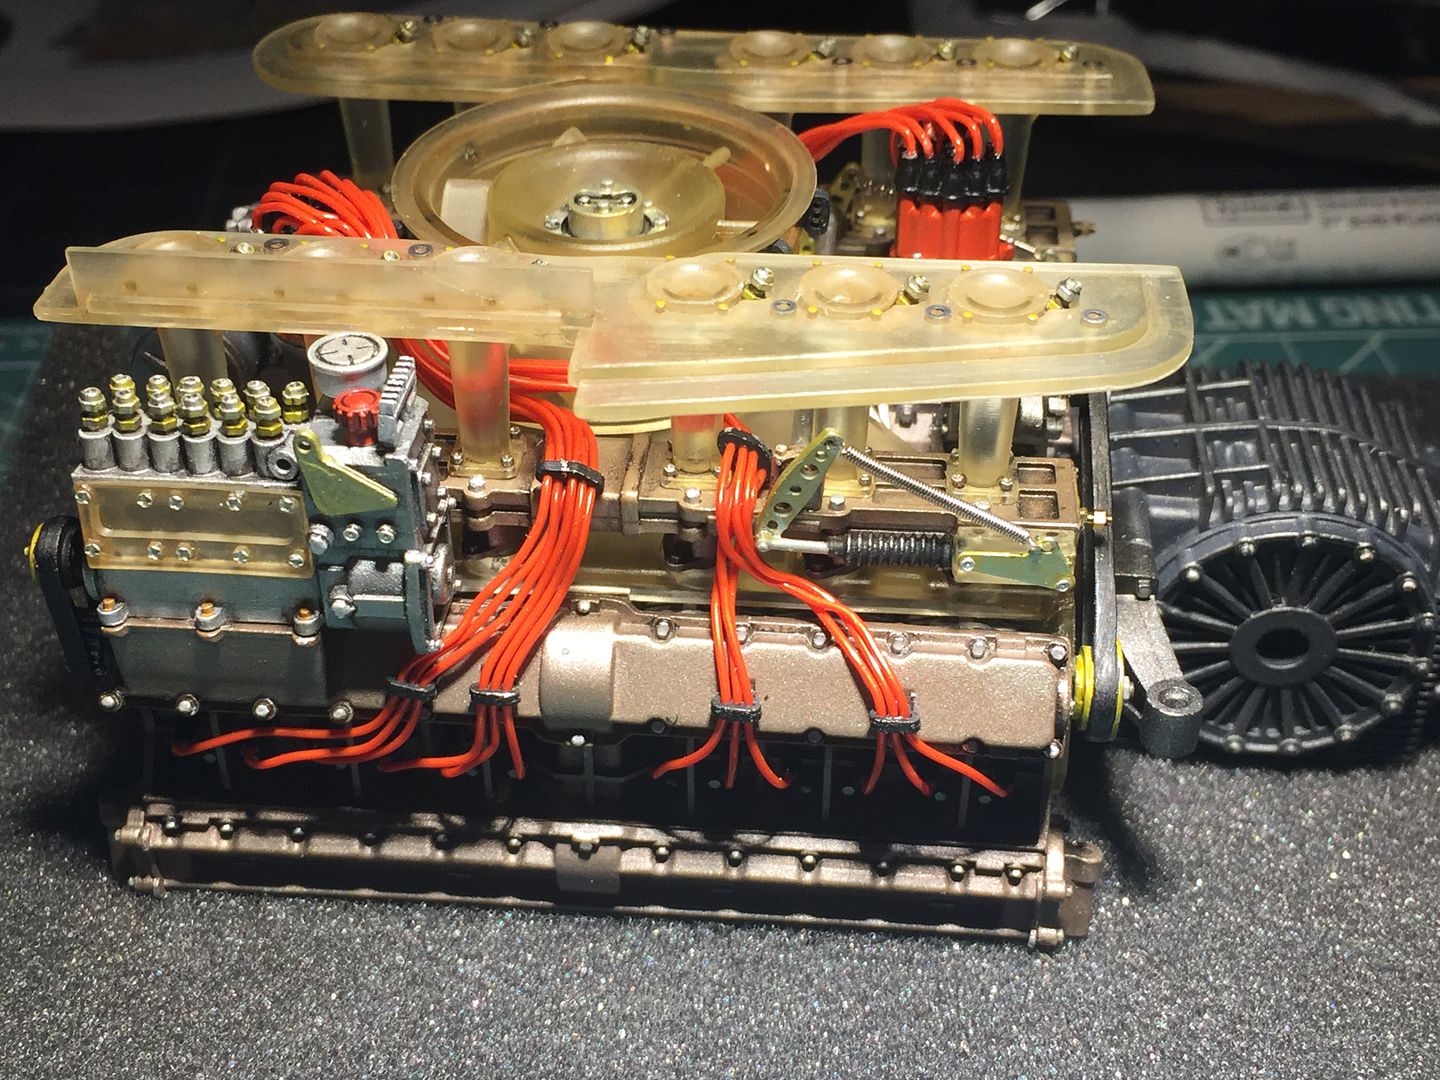
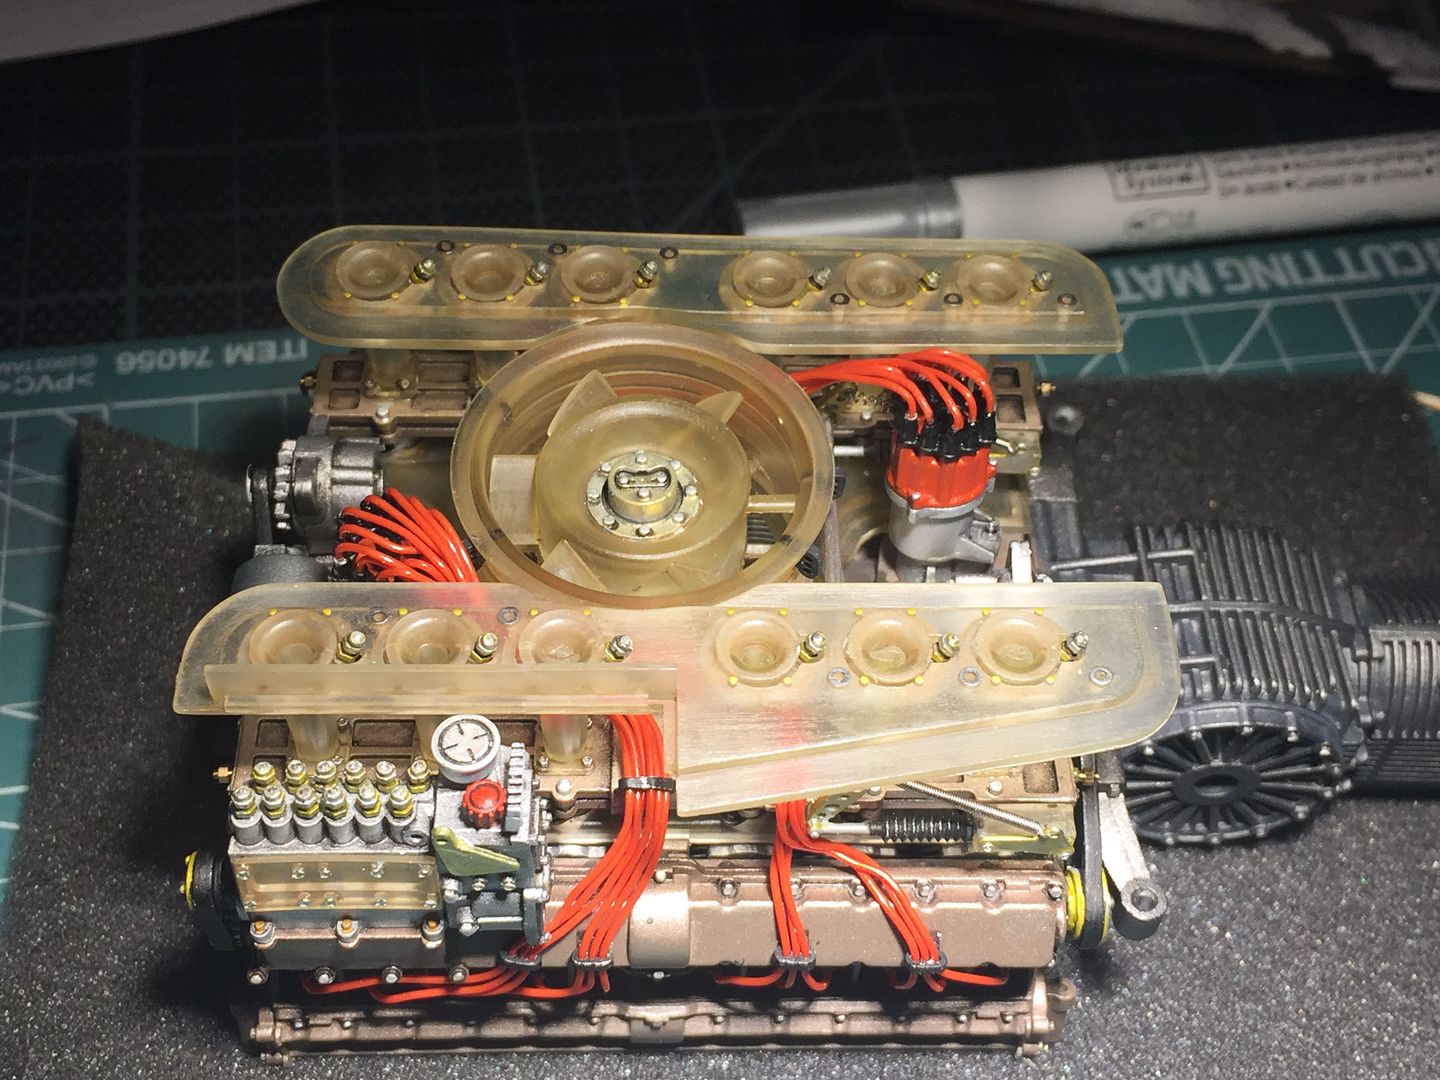
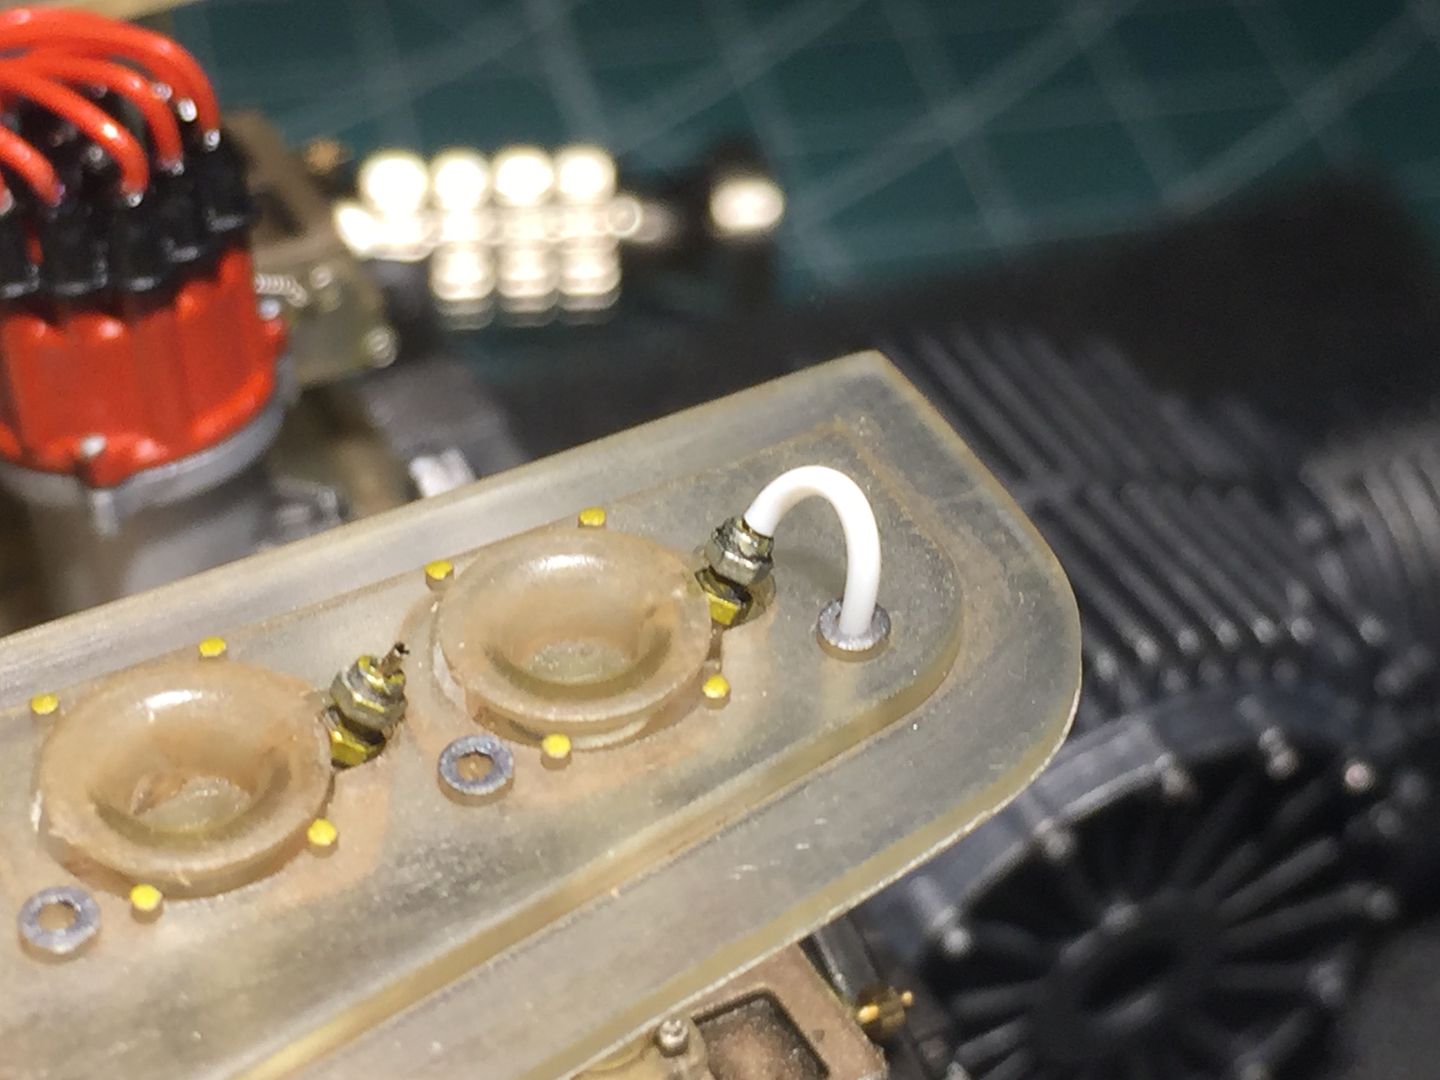
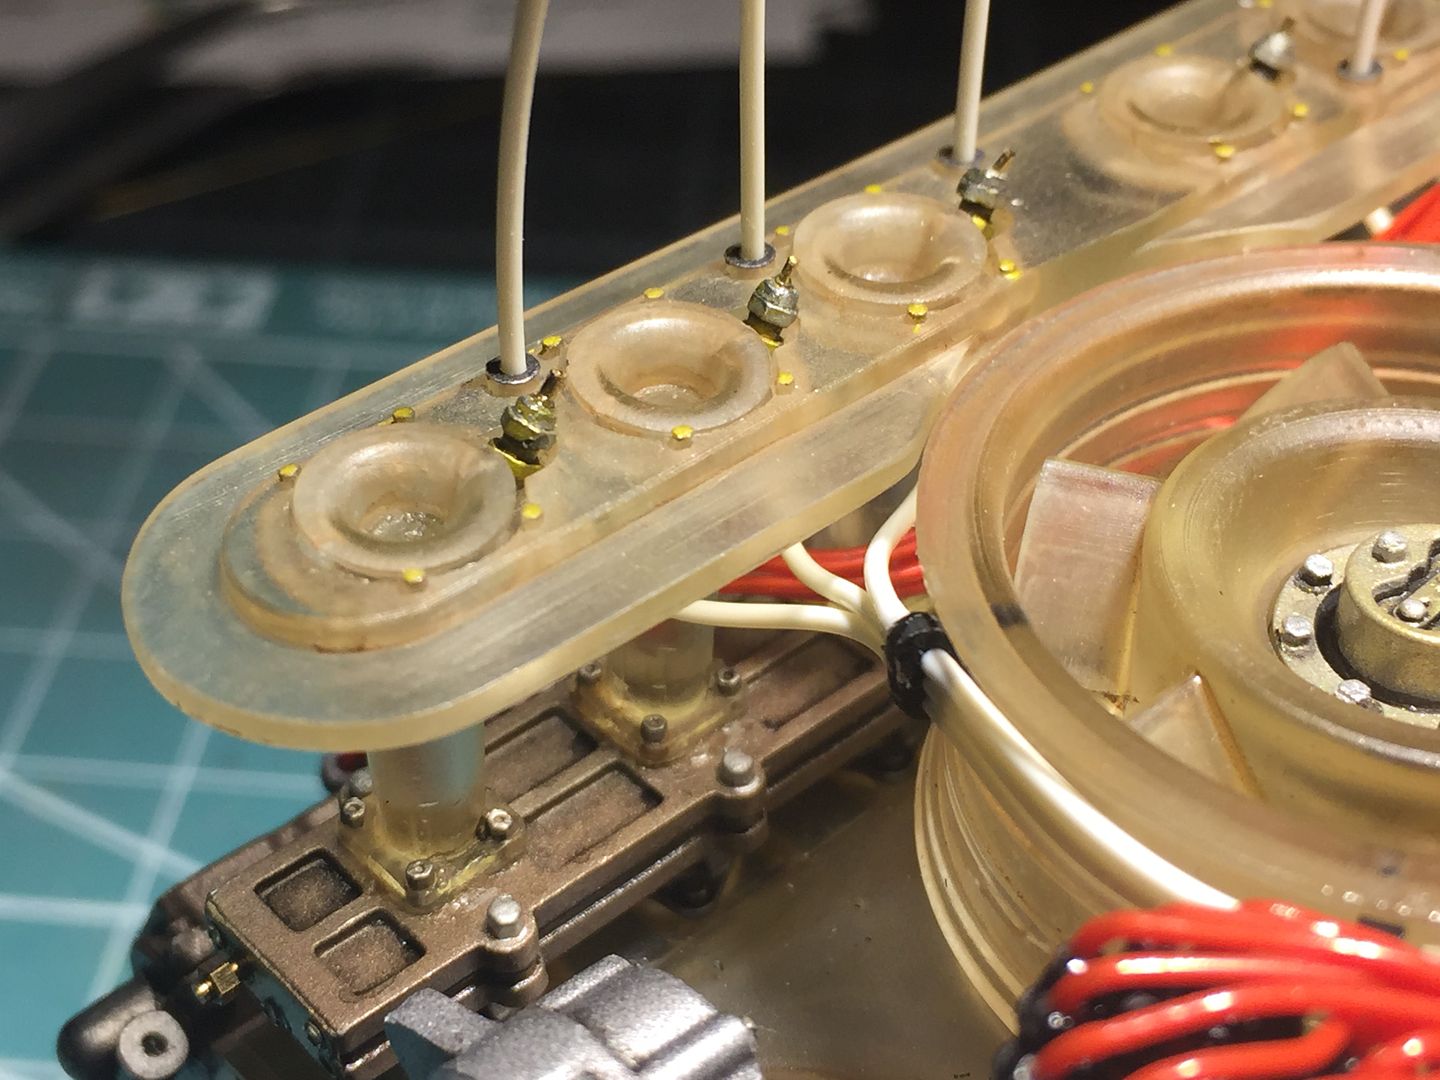
Now it was time to fit the fuel lines. These are cream in color (as shown on the flat-16!) and they thread through these tiny black pieces that I had drilled out and fitted a while back...
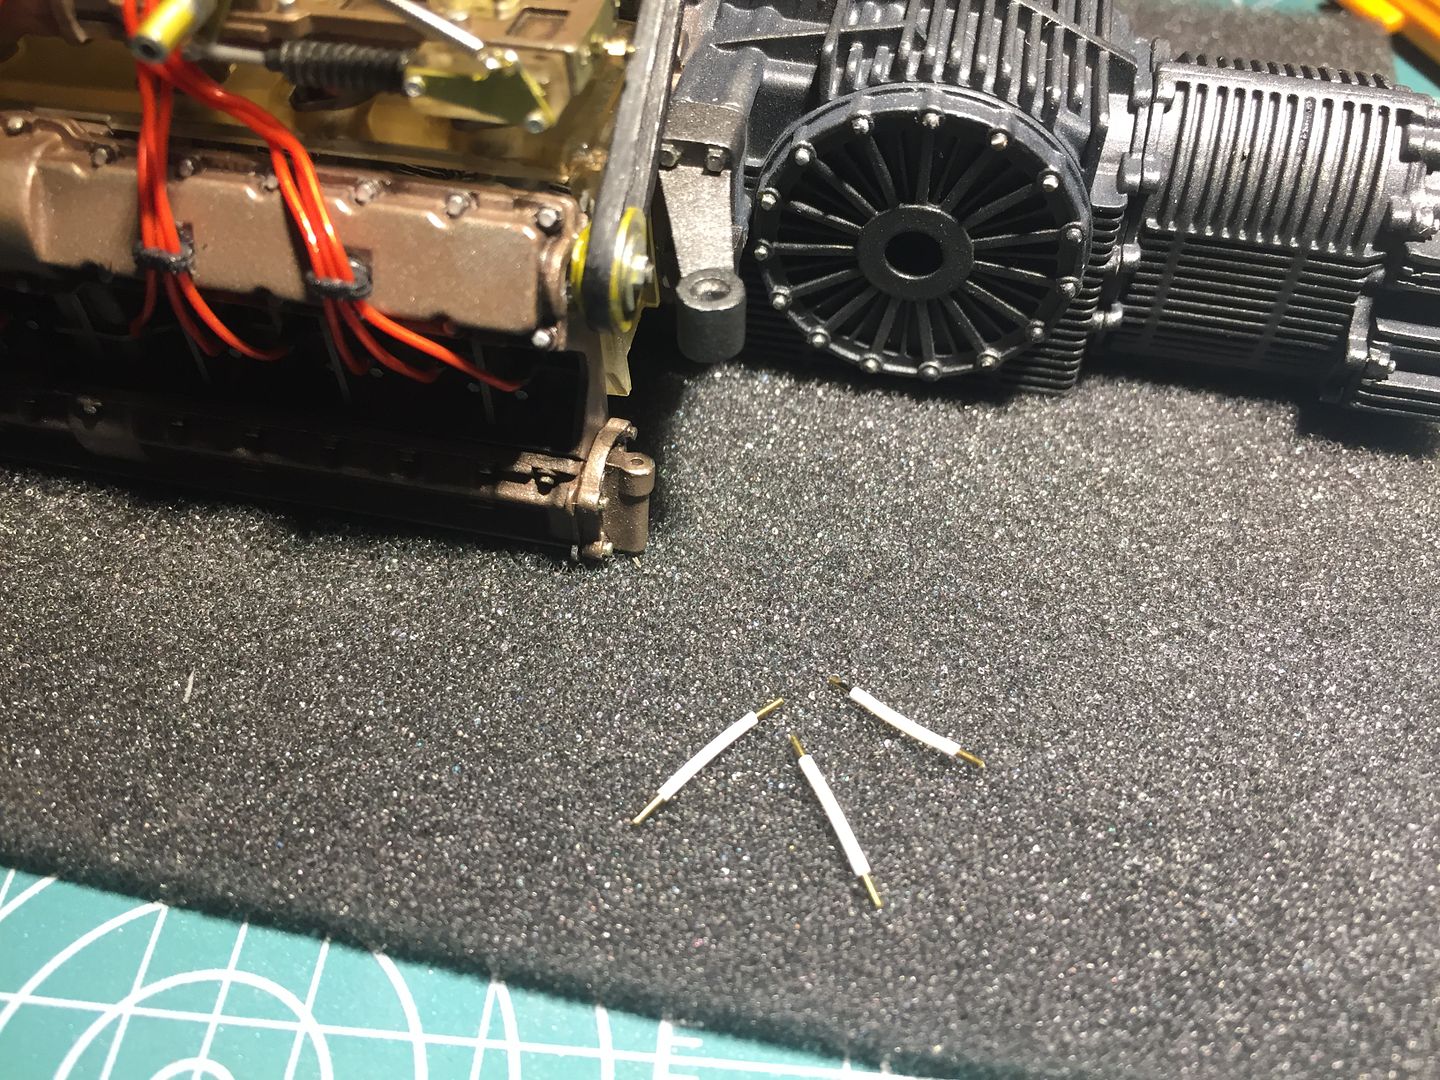
The red ignition wires are - wire. So they thread through tiny holes easily, as you can 'push' them. I discovered that the fuel lines are actually very soft tubing. It was going to be almost impossible to thread them - especially with the decreasing access to these pipe-guides. For the same reason, the tubing does not sit very easily 'IN' the holes I had drilled in injectors and fuel systems - again, the red wires were glued INTO holes. There was nothing to it but to fit some wire 'pegs' for the tubing to sit OVER. So, 24 of these little tiny pieces of brass wire added...

Showing them fitted to the injectors...
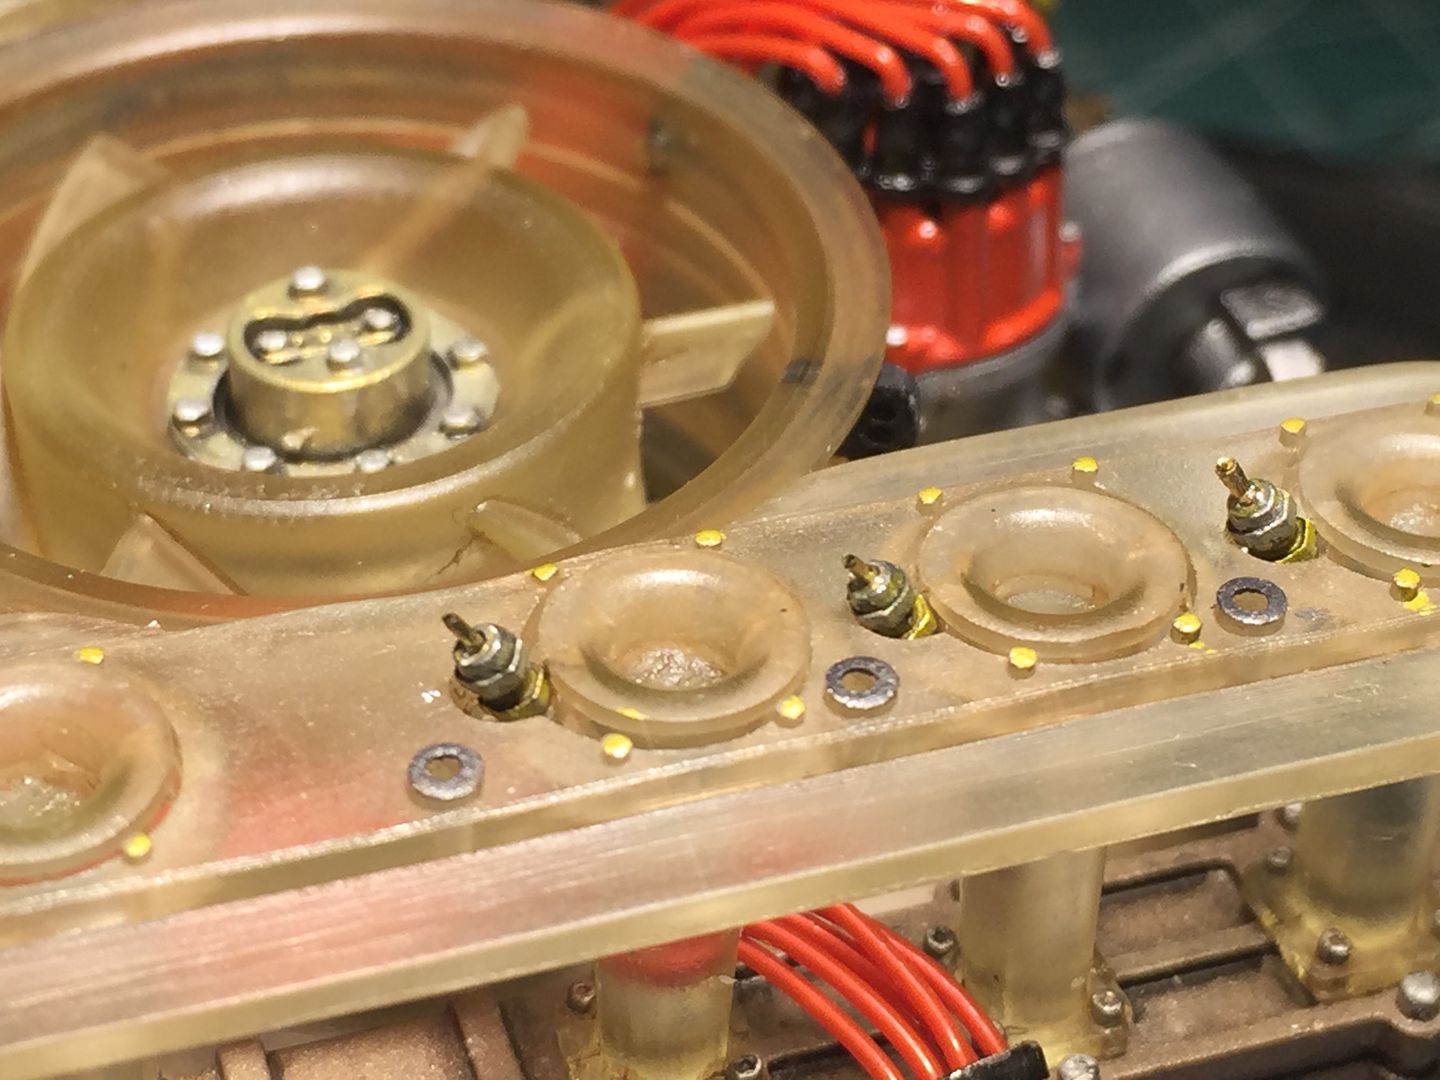
and a quick test fit with an off-cut...
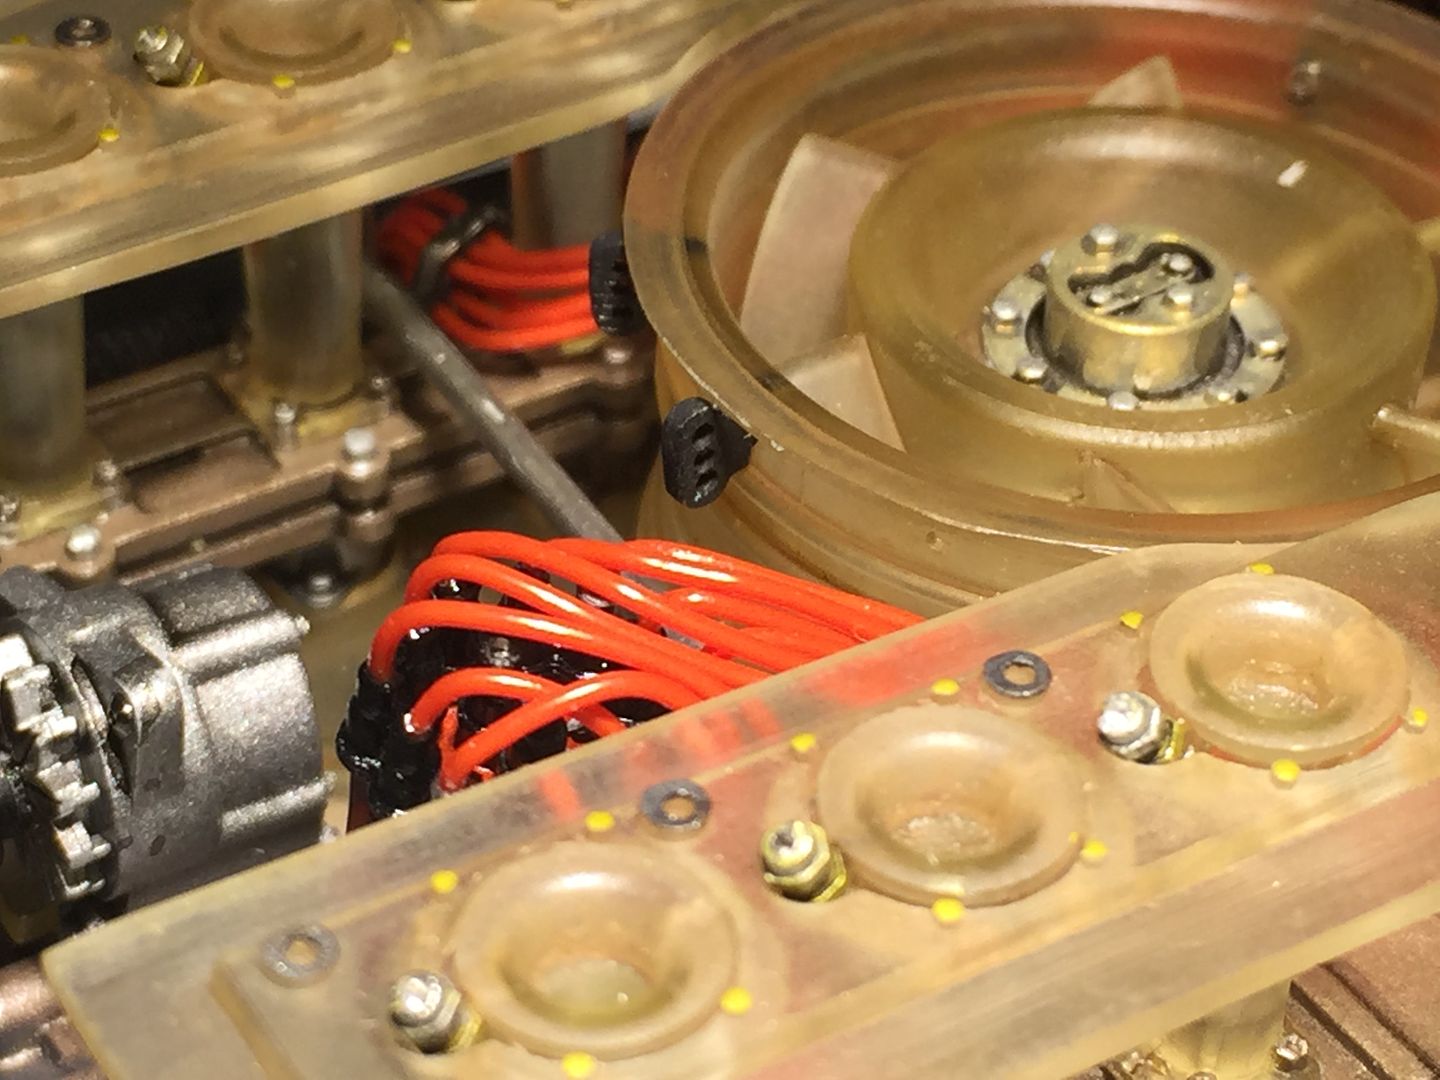
As I mentioned, there was no way I was going to be able to fit and thread the pipes through the guides that are on the fan housing, so I came up with a solution that I am quite pleased with, of providing wire 'pegs' to fit the tubing to either side of the guides...
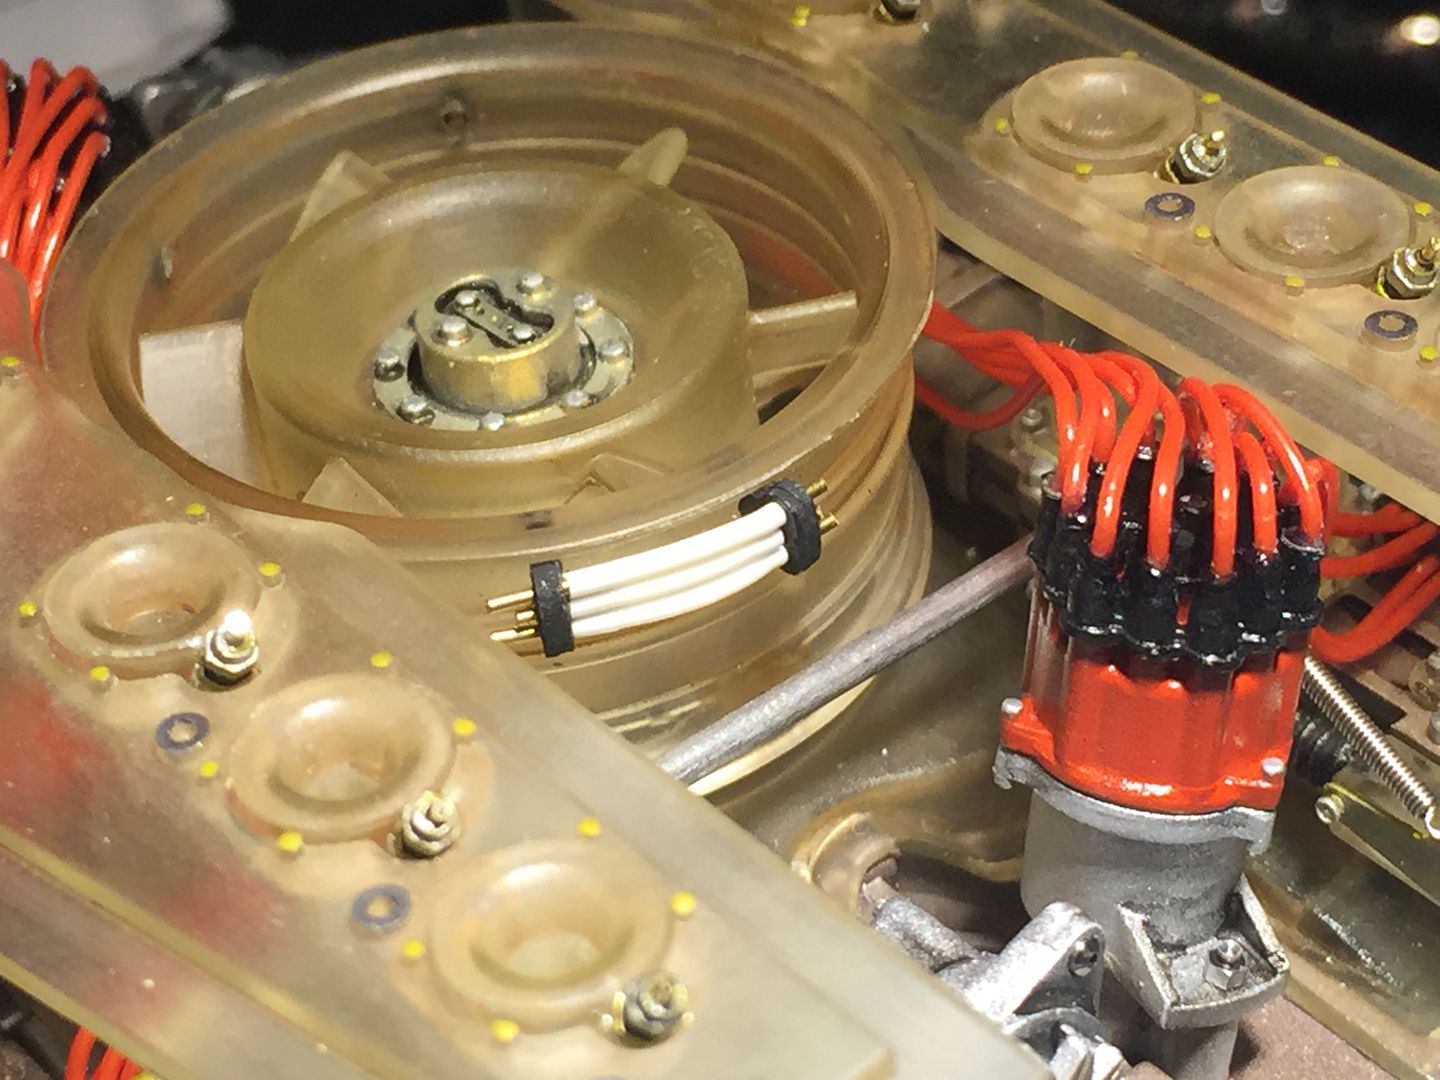
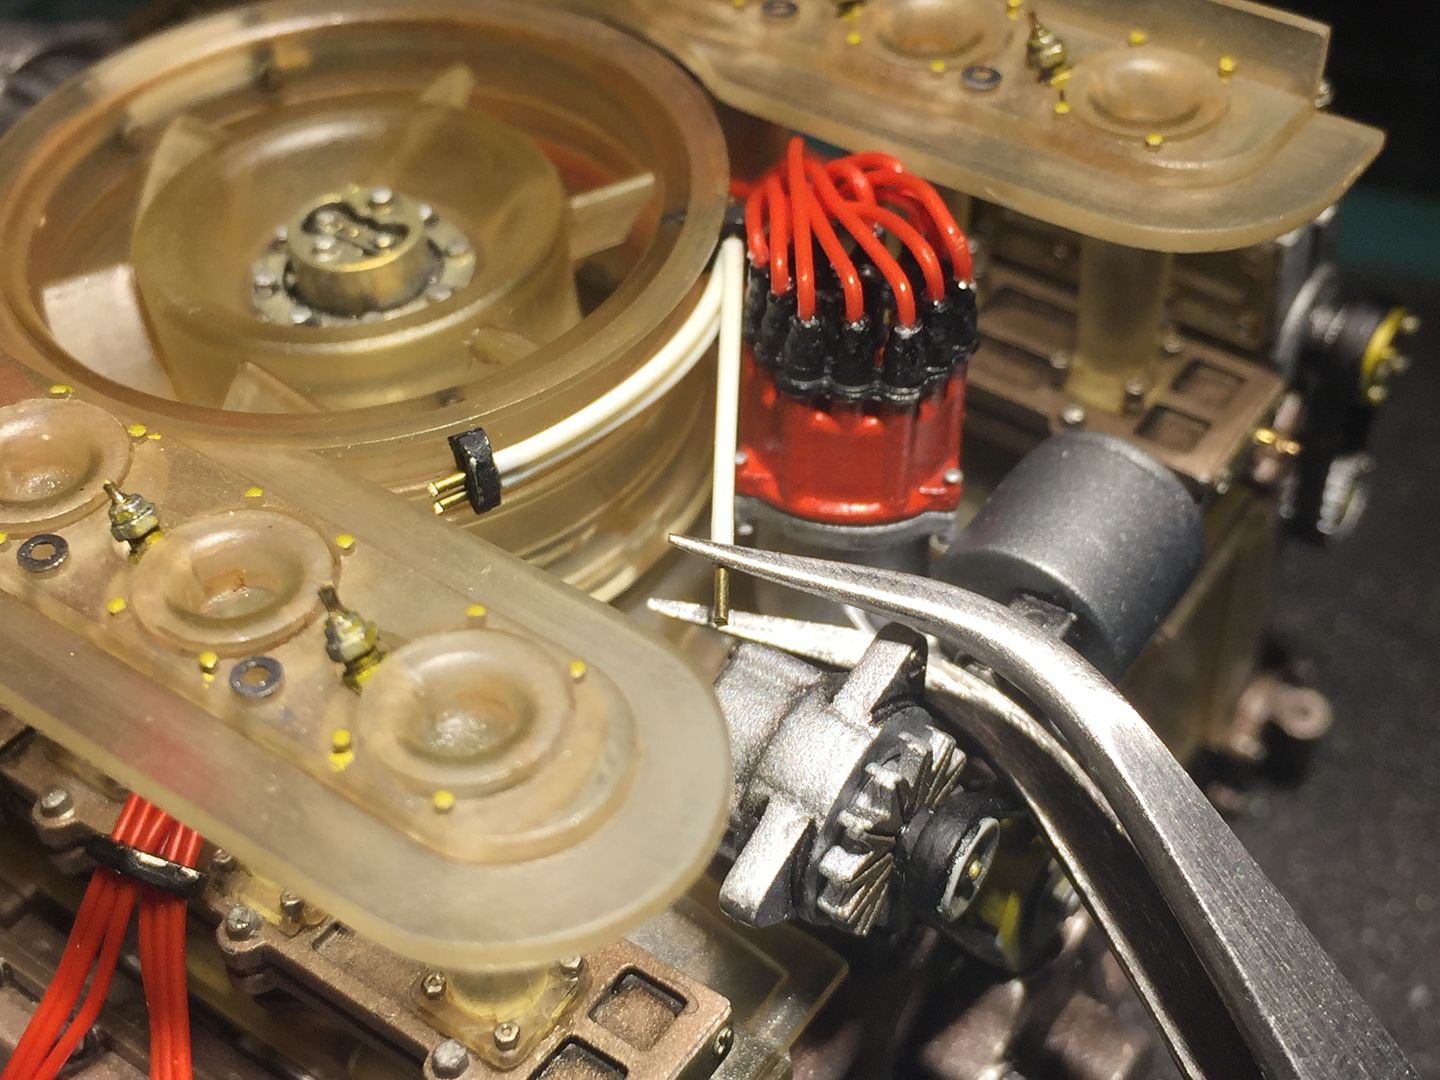
I can now (fairly) easily fit the tubing on to the ends with tweezers, and it will look like a continuous pipe...
Wired the other side, and managed to fit the shroud with less swearing on this side...
Now it was time to fit the fuel lines. These are cream in color (as shown on the flat-16!) and they thread through these tiny black pieces that I had drilled out and fitted a while back...
The red ignition wires are - wire. So they thread through tiny holes easily, as you can 'push' them. I discovered that the fuel lines are actually very soft tubing. It was going to be almost impossible to thread them - especially with the decreasing access to these pipe-guides. For the same reason, the tubing does not sit very easily 'IN' the holes I had drilled in injectors and fuel systems - again, the red wires were glued INTO holes. There was nothing to it but to fit some wire 'pegs' for the tubing to sit OVER. So, 24 of these little tiny pieces of brass wire added...
Showing them fitted to the injectors...
and a quick test fit with an off-cut...
As I mentioned, there was no way I was going to be able to fit and thread the pipes through the guides that are on the fan housing, so I came up with a solution that I am quite pleased with, of providing wire 'pegs' to fit the tubing to either side of the guides...
I can now (fairly) easily fit the tubing on to the ends with tweezers, and it will look like a continuous pipe...
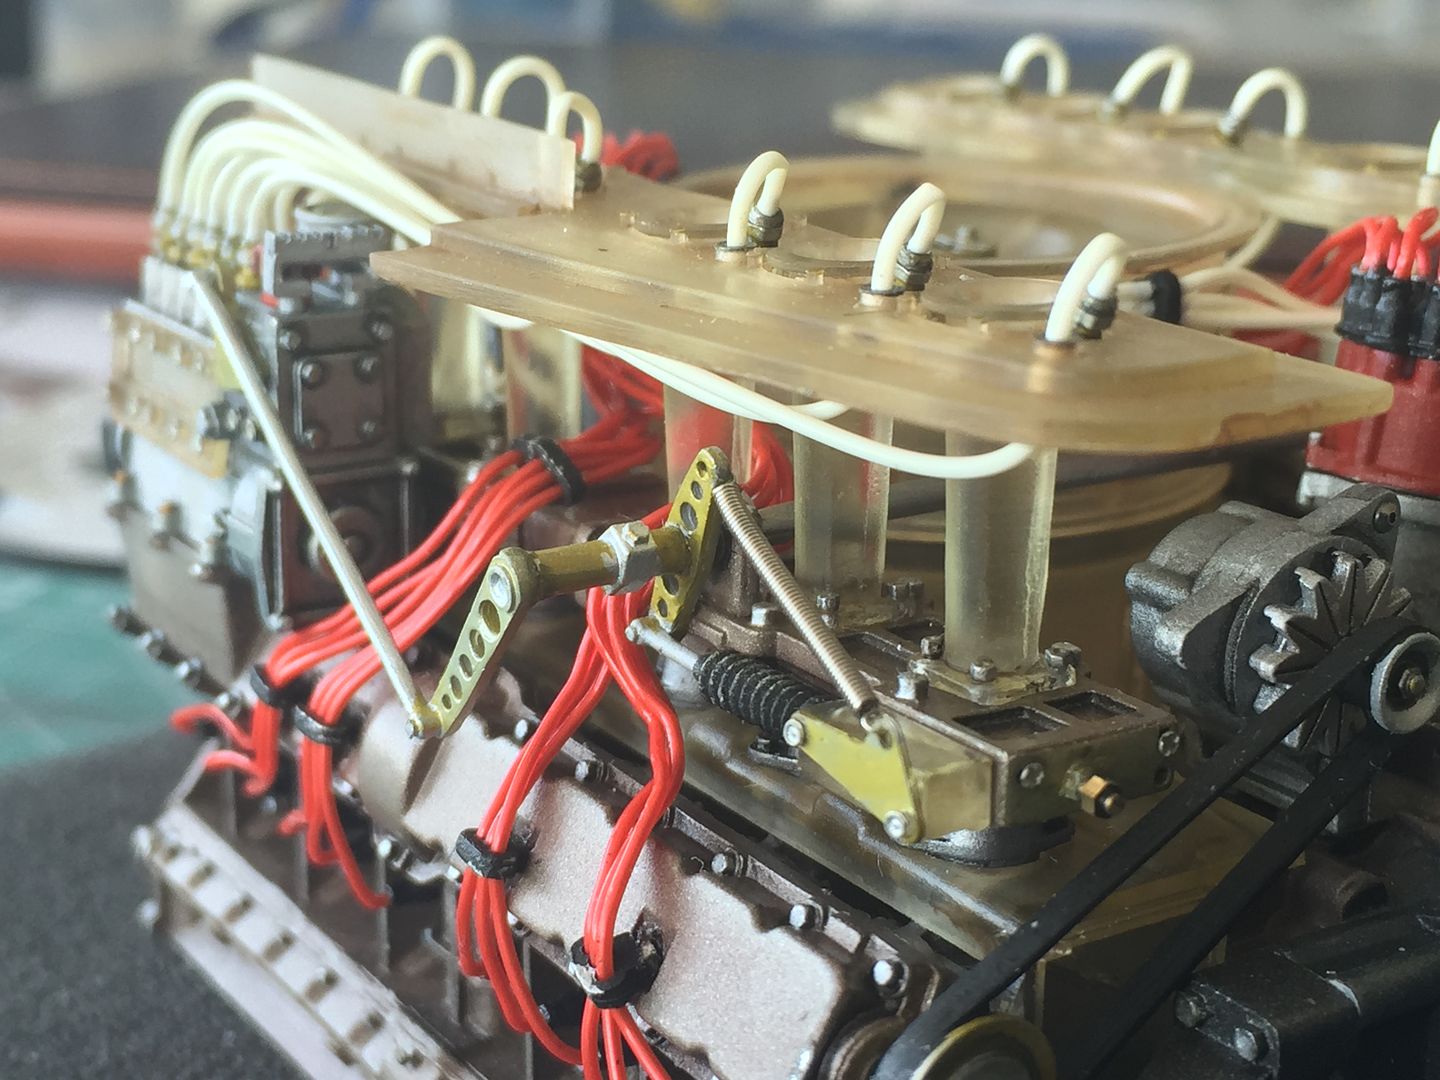
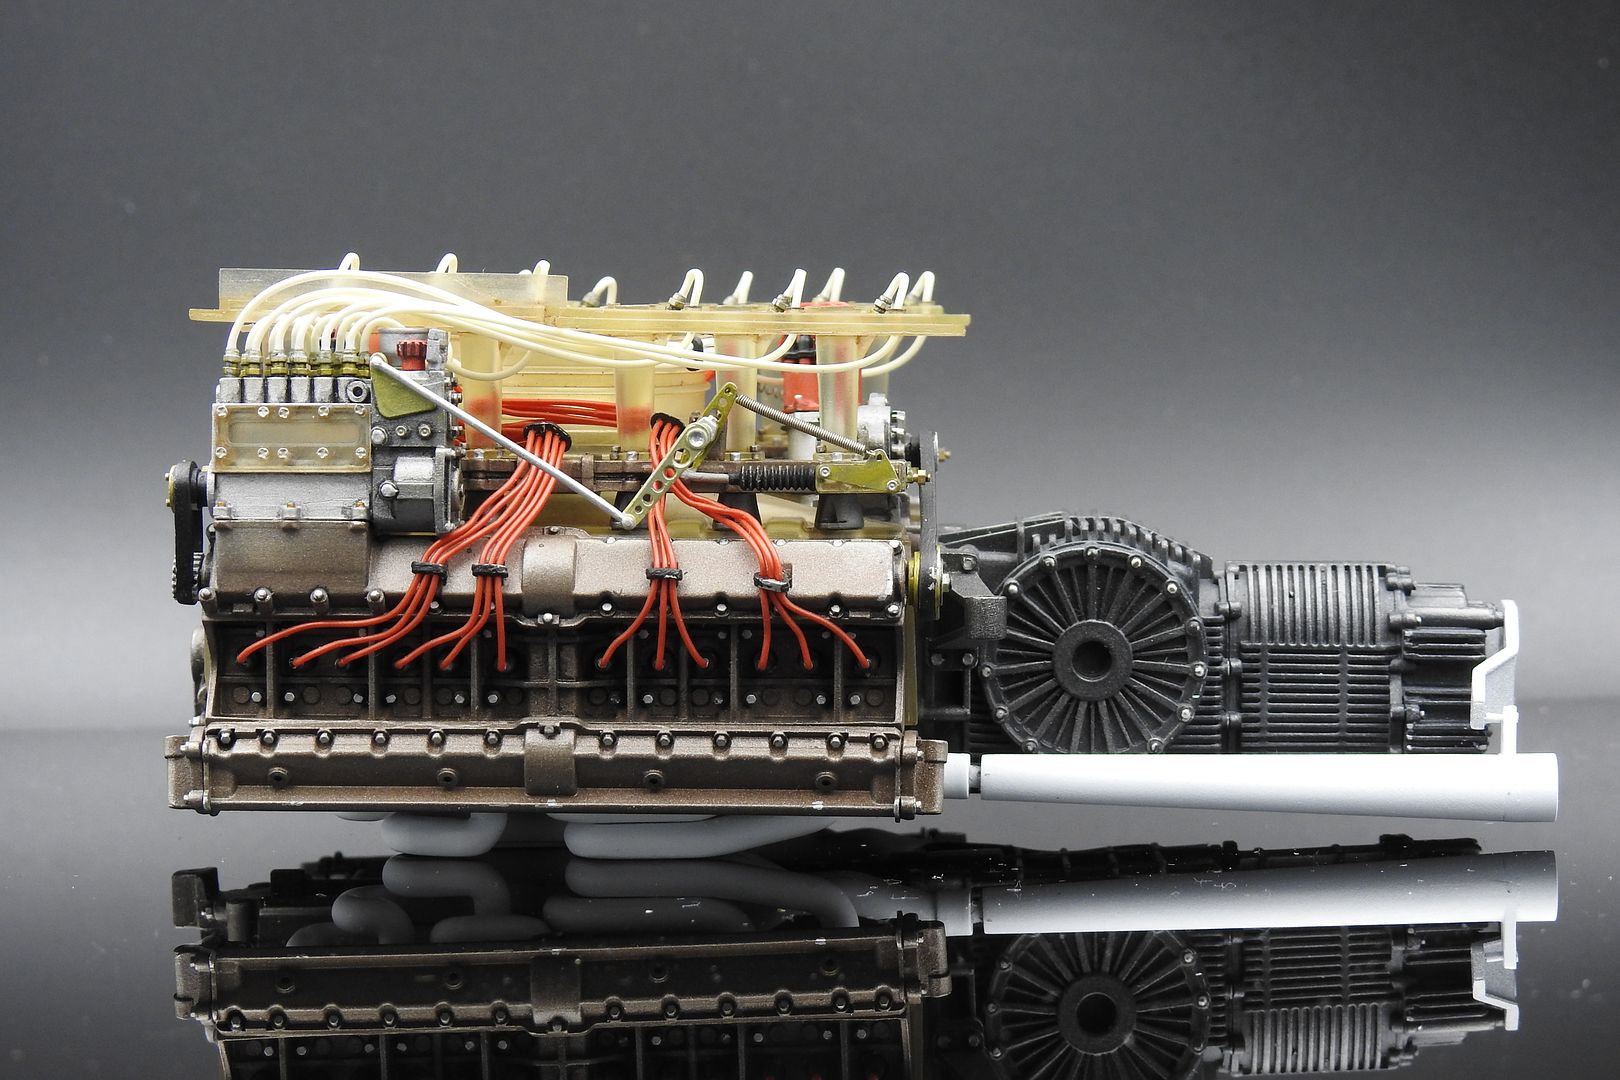
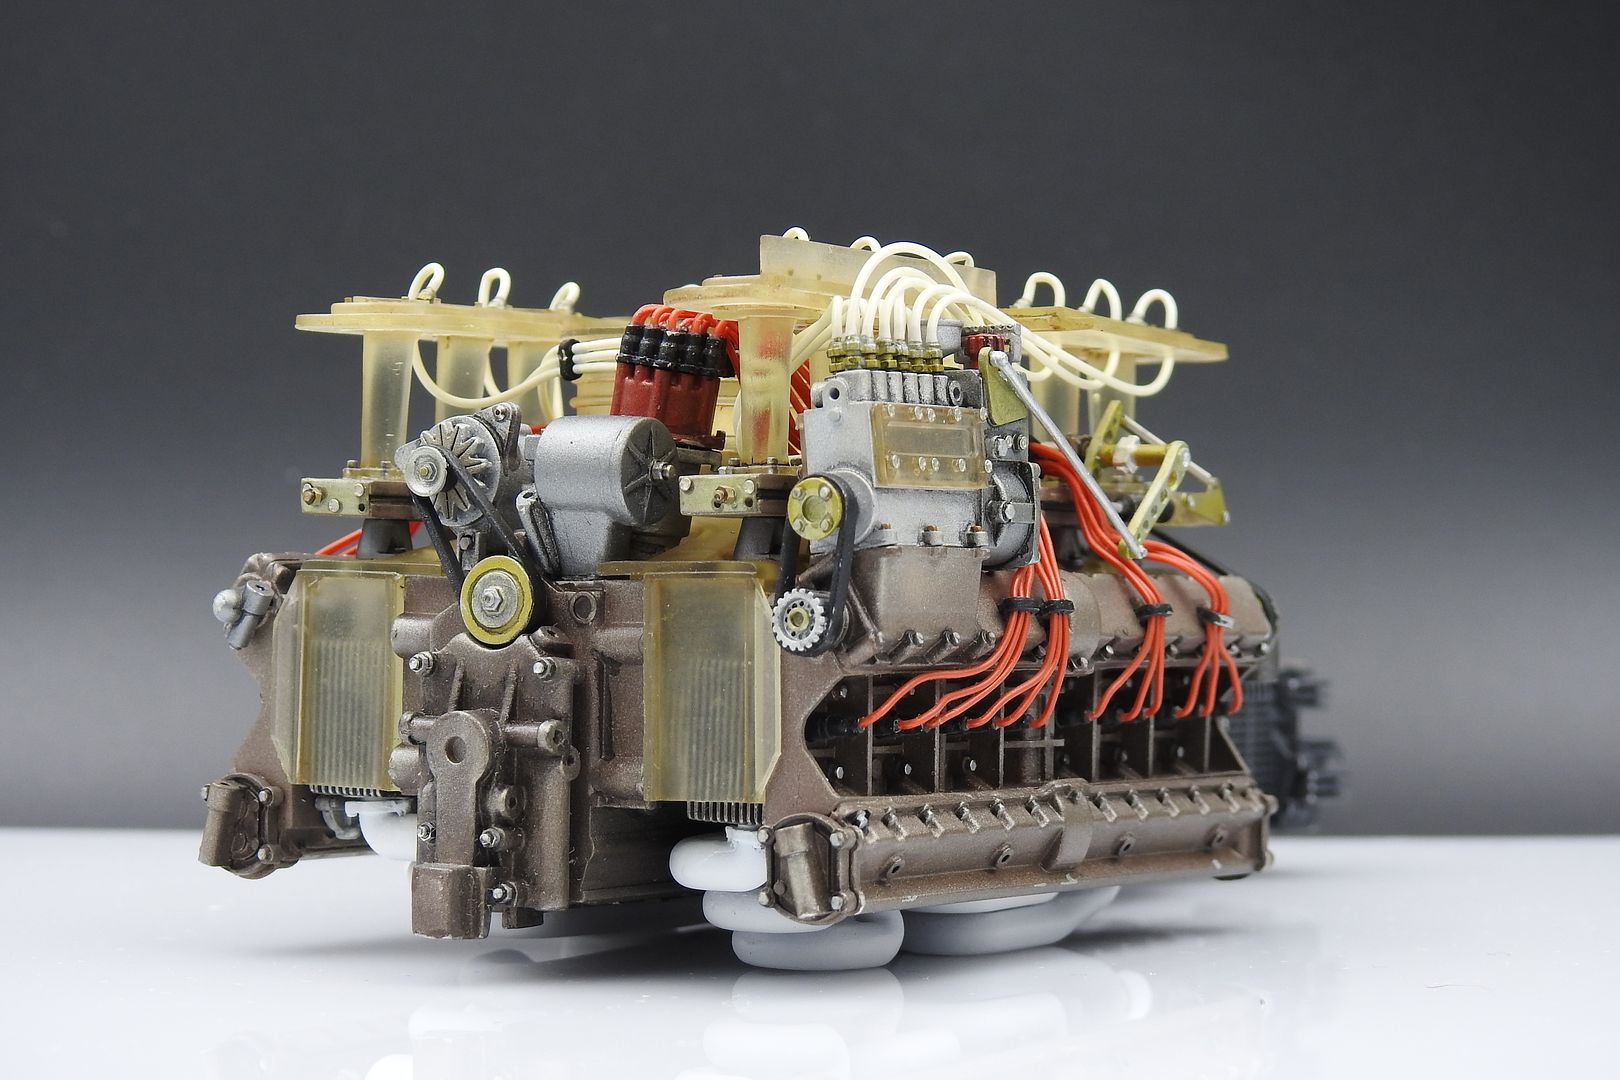
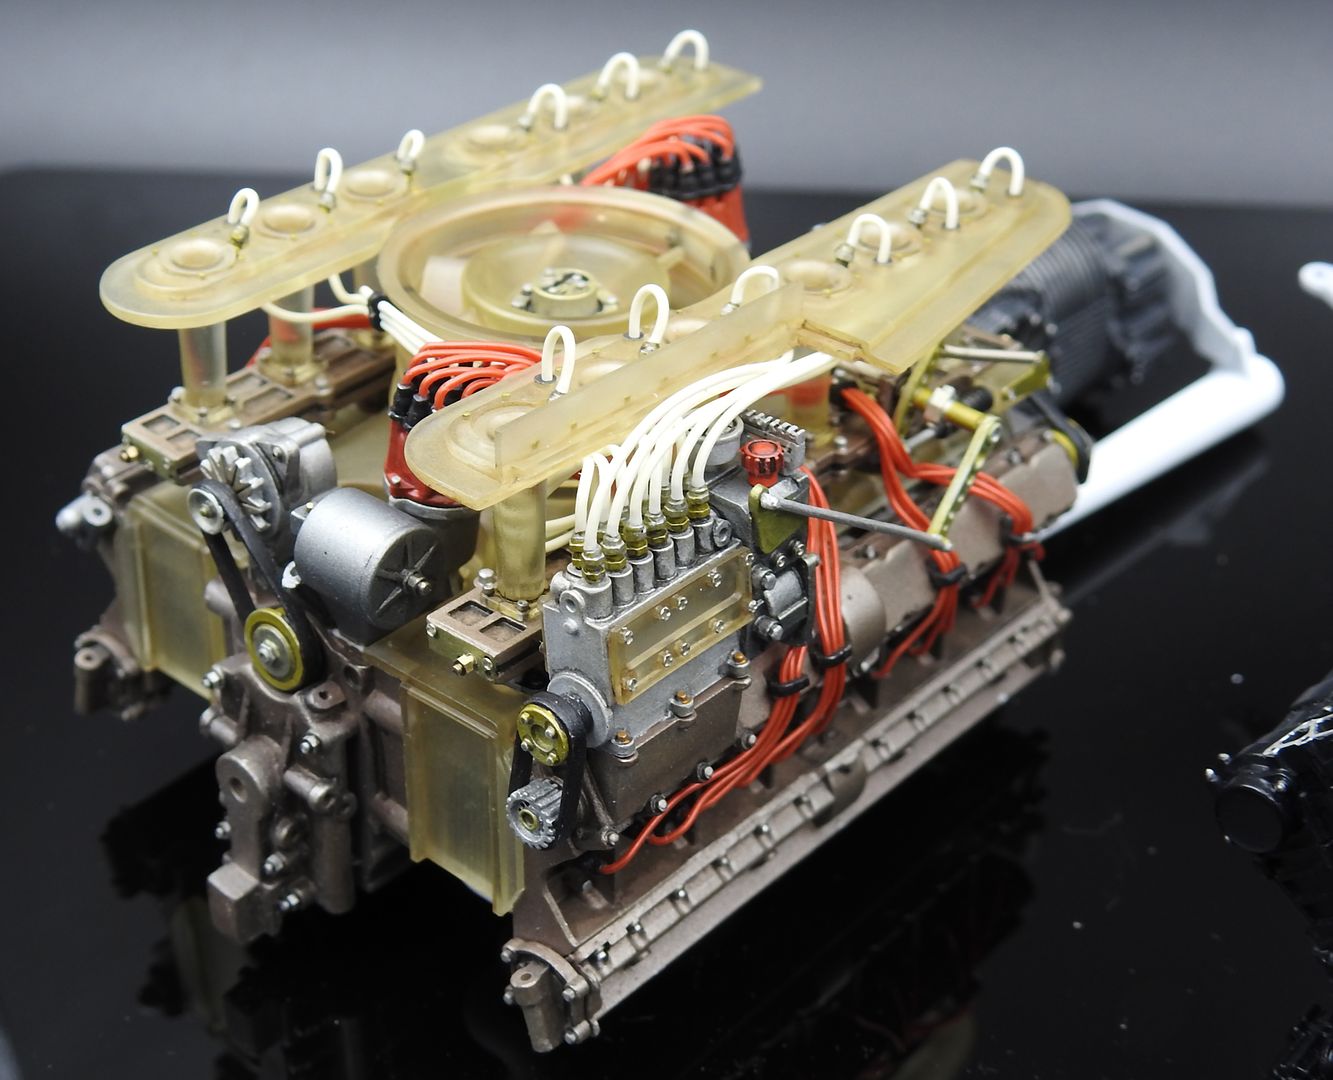
The white fuel lines were surprisingly easy - my 'cheat' around the pipe guides worked well, and the pegs in the ends of the injectors and the fuel system worked well and made fixing very easy.
I attached all the wires 'over-length' first just to get the routing neat, then trimmed and glued after that...bit of a pain trying not to let the pipe kink around the tight bend to injector, but no big deal...
over-length for test fit...
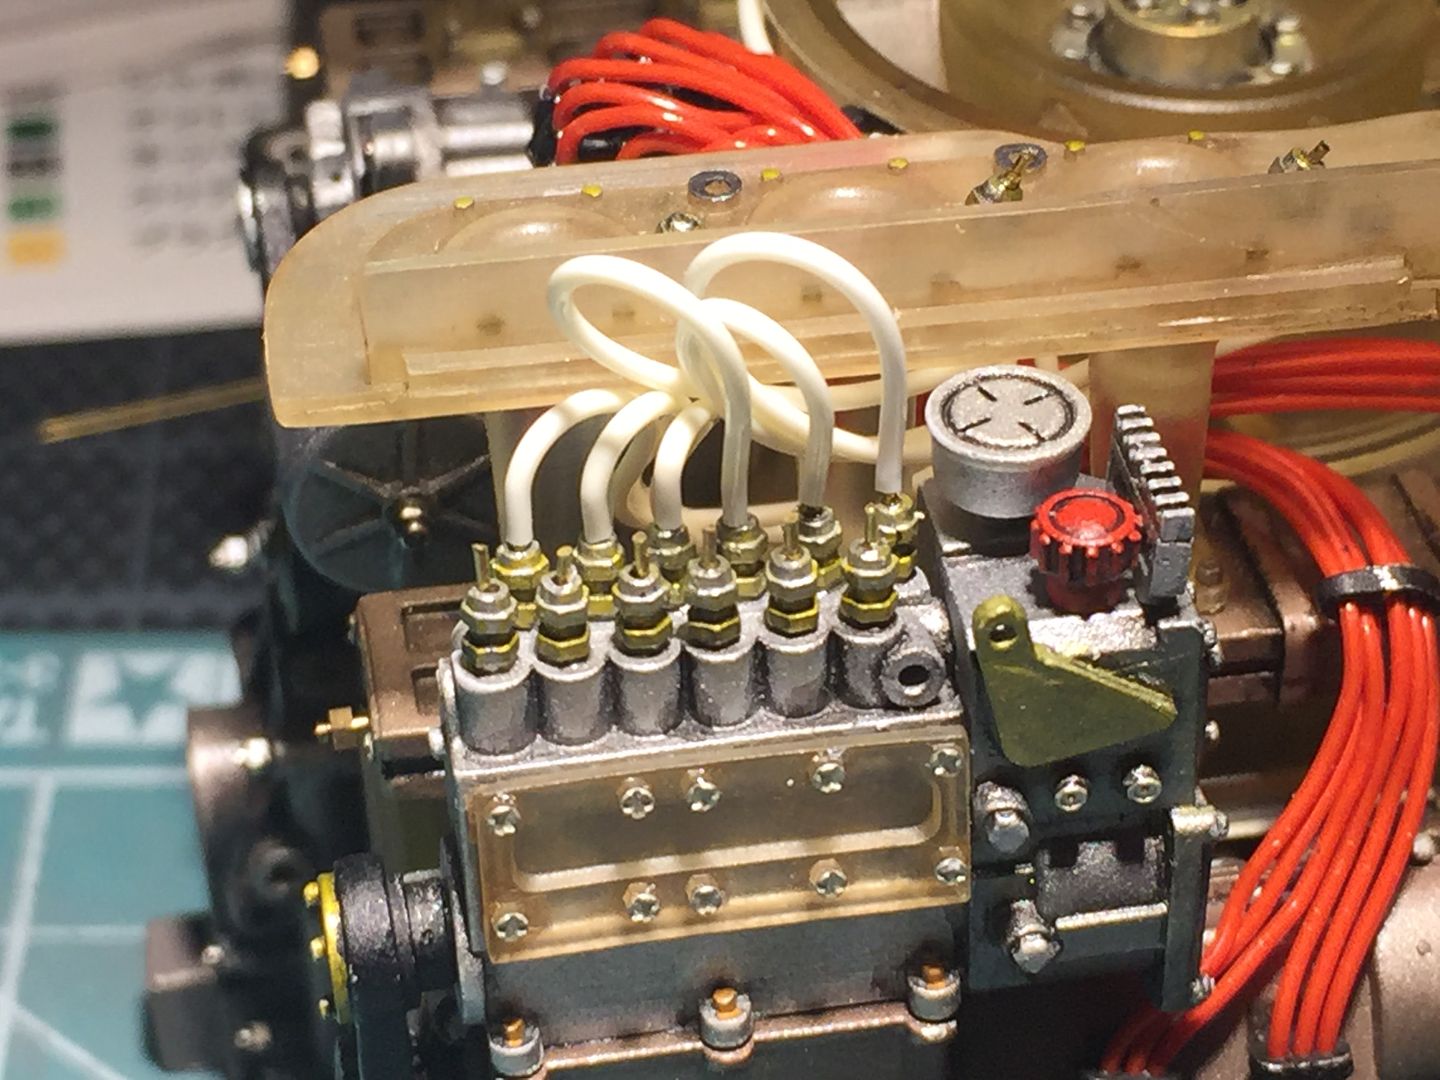

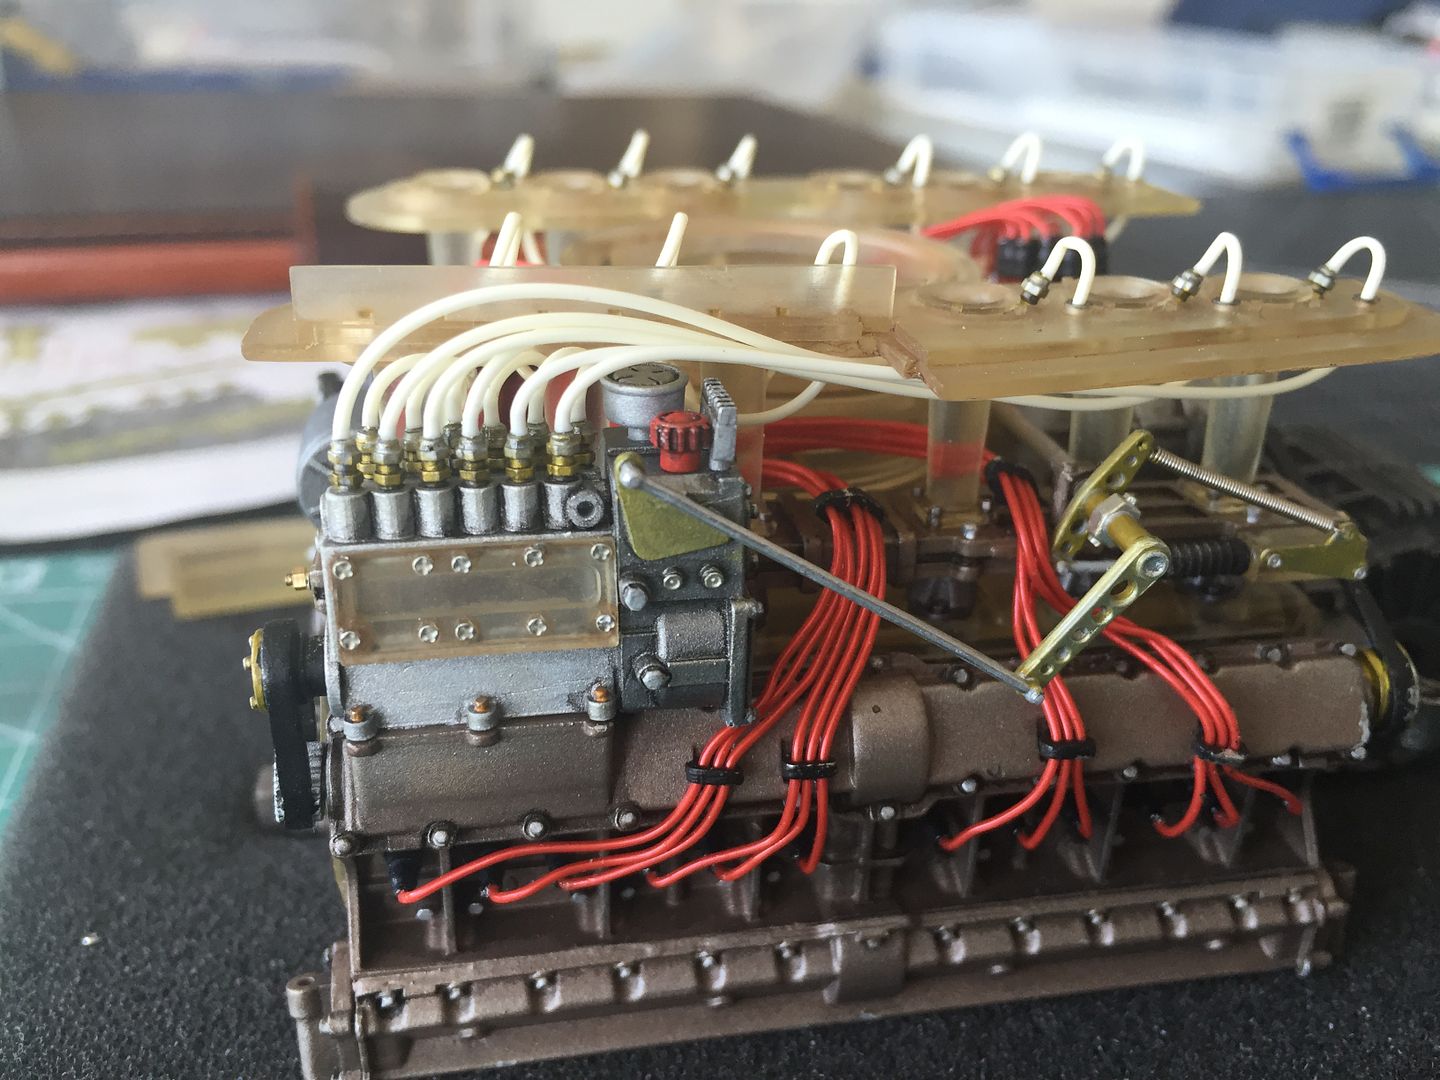
I'd also added the remaining linkage and connecting rod to the throttle...
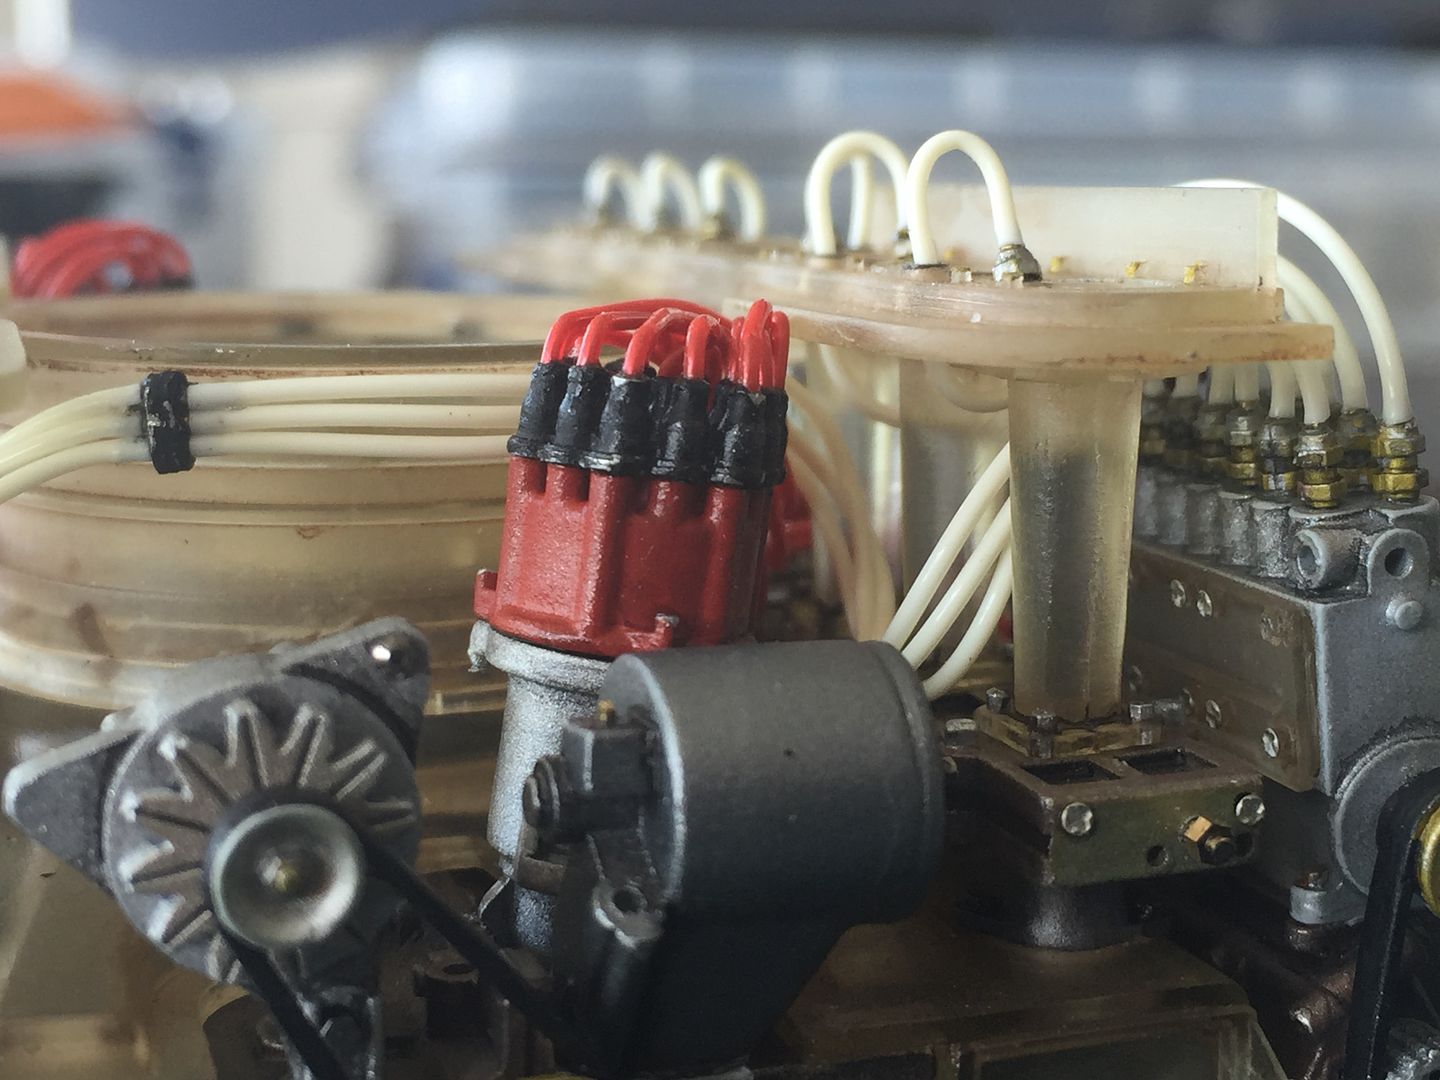
...engine is almost there. Lots of tidying up - adding some more PE screw heads, a little bit of wash etc, and touching up scratched or chipped paint here and there. Exhausts to add, and some more wiring - starter, alternators etc.
Next stage is into the frame, but I kinda want to wait and work on some of my other 1/12 engines a bit more so that I can takes pictures of a 'line up' of classic engines. MP4/4 Honda, Williams Renault etc...
Doesn't stop me starting on other parts of the car though...
I attached all the wires 'over-length' first just to get the routing neat, then trimmed and glued after that...bit of a pain trying not to let the pipe kink around the tight bend to injector, but no big deal...
over-length for test fit...
I'd also added the remaining linkage and connecting rod to the throttle...
...engine is almost there. Lots of tidying up - adding some more PE screw heads, a little bit of wash etc, and touching up scratched or chipped paint here and there. Exhausts to add, and some more wiring - starter, alternators etc.
Next stage is into the frame, but I kinda want to wait and work on some of my other 1/12 engines a bit more so that I can takes pictures of a 'line up' of classic engines. MP4/4 Honda, Williams Renault etc...
Doesn't stop me starting on other parts of the car though...
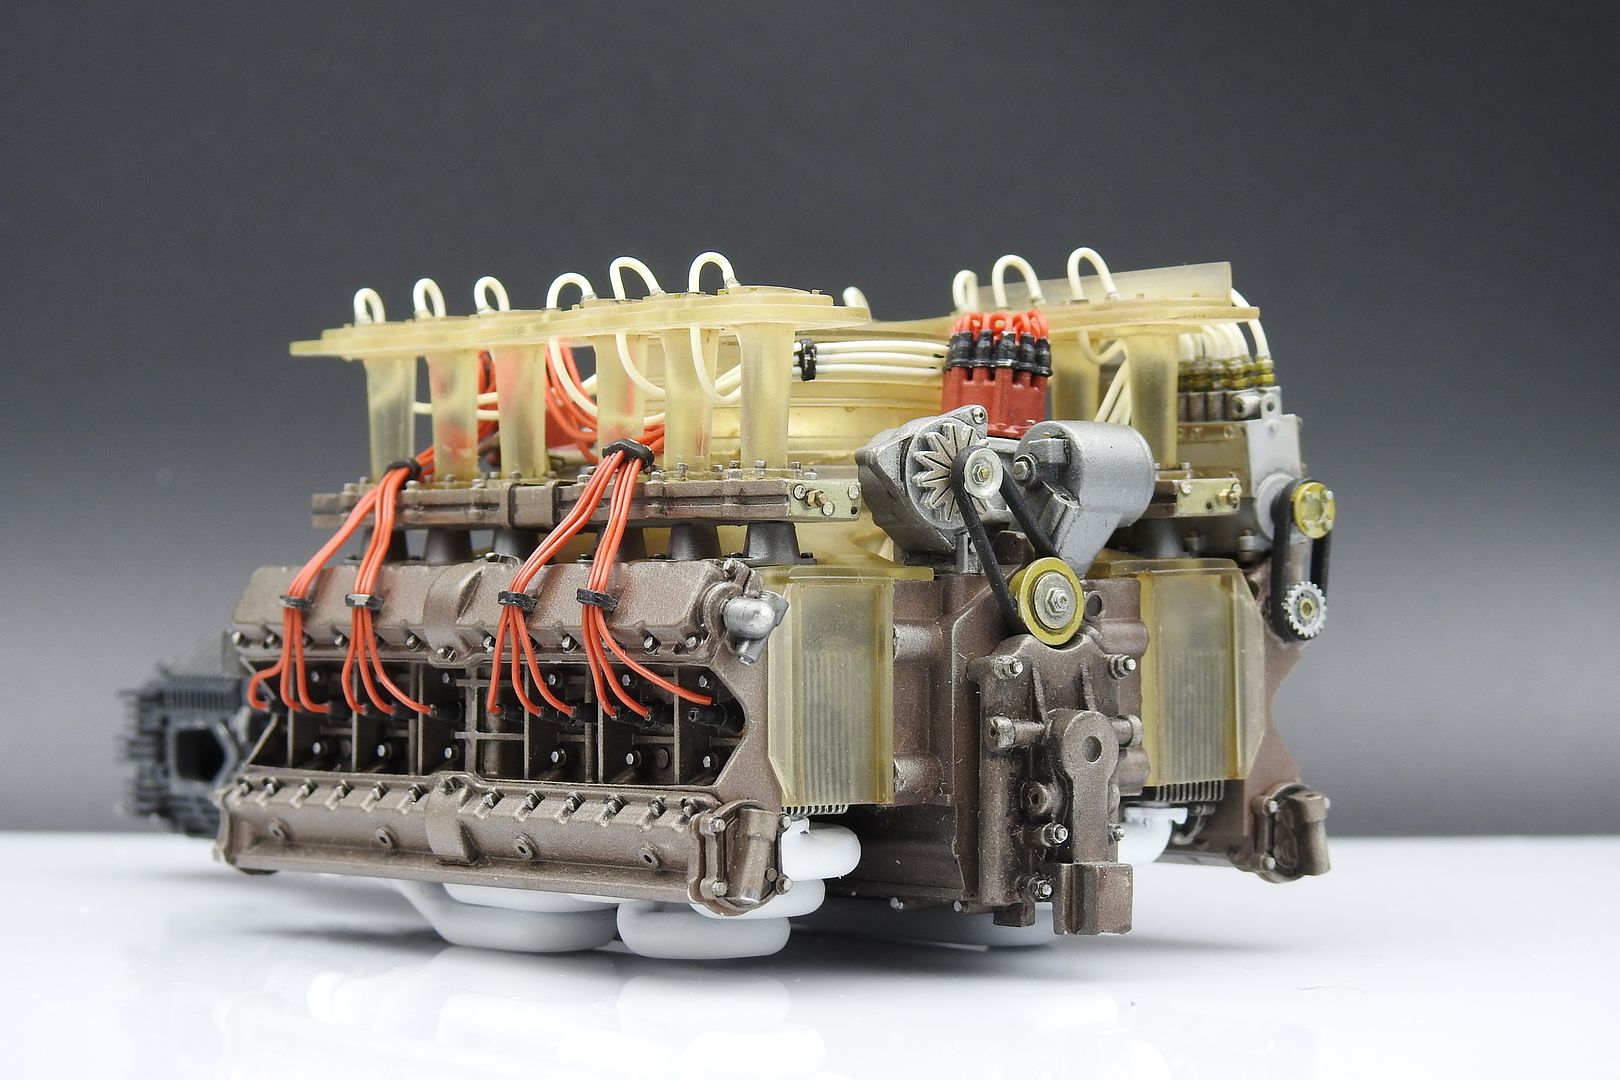
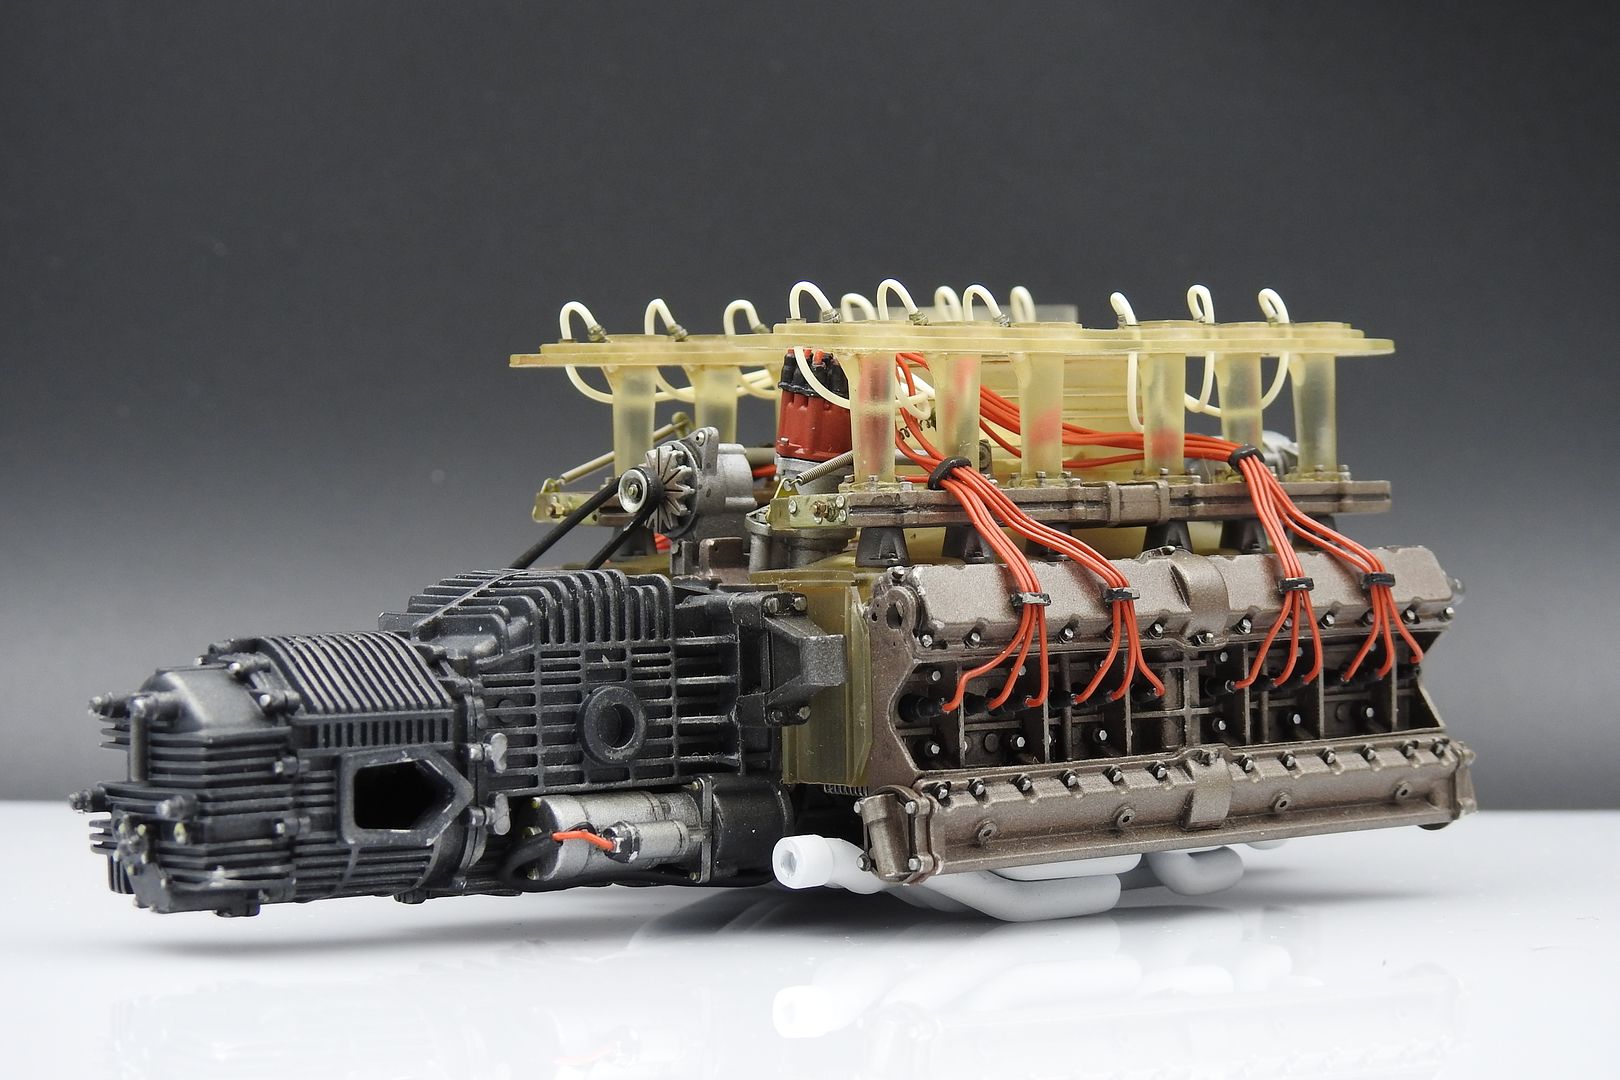
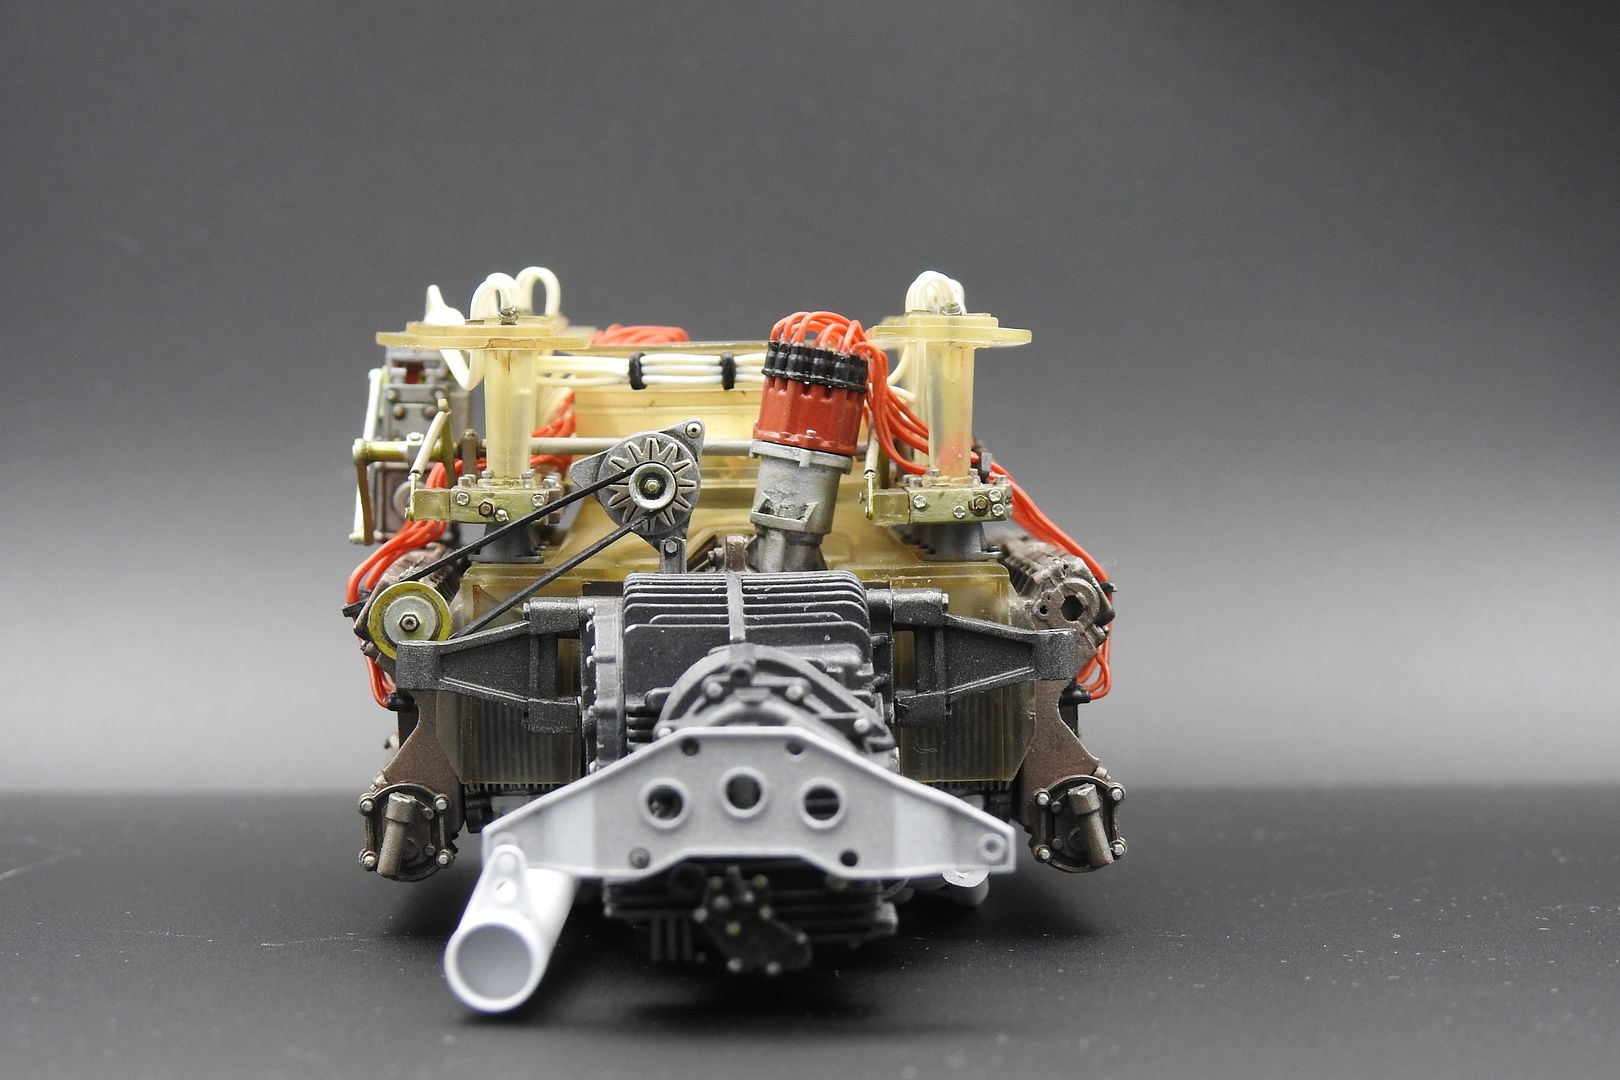
Fitting the main exhaust manifolds - rest of them are fitted after the engine is dropped into the frame, but I put one in place just for a few piccies...
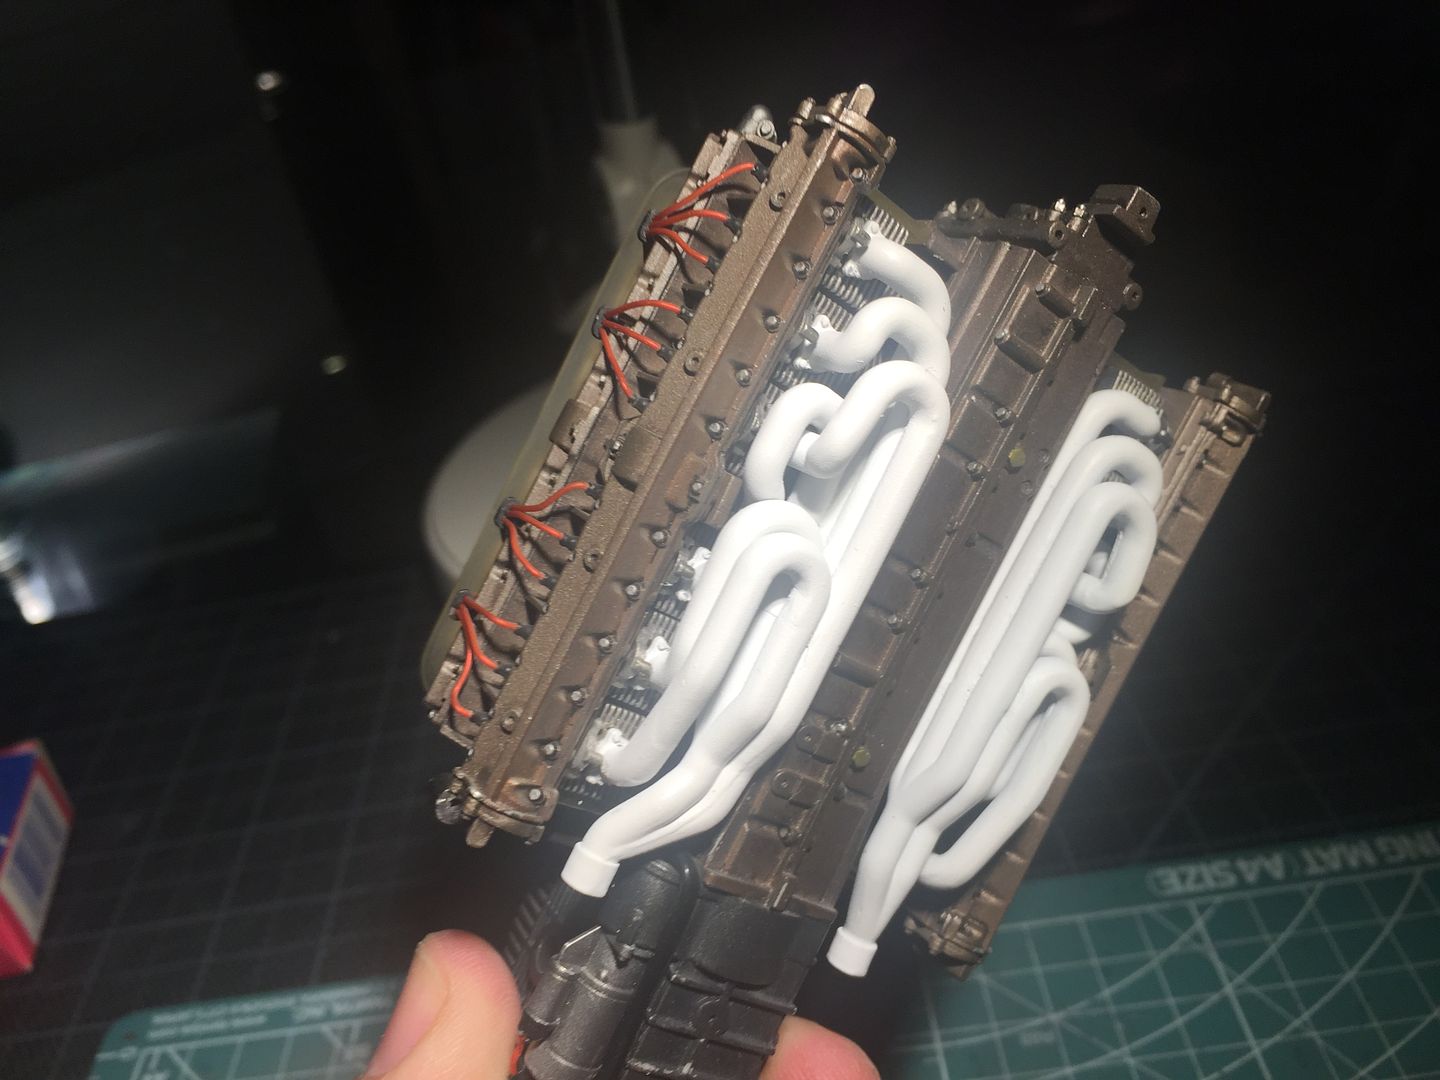
Just before I did this, I took a bit of a risk and sprayed the whole engine with Tamiya 'smoke' which I hoped would 'darken' everything a little bit - I felt it was looking a little bright. I think it has worked, but I am sure I'll spray some 'matt' clear as well. Lots of touch-ups needed - the tiny details that make this sort of thing...
So - not 100% finished, but I took some fancy pictures anyway...

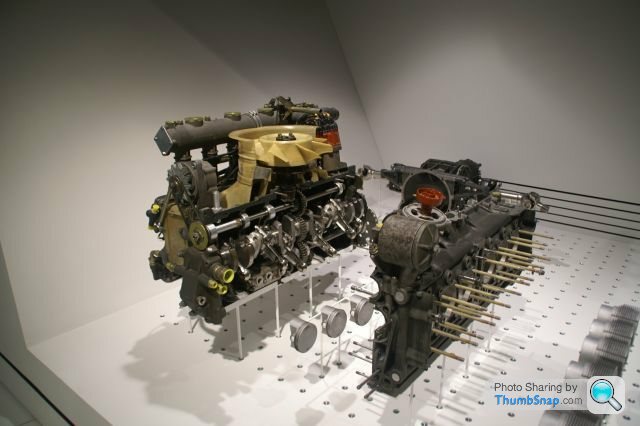
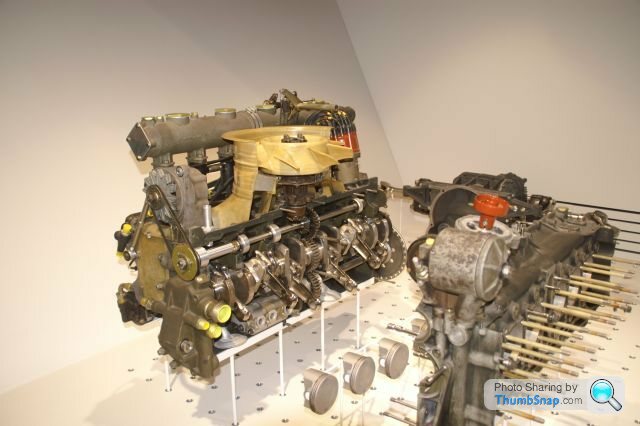
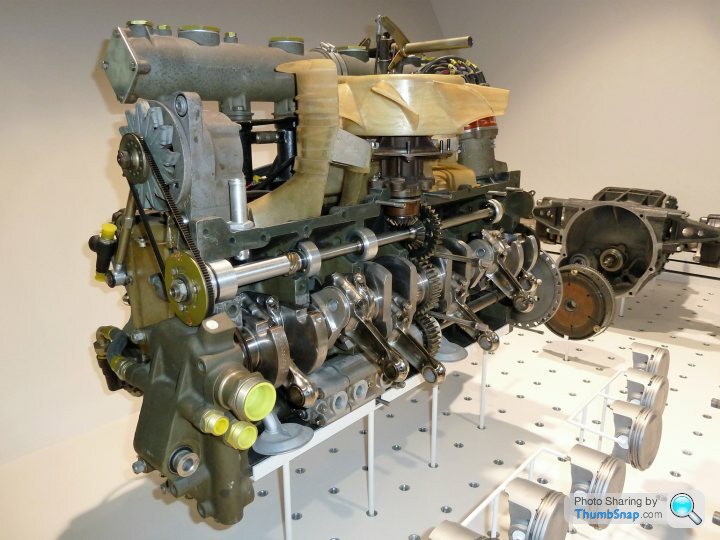
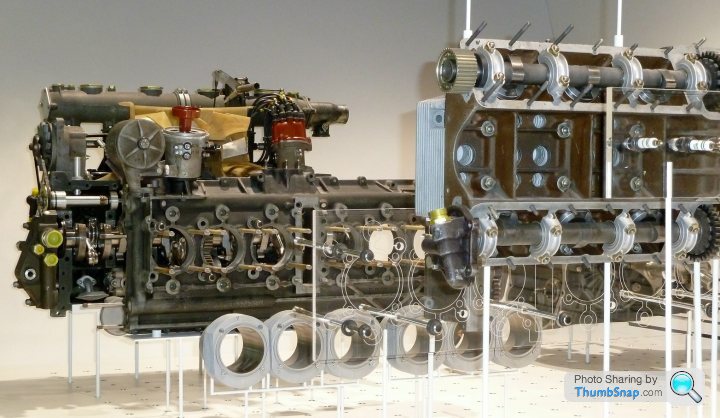
Bit late now but I'm an avid 917 fan. We did a visit to the Porsche museum in 2013 & I just had to take a load of 917 shots. They are here.
http://www.pbase.com/tr7v8/porsche_passes__palaces
With a couple of examples attached. If you want full fat ones (around 3MB) then pop me a PM with numbers.
http://www.pbase.com/tr7v8/porsche_passes__palaces
With a couple of examples attached. If you want full fat ones (around 3MB) then pop me a PM with numbers.
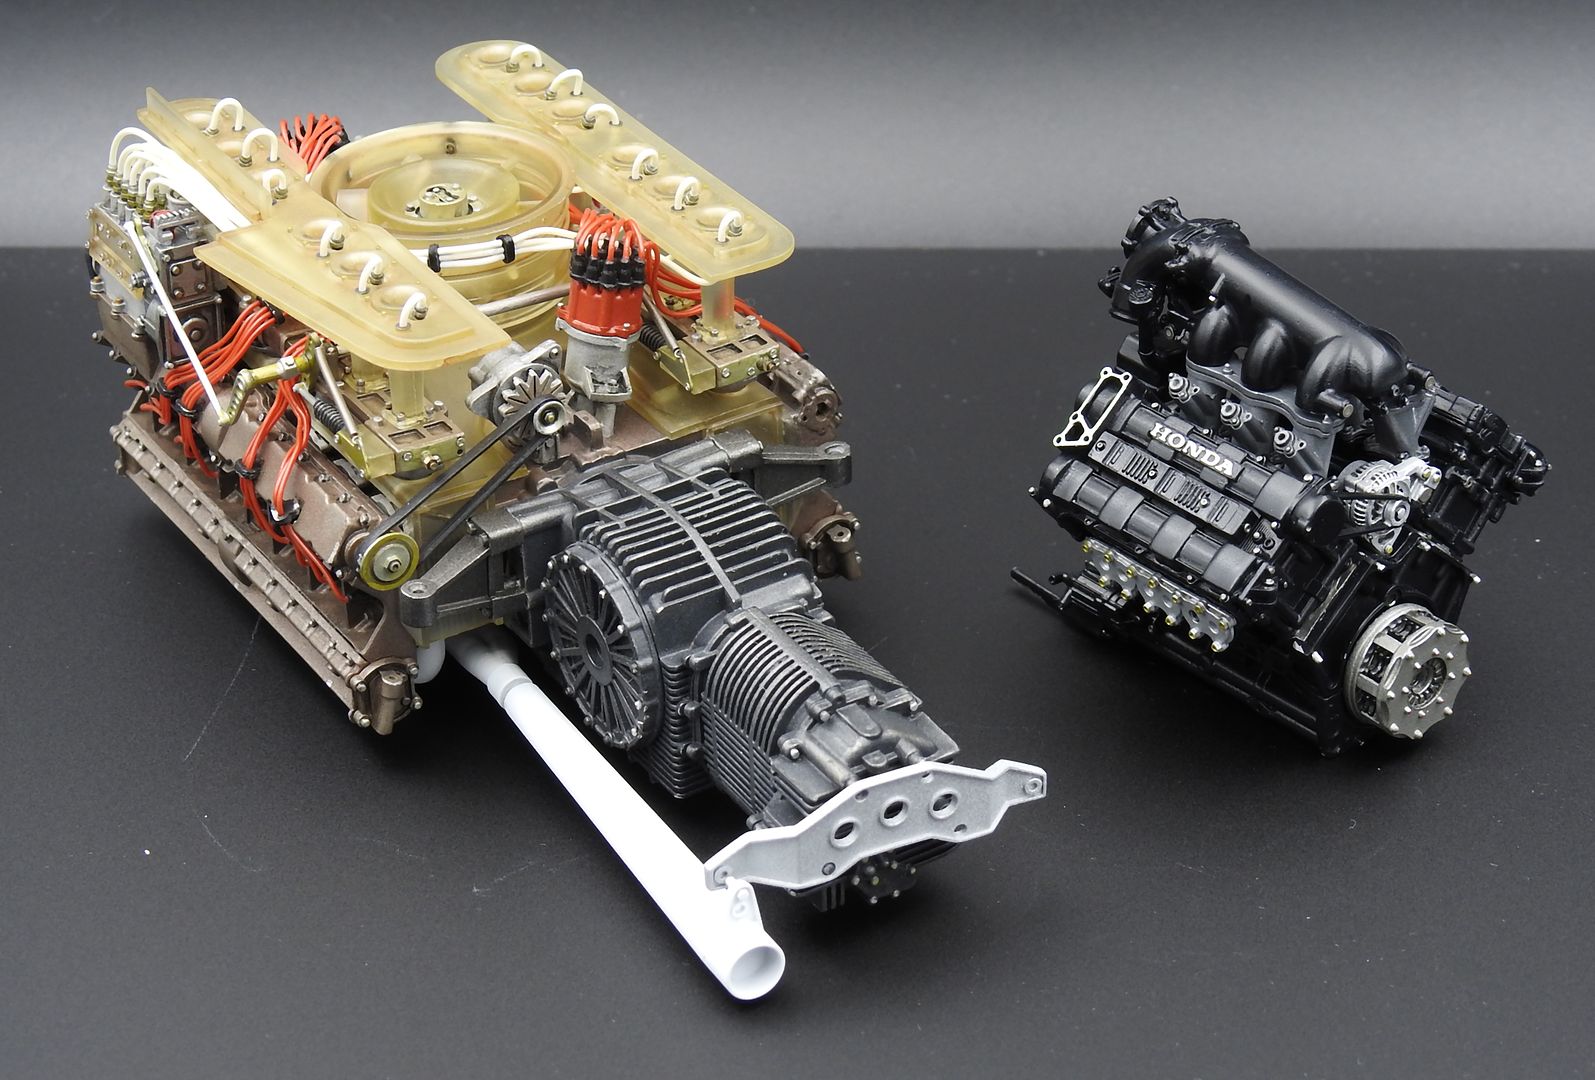
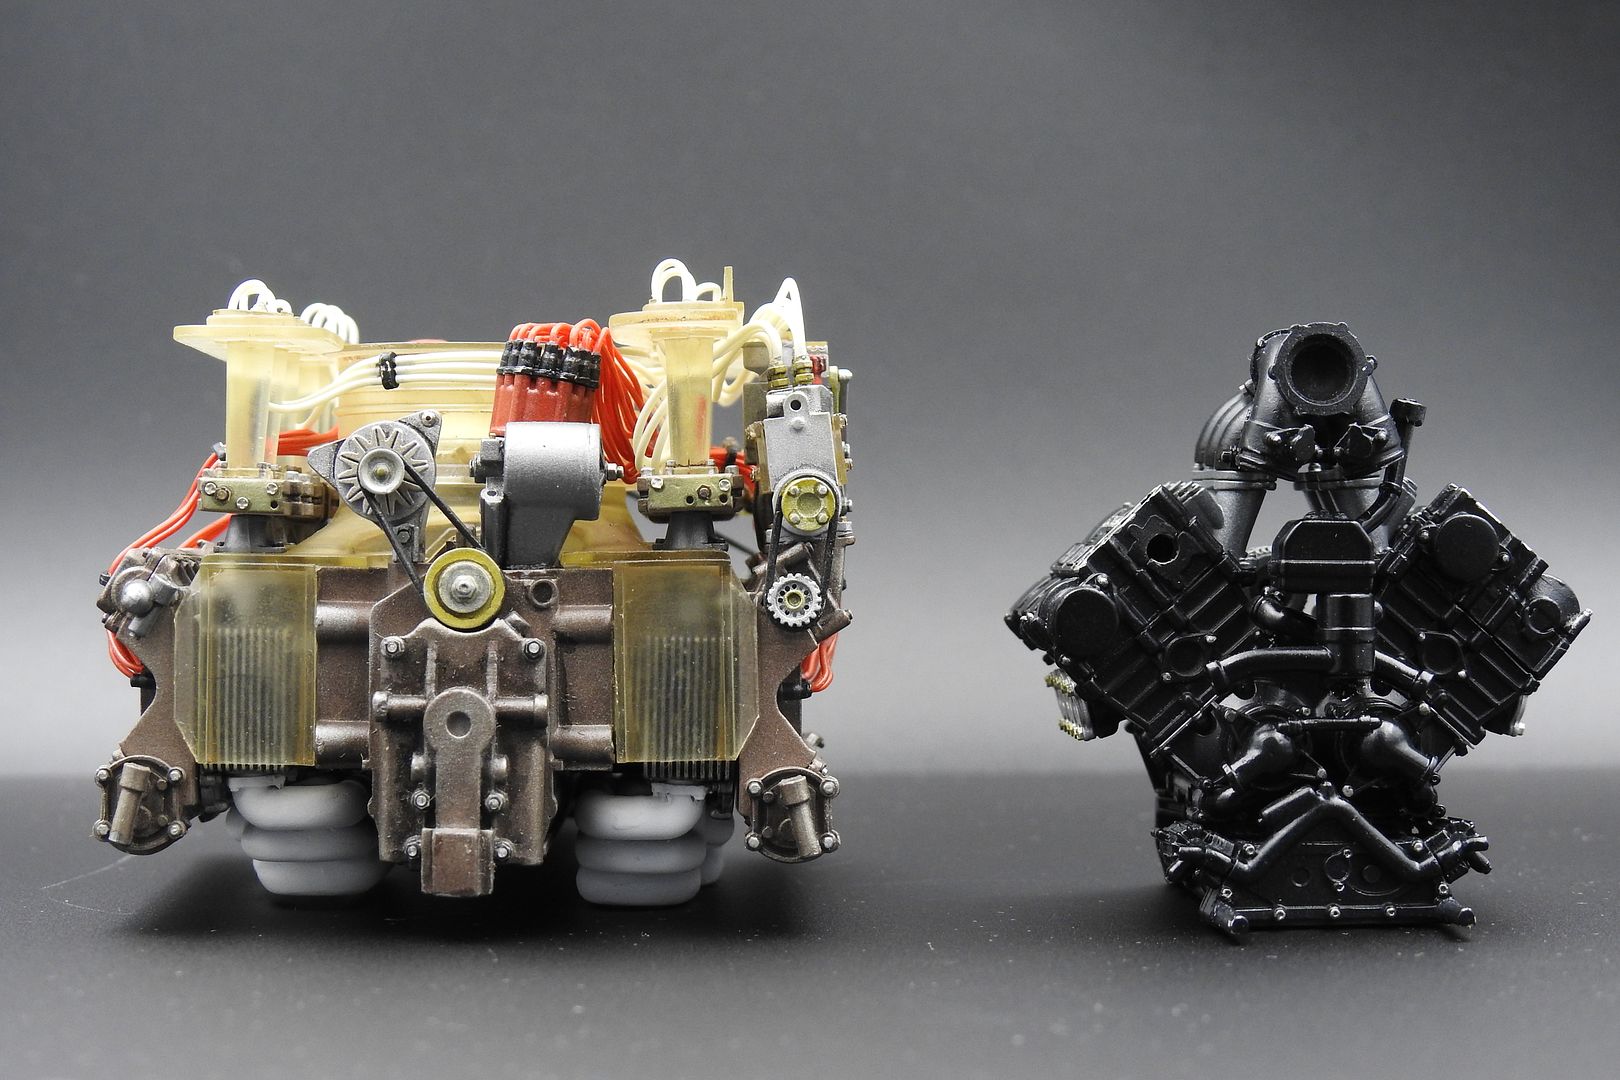
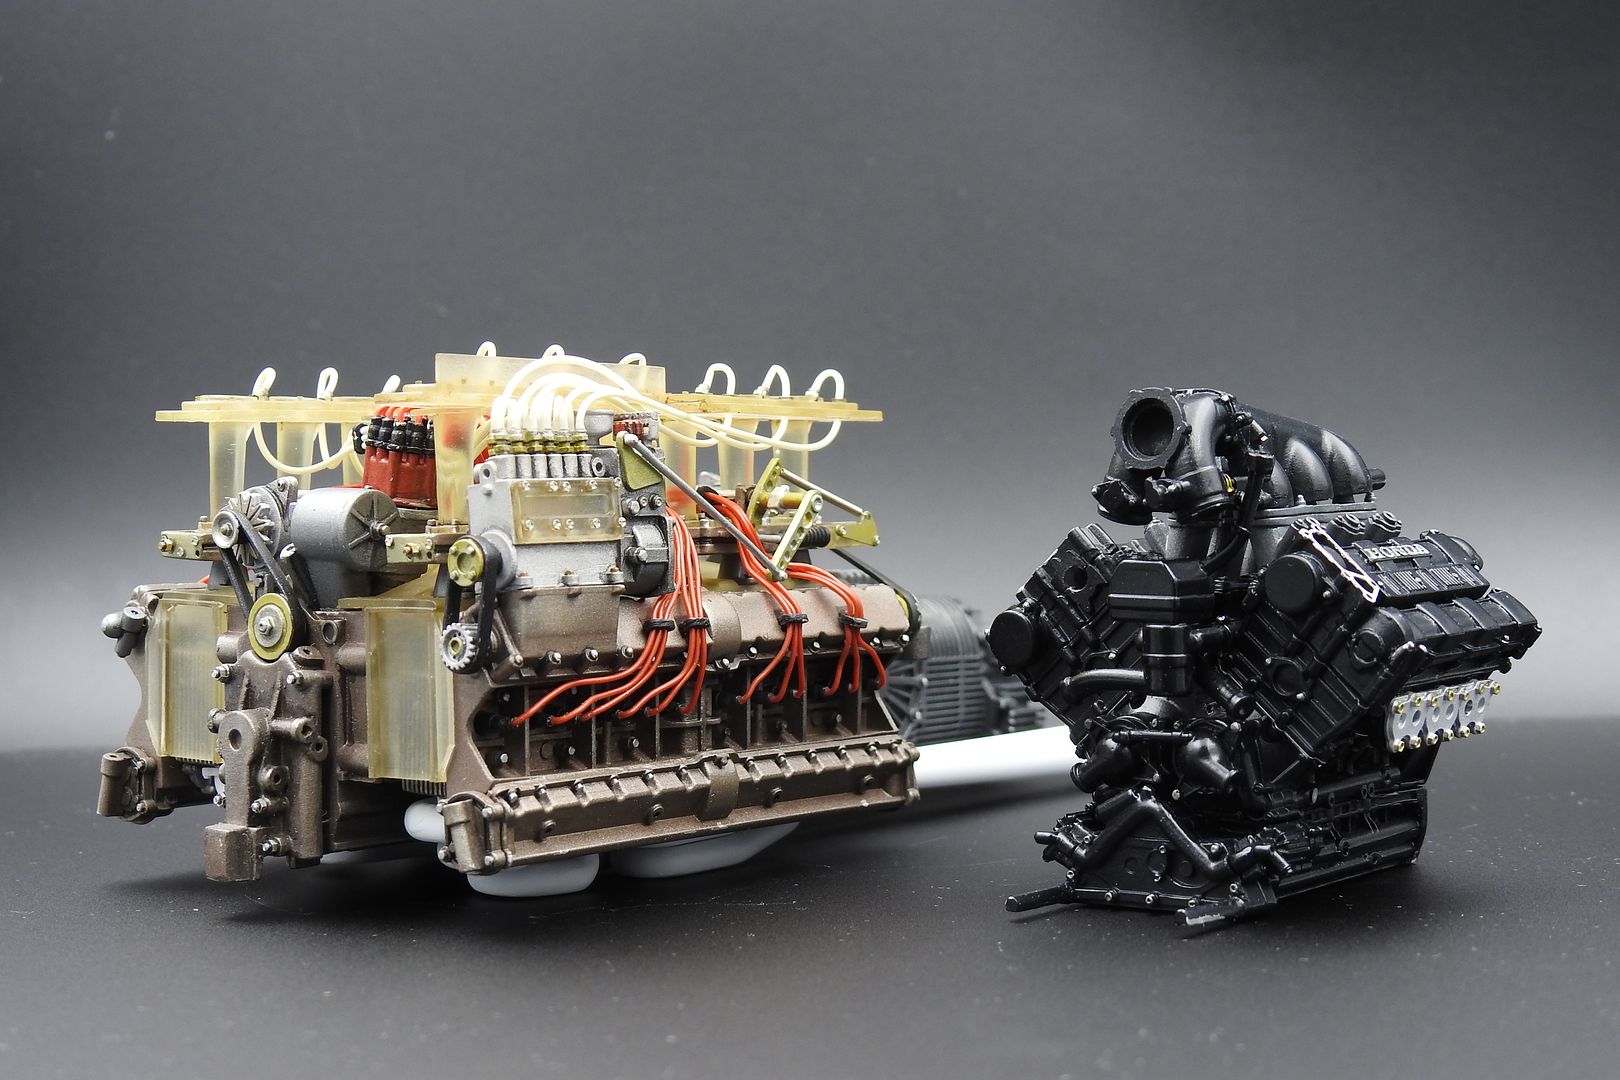
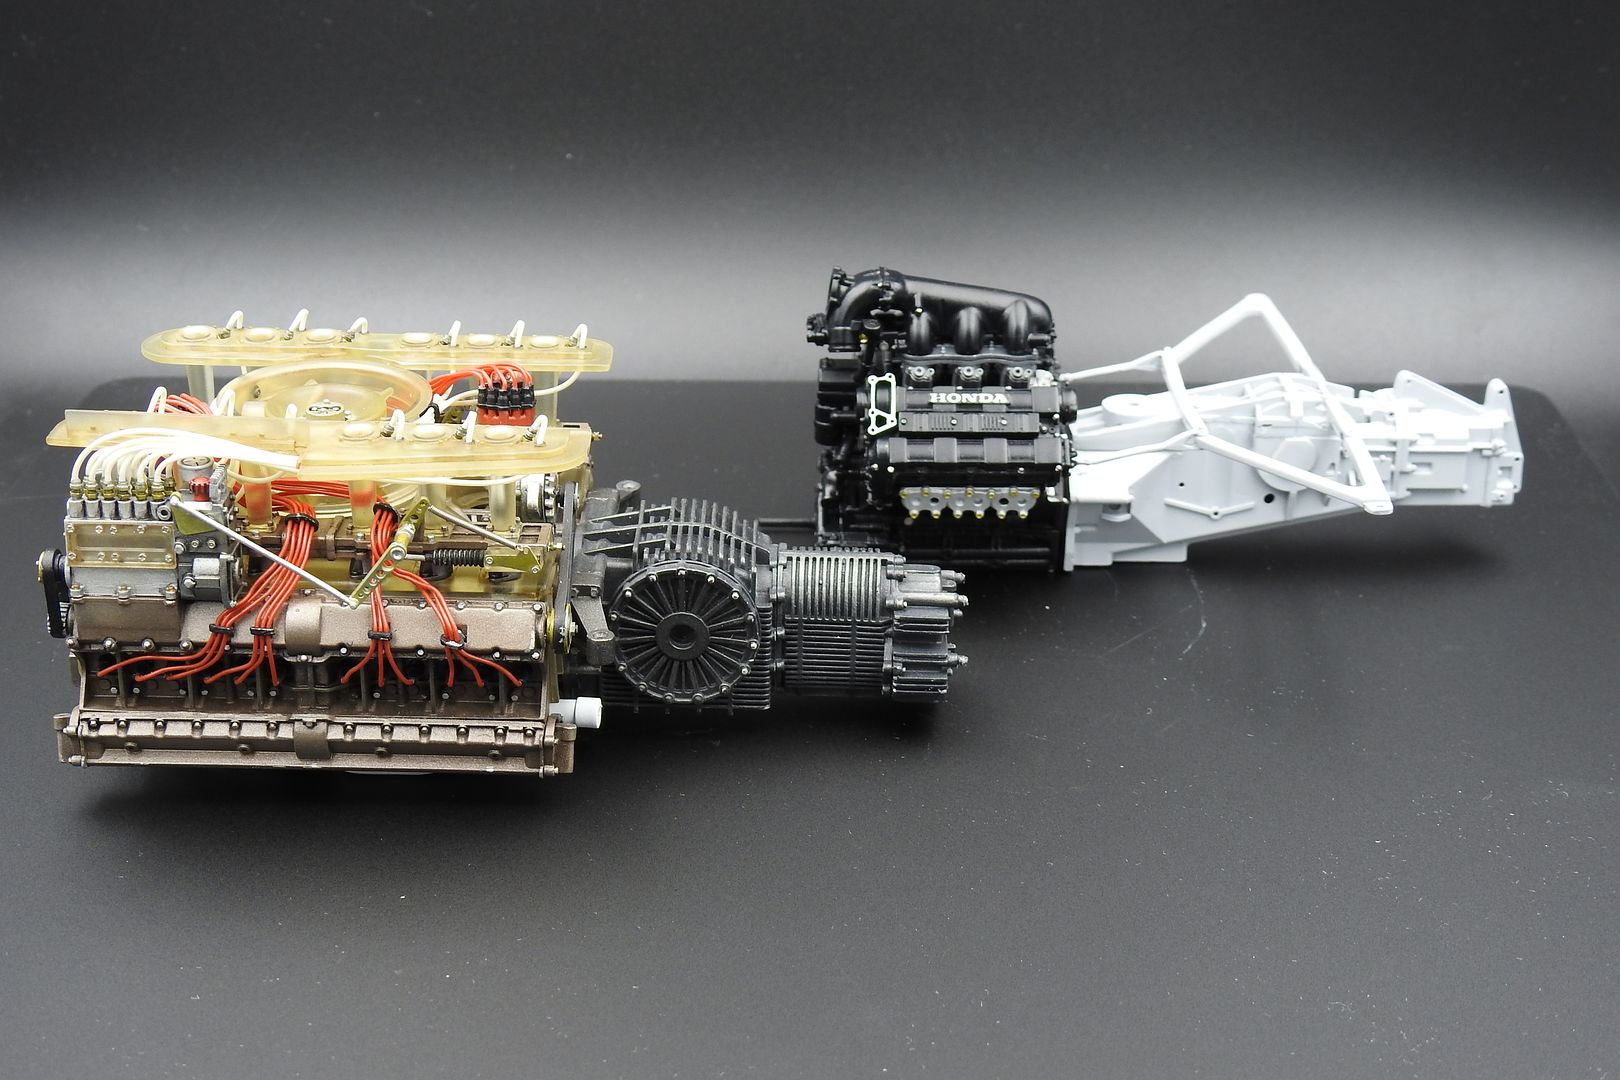
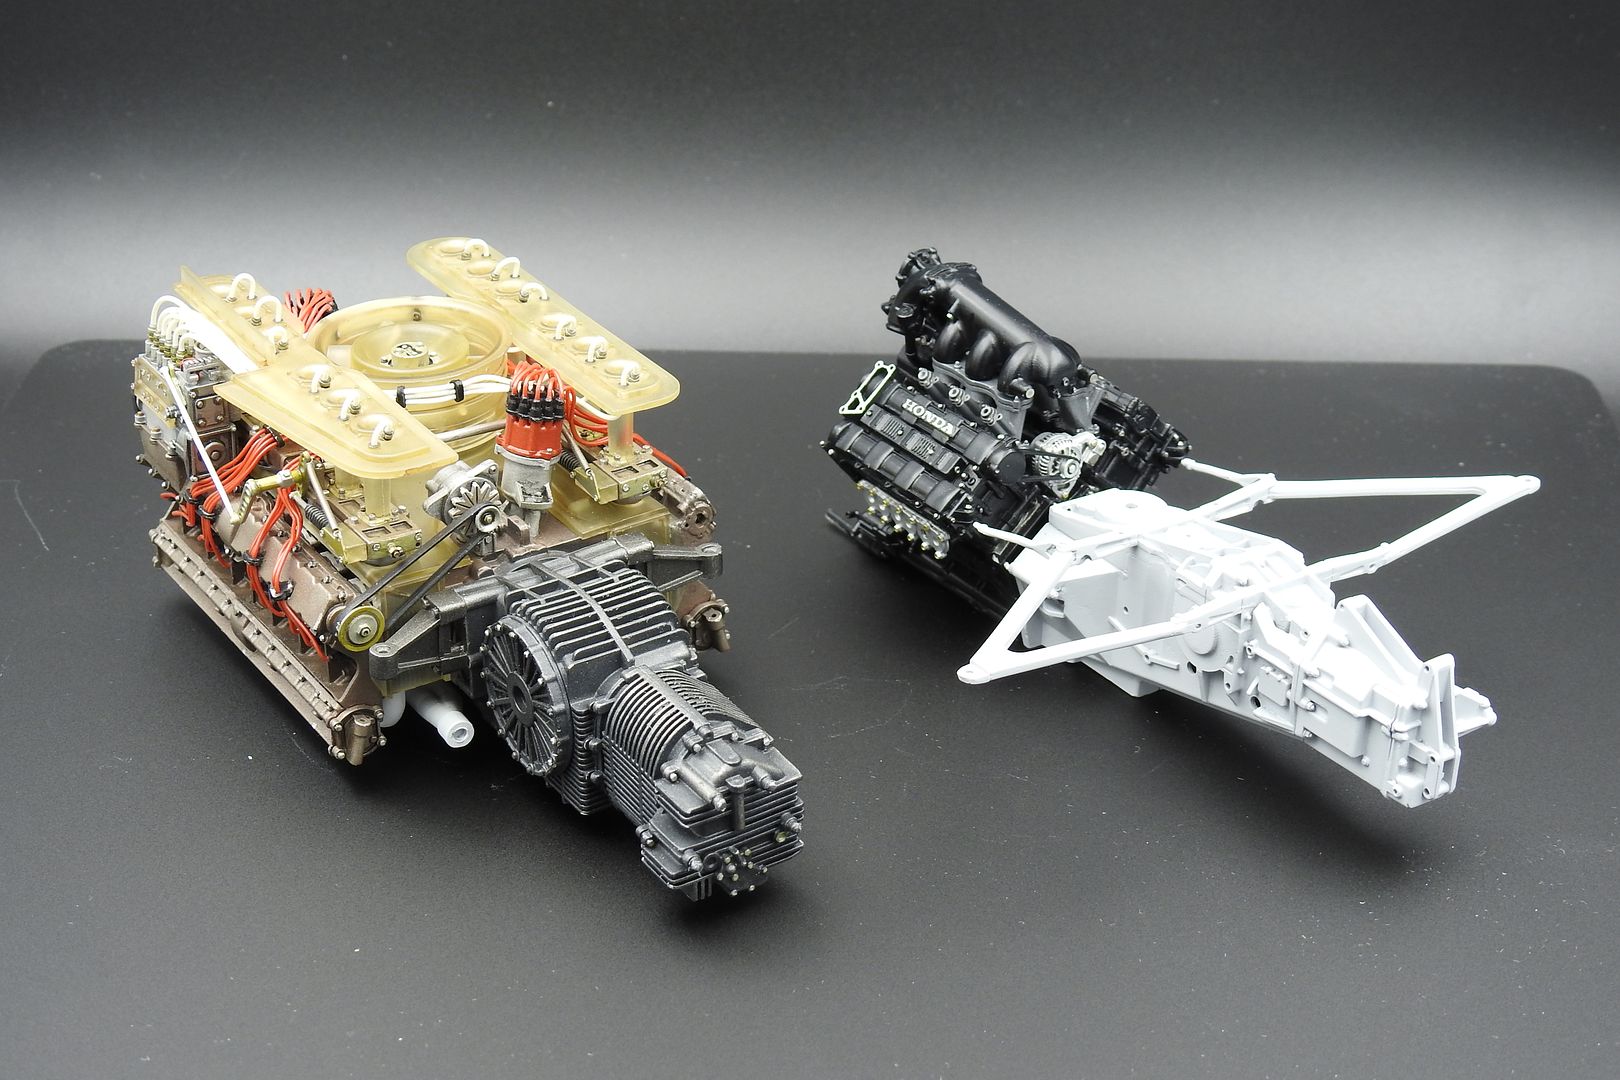
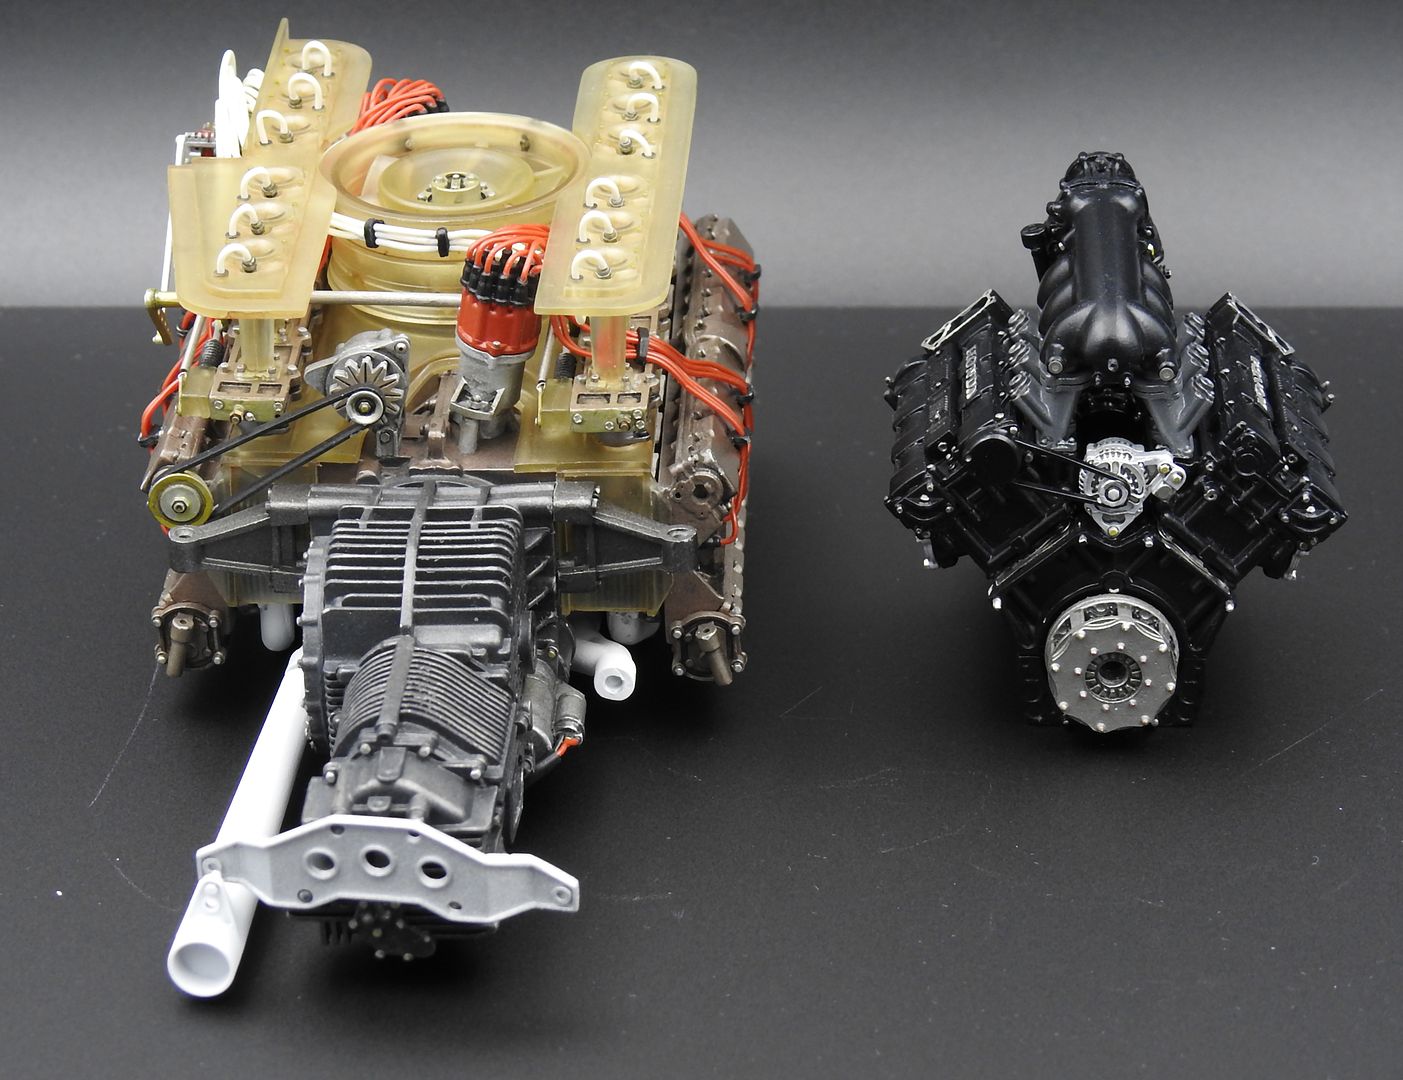
So at this point I couldn't resist adding another unfinished engine into the shots - for comparison!
McLaren MP4/4 Honda
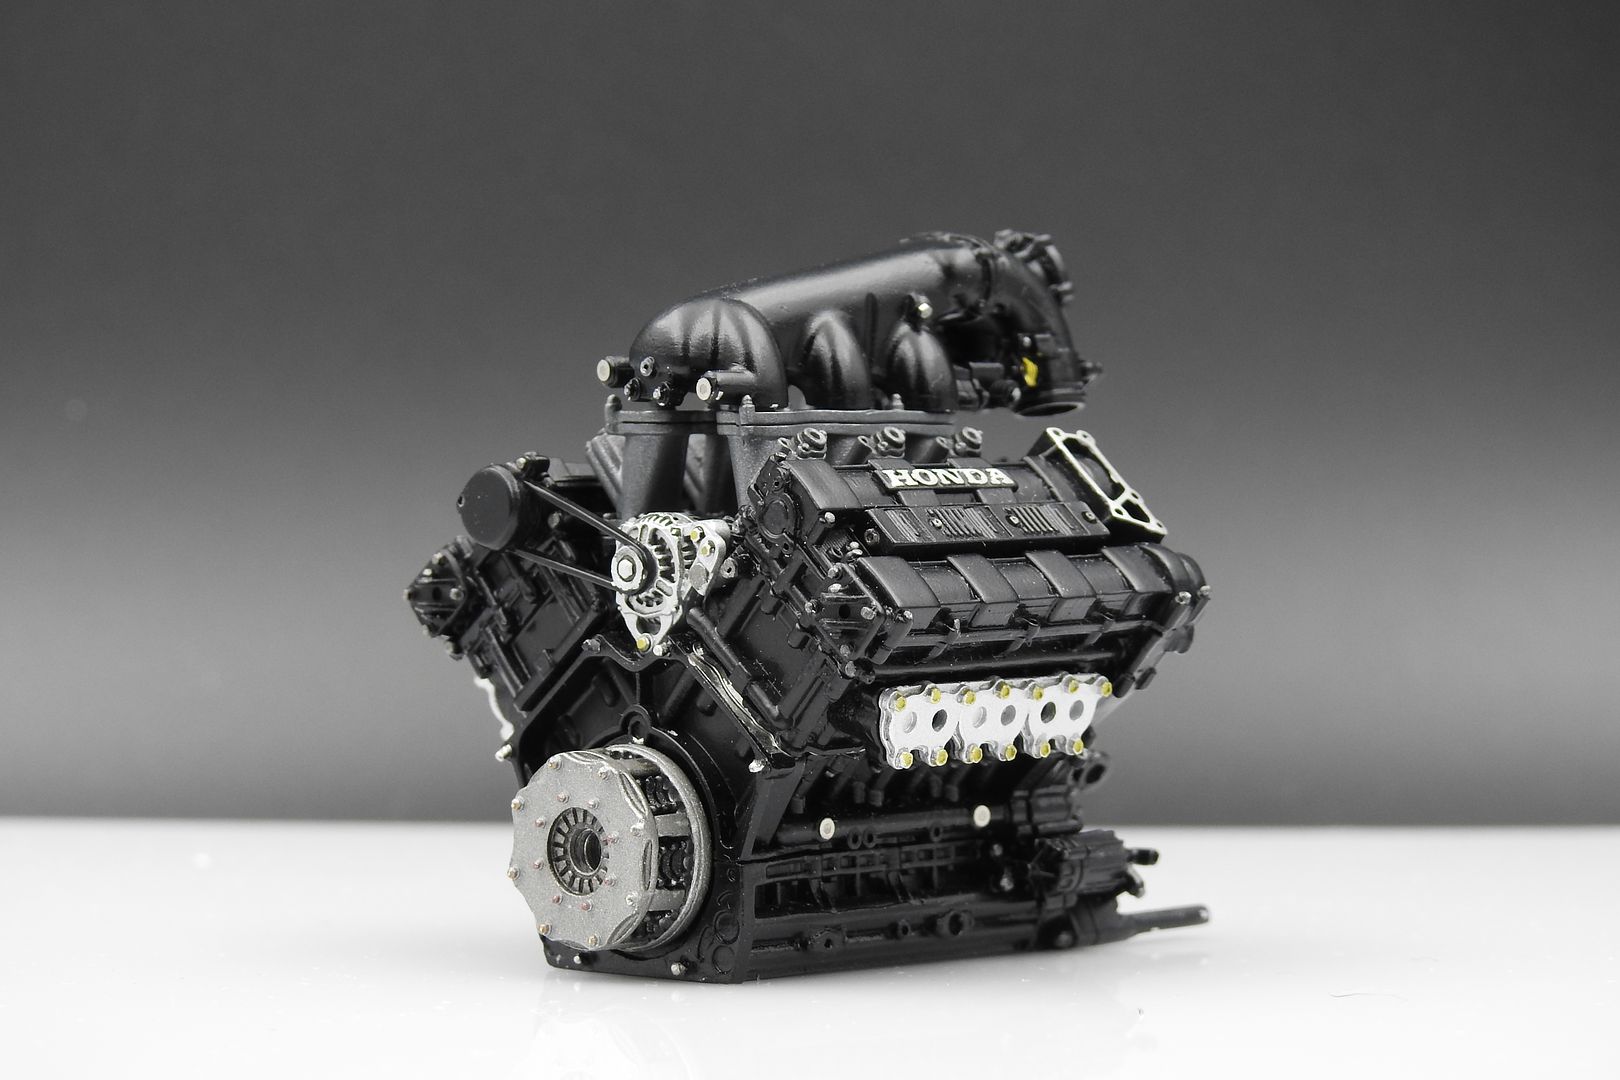
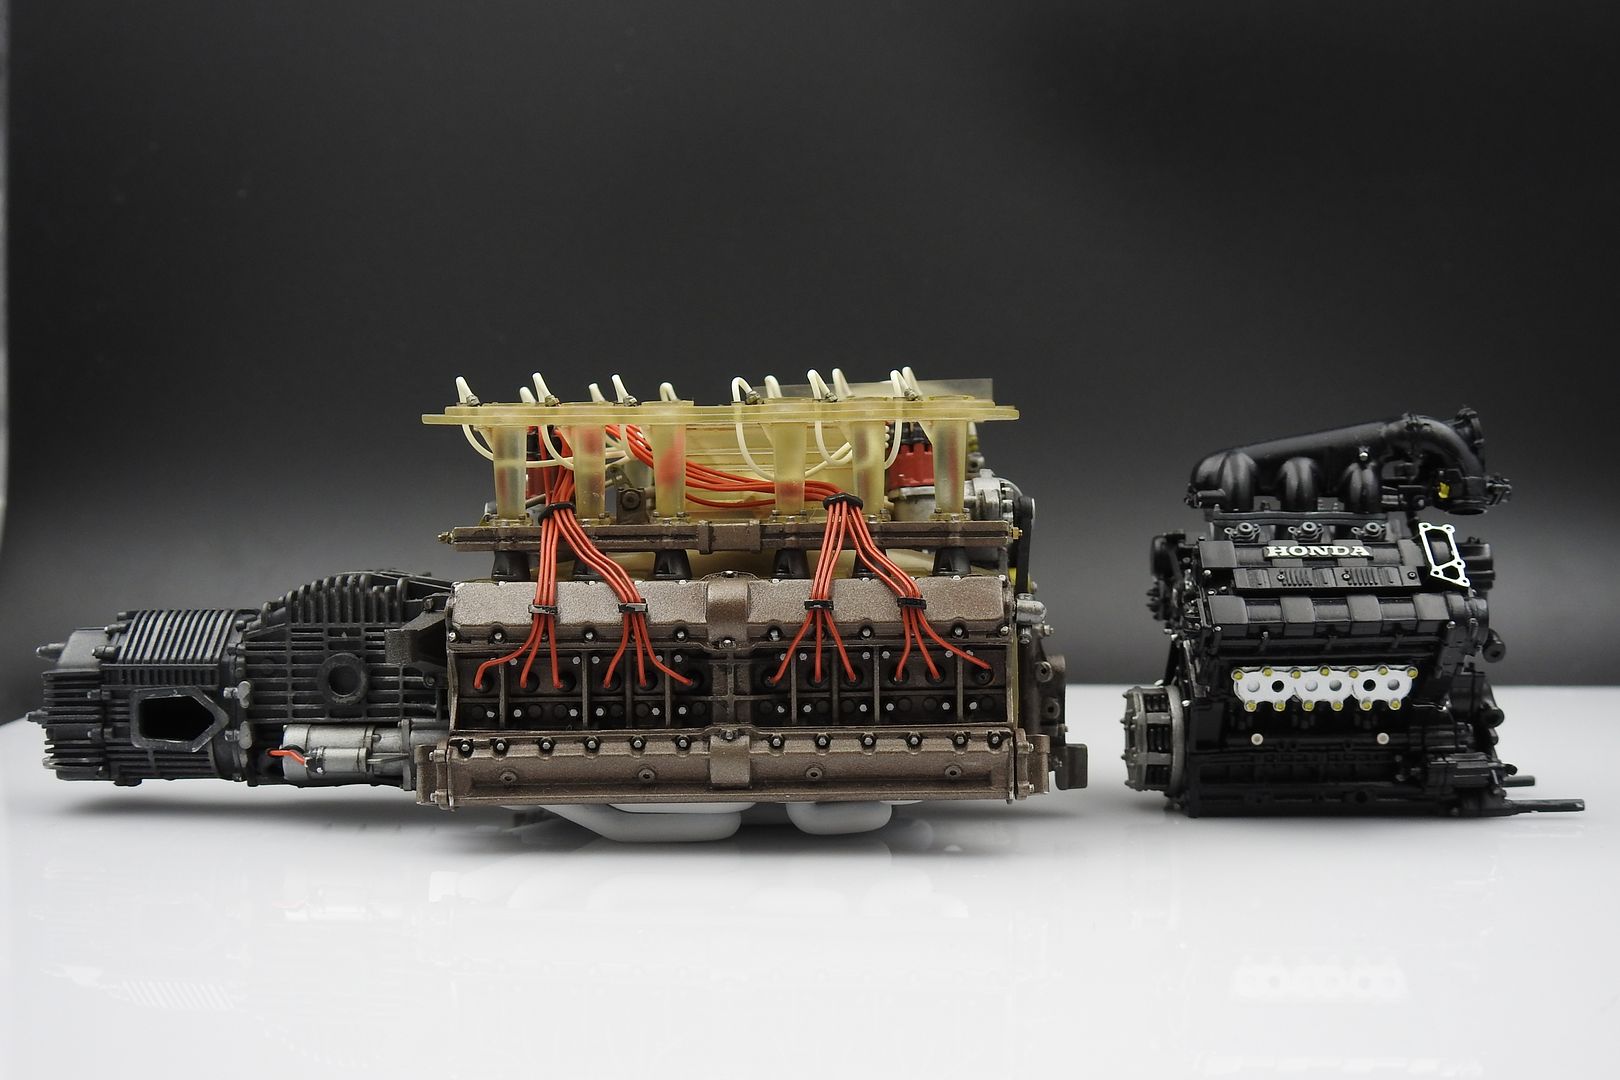
At first I got all incredulous about the size difference - 'advance in technology' etc - but of course if you double the Honda (V6) it becomes almost the same length as the Flat 12! Slightly narrower though....
McLaren MP4/4 Honda
At first I got all incredulous about the size difference - 'advance in technology' etc - but of course if you double the Honda (V6) it becomes almost the same length as the Flat 12! Slightly narrower though....
I took a couple of pics at the Porsche Museum a few years back. Pretty similar to what's already been posted though. Scrolling through the pictures on this thread, it's difficult to identify the real ones form the model - outstanding work. Does it really need Tamiya Smoke? Maybe some shading around the exhaust joints, but not much more required IMO.
Thanks guys - those museum pictures are great.
They also confirm that I should have made the resin parts more opaque - oh well, next time!
I've already used the smoke - not sure how much of an effect it had, but I was just trying to tone down the bronze metallic on the cam covers a tad.
I'm just working on the FW16 engine so I can add it to the pictures, but I think I will get impatient and start mounting the 917 engine into the chassis!
caterhamnut said:
...
They also confirm that I should have made the resin parts more opaque - oh well, next time!
..
Would superglue cloud up the resin bits like it can certain types of plastic?They also confirm that I should have made the resin parts more opaque - oh well, next time!
..
Still think the end product is amazing though Angus.
How much will actually be visible? (Fan and inlet trumpets notwithstanding).
Also, will you drill out the exhaust?
When I first saw the yellow resin parts they were spot-on in terms of how I remembered the original. The photos prove my memory was - once again - slightly flawed. Despite this I'd say that there is possibly a degree of "scale effect" at work; if you darkened the resin it may well not look as right as it does now. Once instlled within the shadows of the engine bay, I think it will look slightly different again. Plus of course, the originals may well have yellowed and darkened with age.
Gassing Station | Scale Models | Top of Page | What's New | My Stuff