MFH 1/12 BT52b
Discussion


At last! Photobucket has been having a bit of a fit - seems to be ok now, so prepare for loads of new pics!!
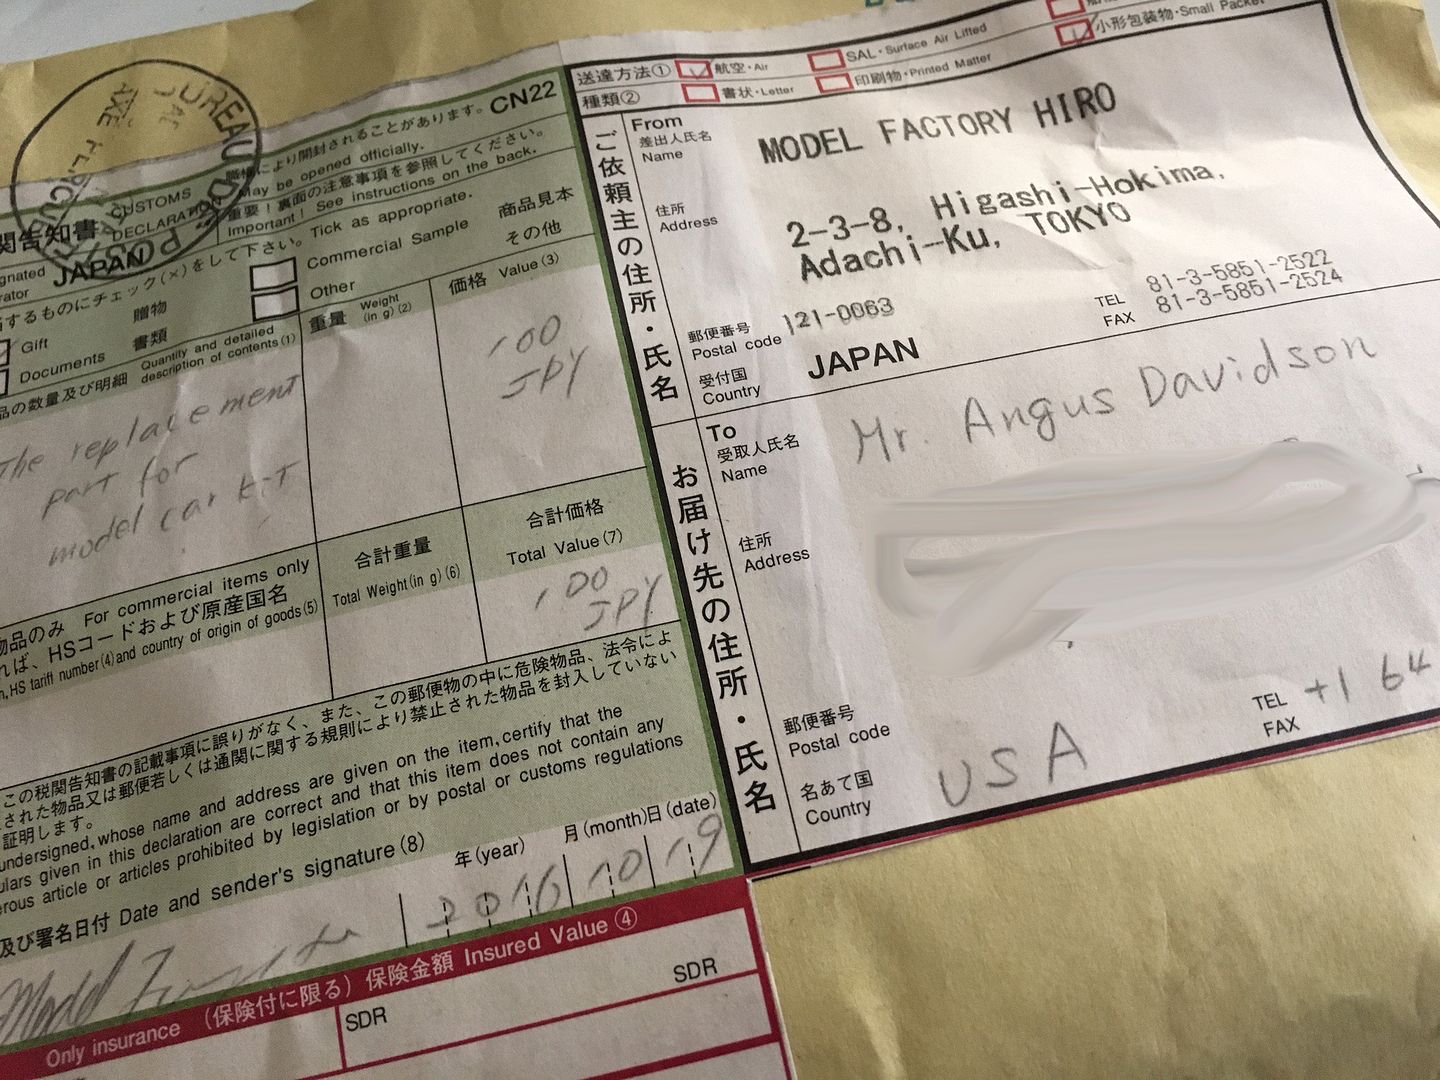
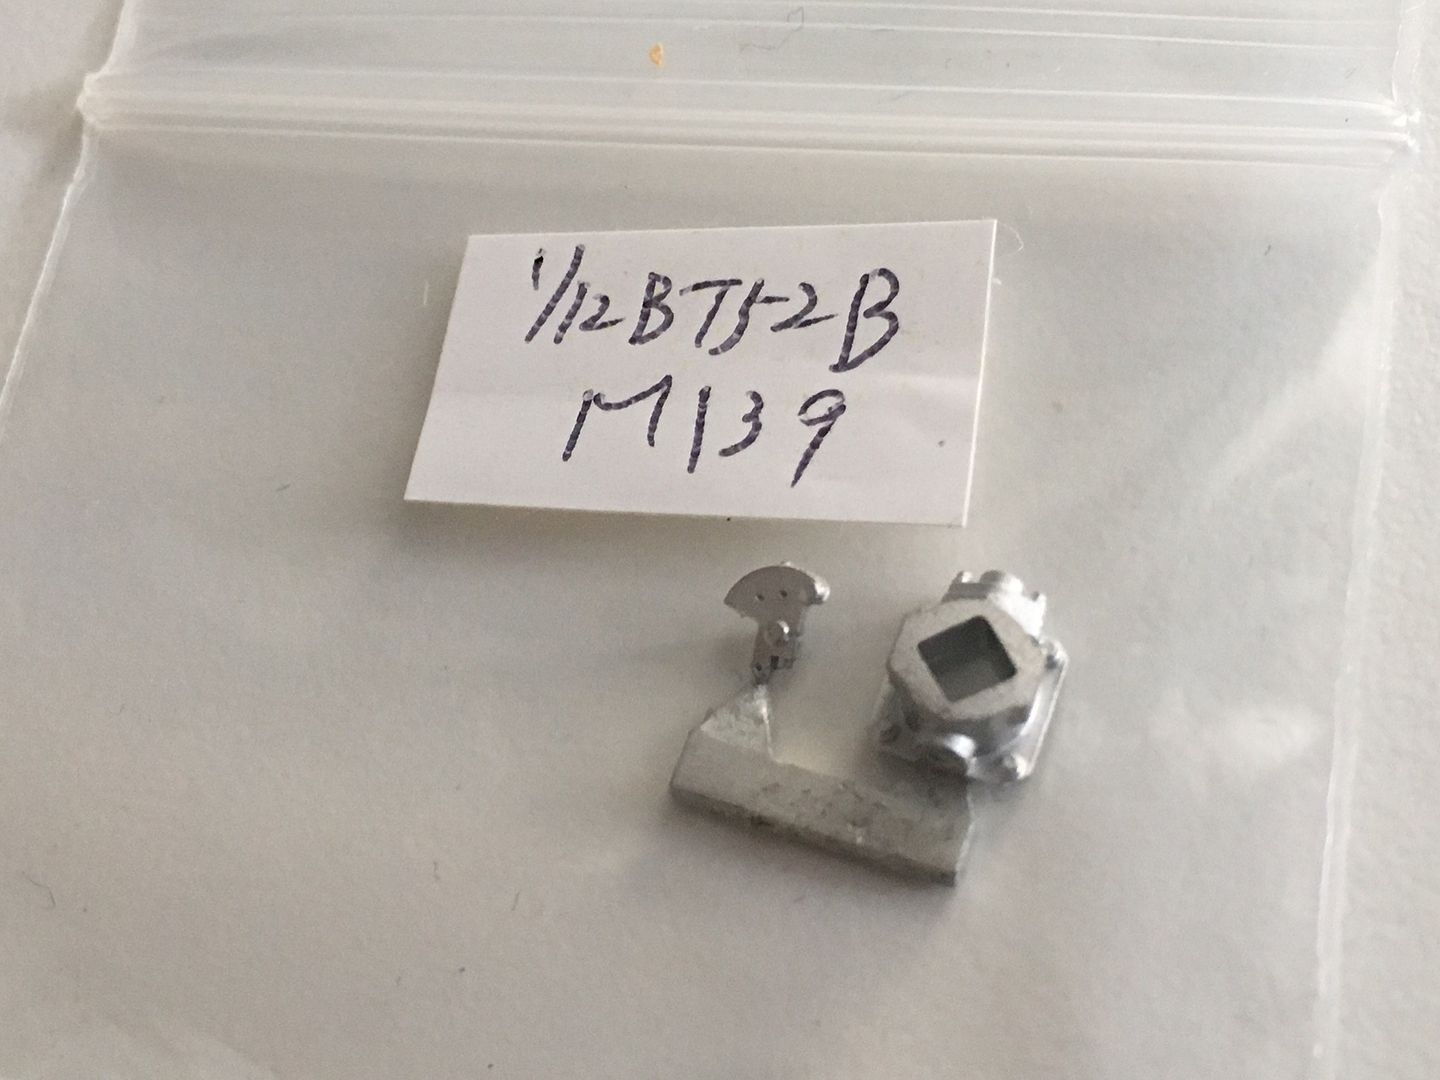
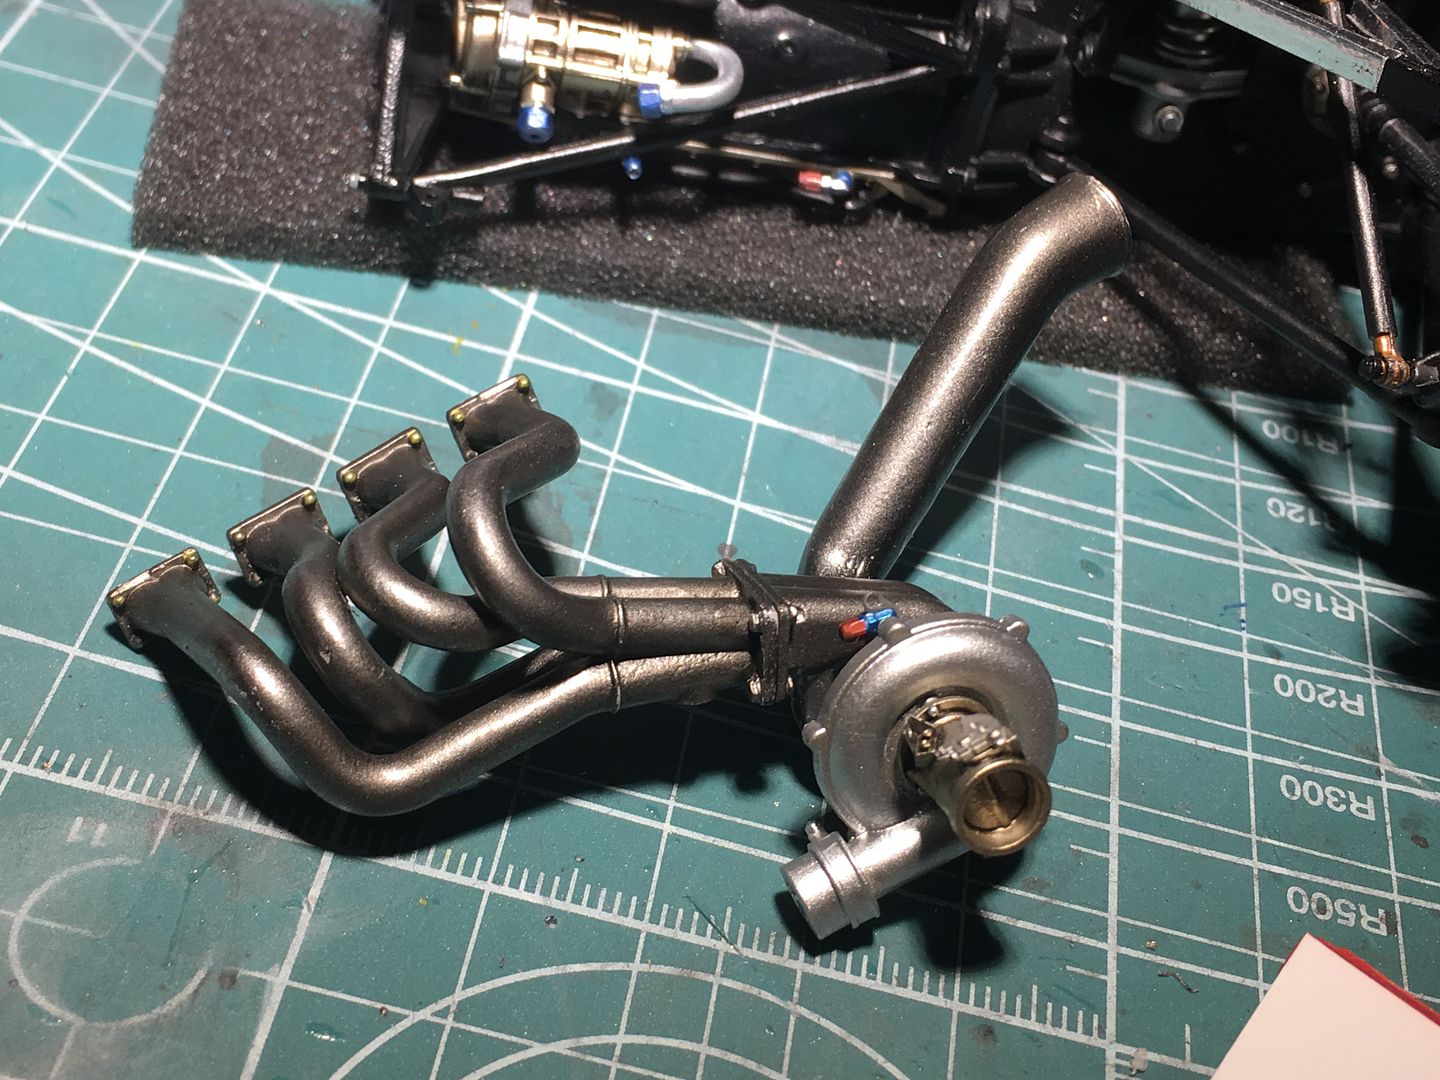
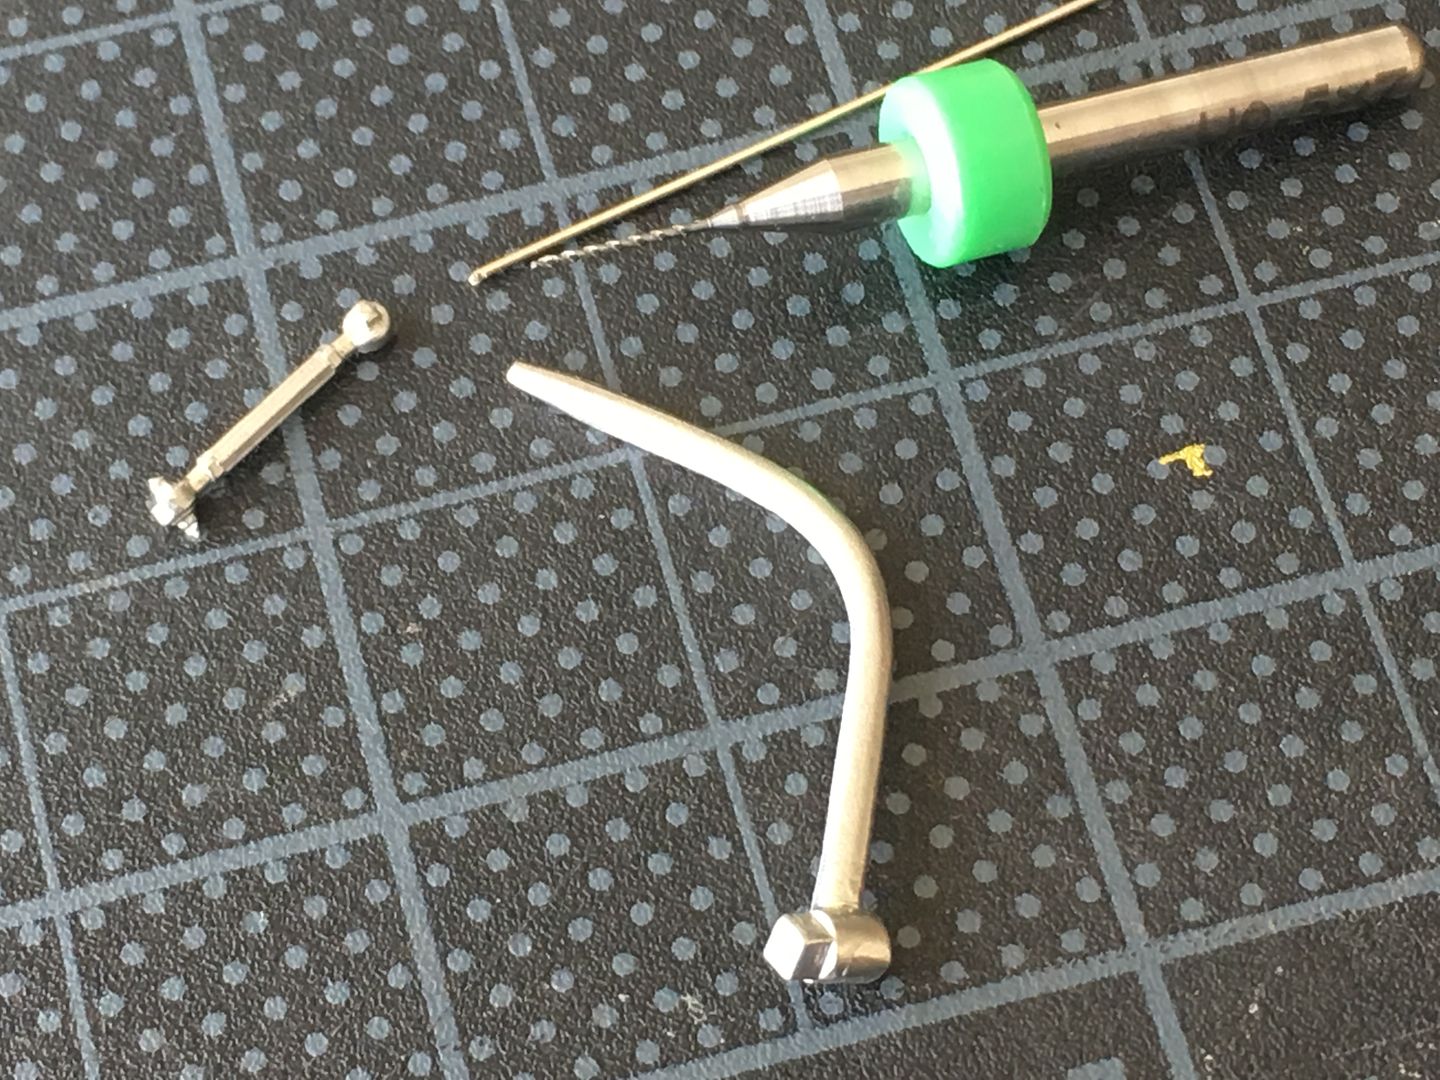
But first - THANK YOU MFH - I lost one part. Joins the turbo/exhaust system together.
Emailed the guys at MFH, and they sent me this VERY quickly.....
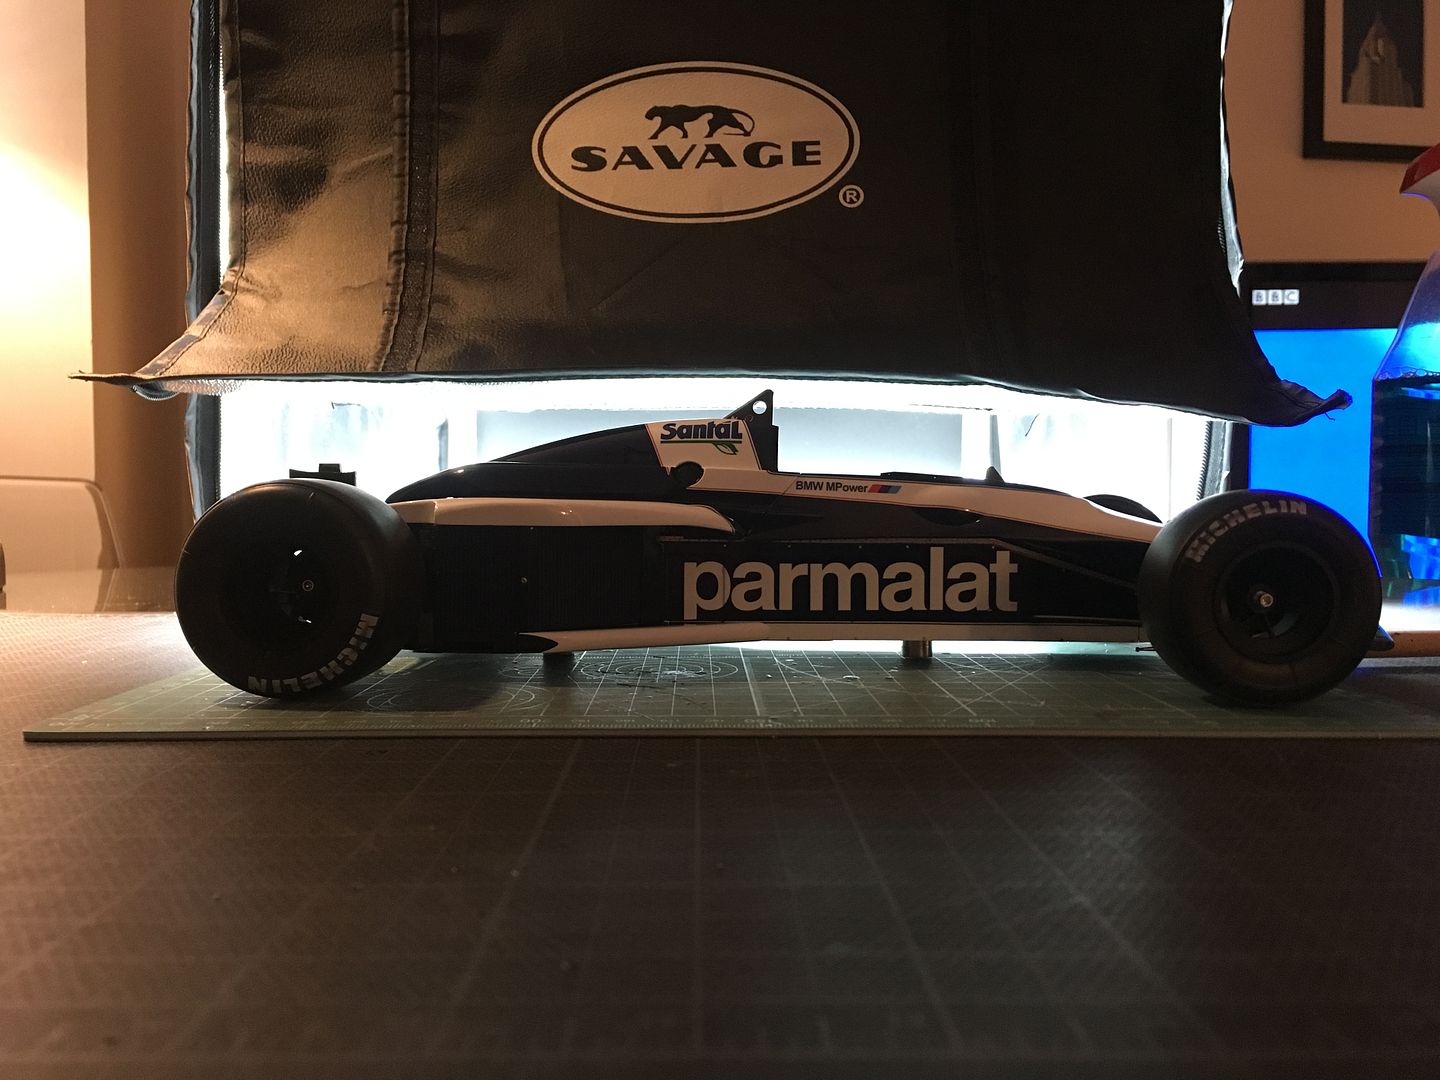
..but now, coming to a light box/photo cube near you - some decent pics for a change!
But first - THANK YOU MFH - I lost one part. Joins the turbo/exhaust system together.
Emailed the guys at MFH, and they sent me this VERY quickly.....
..but now, coming to a light box/photo cube near you - some decent pics for a change!
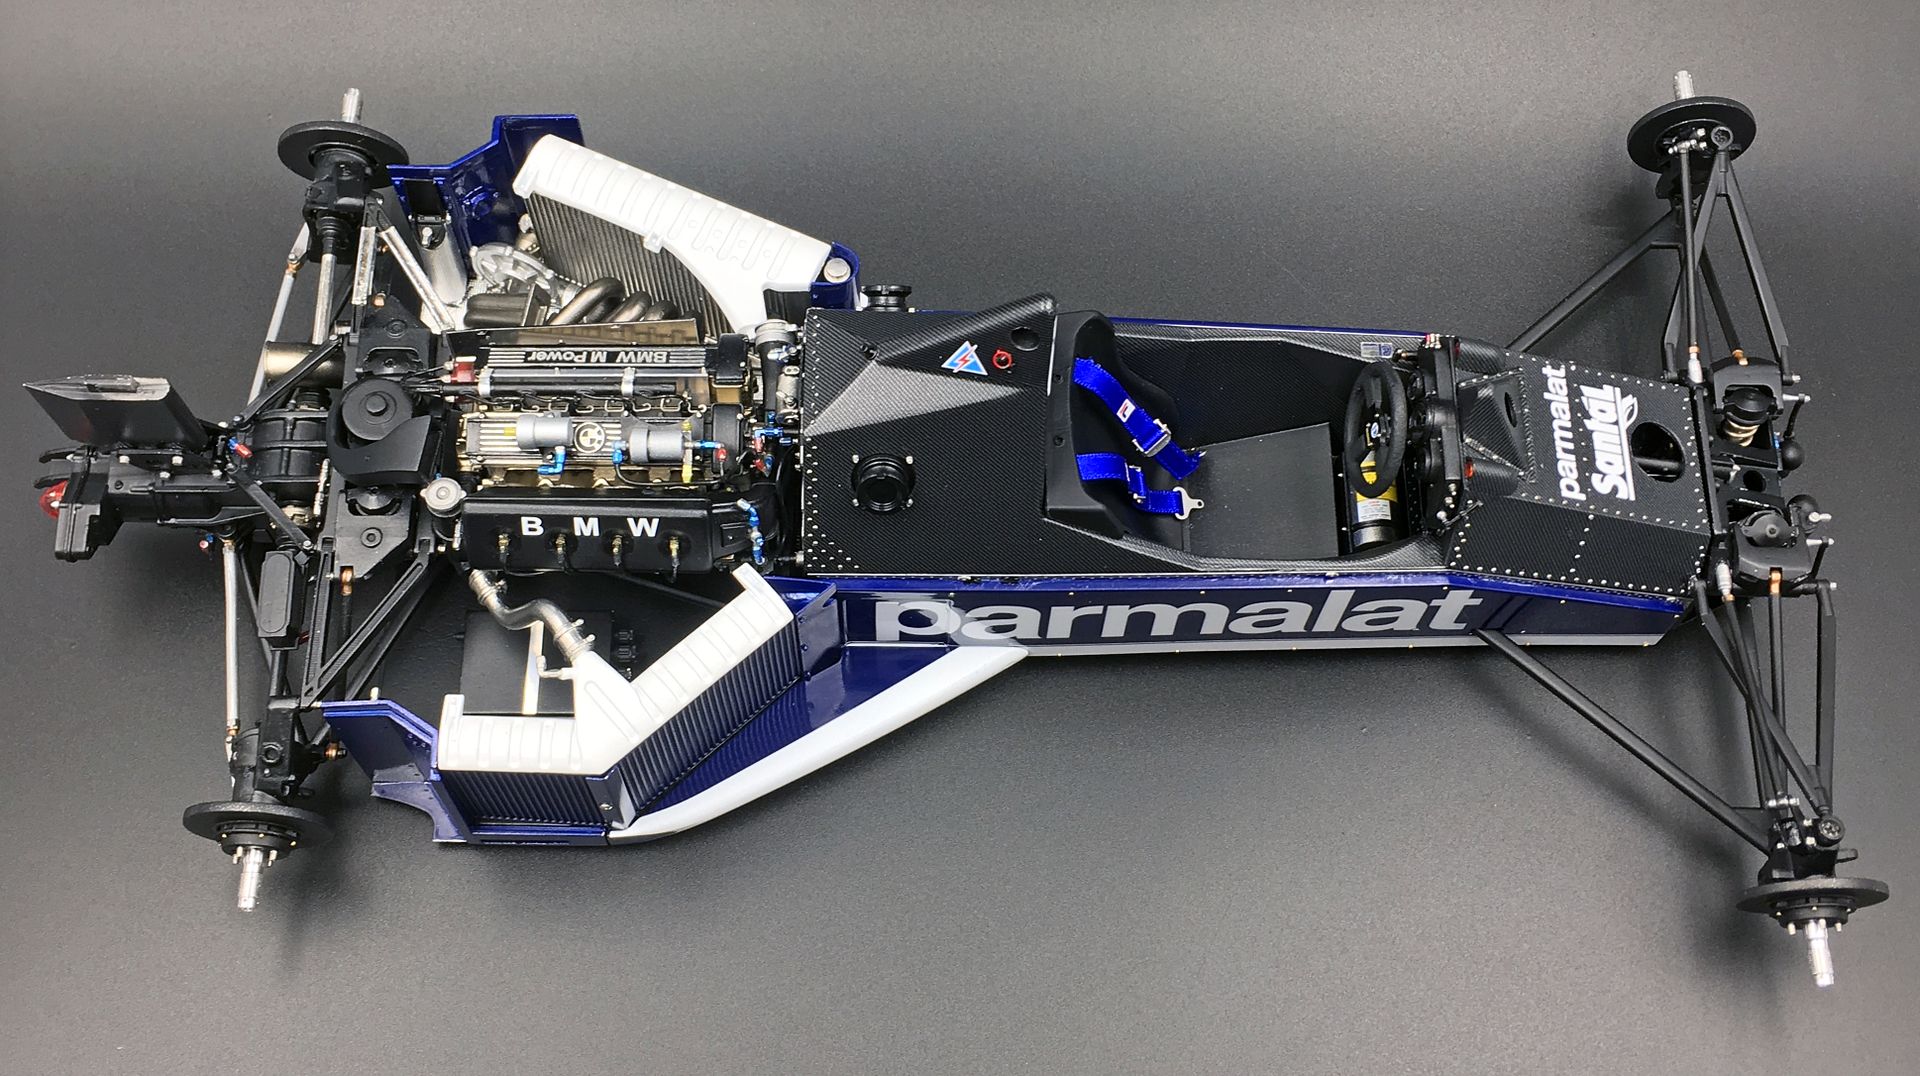
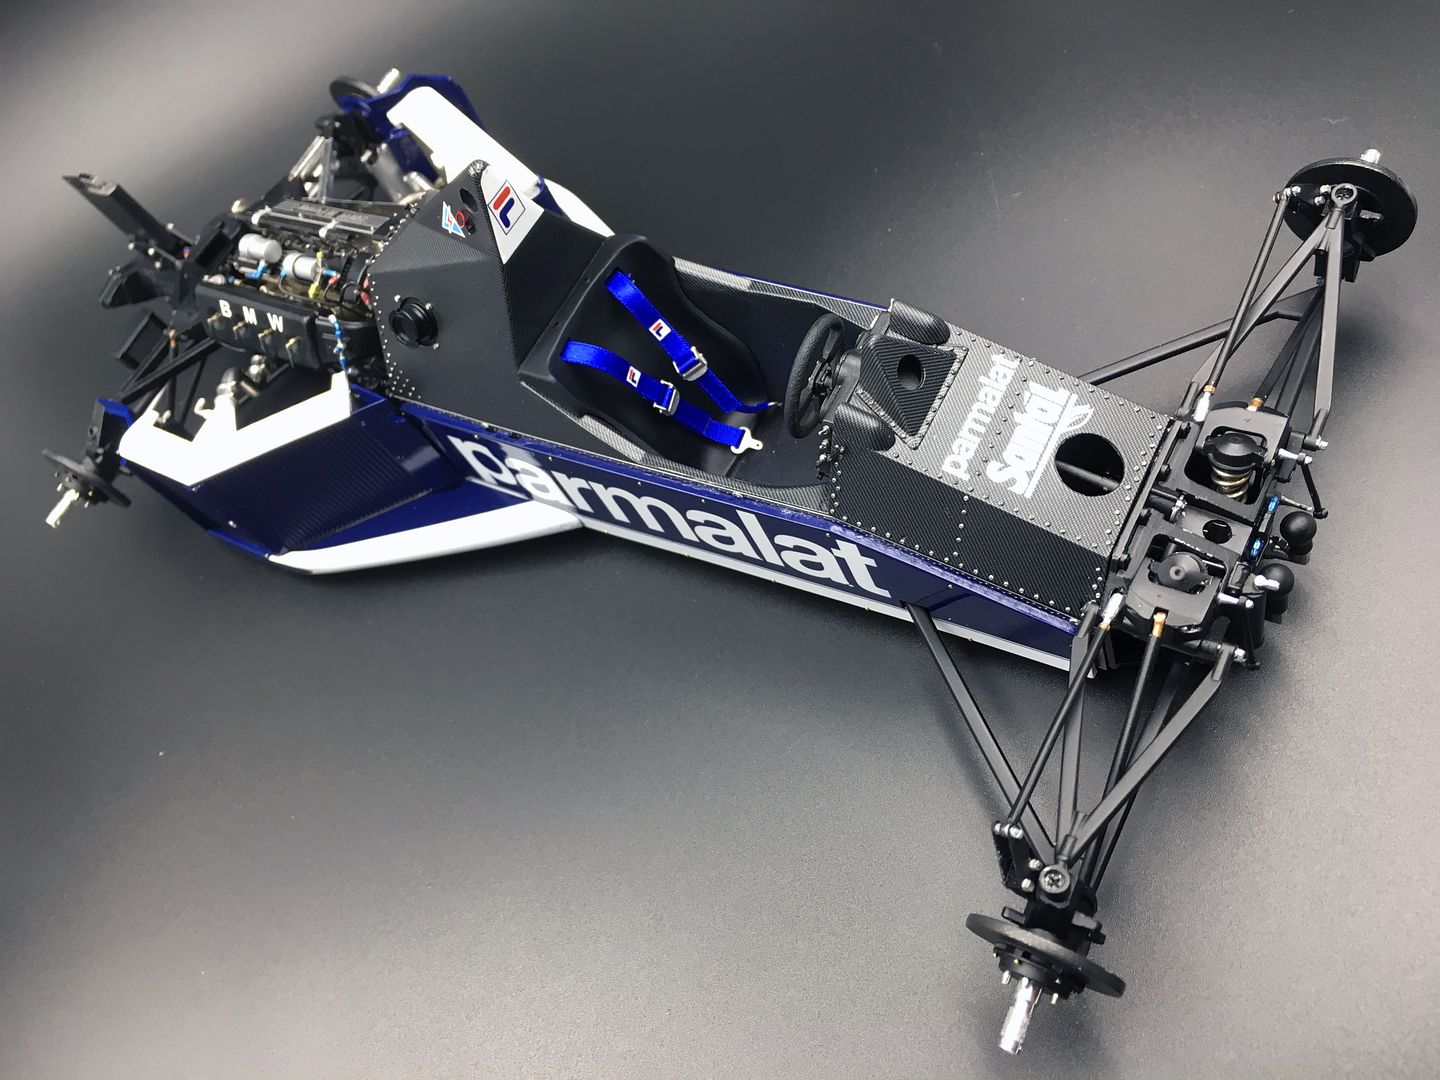
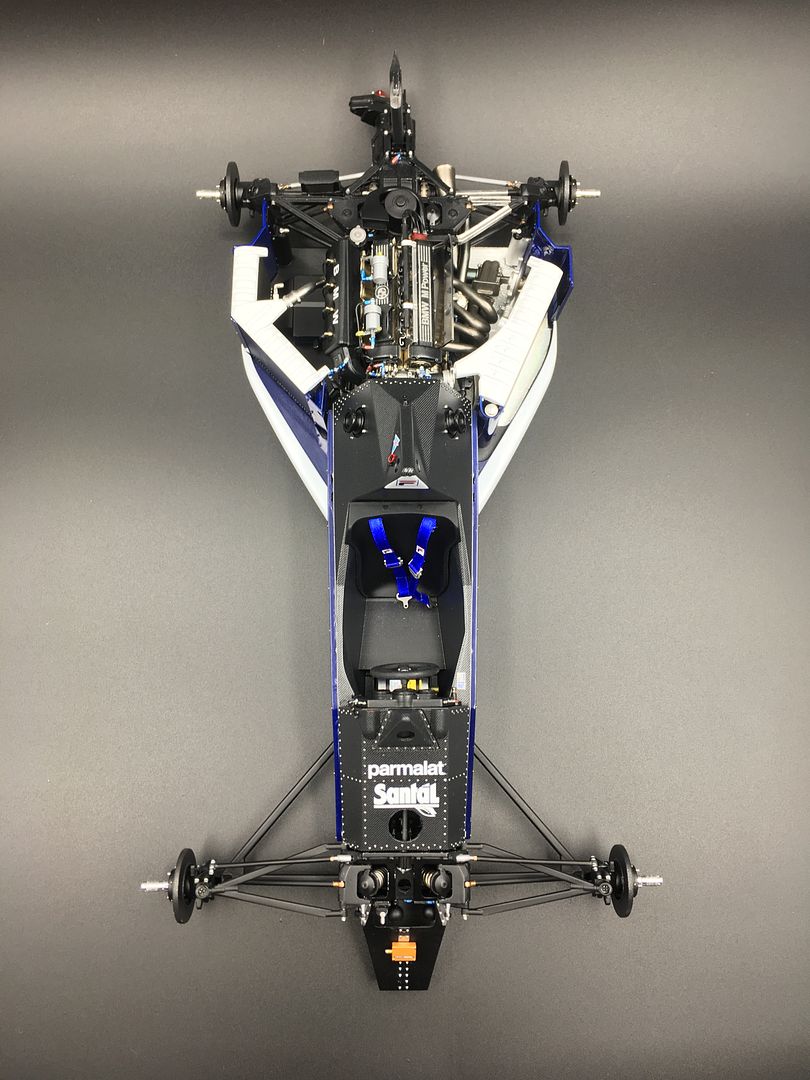
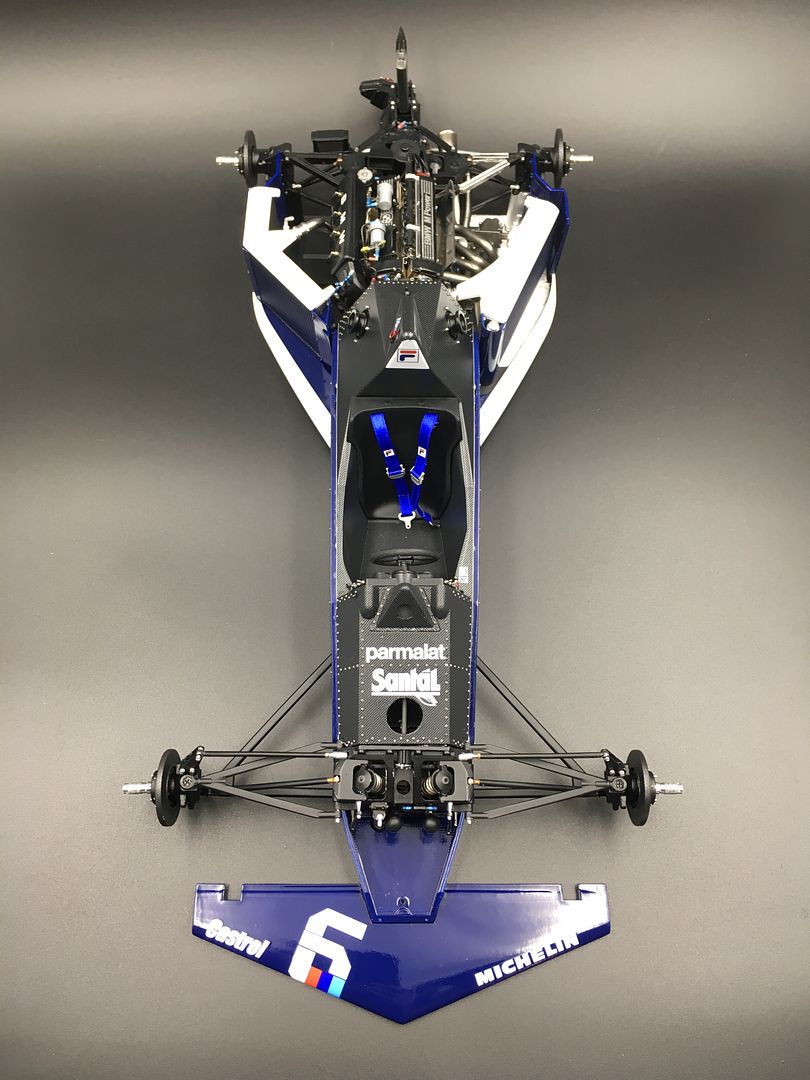
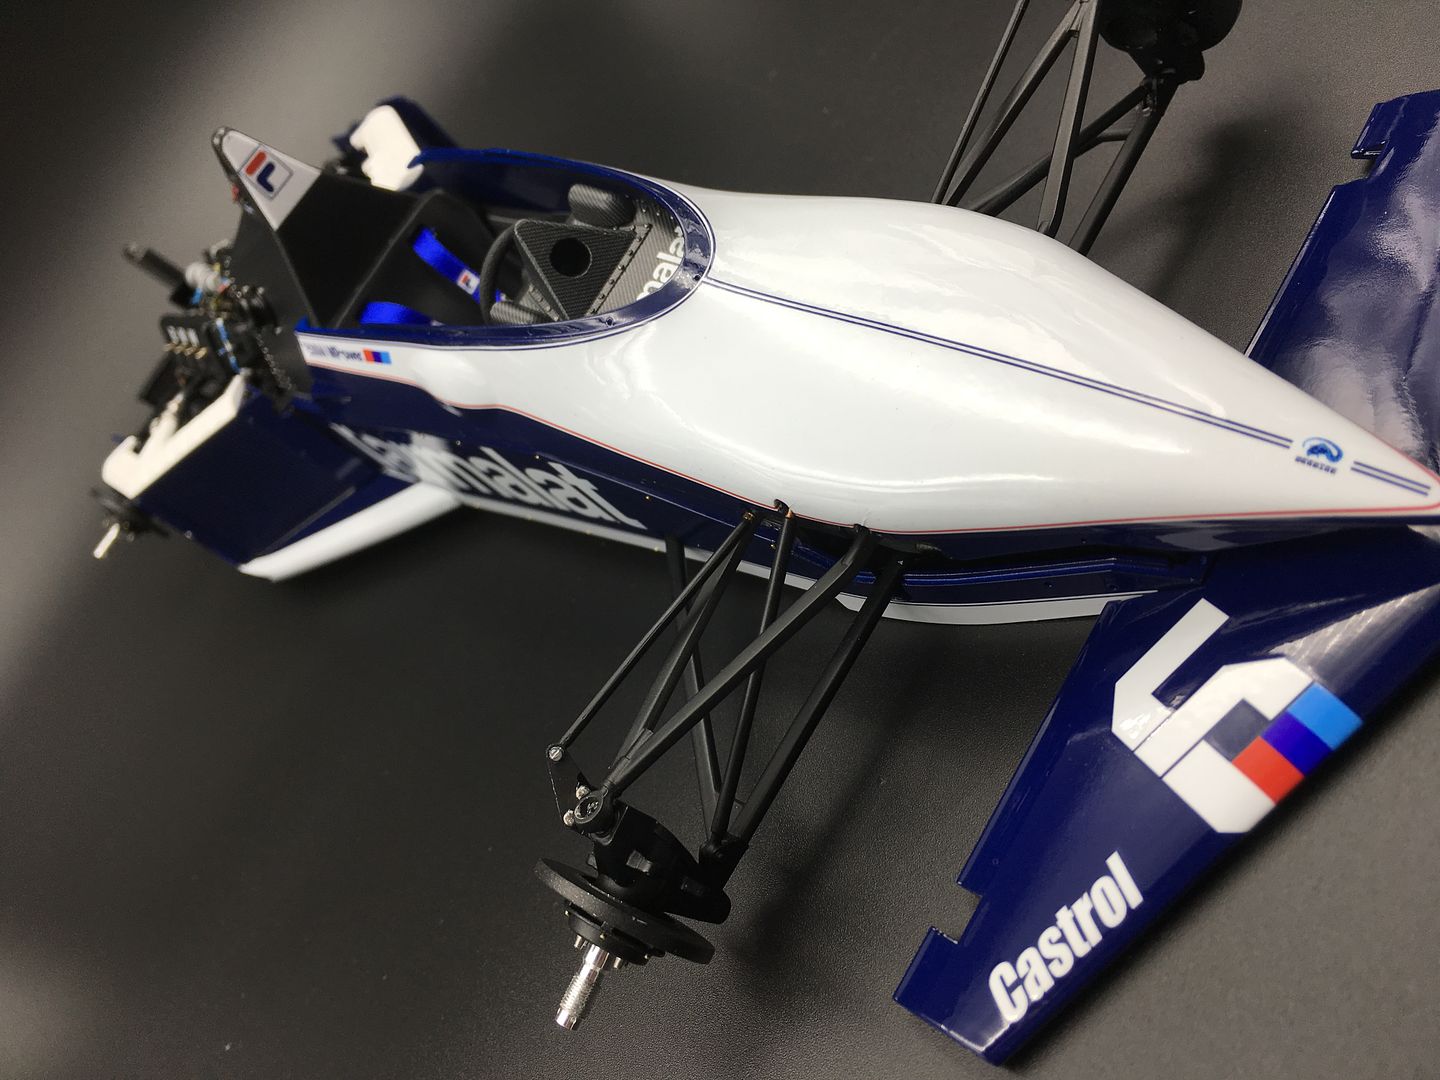
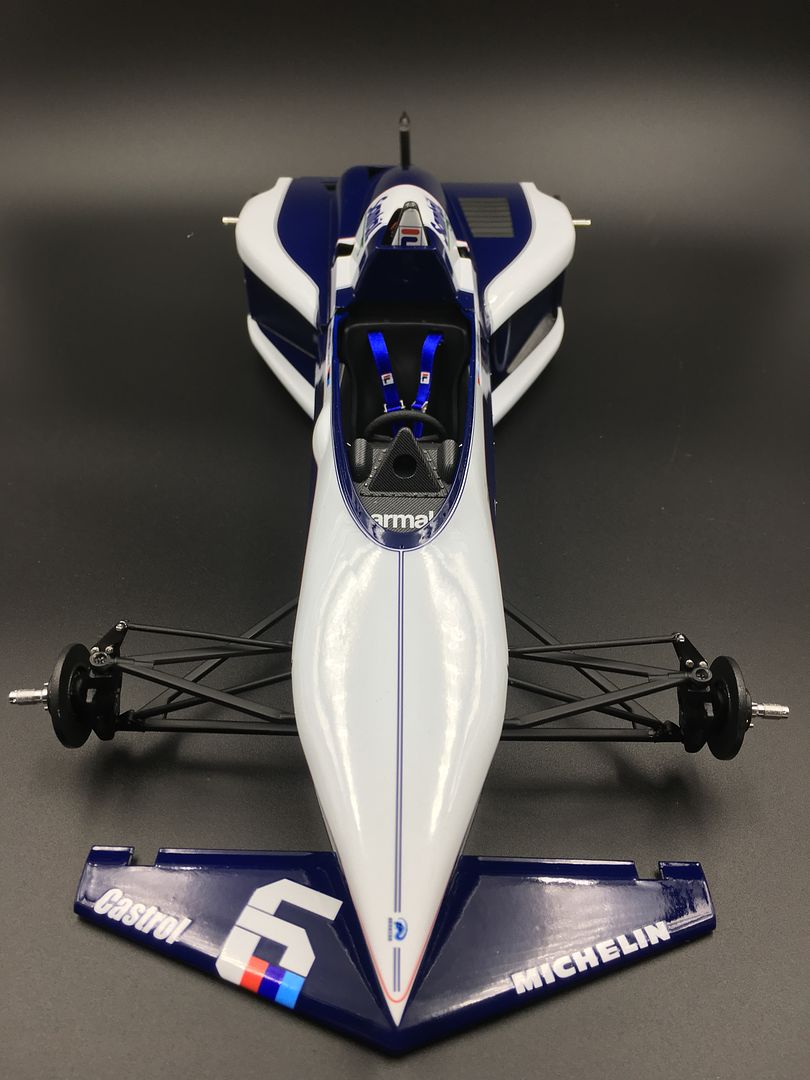
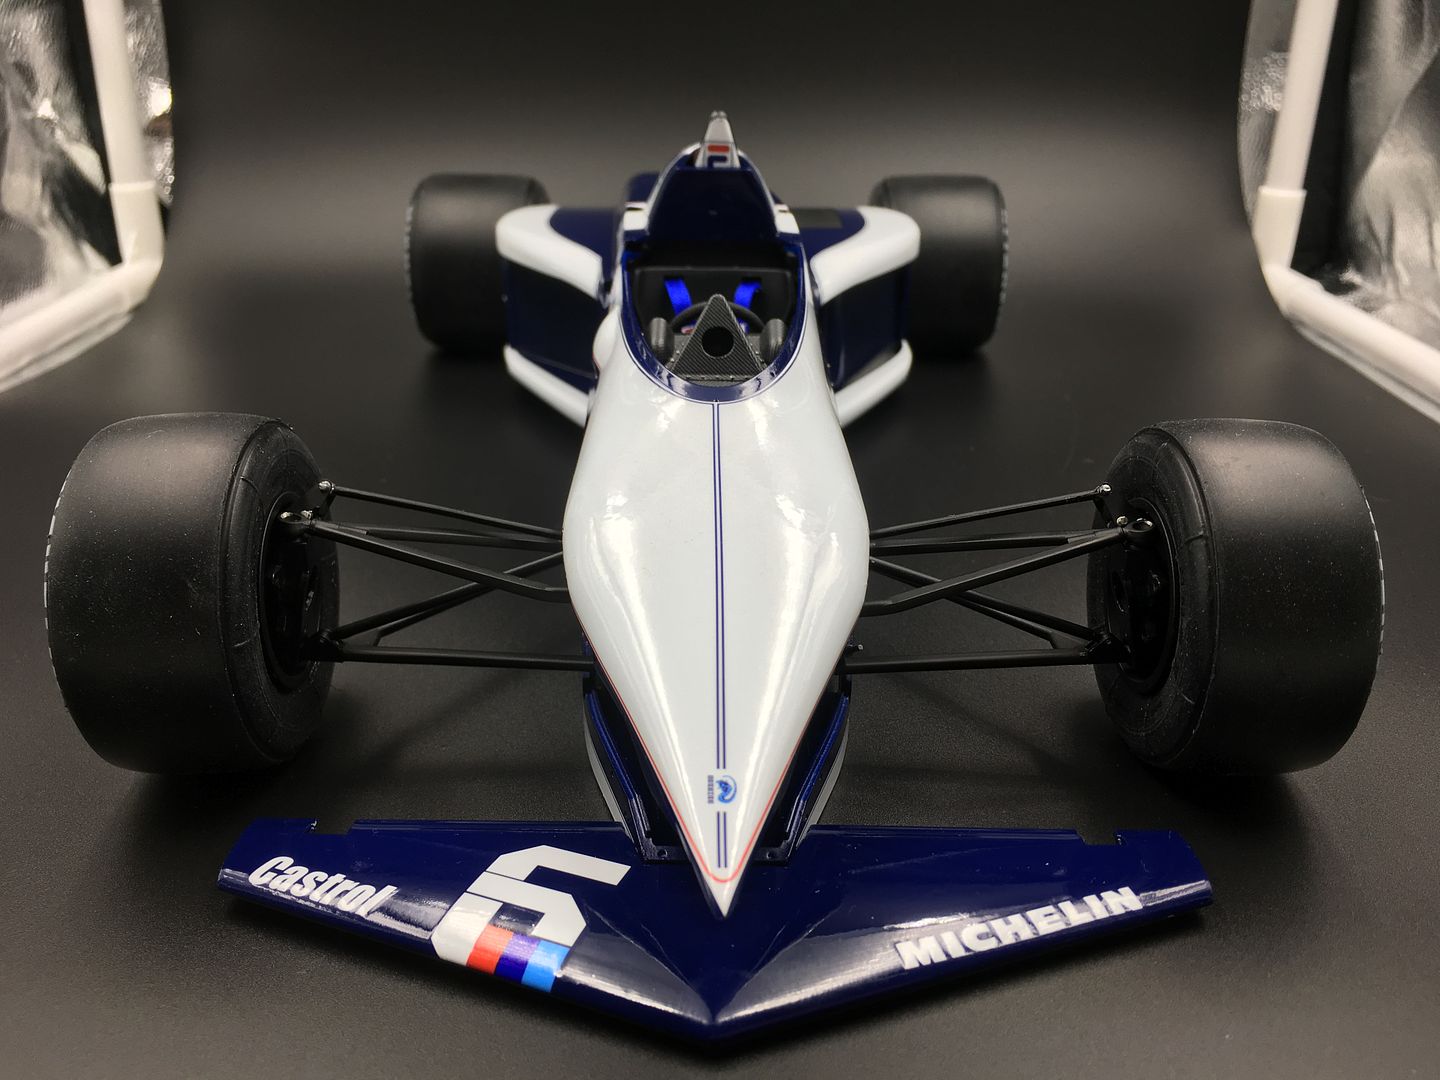
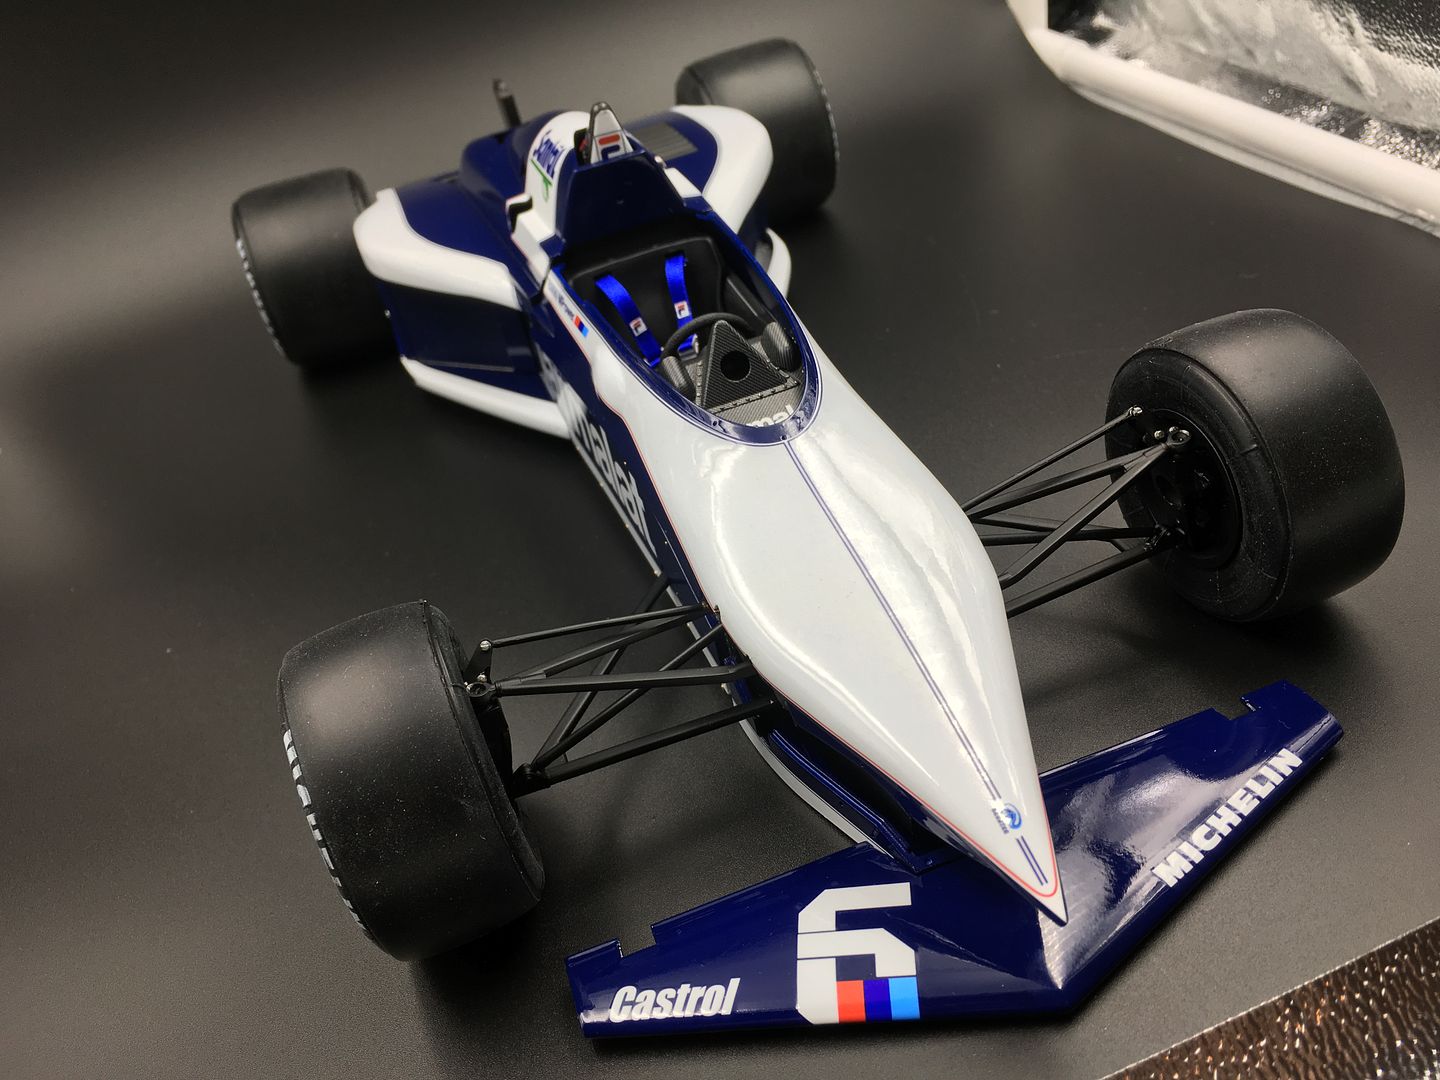
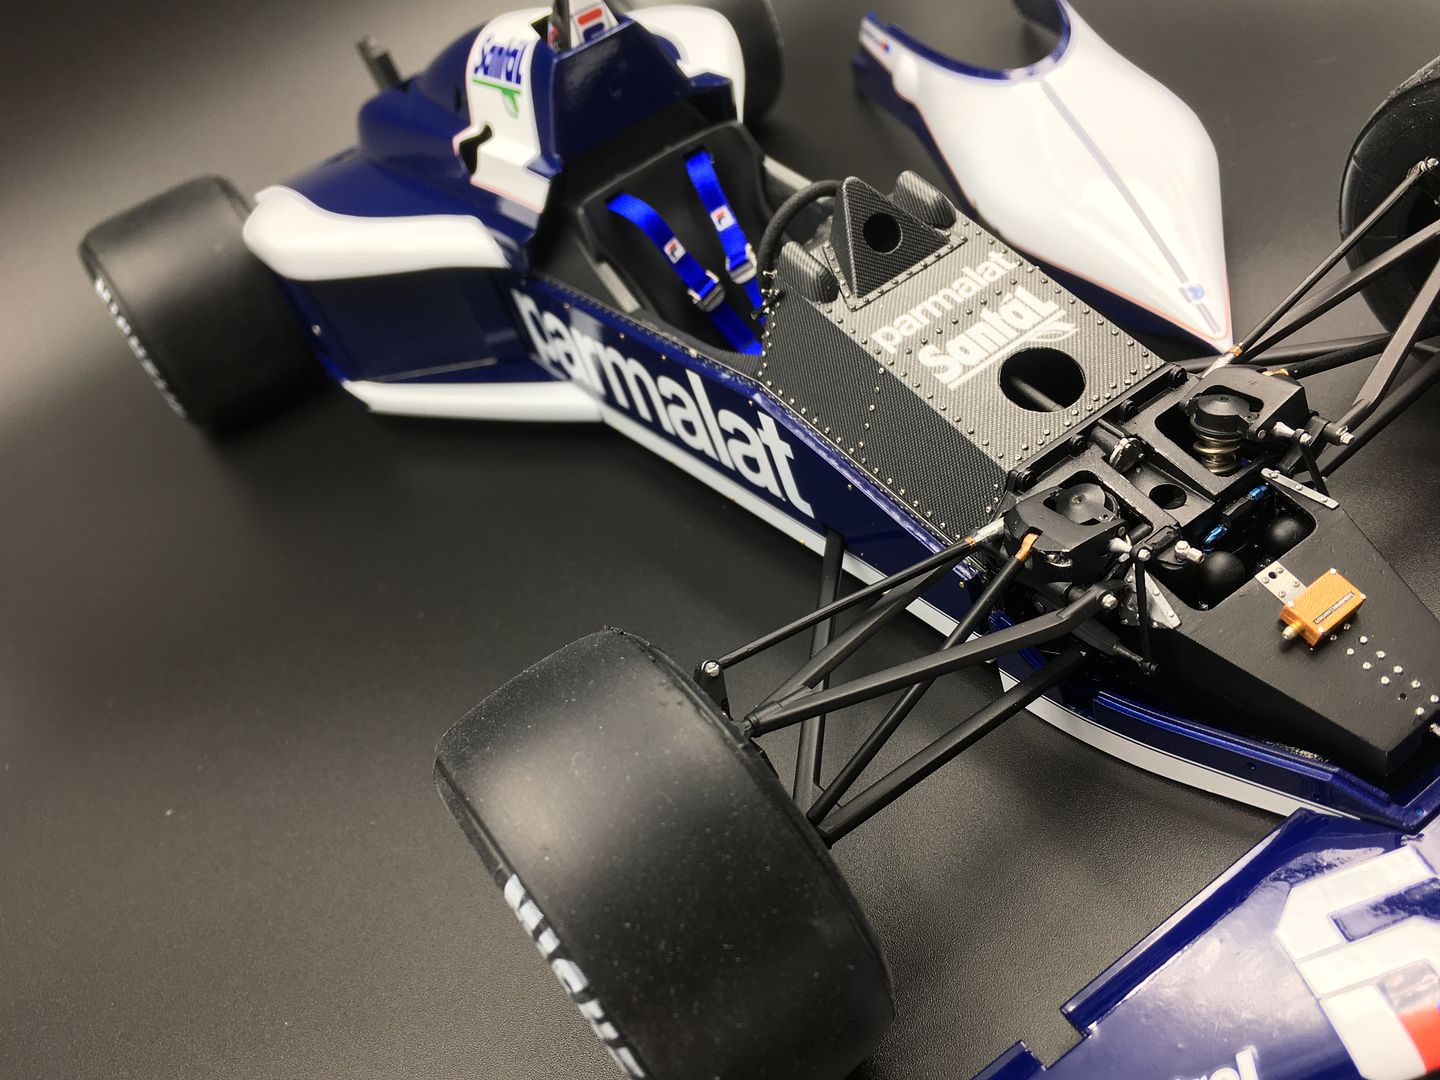
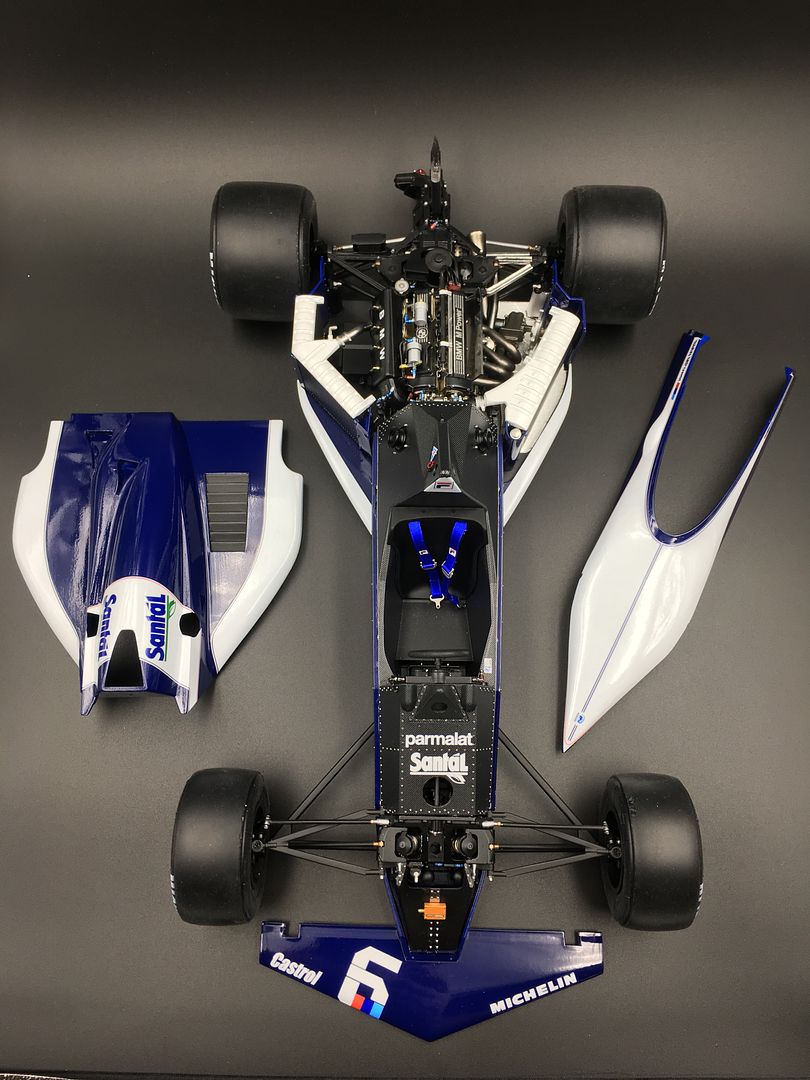
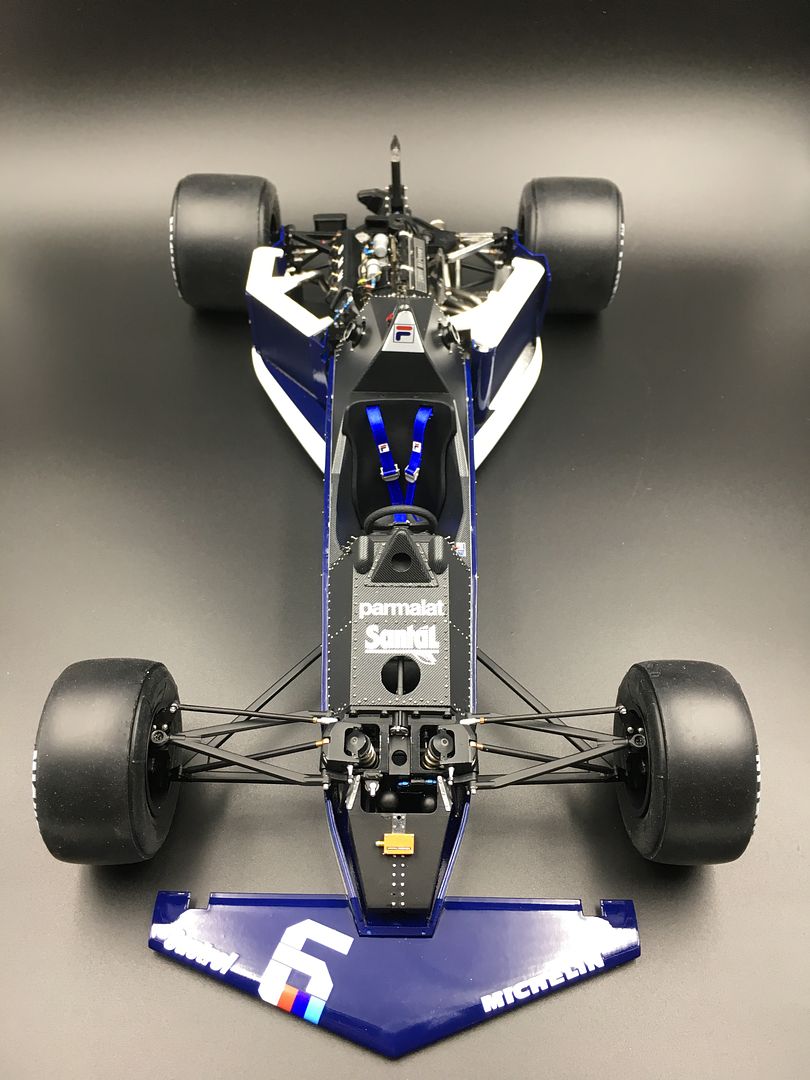
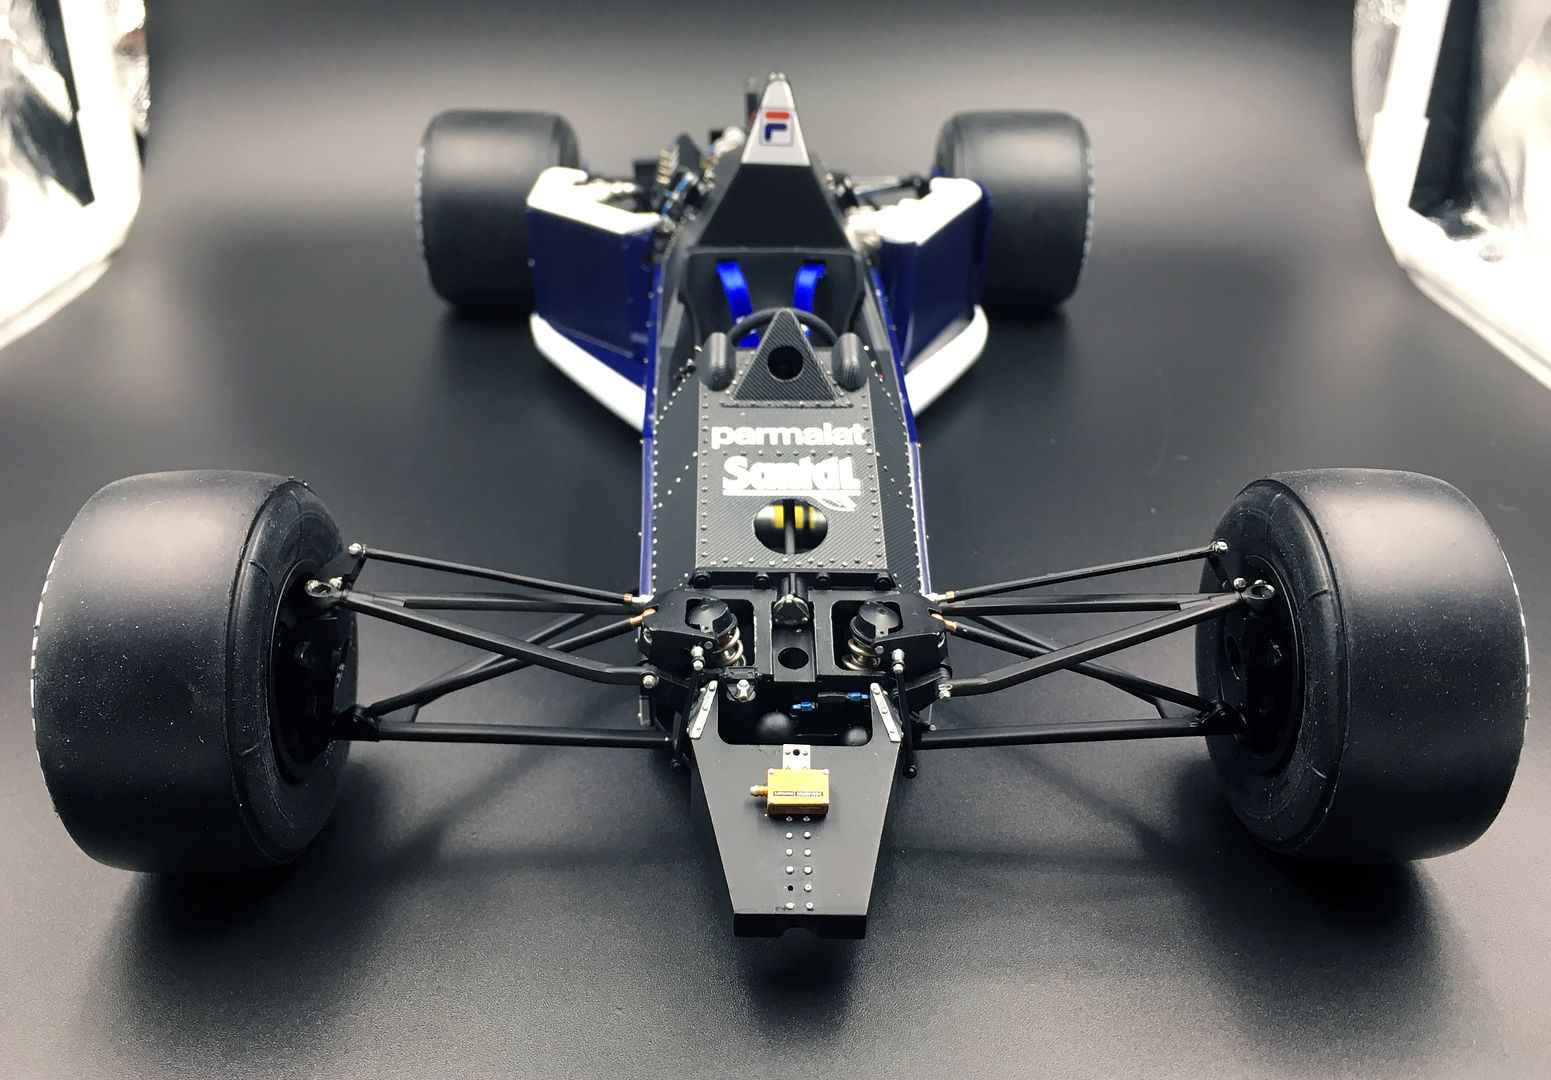
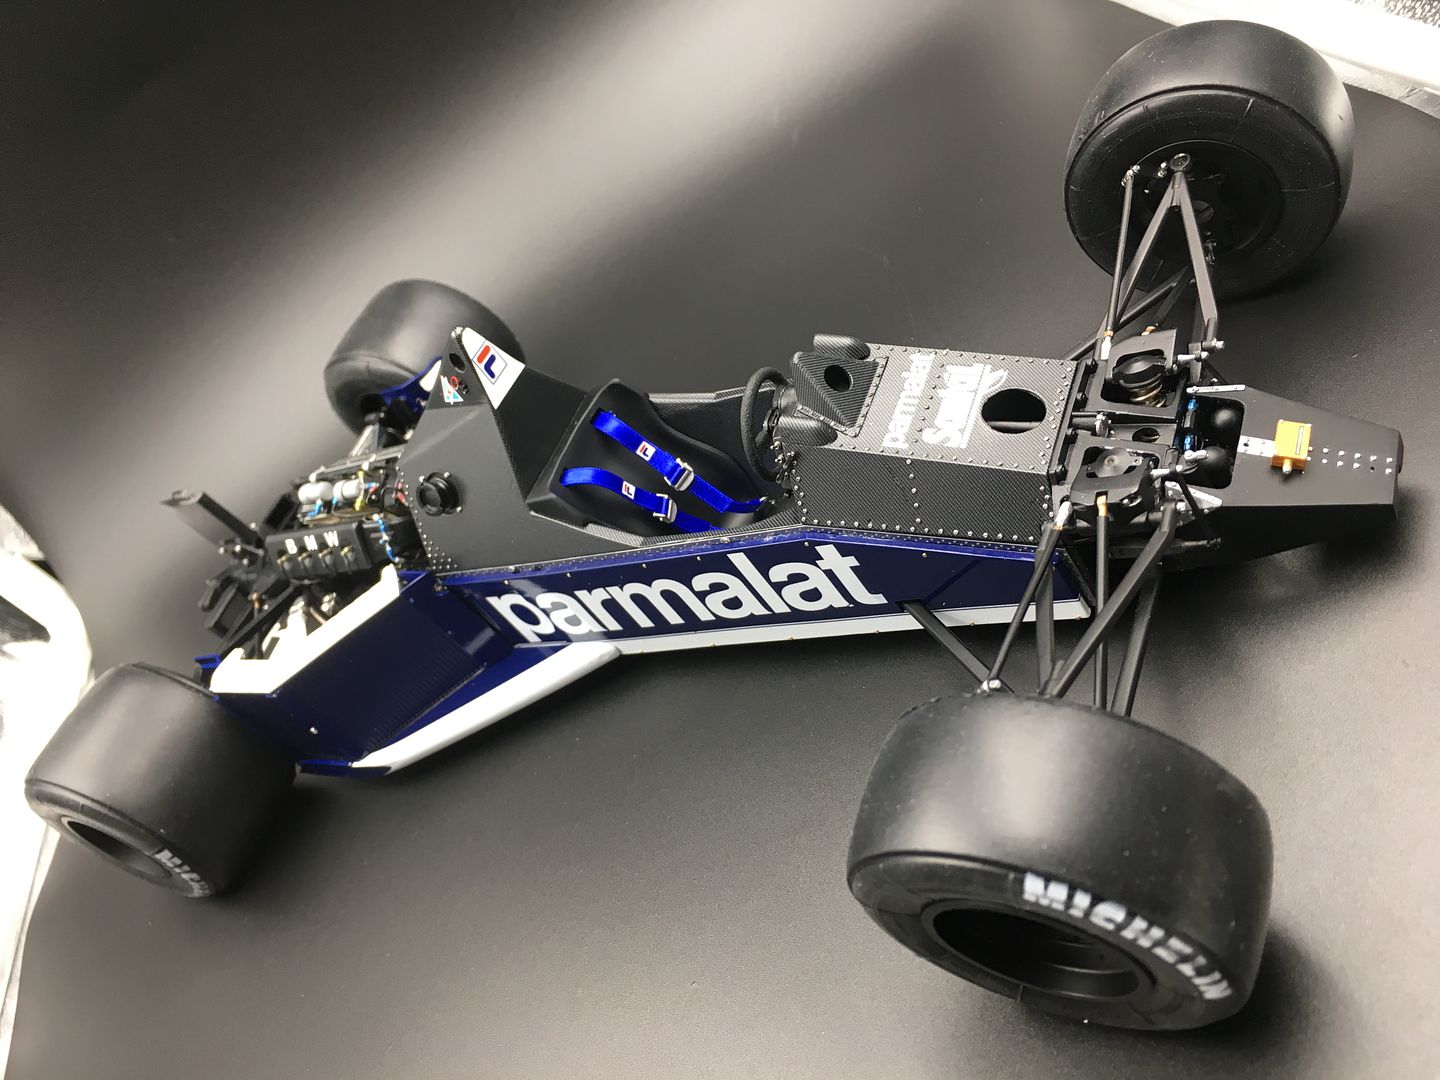
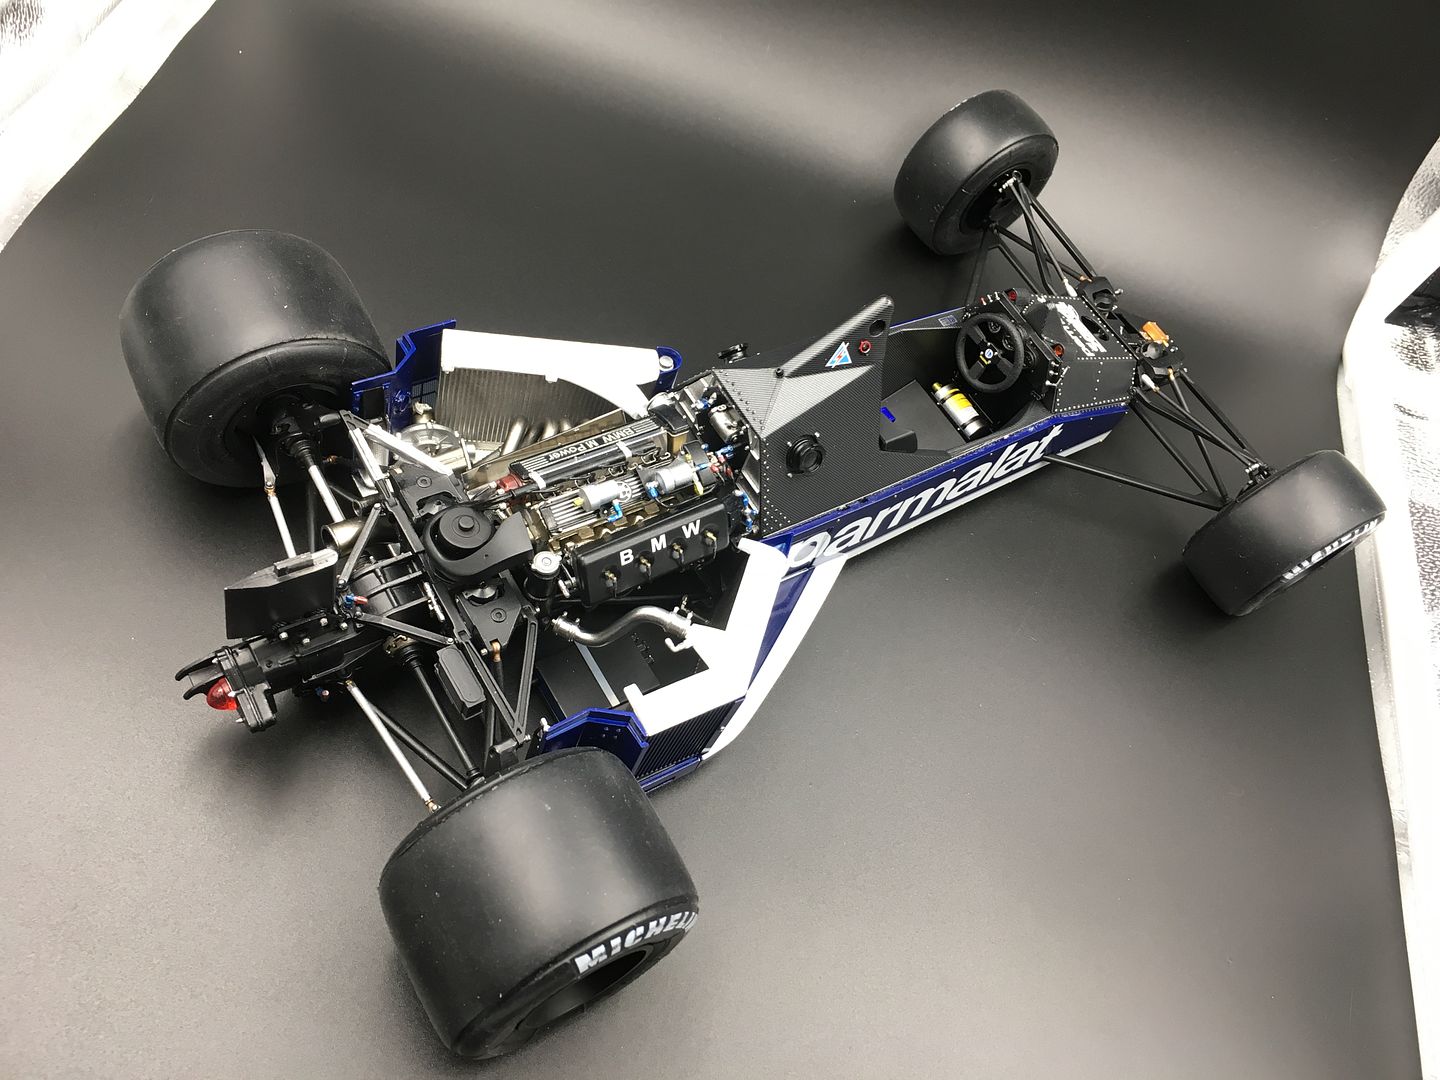
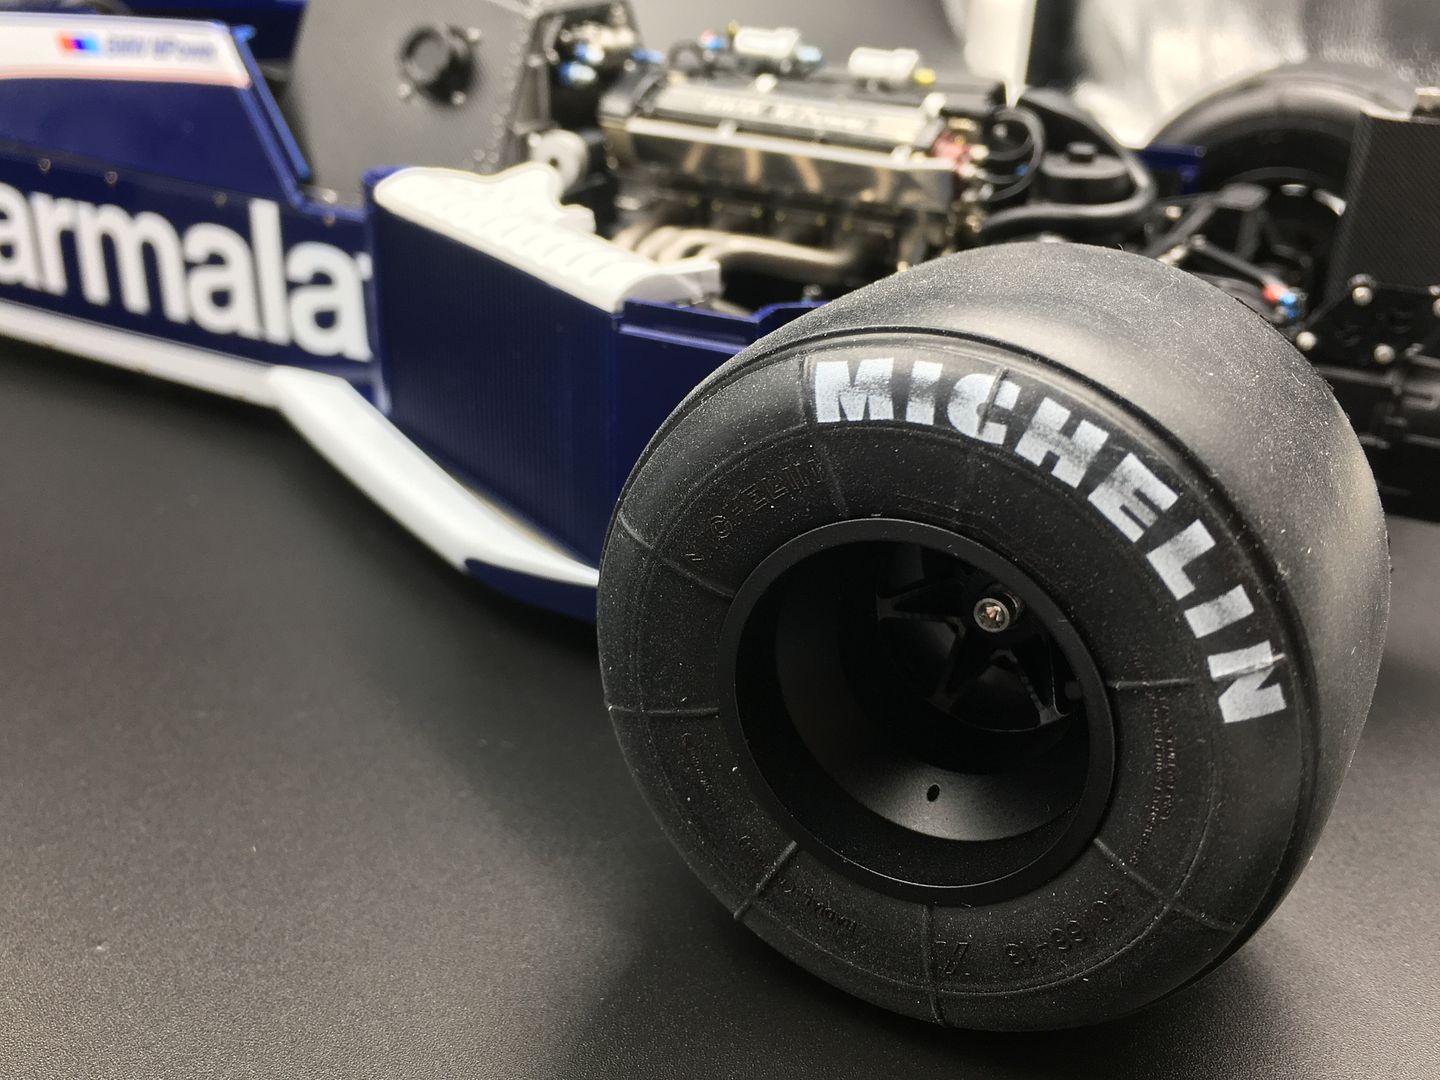
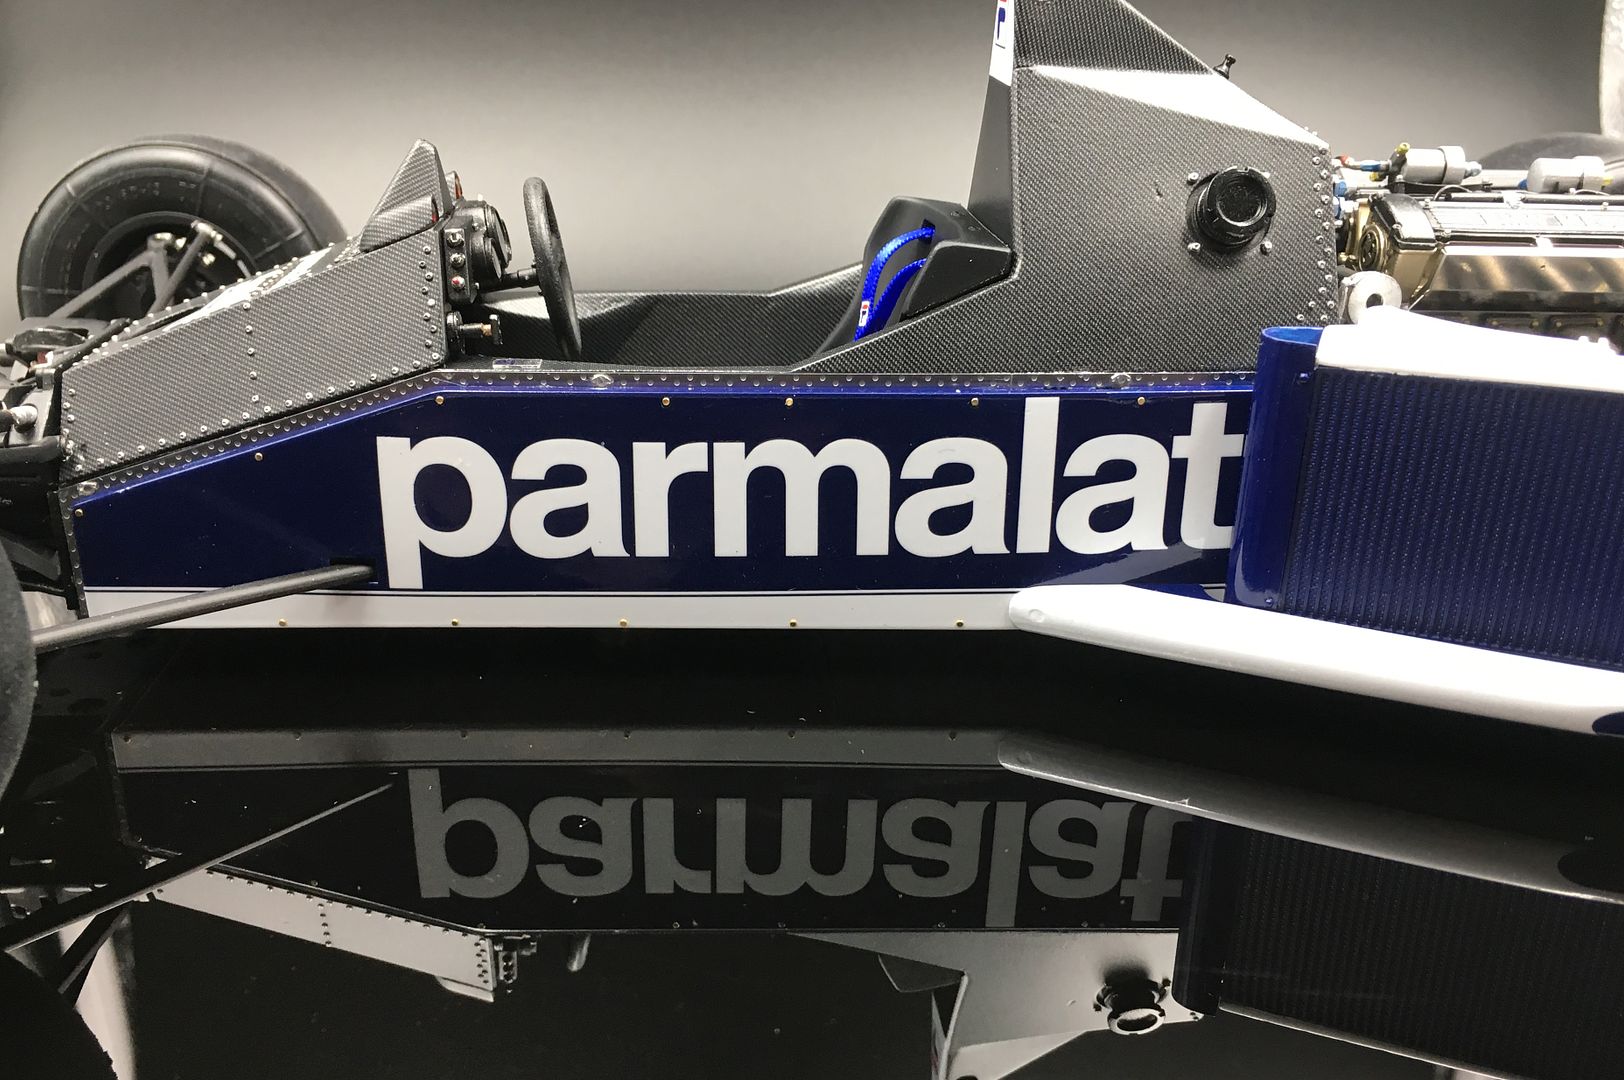
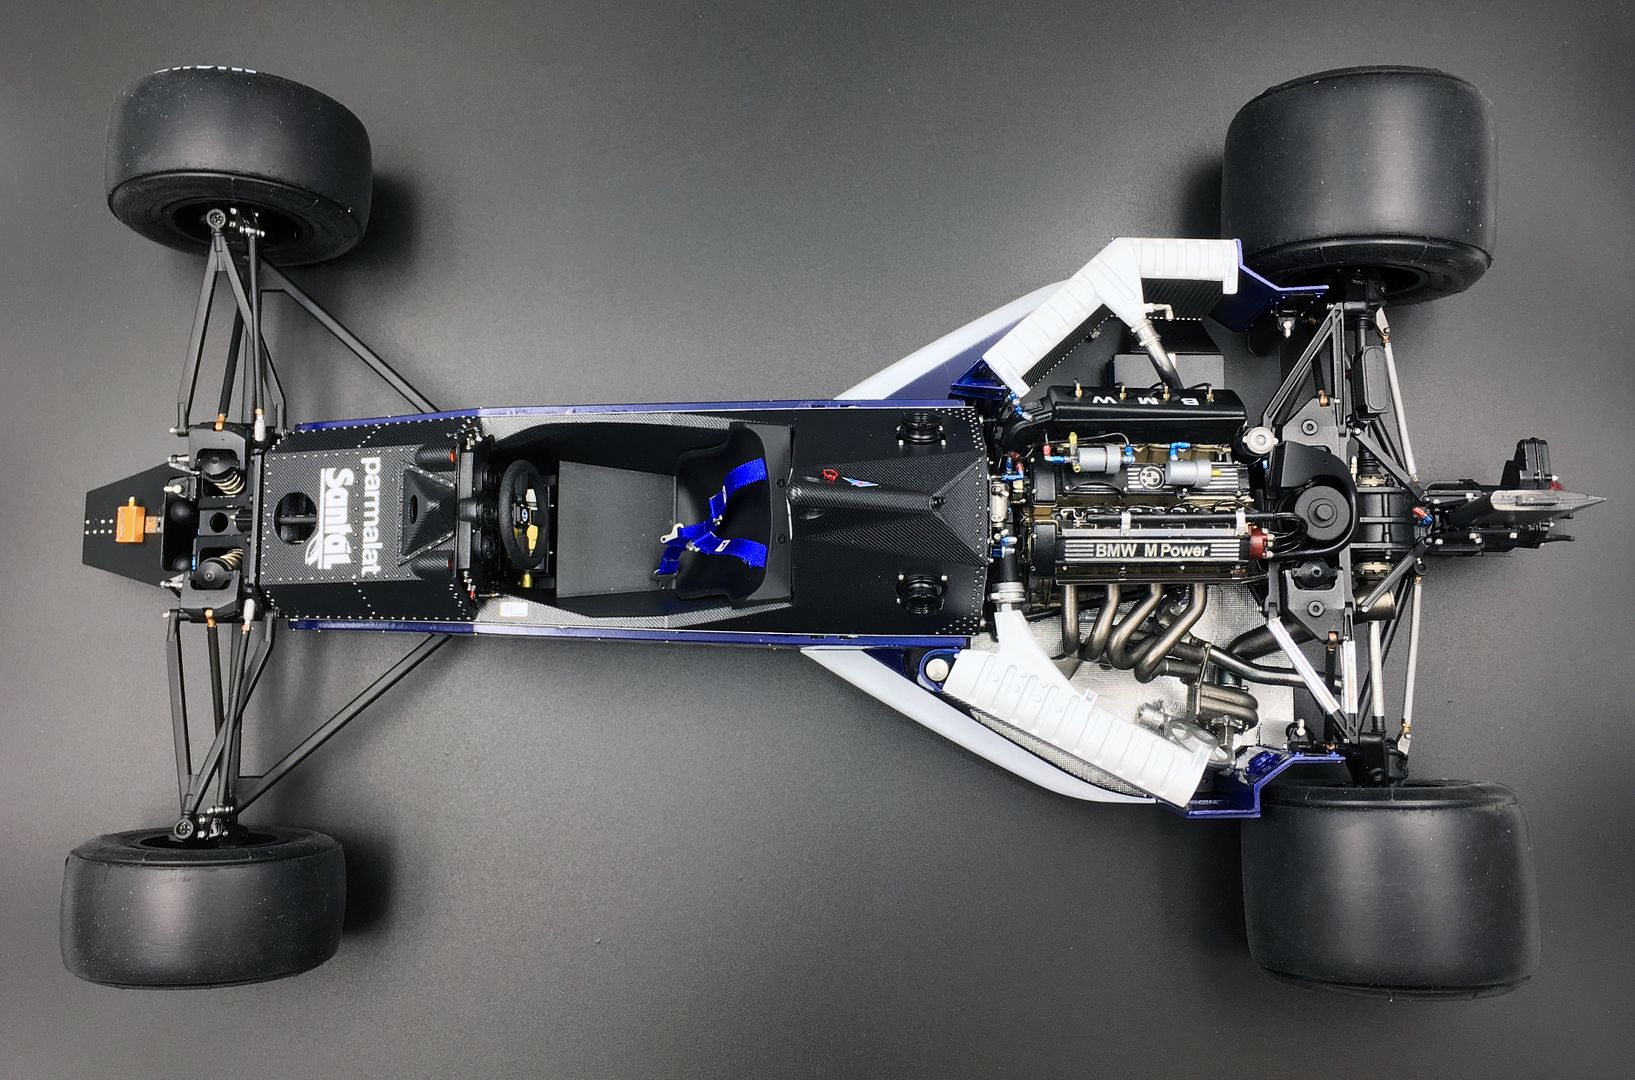
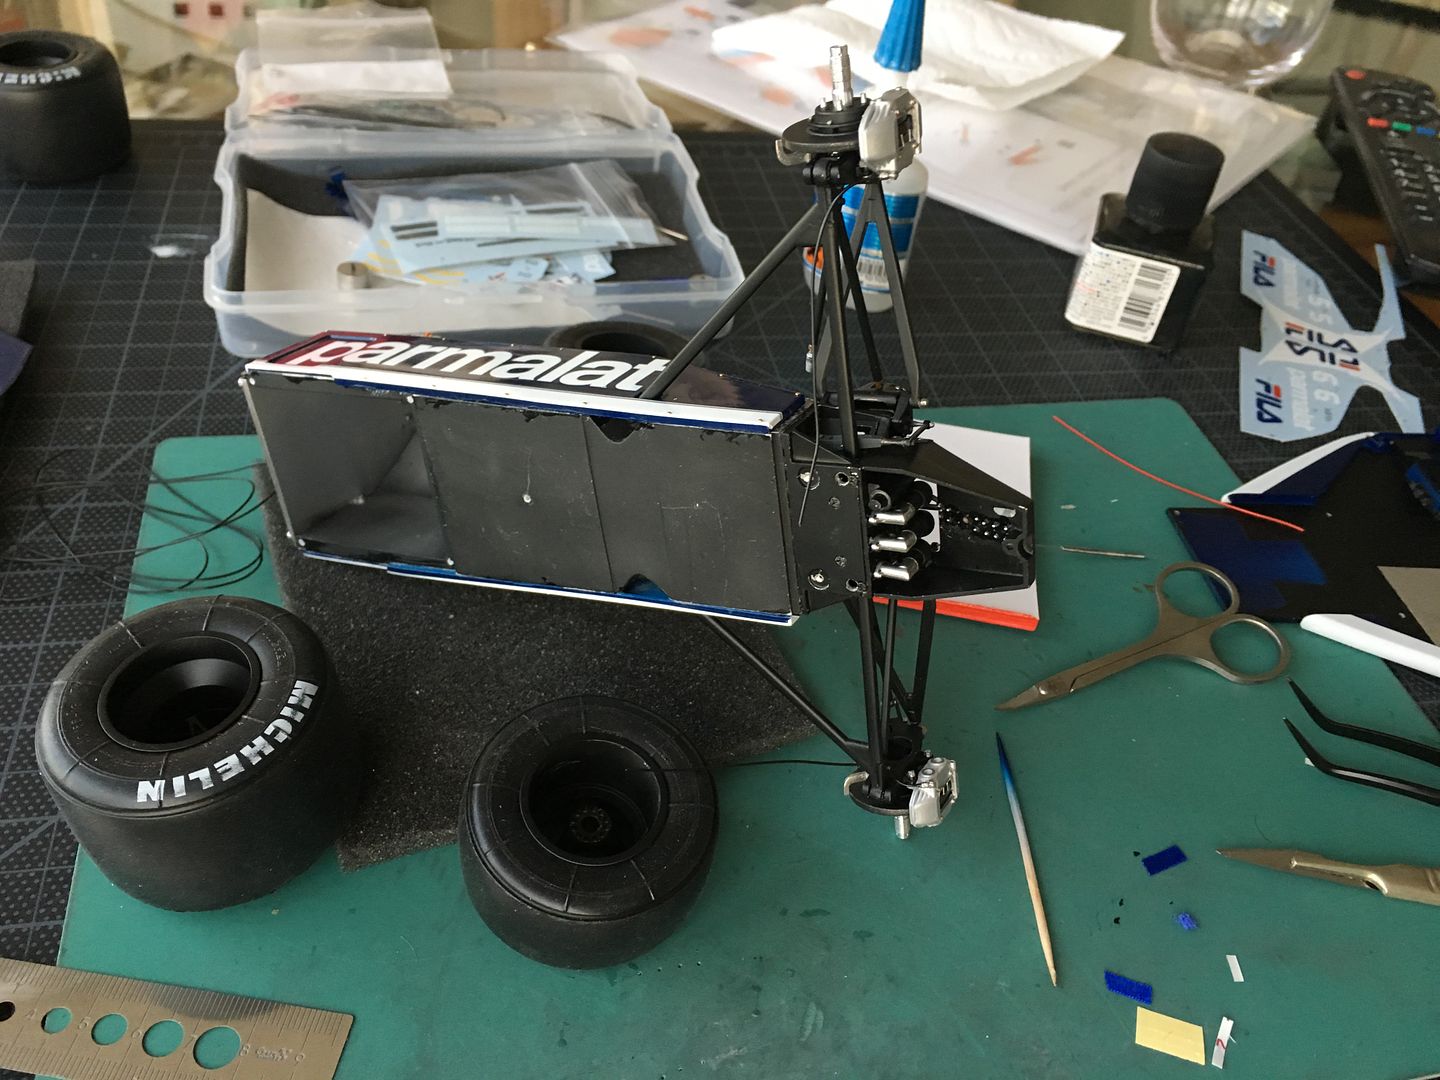
Another big picture dump -and again, many things are not fixed - so the exhaust and turbo area has parts almost literally thrown in - nothing fixed - same with wheels, body panels etc - lots of details to add before anything gets joined together, but I wanted to get some nice pictures whilst still 'in progress...'
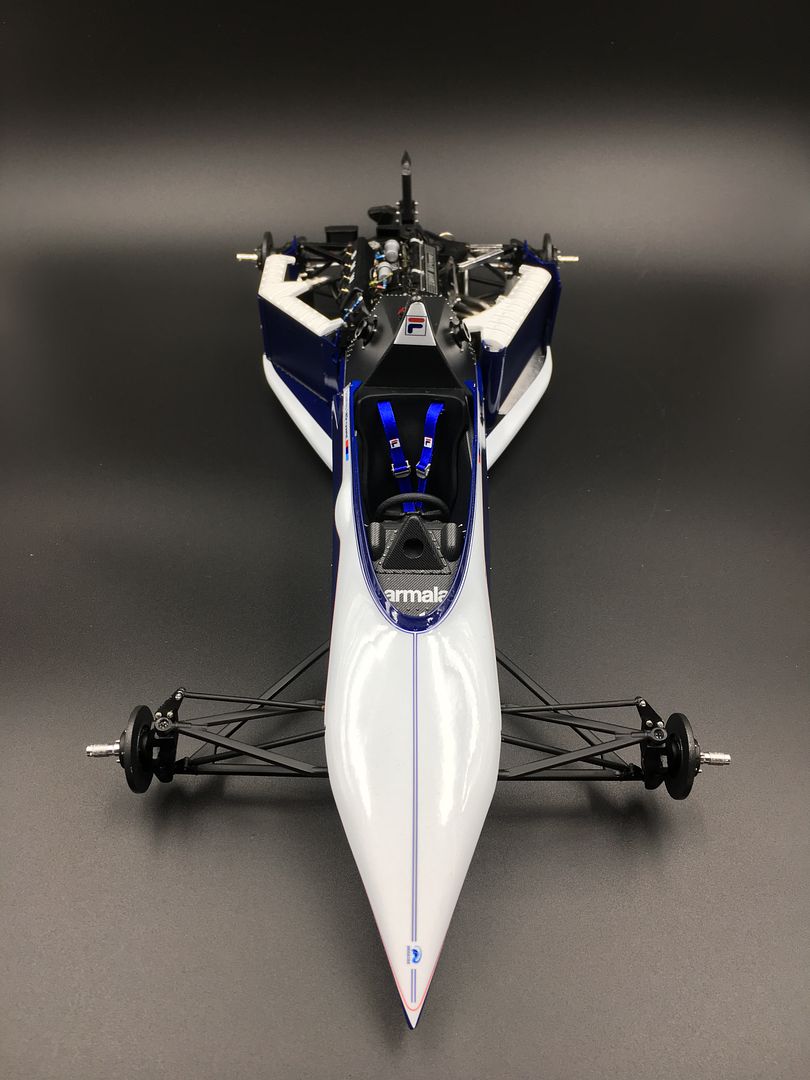

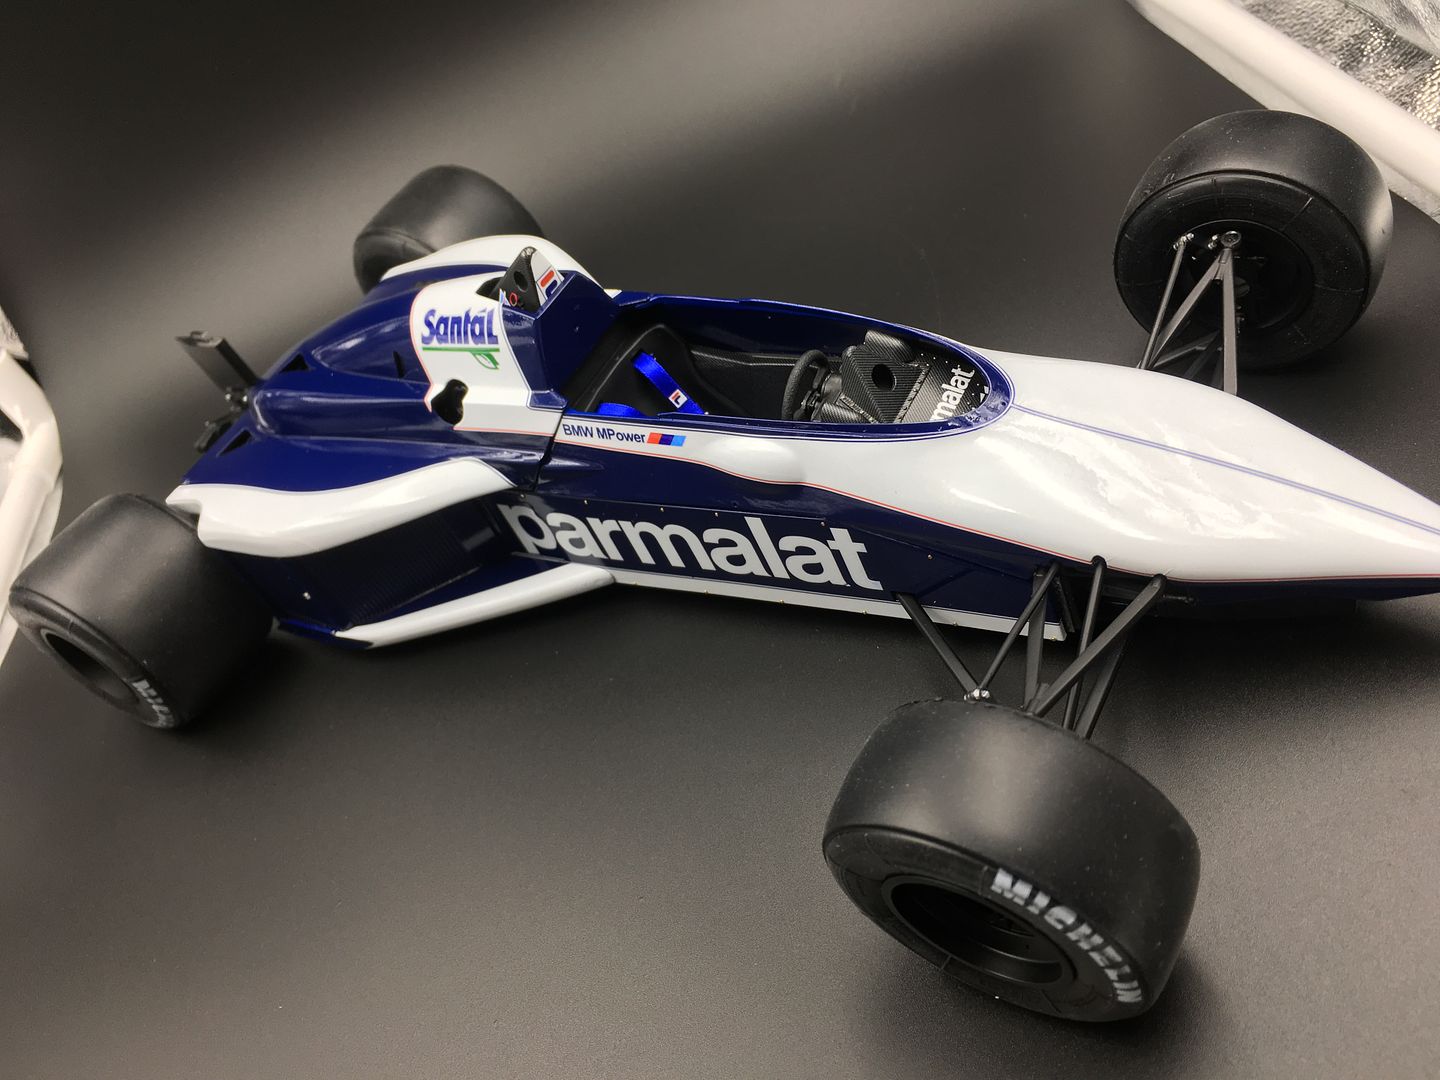
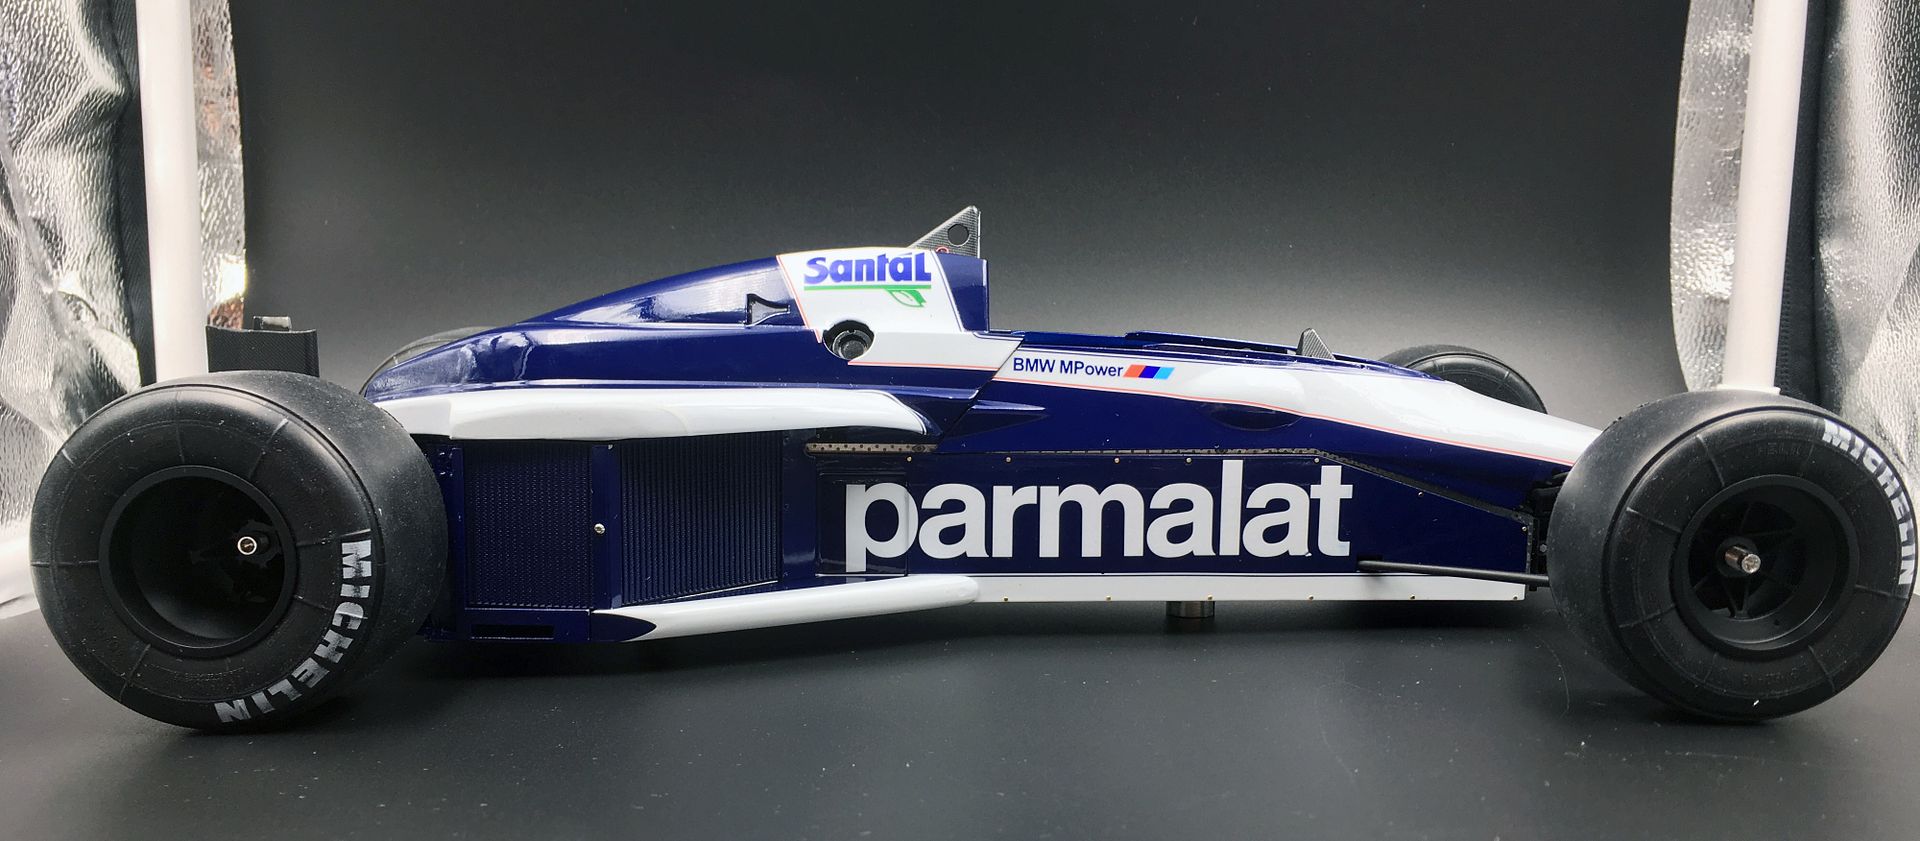
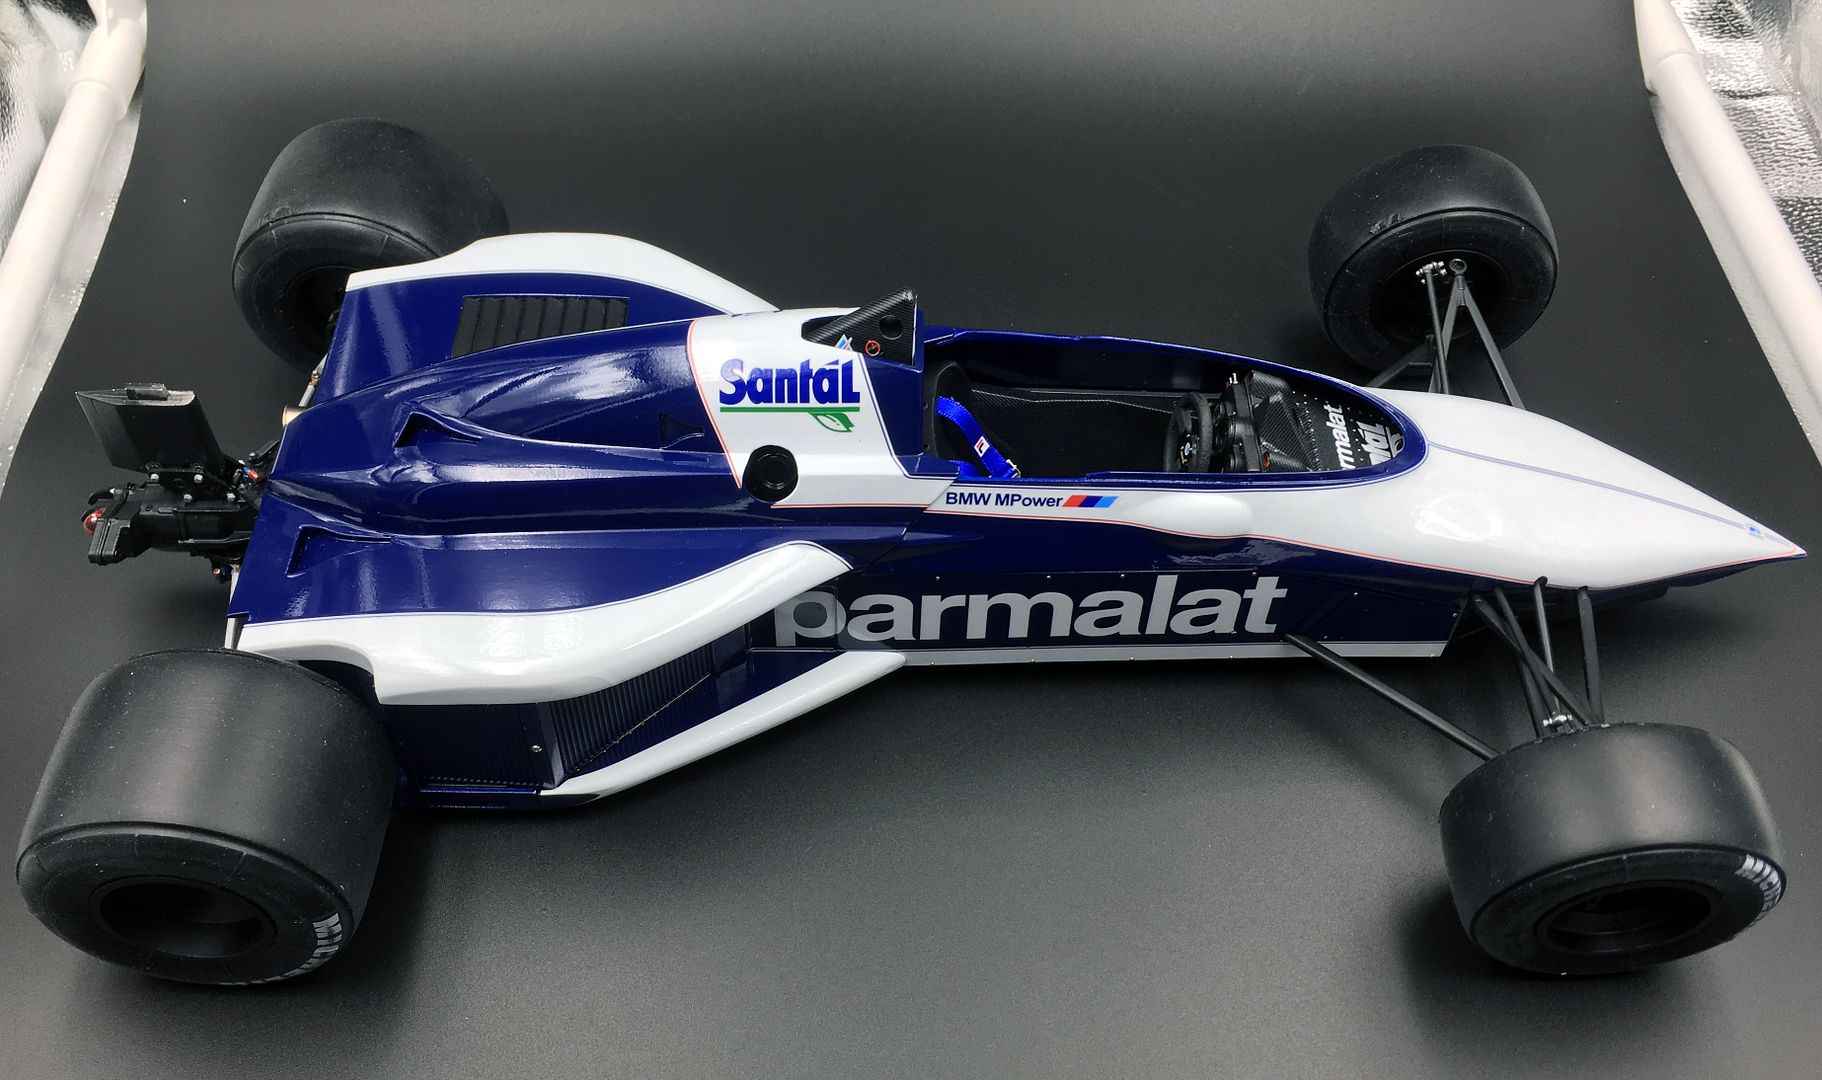
I'm going to have a lot of fun with this with photoshop when it is done


I'm going to have a lot of fun with this with photoshop when it is done
^^^^
Stunning!
I've been reading this thread from day one, it is a fantastic display of skill and detailing, it really is truly beautiful to behold when you see it photographed like this.
Fantastic work.
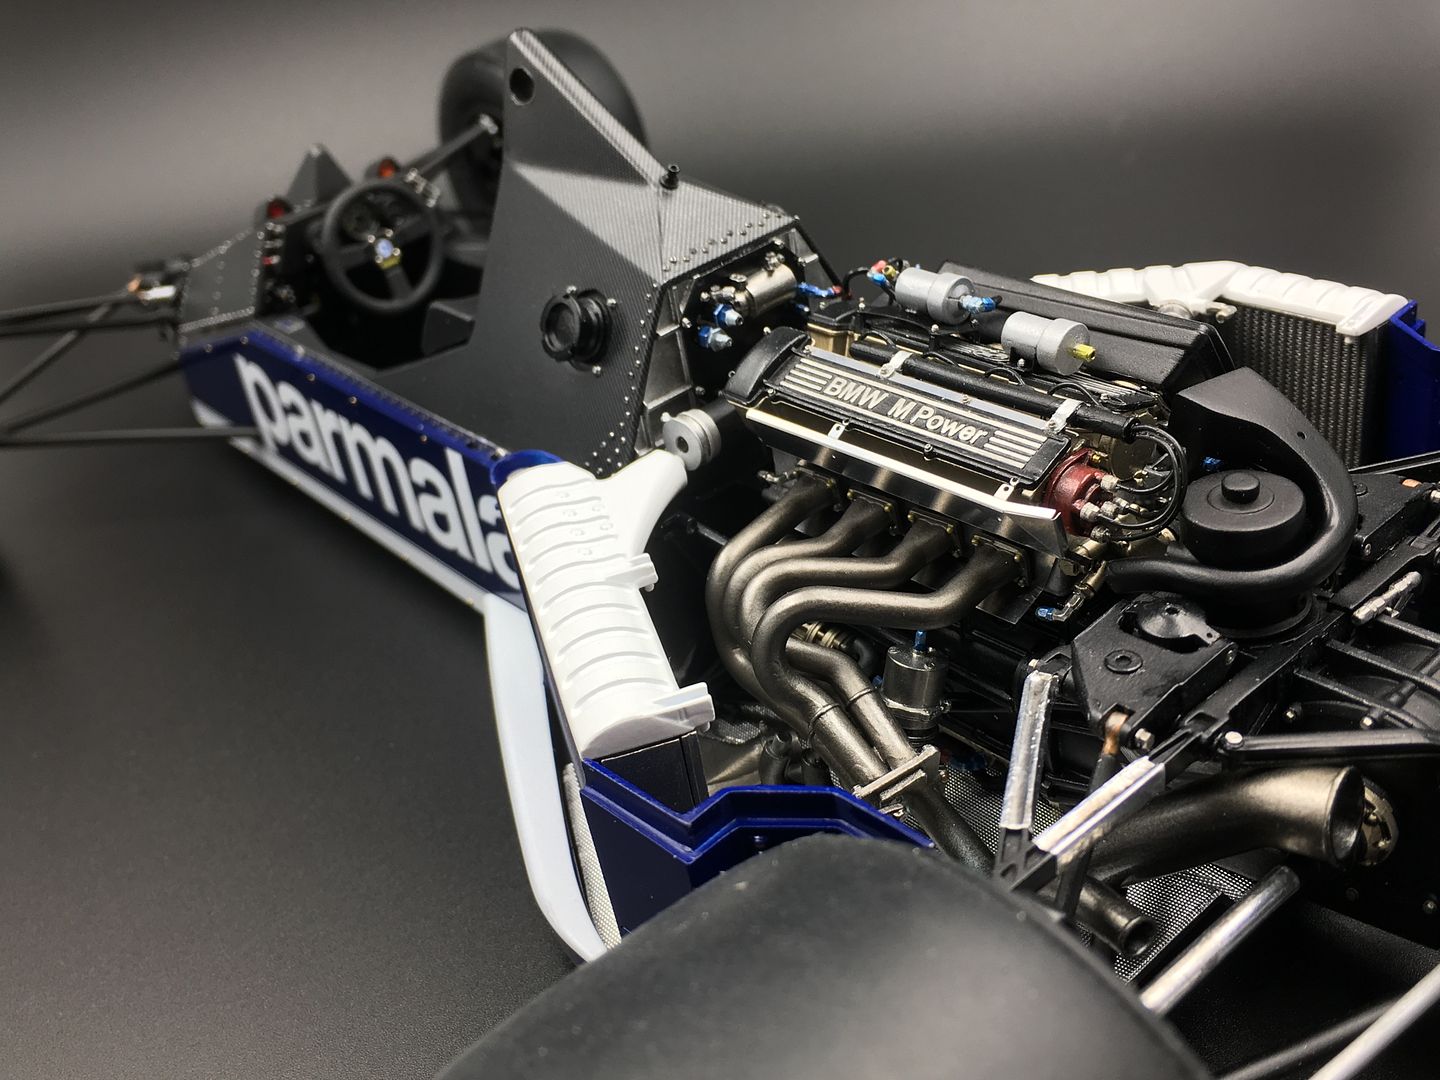
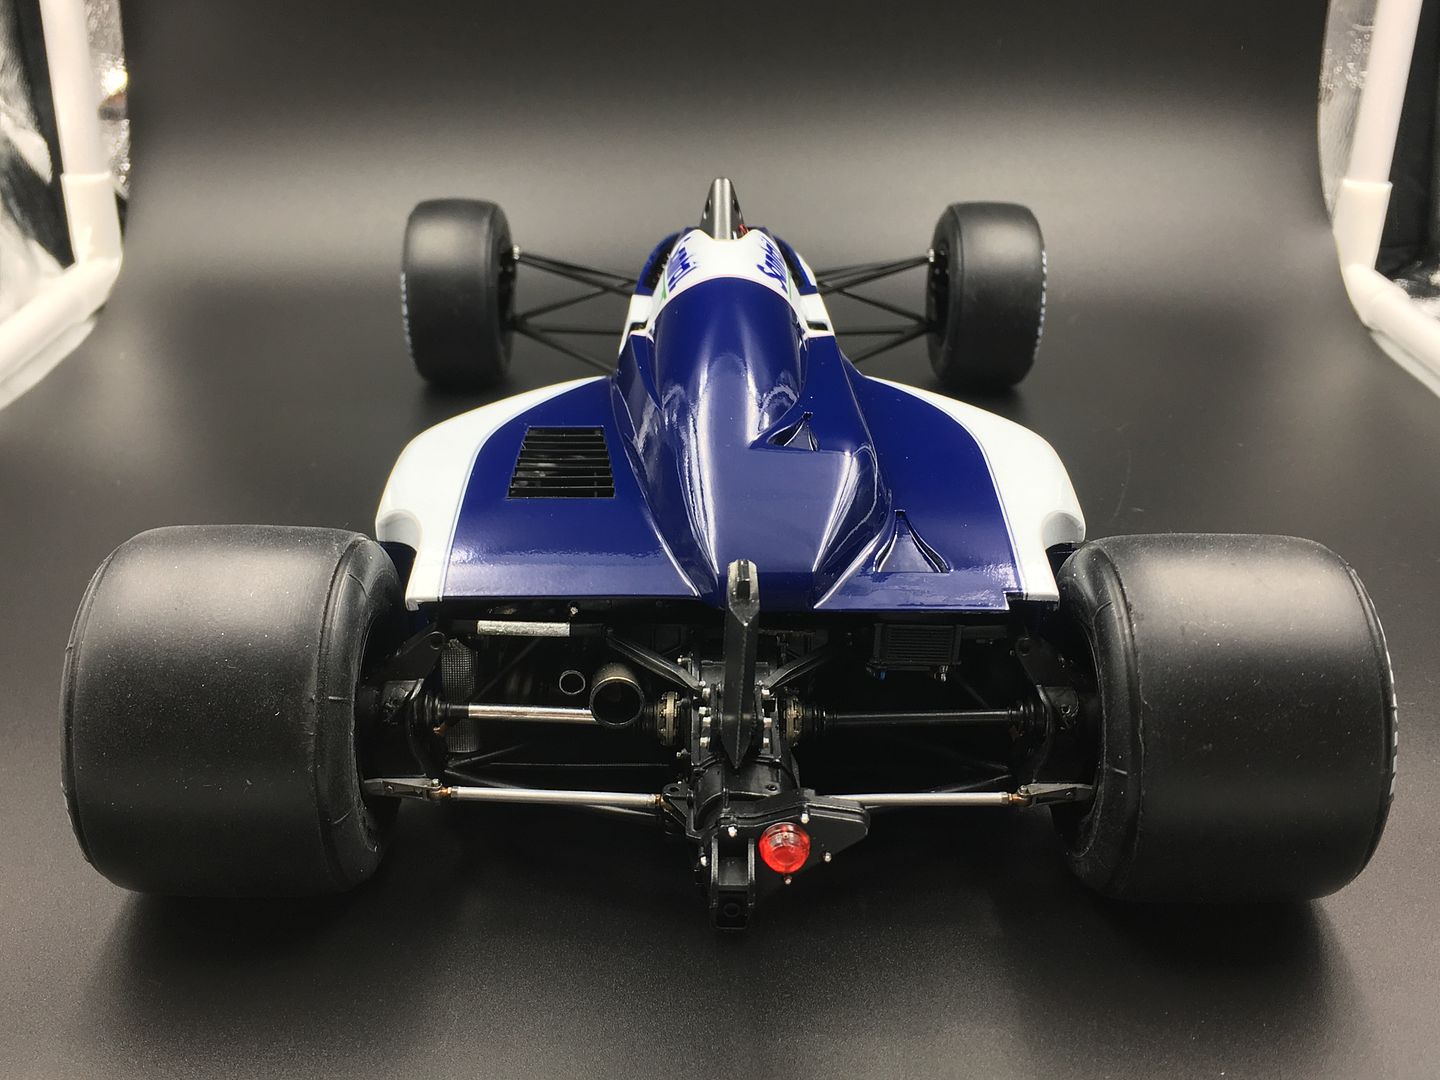
The only parts that trigger my OCD were the slack belts around the pulleys which are now completely hidden up against the cockpit bulkhead, and the red lamp lens on the rear.
Stunning!
I've been reading this thread from day one, it is a fantastic display of skill and detailing, it really is truly beautiful to behold when you see it photographed like this.
Fantastic work.
The only parts that trigger my OCD were the slack belts around the pulleys which are now completely hidden up against the cockpit bulkhead, and the red lamp lens on the rear.
This is an awesome kit & I have nothing but admiration for the time, effort & patience you have put in so far.
Good to see you have gone with Patrese's car rather than Piquet's because he is a very unpleasant individual IMO.
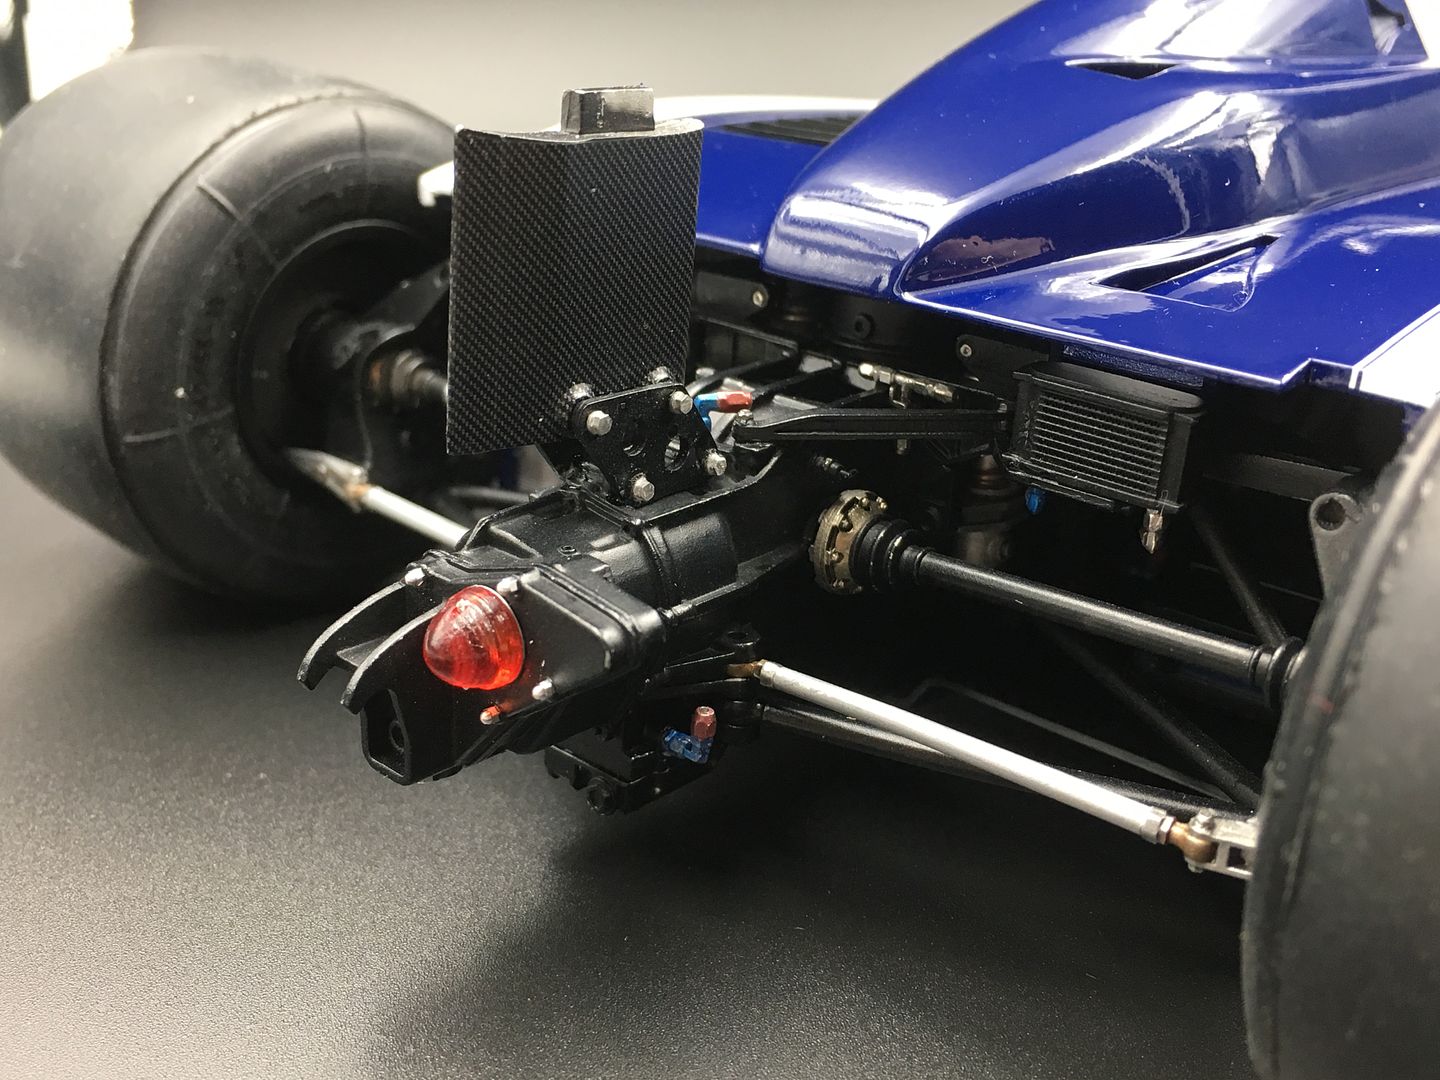
And as for the rear light - buggers up my OCD something terrible however it is 100% correct in its positioning. I checked images on Google just to be certain!!
However knowing how Gordon Murray wanted everything to be perfect, apart from the rear bonnet catch on the McLaren F1, I am somewhat surprised that he allowed the rear light to be offset as it was.
Good to see you have gone with Patrese's car rather than Piquet's because he is a very unpleasant individual IMO.
And as for the rear light - buggers up my OCD something terrible however it is 100% correct in its positioning. I checked images on Google just to be certain!!
However knowing how Gordon Murray wanted everything to be perfect, apart from the rear bonnet catch on the McLaren F1, I am somewhat surprised that he allowed the rear light to be offset as it was.
caterhamnut said:
lol - belts were very very delicate - sort of 3d printed strip, rather than a rubber band, which would have tensioned nicely.
Understood, and I'm far from being skilled enough to criticise you.caterhamnut said:
Now - what is it about the rear light that gets you!
It must be the kit's fault and not your's - it just looks like someone threw a bit of Lego onto the back of a fantastic model. It just seems so out of place.As a whole, it's a f**king stunning model construction - 11/10 - it's just berwilliant.
Thanks for sharing the build (and it isn't even fully finished yet!).
ETA:
The red light - it looks like a massive pimple on the nose of the best looking teenager at a school disco.
Maybe it is the photo/camera, could you 'grey' it down a bit? You know - just reduce the swelling a bit? Looks like a zit that needs popping

Edited by TheExcession on Thursday 27th October 22:58
 ks - I have!! 90 degrees out - will correct!!
Please don't be offended,  it was just about the only thing that stood out as being a bit 'too protruding'.
As I'm sure you are aware - everything else is just stunning. I'm half tempted to start a model of this detail with Little Ex - we've done some monster Lego builds together, they mainly last over a weekend, something like this model which would take us months to complete would be a massive step up.
it was just about the only thing that stood out as being a bit 'too protruding'.As I'm sure you are aware - everything else is just stunning. I'm half tempted to start a model of this detail with Little Ex - we've done some monster Lego builds together, they mainly last over a weekend, something like this model which would take us months to complete would be a massive step up.
oh, no idea! Tends to be a few hours in the evenings after work, but travel, having to tidy up and life gets in the way...
Ok -some more weekend work!
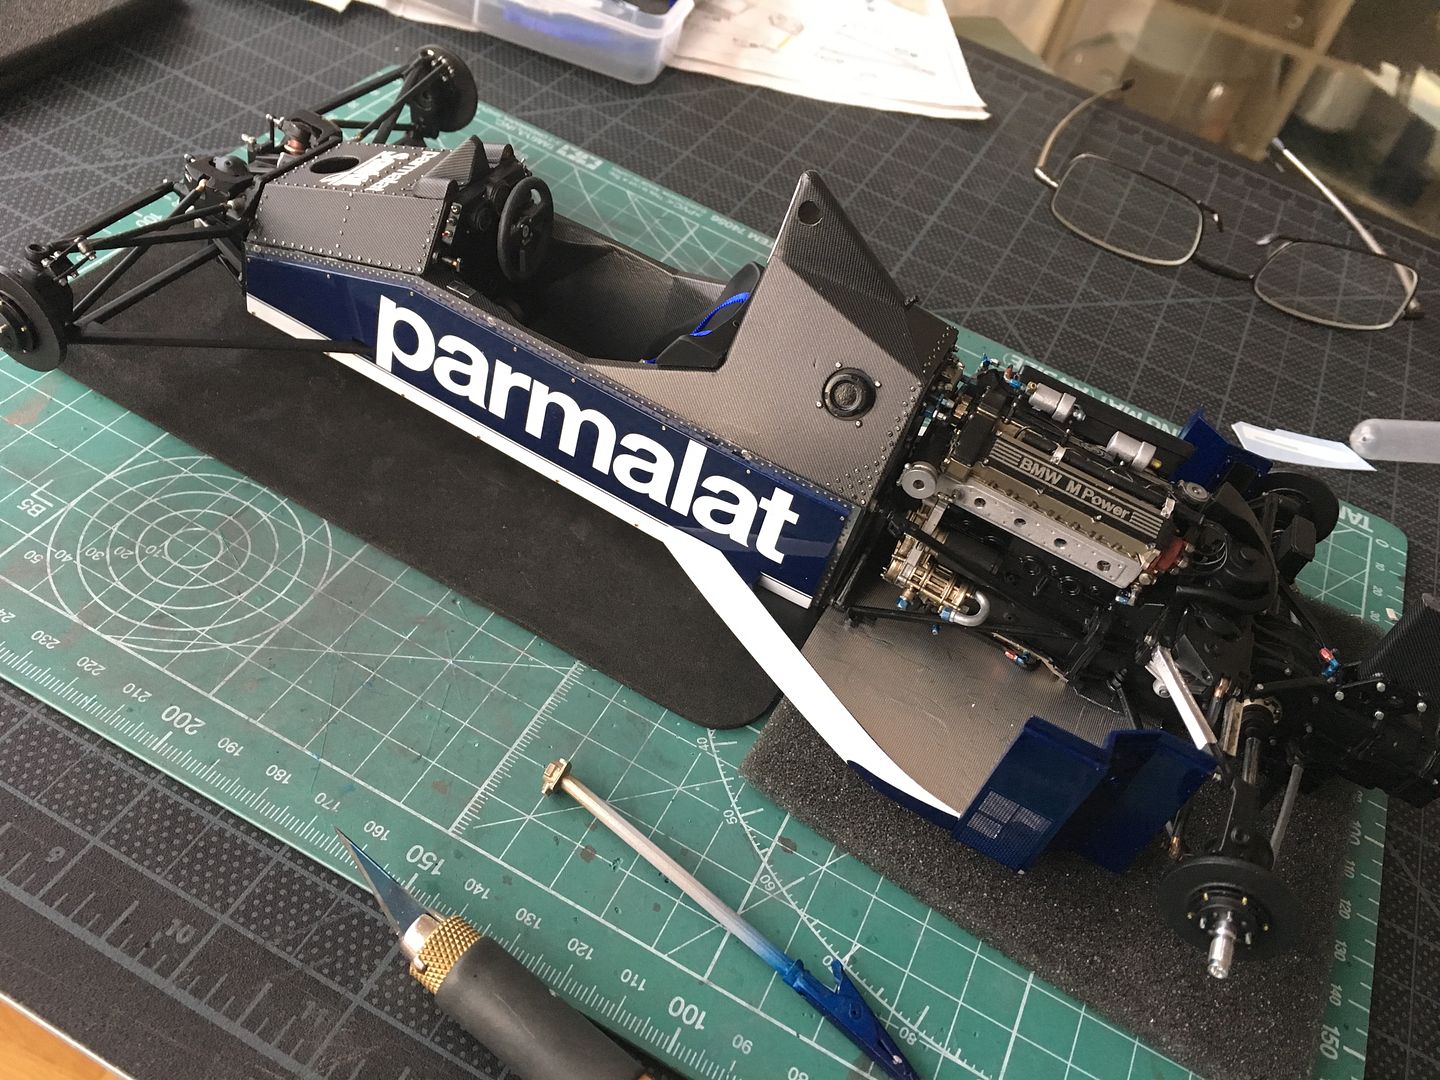
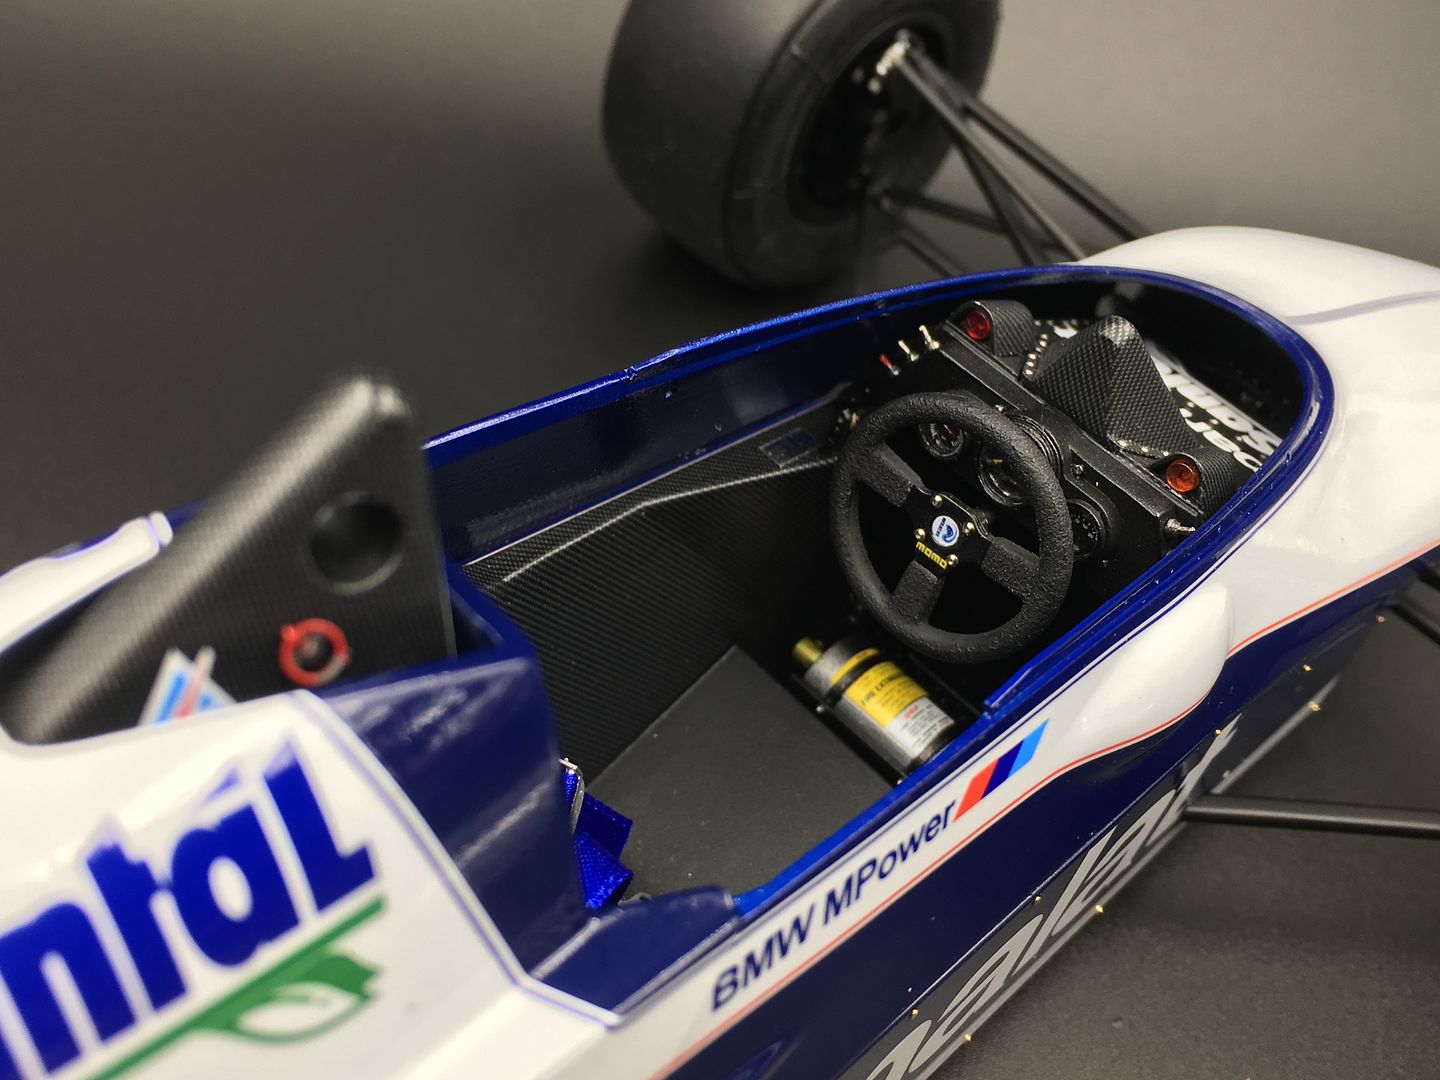
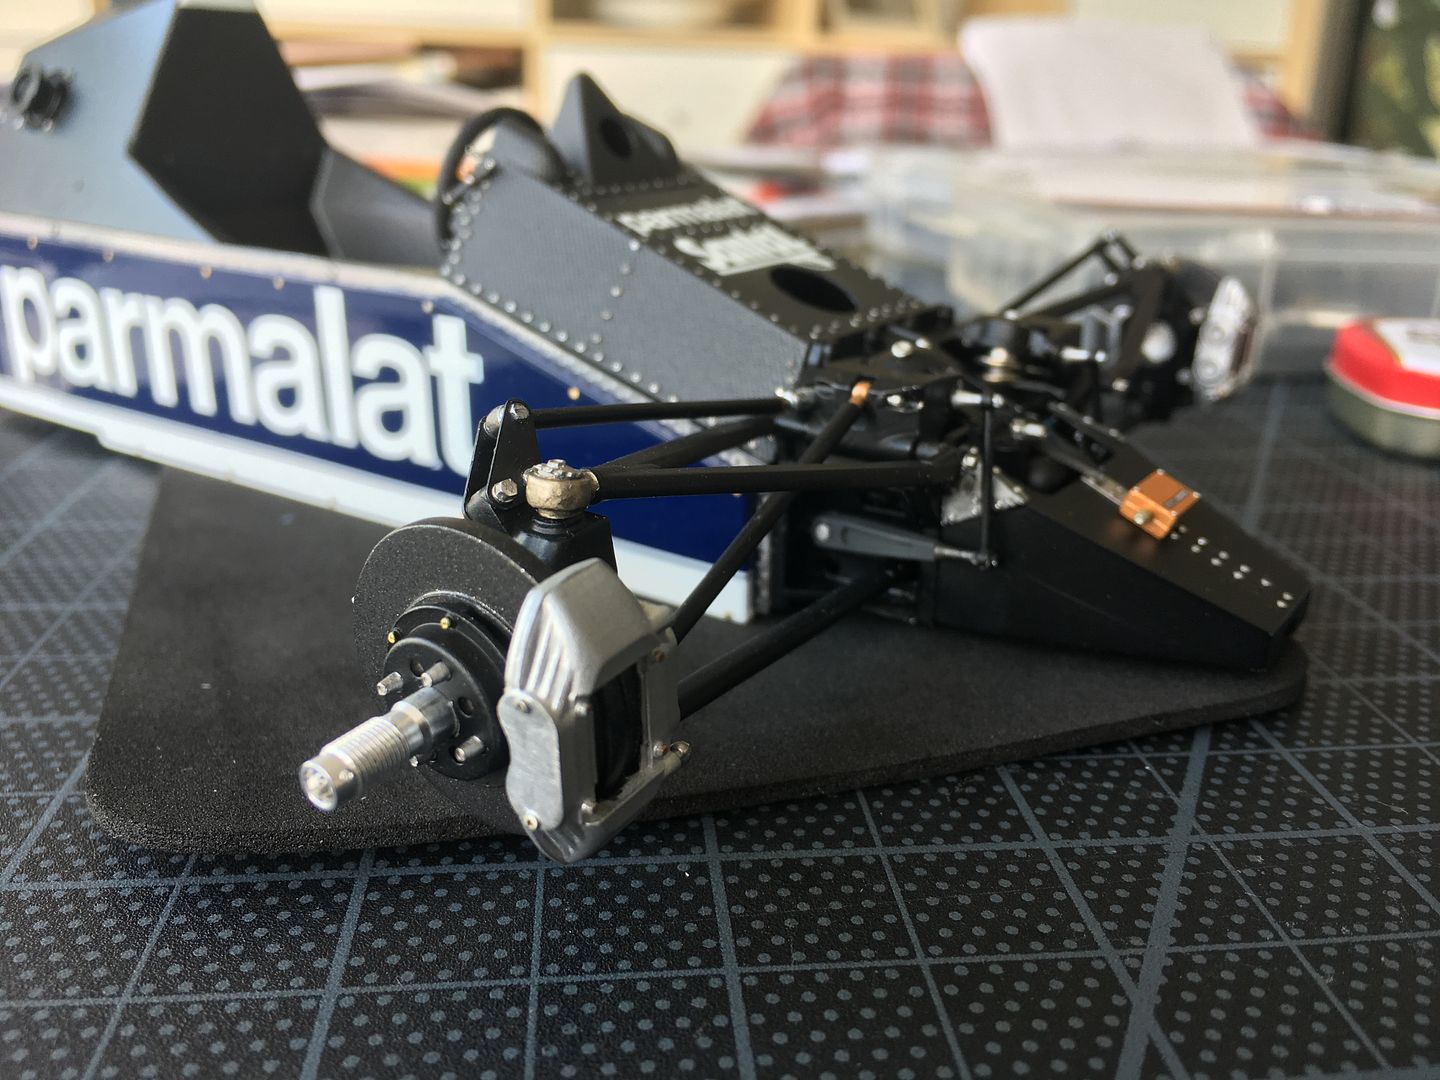
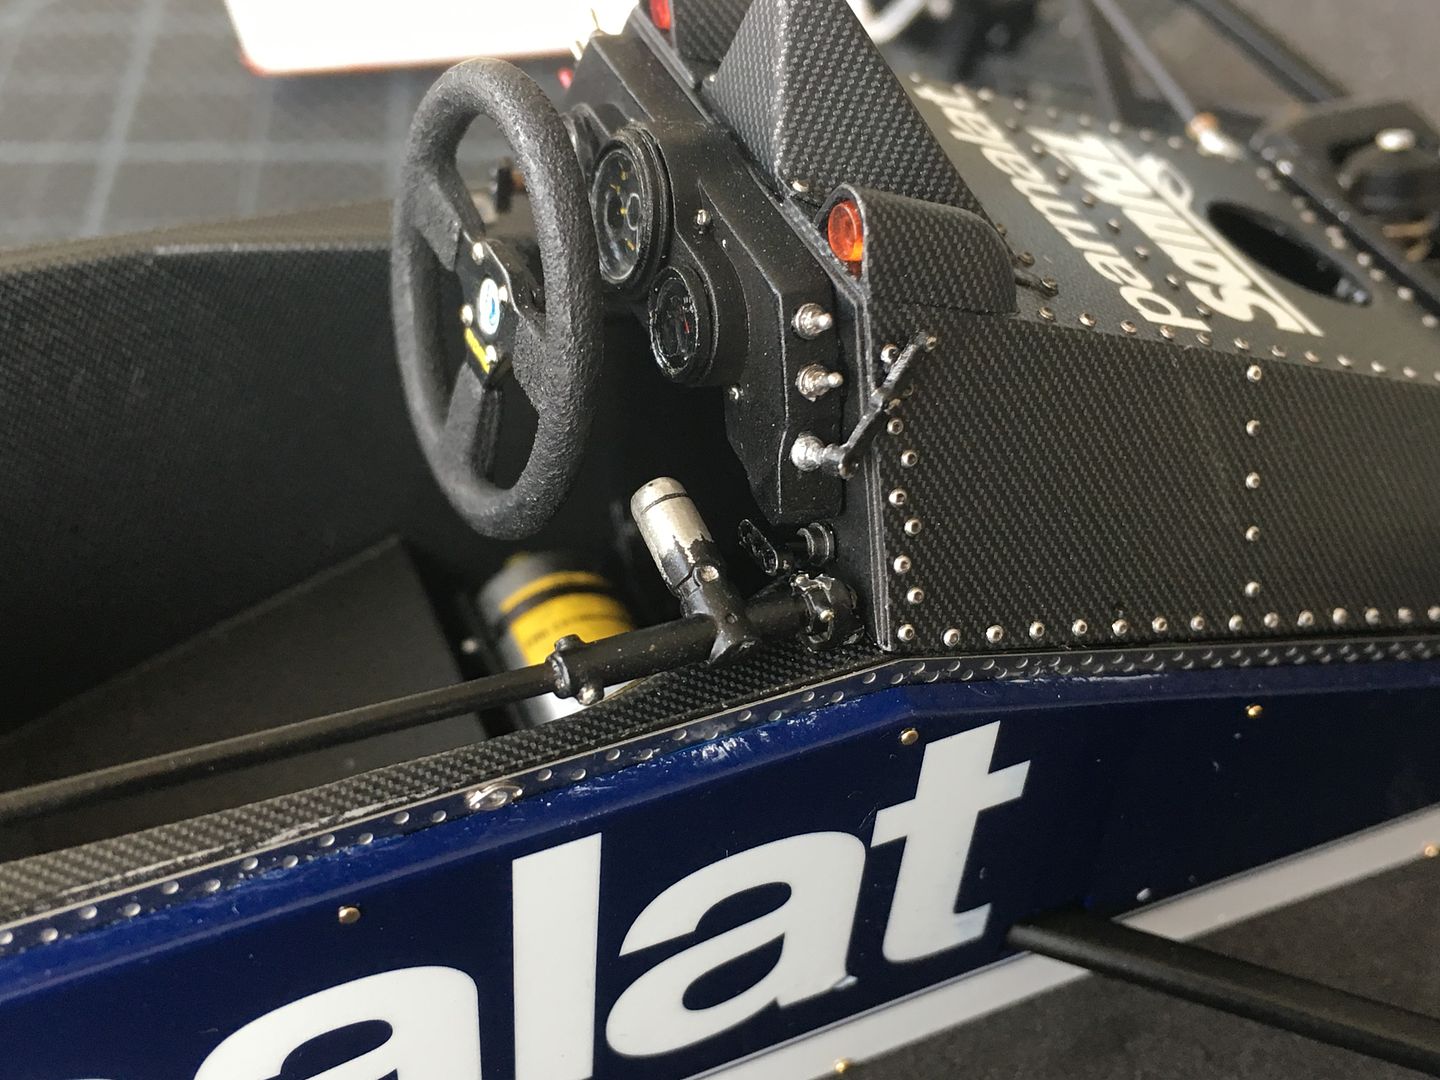
Finished the 'pedal box' area - and promptly covered it, never to be seen again!
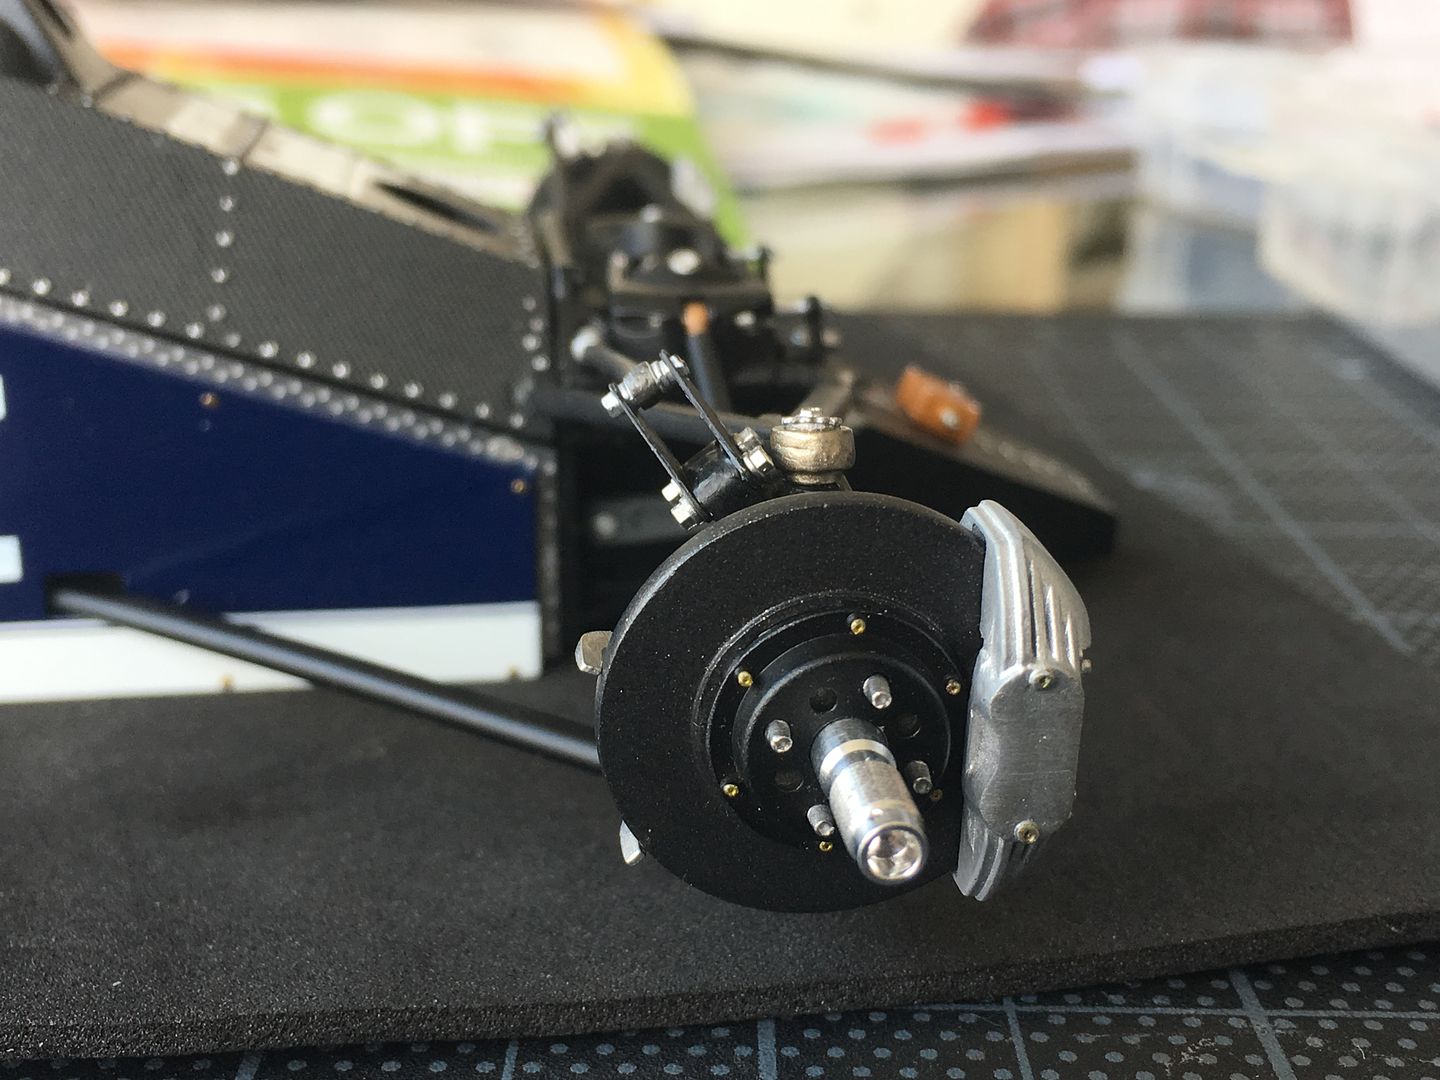
...also added the brakes, having first painted the pads with the same carbon look...
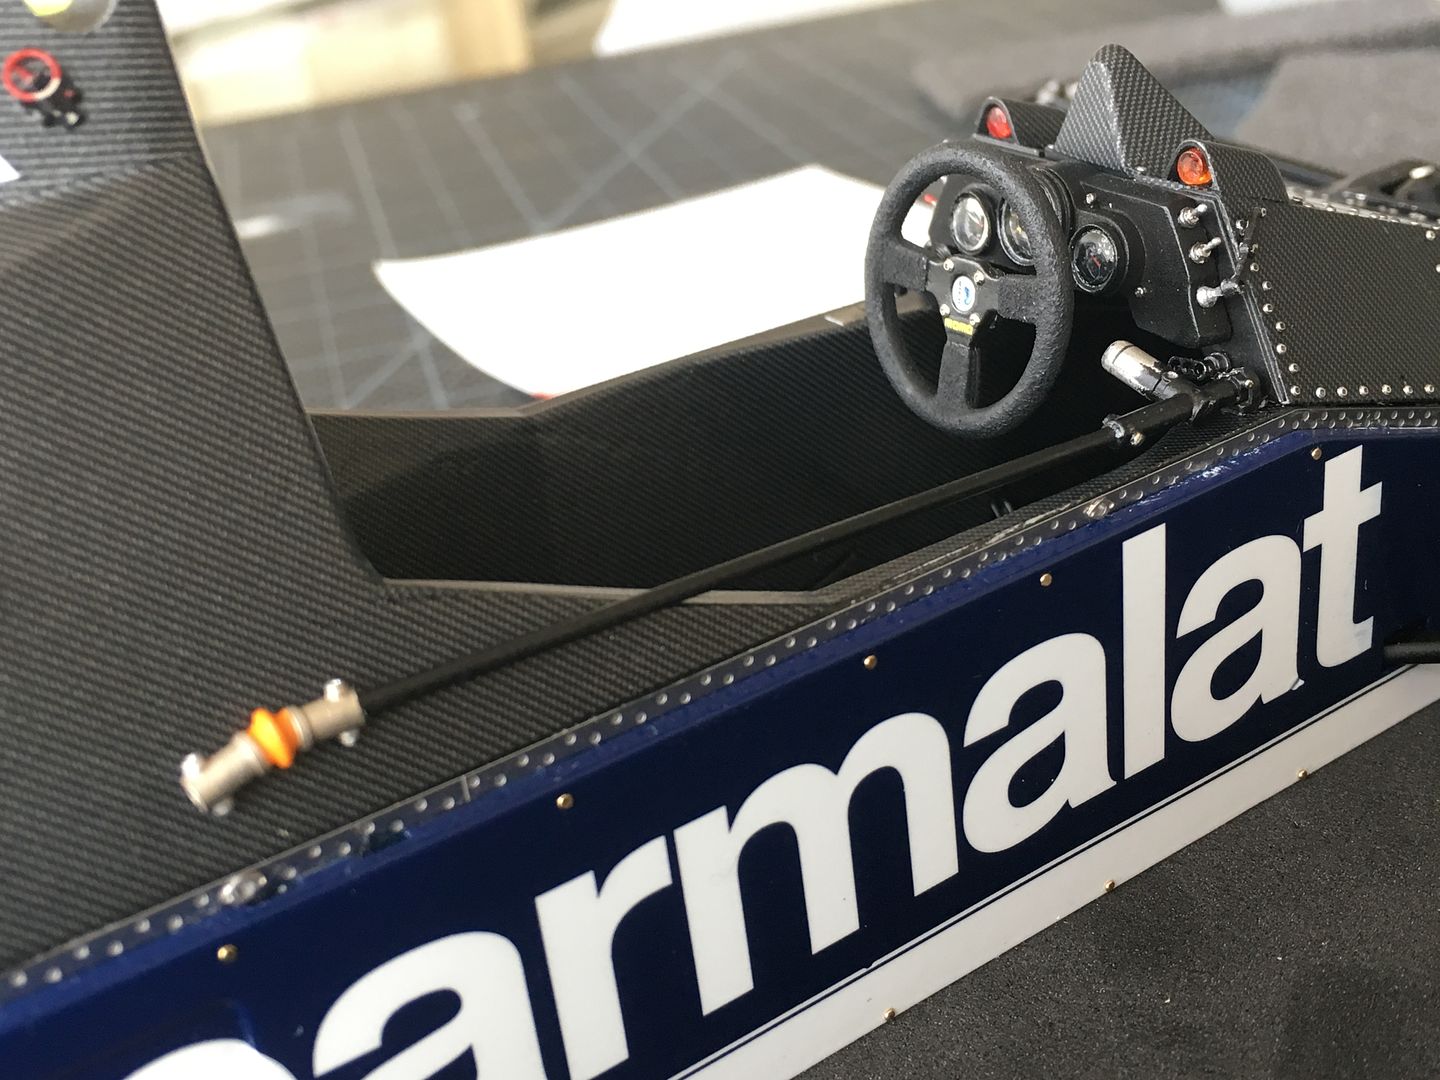
Gear linkage and gear shift. The kit says silver, the photos show it as black, with a hand-worn grip that I created by sanding the paint back to the metal finish, and then using flat clear...
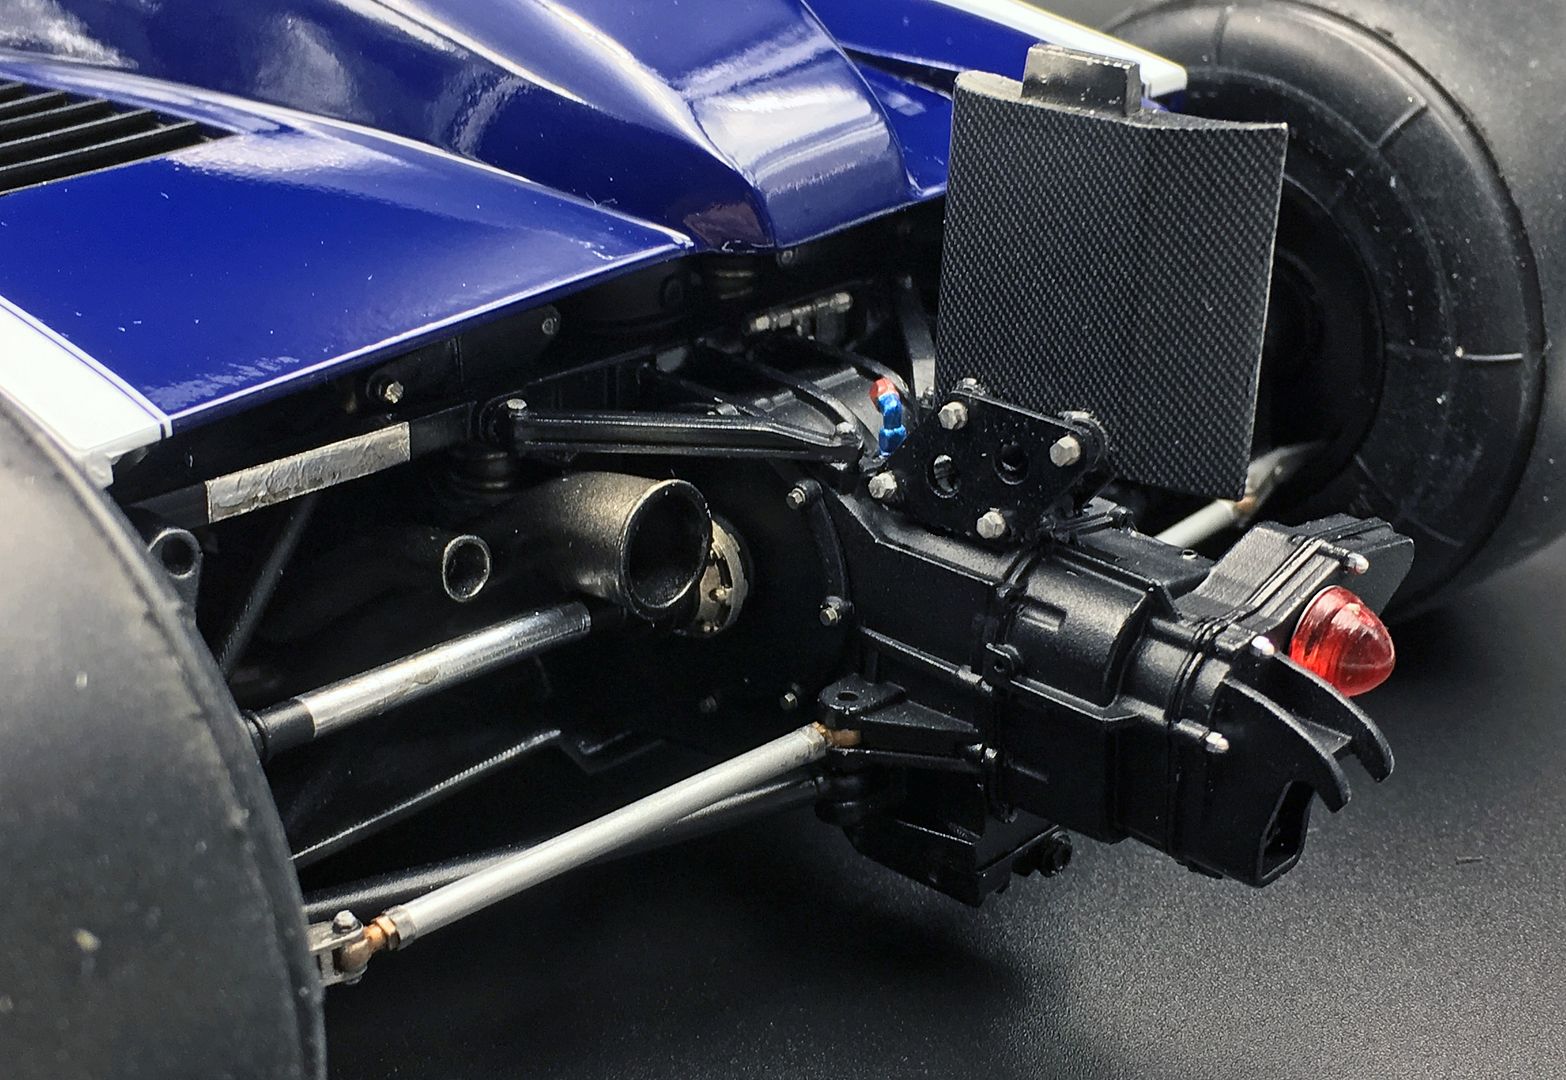
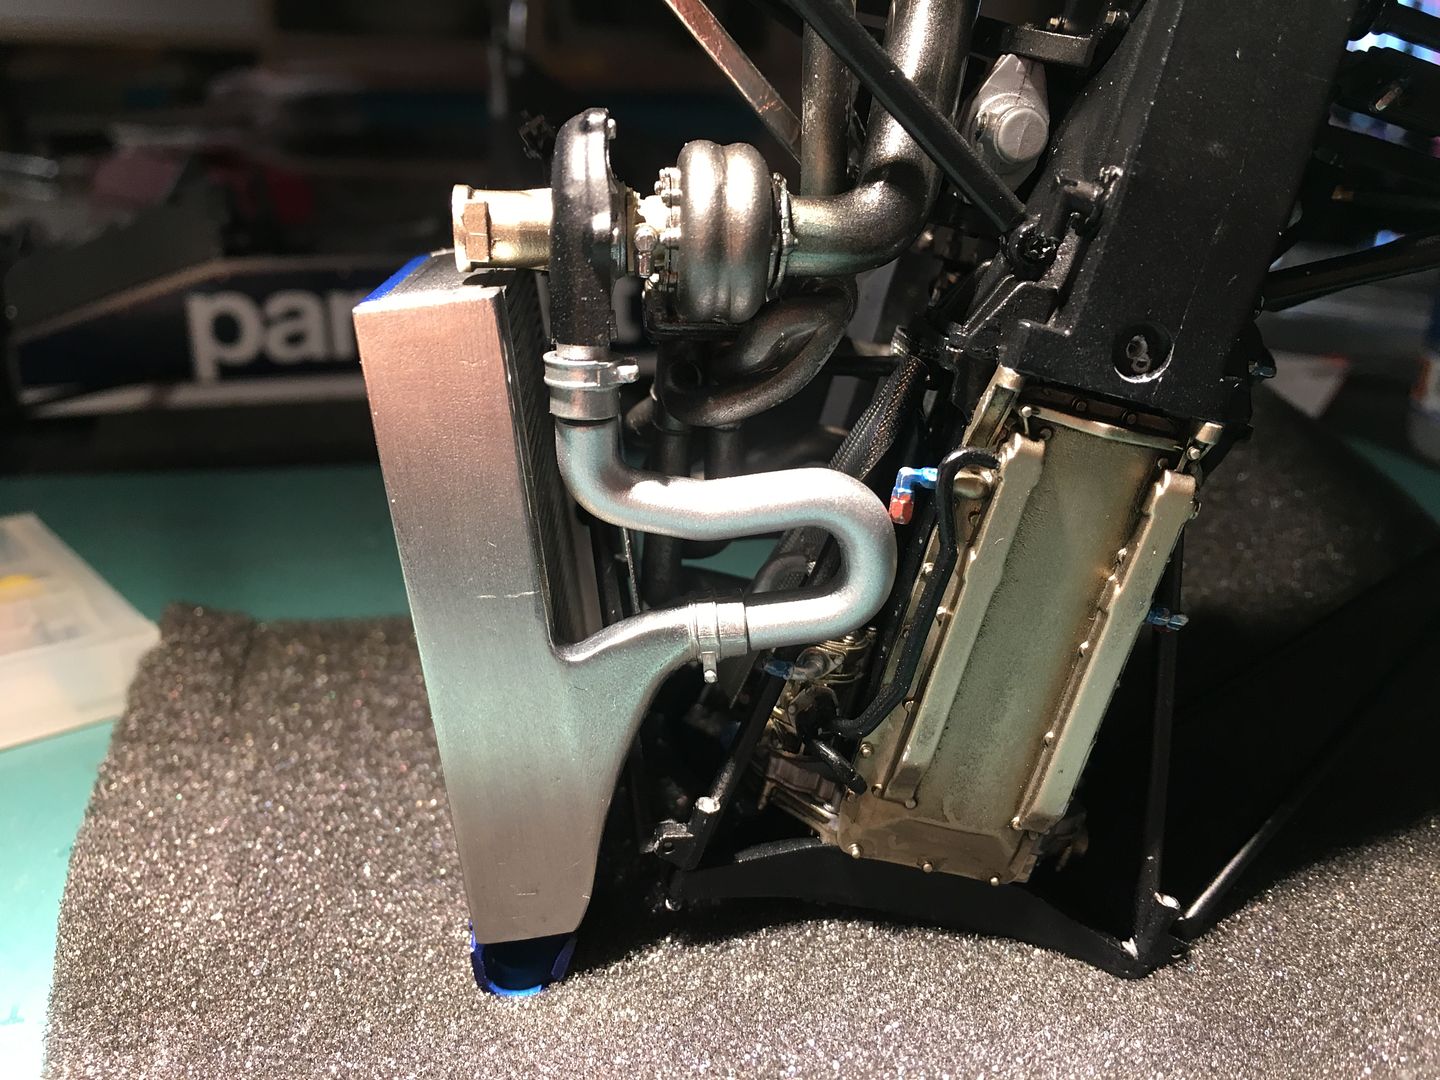
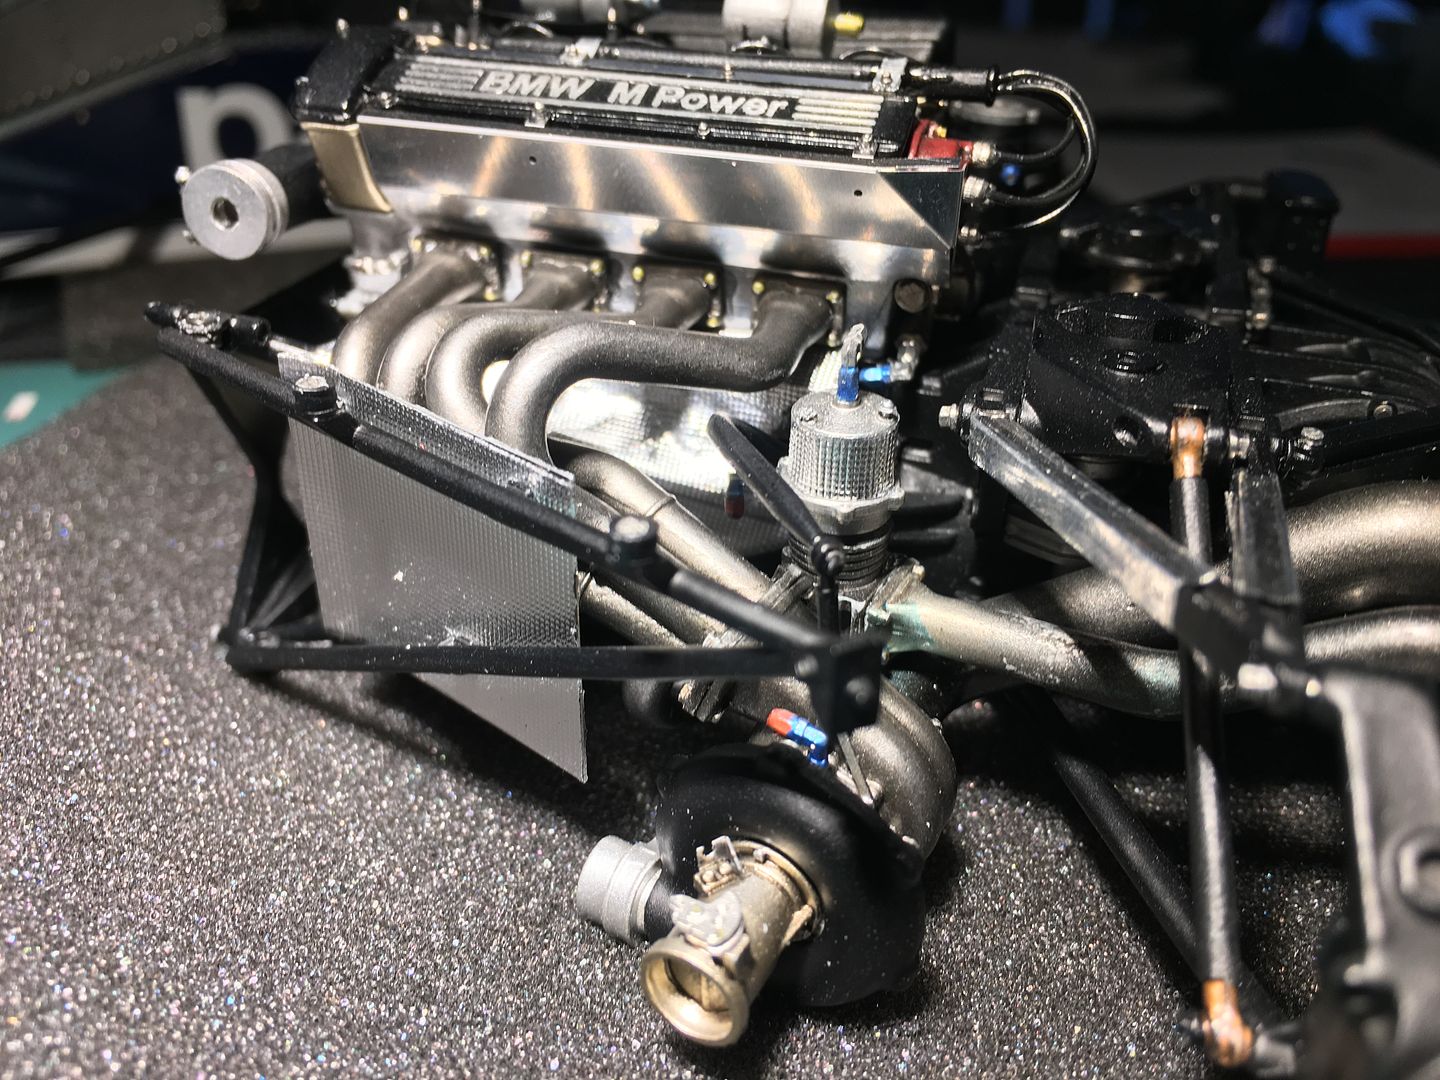
Now MFH had sent me the part I lost, I could carry on with the turbo/exhaust area....
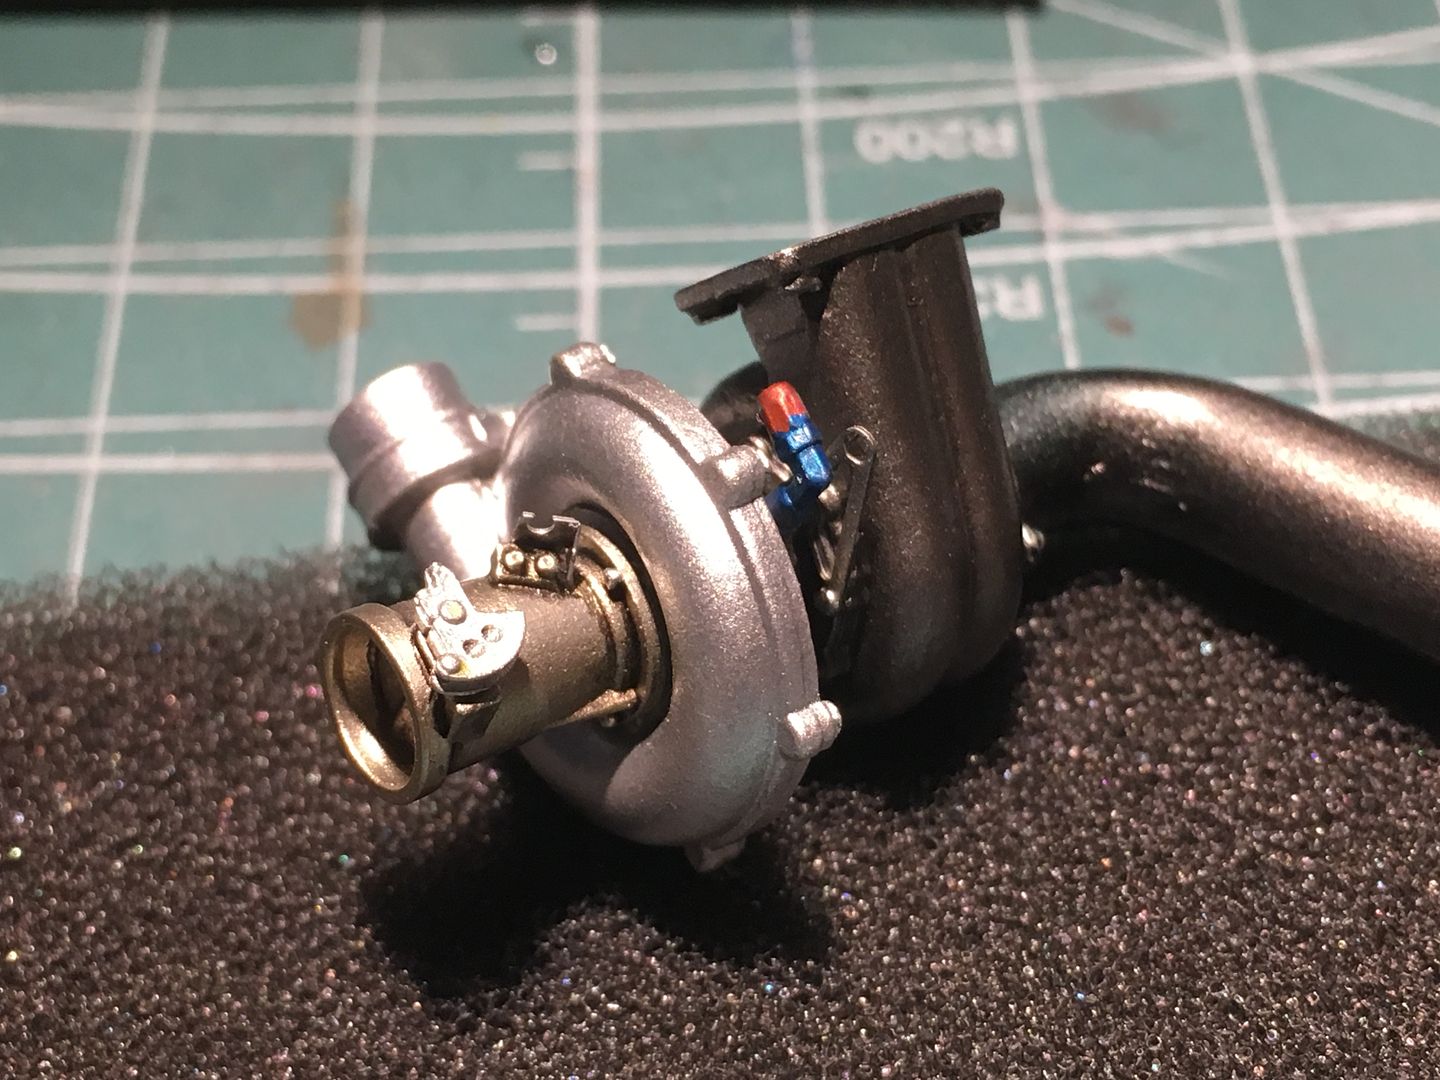
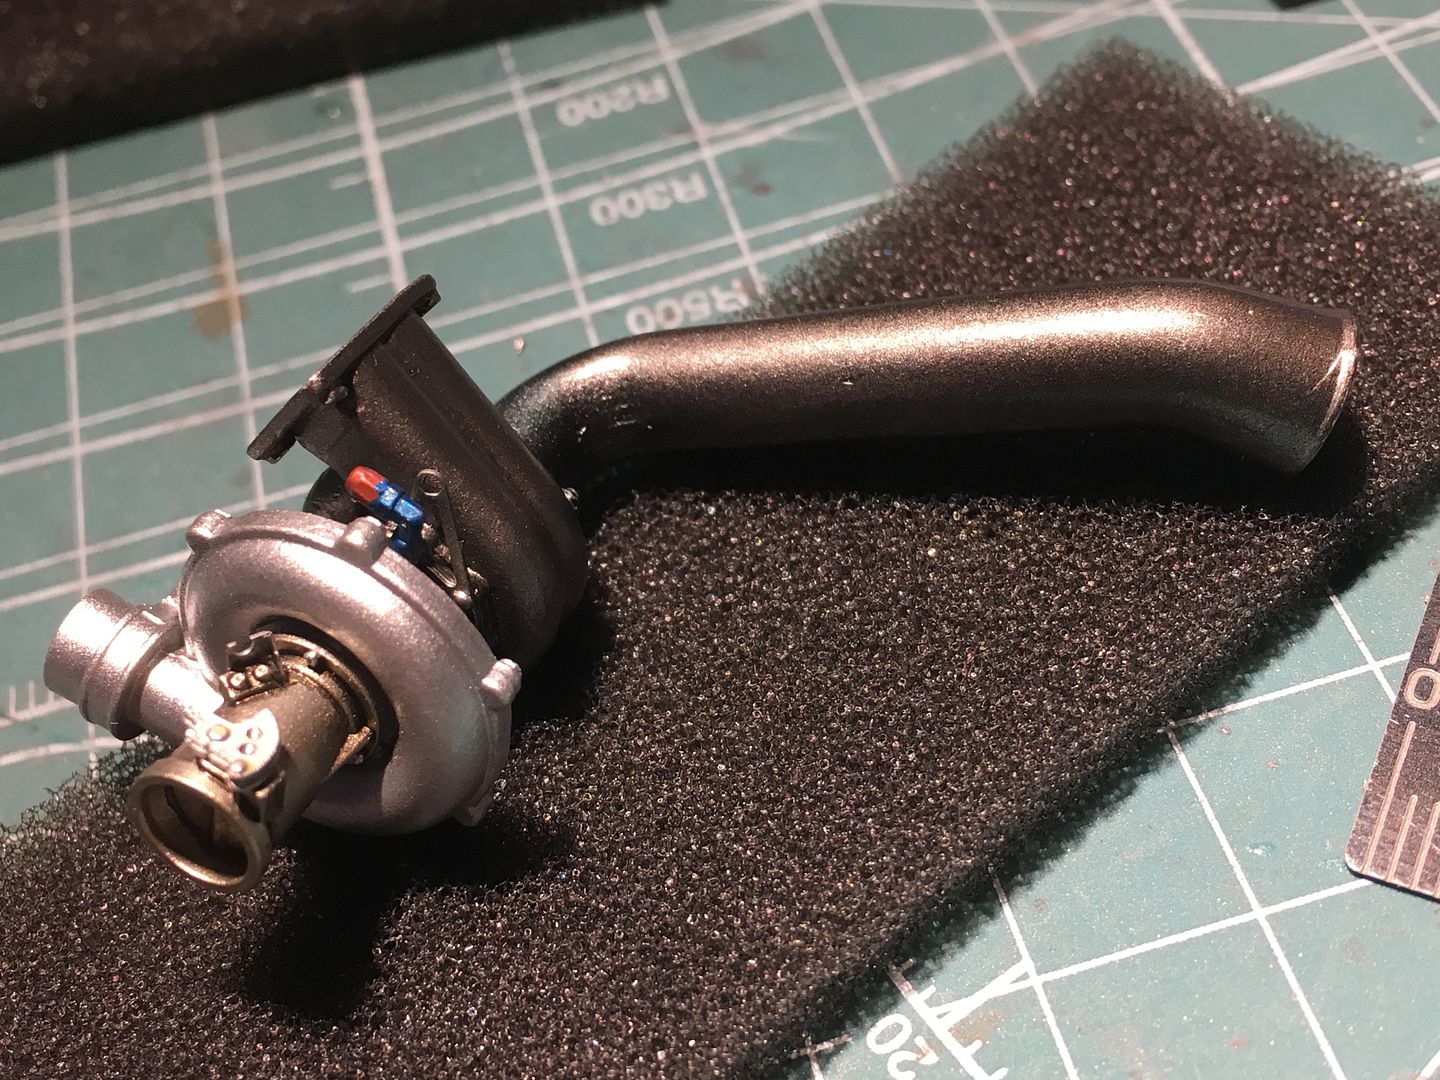
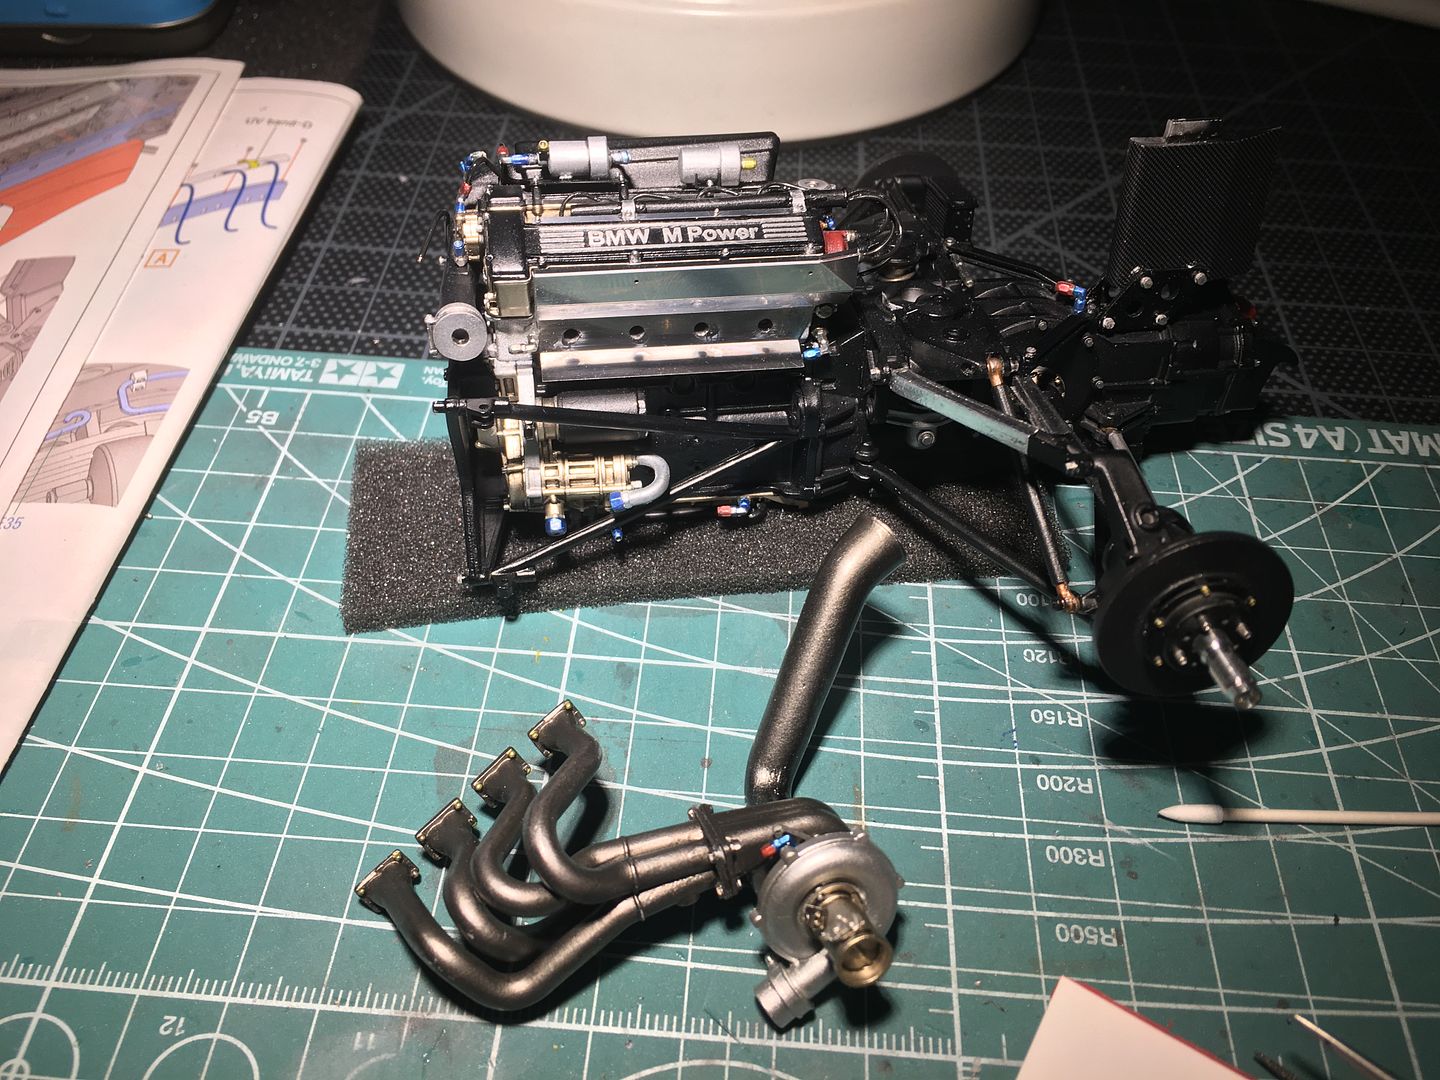
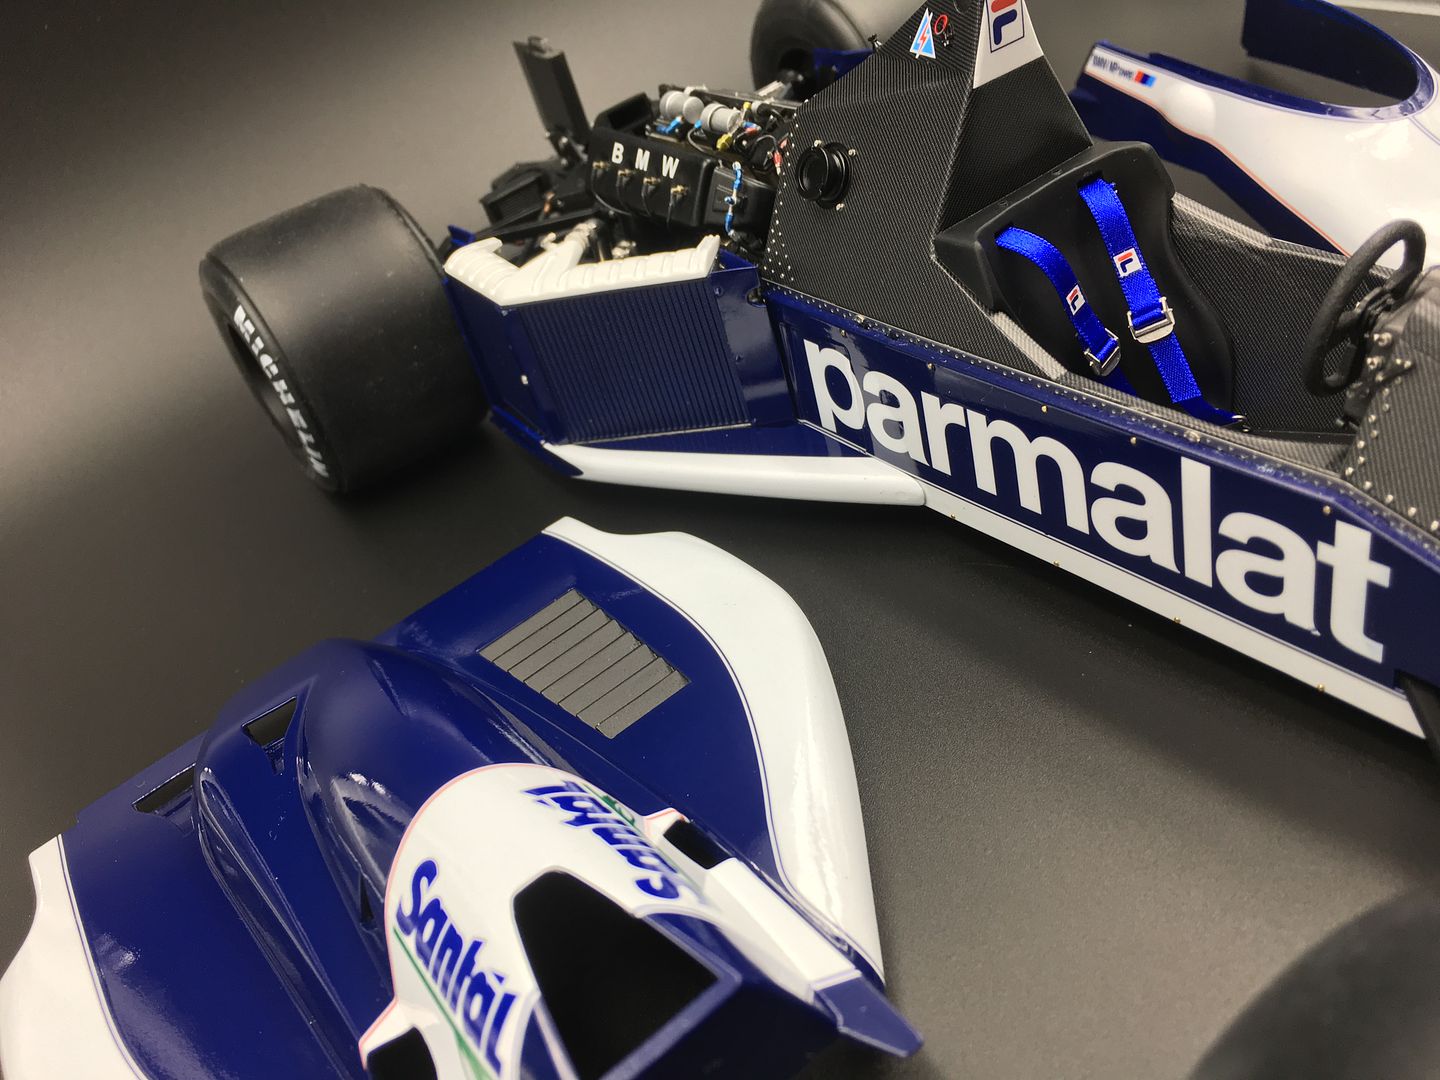
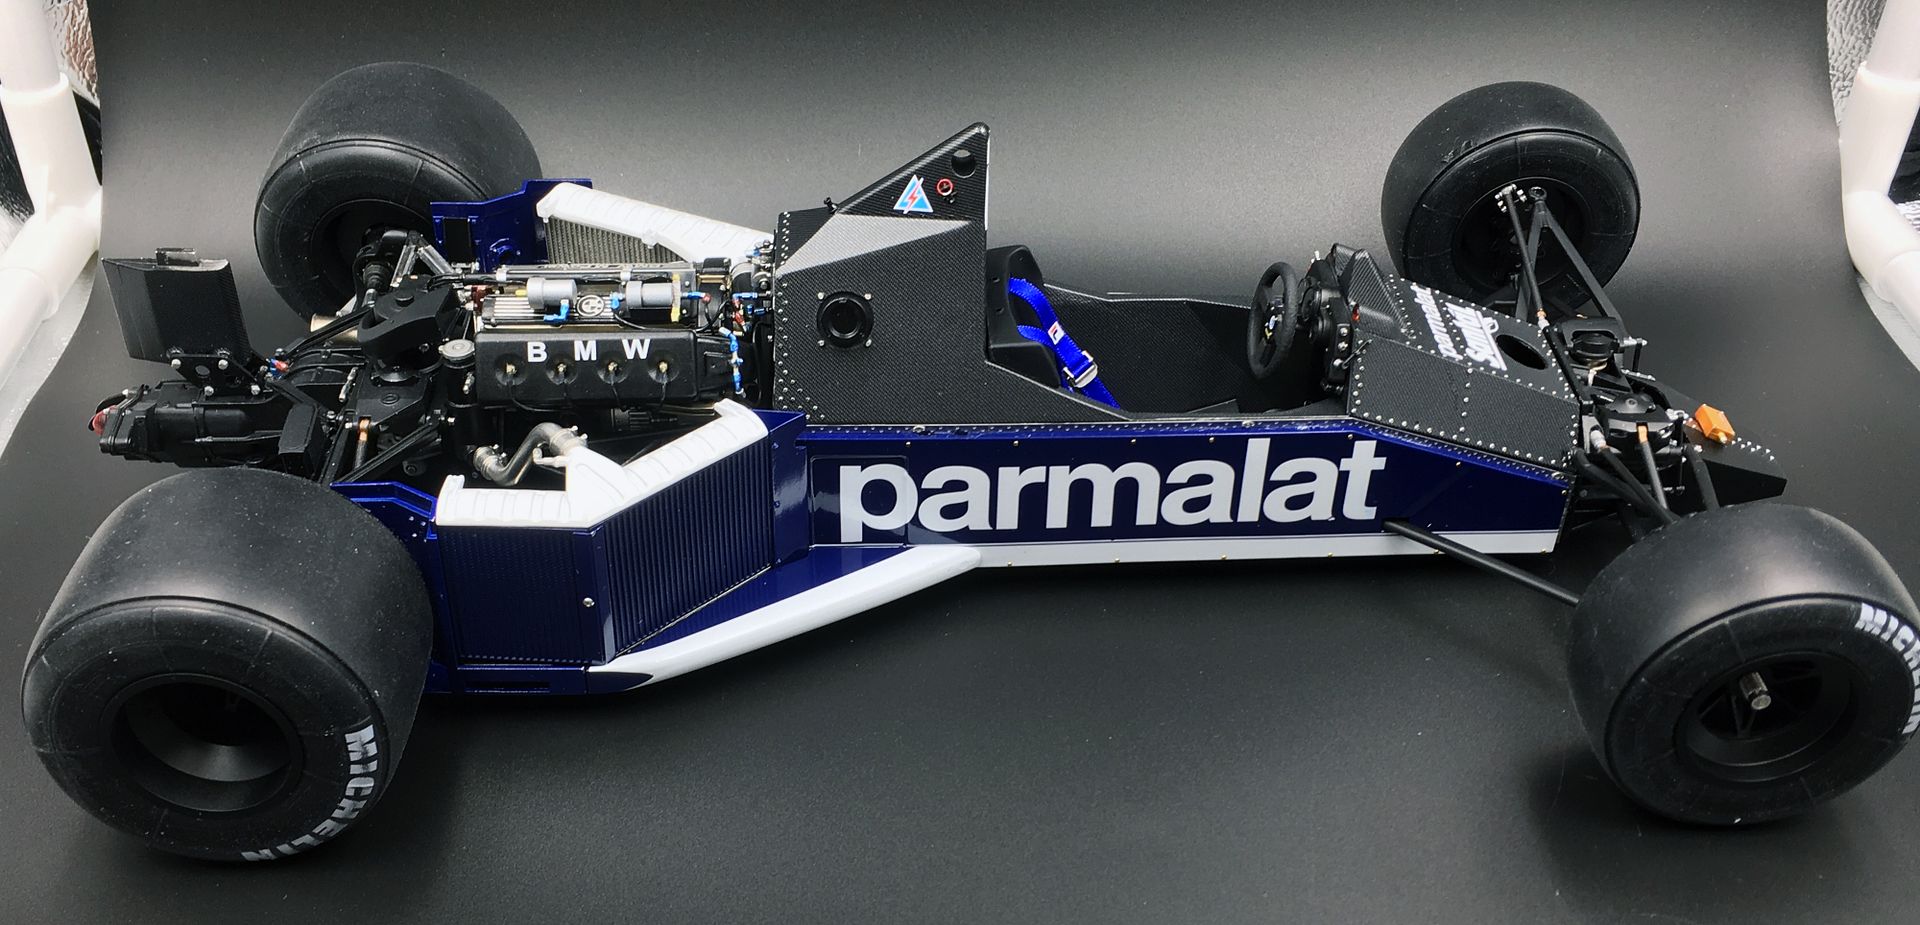
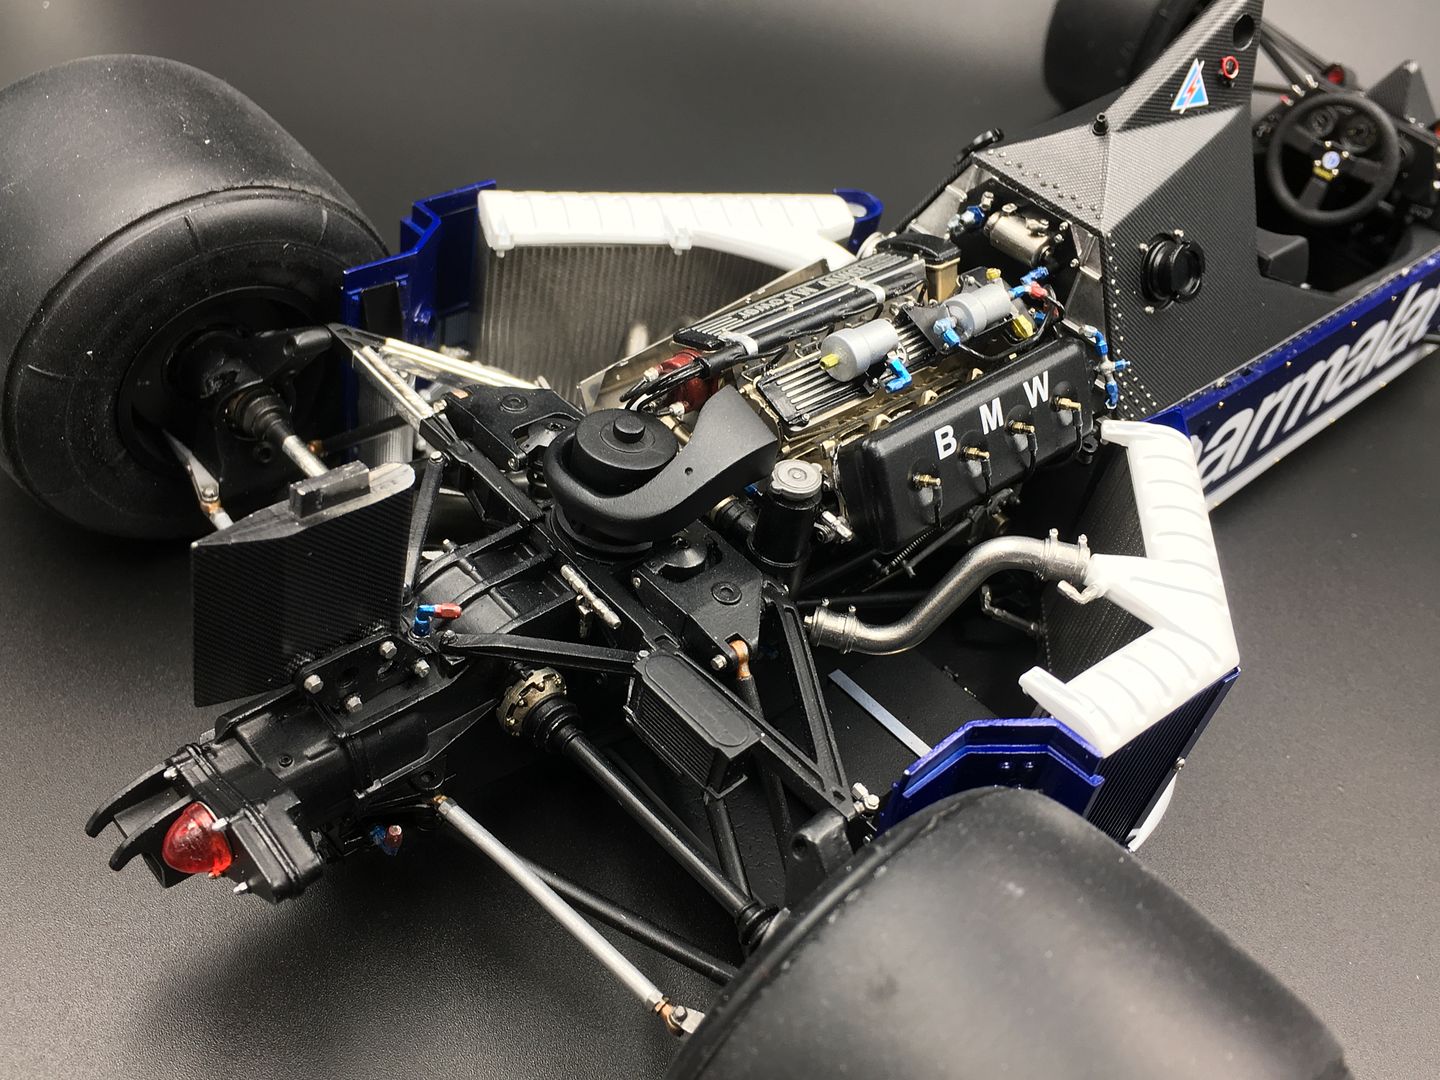
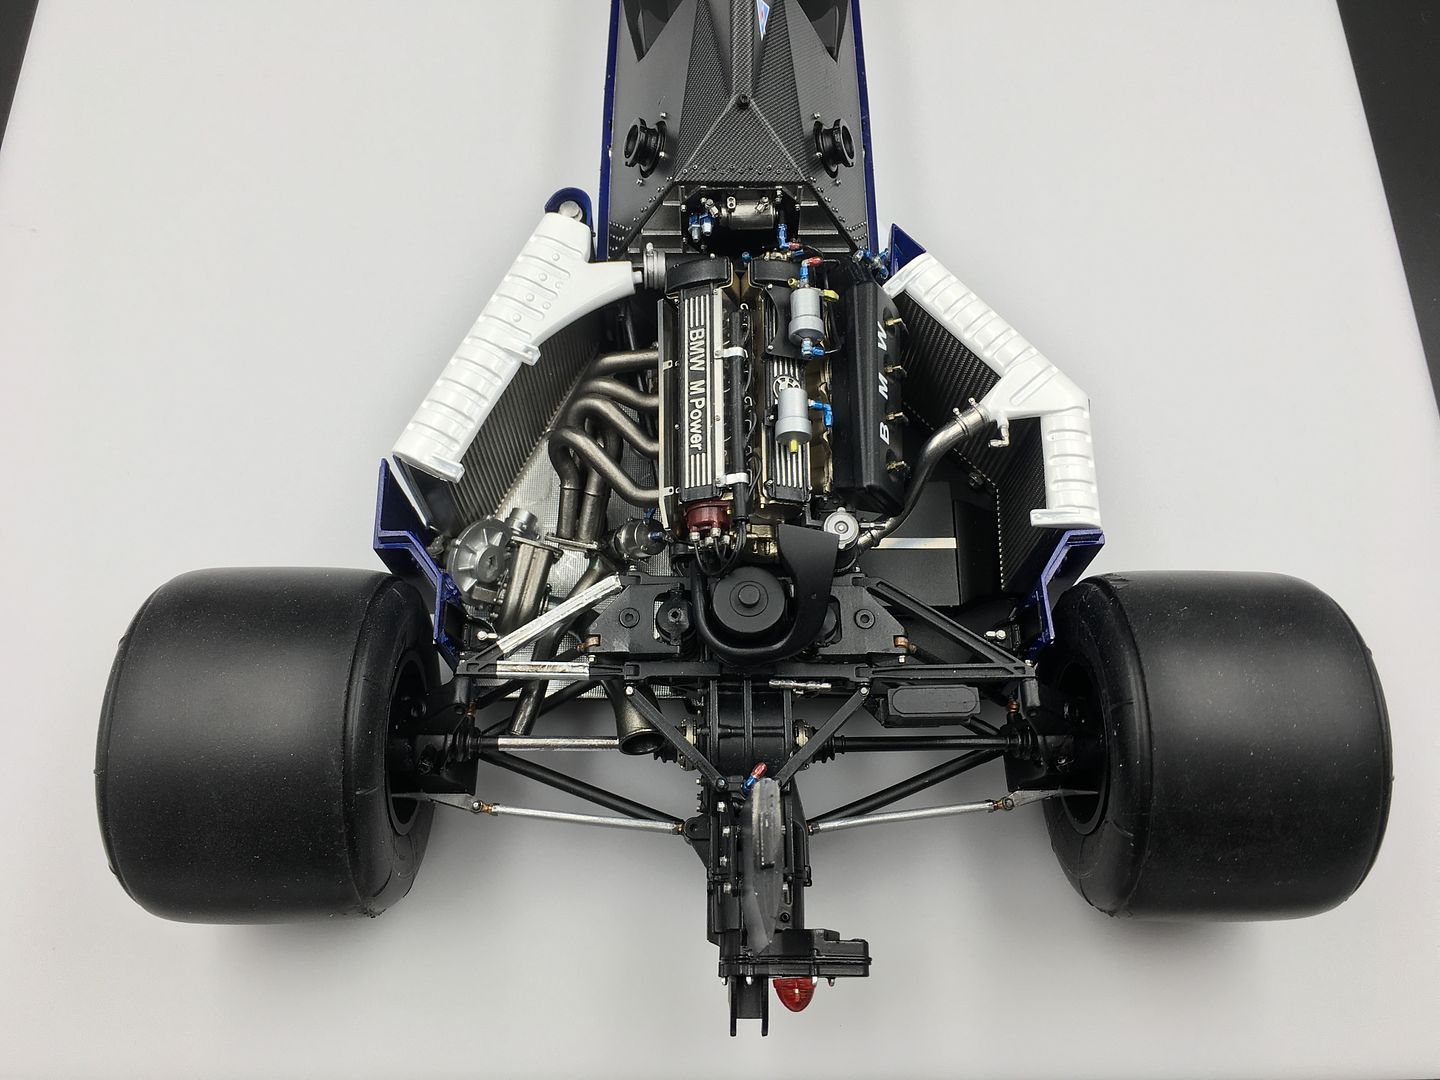
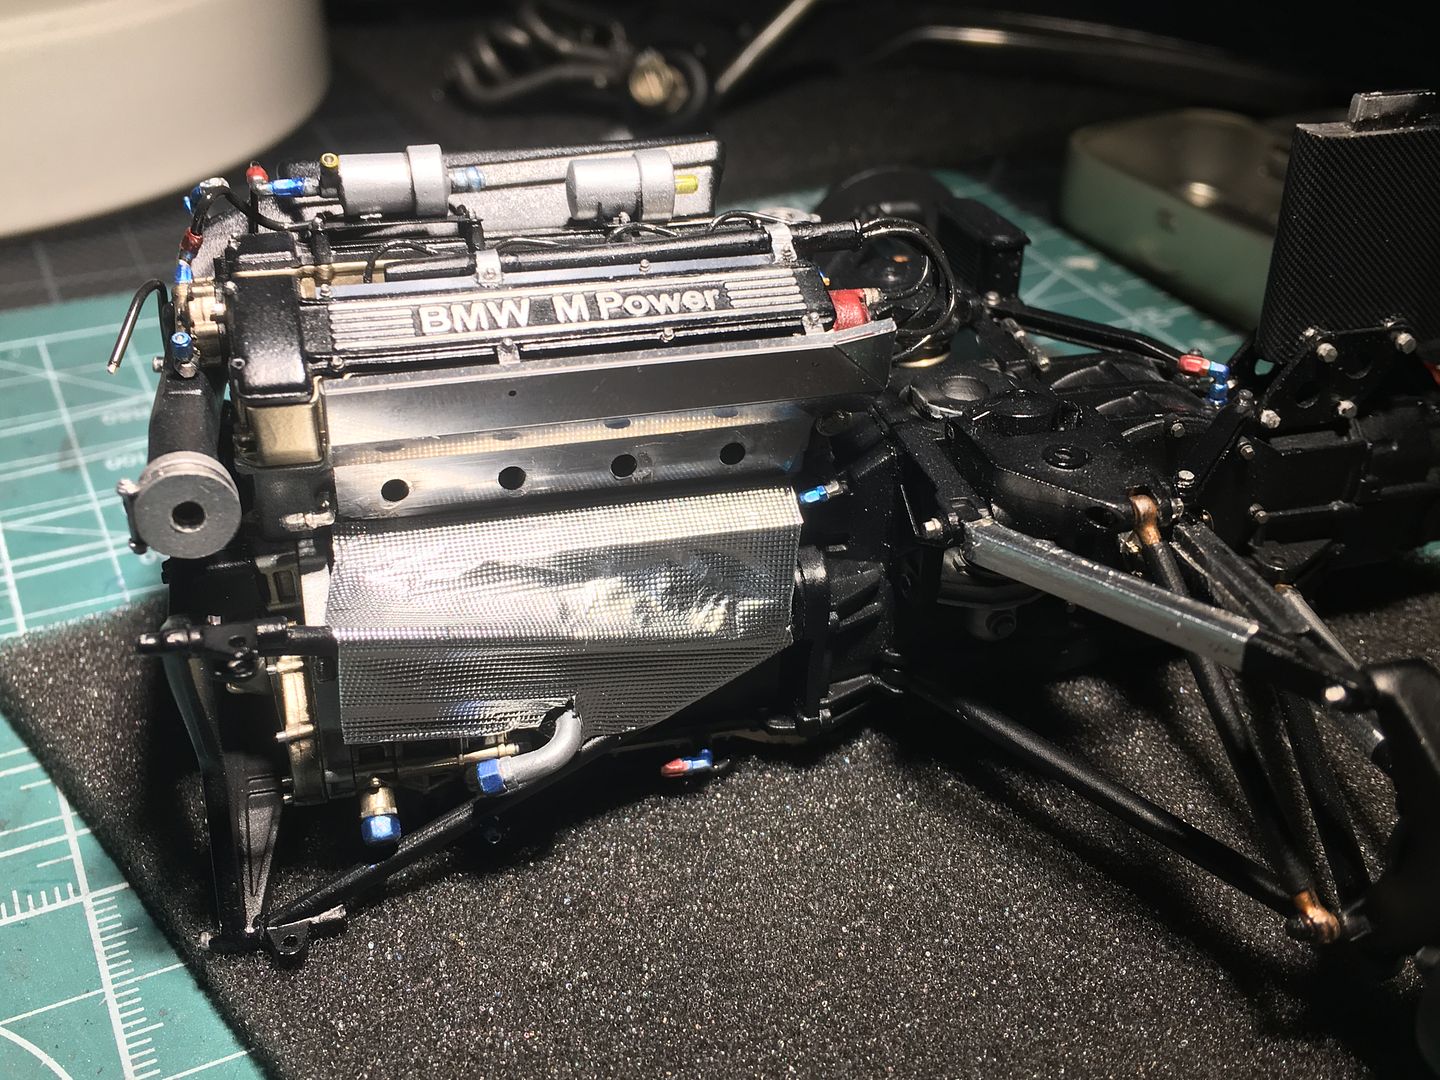
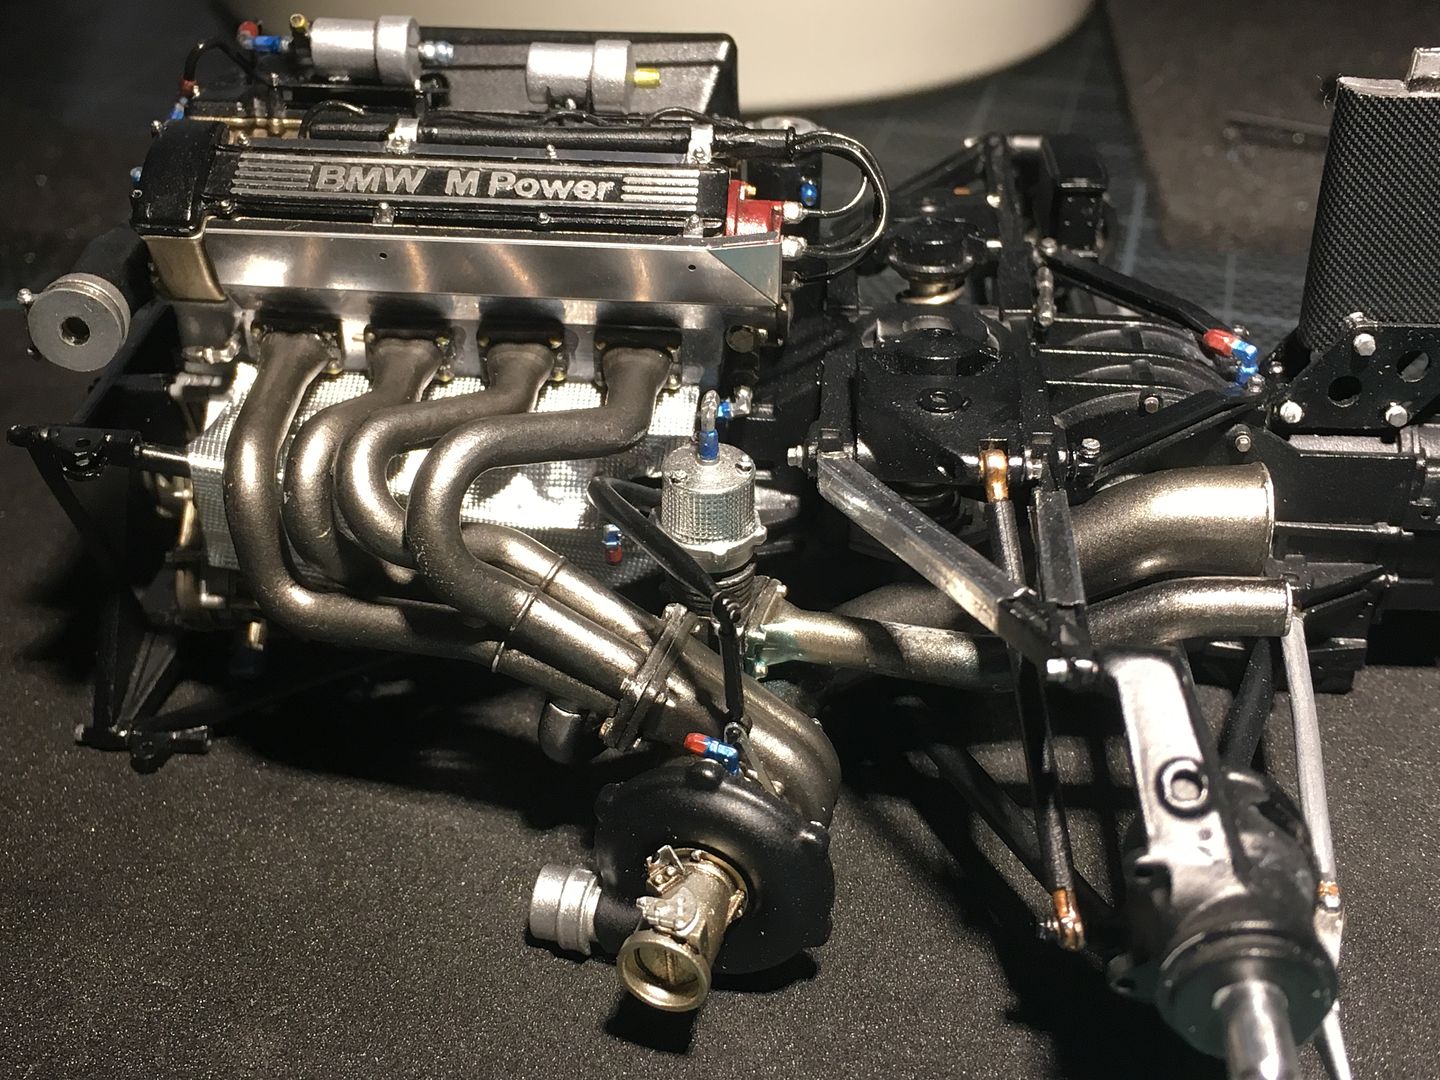
Sadly, it was now a case of covering up a lot of that lovely engine with heat shield foil!

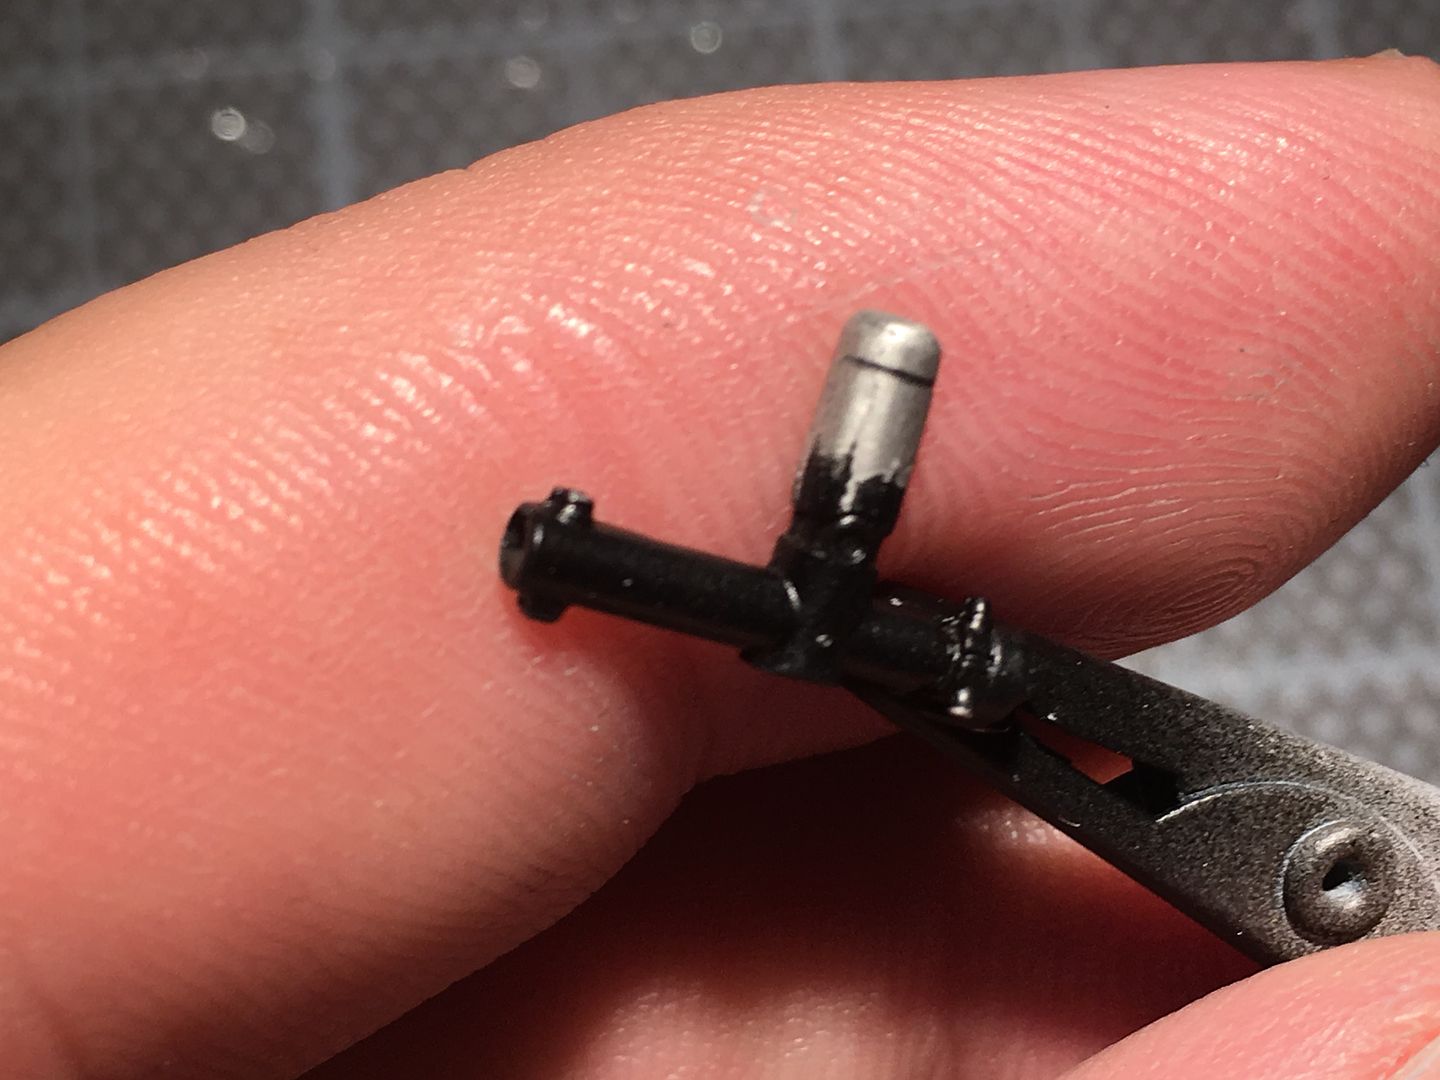
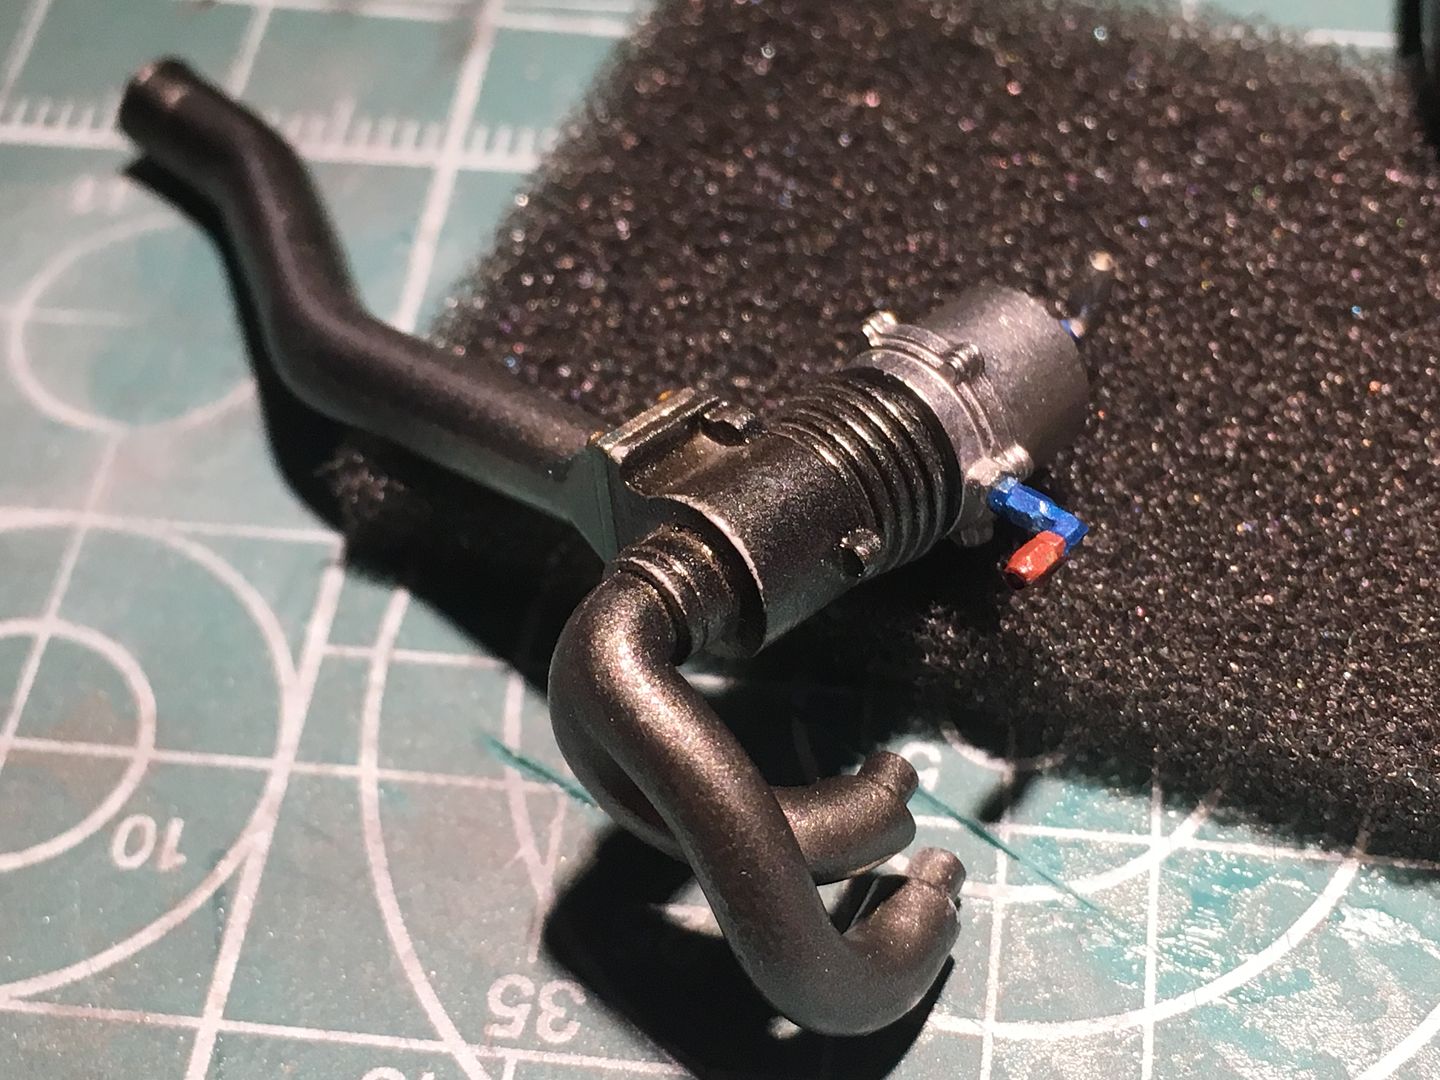
See that very thin, arcing black metal support, that the turbo 'hangs' from? That was one part - waaaaay too small a joint that snapped even before I came to use it - so I had to drill a very very thin hole in both parts and join with some wire - works fine - led to a stabbed thumb as the drill slipped, but all went ok in the end!!
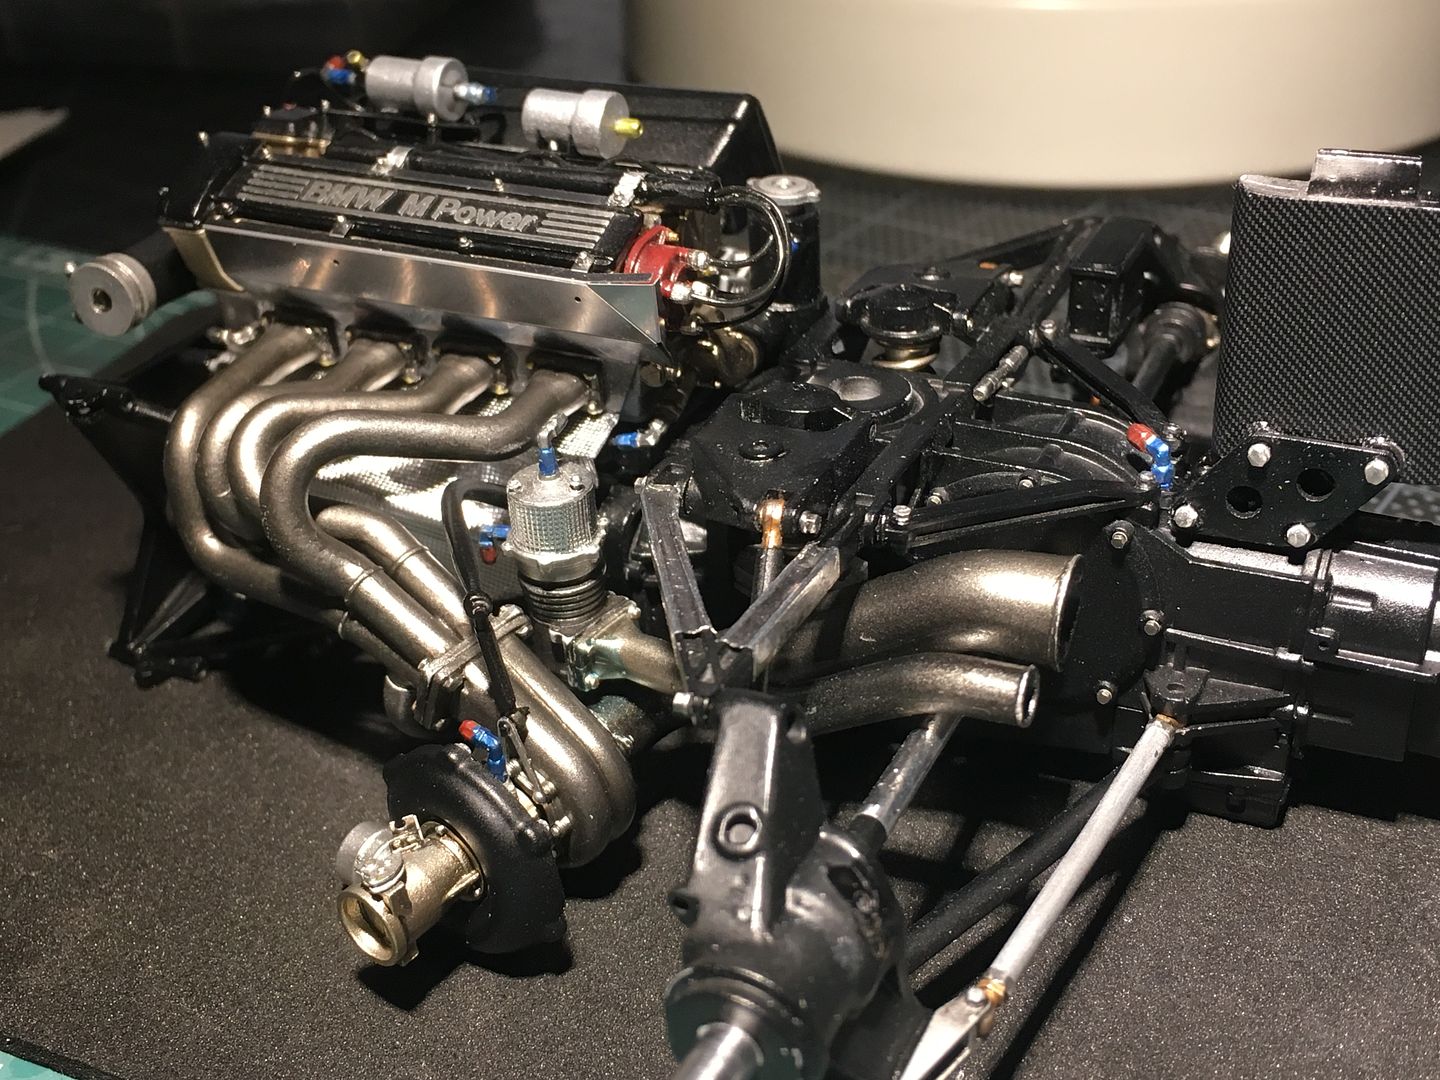
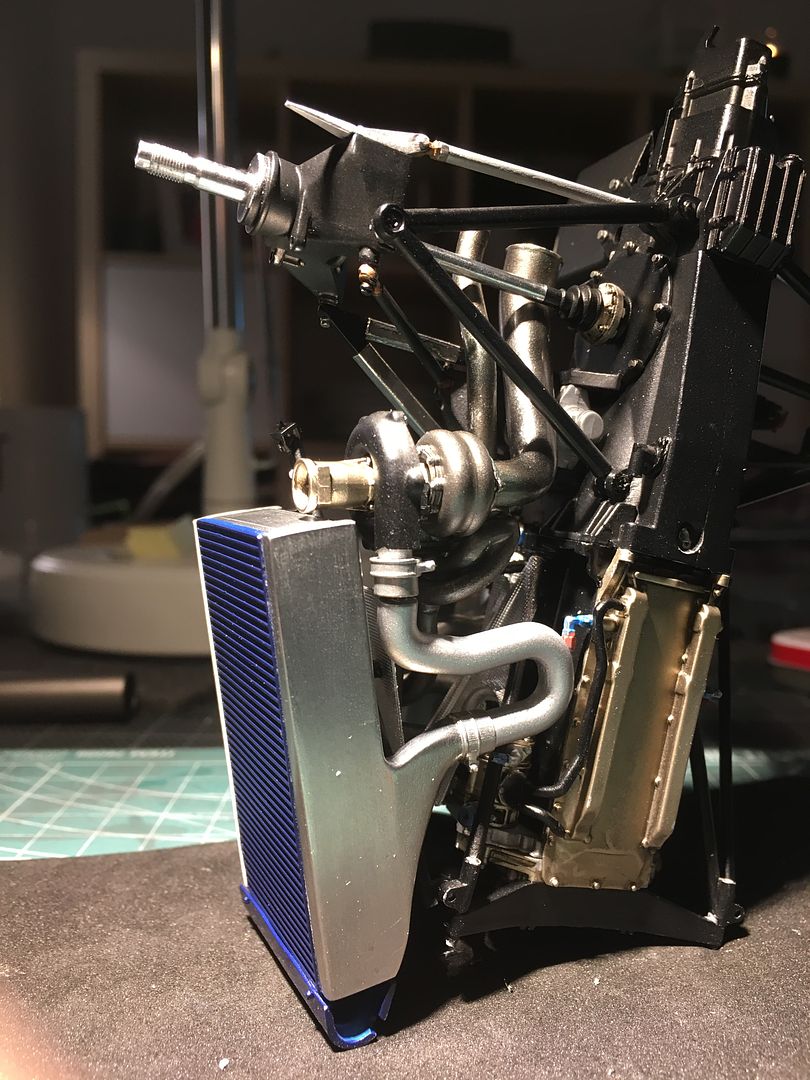
There is a lot of weight in this bit, with radiators etc, that will be supported by the floor when assembled, but at this point it is a bit delicate - I'm not gluing the rads until I have done a lot more wiring and cabling, and the engine is fixed to the floor...
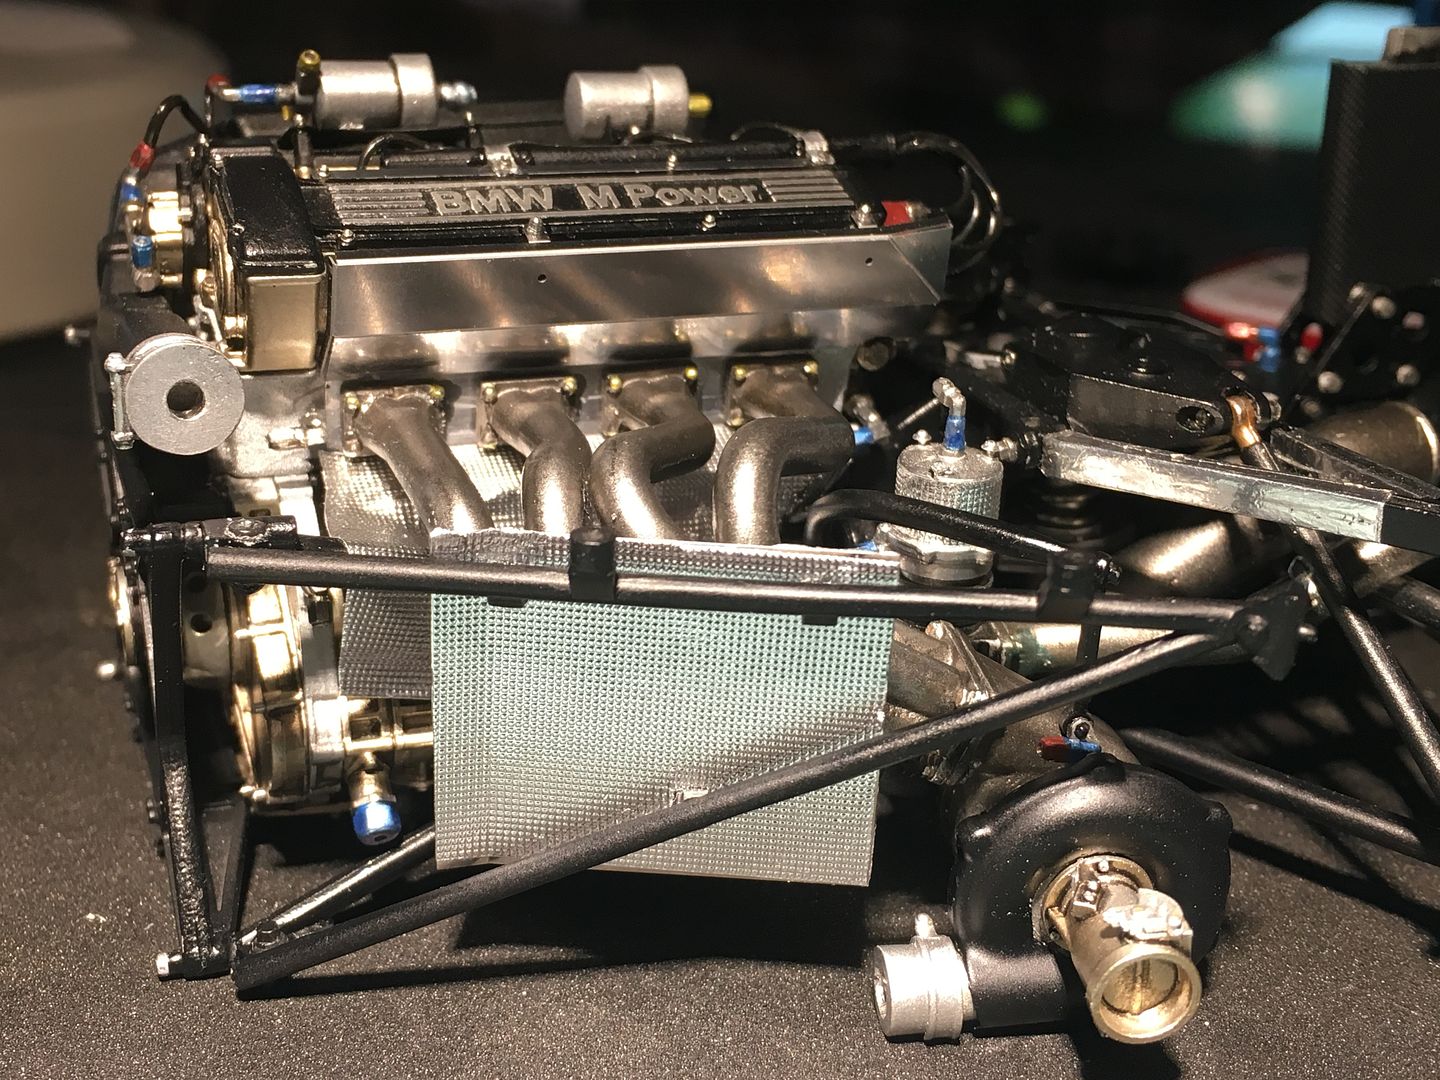
More heat shielding to hide the sexy stuff!
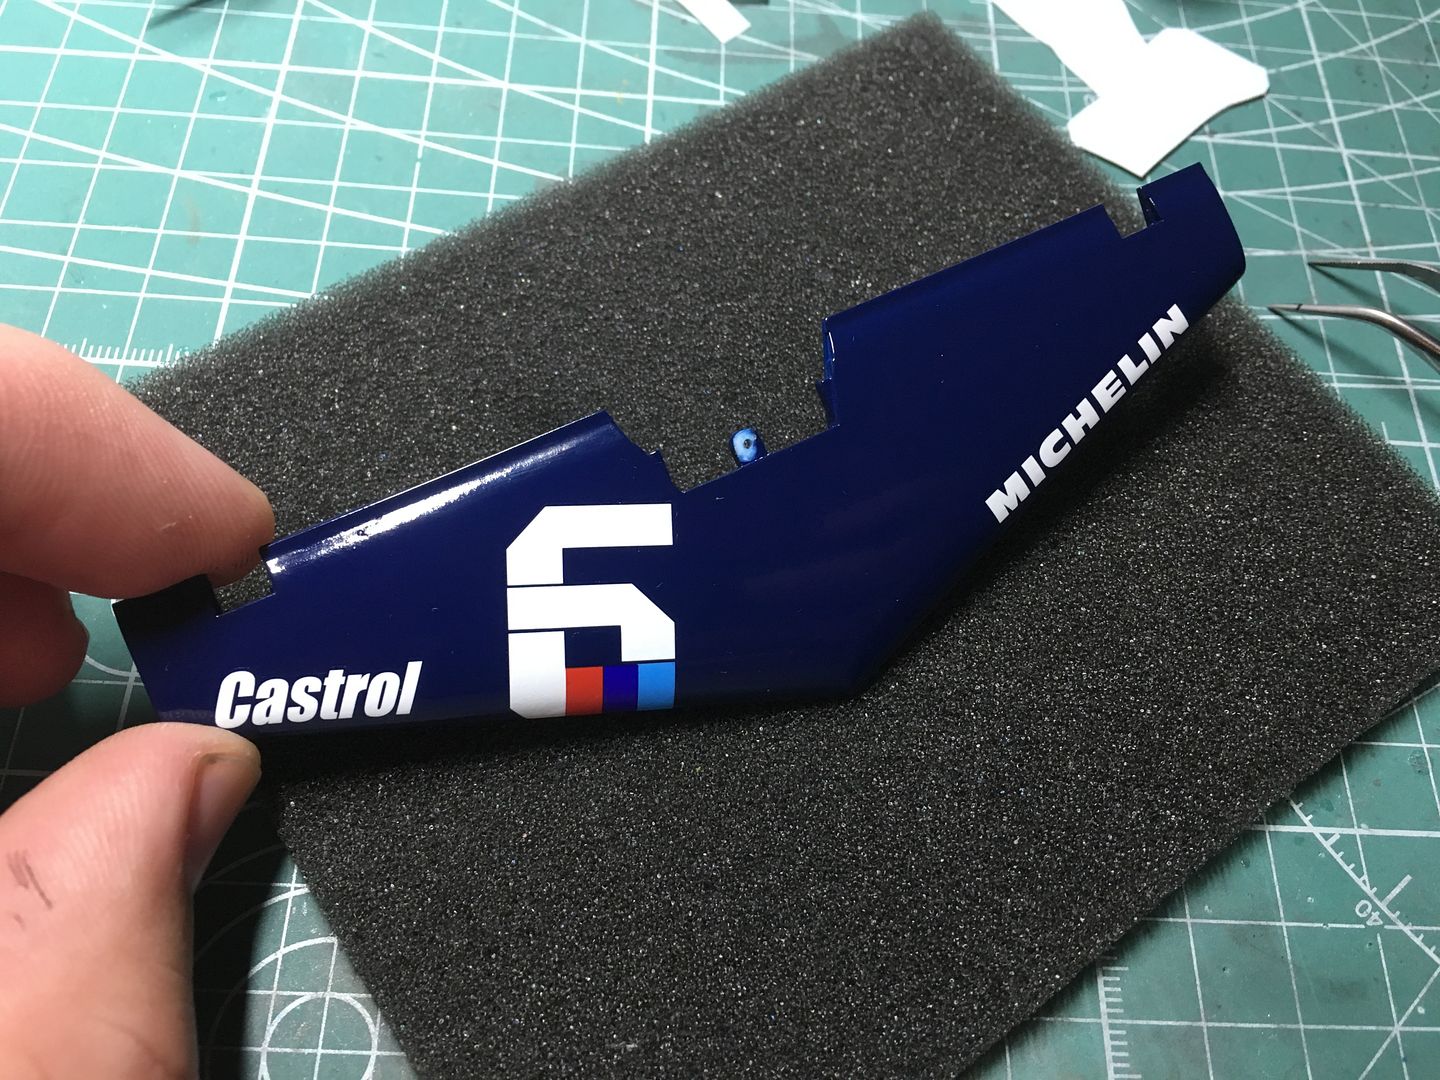
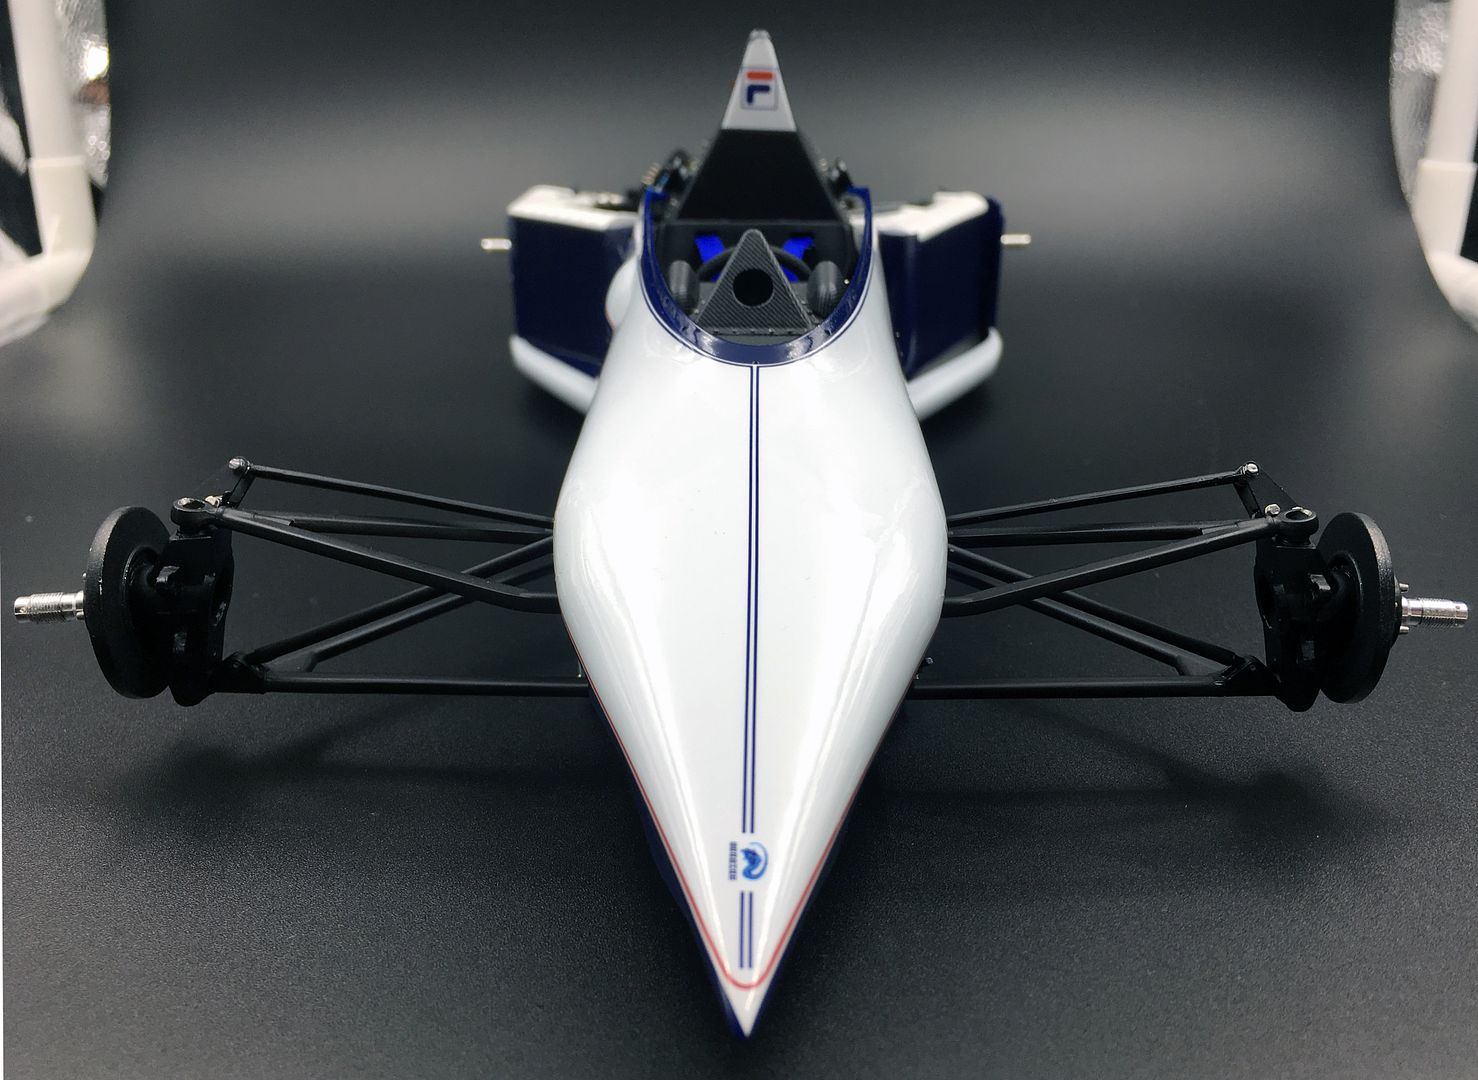
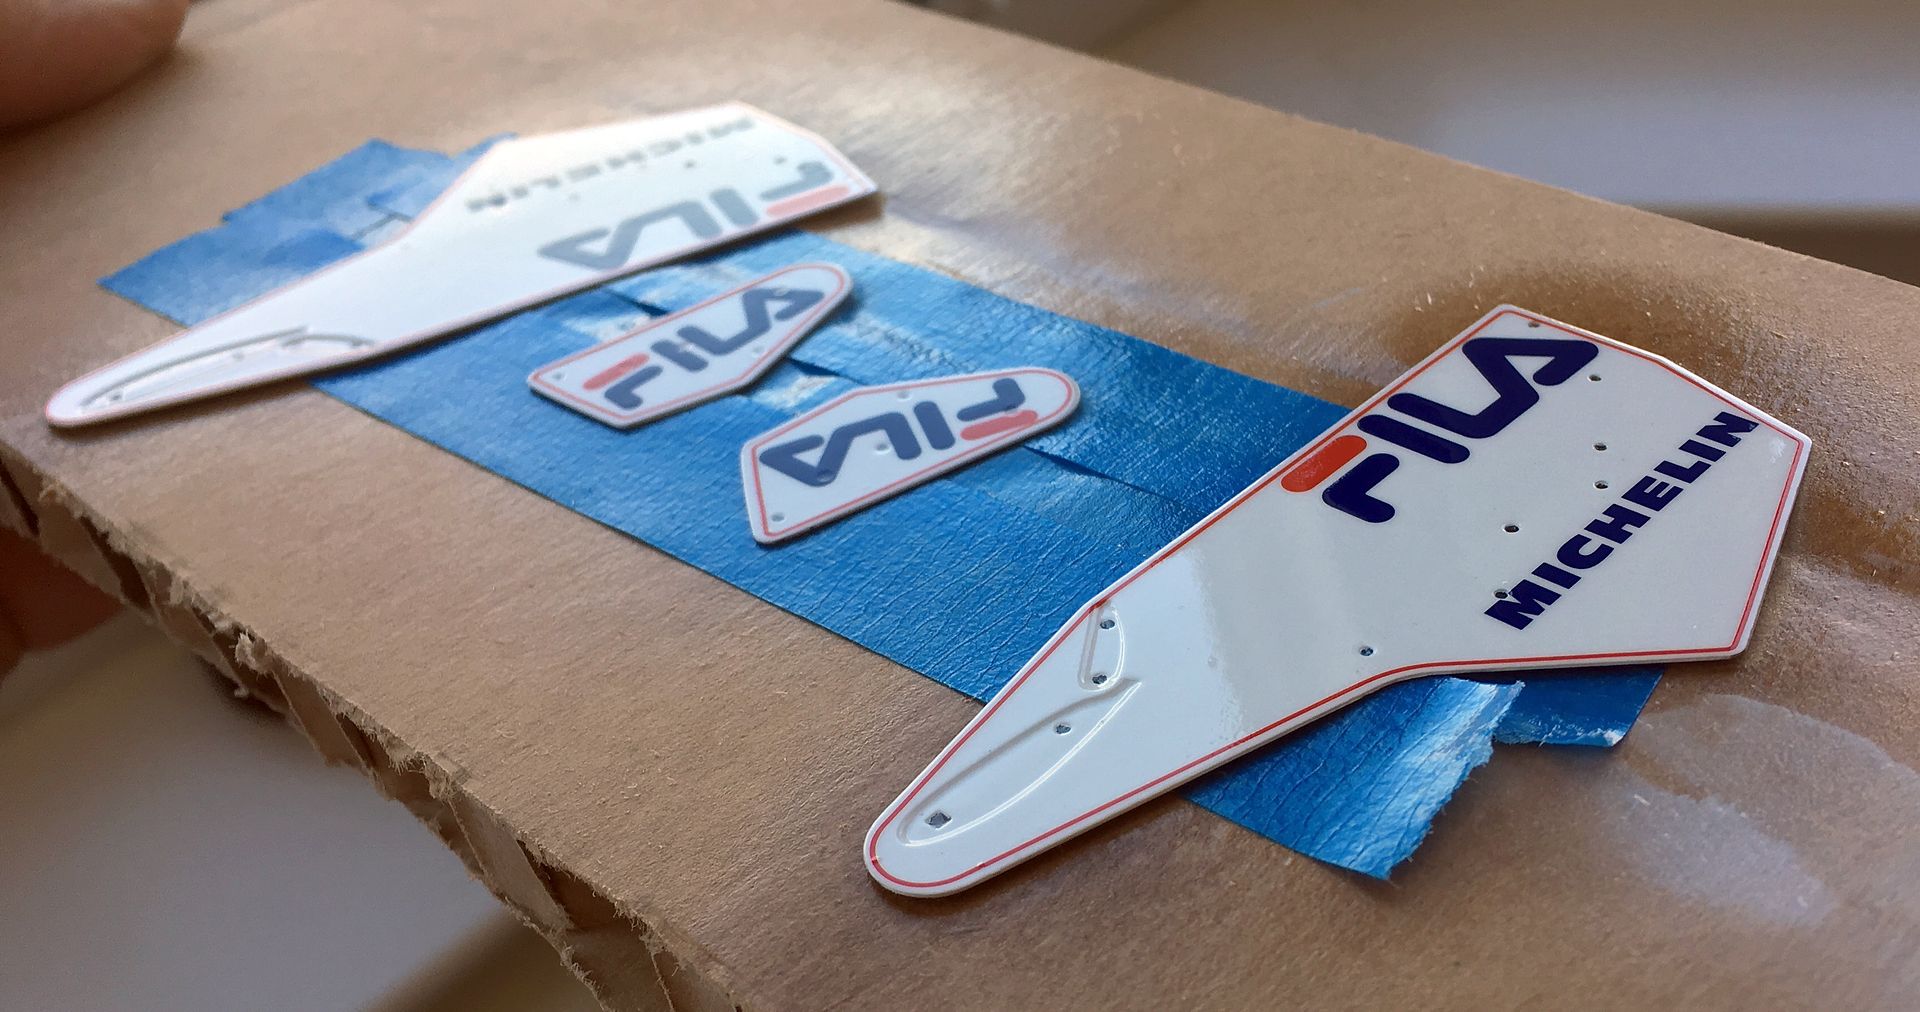
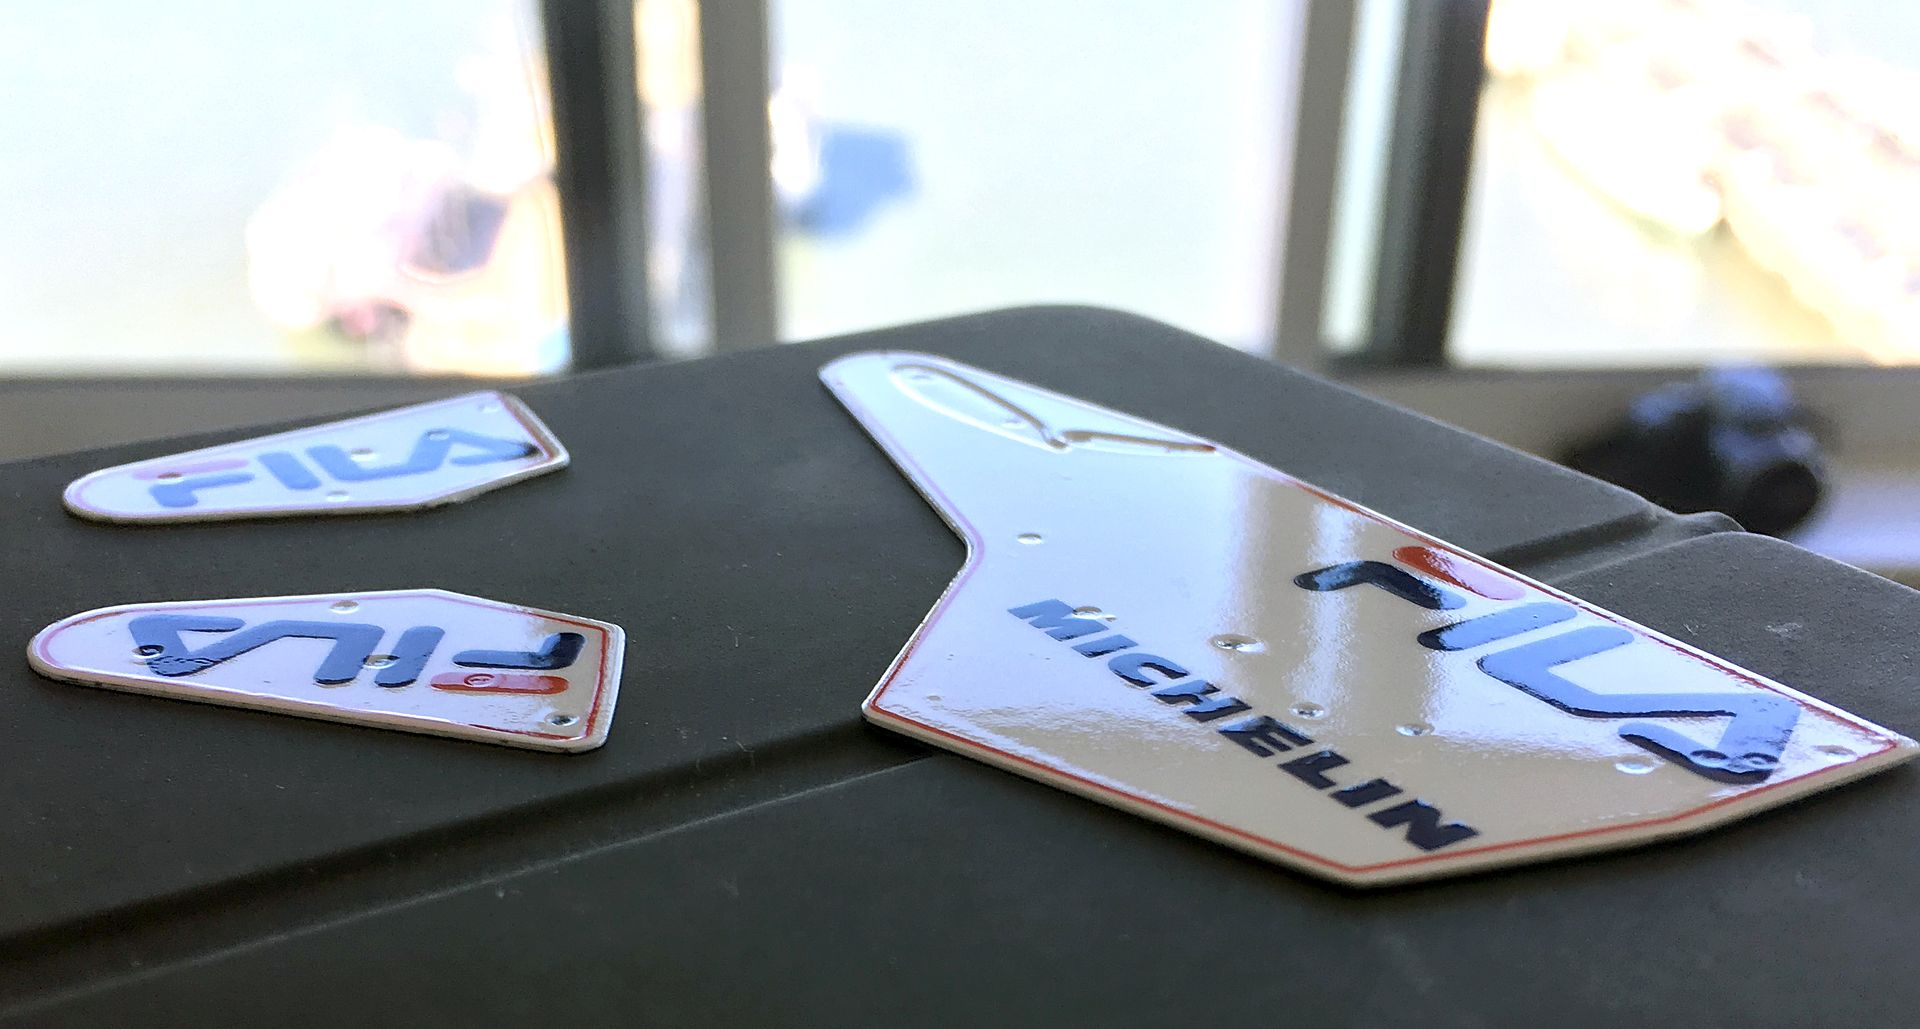
Then moved on to some wing action.
I had sprayed the blue on one side, now had to spray white on the other - the outer side, which would have the 'Fila' decals on. Was worried about spray finding its way through or around holes, but was careful with the masking tape - EXCEPT TAMIYA TAPE LEFT A RESIDUE ON THE BLUE SURFACE! I cleaned it off with very fine wet n' dry, but I was not expecting that - real pain. Need to find an alternative...
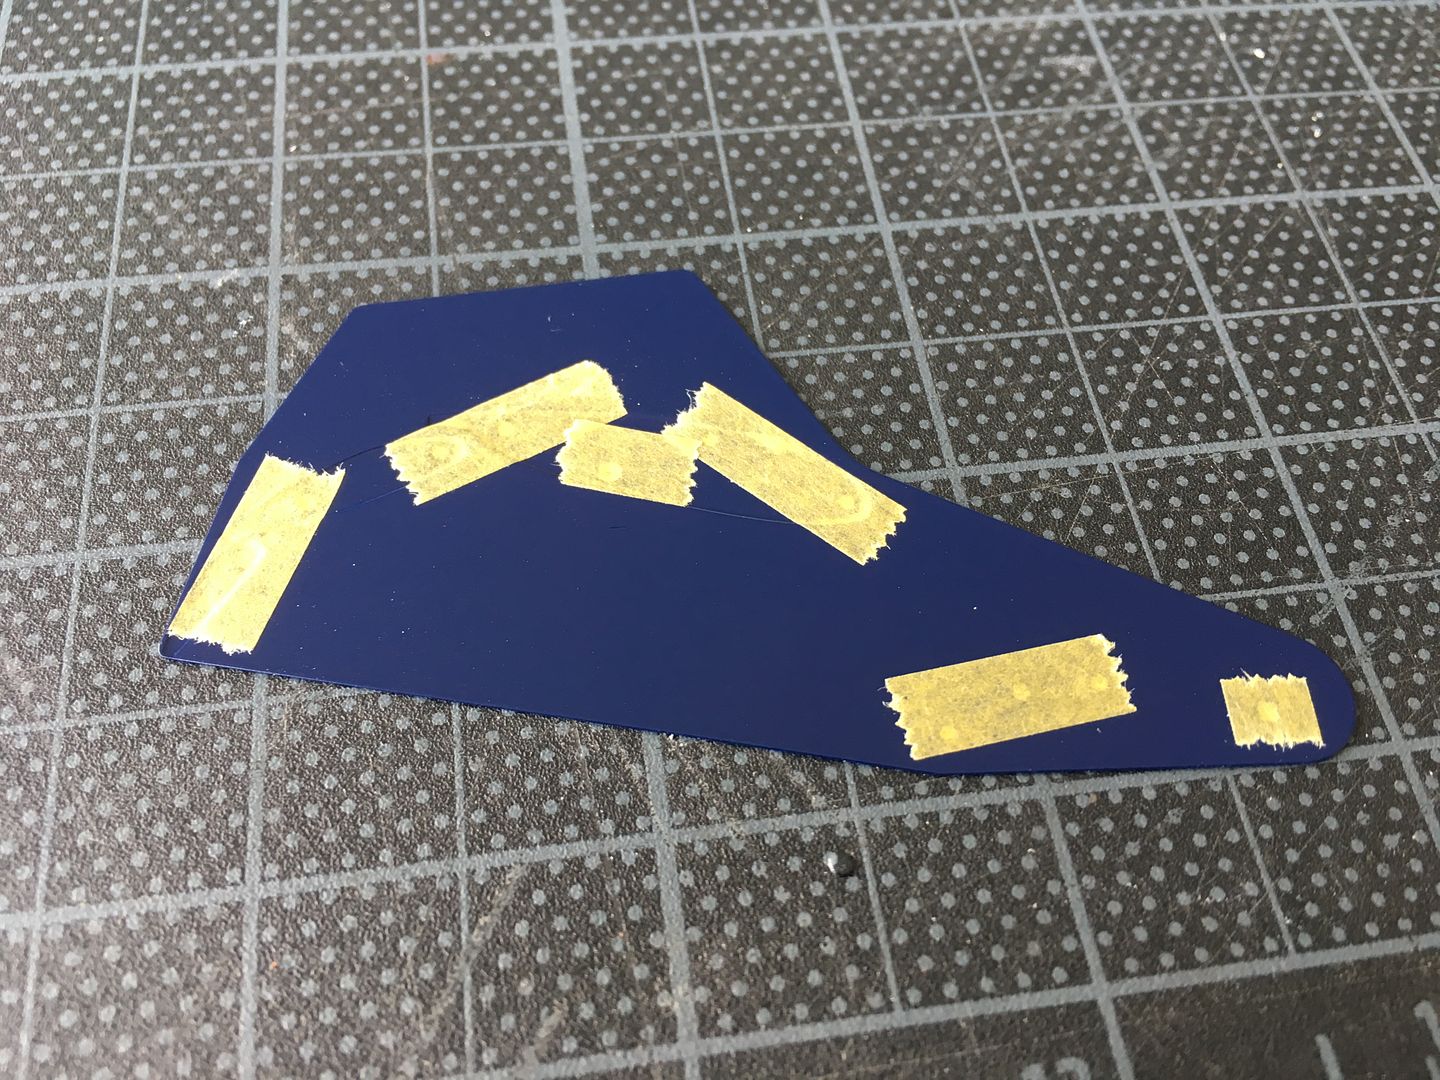
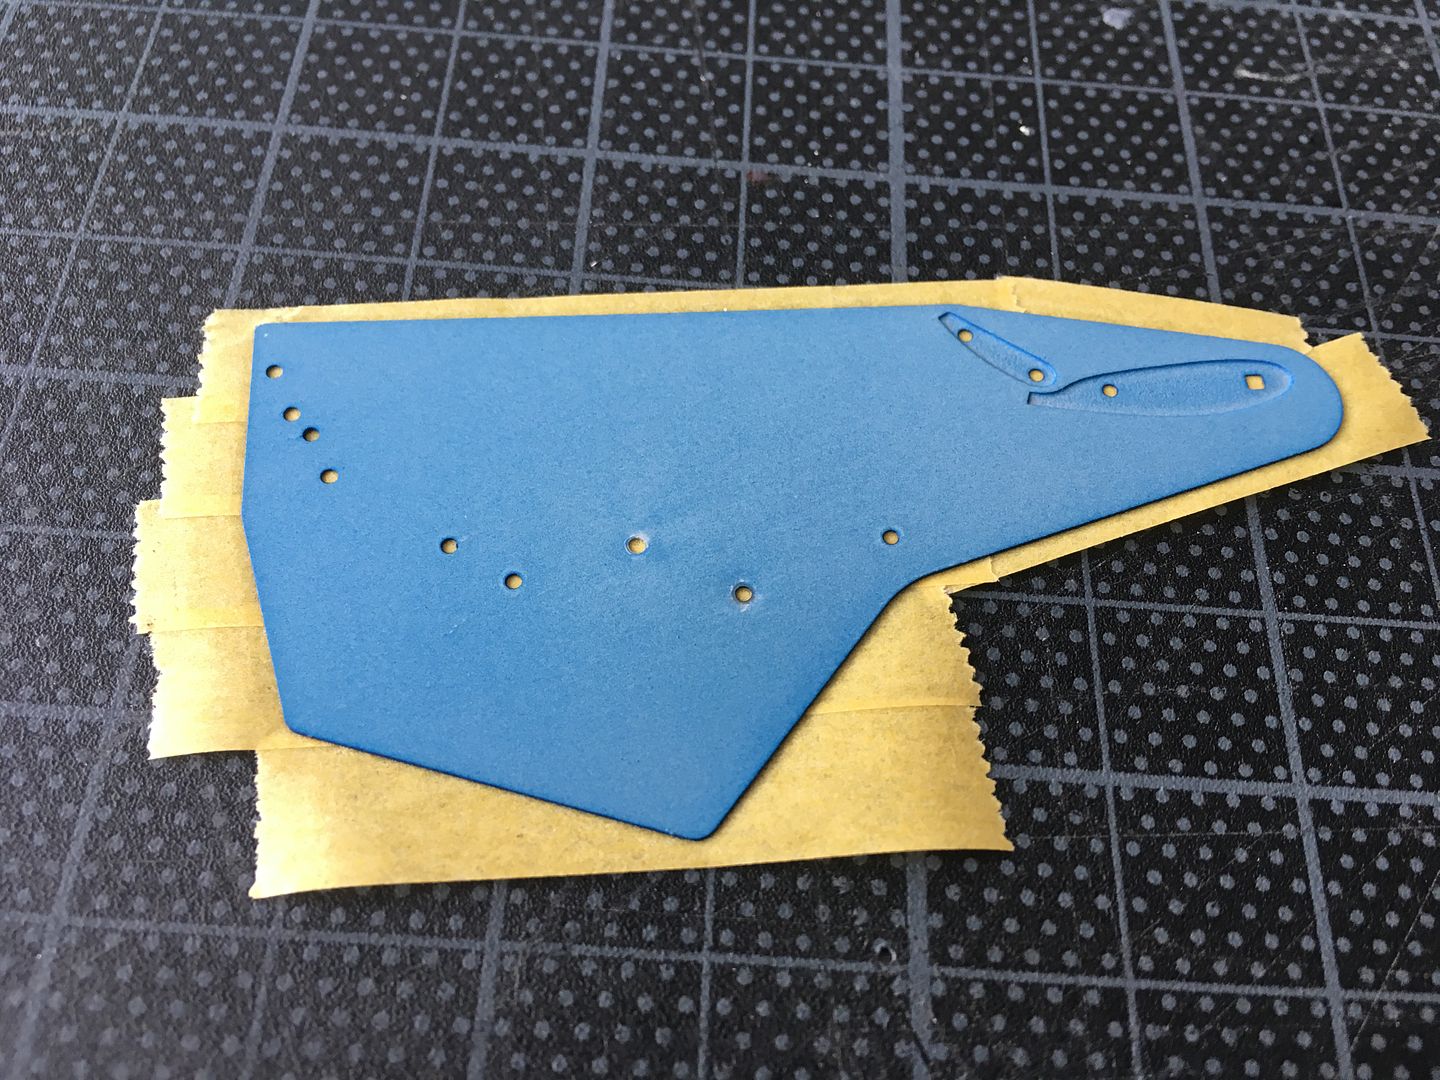
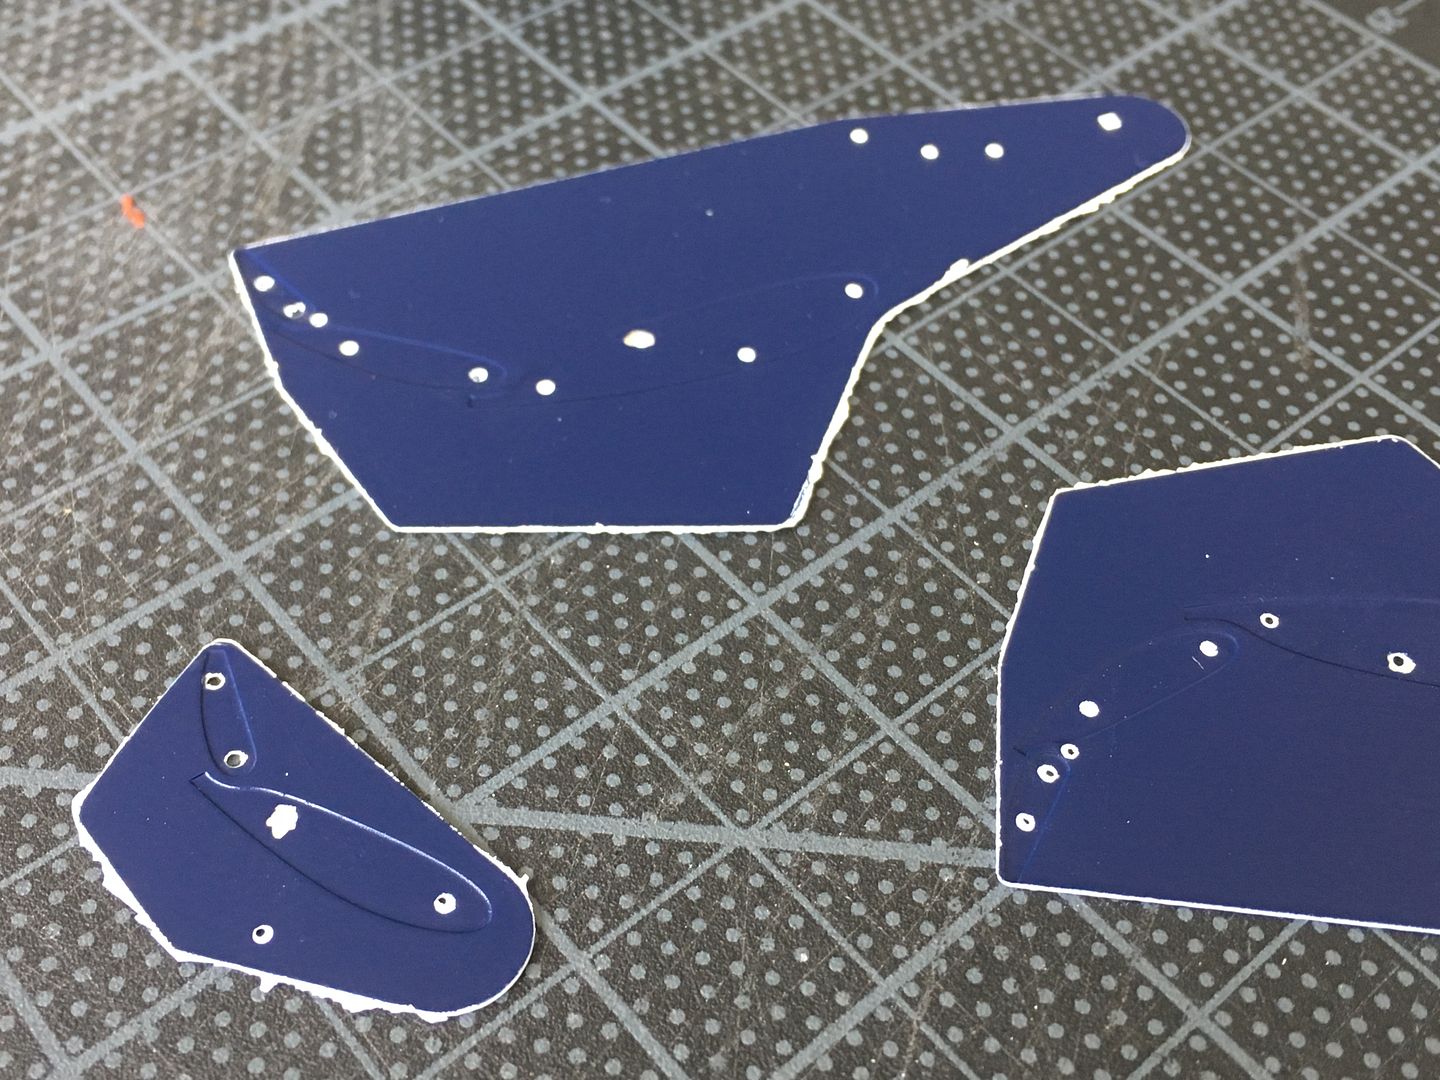
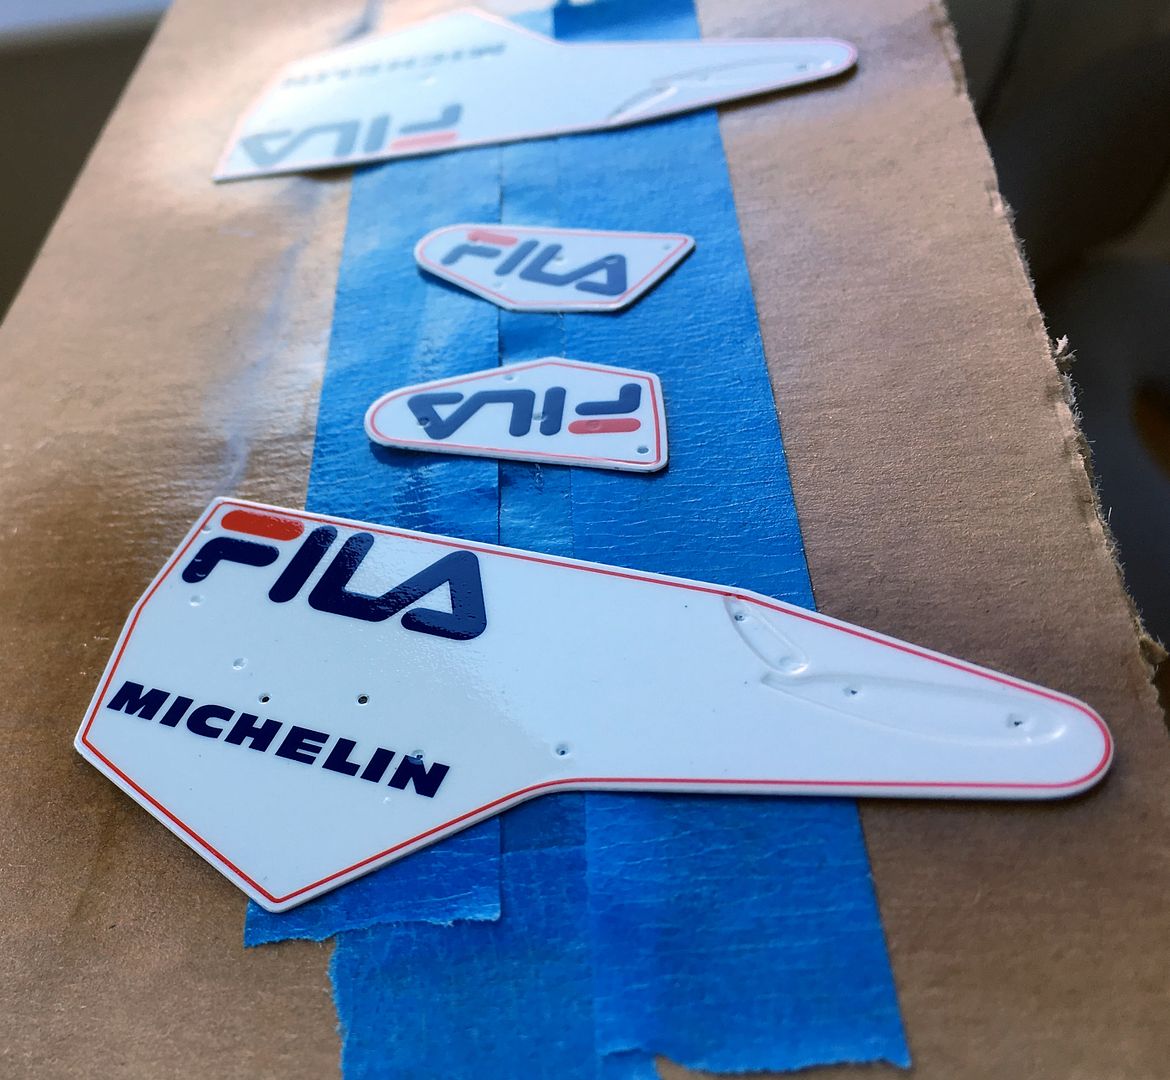
...white 'edges' came off with gentle sanding of edge...most of the holes are located 'behind' wing ends, so won't be seen.
I sealed the white (zero) with one layer of clear and went direct to the decals - the ones on the largest end plates are full coverage, so I was worried about bubbles etc, but actually they went on very well - and actually lucked out on positioning right away with decent spacing around that outer red line!
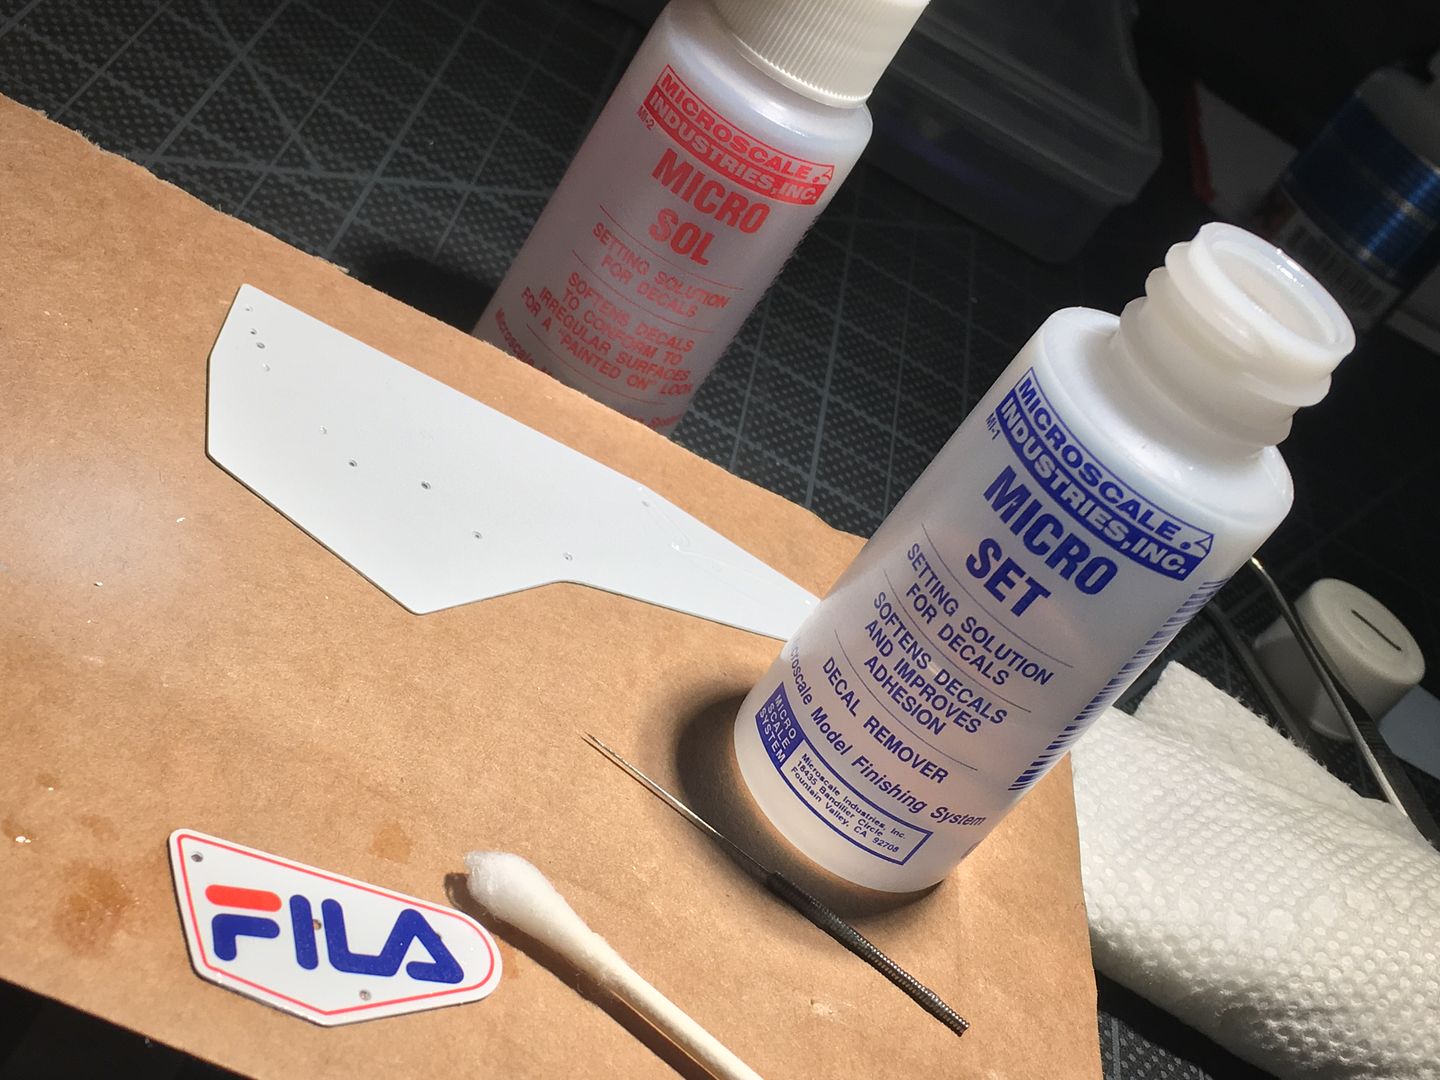
Result!
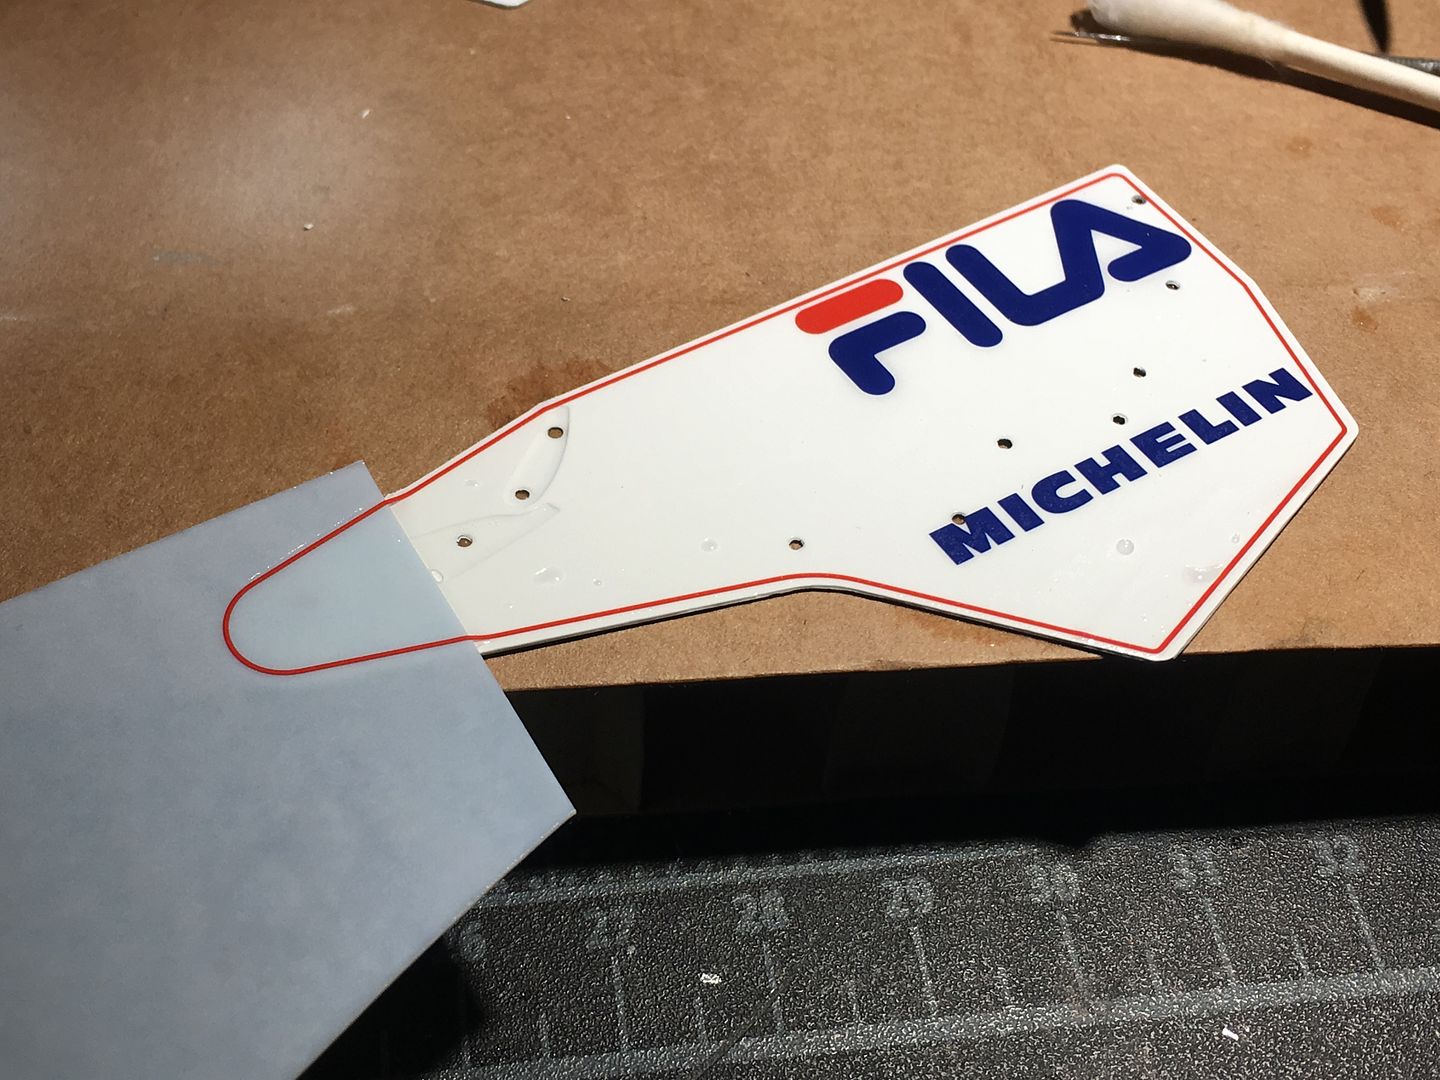
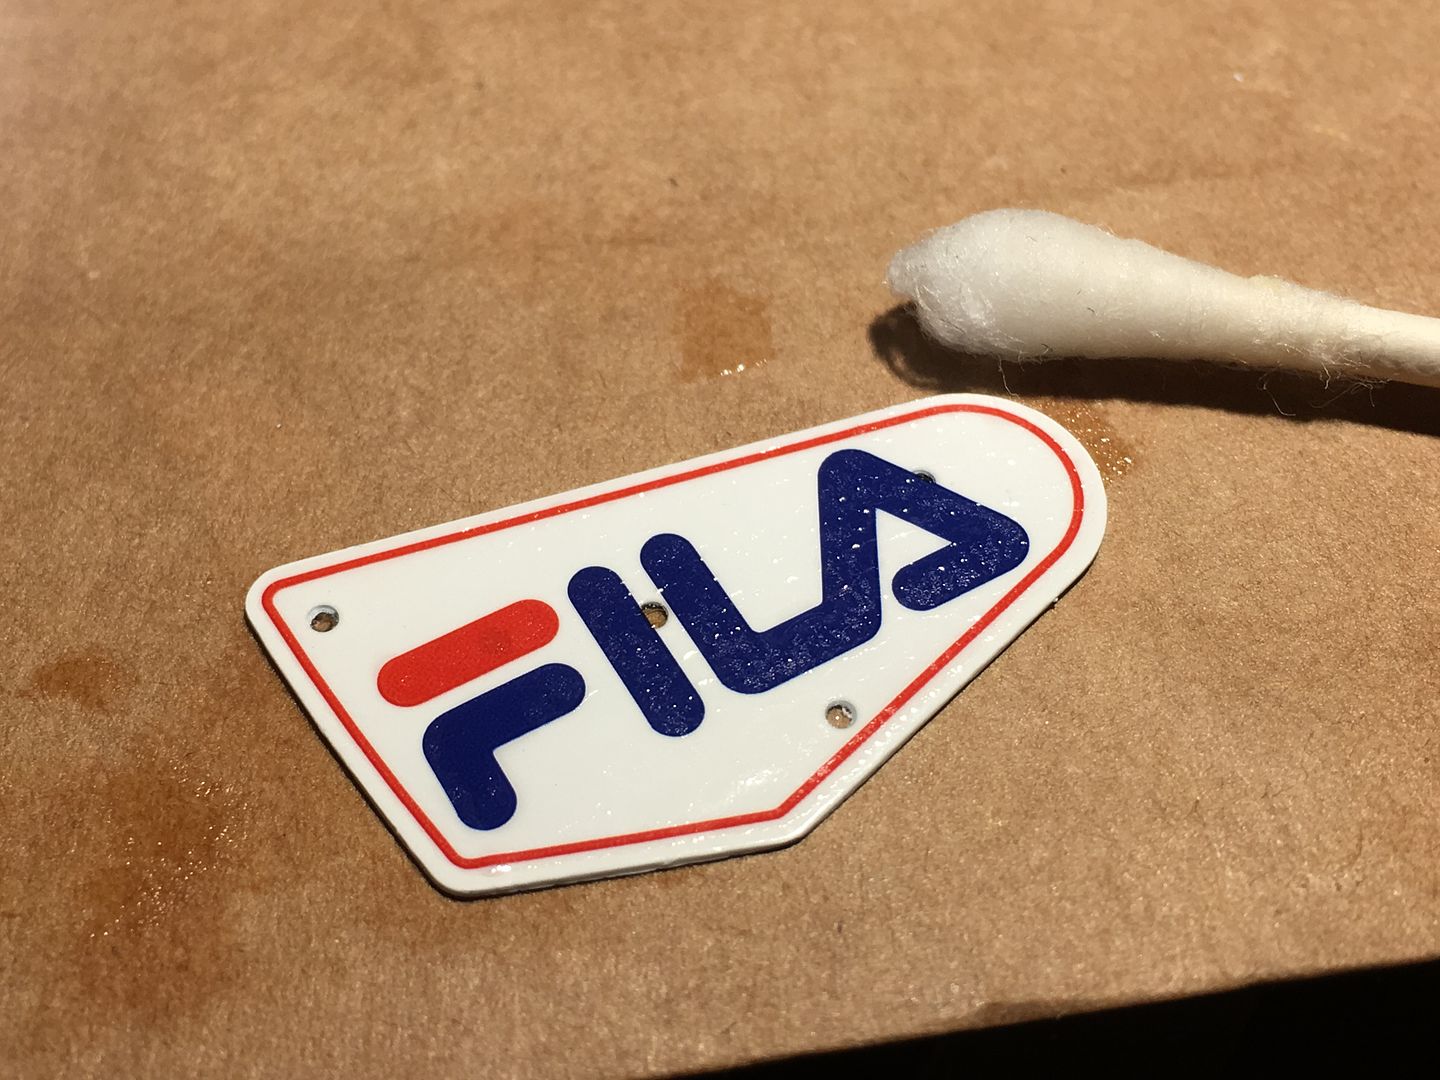
Once dried over night, I added more clear - touch wood it has gone on ok!
Ok -some more weekend work!
Finished the 'pedal box' area - and promptly covered it, never to be seen again!
...also added the brakes, having first painted the pads with the same carbon look...
Gear linkage and gear shift. The kit says silver, the photos show it as black, with a hand-worn grip that I created by sanding the paint back to the metal finish, and then using flat clear...
Now MFH had sent me the part I lost, I could carry on with the turbo/exhaust area....
Sadly, it was now a case of covering up a lot of that lovely engine with heat shield foil!
See that very thin, arcing black metal support, that the turbo 'hangs' from? That was one part - waaaaay too small a joint that snapped even before I came to use it - so I had to drill a very very thin hole in both parts and join with some wire - works fine - led to a stabbed thumb as the drill slipped, but all went ok in the end!!
There is a lot of weight in this bit, with radiators etc, that will be supported by the floor when assembled, but at this point it is a bit delicate - I'm not gluing the rads until I have done a lot more wiring and cabling, and the engine is fixed to the floor...
More heat shielding to hide the sexy stuff!
Then moved on to some wing action.
I had sprayed the blue on one side, now had to spray white on the other - the outer side, which would have the 'Fila' decals on. Was worried about spray finding its way through or around holes, but was careful with the masking tape - EXCEPT TAMIYA TAPE LEFT A RESIDUE ON THE BLUE SURFACE! I cleaned it off with very fine wet n' dry, but I was not expecting that - real pain. Need to find an alternative...
...white 'edges' came off with gentle sanding of edge...most of the holes are located 'behind' wing ends, so won't be seen.
I sealed the white (zero) with one layer of clear and went direct to the decals - the ones on the largest end plates are full coverage, so I was worried about bubbles etc, but actually they went on very well - and actually lucked out on positioning right away with decent spacing around that outer red line!
Result!
Once dried over night, I added more clear - touch wood it has gone on ok!
Right - back with another 3 years of work Visa for the States....and now back to the model.
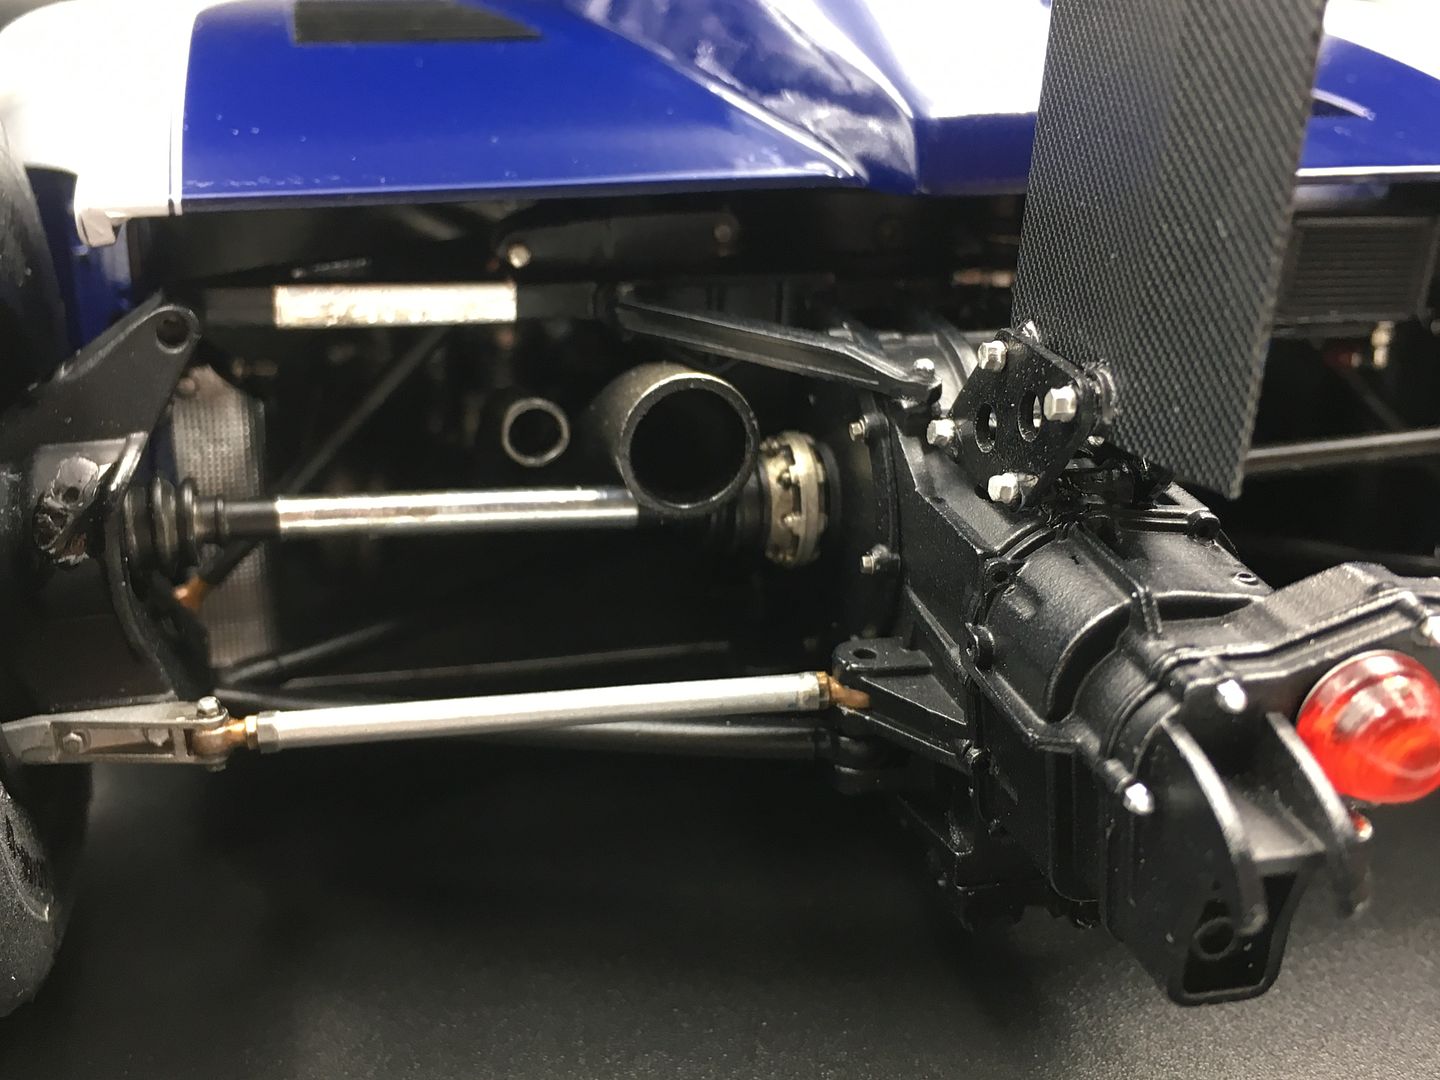
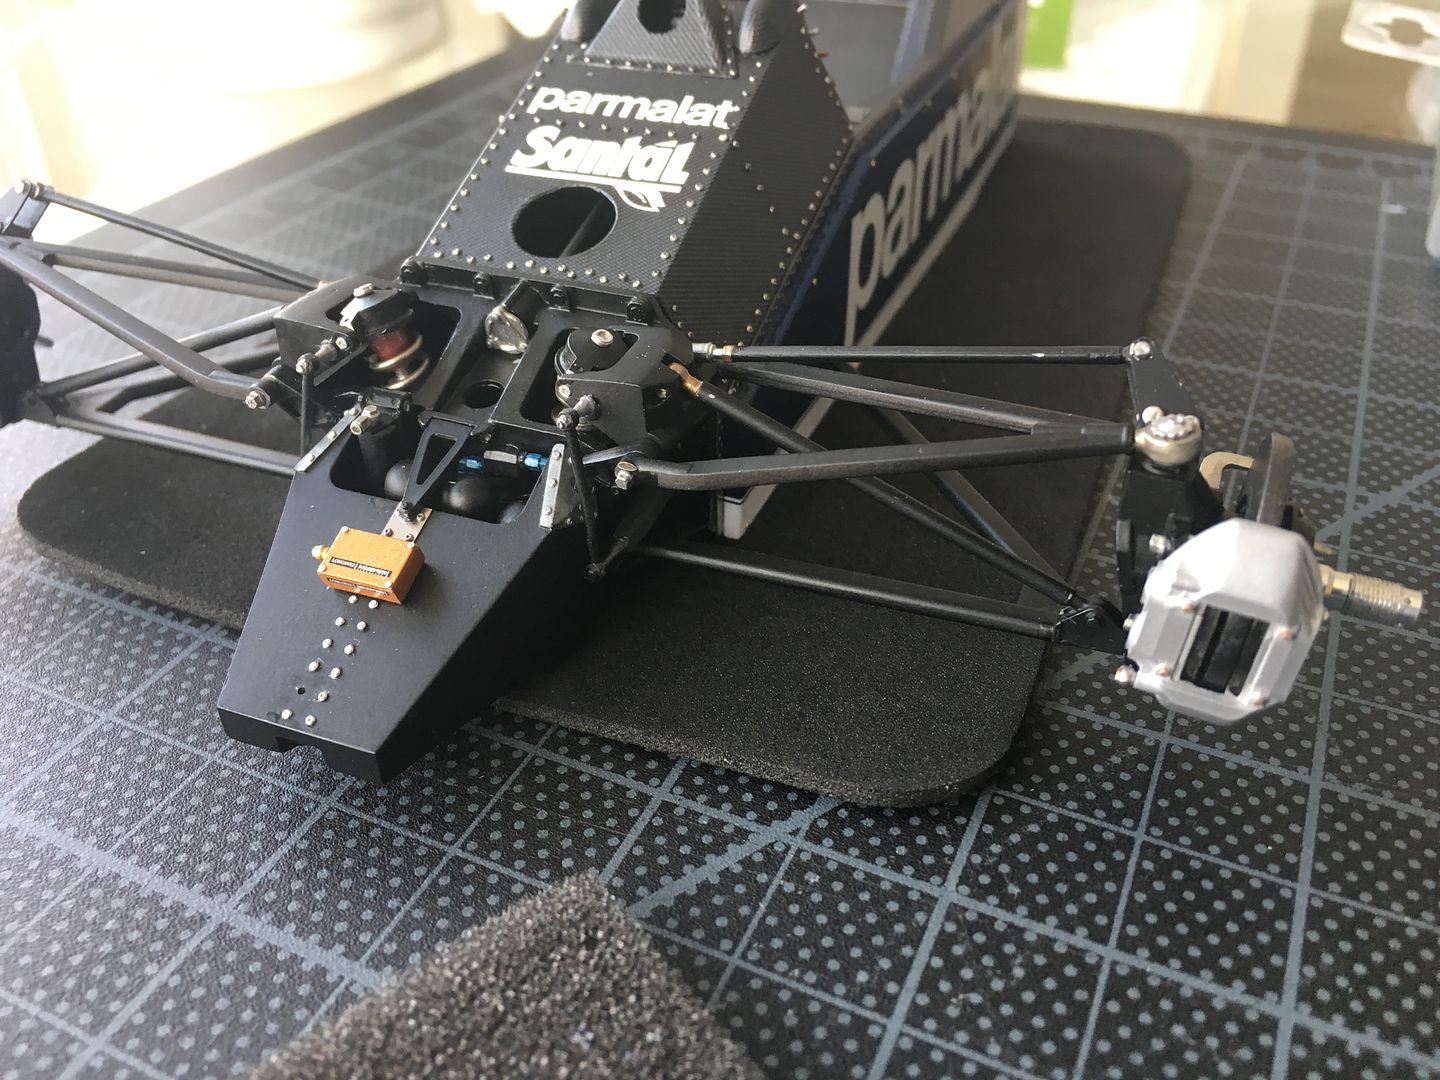
Small detail stuff now really - apart from final assembly, which looks a pig - getting all the radiators, joining pipes and chassis framework lined up and fixed is going to be a pain - I can tell already!!
Nothing above is actually fixed yet!
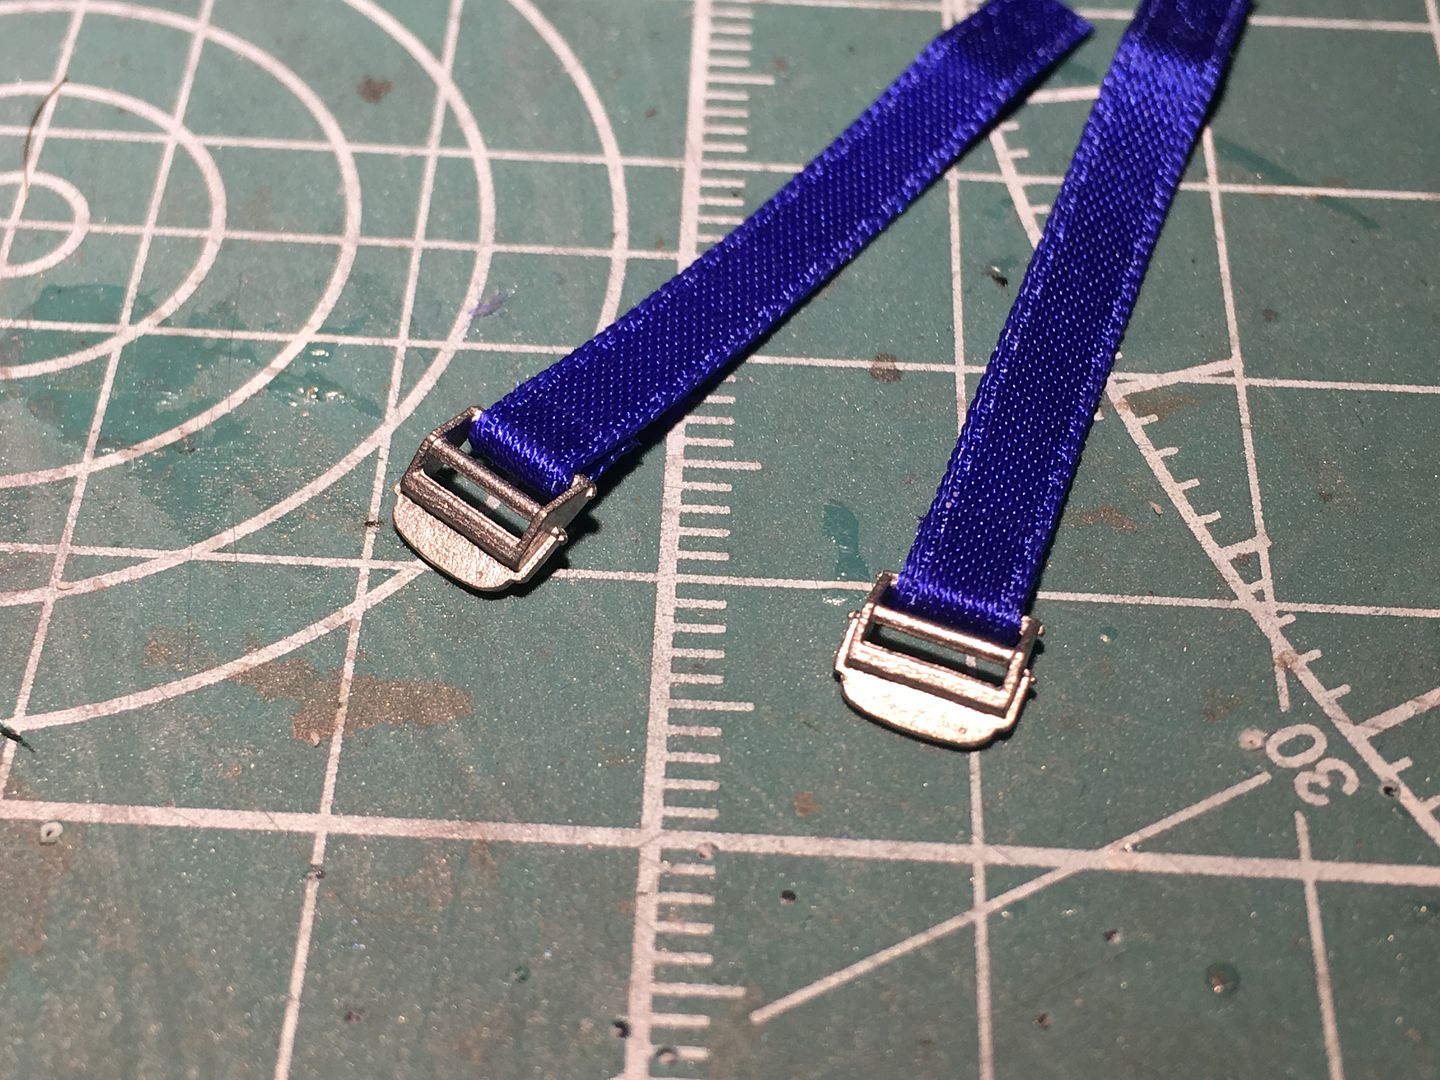
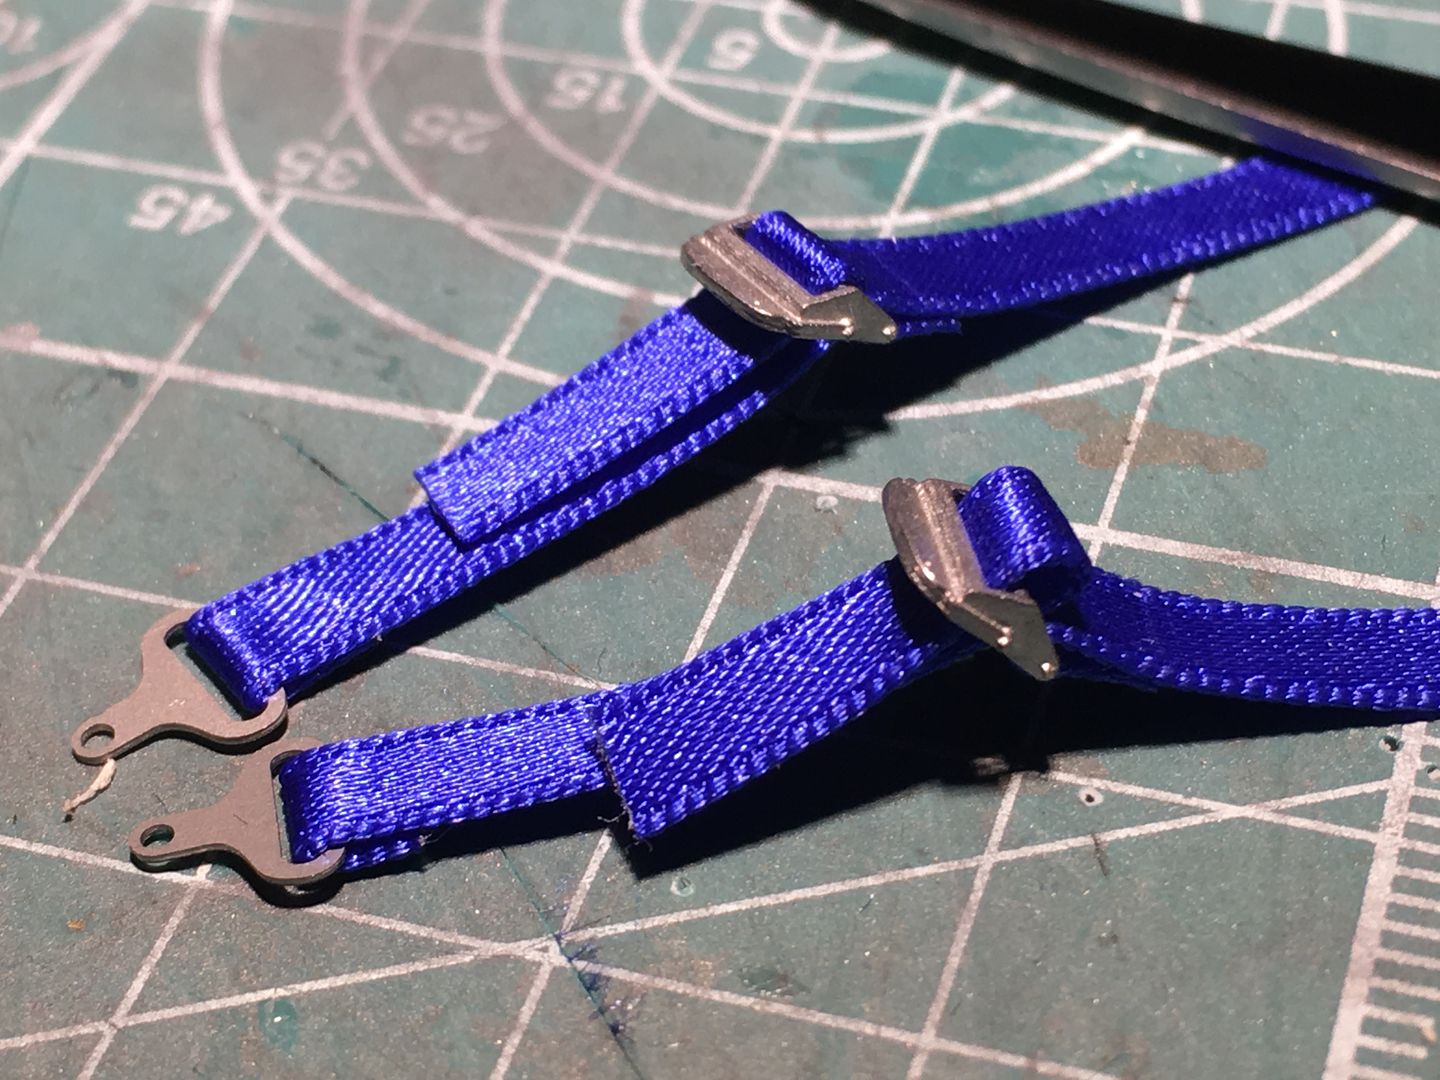
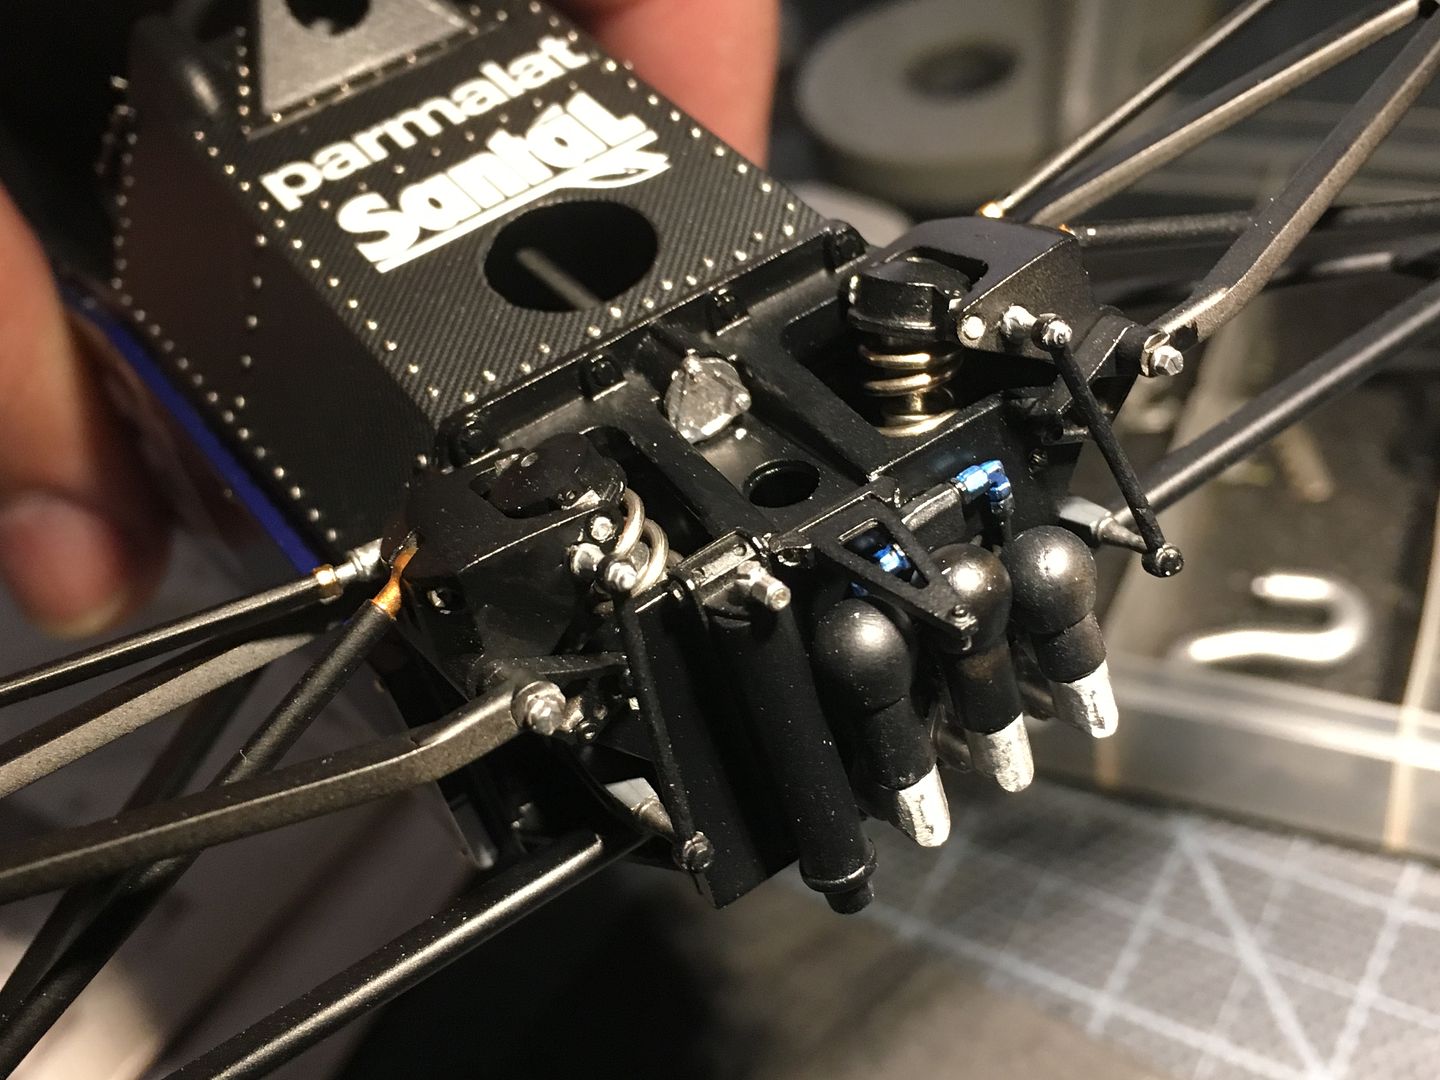
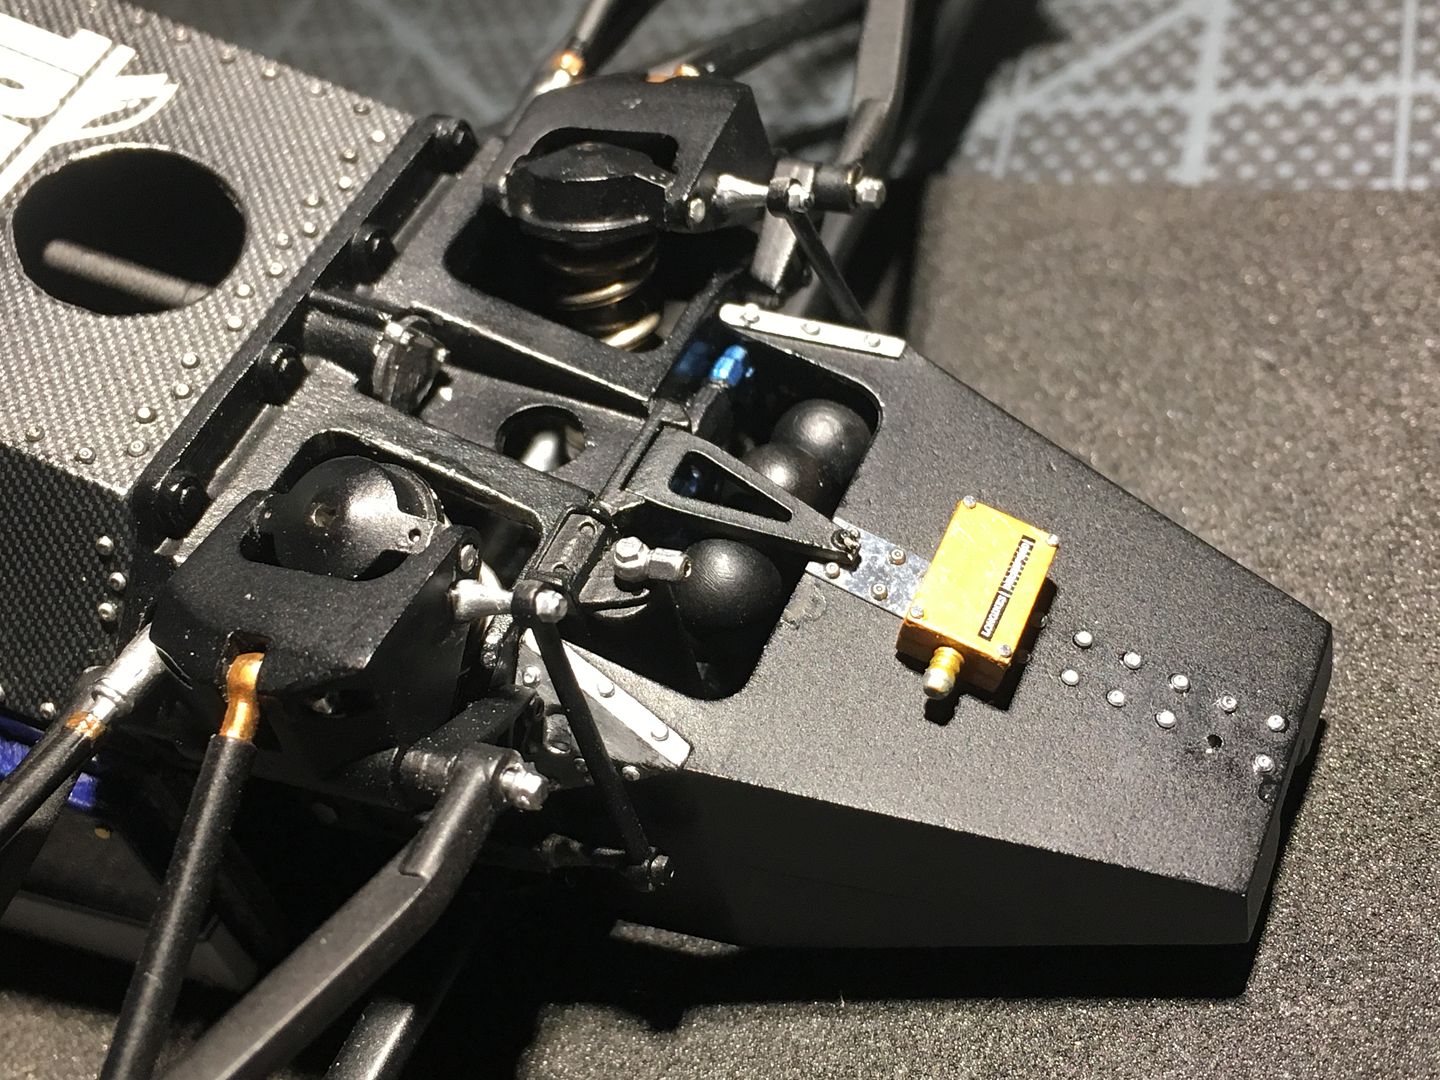
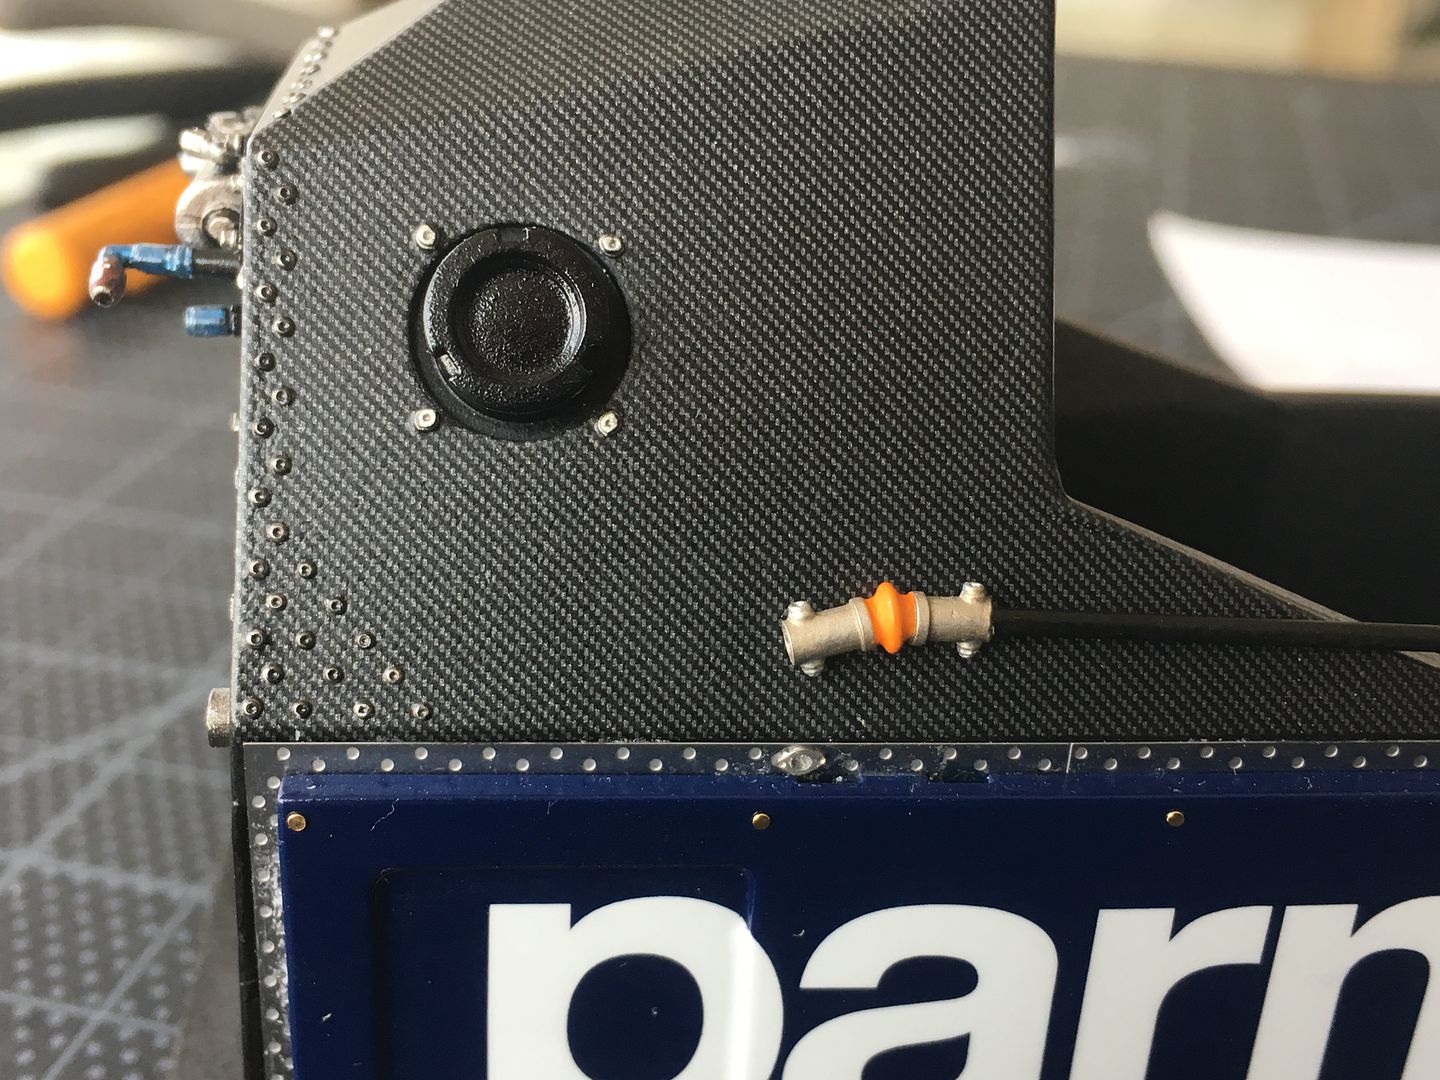
Adding brake pipes to the front suspension struts...
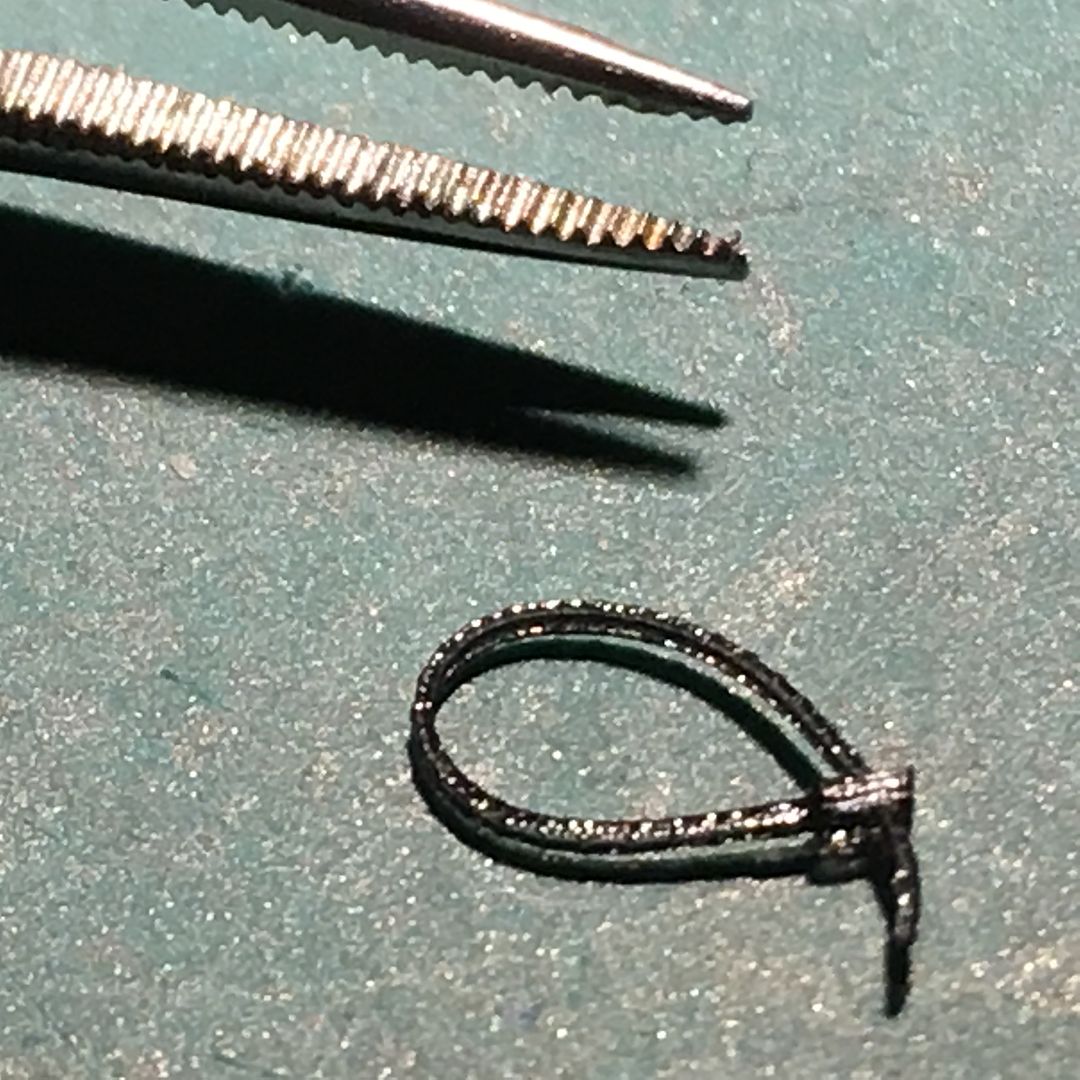
I wanted to use these - the tie-wraps that MFH now make - they look 3D printed - BUT - I have not successfully managed to use one yet. They are so brittle and fragile. They have used a similar strip for the belts on the engine, and they just crack. You get the tooth detail, but it snaps off - prefer the molded or rubber bands!!
Anyone managed to use these on anything with success?!
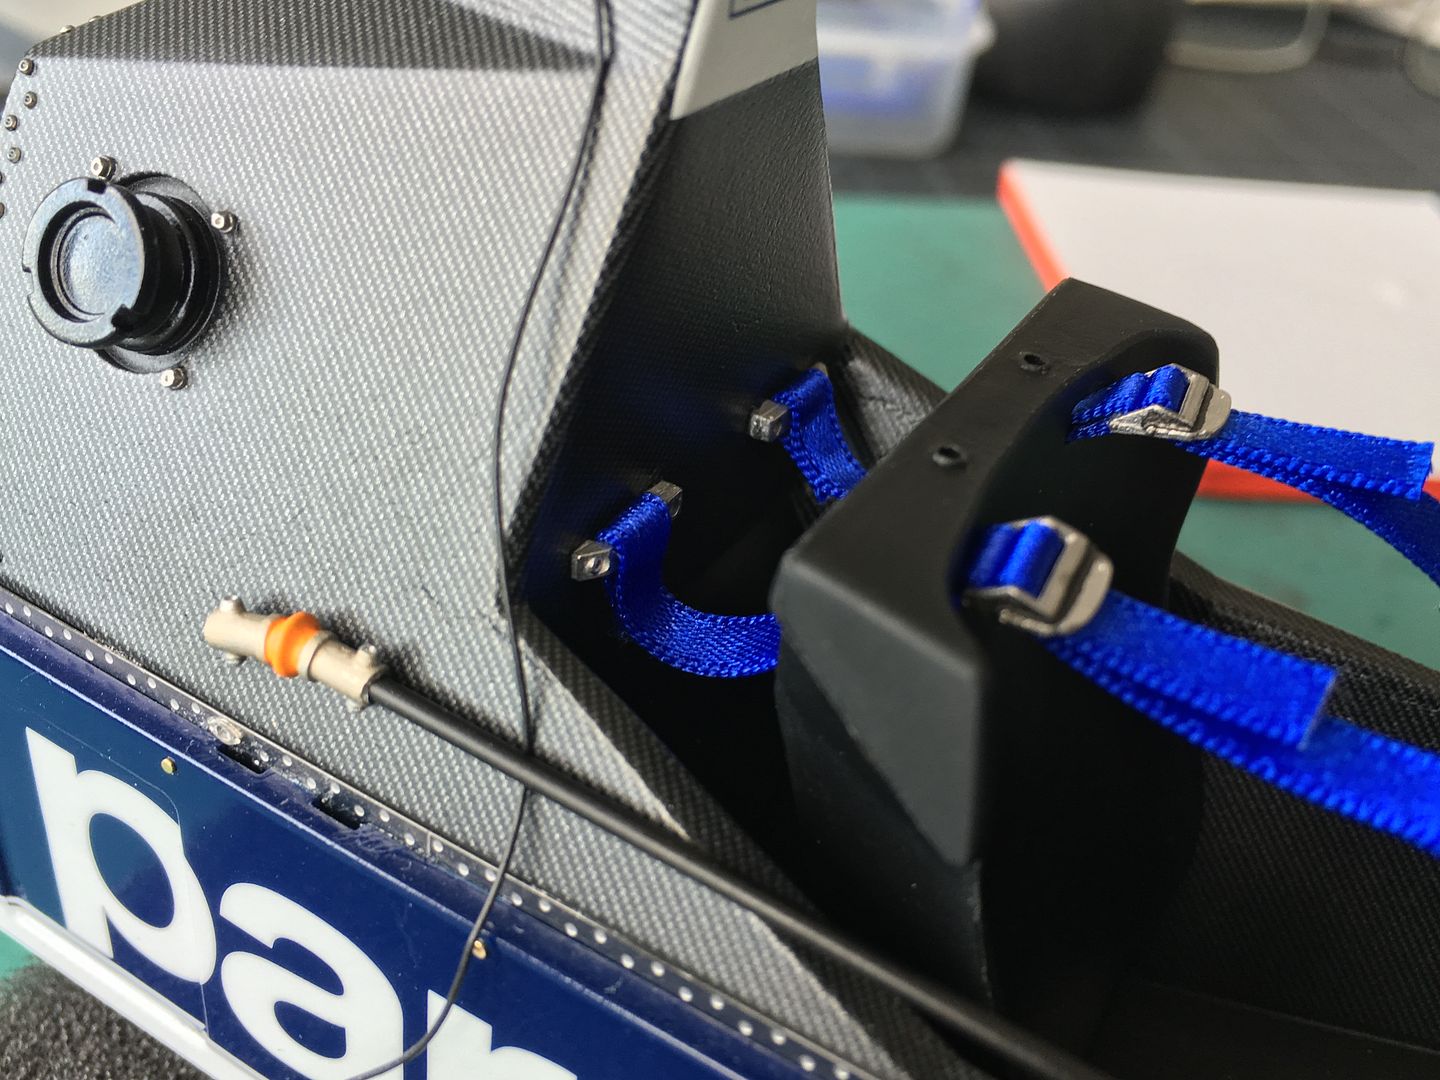
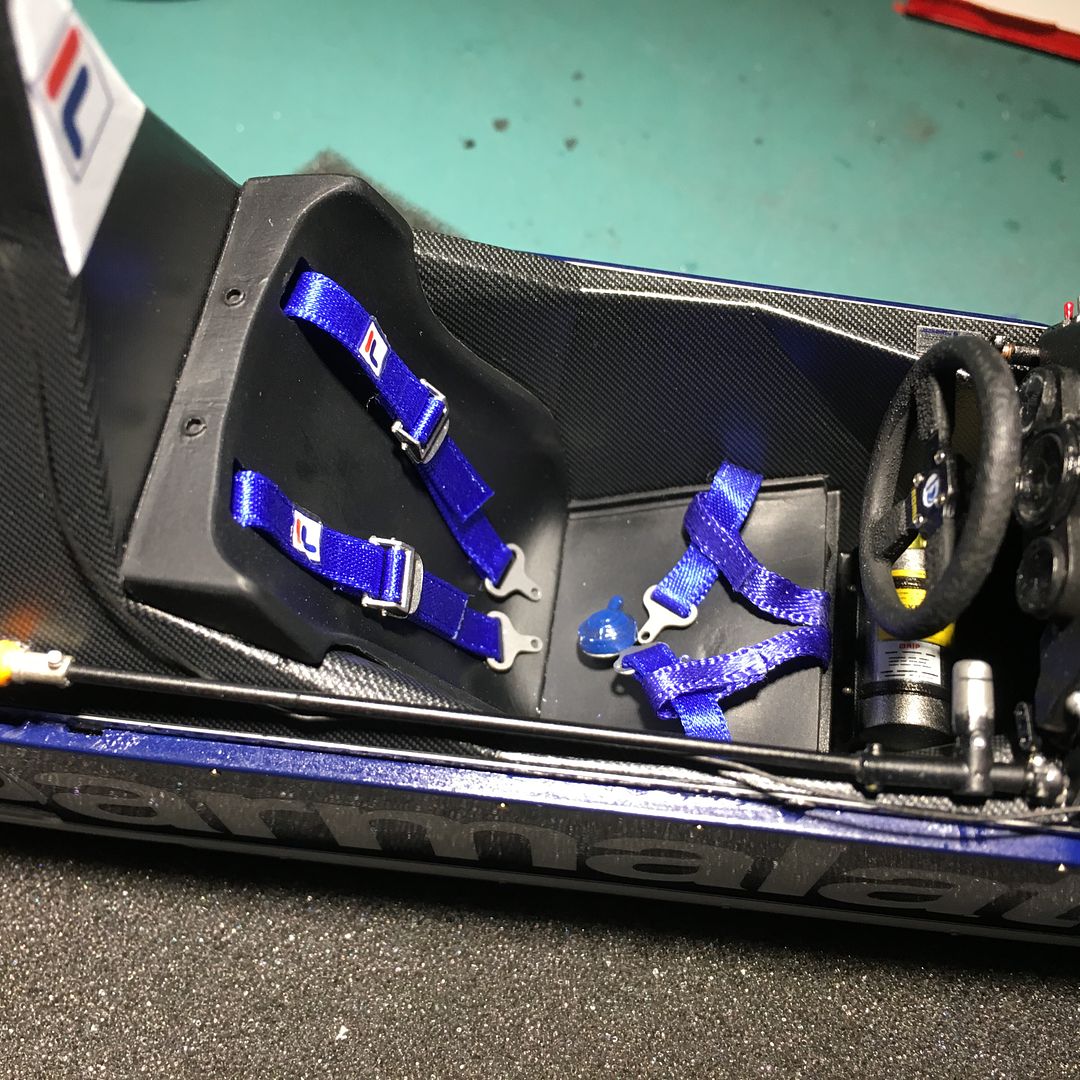
More detail never to be seen - seat belt mounts behind the seat molding...
Small detail stuff now really - apart from final assembly, which looks a pig - getting all the radiators, joining pipes and chassis framework lined up and fixed is going to be a pain - I can tell already!!
Nothing above is actually fixed yet!
Adding brake pipes to the front suspension struts...
I wanted to use these - the tie-wraps that MFH now make - they look 3D printed - BUT - I have not successfully managed to use one yet. They are so brittle and fragile. They have used a similar strip for the belts on the engine, and they just crack. You get the tooth detail, but it snaps off - prefer the molded or rubber bands!!
Anyone managed to use these on anything with success?!
More detail never to be seen - seat belt mounts behind the seat molding...

It is kind of ironic that when I made a kit of this car, (A Tameo 1/43 not one of these hugely complex jobs…) I felt compelled to do Piquets car, much as I disliked him… He did after all drive it extremely well to the WC that year…
BTW Caterhamnut. so very pleased to see, that after the numerous trips to the Caterham Garage on the way back from endless trips to and from Shoreham-by-Sea, where you would sit in and check out every available Caterham on the forecourt… You went and bought your very own one lol….
BTW Caterhamnut. so very pleased to see, that after the numerous trips to the Caterham Garage on the way back from endless trips to and from Shoreham-by-Sea, where you would sit in and check out every available Caterham on the forecourt… You went and bought your very own one lol….
Gassing Station | Scale Models | Top of Page | What's New | My Stuff