MFH 1/12 BT52b
Discussion


thanks all...
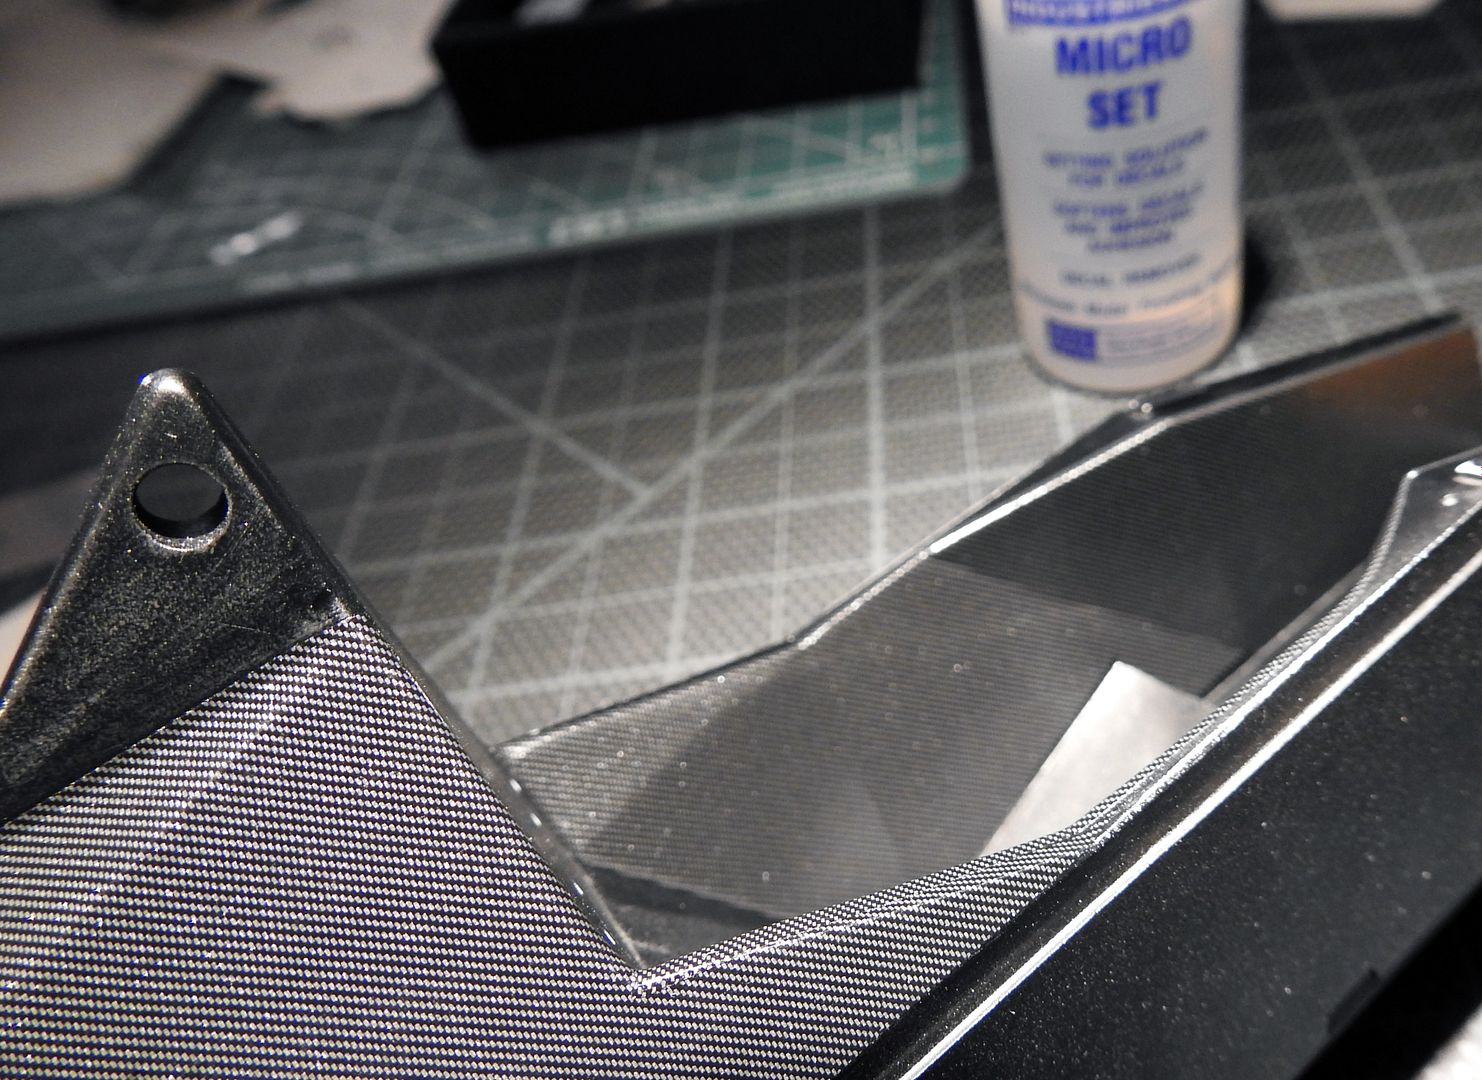
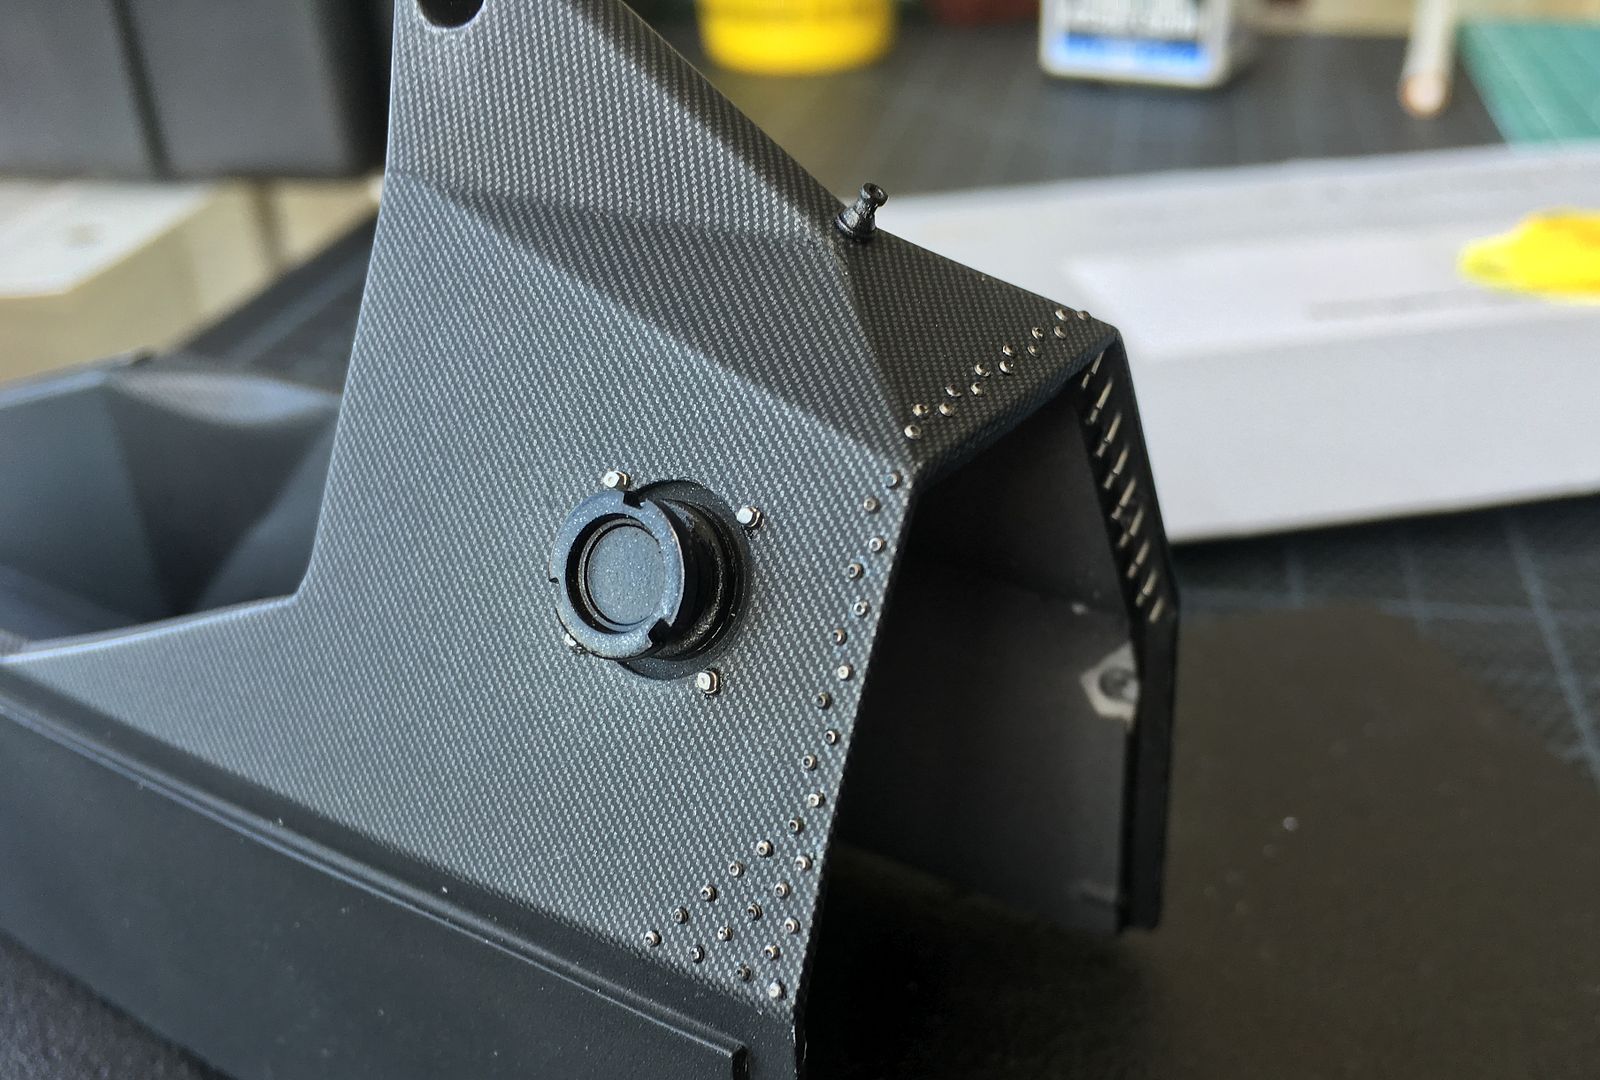
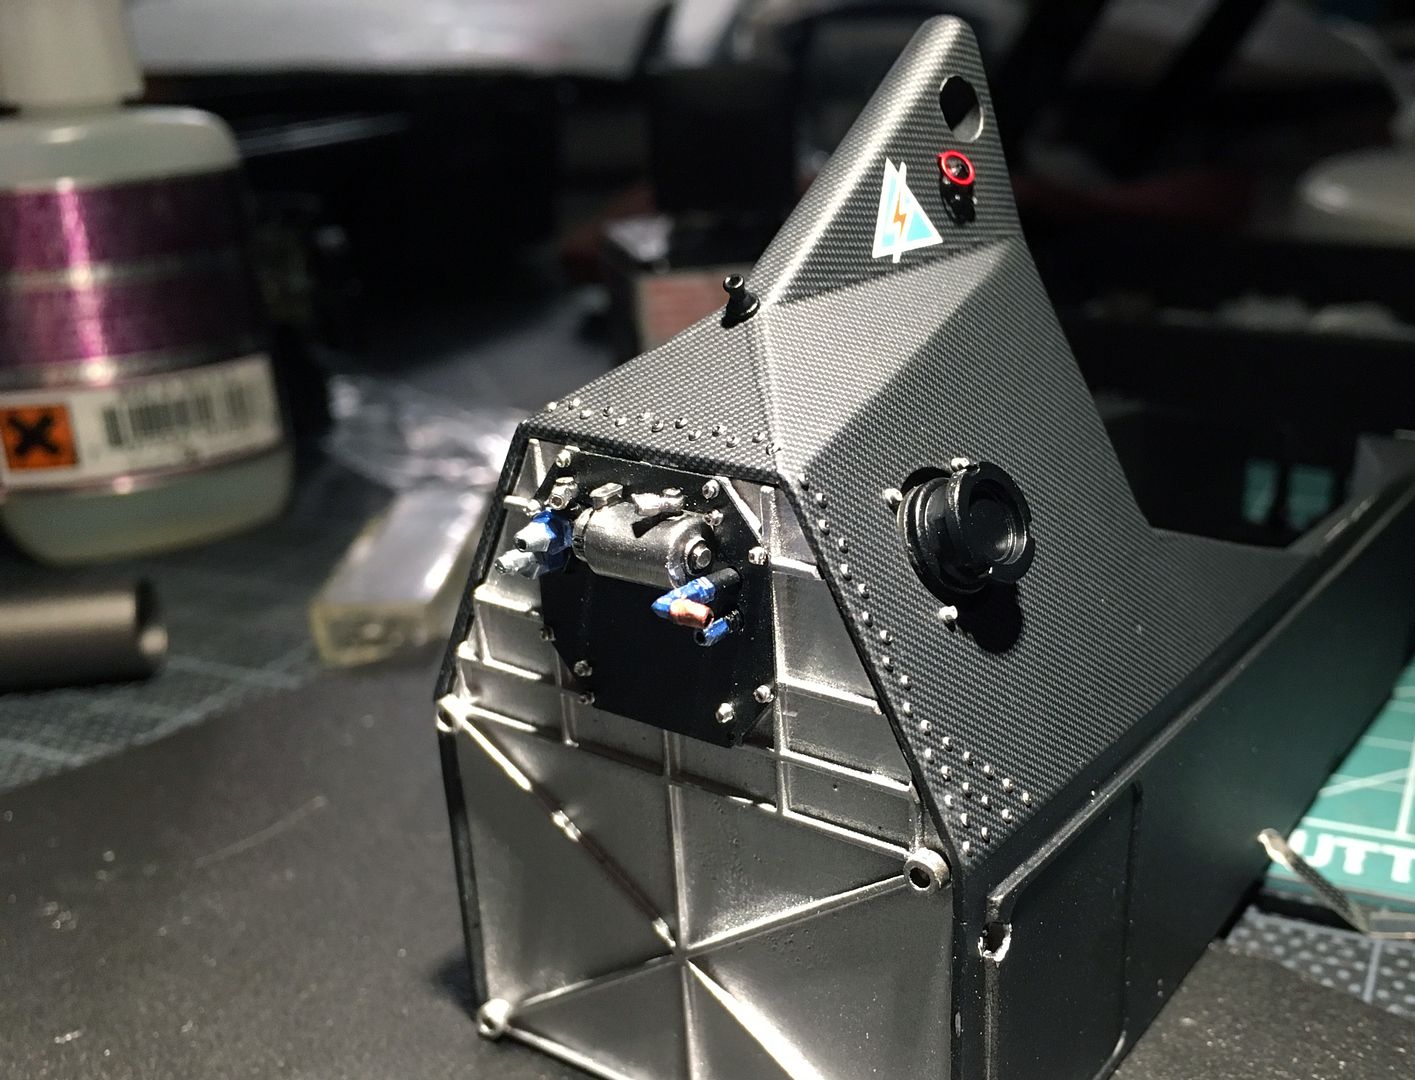
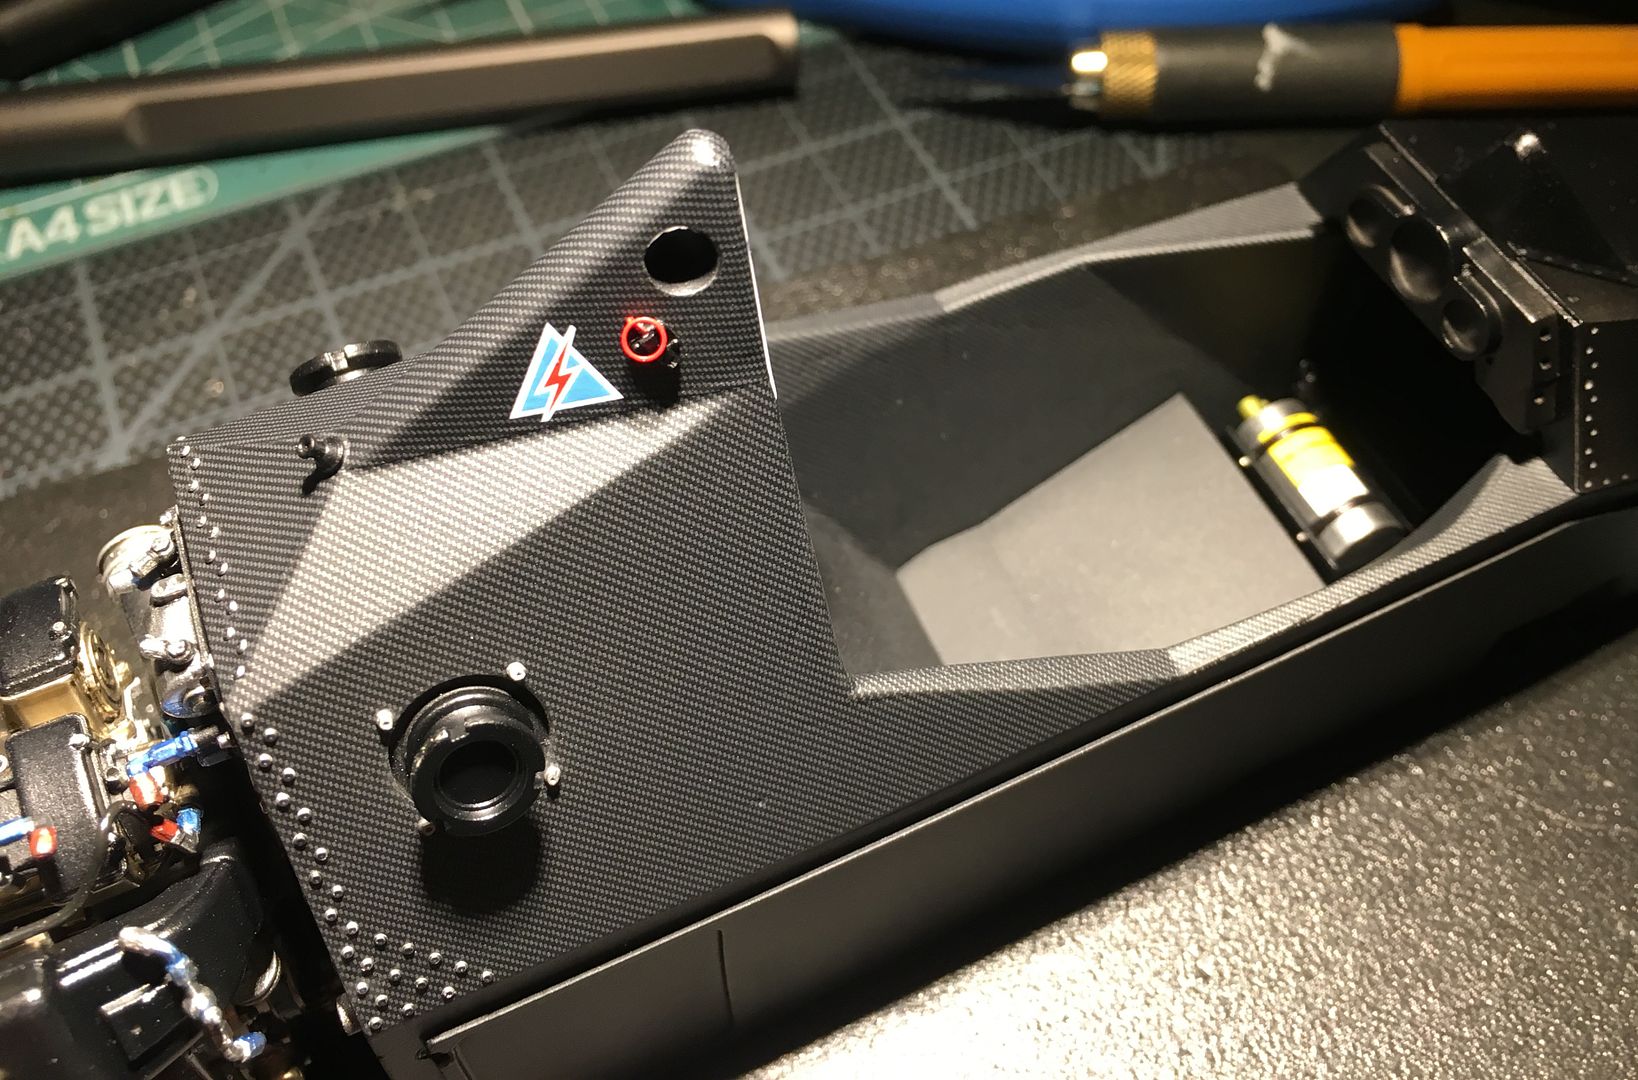
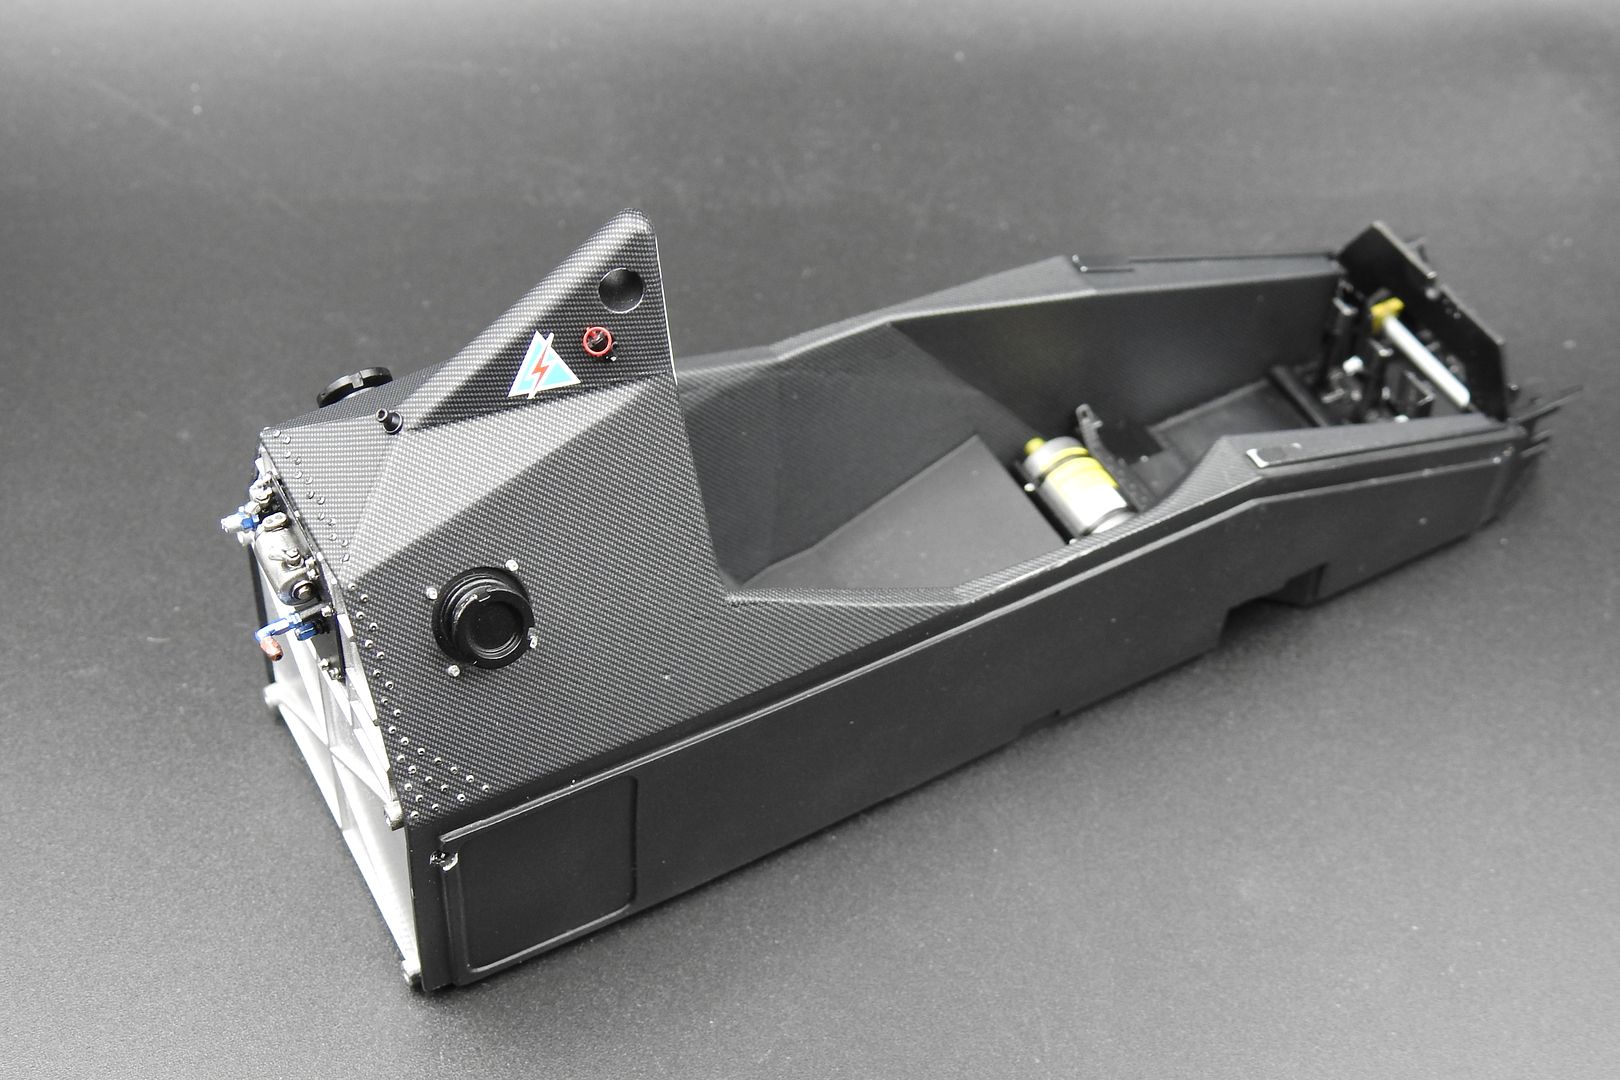
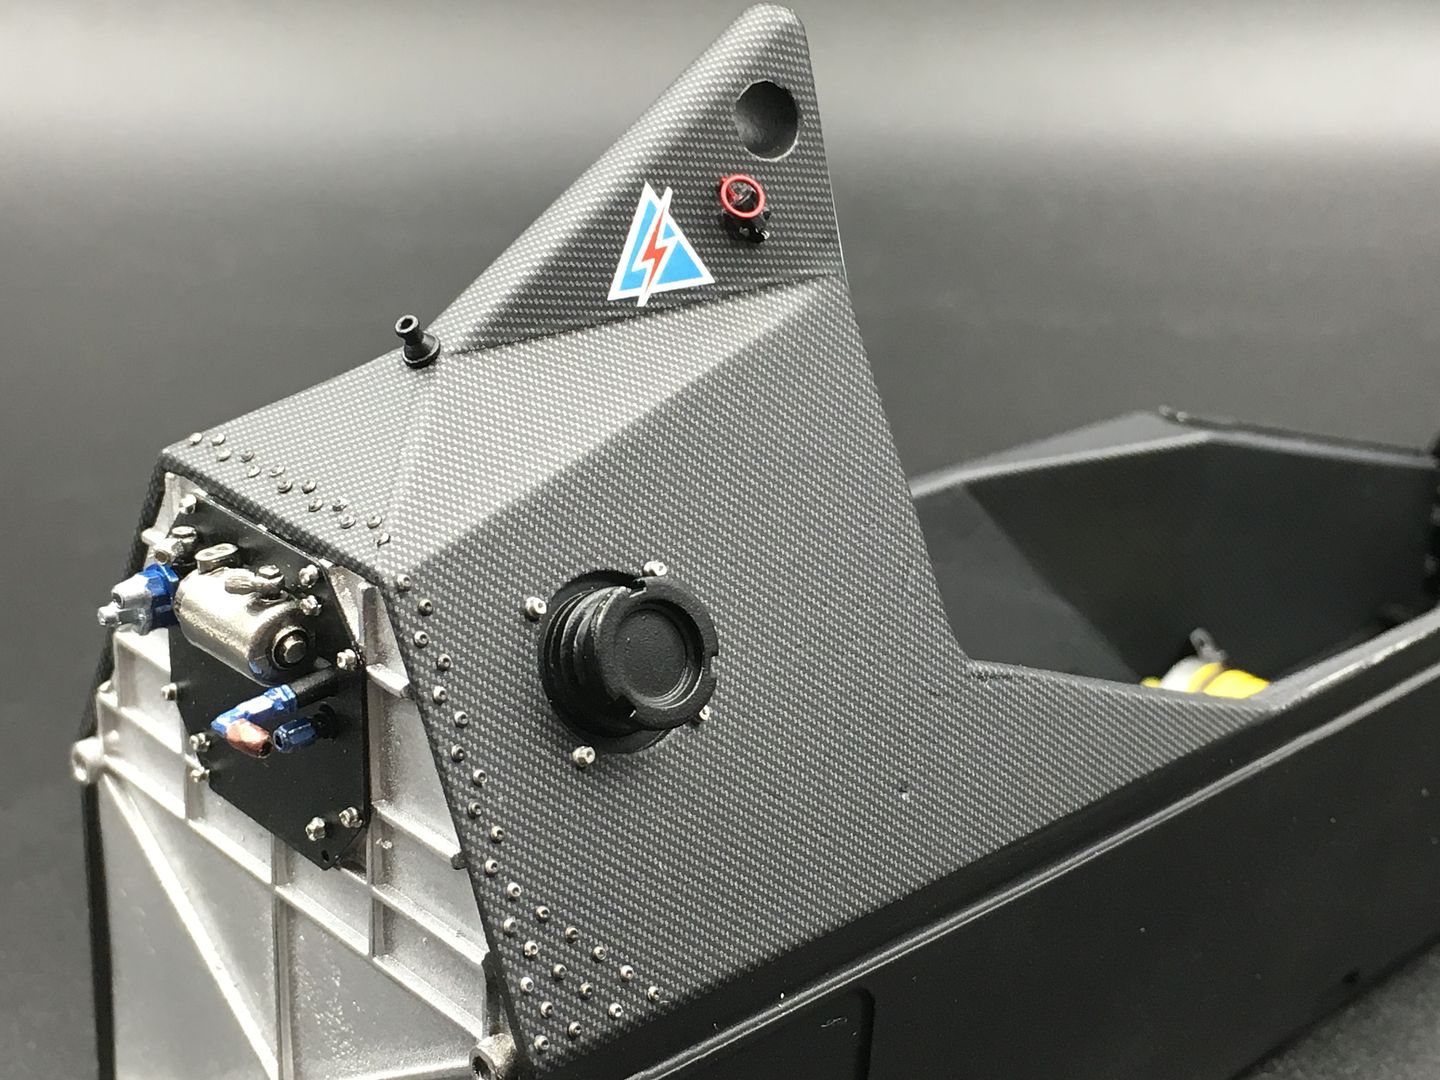
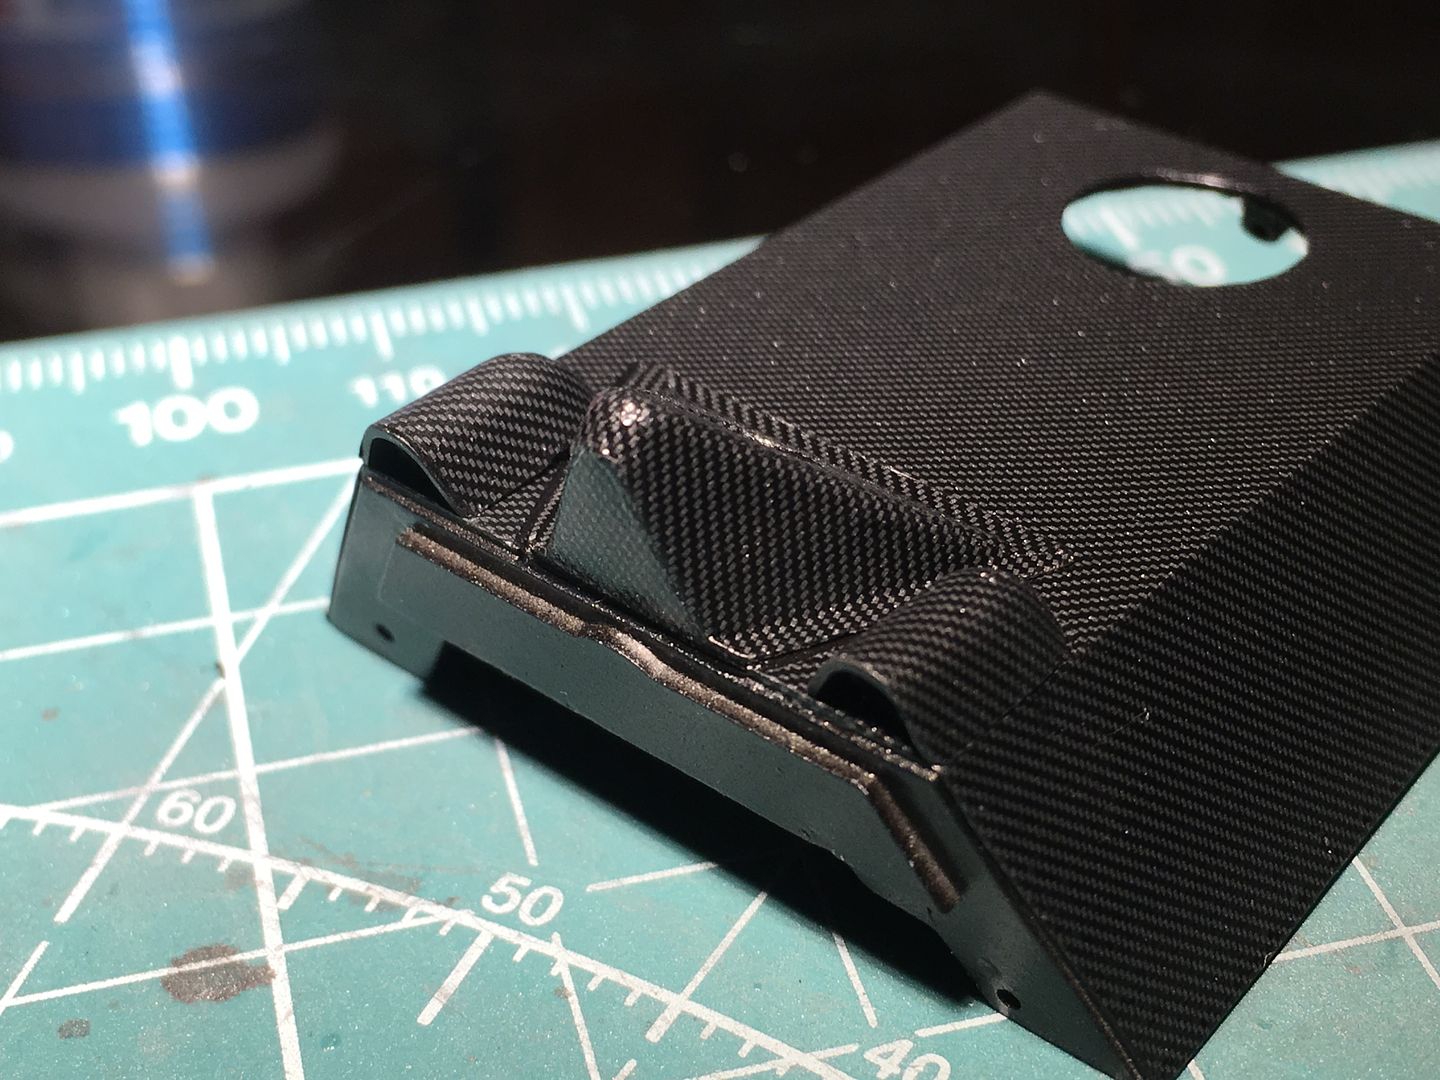
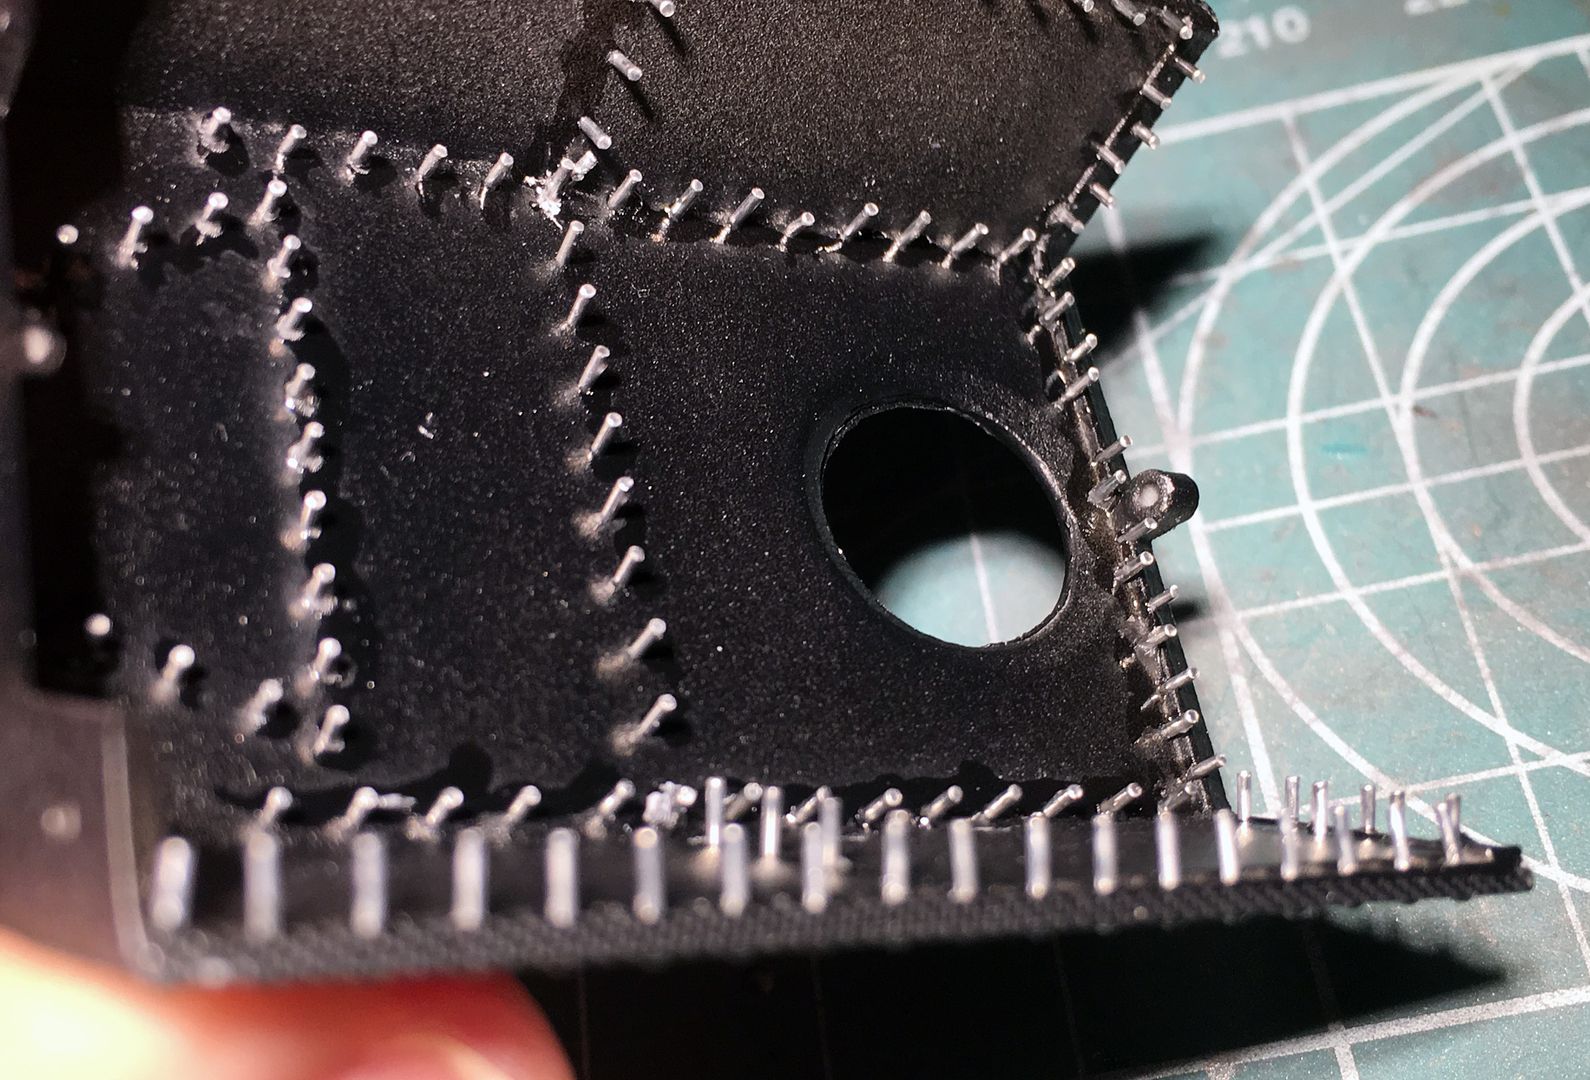
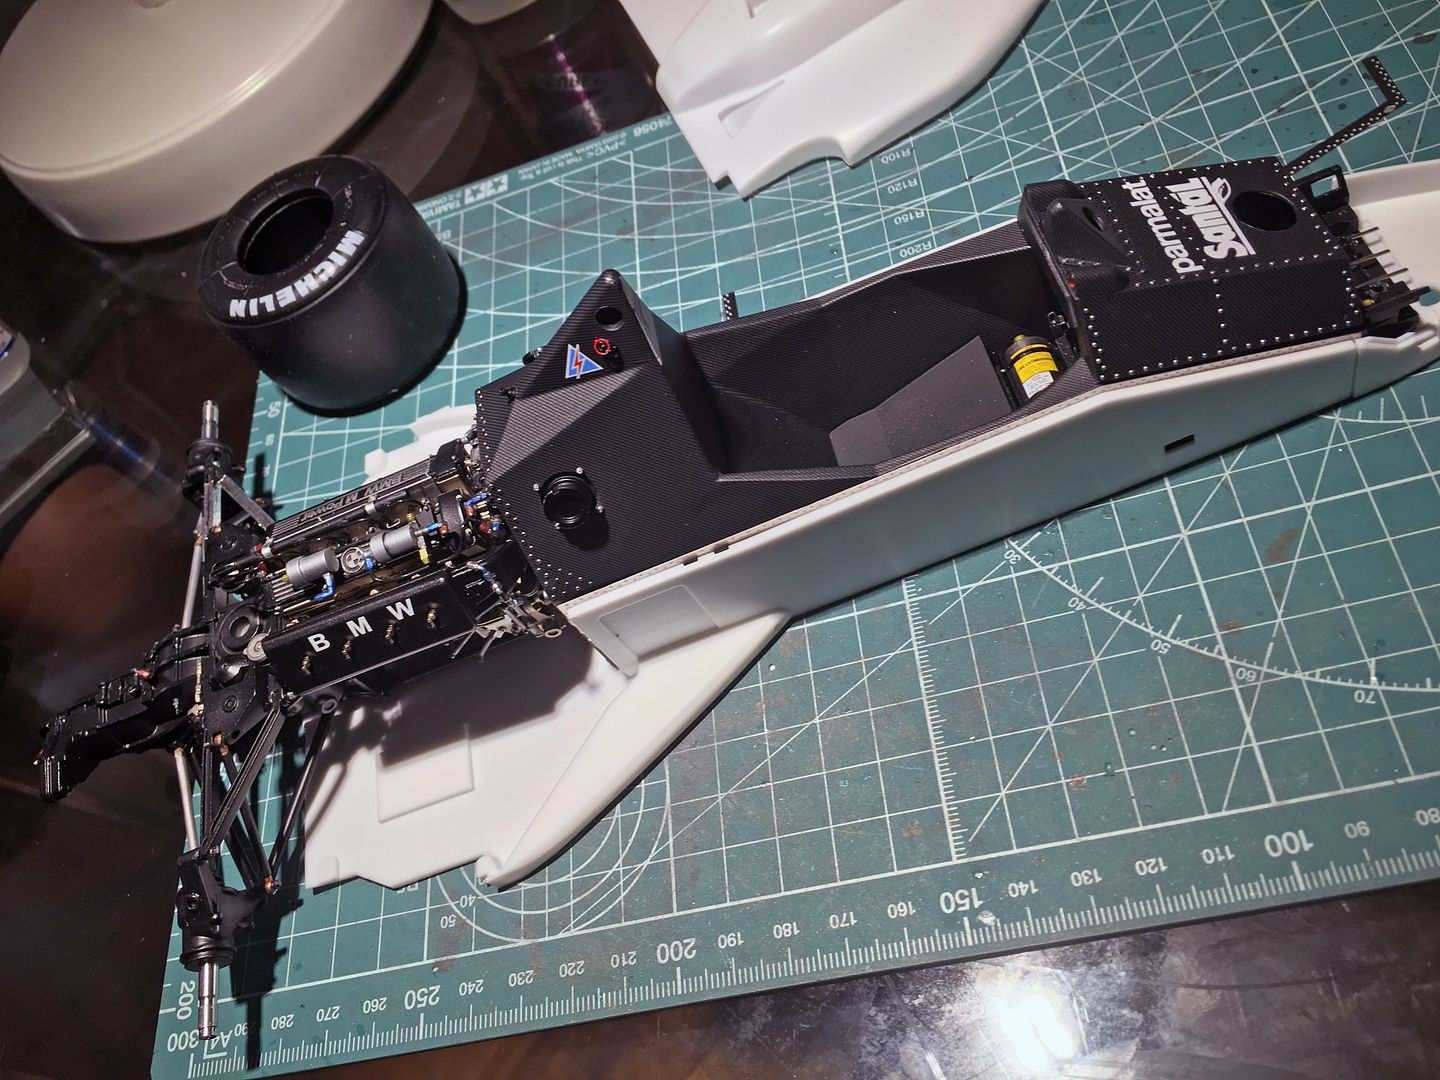
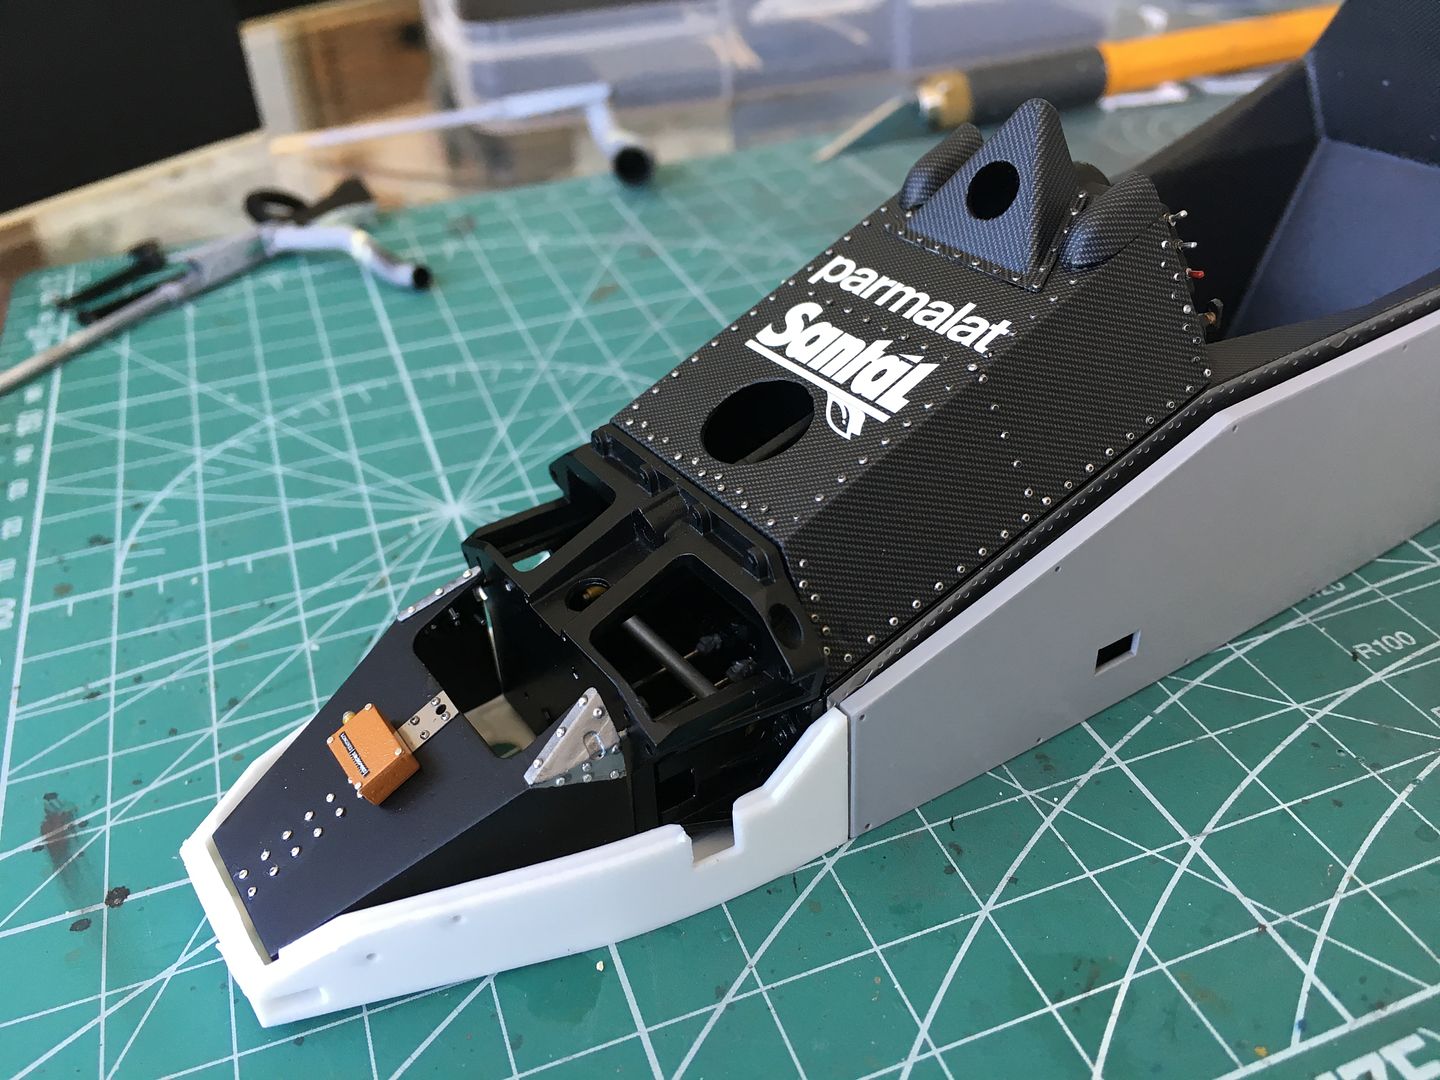
Some more progress - the carbon decals (once cut out from the template - which you must photocopy as it is double sided!) went on very well. The close up pictures show a bit of wrinkling at the very top of the roll hoop, which bothers me - hopefully when there is more detail on the kit it will distract from them!
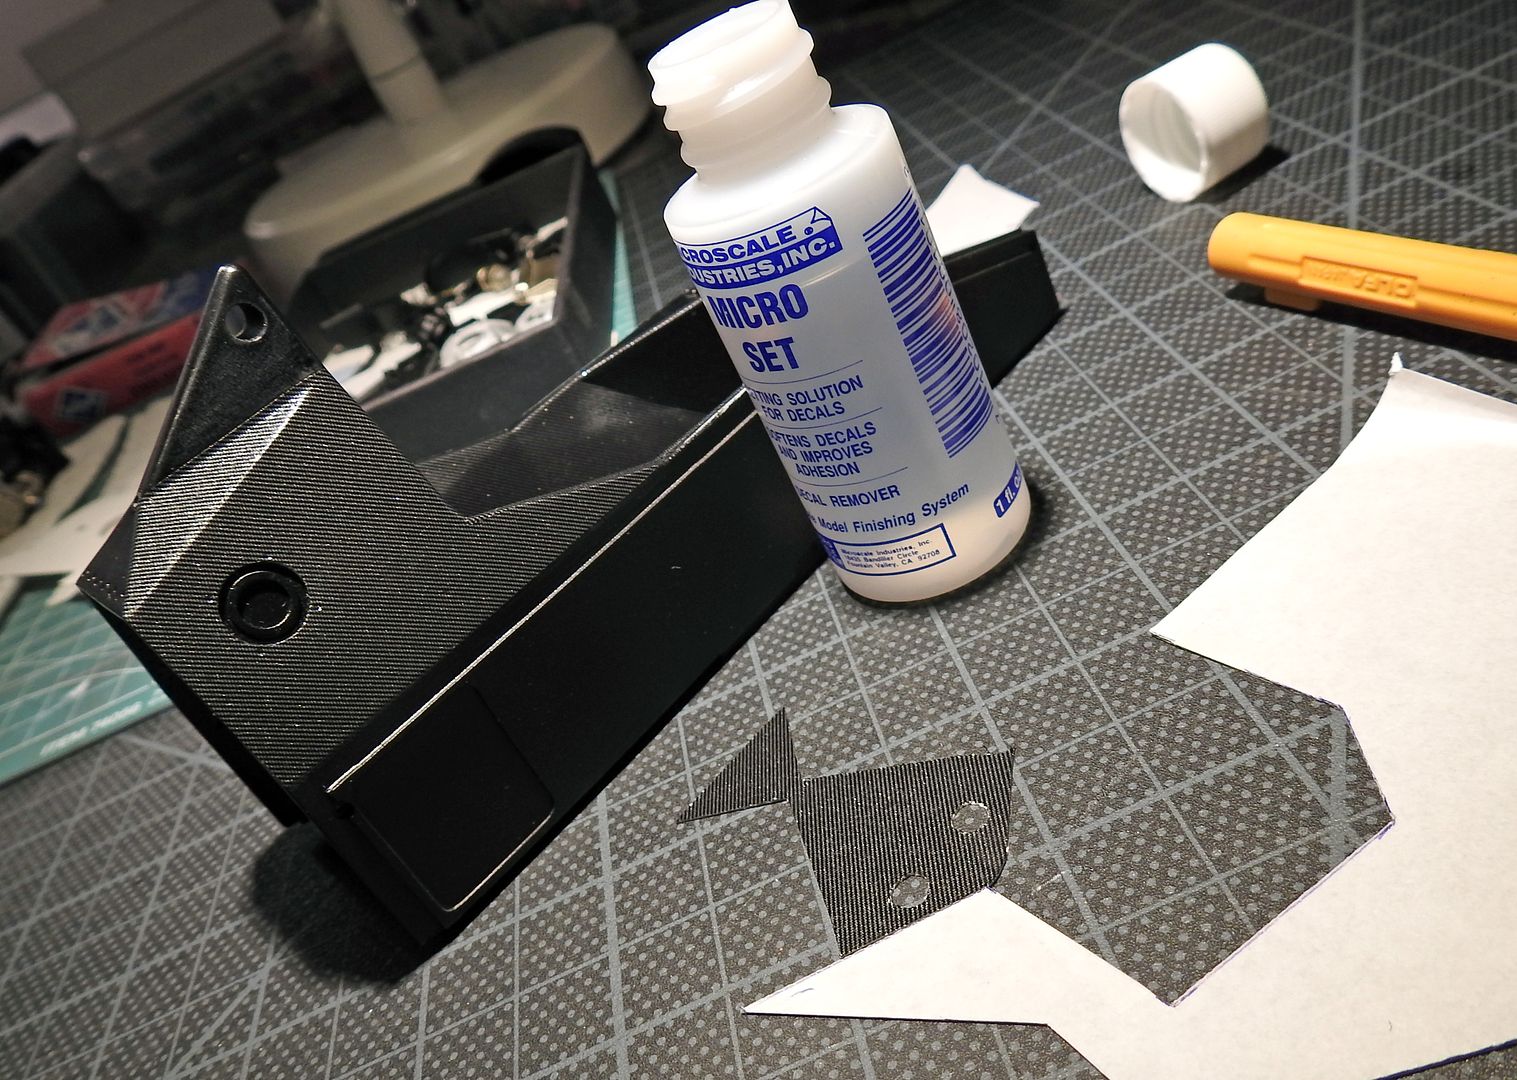
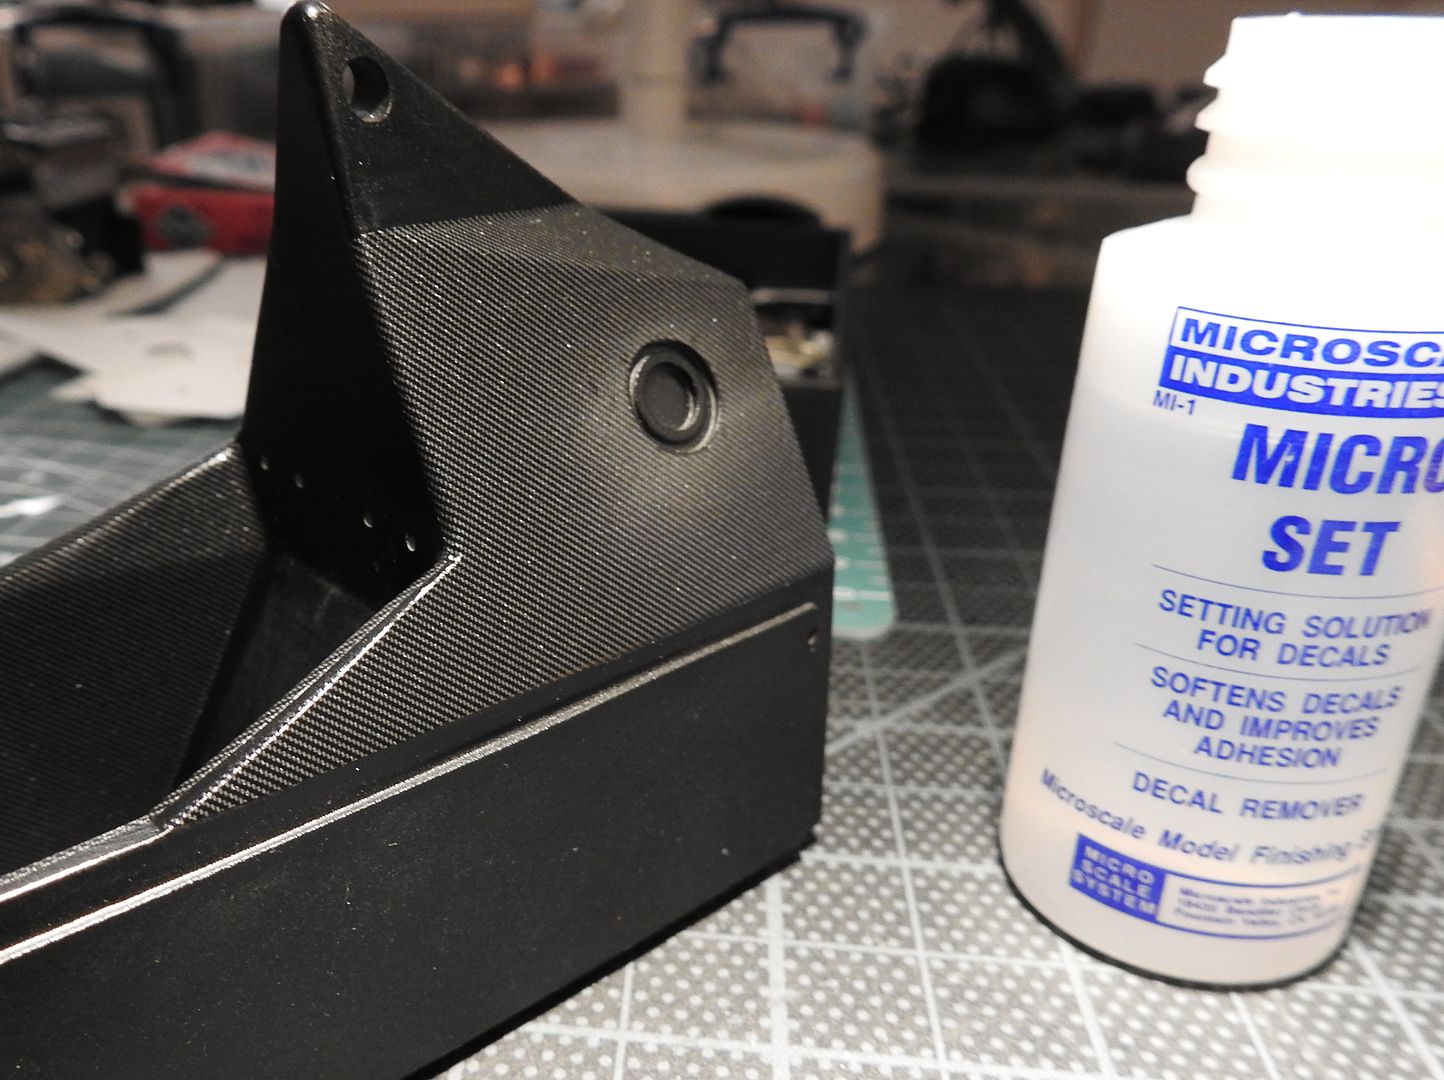
I sprayed the tub with some matt Tamiya spray to protect the finish. I over did it slightly which led to some 'cracking' - but a light coat when the first had dried made these disappear.
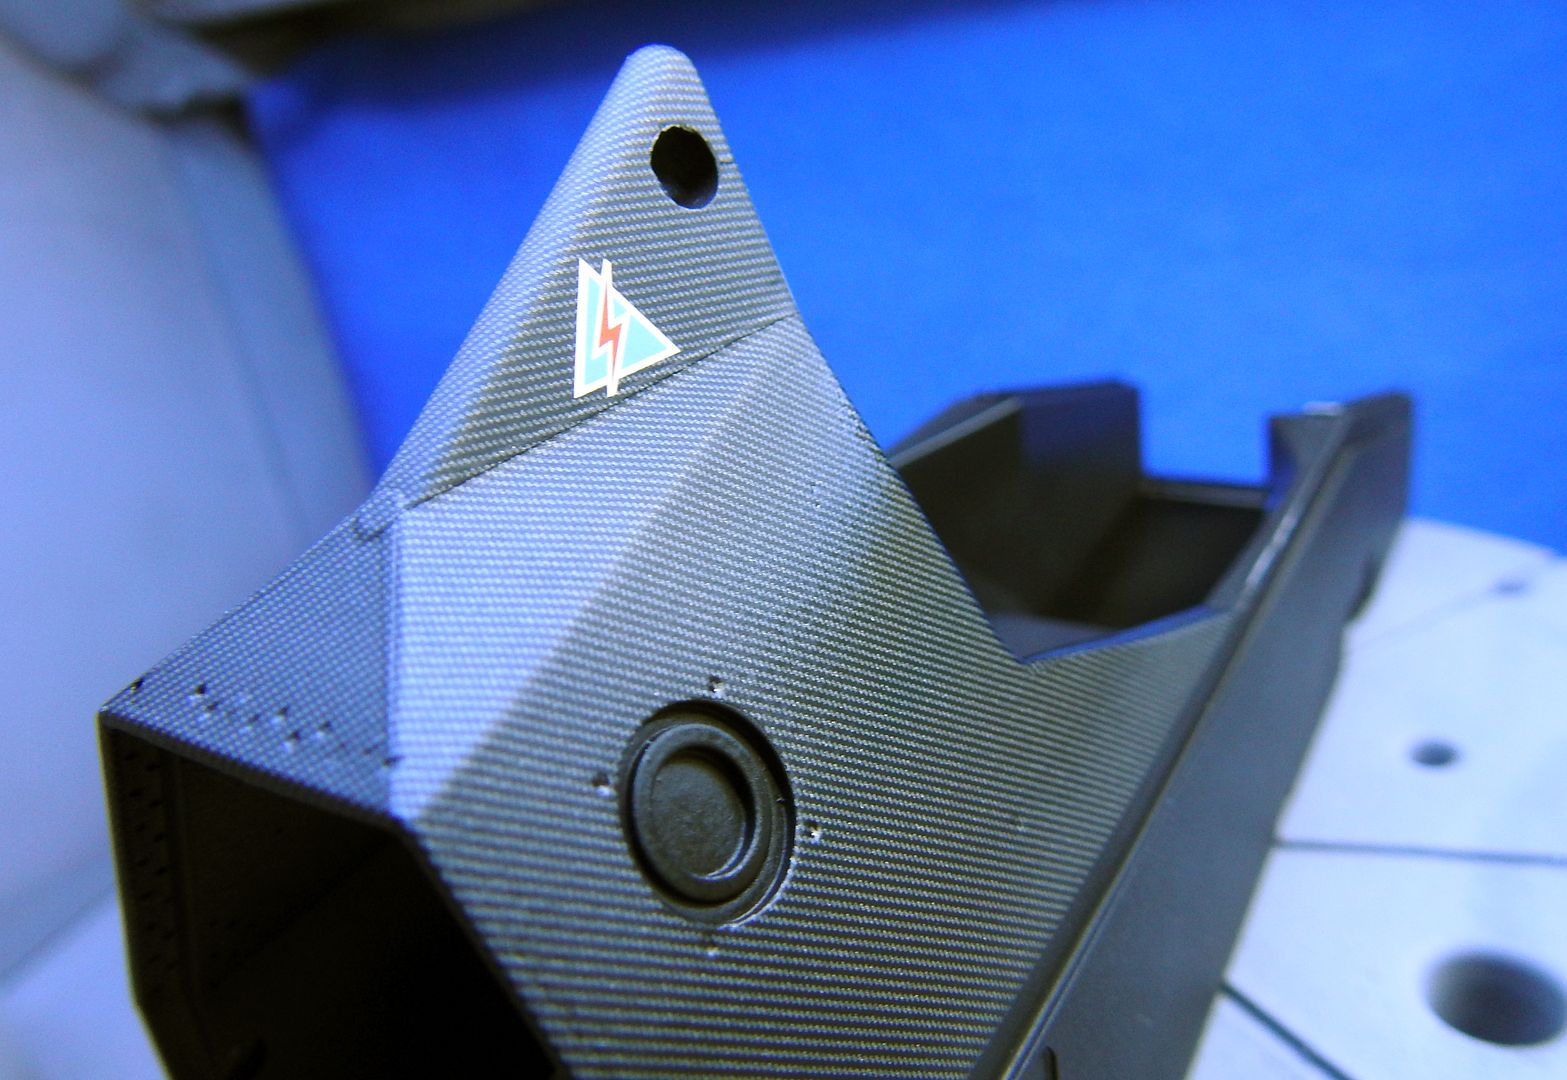
You can see the holes drilled beneath,where the rivets will go. I made sure to press the decal so these would be visible. On this part of the chassis, the rivets look black, so I will partially insert them, and then paint the heads darker. I think I am going to use some MFH 'turned' rivets rather then the white-metal cast ones that come with the kit...
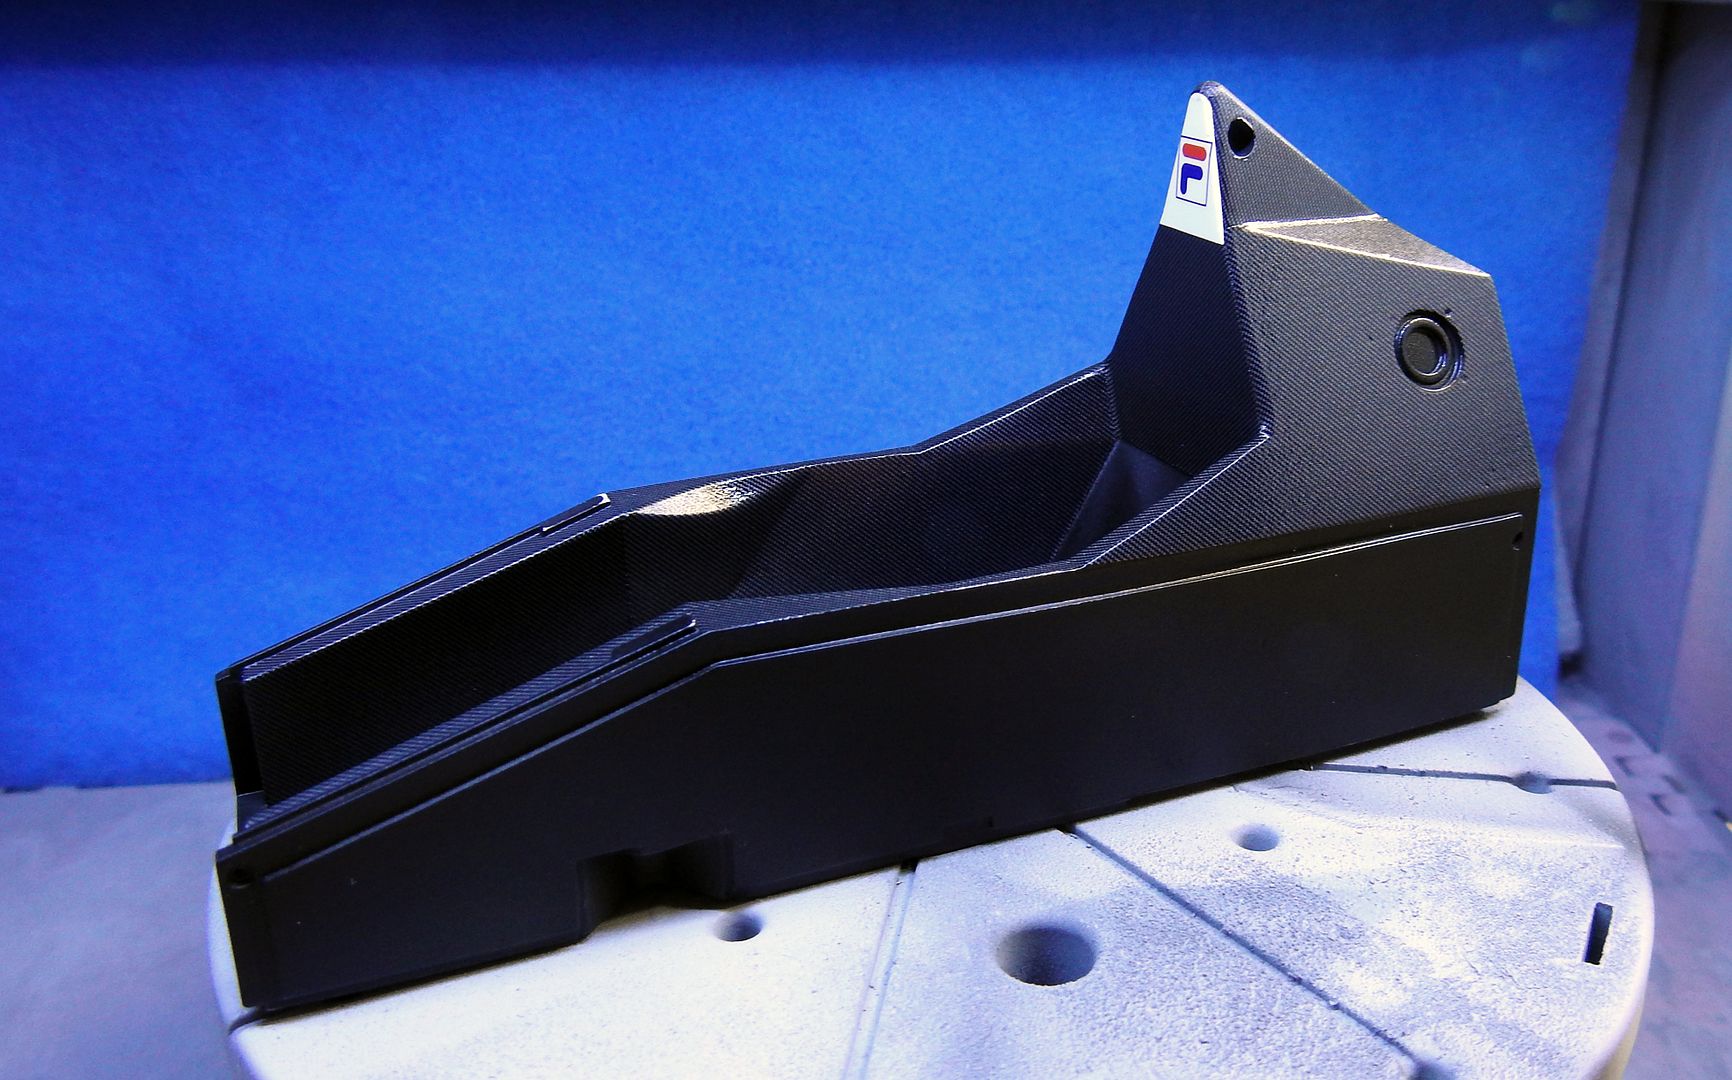
I think some of the carbon decals I have seen for kits looks vastly over-scale, but I think this one looks pretty good.
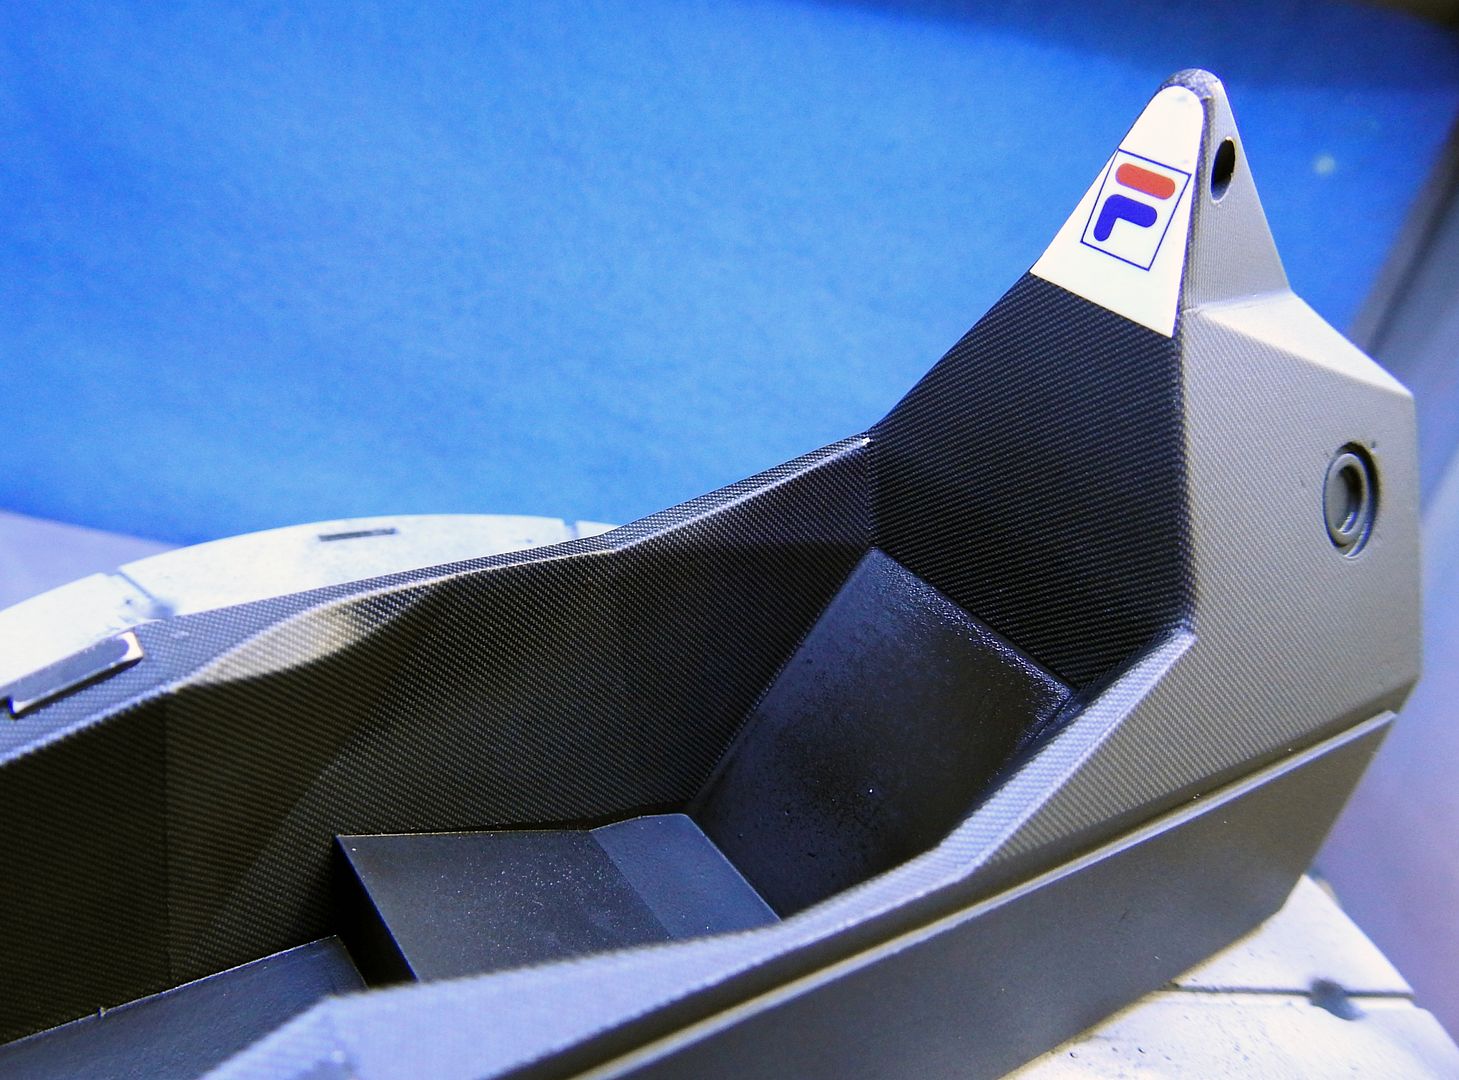
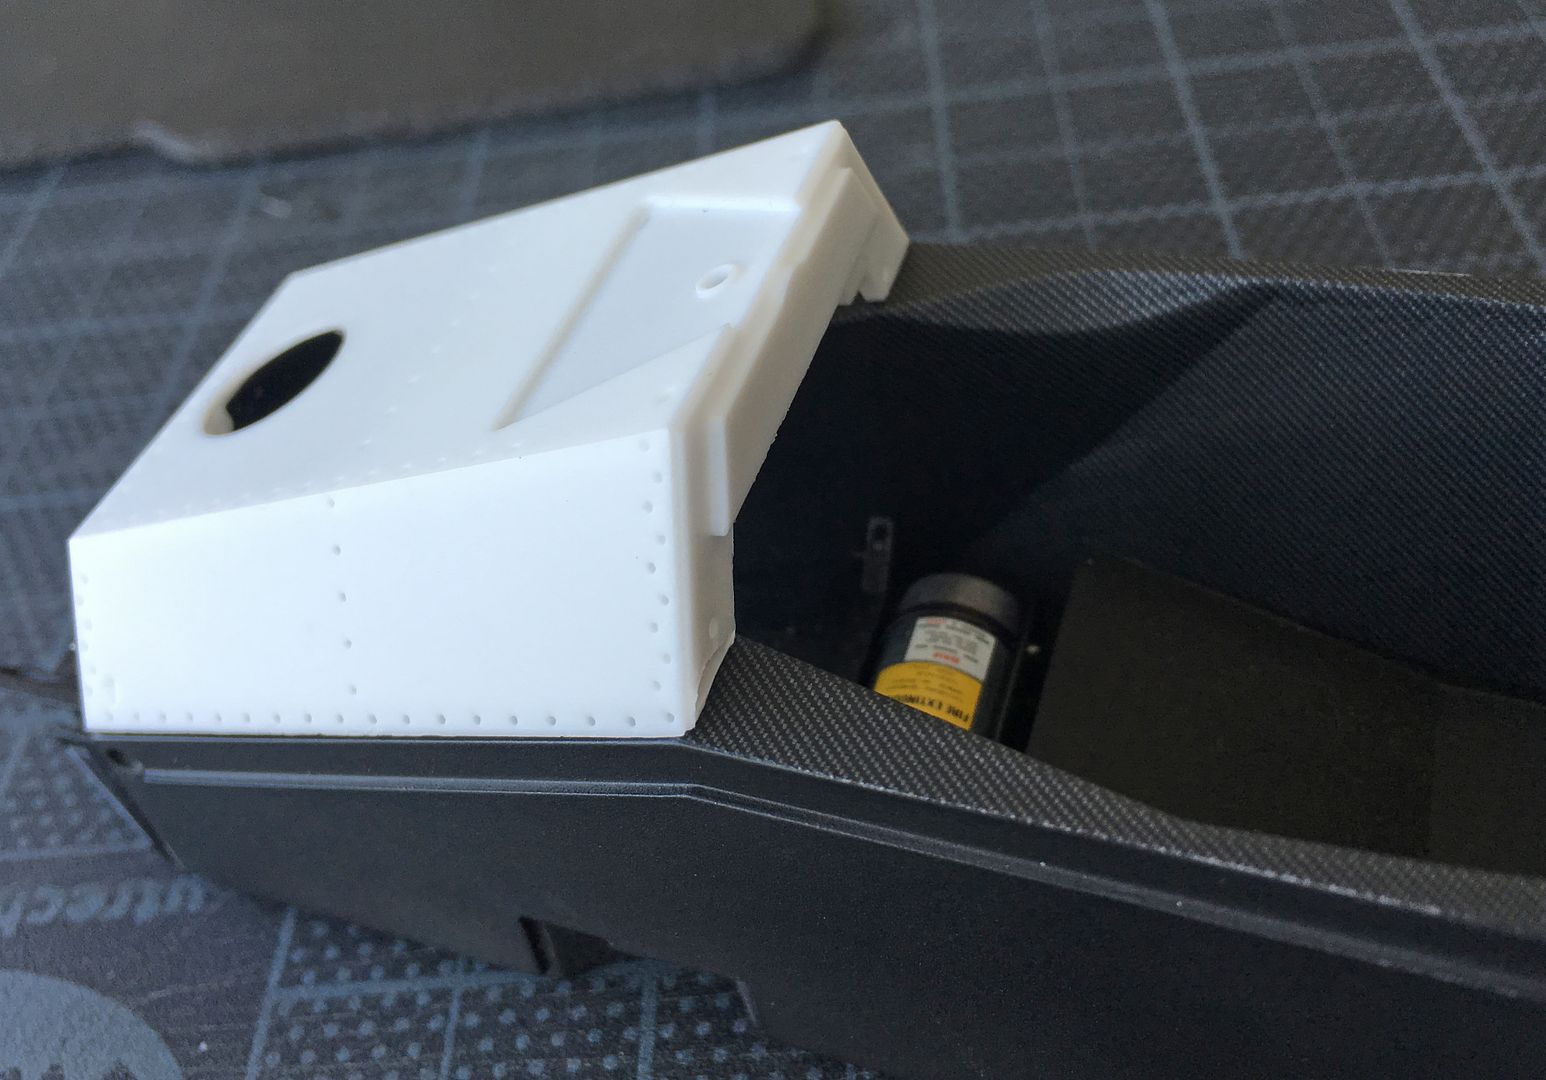
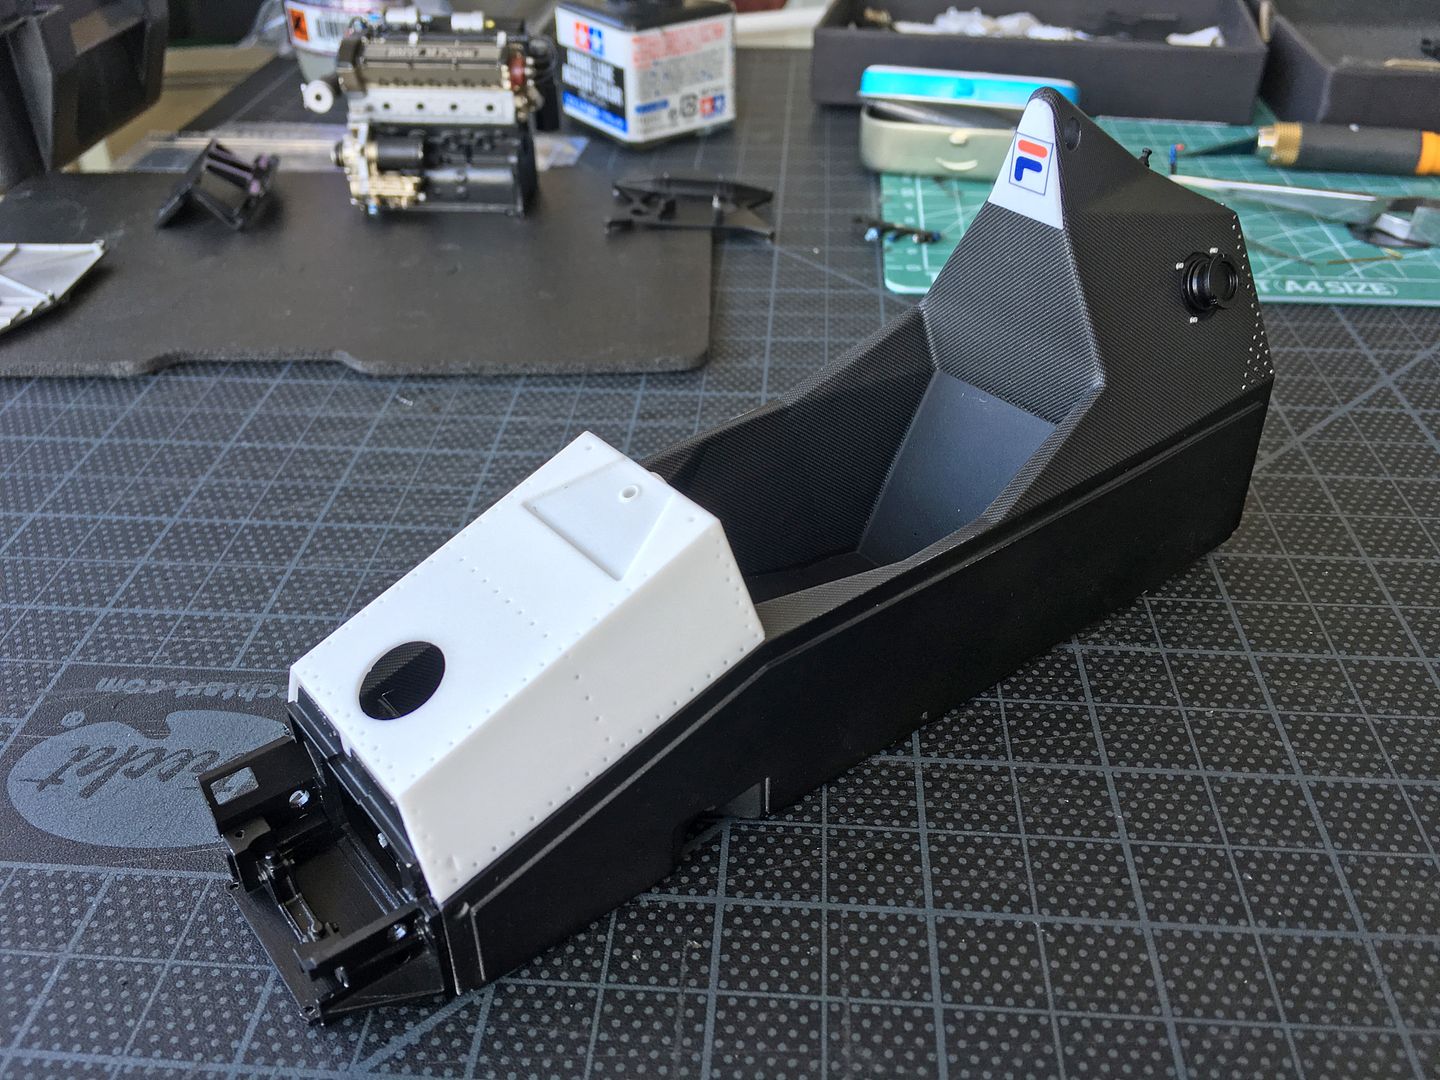
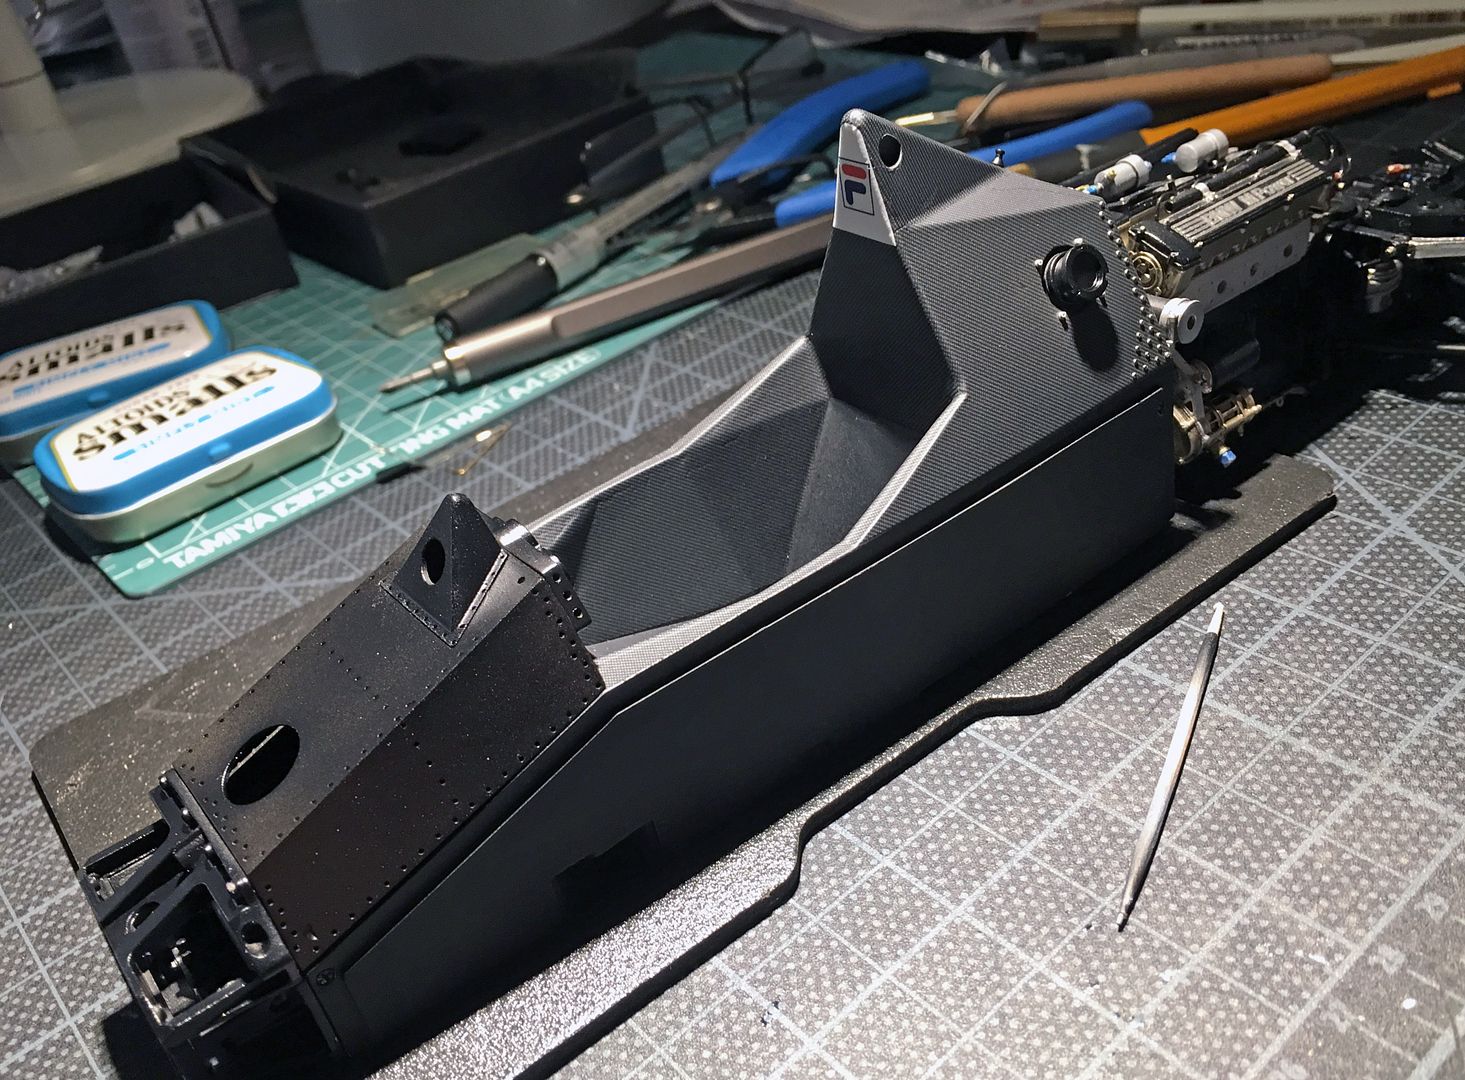
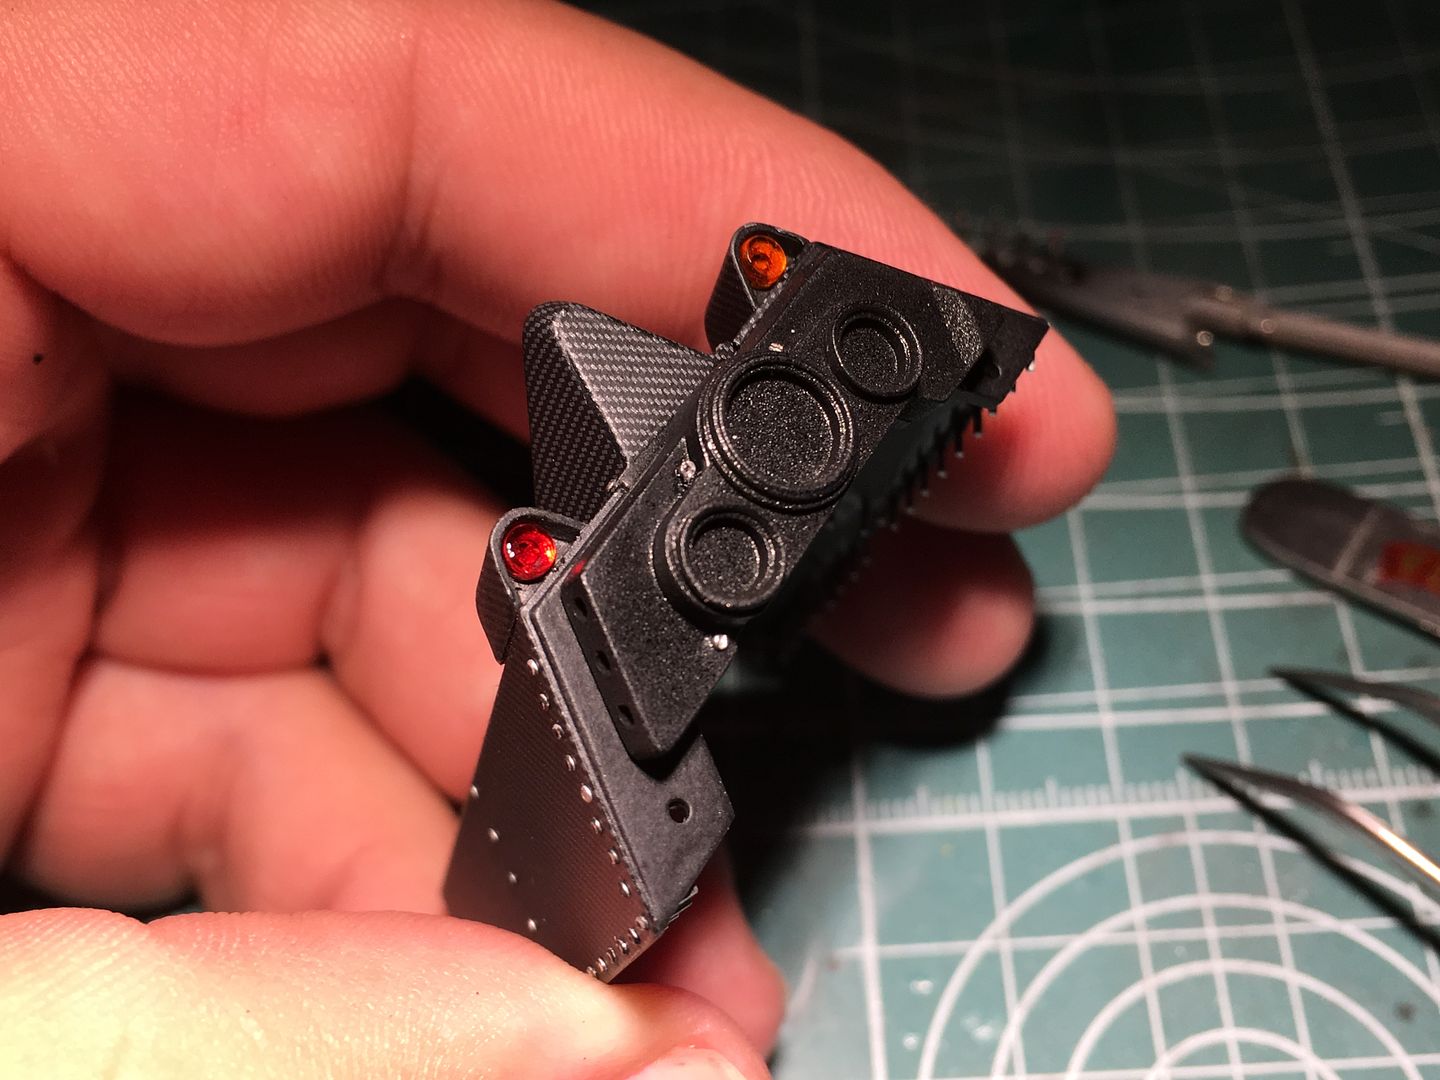
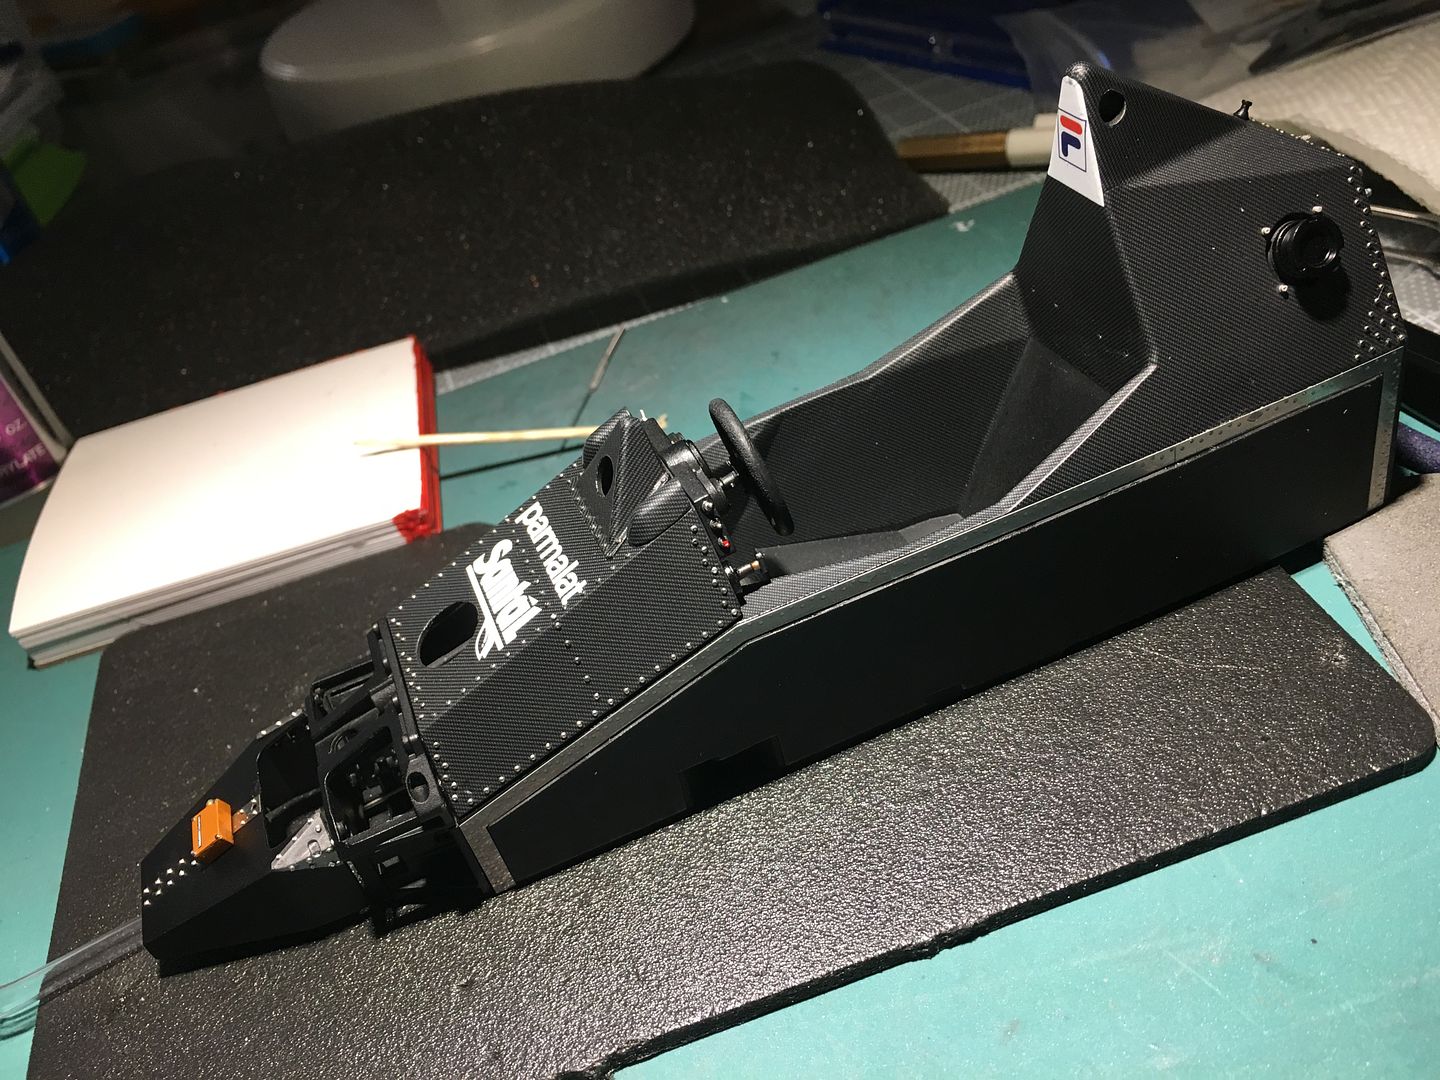
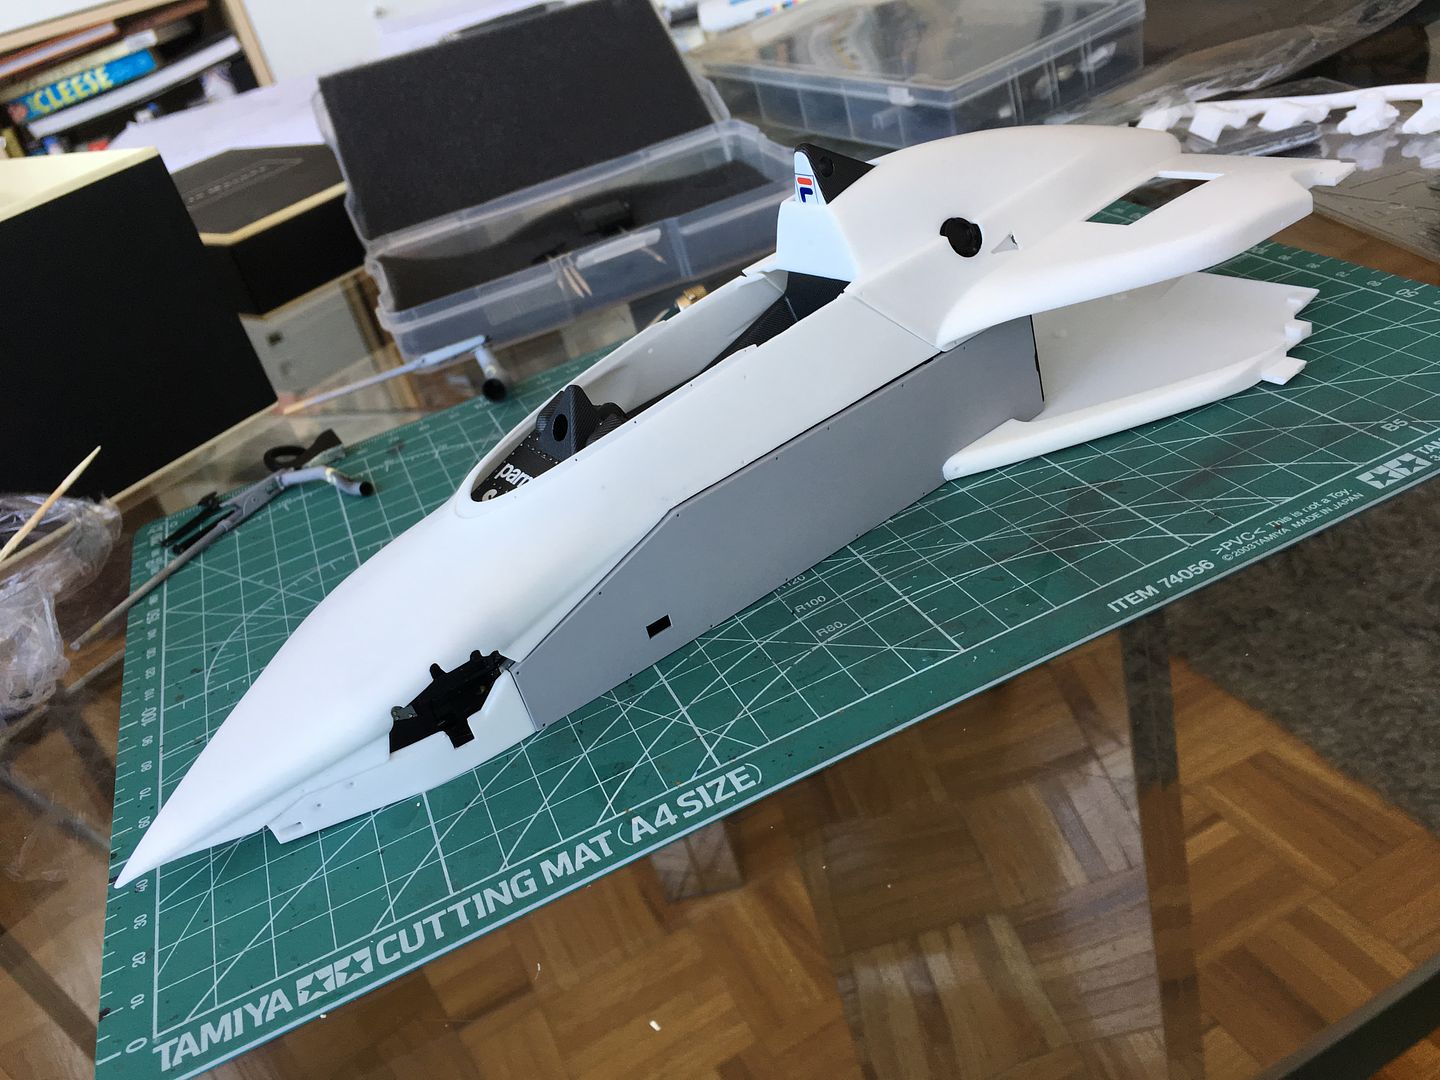
The inevitable mock-up!

Prepared and sprayed lots of bits last night, so should be able to assemble some more stuff tonight...

Some more progress - the carbon decals (once cut out from the template - which you must photocopy as it is double sided!) went on very well. The close up pictures show a bit of wrinkling at the very top of the roll hoop, which bothers me - hopefully when there is more detail on the kit it will distract from them!
I sprayed the tub with some matt Tamiya spray to protect the finish. I over did it slightly which led to some 'cracking' - but a light coat when the first had dried made these disappear.
You can see the holes drilled beneath,where the rivets will go. I made sure to press the decal so these would be visible. On this part of the chassis, the rivets look black, so I will partially insert them, and then paint the heads darker. I think I am going to use some MFH 'turned' rivets rather then the white-metal cast ones that come with the kit...
I think some of the carbon decals I have seen for kits looks vastly over-scale, but I think this one looks pretty good.
The inevitable mock-up!
Prepared and sprayed lots of bits last night, so should be able to assemble some more stuff tonight...


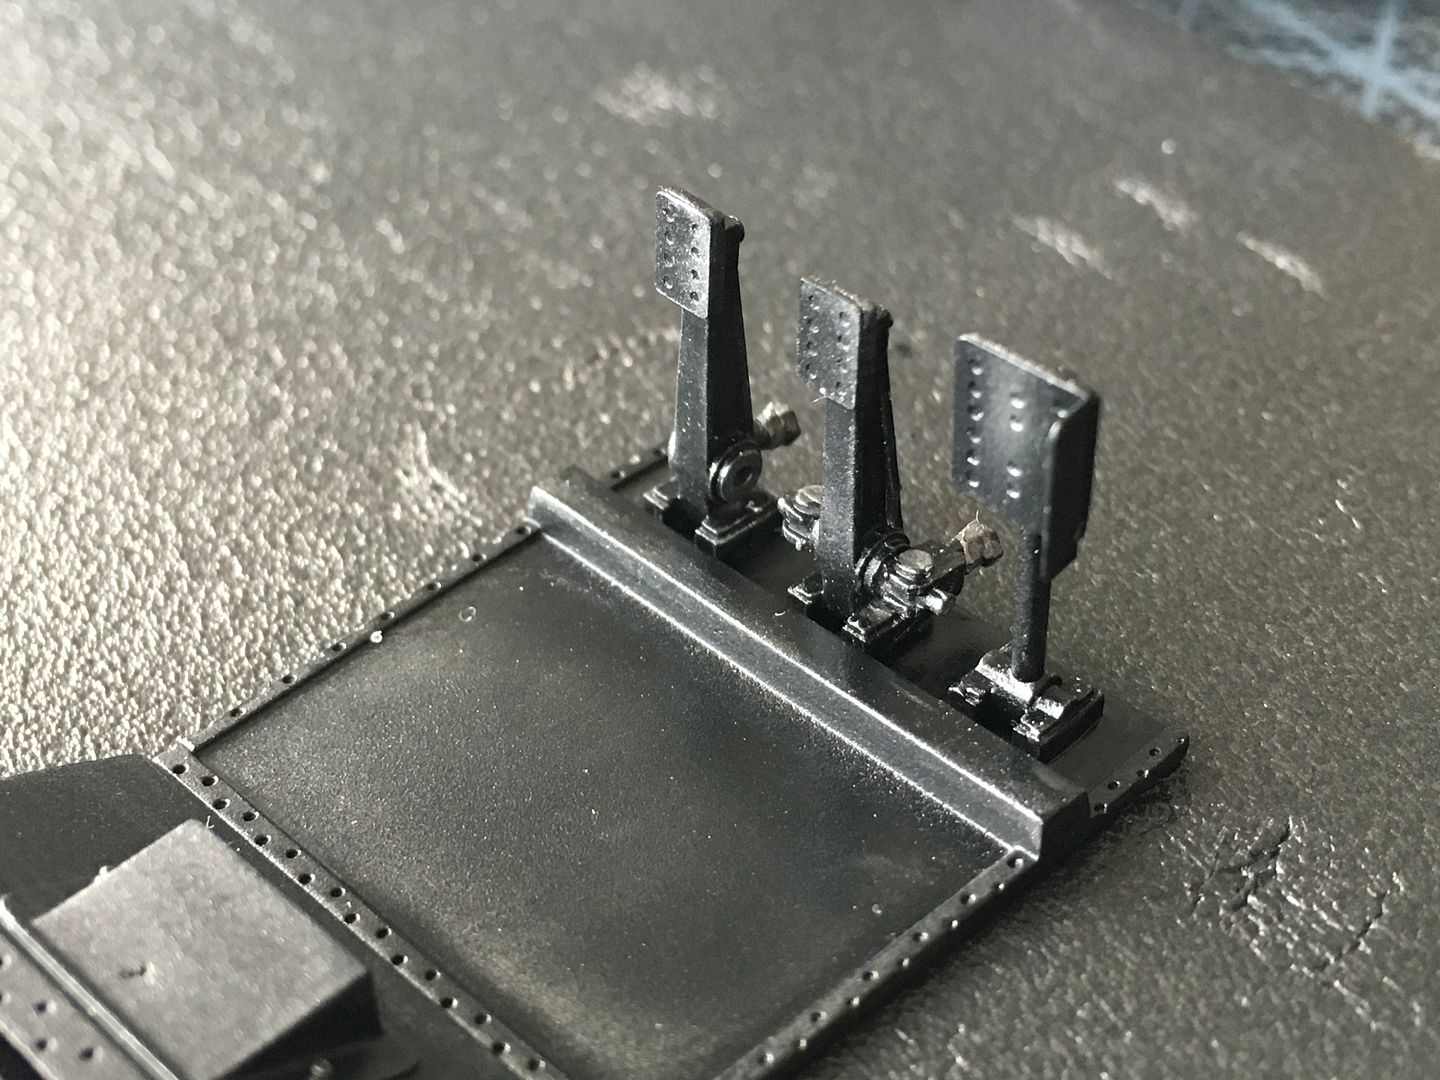
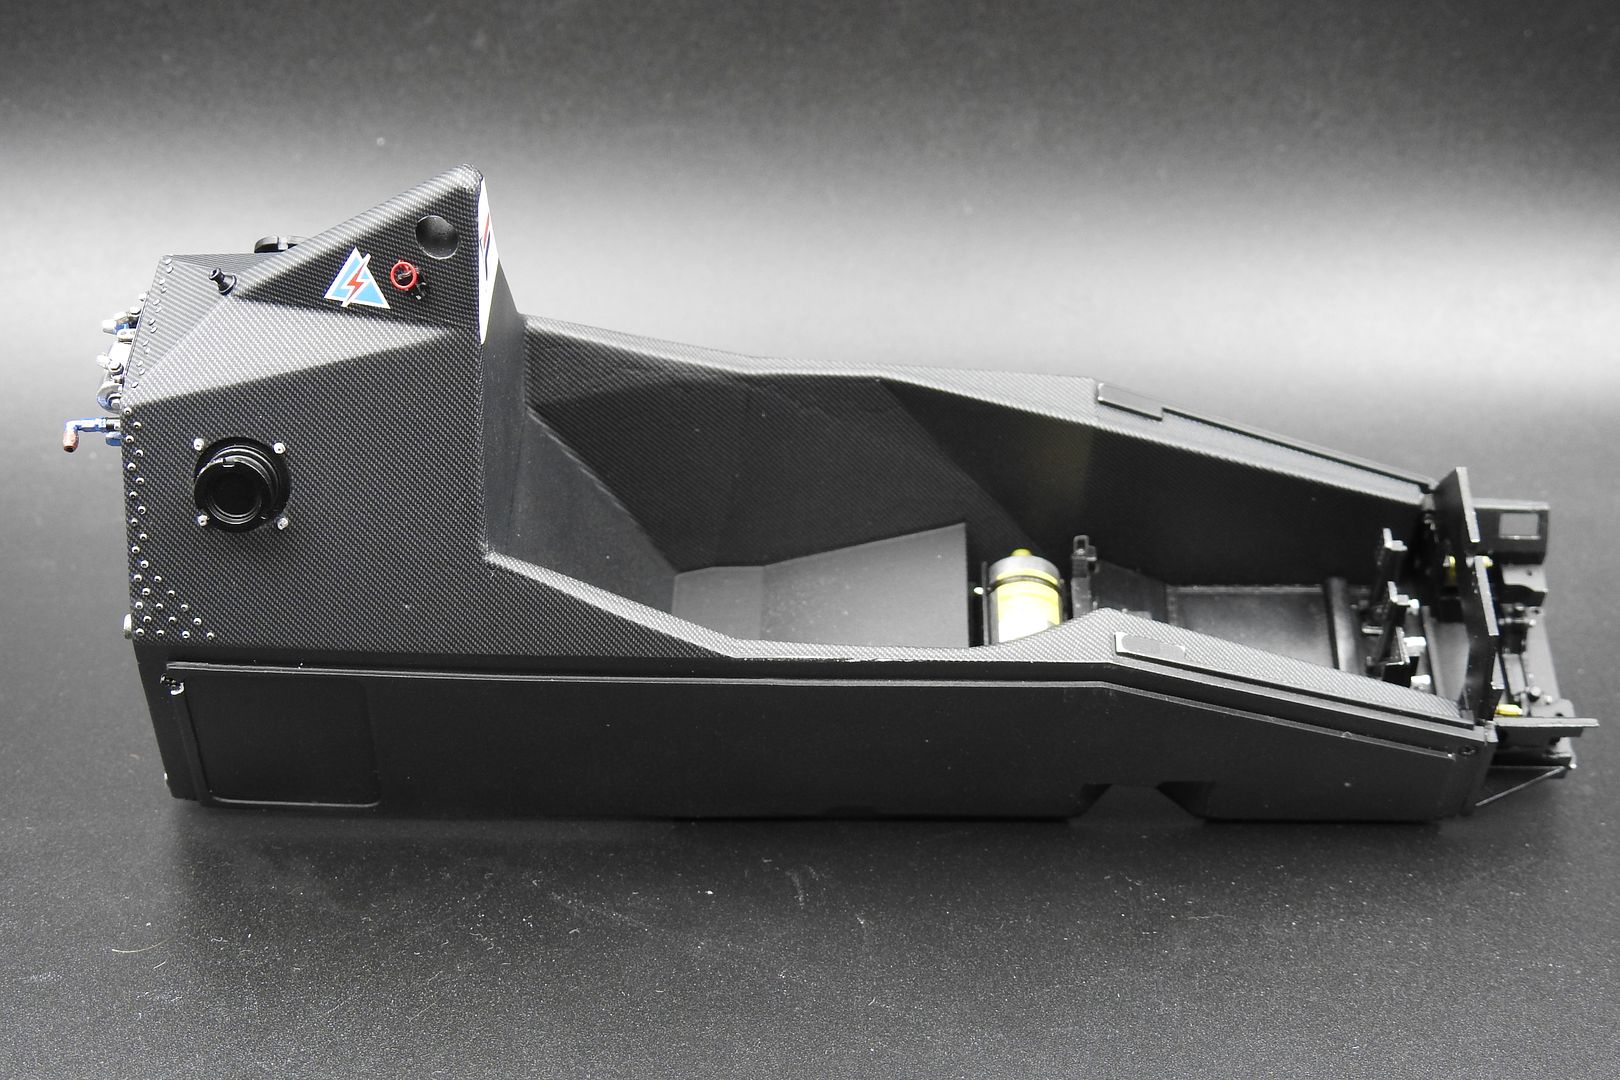
The pedals are all mounted onto a 'floor' sub-assembly. It is all semi-gloss black, so I will use a little 'weathering' to bring out some highlights - although again - once the top of the chassis is fixed on, none of this will be visible!
You can just see where I used some Tamiya weathering silver to bring out some edges and definition. Wanted it subtle as I am not really 'weathering' the car...
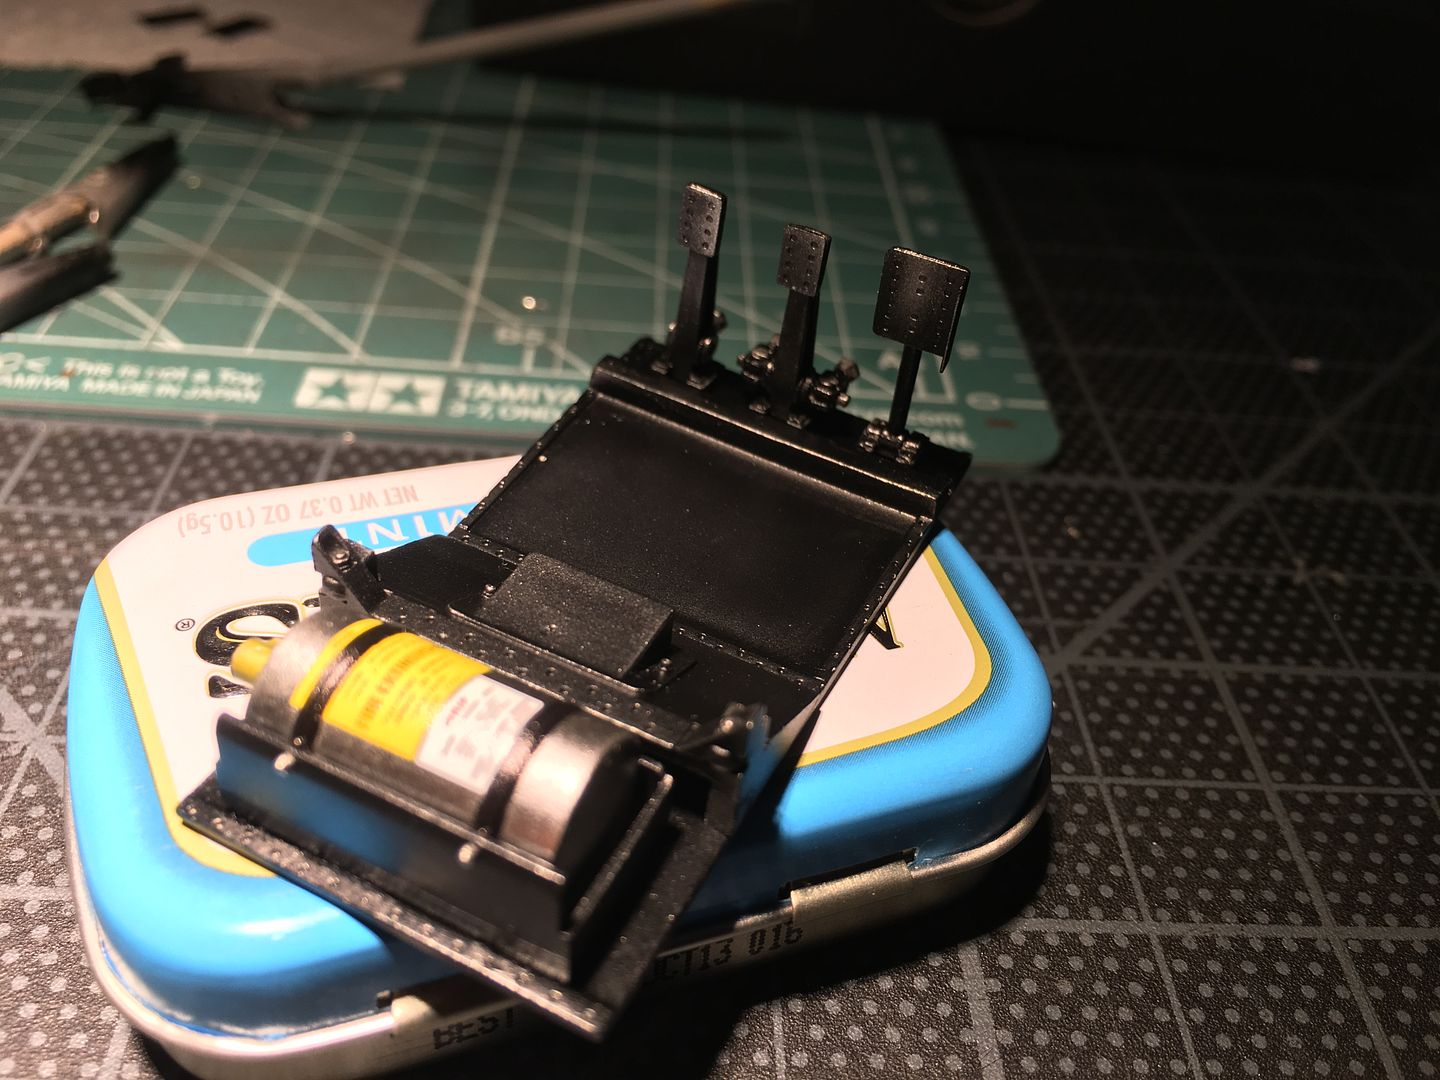
You can see the silver on the pedals.
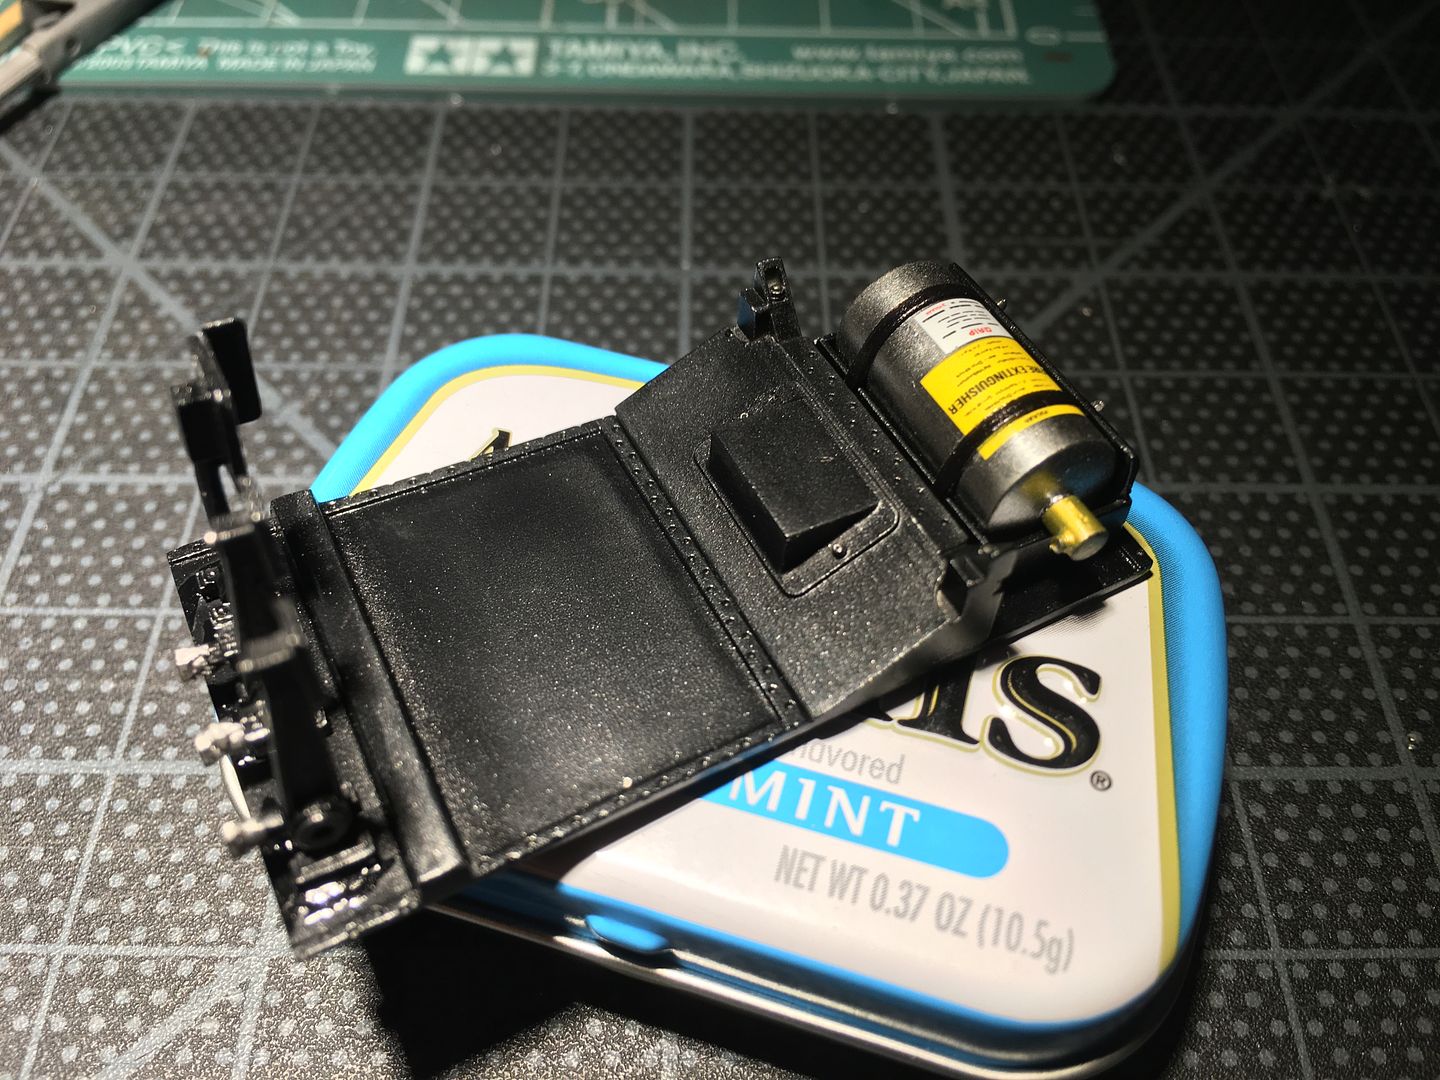
This then slips into the front of the chassis tub...

Subtle highlighting...
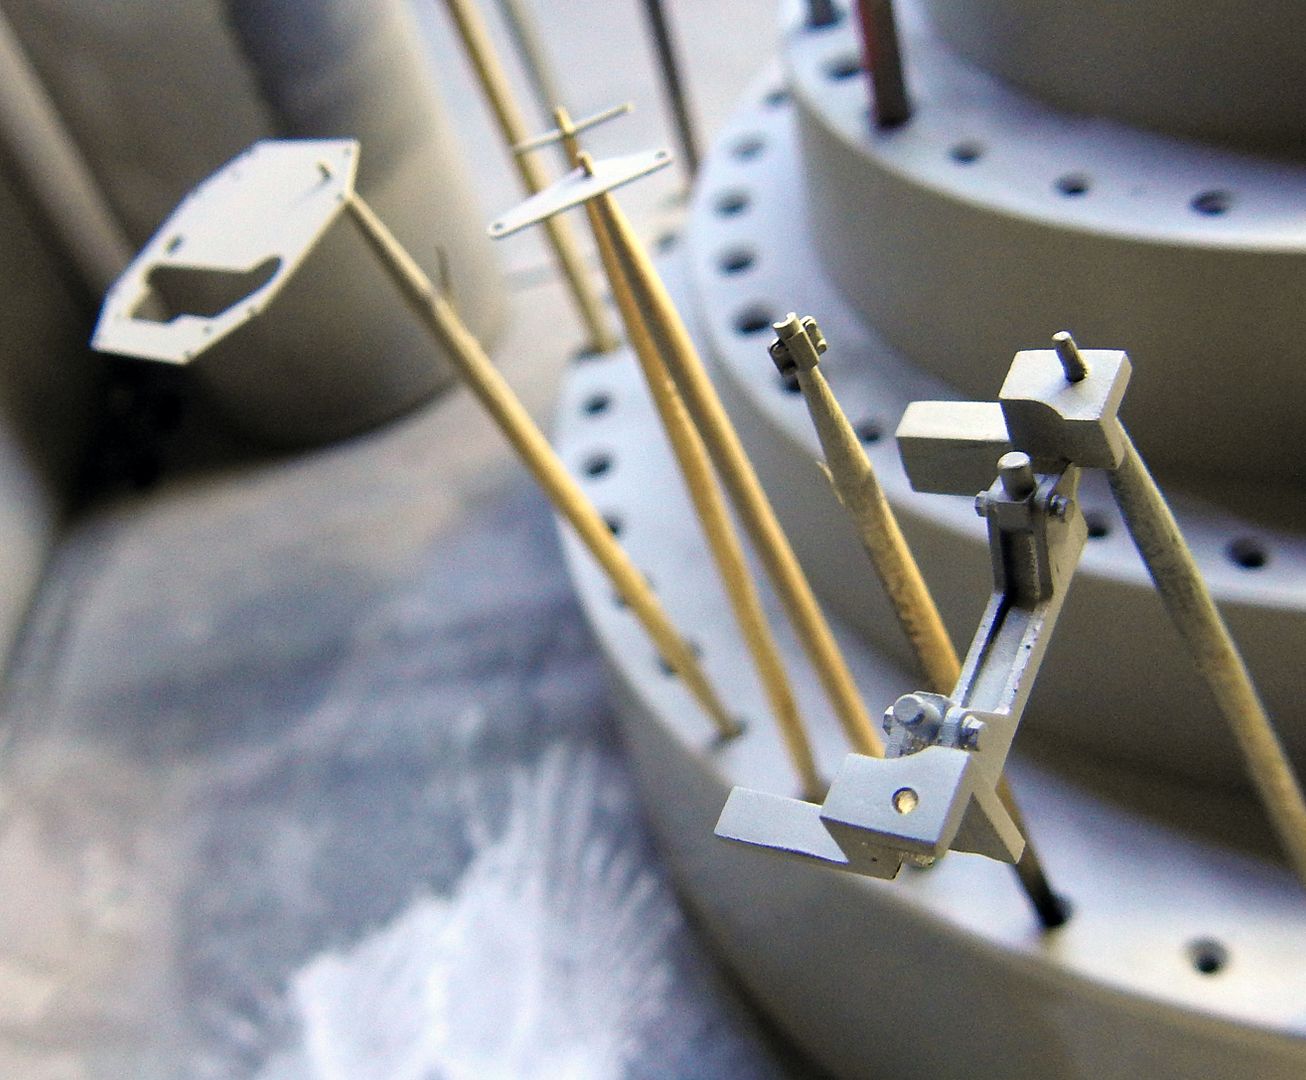
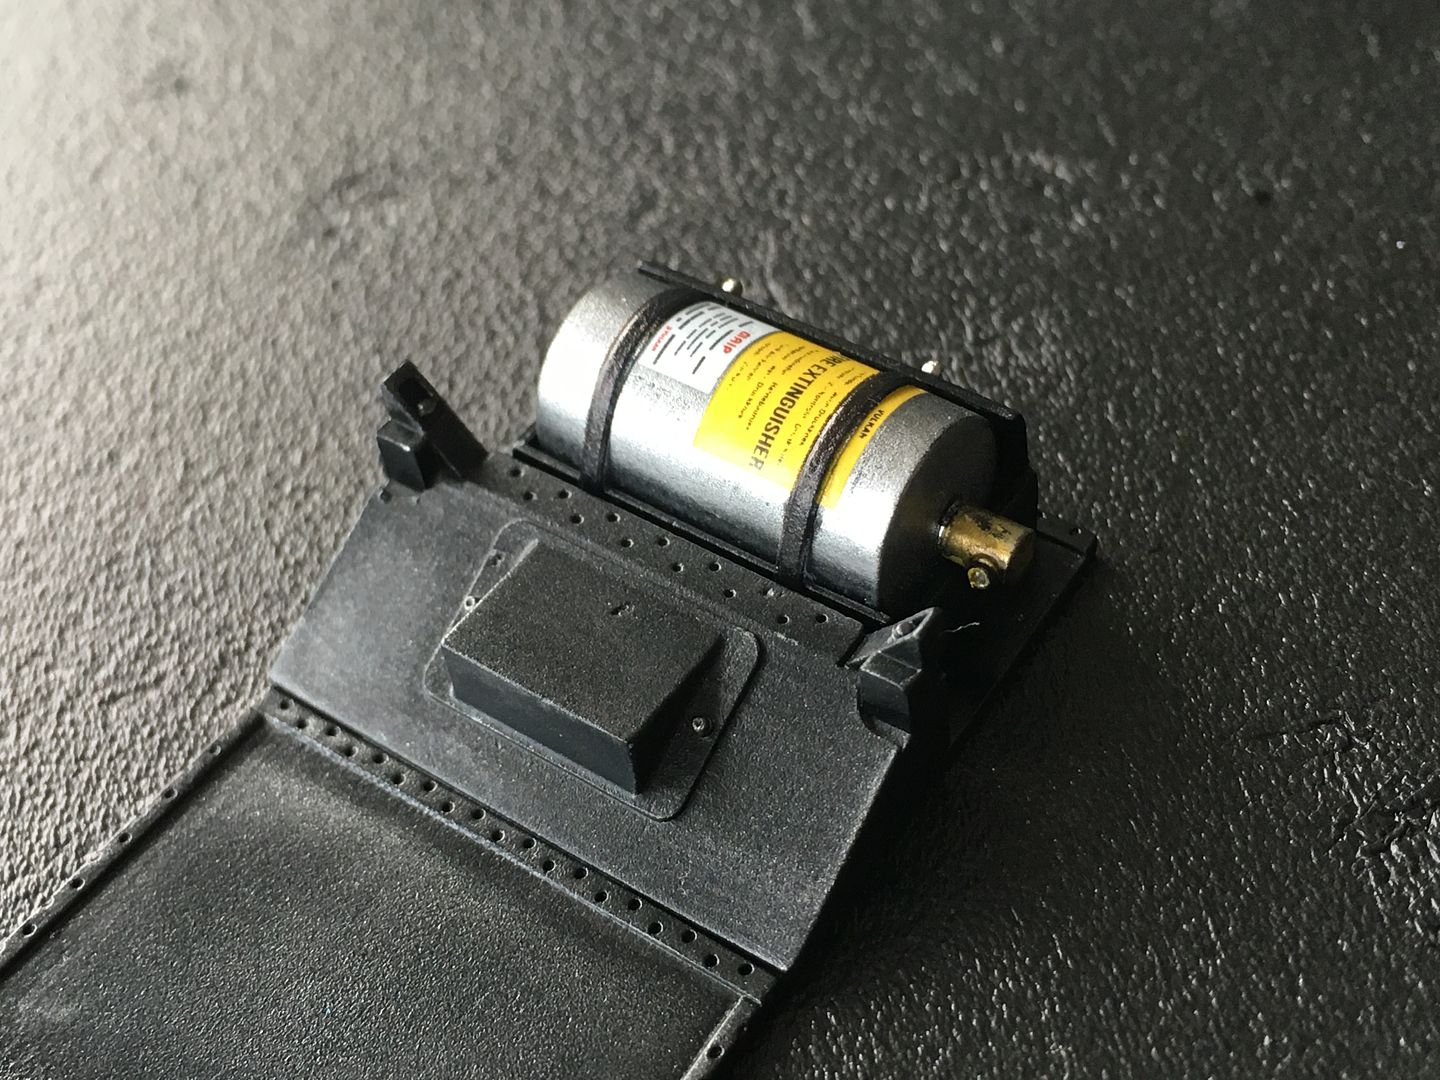
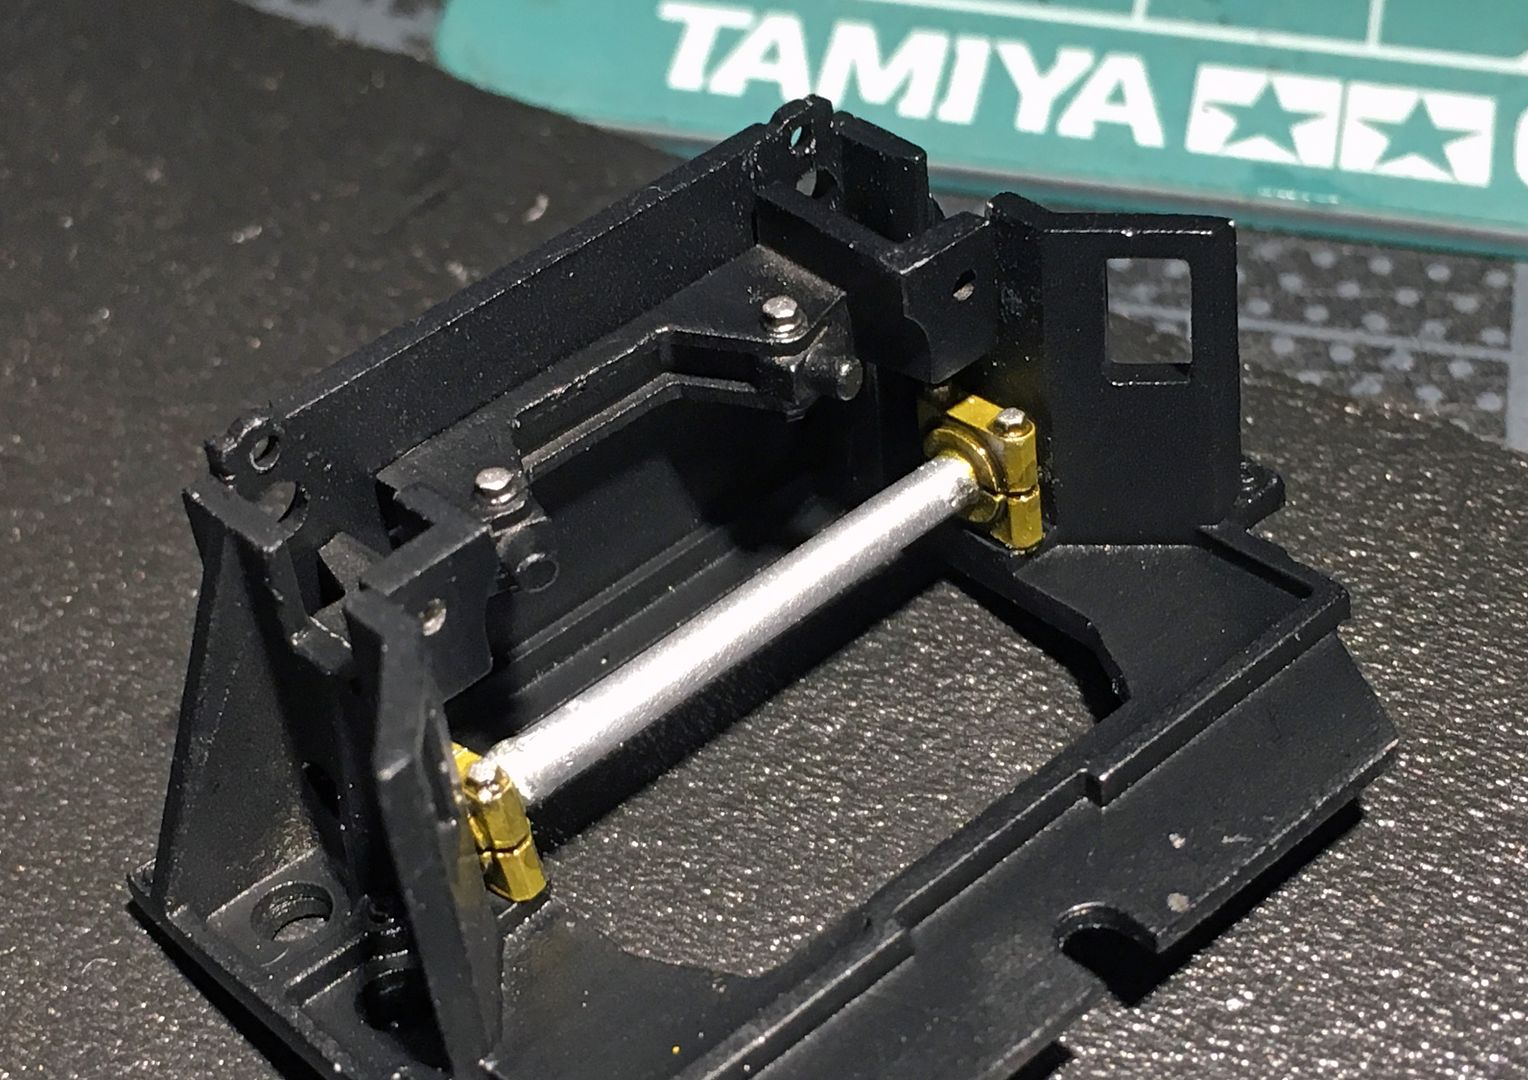
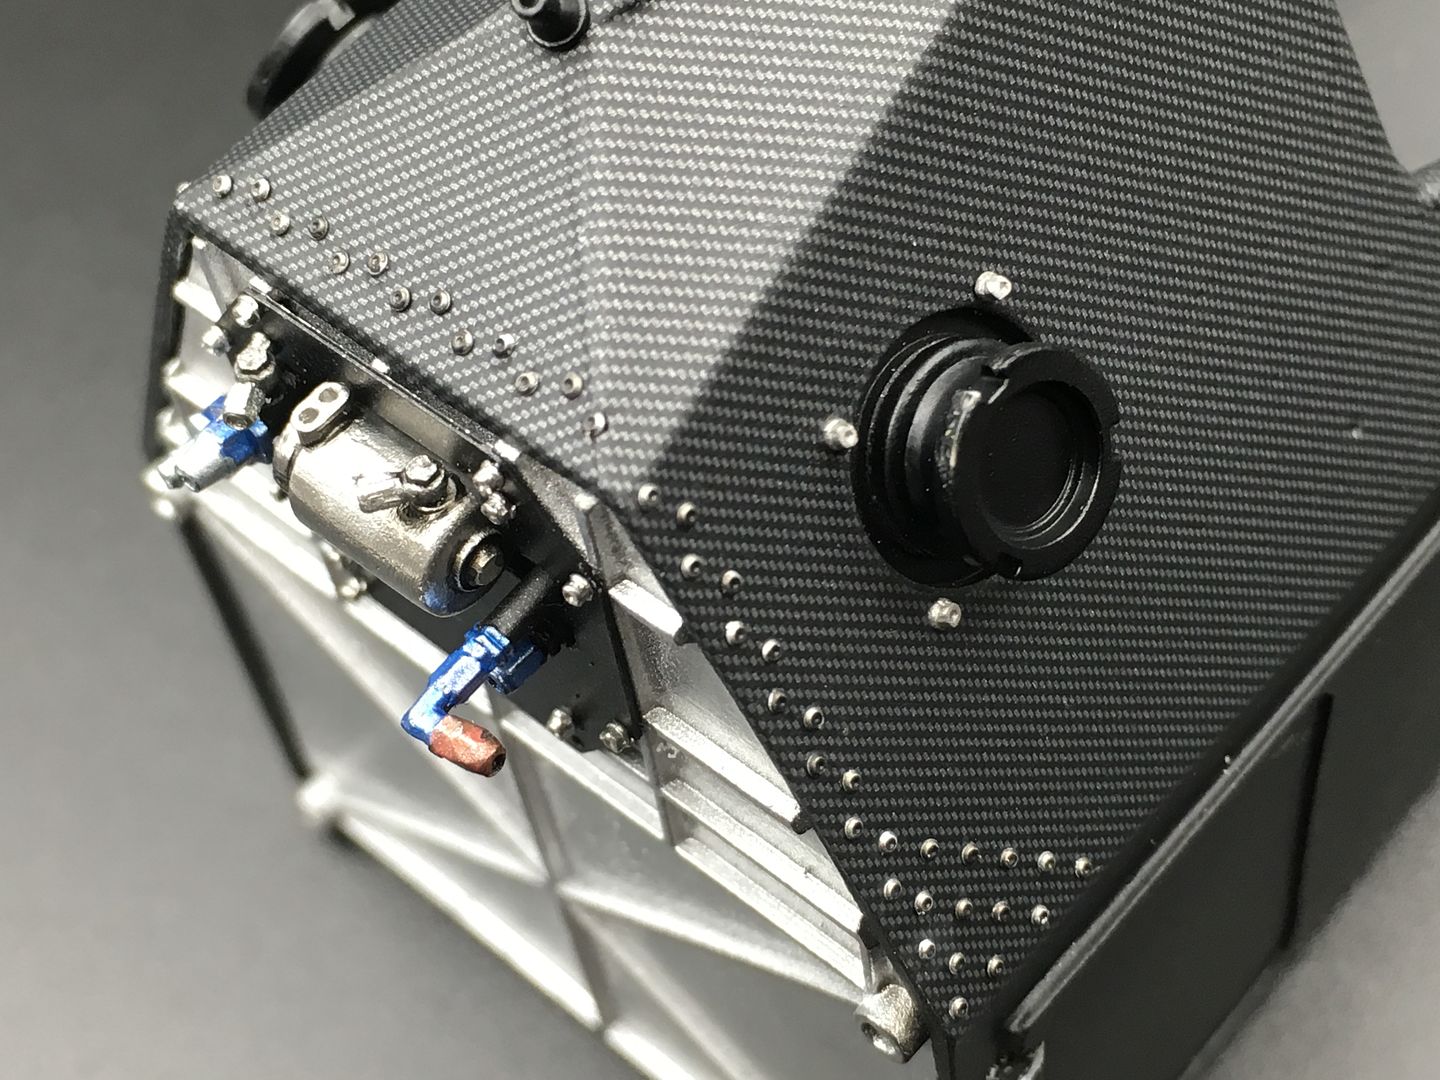
This picture below highlights the quality of these current MFH castings (it is one piece white metal) - that bolt-head detail is less than a mm in diameter...
If it was going to be at all visible, I might have swapped it for a 'detail' machined part - but actually, it is so crisp already that I am not sure it would even be needed...
You can just see where I used some Tamiya weathering silver to bring out some edges and definition. Wanted it subtle as I am not really 'weathering' the car...
You can see the silver on the pedals.
This then slips into the front of the chassis tub...
Subtle highlighting...
This picture below highlights the quality of these current MFH castings (it is one piece white metal) - that bolt-head detail is less than a mm in diameter...
If it was going to be at all visible, I might have swapped it for a 'detail' machined part - but actually, it is so crisp already that I am not sure it would even be needed...
More chassis work - rivets!
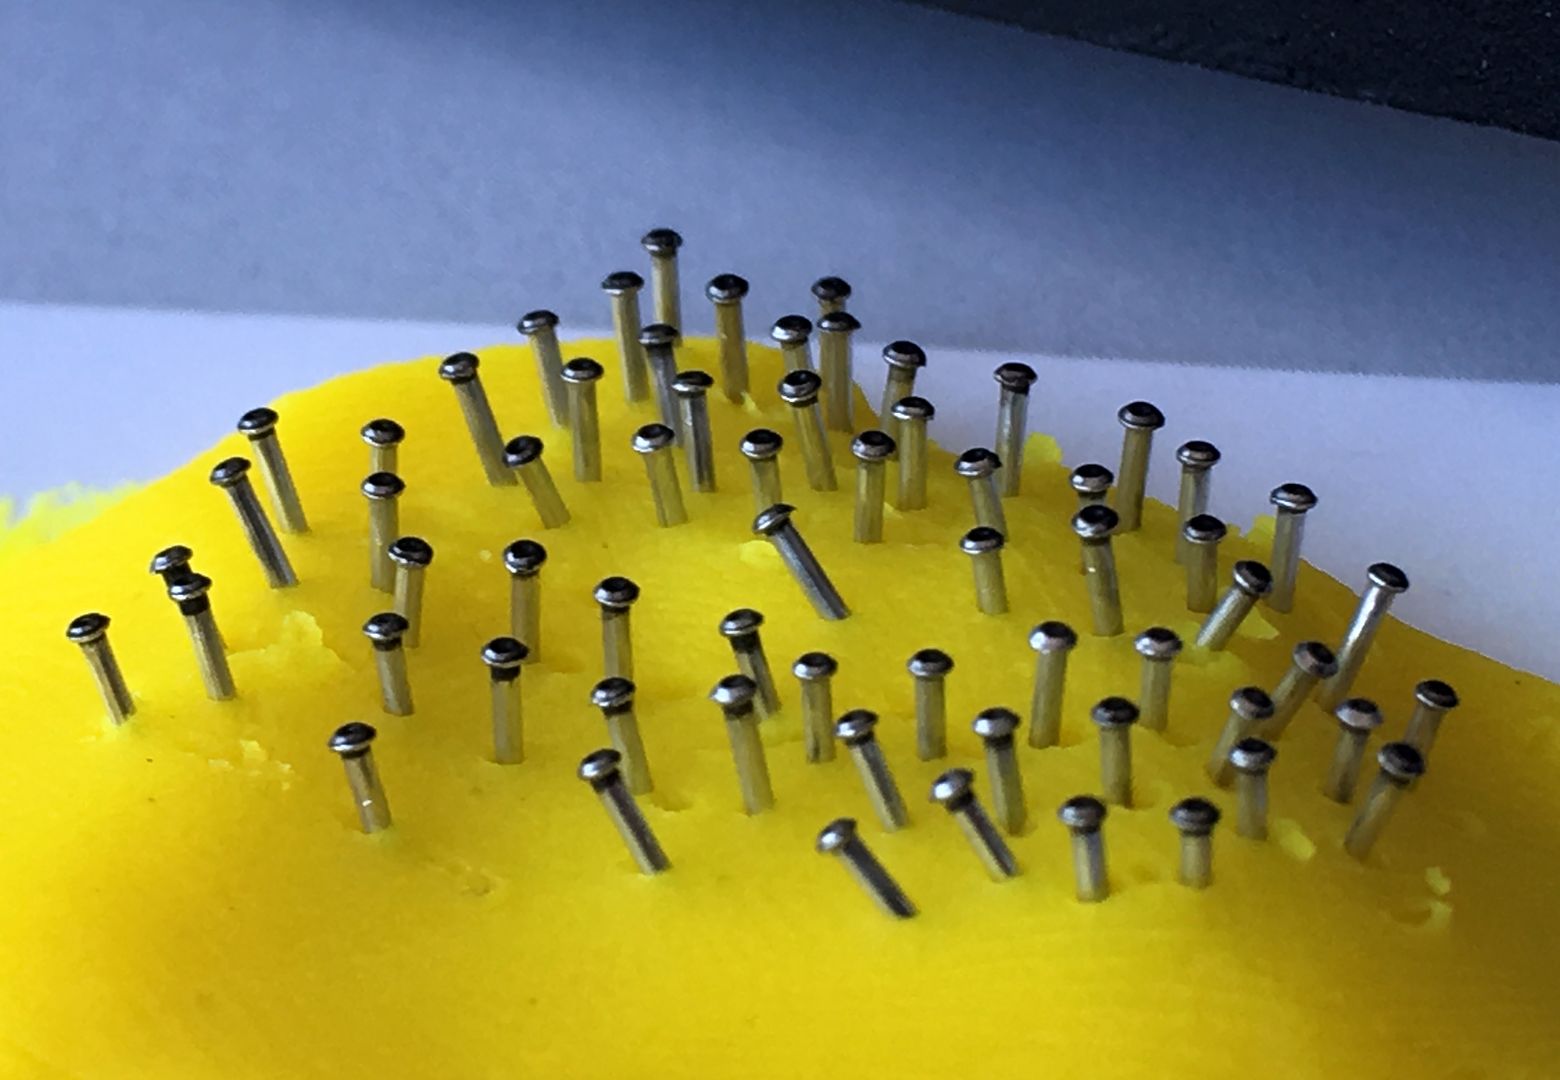
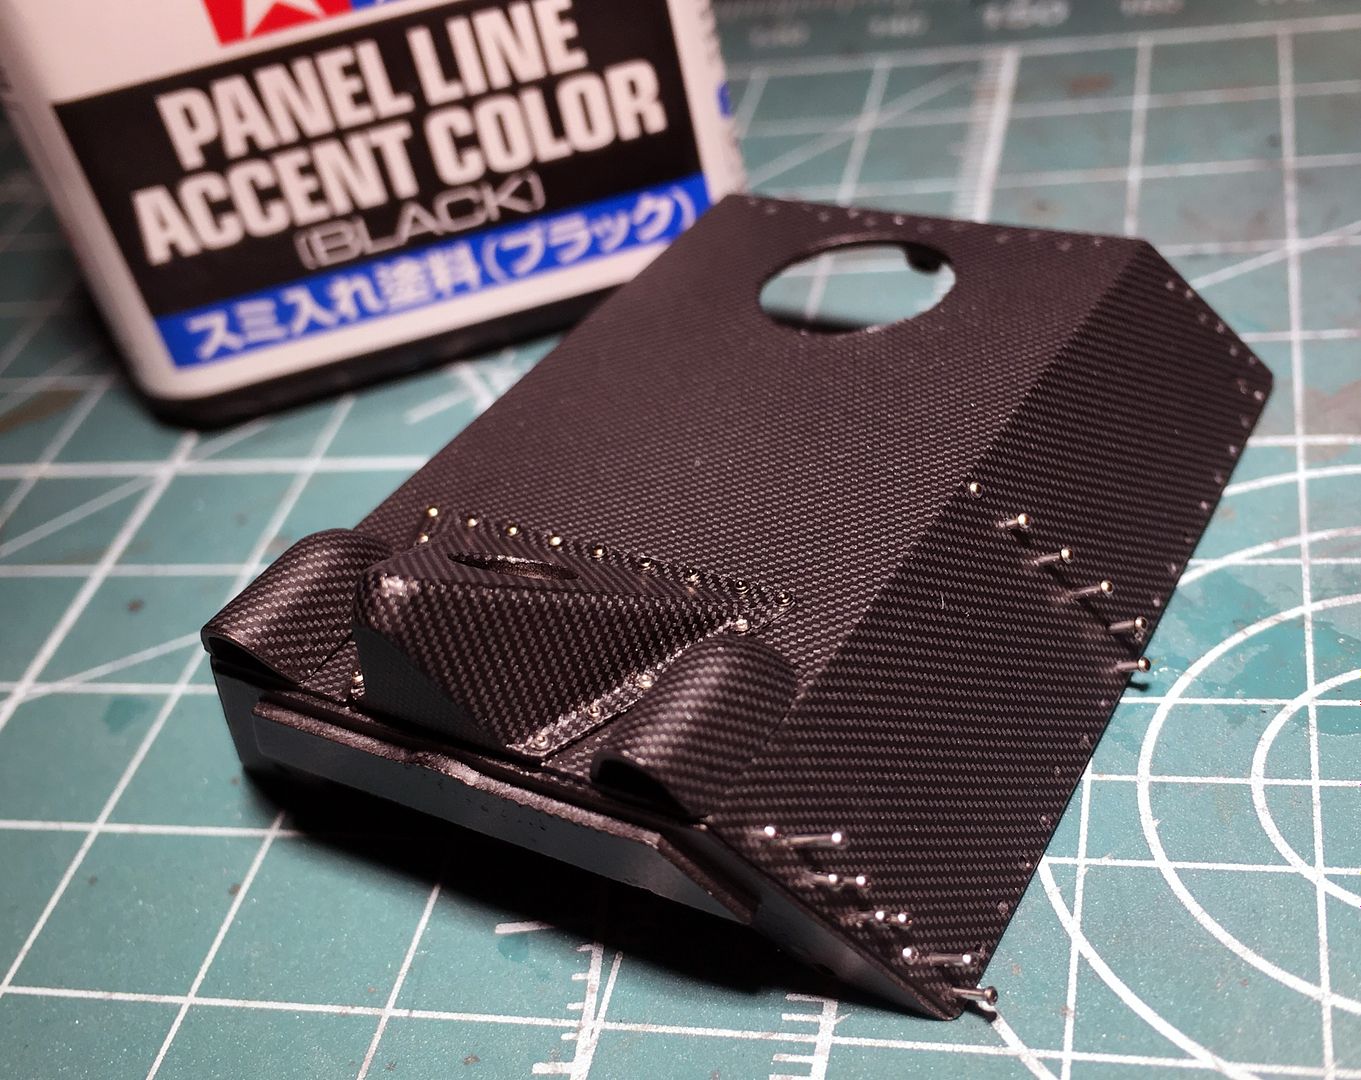
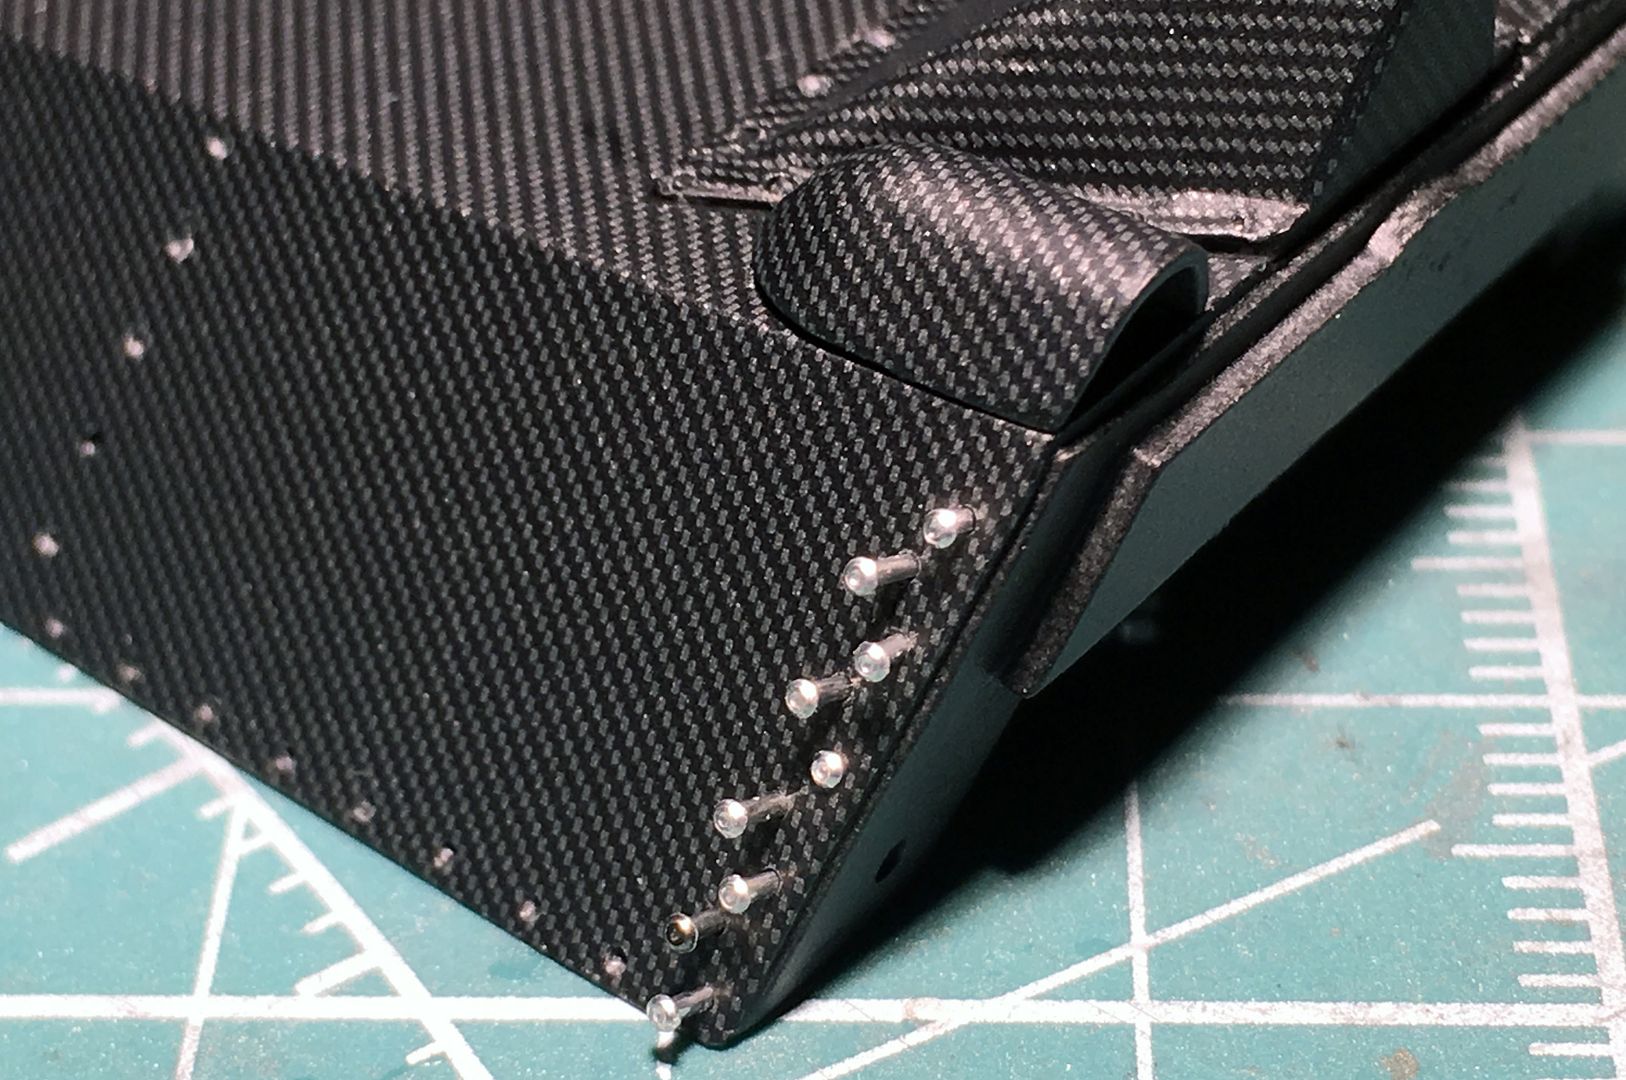
The kit comes with white metal cast rivets, which are fine - but I have used MFH 'machined' rivets I purchased separately (may not be machined, but not cast - so cleaner)
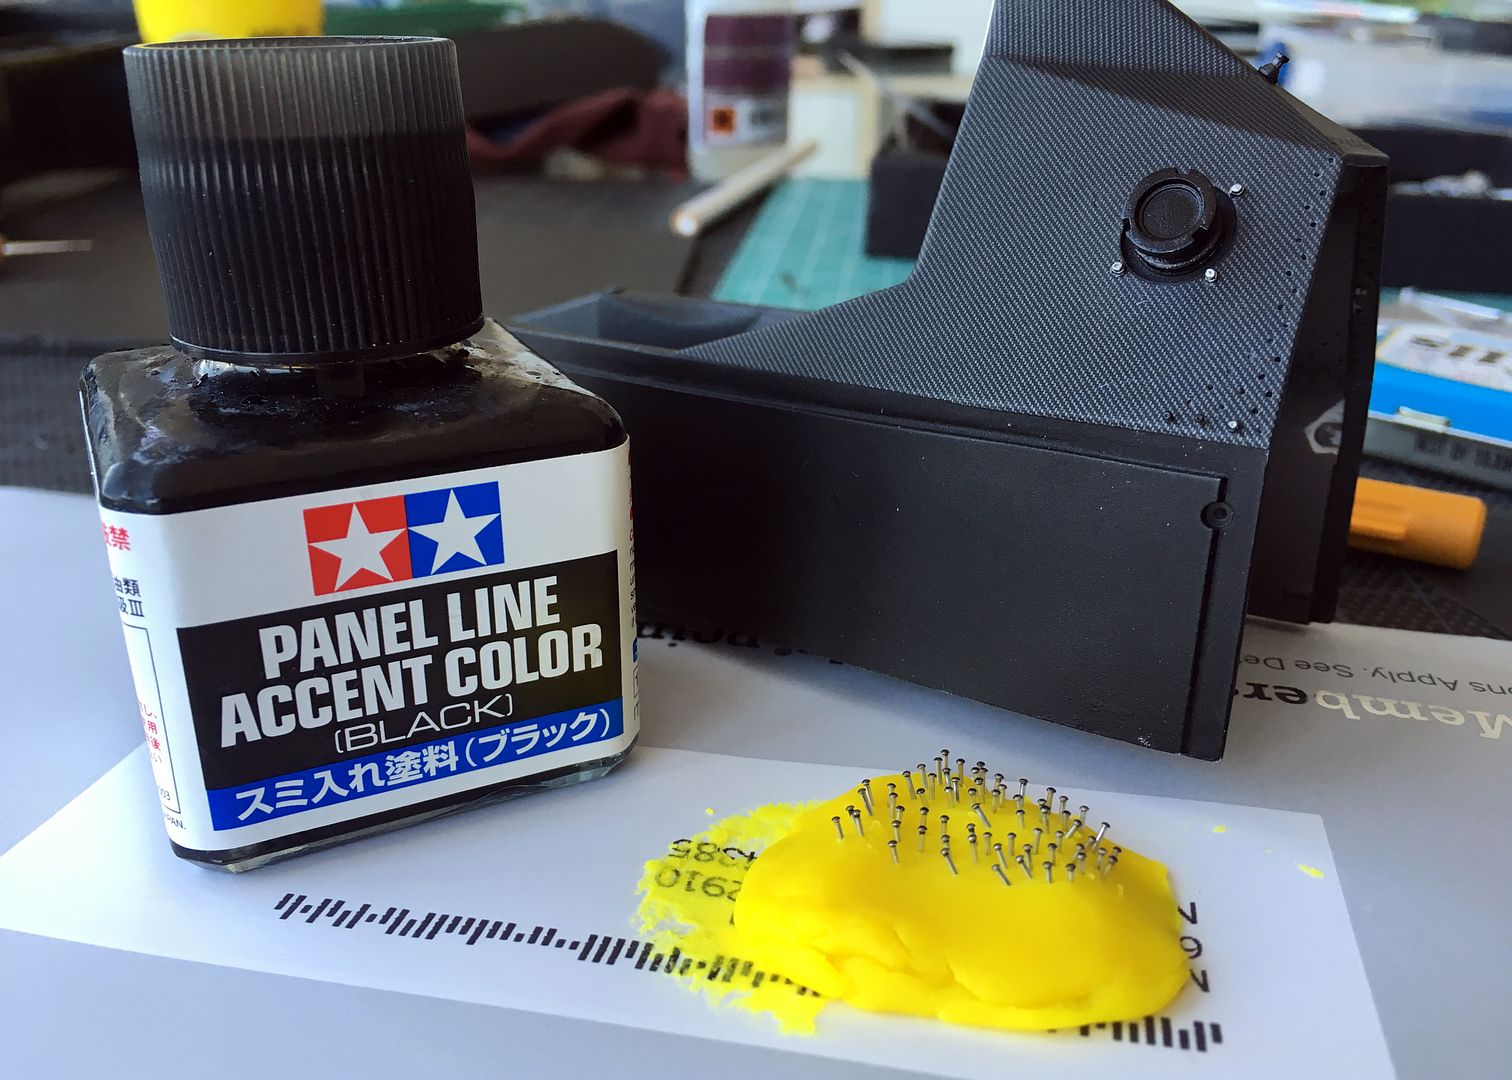
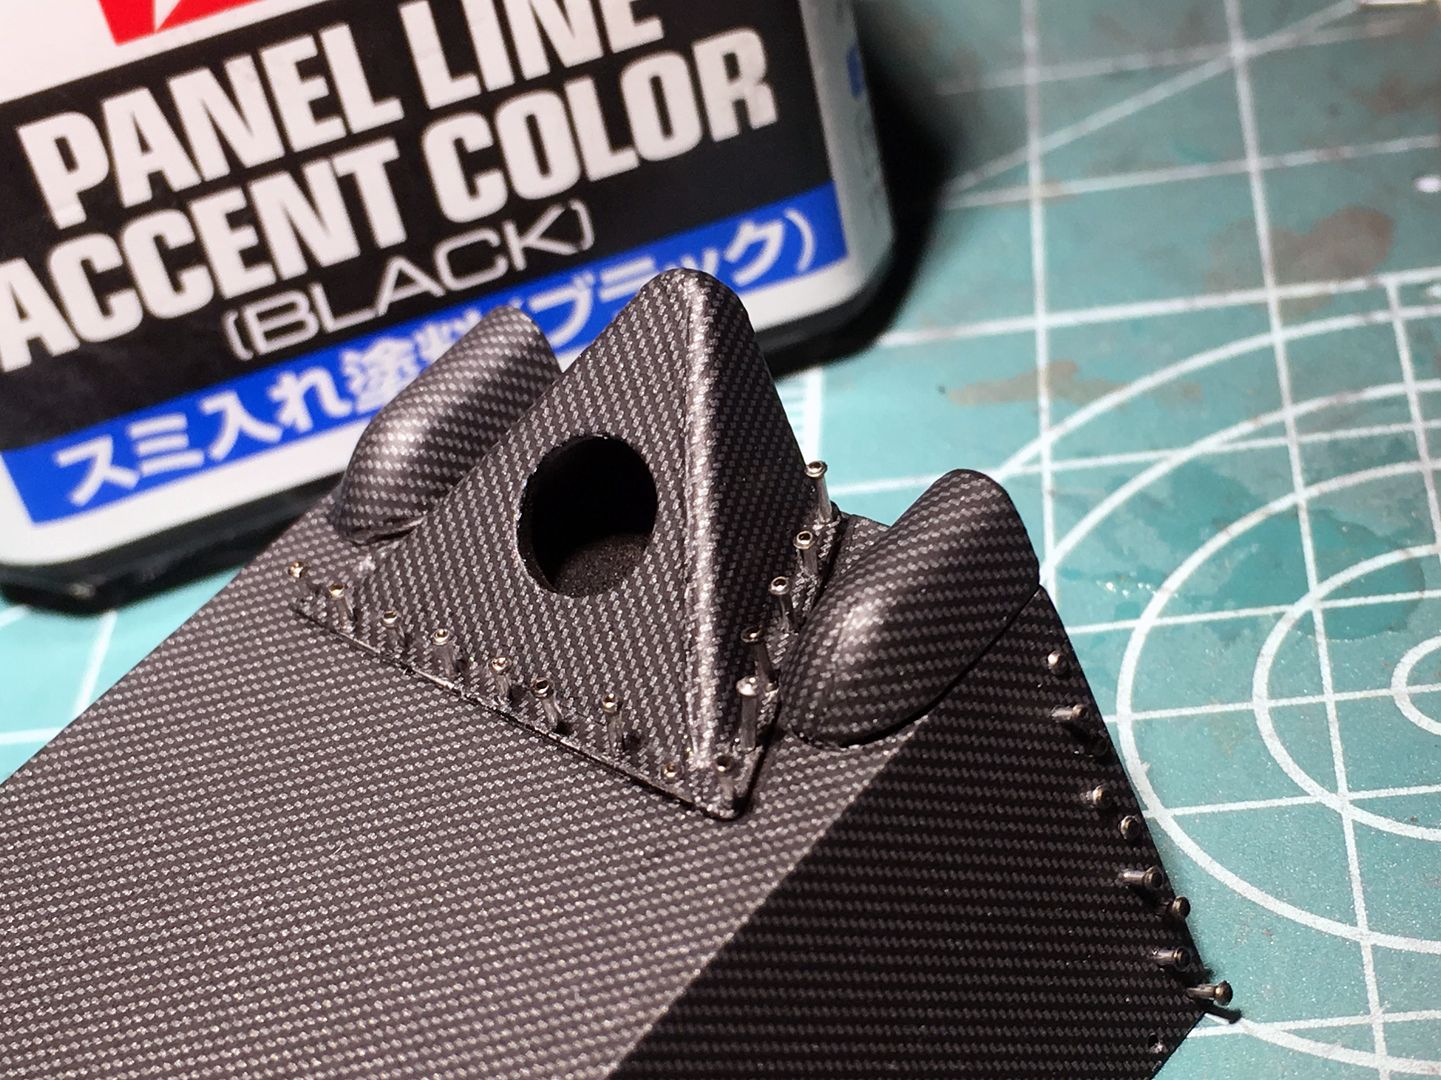
Photos of the real car shows these rivets to be black, with a few shiny ones. I have knocked back the polished rivets with the panel line stuff shown - I want some of the shine to still come through, so I didn't just paint the rivets. Also, the panel line stuff is very thin, so does not hide the detail of the rivets. No way I was going to paint these once fitted to the chassis.
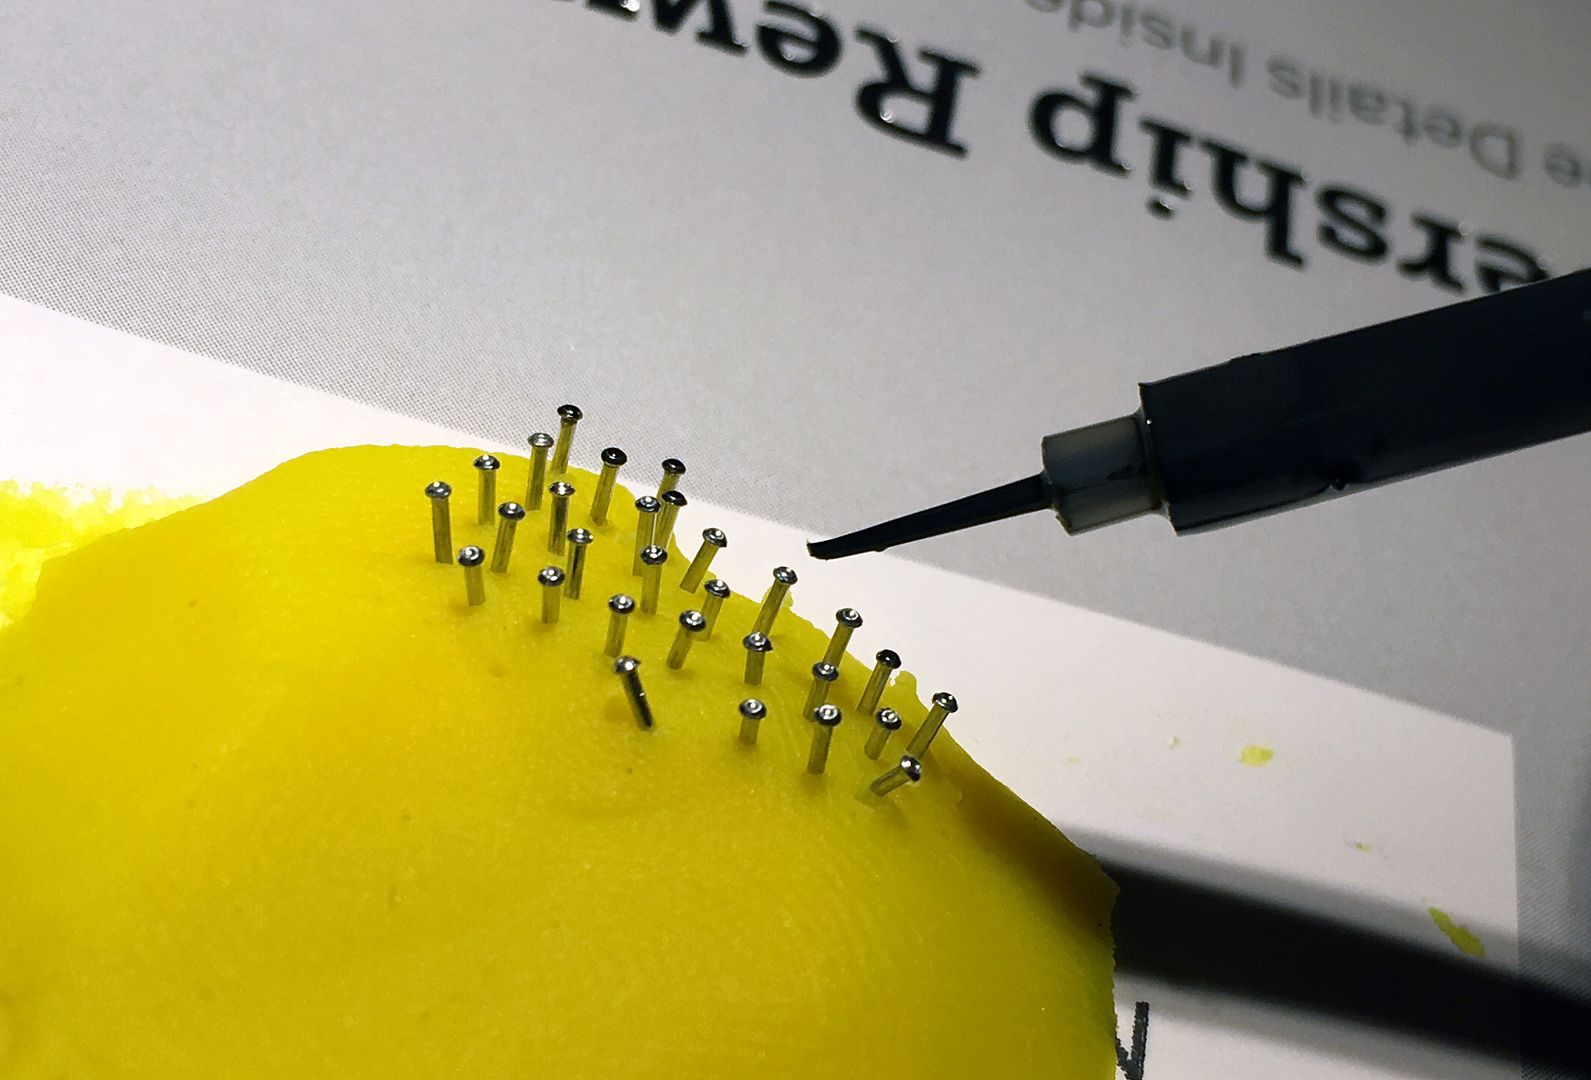
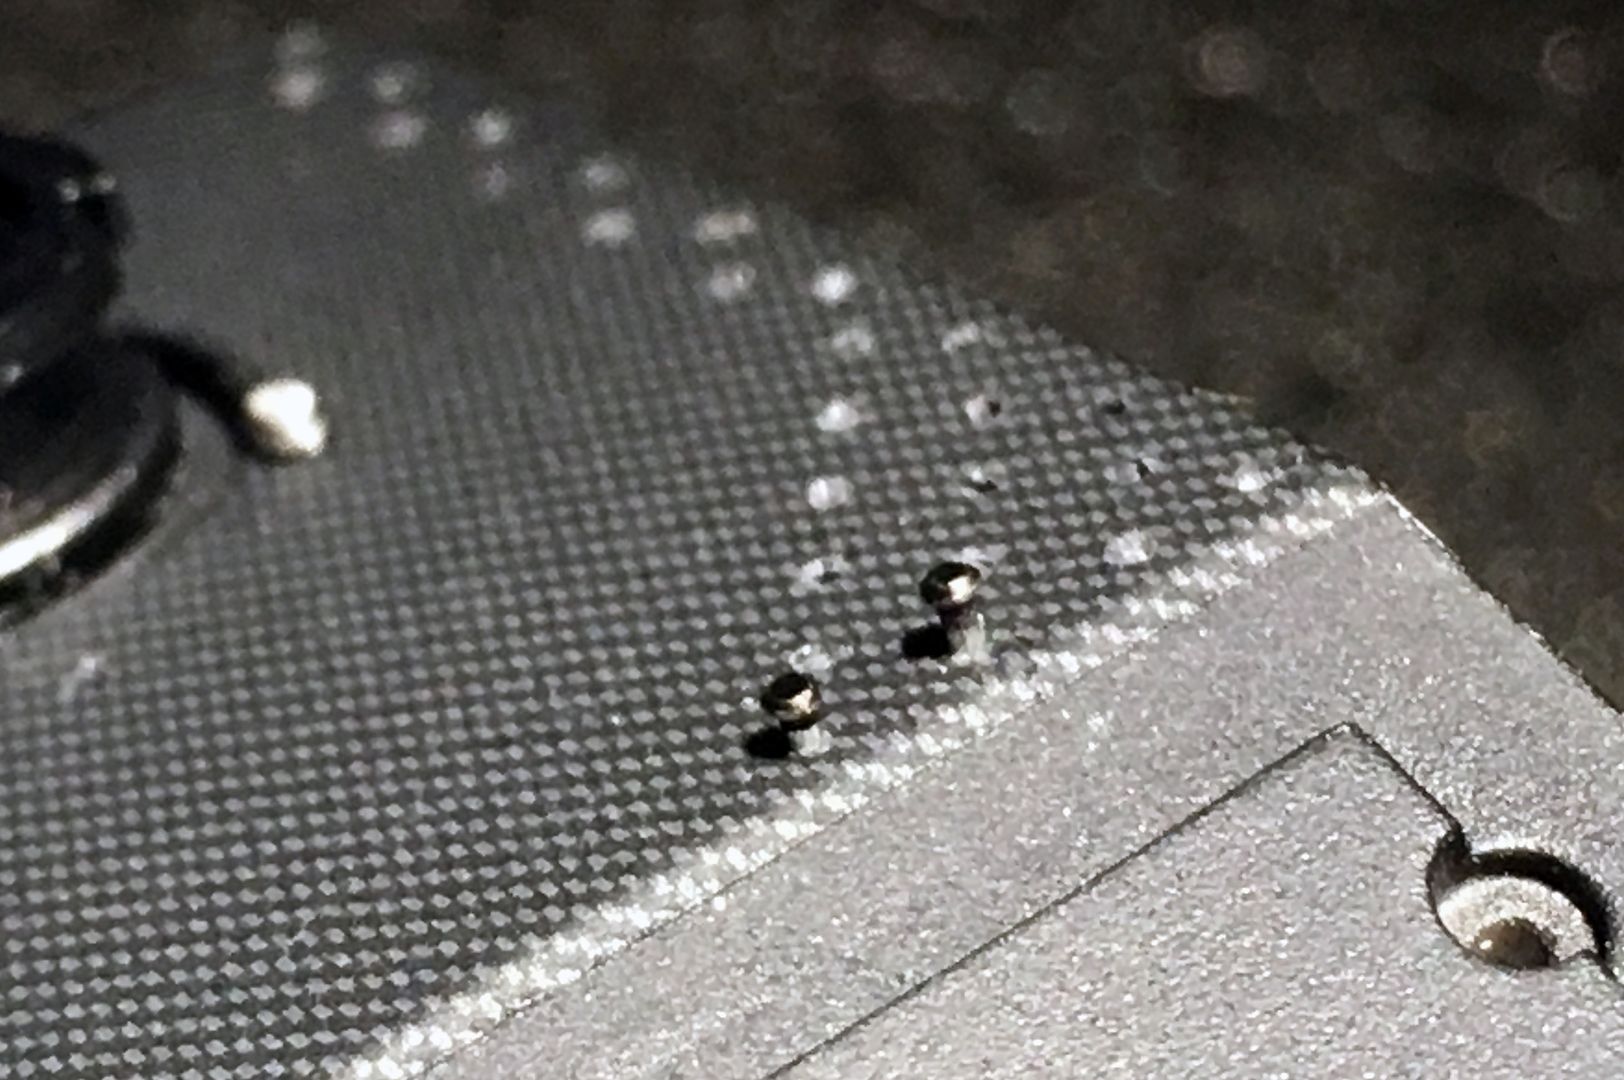
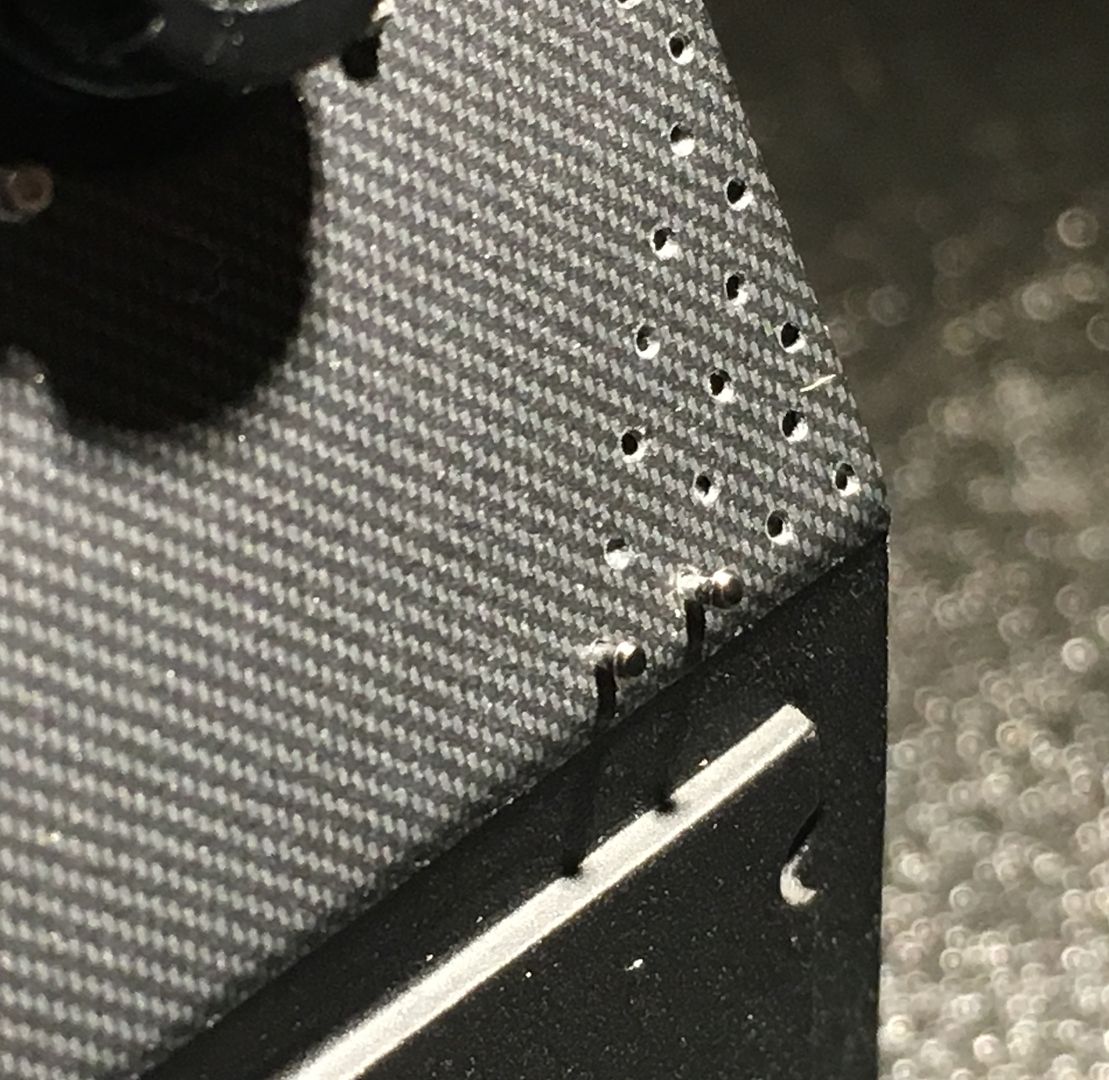
Actually quite quick once you get started. The rivets are soft enough to cut down with a knife once threaded through the resin chassis - they need to be trimmed as the rear bulkhead fits there...
Same treatment required on the front part of the tub - later.
The kit comes with white metal cast rivets, which are fine - but I have used MFH 'machined' rivets I purchased separately (may not be machined, but not cast - so cleaner)
Photos of the real car shows these rivets to be black, with a few shiny ones. I have knocked back the polished rivets with the panel line stuff shown - I want some of the shine to still come through, so I didn't just paint the rivets. Also, the panel line stuff is very thin, so does not hide the detail of the rivets. No way I was going to paint these once fitted to the chassis.
Actually quite quick once you get started. The rivets are soft enough to cut down with a knife once threaded through the resin chassis - they need to be trimmed as the rear bulkhead fits there...
Same treatment required on the front part of the tub - later.
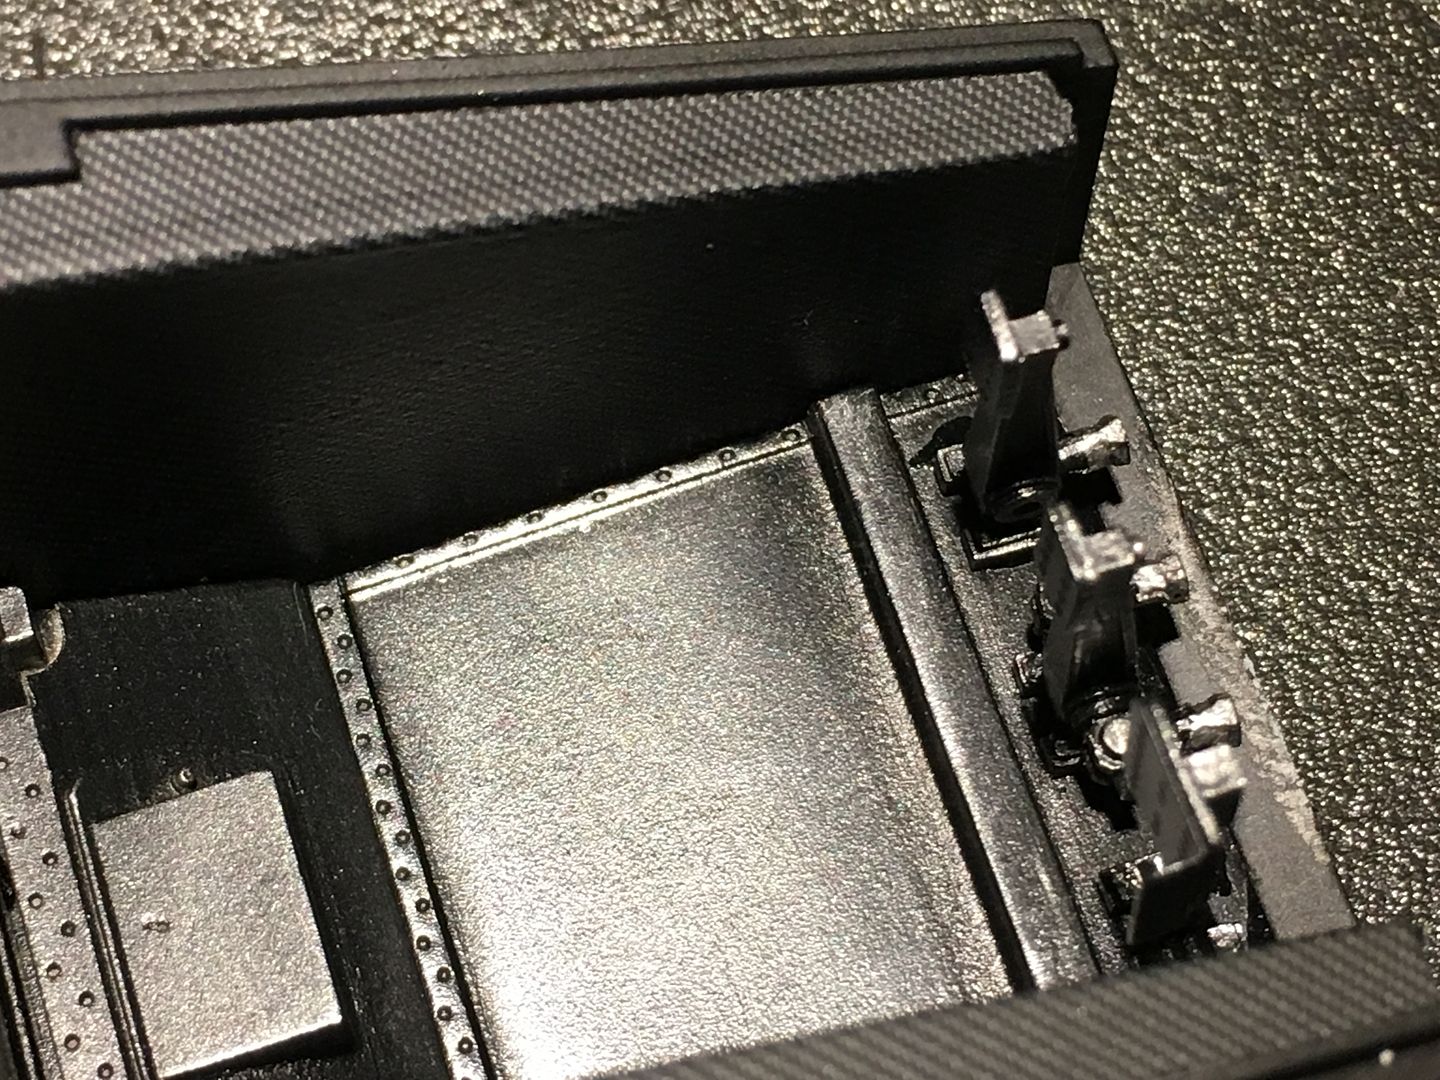
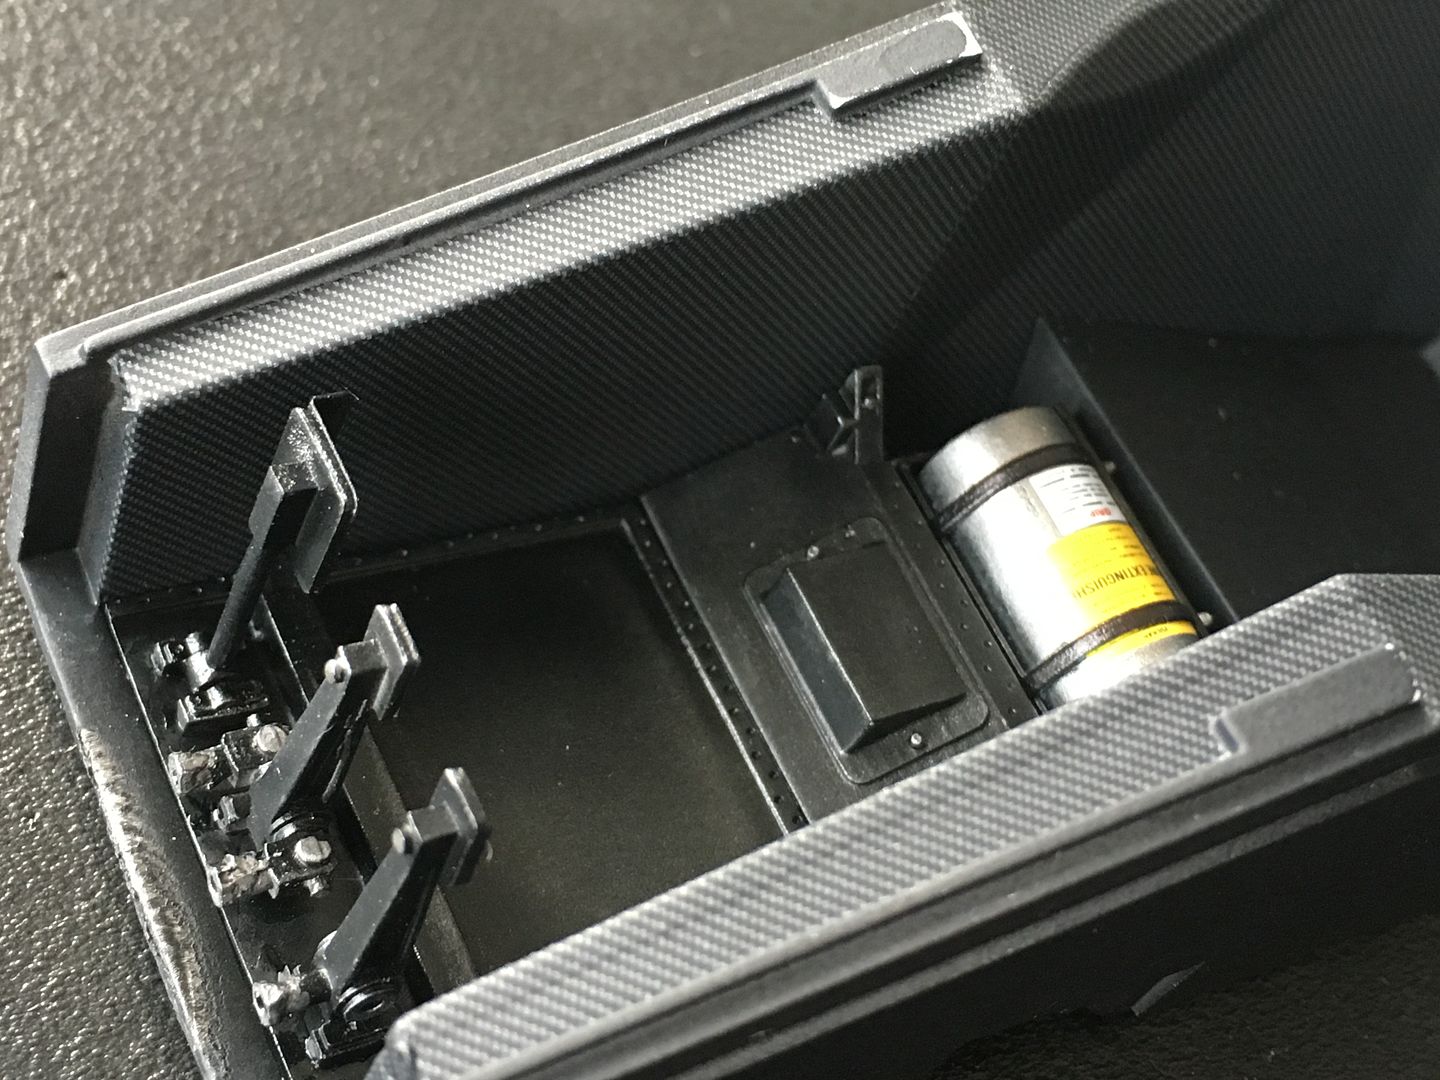
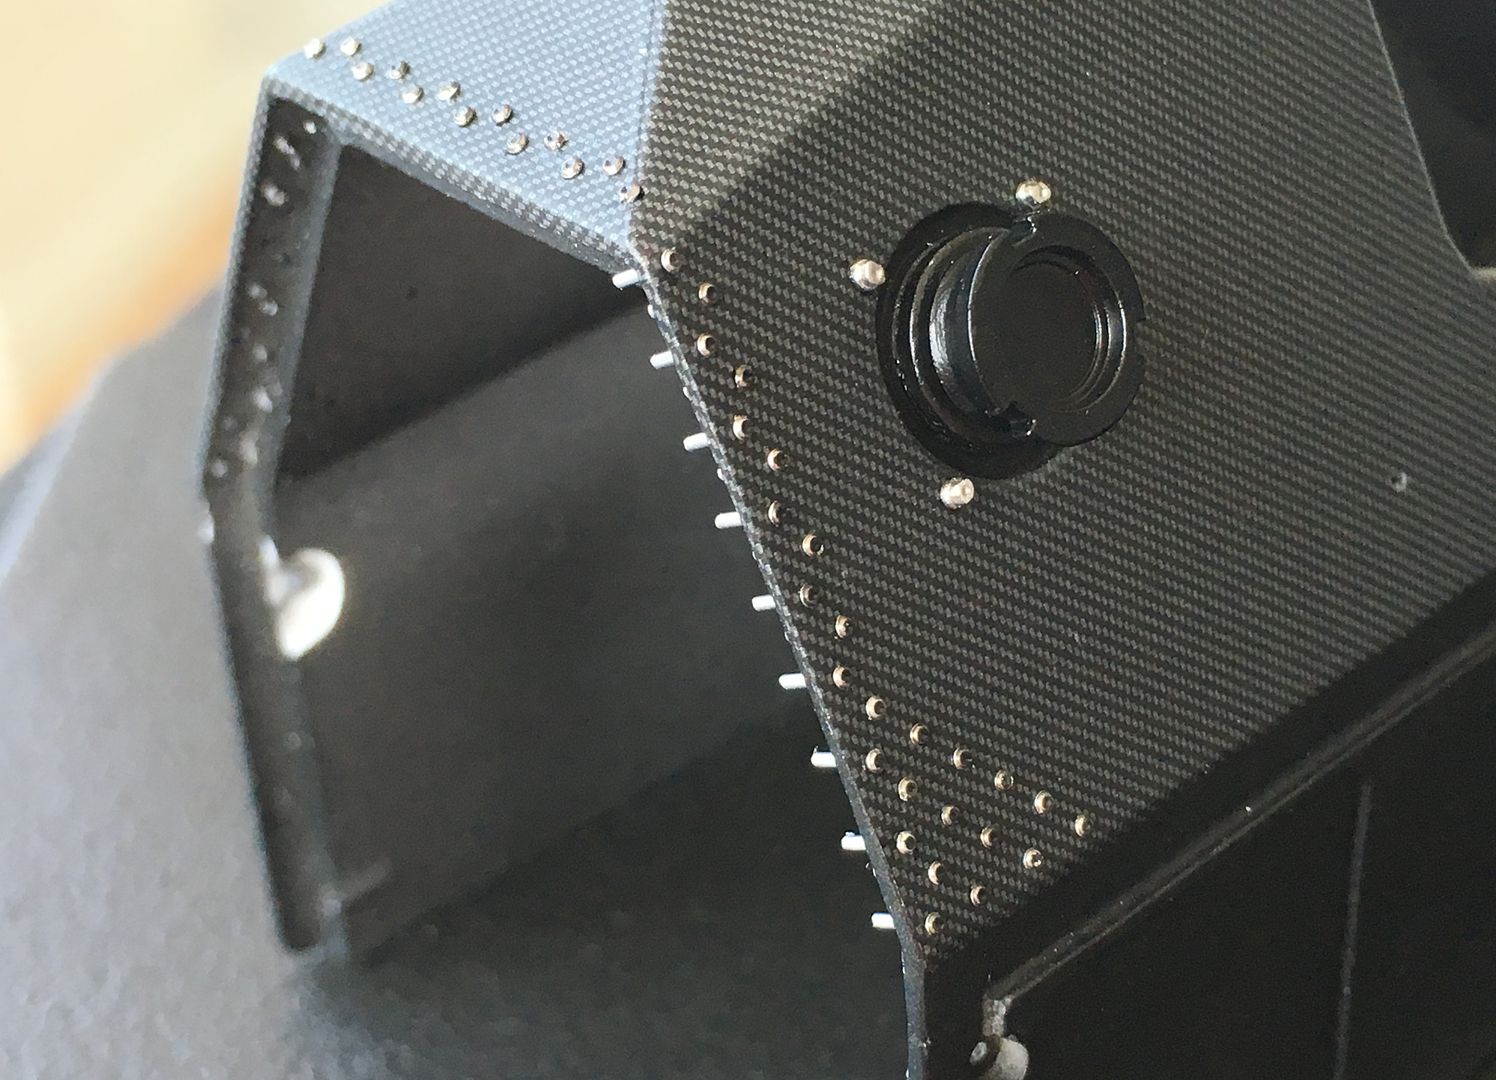
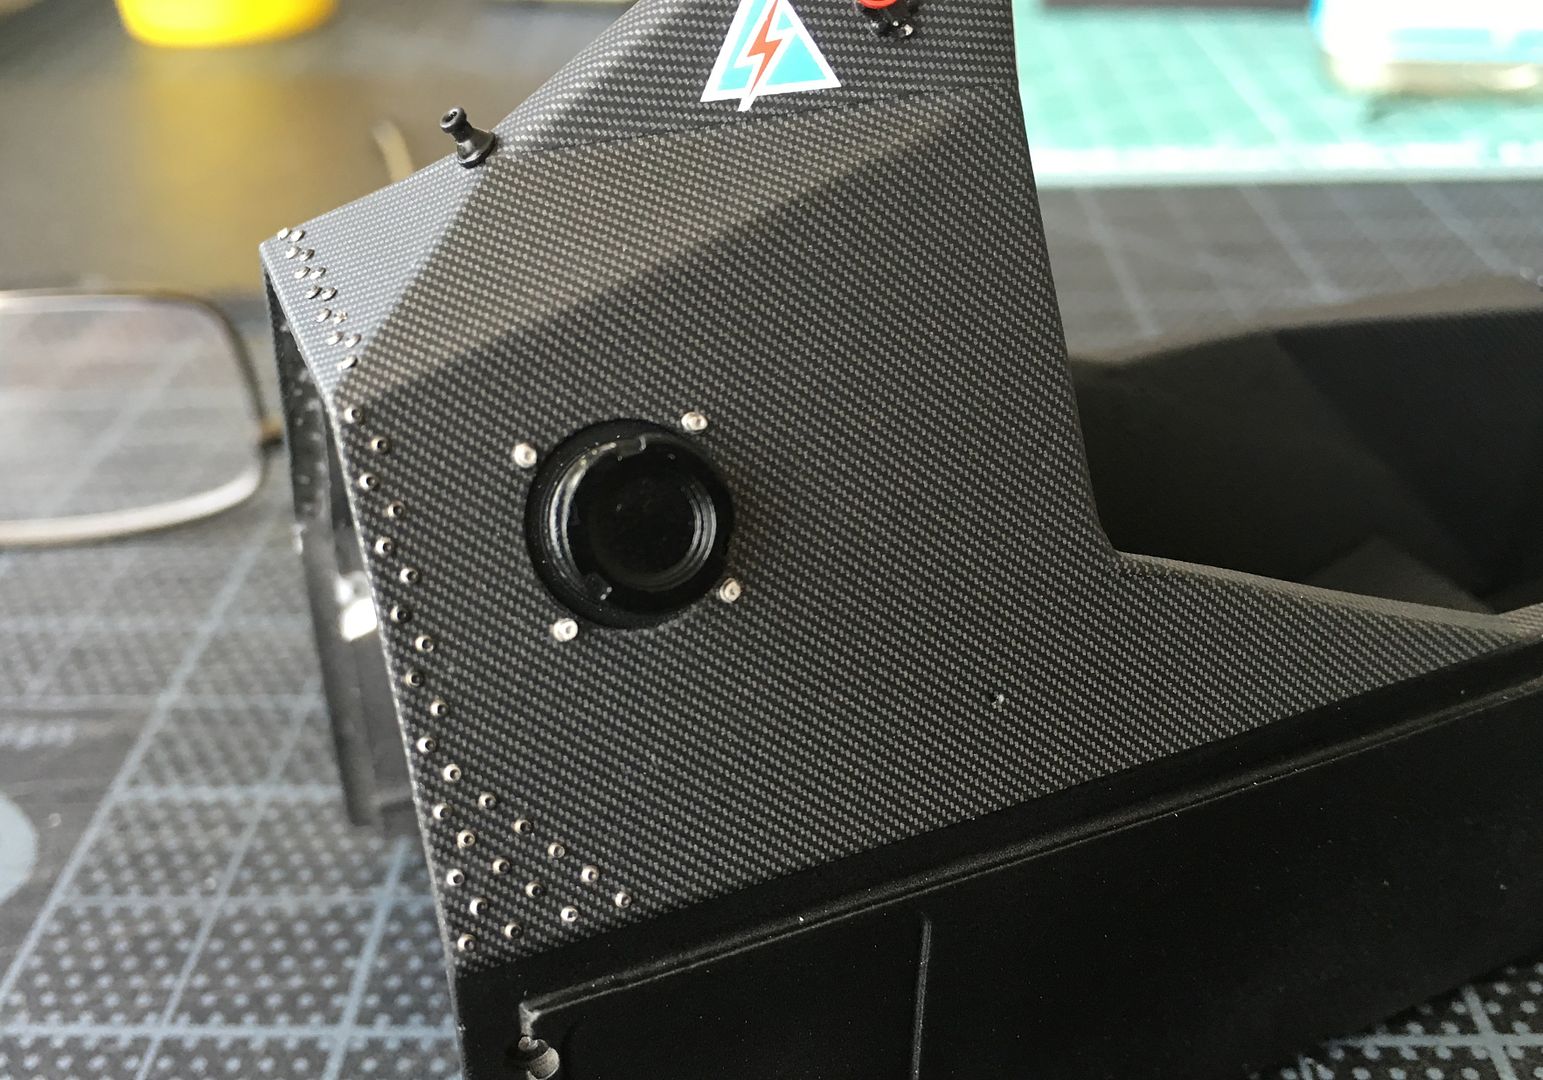
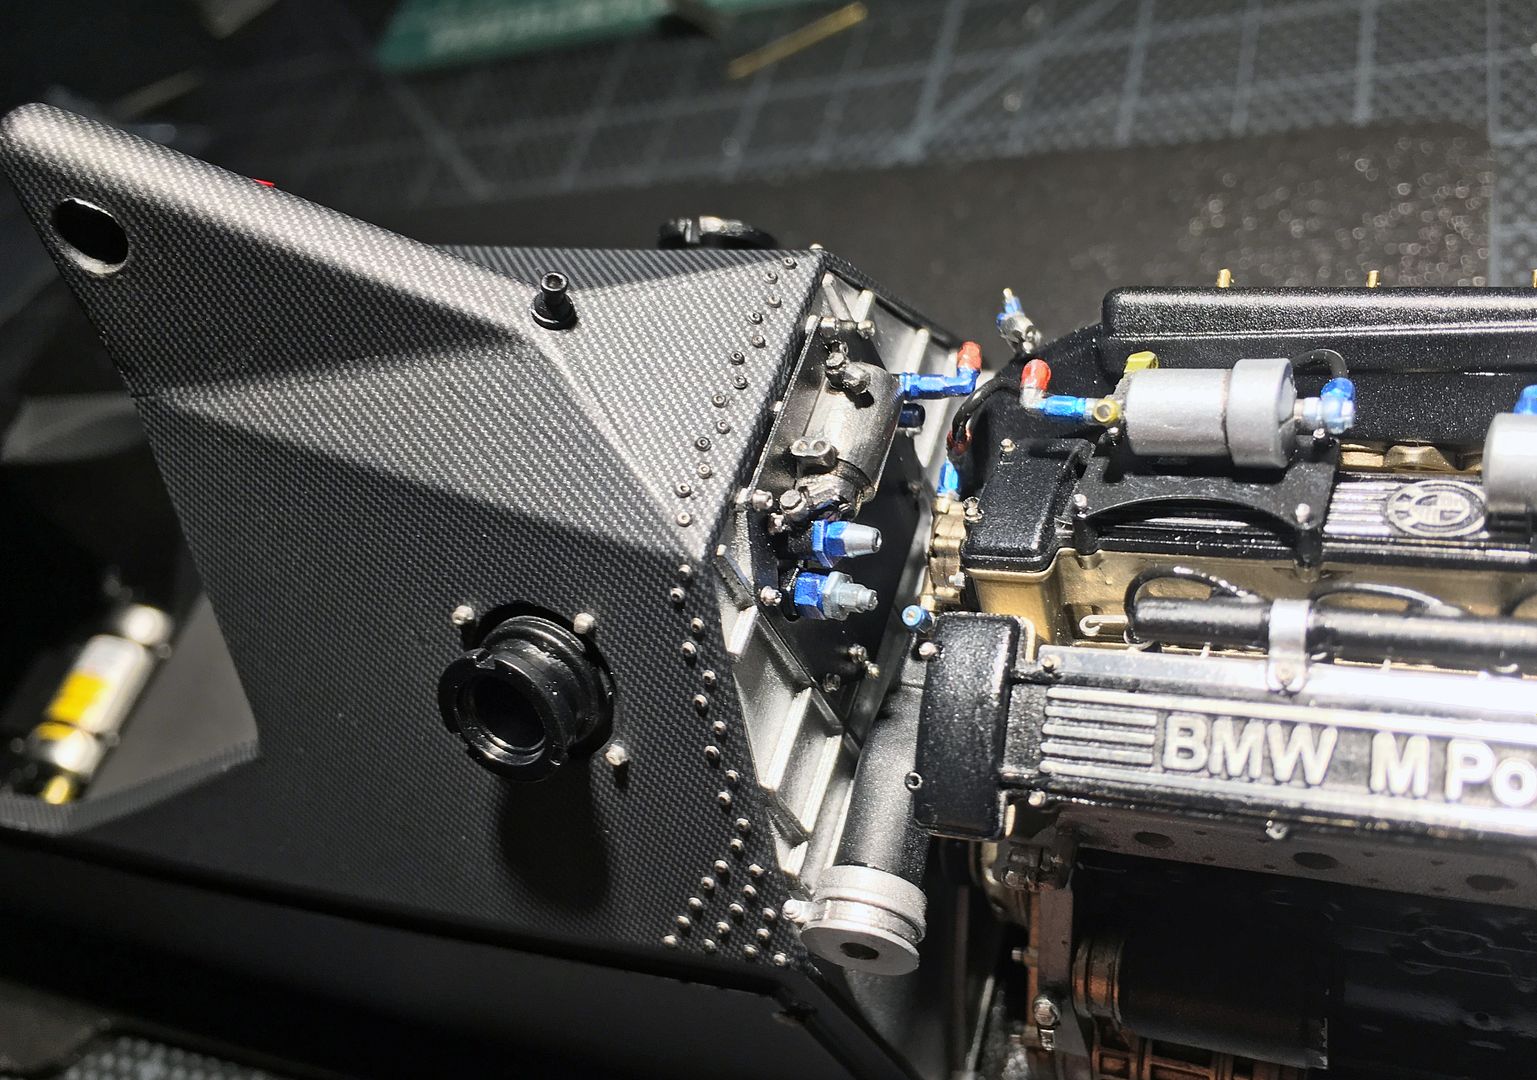
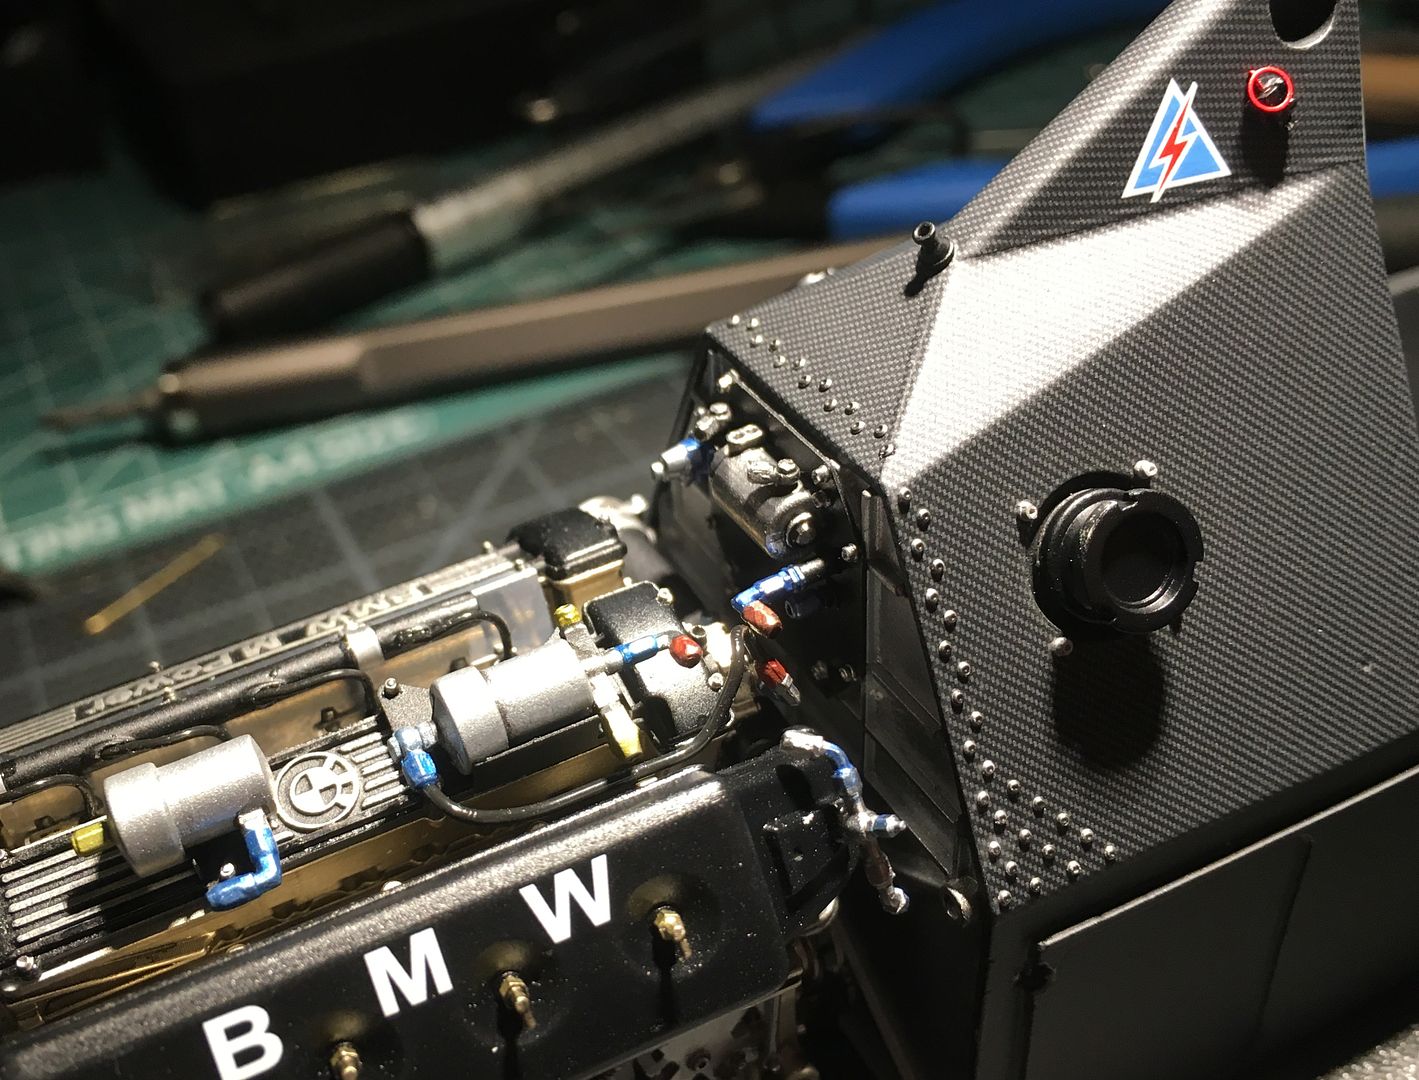
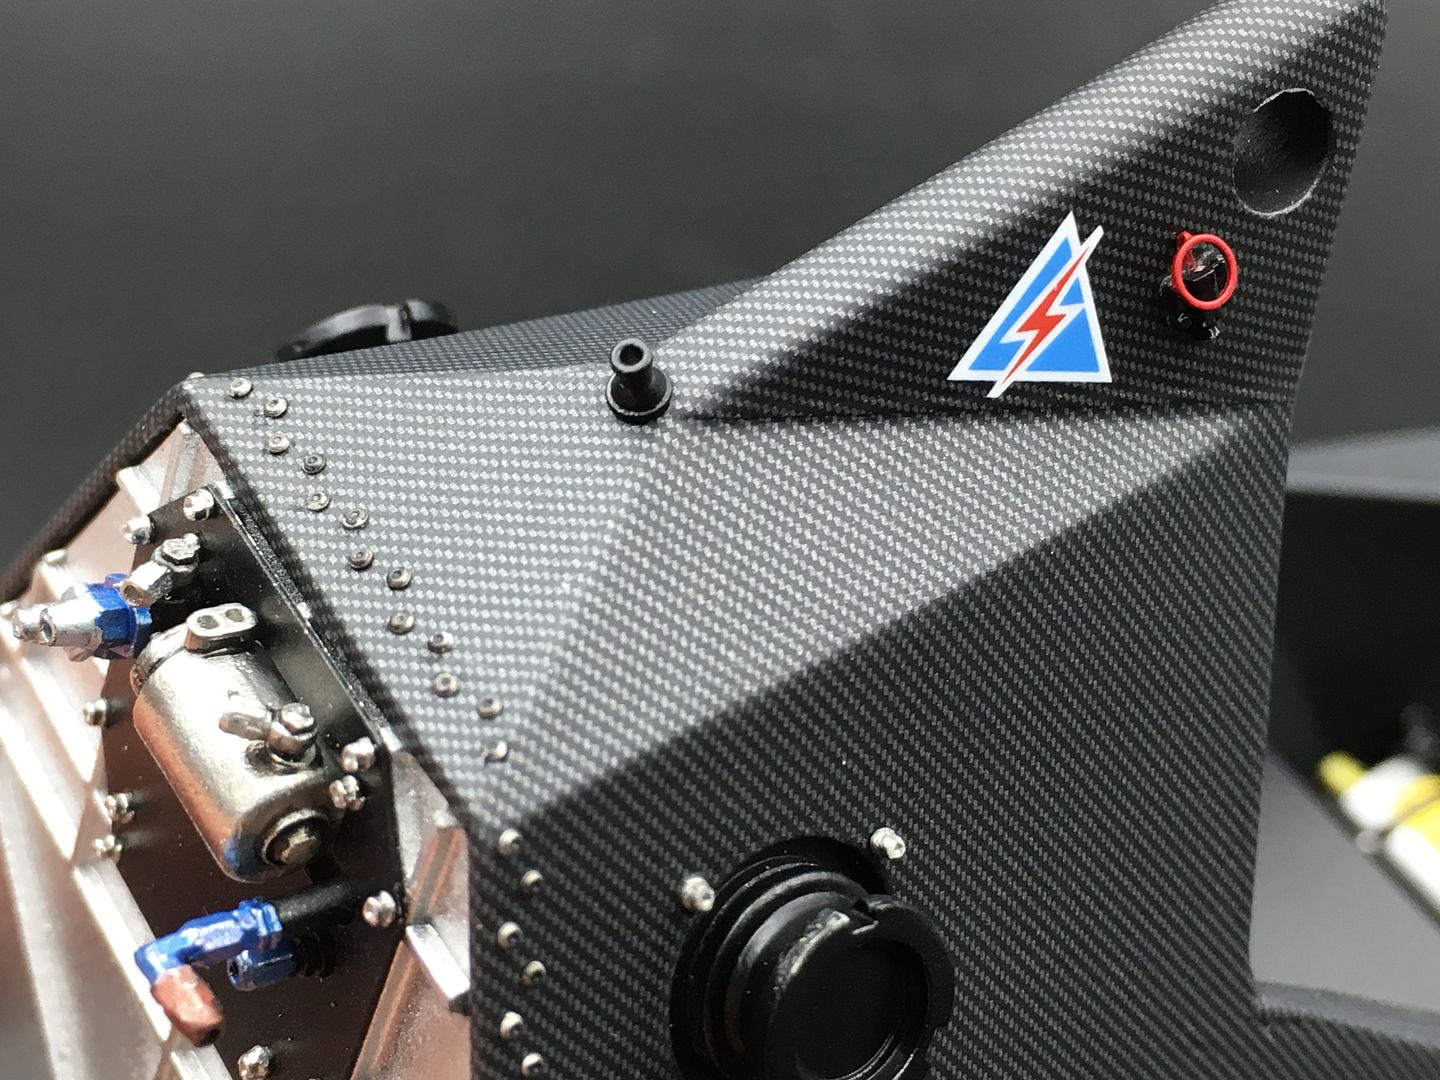
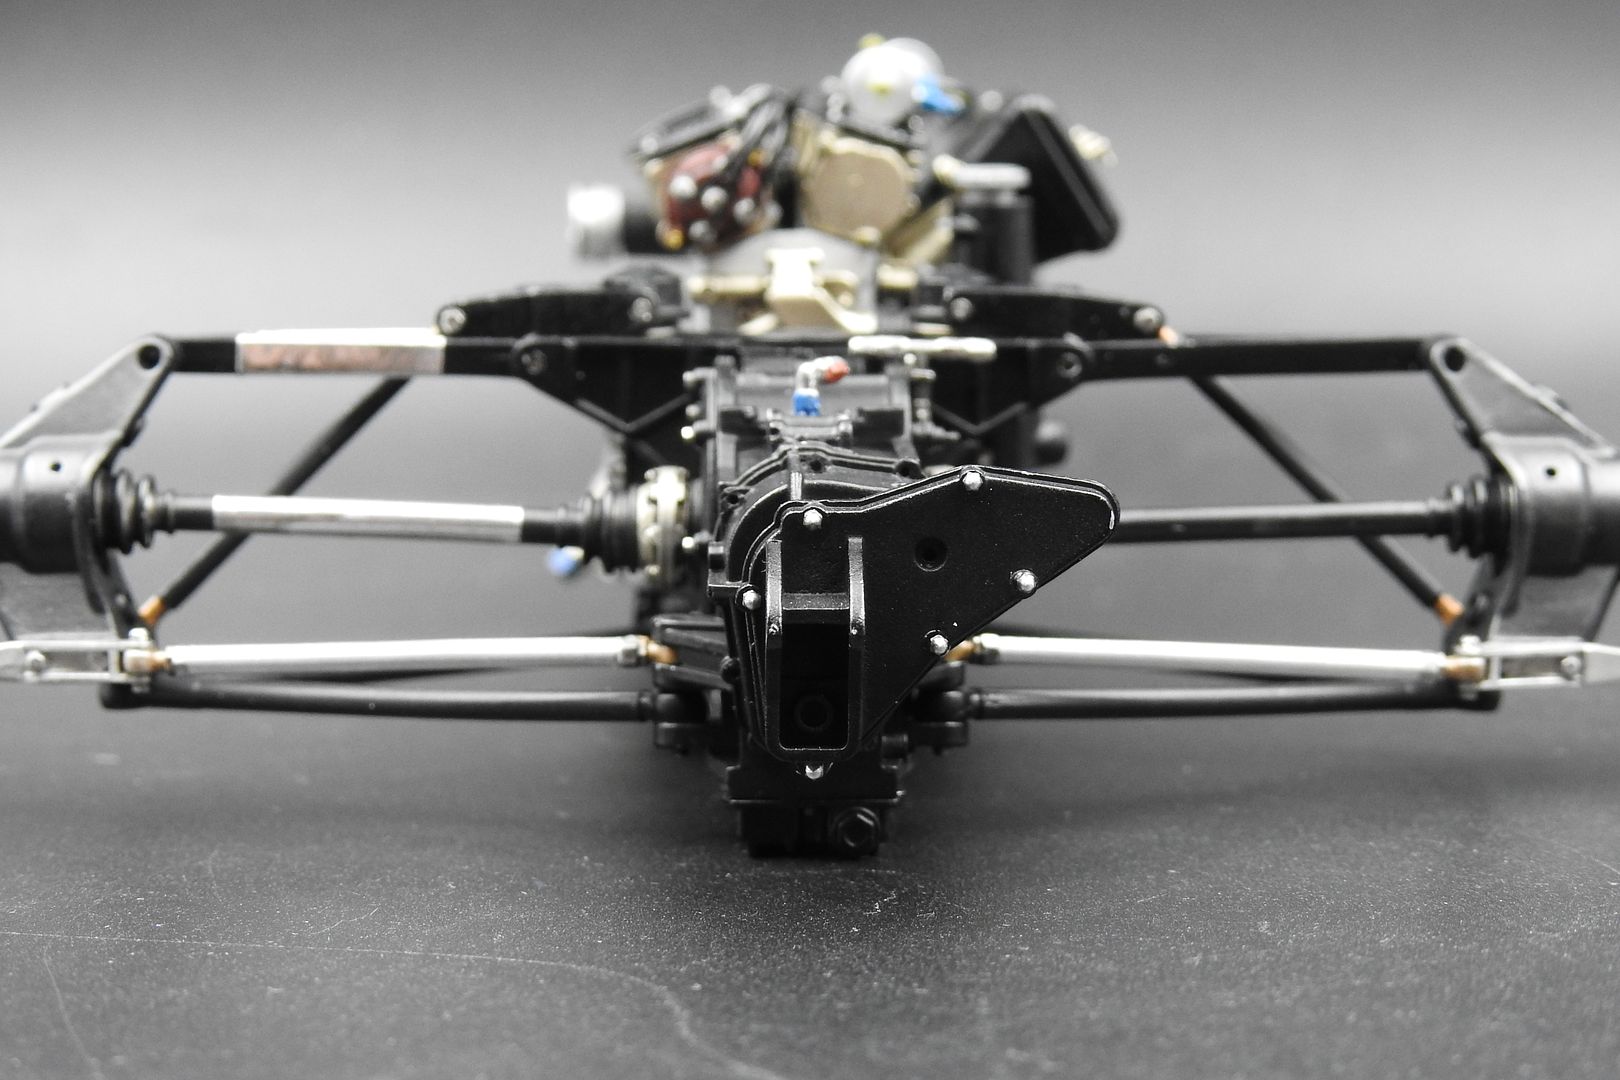
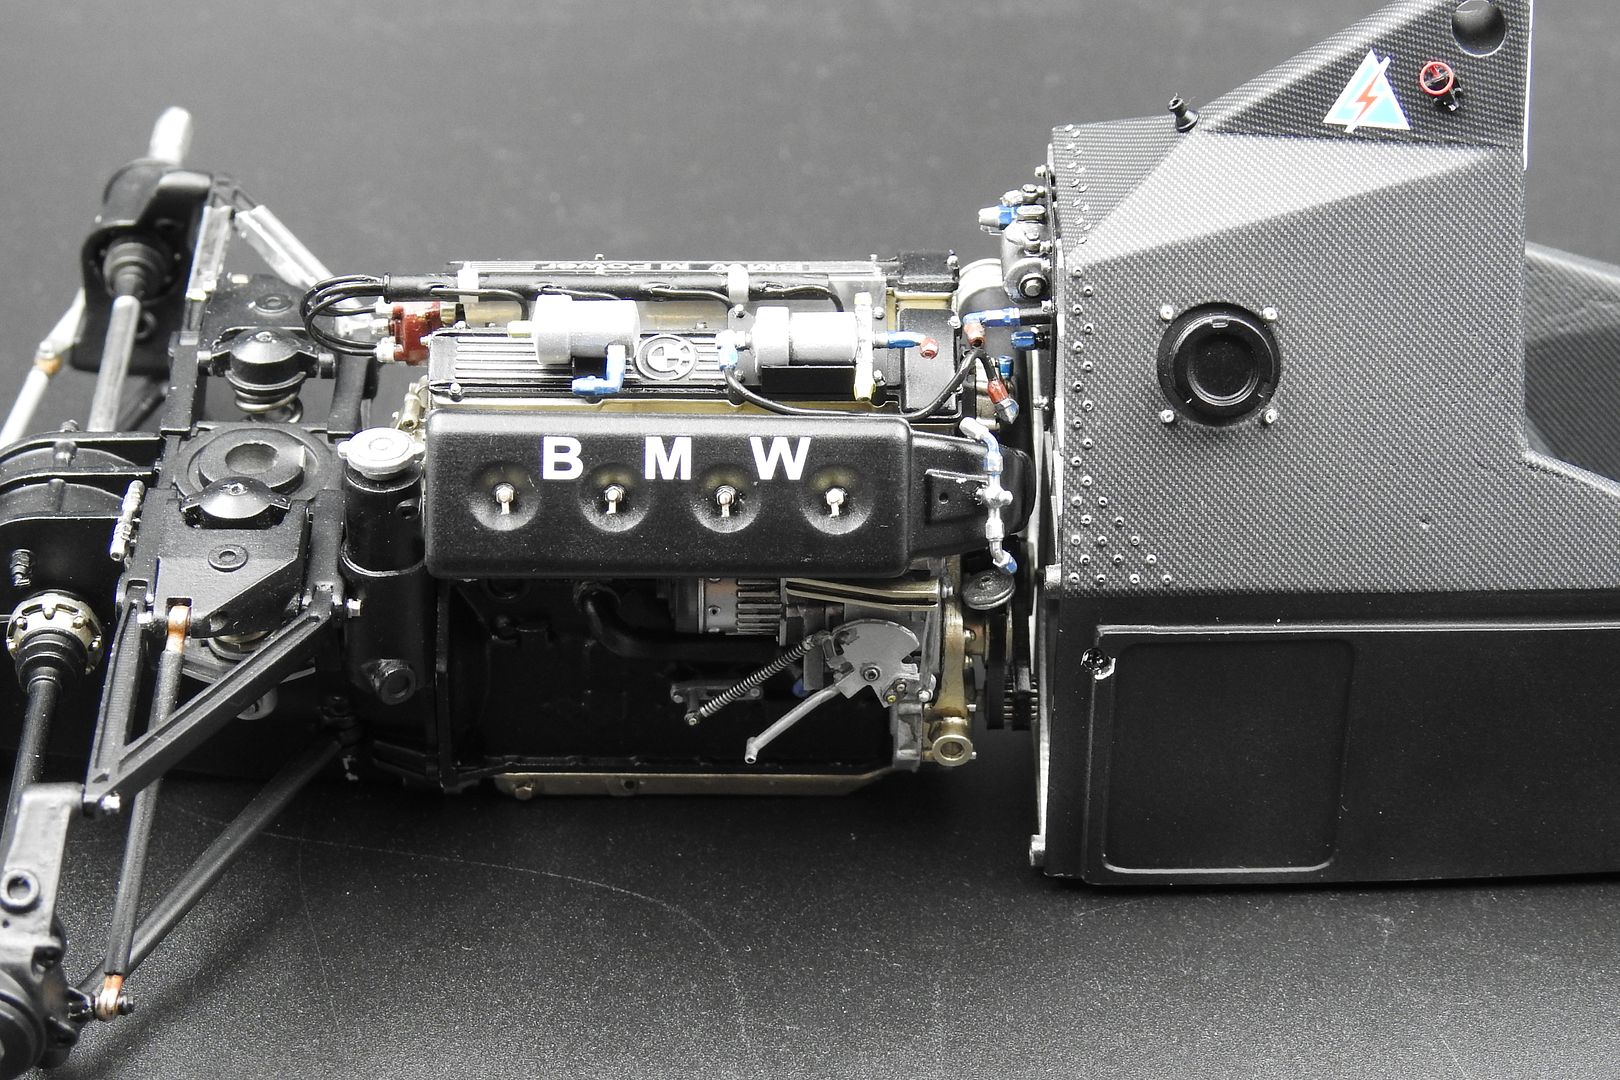
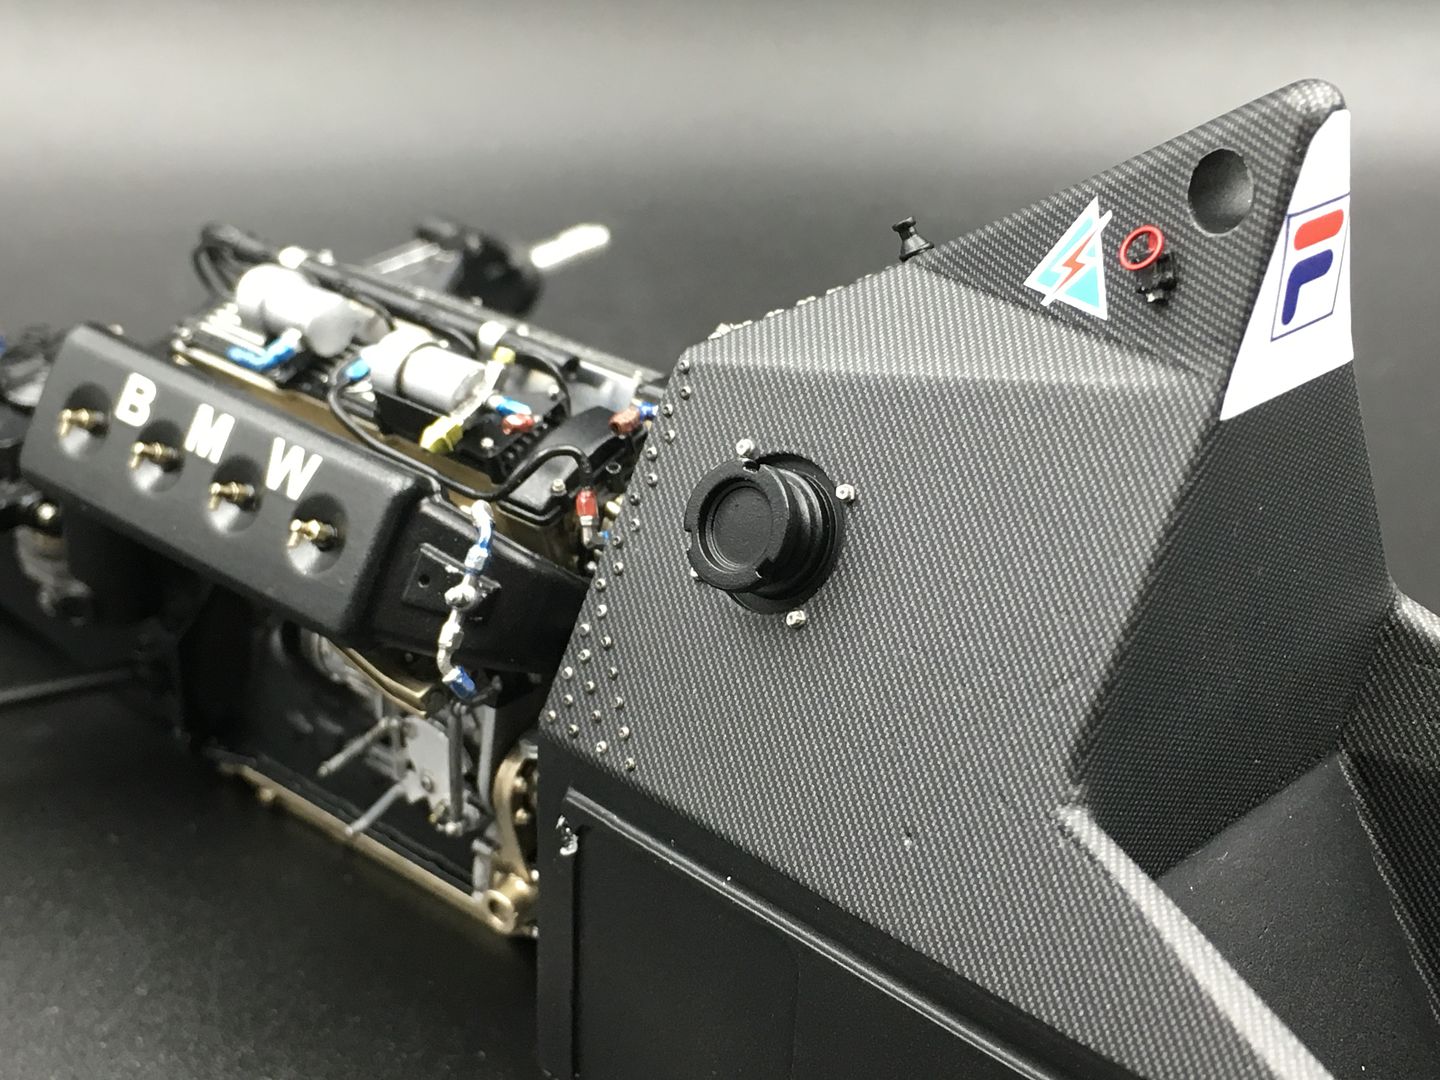
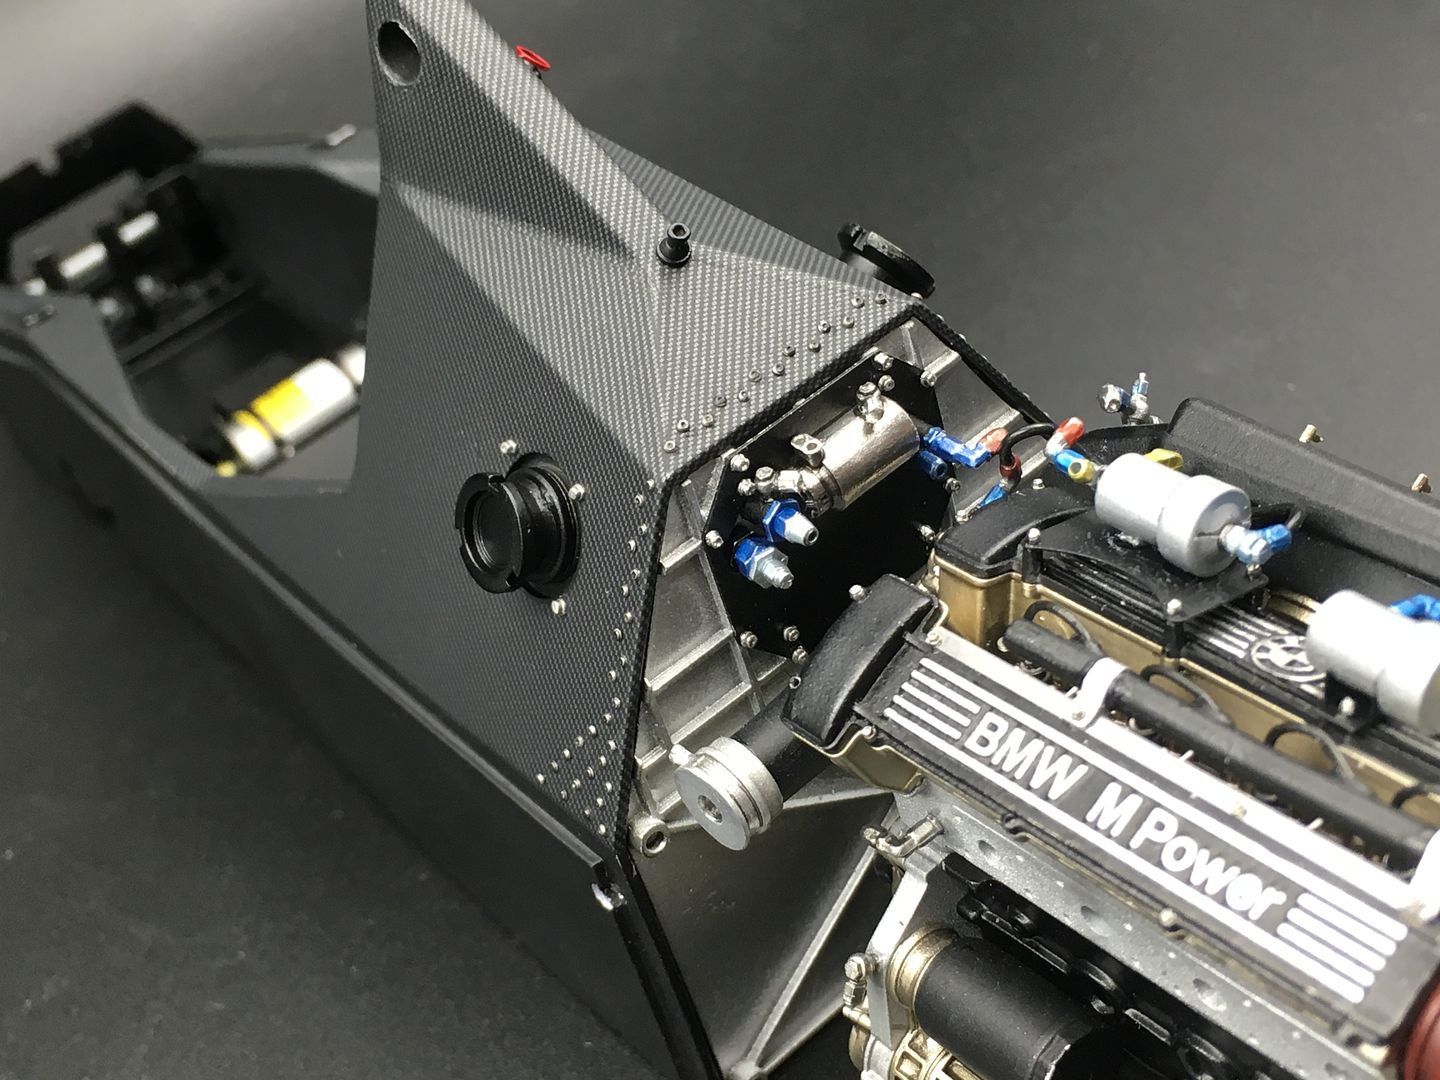
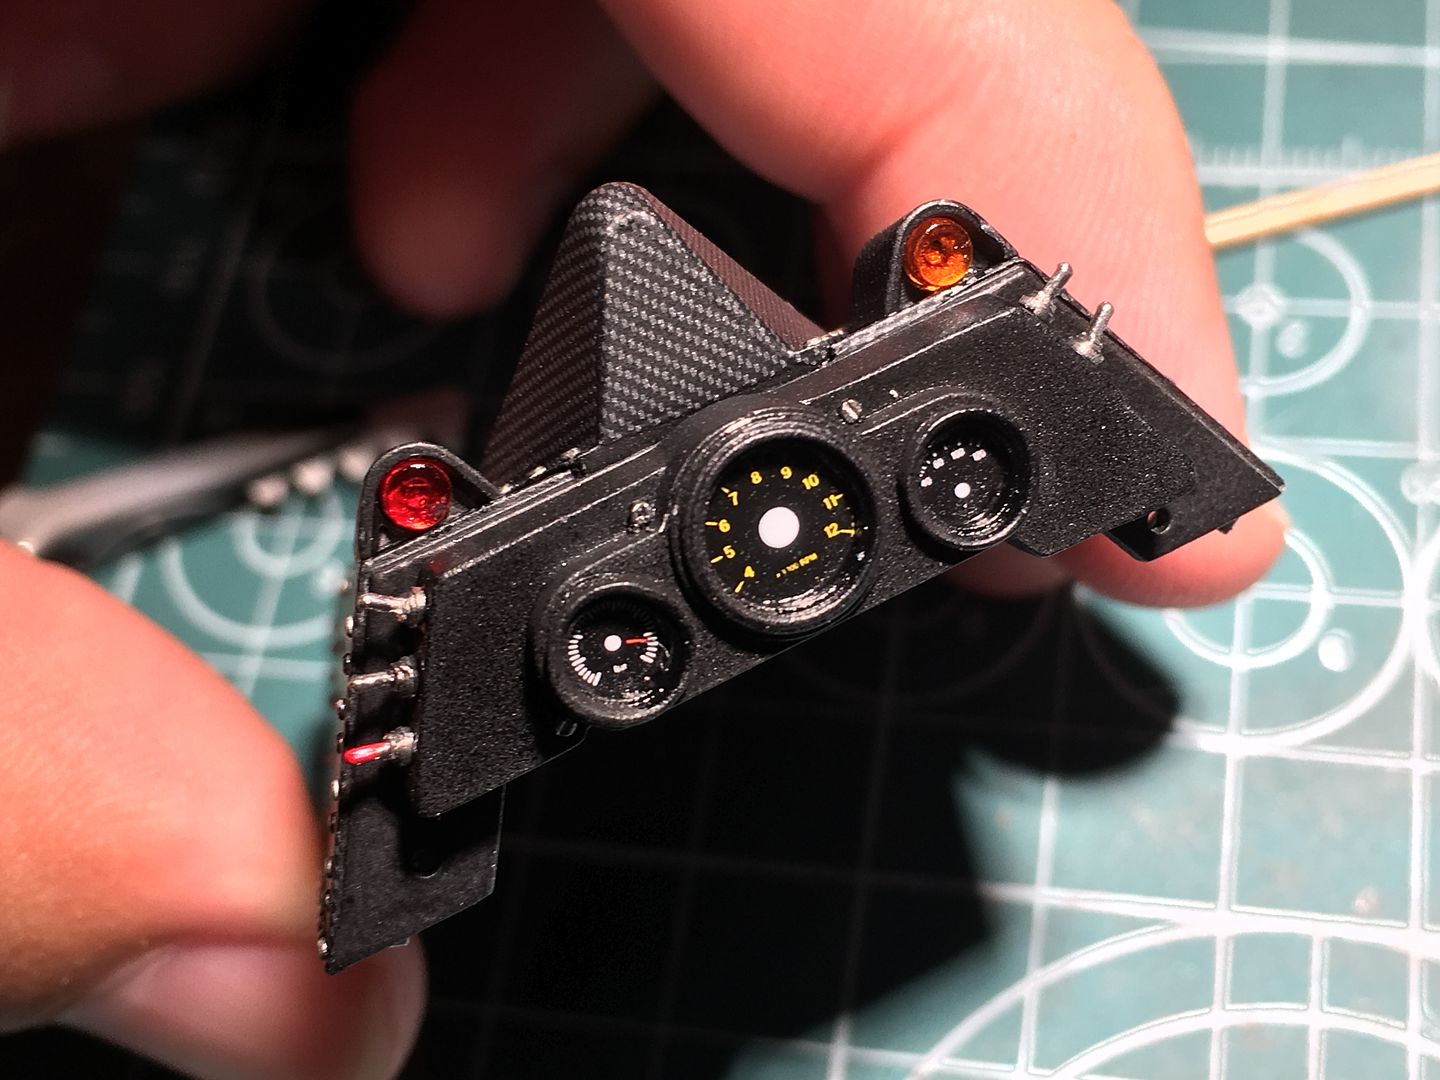
Adding bulkhead detail.
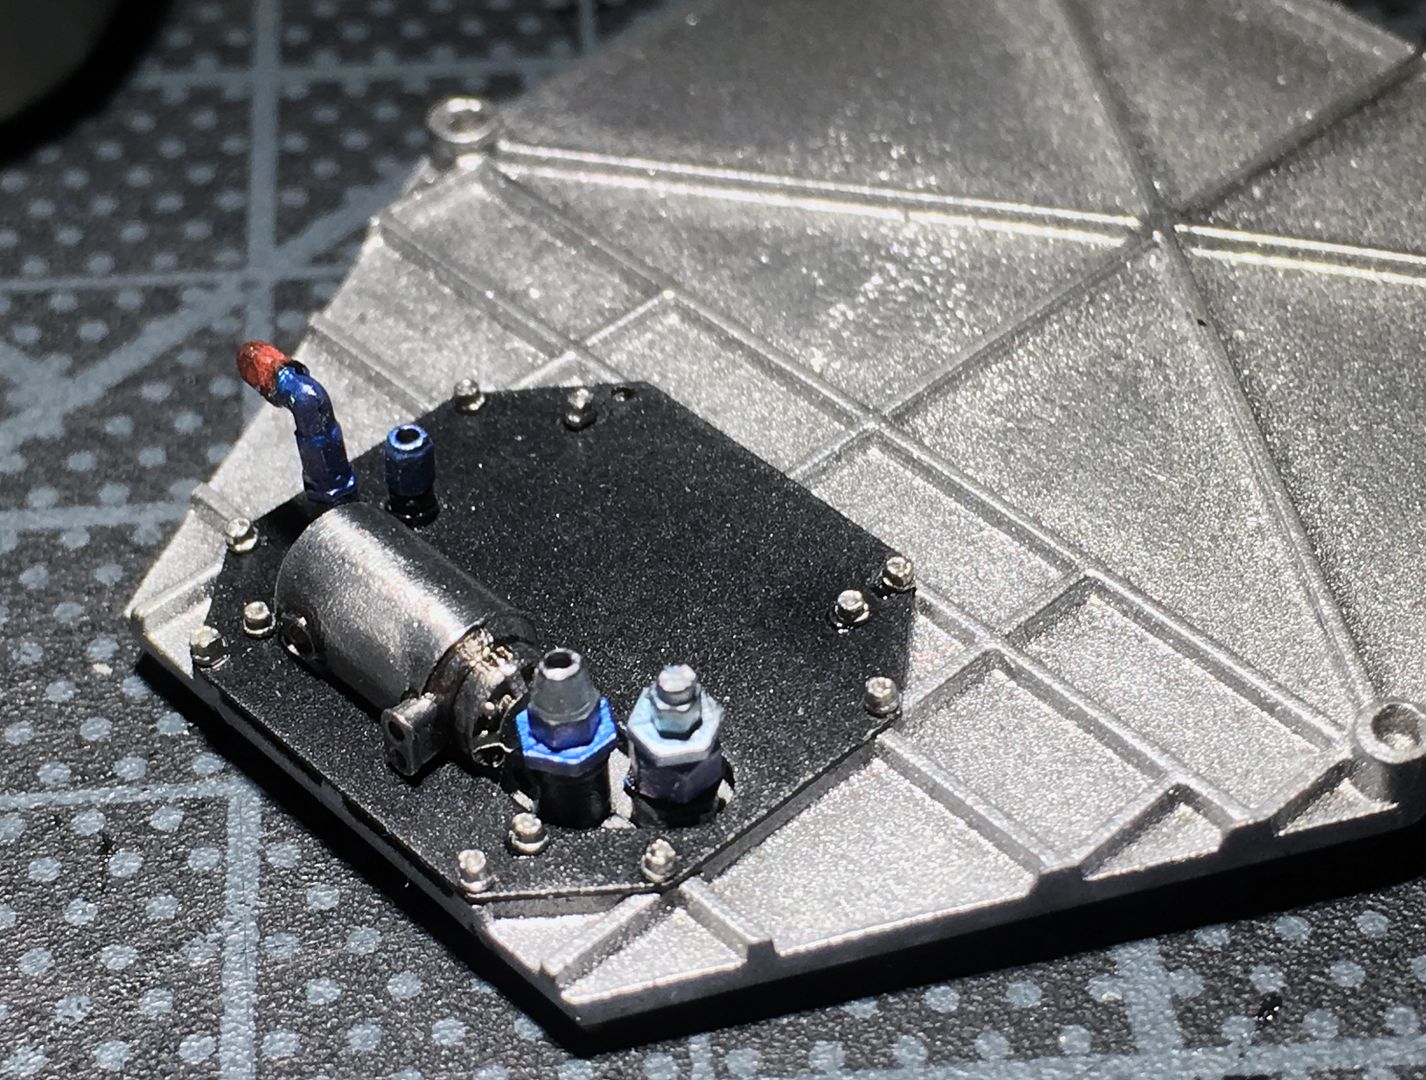
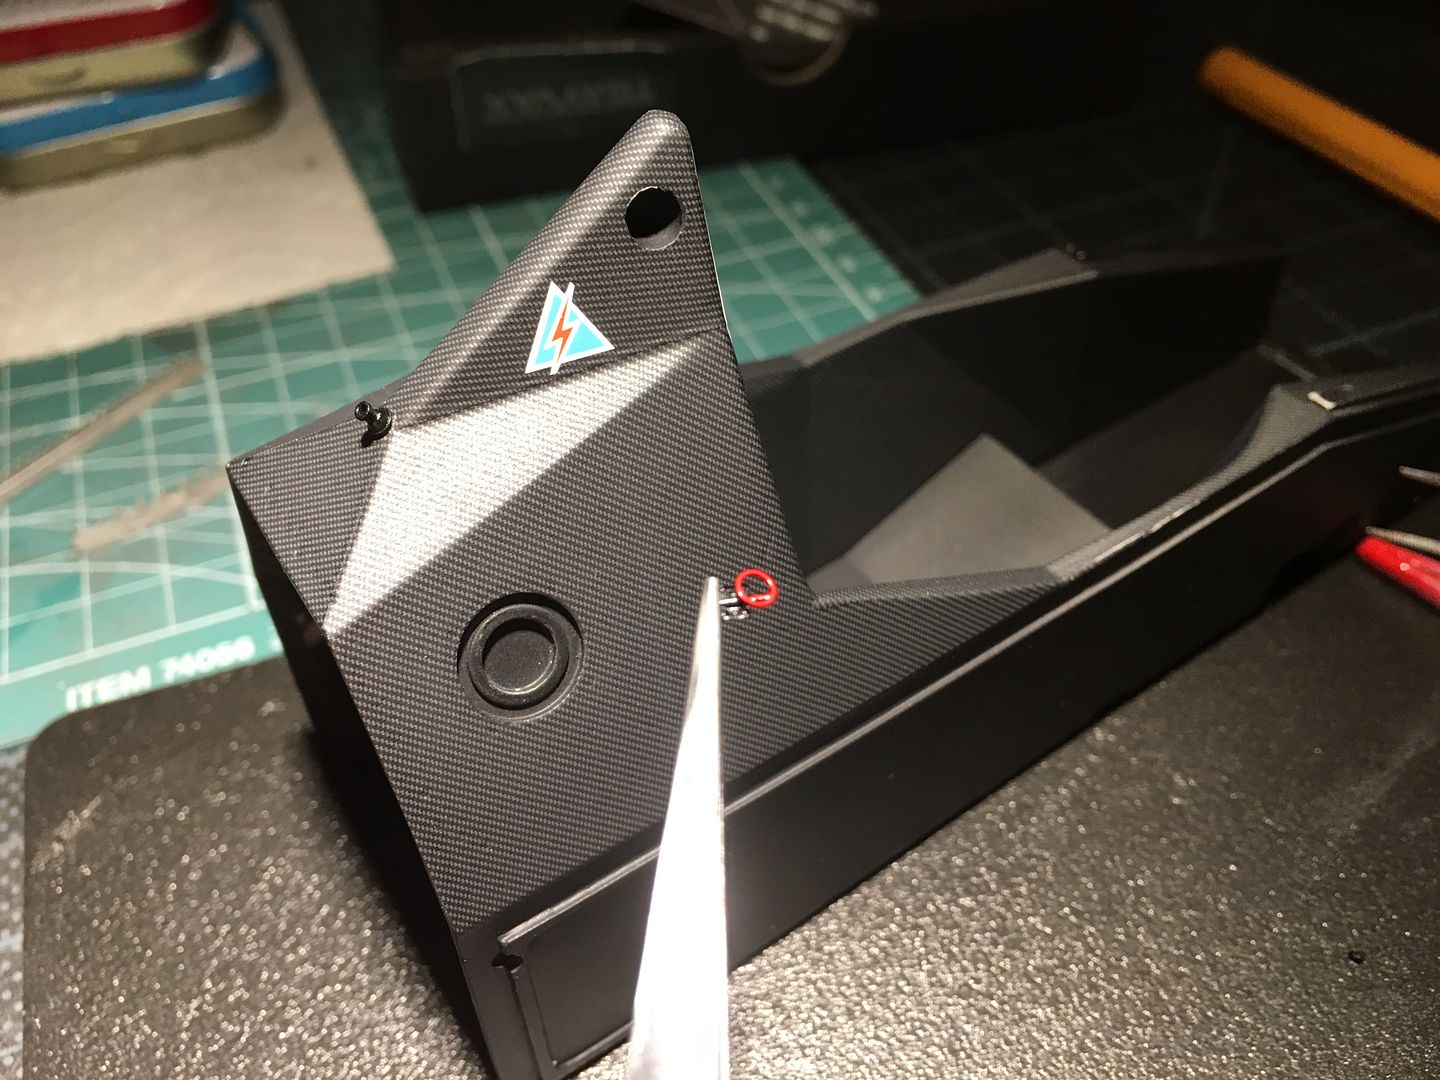
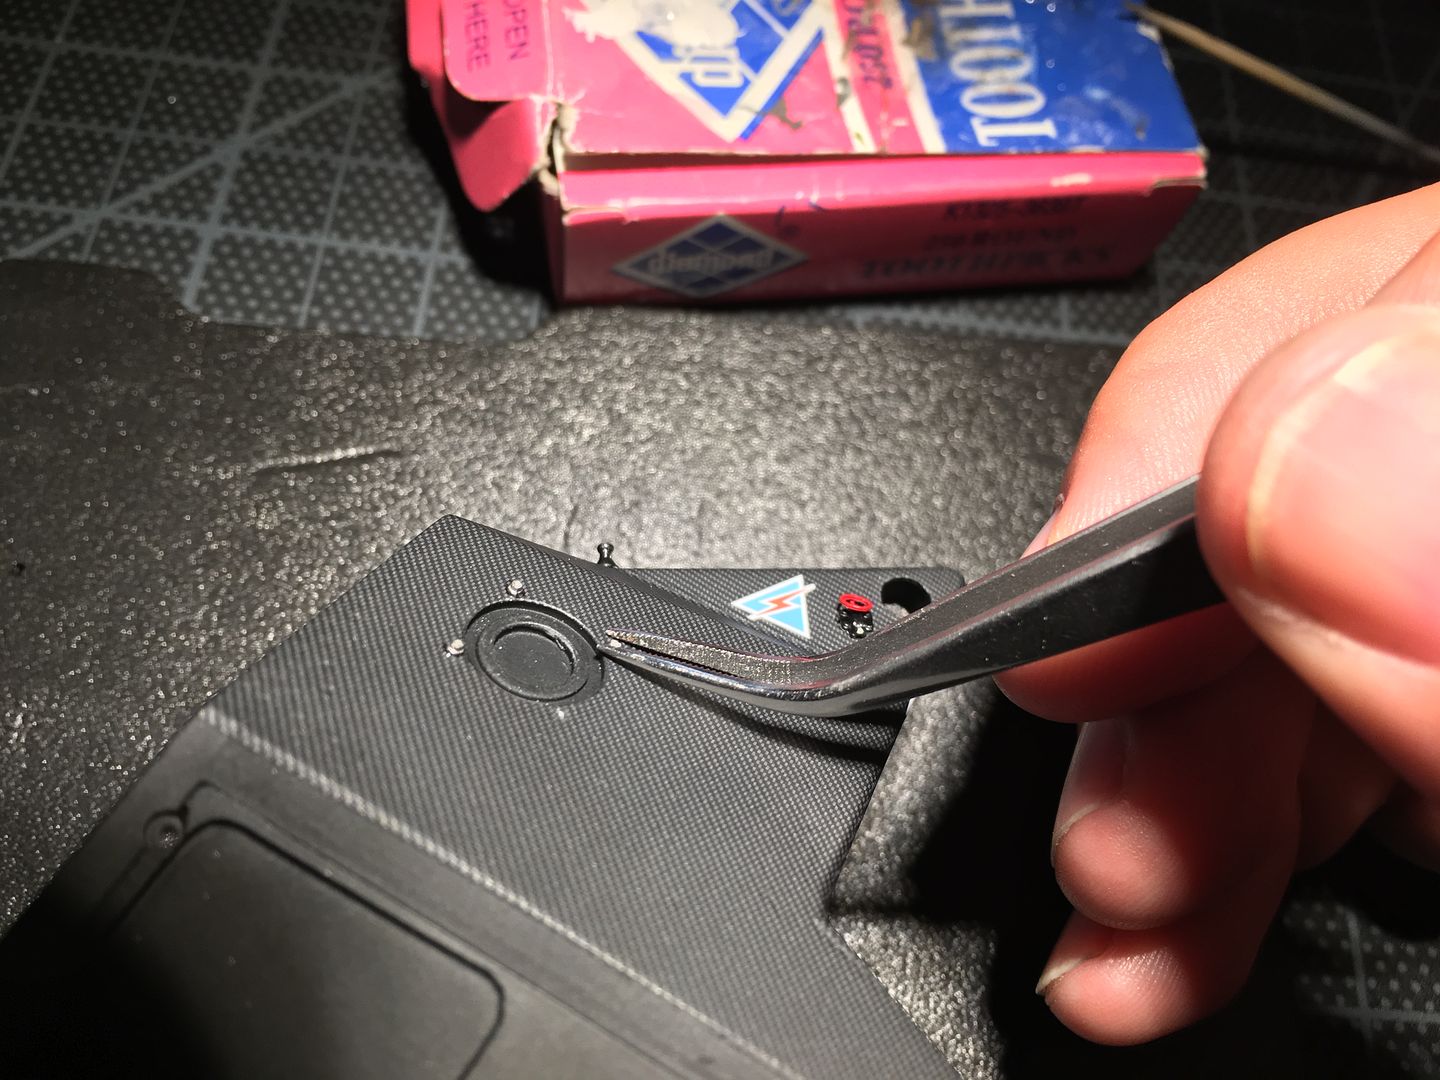
Those little bolts that fix the black panel to the bulkhead were the biggest paint so far!! SOOOO small and hard to hold as you try and puch them into the hole, without any glue showing! Lost one.
Lots of wiring and finishing to do still - but trying to get the construction part of the sub-assemblies sorted first, as I will only damage the wiring if I did that first!

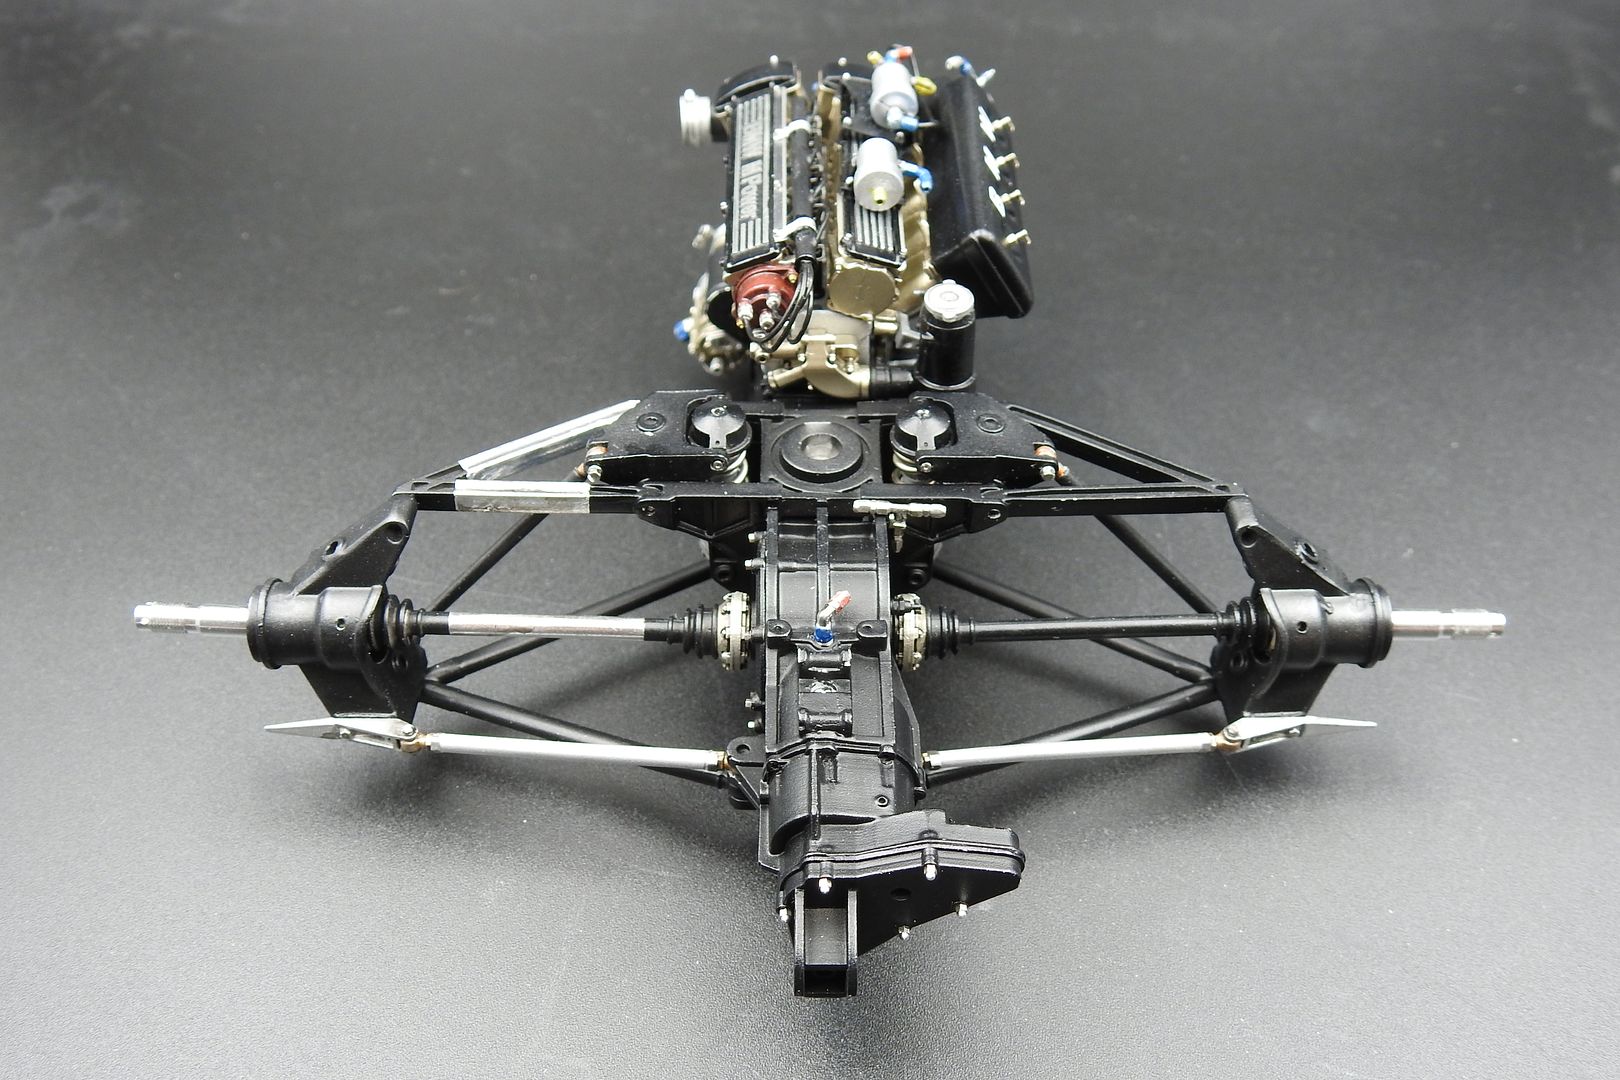
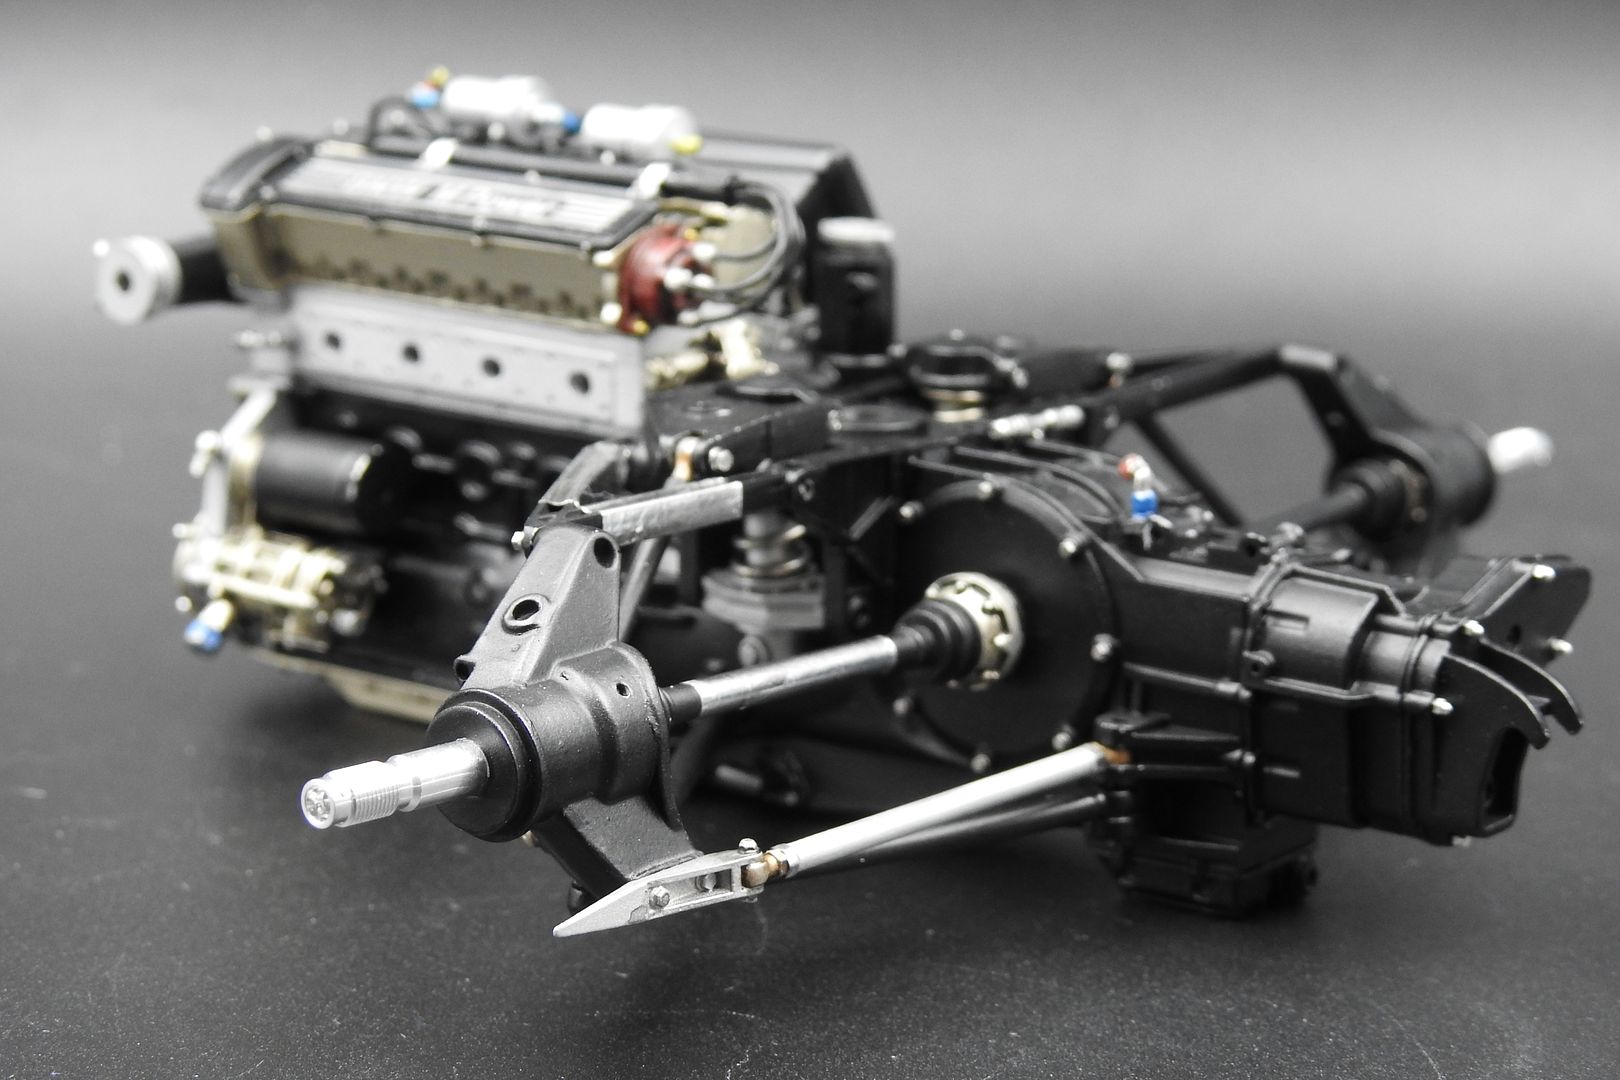
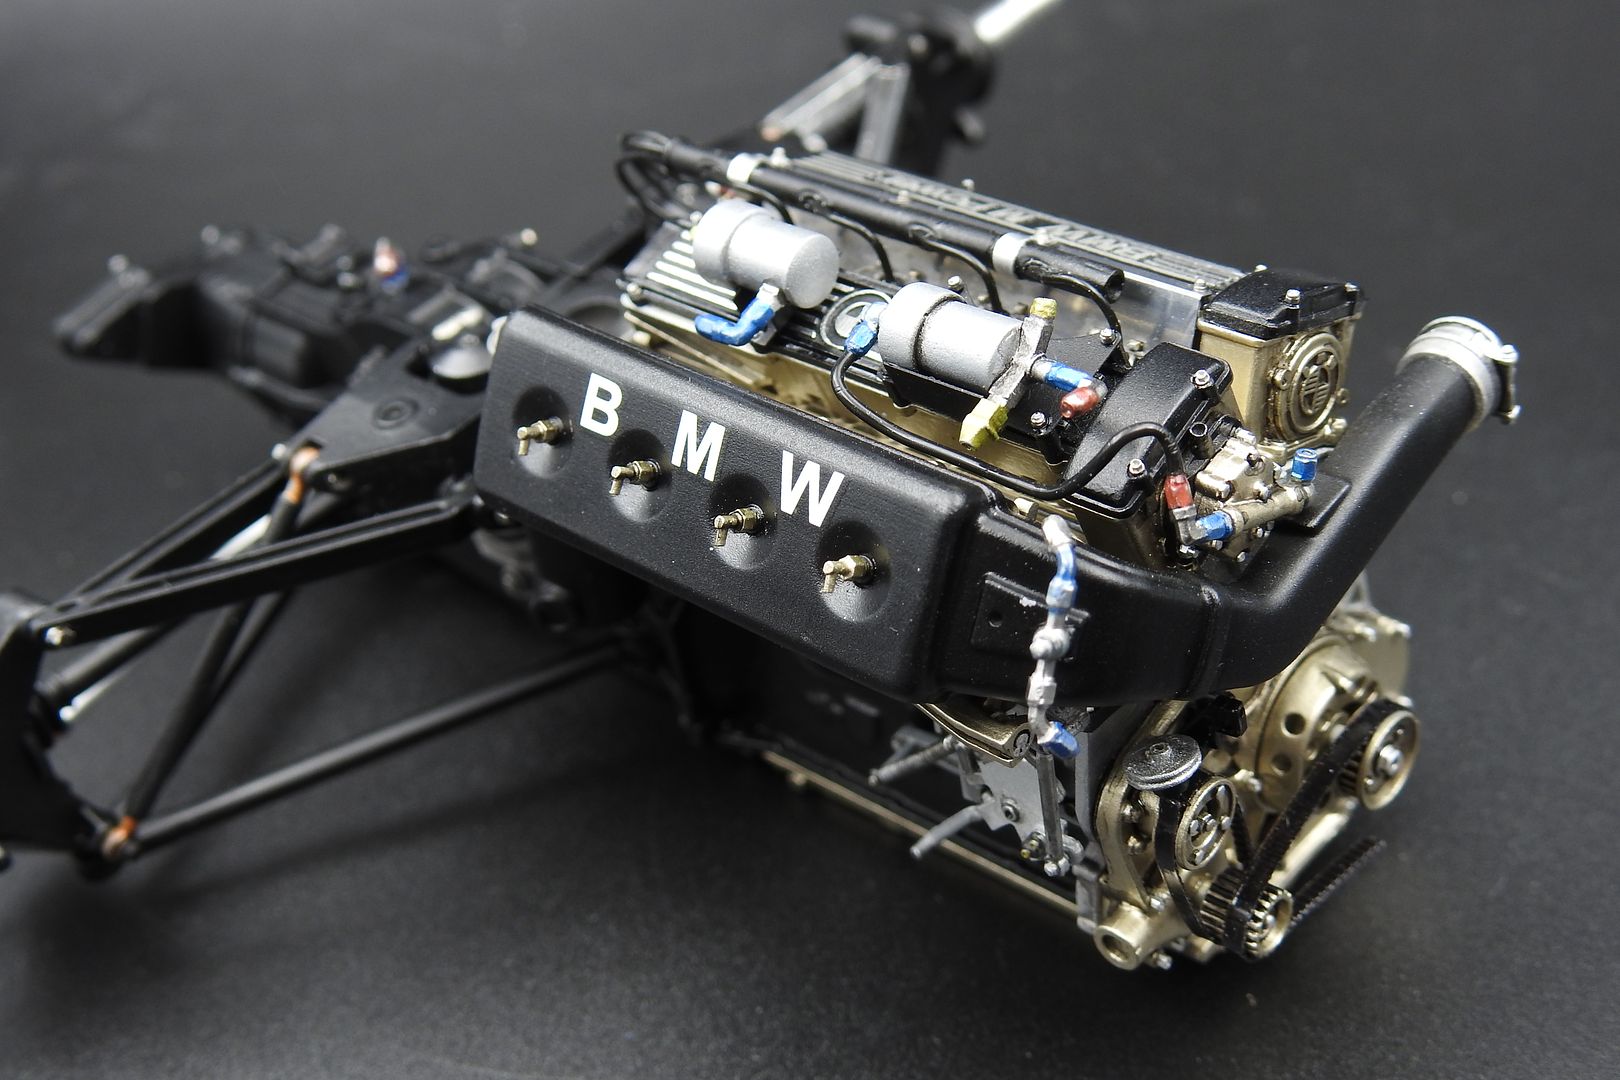
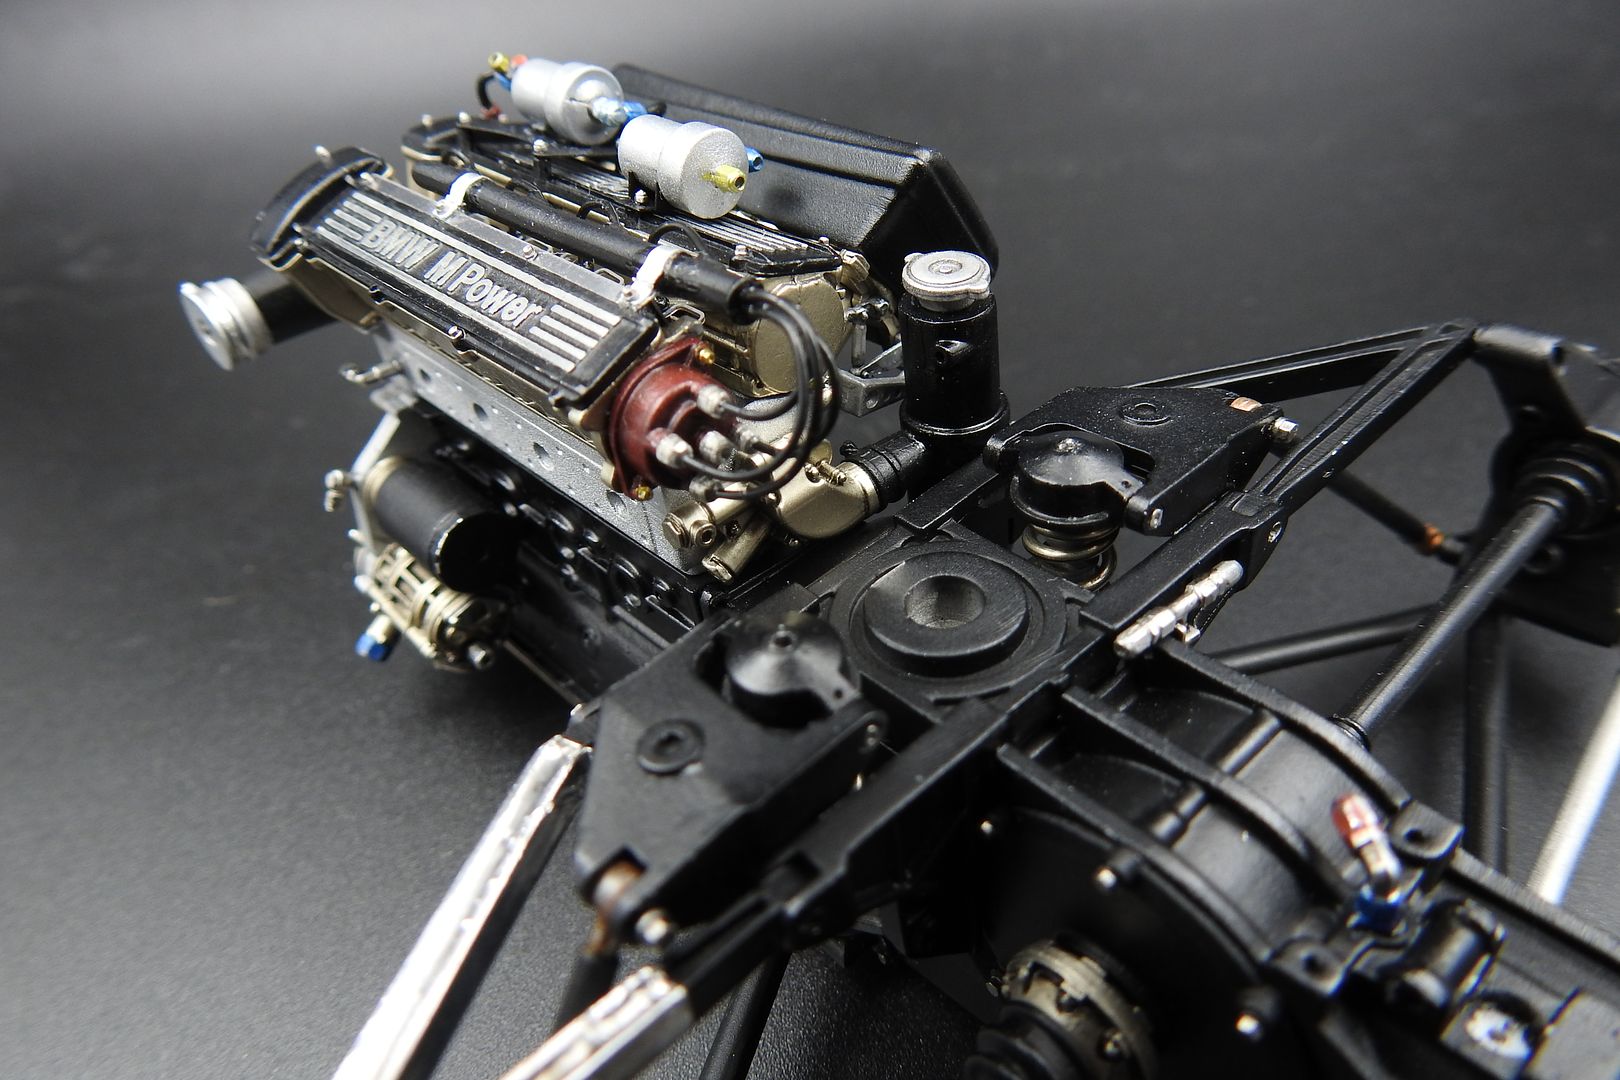
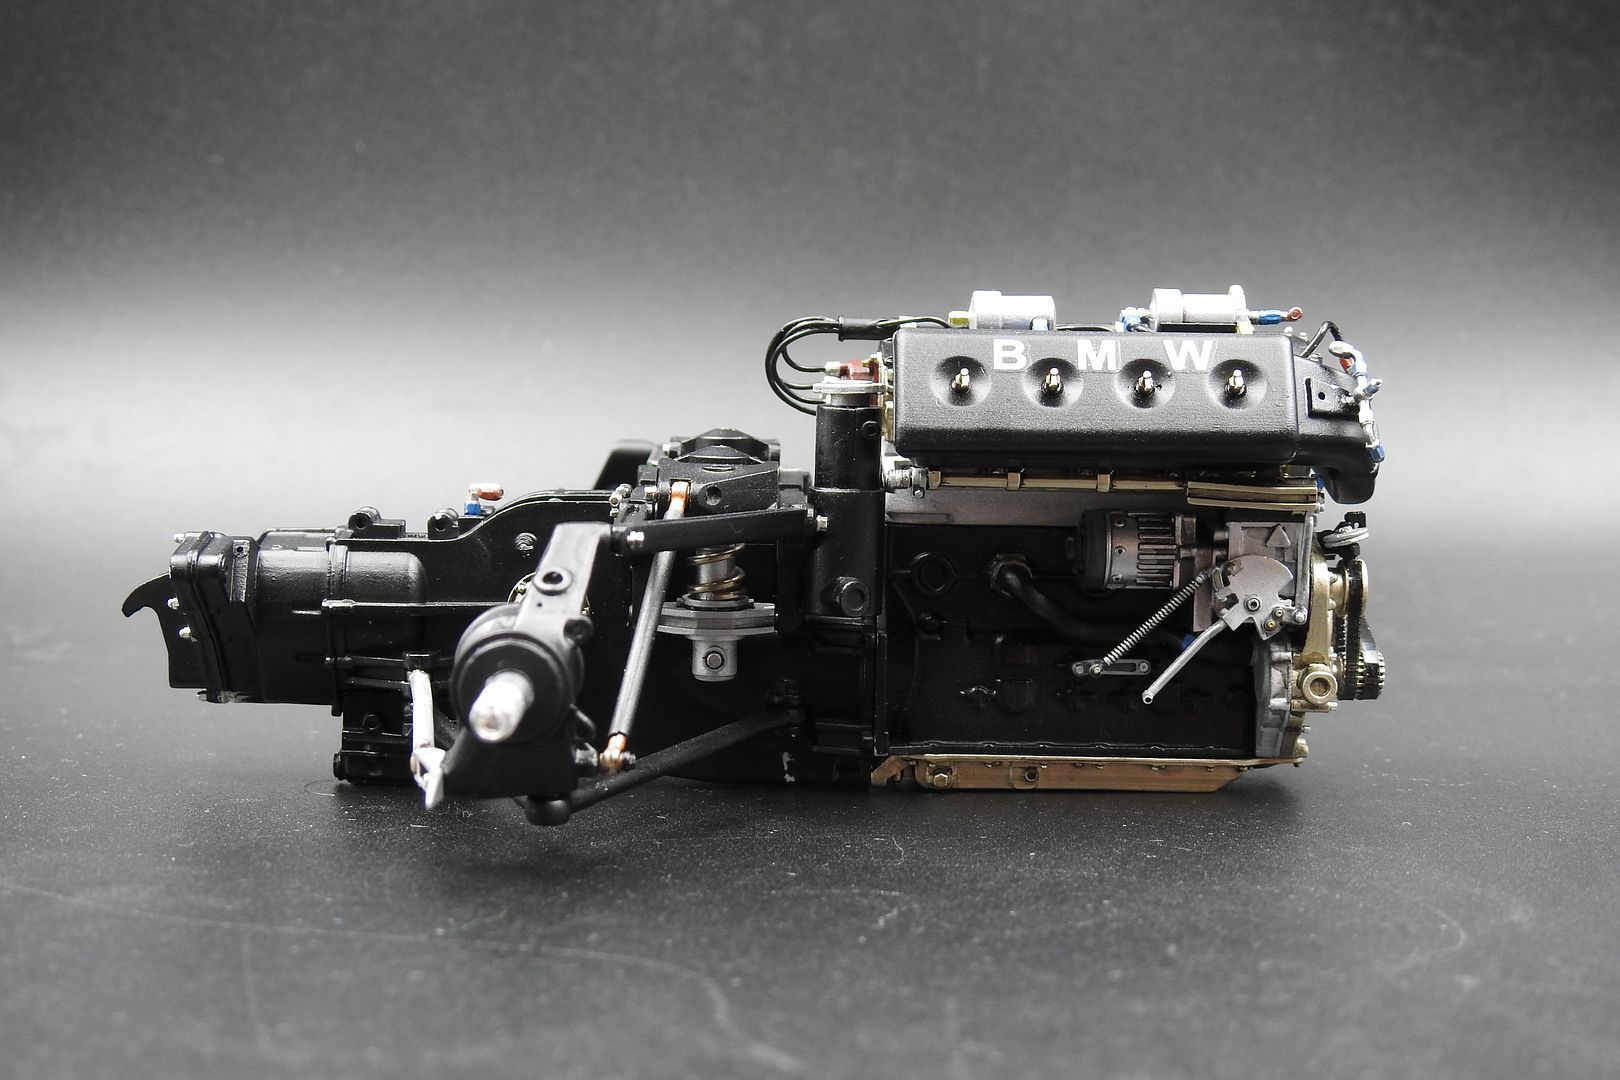
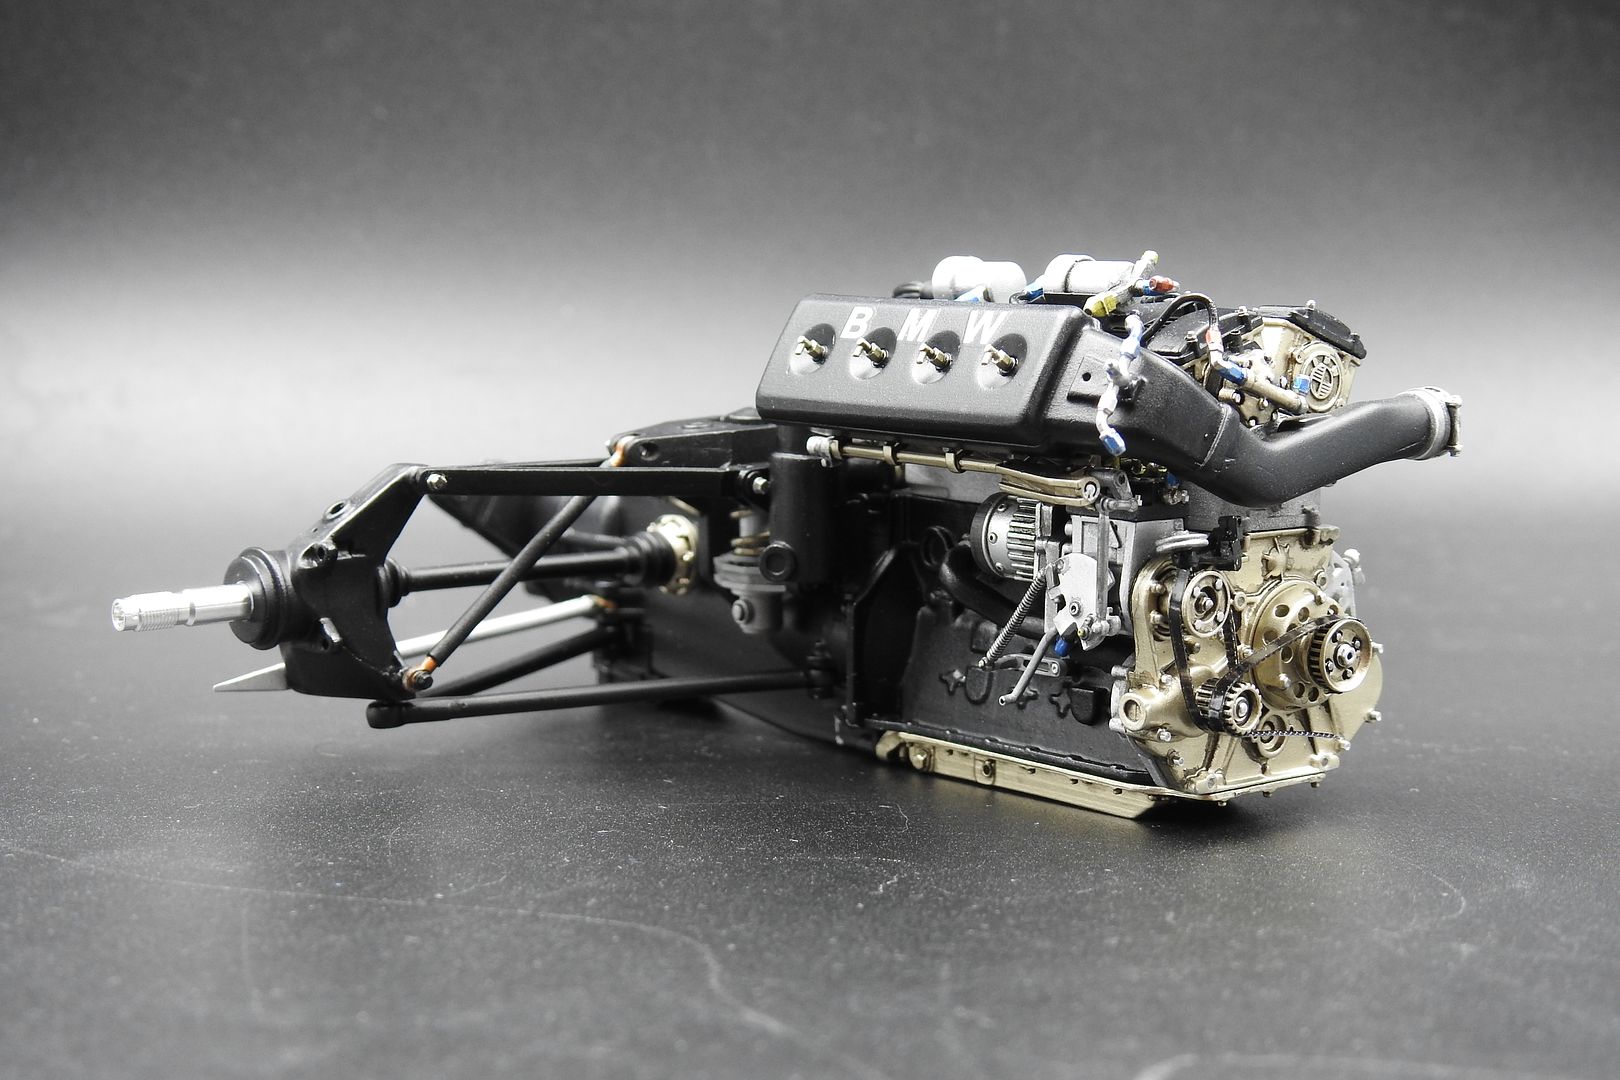
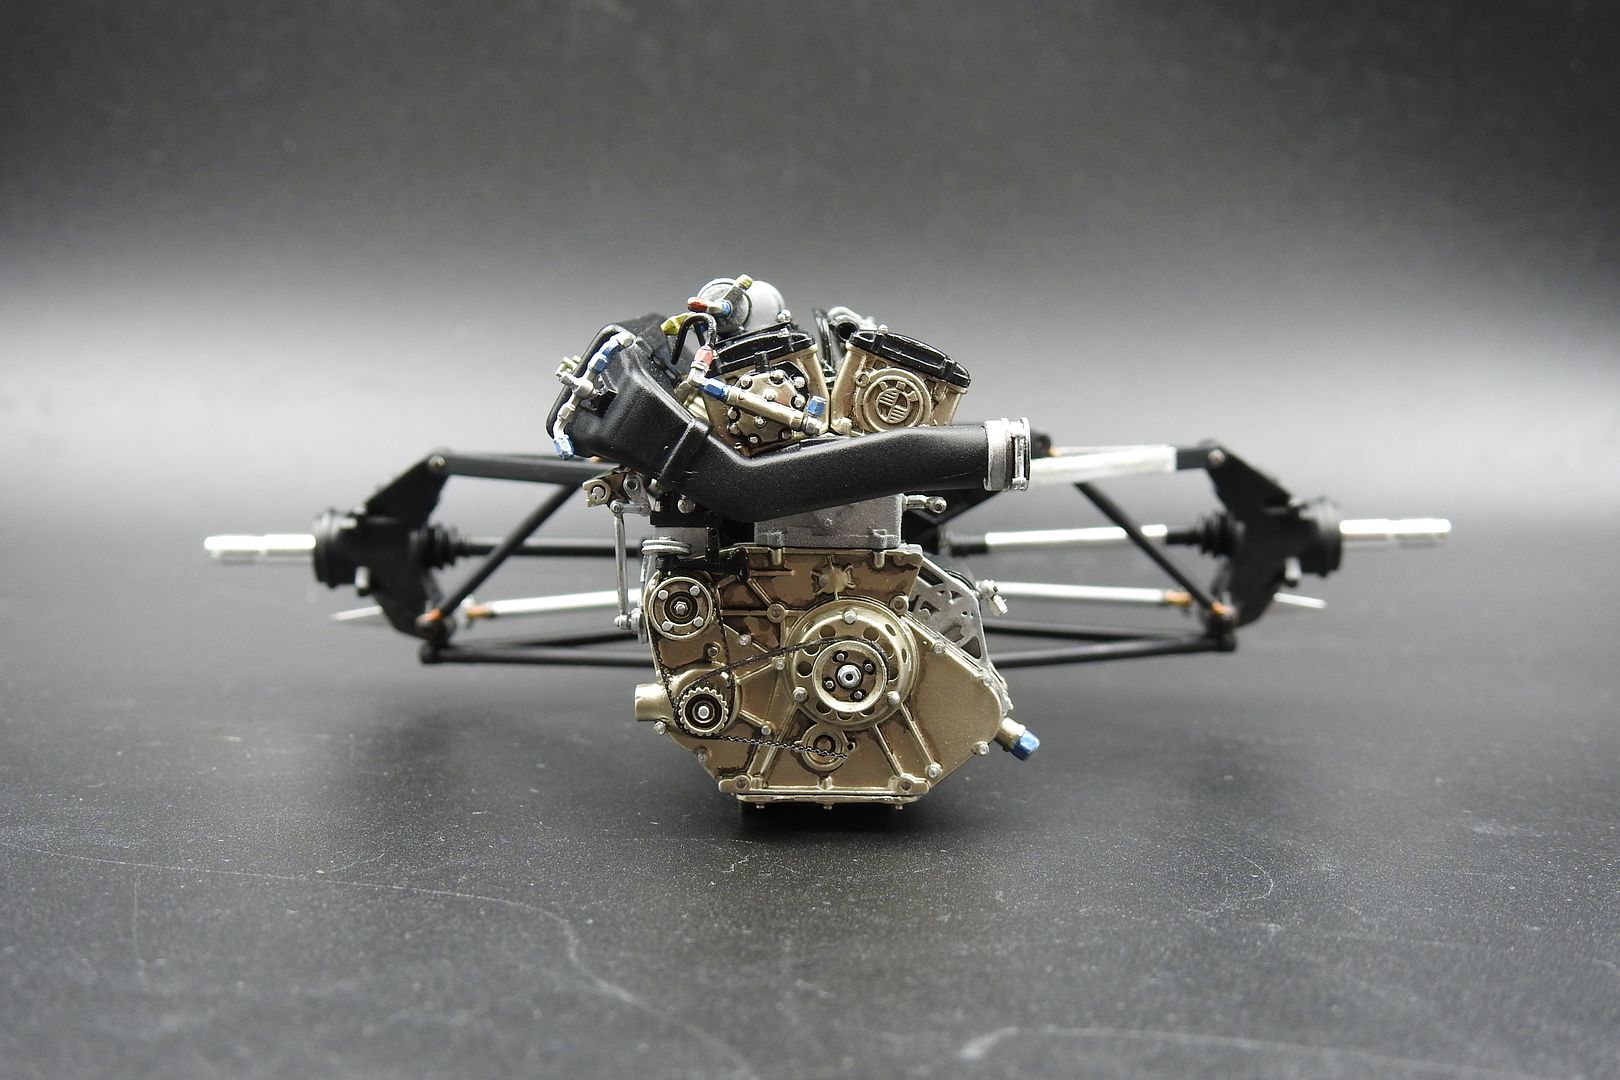
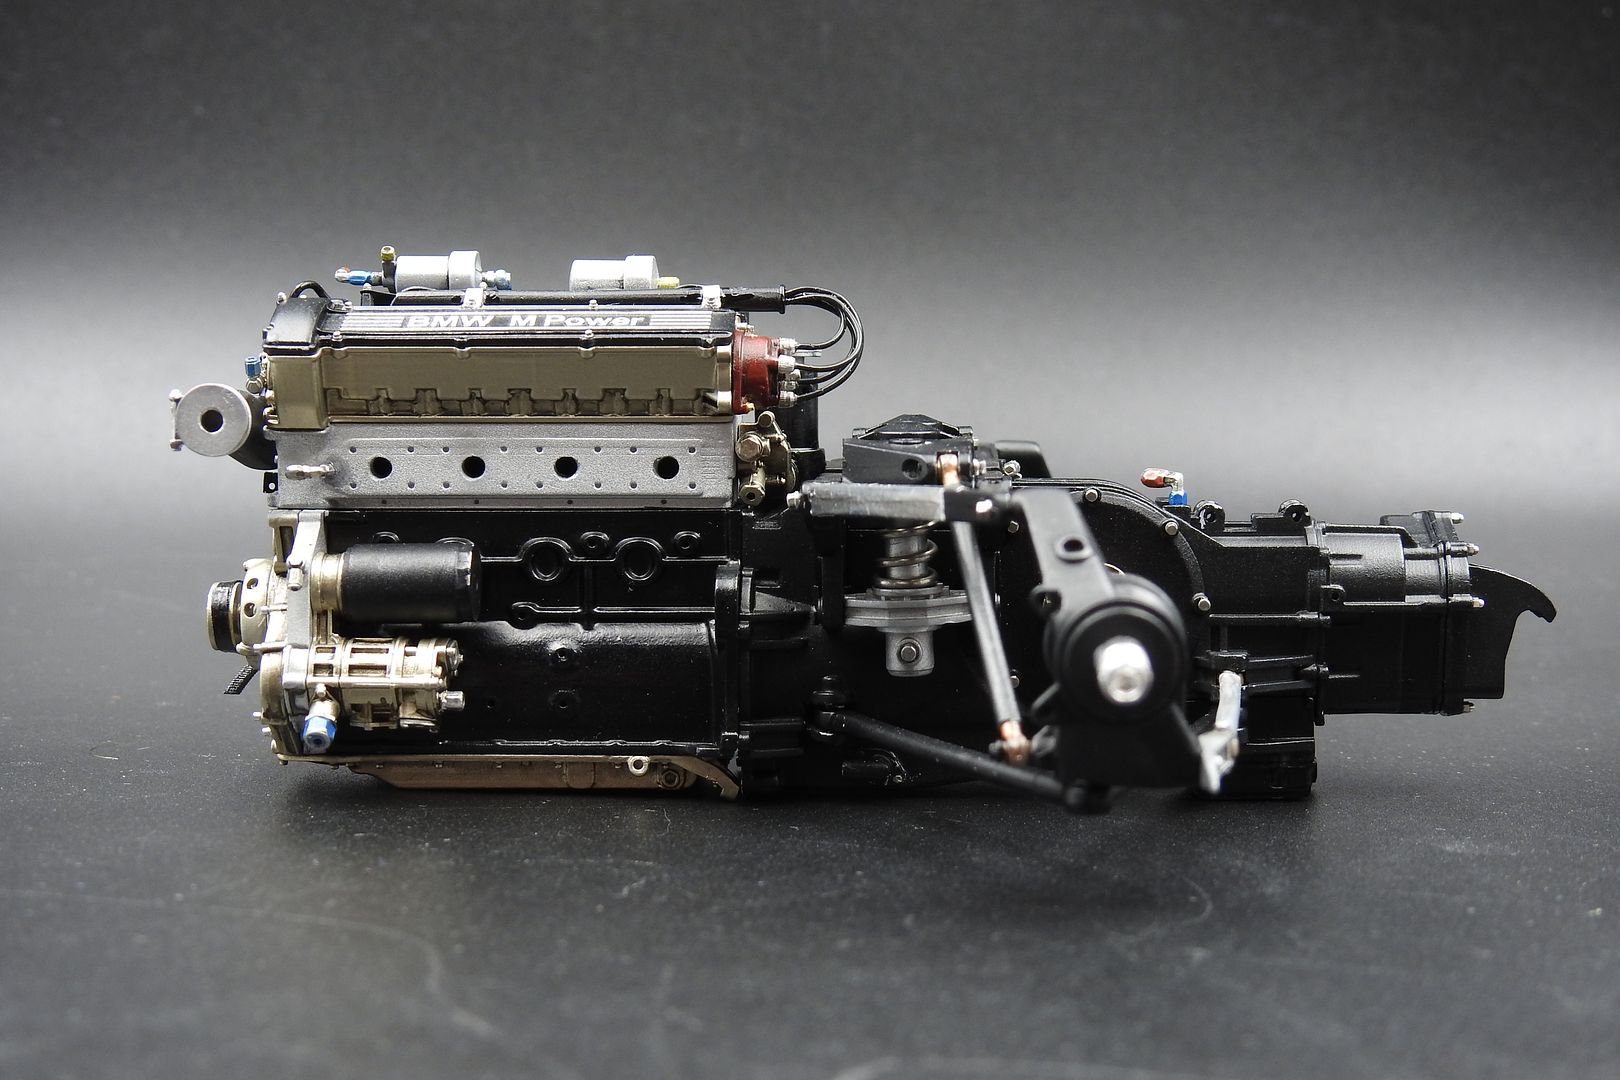
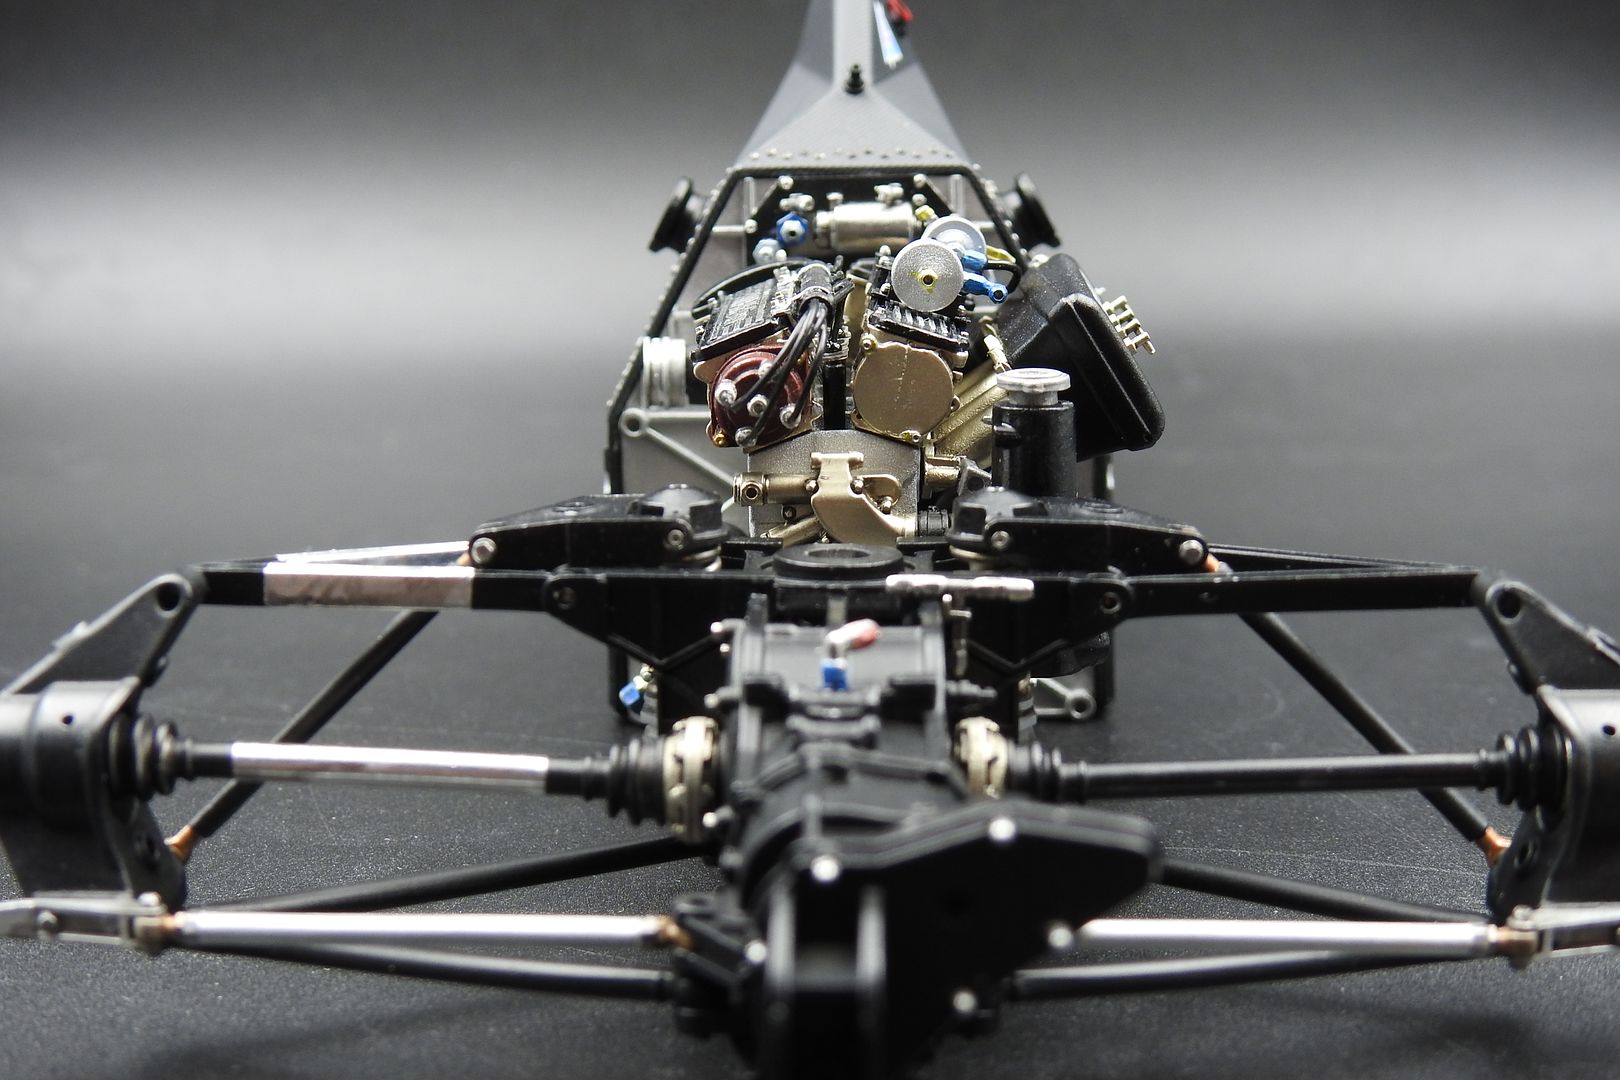
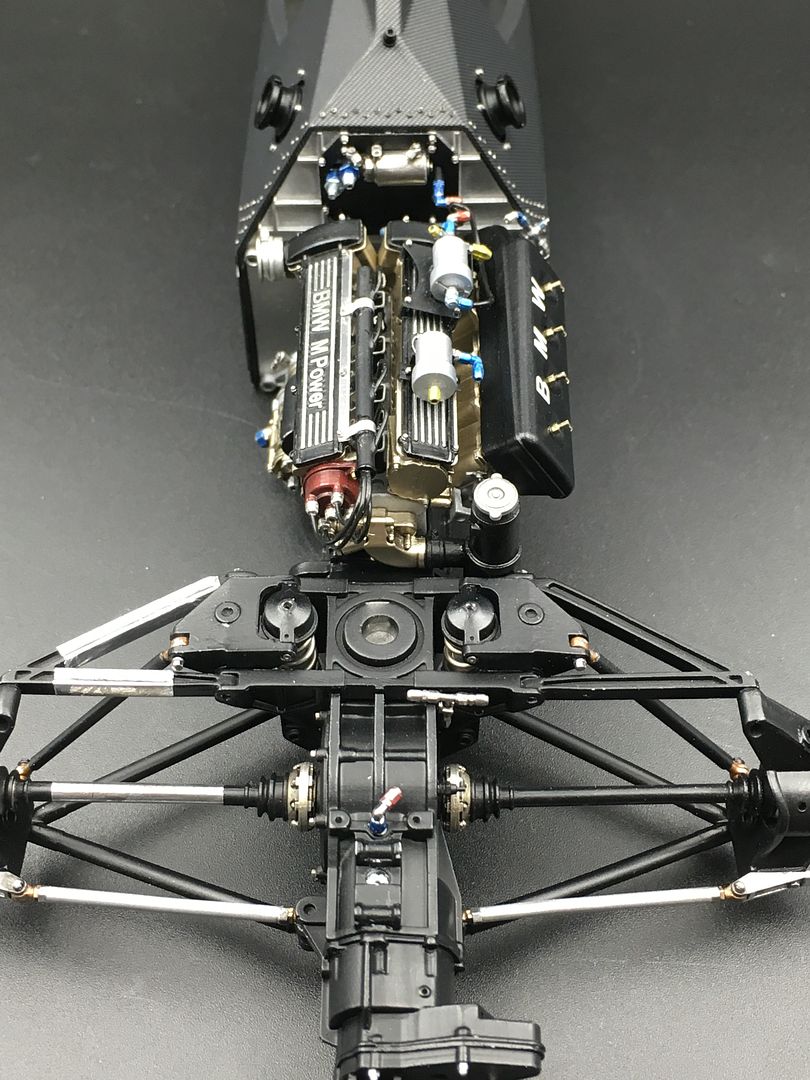
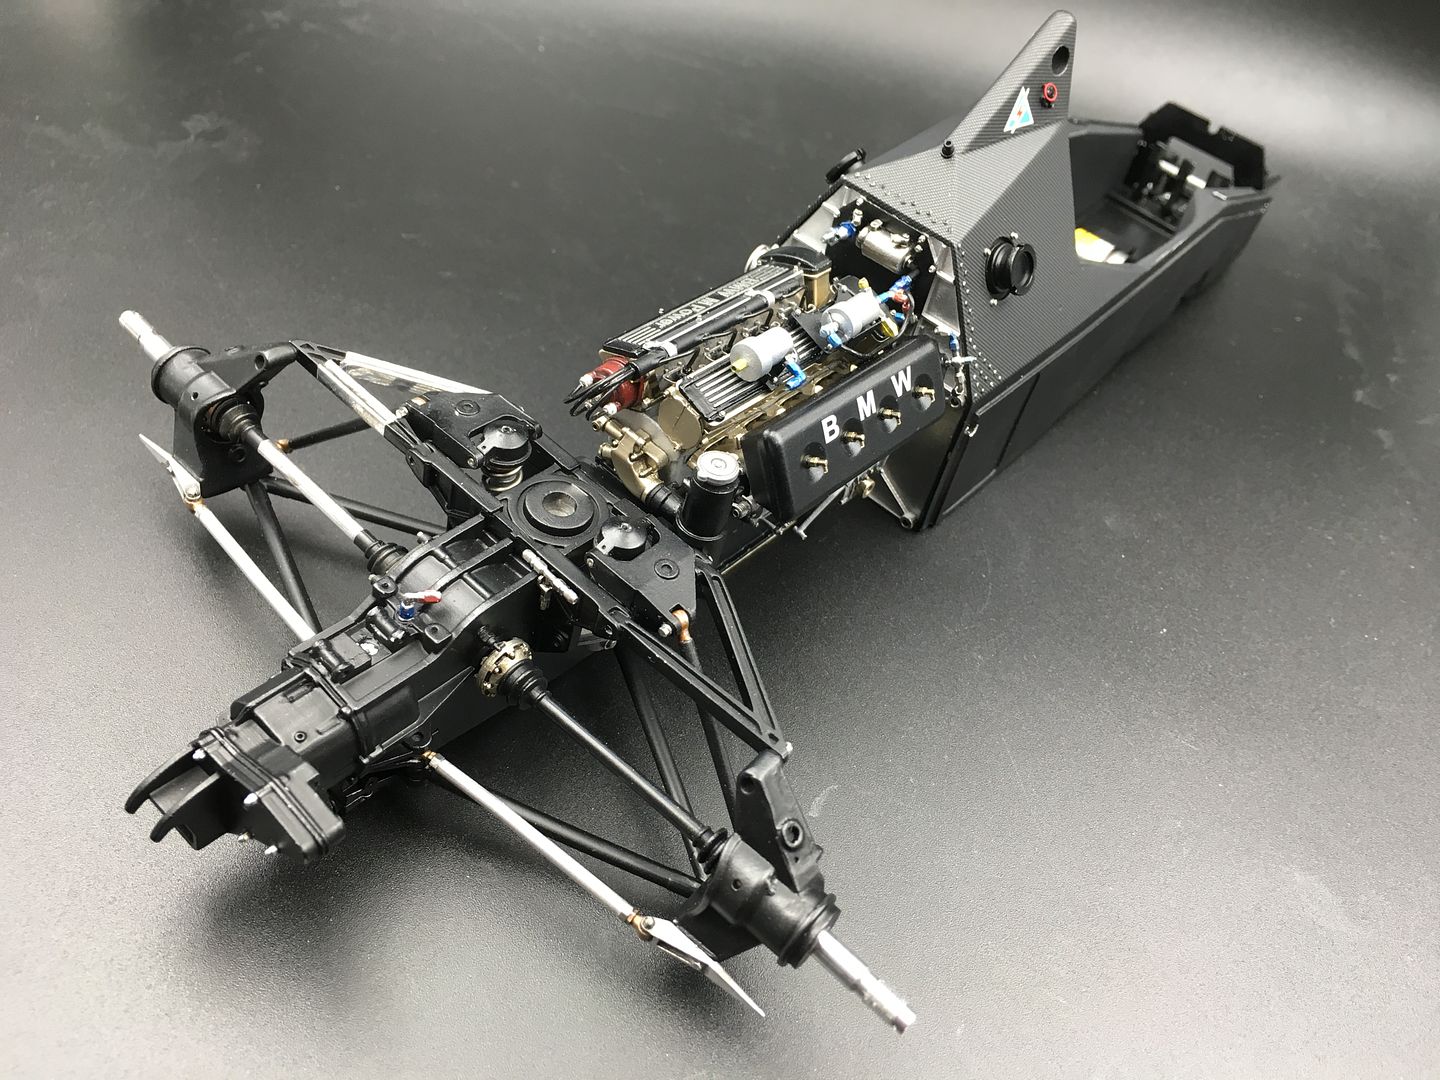
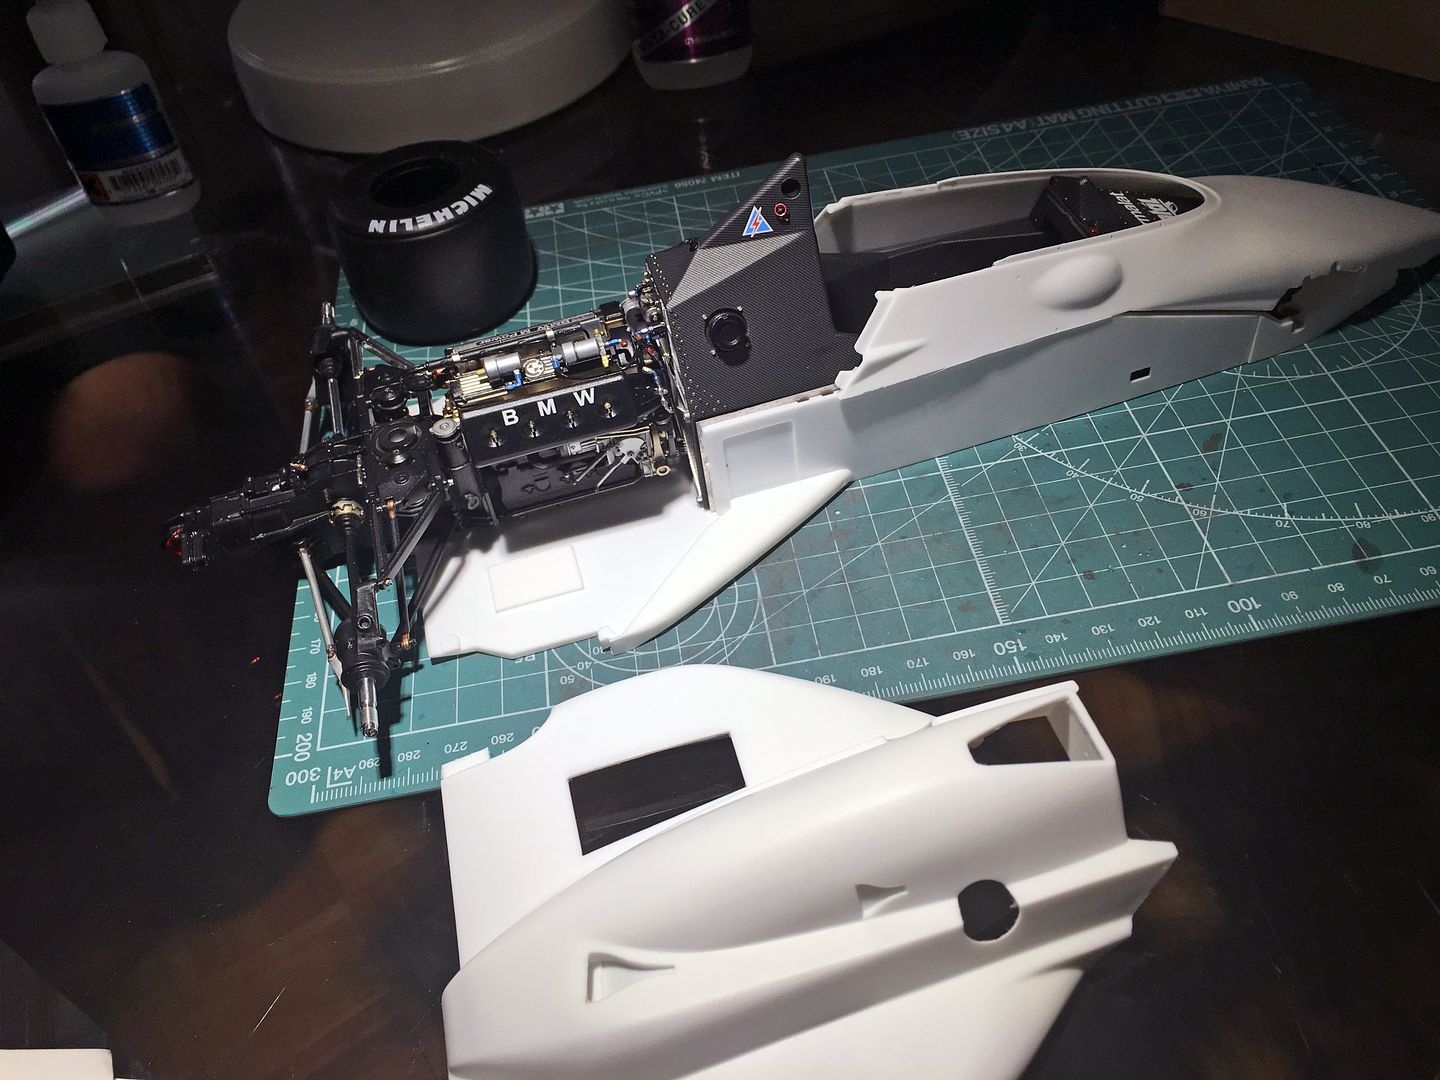
Of course had to add the engine to see how it all looks (just placed in position)
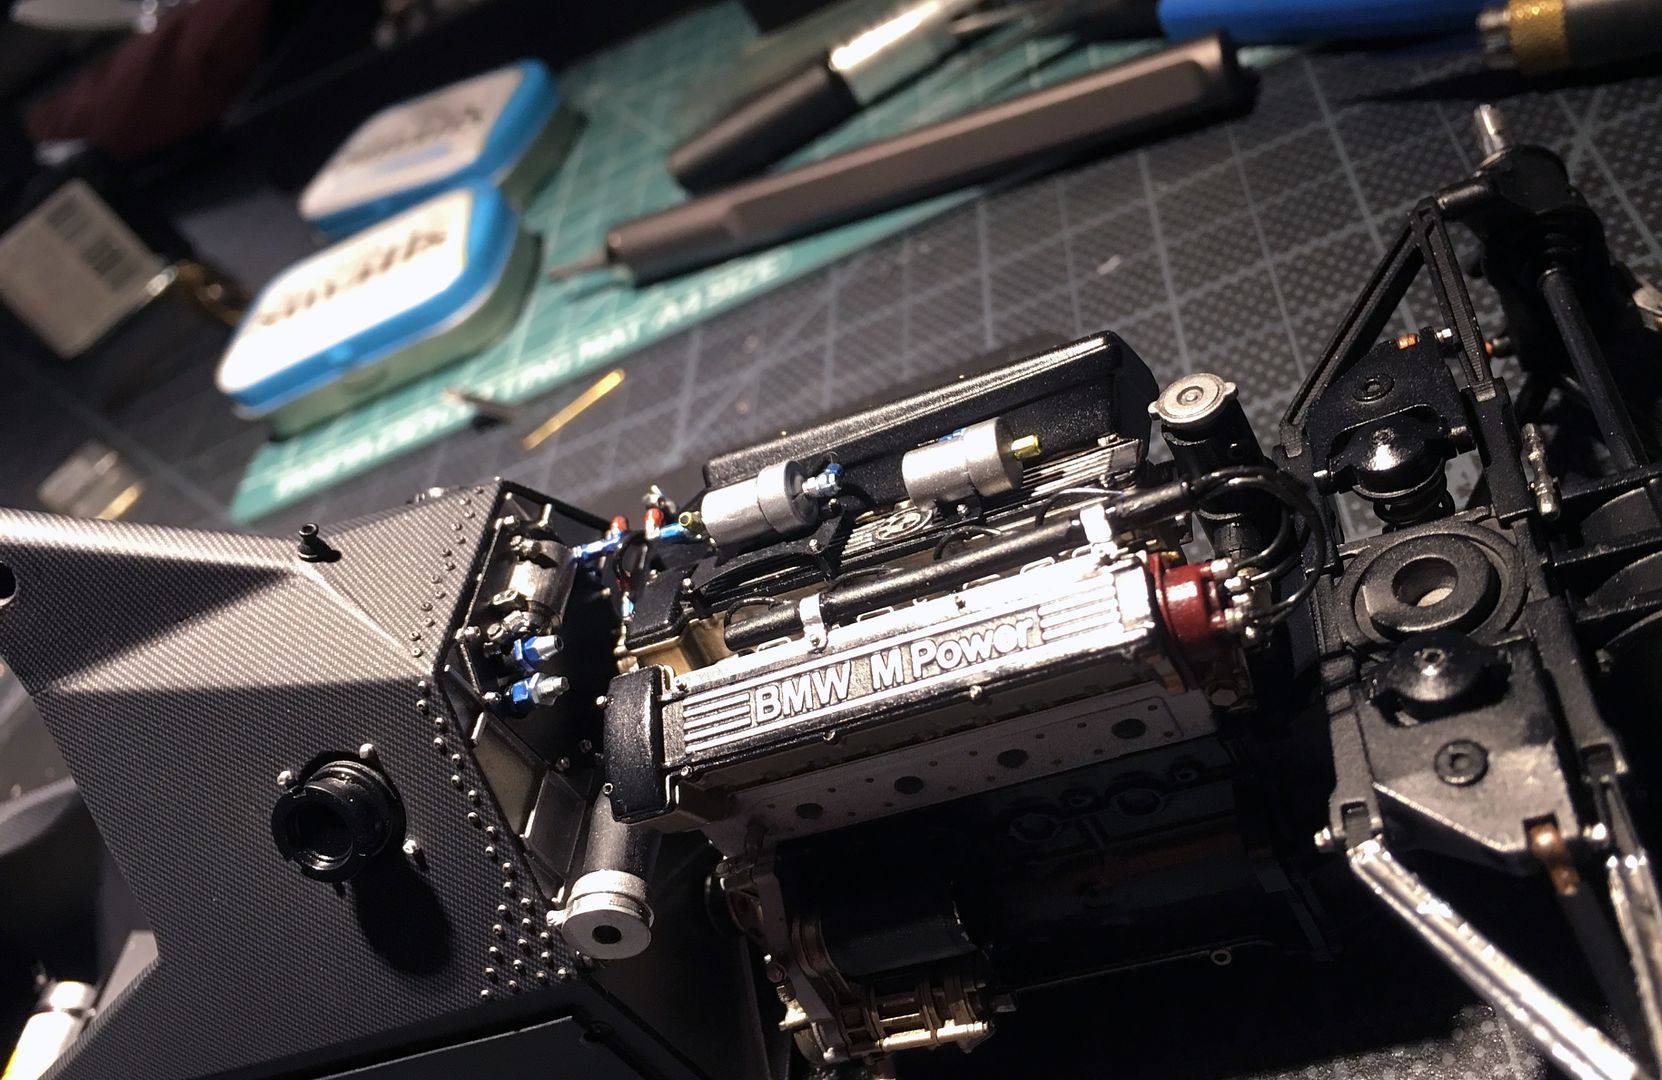
A few other basic chassis detail added.
Those little bolts that fix the black panel to the bulkhead were the biggest paint so far!! SOOOO small and hard to hold as you try and puch them into the hole, without any glue showing! Lost one.
Lots of wiring and finishing to do still - but trying to get the construction part of the sub-assemblies sorted first, as I will only damage the wiring if I did that first!
Of course had to add the engine to see how it all looks (just placed in position)
A few other basic chassis detail added.
Thank you sir - it is the kit that is stunning!
Right - back from more work travels. Really does get in the way - but enables me to buy MFH....so...
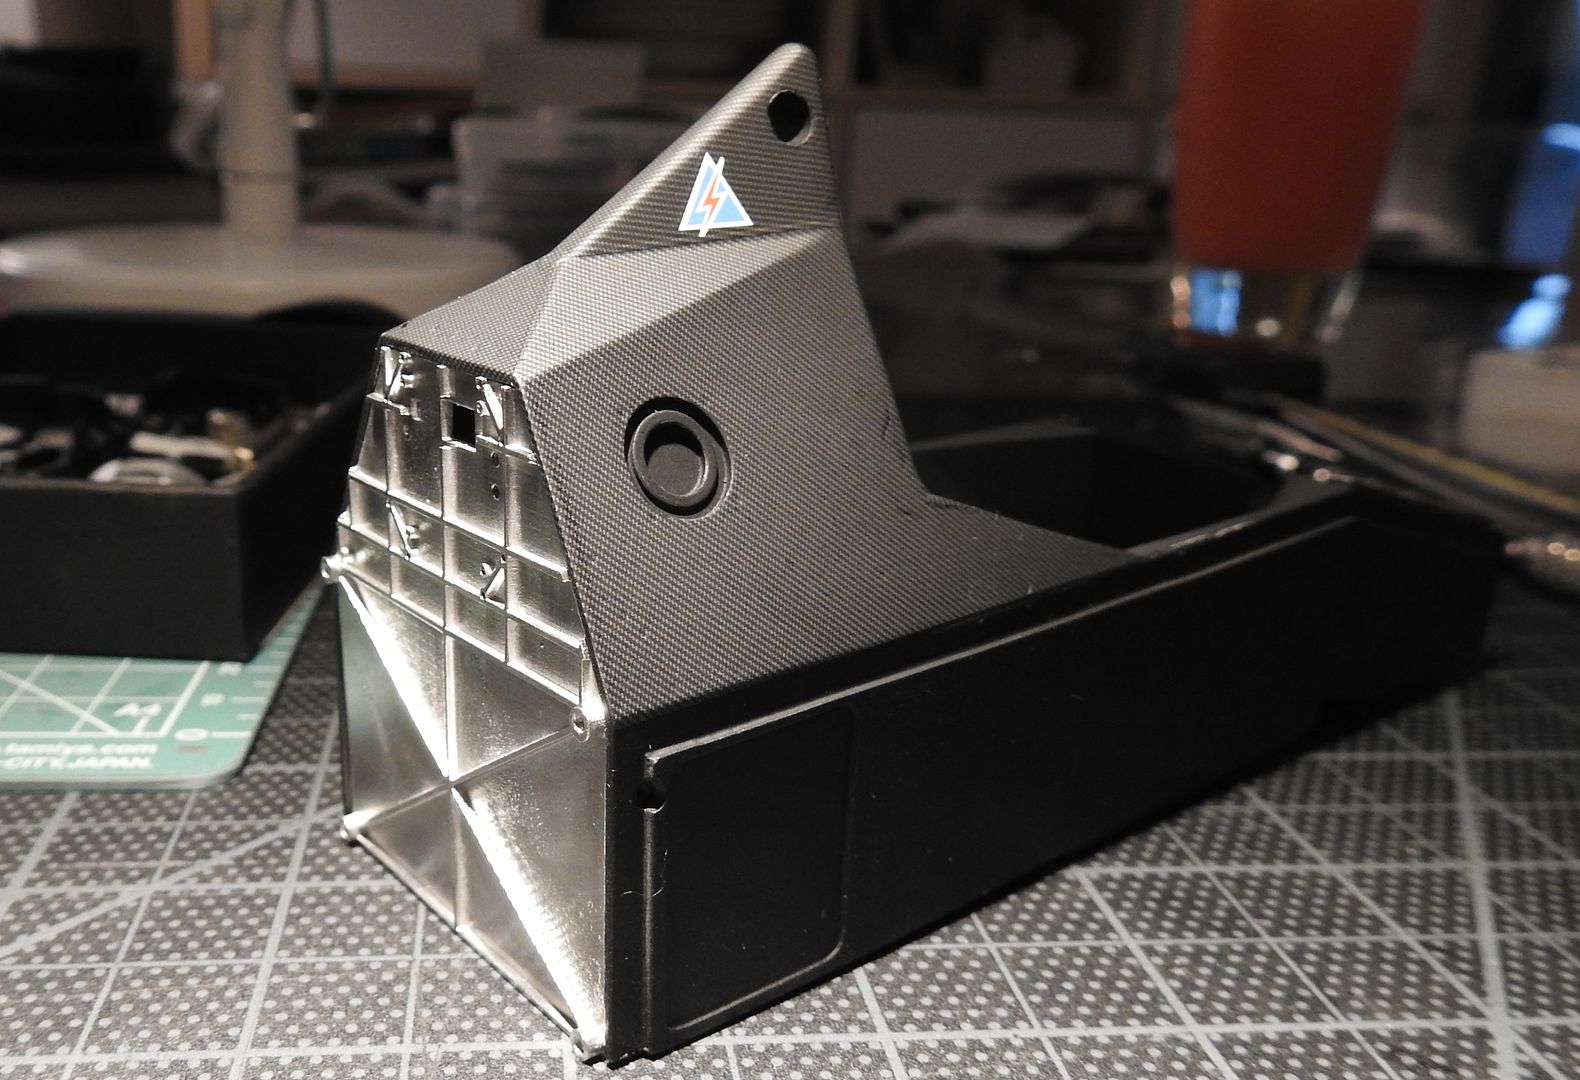
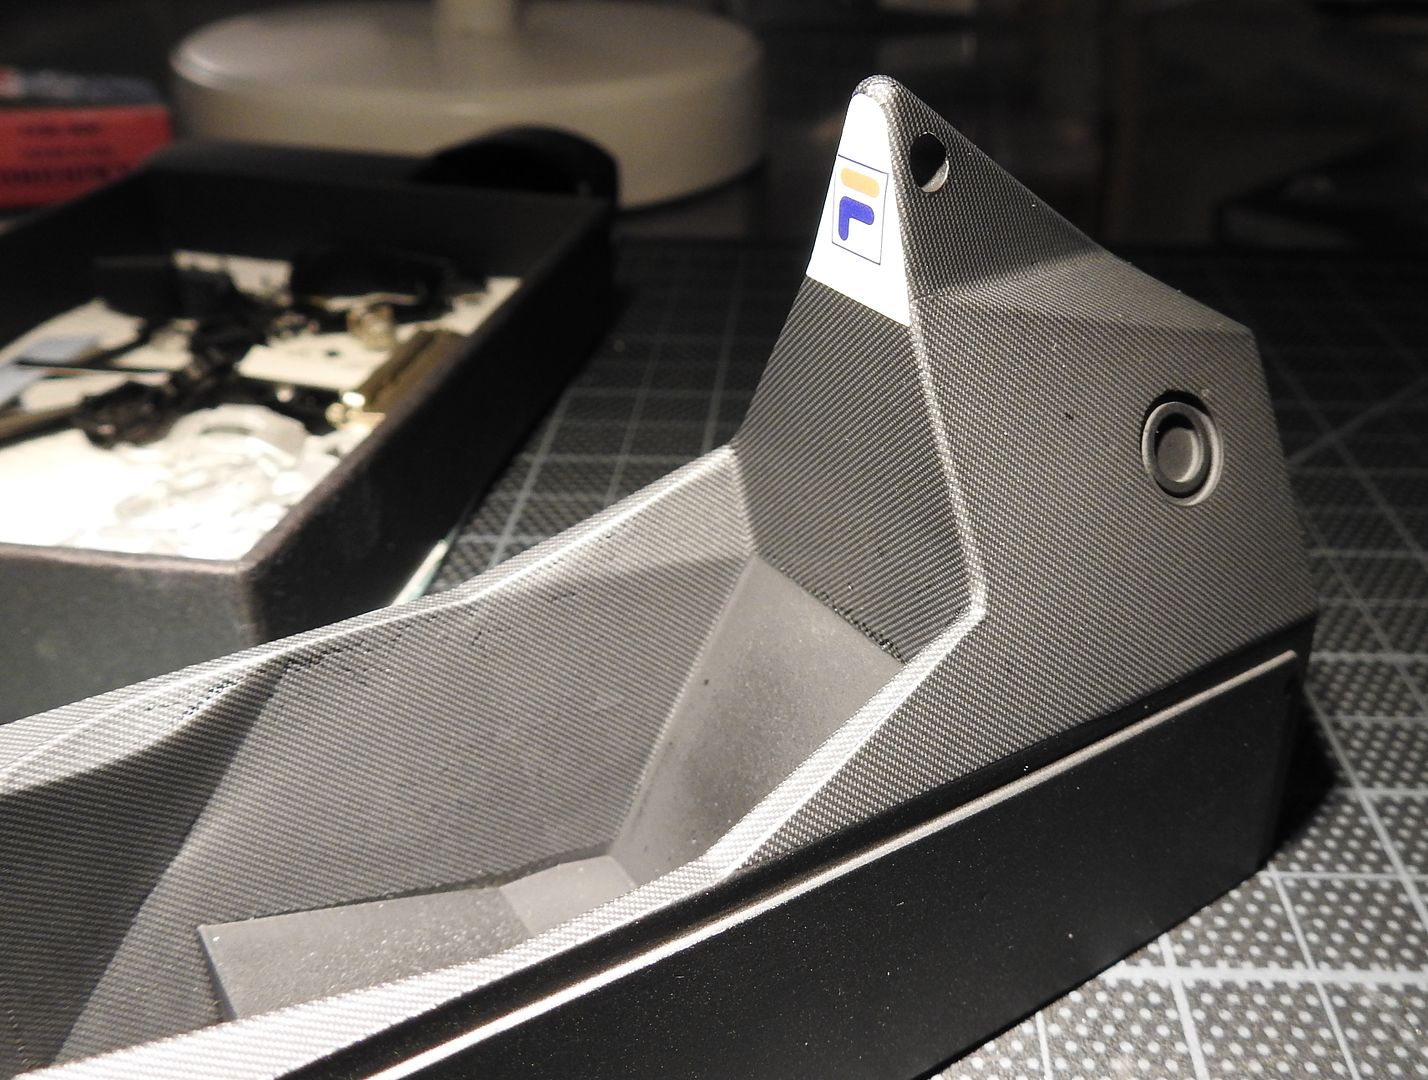
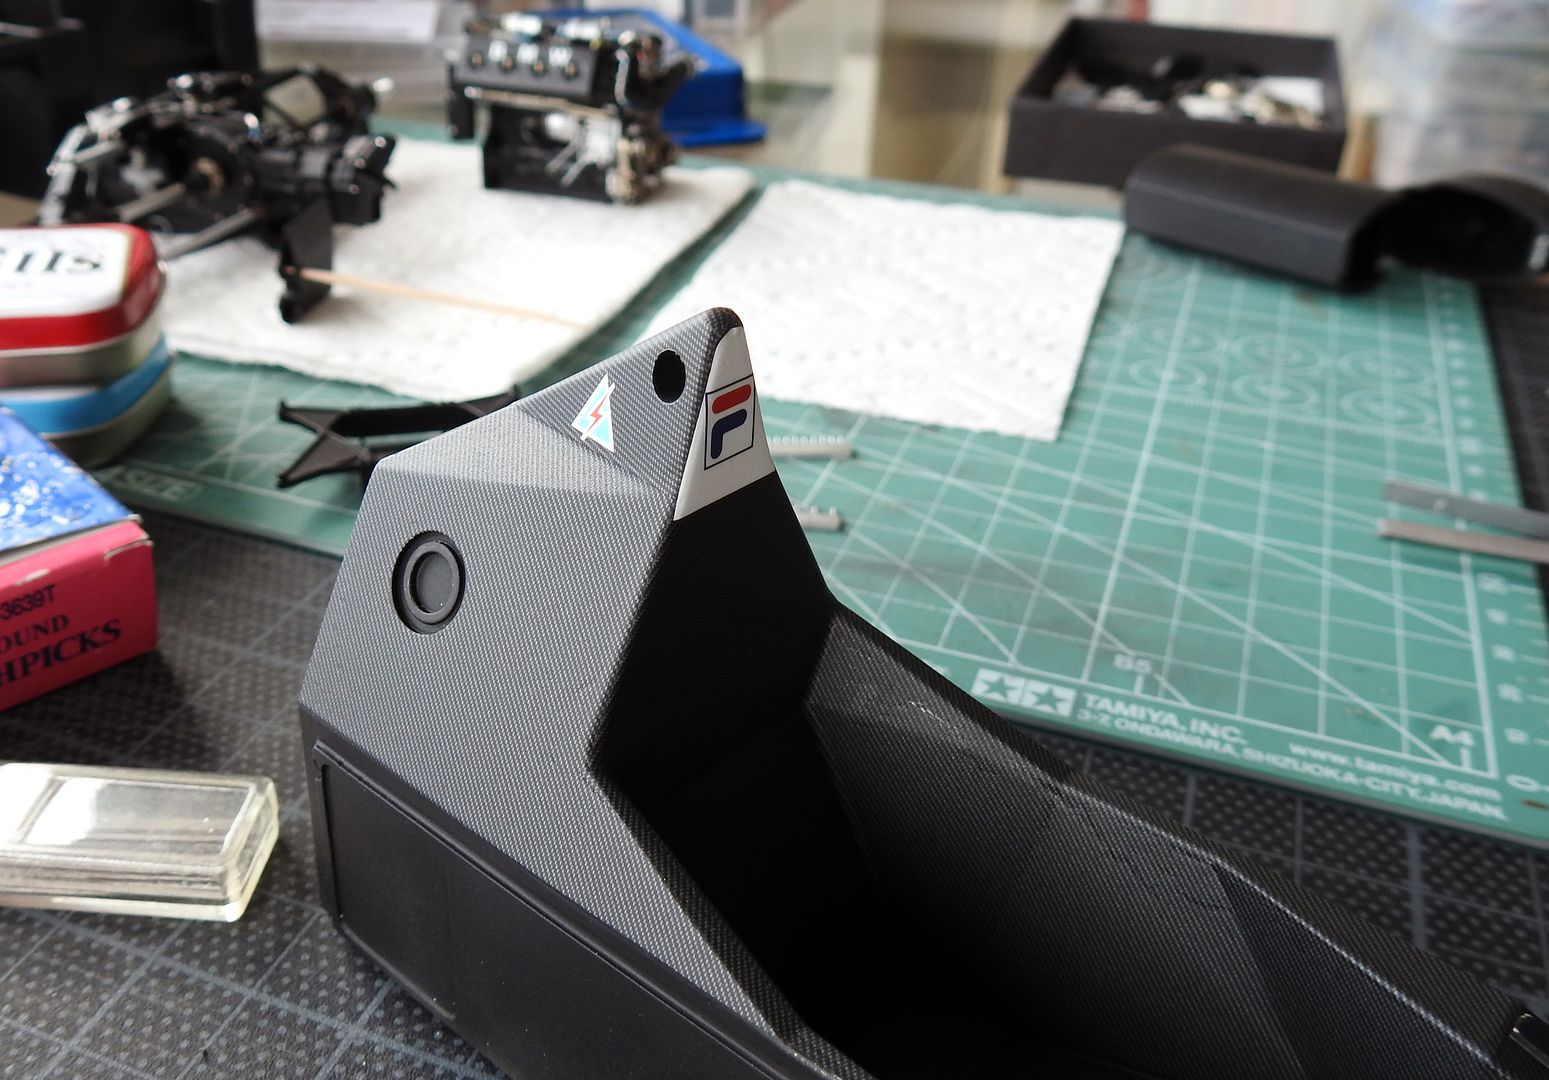
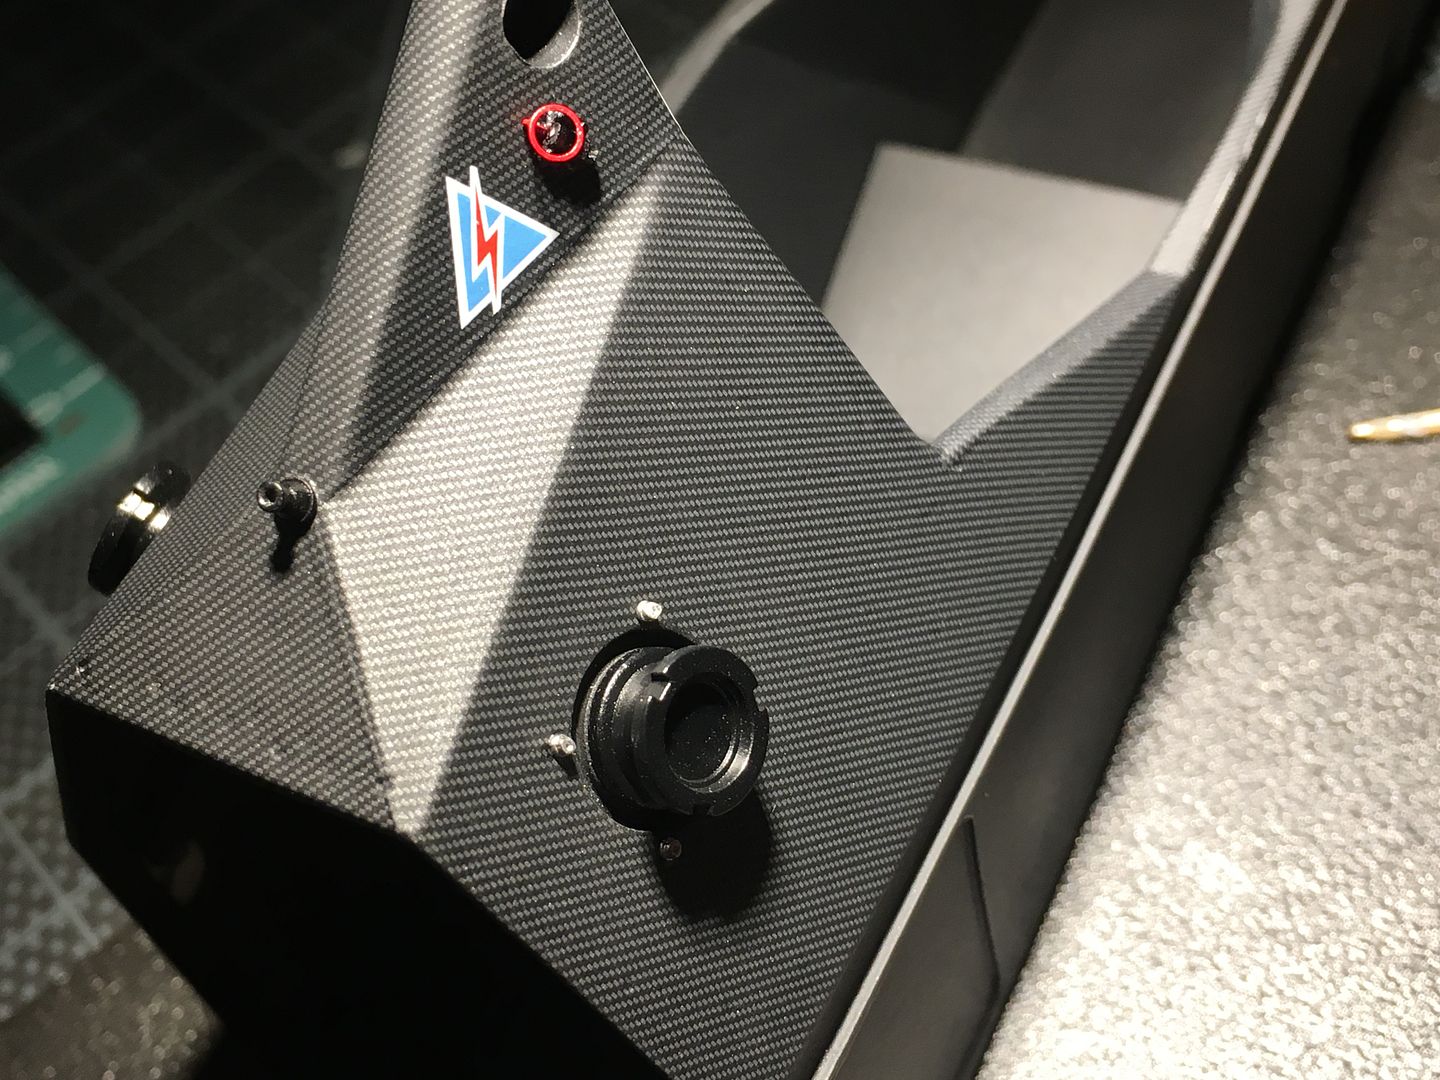
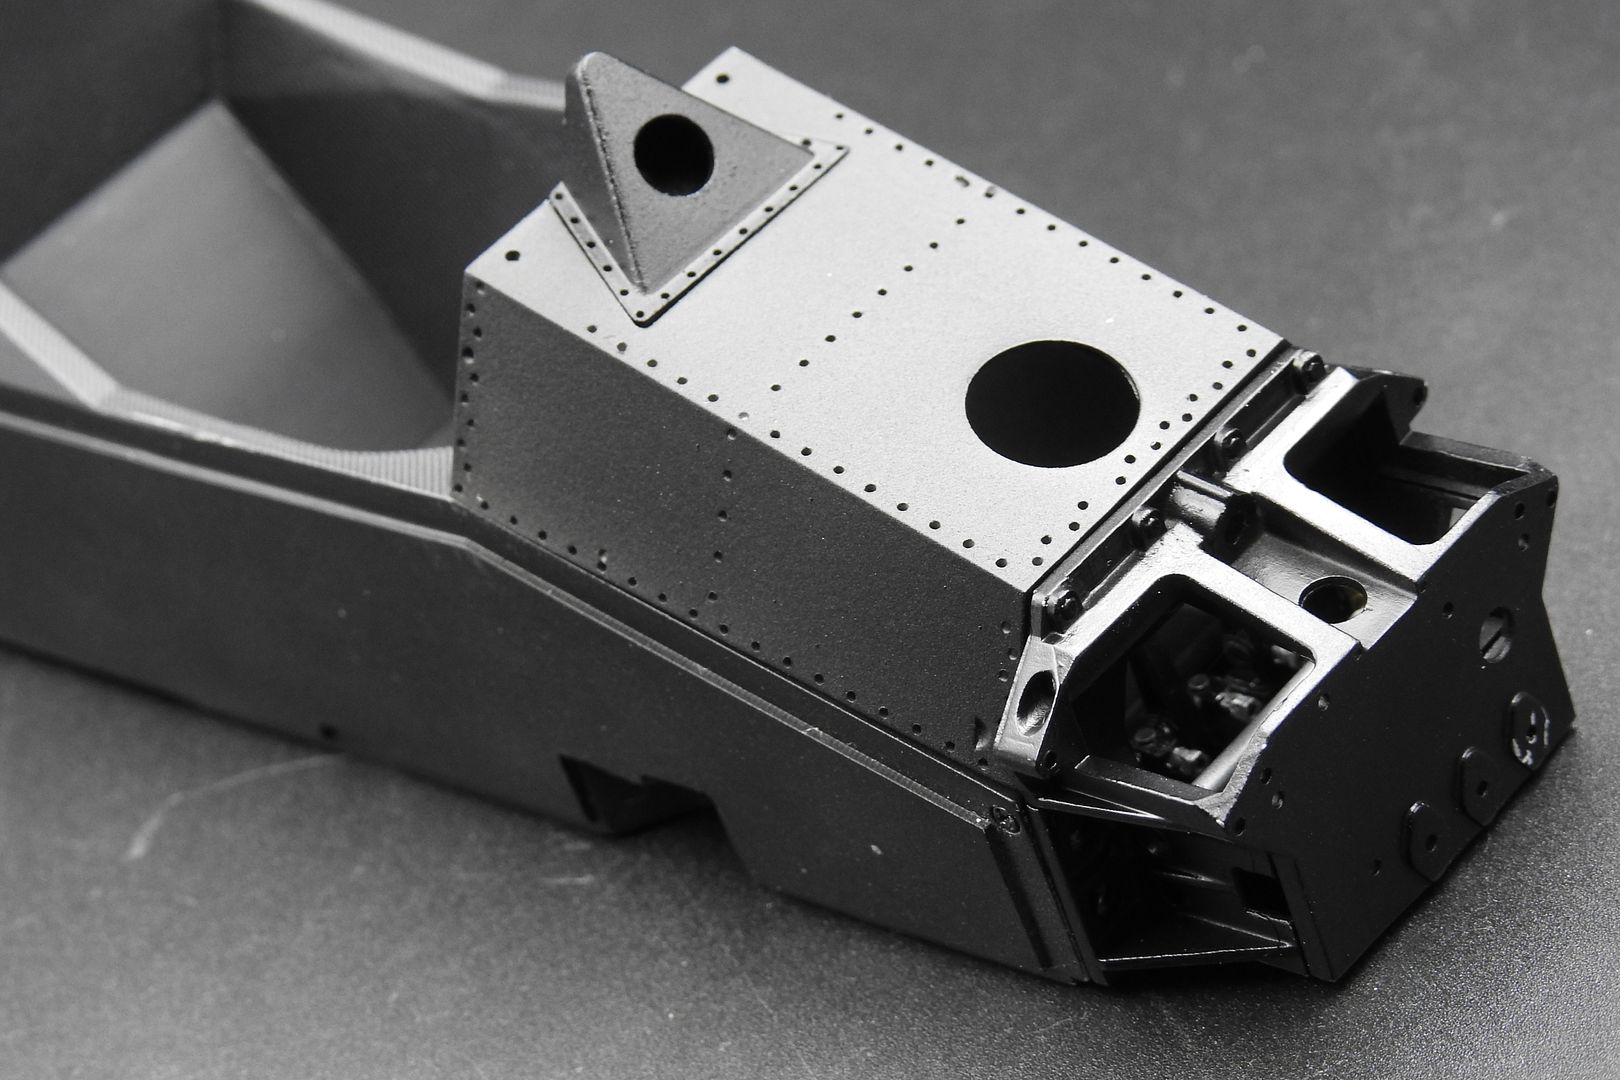
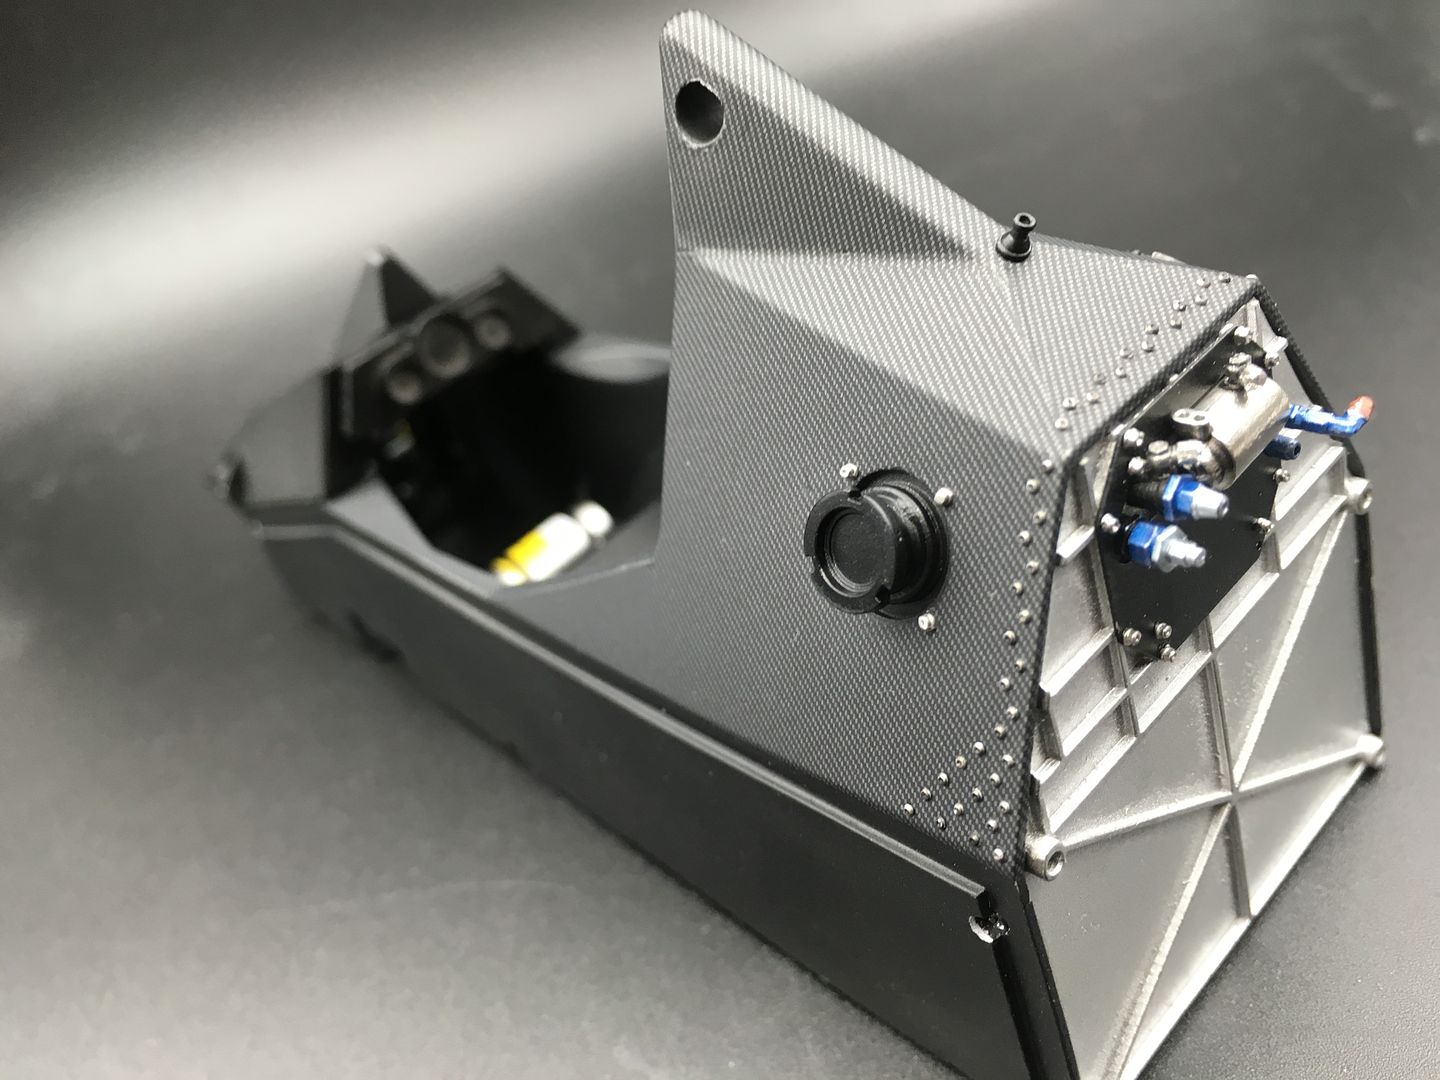
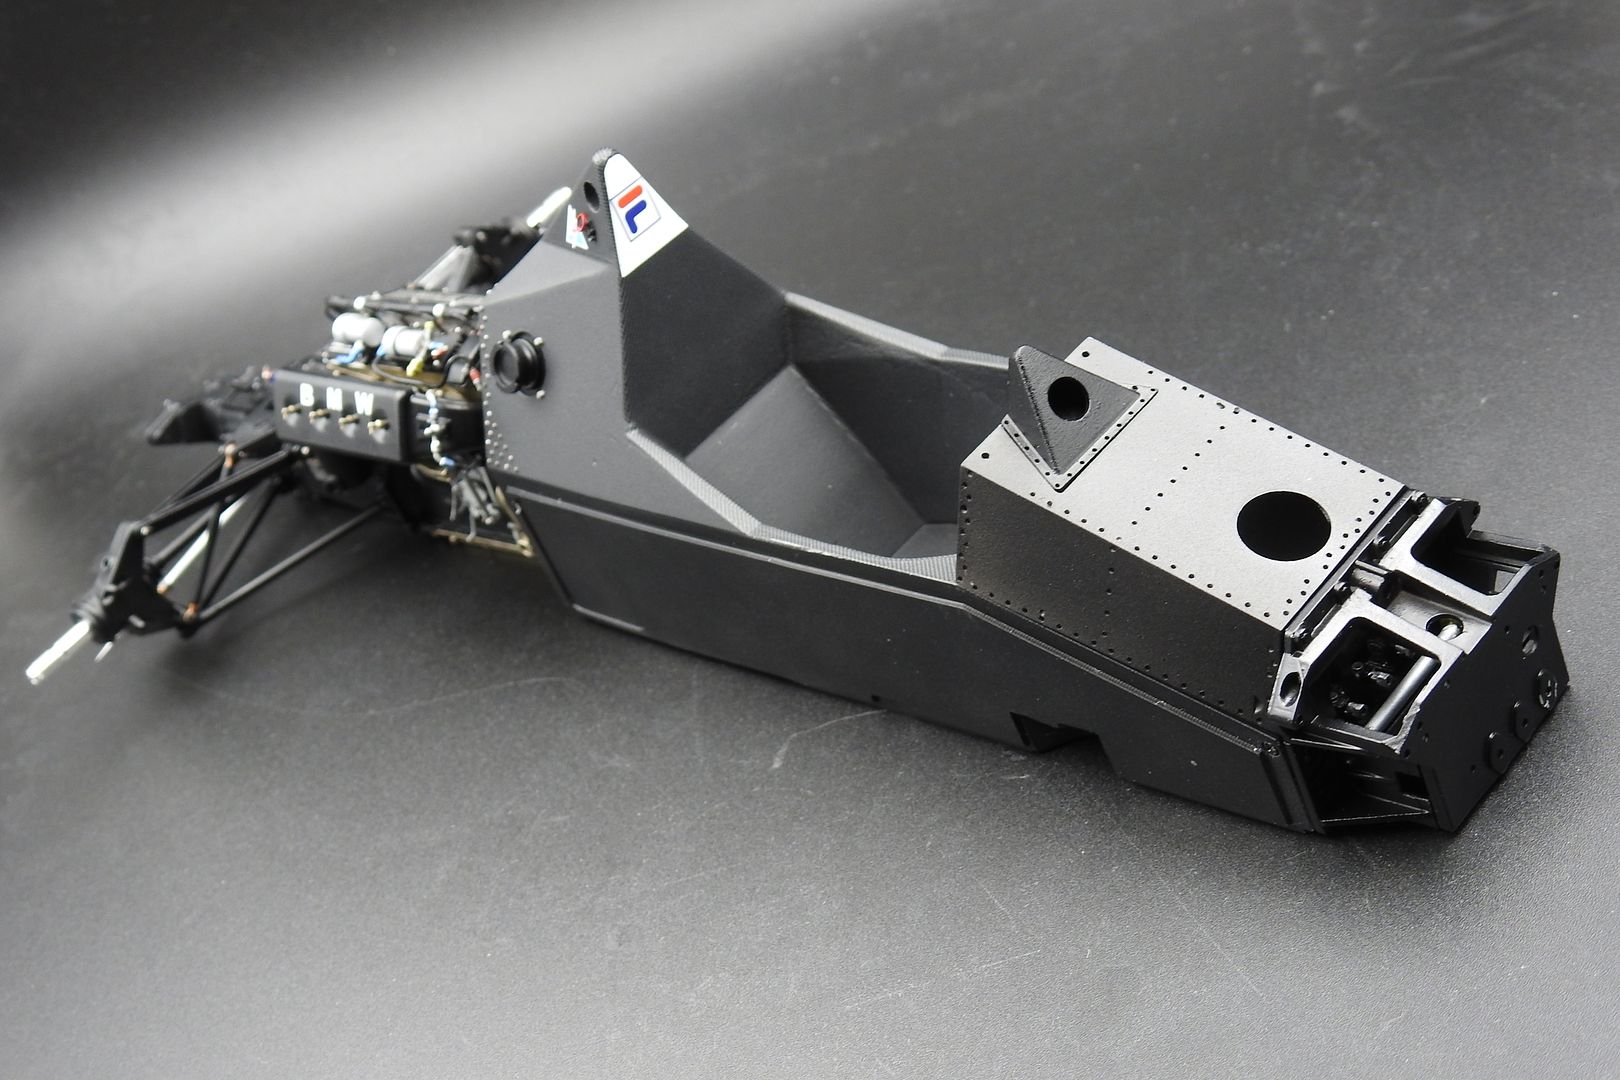
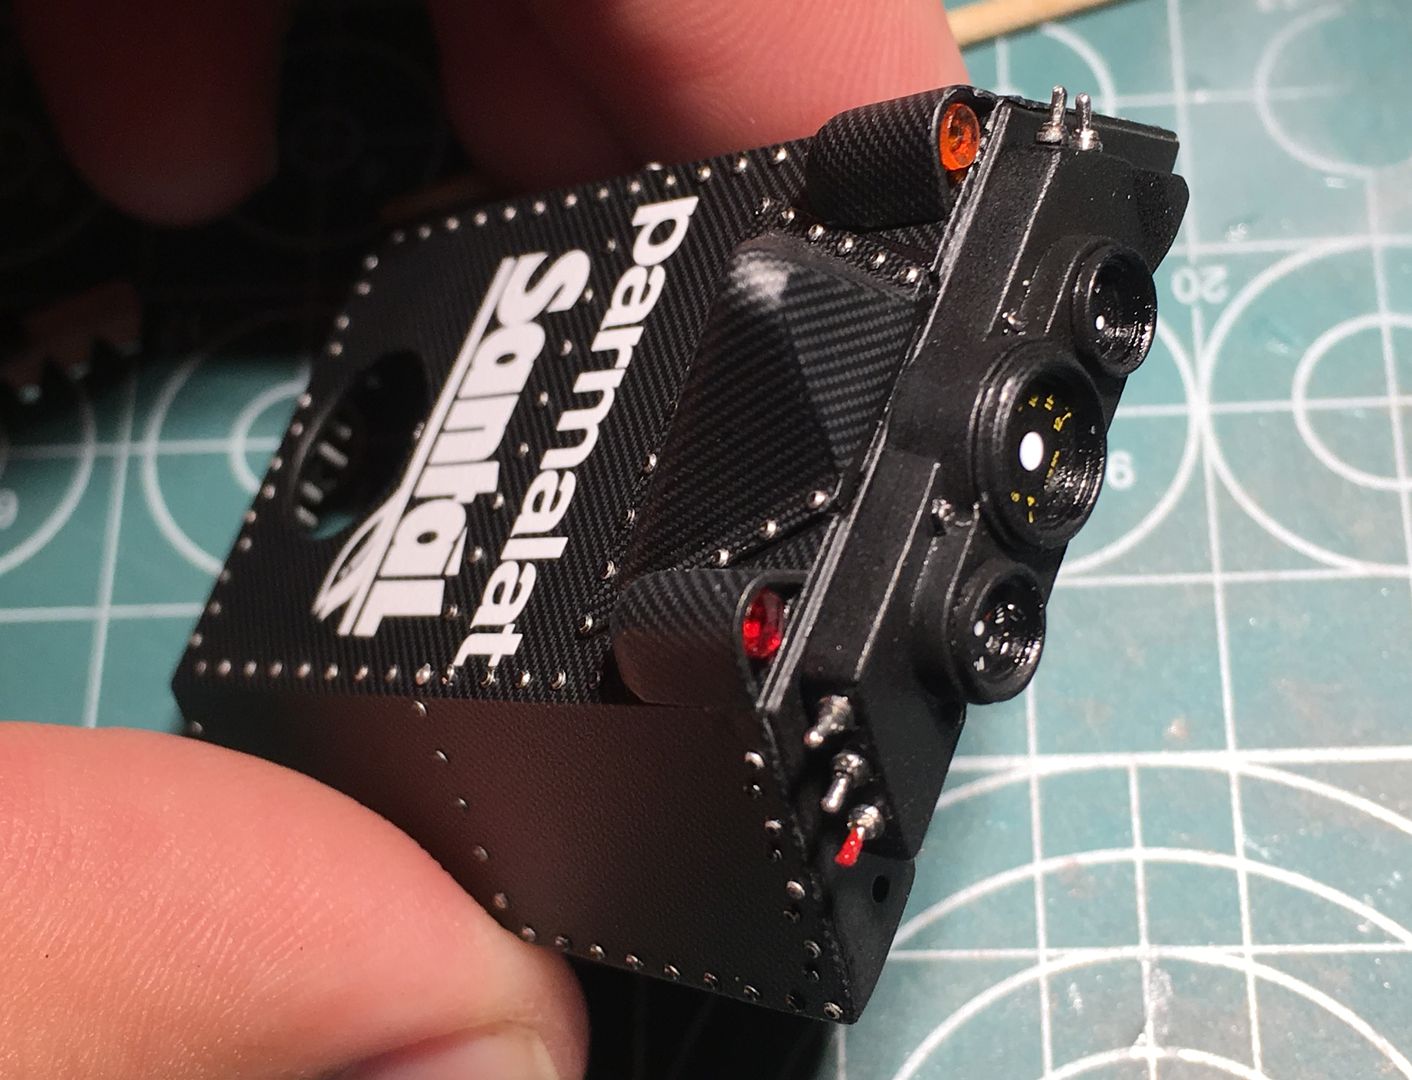
Started more chassis work - carbon decals on the top of the tub and dash area. Decals went on well - even on those curvy bits. Will add rivets tonight...
This is a resin part - I had already drilled the holes, now sprayed semi-gloss black - although it is covered by decal it means any tiny gaps will be less visible (and of course the underside needs painting anyway)
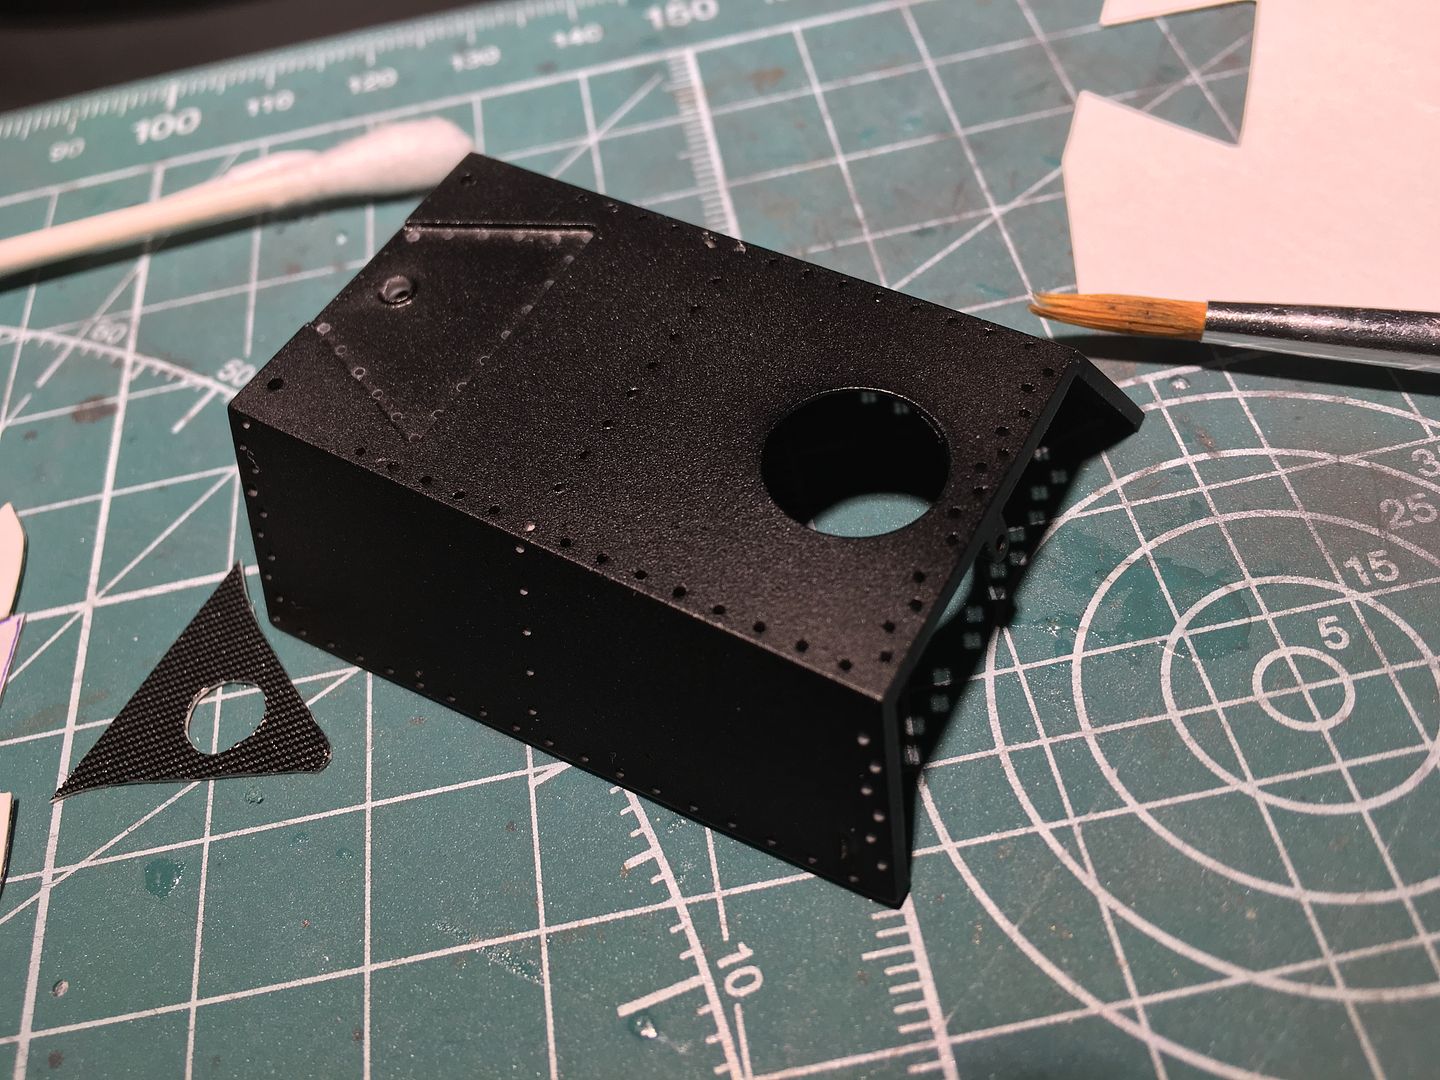
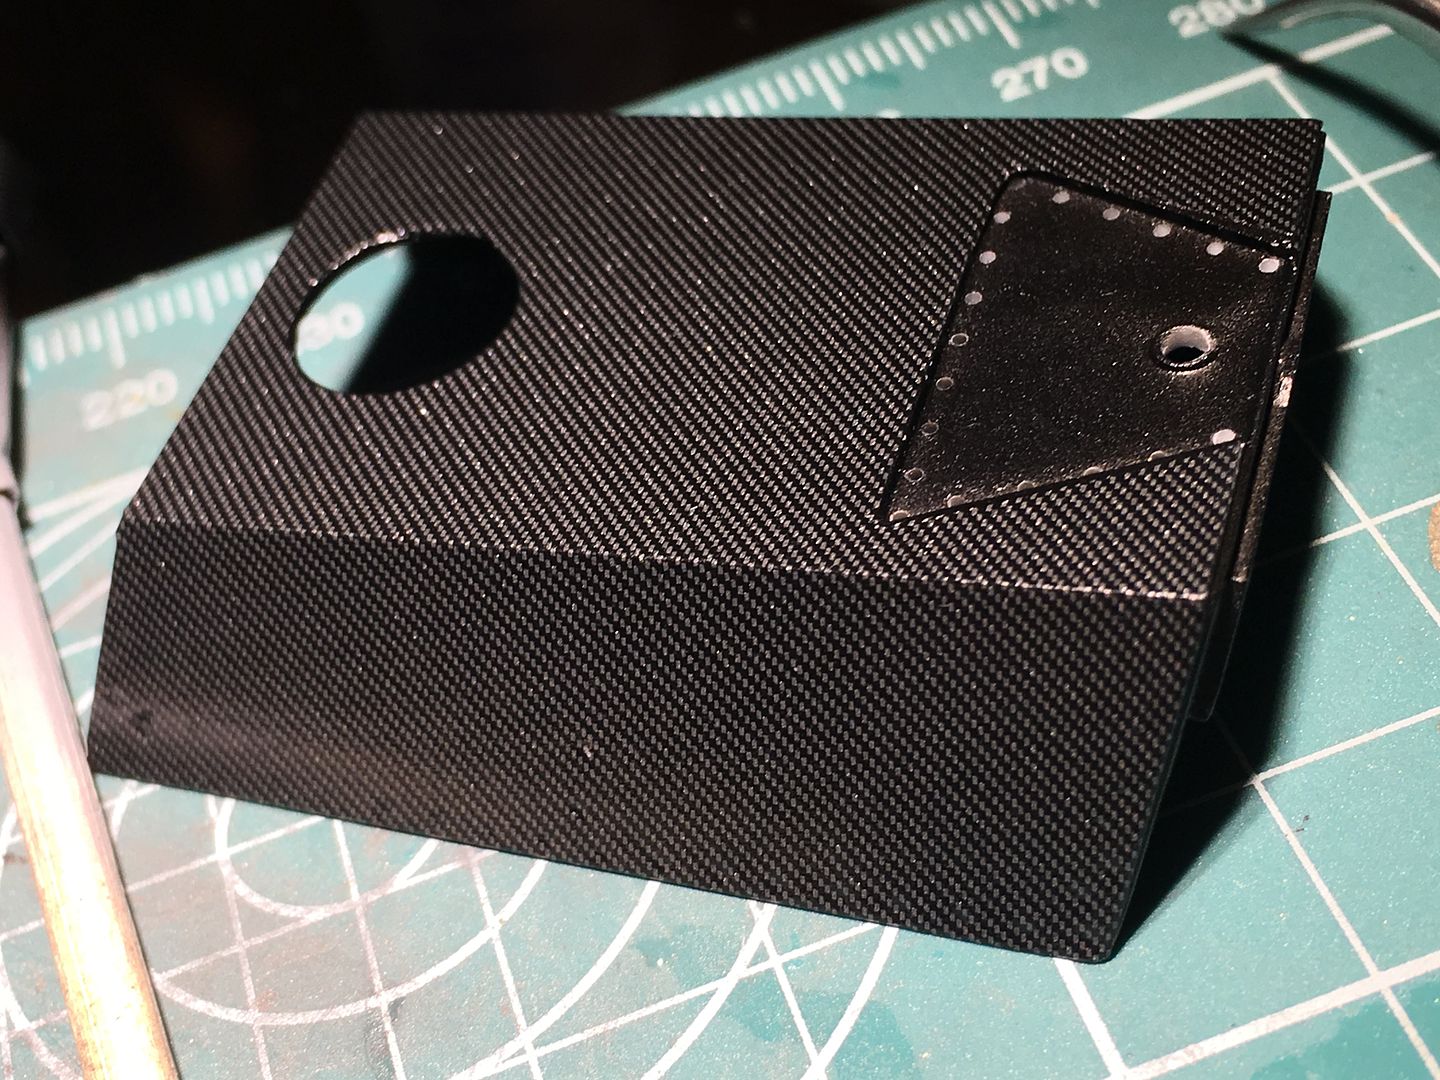
The rivets will make the separation between components look better - without the carbon just looks mis-matched!
Right - back from more work travels. Really does get in the way - but enables me to buy MFH....so...
Started more chassis work - carbon decals on the top of the tub and dash area. Decals went on well - even on those curvy bits. Will add rivets tonight...
This is a resin part - I had already drilled the holes, now sprayed semi-gloss black - although it is covered by decal it means any tiny gaps will be less visible (and of course the underside needs painting anyway)
The rivets will make the separation between components look better - without the carbon just looks mis-matched!
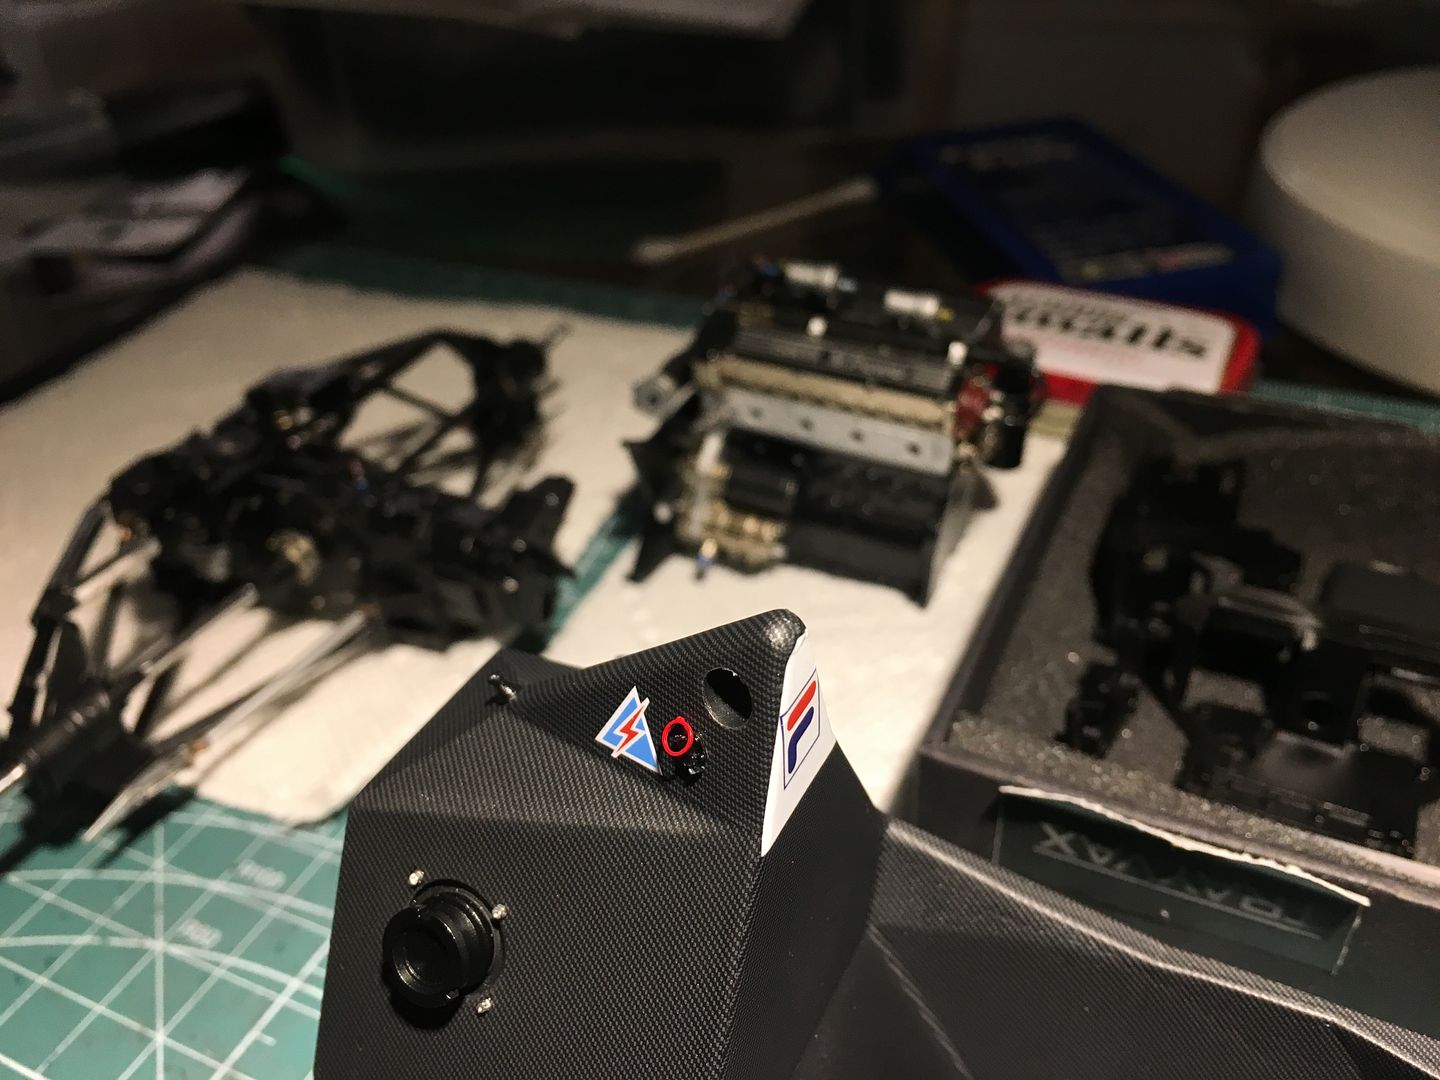
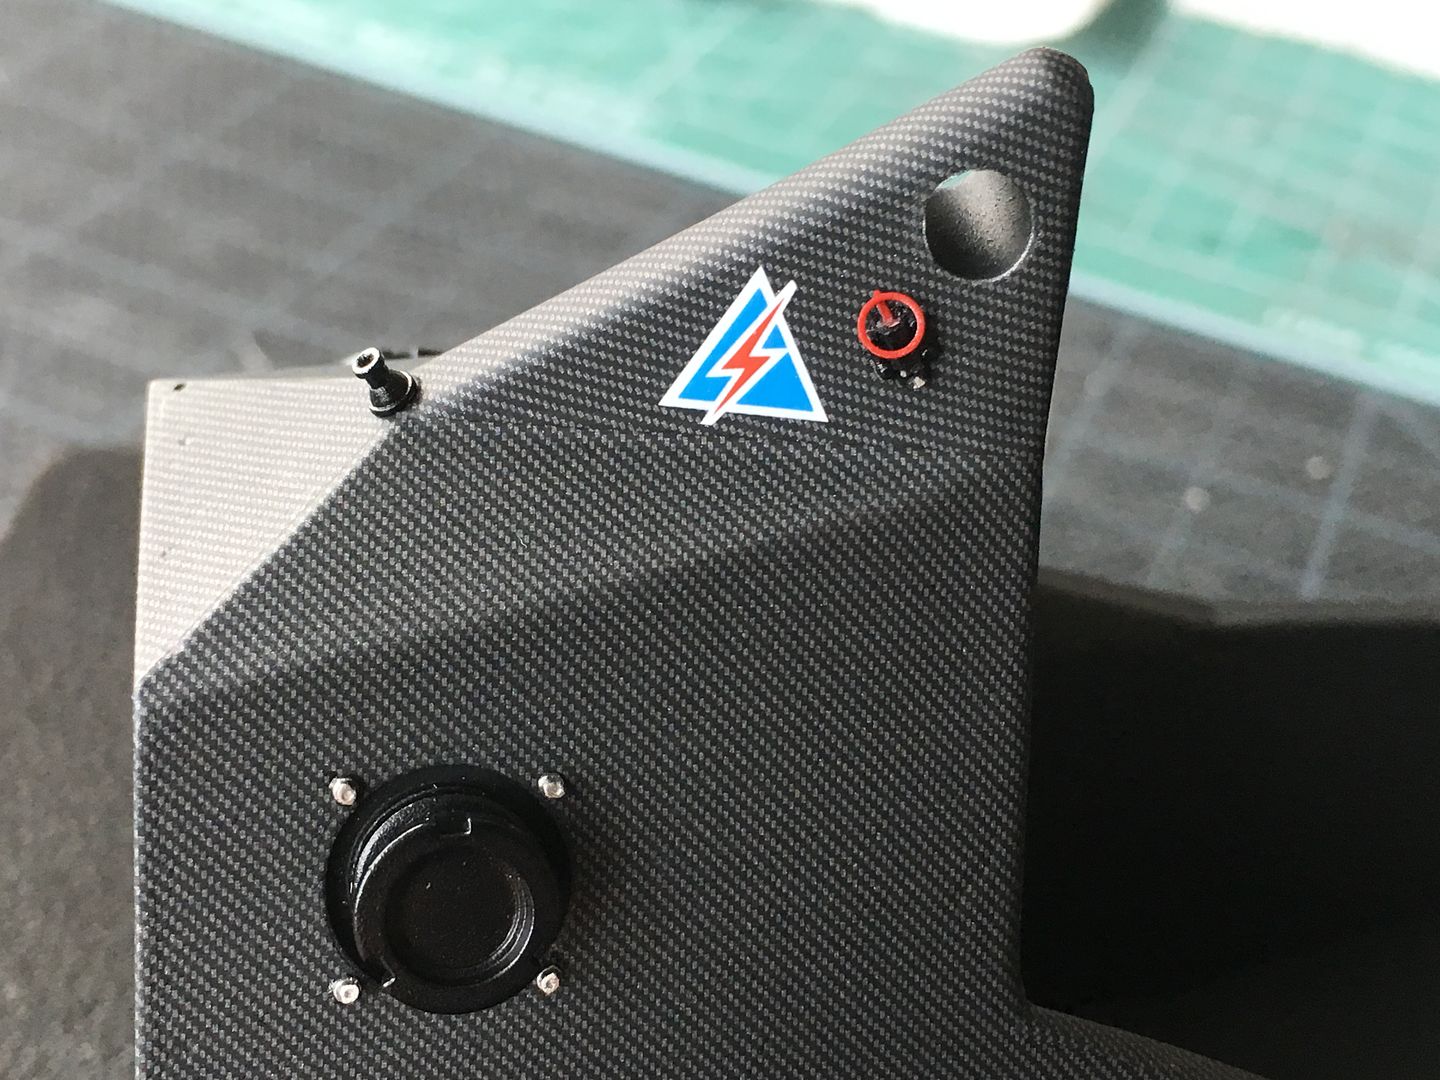
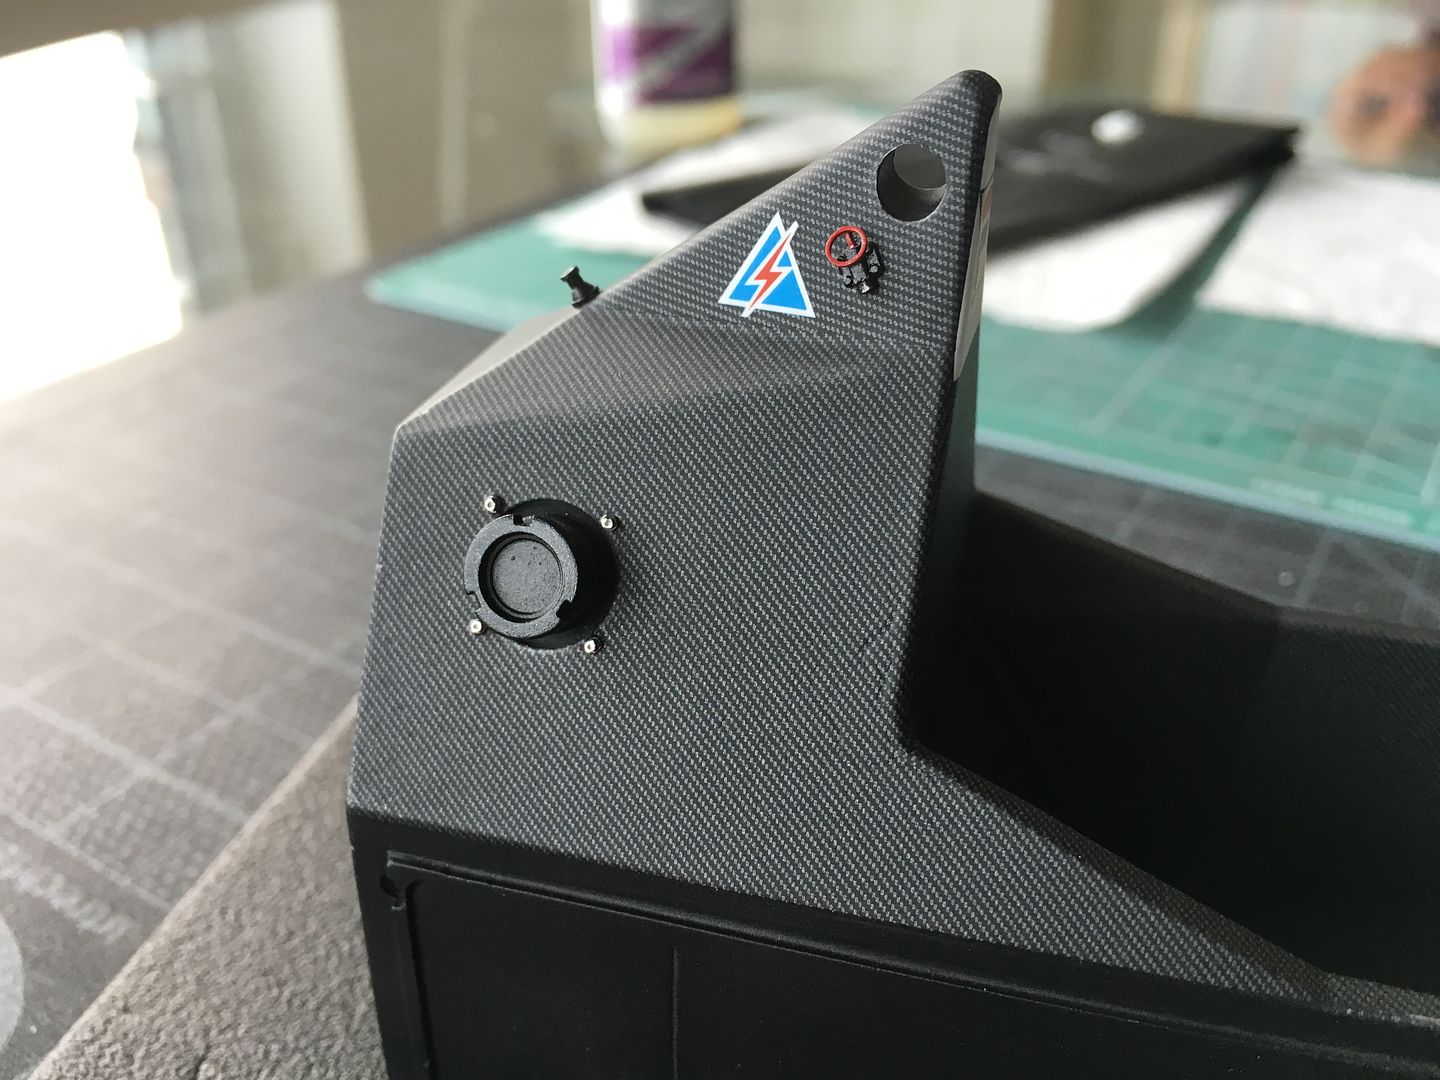
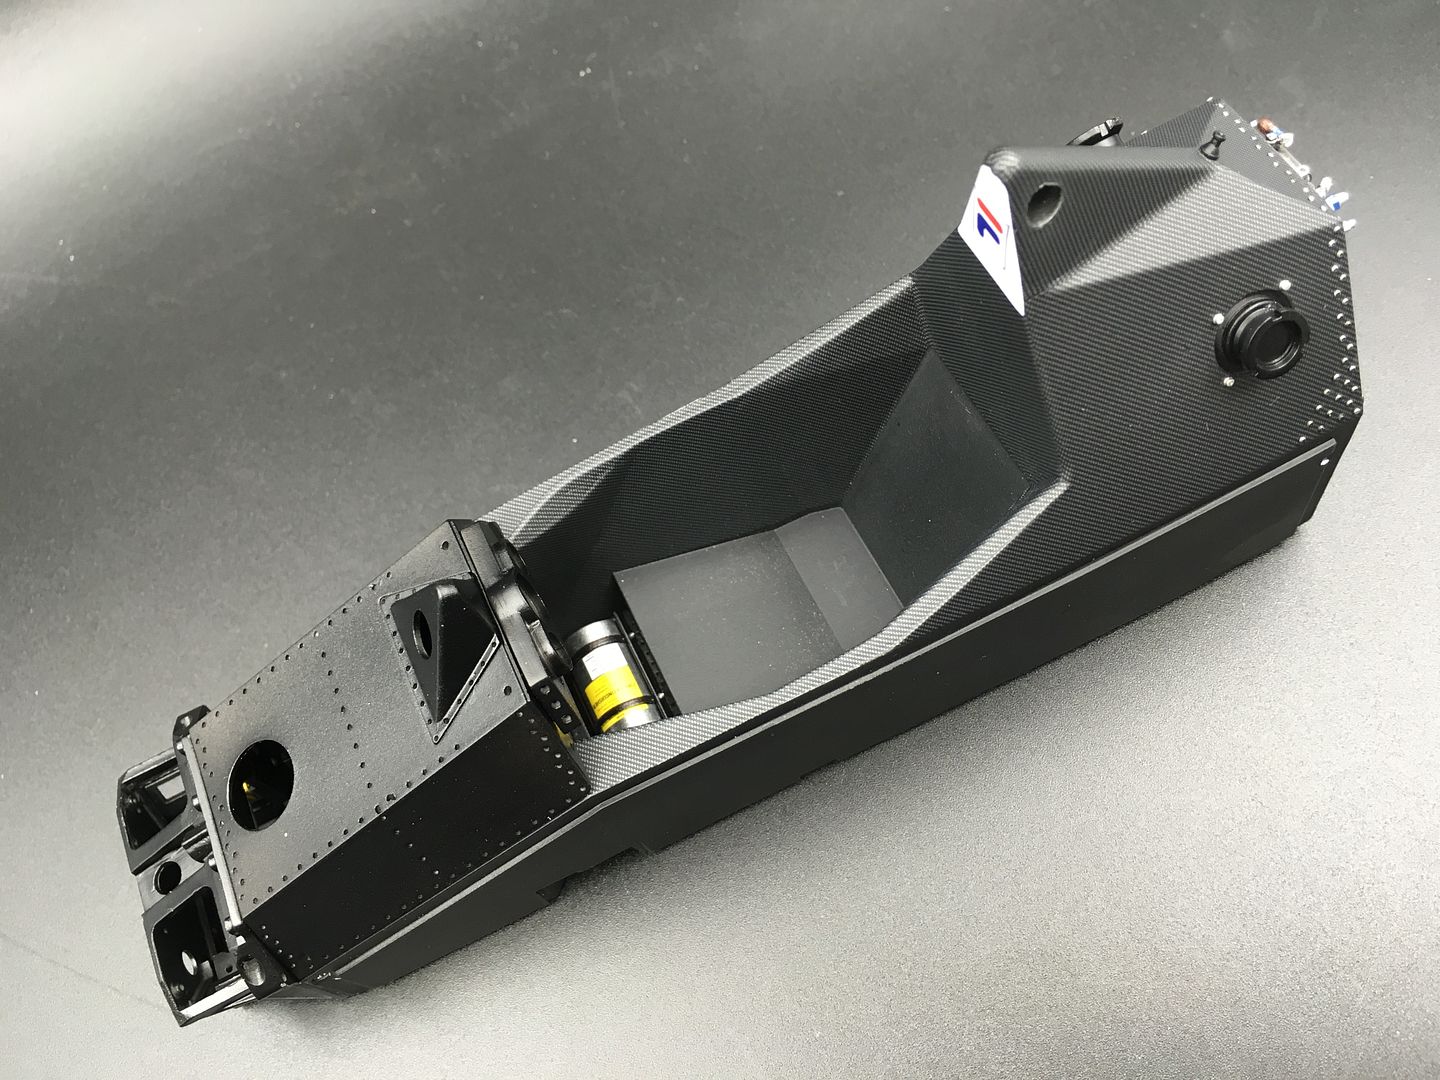
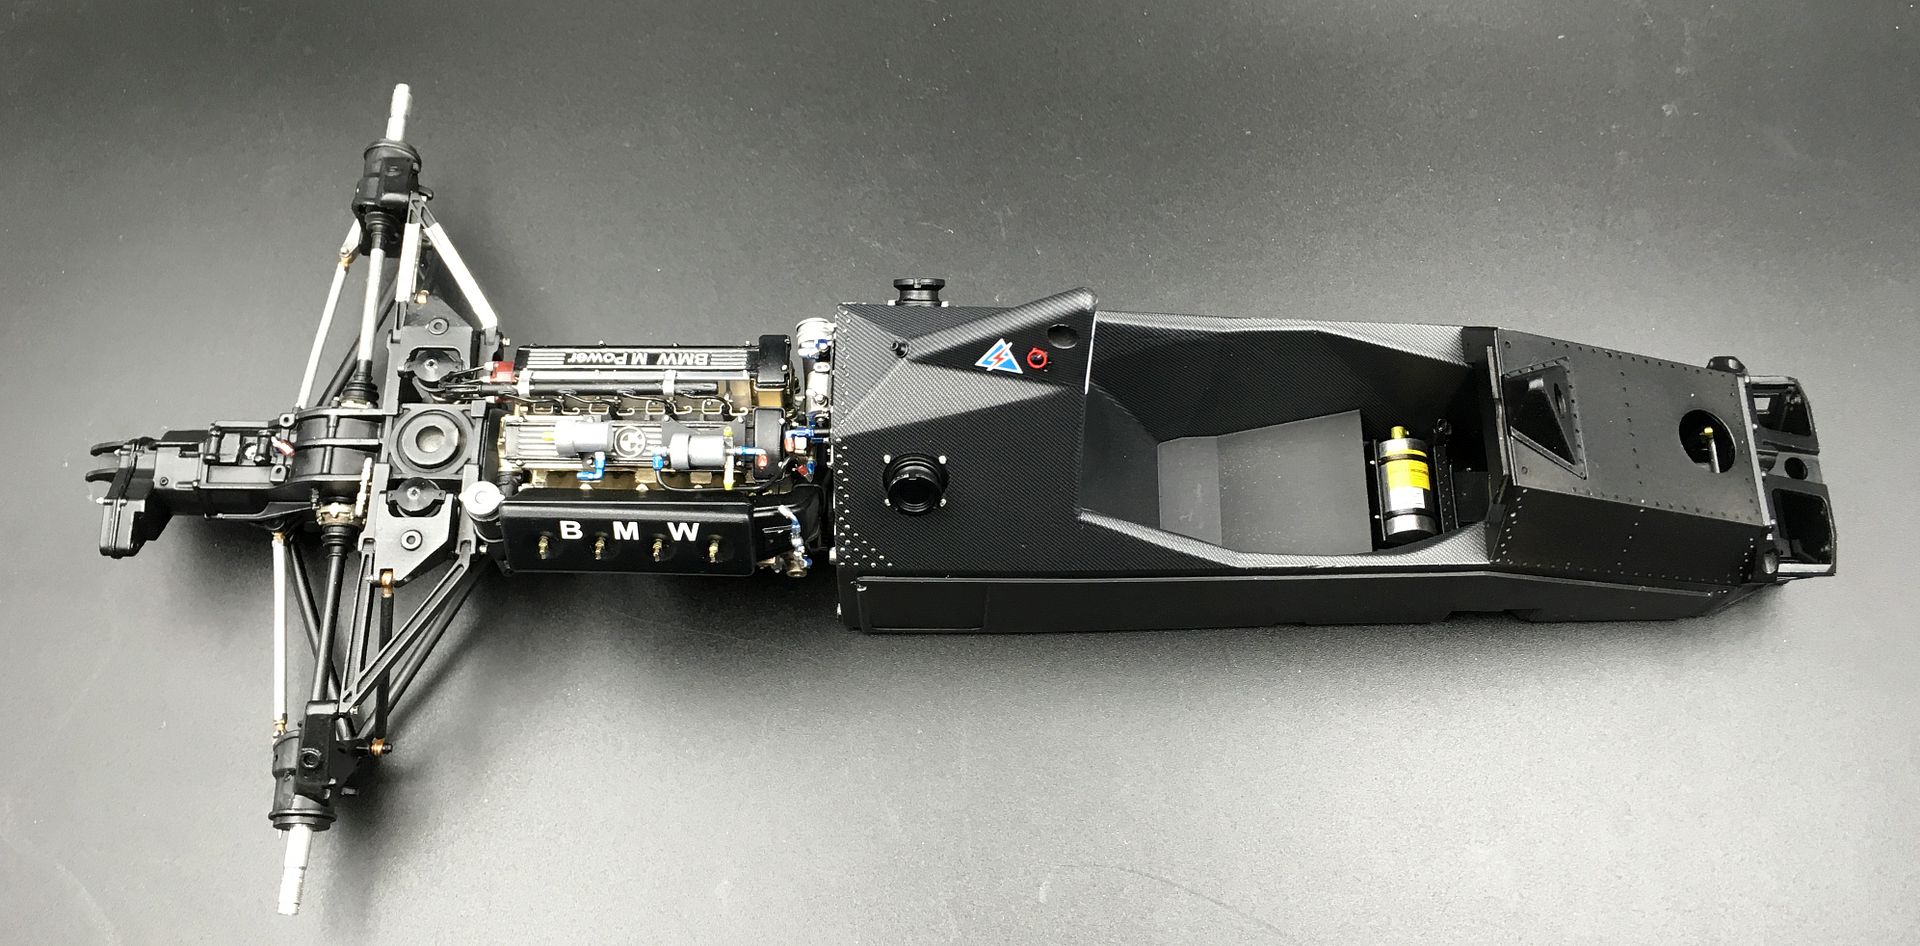
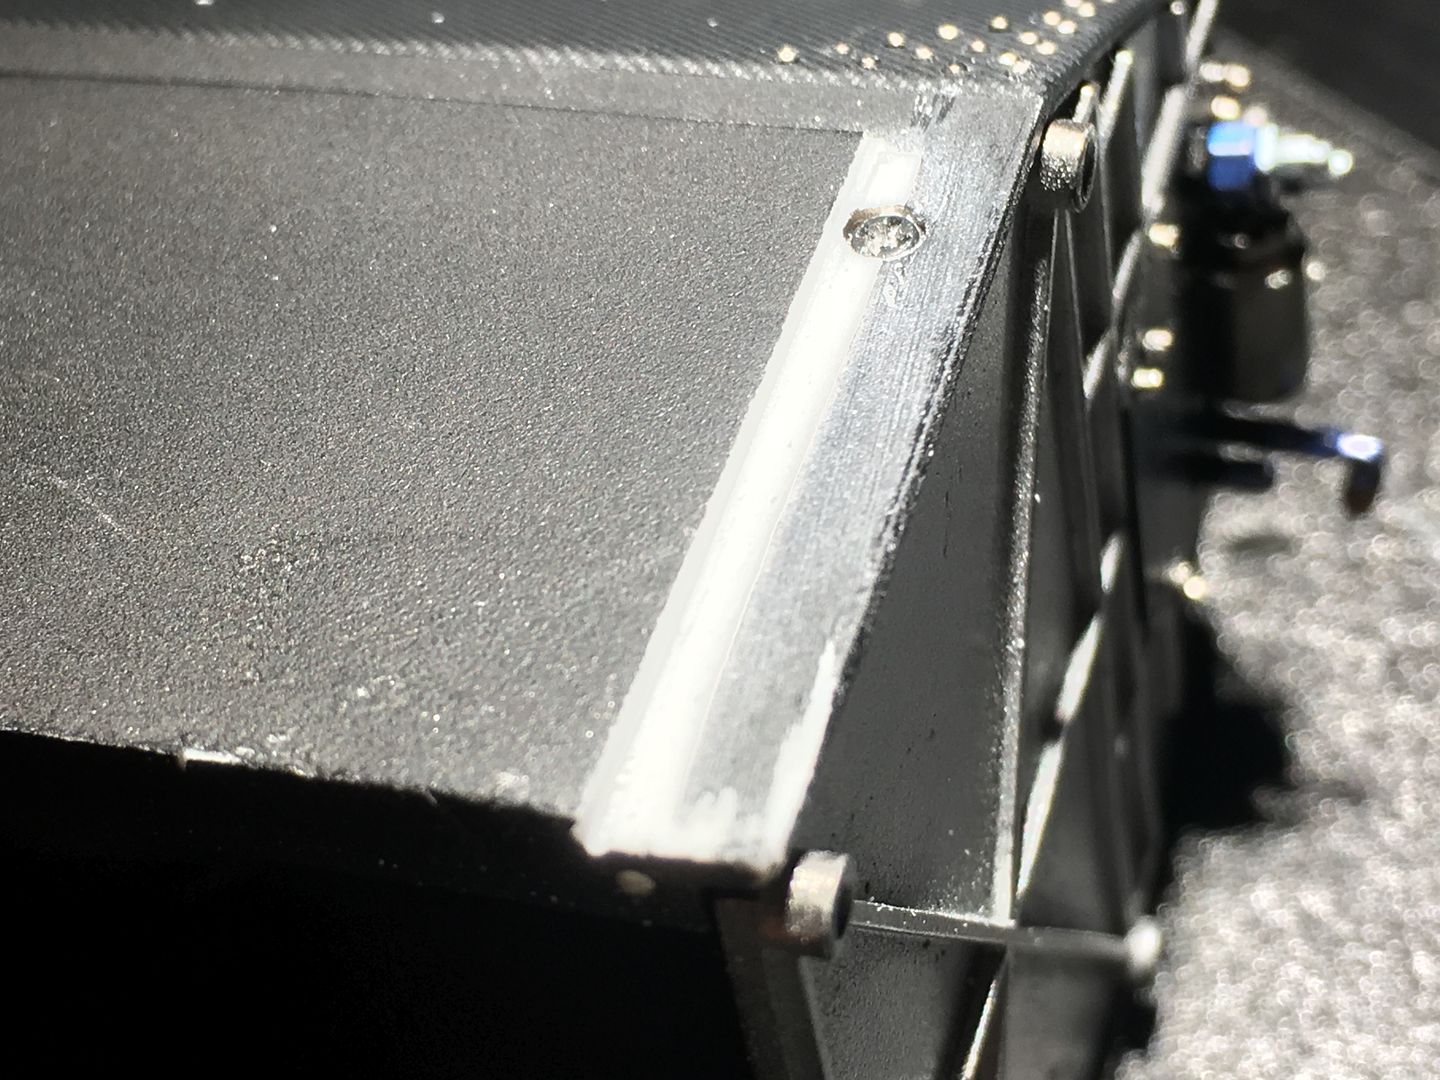
Right - more (many more!) rivets added!
Same method as before - I have used panel line liquid to darken the rivets slightly, not worried if it rubs off randomly, as the 'real' car looks like that...
Lots of them!
Sprayed with satin clear...
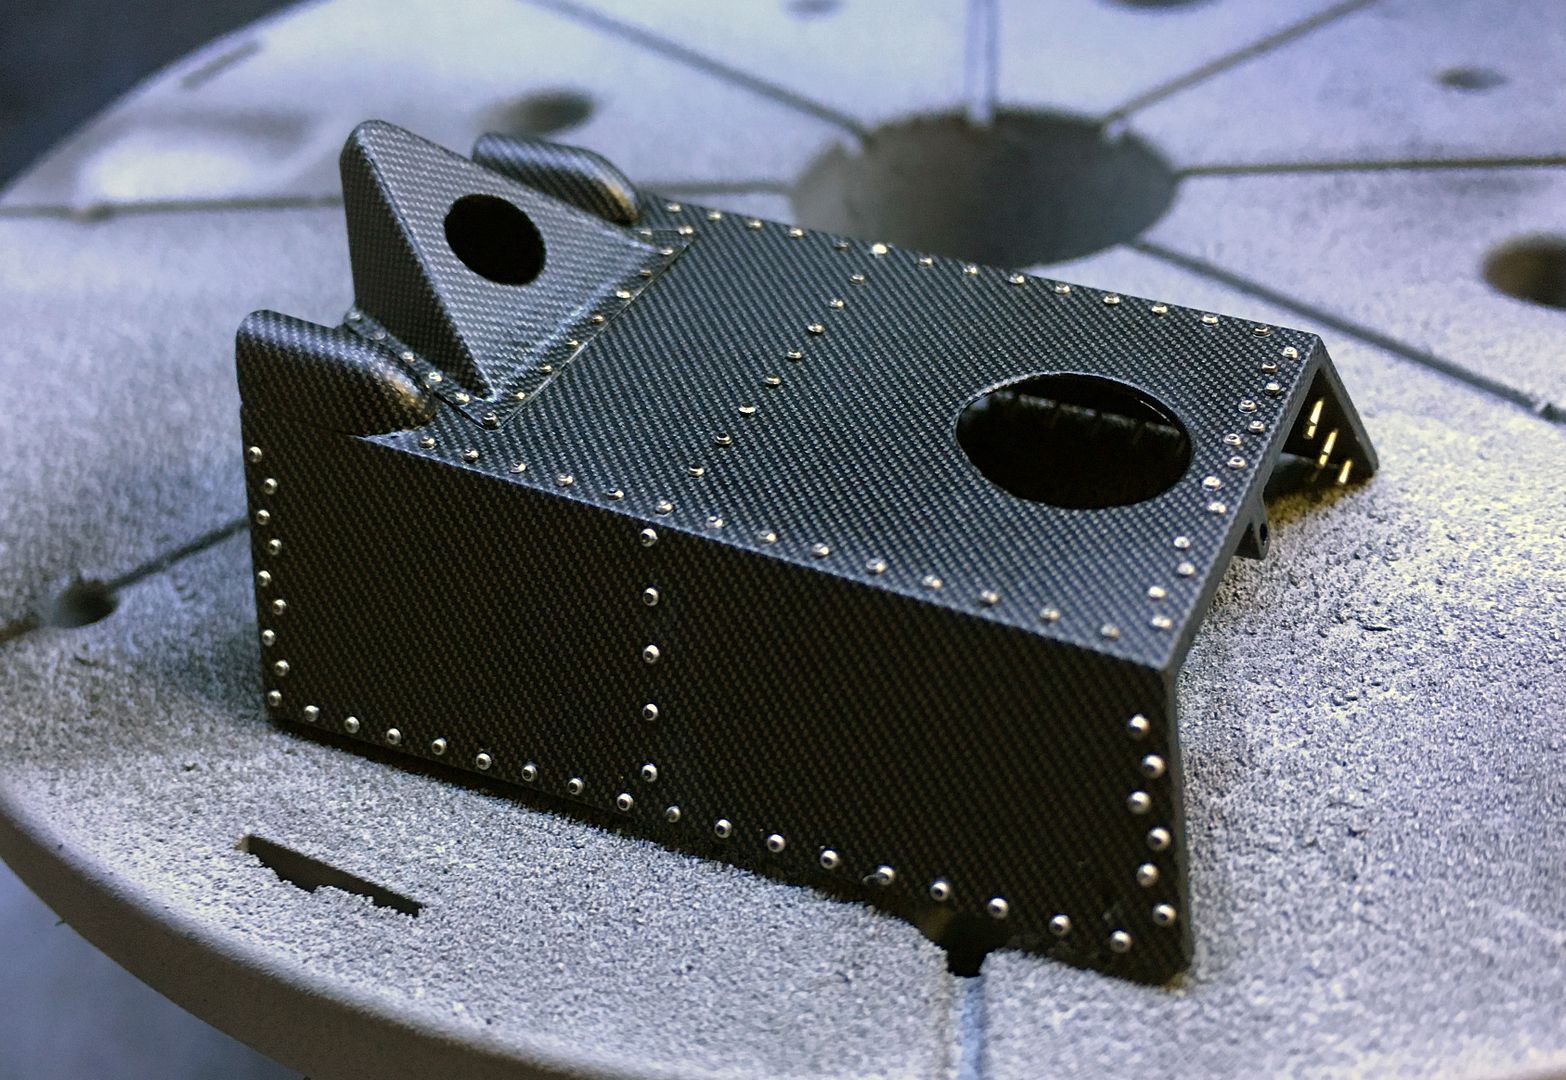
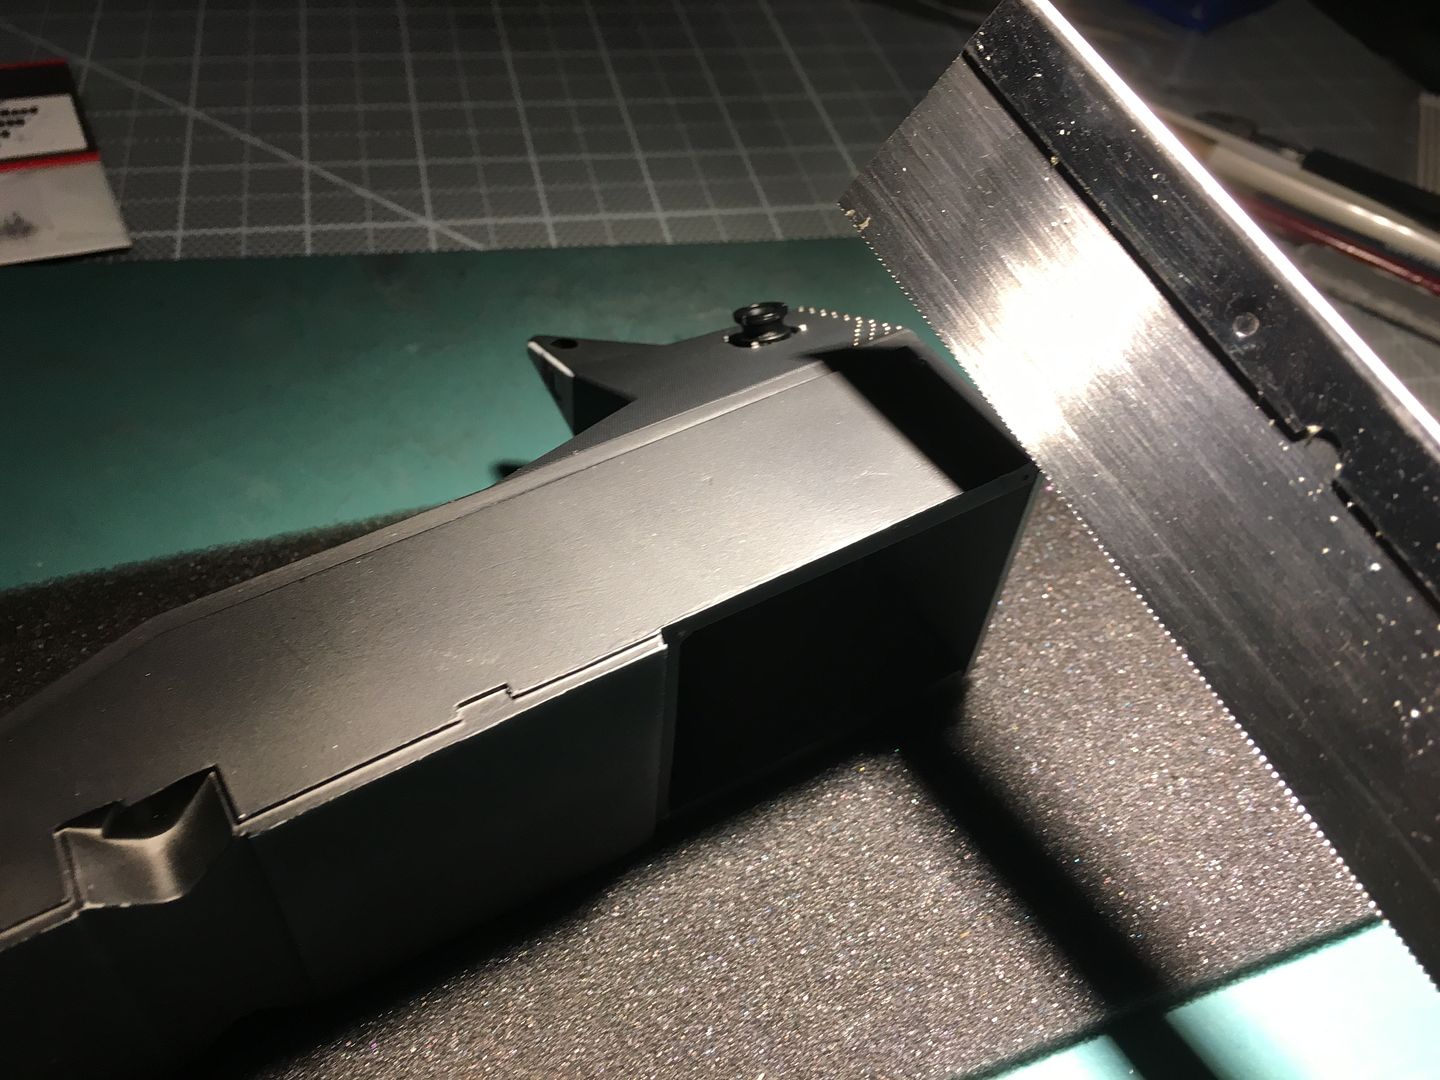
Have to trim all these - certainly at the edge so that the part fits on top of the chassis...

So it isn't sitting properly here:
Also got a new toy - magnetic polisher, I've got far too many very small parts to clean that now I think it becomes worthwhile!
Same method as before - I have used panel line liquid to darken the rivets slightly, not worried if it rubs off randomly, as the 'real' car looks like that...
Lots of them!
Sprayed with satin clear...
Have to trim all these - certainly at the edge so that the part fits on top of the chassis...
So it isn't sitting properly here:
Also got a new toy - magnetic polisher, I've got far too many very small parts to clean that now I think it becomes worthwhile!

Detail stuff...seems a shame to spray these wheels, but have to...
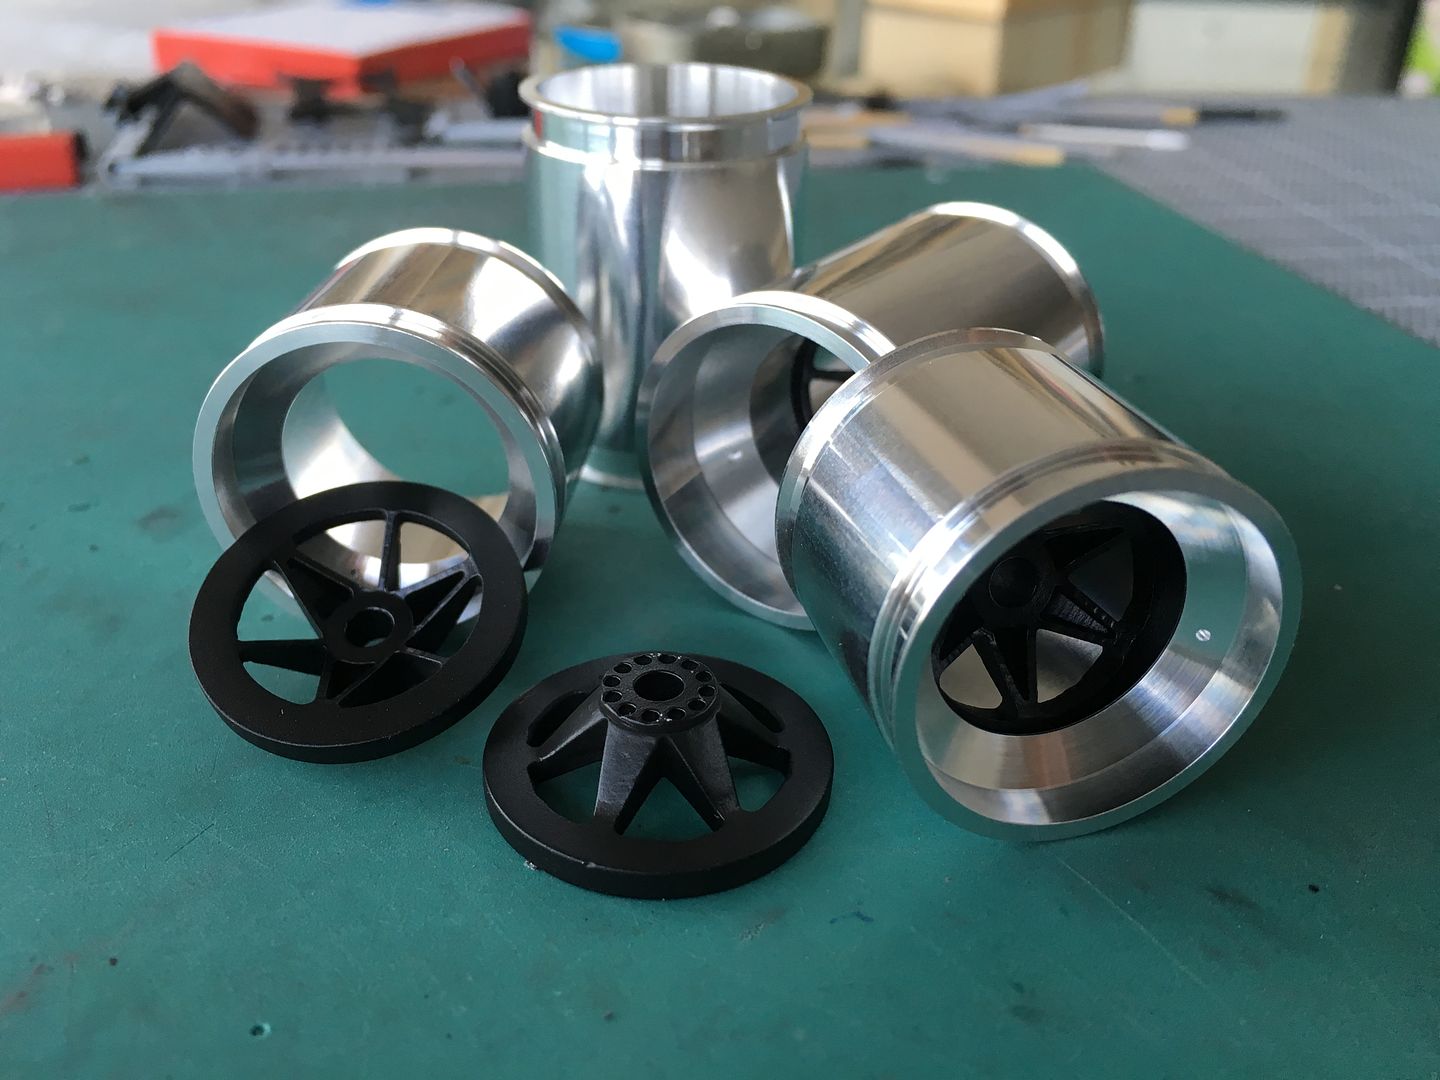
...but no choice!
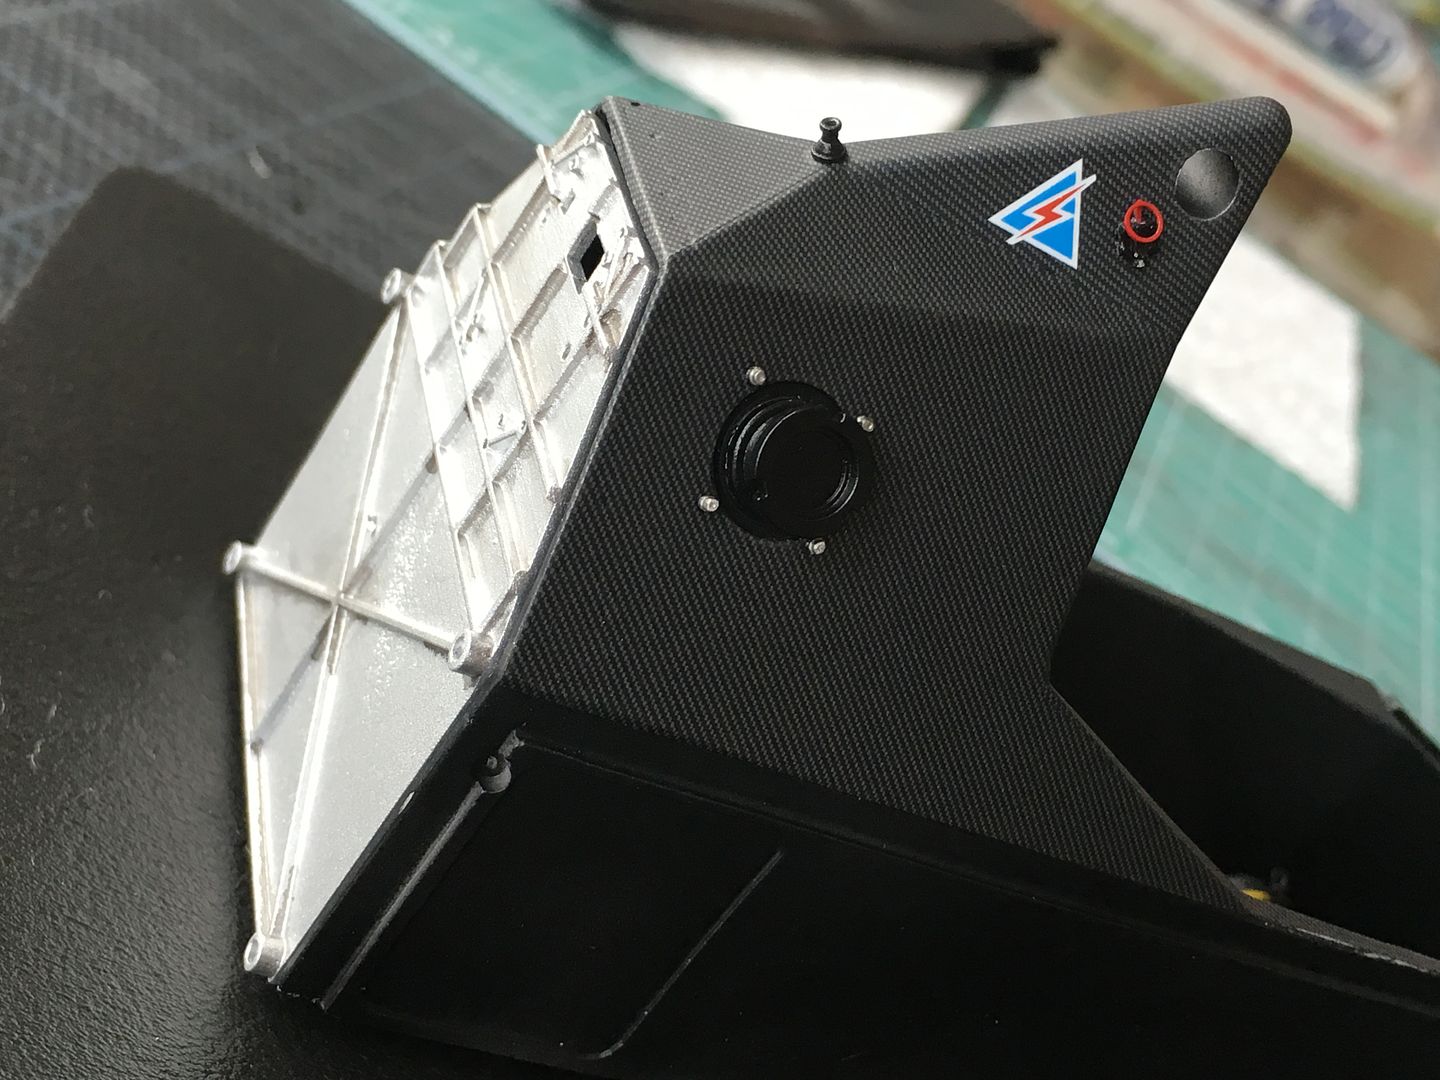
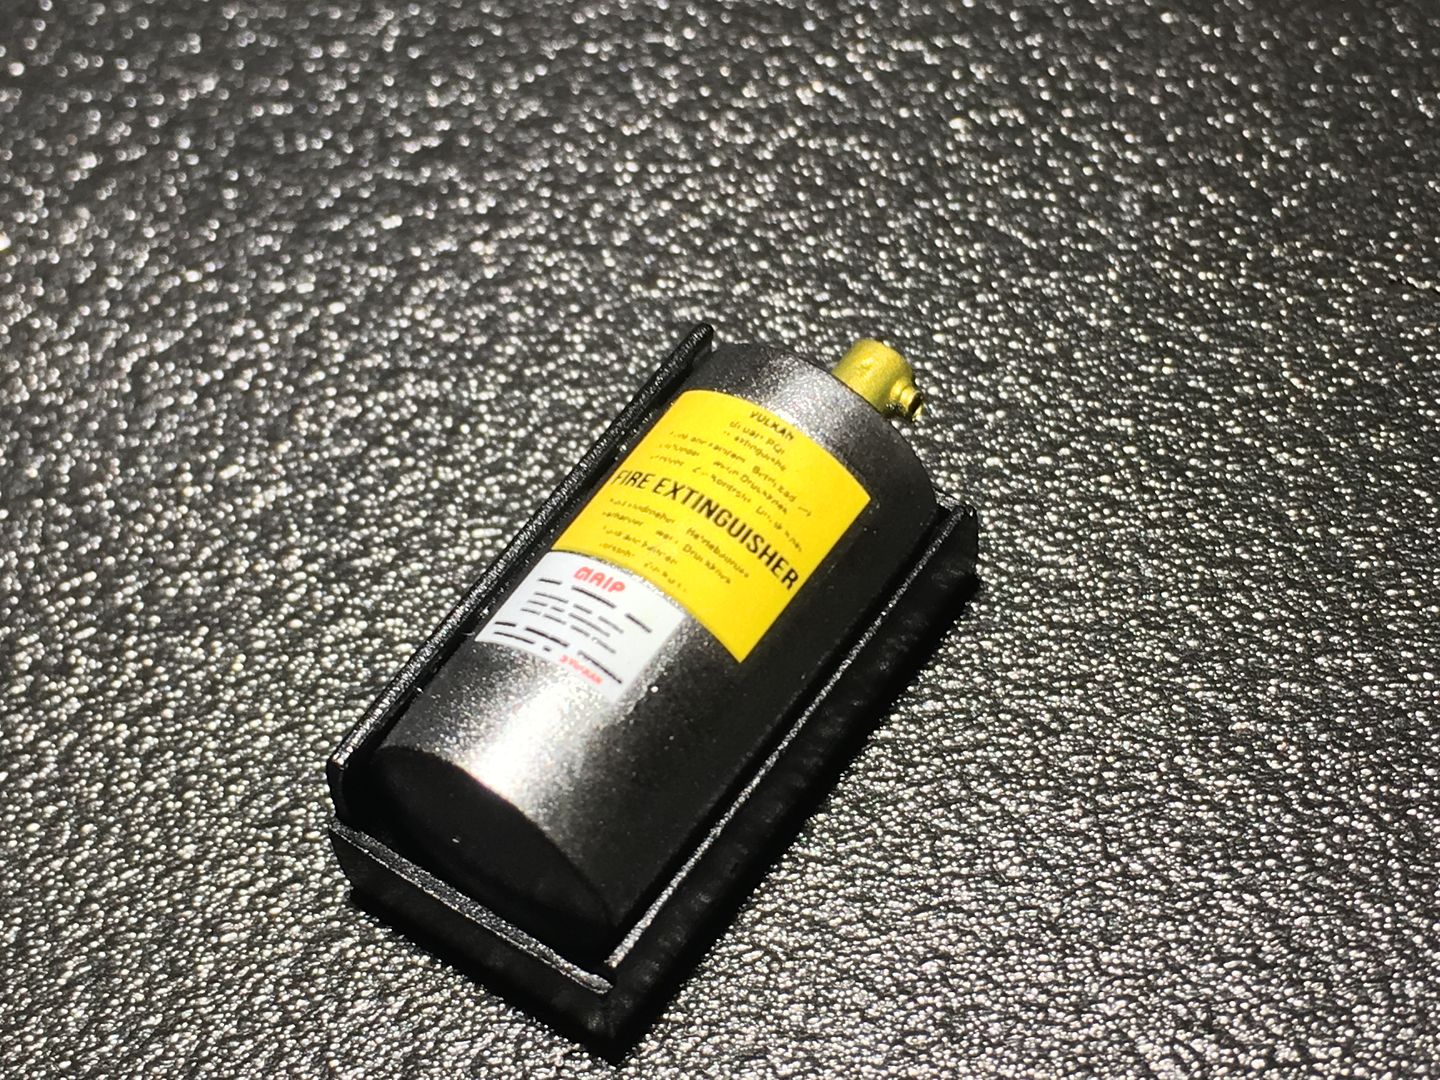
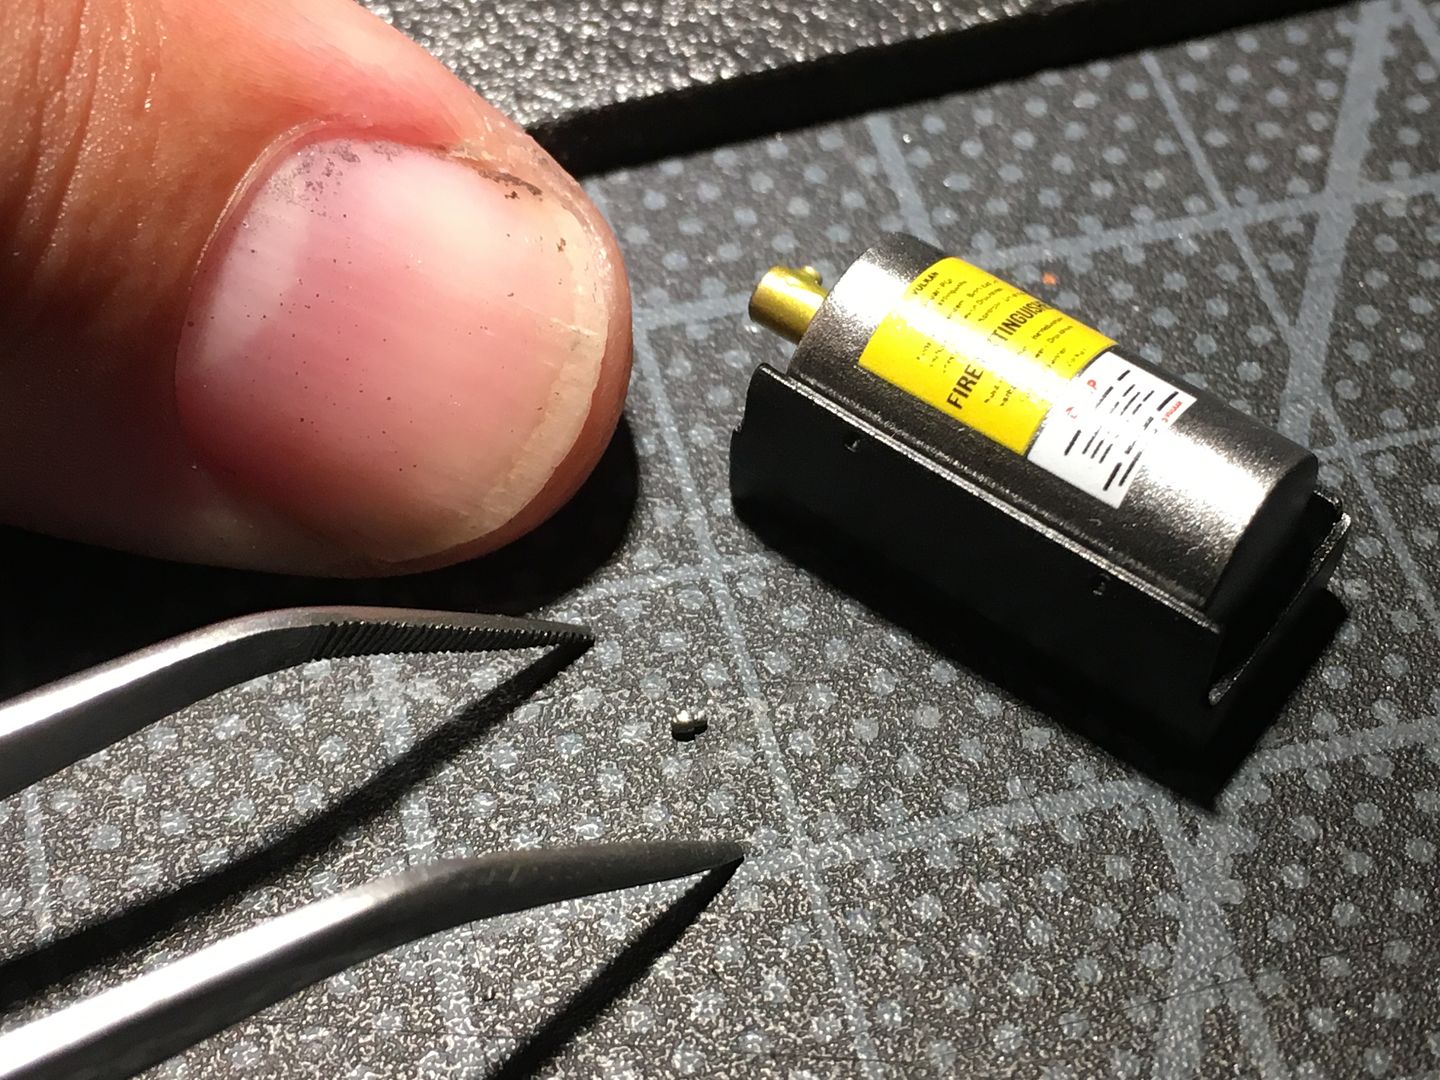
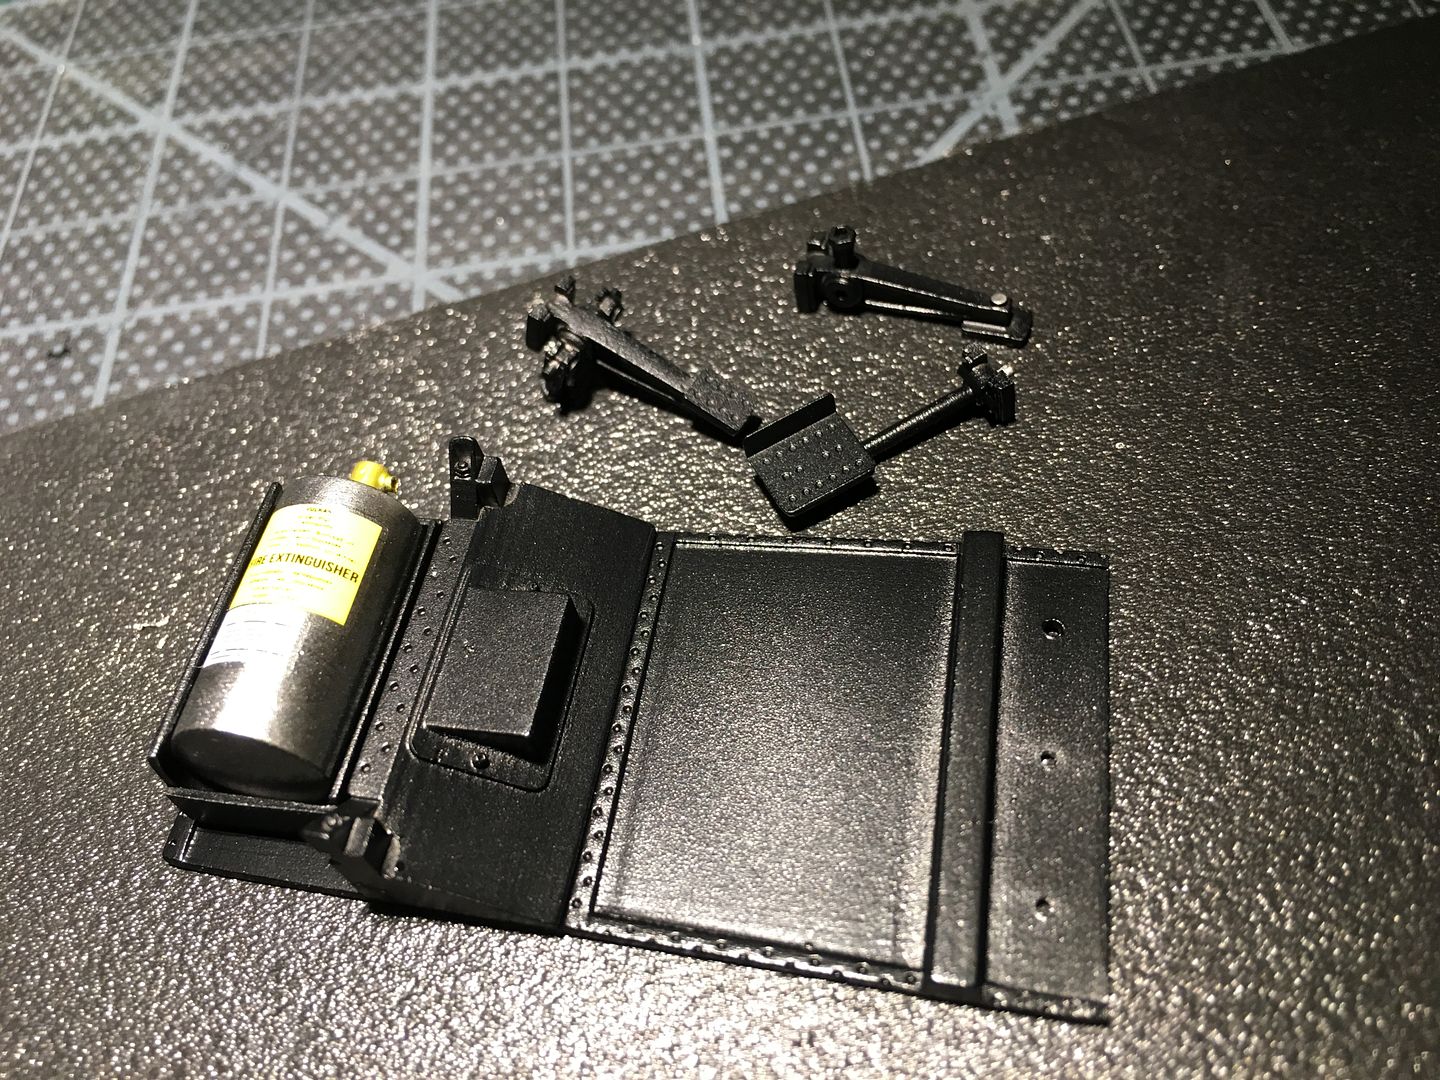
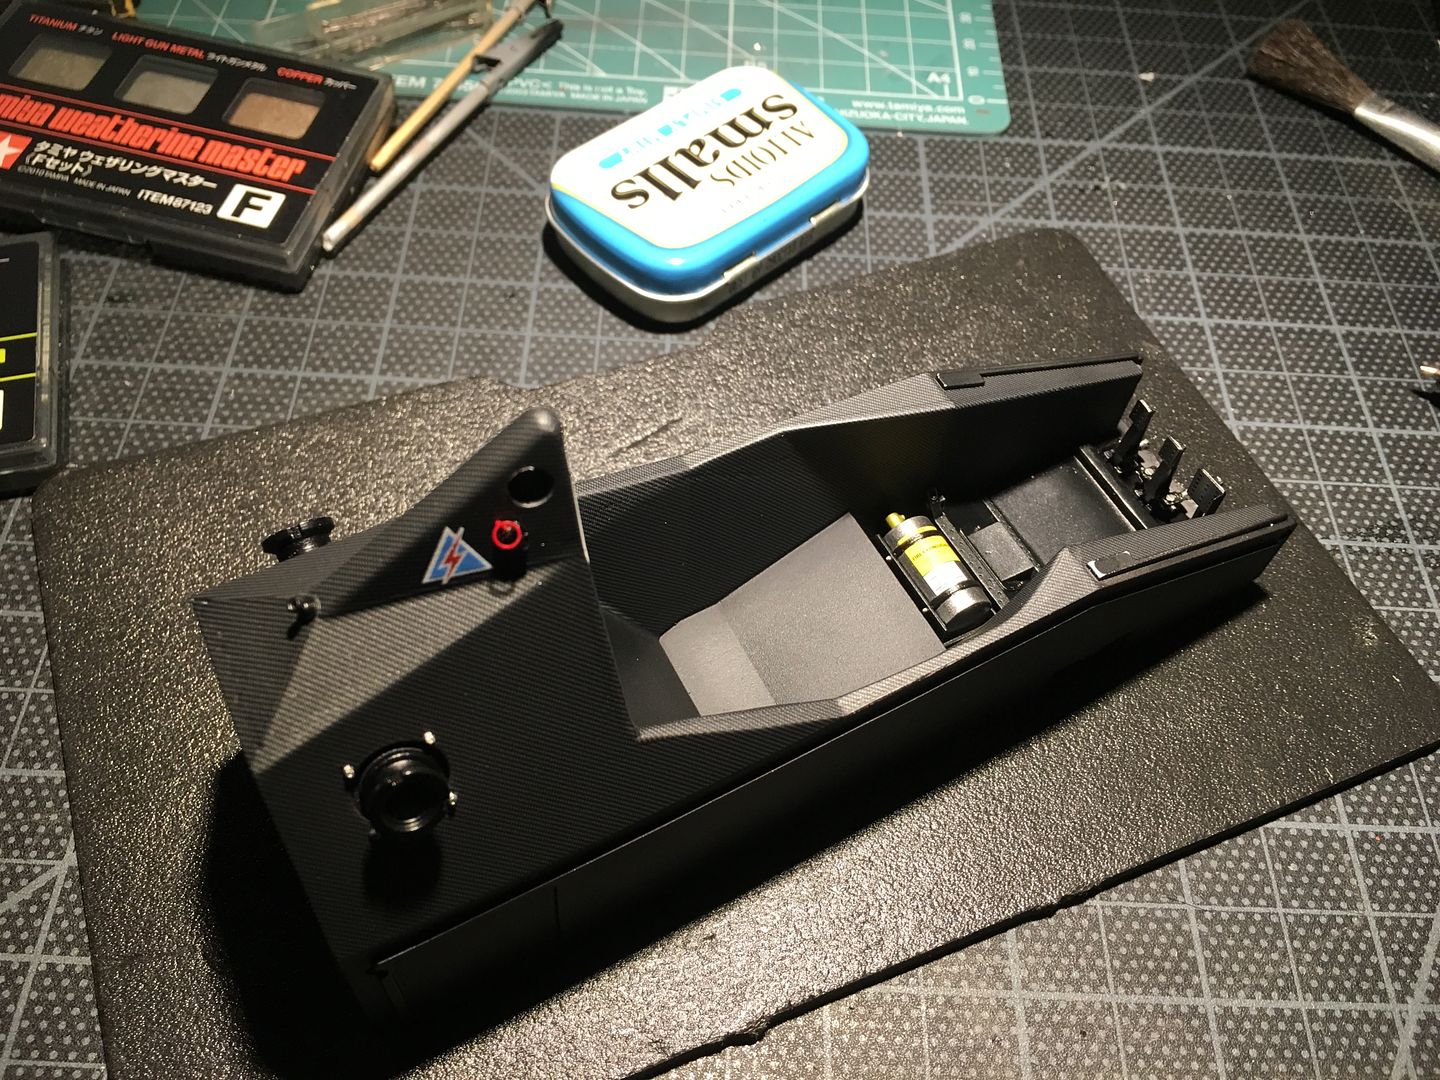
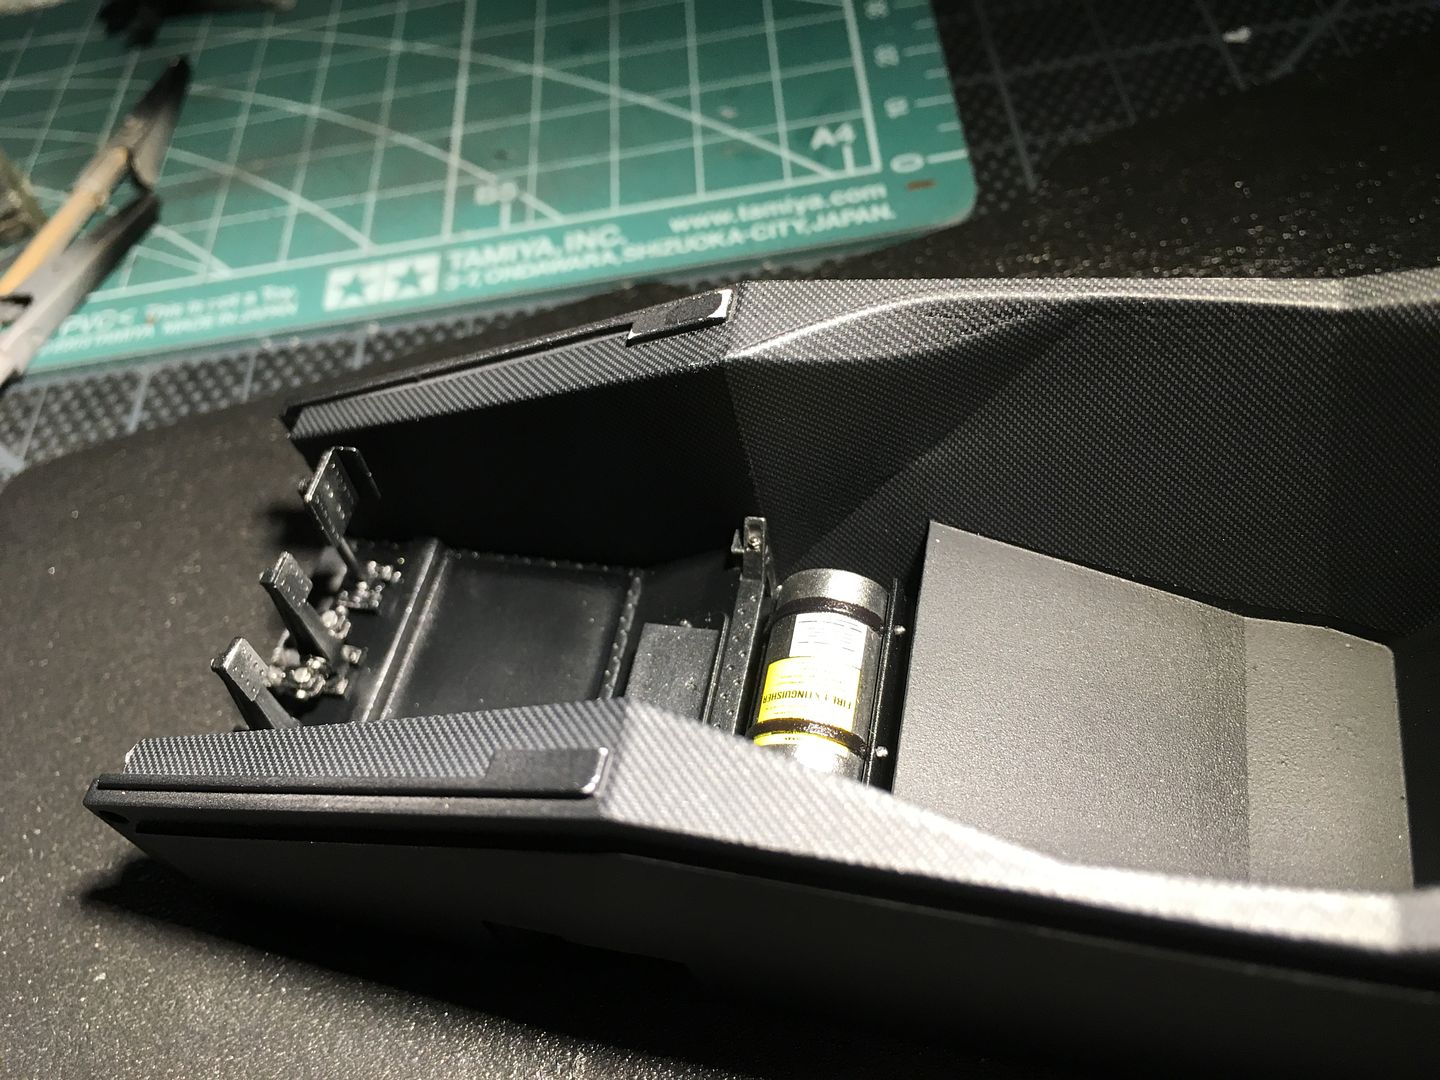
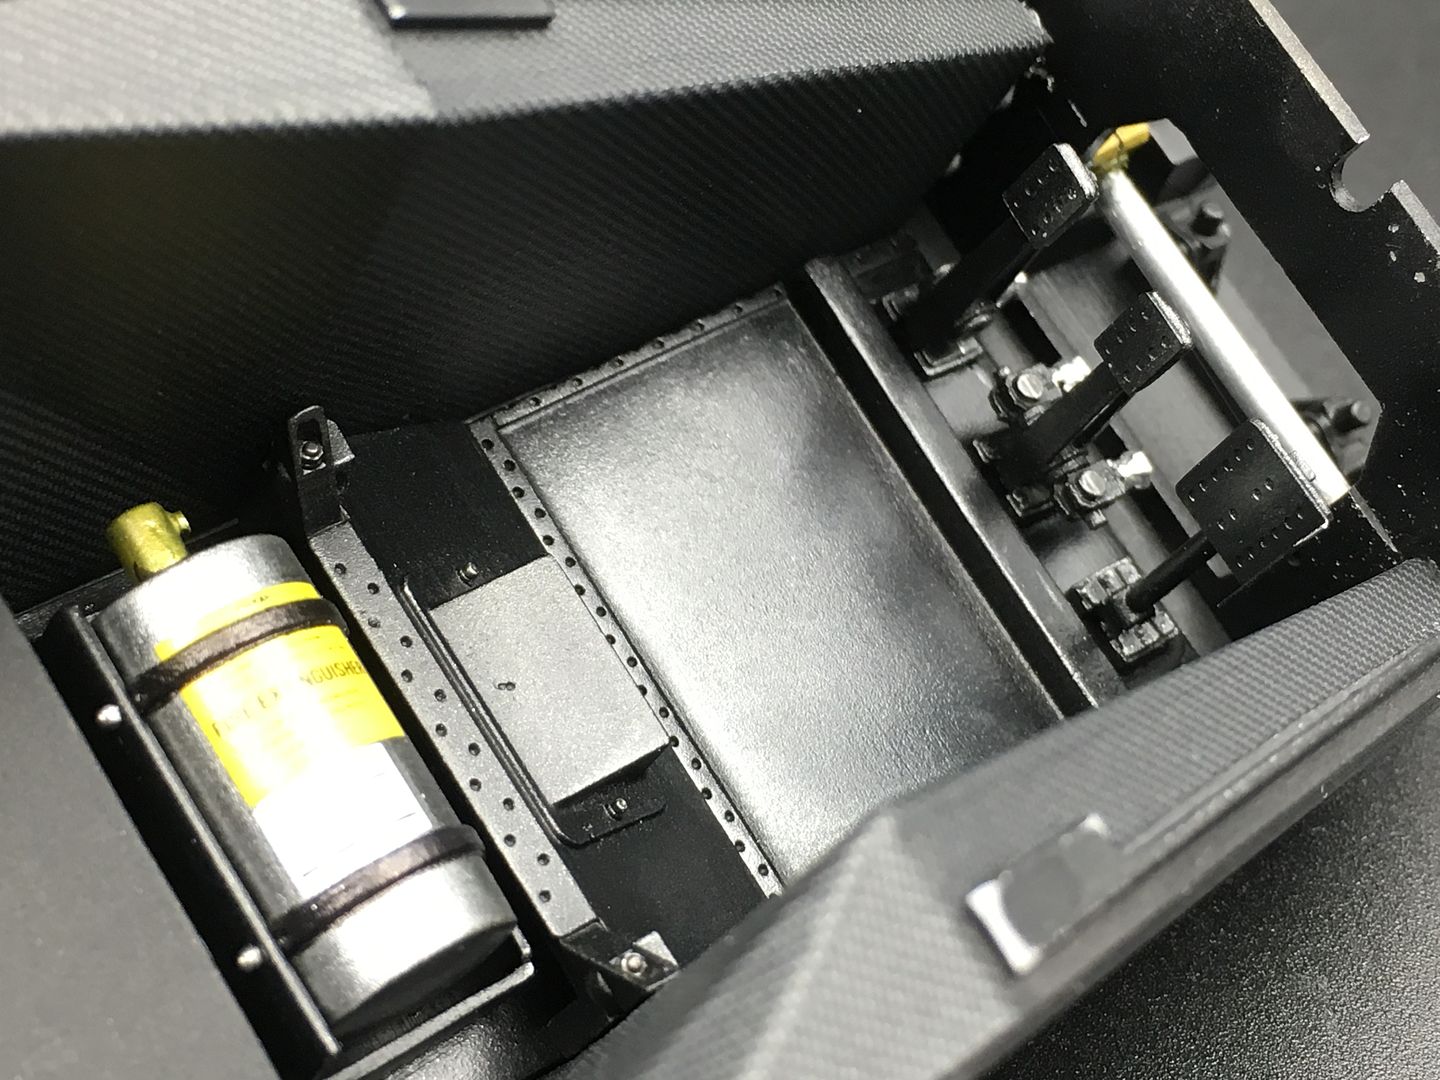
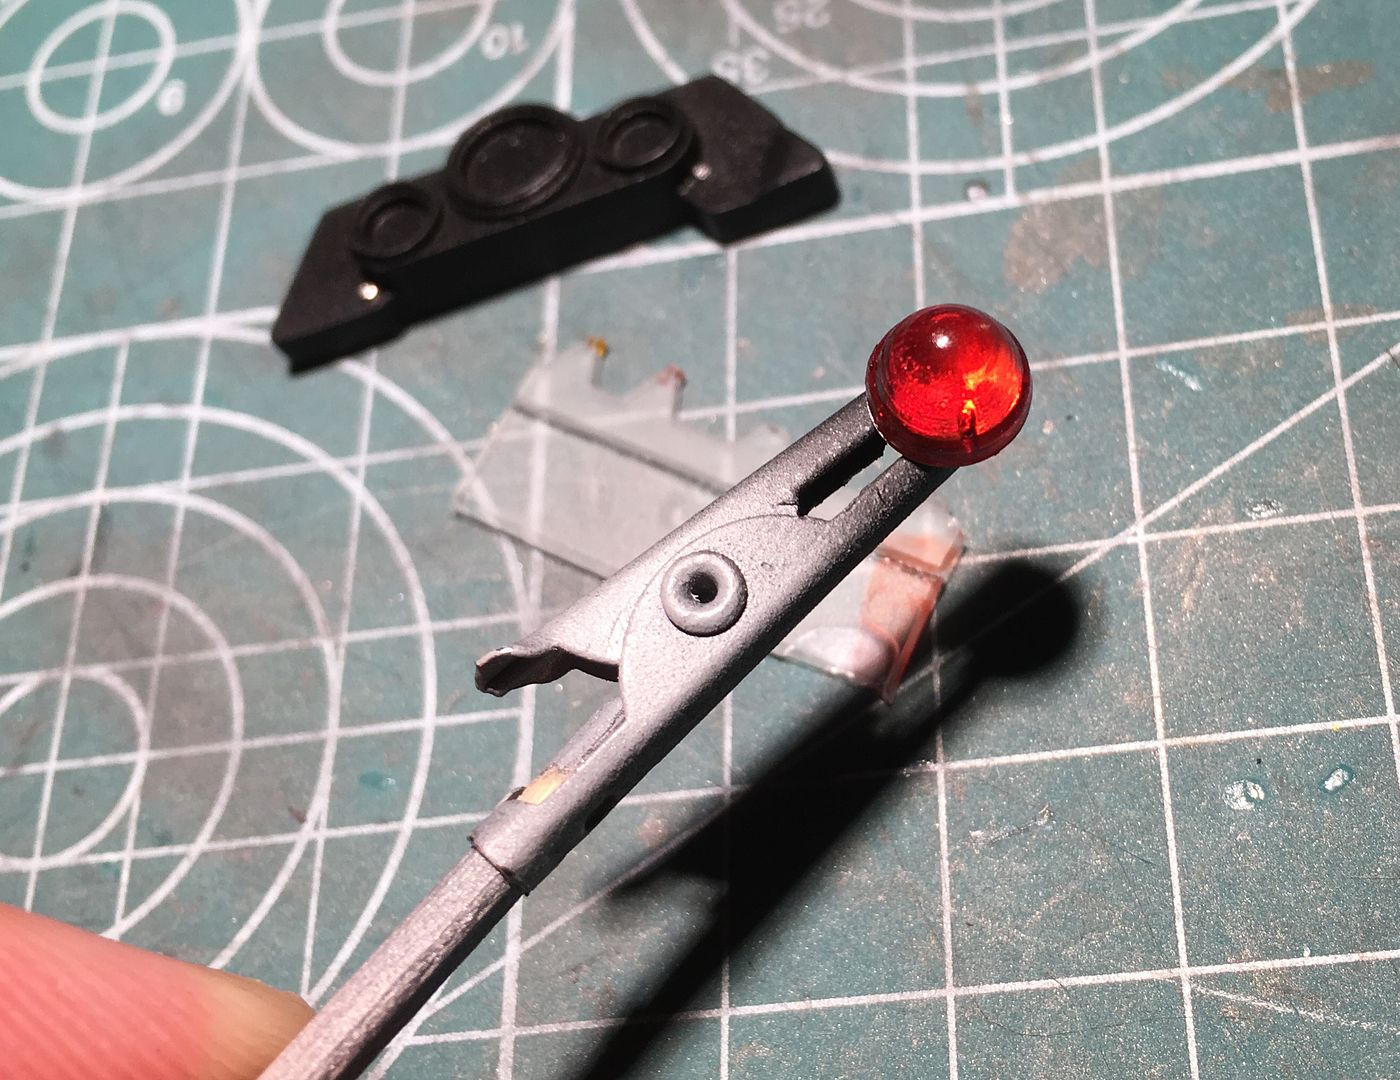
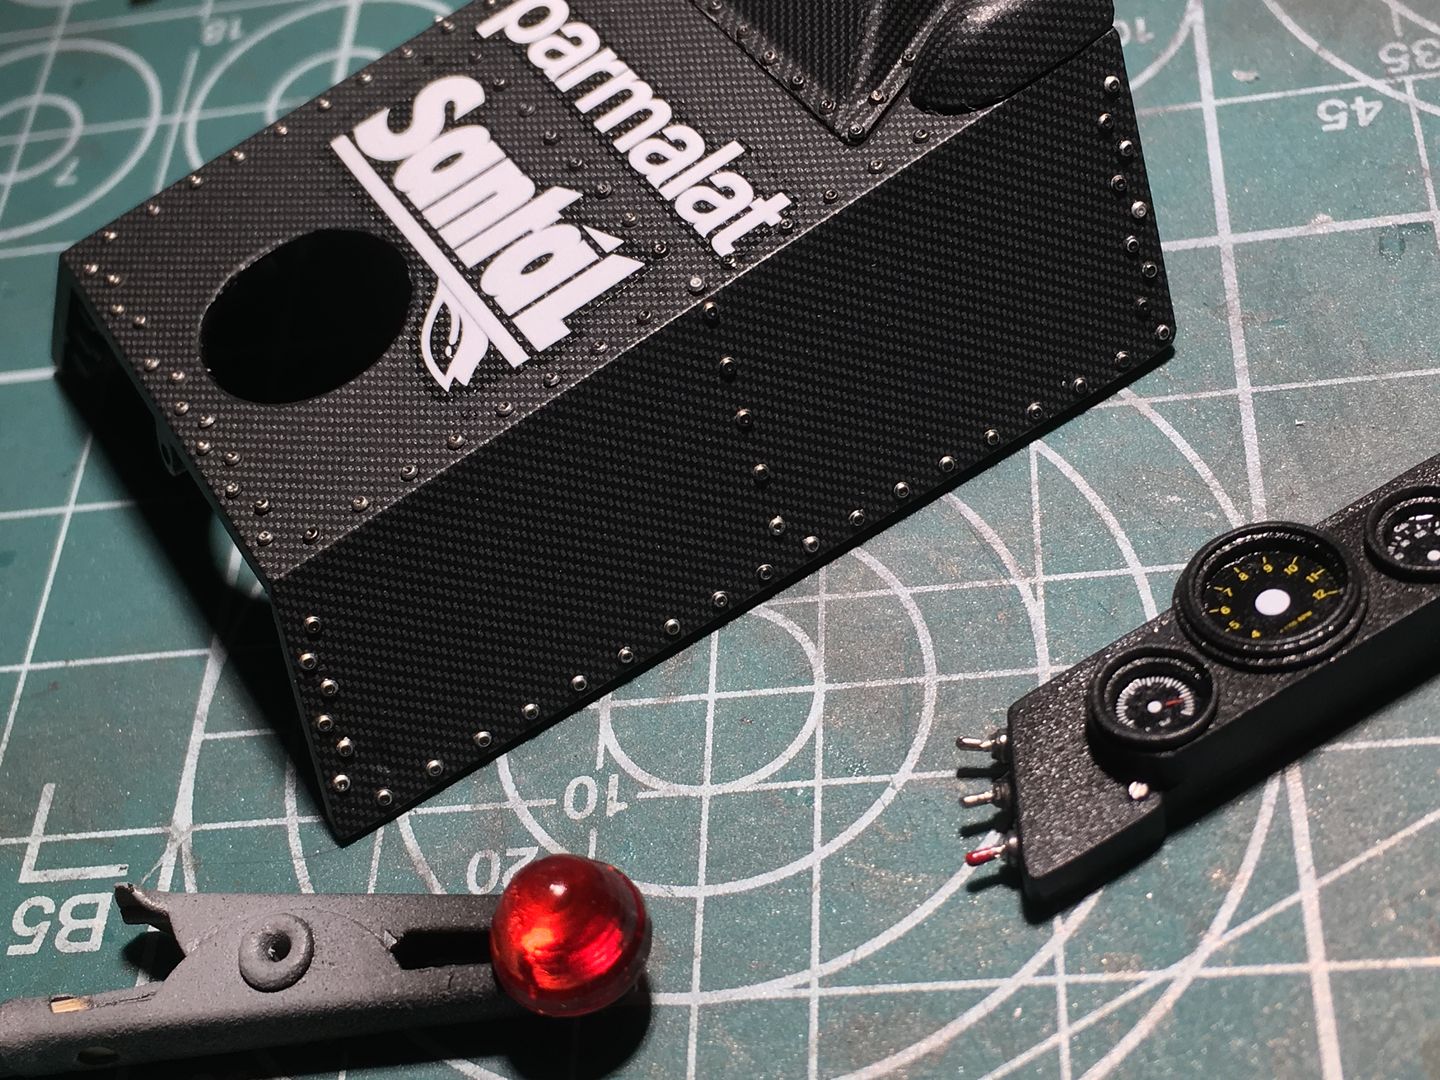
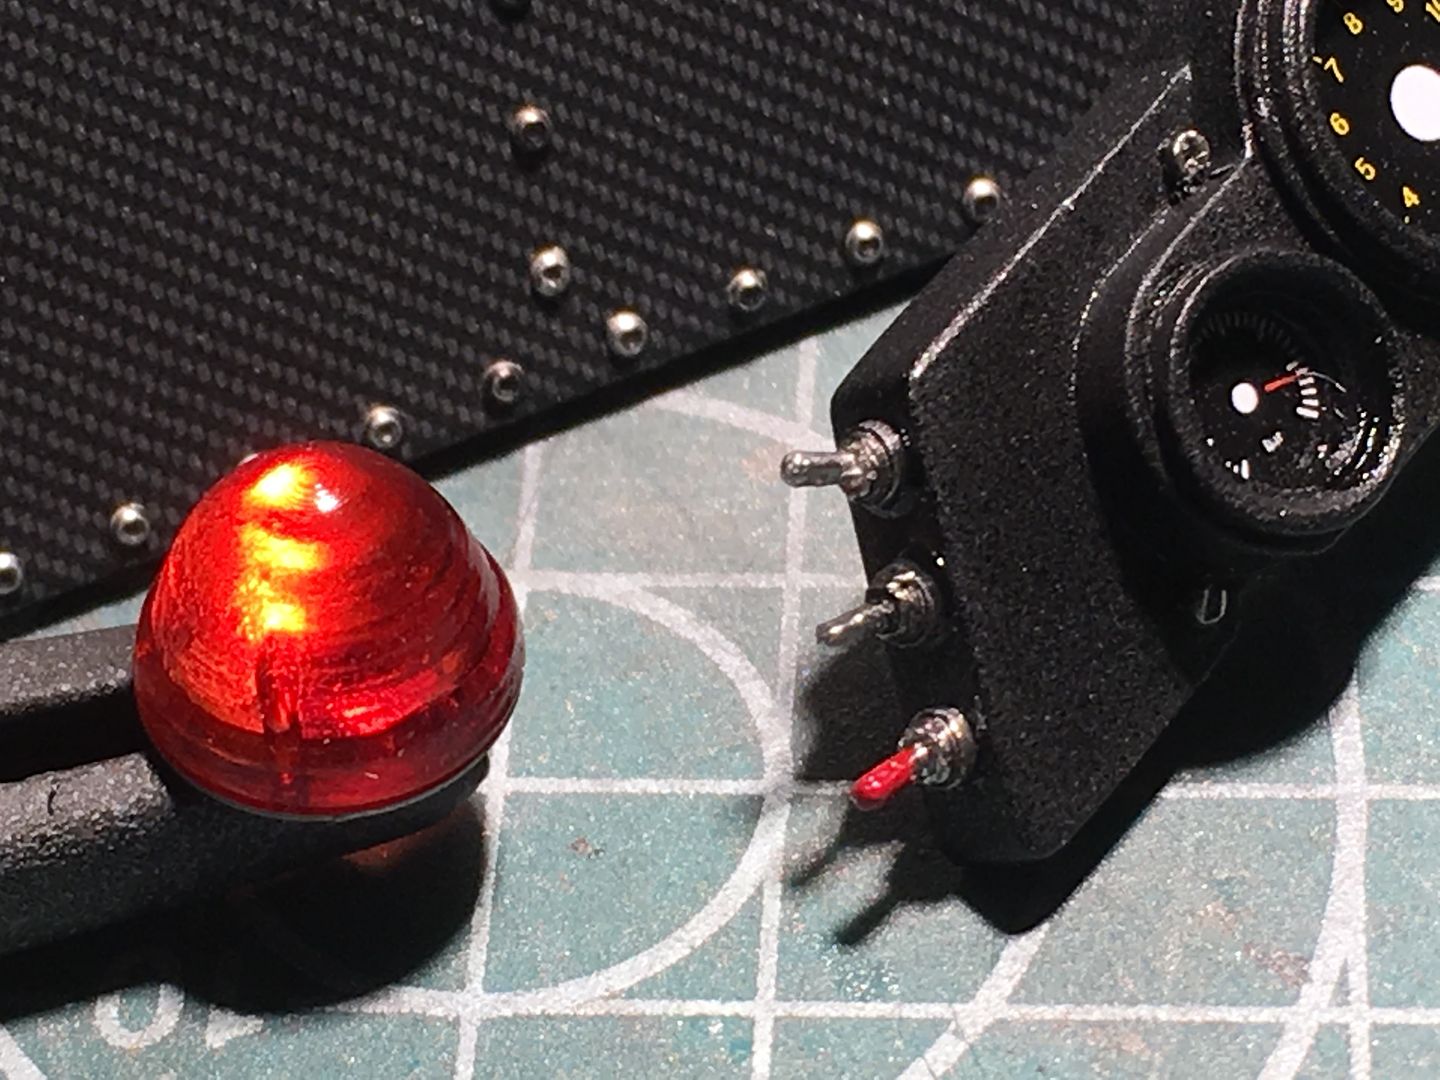
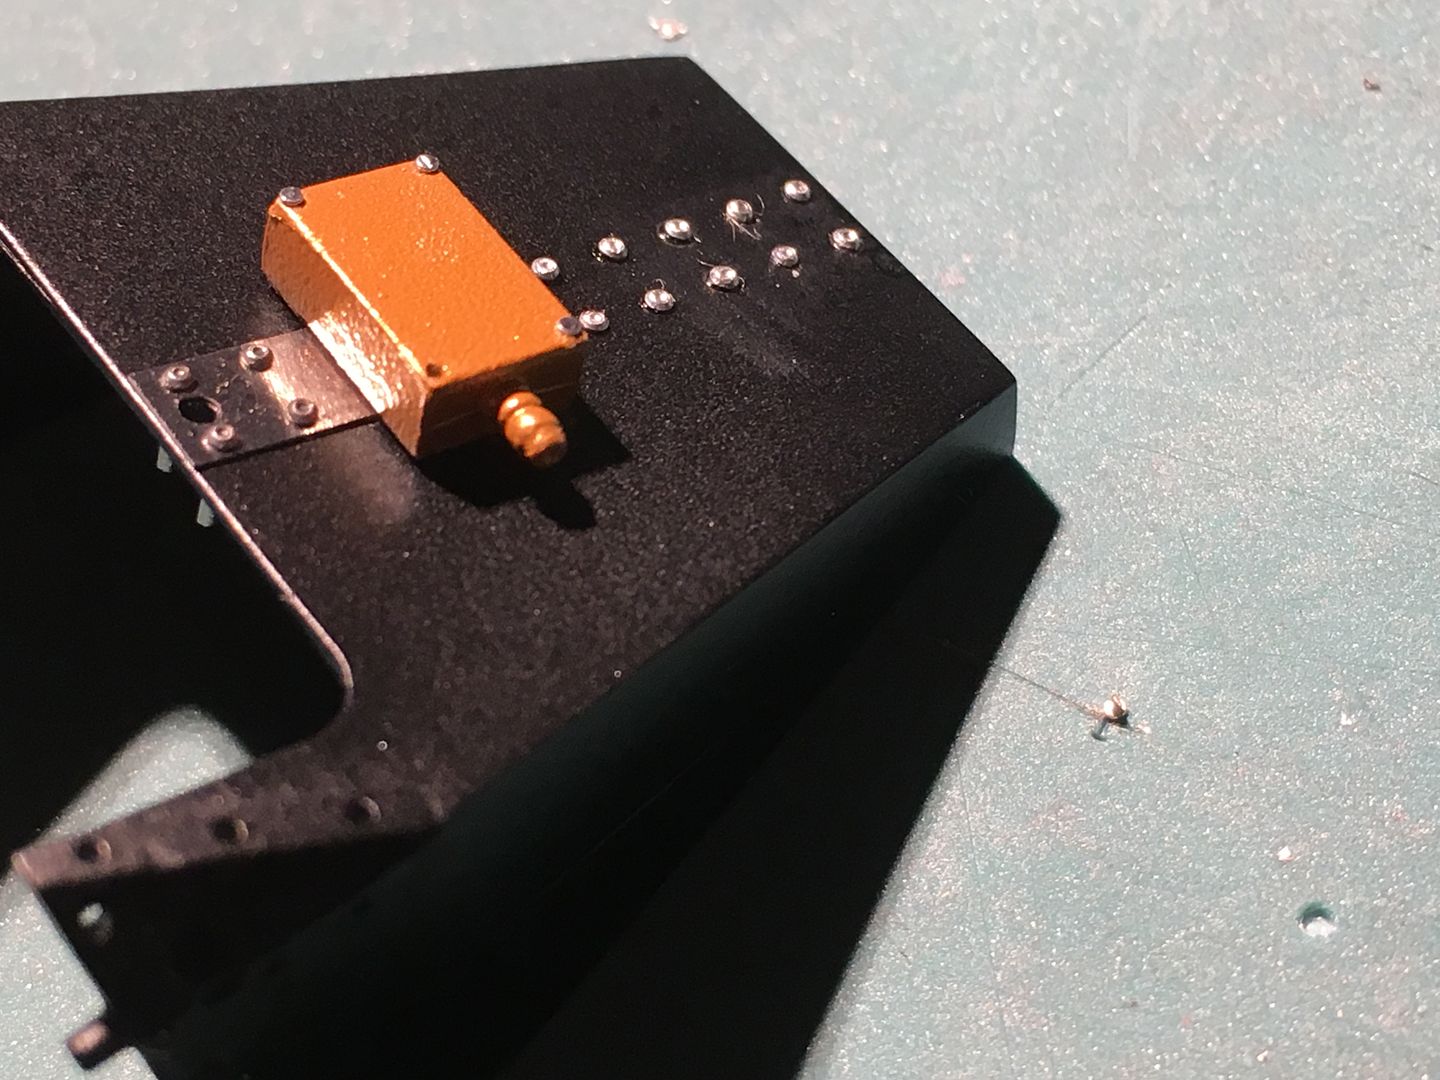
More riveting on the chassis nose...
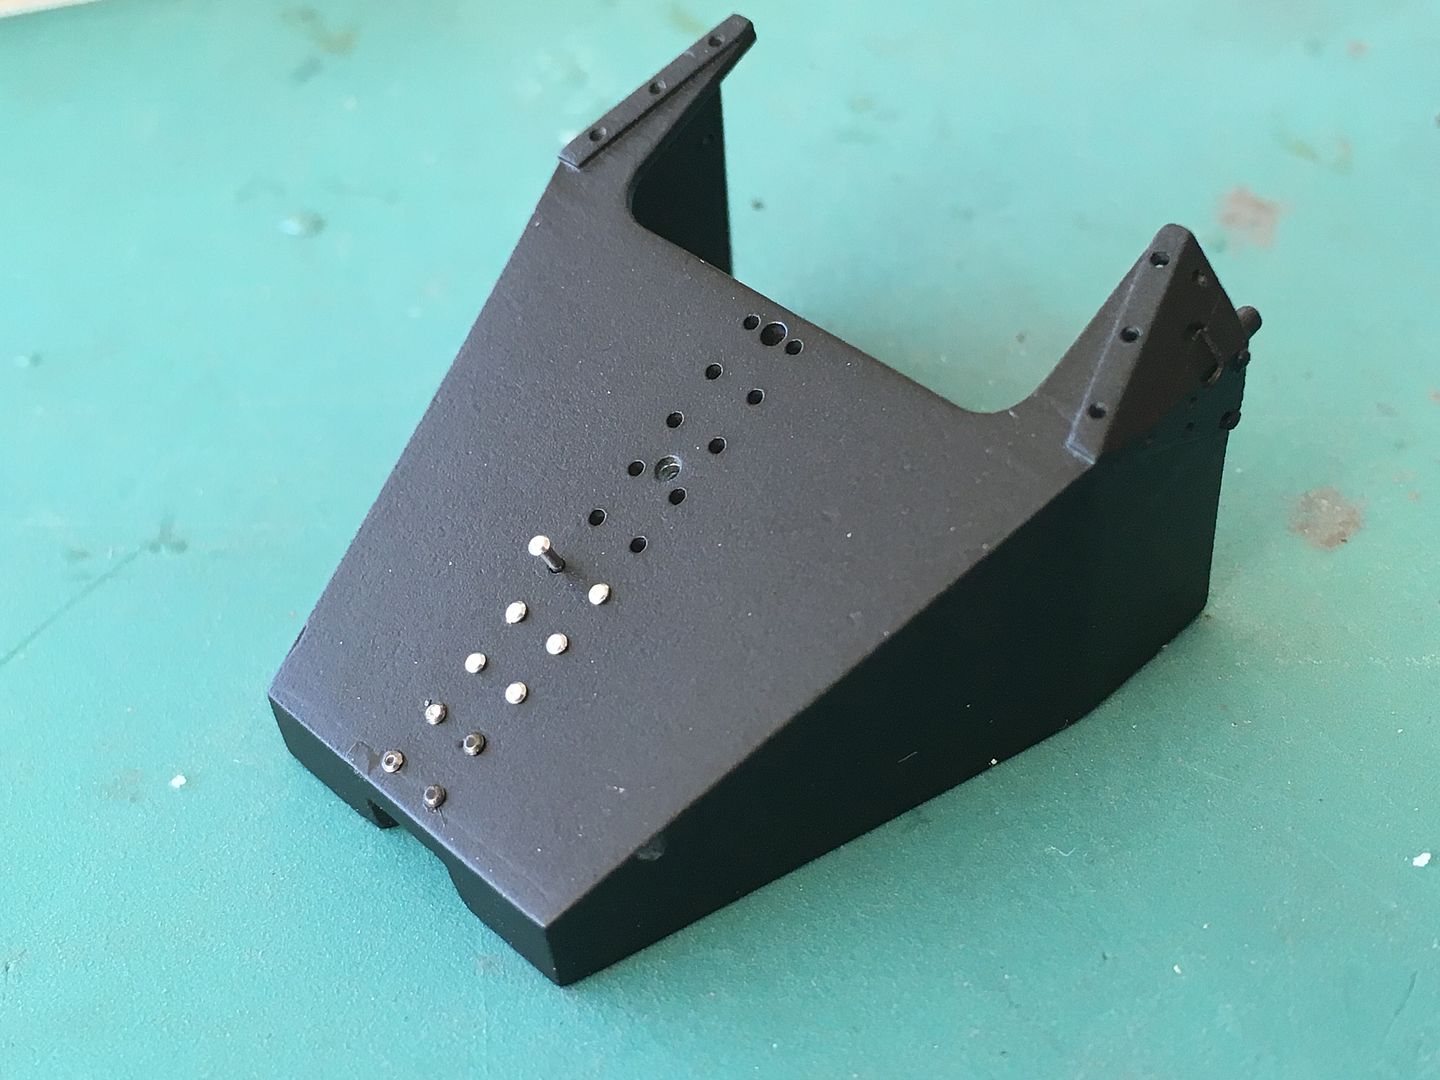
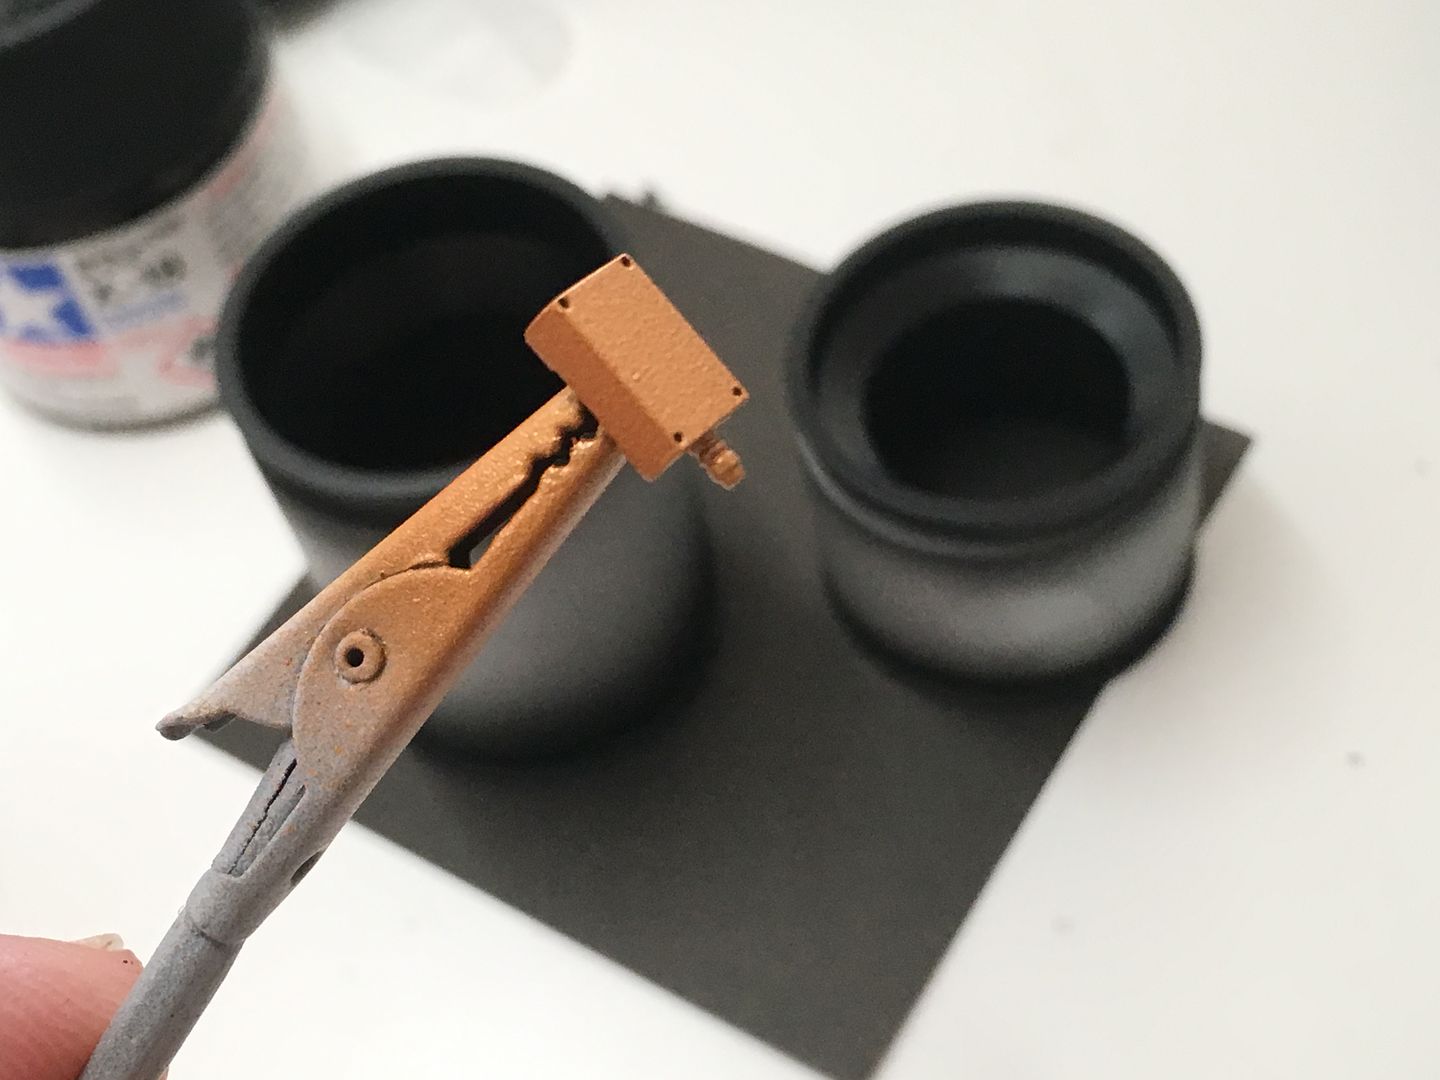
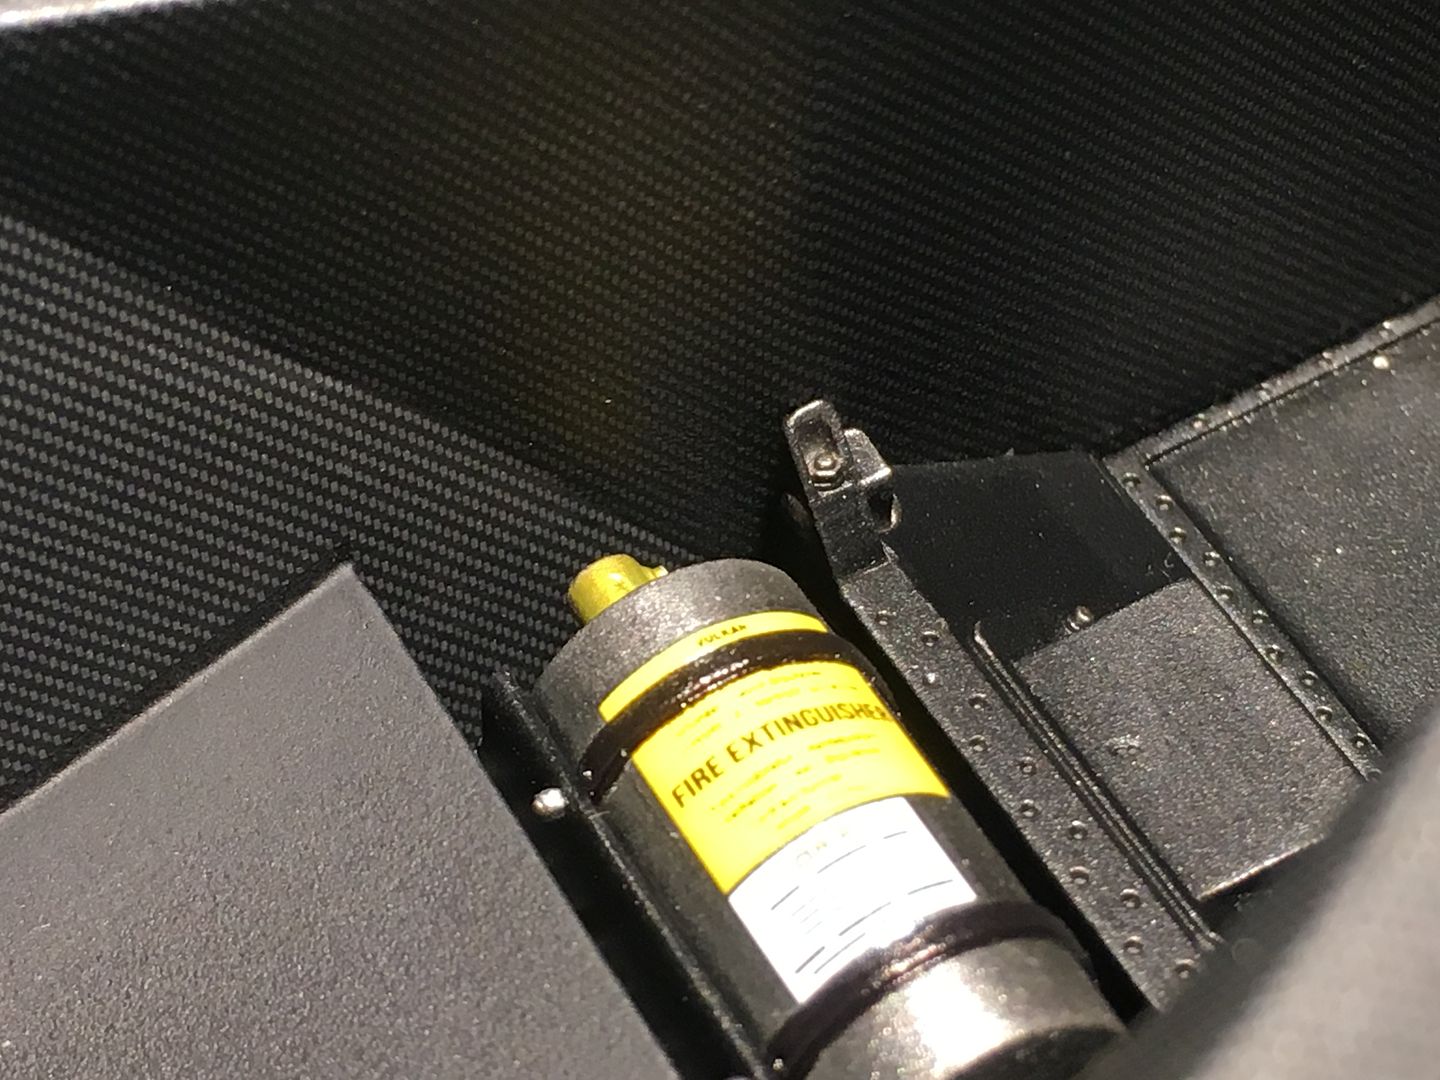
See that little shiny dot on the green mat, right of the box - that is a rivet for that orange box - absolute b*gger to actually handle!
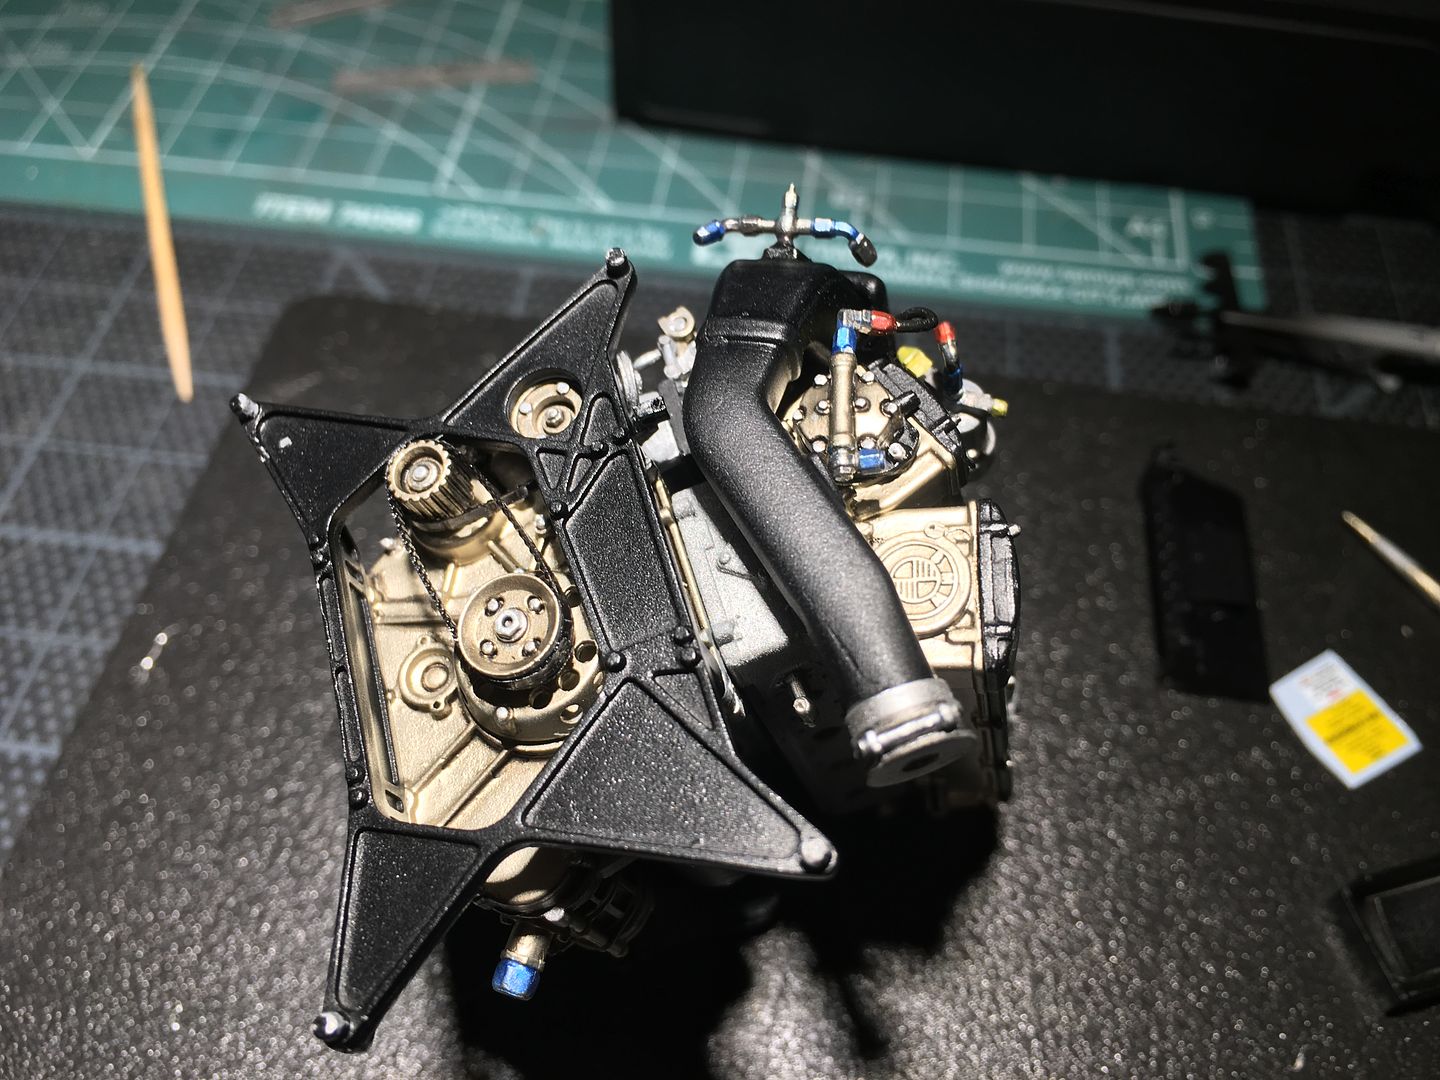
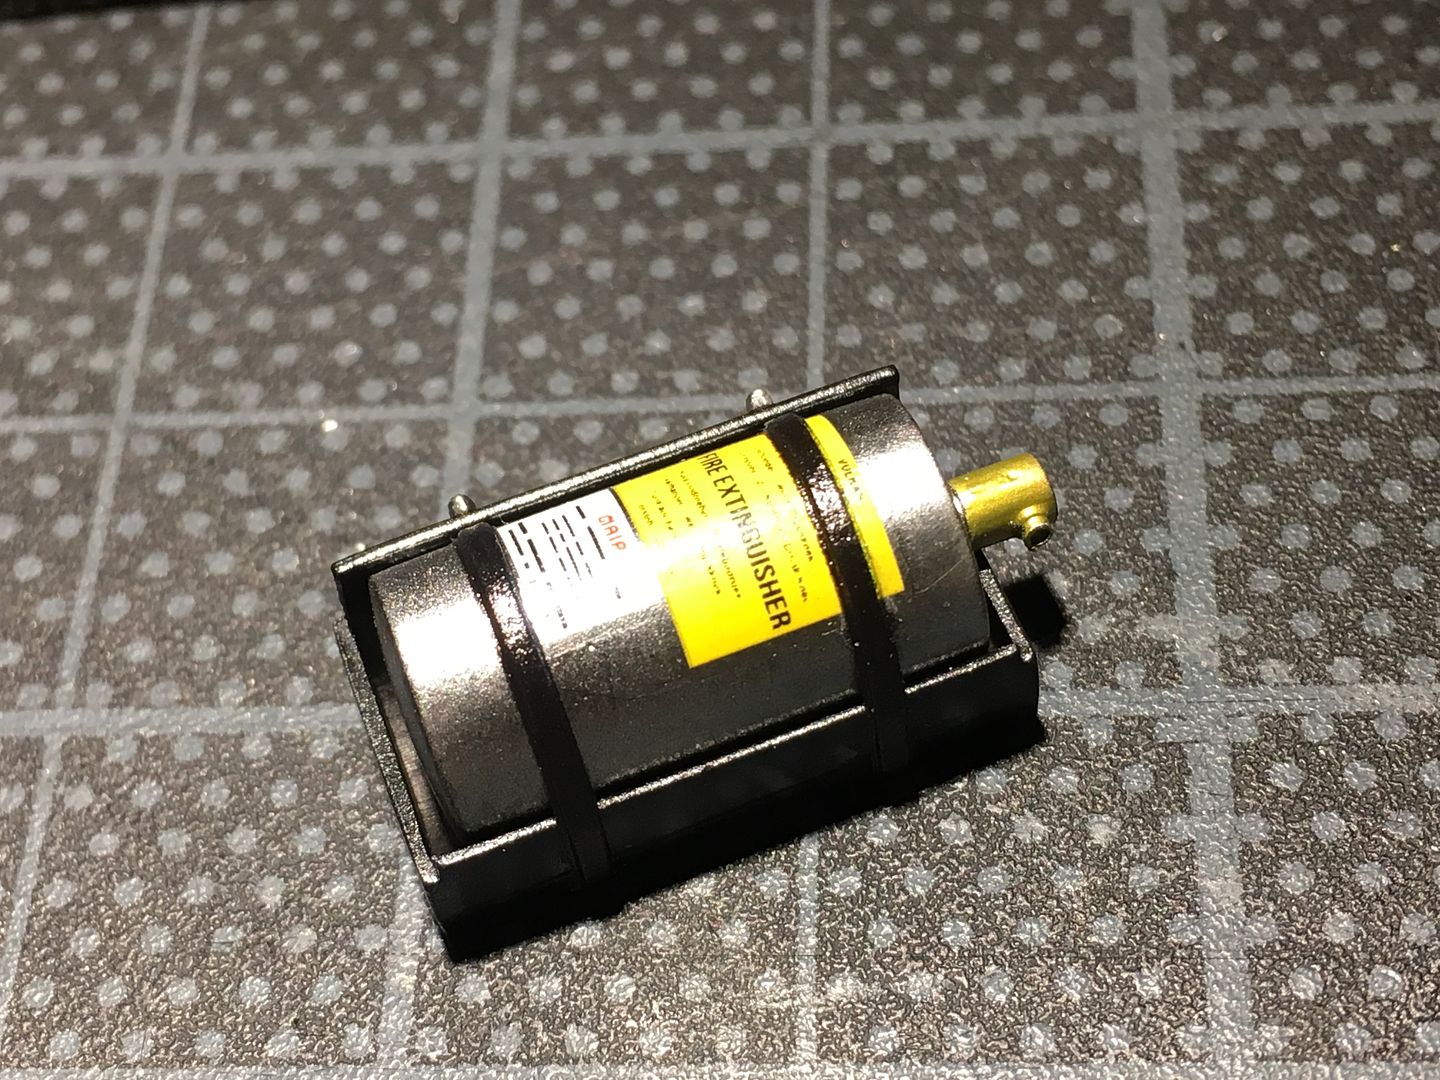
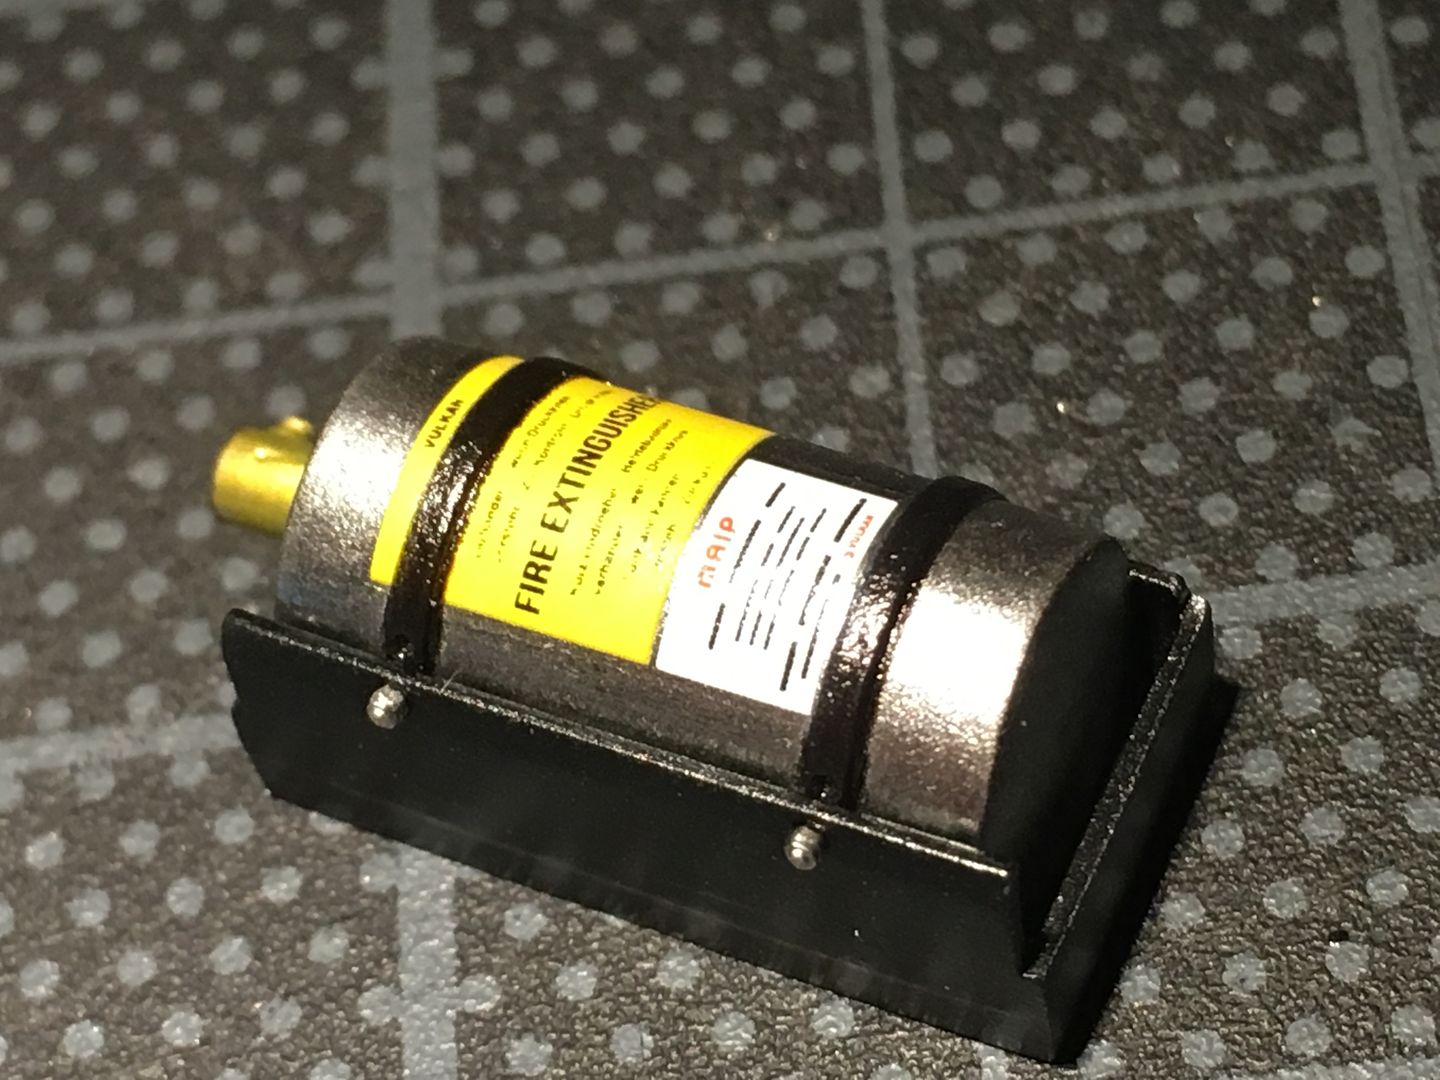
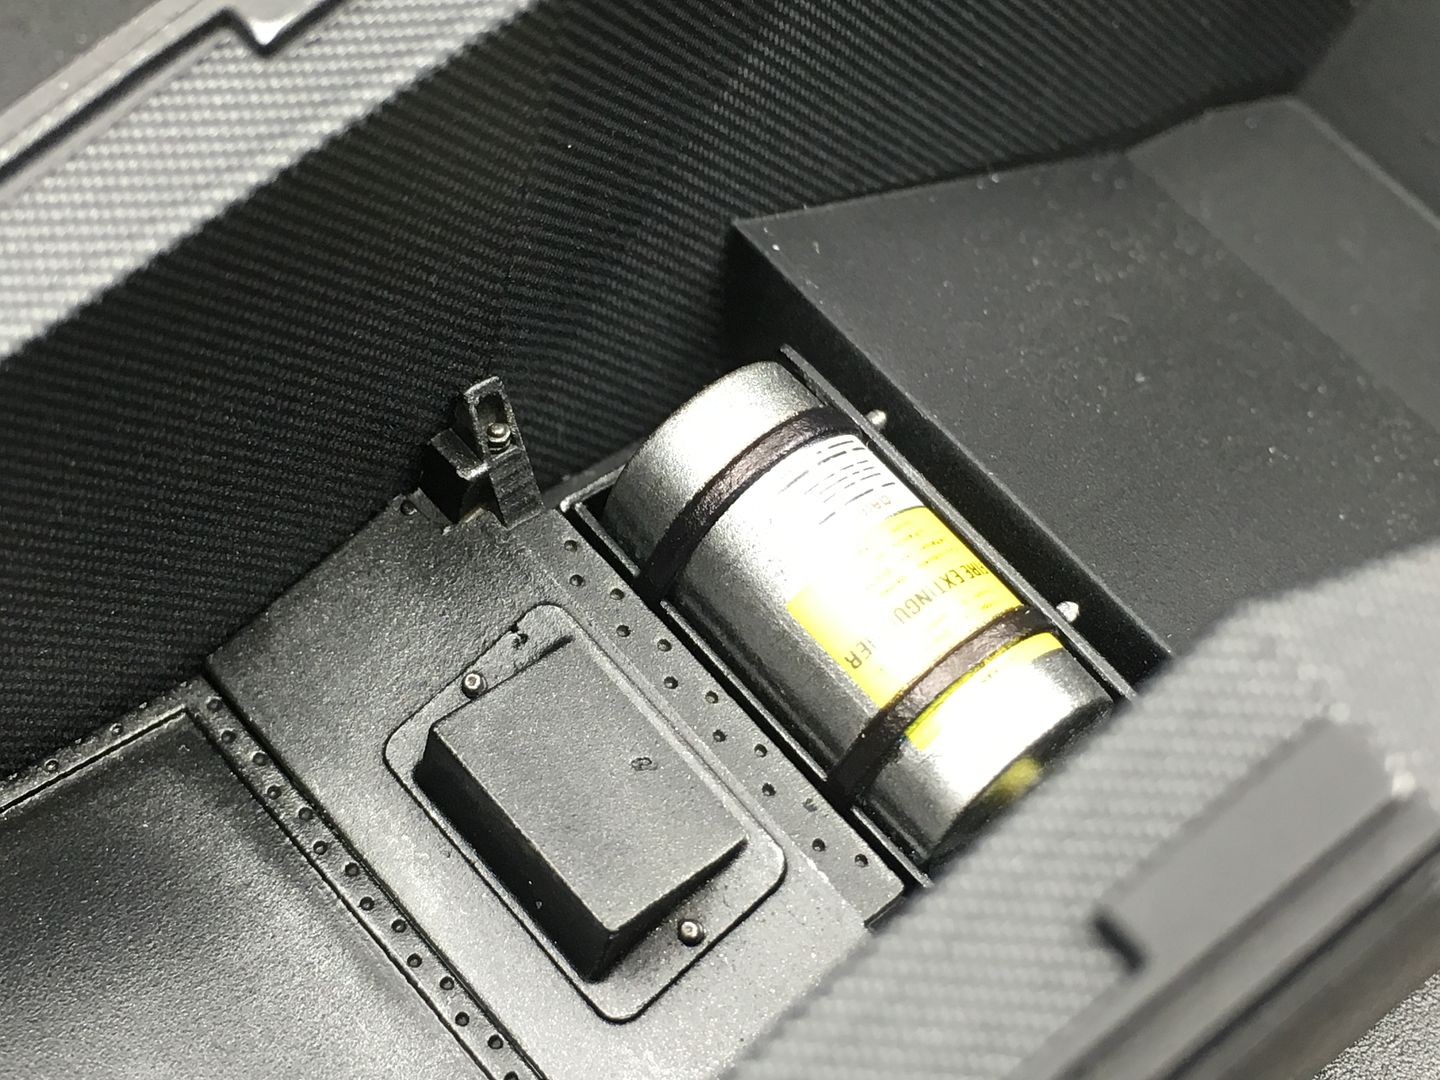
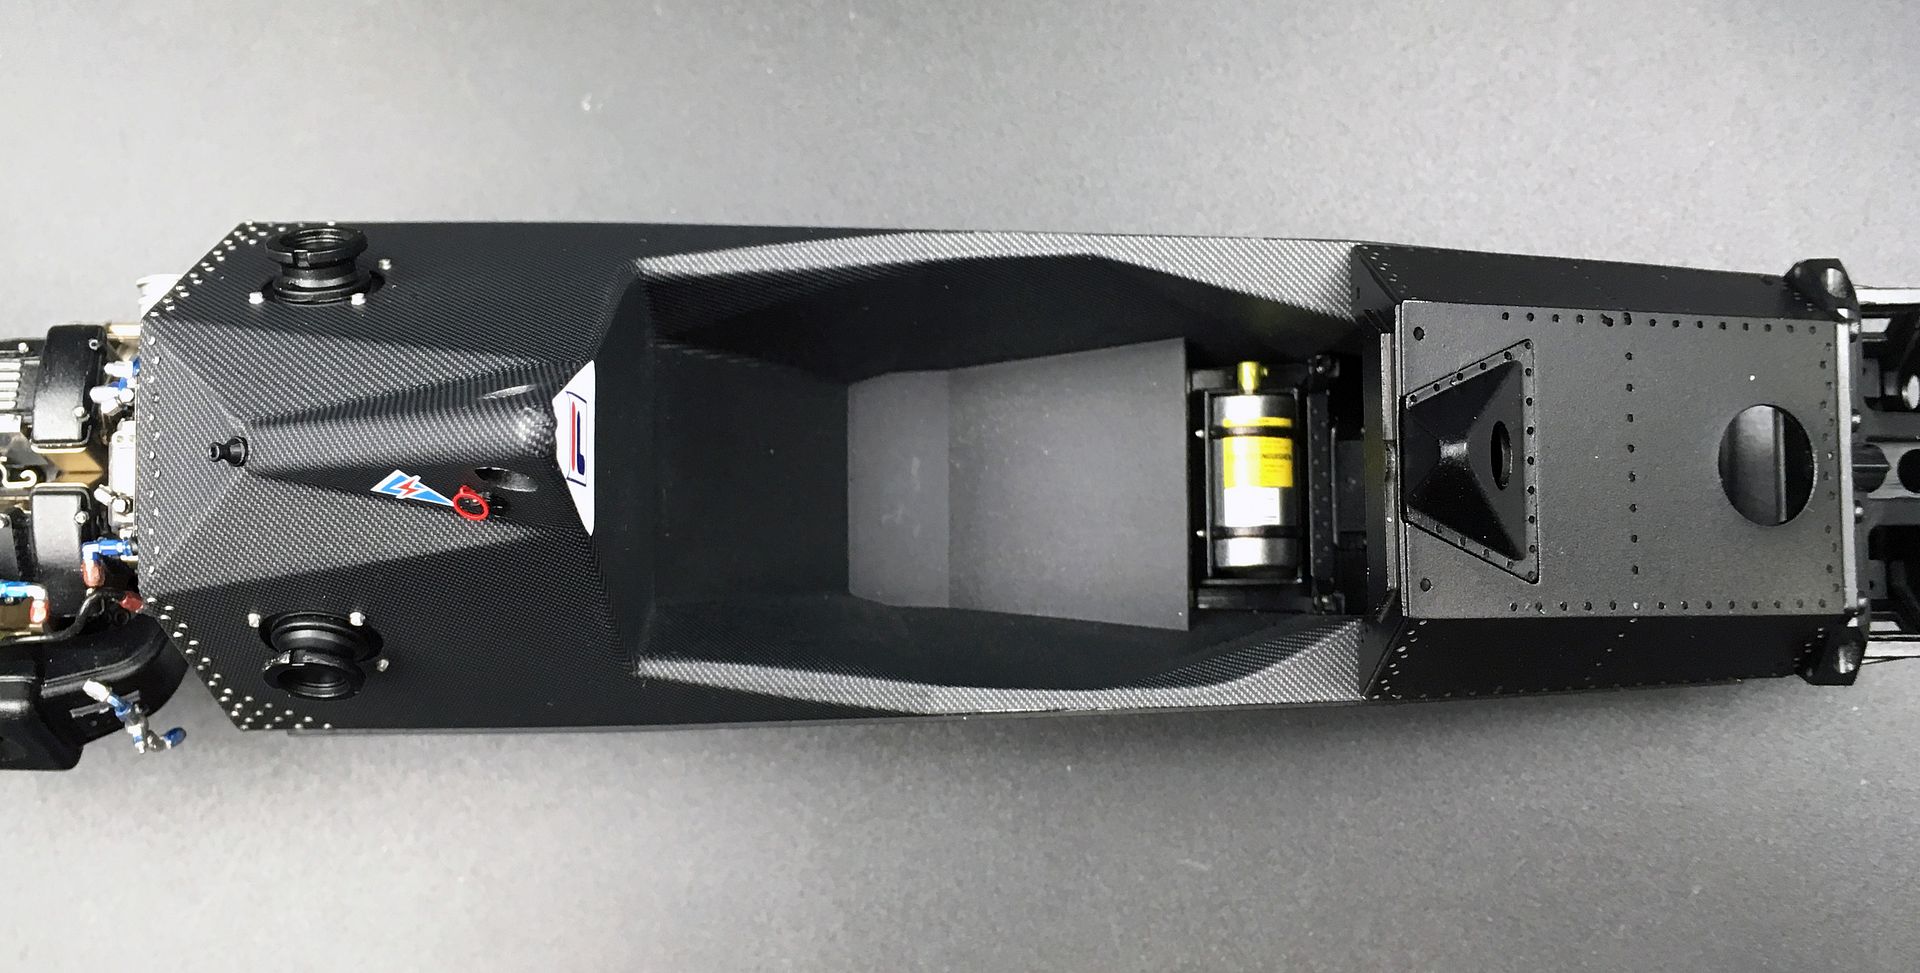
This little radiator on the gearbox is 'hollow' - so the light shines through the mesh and shows that there is nothing in...I added some folded black paper to block the light. You can't see it behind the mesh now it is dark...
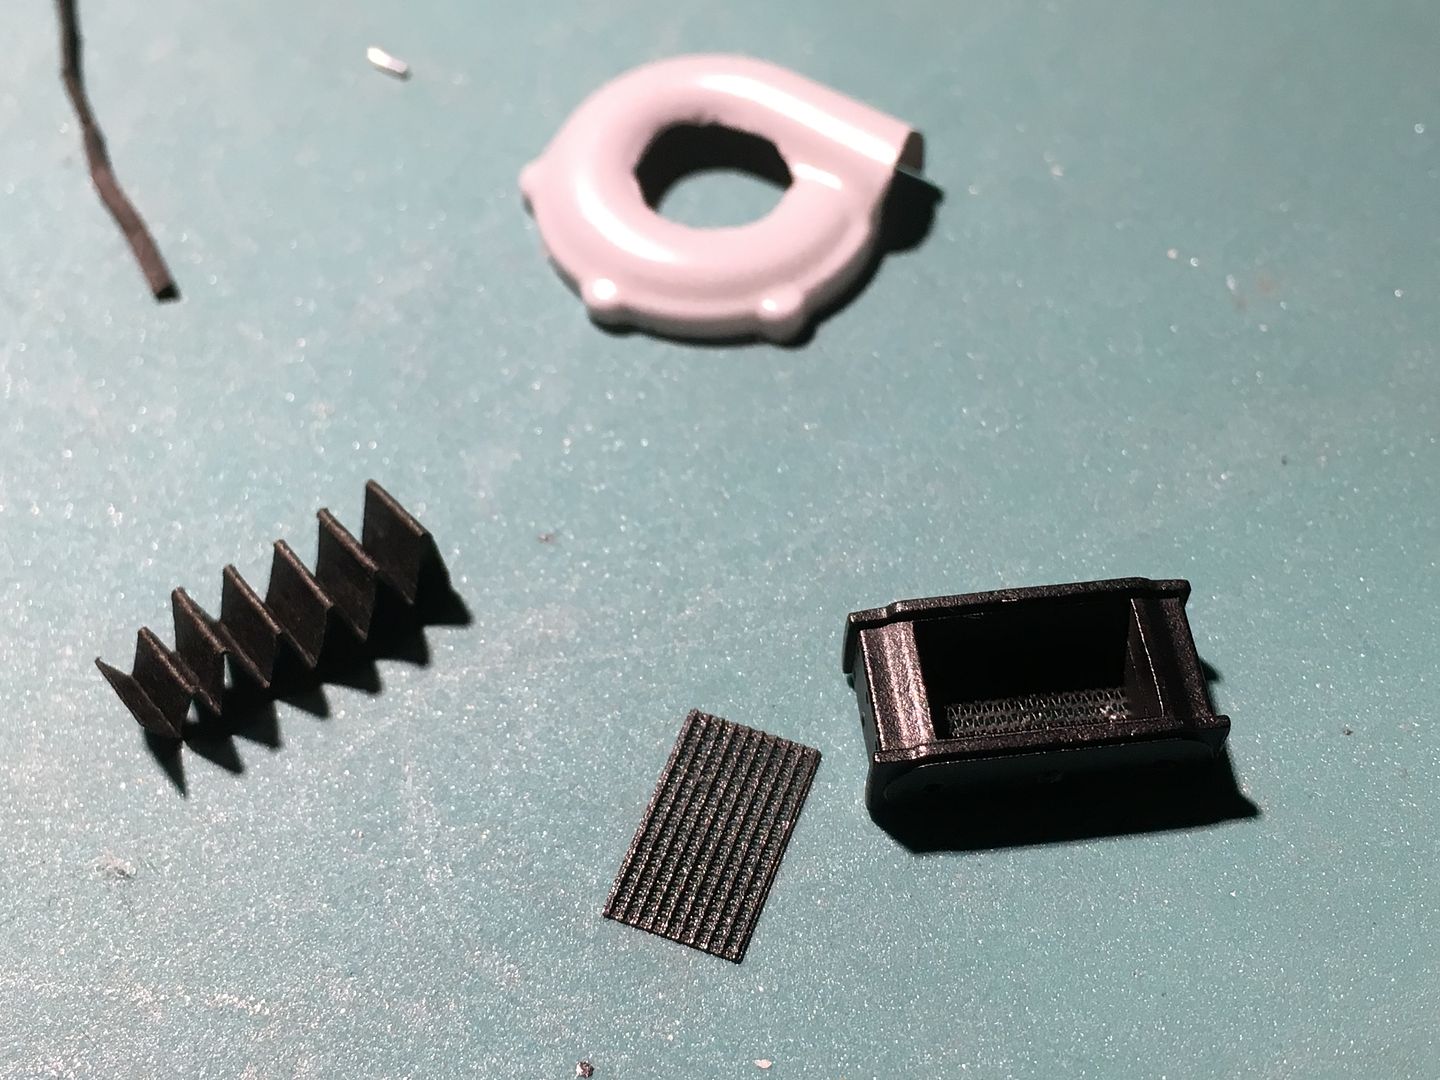
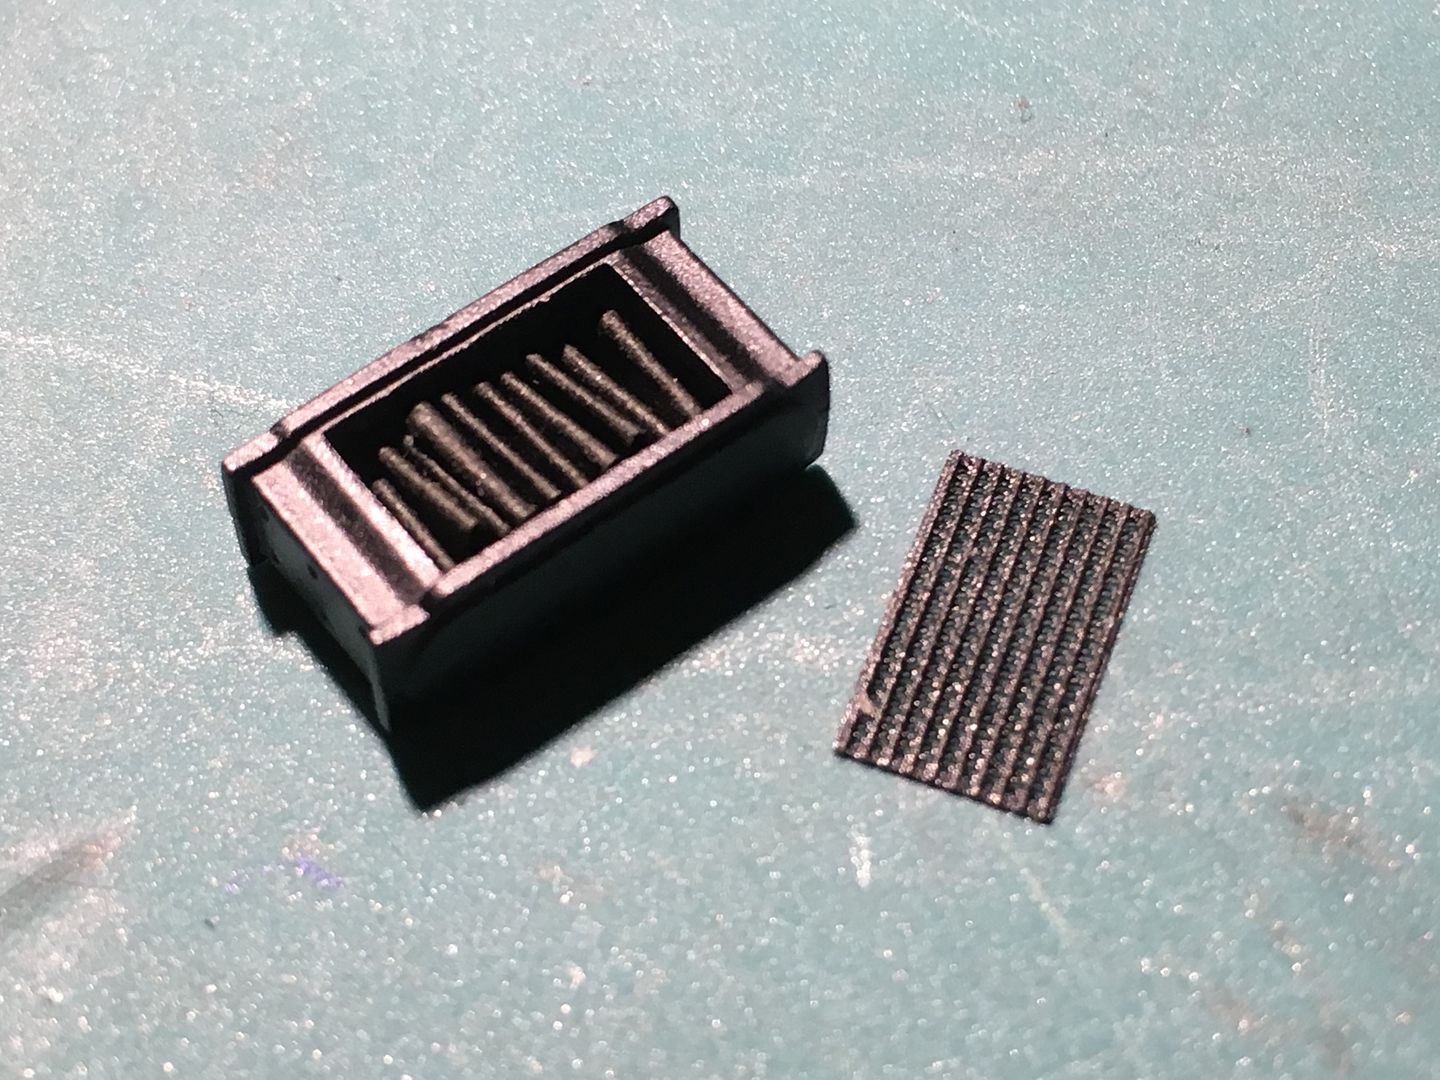
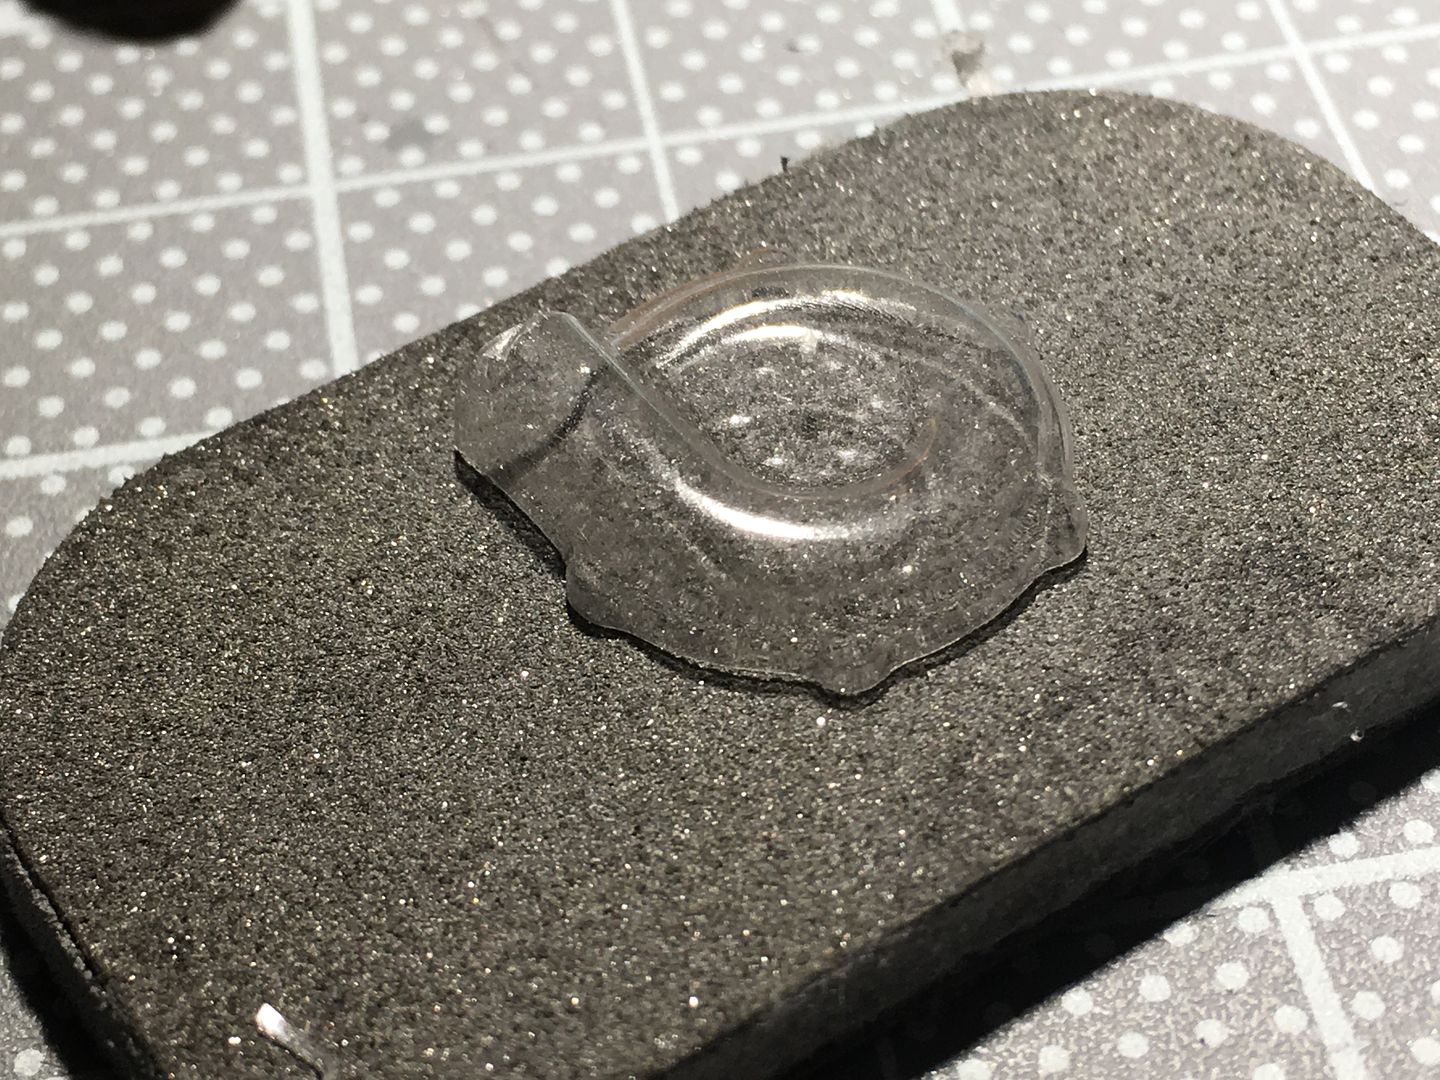
The snail shell behind the rad is to cover the turbo - it is a carbon heat shield that comes as a vacuum formed part in the MFH kit - a b*gger to cut out neatly and level. The kit says spray black, but pictures show the carbon , so I will try and add carbon decal to it...
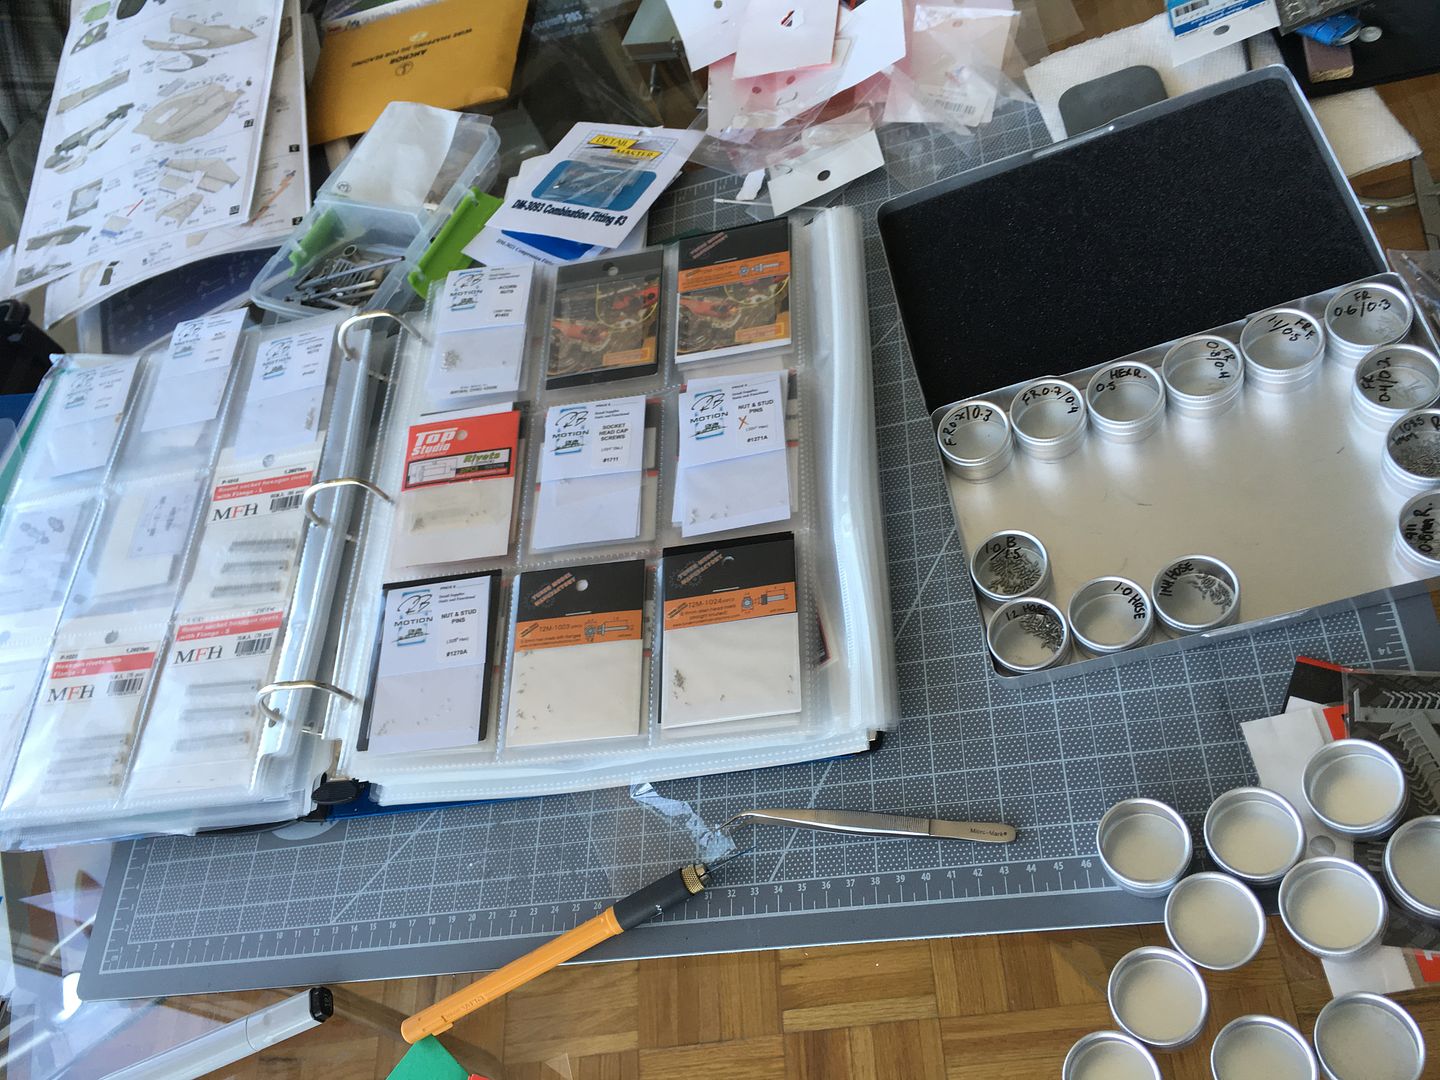
Spent a lot of time 'sorting' detail bags (bolts etc) - still looking for the easiest solution!
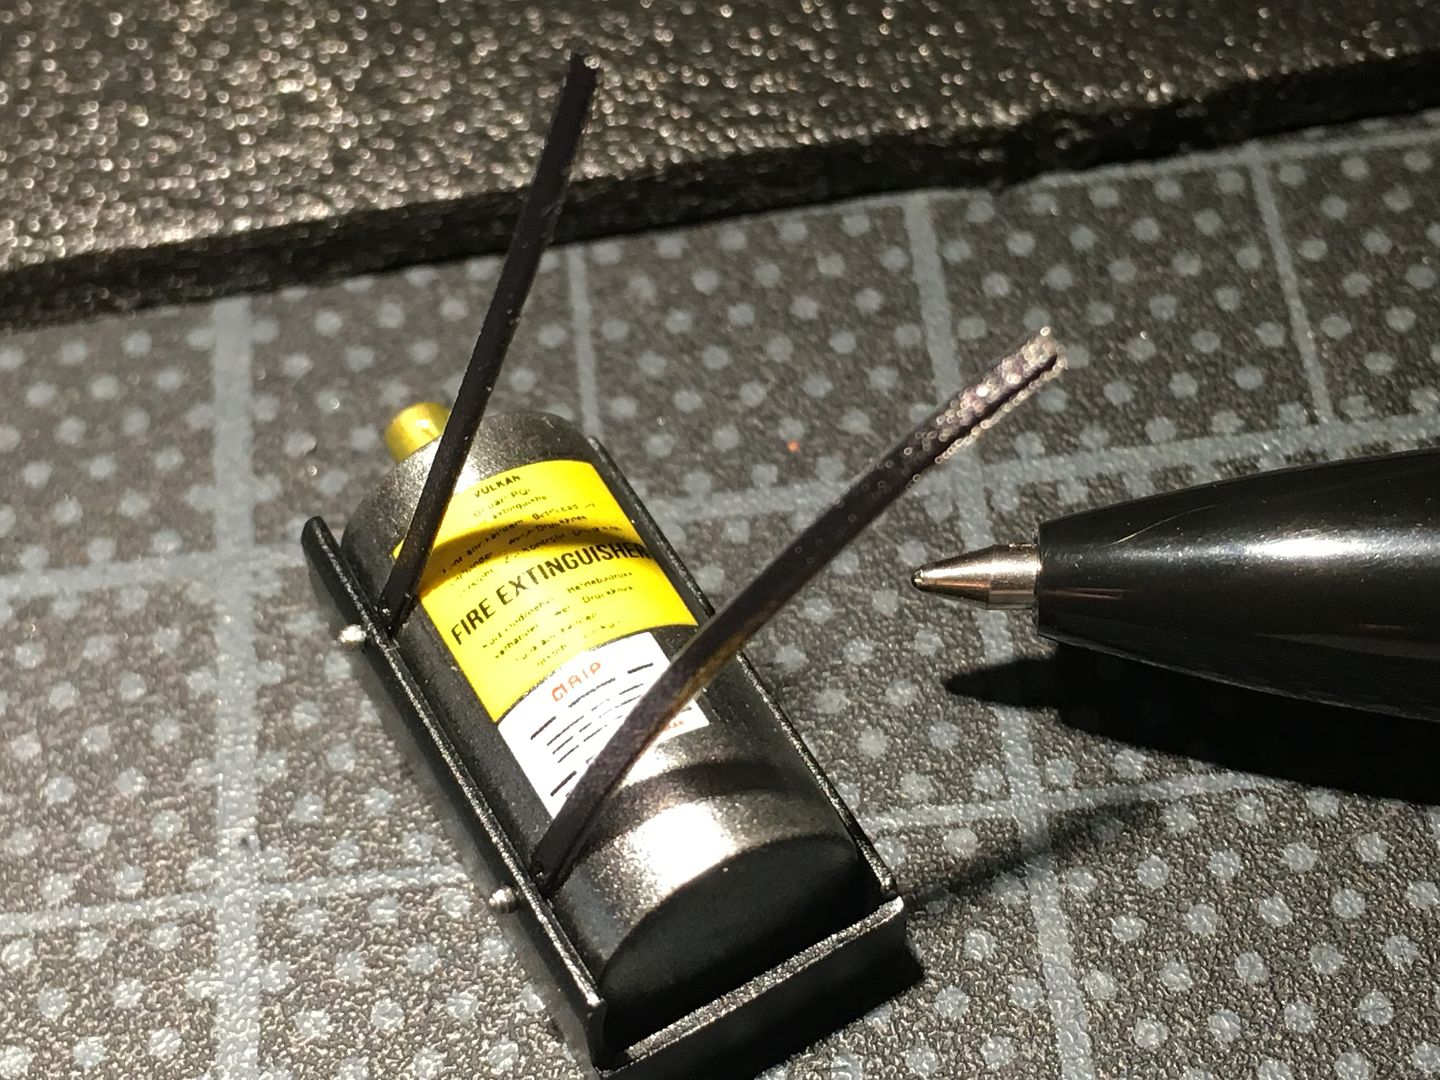
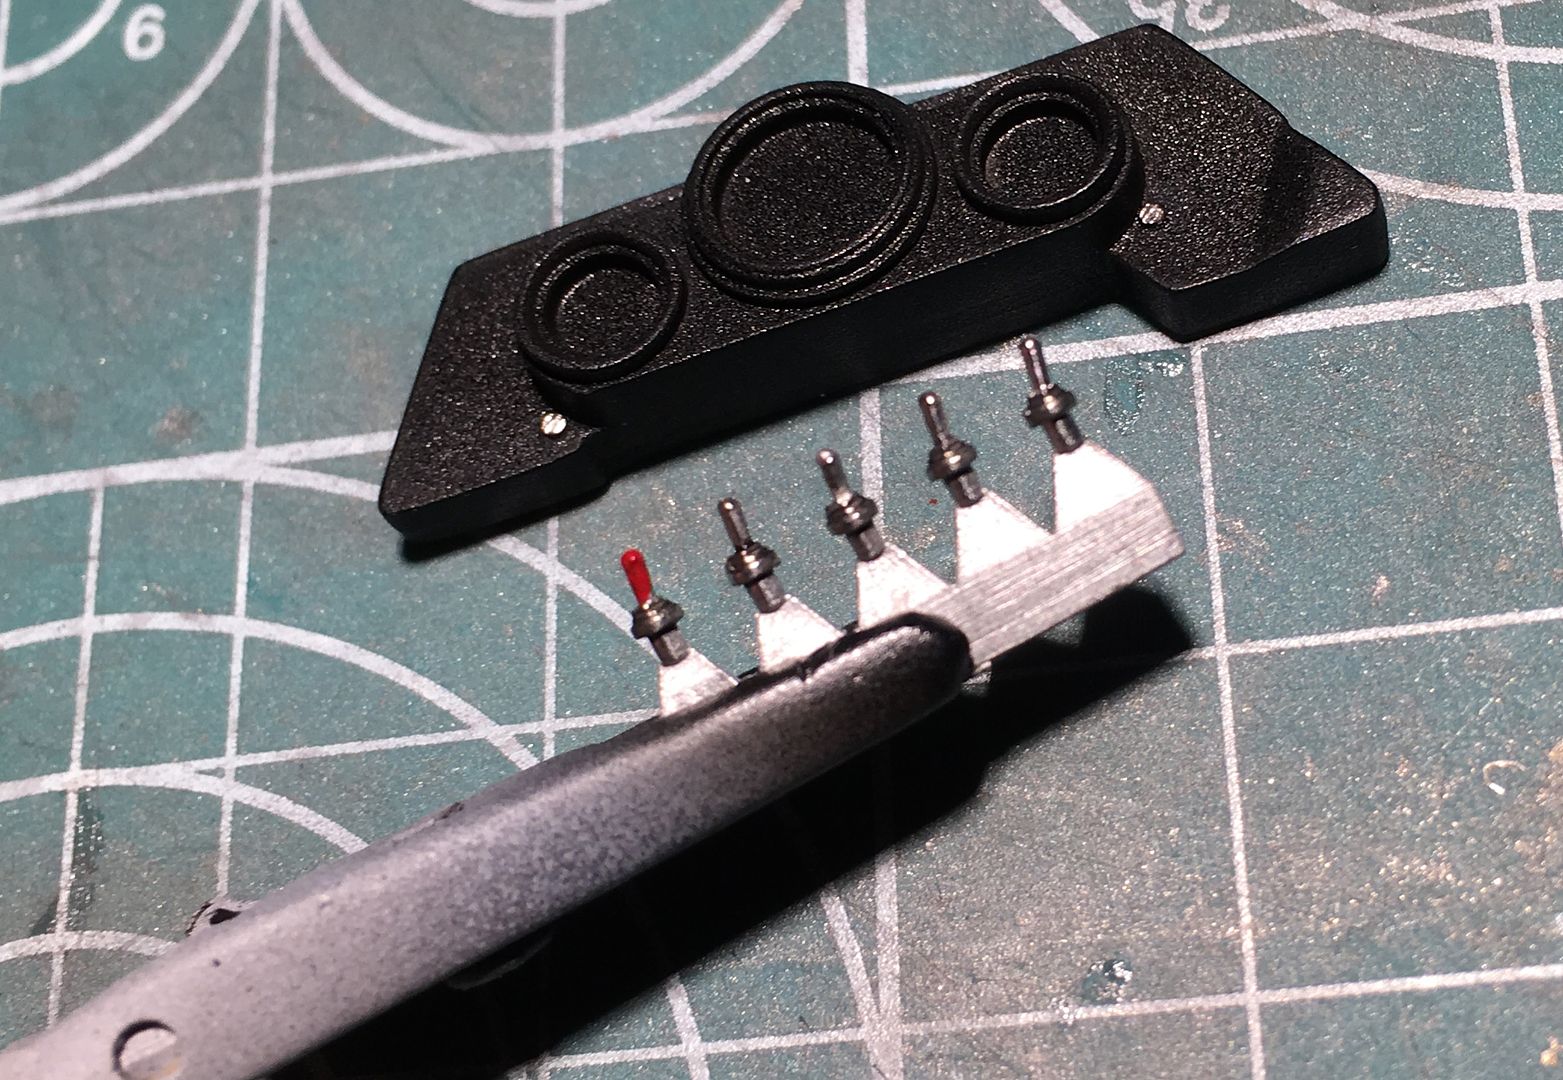
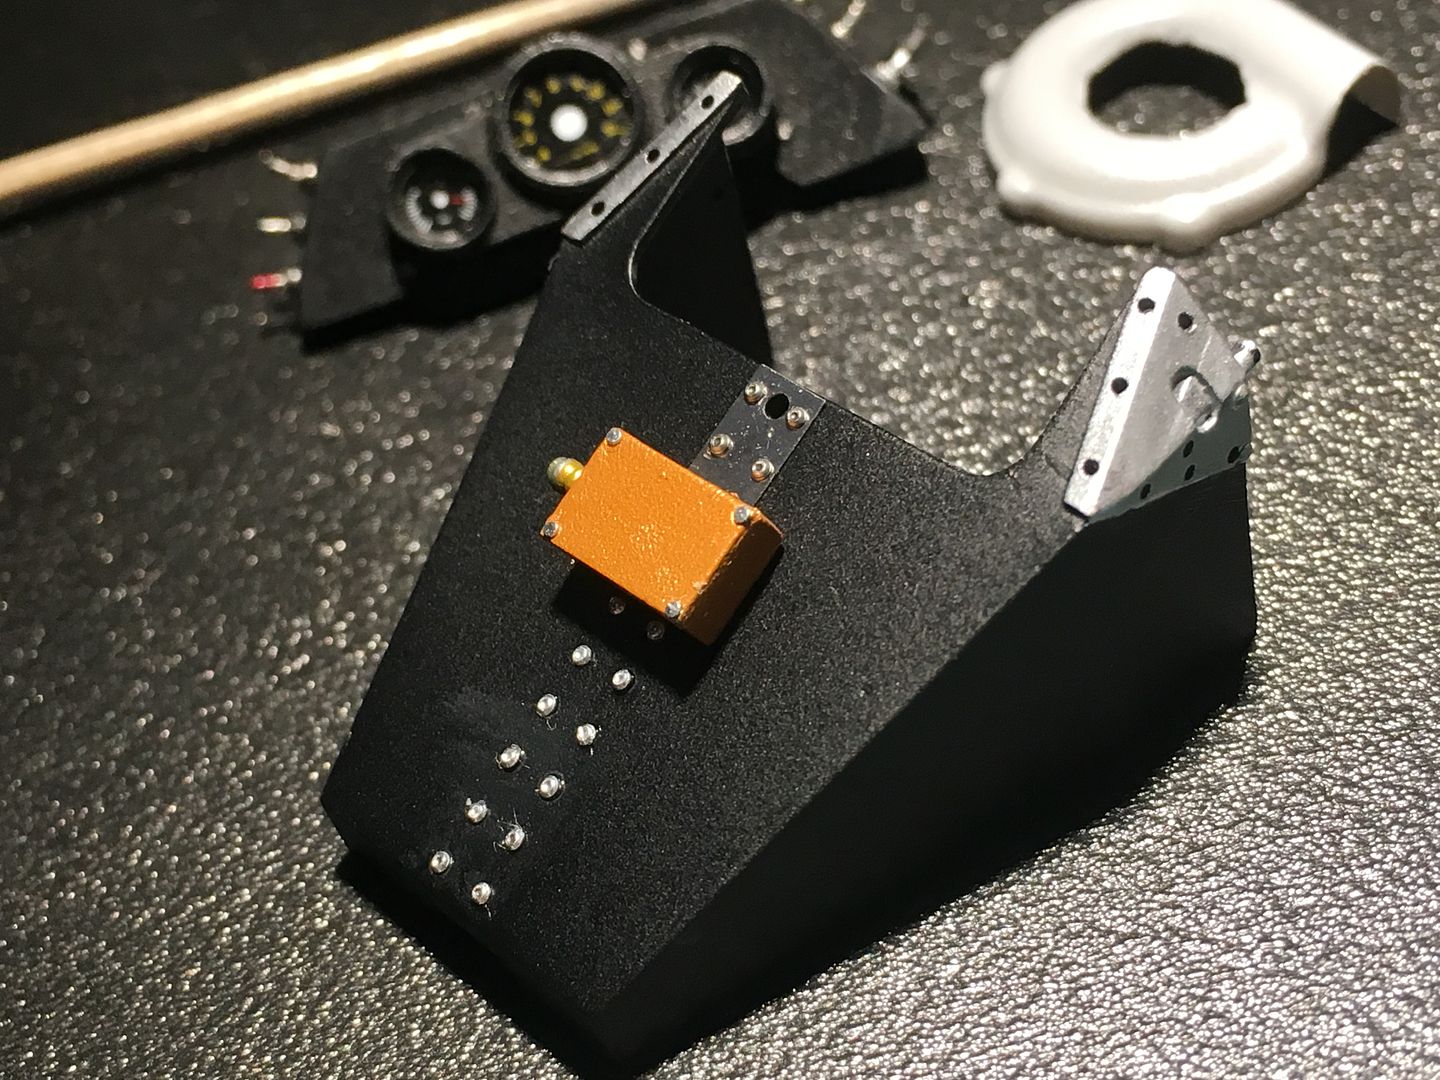
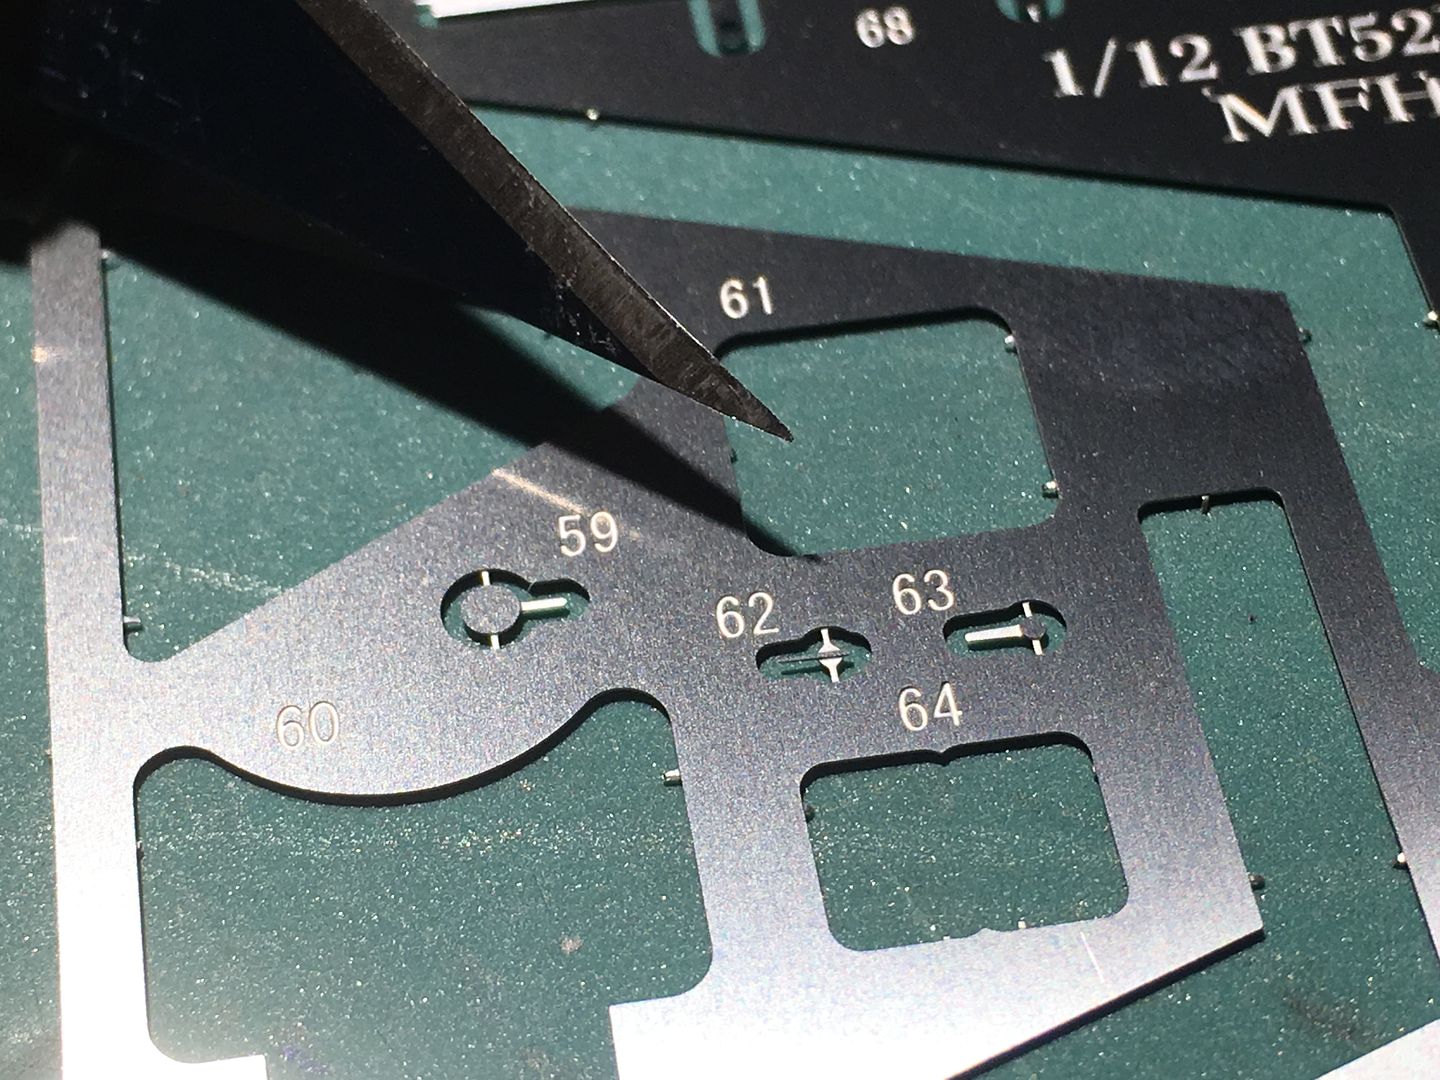
The smallest PE parts in the kit - needles from the dash!
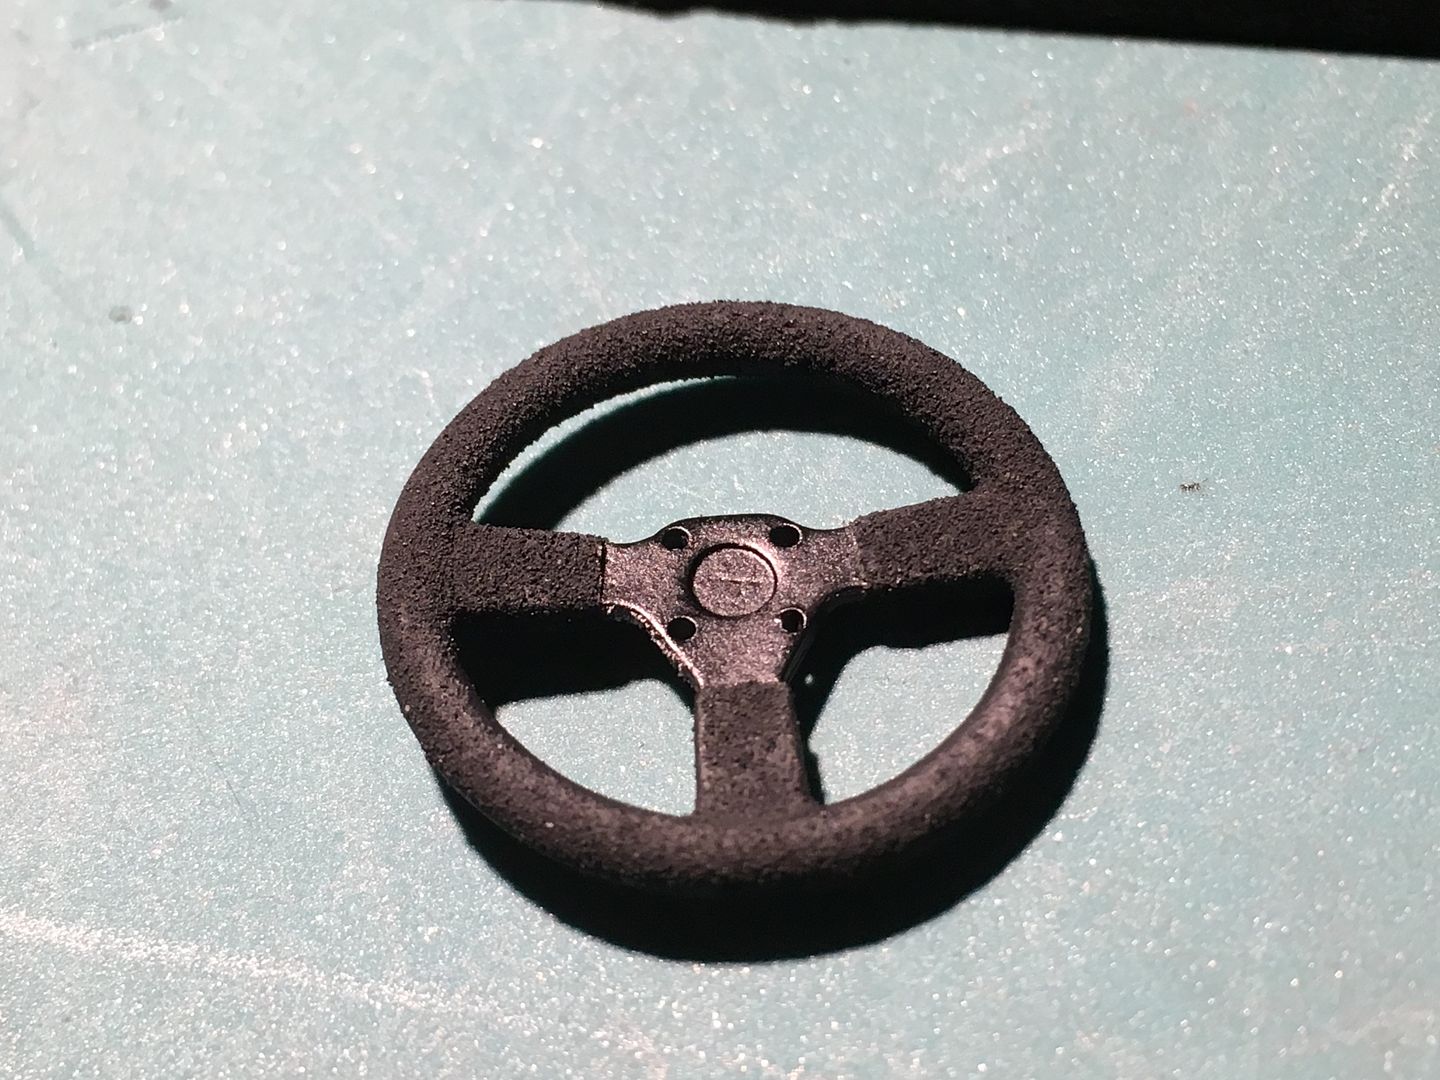
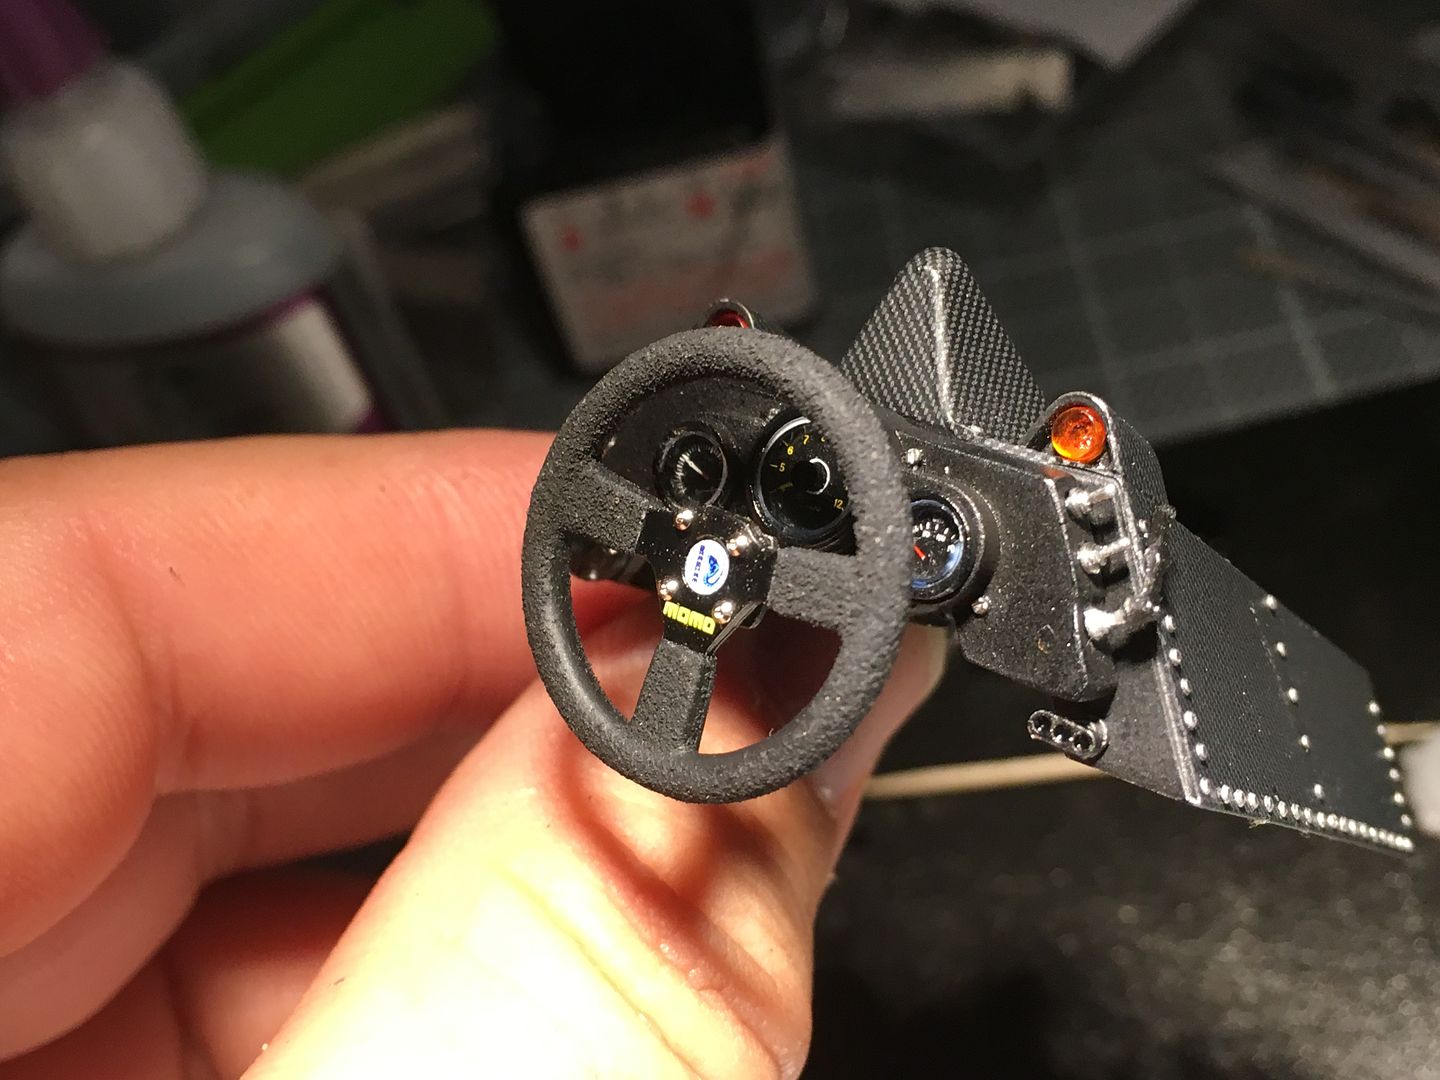
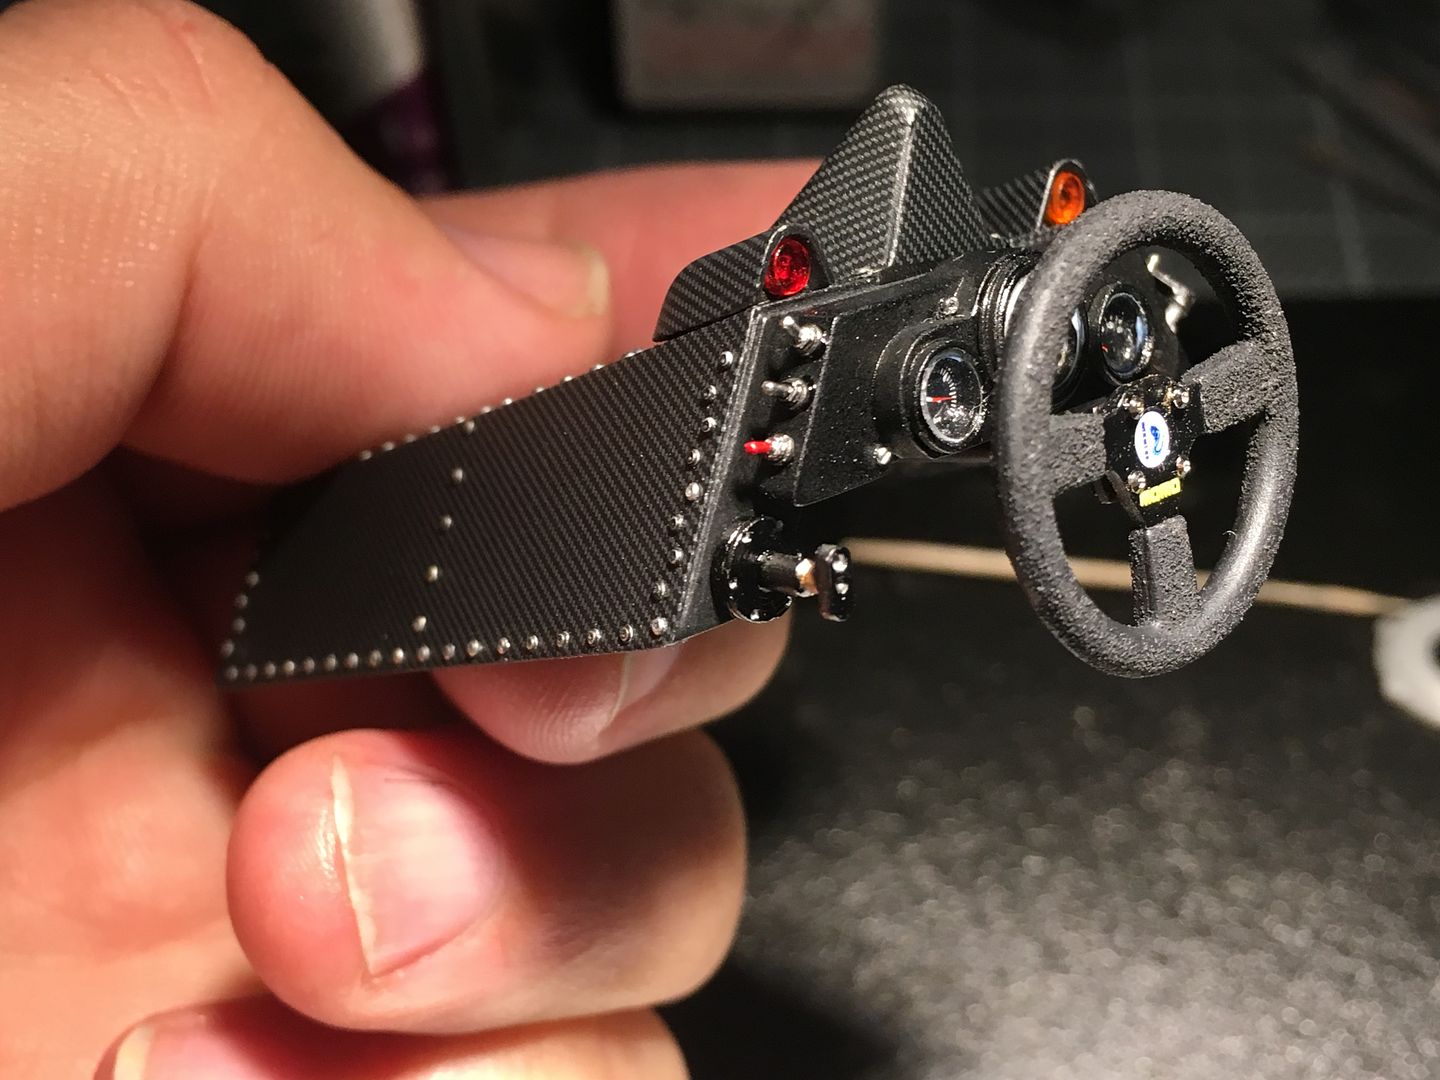
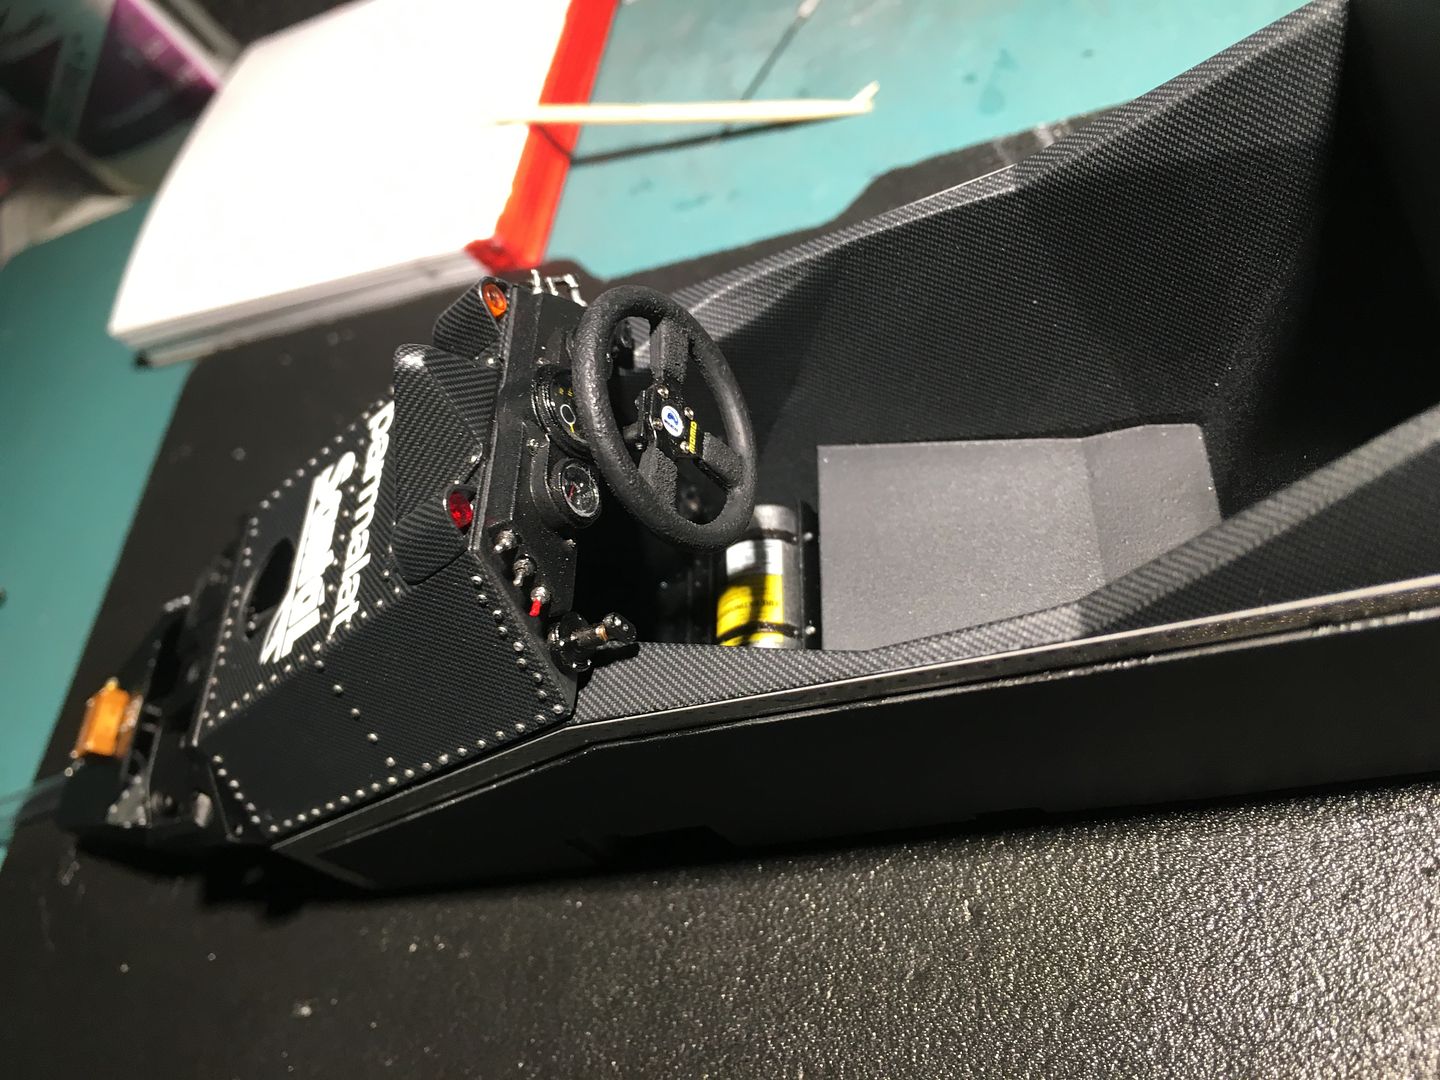
Steering wheel - I was just going to use Tamiya 'black rubber' to paint the rim, but succumbed to using a texture, as the contrast wasn't enough. I used flour, as I wanted as fine as possible - looks ok!
...but no choice!
More riveting on the chassis nose...
See that little shiny dot on the green mat, right of the box - that is a rivet for that orange box - absolute b*gger to actually handle!
This little radiator on the gearbox is 'hollow' - so the light shines through the mesh and shows that there is nothing in...I added some folded black paper to block the light. You can't see it behind the mesh now it is dark...
The snail shell behind the rad is to cover the turbo - it is a carbon heat shield that comes as a vacuum formed part in the MFH kit - a b*gger to cut out neatly and level. The kit says spray black, but pictures show the carbon , so I will try and add carbon decal to it...
Spent a lot of time 'sorting' detail bags (bolts etc) - still looking for the easiest solution!
The smallest PE parts in the kit - needles from the dash!
Steering wheel - I was just going to use Tamiya 'black rubber' to paint the rim, but succumbed to using a texture, as the contrast wasn't enough. I used flour, as I wanted as fine as possible - looks ok!
So this was brave!
had to trim a small piece of the resin tub to enable the PE strip to fit properly. managed to not damage any of the carbon bits!
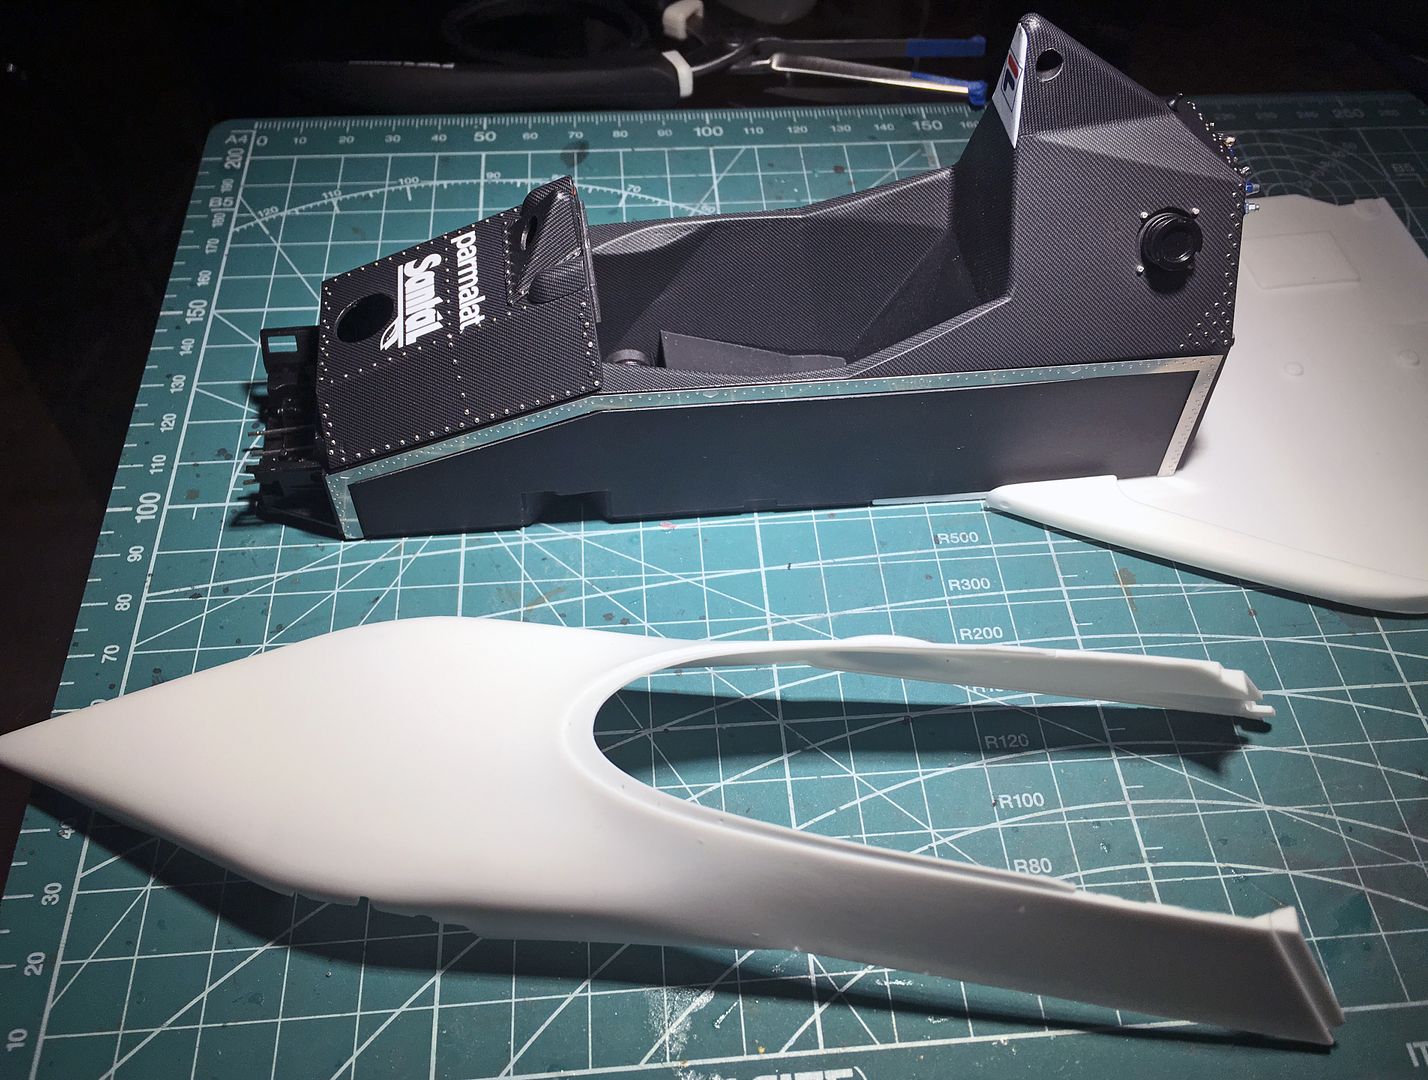
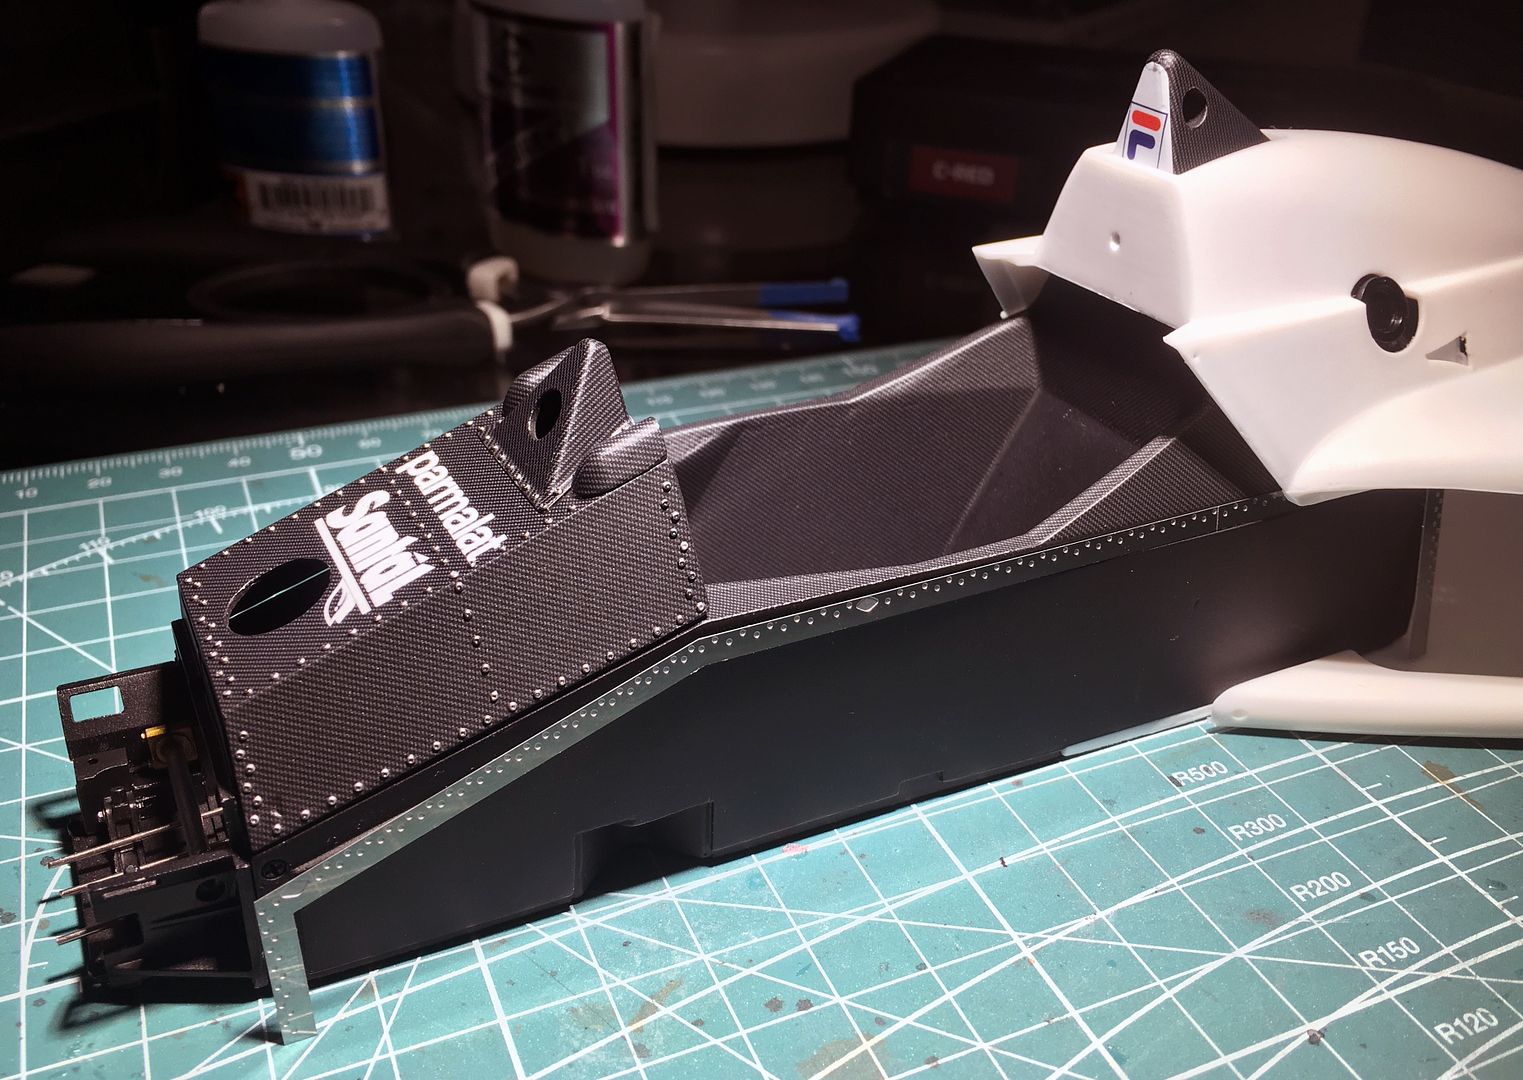
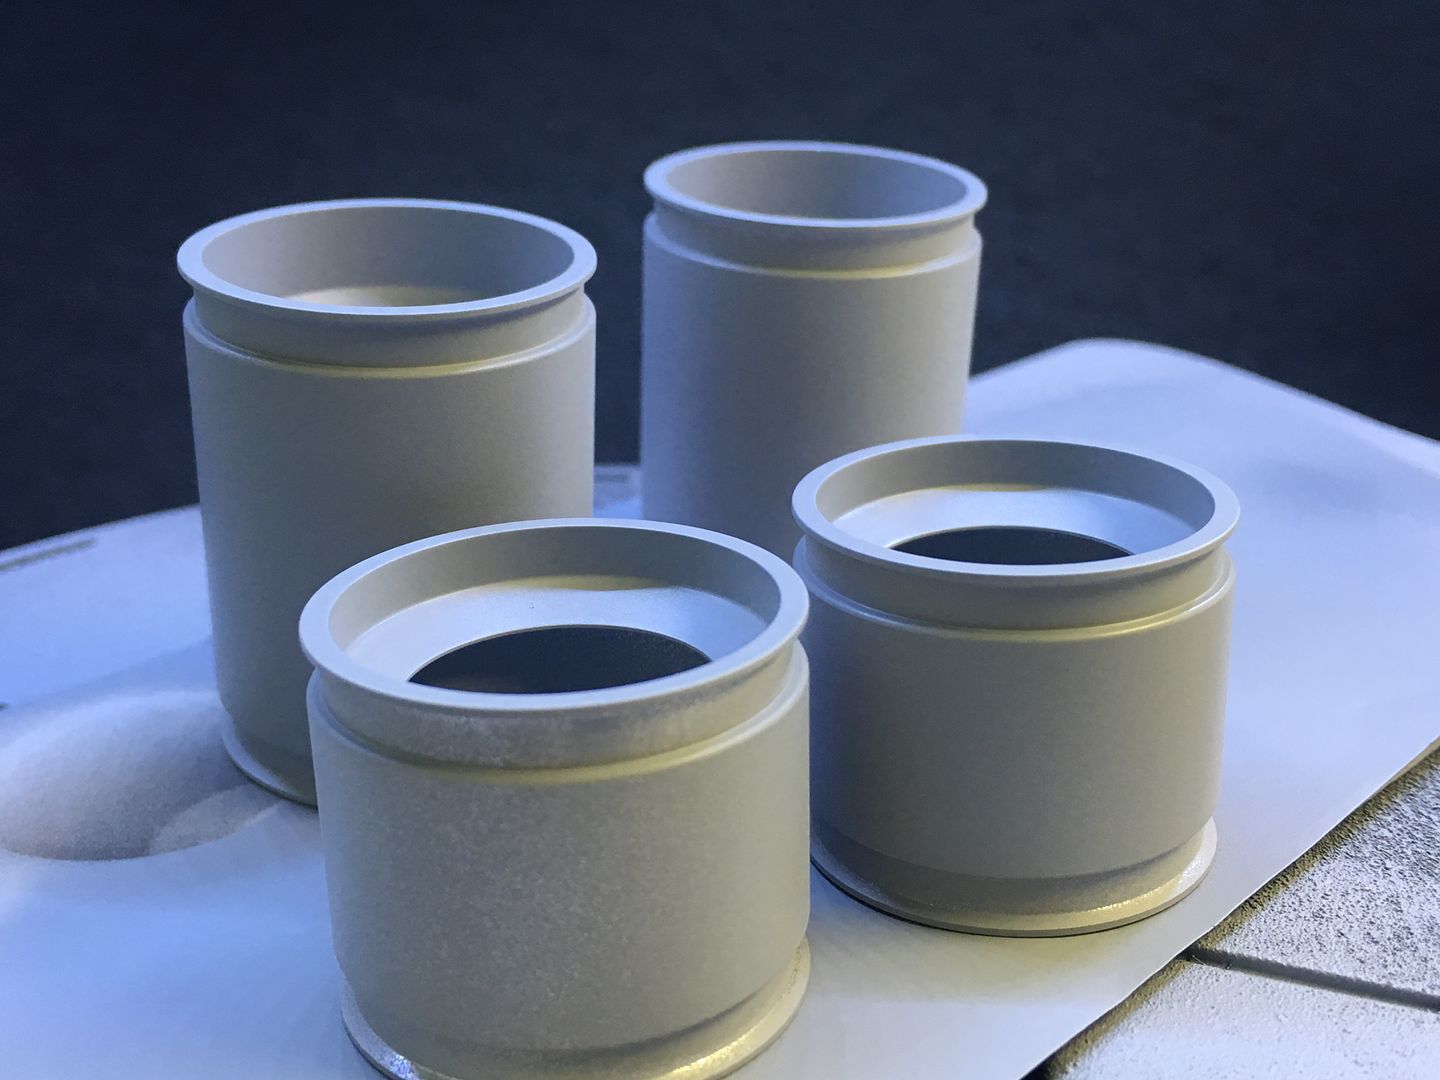
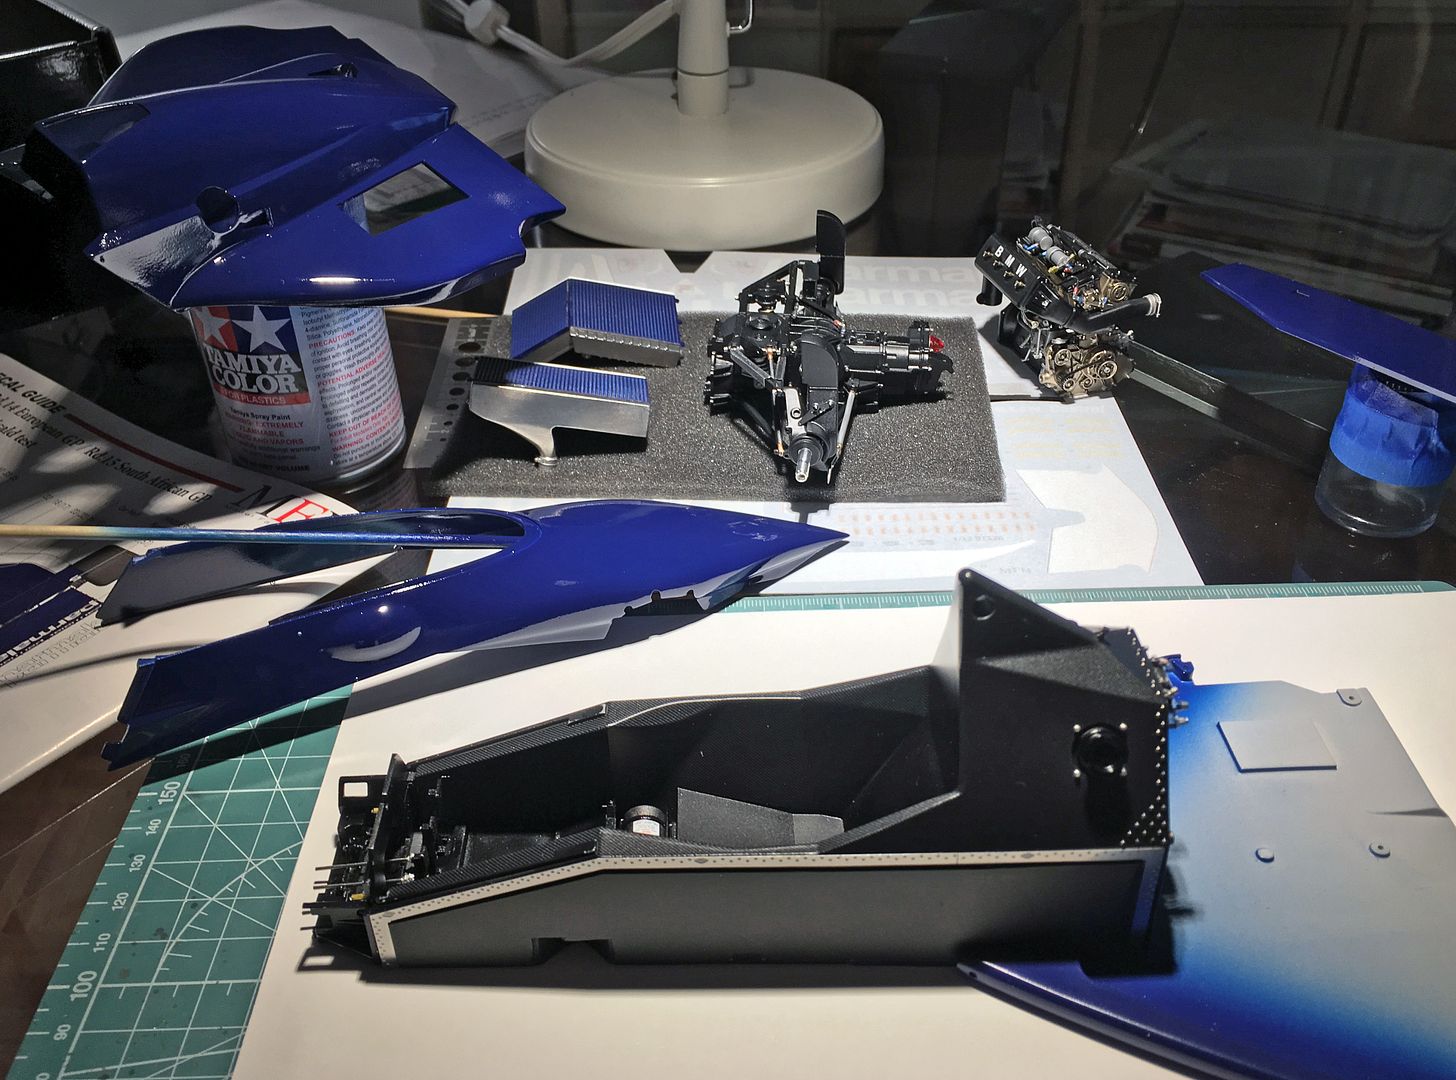
Can't assemble the front suspension until I have fixed the side panel - can't do that until it is sprayed blue. Was waiting for the Zero BT52 paint to arrive, which it just did, so I cleaned up and primed the main body parts - I've never used Zero paints before, so I wanted to do all the big bits at the same time so everything matched - wings will come later...
Also had to paint some radiator and side pod parts the body colour before assembling.
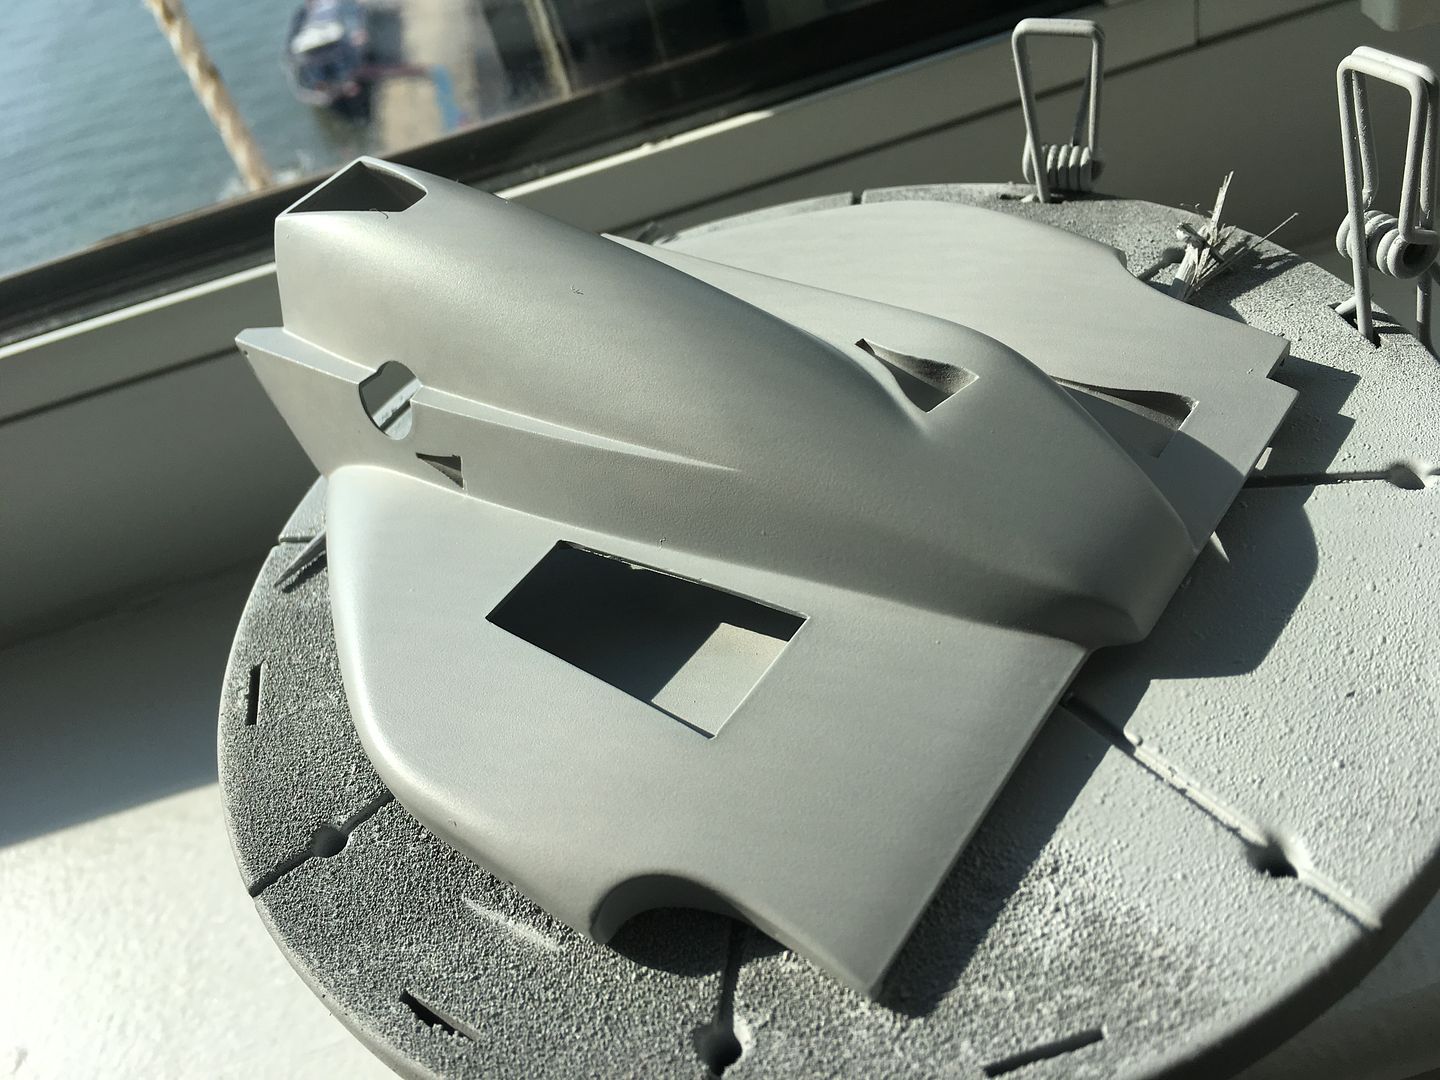
Some mocking up...
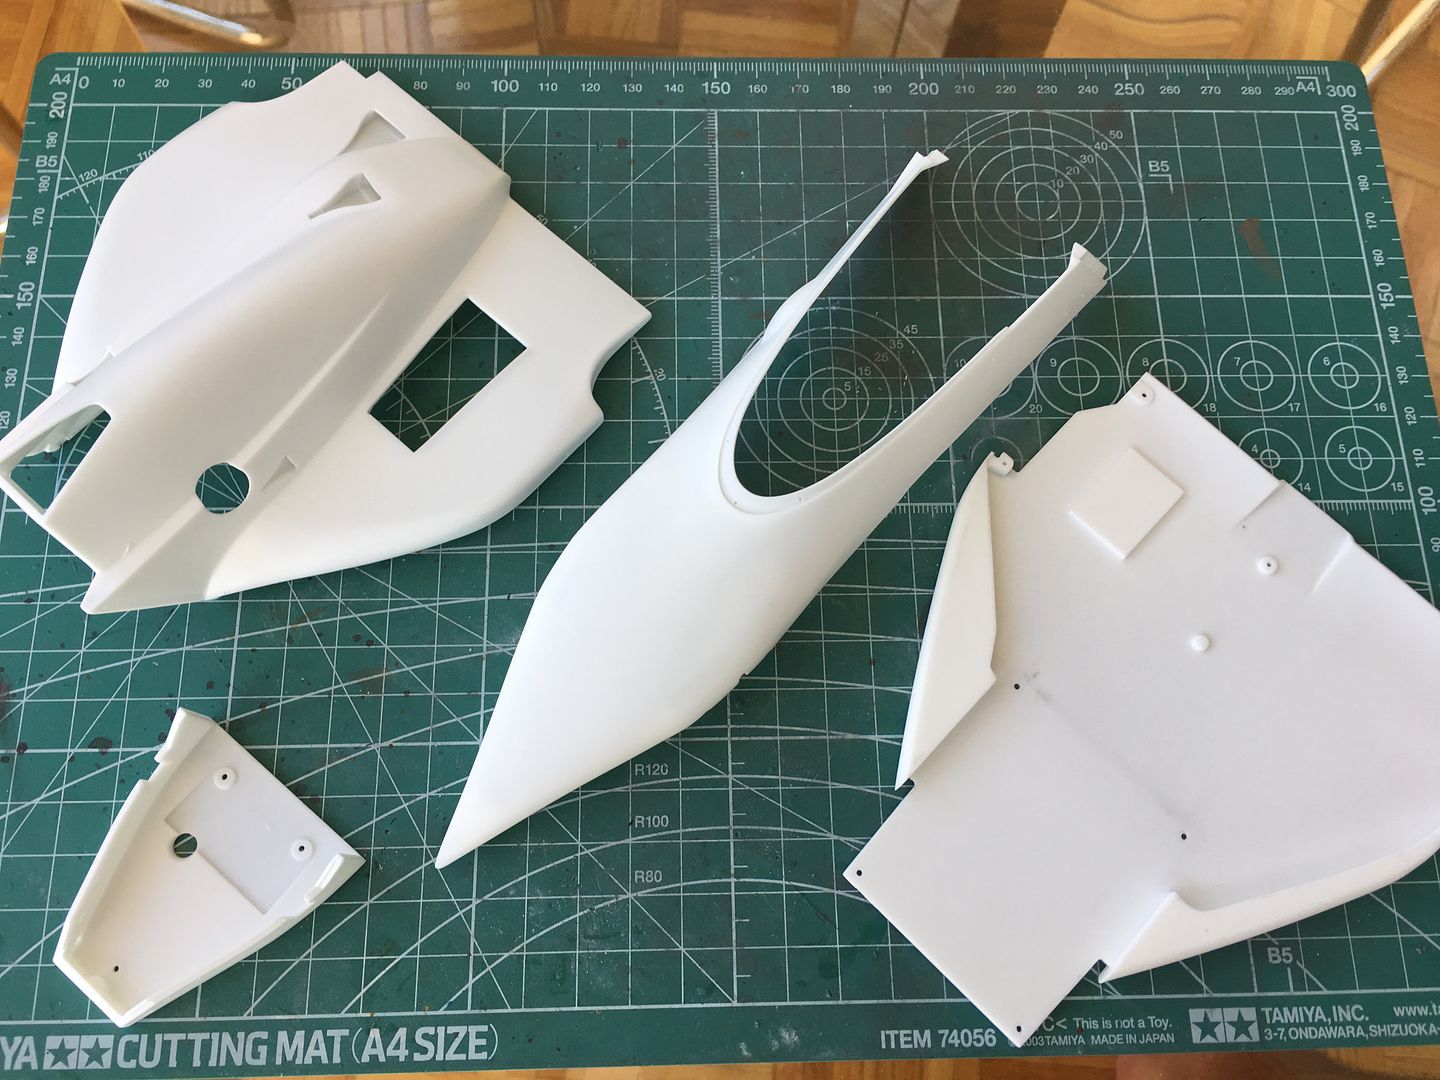
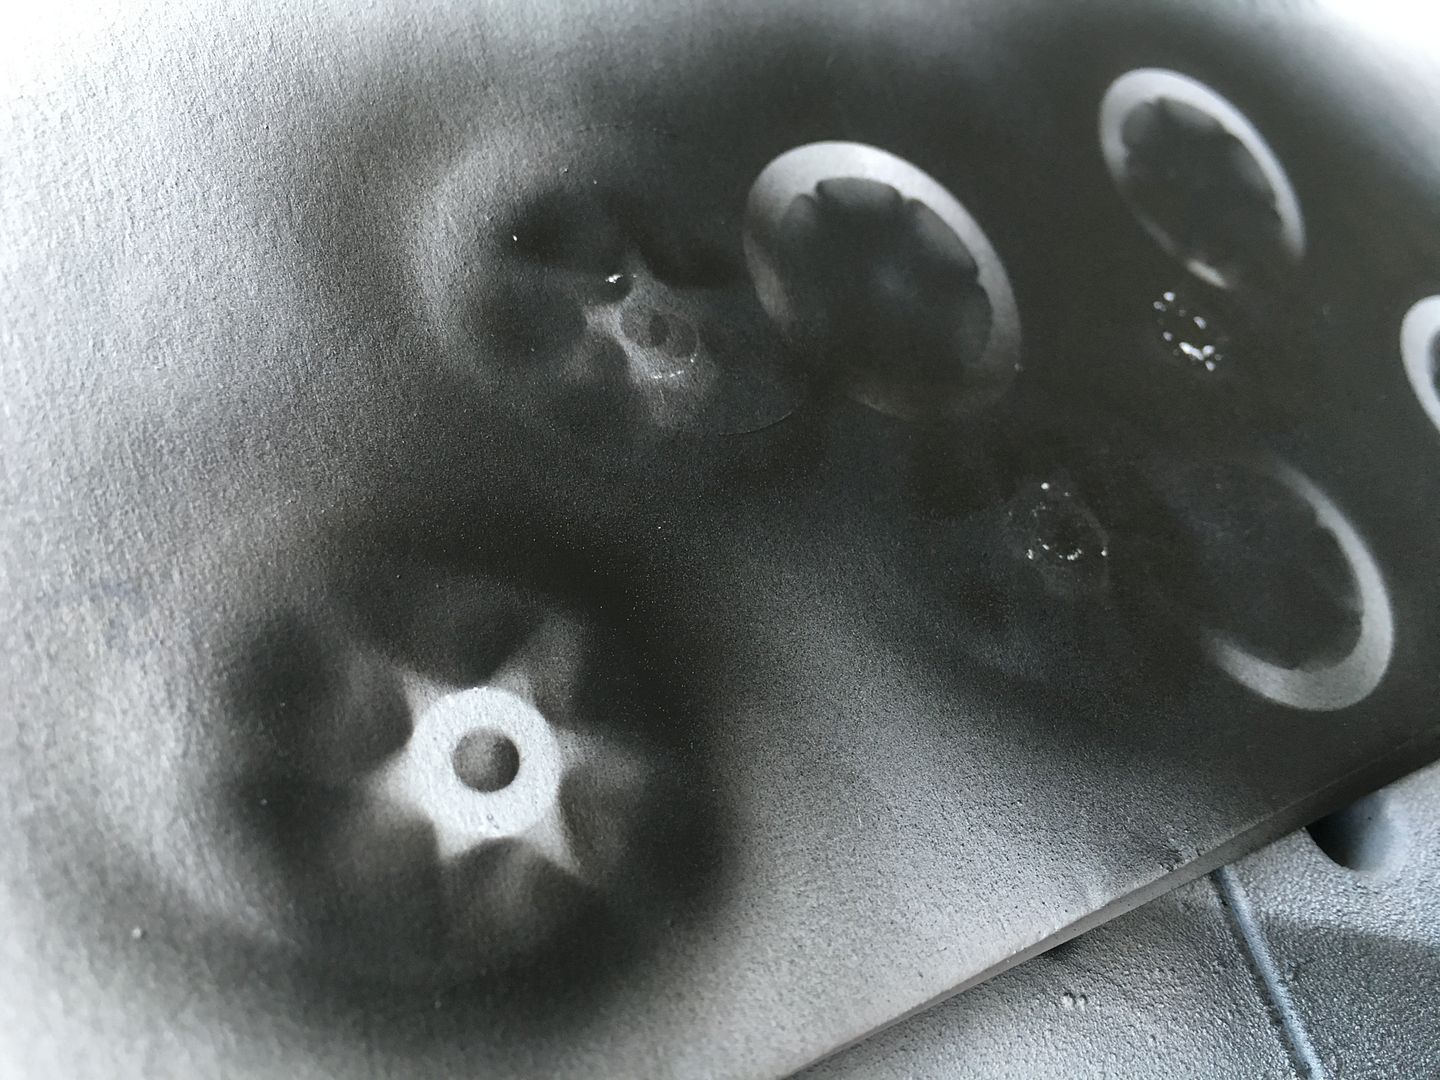
Used Tamiya Fine Surface Primer....
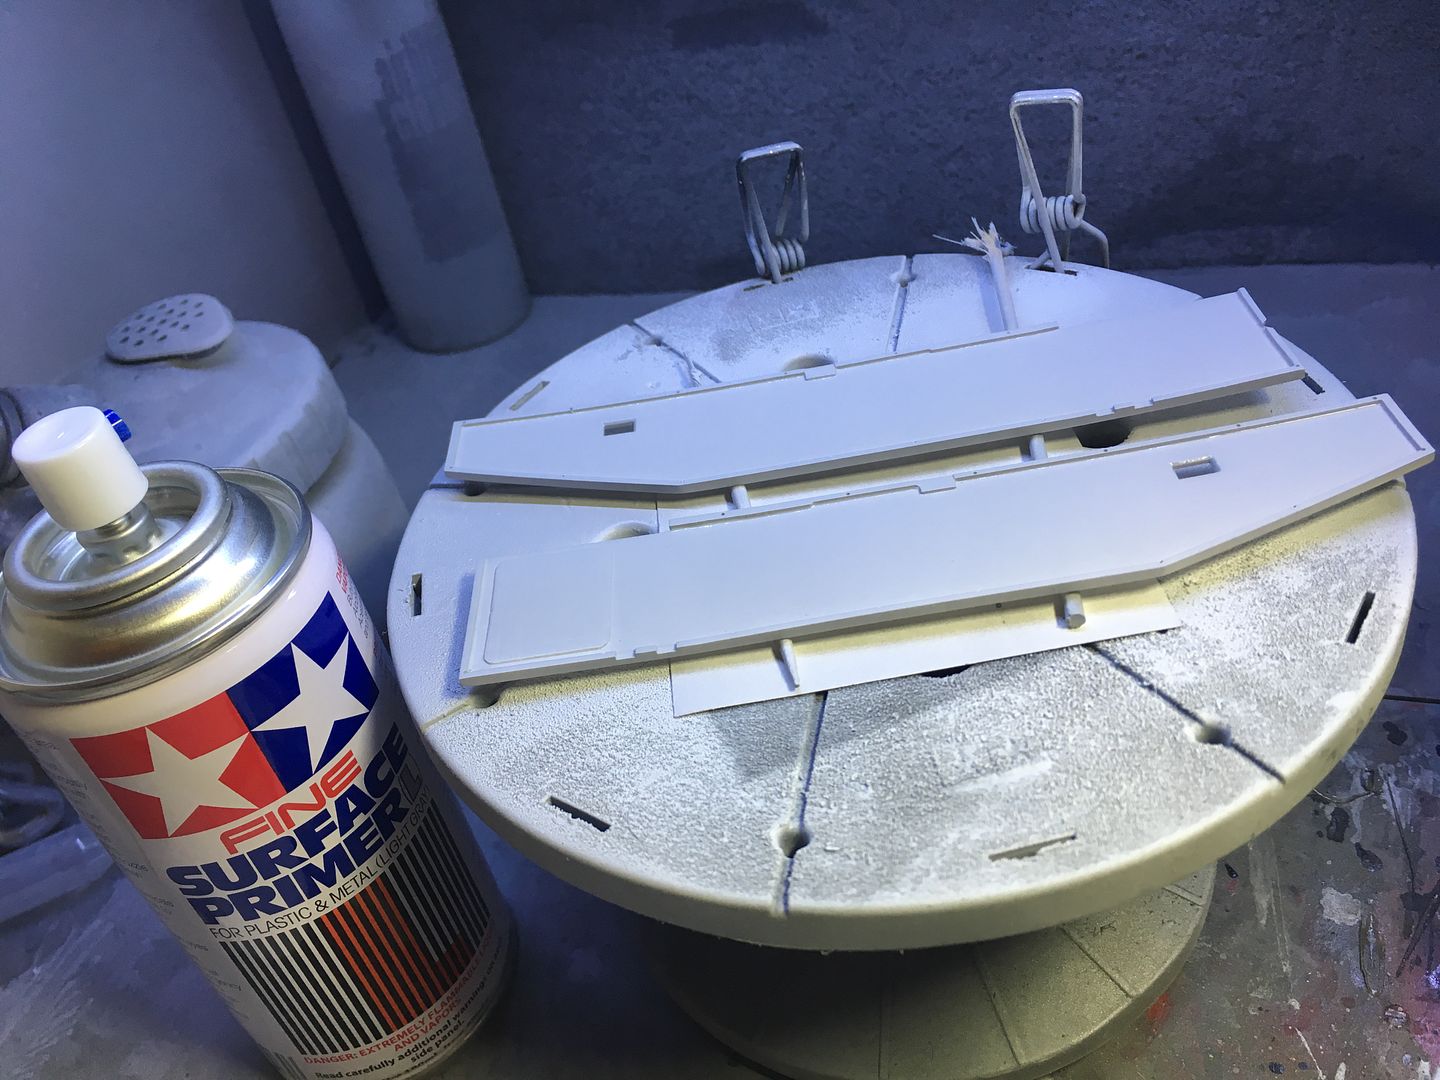
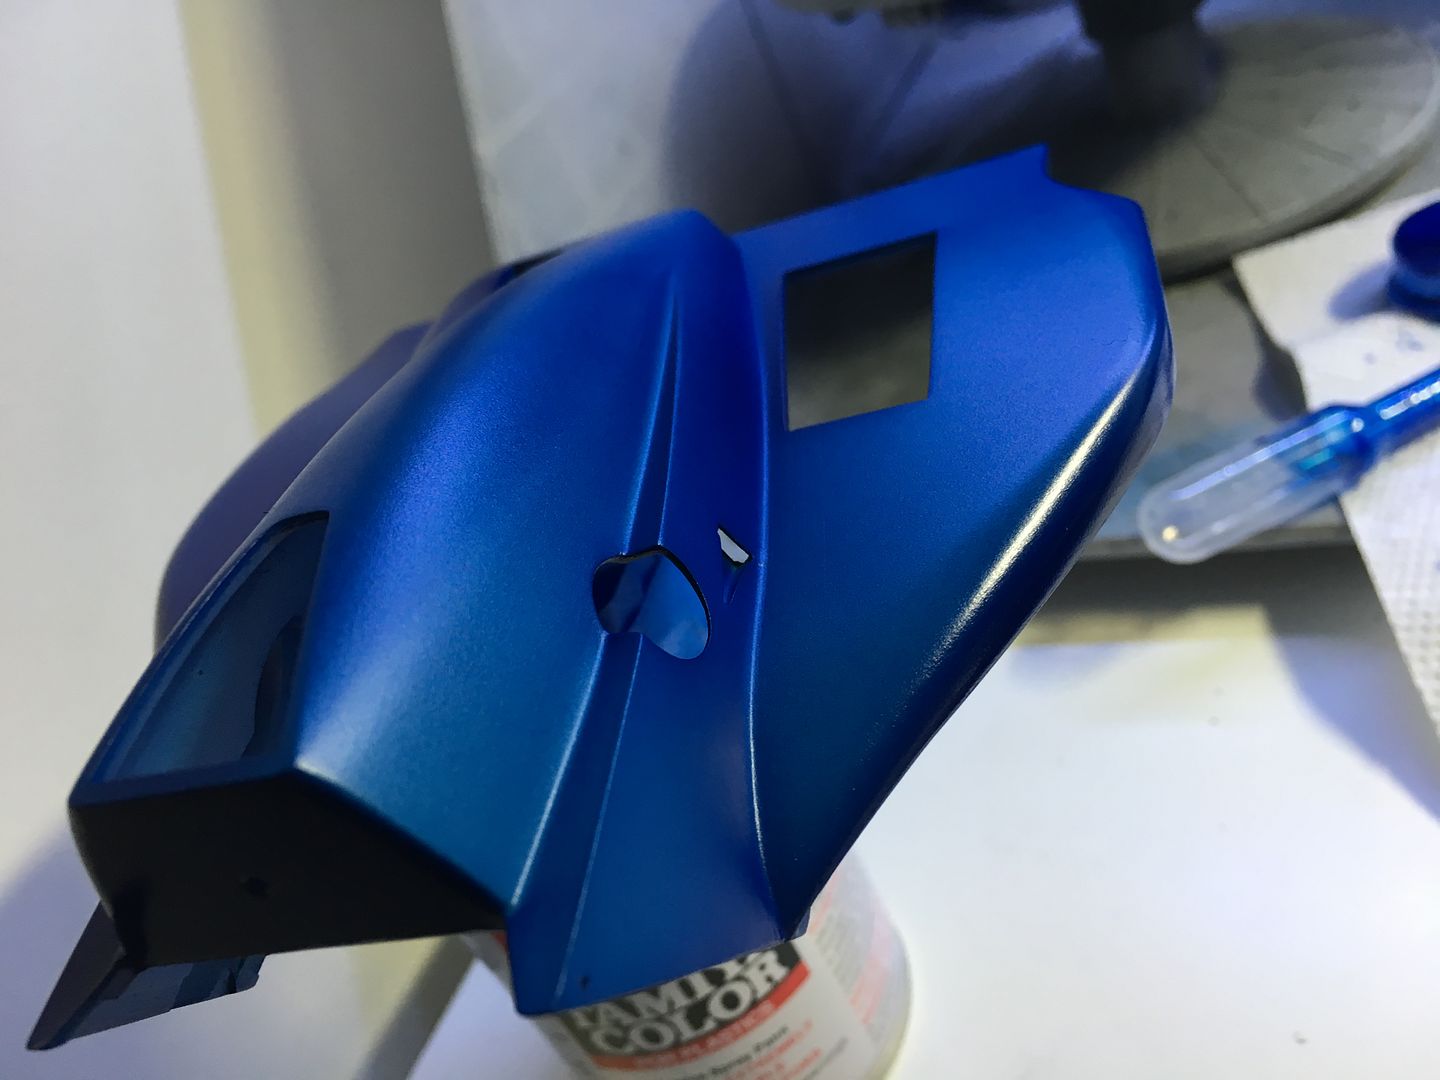
So here goes with the paint. Followed advice and tutorials from here, and built the color up gradually - in these pictures we are about halfway through the layers - here the paint looks light and metallic, but after a few more coats it became darker....loved the way it went on - very easy to build up. I'm not using 2K clear coat - I simply don't have the space/location to use the potent stuff - so I am using the Zero pre-mixed 1K clearcoat...
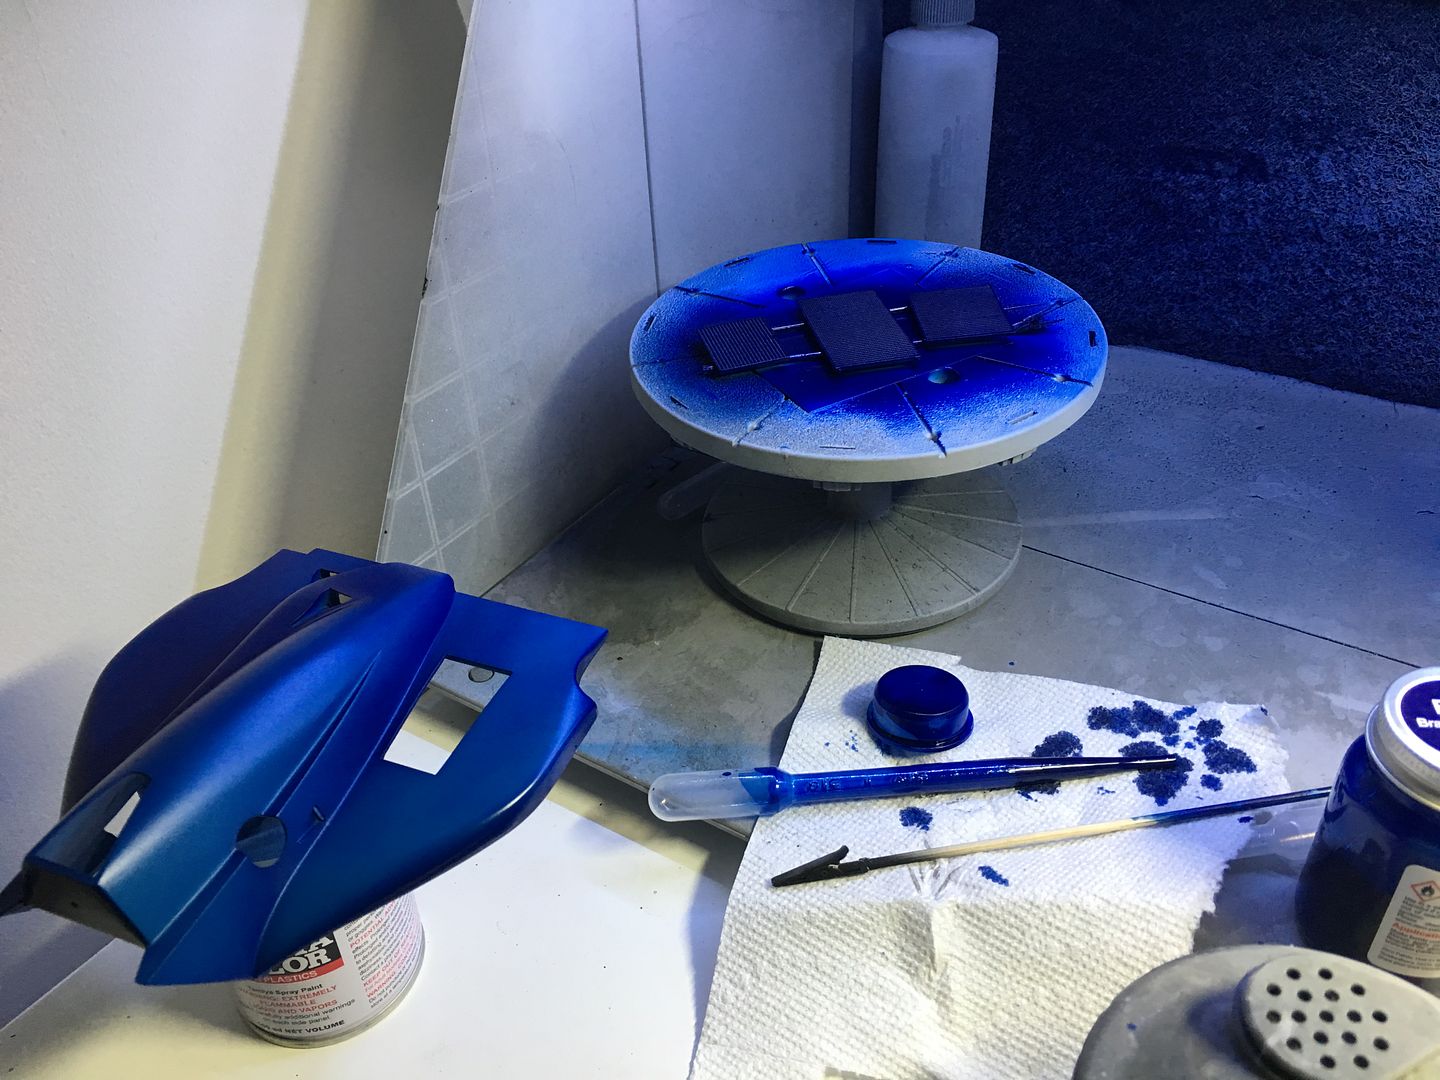
Managed to get paint on all the stuff I needed before disaster struck!
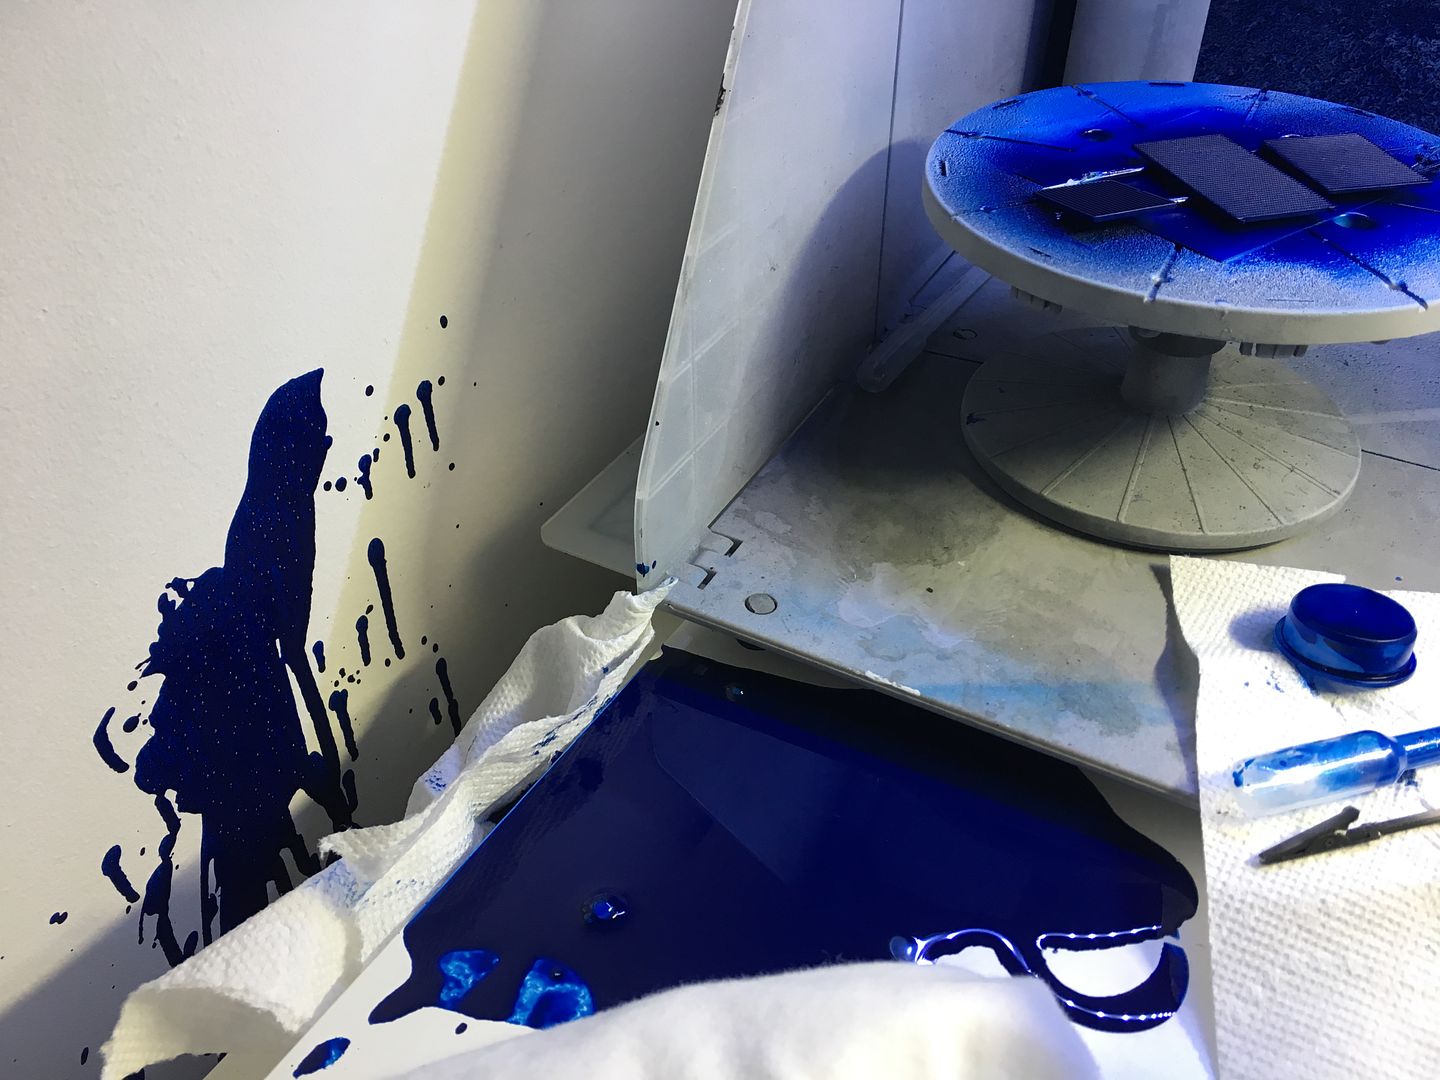
Cock!
Got some wall and floor re-painting to do now aswell - and have had to order another Zero blue paint, having spilt over half a 60ml bottle all over the wall and floor - grrrrrrrrrrrrrrrr!!
had to trim a small piece of the resin tub to enable the PE strip to fit properly. managed to not damage any of the carbon bits!
Can't assemble the front suspension until I have fixed the side panel - can't do that until it is sprayed blue. Was waiting for the Zero BT52 paint to arrive, which it just did, so I cleaned up and primed the main body parts - I've never used Zero paints before, so I wanted to do all the big bits at the same time so everything matched - wings will come later...
Also had to paint some radiator and side pod parts the body colour before assembling.
Some mocking up...
Used Tamiya Fine Surface Primer....
So here goes with the paint. Followed advice and tutorials from here, and built the color up gradually - in these pictures we are about halfway through the layers - here the paint looks light and metallic, but after a few more coats it became darker....loved the way it went on - very easy to build up. I'm not using 2K clear coat - I simply don't have the space/location to use the potent stuff - so I am using the Zero pre-mixed 1K clearcoat...
Managed to get paint on all the stuff I needed before disaster struck!
Cock!
Got some wall and floor re-painting to do now aswell - and have had to order another Zero blue paint, having spilt over half a 60ml bottle all over the wall and floor - grrrrrrrrrrrrrrrr!!
haha - love the ceiling! I'm going to have to get some paint from the building maintenance guy and start layering white over that wall - I was more annoyed that I would then run out of paint while I was in the middle spraying all the body work, but JUST managed to salvage enough to finish the bulk - more on order for the wings etc! I carried on spraying rather than stopping to clean up, so there is probably a bit more on the floor than there could have been lol
I clear coated last night with the 1K lacquer from Zero - it seemed to go on pretty well actually - I am impressed with the Zero paint not running - unlike rattle cans can - same with the clear...I'm happy with the finish - there is a little 'texture' where maybe I should have polished the base coat - or even primer - slightly, but to be honest with this '82 model, I'm not trying for 'mirror finish' - maybe for the McLaren MP4/23 that will be different.
Anyway - this is the first coats to enable me to decal, so then there will be another round of clear coat over that...
The photos tend to show the 'texture' way more than you can actually see - but you can see how much darker the paint becomes once you build up the layers - the first pictures above show the first very thin application...
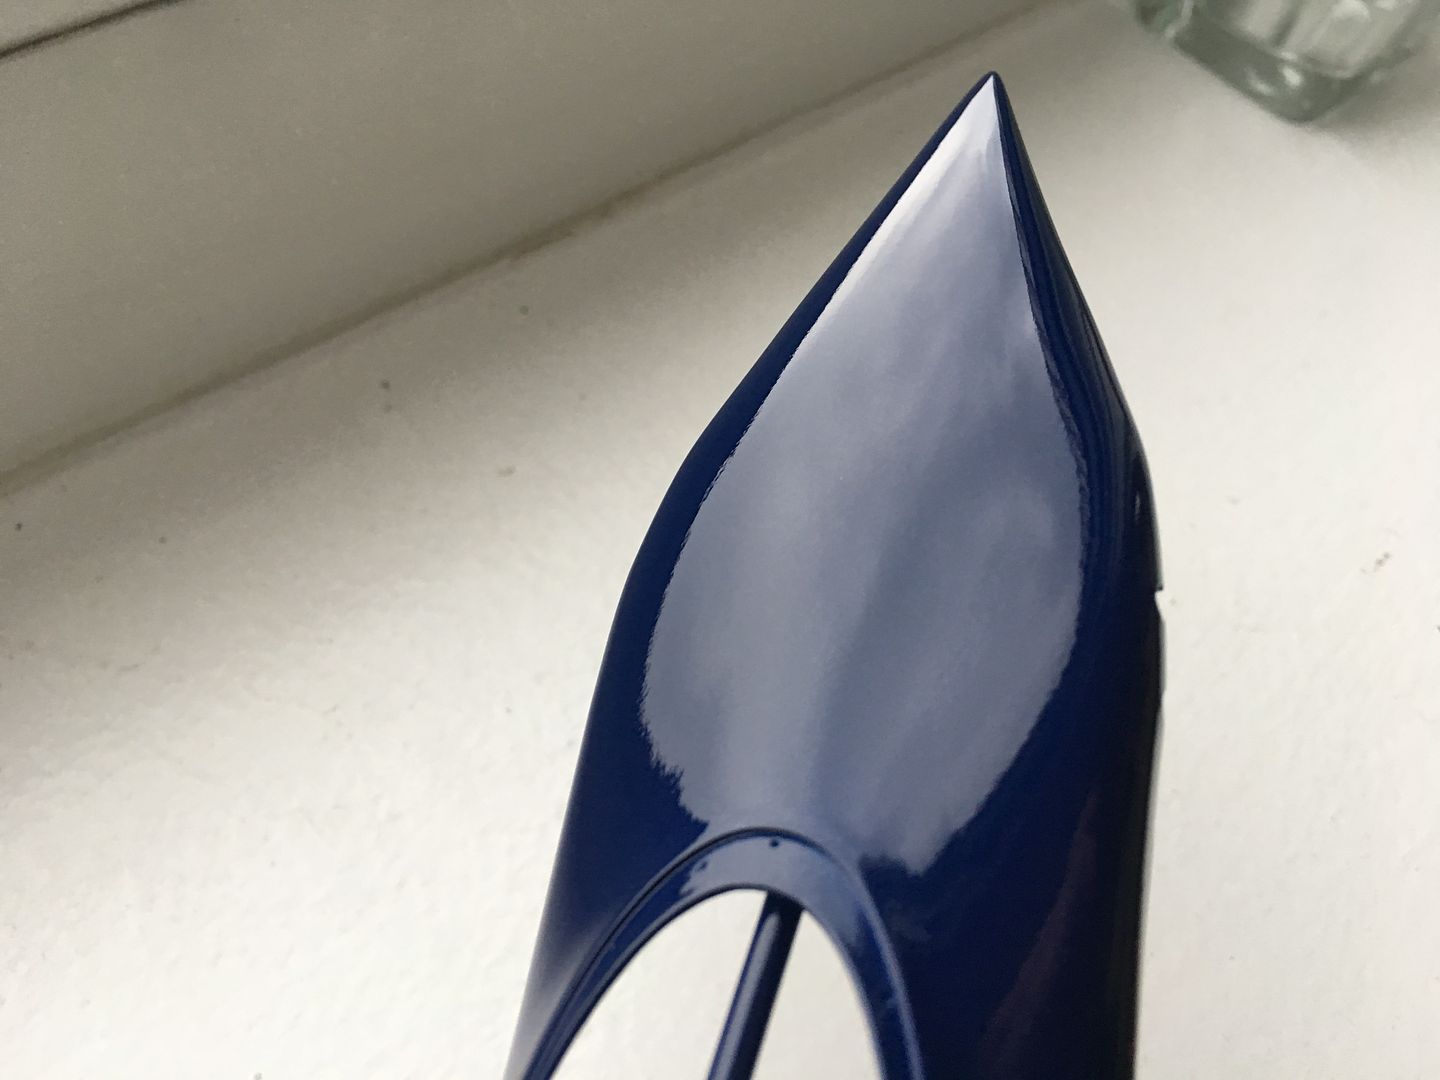

Overall I'm pretty pleased - I just wish I had a 'shed' - spraying in a NYC apartment on the 29th floor is not ideal - can't pop outside and ventilate etc!
First time I've sprayed 'bodywork' and first time with Zero paint - I'm a convert in terms of building up the layers and the way they spray on. I'd like to try 2K but just can't at this point in my home life - maybe in the future when I am back in the UK...
I can start applying the decals now, which will cover a lot of what you see - all the white on the car is decal, so we will see if the blue shows through much!
I clear coated last night with the 1K lacquer from Zero - it seemed to go on pretty well actually - I am impressed with the Zero paint not running - unlike rattle cans can - same with the clear...I'm happy with the finish - there is a little 'texture' where maybe I should have polished the base coat - or even primer - slightly, but to be honest with this '82 model, I'm not trying for 'mirror finish' - maybe for the McLaren MP4/23 that will be different.
Anyway - this is the first coats to enable me to decal, so then there will be another round of clear coat over that...
The photos tend to show the 'texture' way more than you can actually see - but you can see how much darker the paint becomes once you build up the layers - the first pictures above show the first very thin application...
Overall I'm pretty pleased - I just wish I had a 'shed' - spraying in a NYC apartment on the 29th floor is not ideal - can't pop outside and ventilate etc!
First time I've sprayed 'bodywork' and first time with Zero paint - I'm a convert in terms of building up the layers and the way they spray on. I'd like to try 2K but just can't at this point in my home life - maybe in the future when I am back in the UK...
I can start applying the decals now, which will cover a lot of what you see - all the white on the car is decal, so we will see if the blue shows through much!
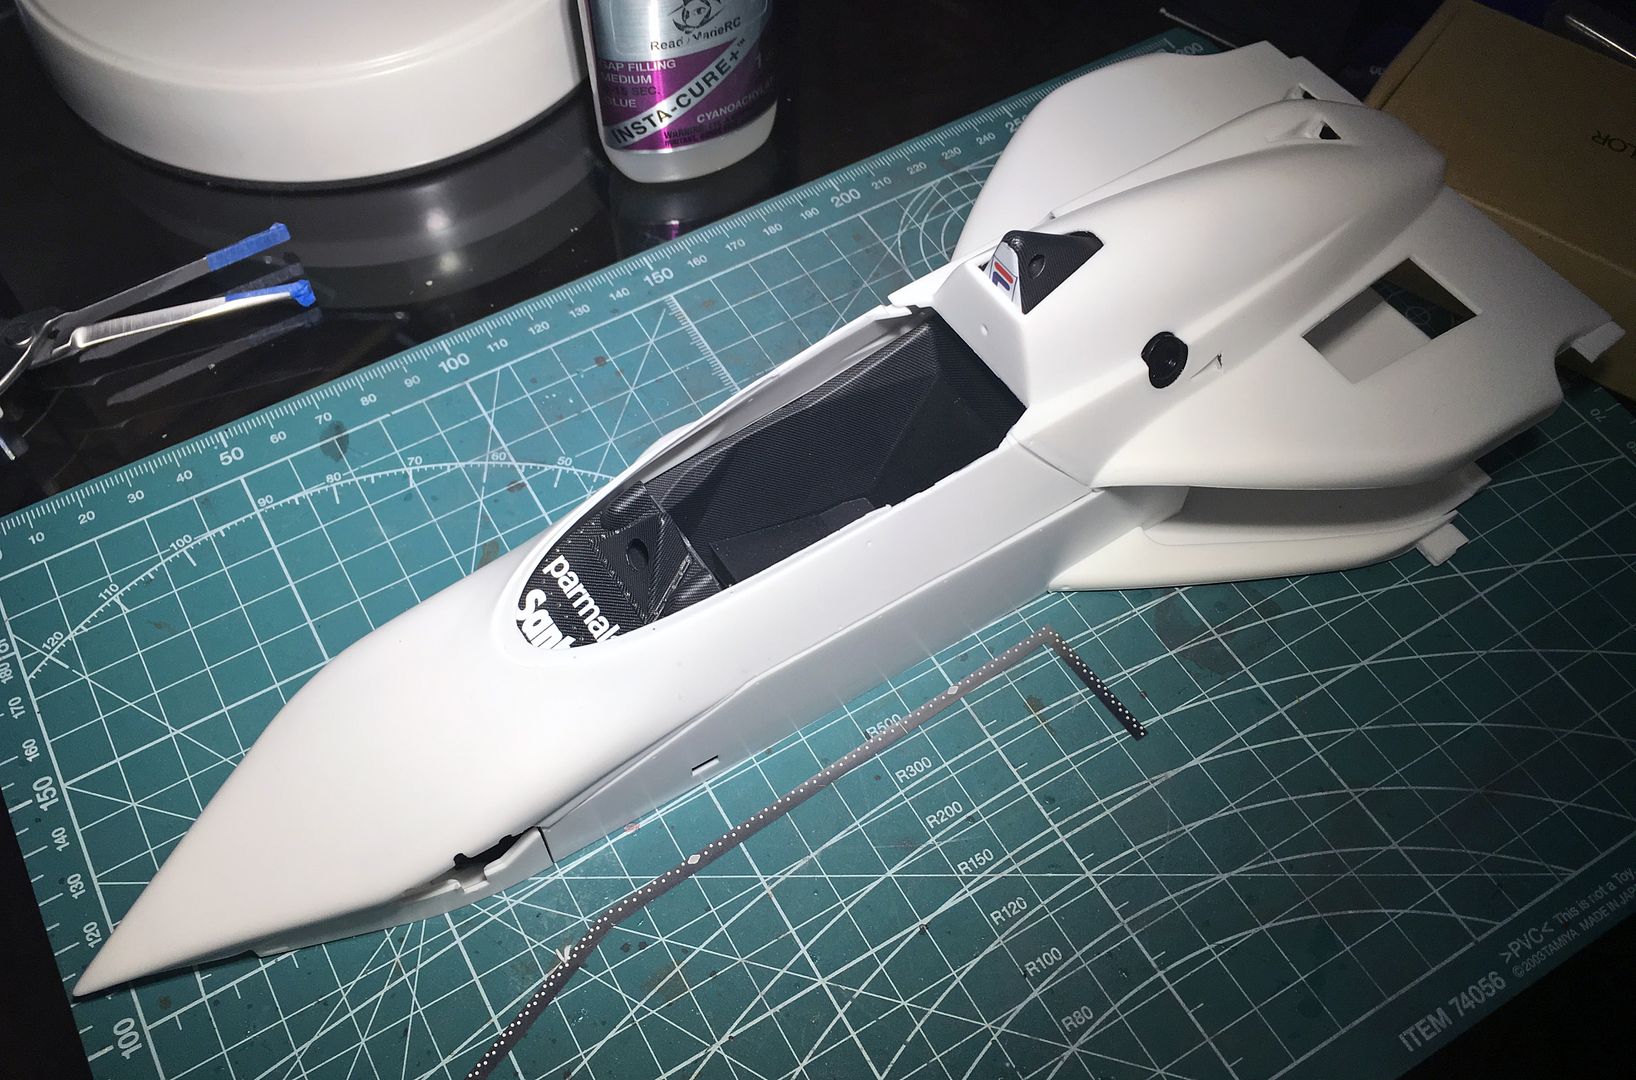
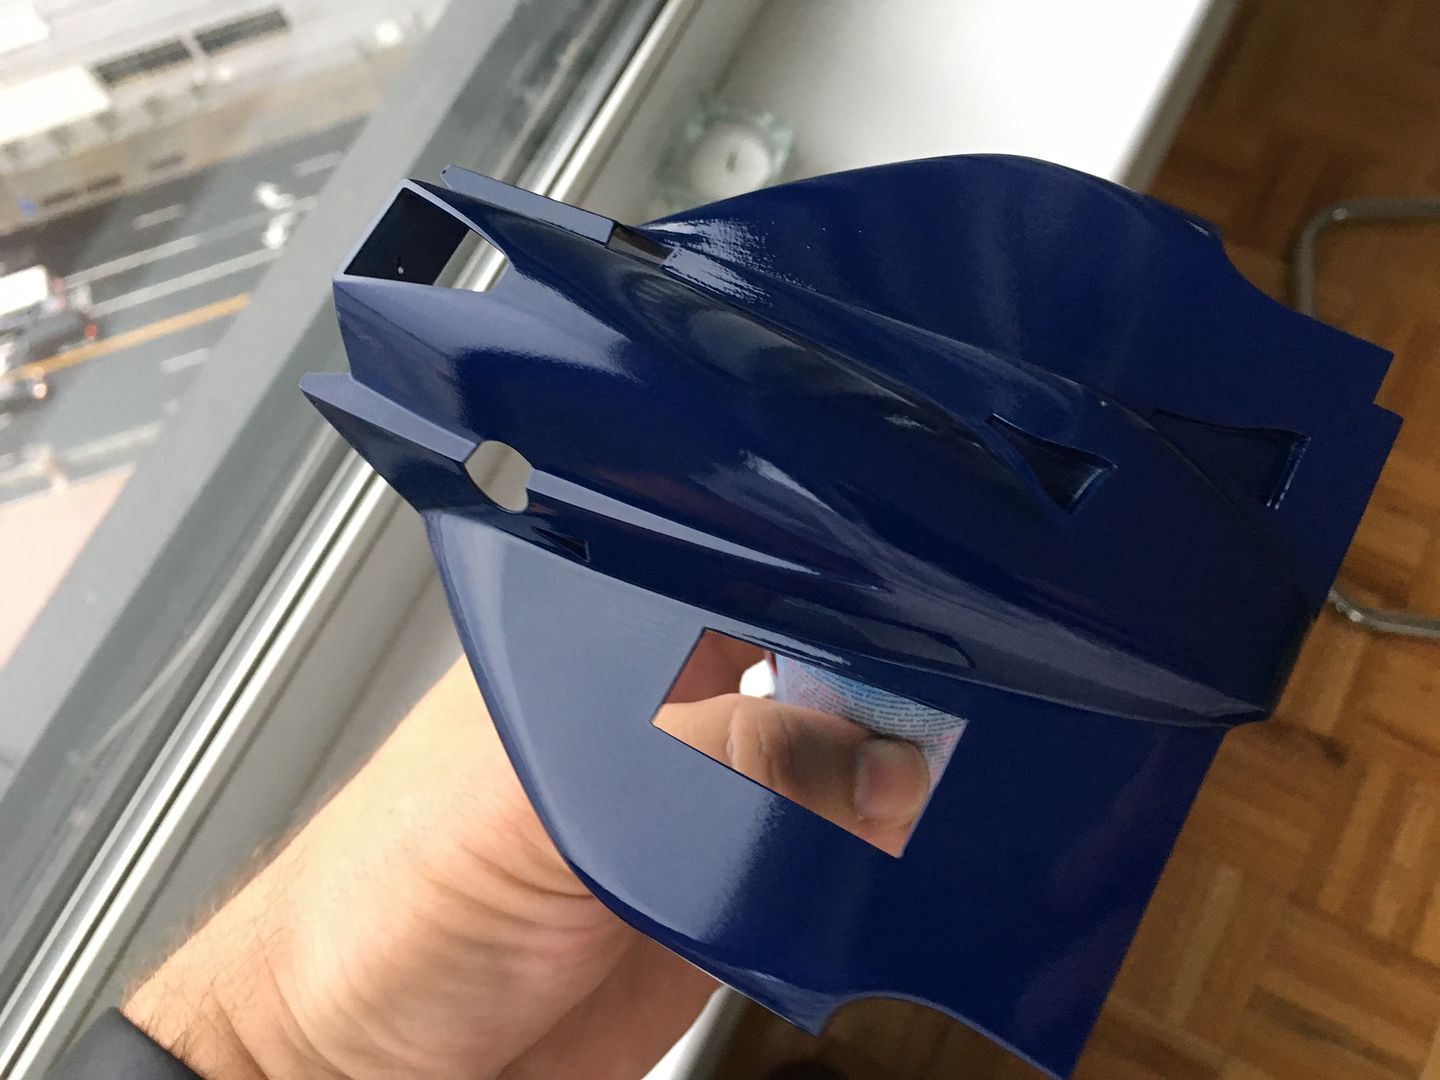
As I thought - absolutely no issue with the white decals - they are thick enough (not necessarily a good thing, I know) or rather 'solid' enough to remain bright white when on the navy blue...now of course we'll see how well they conform to some of the curves - I've only done a bit of flat work so far!!
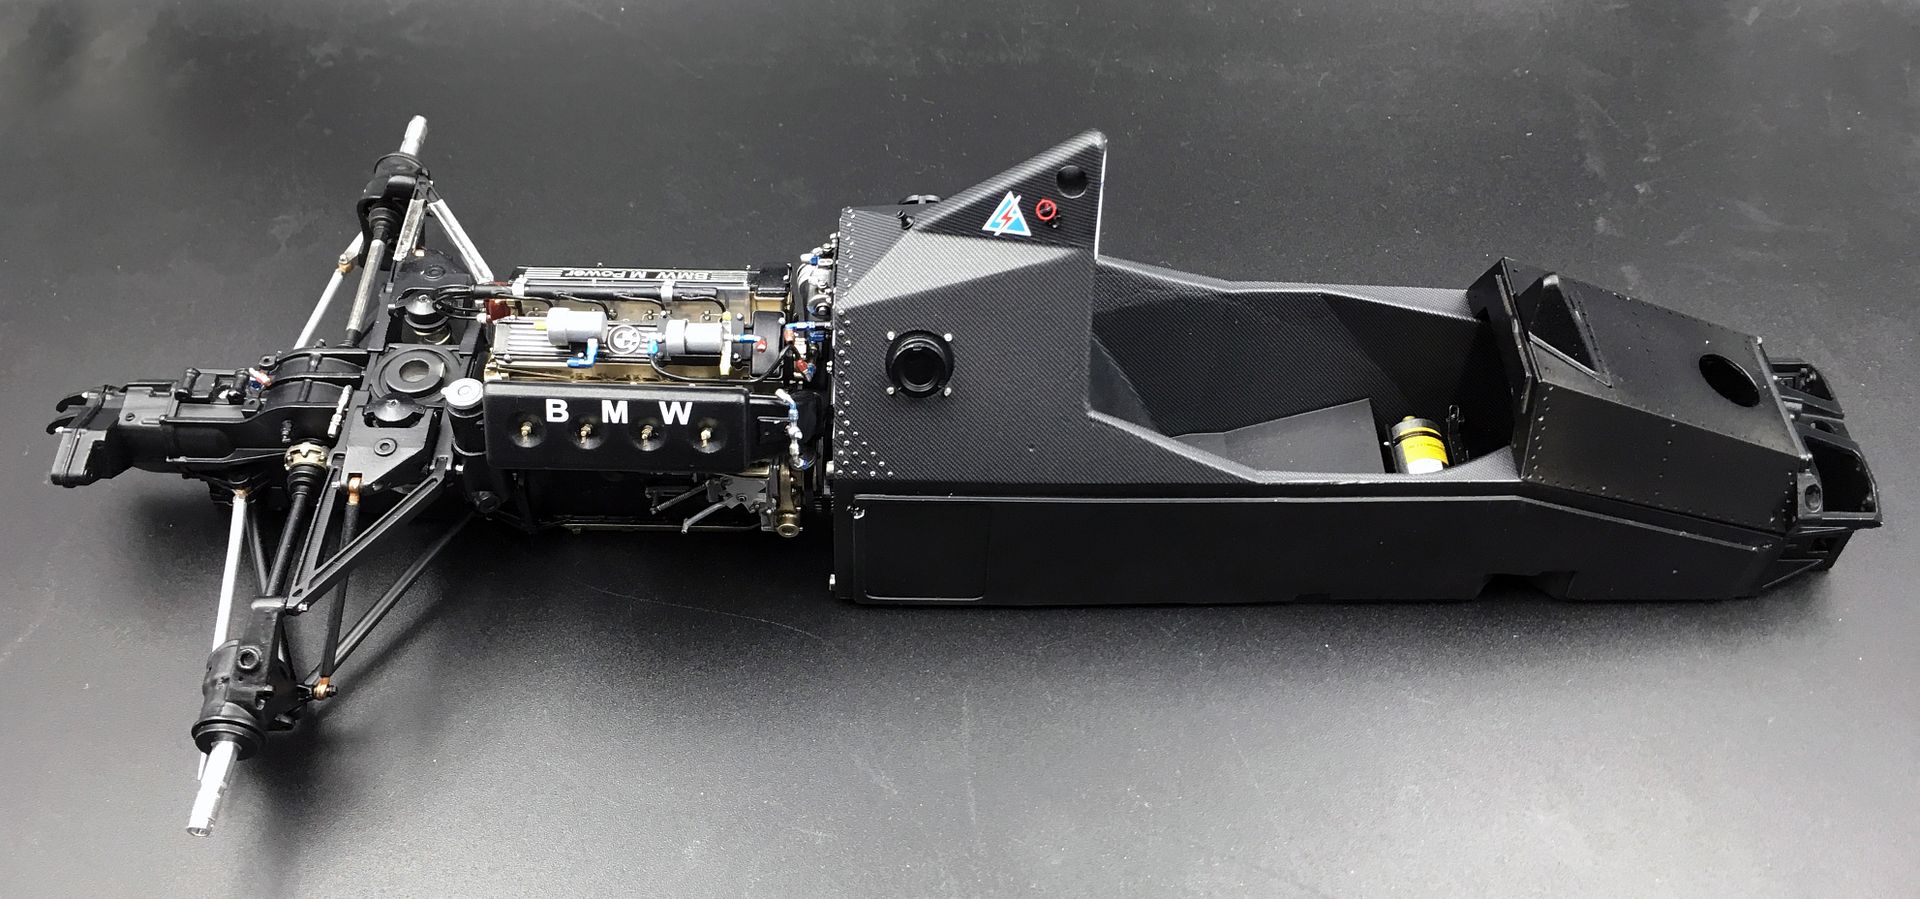
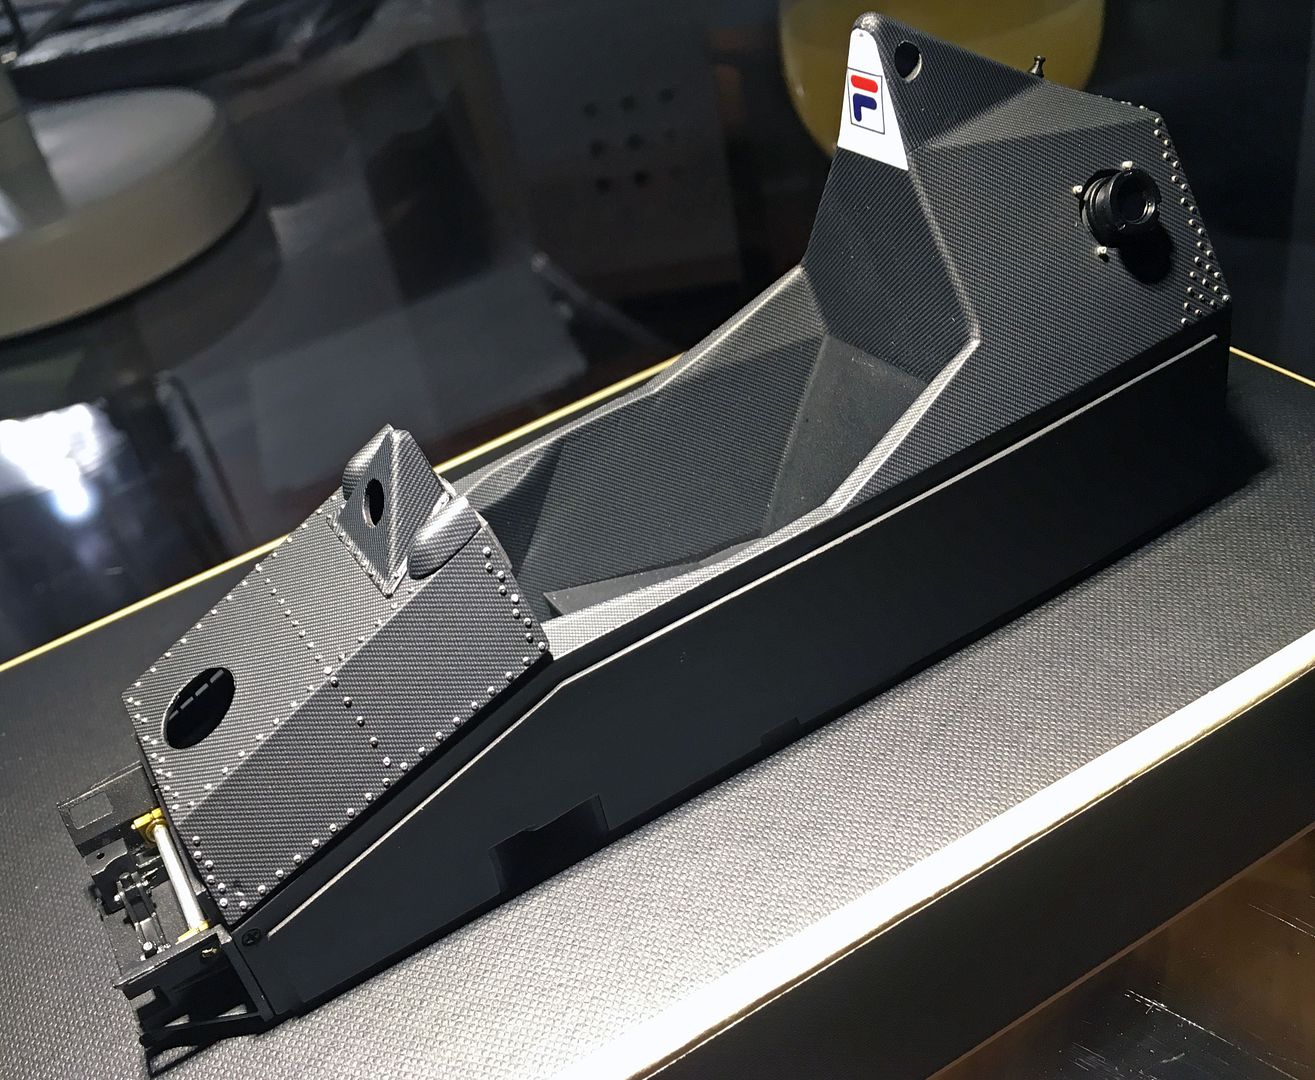
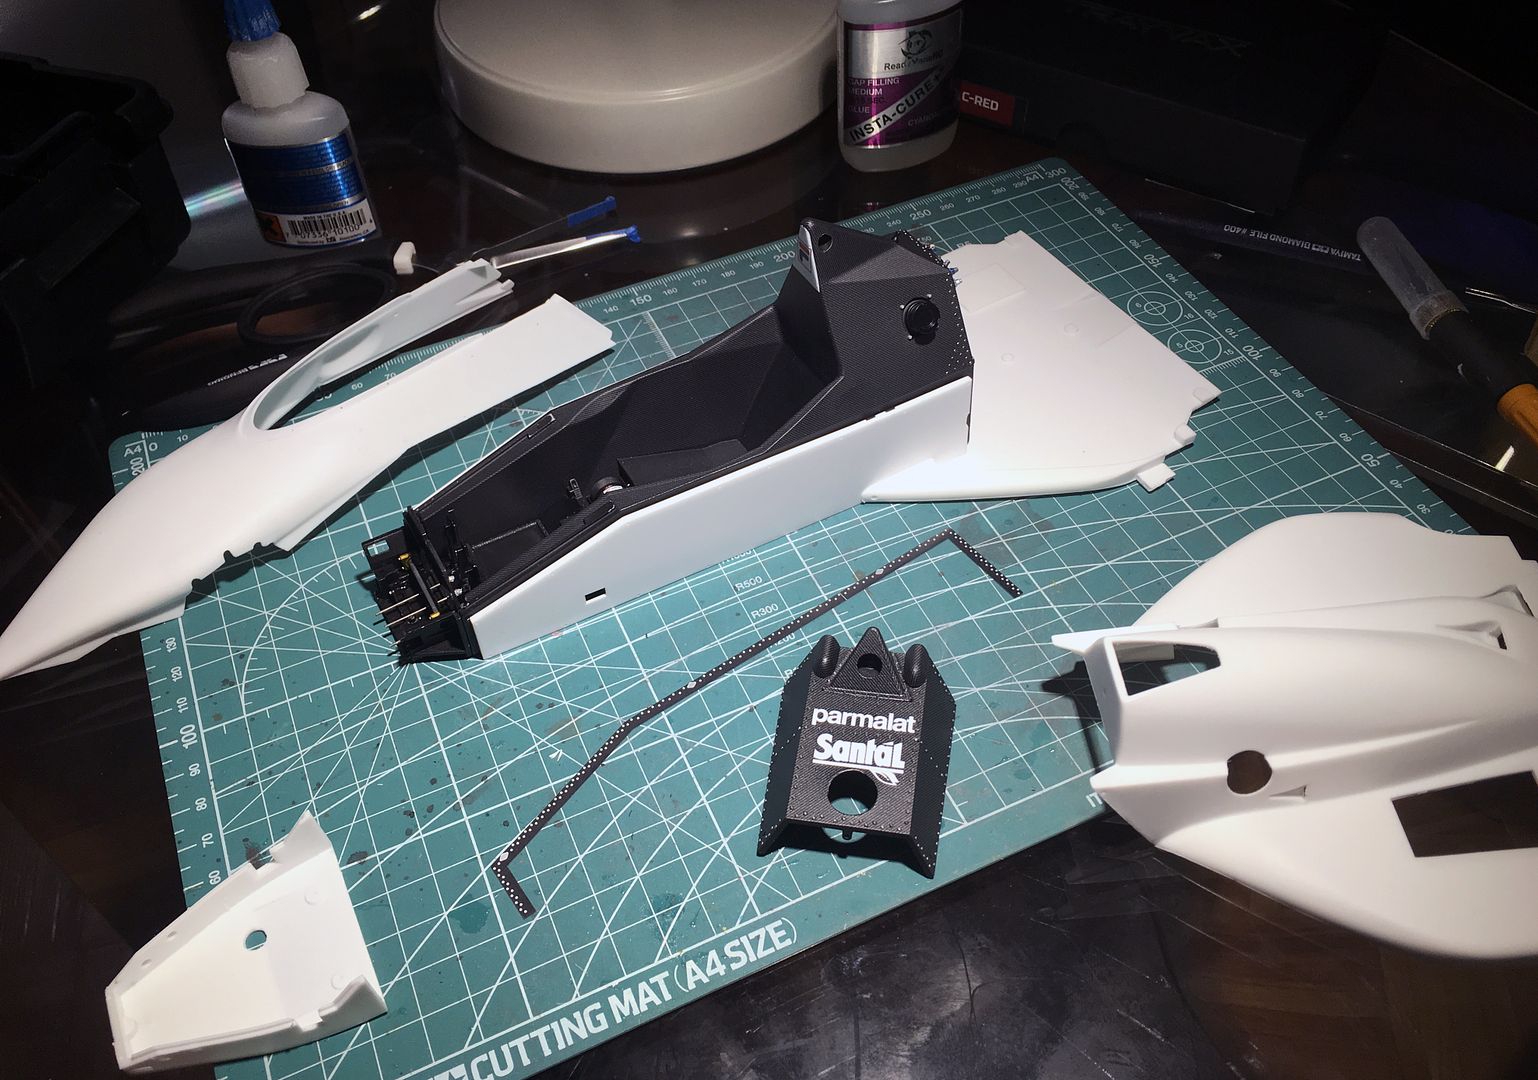
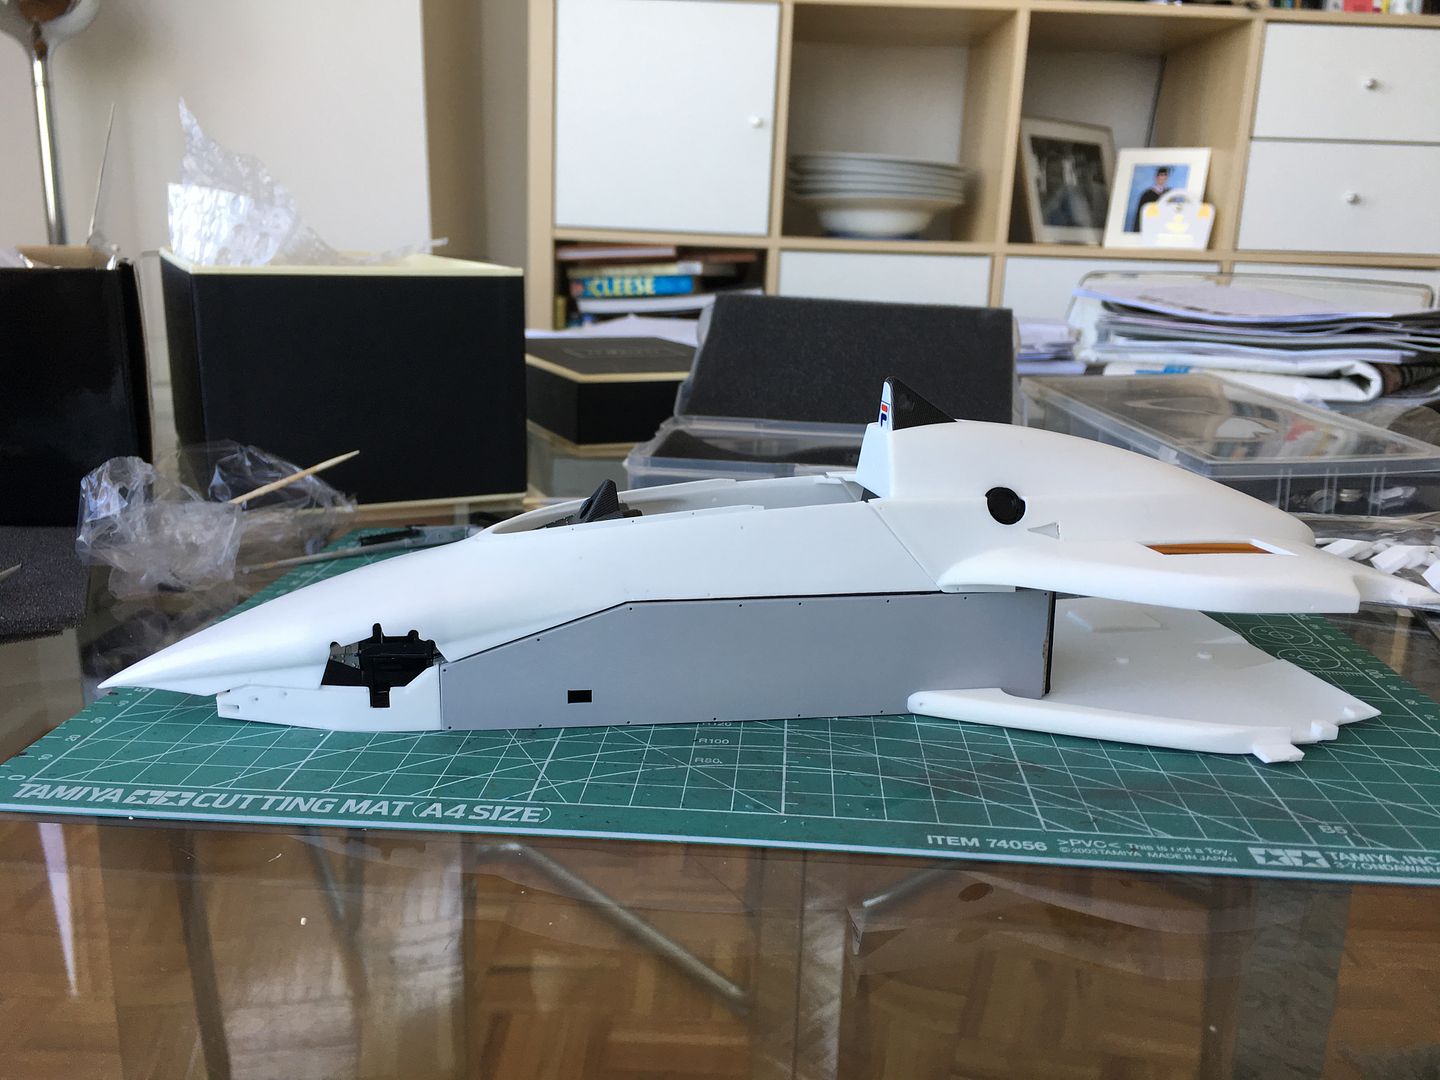
Time for some more 'mocking up' - loving this scale! Nothing glued or fixed here, so ignore panel gaps, funny angles etc!!
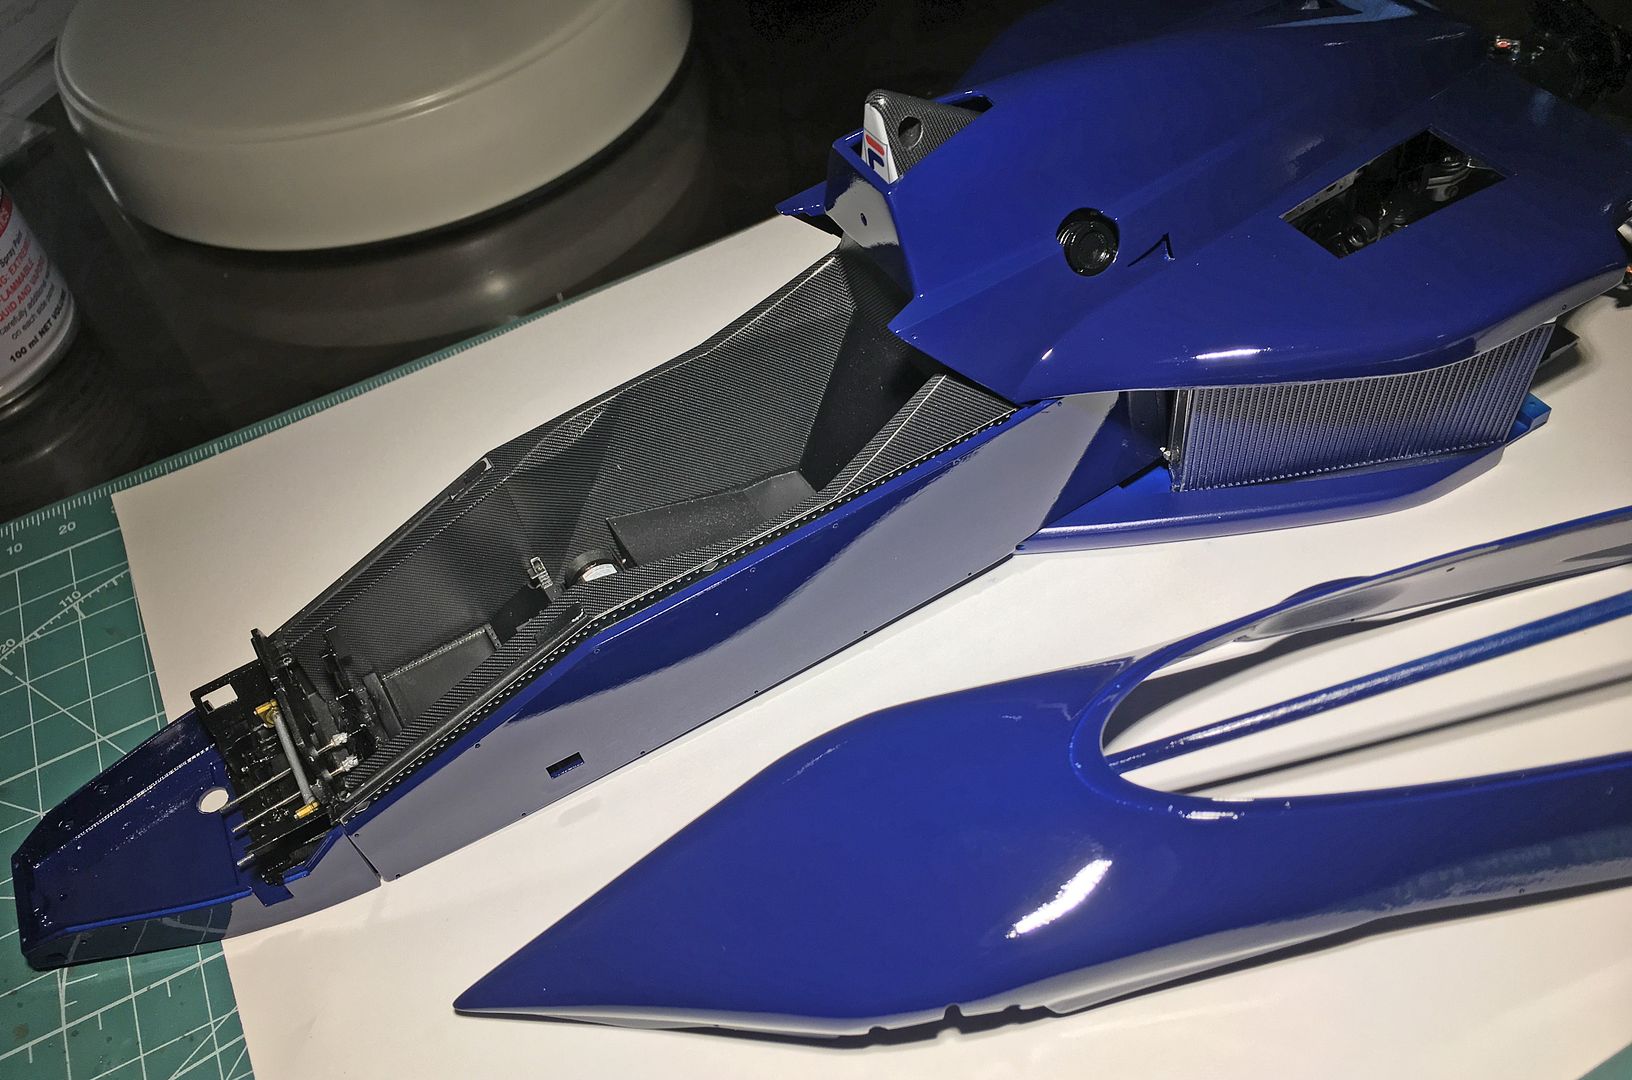
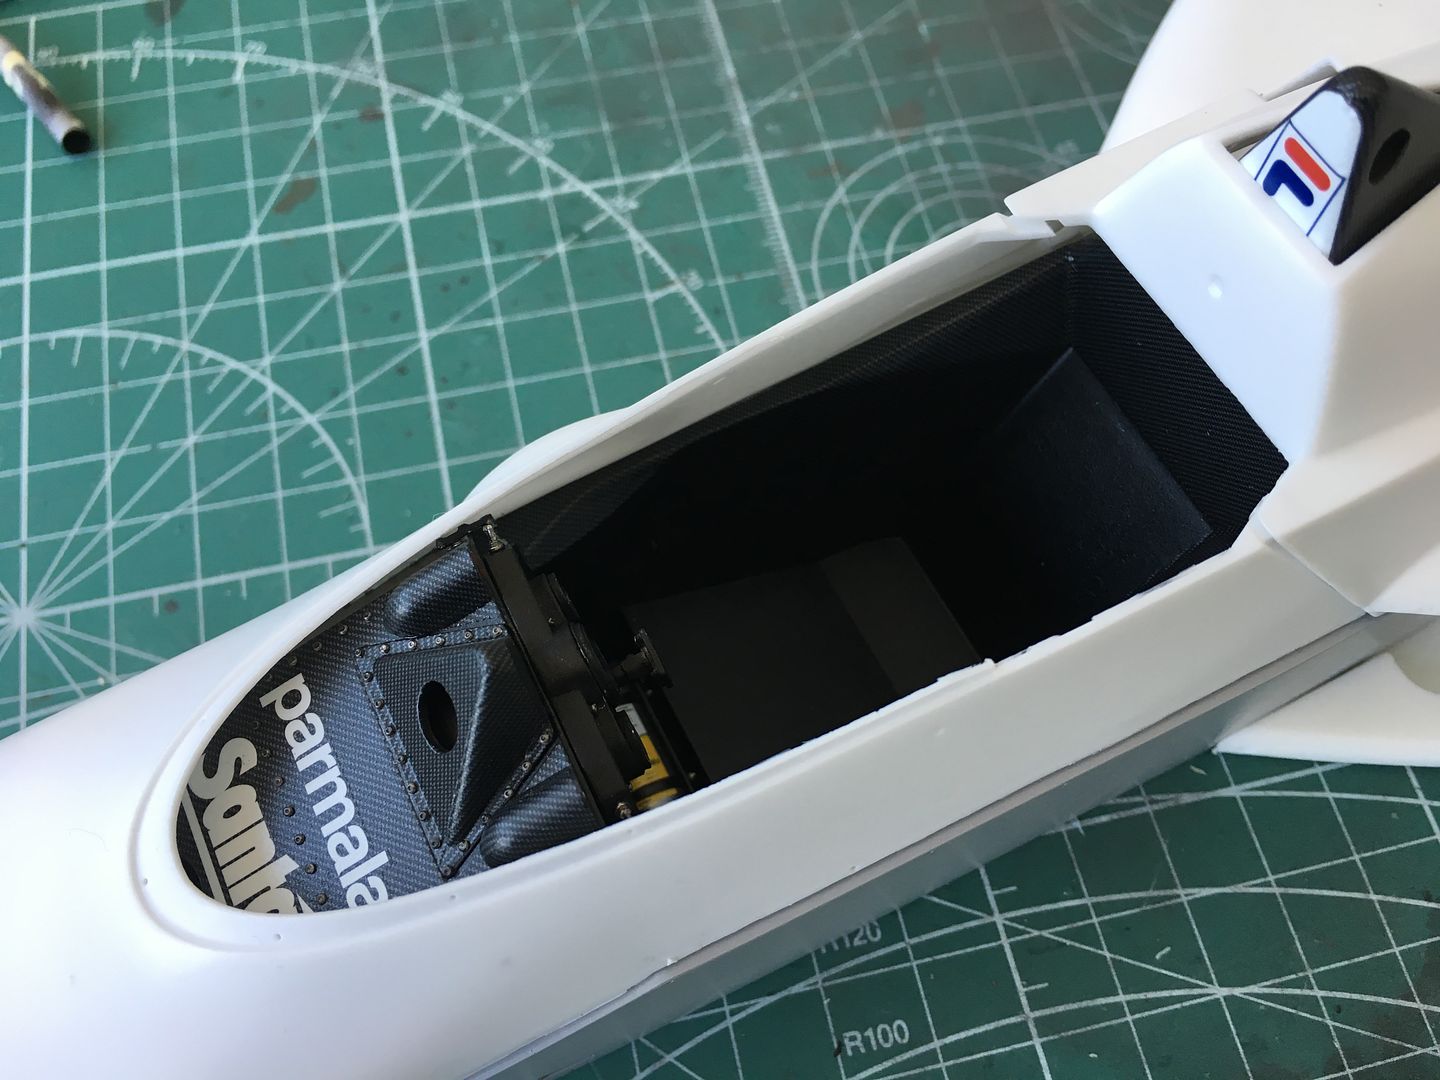
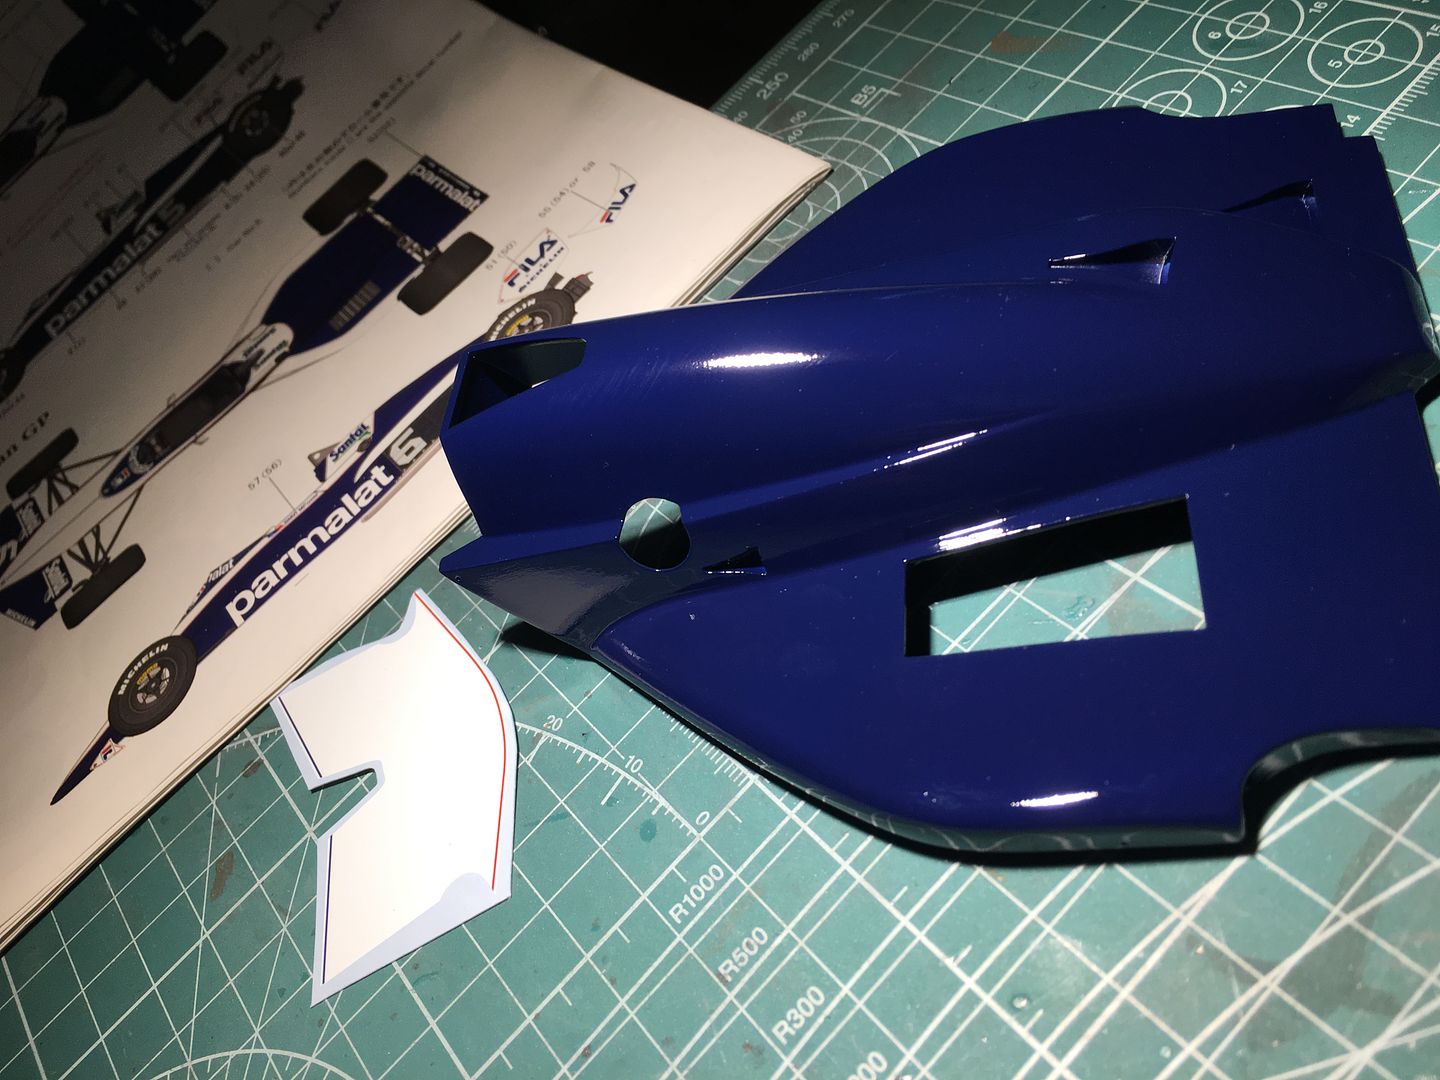
Now the decals - again, photos are of decals in progress of being added, so ignore any stains or streaks at this stage...I'm also going to find time to get the model into the decent photo cube for some better pictures - it has been a while!
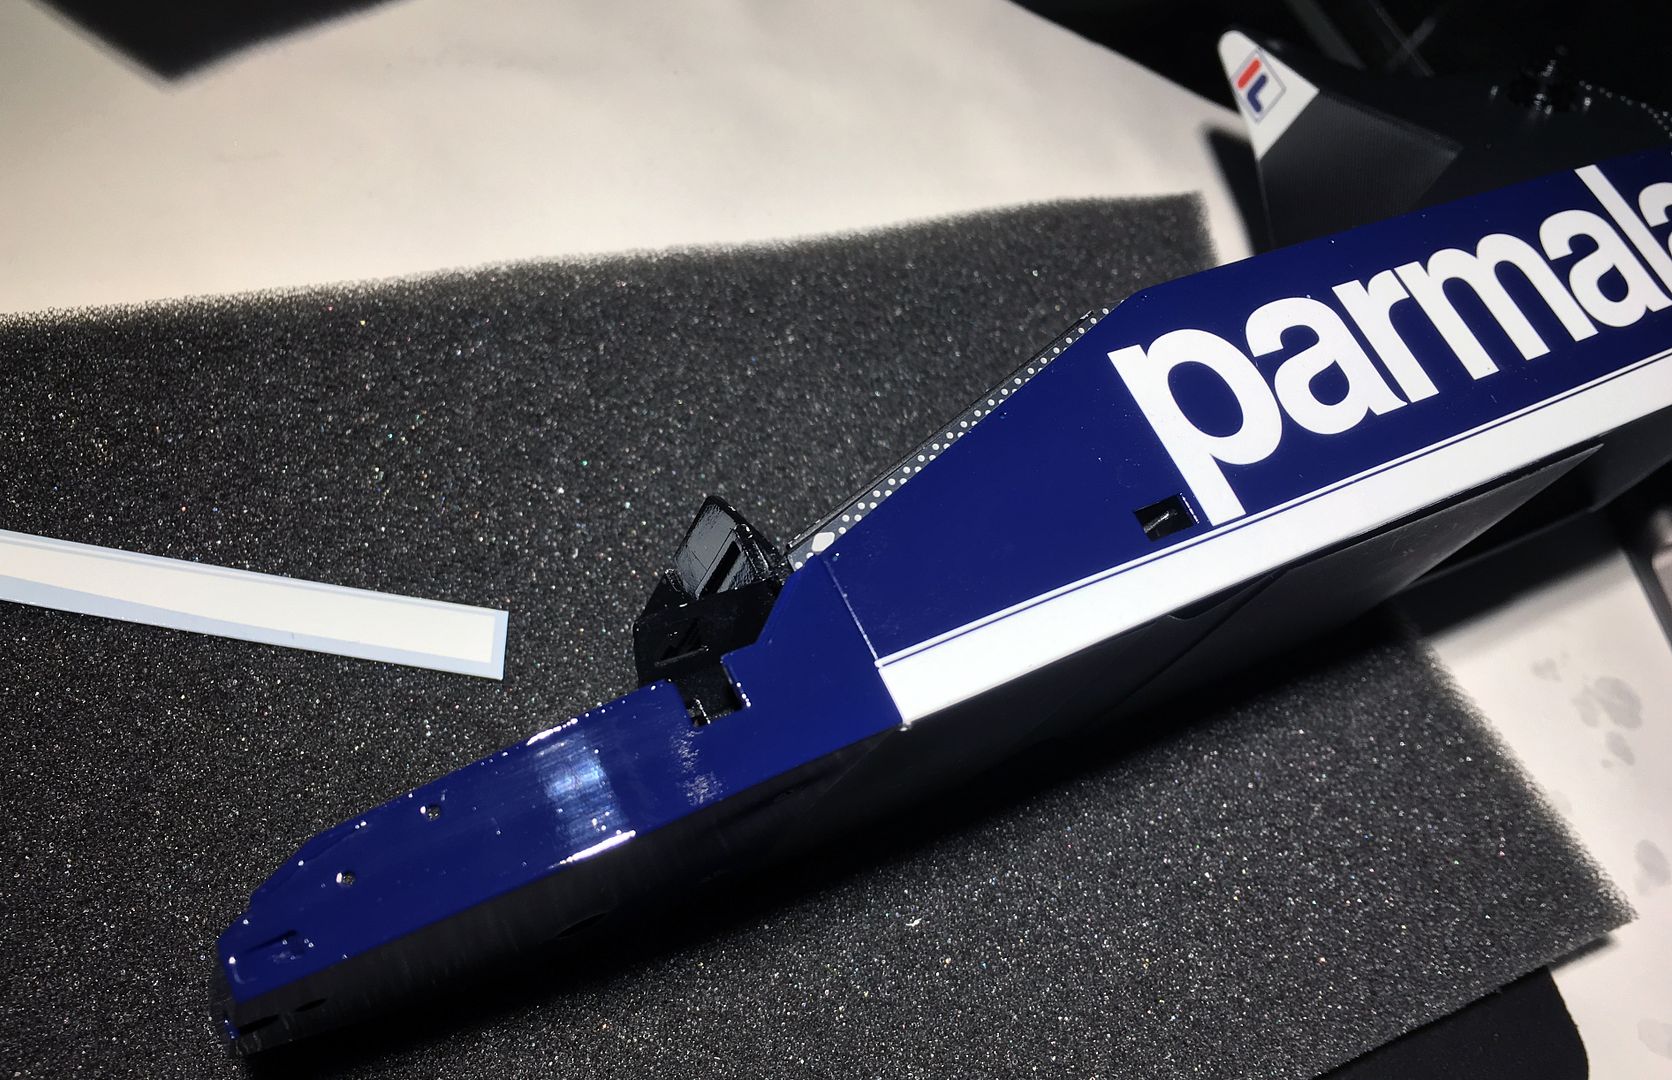
You can see why the side panels had to be painted, decaled and then clear coated before assembly - the front suspension goes through that hole...
Time for some more 'mocking up' - loving this scale! Nothing glued or fixed here, so ignore panel gaps, funny angles etc!!
Now the decals - again, photos are of decals in progress of being added, so ignore any stains or streaks at this stage...I'm also going to find time to get the model into the decent photo cube for some better pictures - it has been a while!
You can see why the side panels had to be painted, decaled and then clear coated before assembly - the front suspension goes through that hole...
Thanks guys - question at end of this piece!
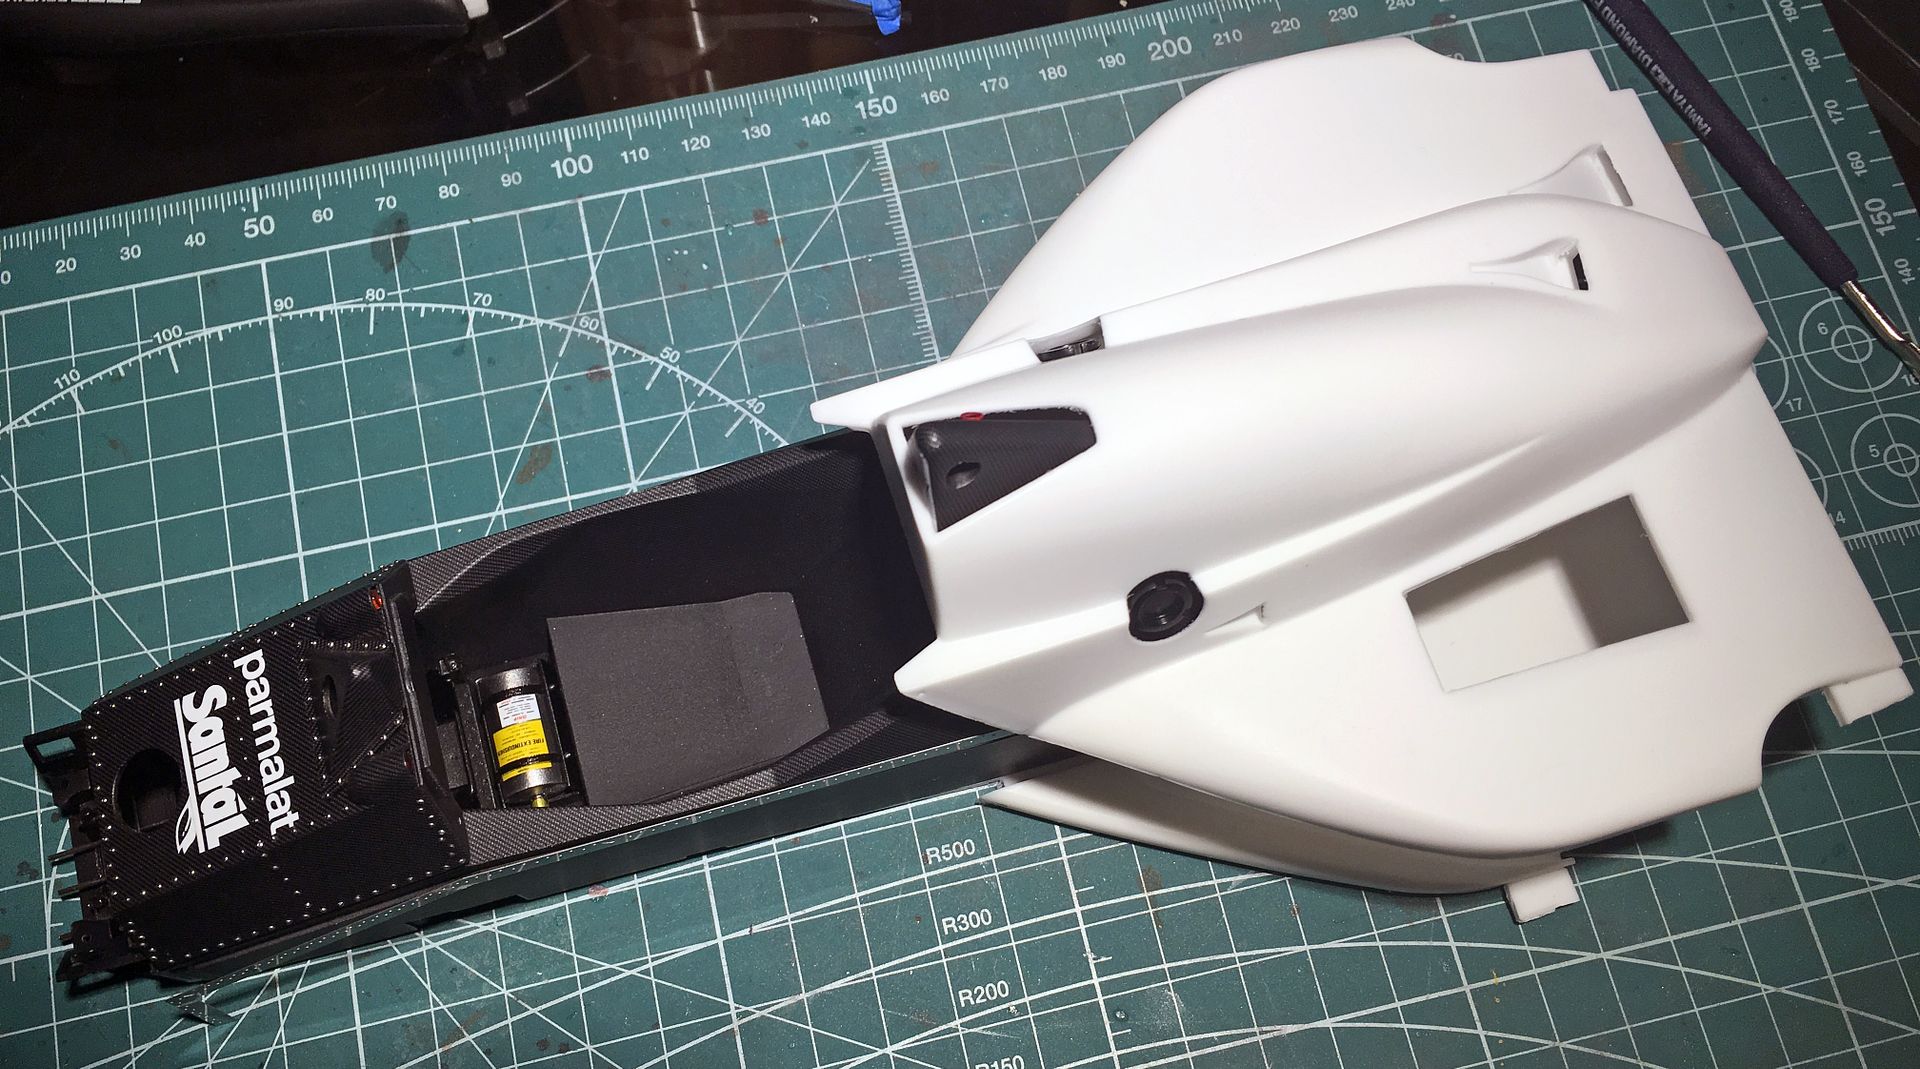
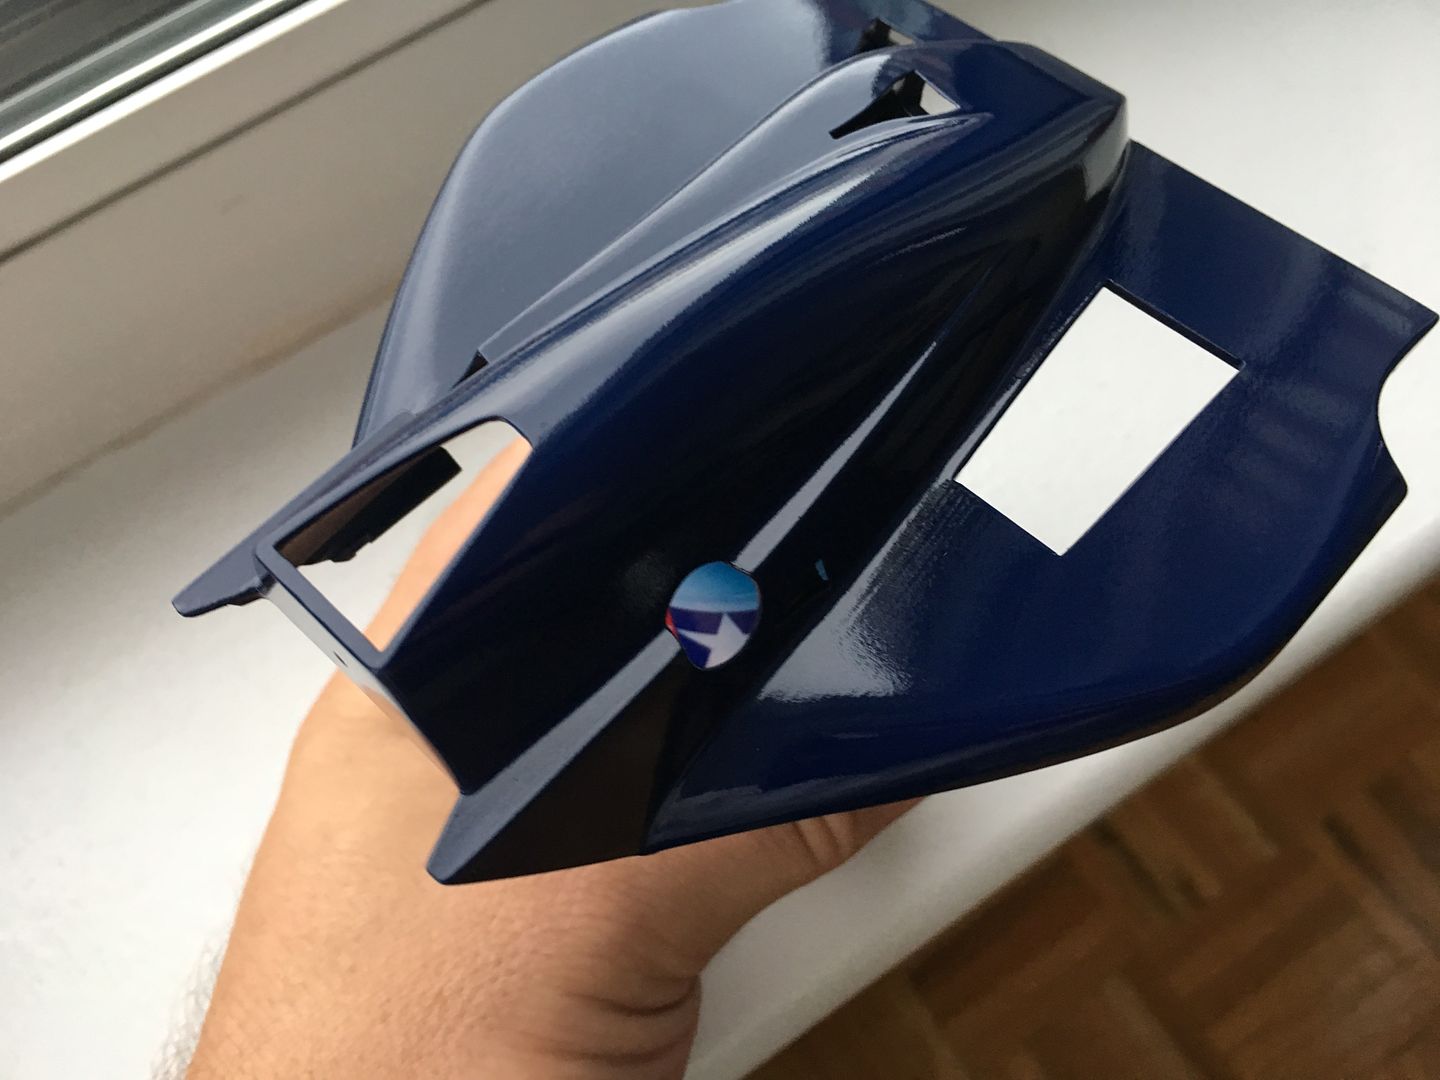
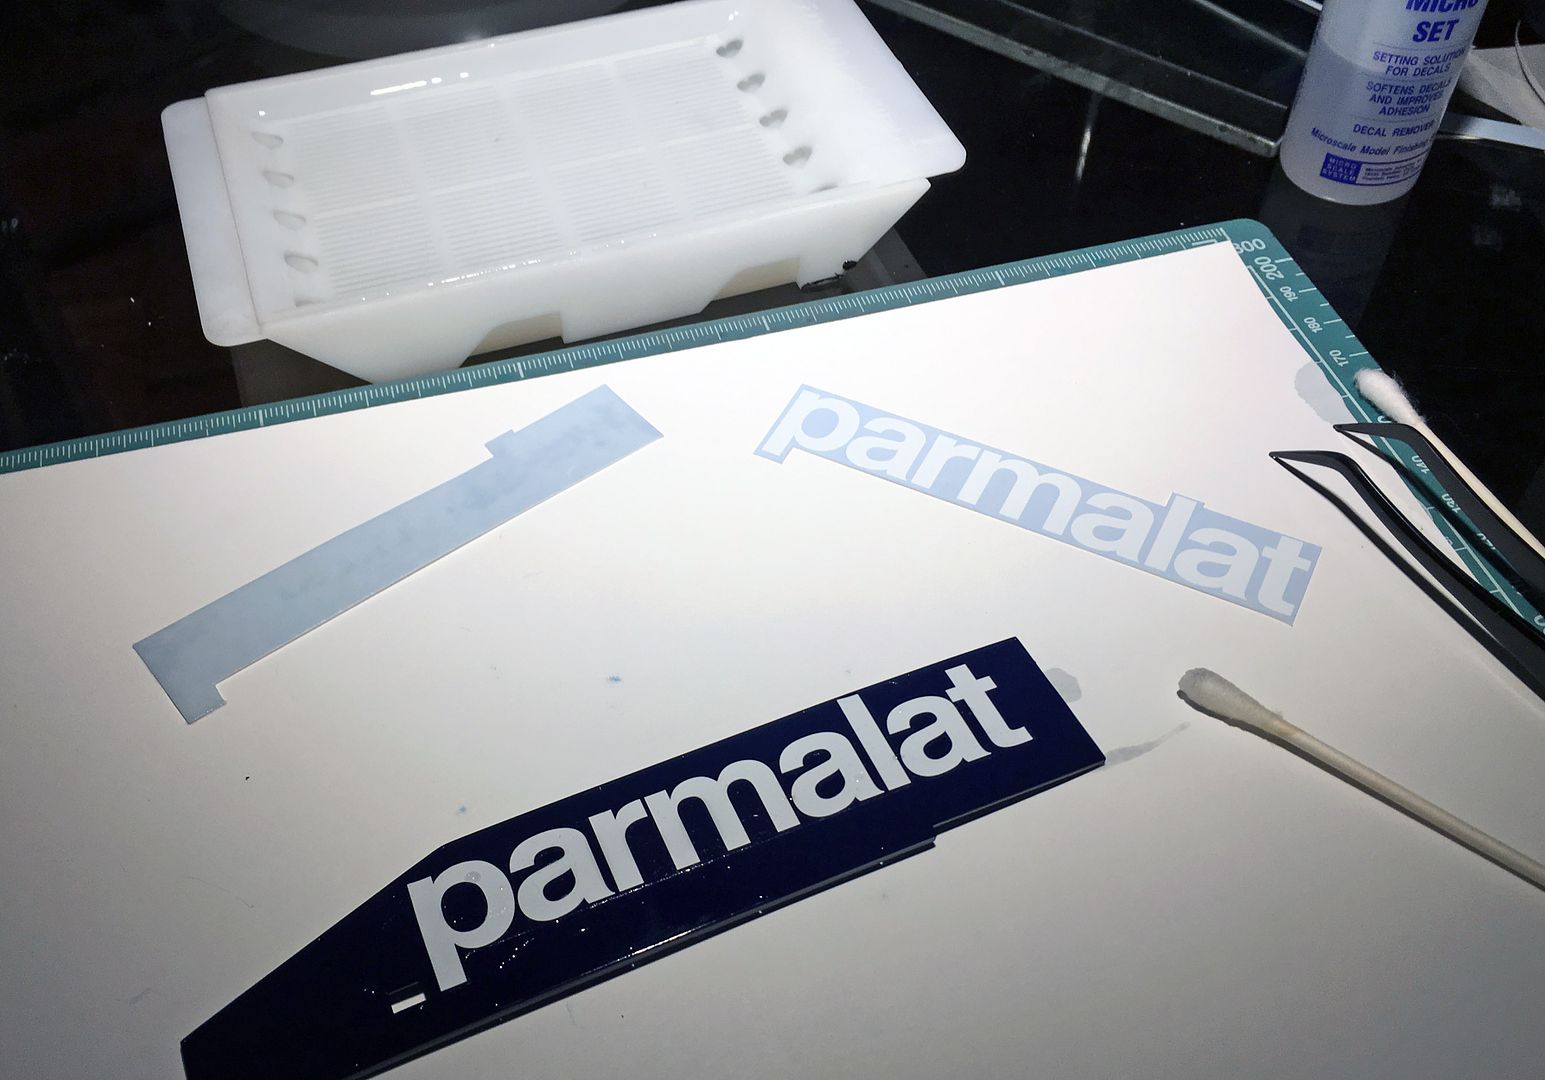
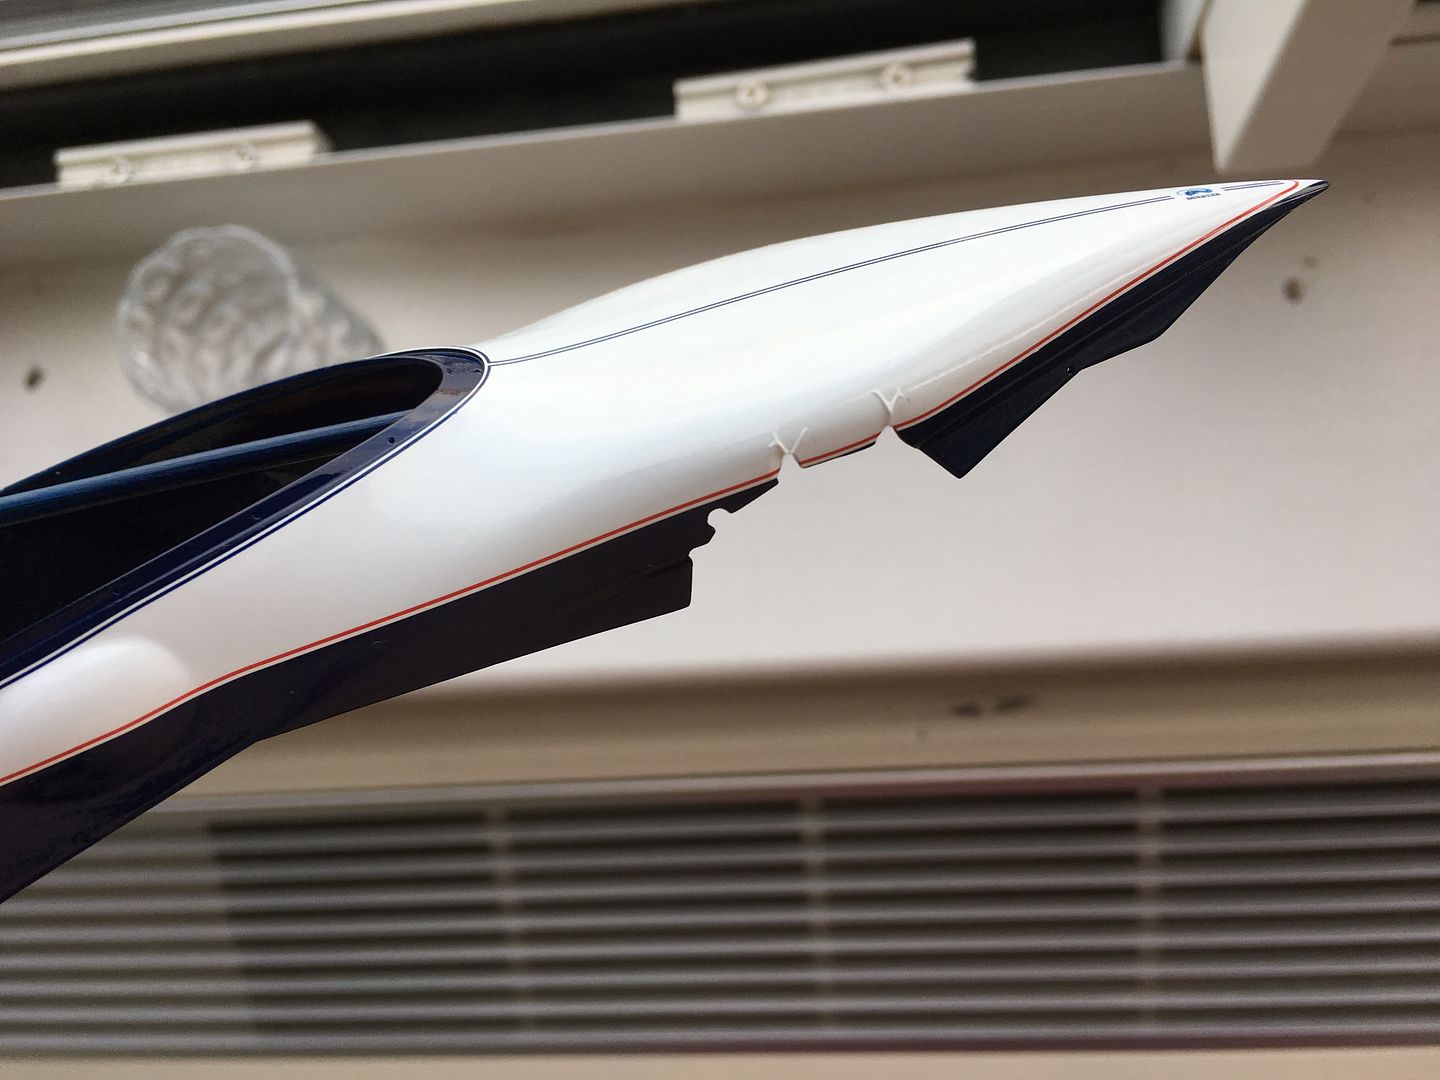
So this large decal was a bit daunting...needed 3+ hands.
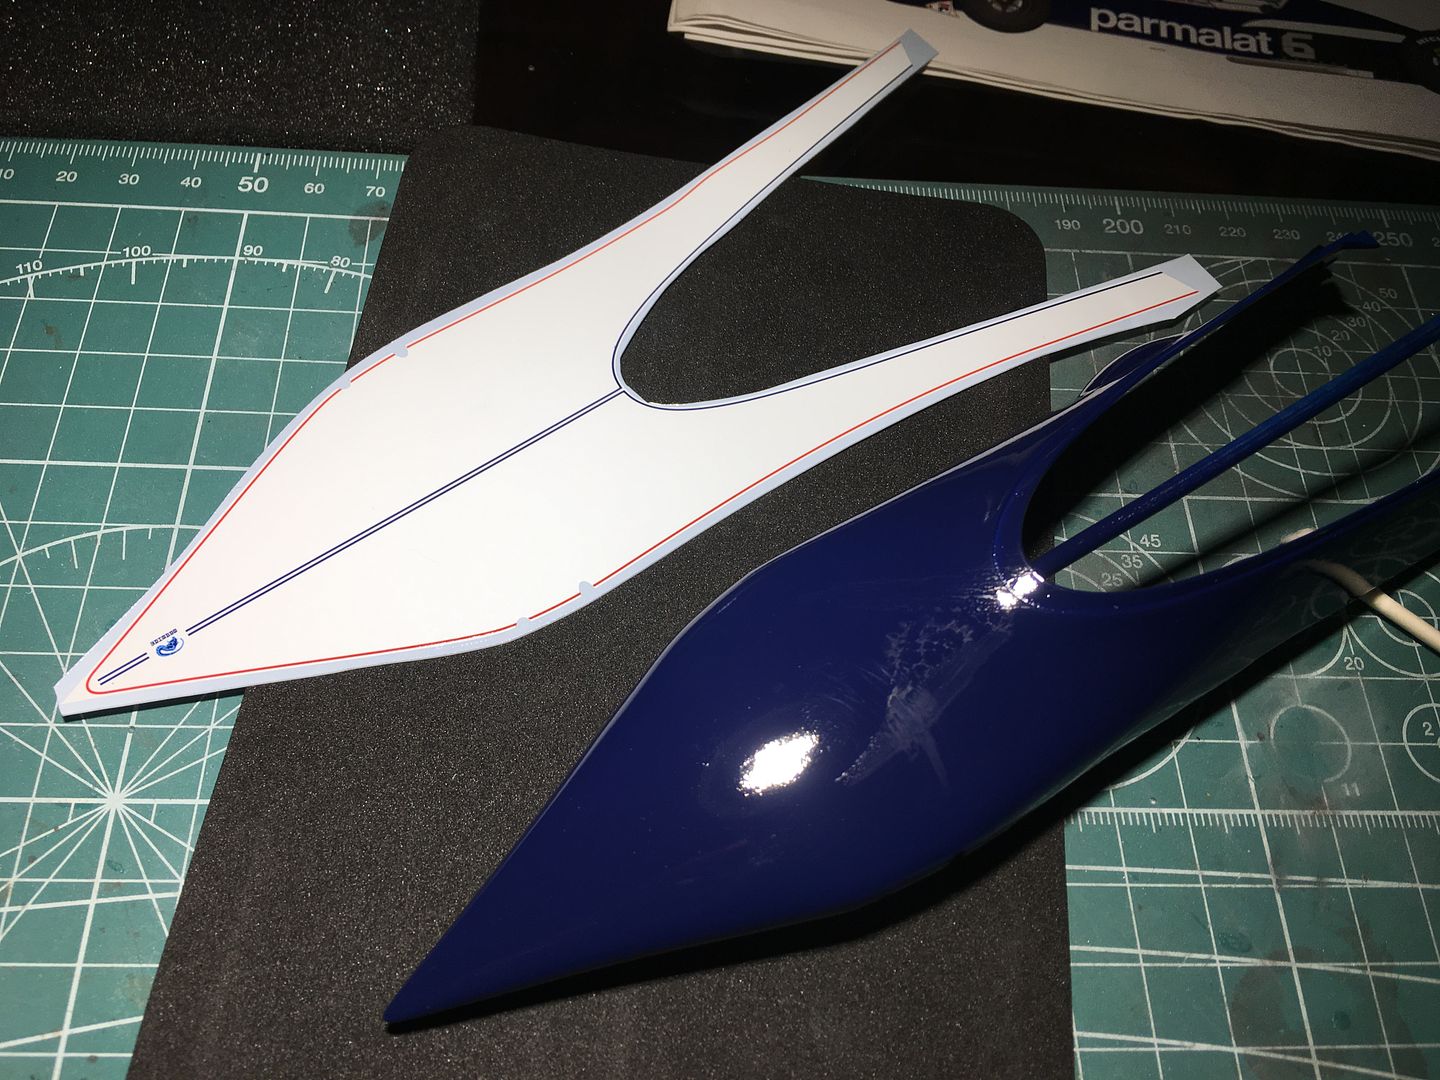
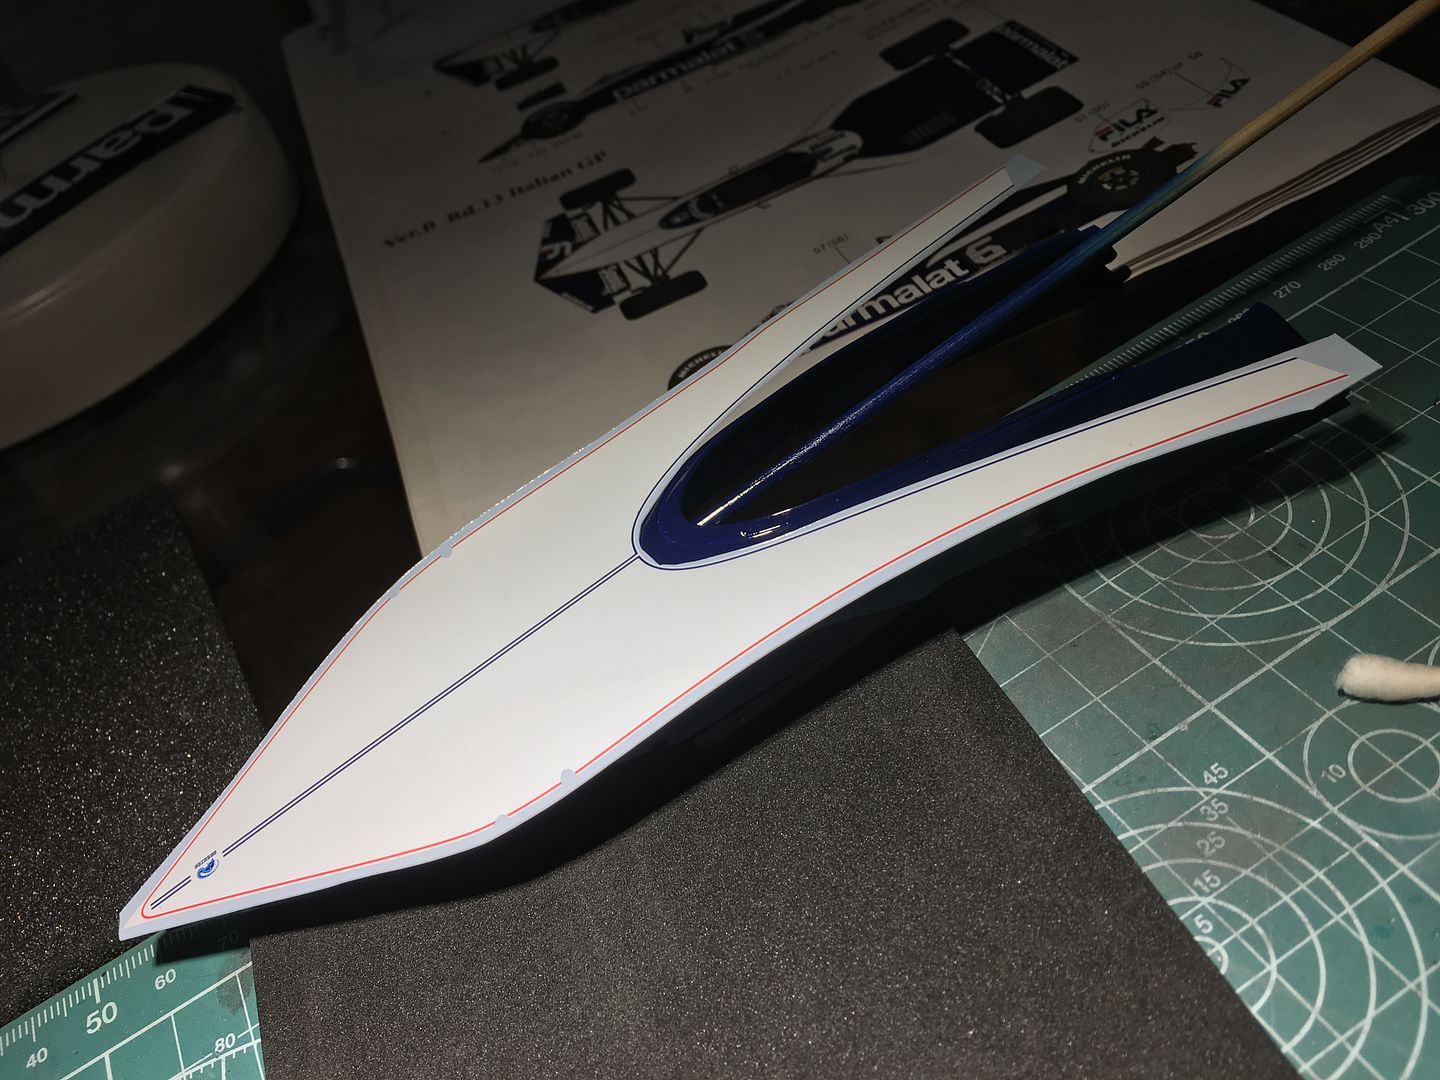
....but it went on quite well, and was 'thick' enough to allow me to play with it for a while, re-lift and re-position to line things up etc...
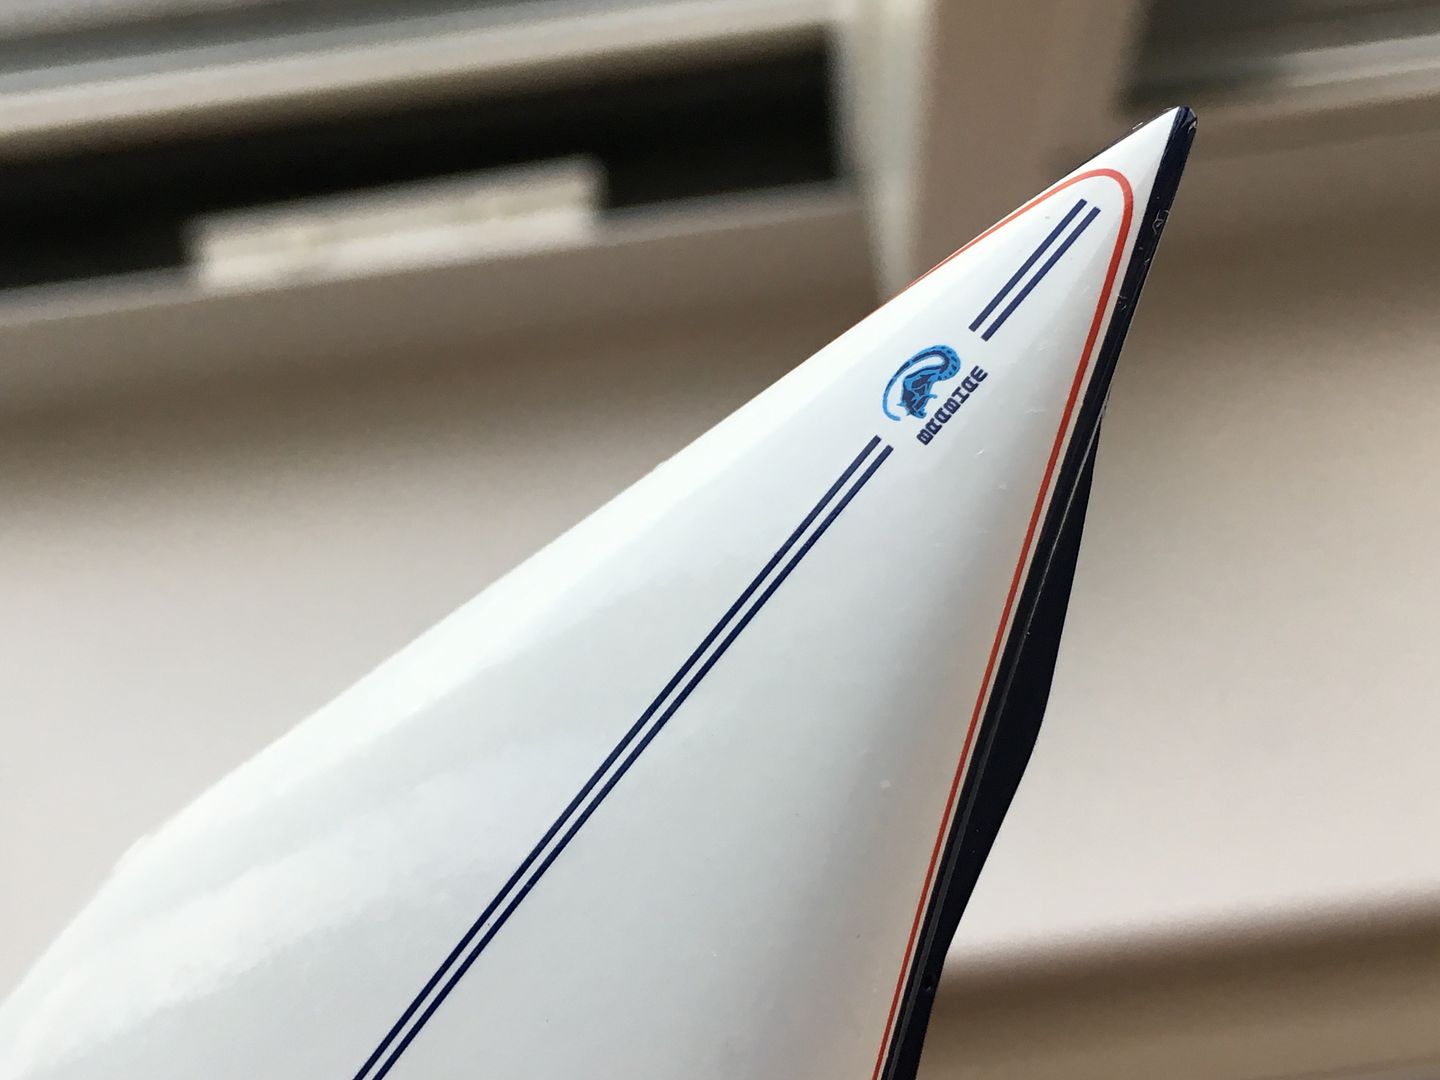
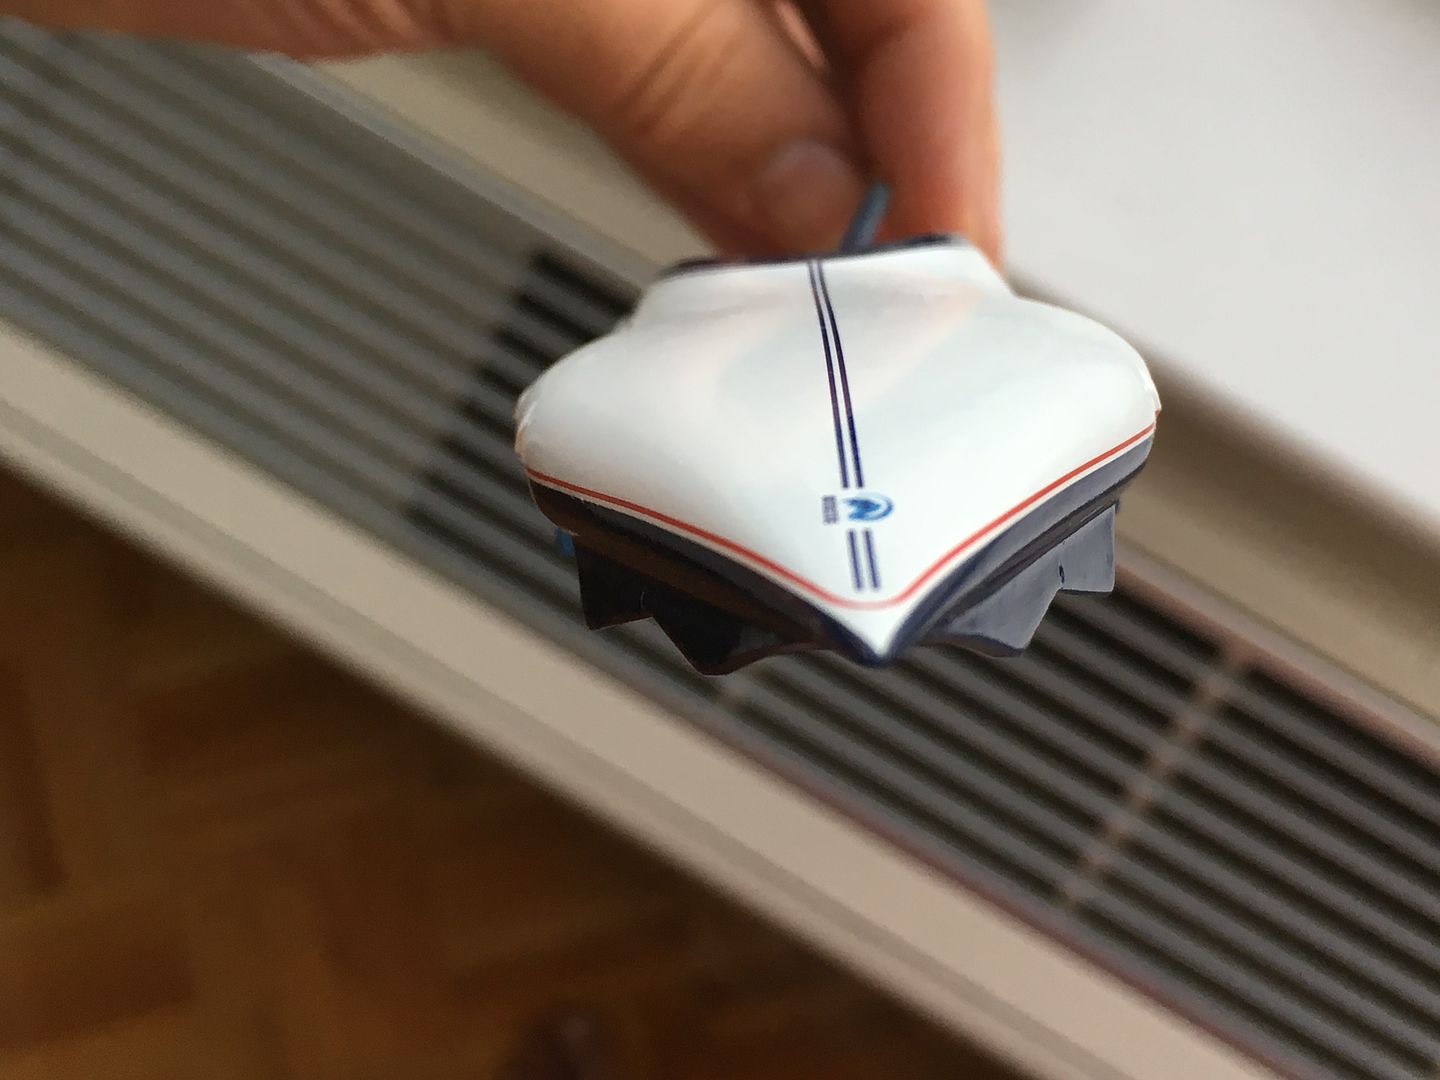
However, I have some creases around a cure point - what is the best way to get rid of these? They have tightened a bit on drying, but I guess I need to revisit this area locally with decal solution?
So this large decal was a bit daunting...needed 3+ hands.
....but it went on quite well, and was 'thick' enough to allow me to play with it for a while, re-lift and re-position to line things up etc...
However, I have some creases around a cure point - what is the best way to get rid of these? They have tightened a bit on drying, but I guess I need to revisit this area locally with decal solution?
Thanks for the tips guys - appreciated. I'll give them a go - didn't get a chance last night, but already one crease has pulled itself out as the decals dried over night. I use the microset and sol, so hopefully more of these will work..
The 'spray the white bits' has been mentioned a lot on the F1m thread I have - I said that this was the first time I'd used Zero and even any type of clearcoat, or indeed 'proper' spraying in fact - I probably brush painted car kits when I was 14!
I get the spray white thing - I'd be ok masking the shapes off, like the large nose section - I mainly avoided it because of the very large white text (Parmalat) and the confidence in matching that to the sprayed white...or am I missing something here, and it is a case of masking off and spraying white primer, then using the decals in the same way OVER the white areas (but in this case, it would still have the potential issue with the Parmalat matching)
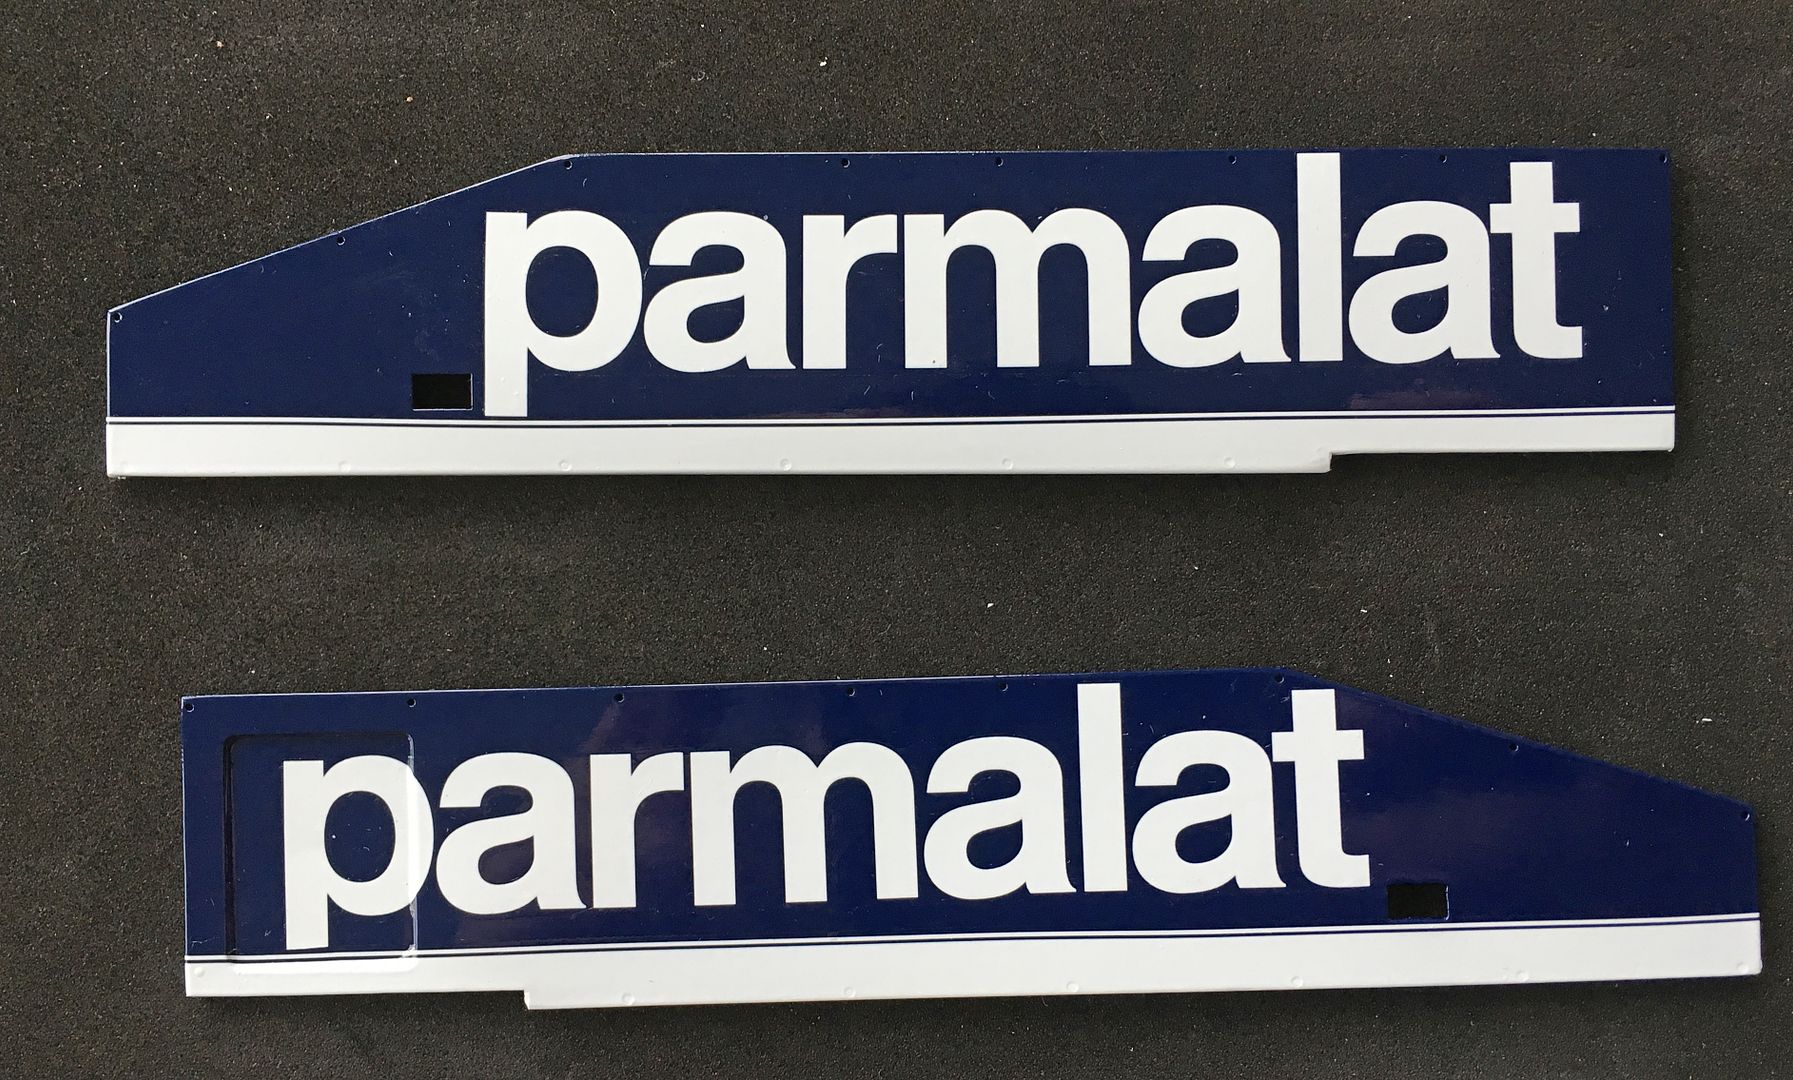
Although I have read negative things about older MFH decals, I decided to trust MFH in this case, that the blue wouldn't shine through, and it seems pretty good.
Anyway - in this case the white decals are obviously pretty thick - which obviously has its own disadvantages. (They do look 'thick' on the model...)
I know many are decals are finer in detail, and the blue would indeed be an issue...
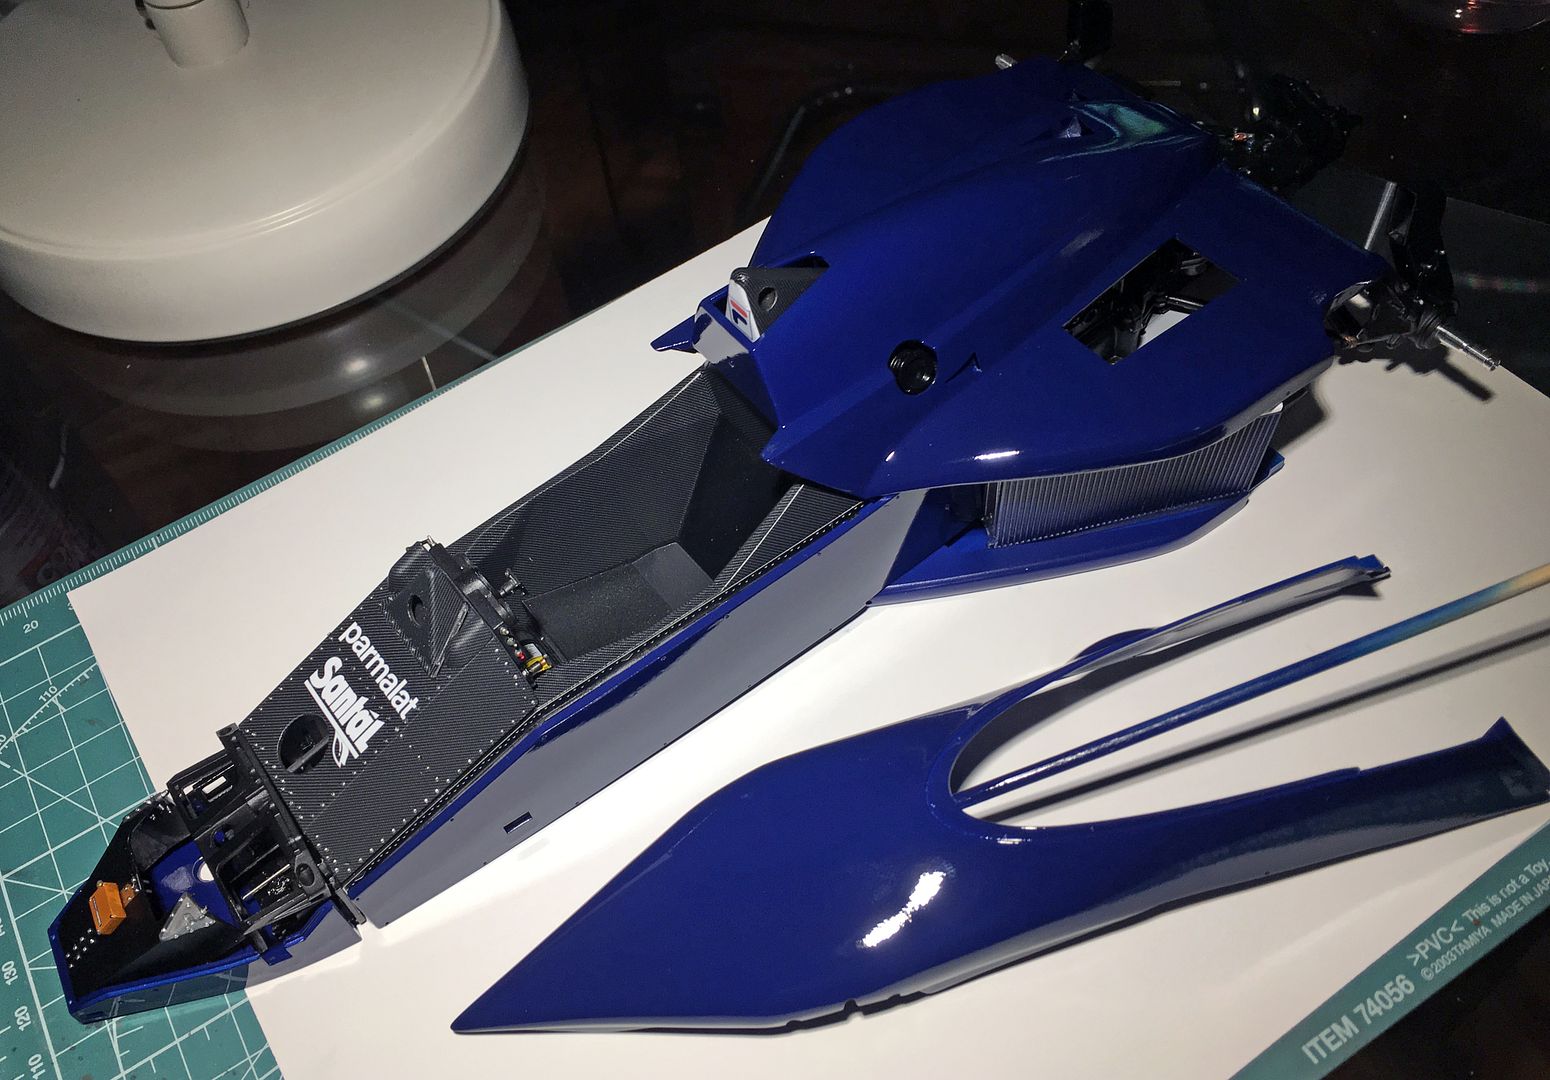
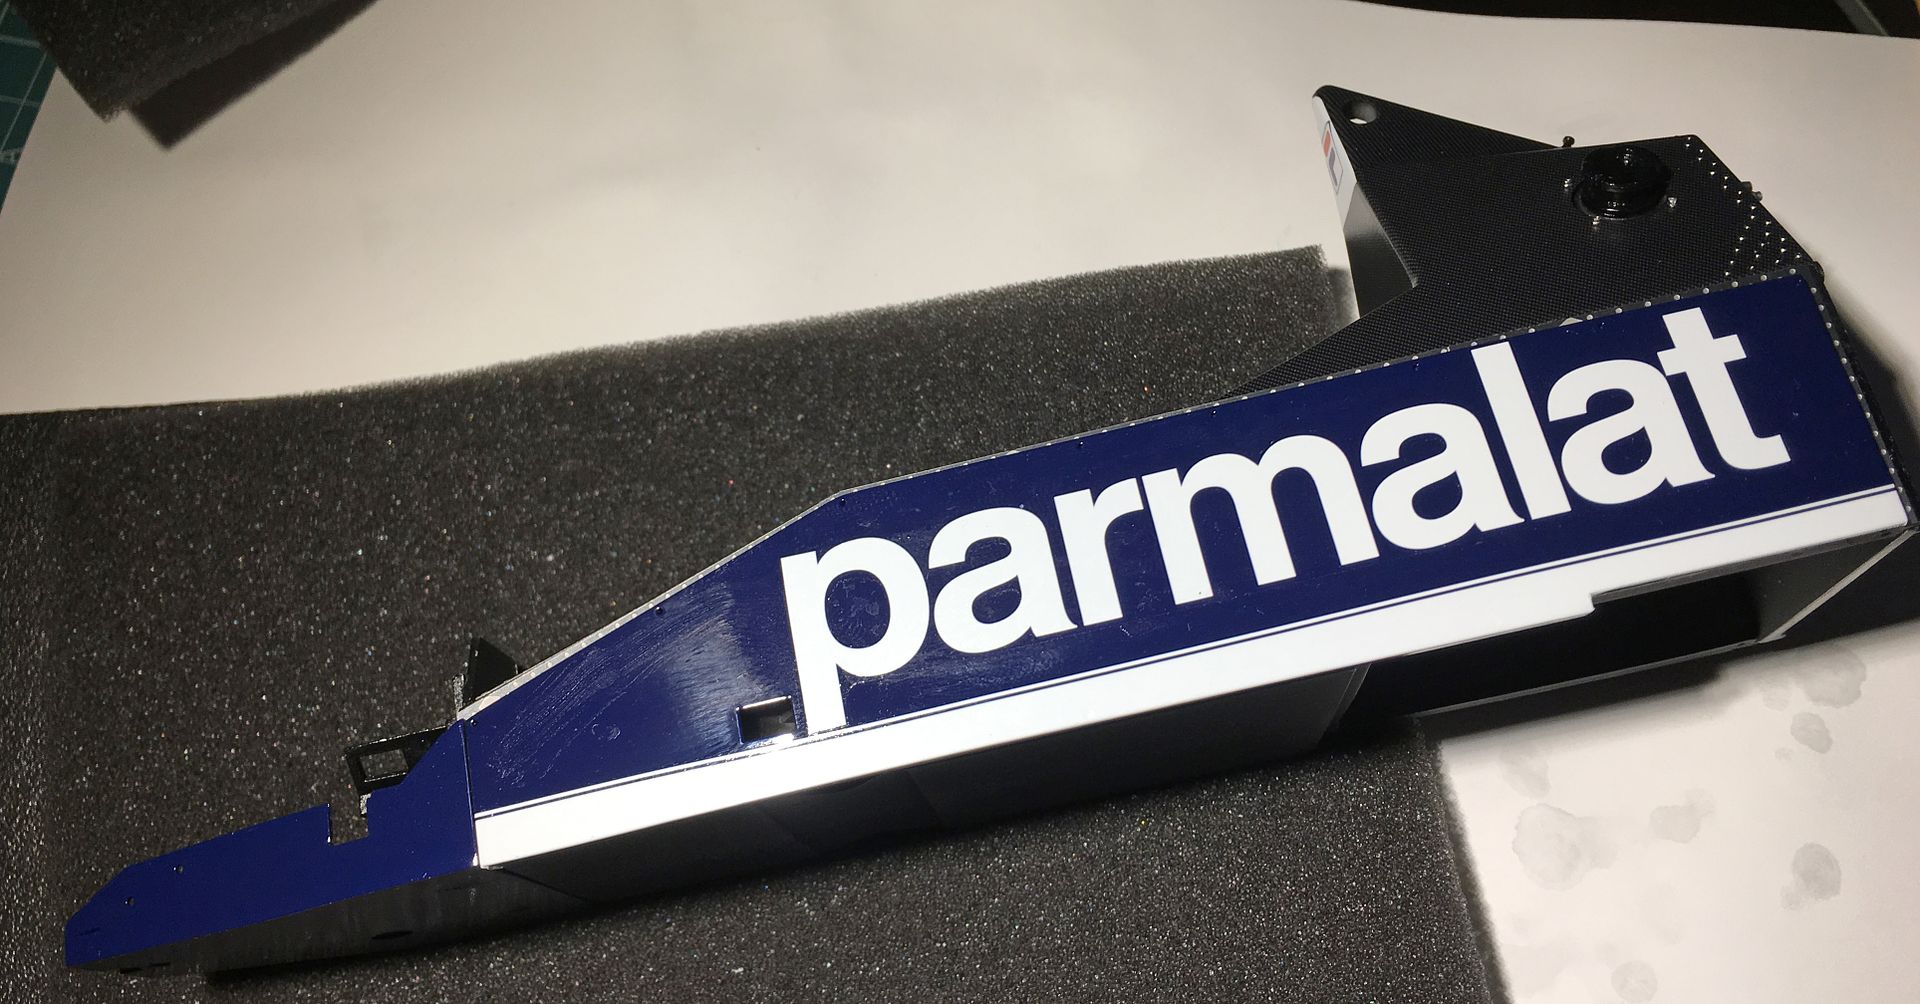
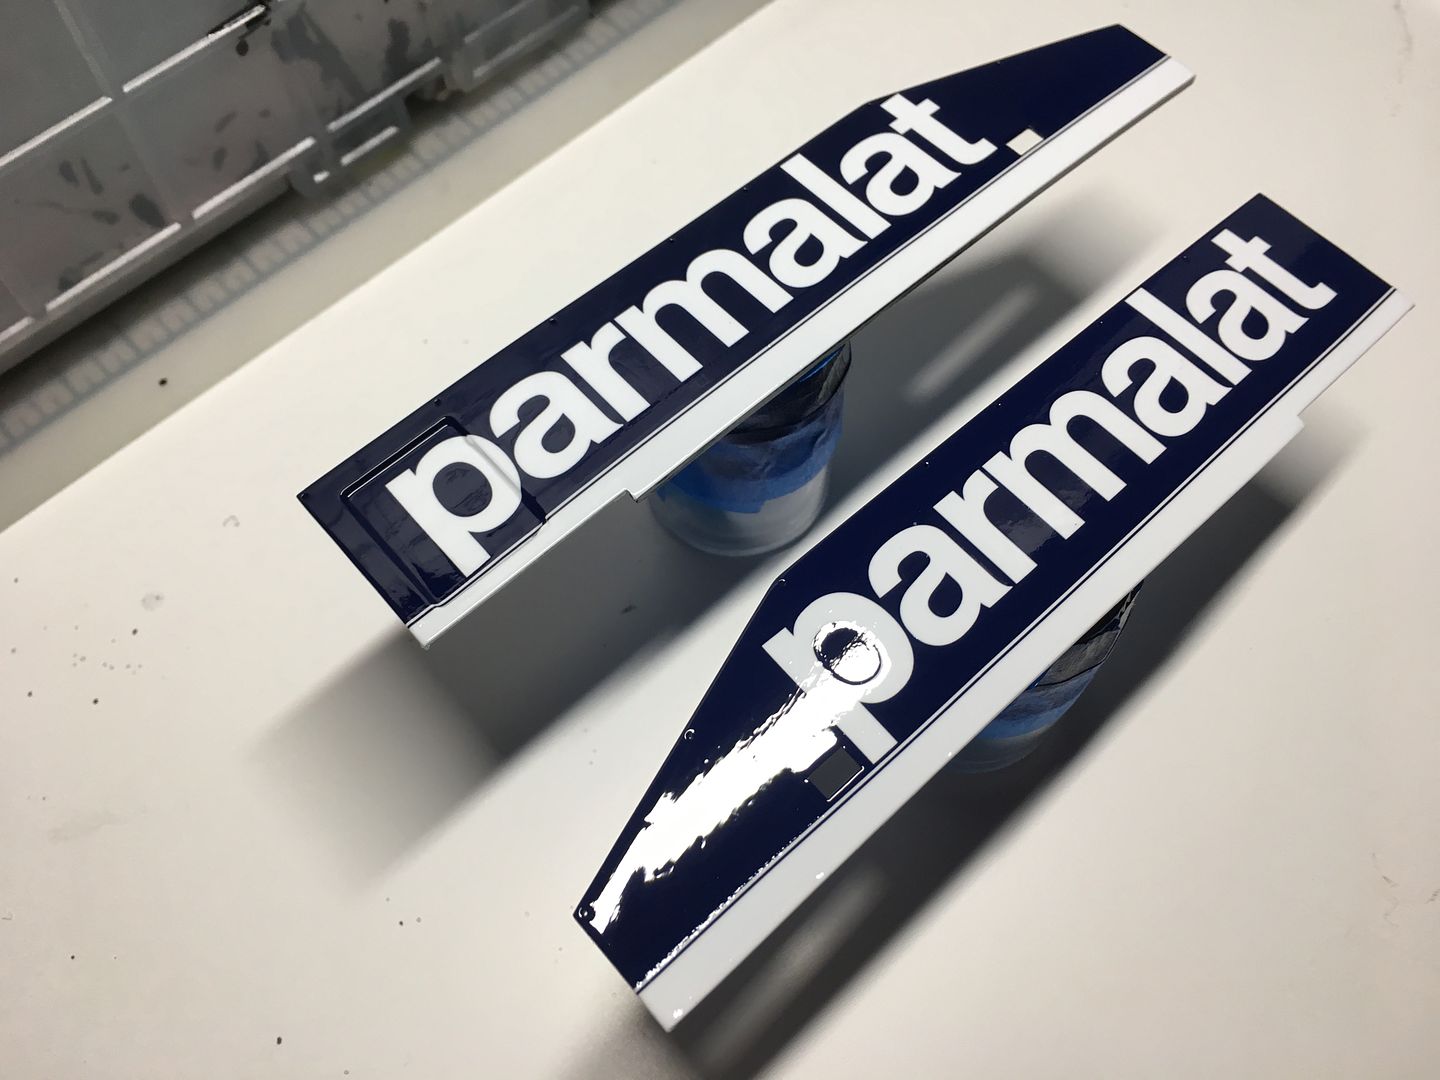
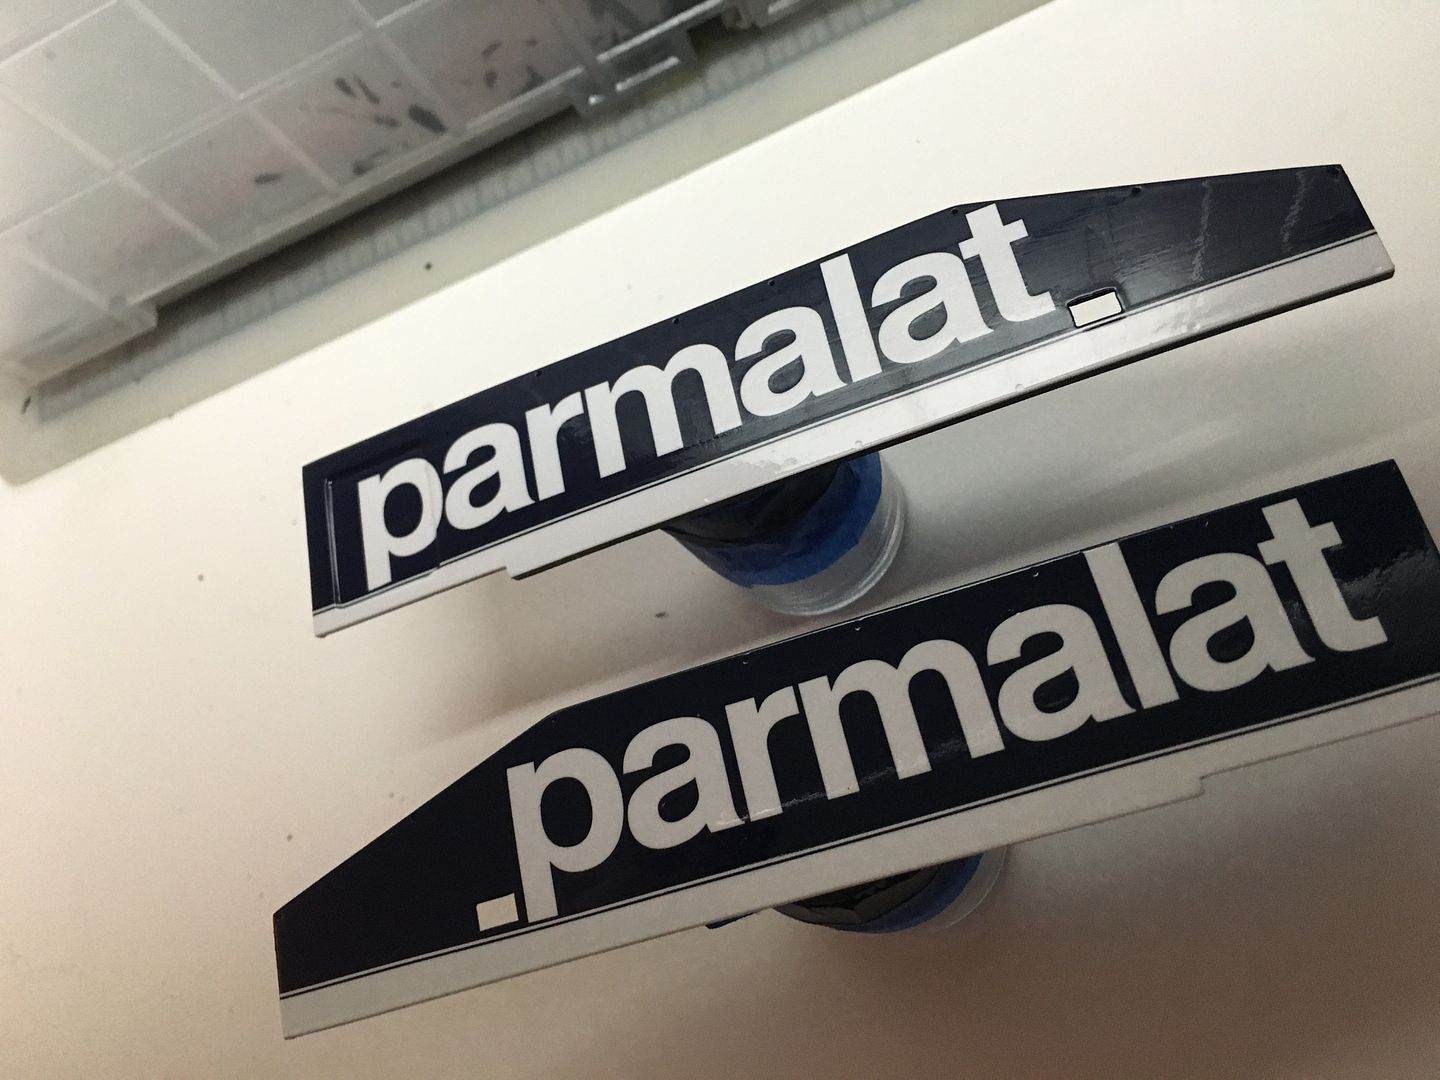
I sprayed over the flat cockpit side panels last night, sealing the Parmalat decal and luckily nothing peeled, bubbled, clouded or pitted! Quite chuffed with the result (first time with Zero and indeed any clear coat) and looking forward to adding these colour panels to the rest of the build! Sister visiting NYC this week, so there will likely be a break...
The spotlight doesn't do the pictures any favours - you can't really see any marks in the daylight...next time I might spend a bit more time sanding/smoothing the primer. I have not polished these panels yet either...they may benefit from a slight flattening? I'm so nervous of buggering up the spraying/lacquering part of these builds, I dare not touch anything once they are 'ok'!
It will happen one day though - that whole 'strip and start again' saga!

The 'spray the white bits' has been mentioned a lot on the F1m thread I have - I said that this was the first time I'd used Zero and even any type of clearcoat, or indeed 'proper' spraying in fact - I probably brush painted car kits when I was 14!
I get the spray white thing - I'd be ok masking the shapes off, like the large nose section - I mainly avoided it because of the very large white text (Parmalat) and the confidence in matching that to the sprayed white...or am I missing something here, and it is a case of masking off and spraying white primer, then using the decals in the same way OVER the white areas (but in this case, it would still have the potential issue with the Parmalat matching)
Although I have read negative things about older MFH decals, I decided to trust MFH in this case, that the blue wouldn't shine through, and it seems pretty good.
Anyway - in this case the white decals are obviously pretty thick - which obviously has its own disadvantages. (They do look 'thick' on the model...)
I know many are decals are finer in detail, and the blue would indeed be an issue...
I sprayed over the flat cockpit side panels last night, sealing the Parmalat decal and luckily nothing peeled, bubbled, clouded or pitted! Quite chuffed with the result (first time with Zero and indeed any clear coat) and looking forward to adding these colour panels to the rest of the build! Sister visiting NYC this week, so there will likely be a break...
The spotlight doesn't do the pictures any favours - you can't really see any marks in the daylight...next time I might spend a bit more time sanding/smoothing the primer. I have not polished these panels yet either...they may benefit from a slight flattening? I'm so nervous of buggering up the spraying/lacquering part of these builds, I dare not touch anything once they are 'ok'!
It will happen one day though - that whole 'strip and start again' saga!
Gassing Station | Scale Models | Top of Page | What's New | My Stuff