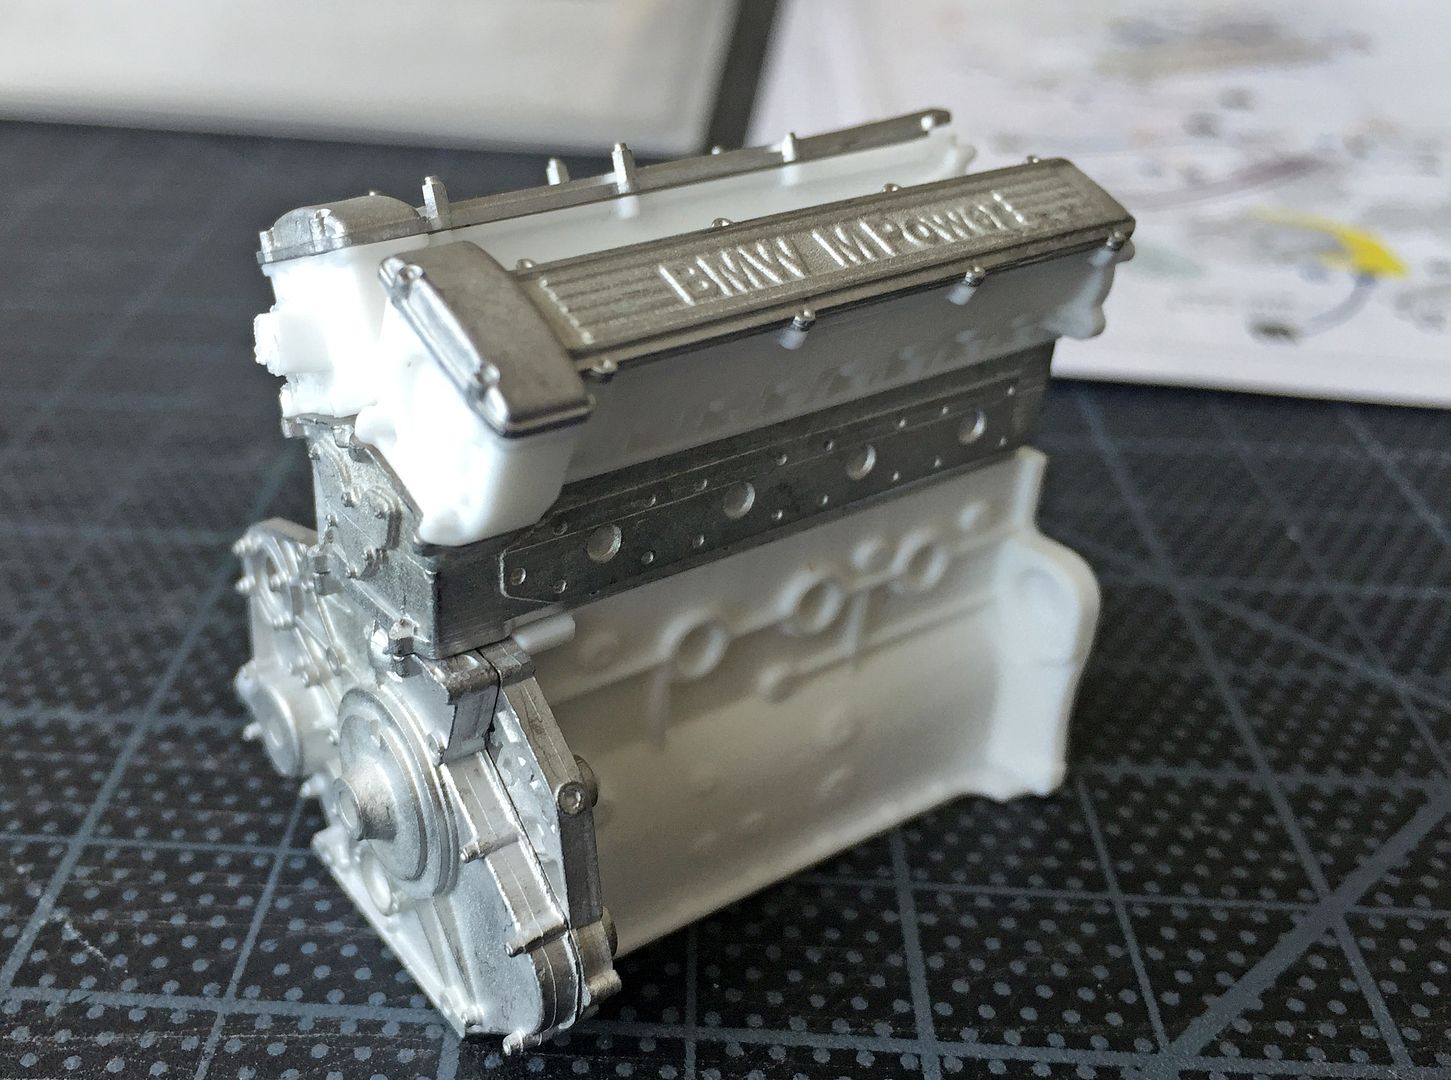
MFH 1/12 BT52b
Discussion


Way too kind...it really is the kit - I'm not joking. Go slow and it goes together so well.
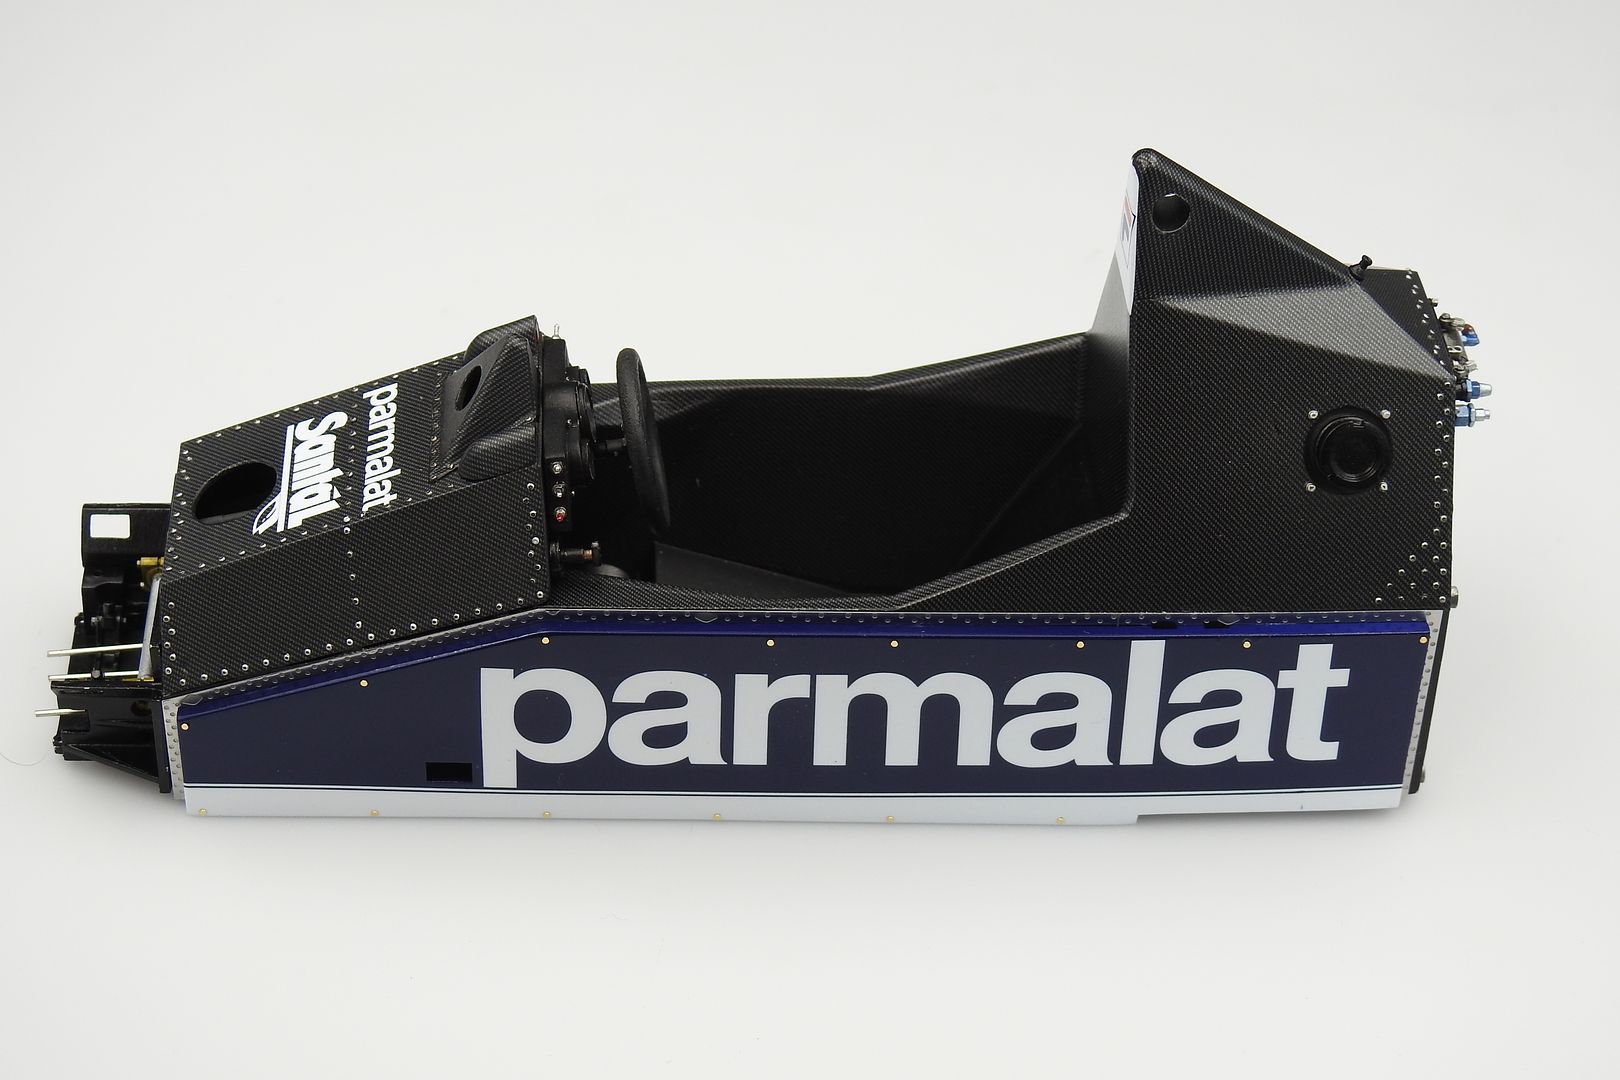
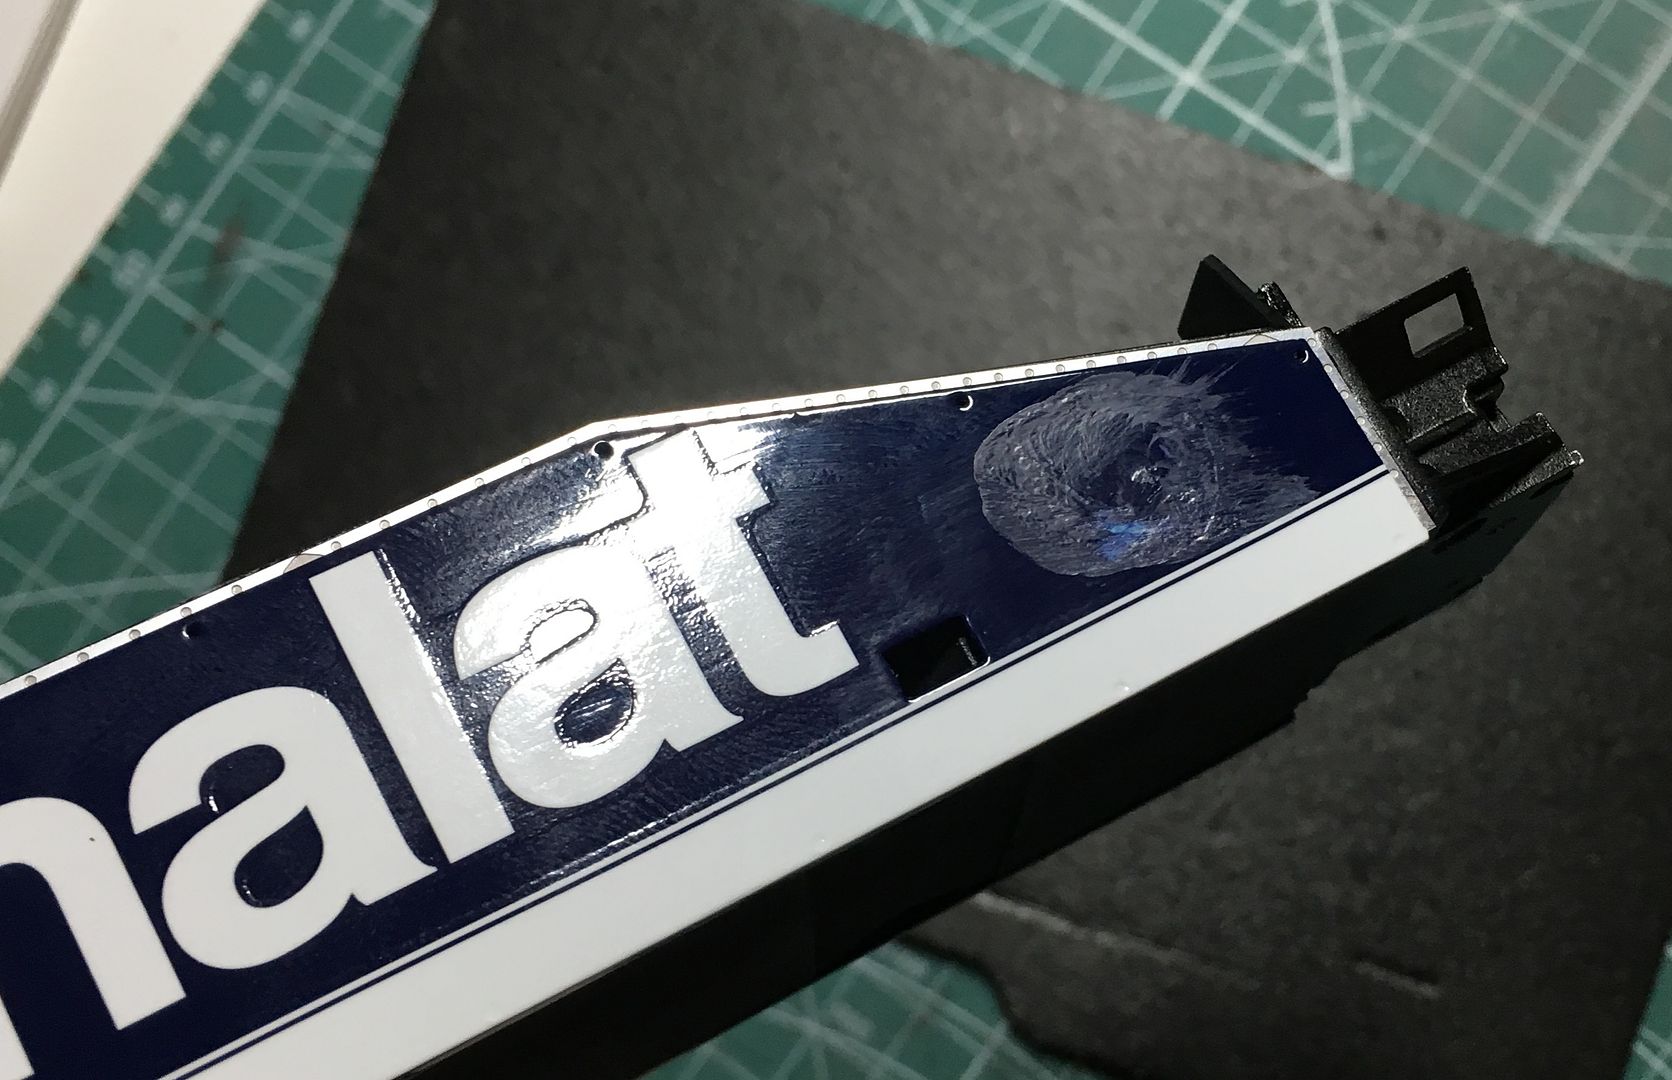
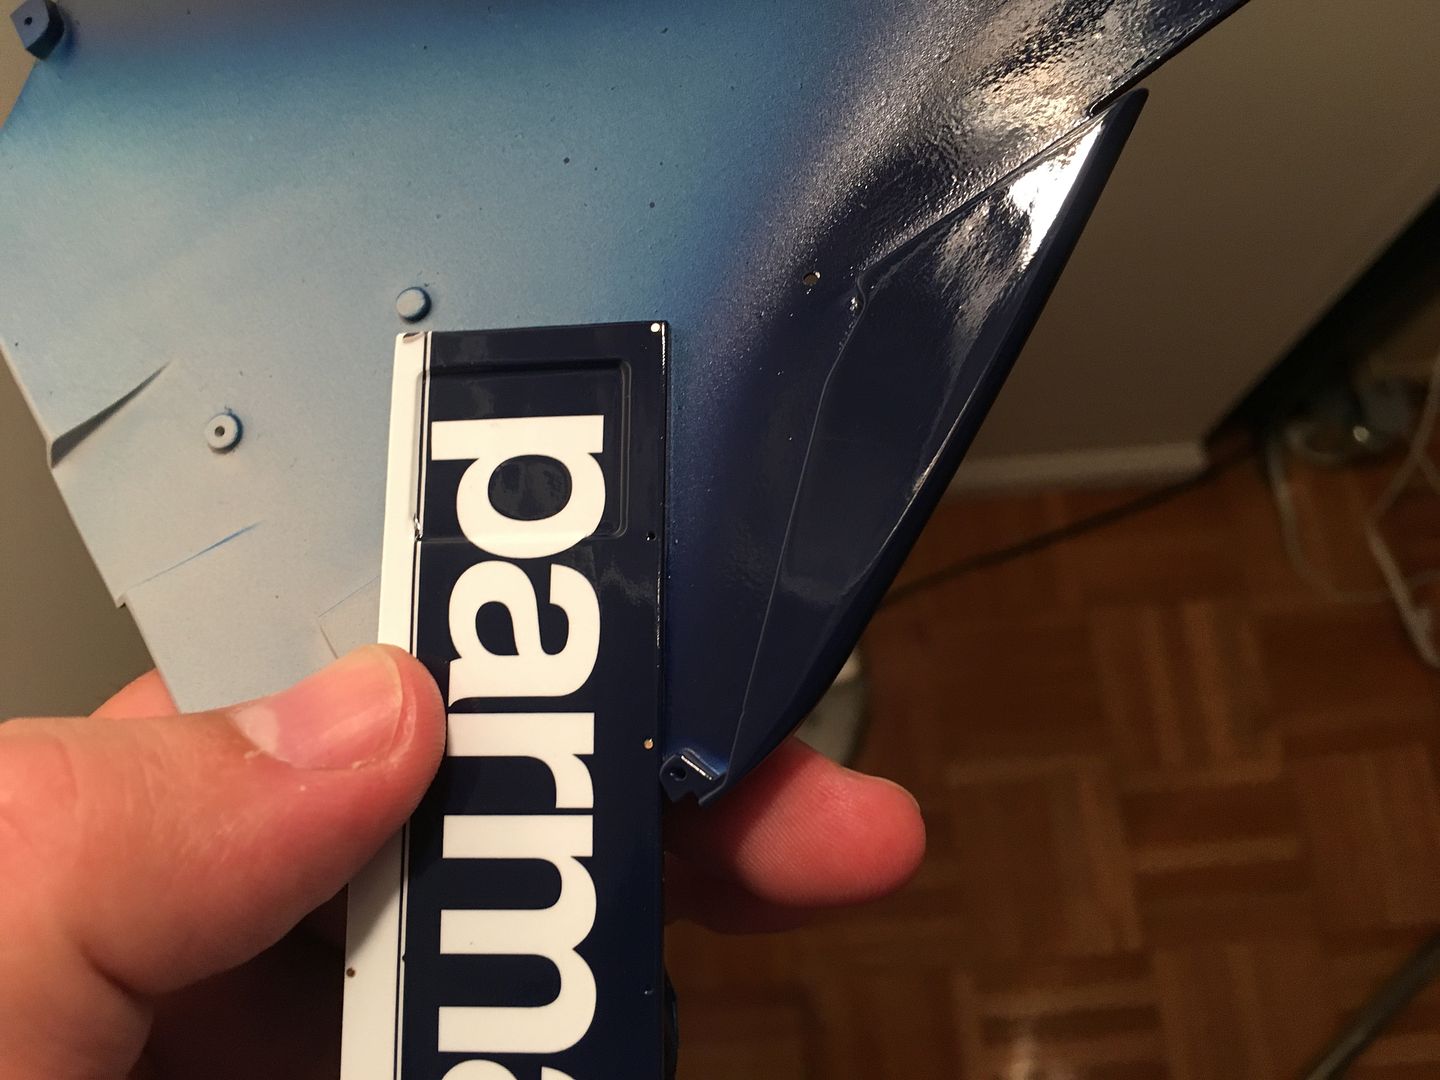
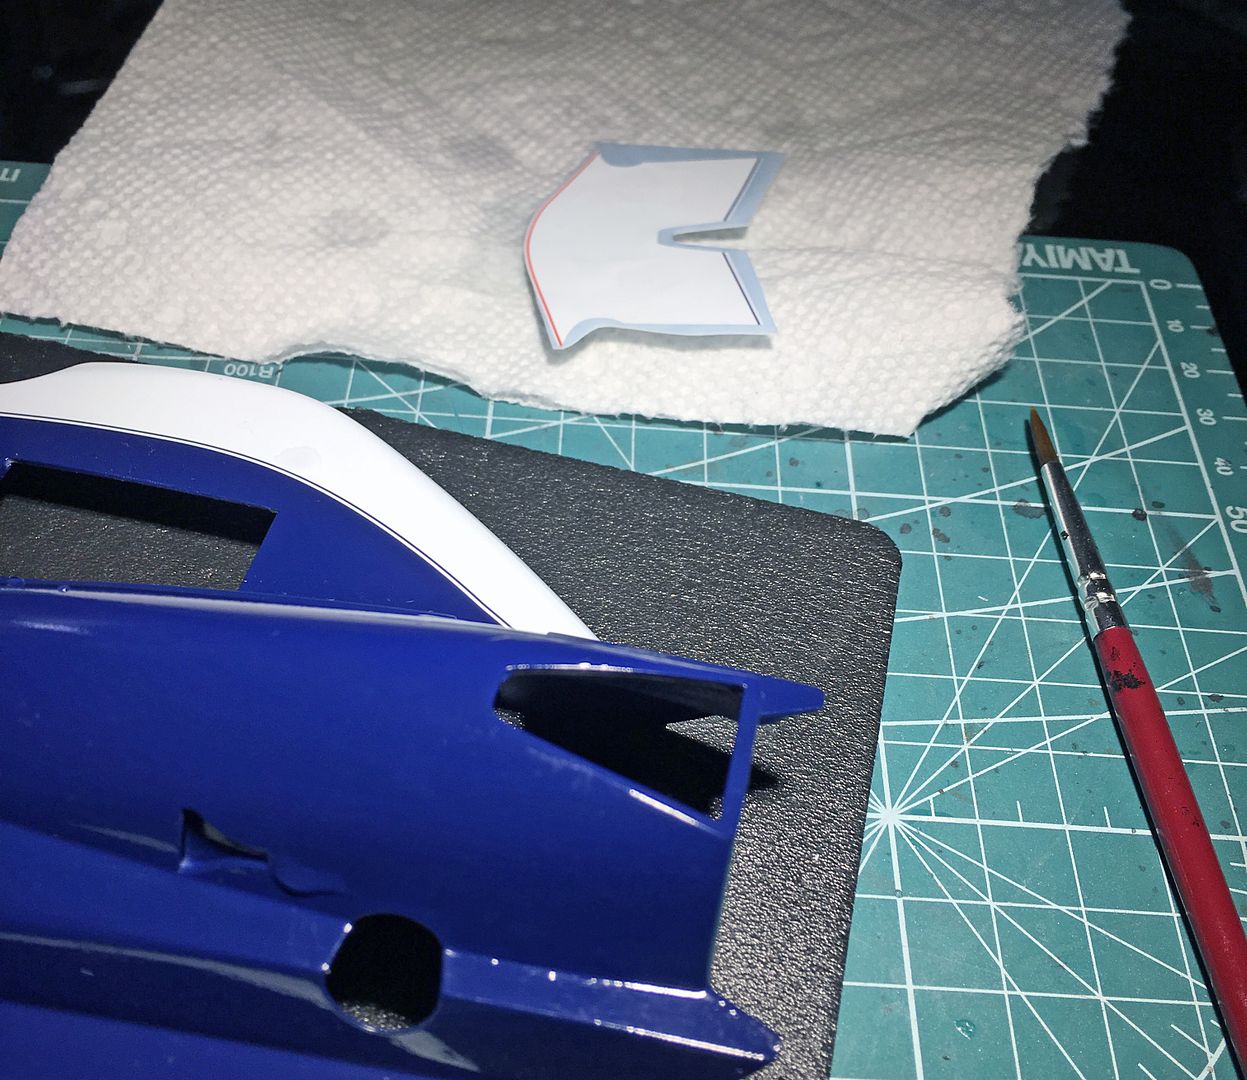
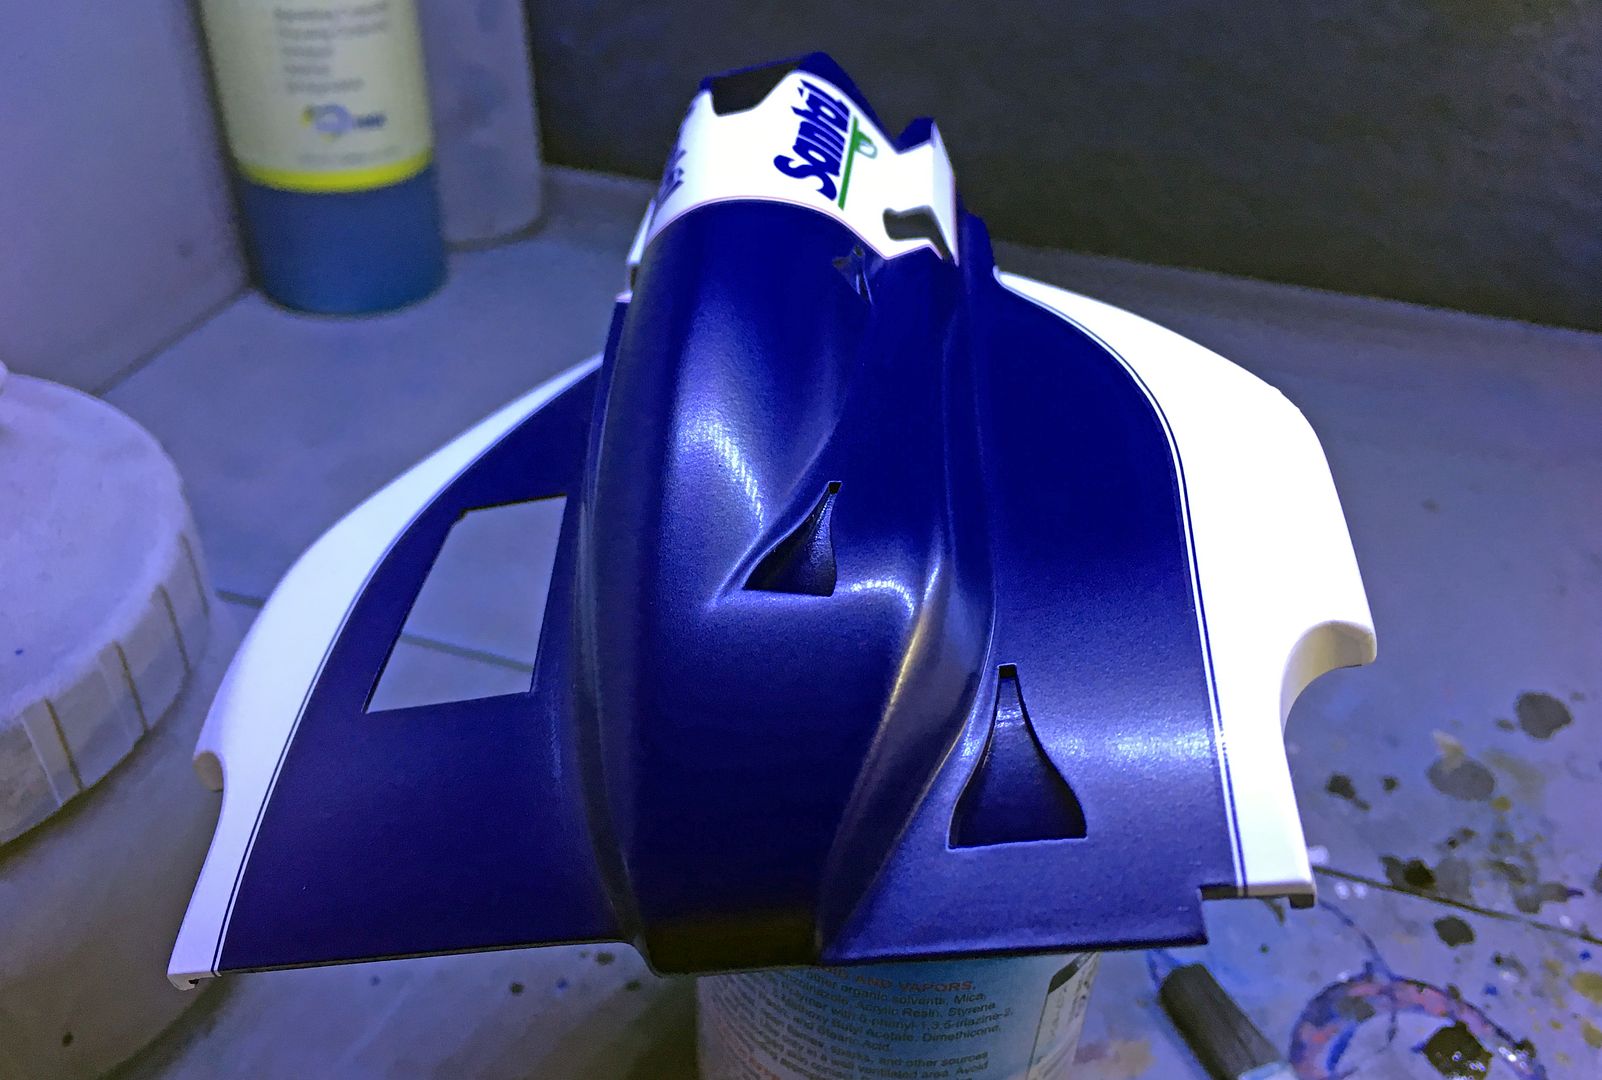
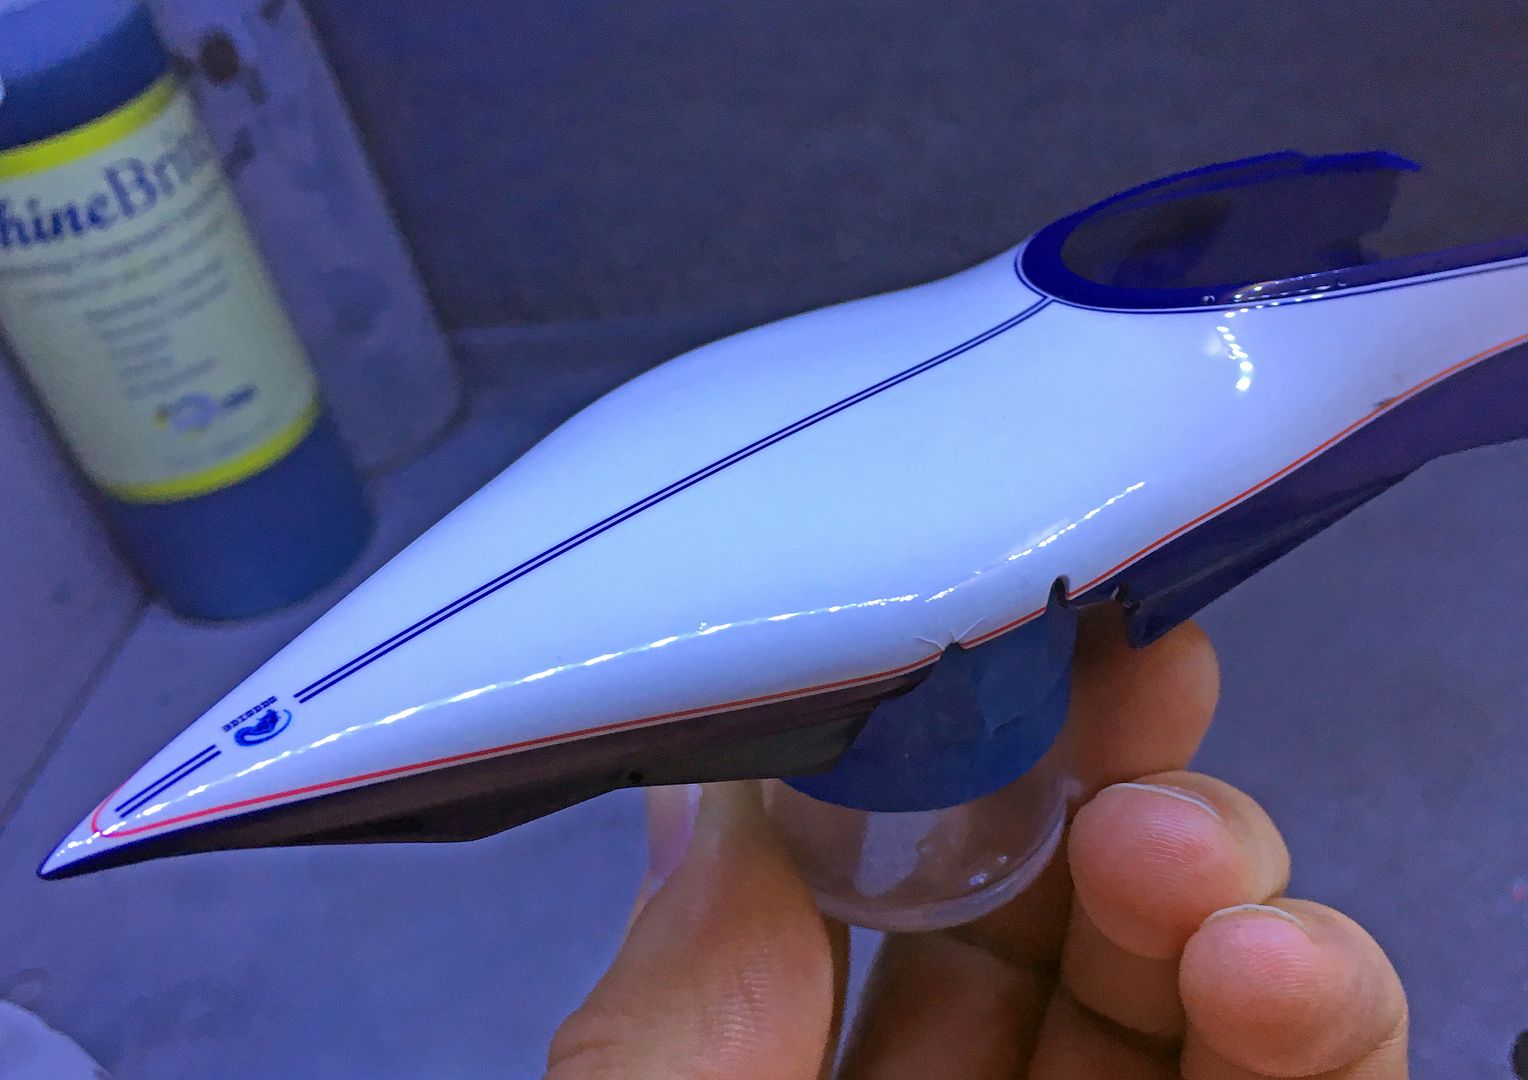
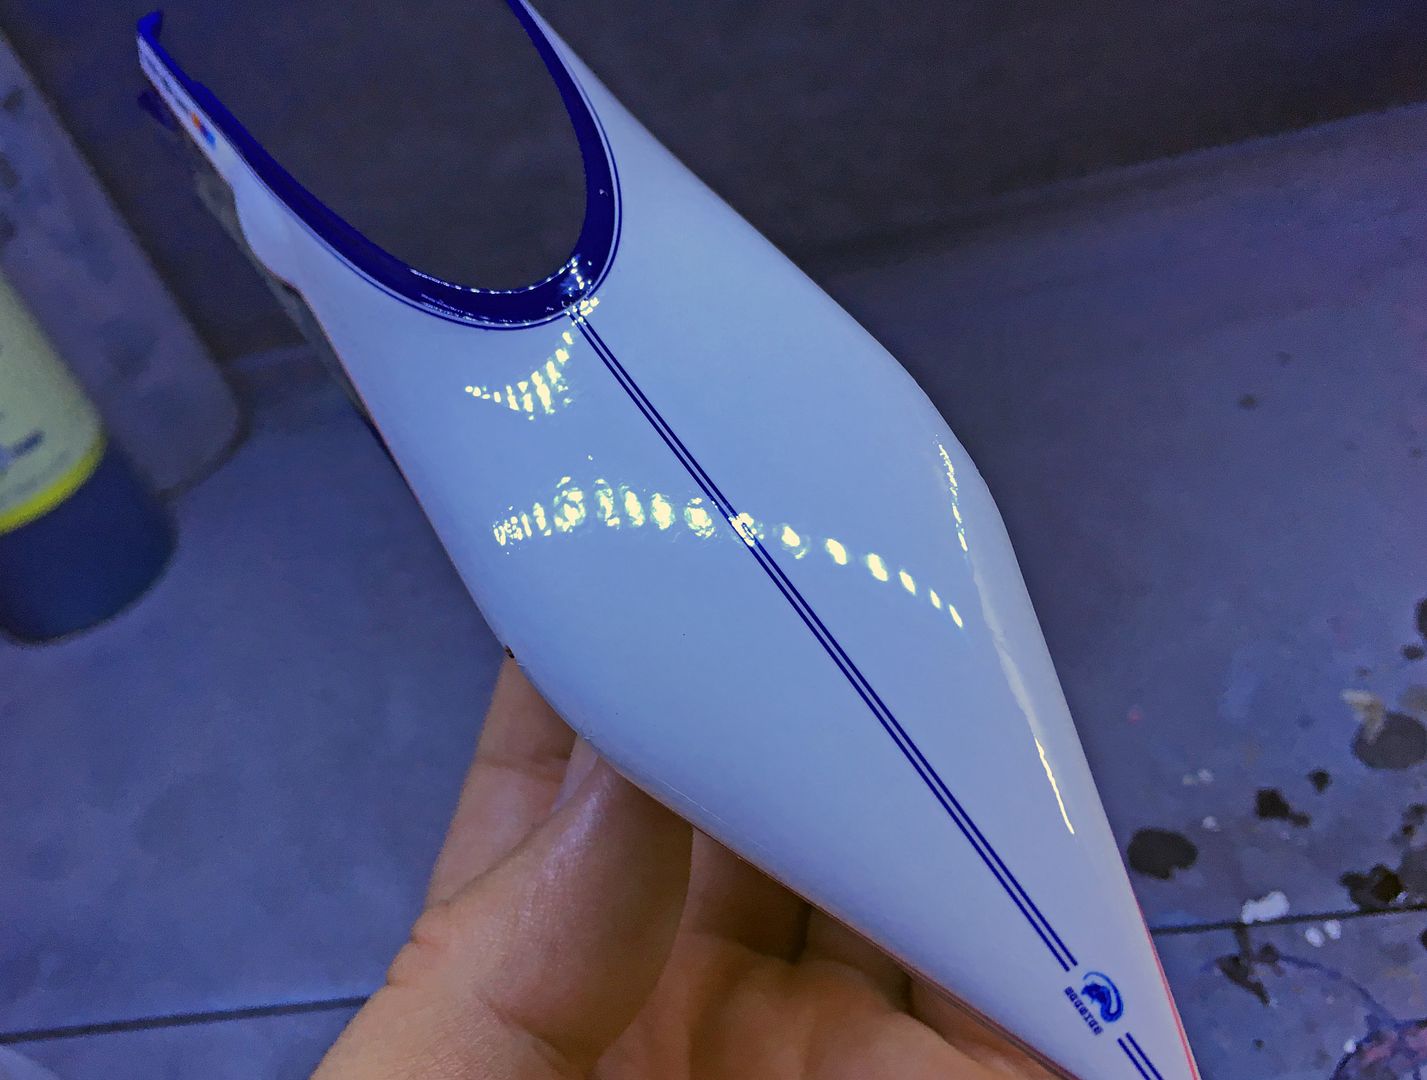
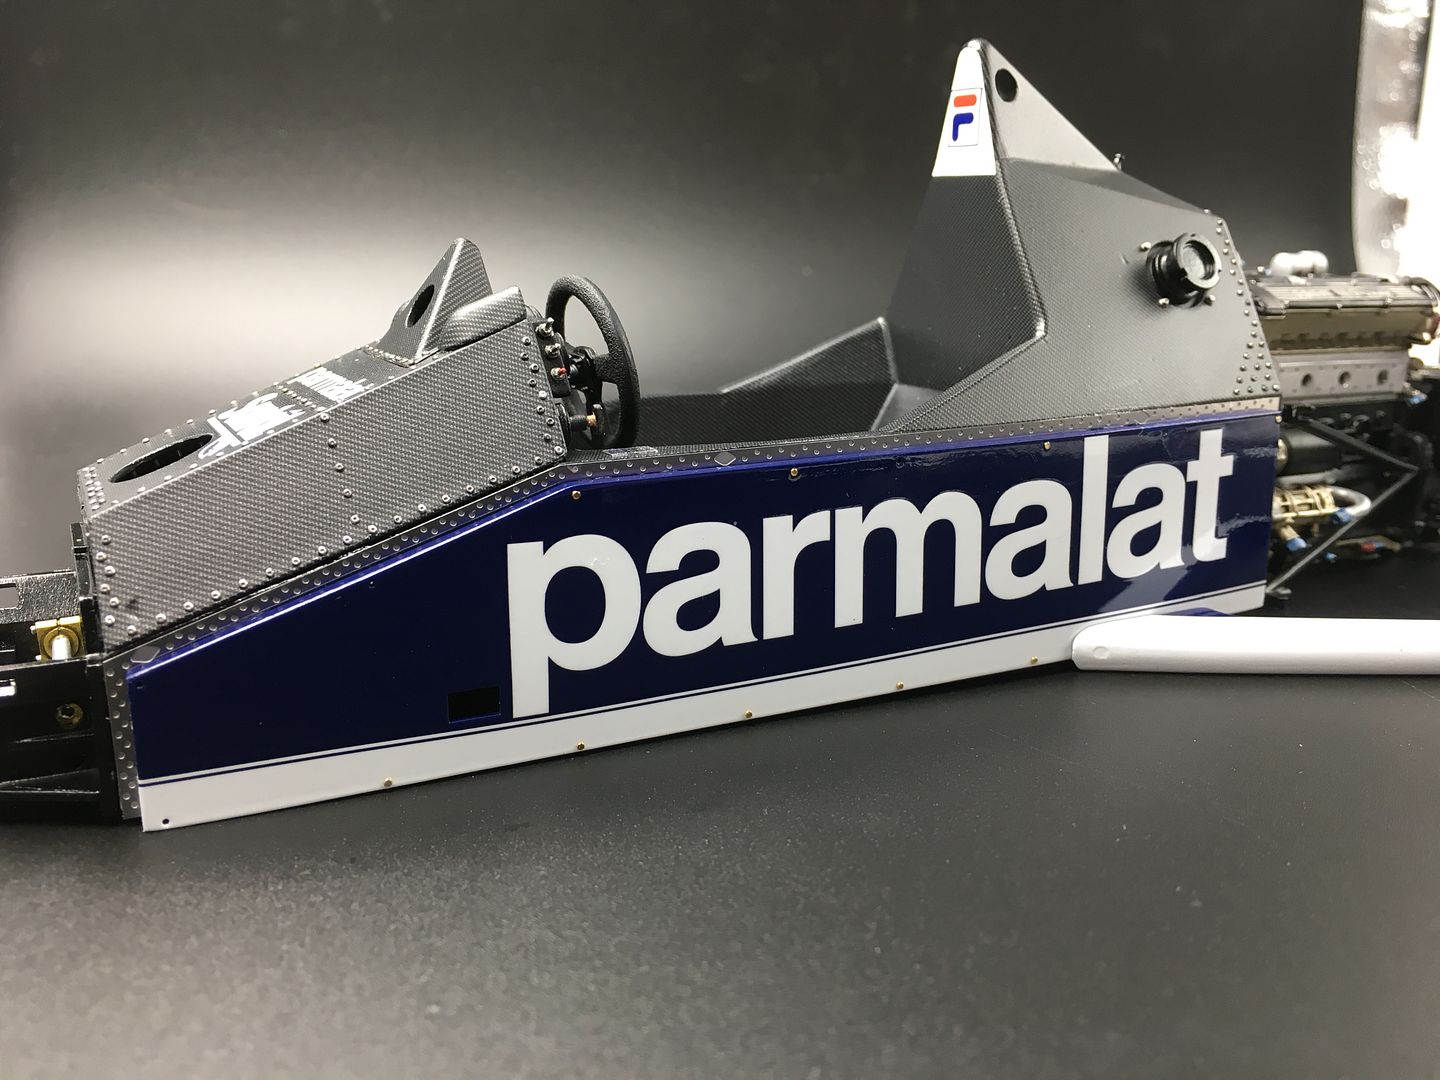
Bit of a rescue mission completed...you can't see in the pictures above, but I made a right cock up on the right hand side panel, by managing to get a CA glue finger print right in the middle of a nice clean part of blue...then made an even bigger mess trying to get it off quickly - don't ask...
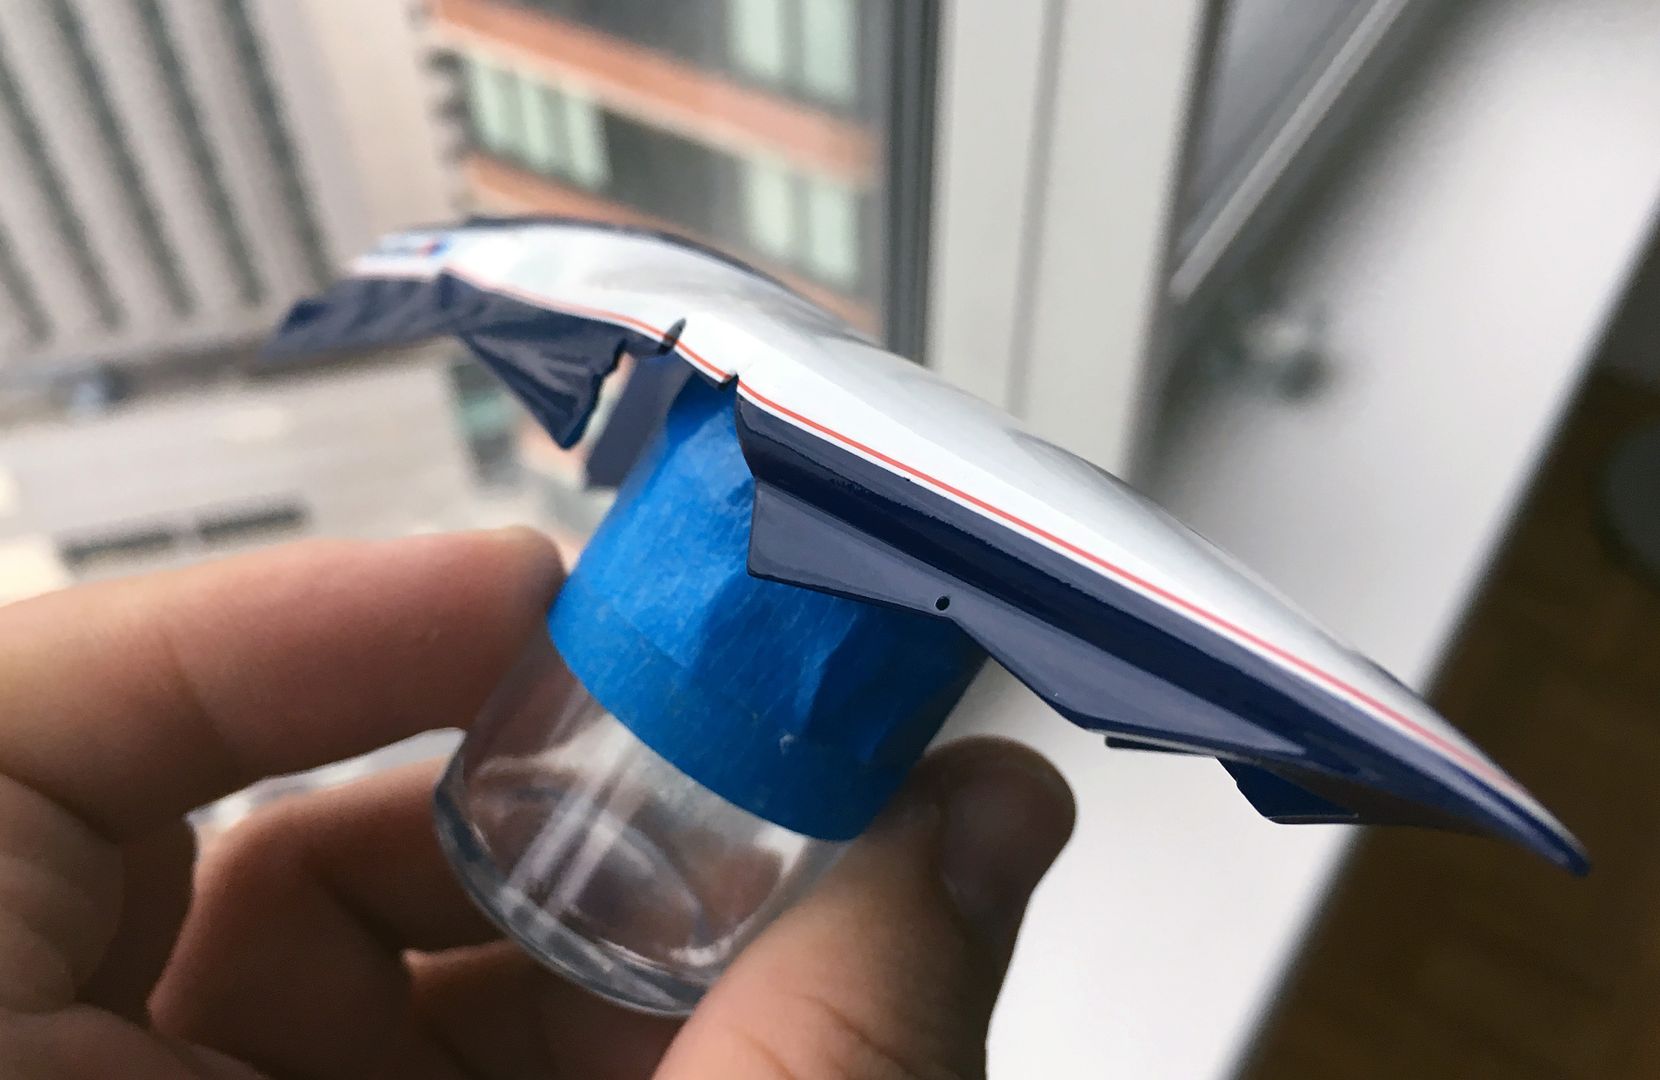
Had to sand back, without damaging the Parmalat clear-coat-sealed decal, or the lower white stripe, then mask, and with my freshly arrived replacement Zero paint BT52 blue paint, repaint the front section. This spray painting lark is all new to me, so was afraid of big ridges in the paint, mis-matched colours etc - but that zero base coat goes on very well, just building up layers, until it matched the surrrounding paint - removed the masking tape and just a faint line, but he lined it up with the text, so you hardly notice it. Re-sprayed the clear coat and it looks good! Pics tomorrow....phew!
The **** up!!
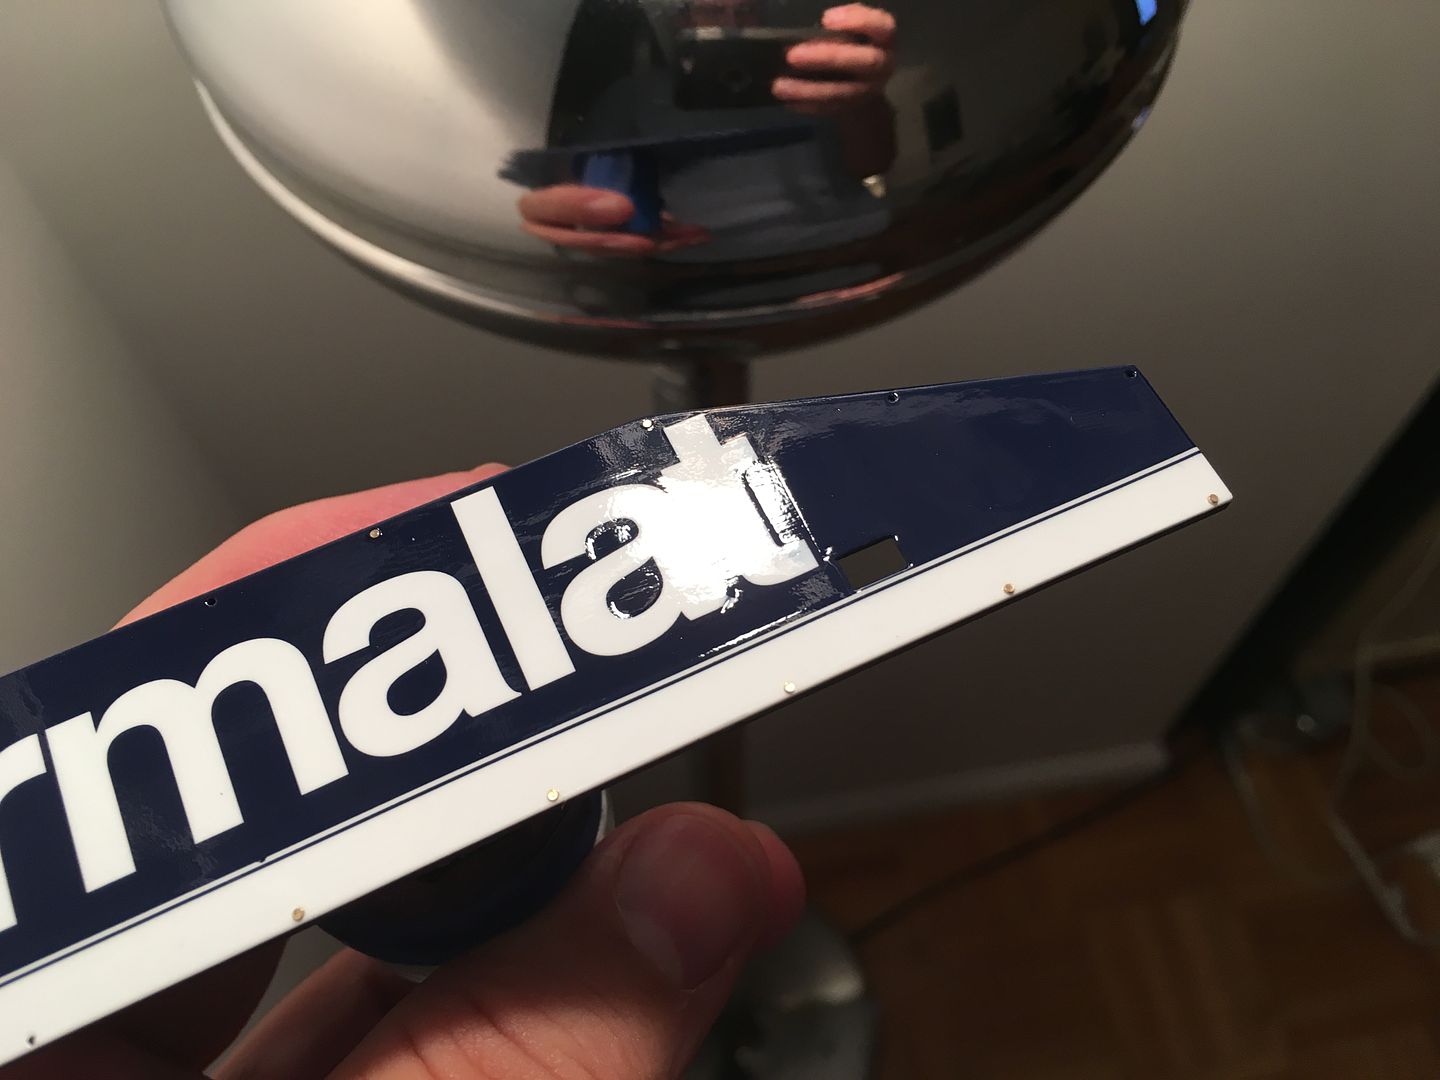
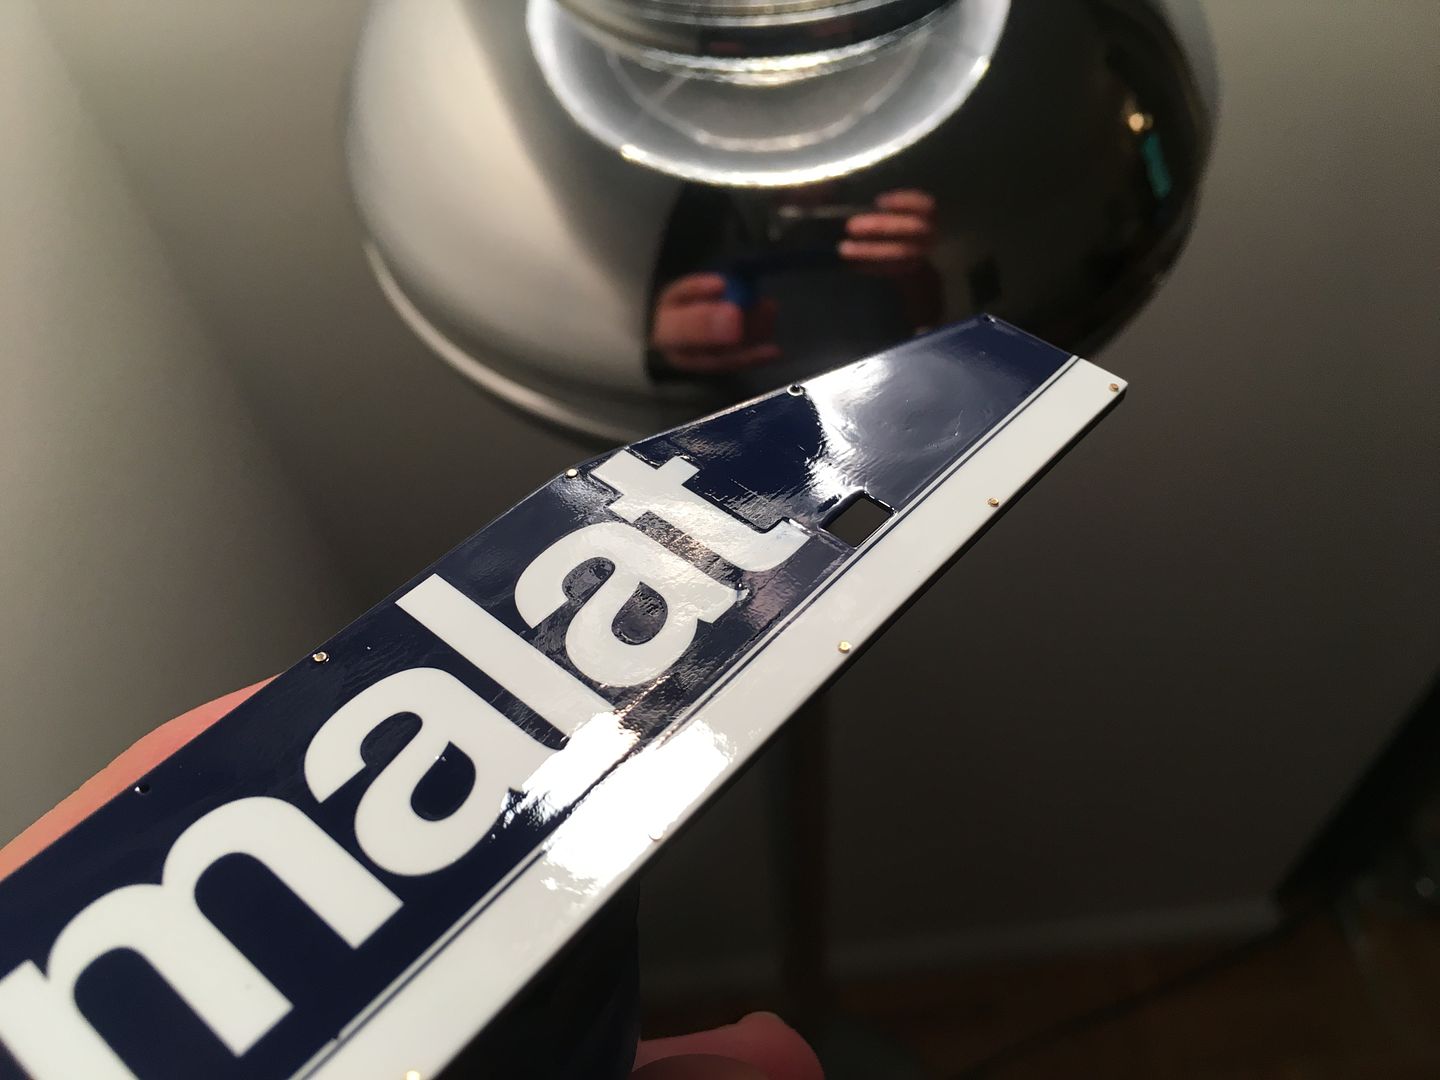
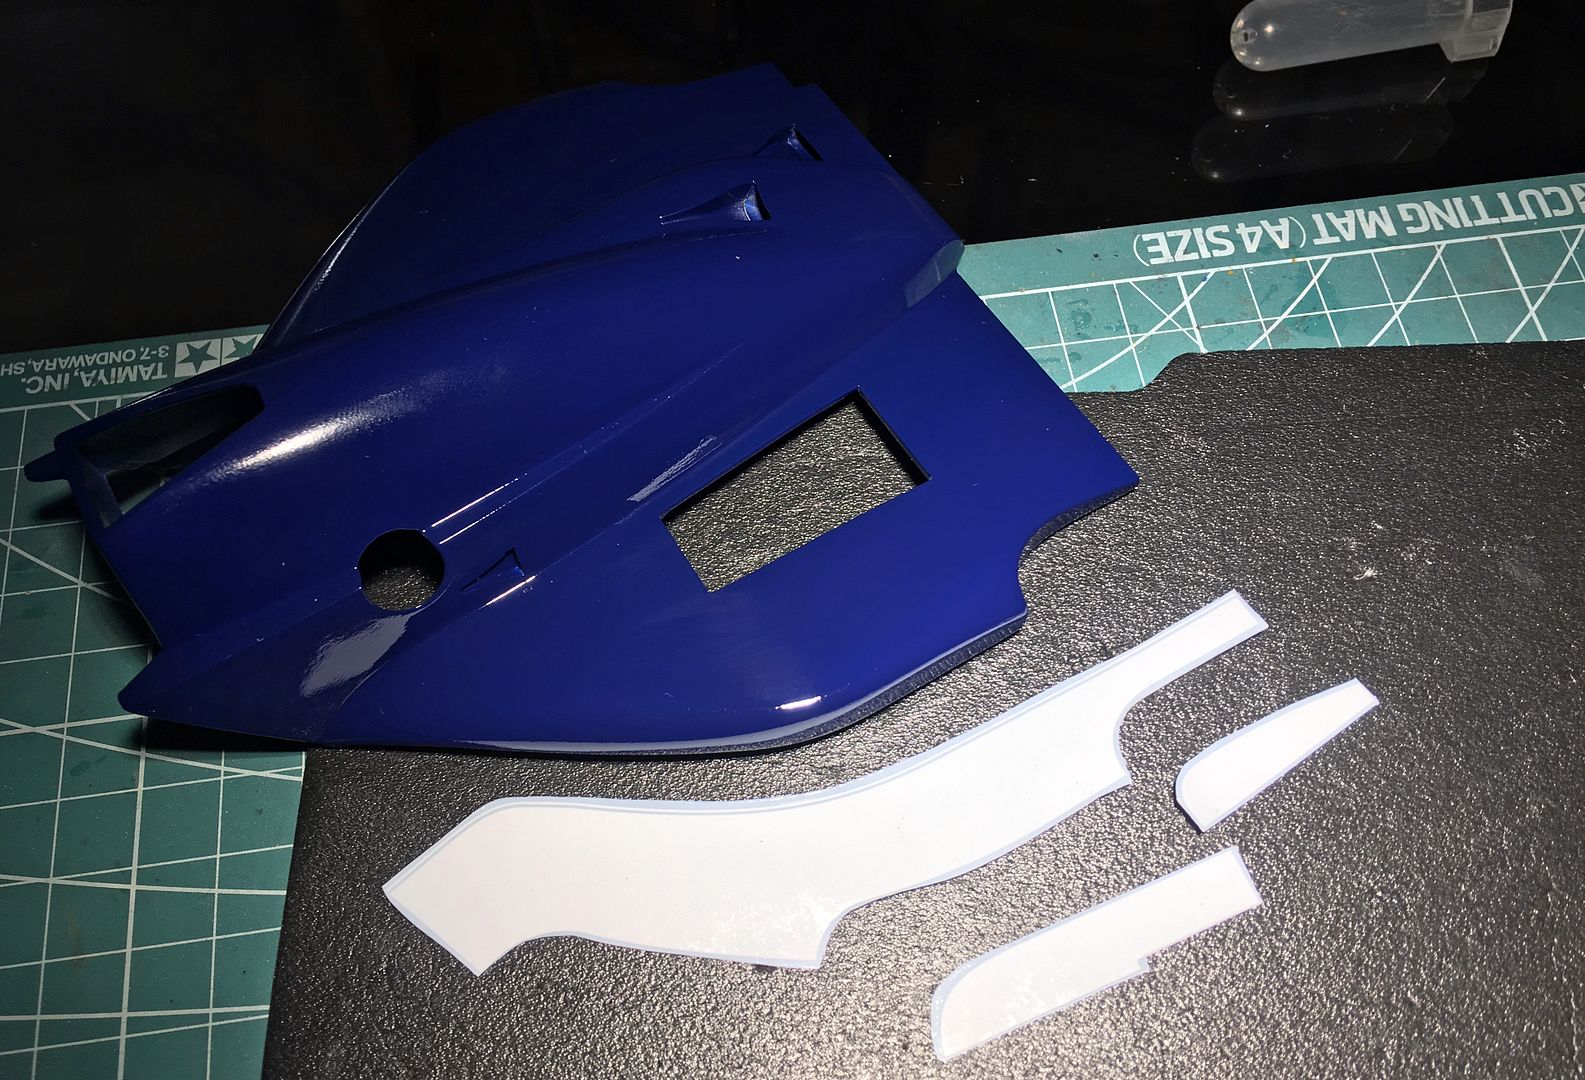
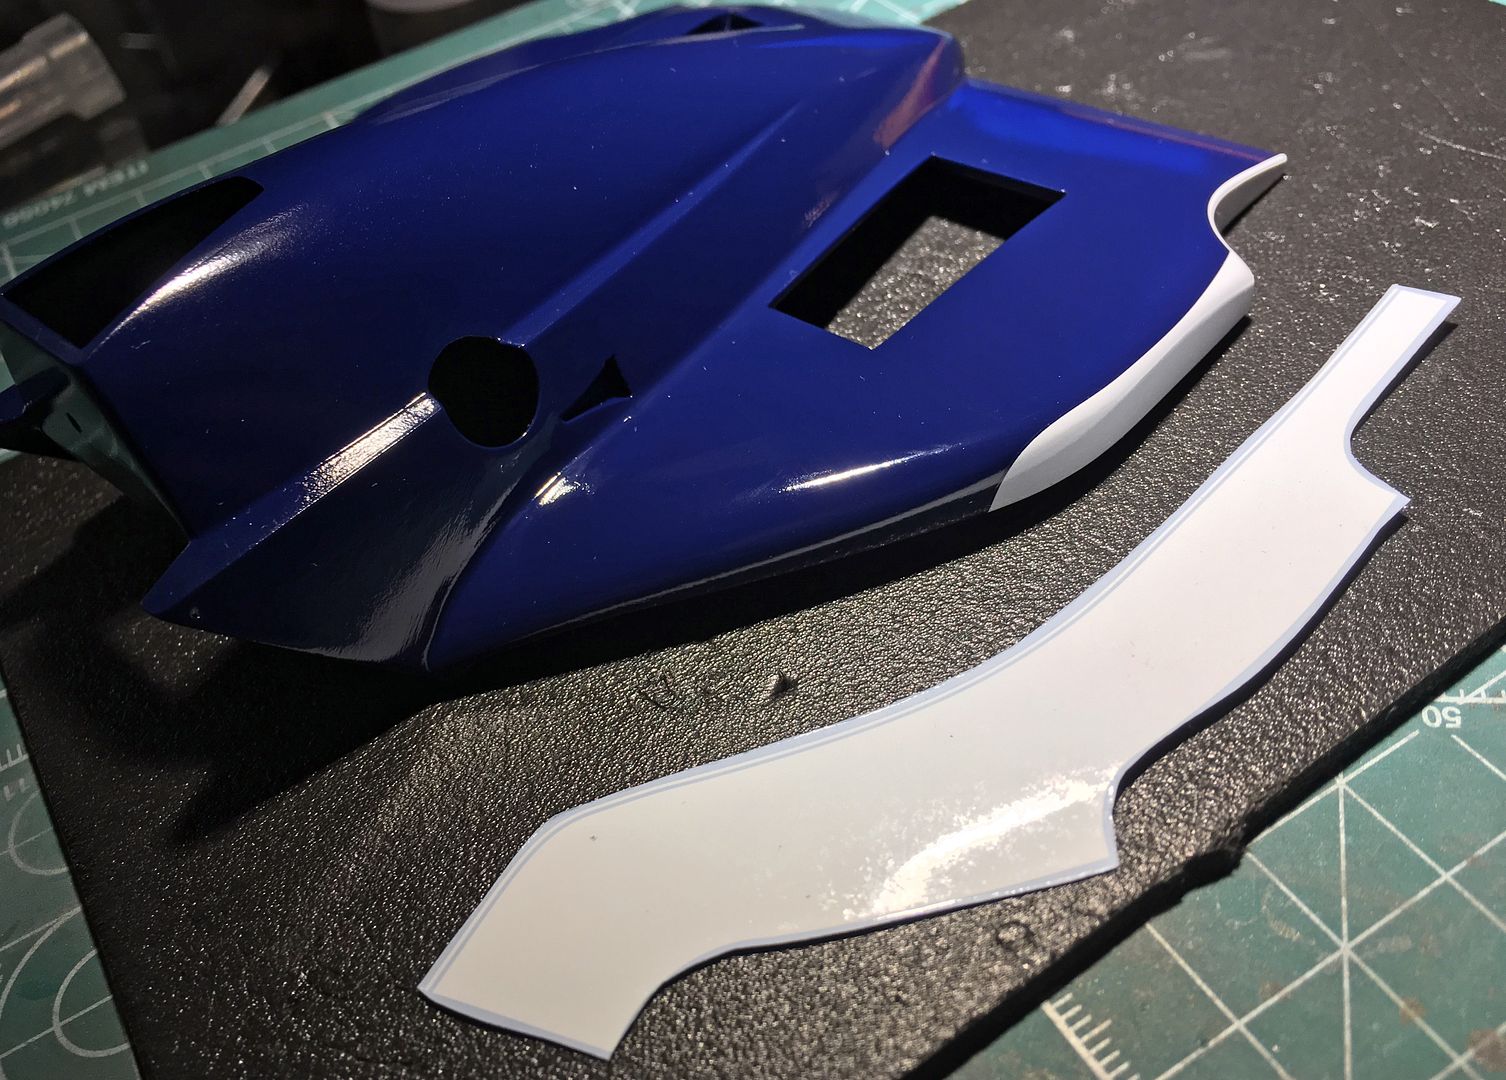
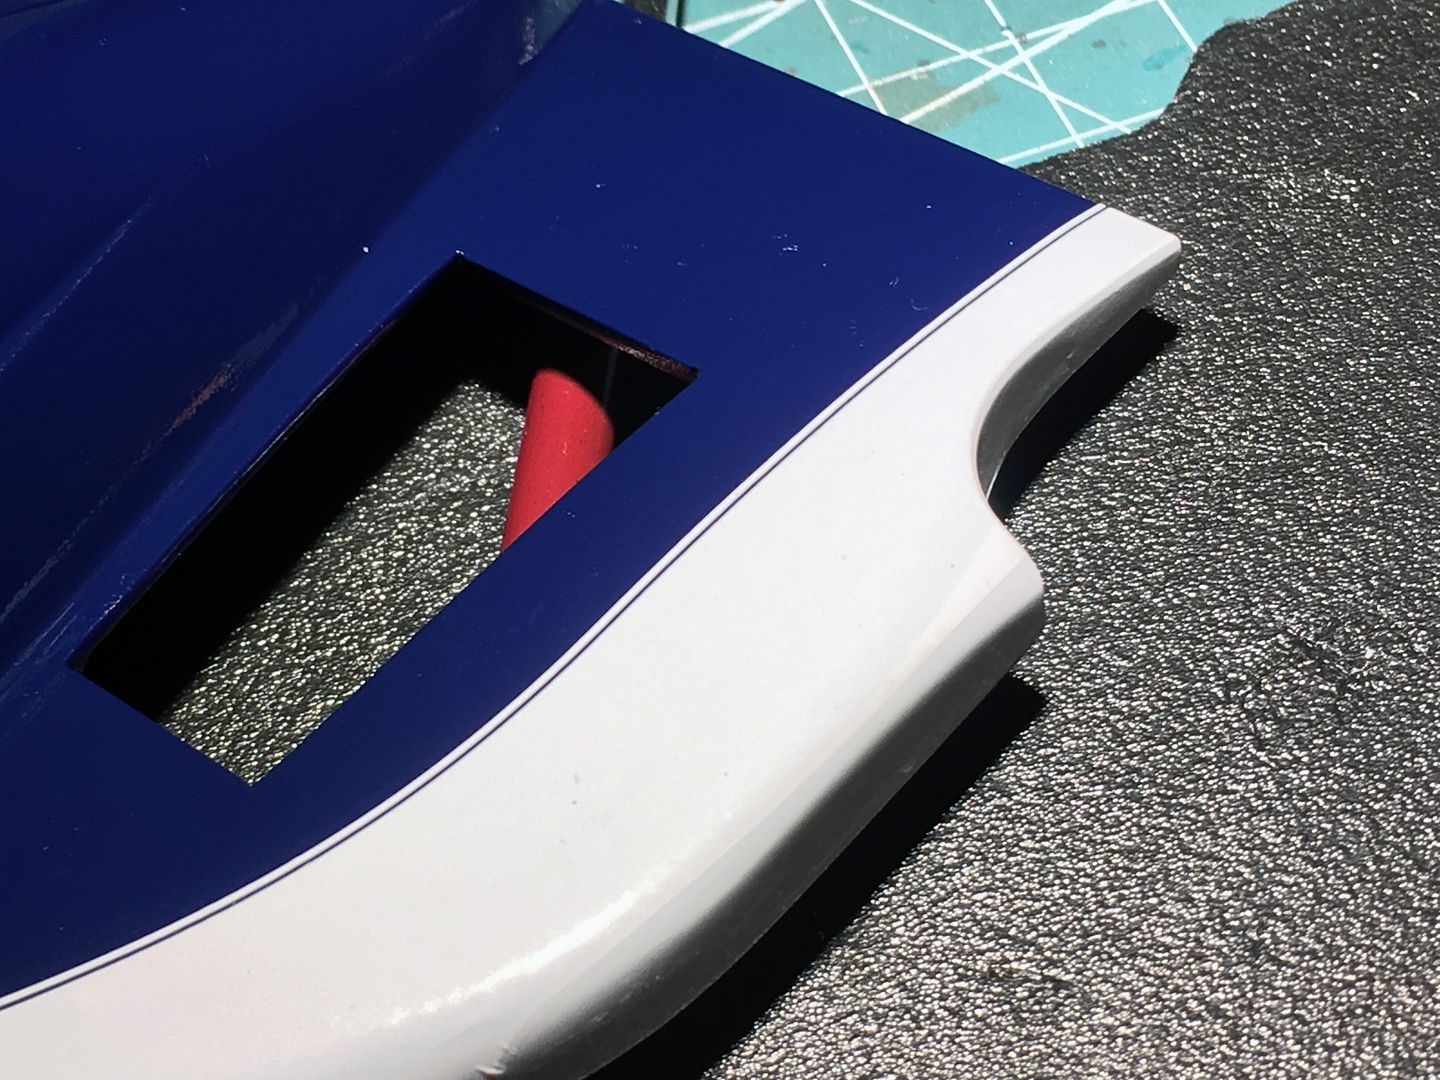
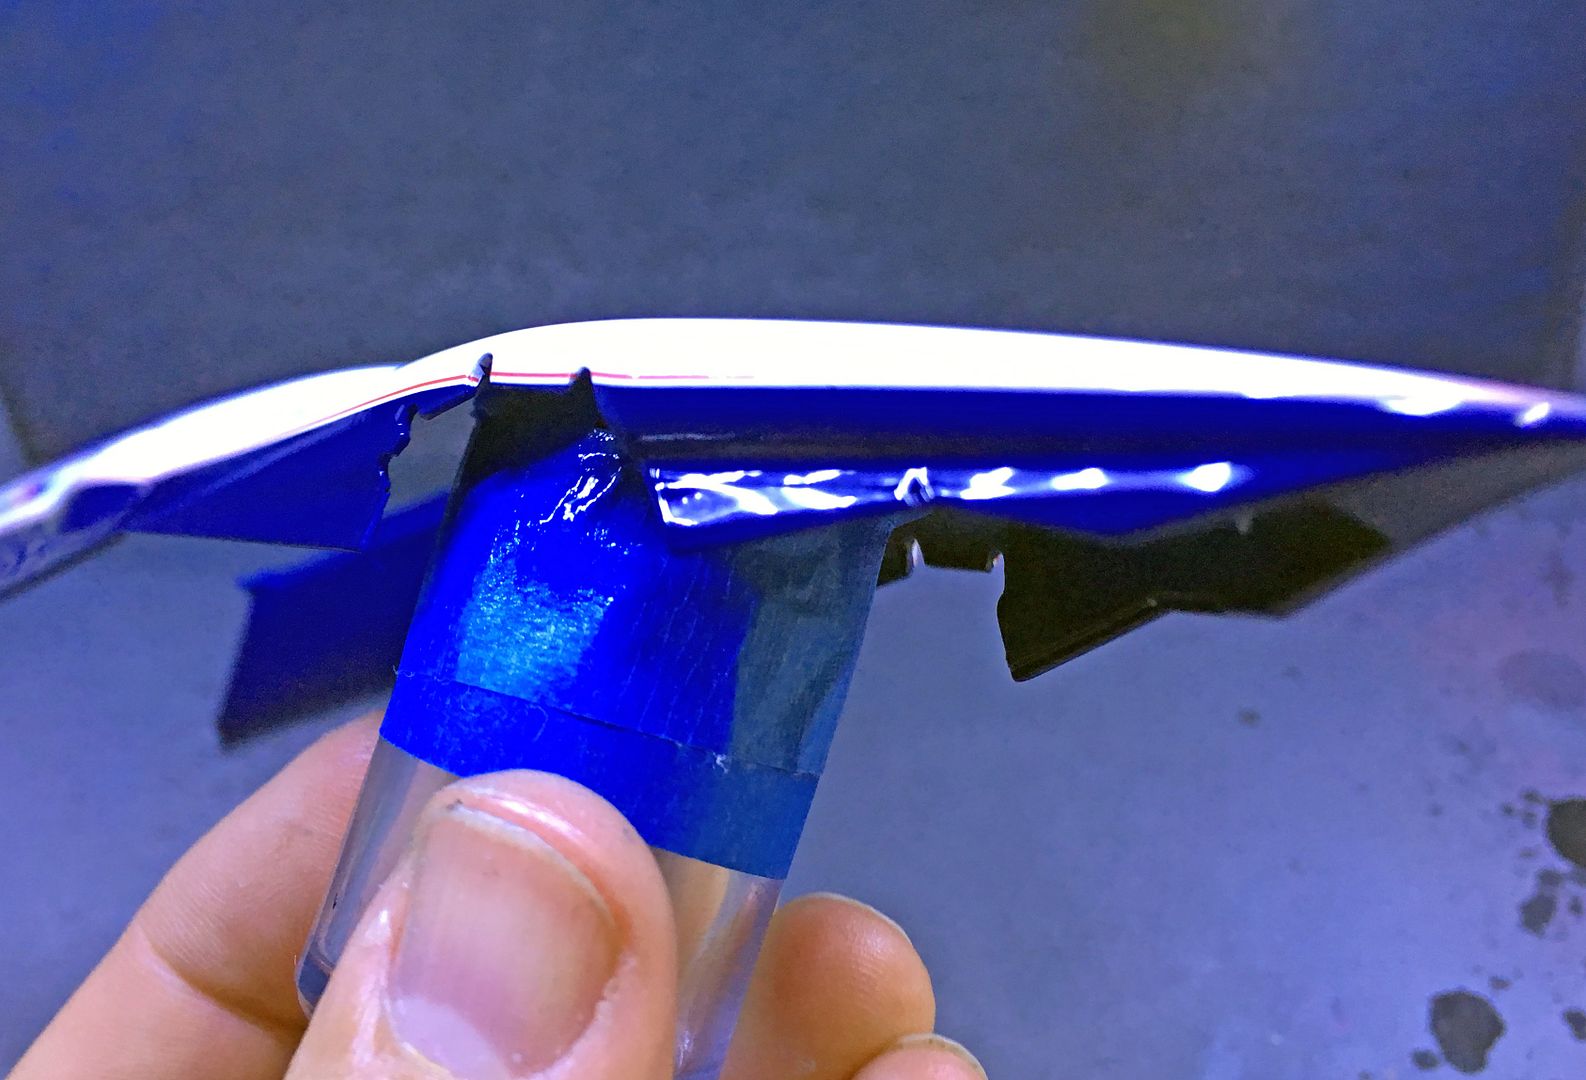
Gave the whole panel a very very light sand to clean a few other bits and bobs off - just had to be careful not to get down to the decal...
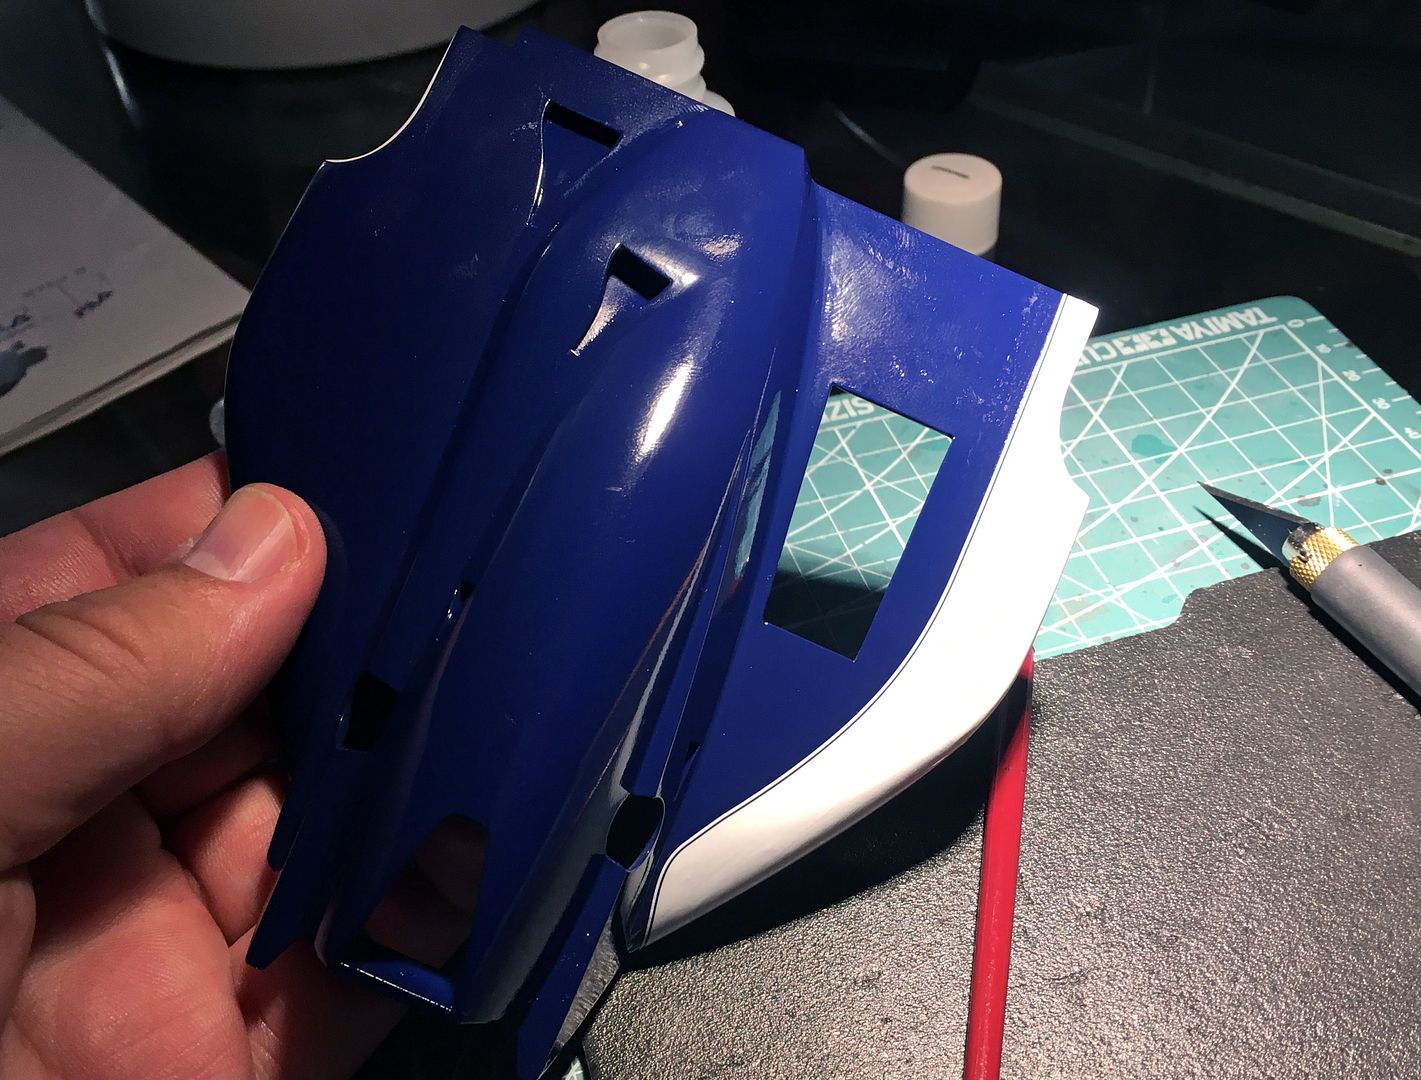
You can just see where the issue was, but I'm ok with this - just happy to save it and not make it any worse!
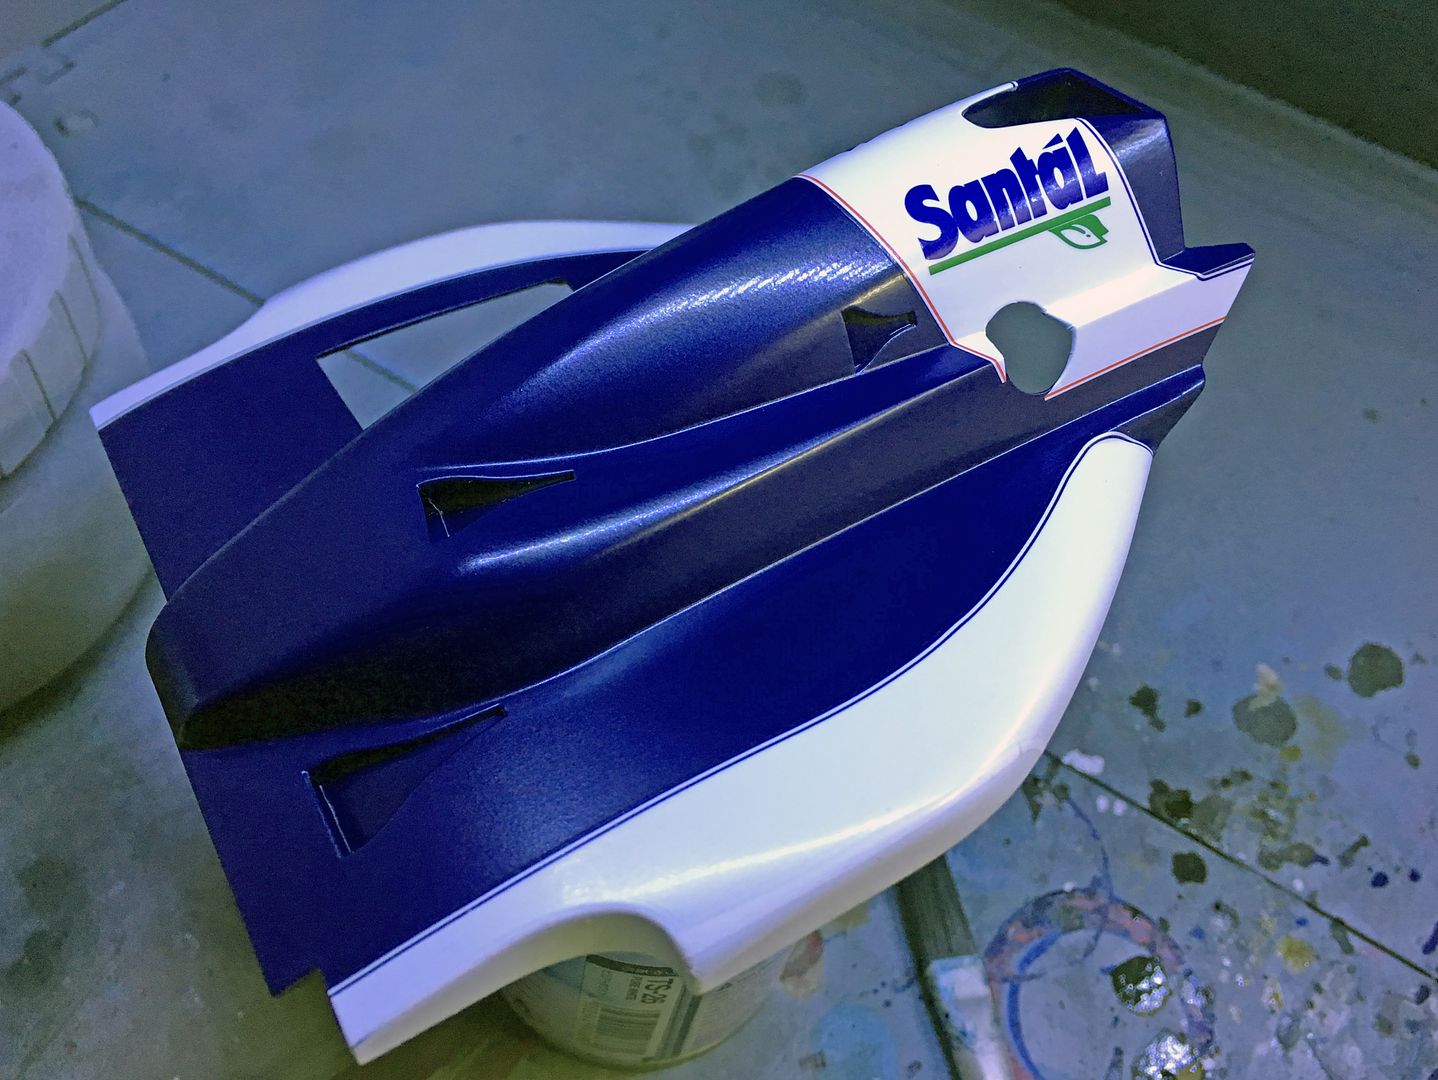
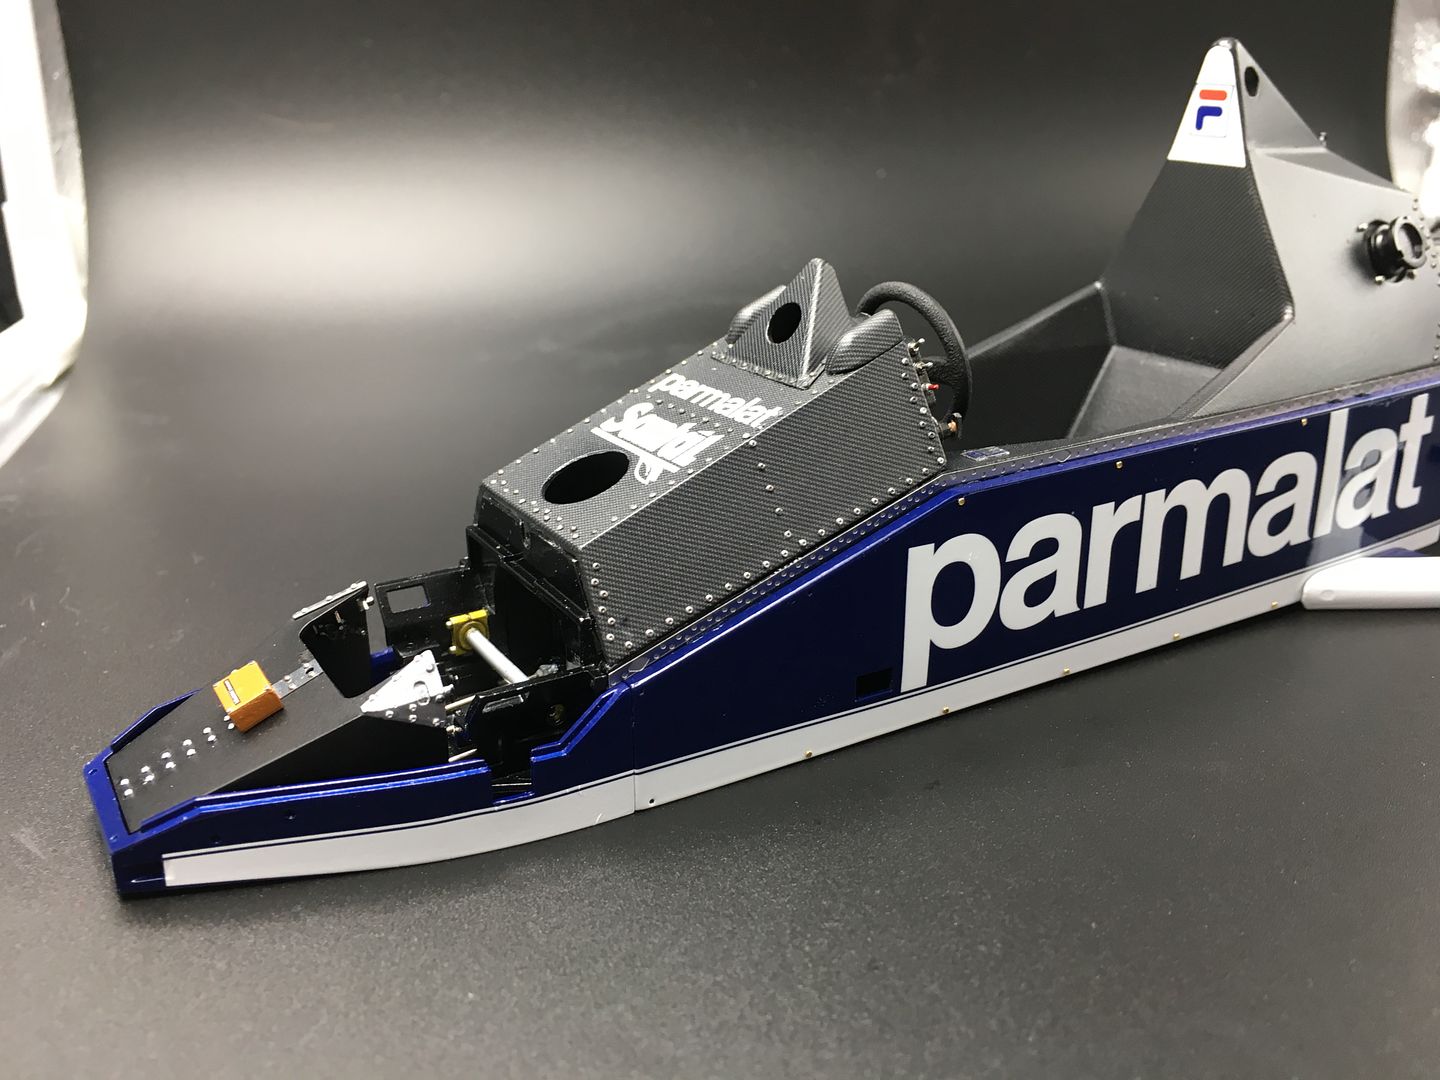
Did the other side again as well, as there was a very slight similar mark...
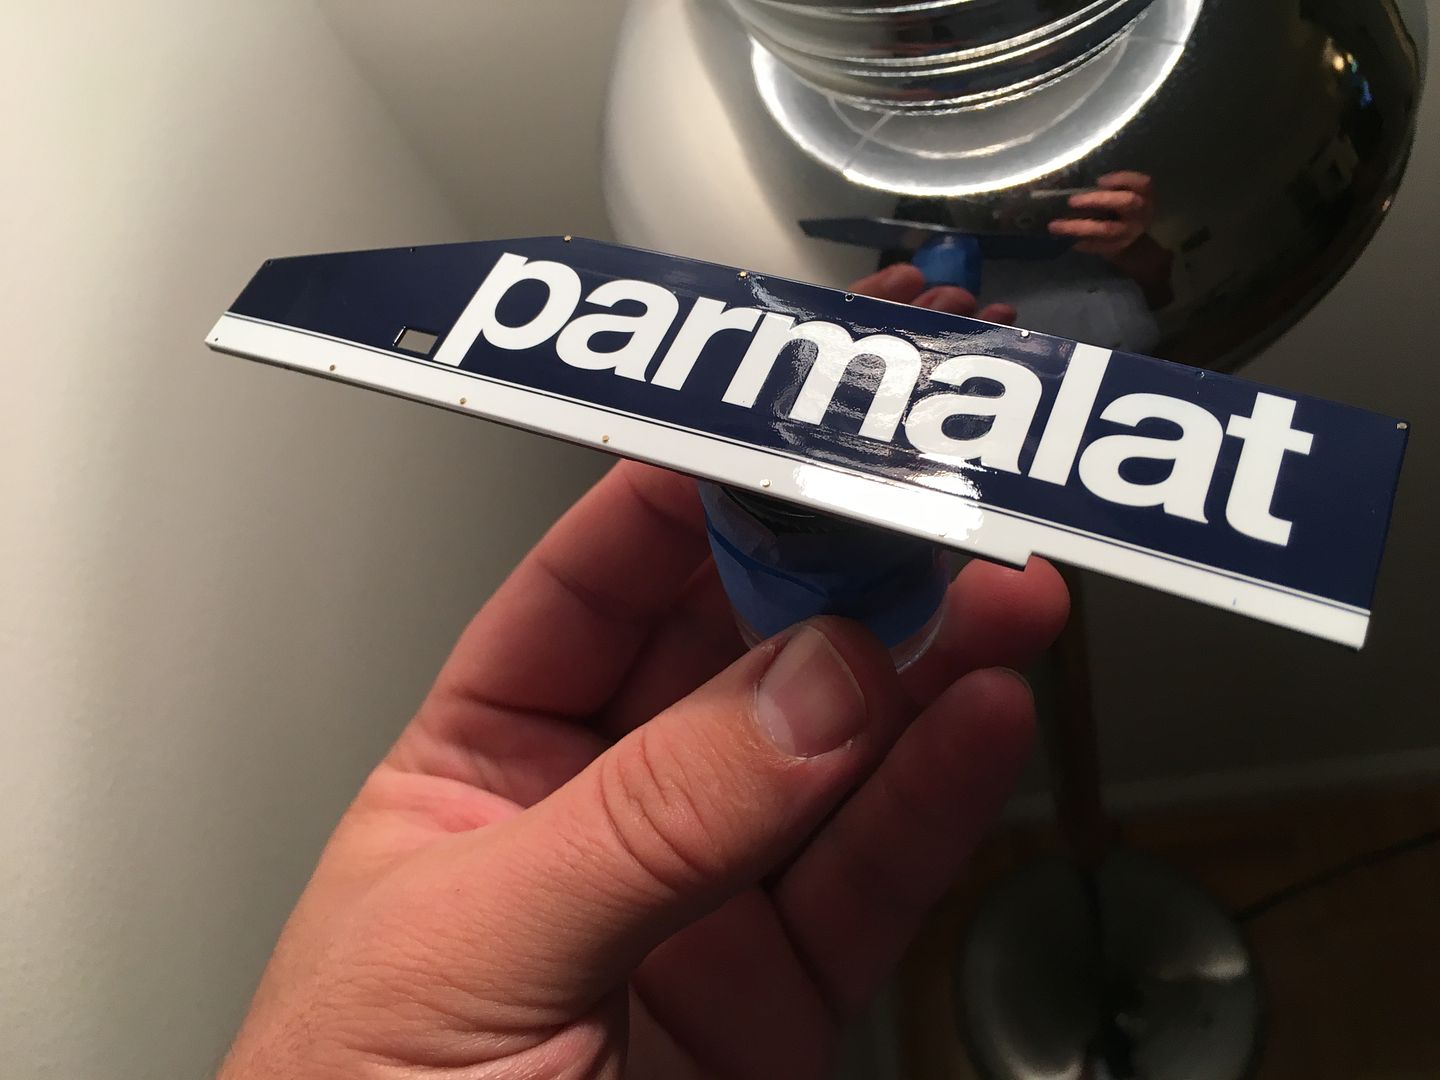
I can see why people get obsessive about the paint finish...I am a convert to the Zero paints, although I suspect this dark blue colour is a particularly easy one to spray...
Also added the last layer of paint to the floor detail, which brought the dark blue into line with the other panels - you do have to build up the colour with these paints, and my paint spillage meant that the floor had one less layer - you could see the difference in previous pictures...
Right - mini disaster averted - onwards!
Bit of a rescue mission completed...you can't see in the pictures above, but I made a right cock up on the right hand side panel, by managing to get a CA glue finger print right in the middle of a nice clean part of blue...then made an even bigger mess trying to get it off quickly - don't ask...
Had to sand back, without damaging the Parmalat clear-coat-sealed decal, or the lower white stripe, then mask, and with my freshly arrived replacement Zero paint BT52 blue paint, repaint the front section. This spray painting lark is all new to me, so was afraid of big ridges in the paint, mis-matched colours etc - but that zero base coat goes on very well, just building up layers, until it matched the surrrounding paint - removed the masking tape and just a faint line, but he lined it up with the text, so you hardly notice it. Re-sprayed the clear coat and it looks good! Pics tomorrow....phew!
The **** up!!
Gave the whole panel a very very light sand to clean a few other bits and bobs off - just had to be careful not to get down to the decal...
You can just see where the issue was, but I'm ok with this - just happy to save it and not make it any worse!
Did the other side again as well, as there was a very slight similar mark...
I can see why people get obsessive about the paint finish...I am a convert to the Zero paints, although I suspect this dark blue colour is a particularly easy one to spray...
Also added the last layer of paint to the floor detail, which brought the dark blue into line with the other panels - you do have to build up the colour with these paints, and my paint spillage meant that the floor had one less layer - you could see the difference in previous pictures...
Right - mini disaster averted - onwards!
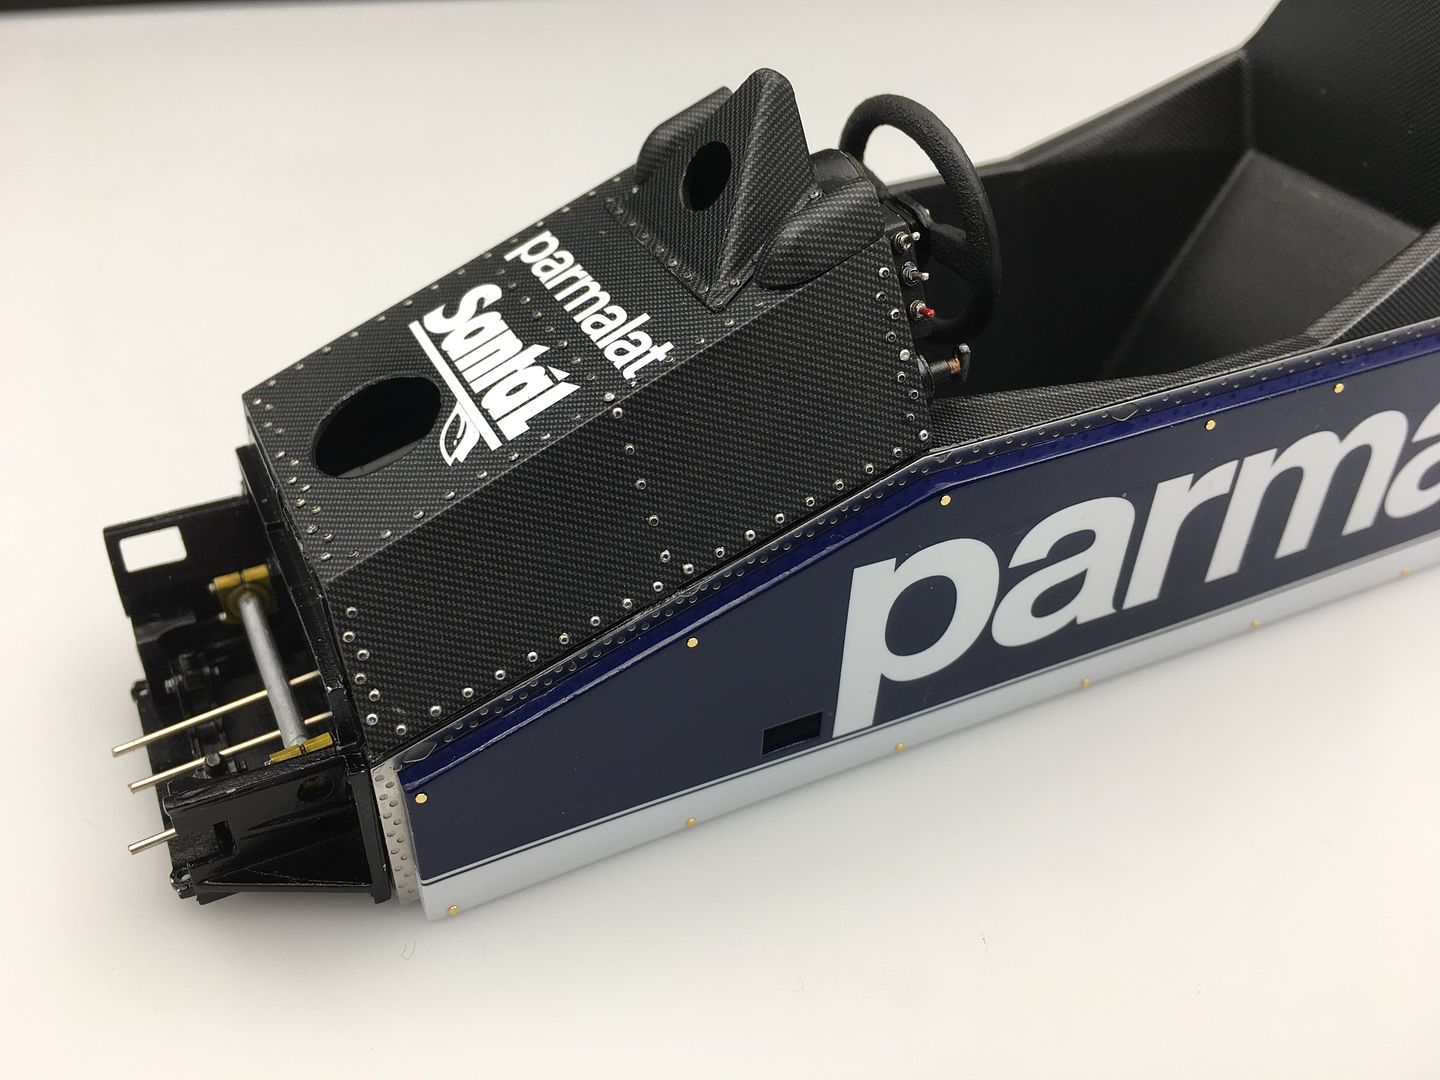
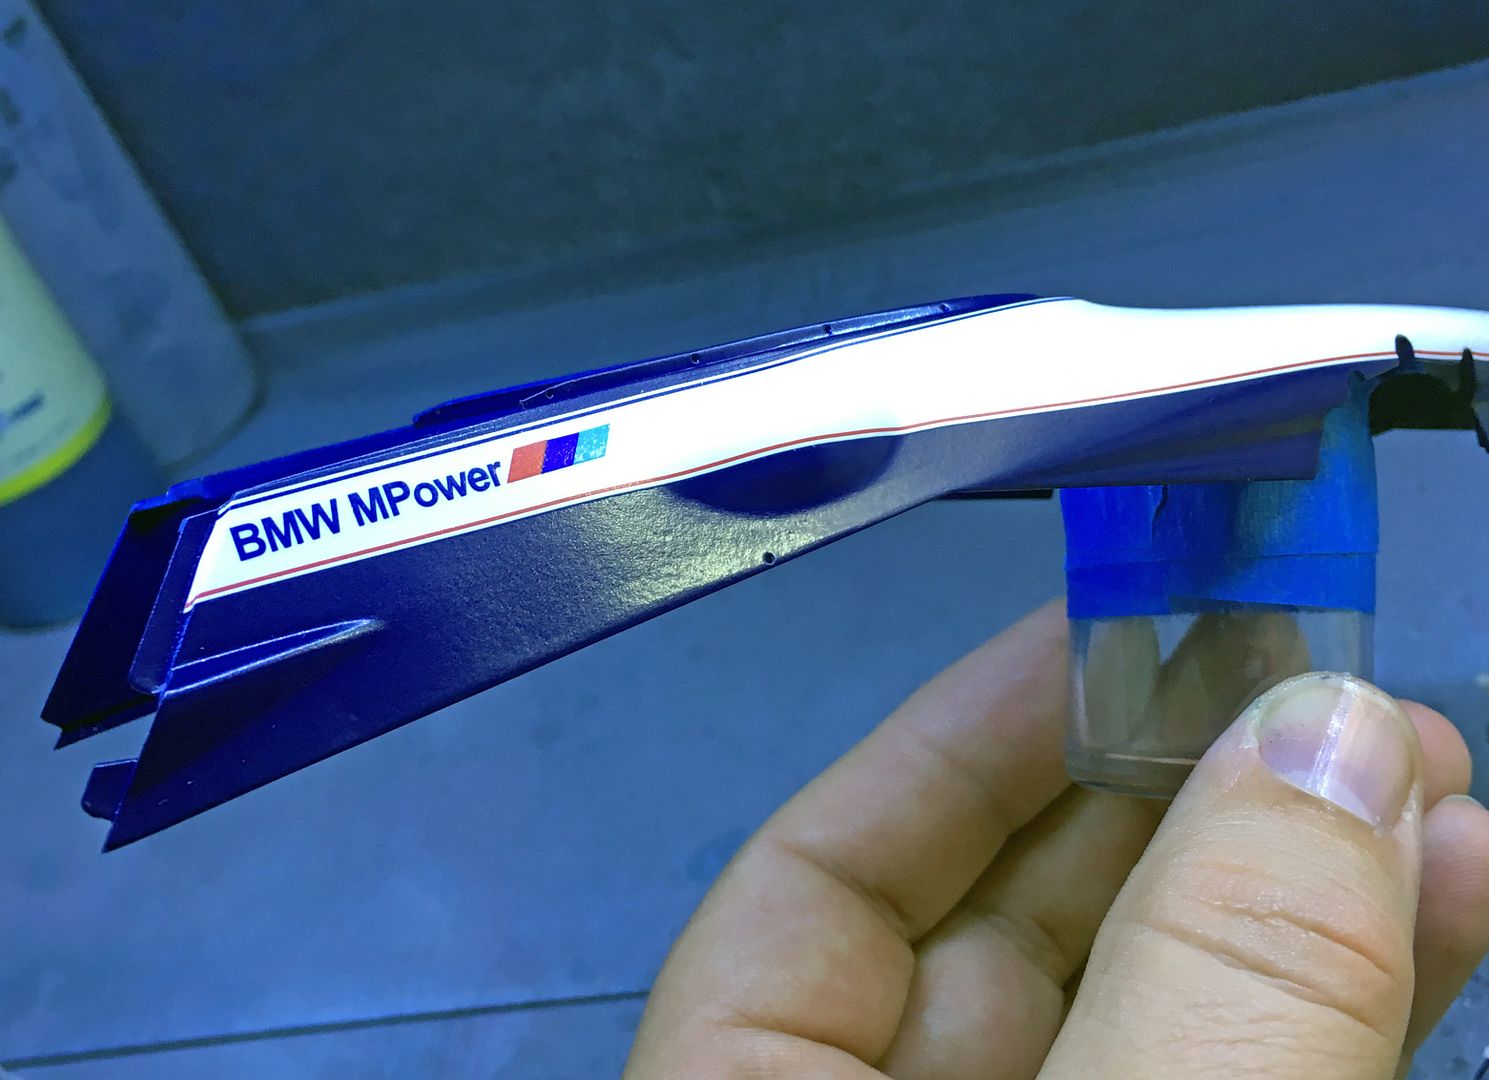
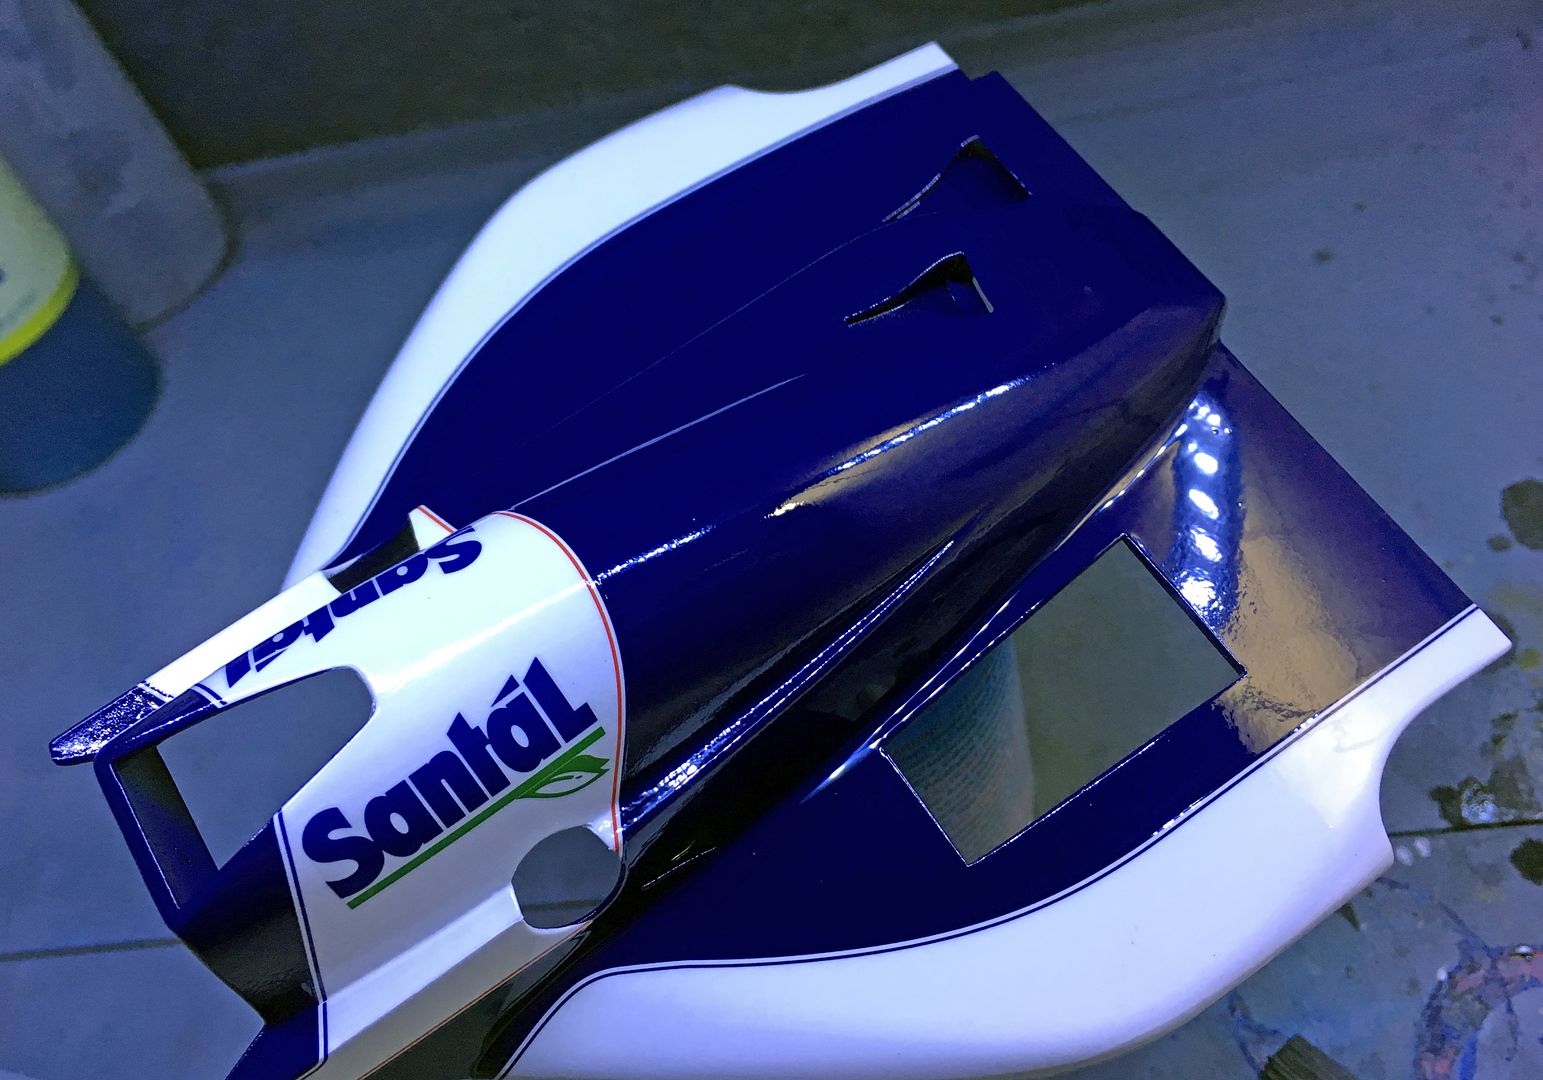
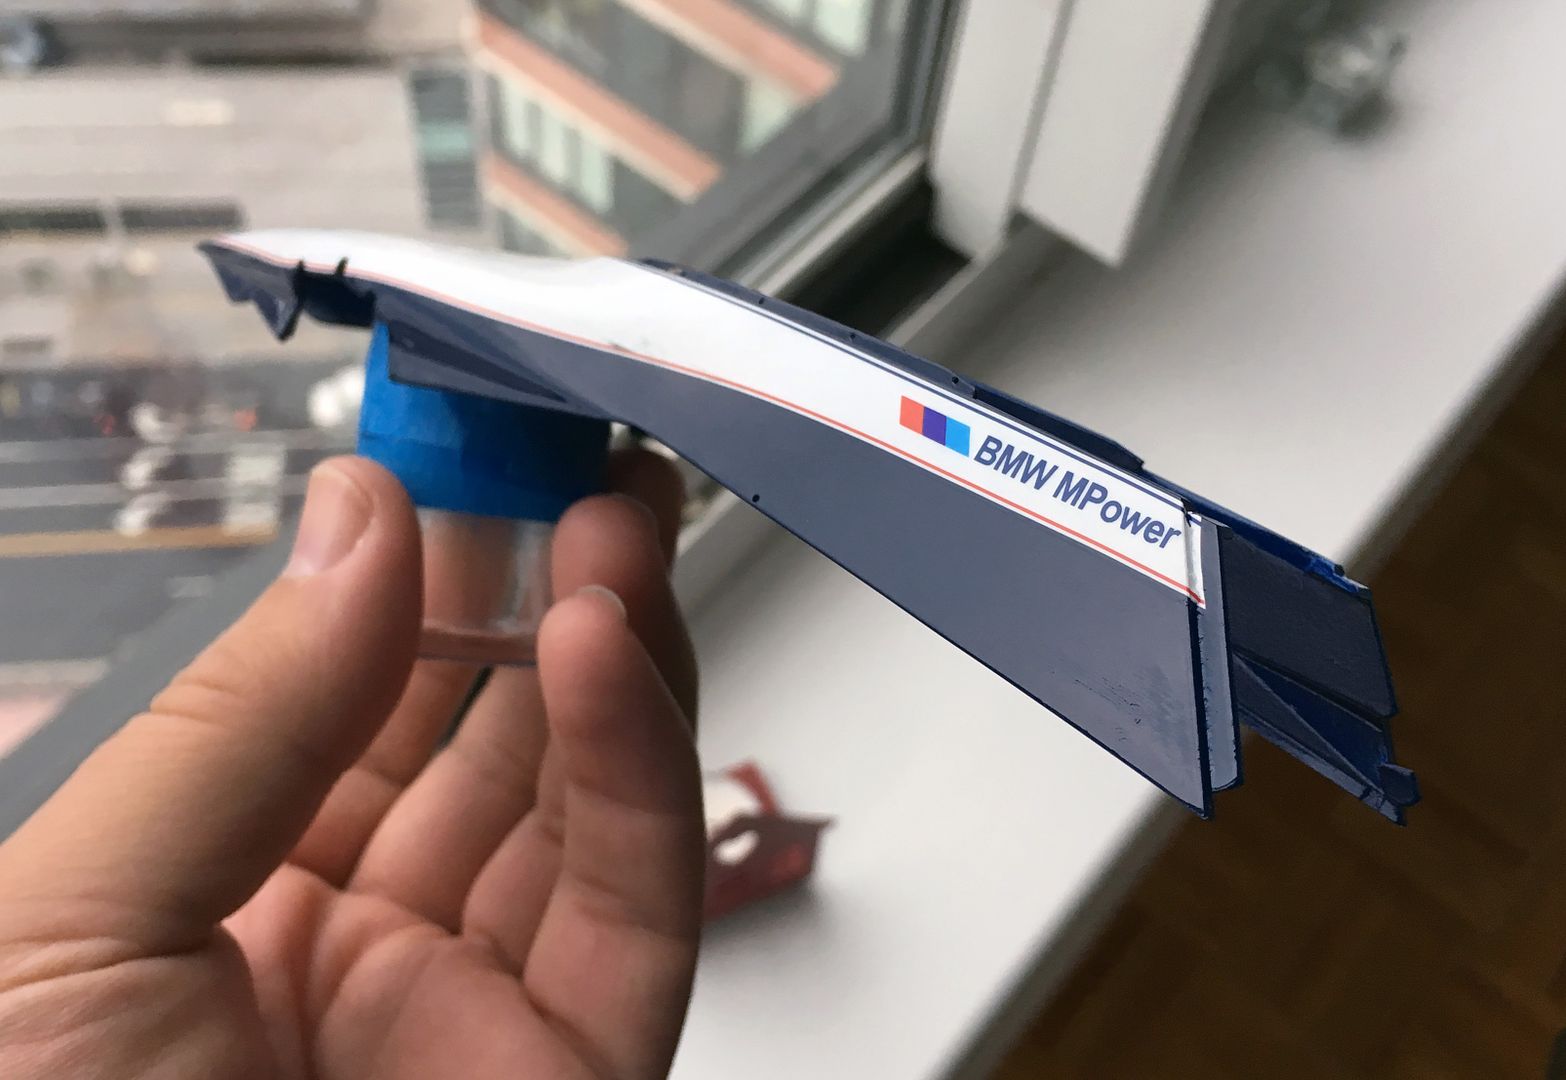
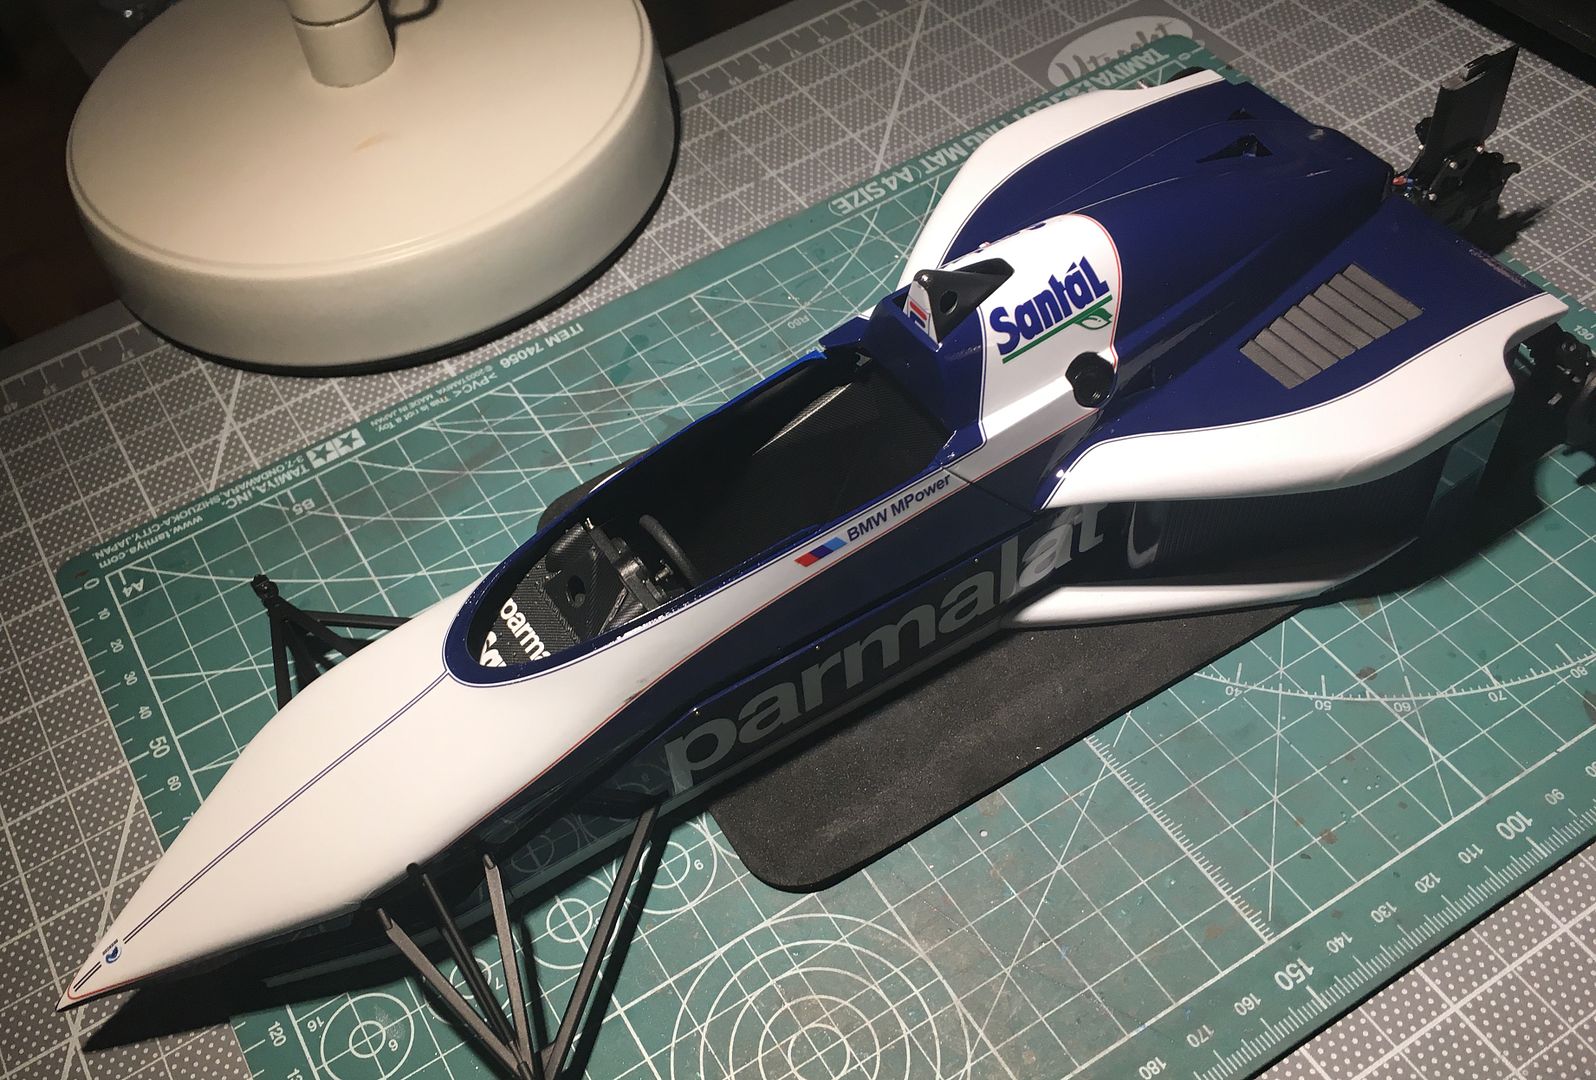
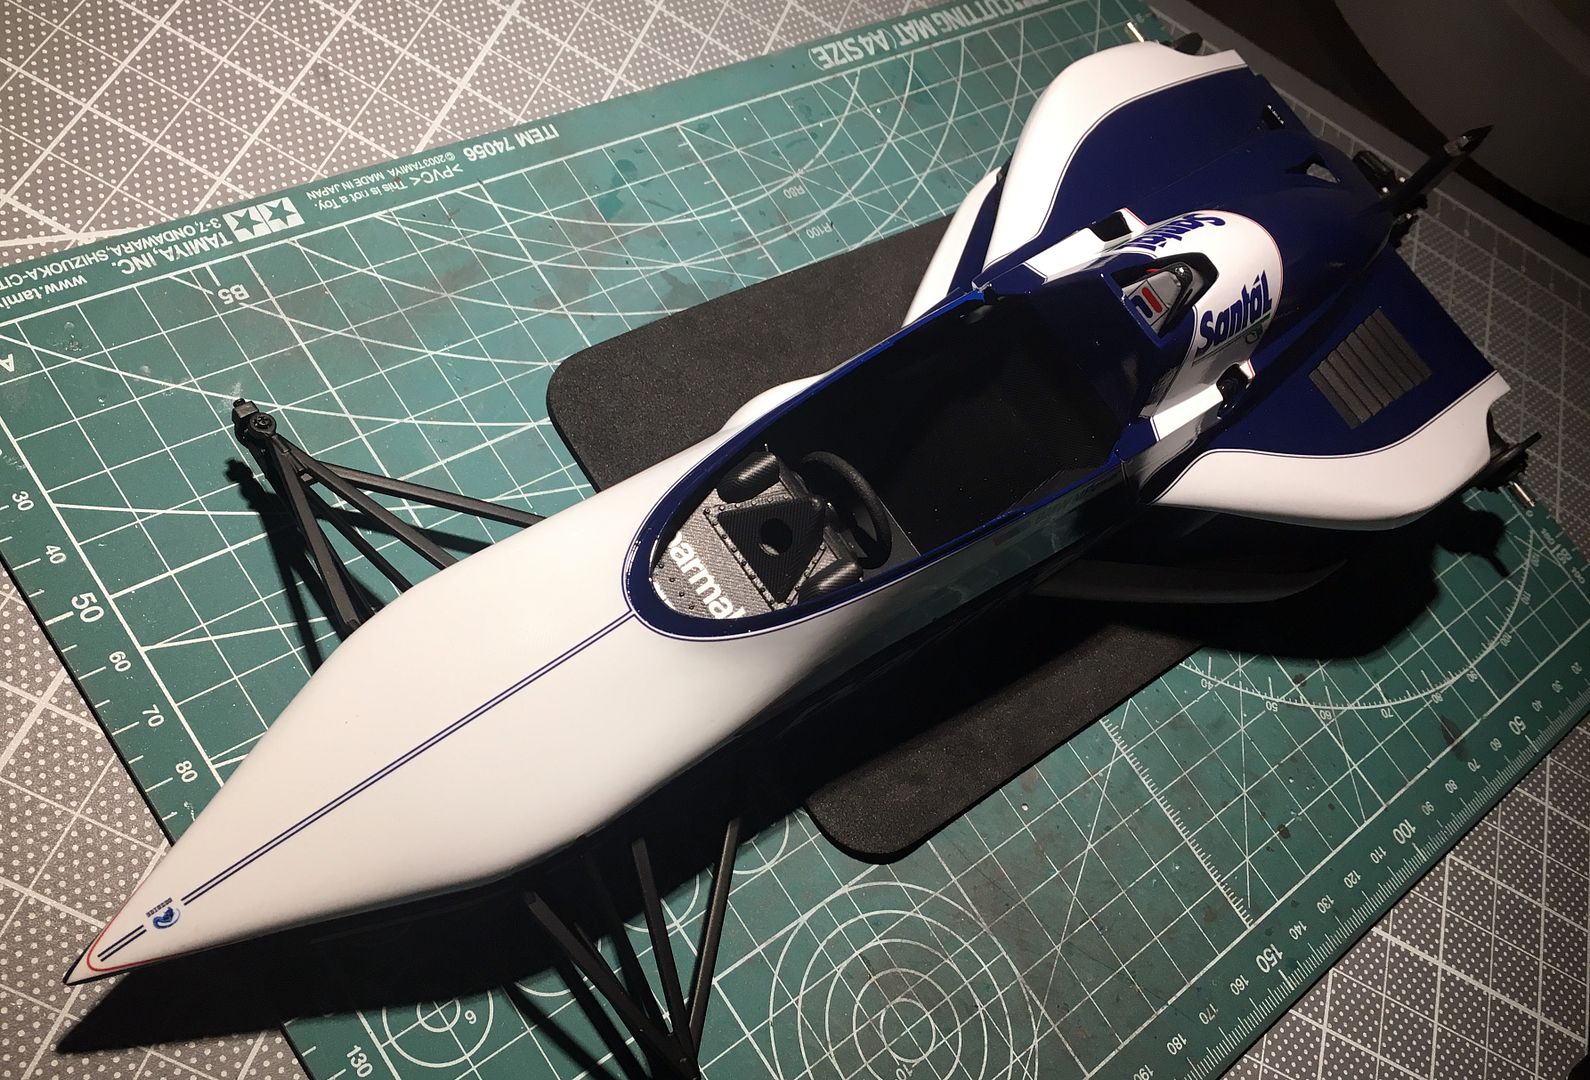
Applied some more decals to the body work - pretty straight forward, and the decals conformed to the curves well...one issue with the white decals is that where you are applying any overlaps - you see the white...whiter! Actually, in daylight it is hardly noticeable...

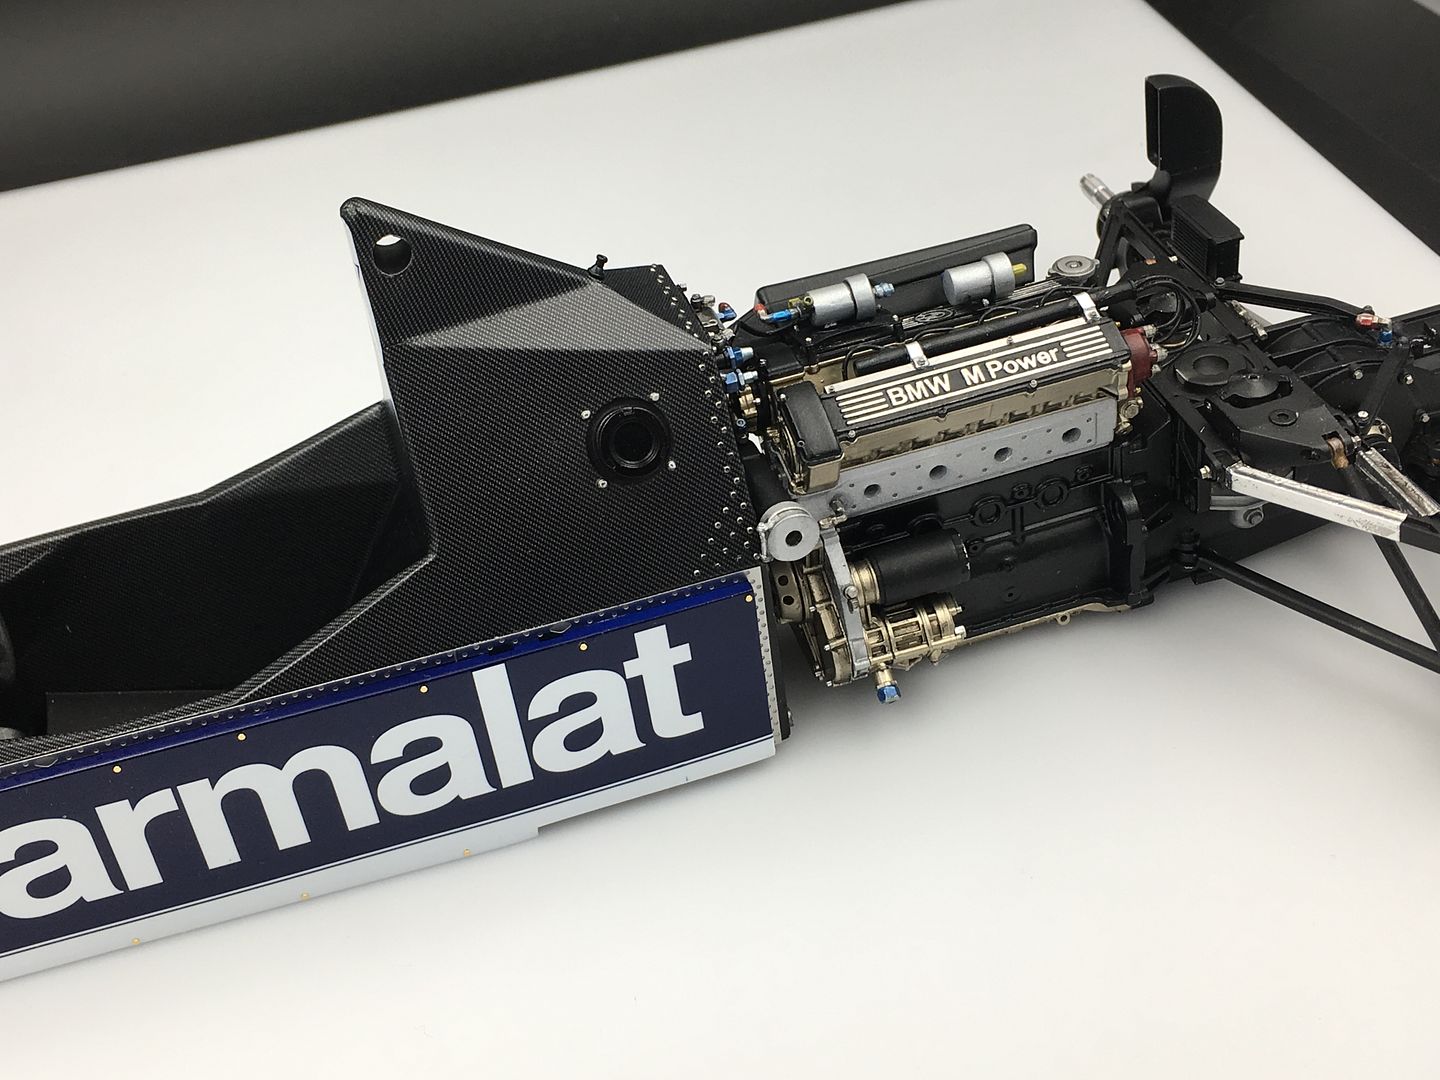
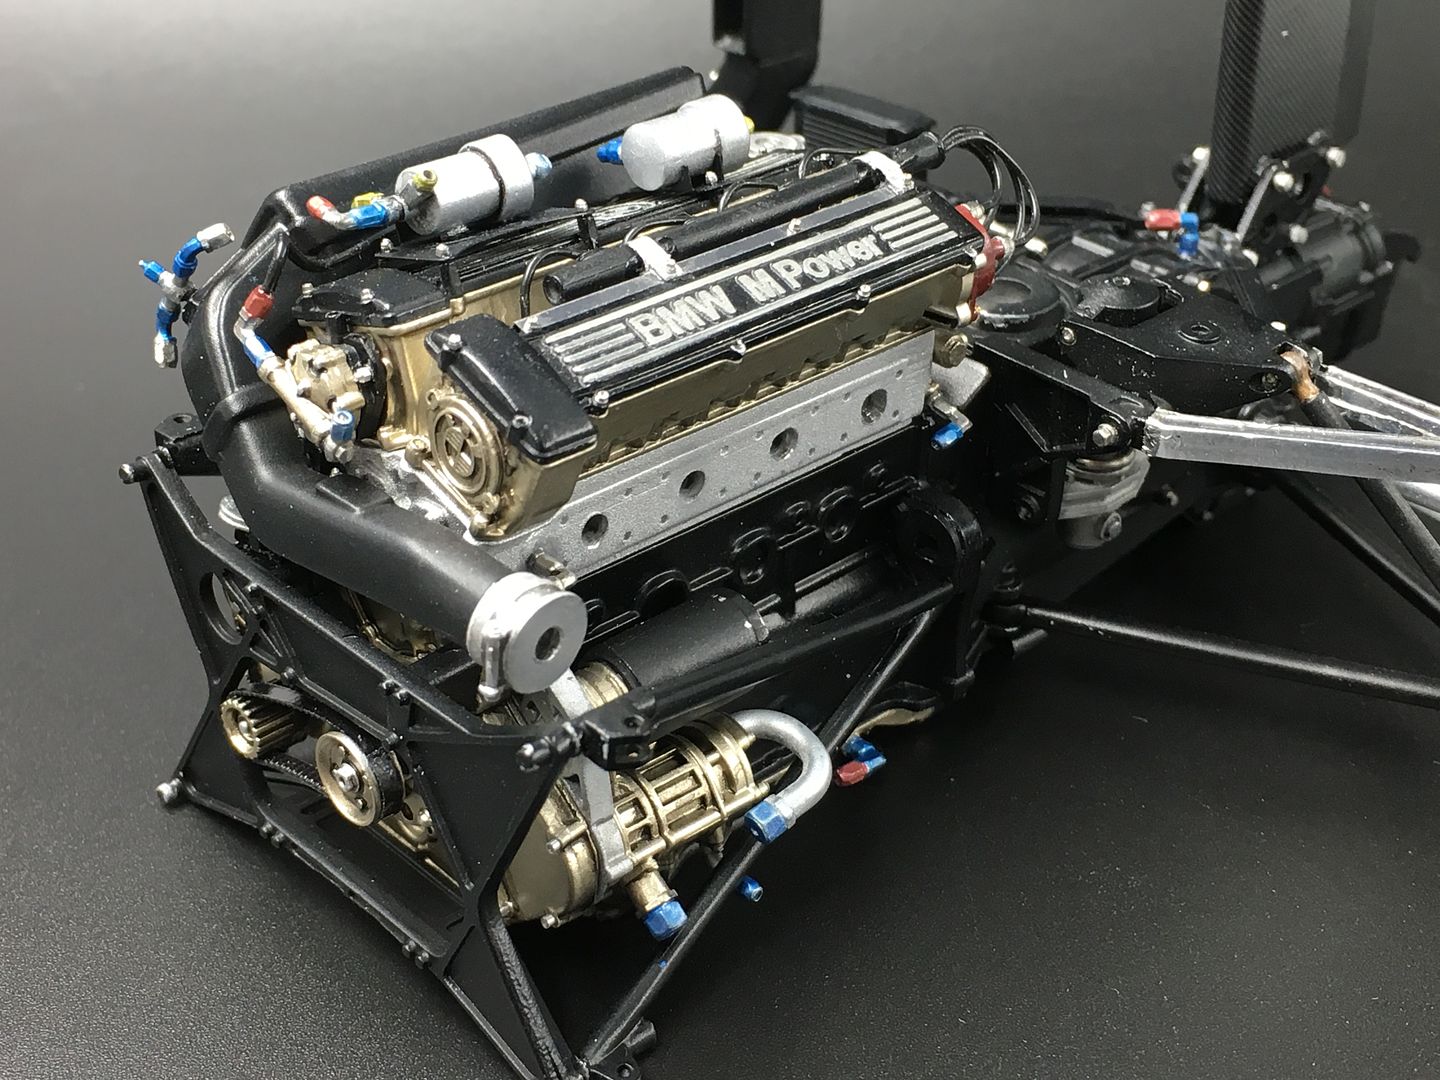
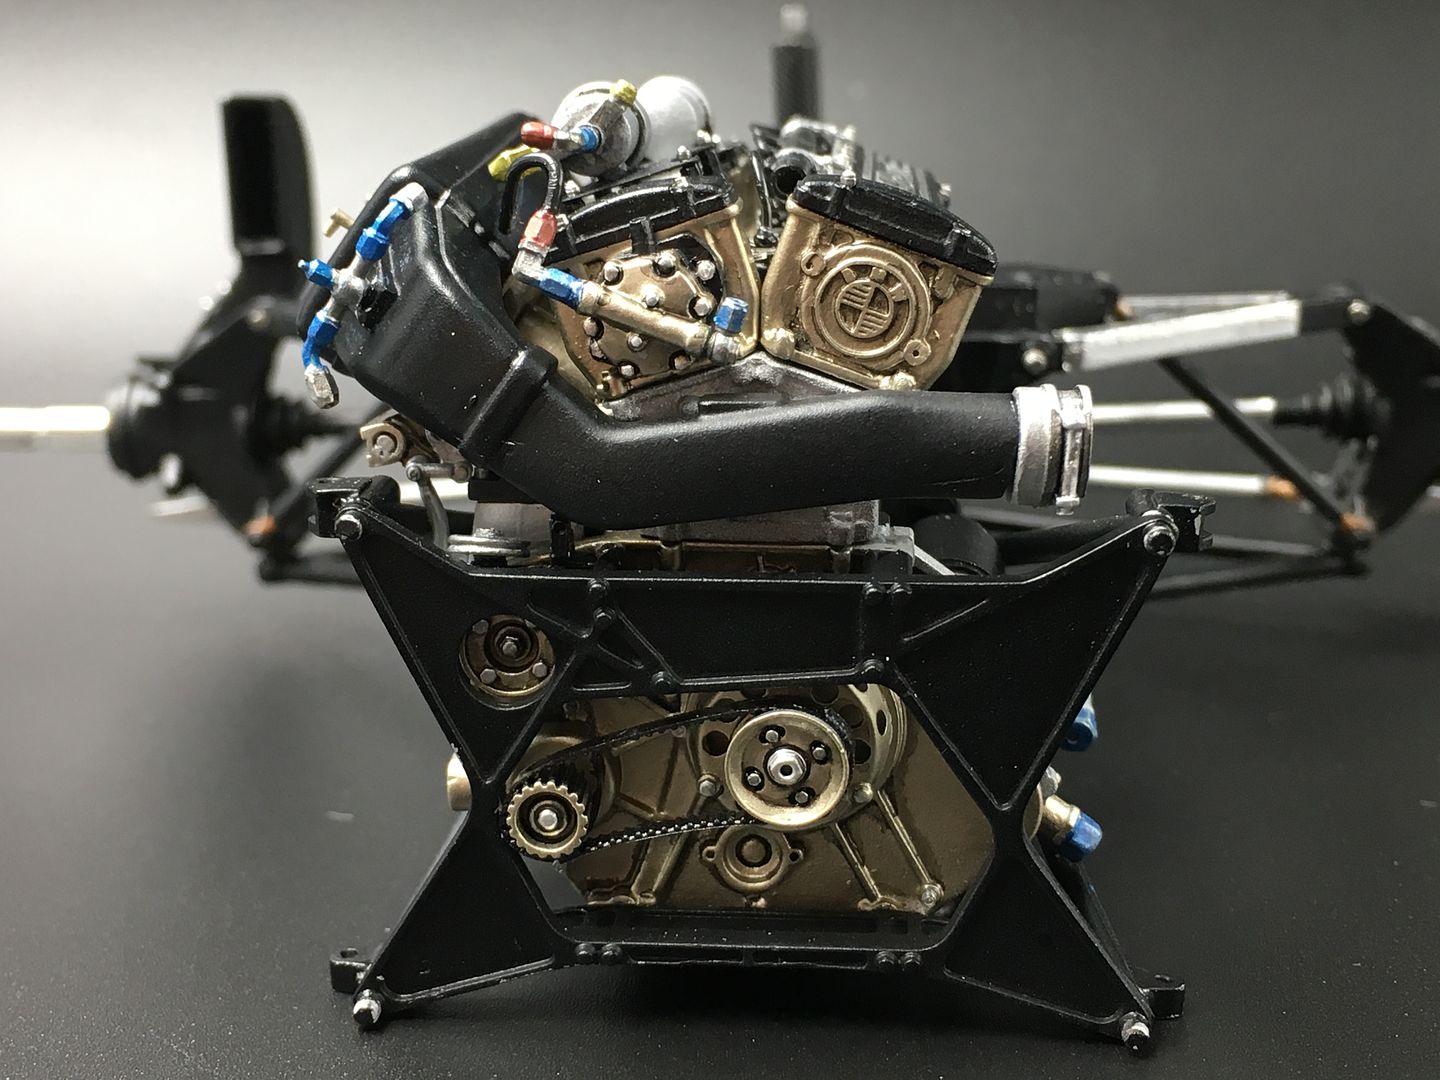
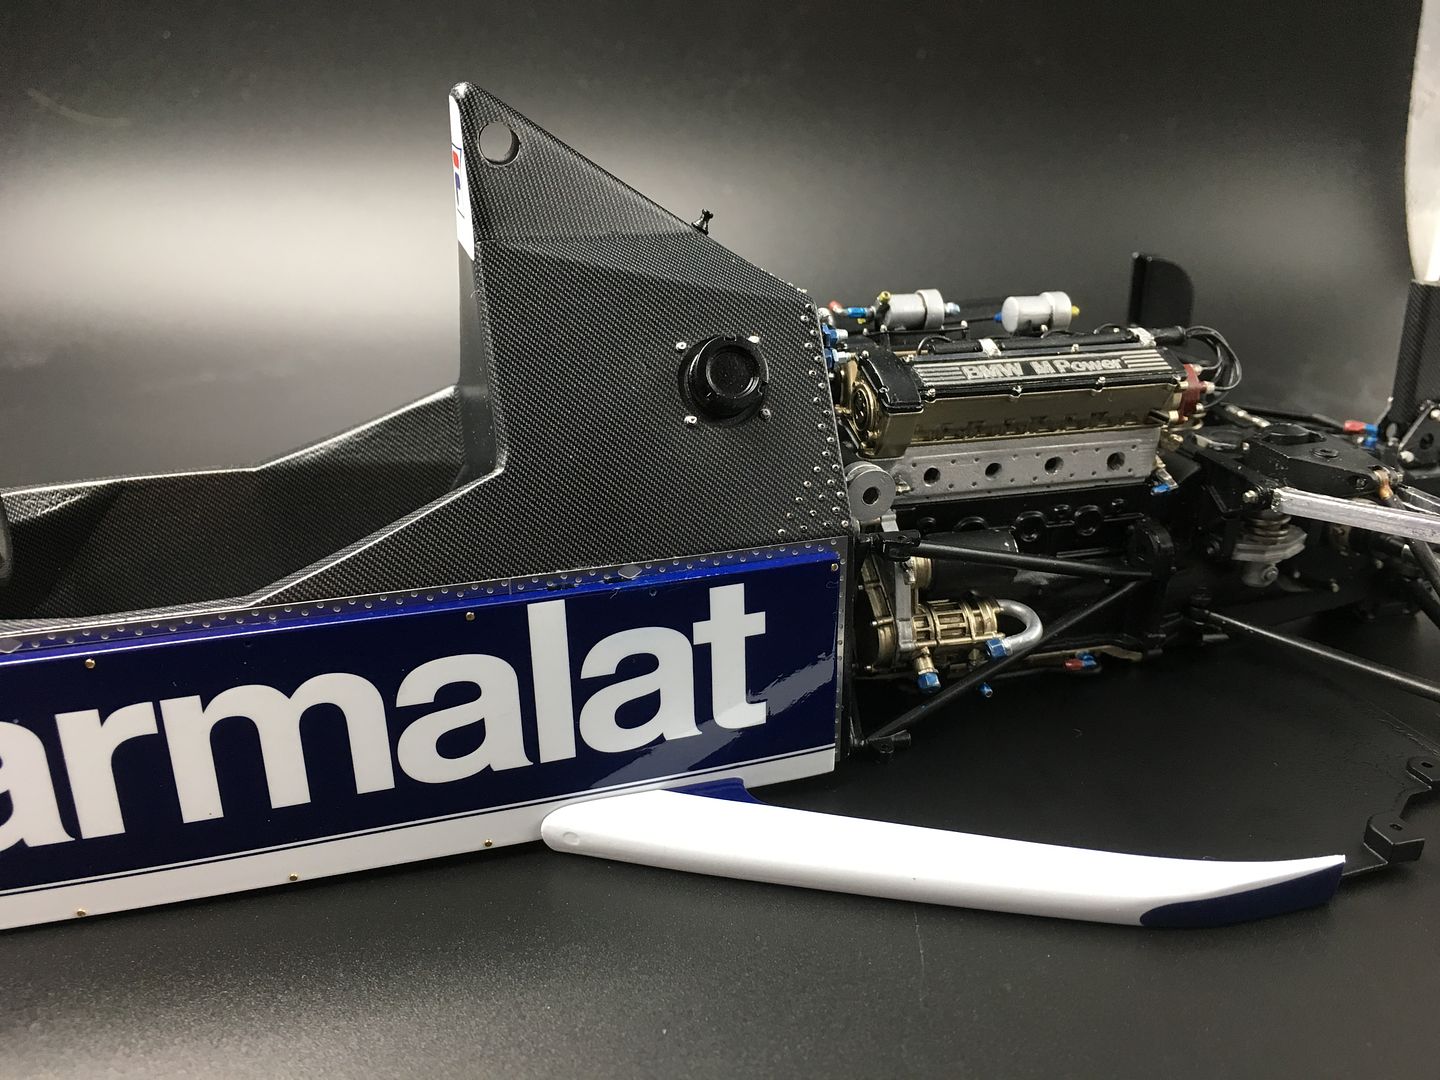
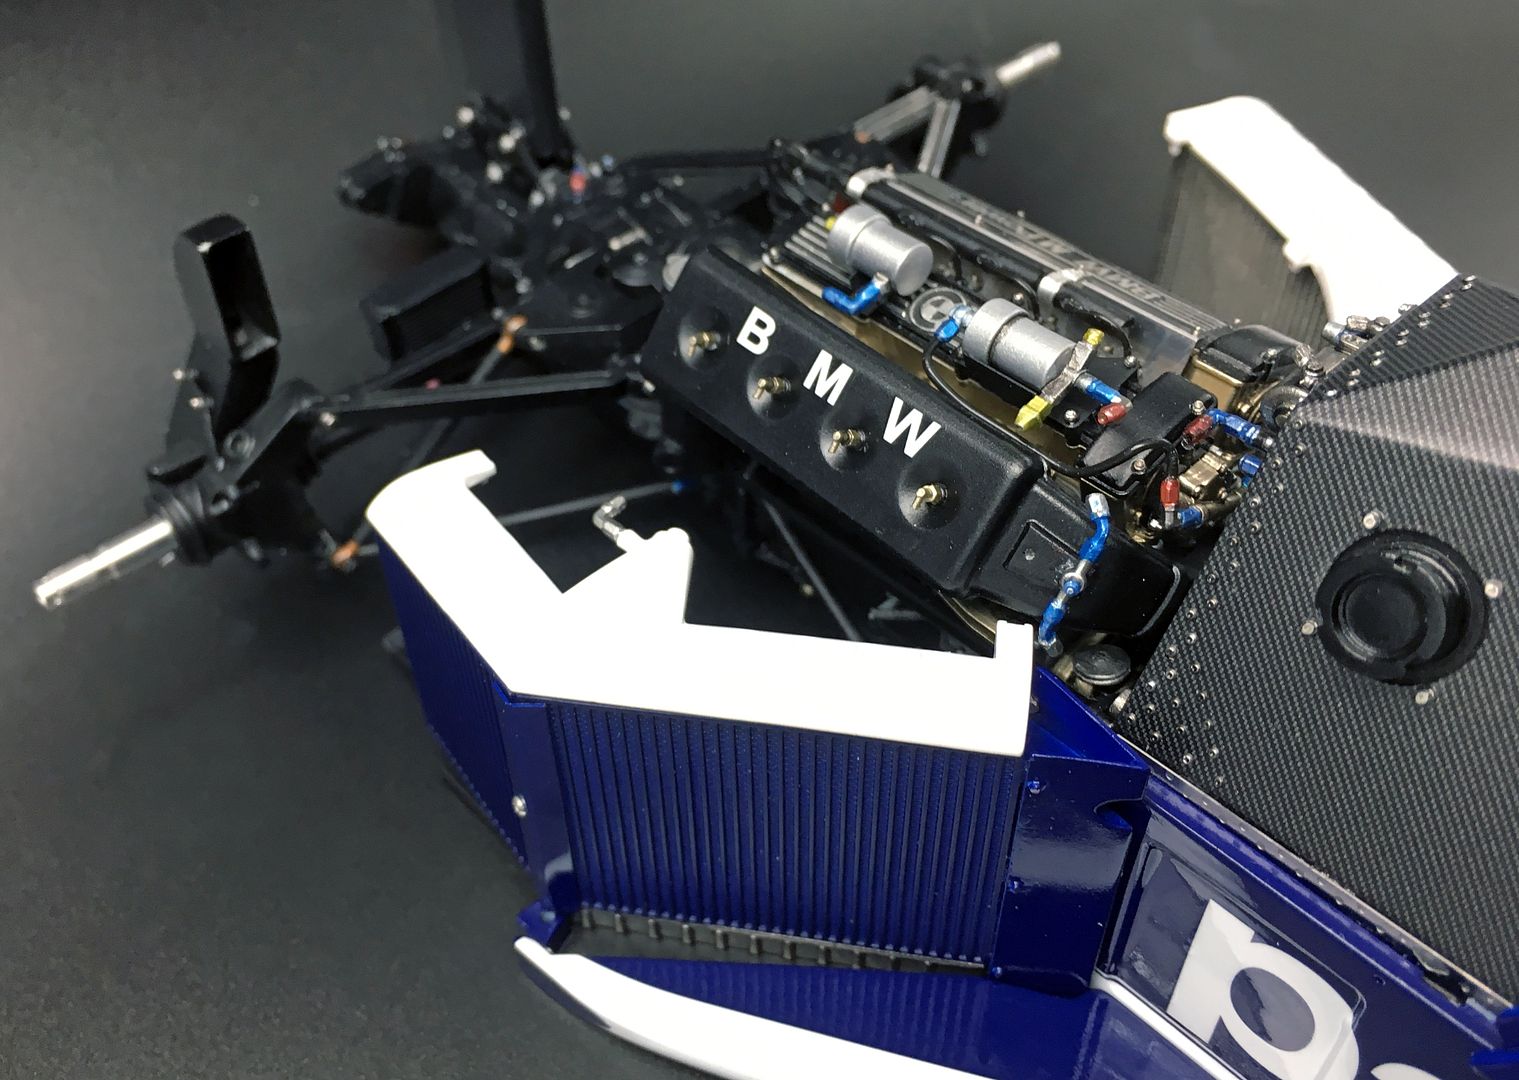
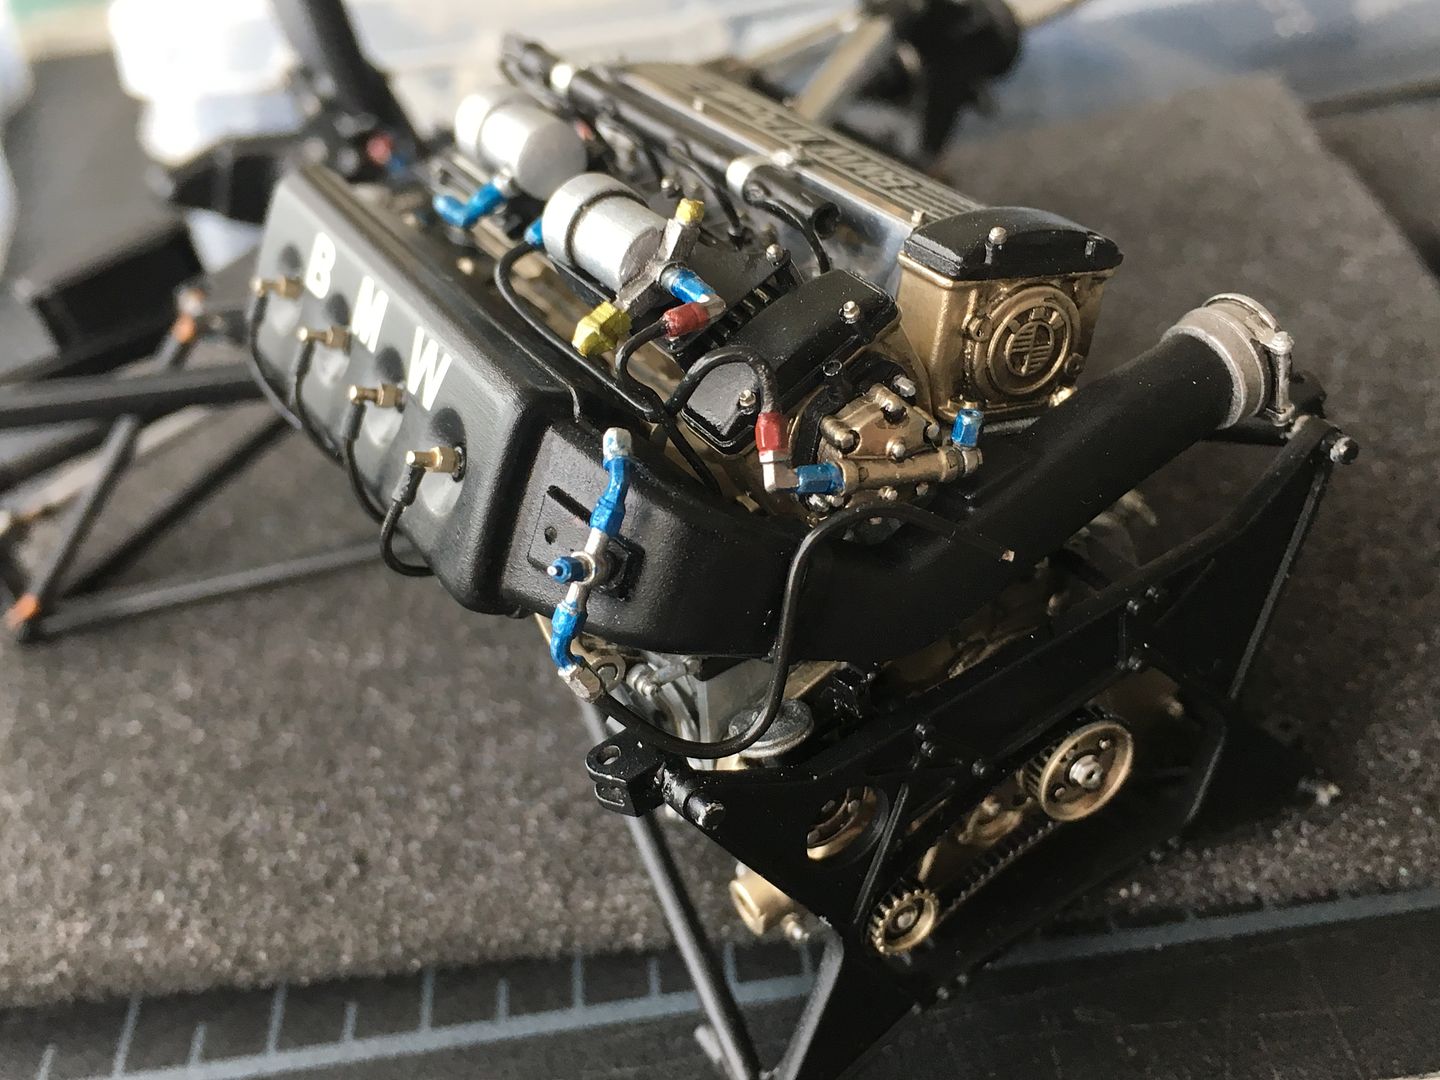
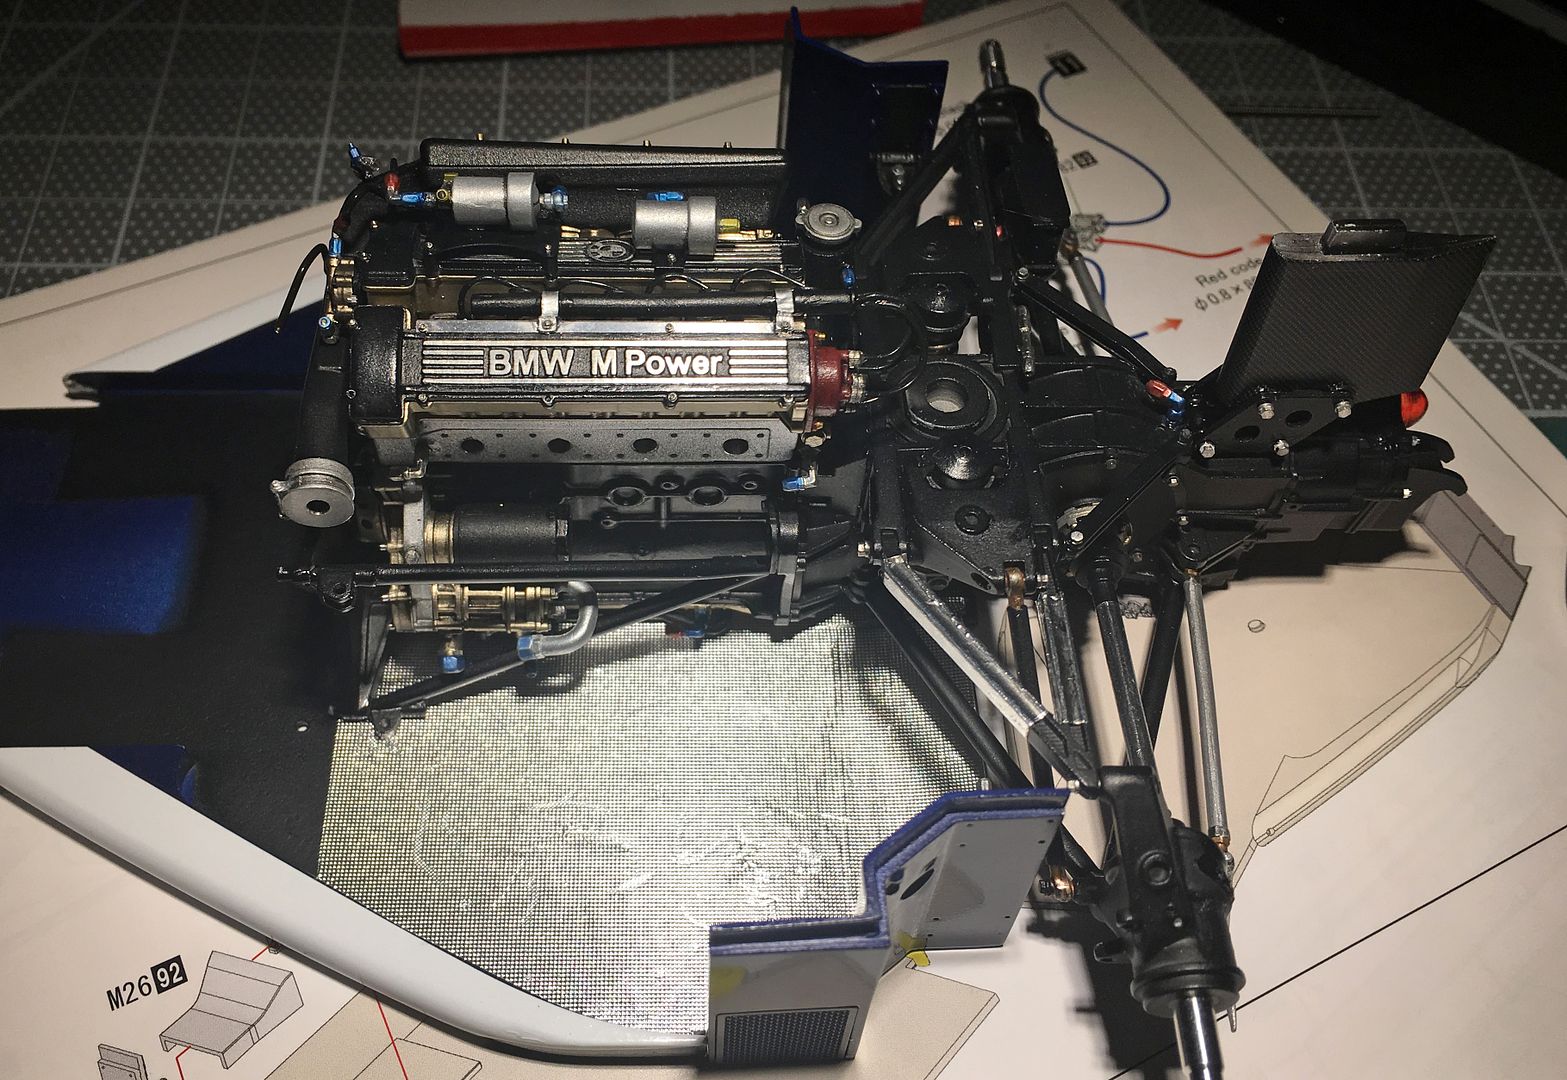
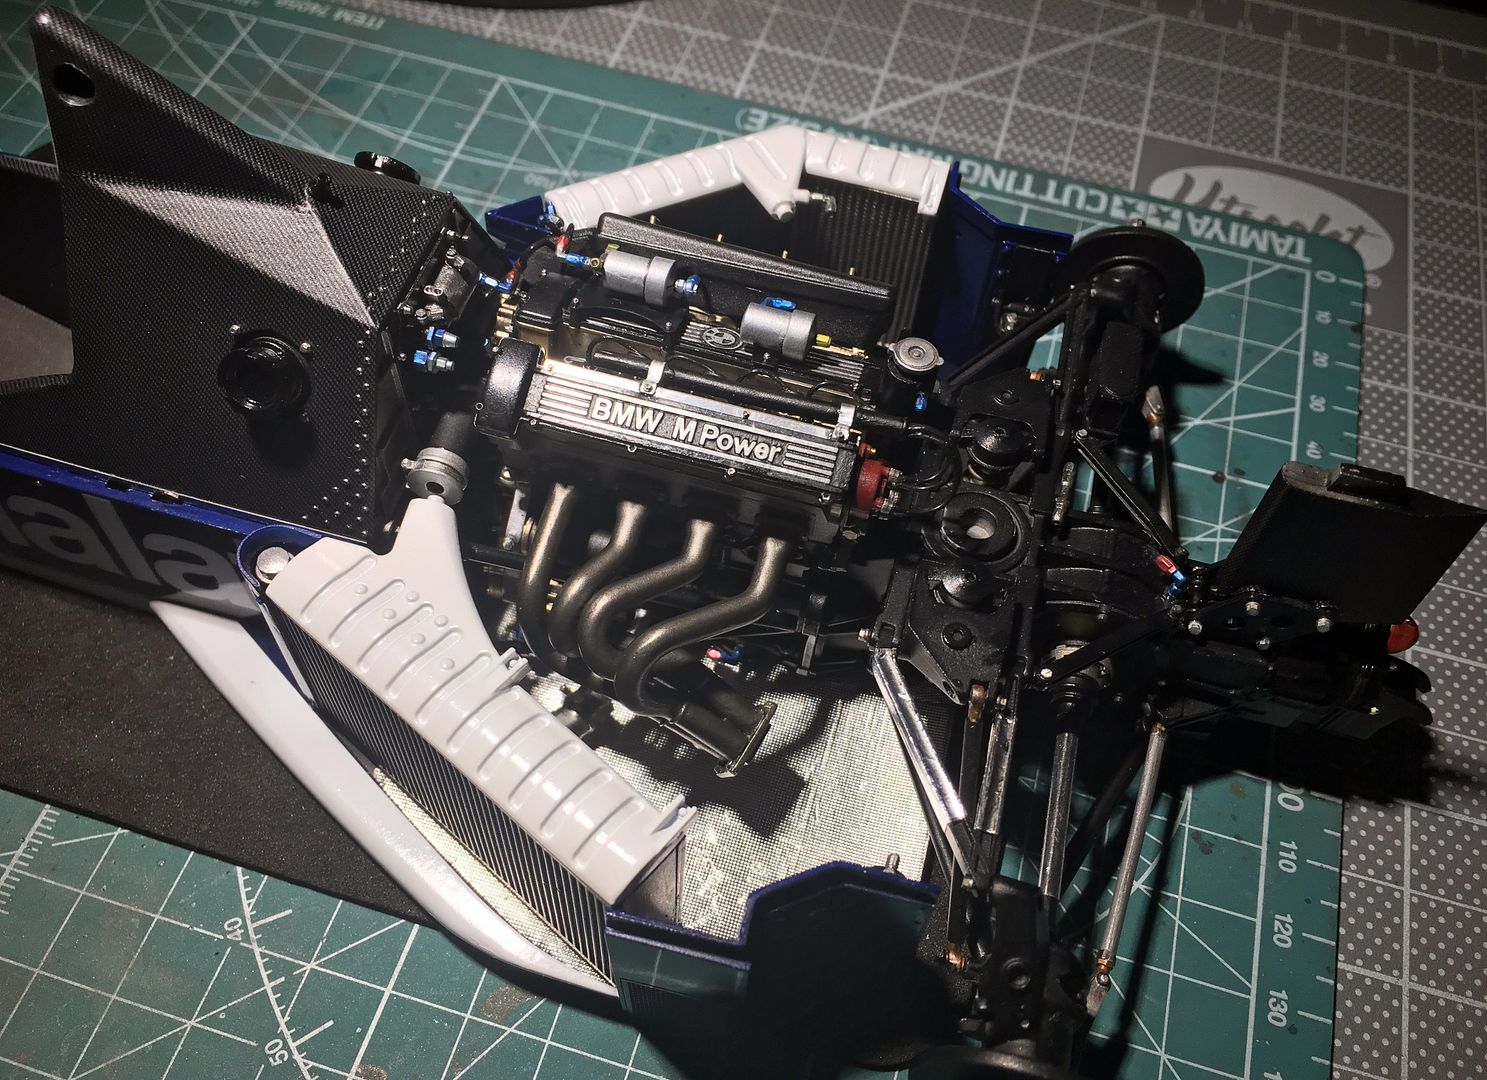
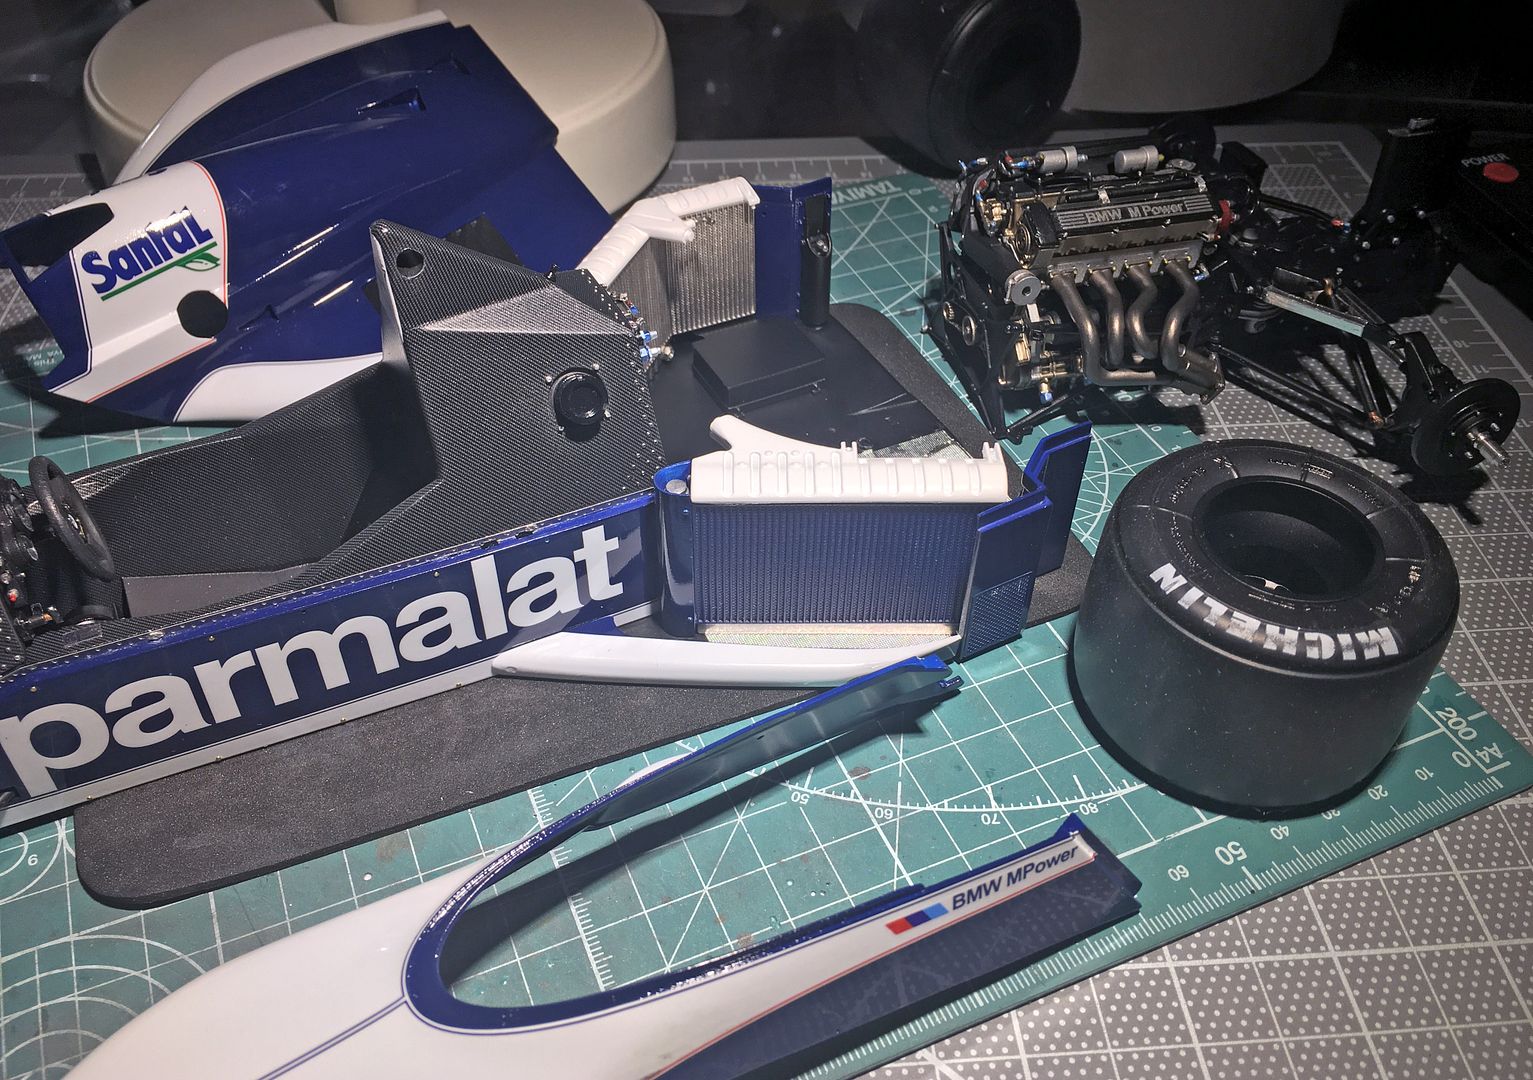
It is gradually coming together. Lots of details to add - and the exhaust/turbo/rads.
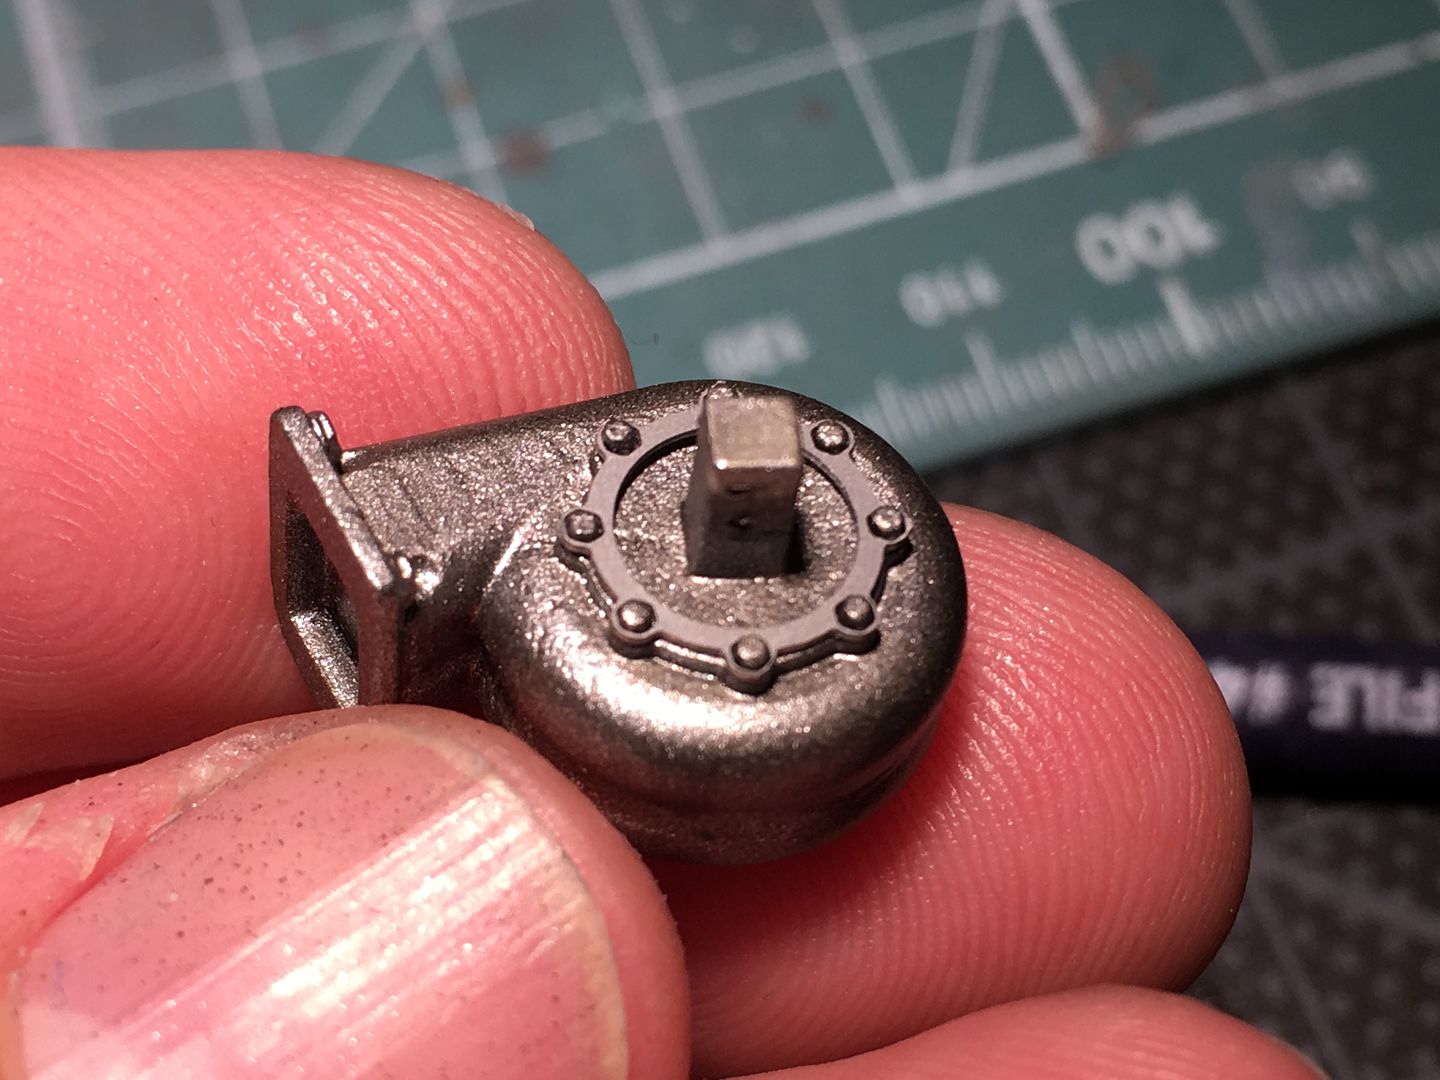
some nice PE parts.
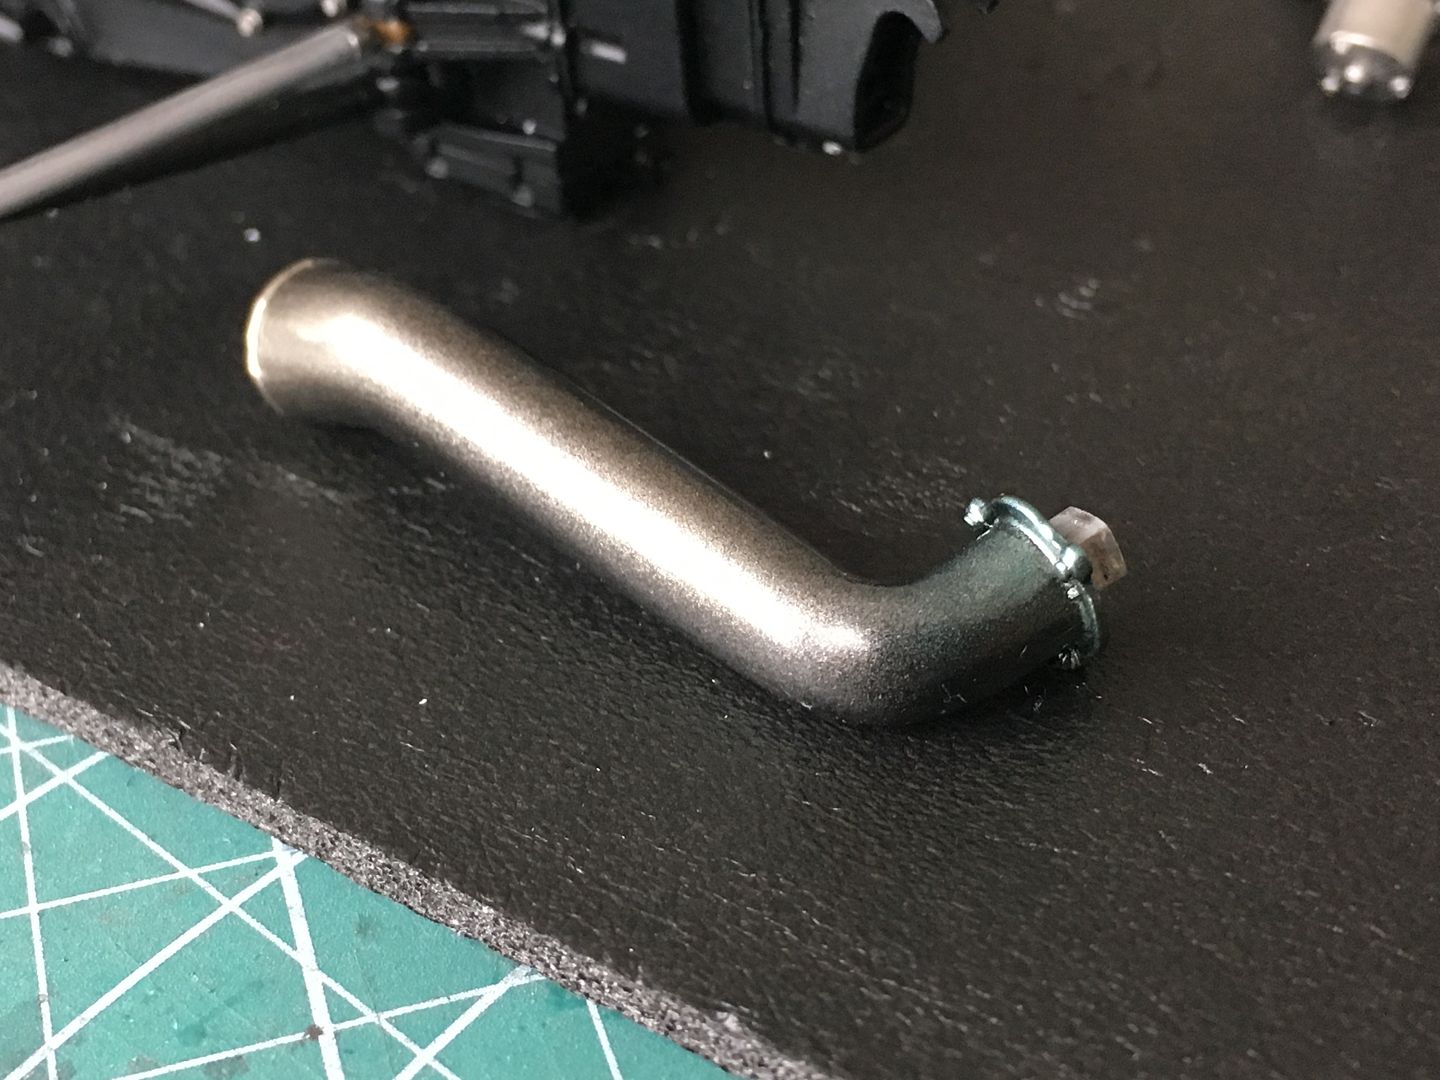
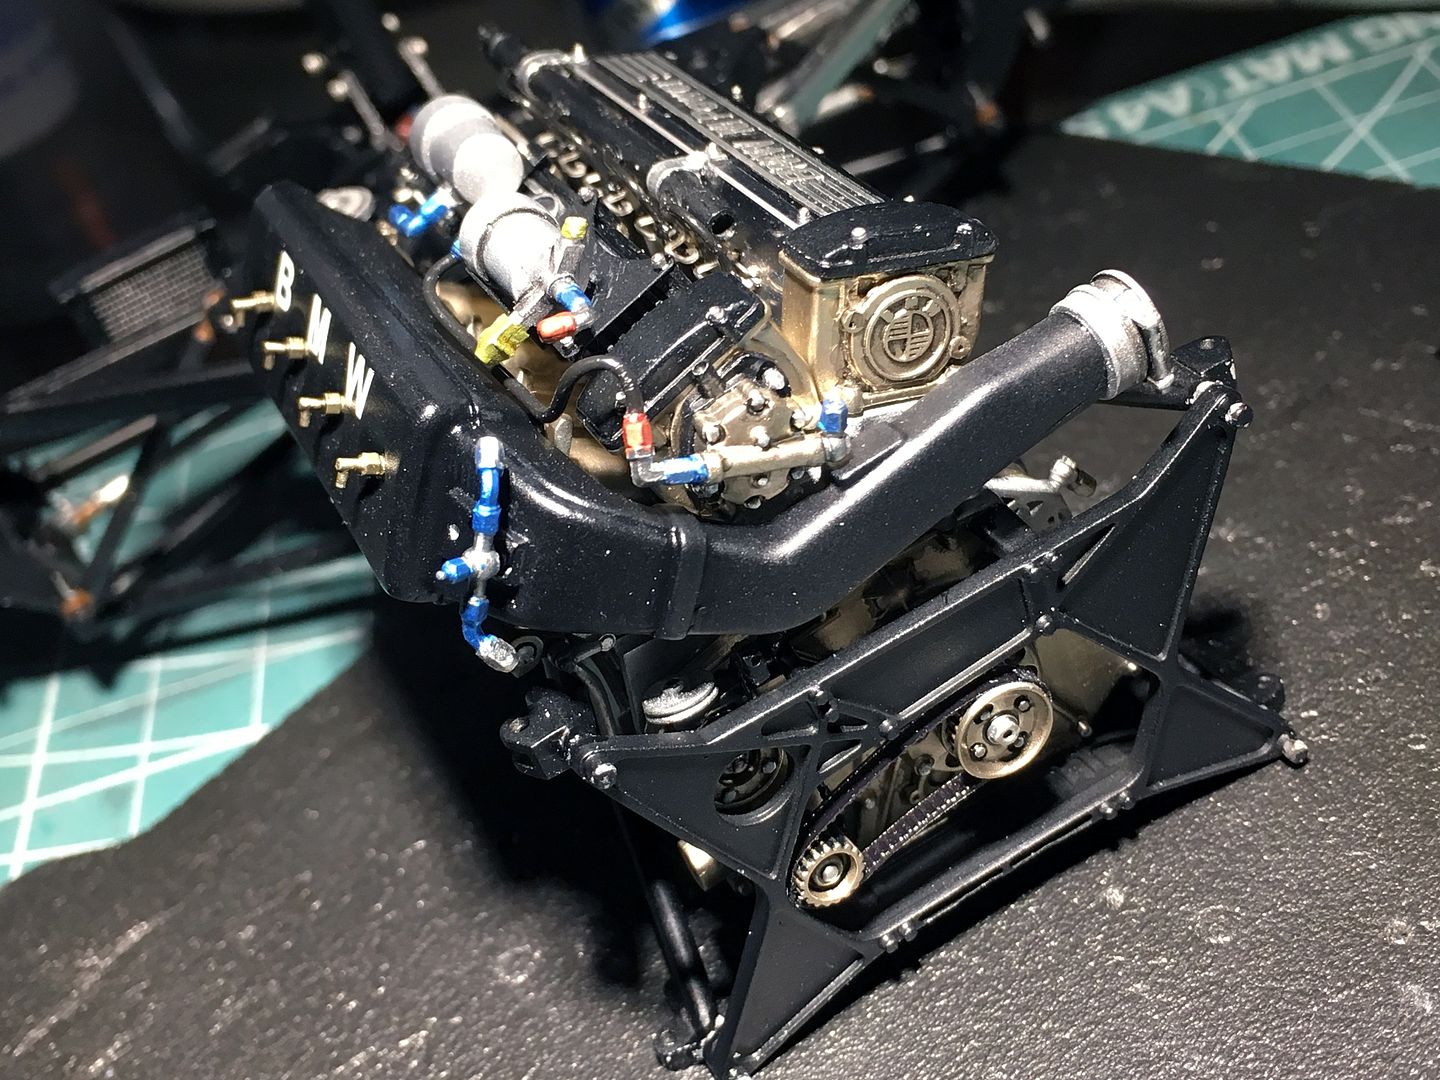
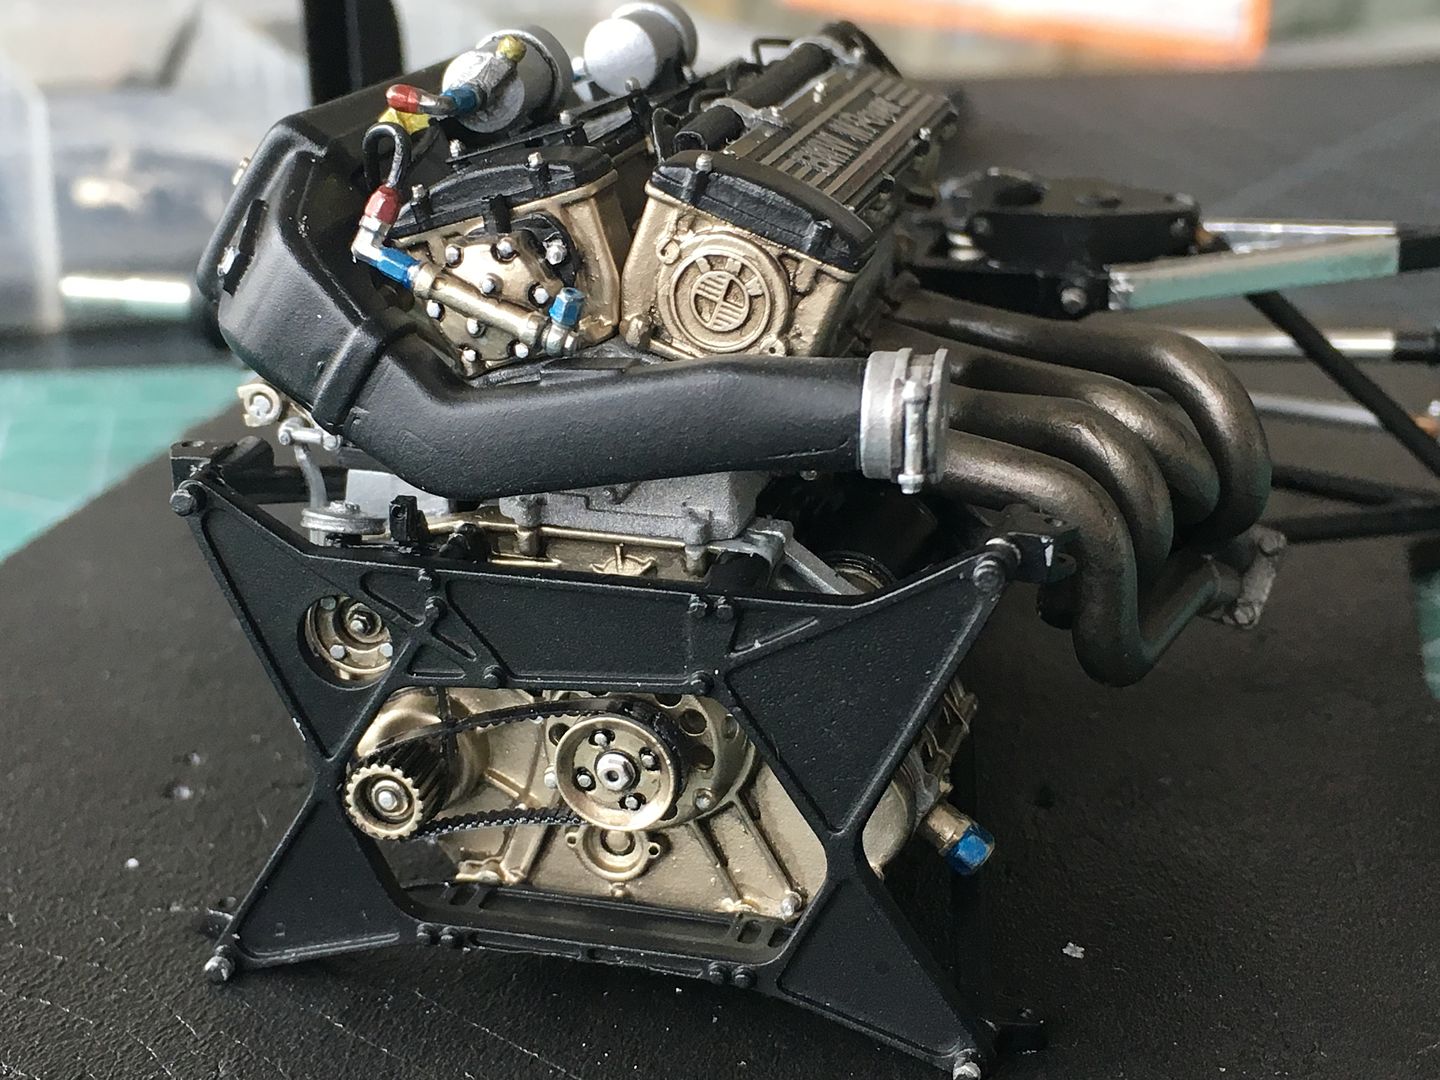
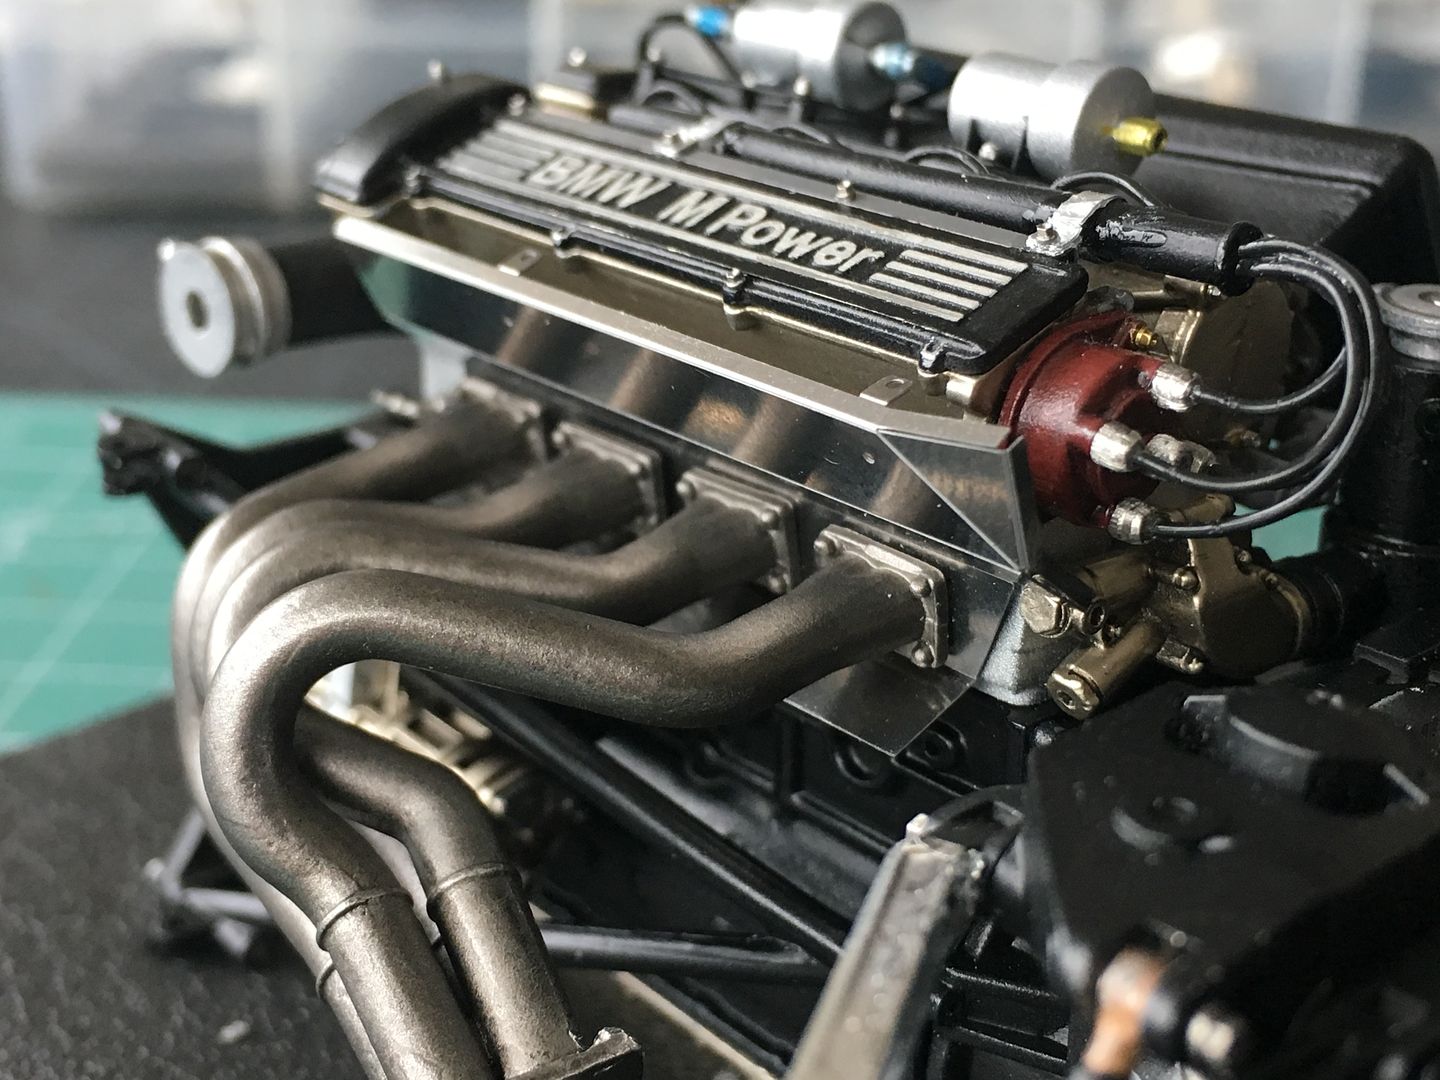
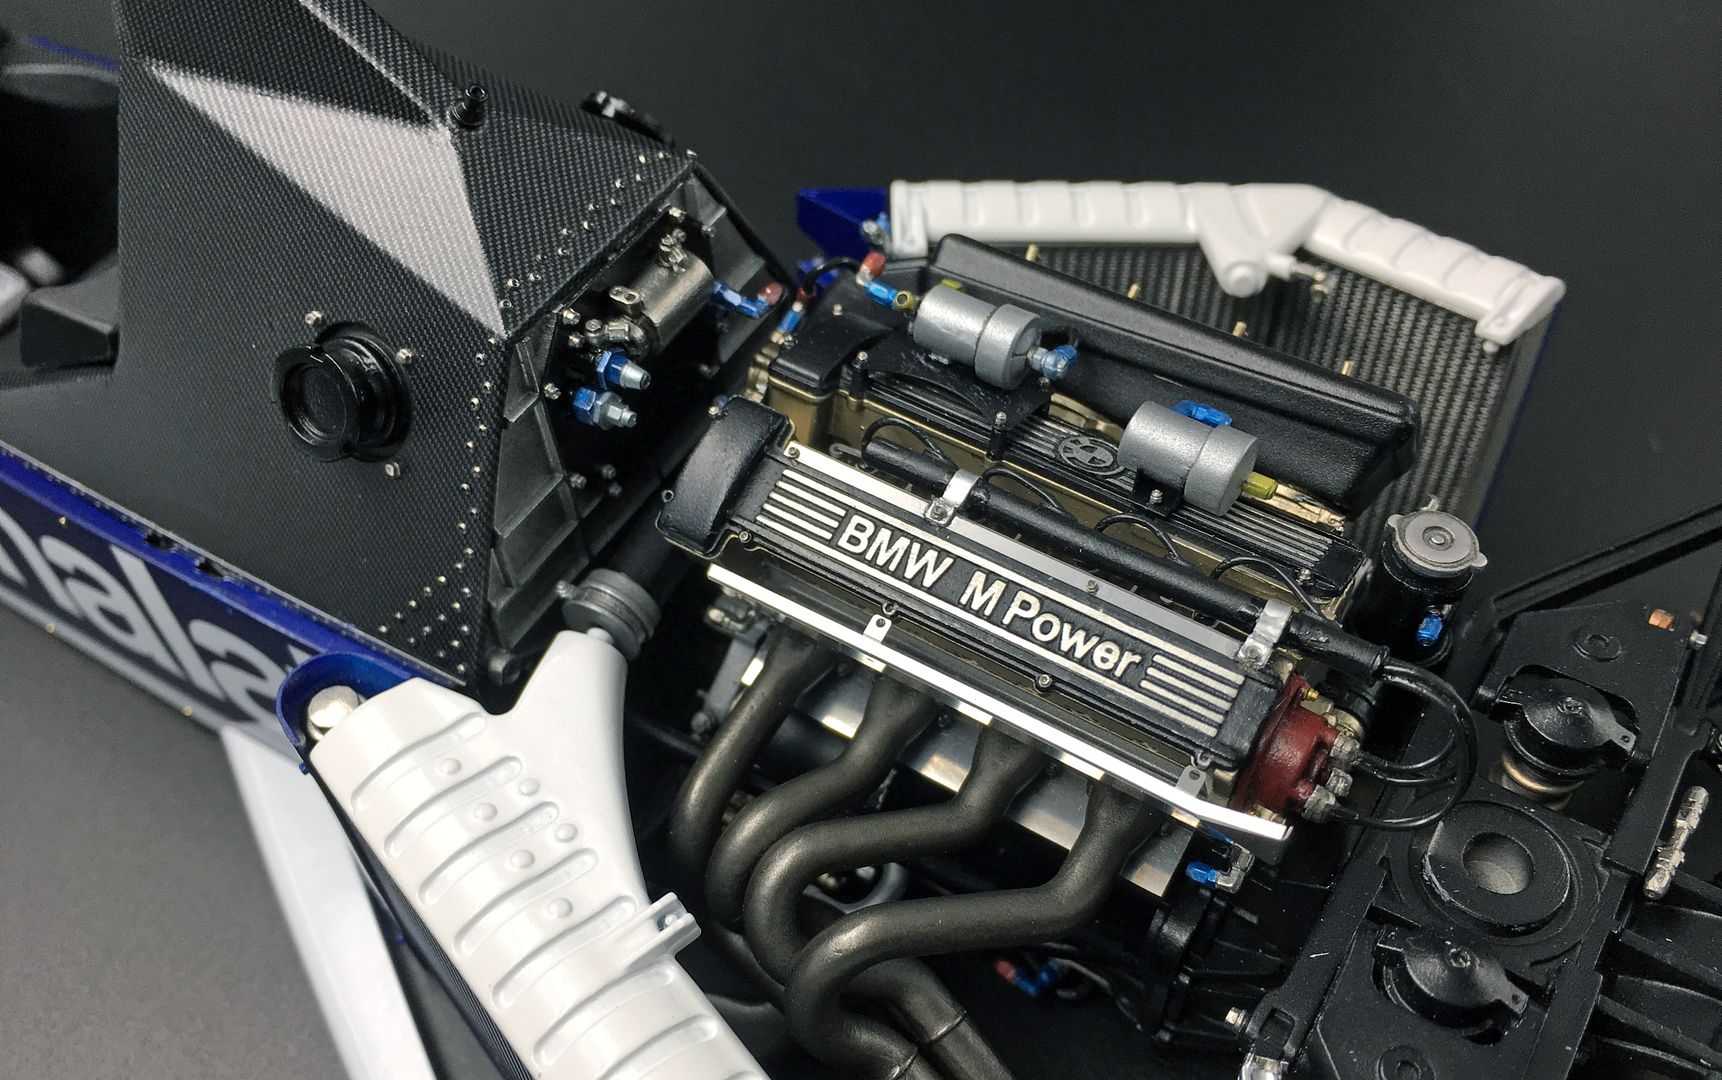
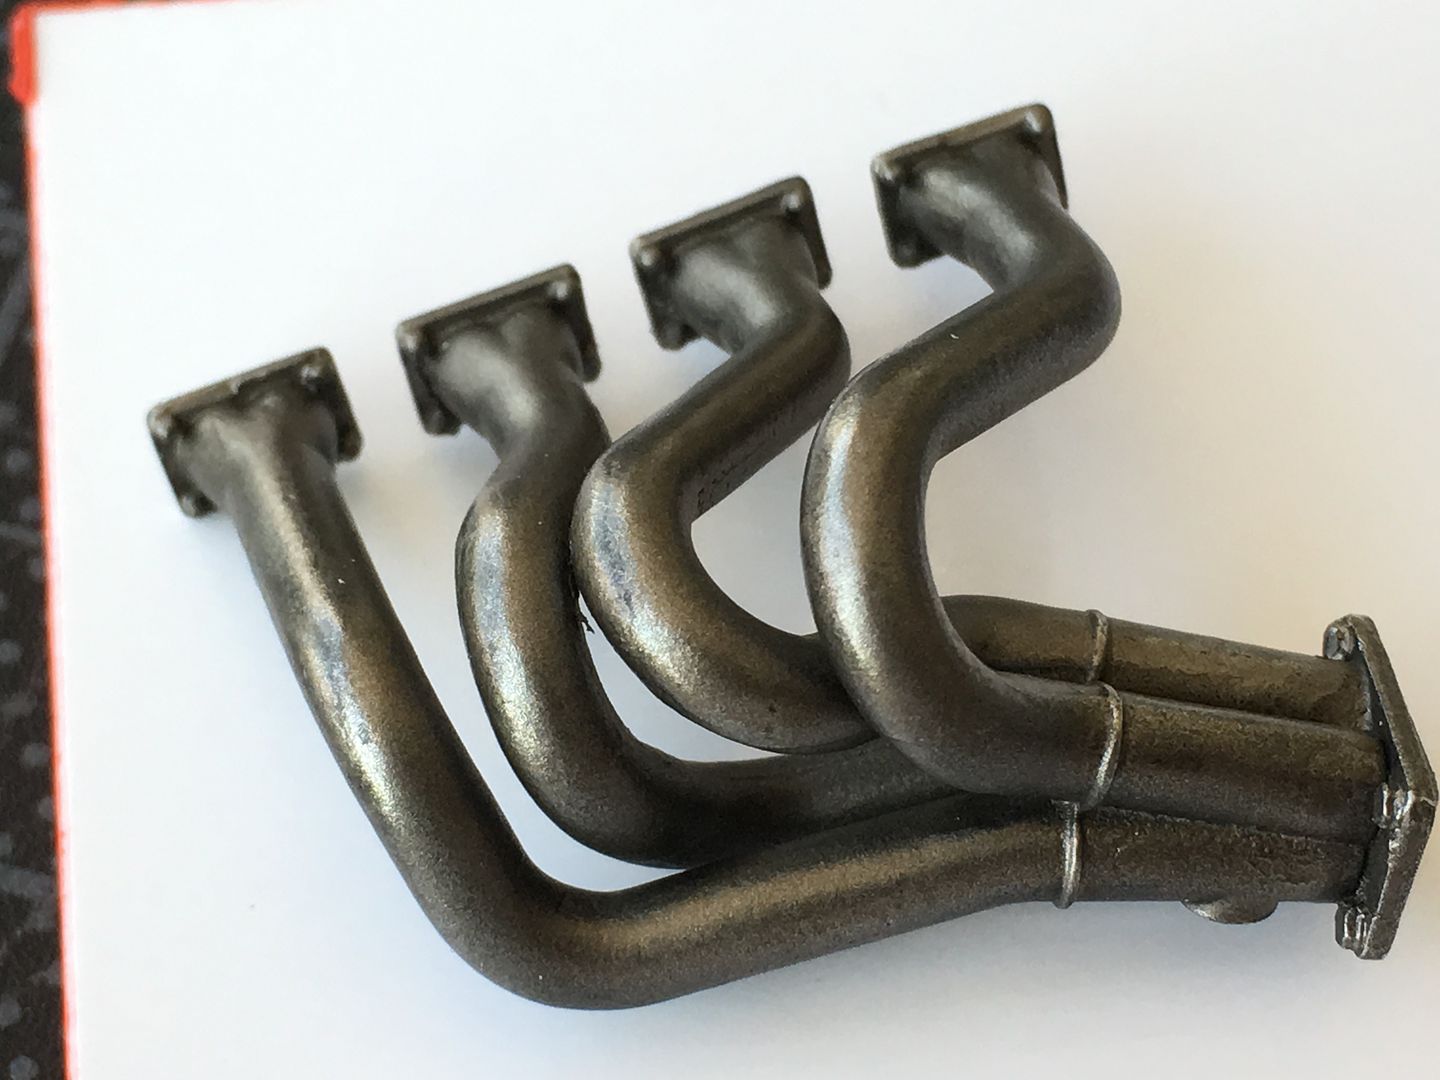
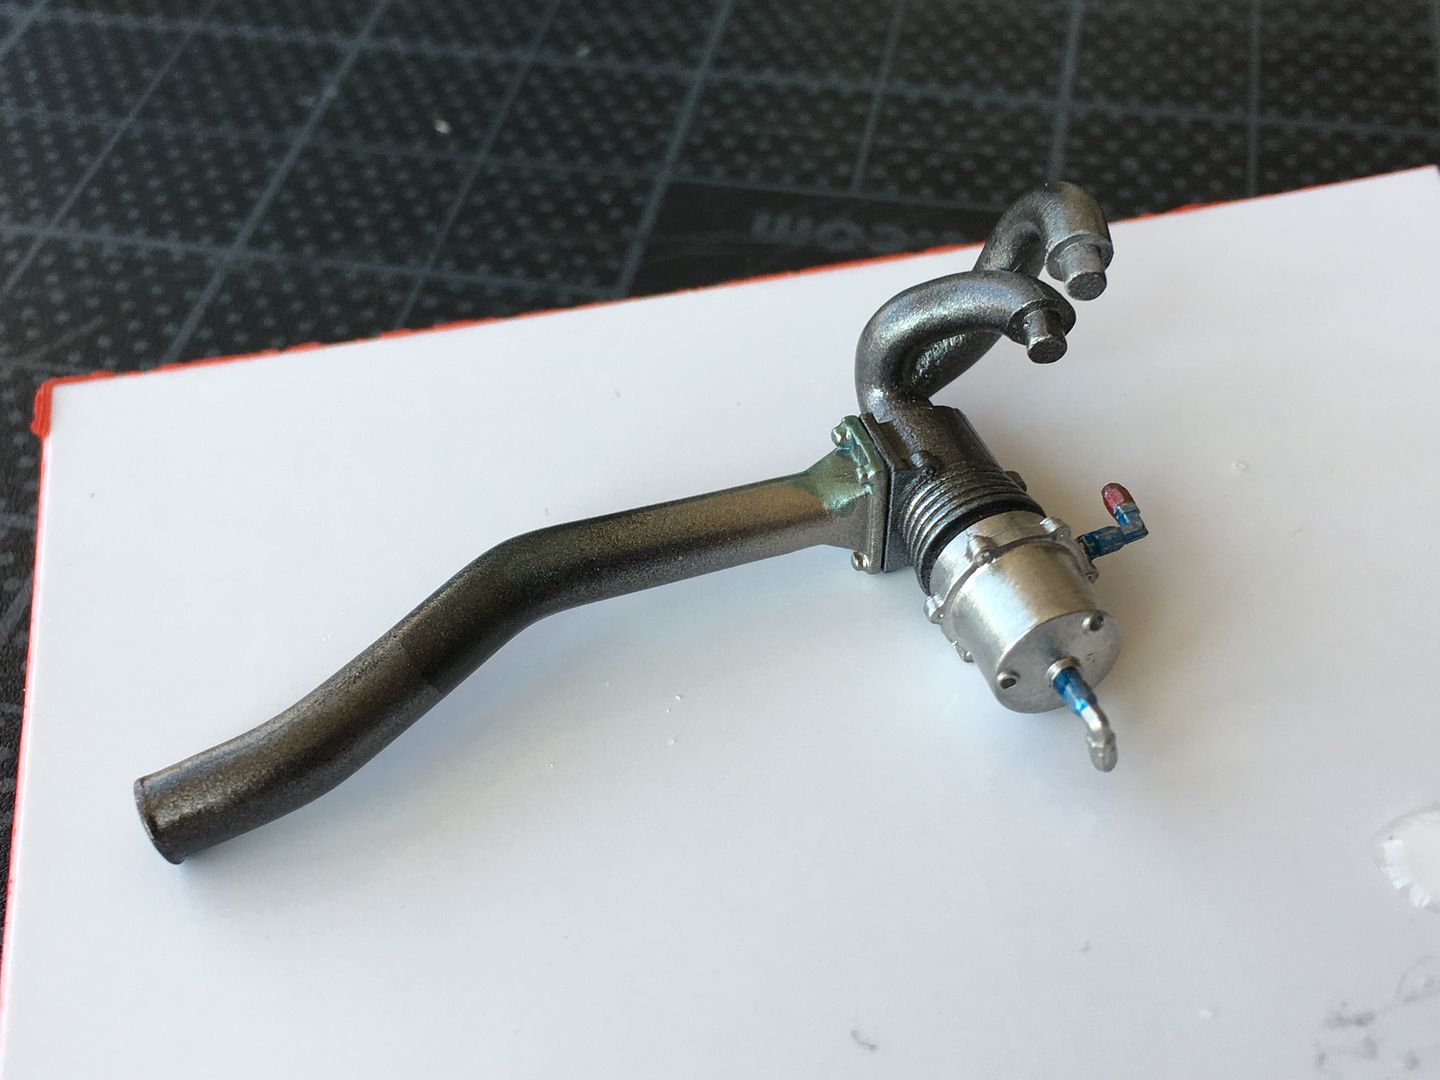
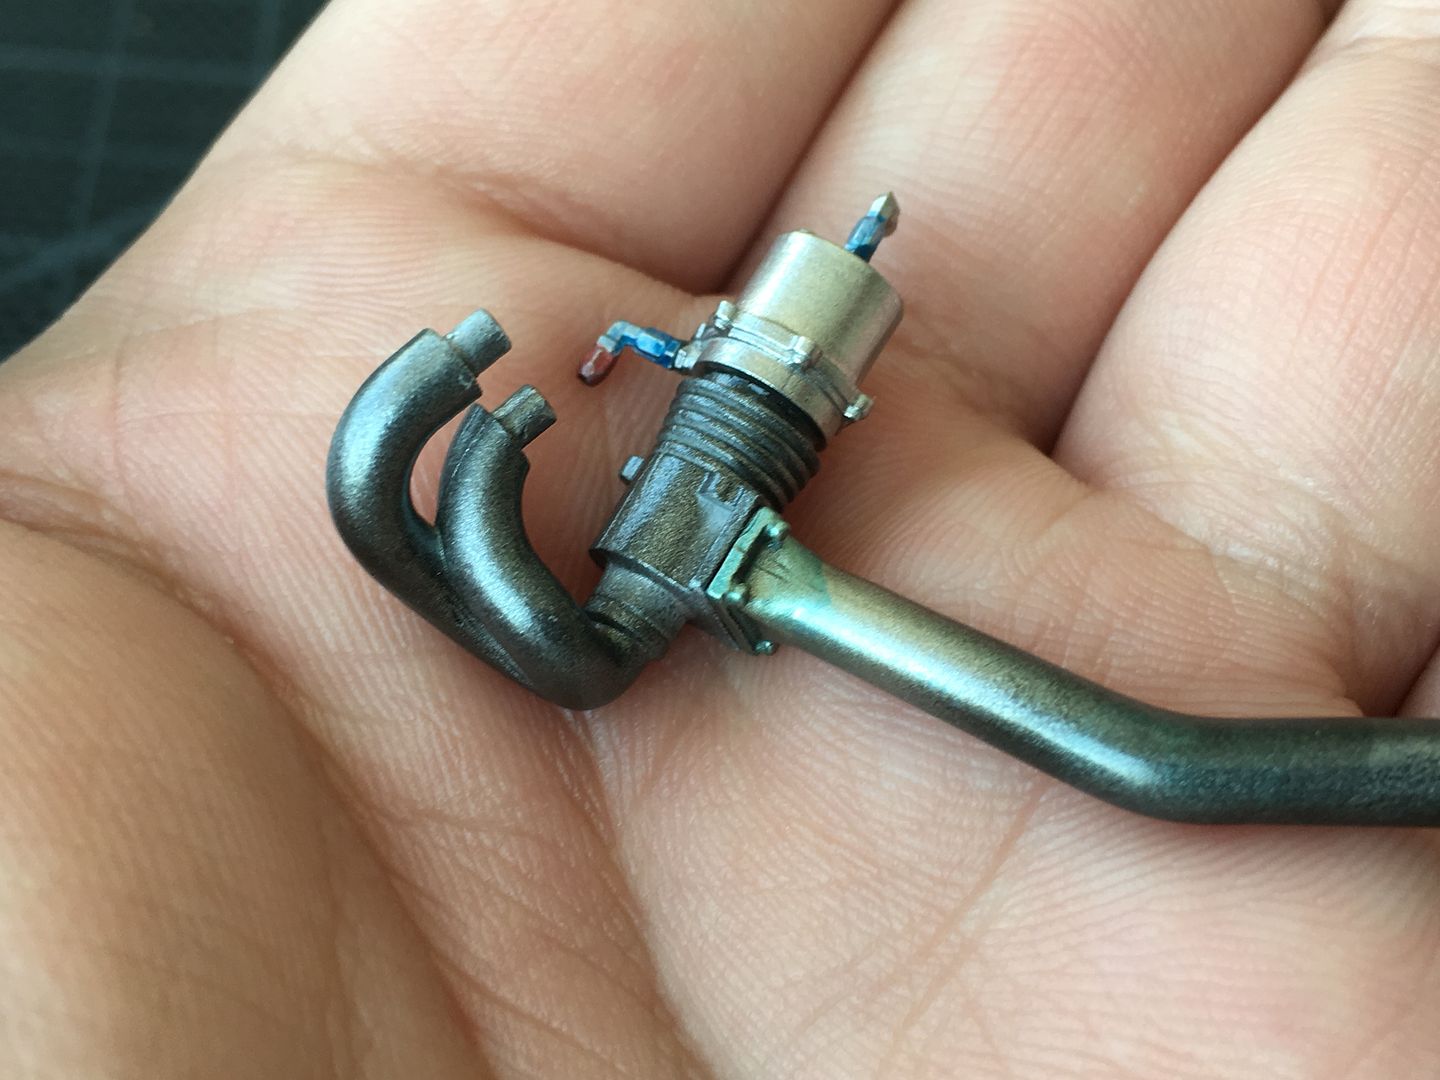
Source photos show how the two end exhaust pipes are chrome with some heat stains, whilst the rest is that dark, metallic brown colour,as well as the turbo etc.
This is the first pass, but I think it works ok. I used Alclad chrome on the exhaust pipes (after spraying gloss black) and then a little pale gold on the manifold ends, with a hint of clear blue to give some localised colour.

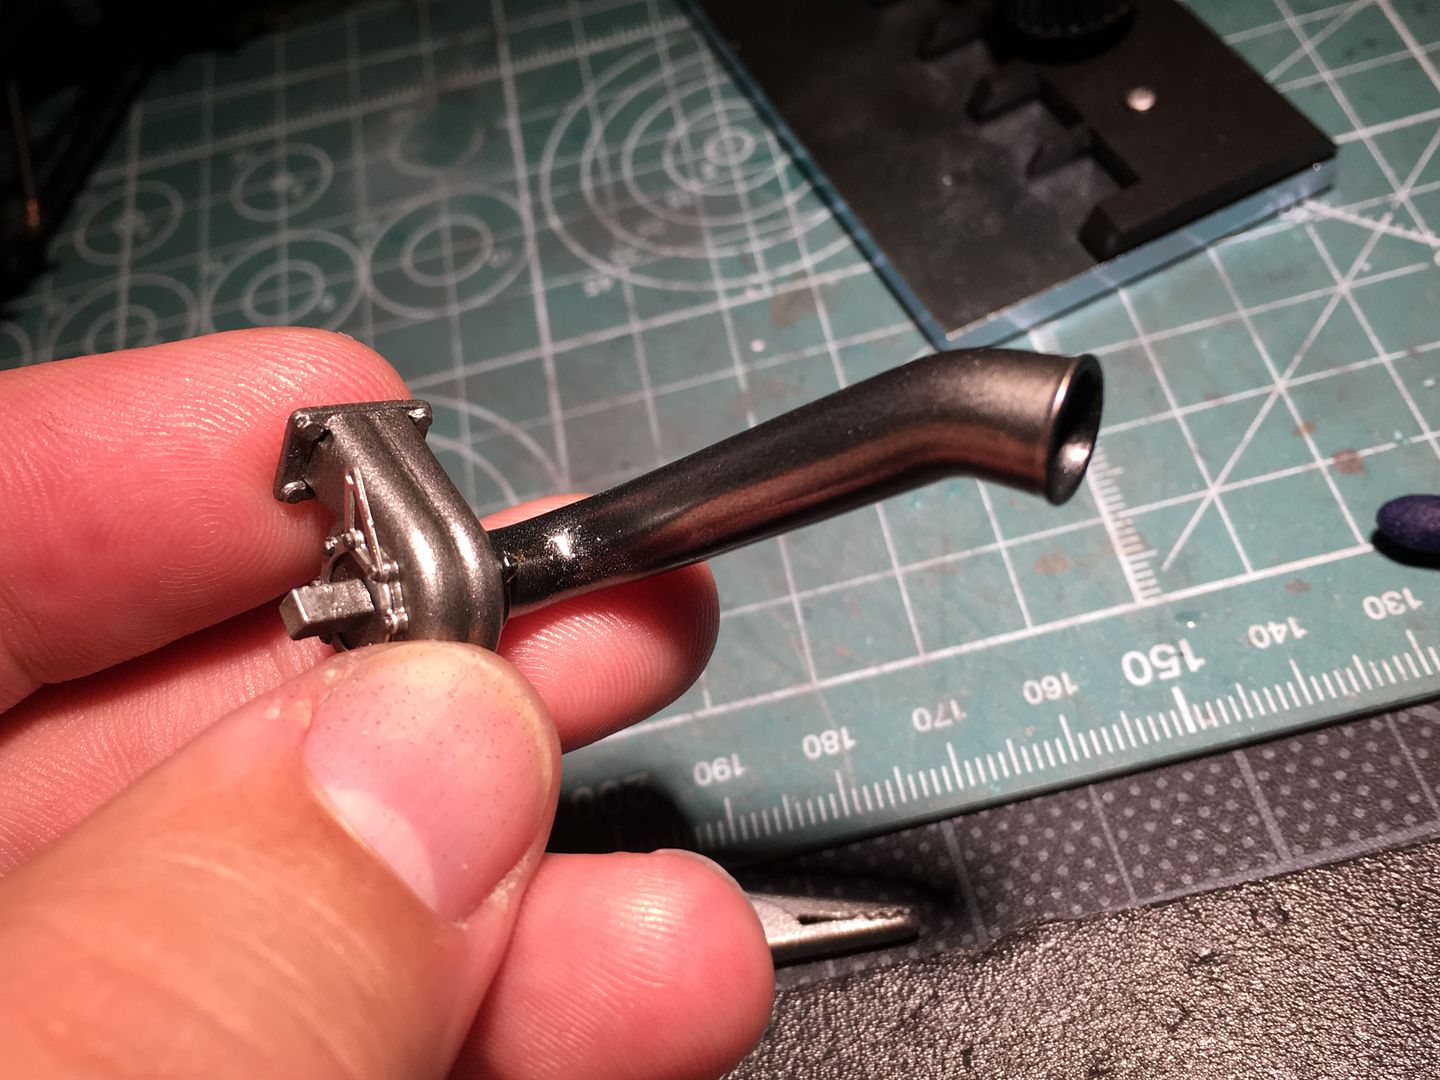
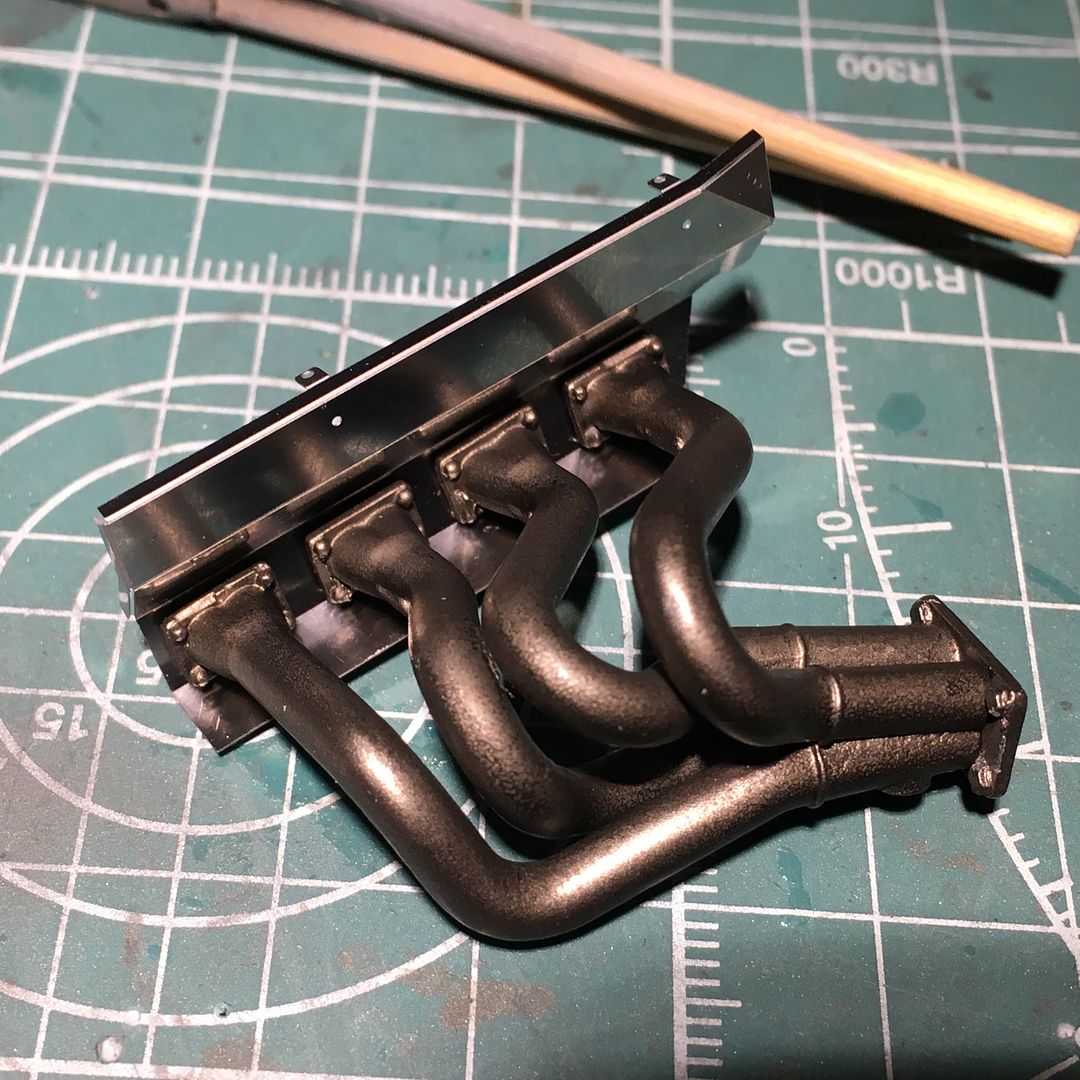
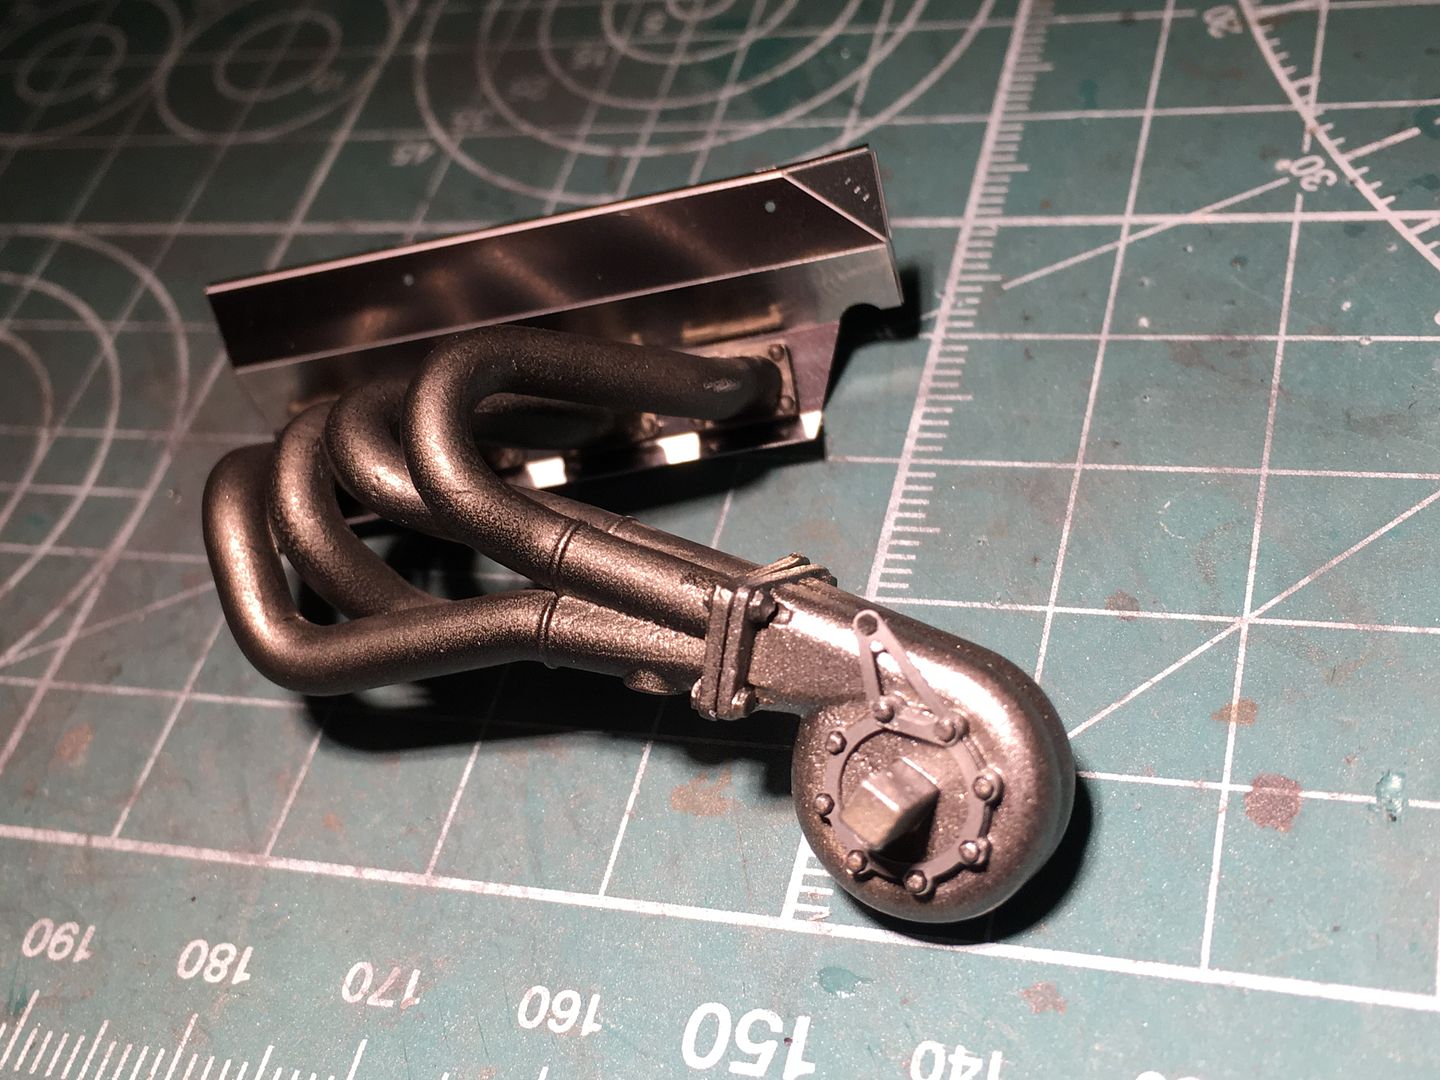
I dulled the manifolds back a little after these shots. Still some tweaking.
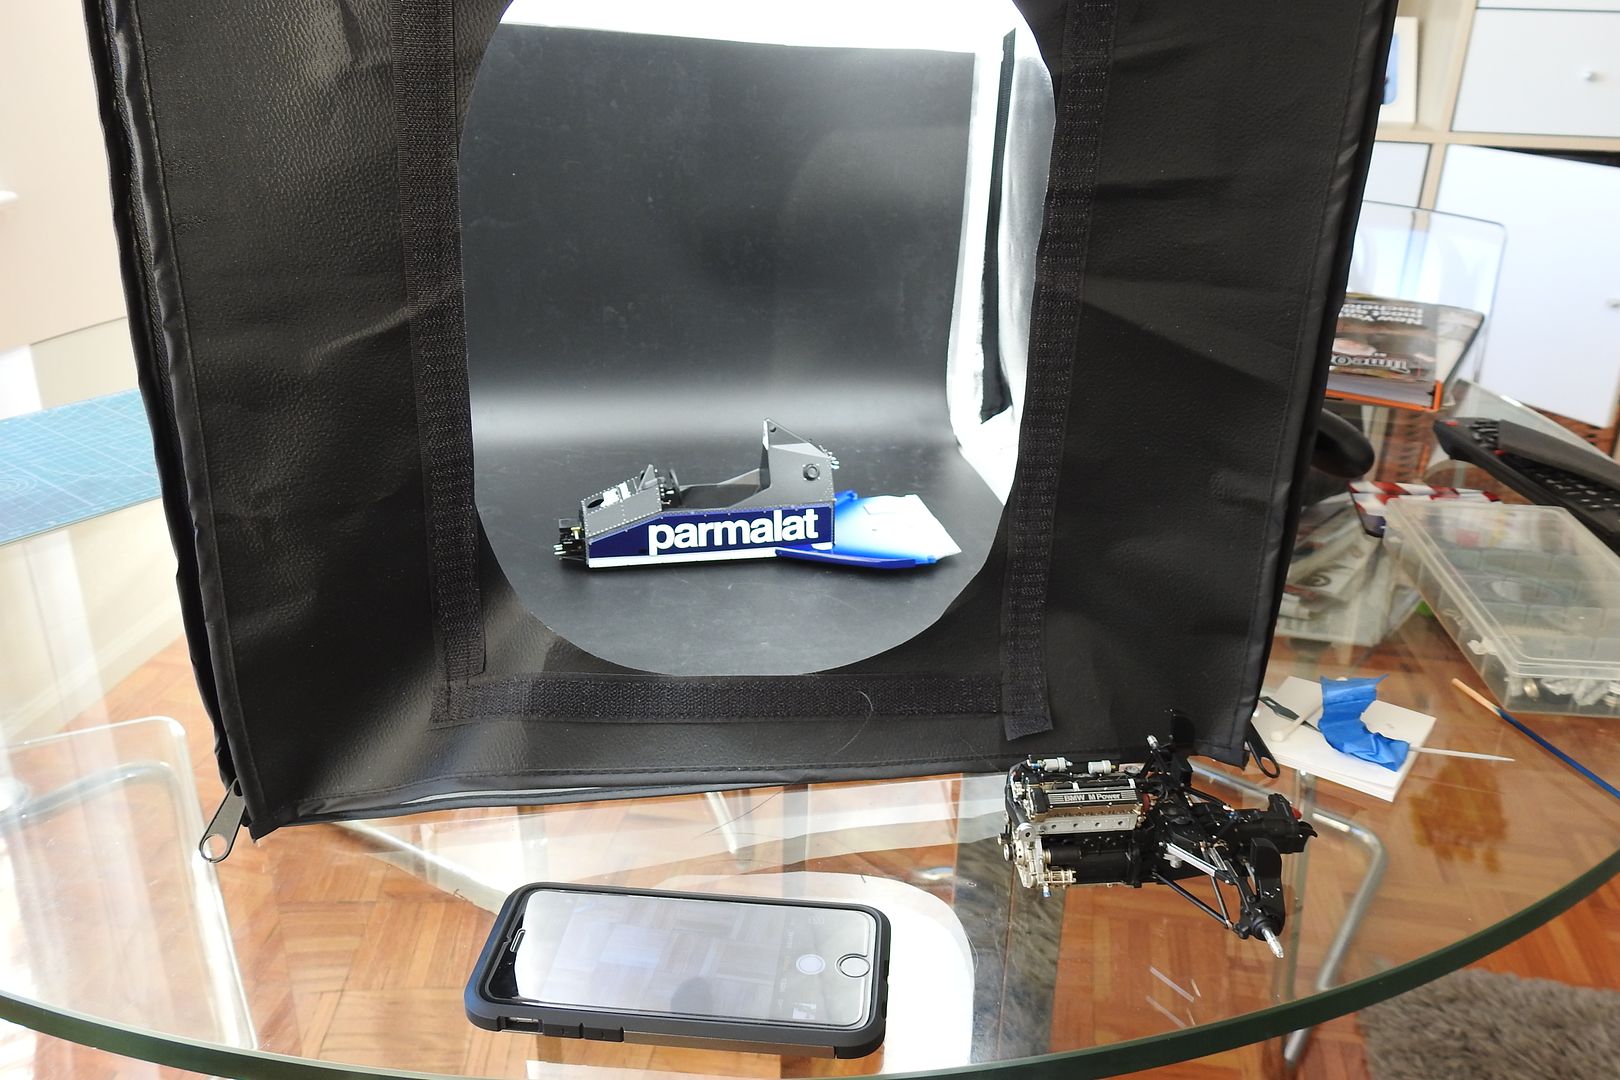
Daylight! I do 90% of my work in the evening with a small lamp, hence the crap photos - I'll get he kit in the light box soon...

It is gradually coming together. Lots of details to add - and the exhaust/turbo/rads.
some nice PE parts.
Source photos show how the two end exhaust pipes are chrome with some heat stains, whilst the rest is that dark, metallic brown colour,as well as the turbo etc.
This is the first pass, but I think it works ok. I used Alclad chrome on the exhaust pipes (after spraying gloss black) and then a little pale gold on the manifold ends, with a hint of clear blue to give some localised colour.
I dulled the manifolds back a little after these shots. Still some tweaking.
Daylight! I do 90% of my work in the evening with a small lamp, hence the crap photos - I'll get he kit in the light box soon...
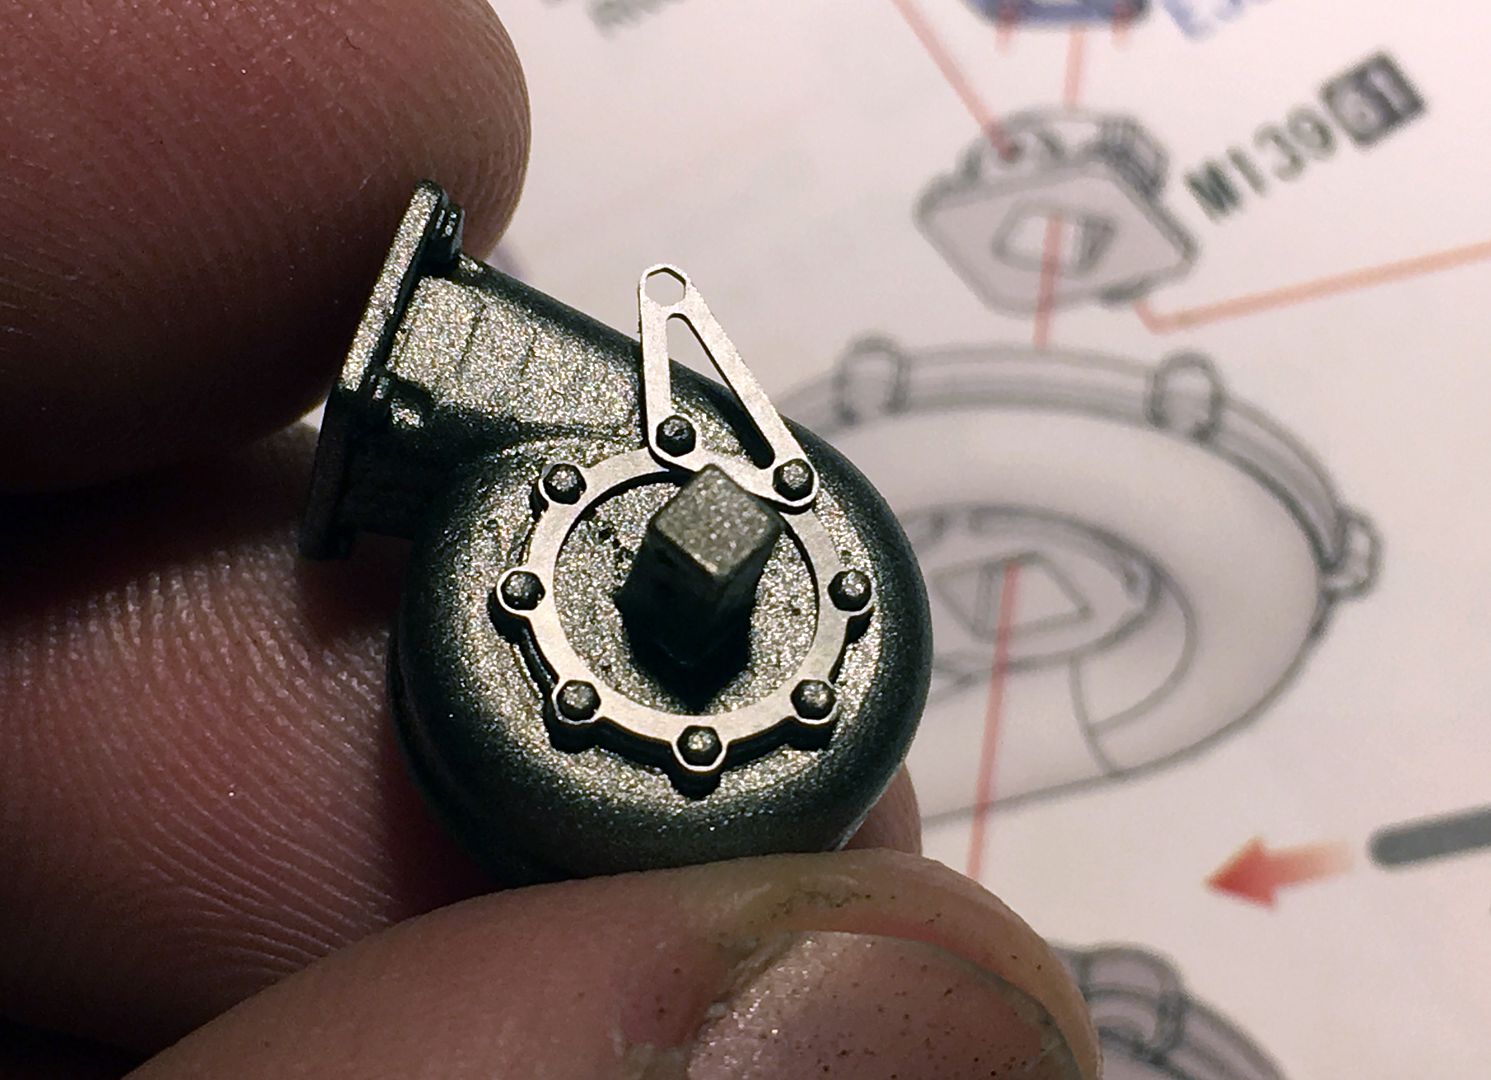
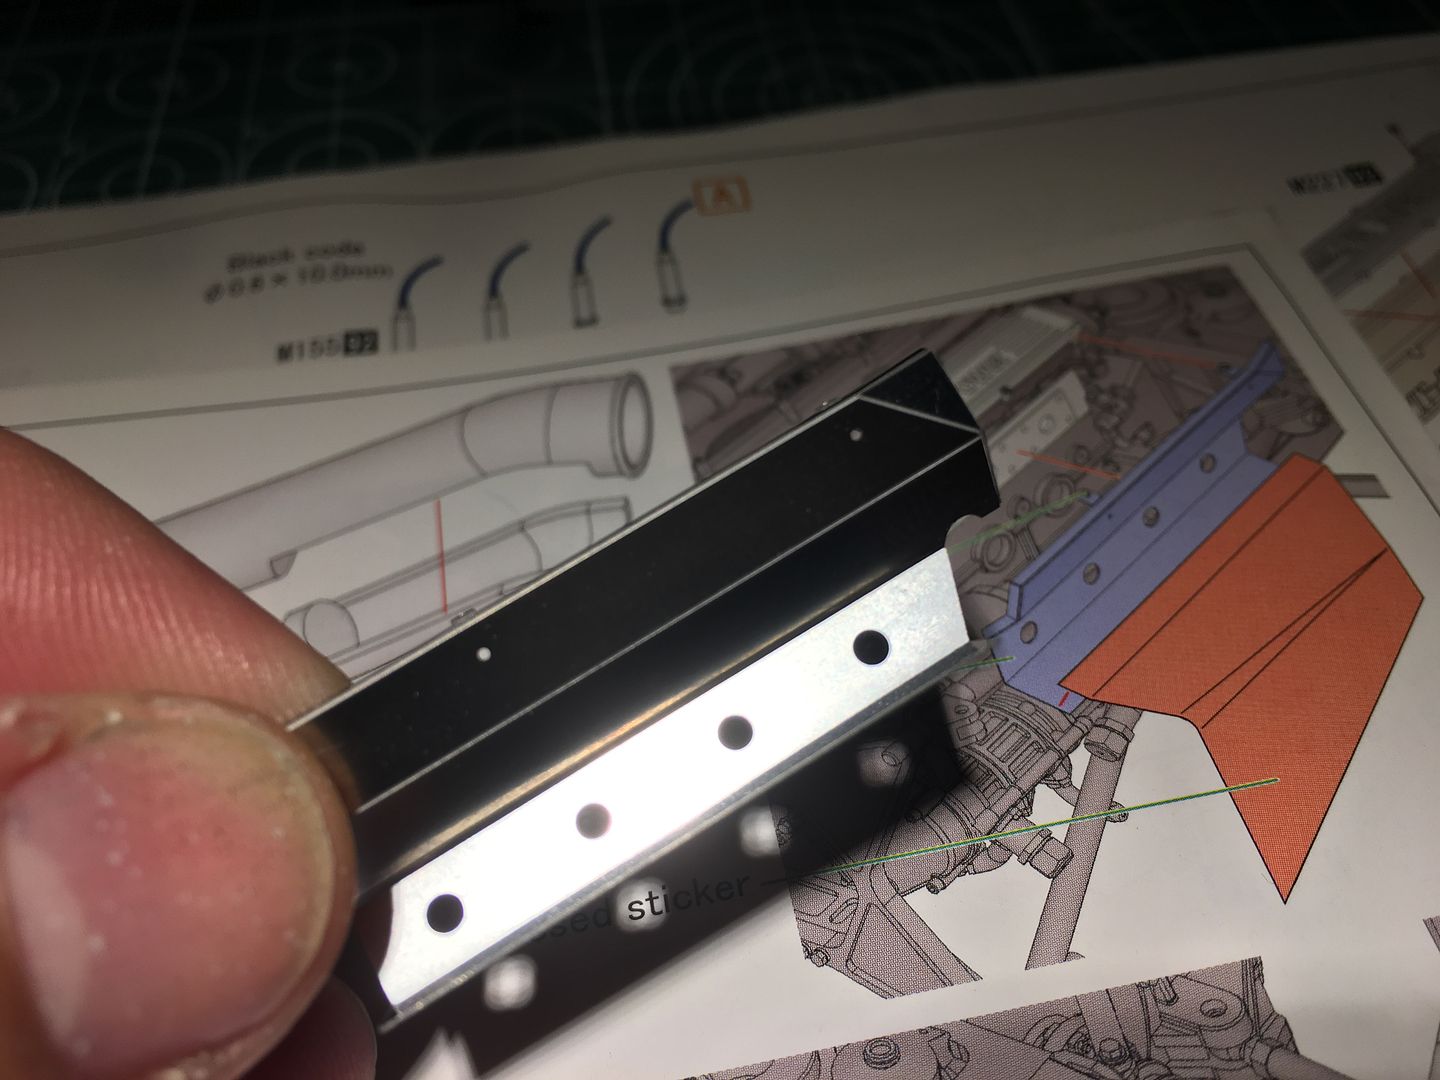
If you have many PE parts that need folding, worth investing in one of these PE clamps.
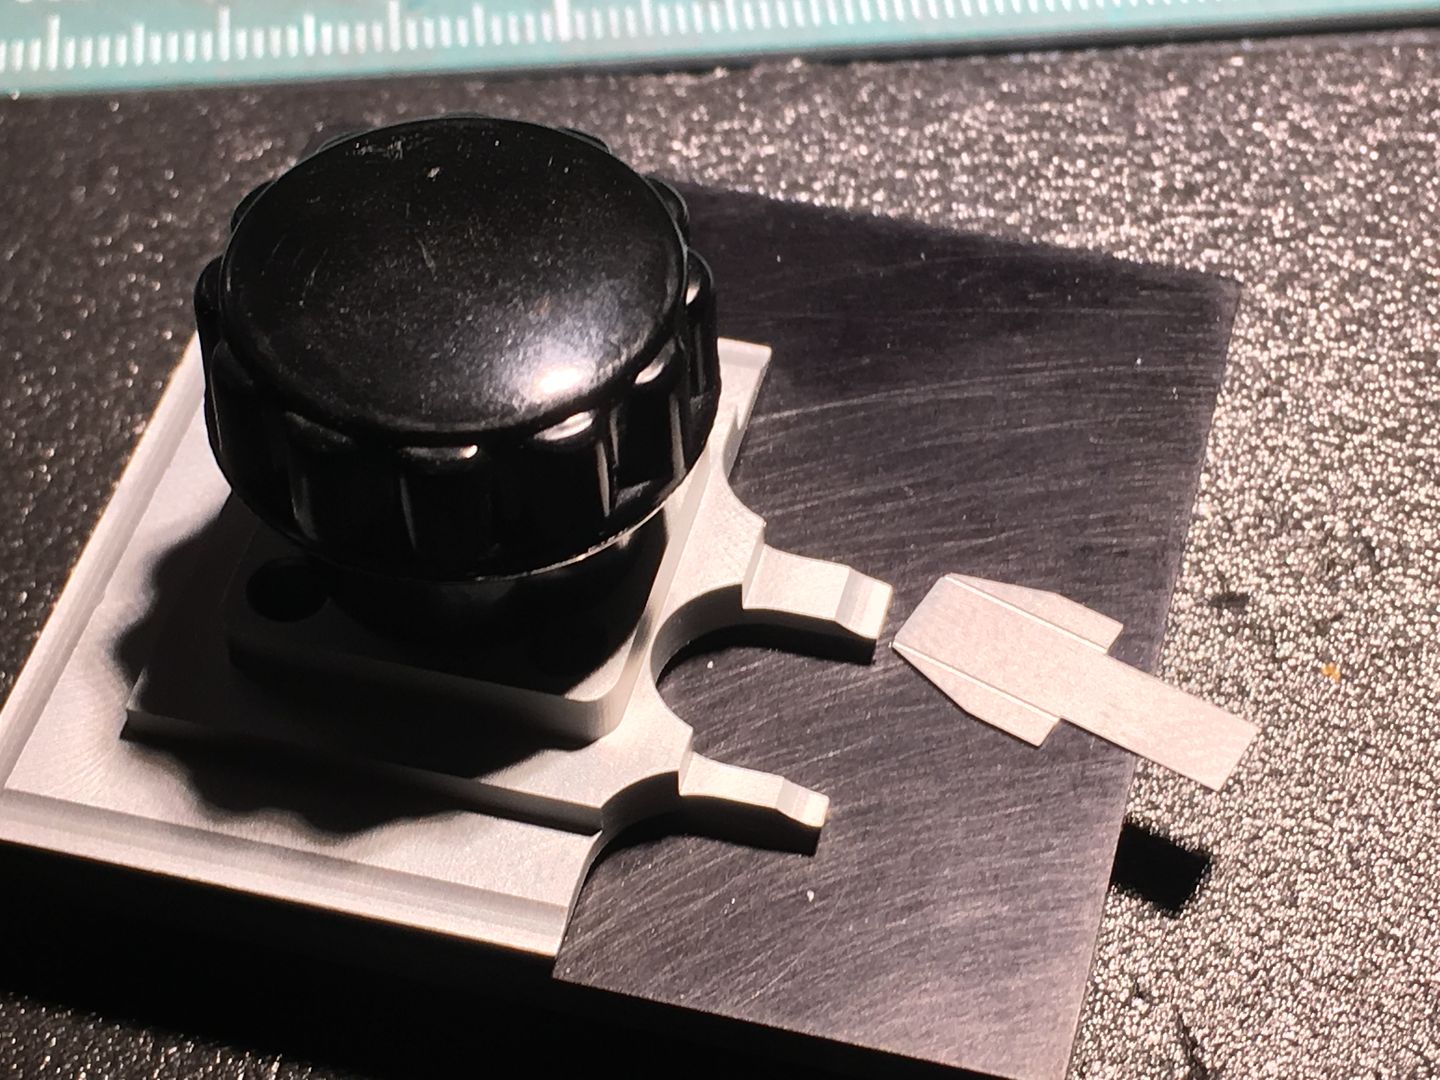
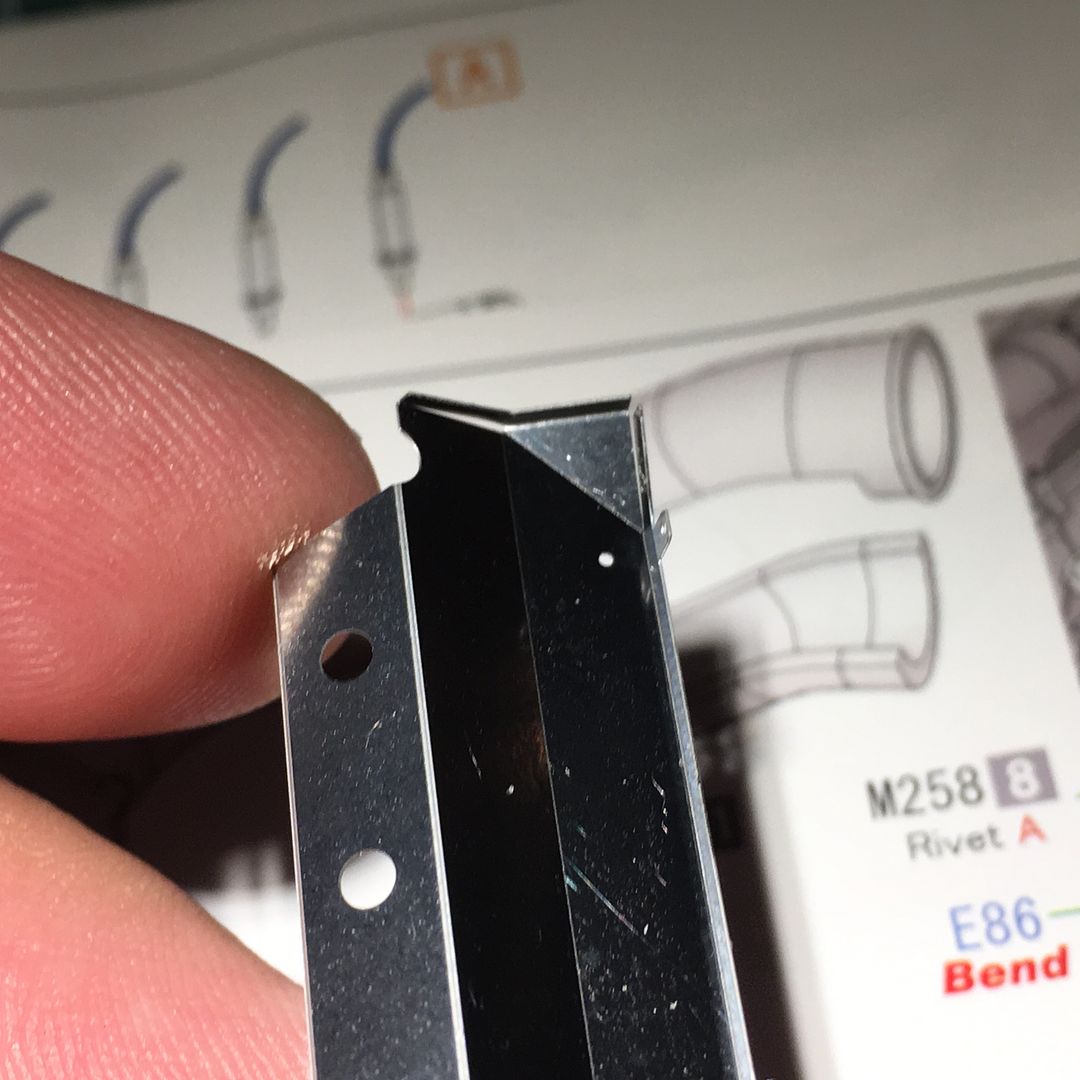
...and also one of these diamond files for getting rid of the little PE joining nibs - you can see one just under the file in this shot...

the file works very smoothly and does no grab or snag...
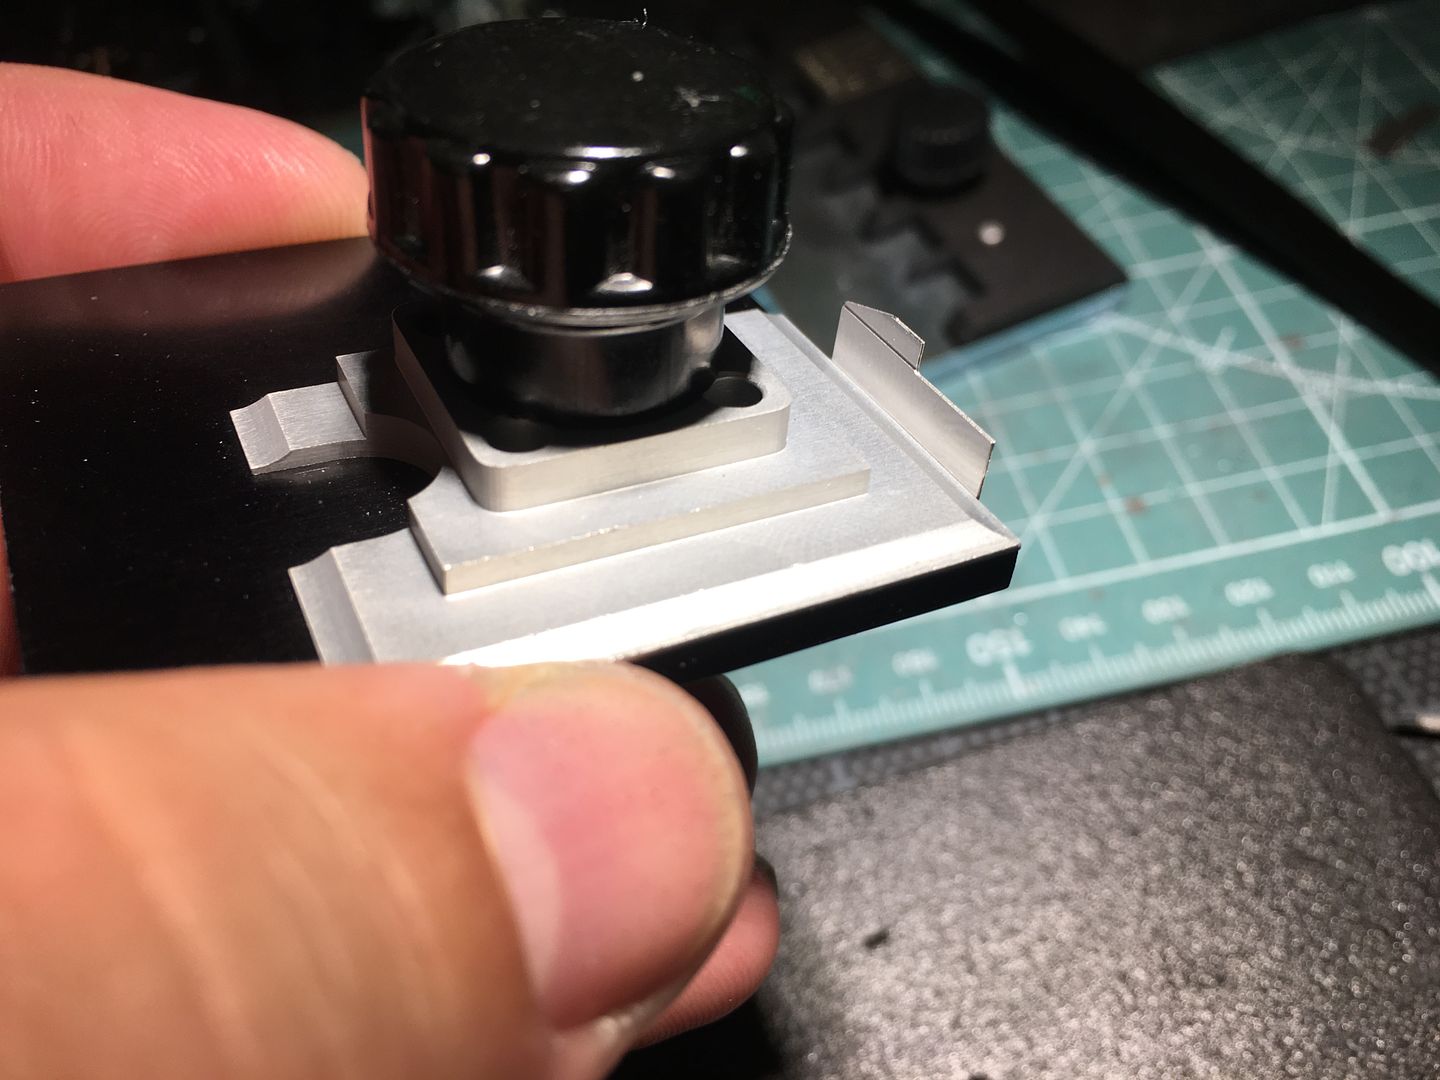
This flat sheet had to be folded a few times, which took a bit or thinking in terms of what order you fold, whilst still being able to clamp!
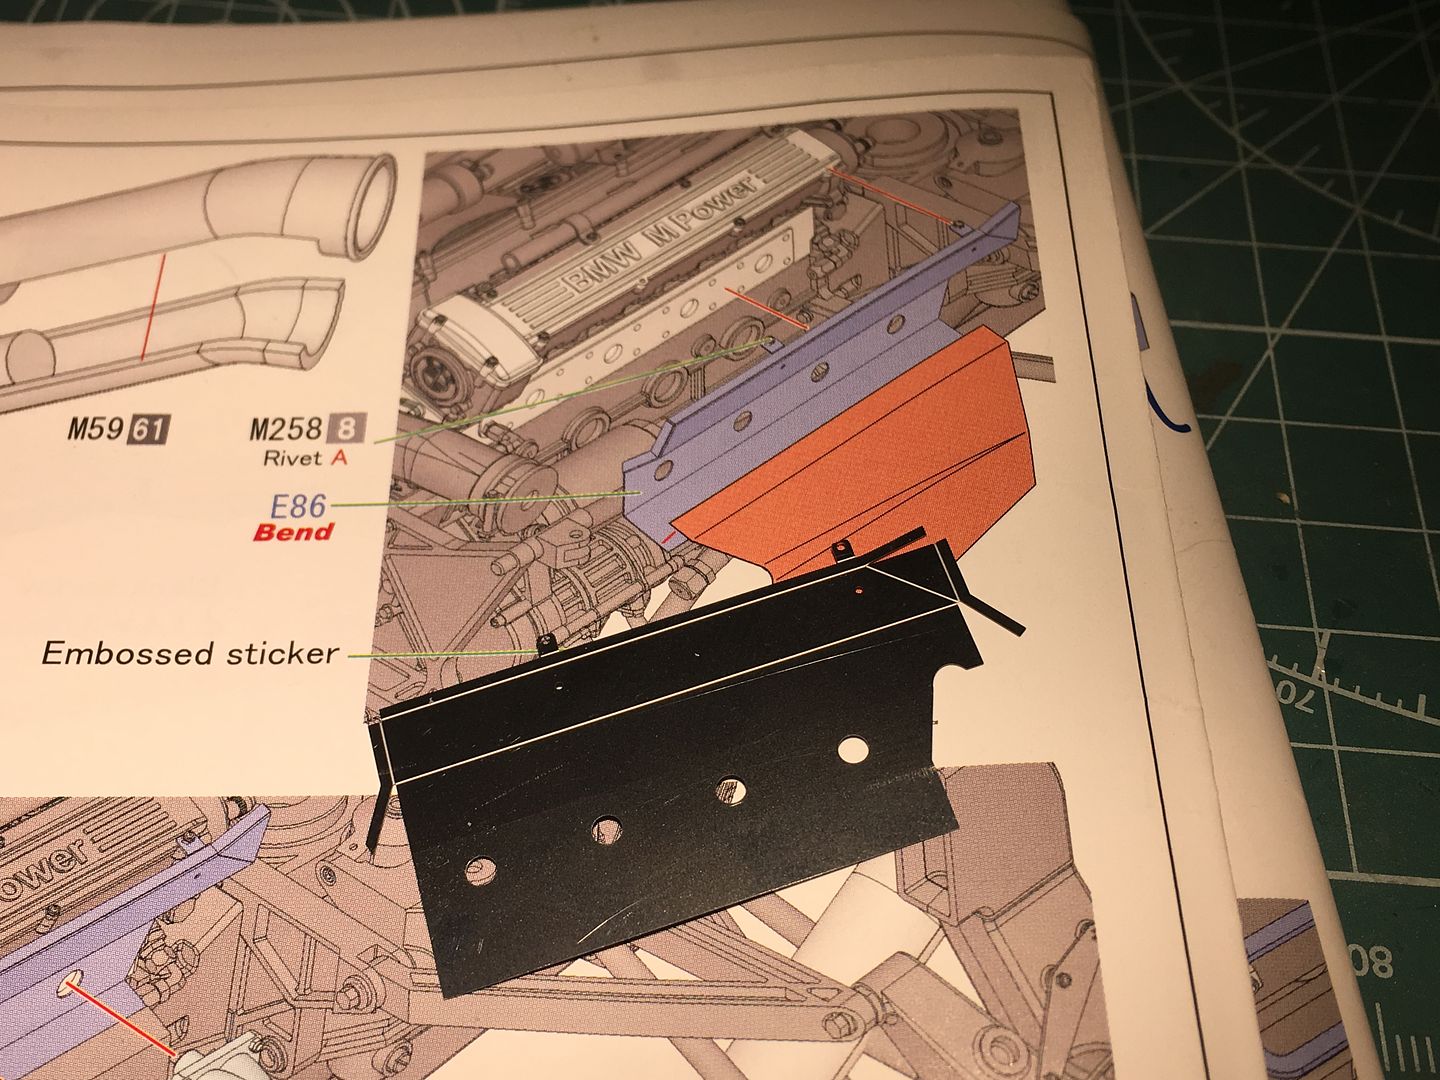

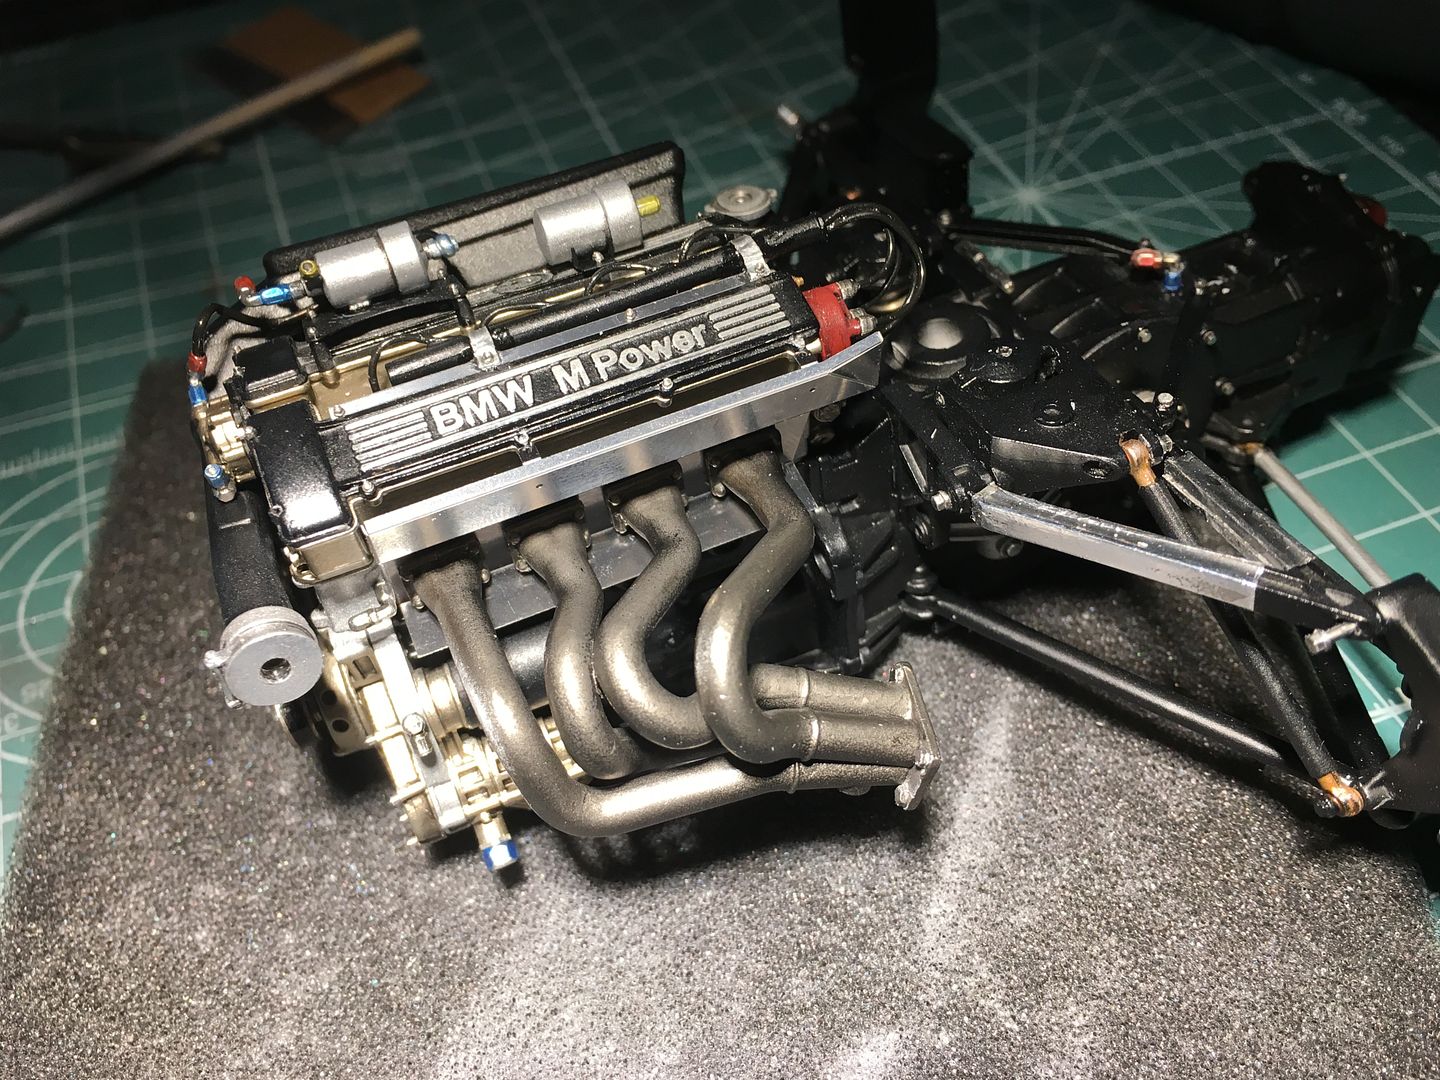
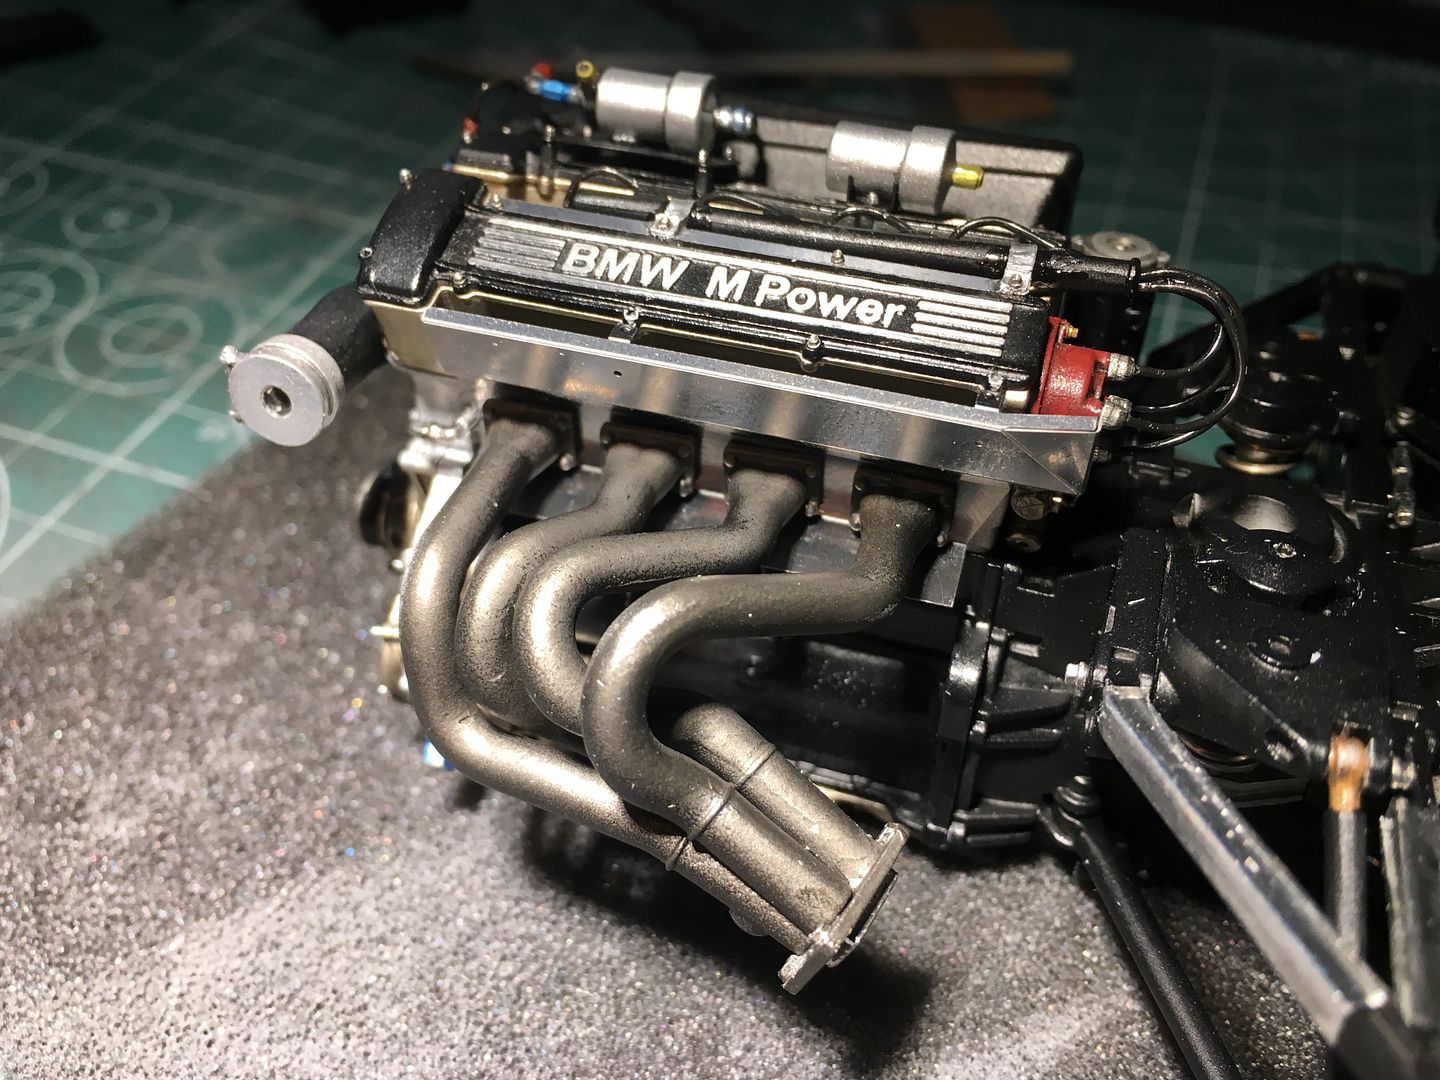
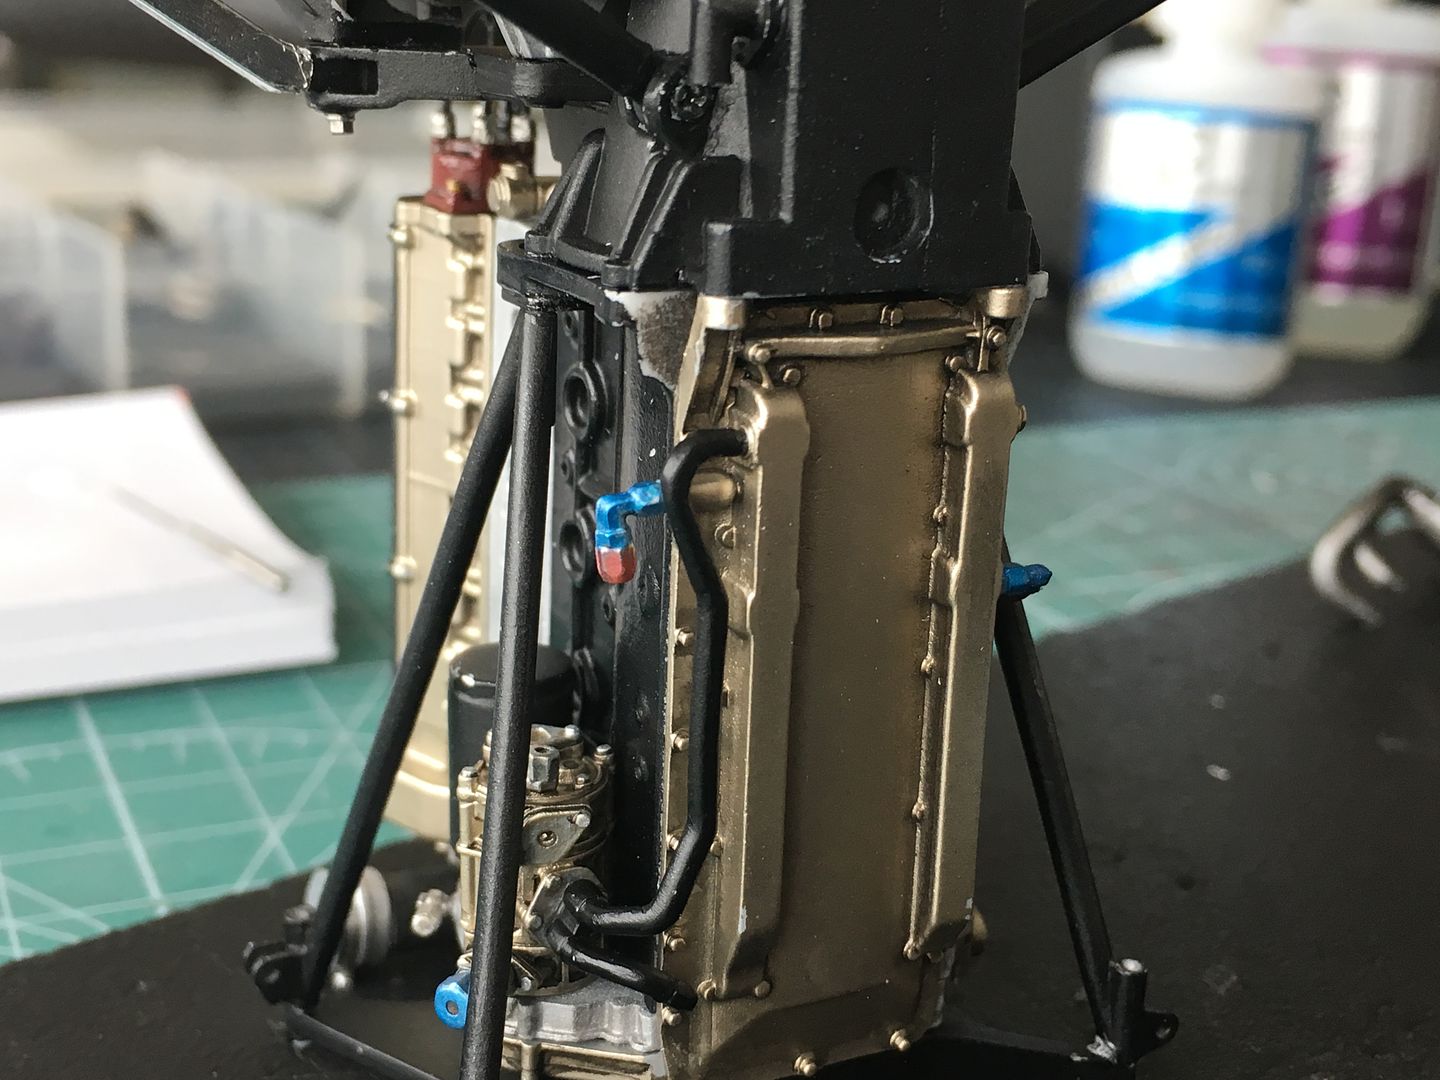
This part will be glued under the manifold, but first I have to fit a heat shield under it - made with embossed foil that comes with the kit. I'll do this last minute as I don't want to damage it as I work on other bits - like wiring.
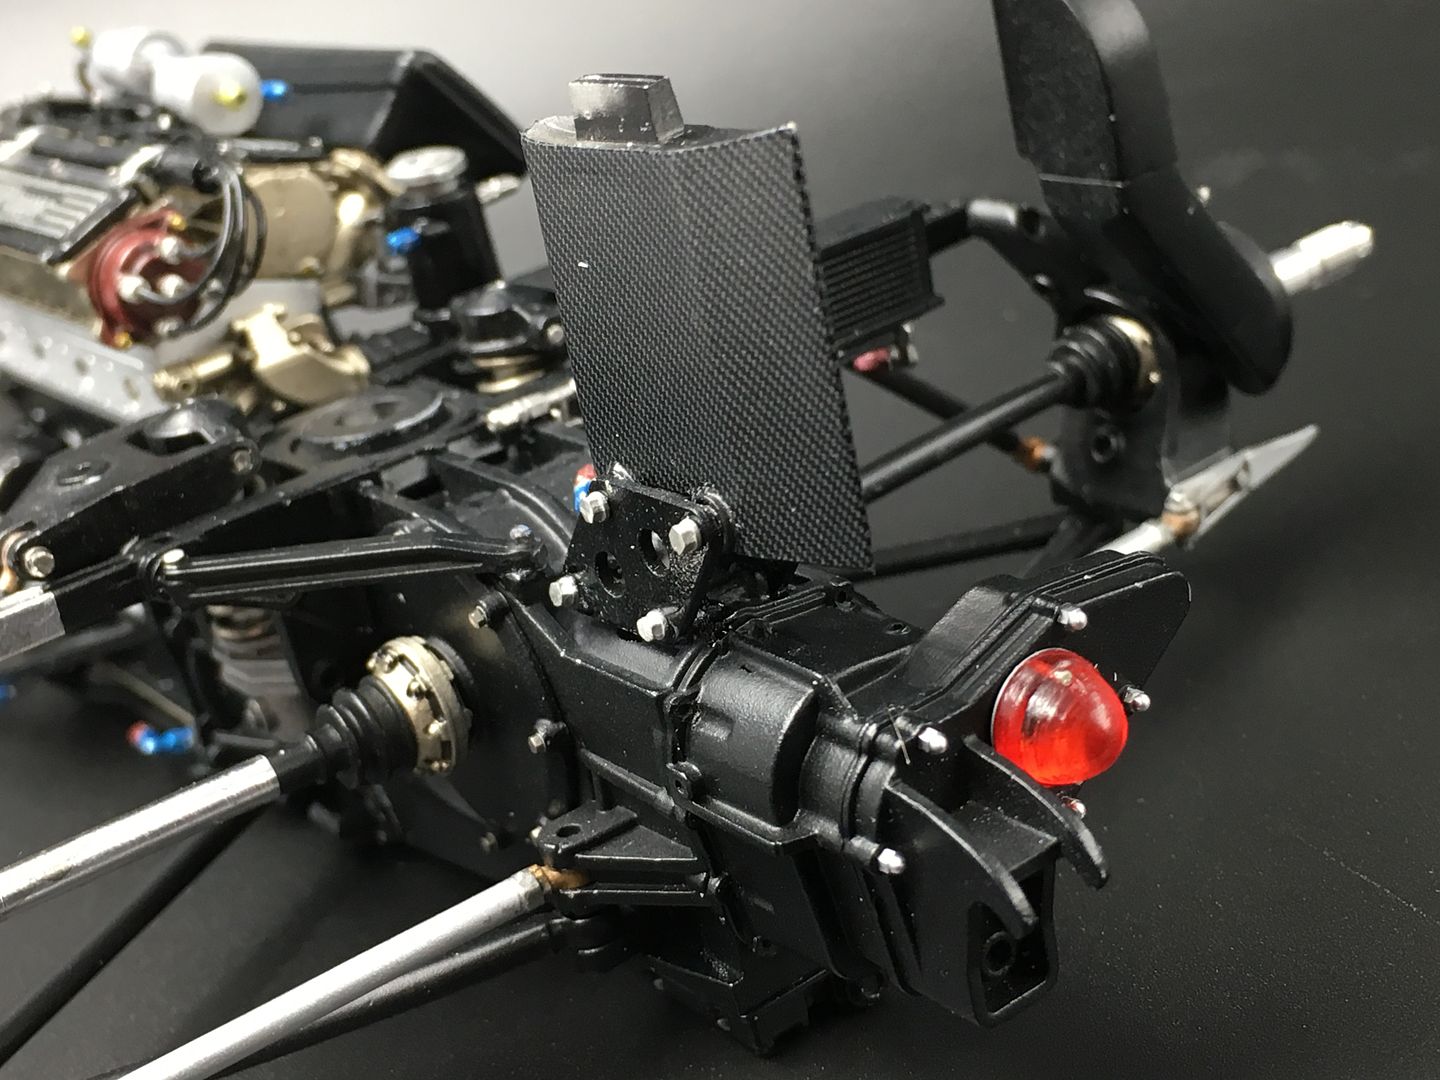
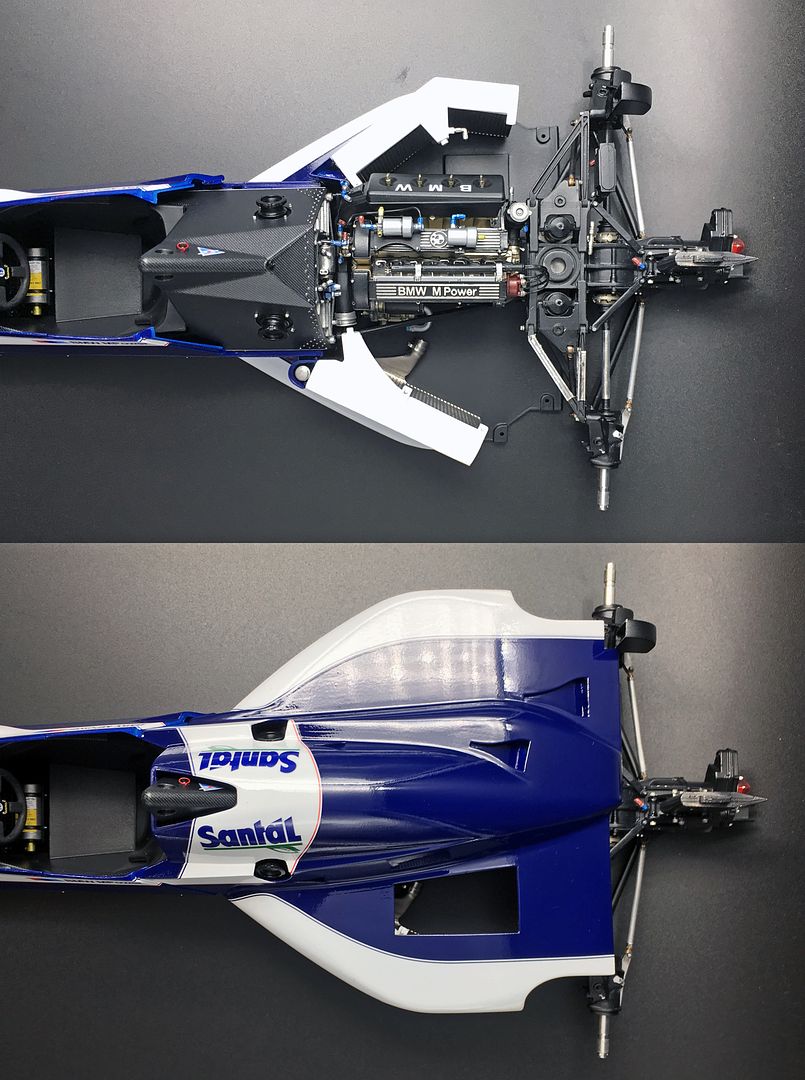
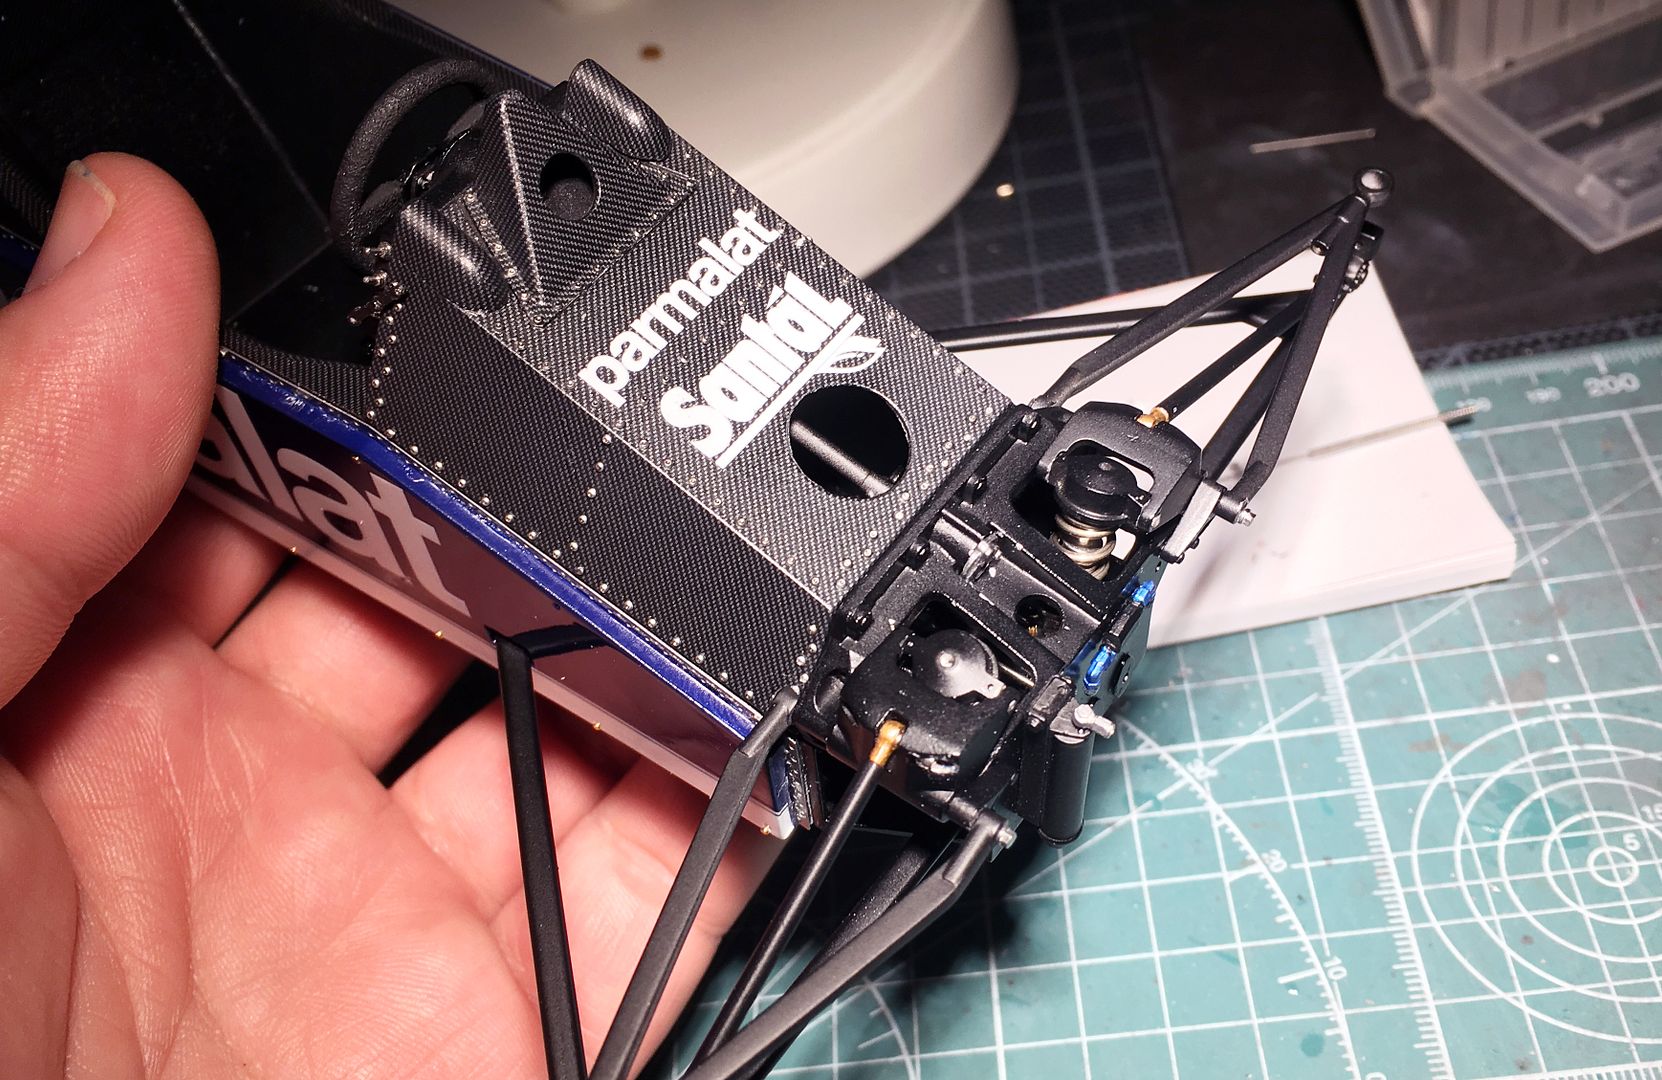
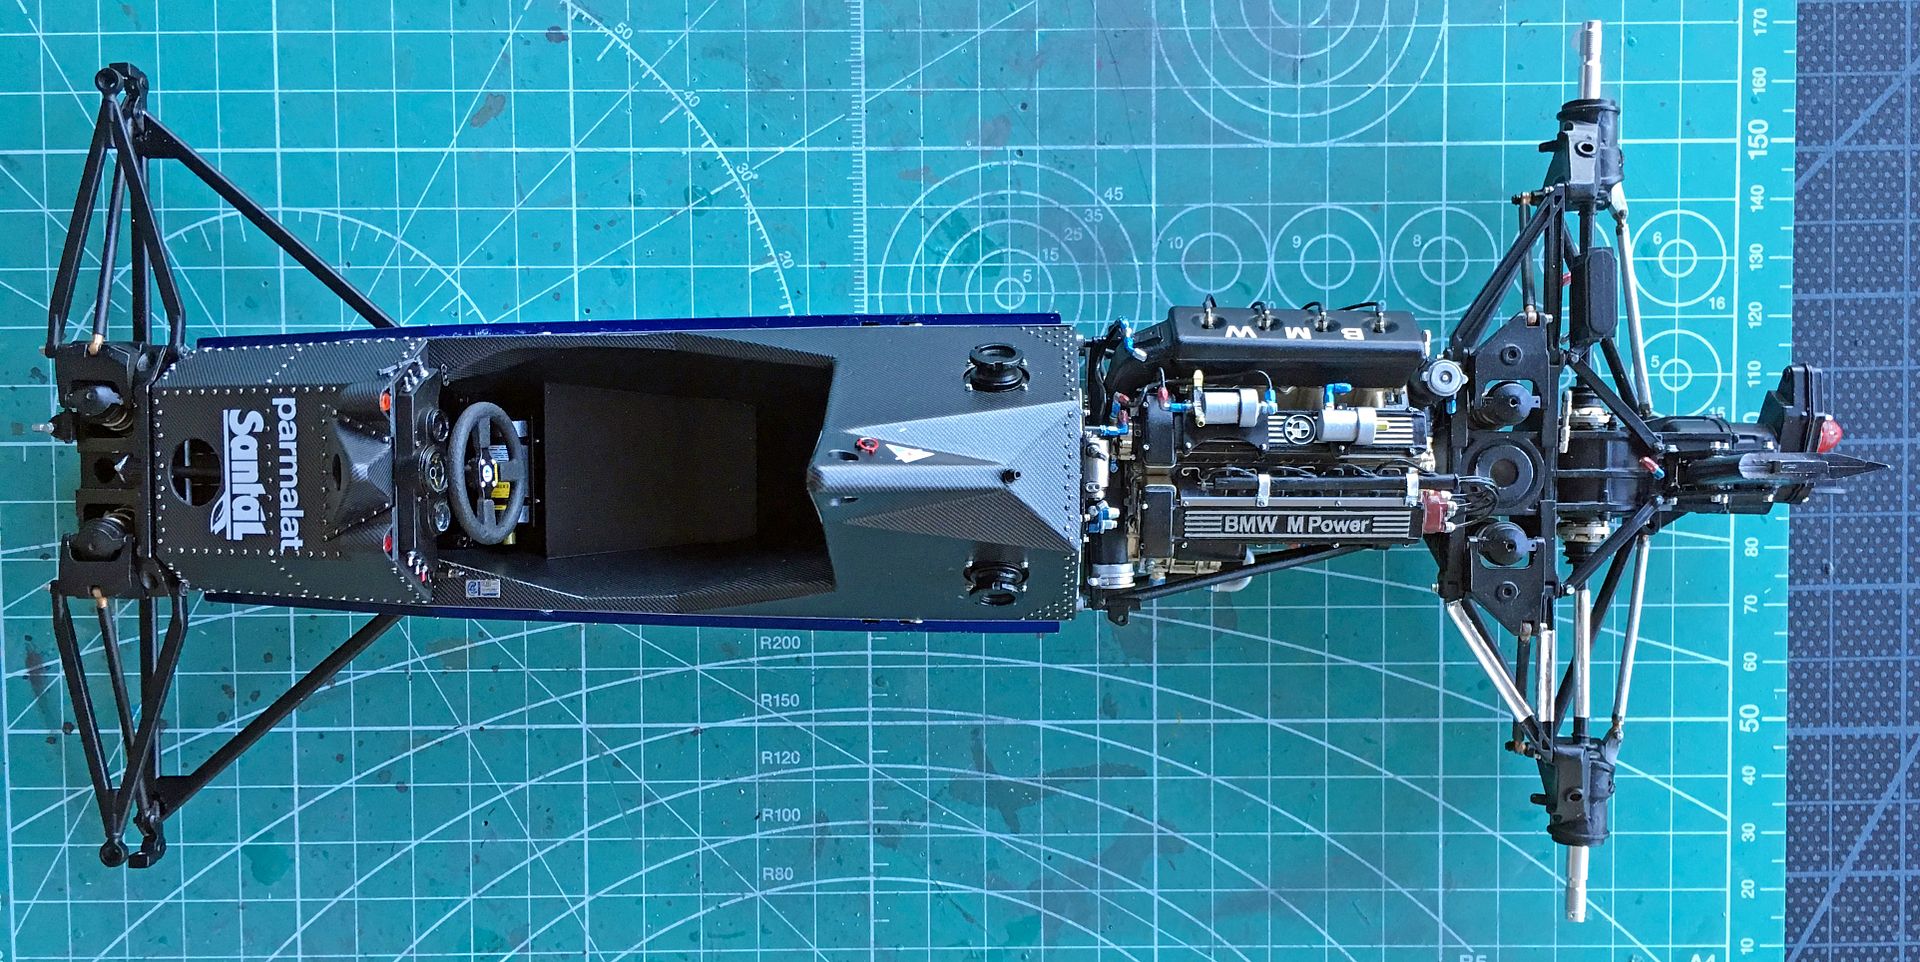
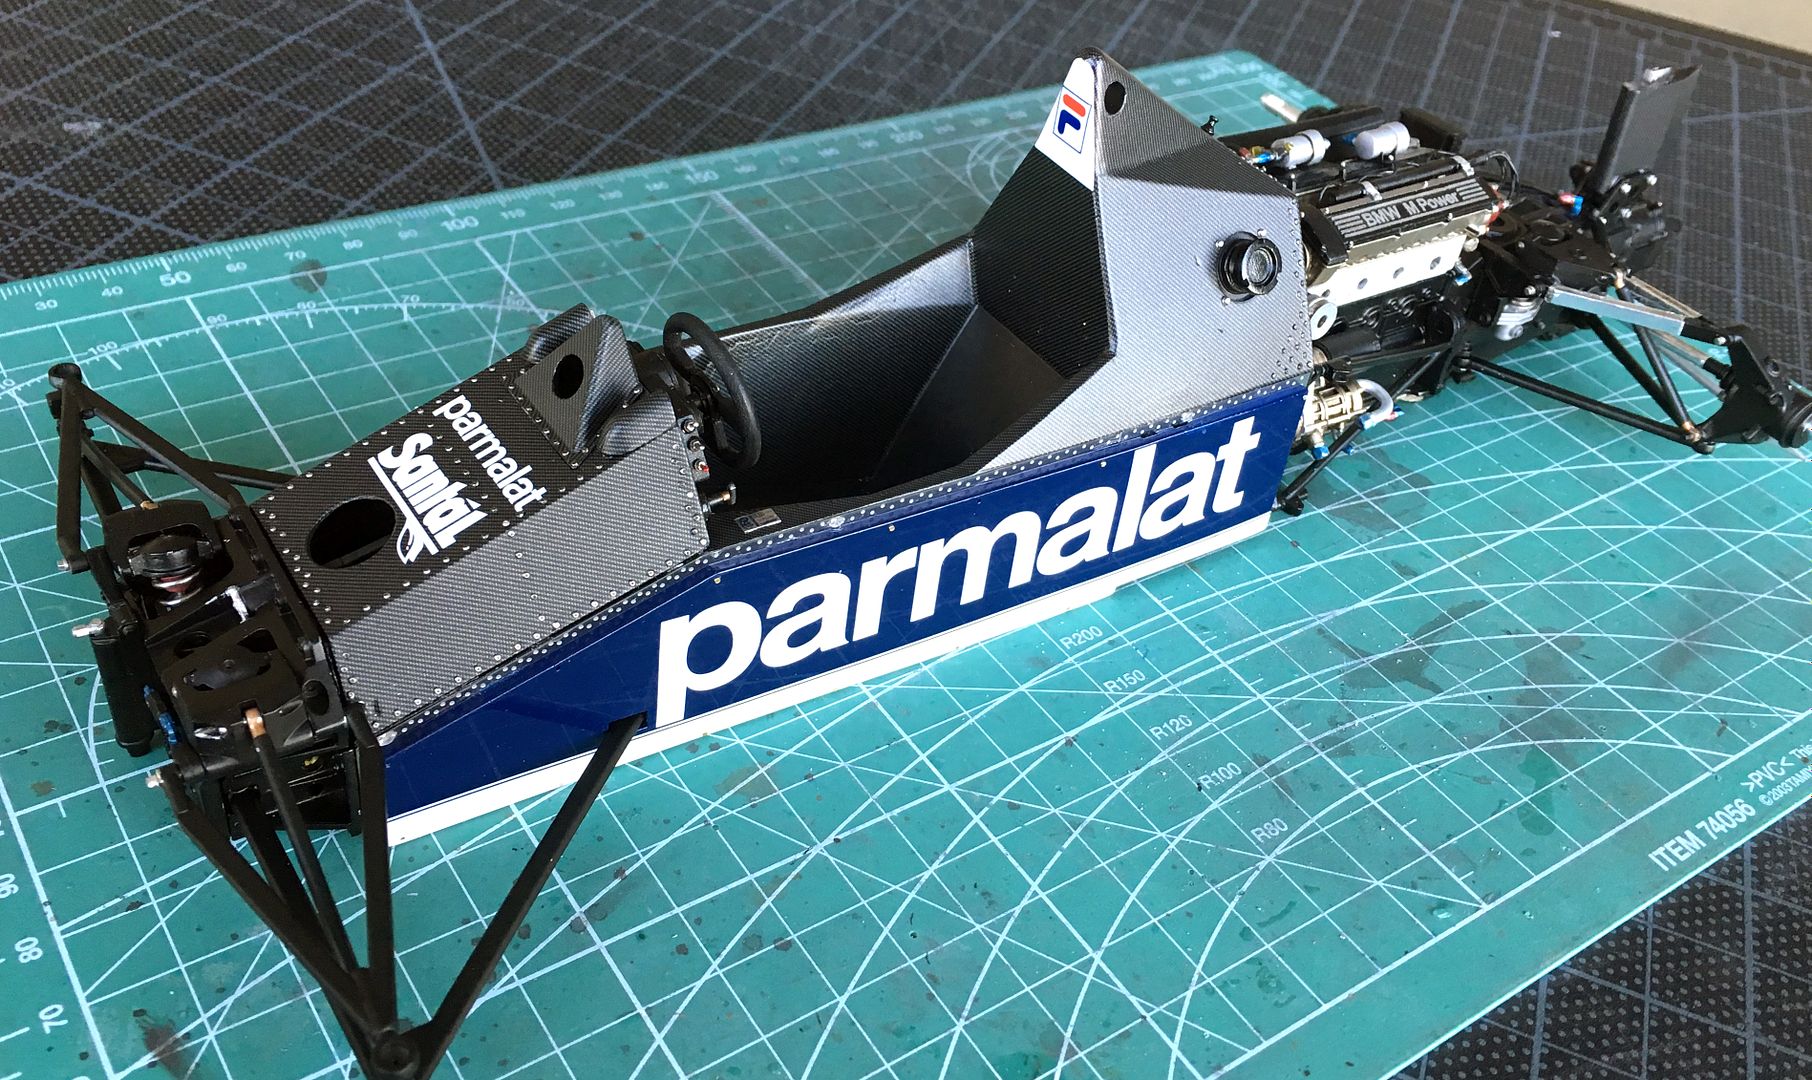
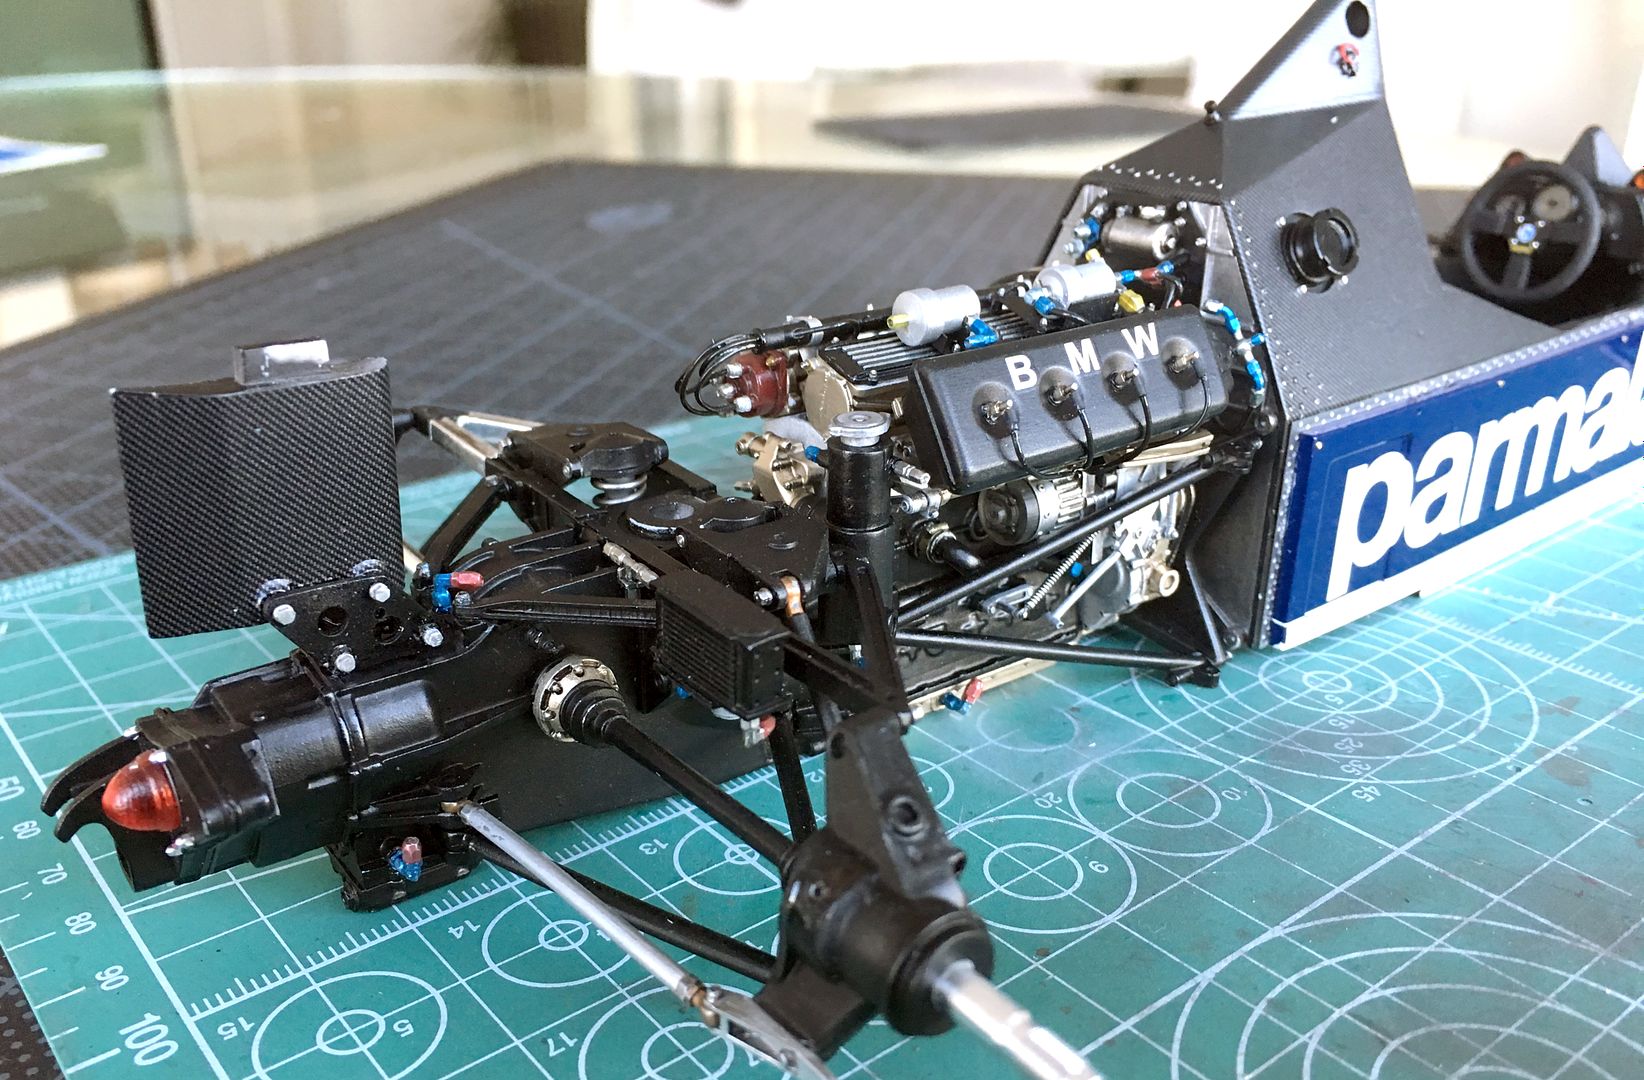
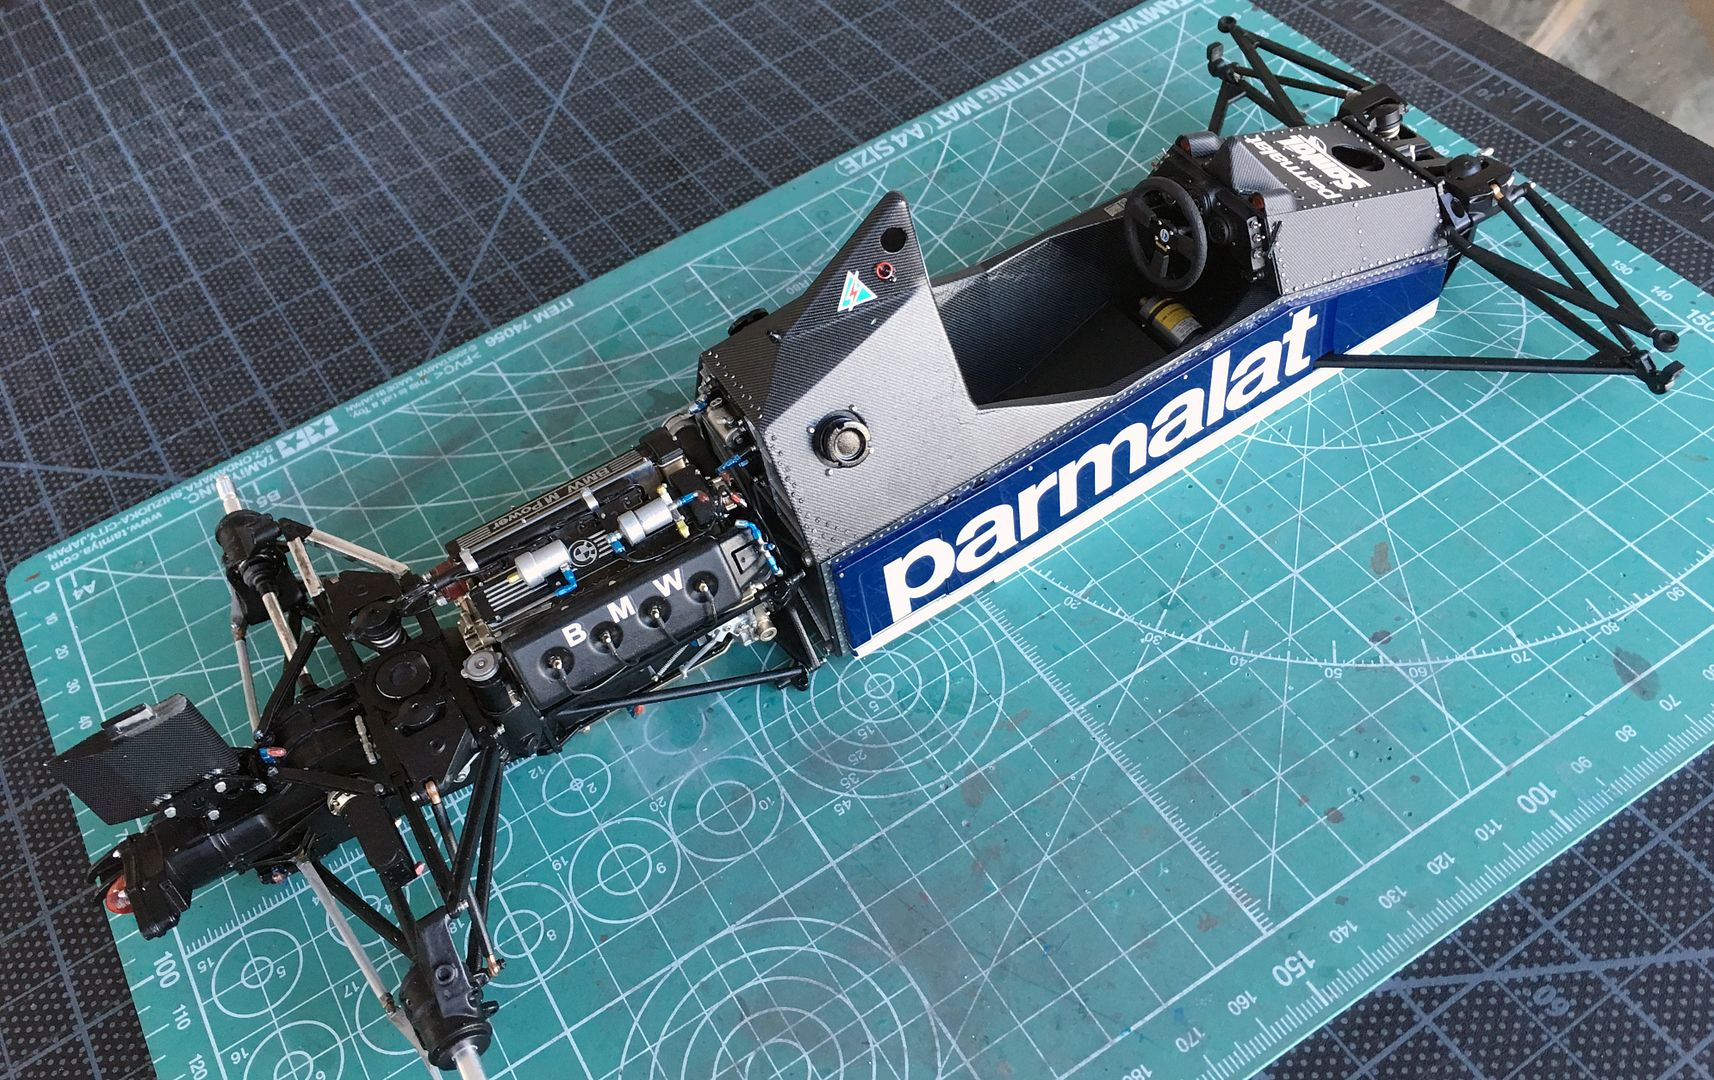
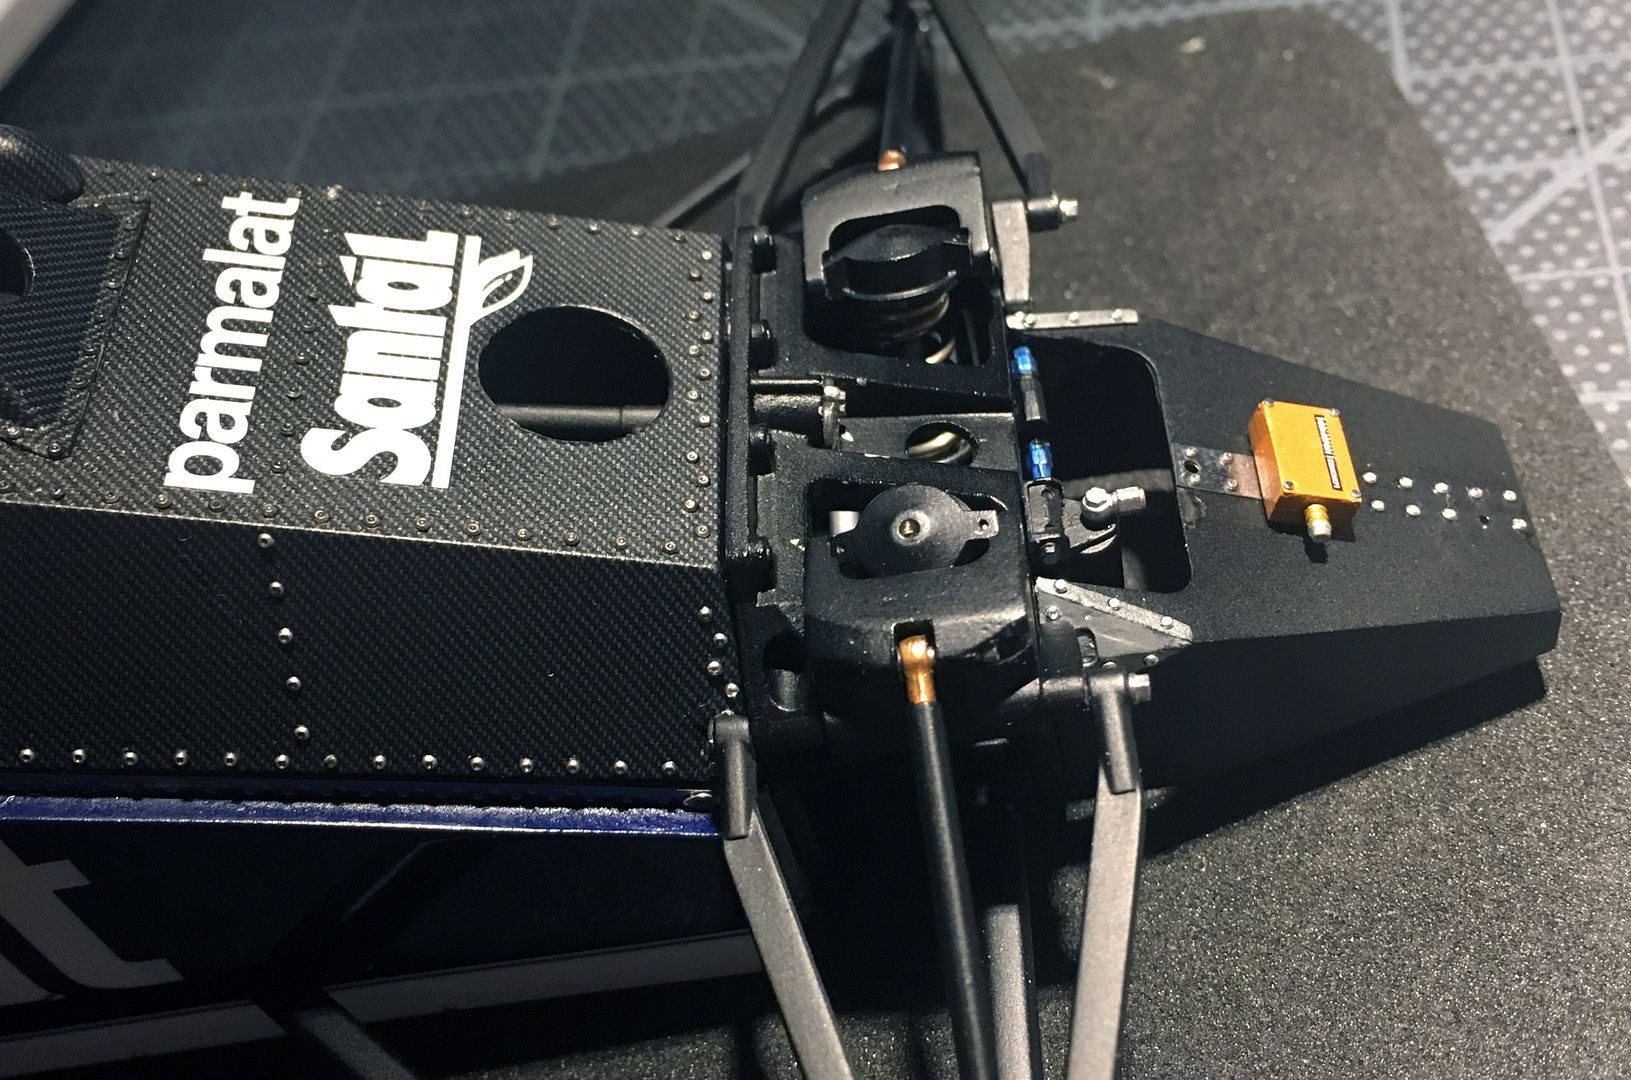
Fitted the engine subframe to the front - so goodbye to all that pulley work - will see even less when it is mounted to the main tub bulkhead.

A few other shots...

...lots of touching up to do with paint.
...and also one of these diamond files for getting rid of the little PE joining nibs - you can see one just under the file in this shot...
the file works very smoothly and does no grab or snag...
This flat sheet had to be folded a few times, which took a bit or thinking in terms of what order you fold, whilst still being able to clamp!
This part will be glued under the manifold, but first I have to fit a heat shield under it - made with embossed foil that comes with the kit. I'll do this last minute as I don't want to damage it as I work on other bits - like wiring.
Fitted the engine subframe to the front - so goodbye to all that pulley work - will see even less when it is mounted to the main tub bulkhead.
A few other shots...
...lots of touching up to do with paint.
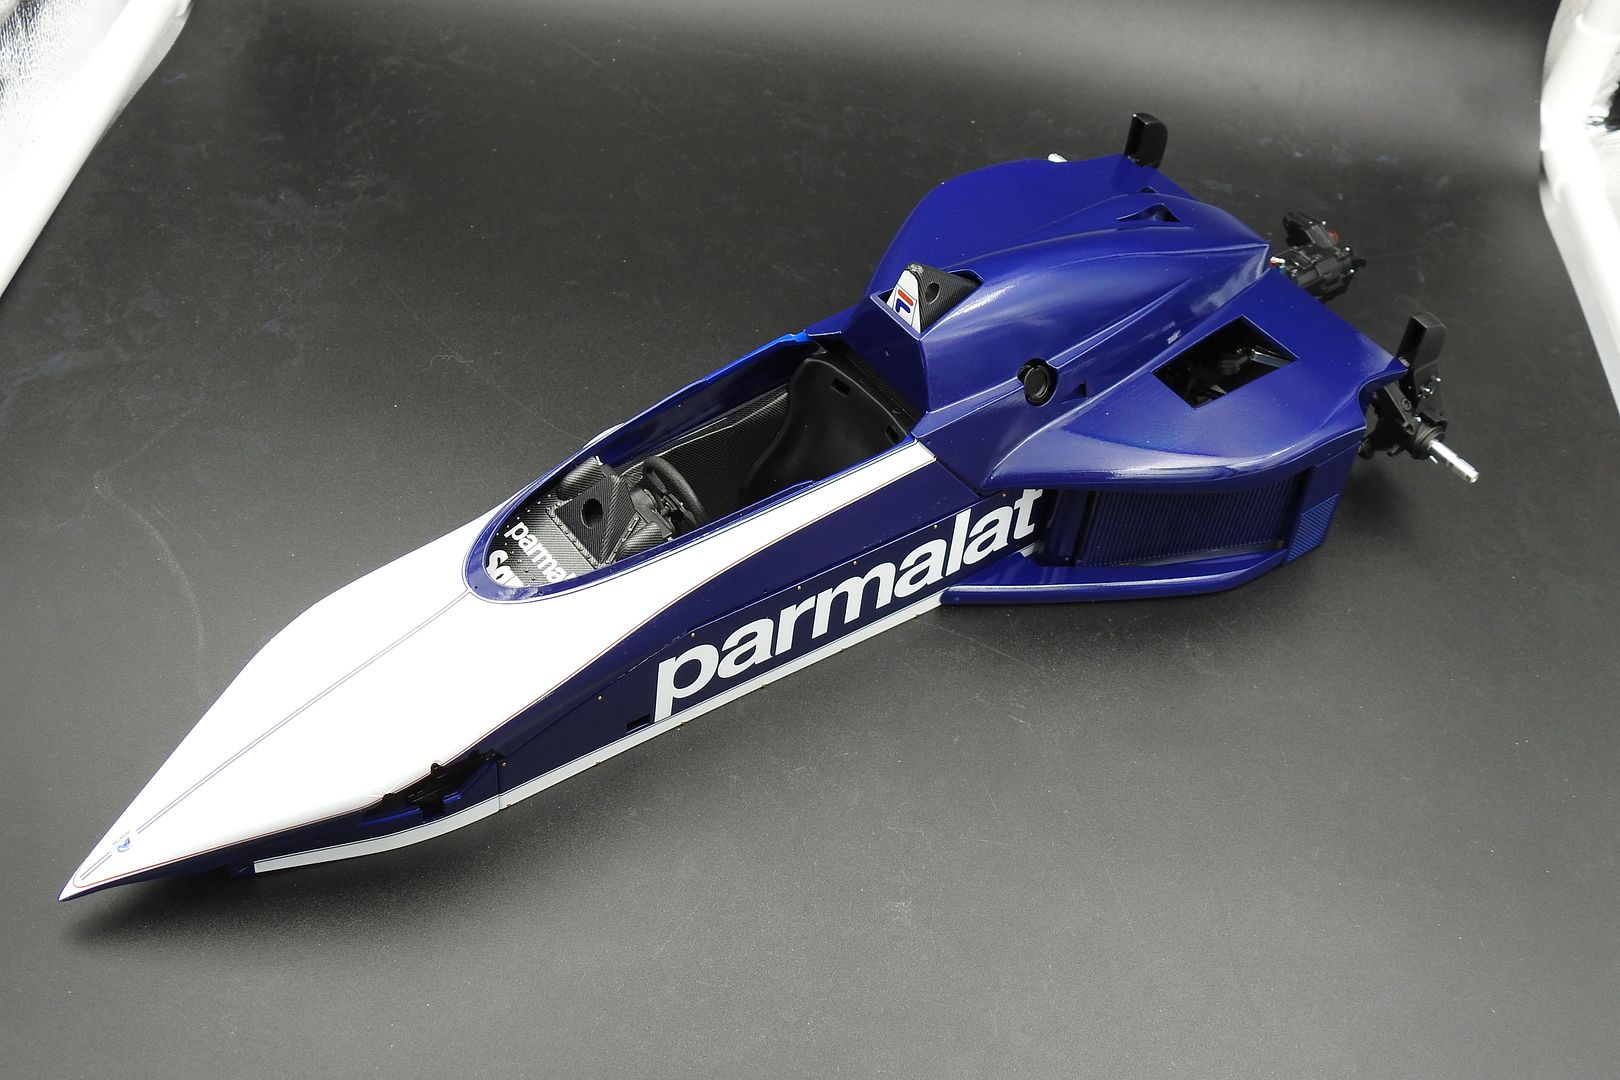
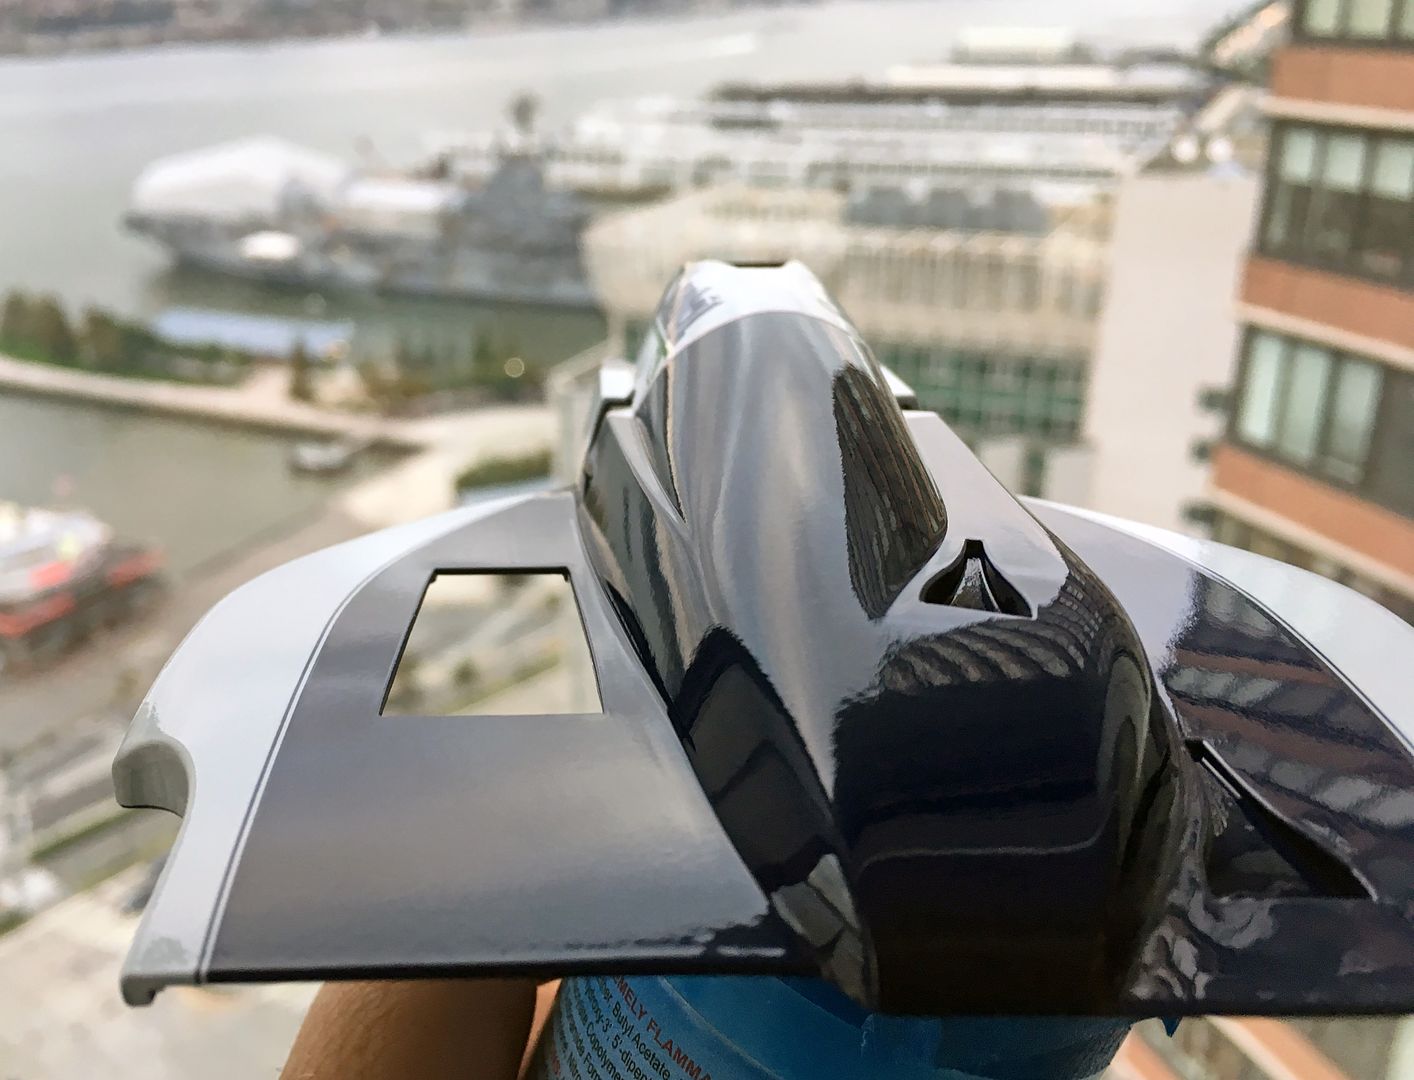
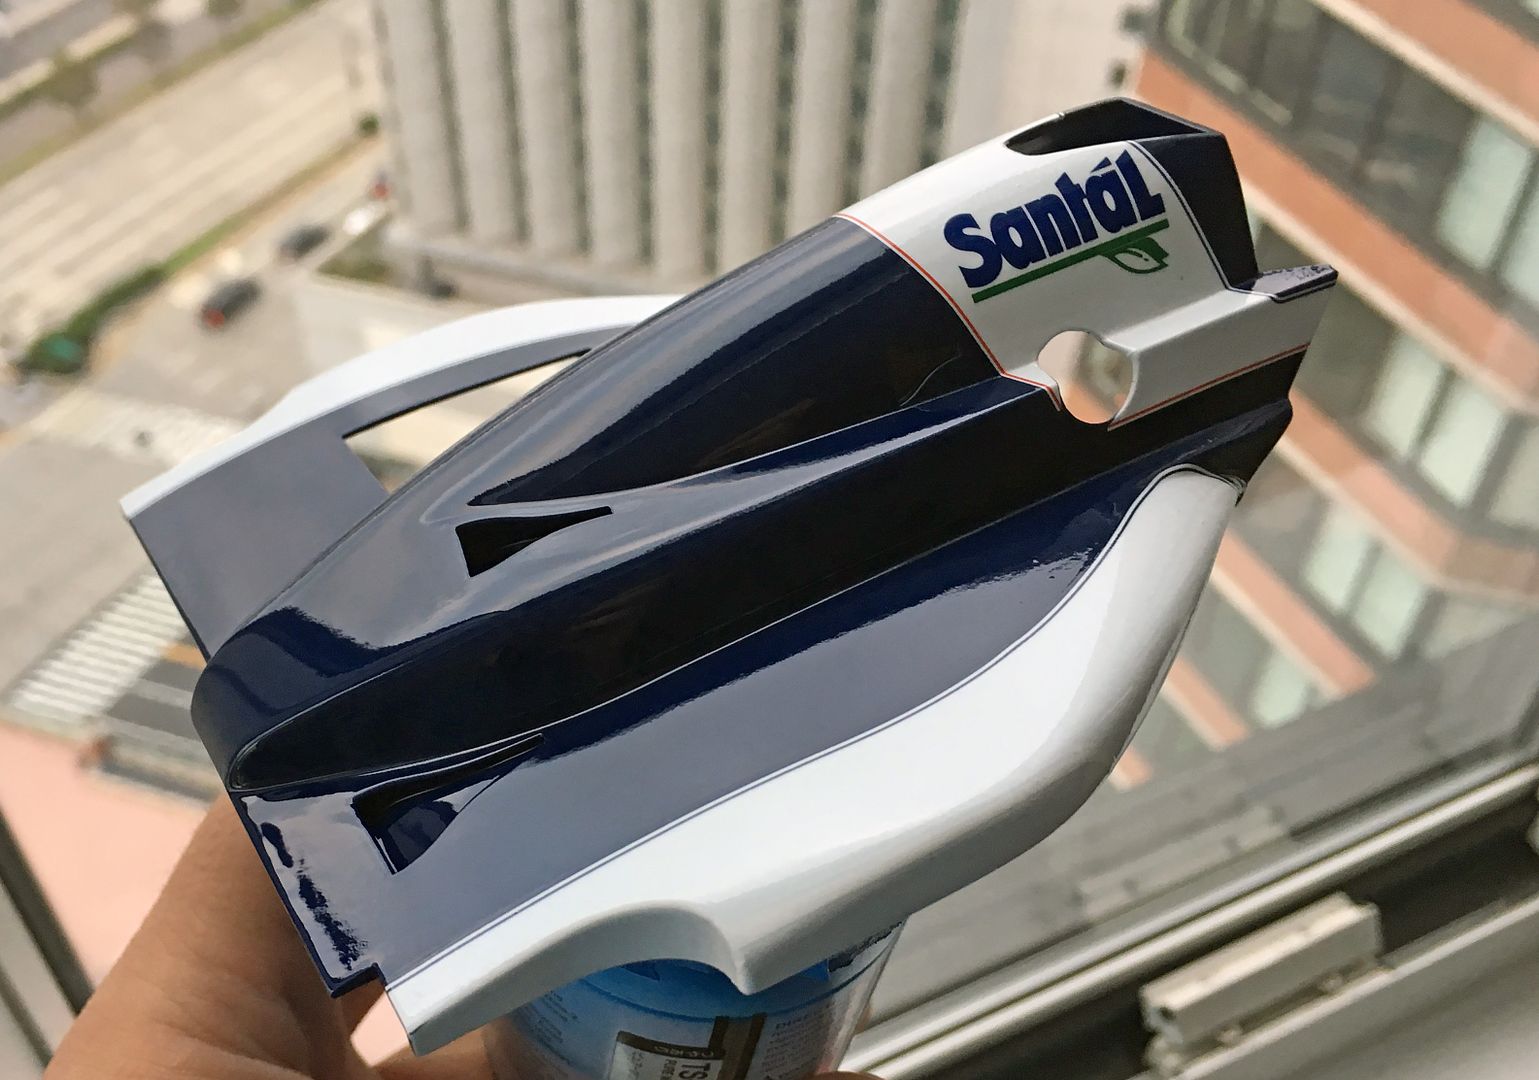
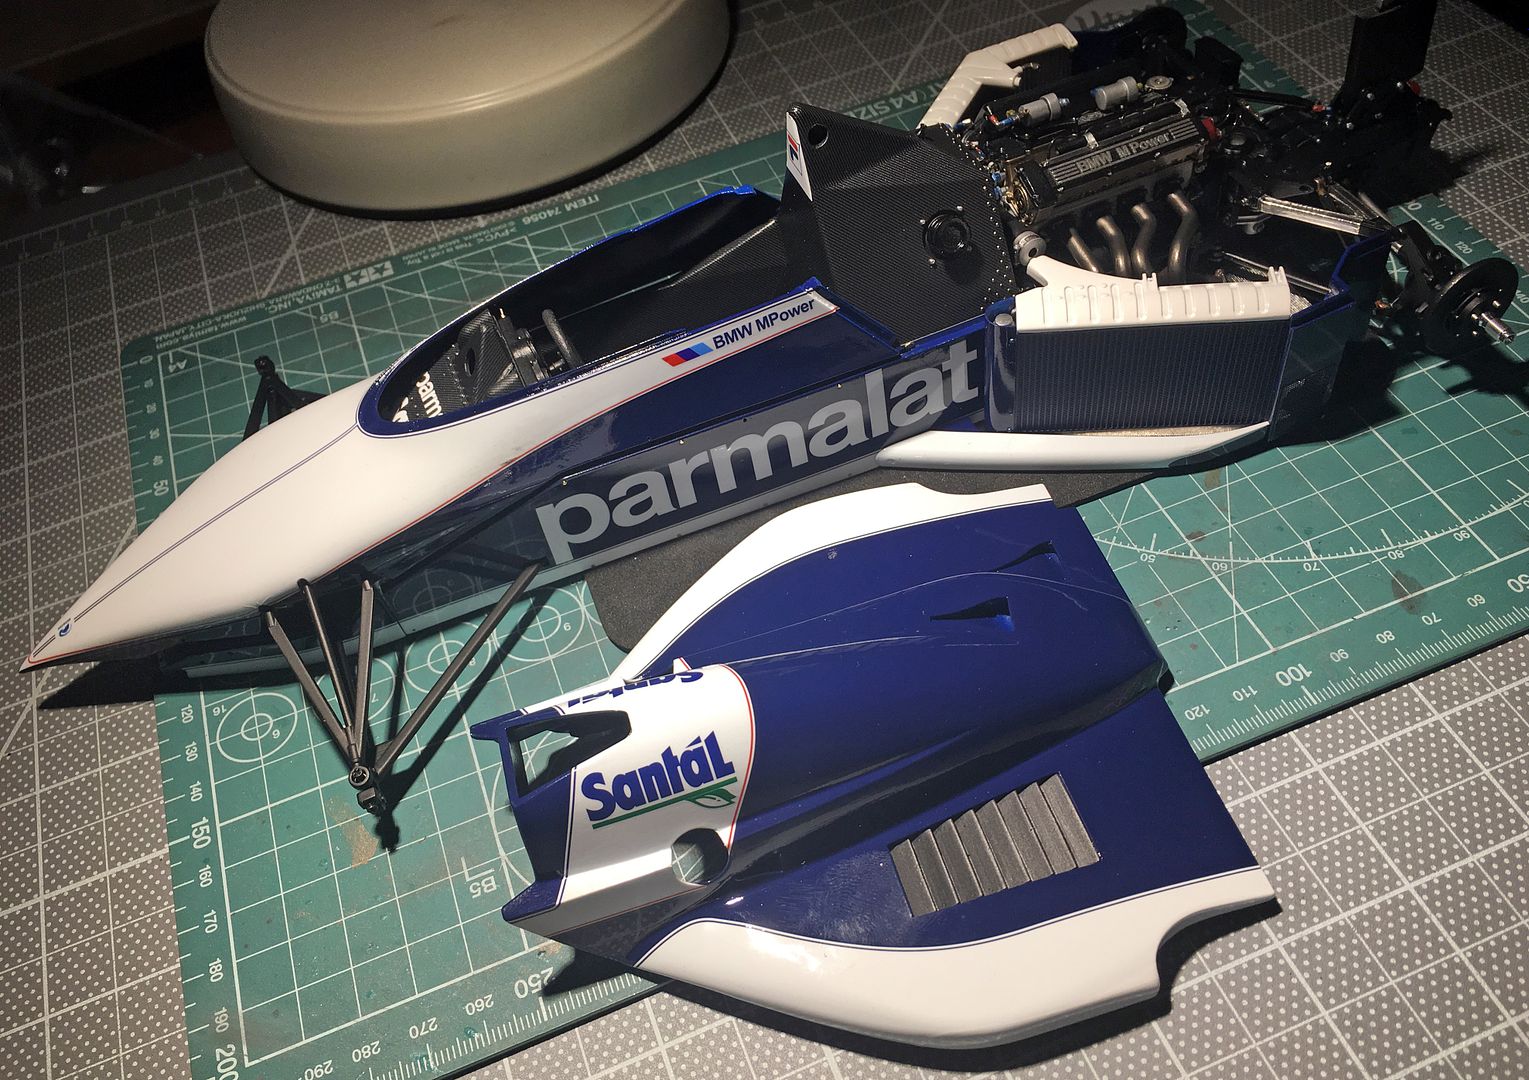
There are actually very few decals on this car!
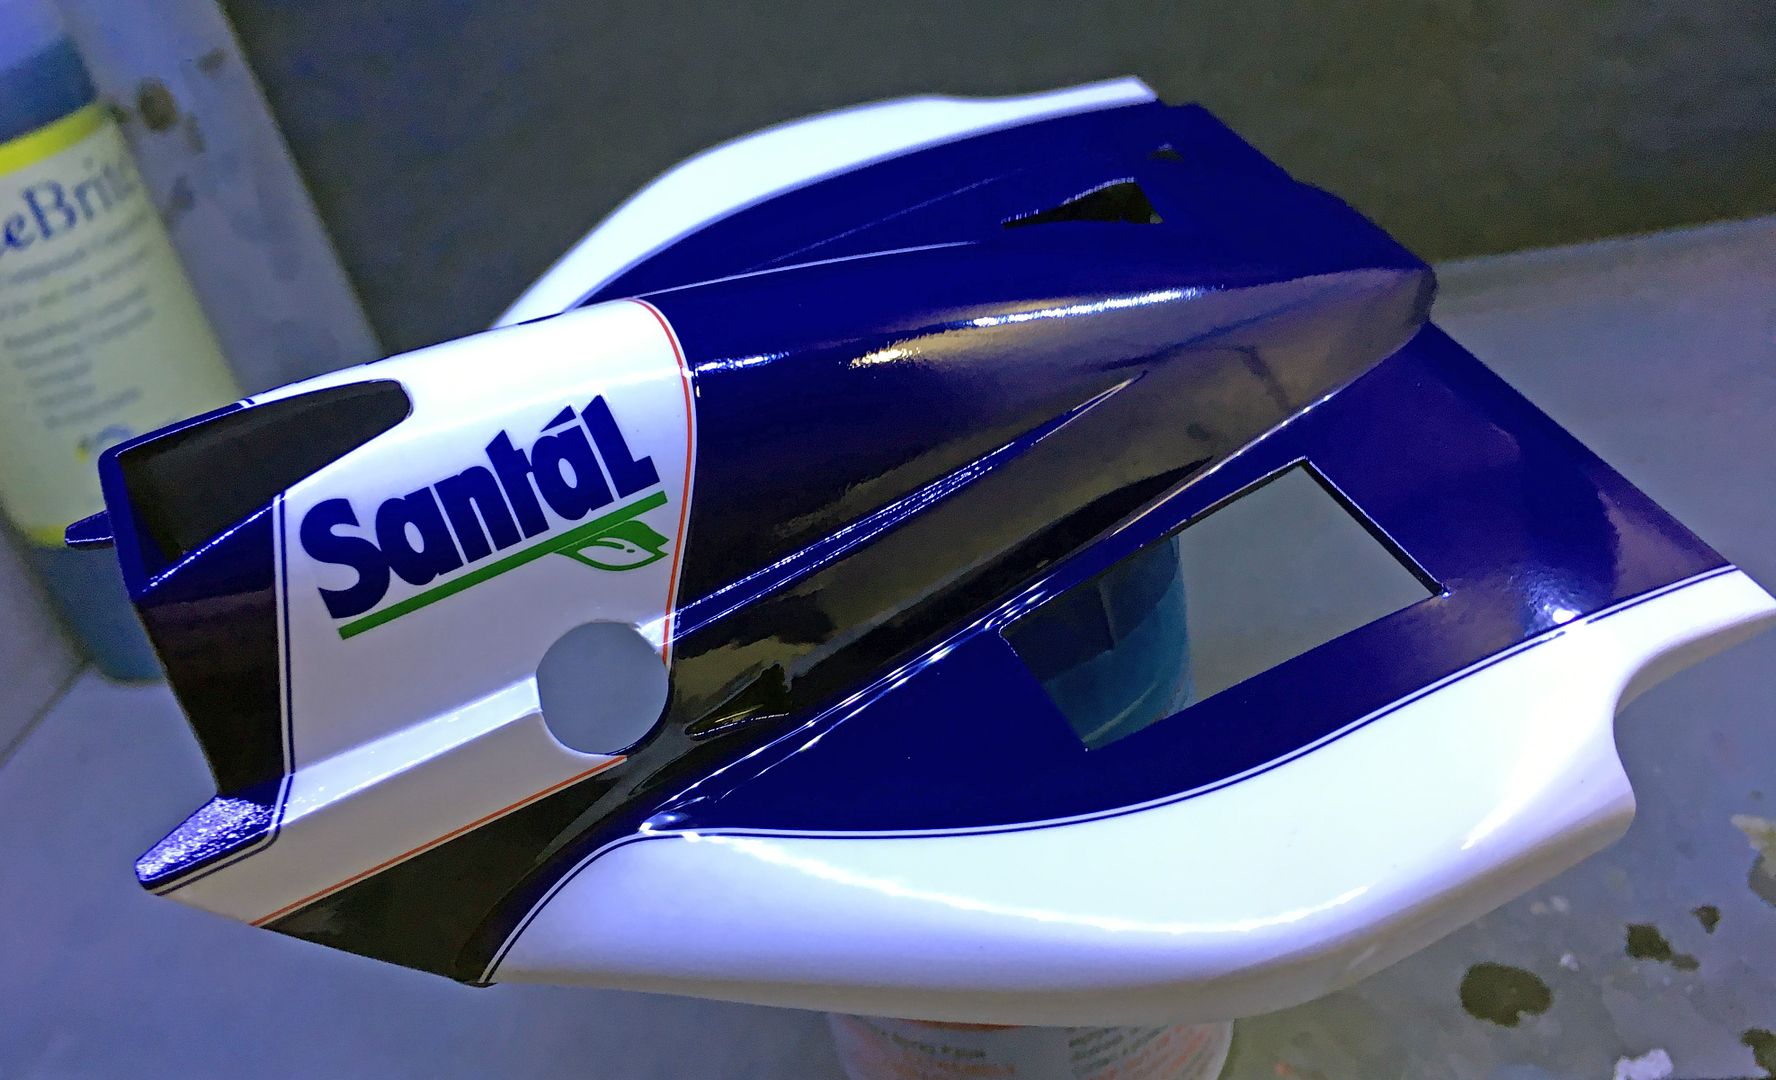
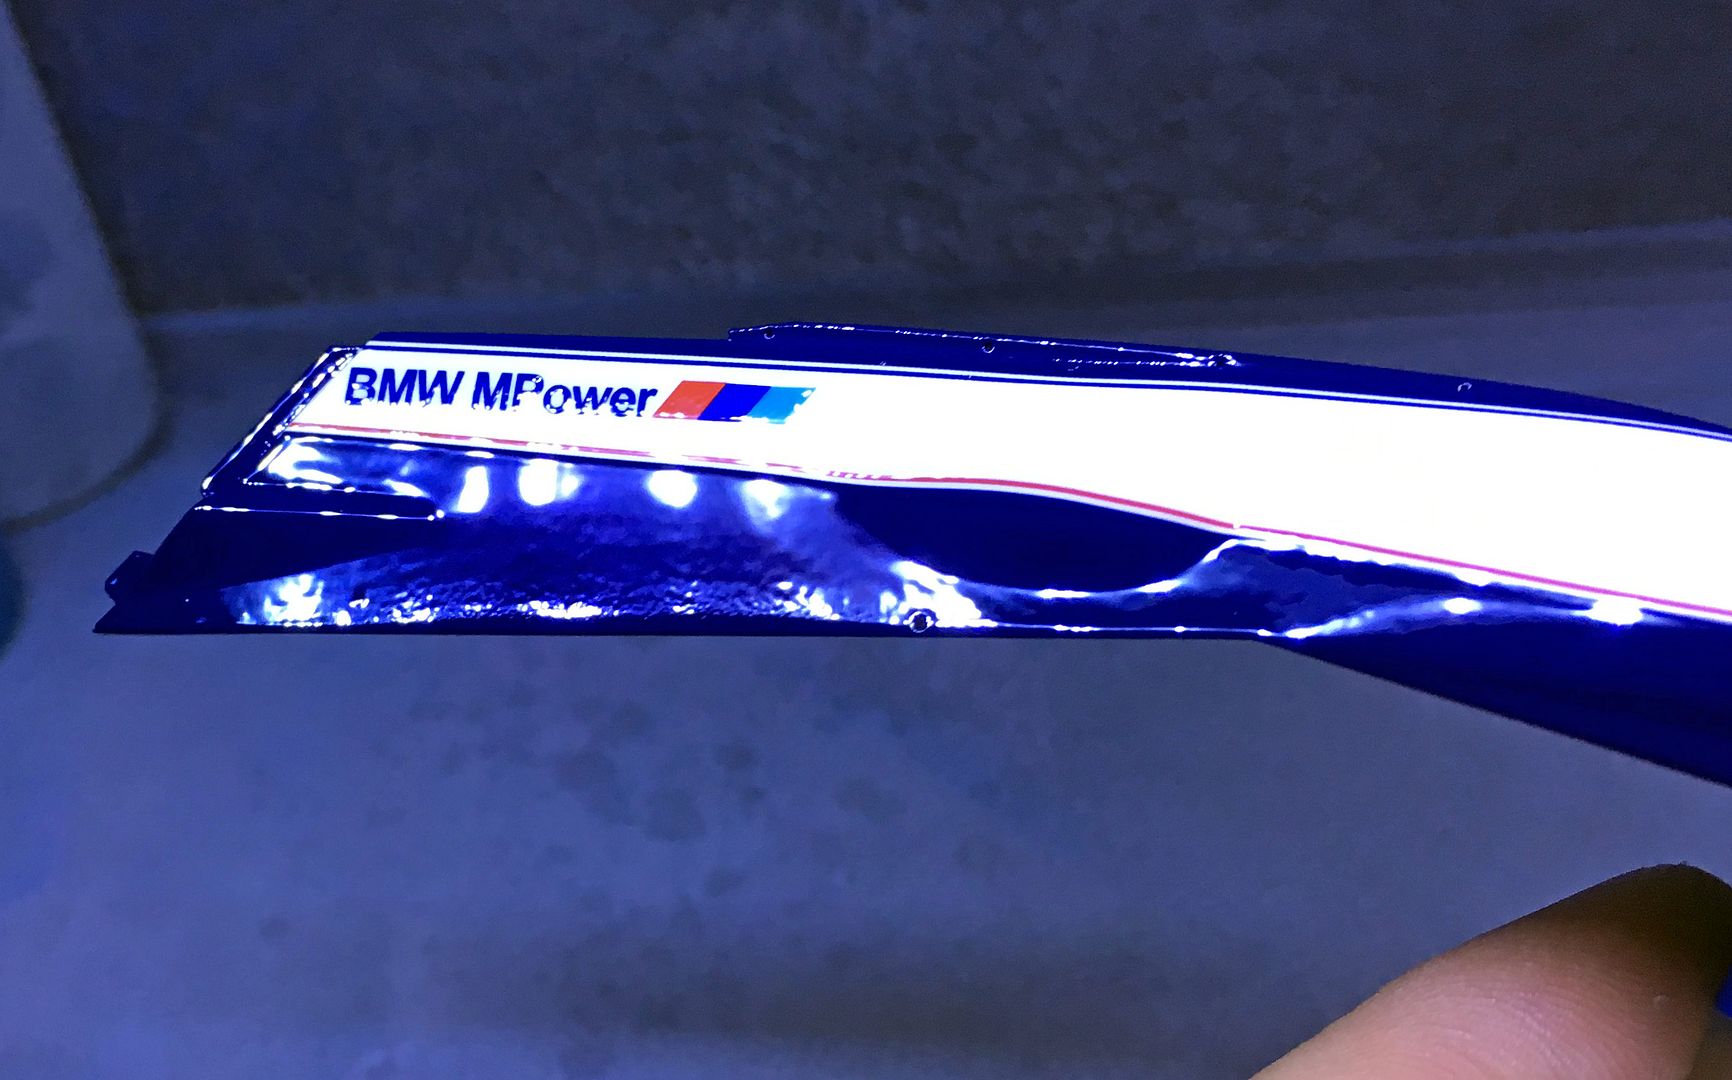
So - applied the decals to the rear bodywork and clear-coated (Zero '1K')
Spray a light 'mist' first - I think this acts to 'seal the surface before you lay a thicker (more aggressive?) layer down...
Leaves a very nice satin finish.
A few seconds later I spray the heavier coat on. I'm winging it as first time I have used this stuff, but you seen to be able to build up a nice shiny layer and it never runs...
This next one looks a bit blobby but it is just the iphone photo - the layers are not nearly as thick as this looks!
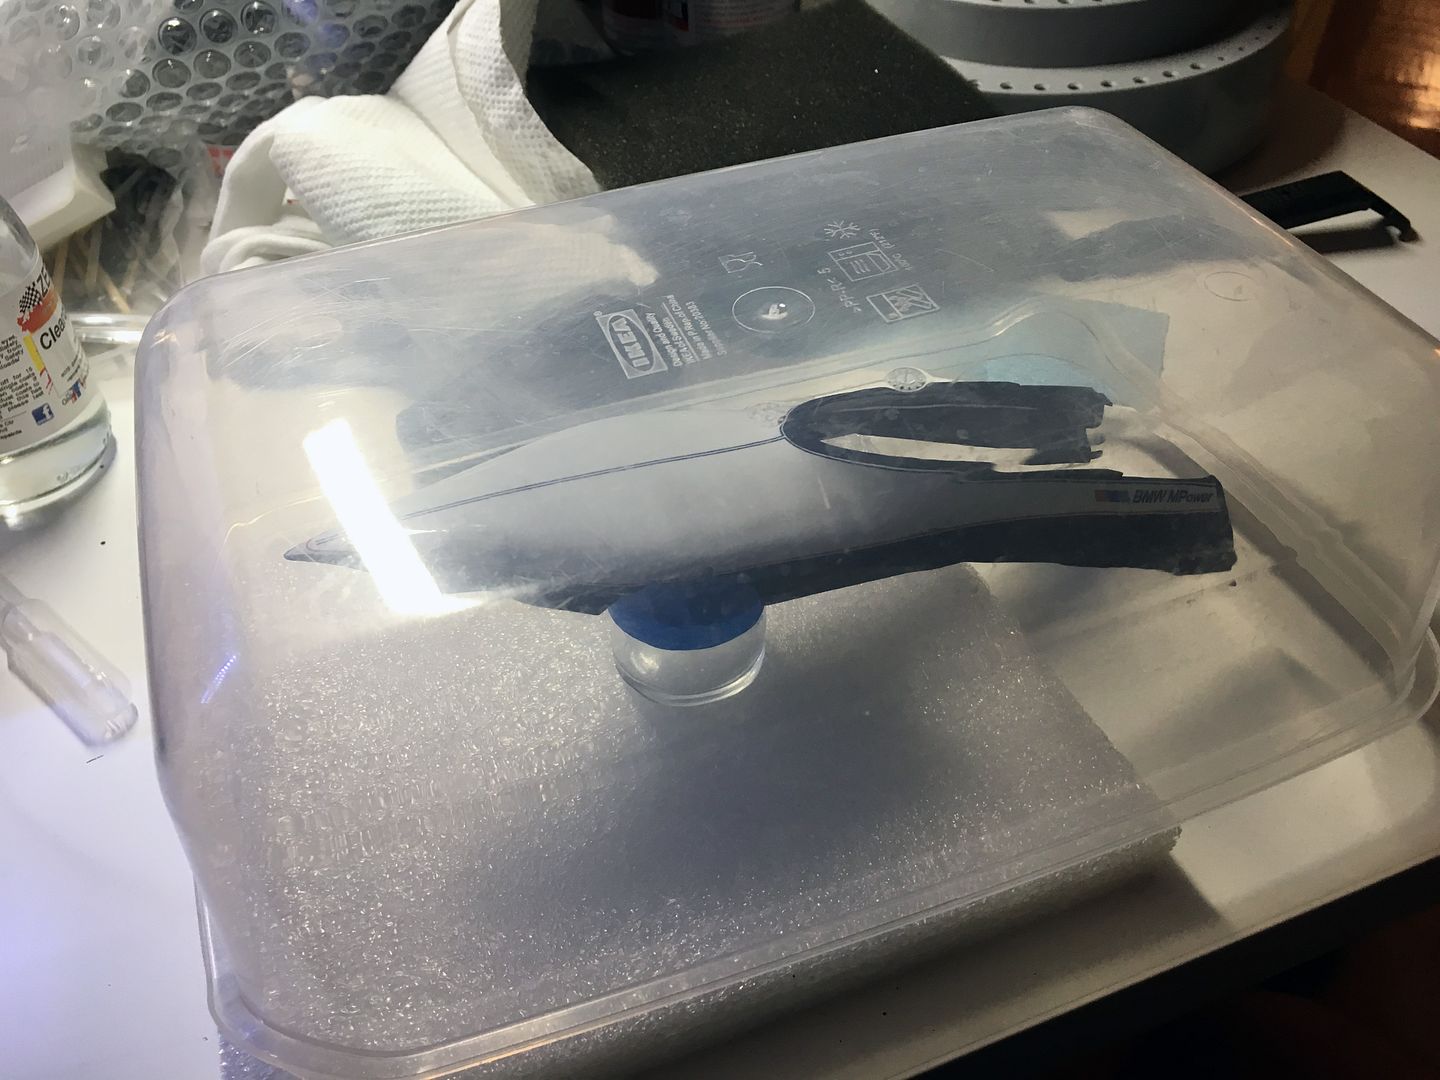
Protection whilst drying!
So - applied the decals to the rear bodywork and clear-coated (Zero '1K')
Spray a light 'mist' first - I think this acts to 'seal the surface before you lay a thicker (more aggressive?) layer down...
Leaves a very nice satin finish.
A few seconds later I spray the heavier coat on. I'm winging it as first time I have used this stuff, but you seen to be able to build up a nice shiny layer and it never runs...
This next one looks a bit blobby but it is just the iphone photo - the layers are not nearly as thick as this looks!
Protection whilst drying!

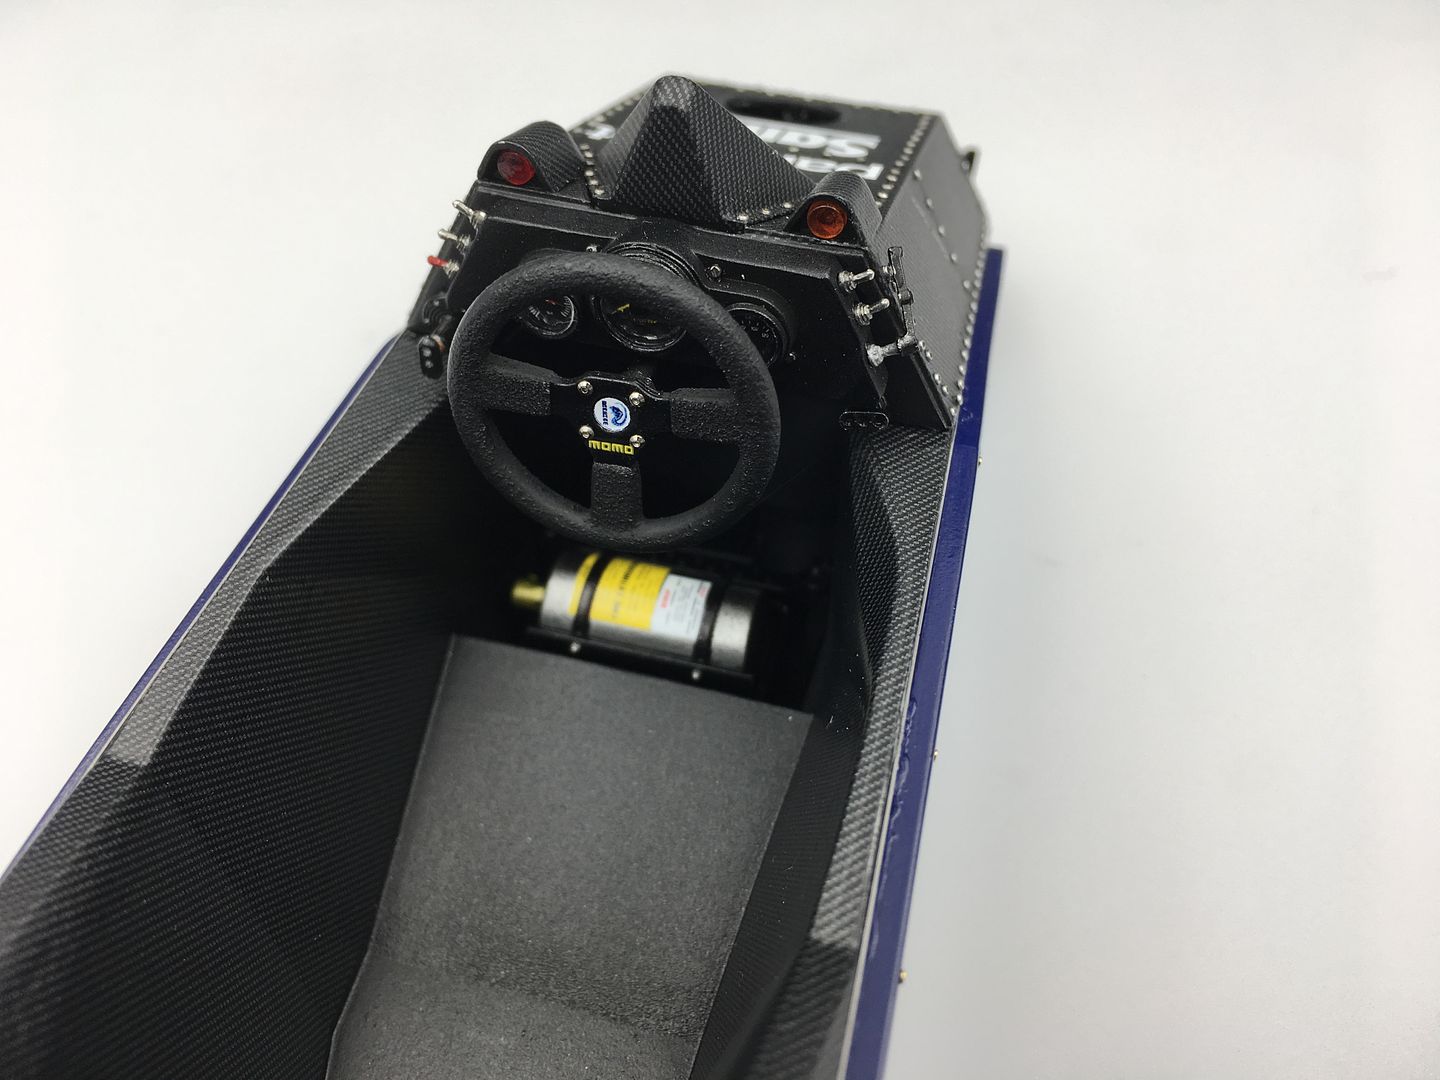
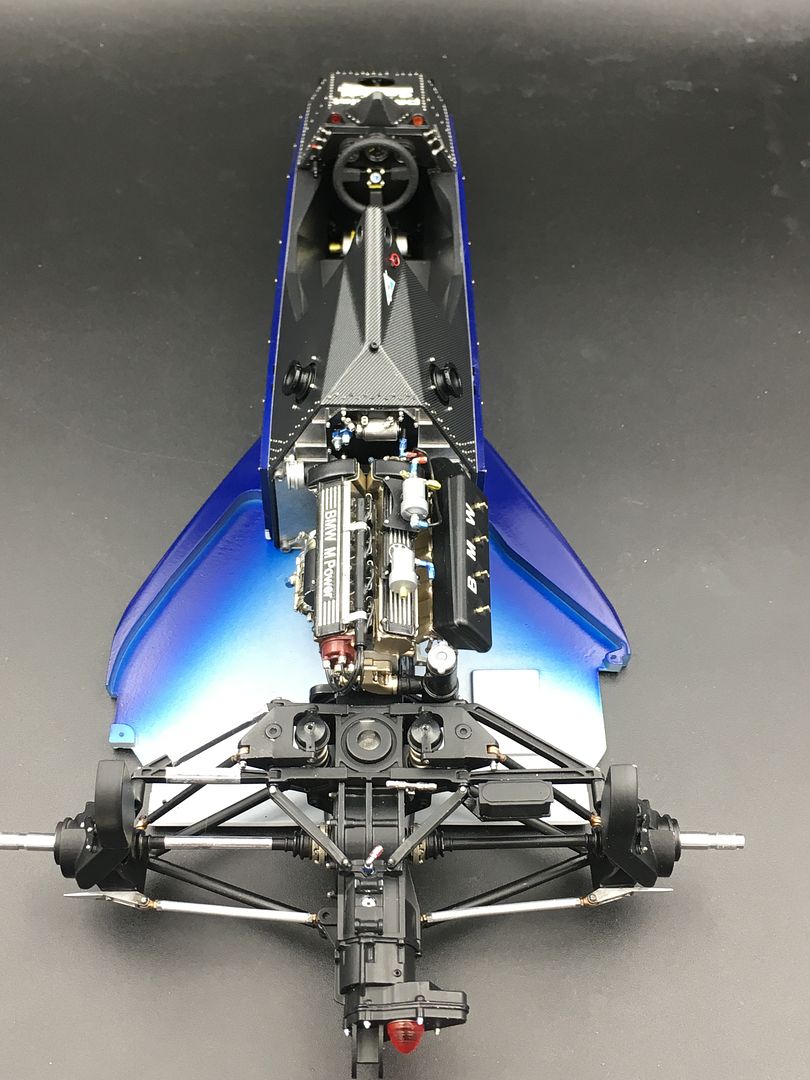
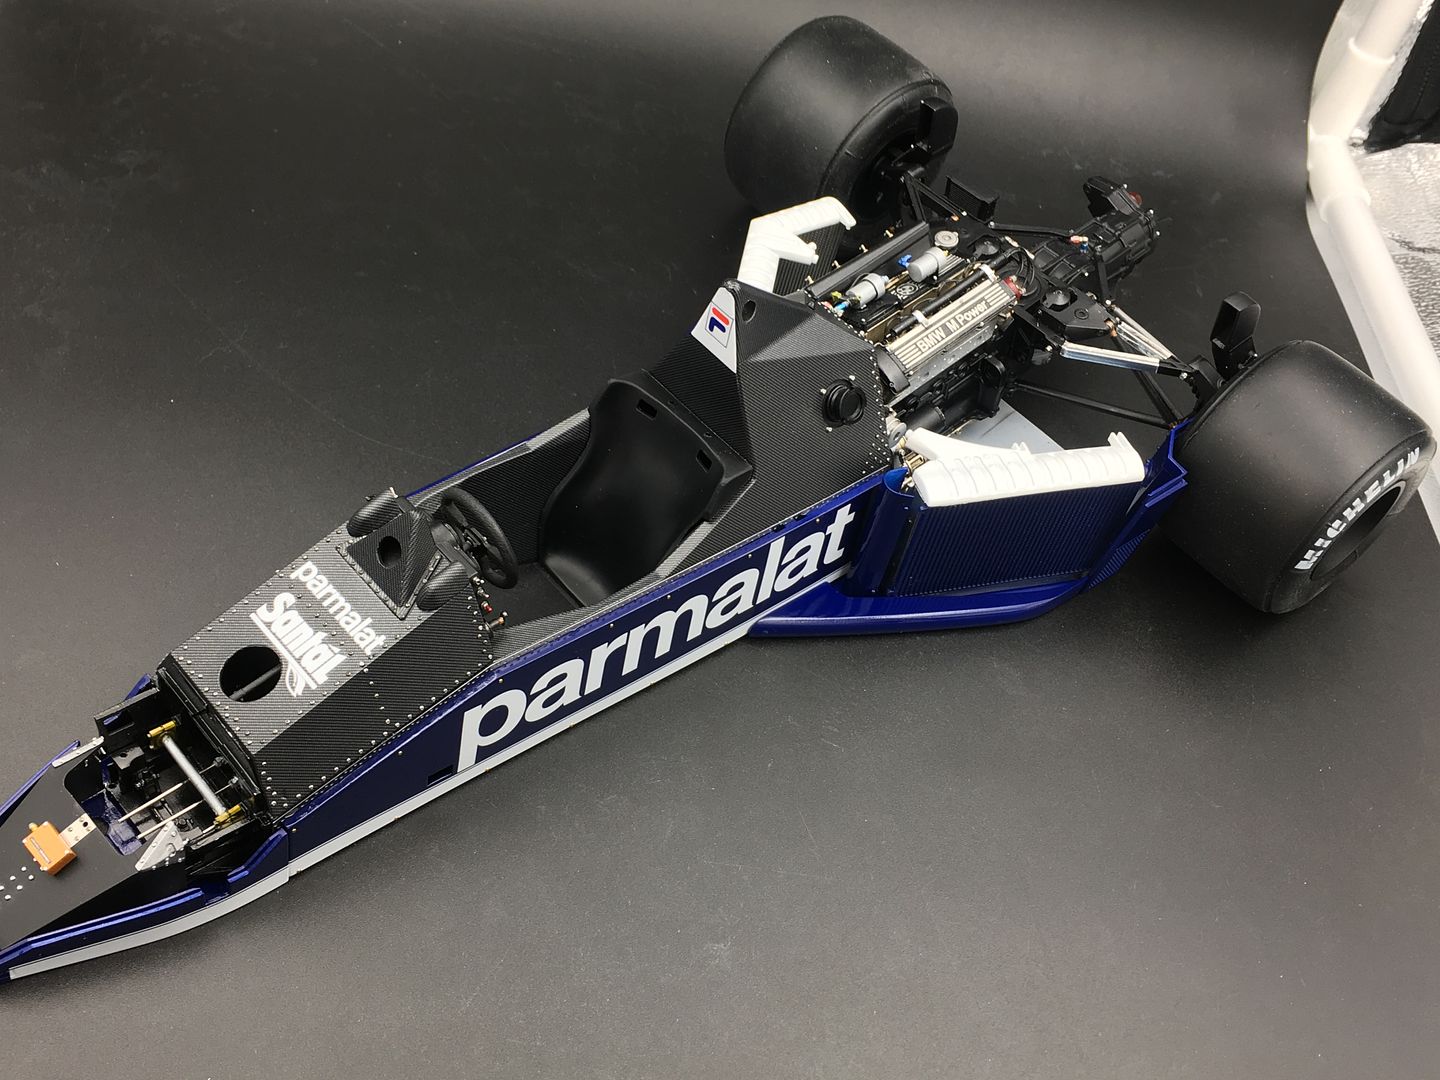
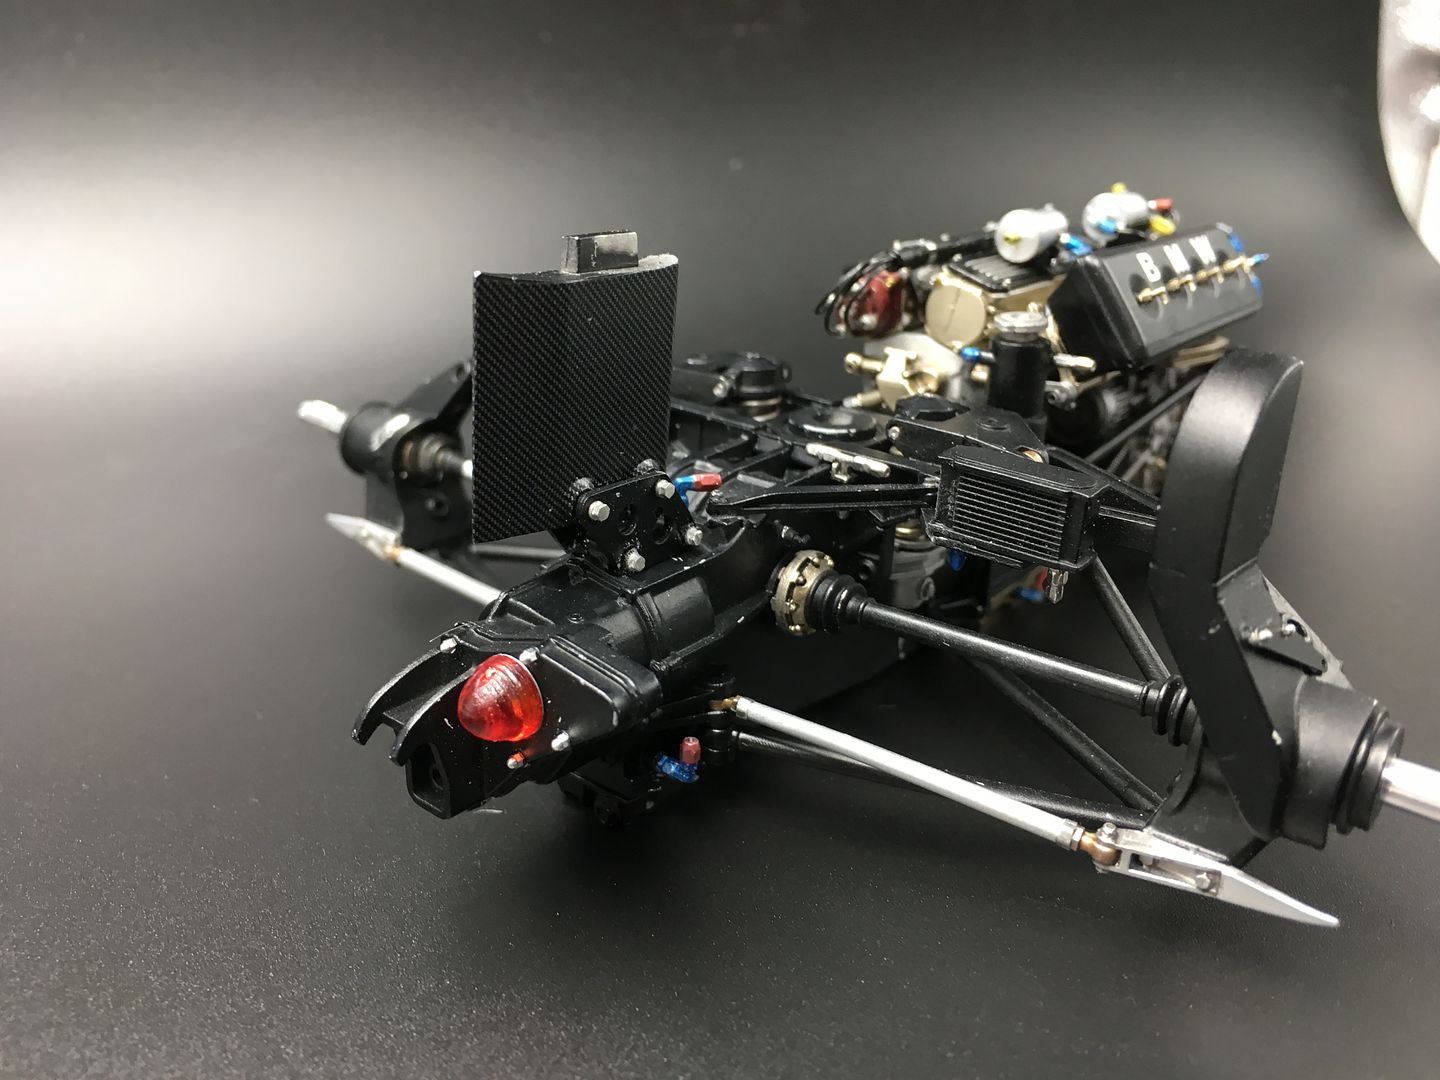
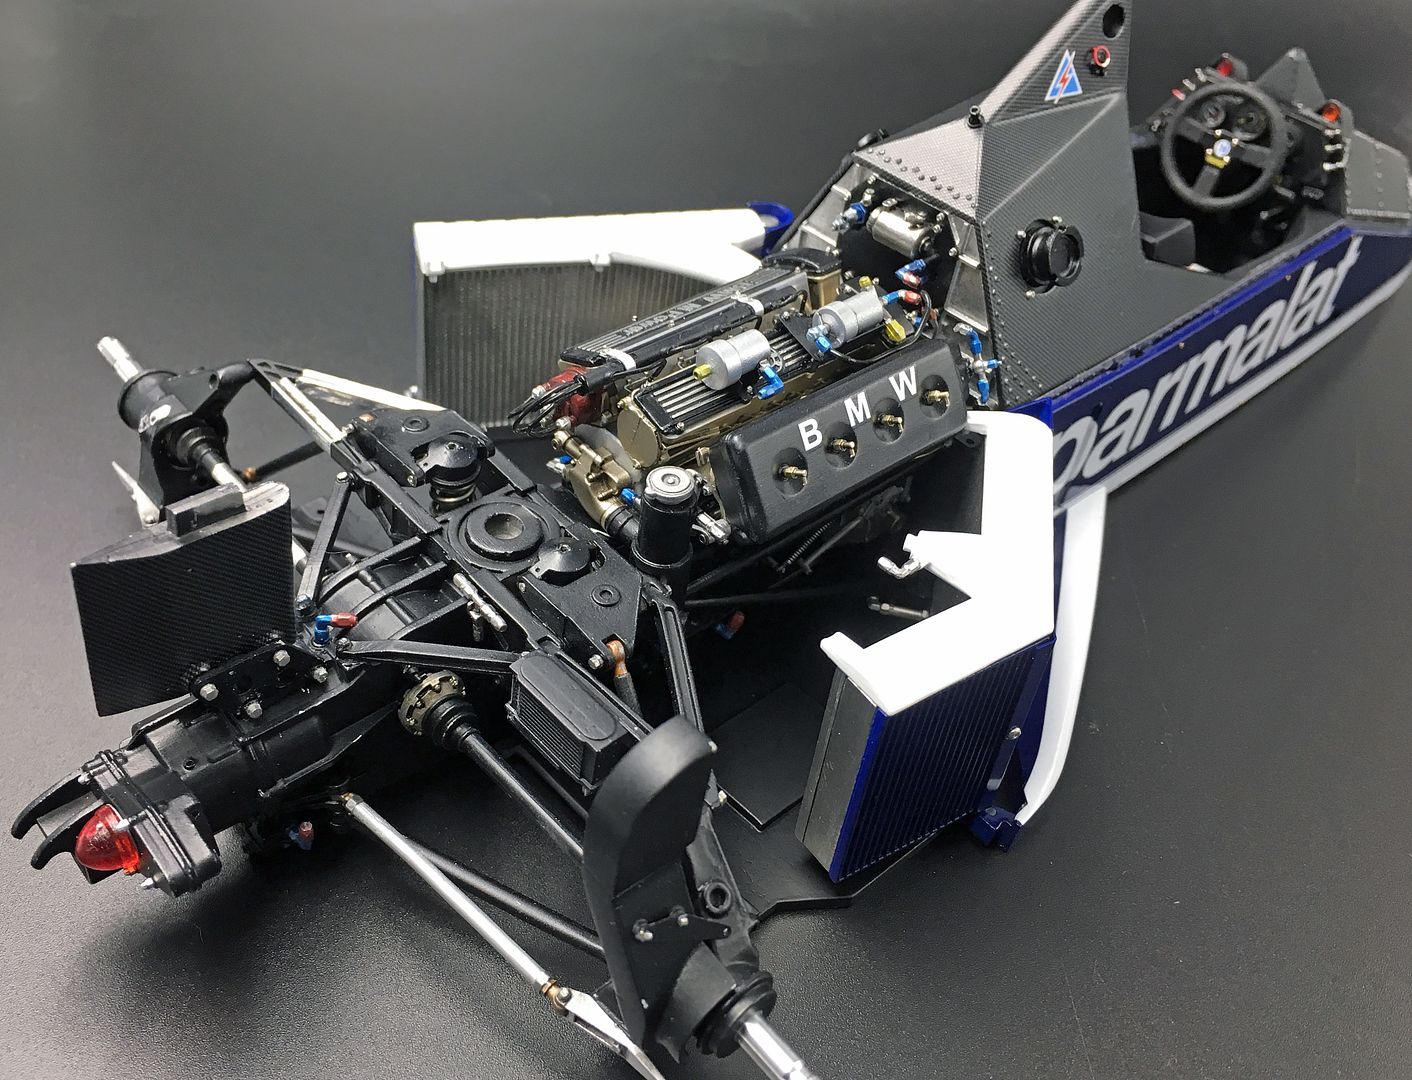
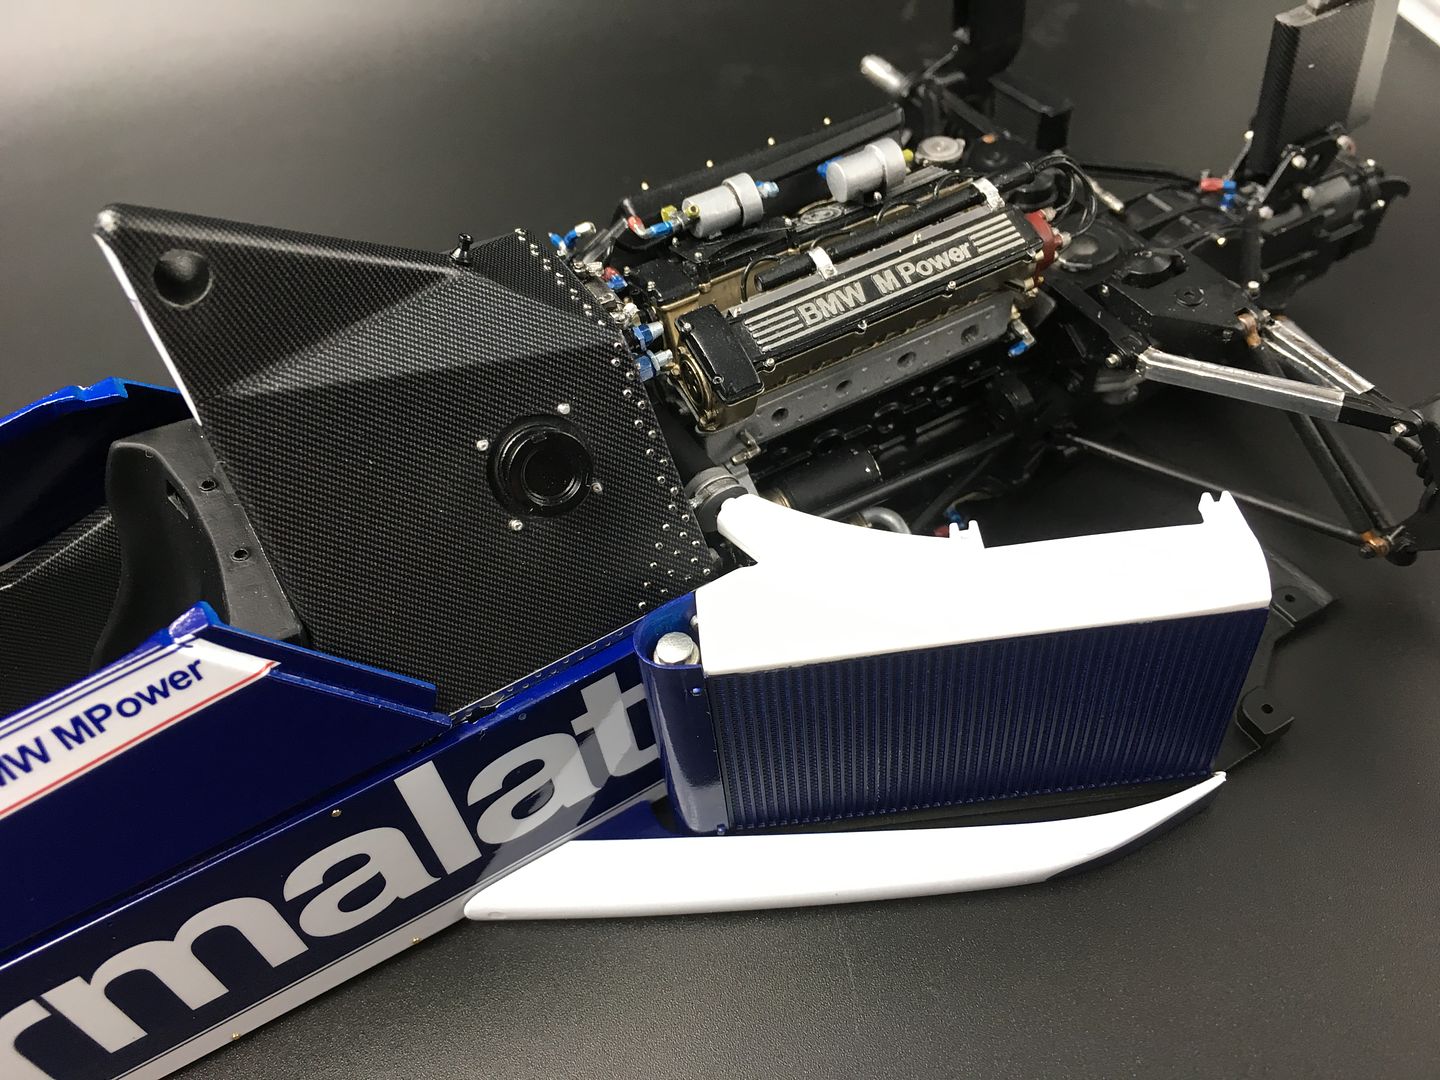
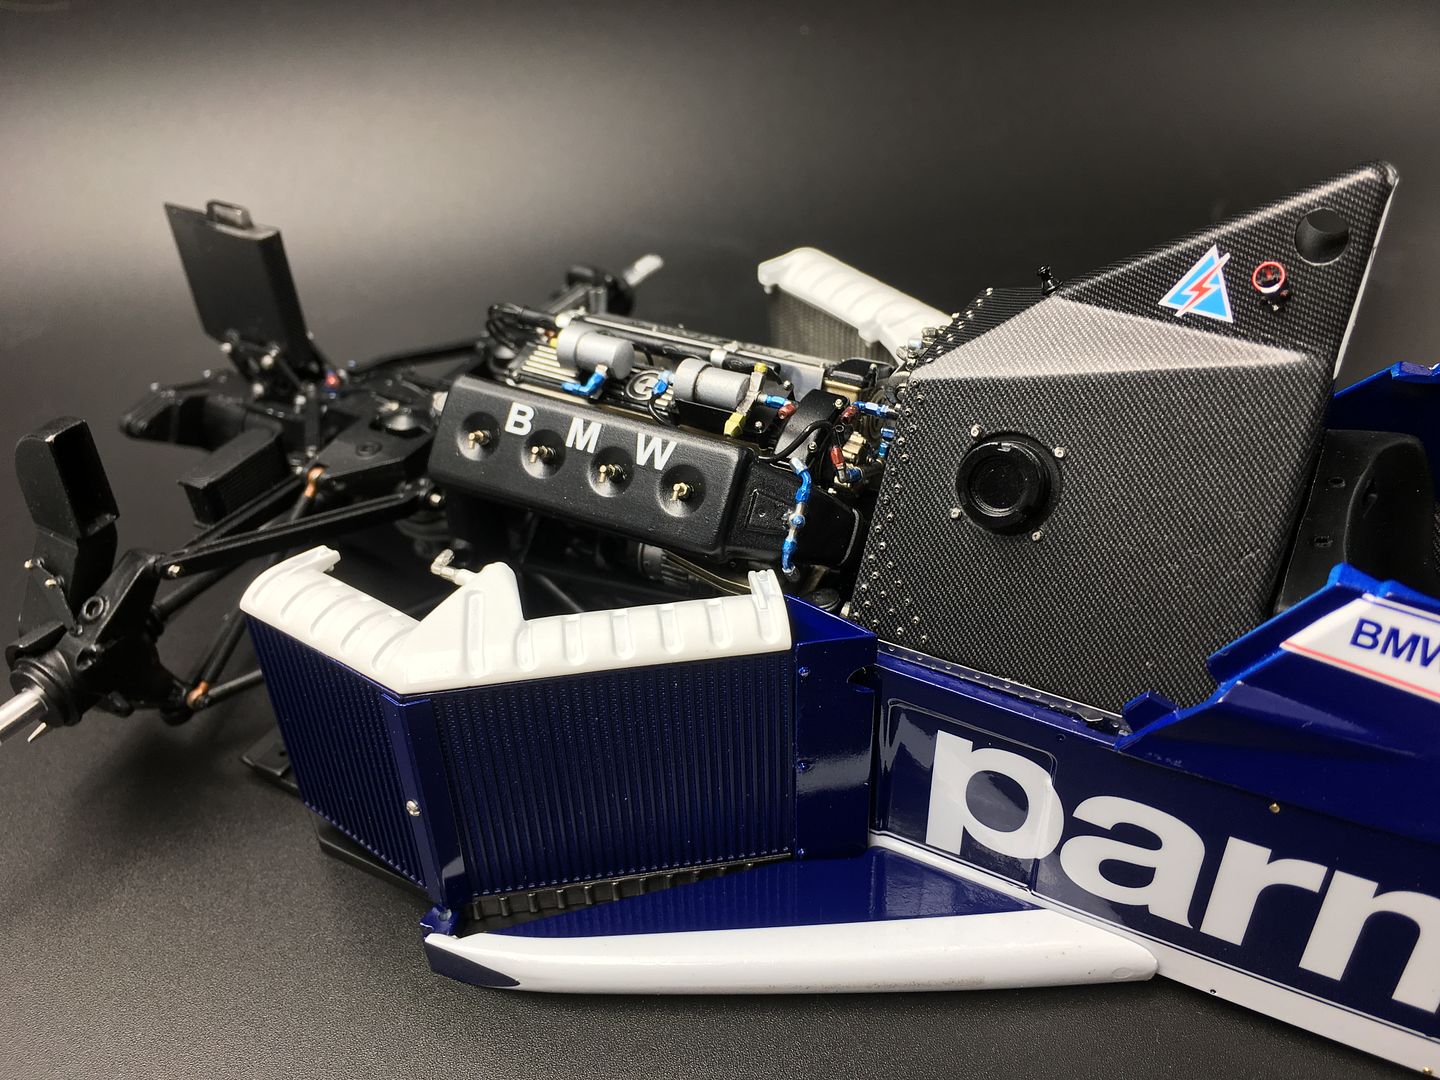
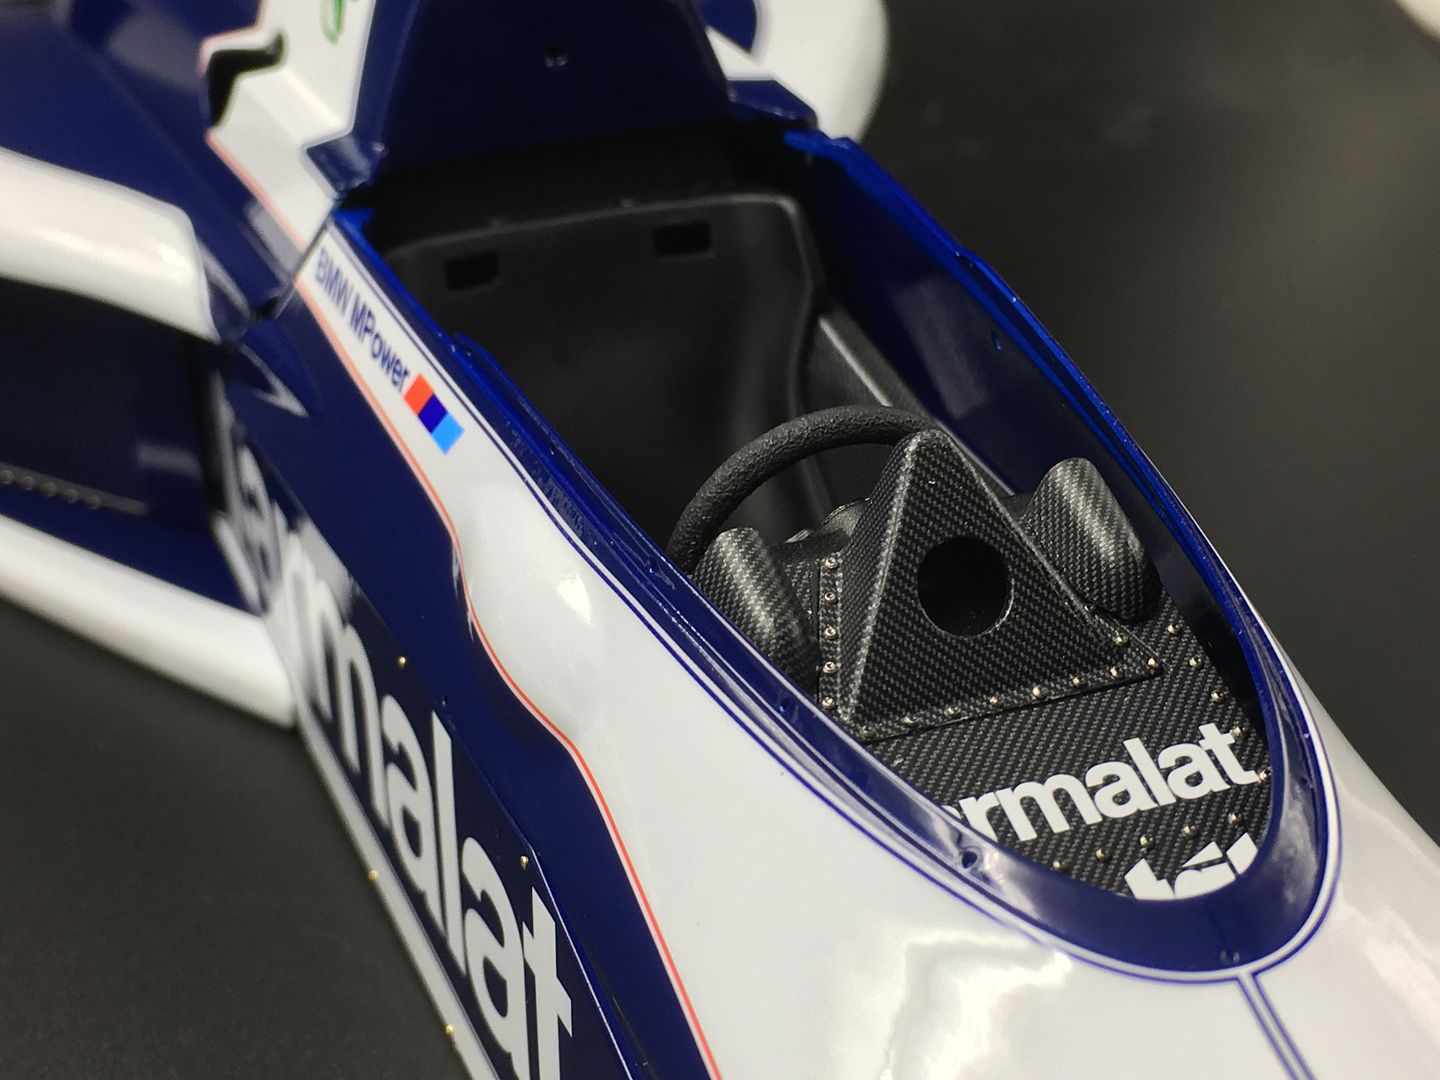
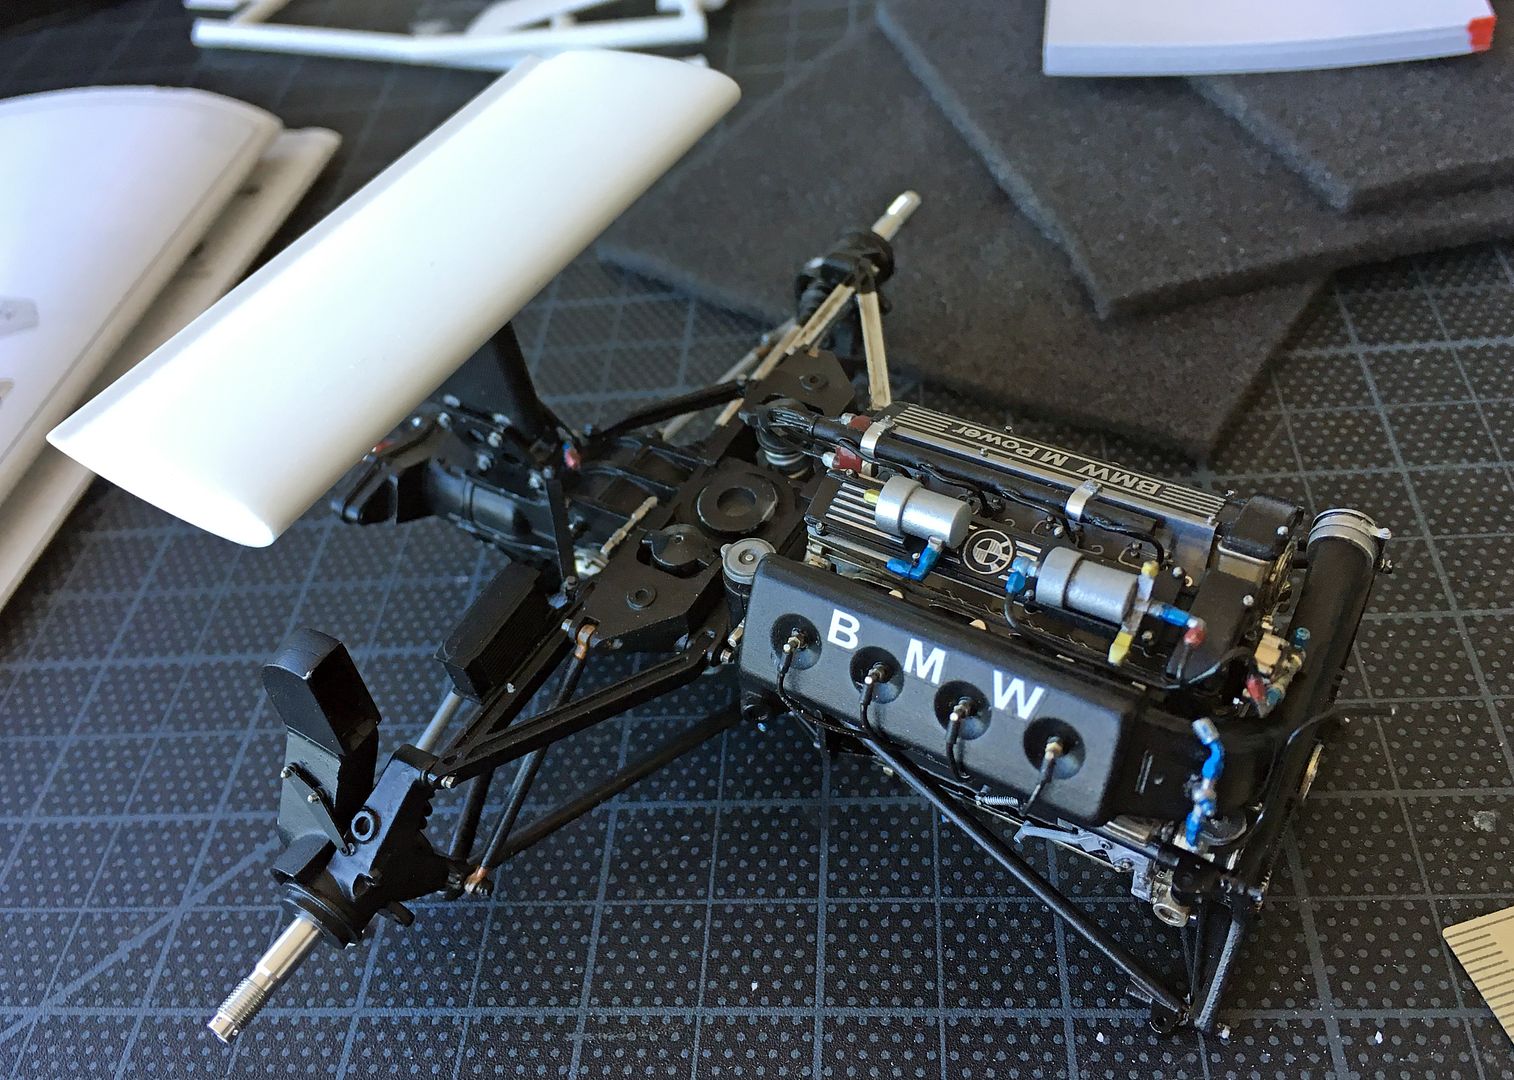
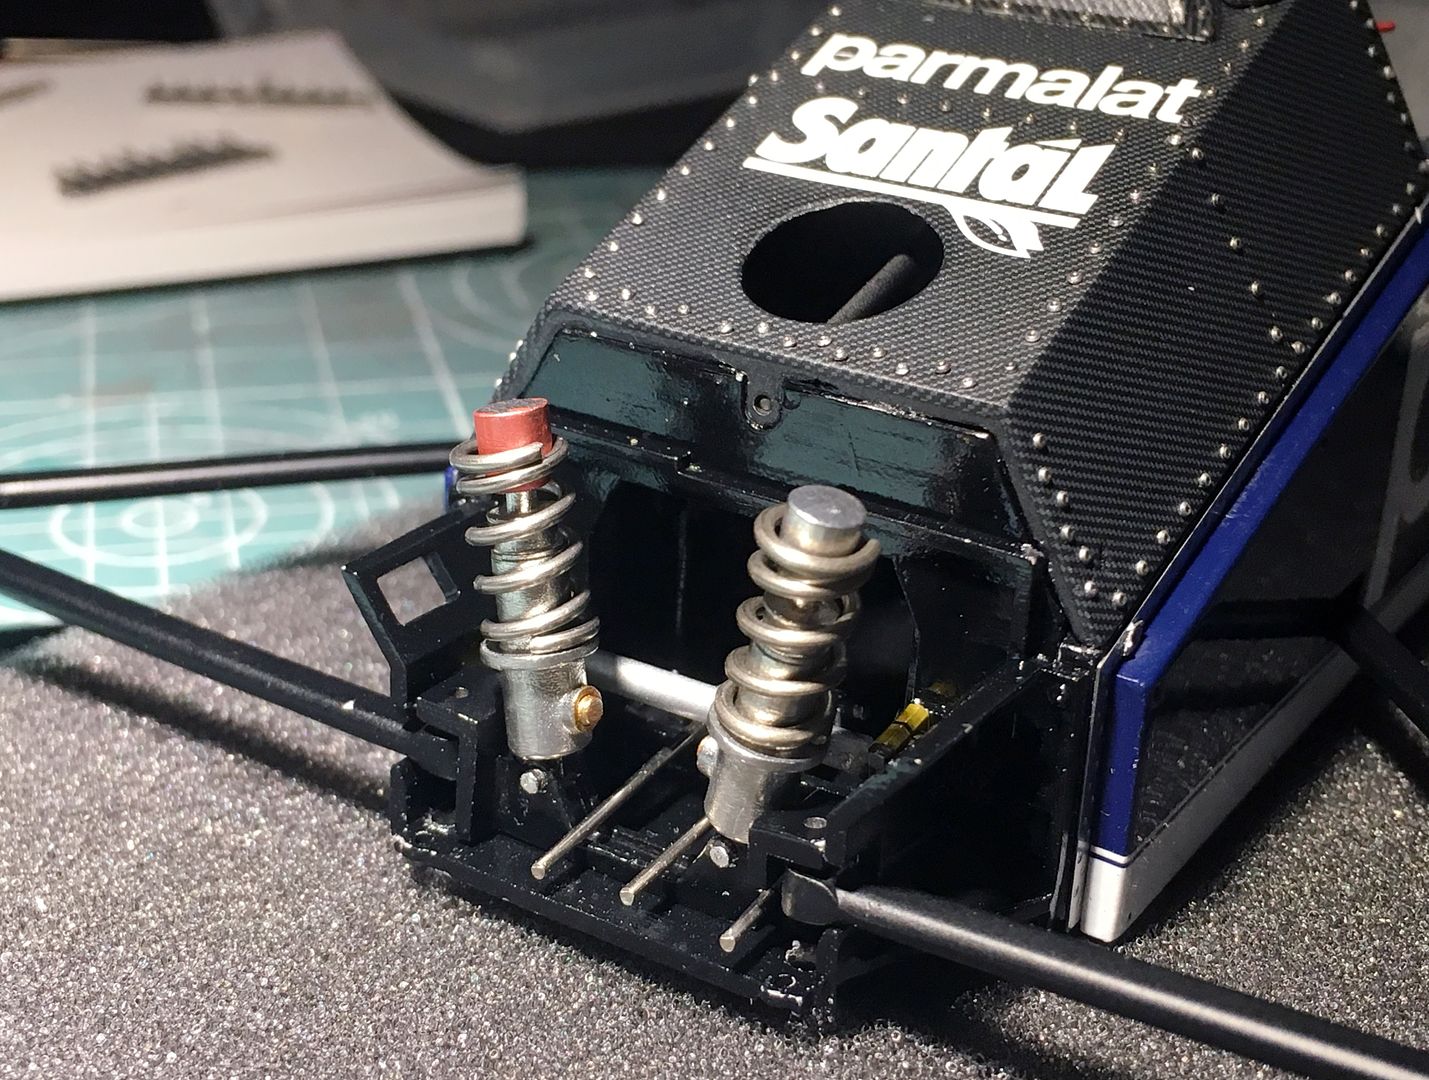
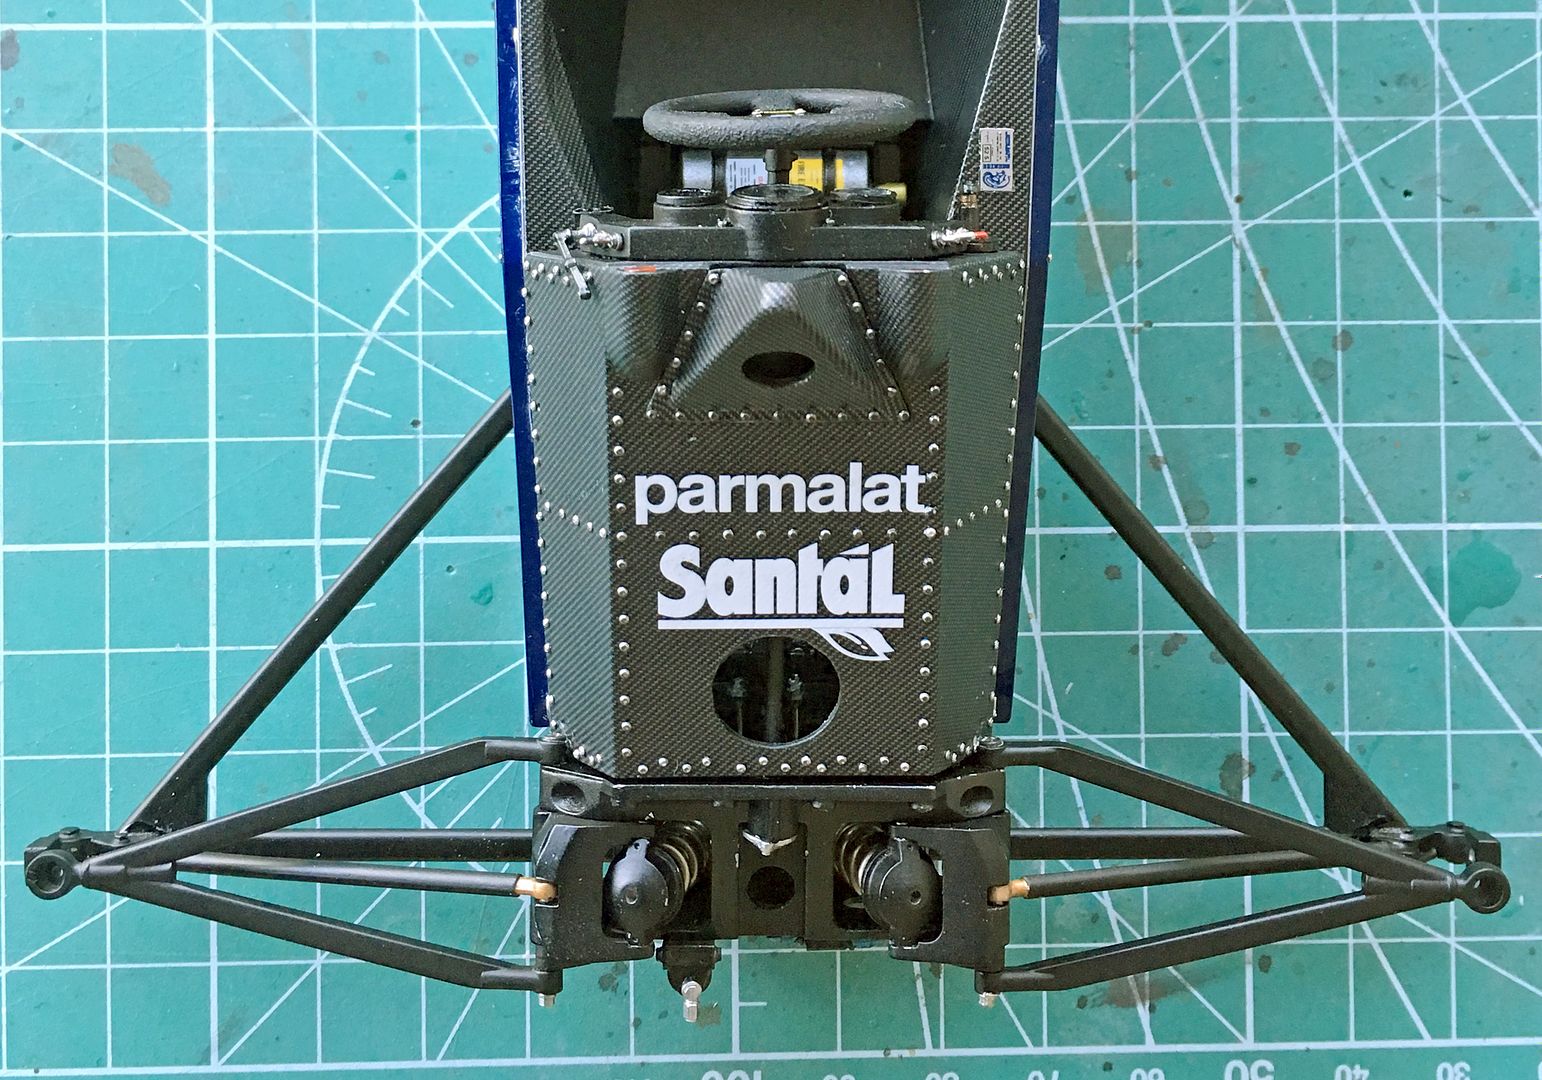
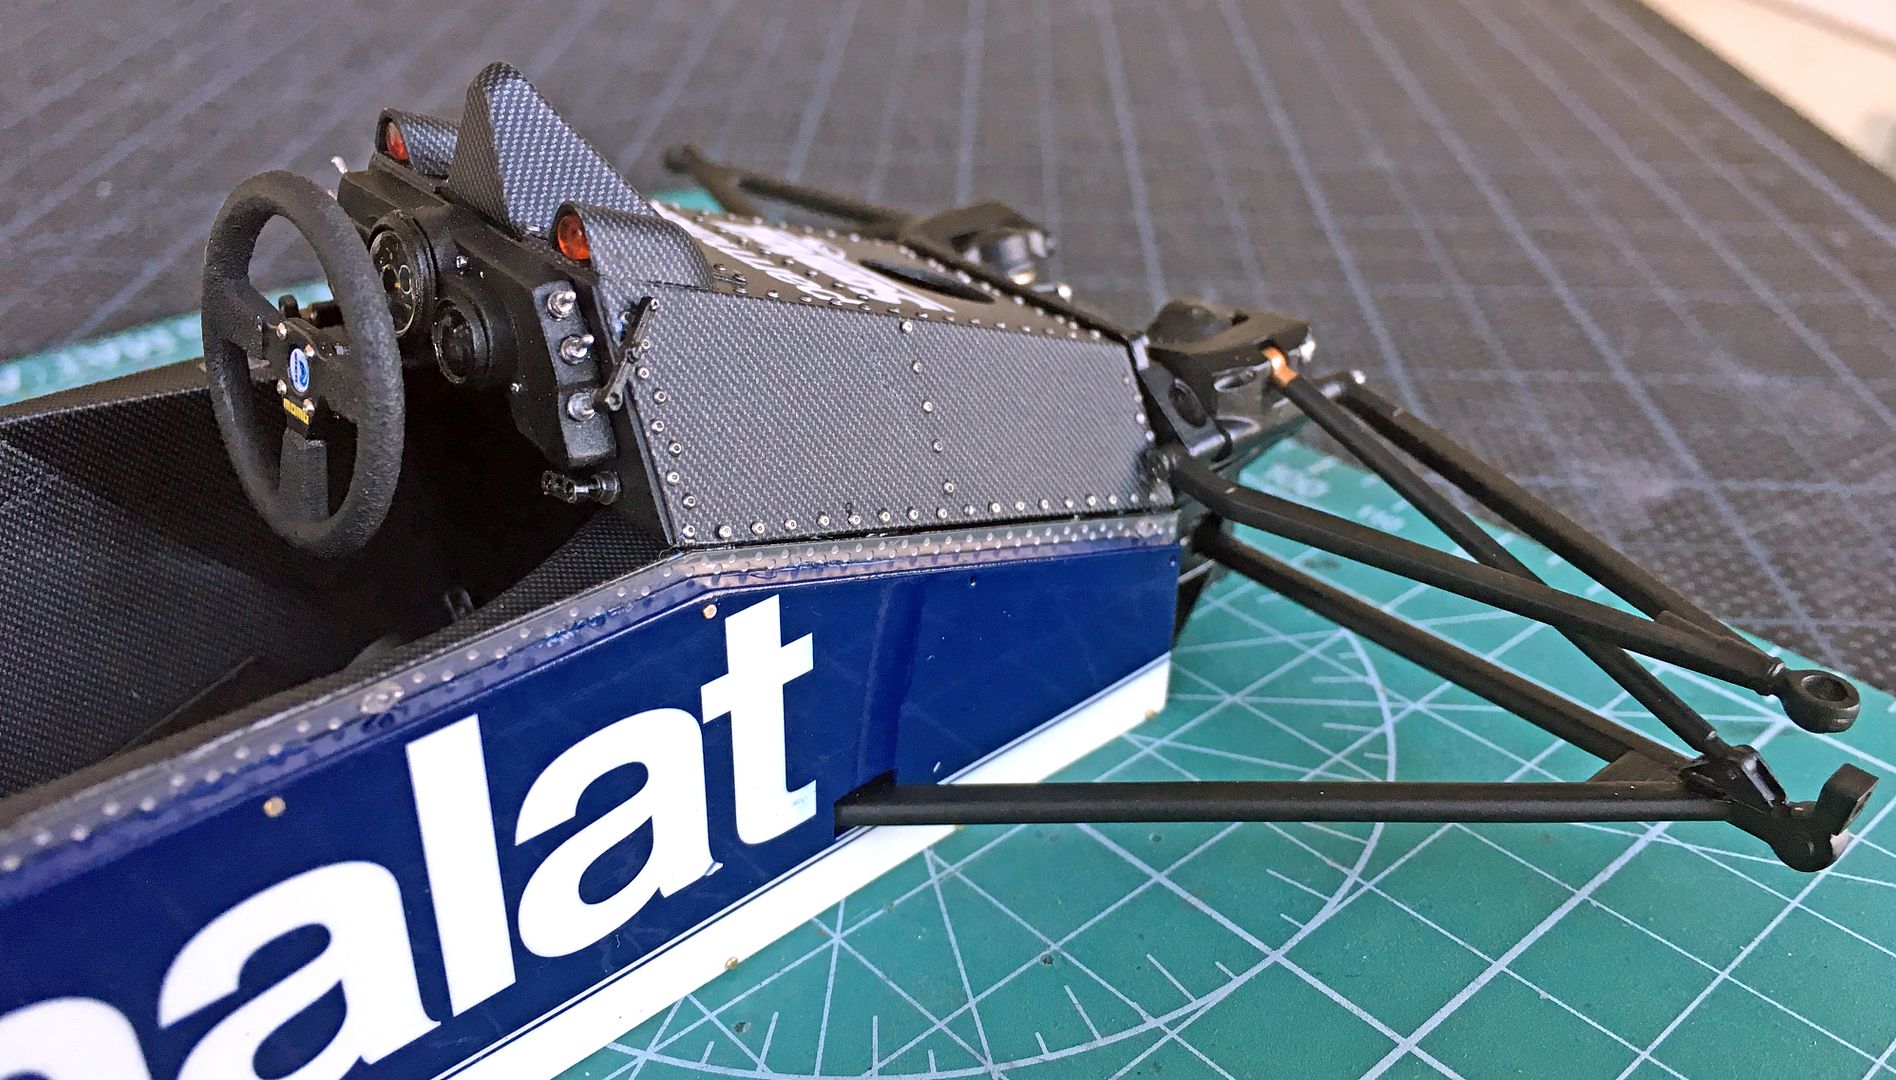
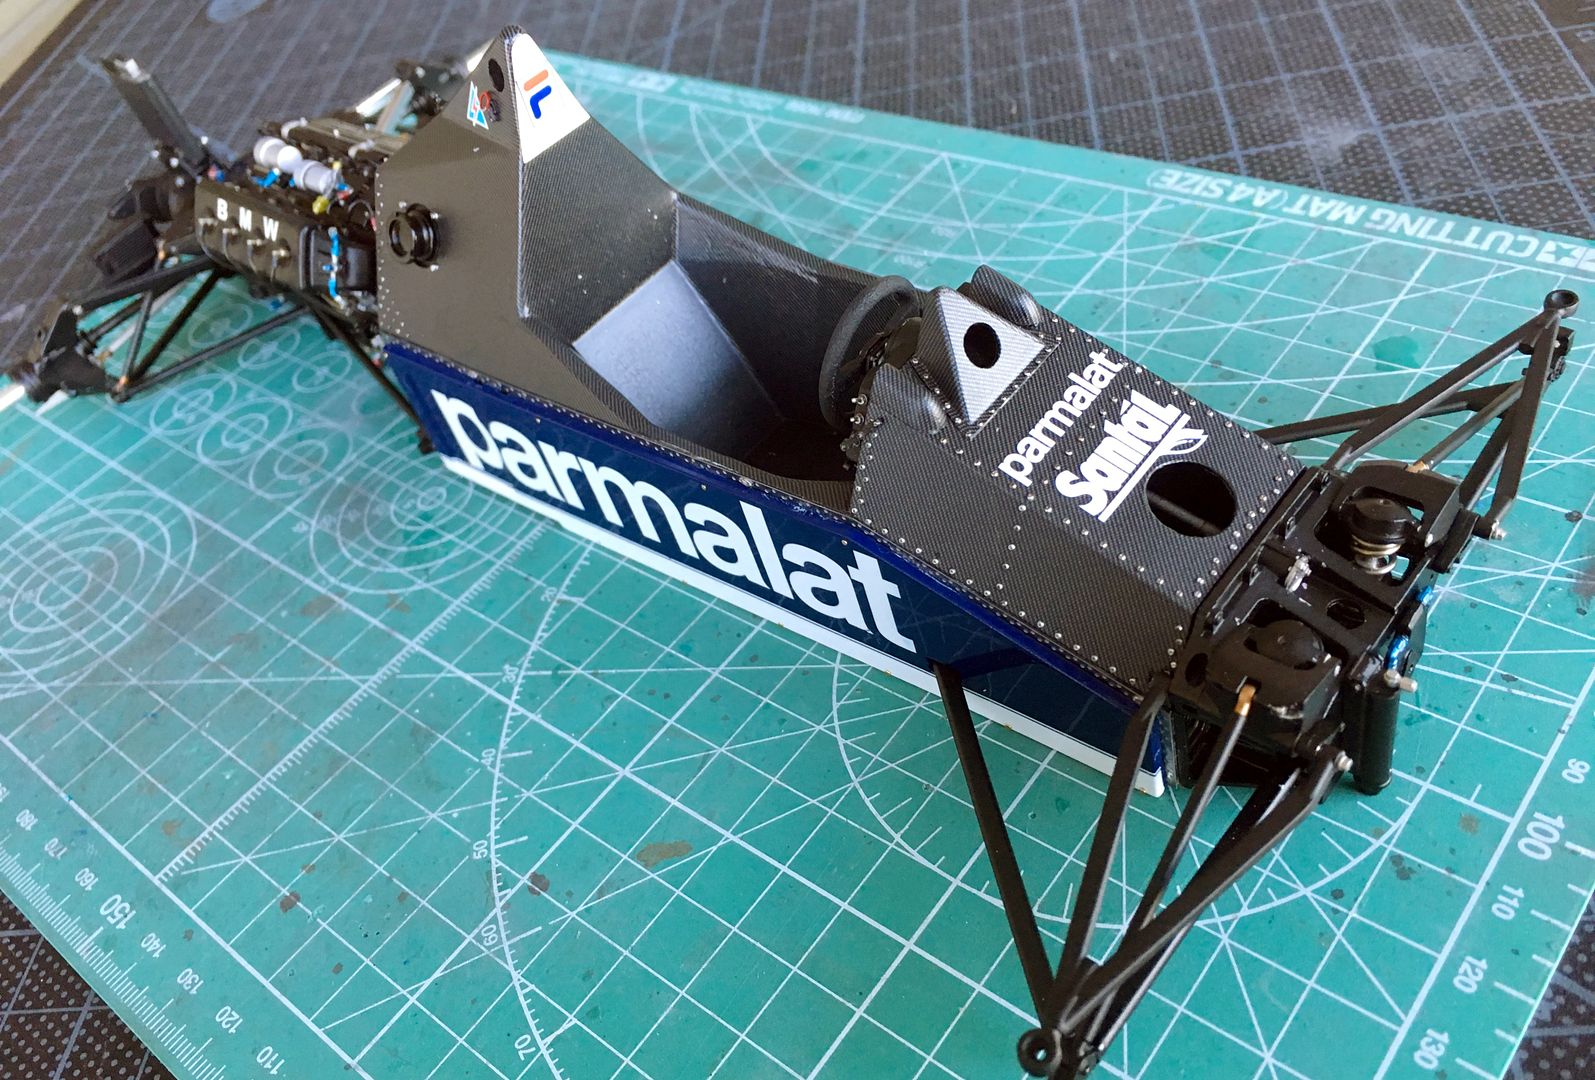
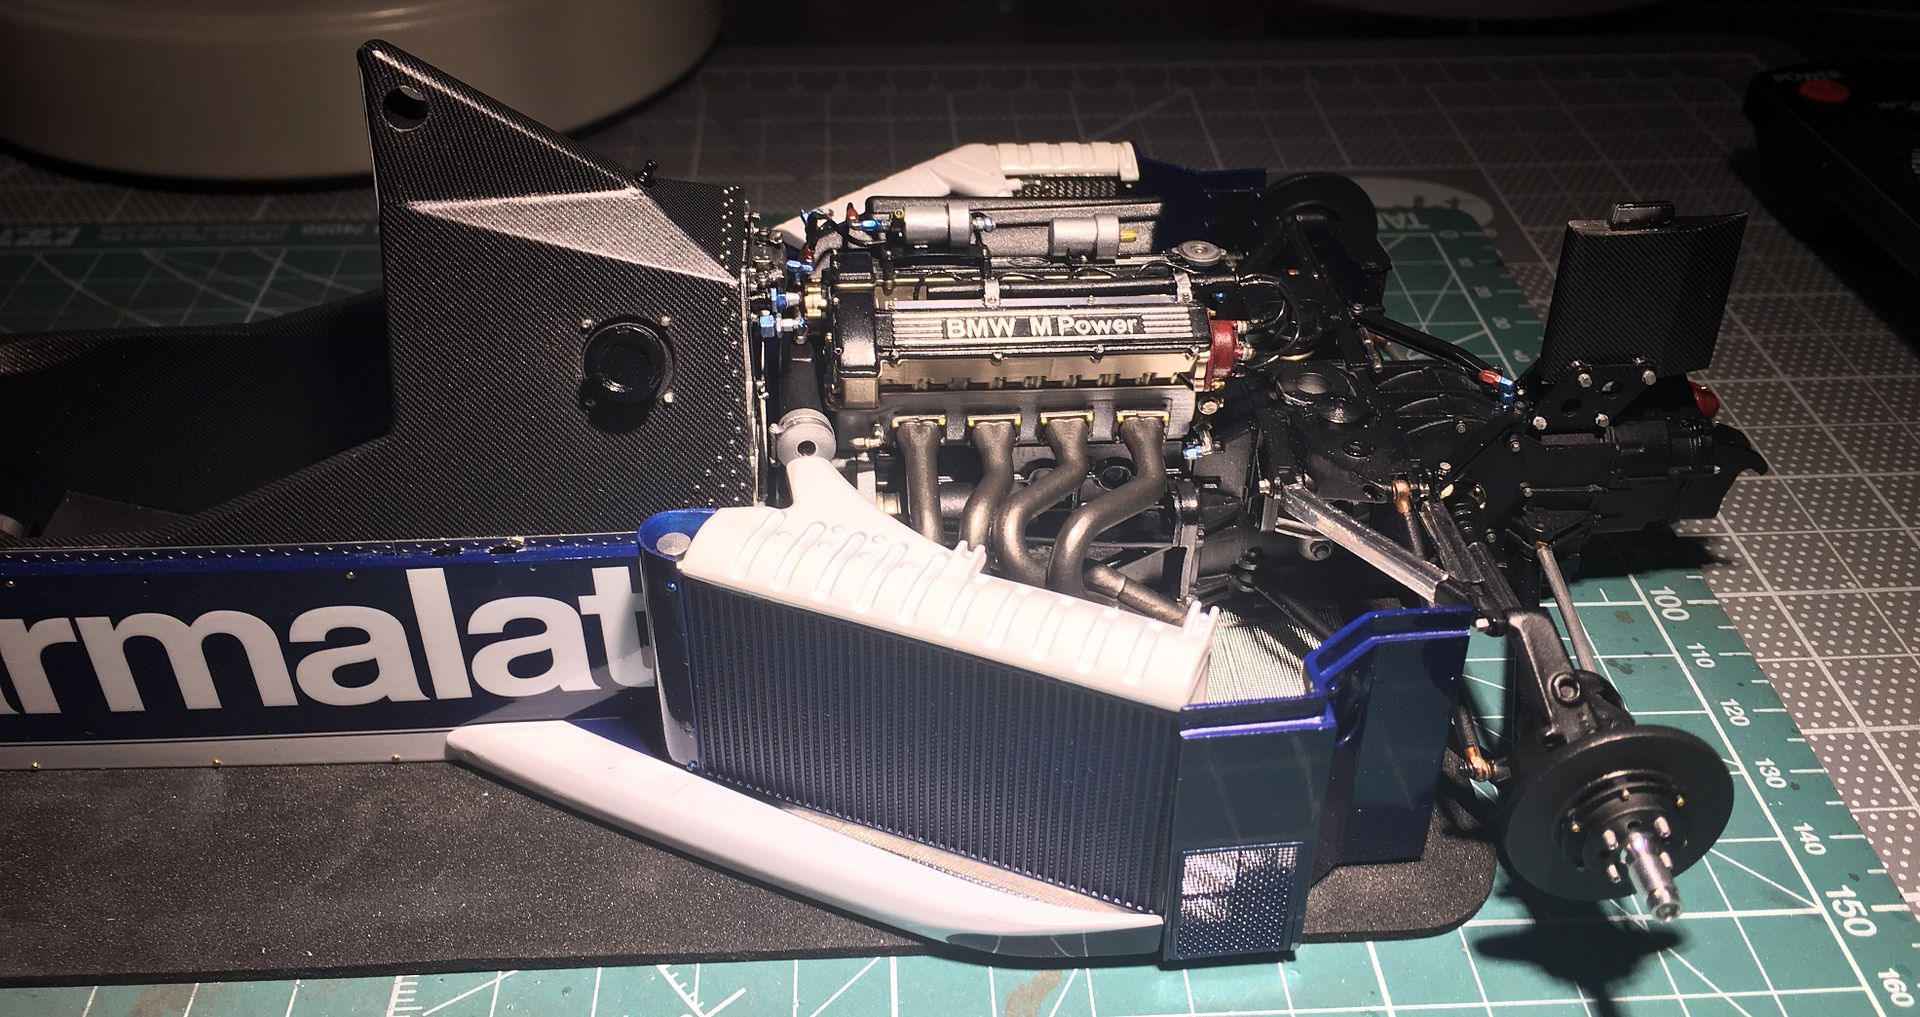
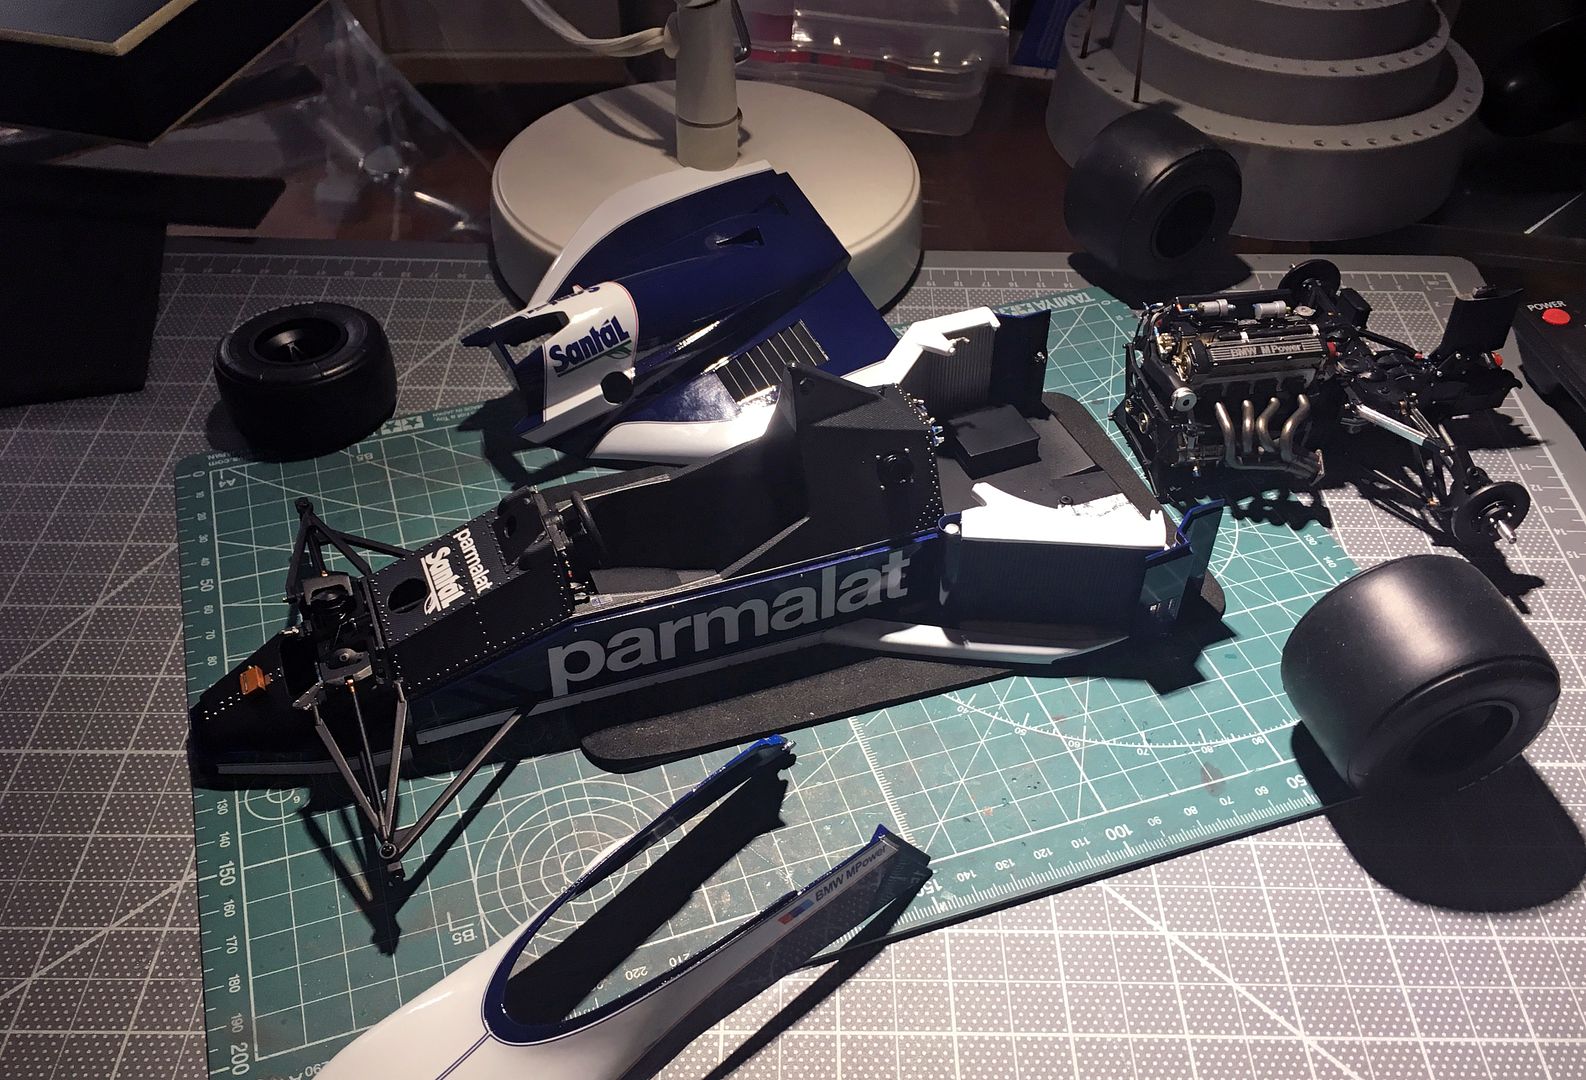
Model is coming together nicely...only major 'construction' left is the front suspension - then lots of 'assembly' and the big job of wiring.
Oh - and all the wings! Forgot about them...
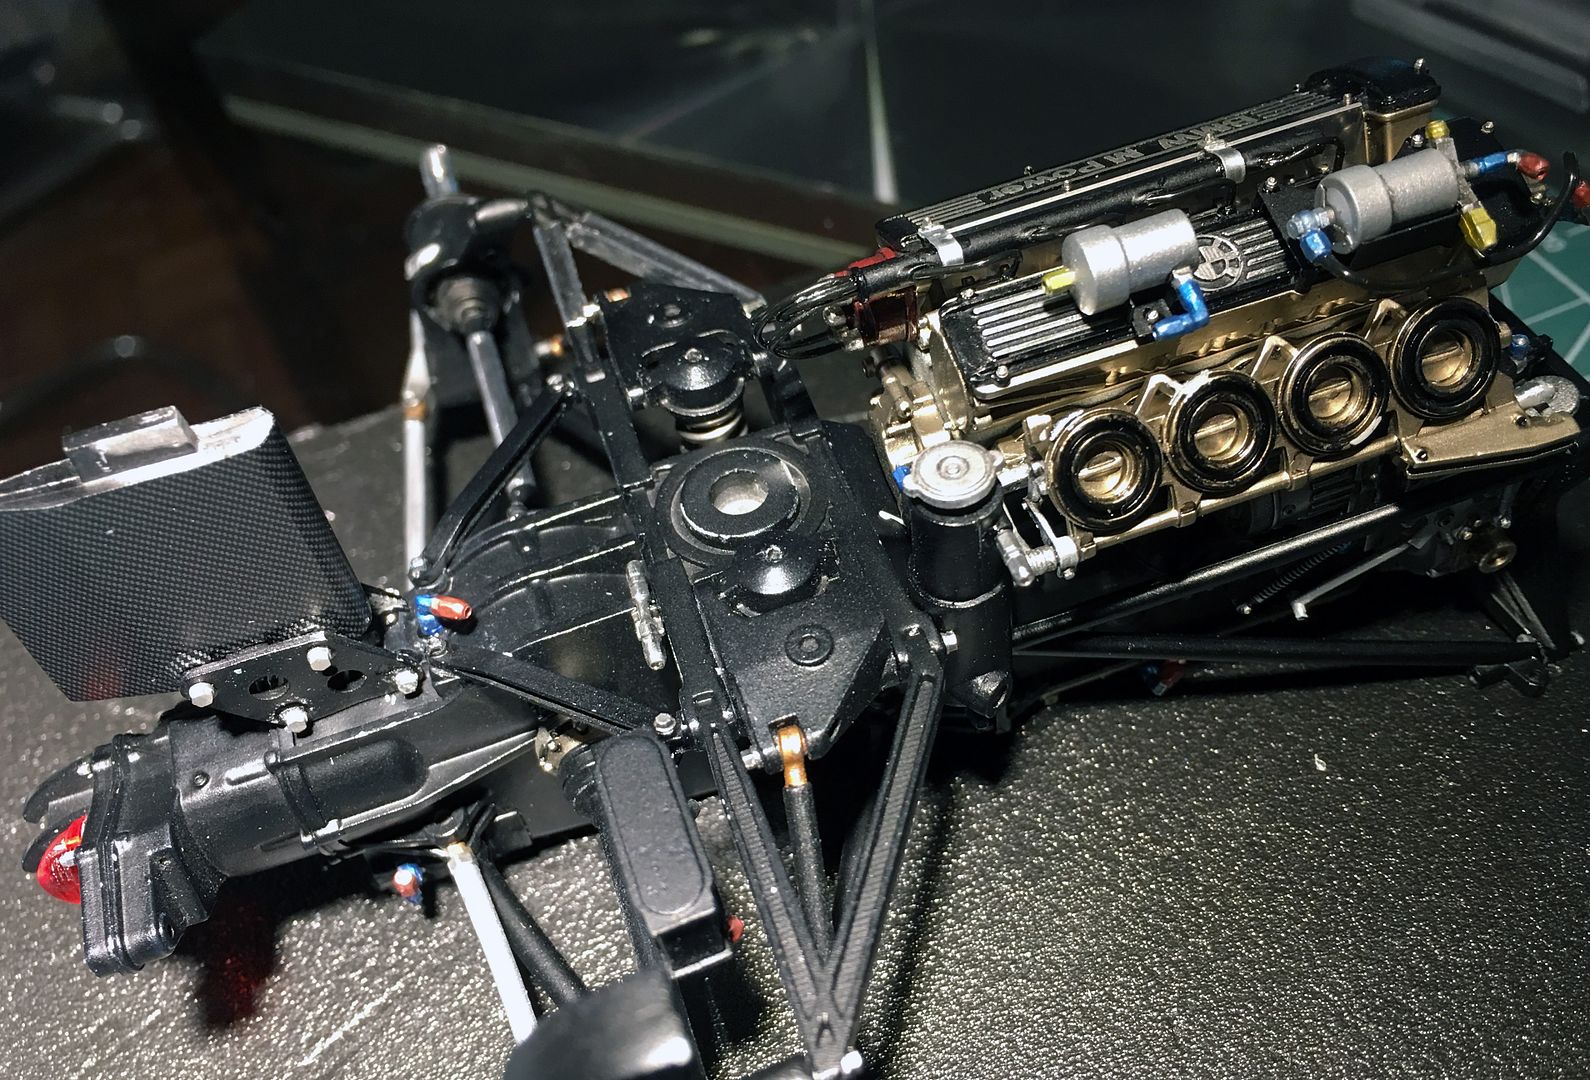
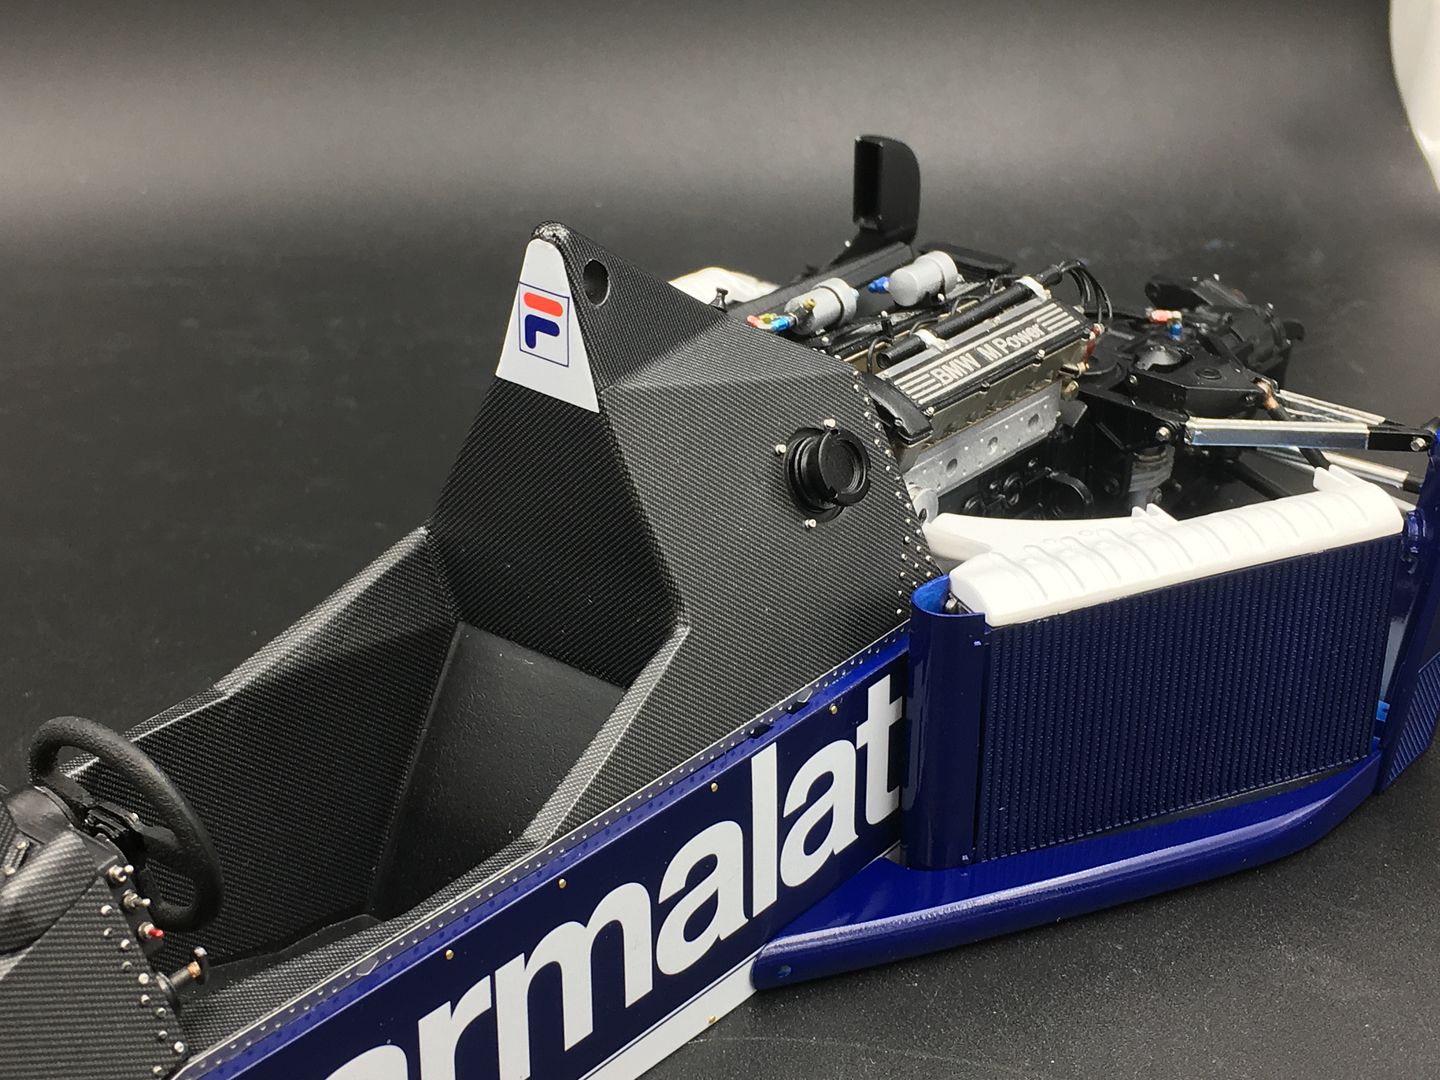
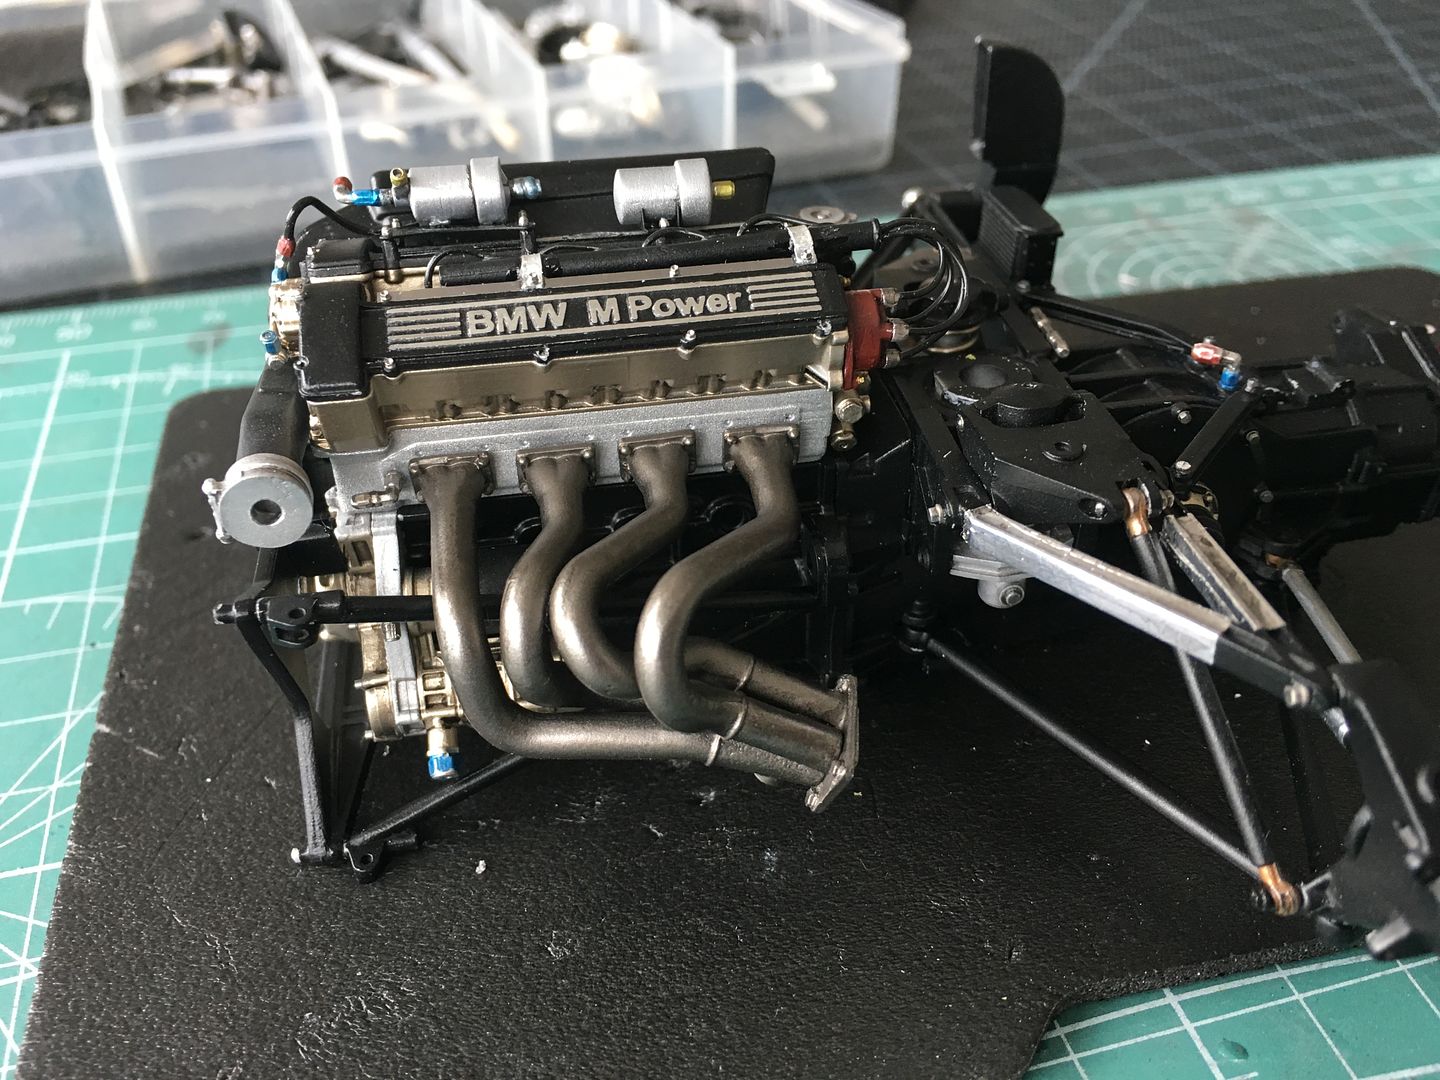
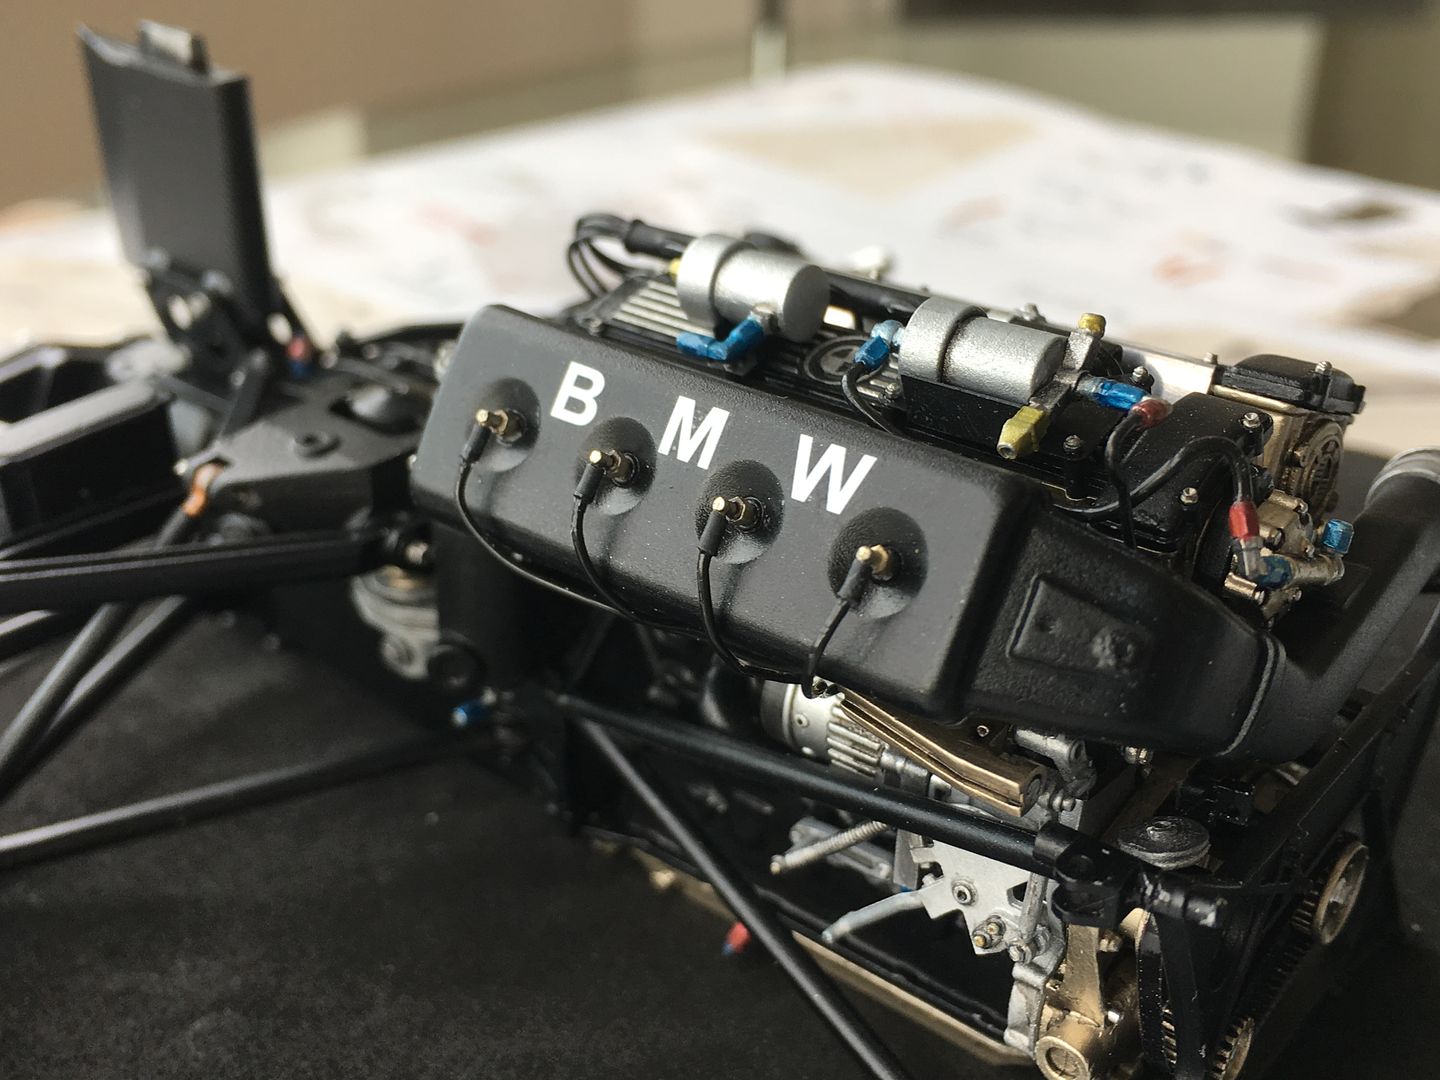
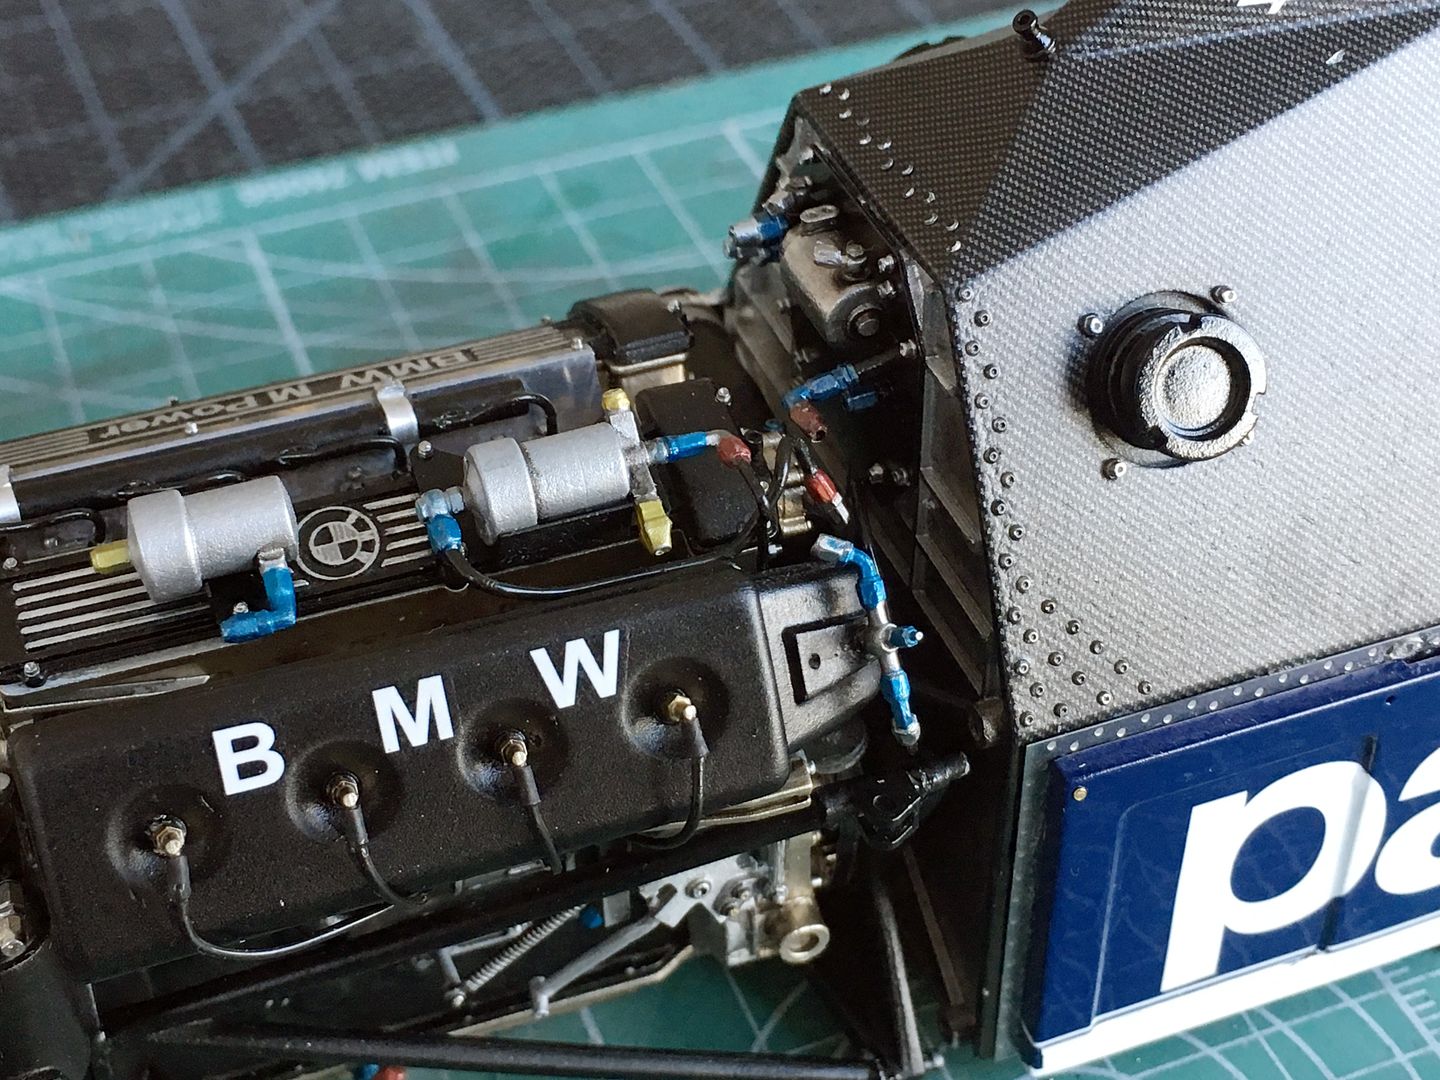
I've been adding all the plumbing pipes and fittings - lots of tiny holes on the ends ready for wiring...
I also have to go over the whole engine and touch up with black etc - so you can see lots of dust in these very close-up shots that will be removed!
I will take some 'light box' shots tonight, for sure....
Oh - and all the wings! Forgot about them...
I've been adding all the plumbing pipes and fittings - lots of tiny holes on the ends ready for wiring...
I also have to go over the whole engine and touch up with black etc - so you can see lots of dust in these very close-up shots that will be removed!
I will take some 'light box' shots tonight, for sure....
Sprayed direct from the bottle - very light coat first, then less than a minute later a 'wet' coat - then another a minute late etc - IS WHAT I DID - not saying that is 'as per instructions' but it has worked so far!
If I had space to get more ventilation I might try 2K, but not at this stage...
If I had space to get more ventilation I might try 2K, but not at this stage...
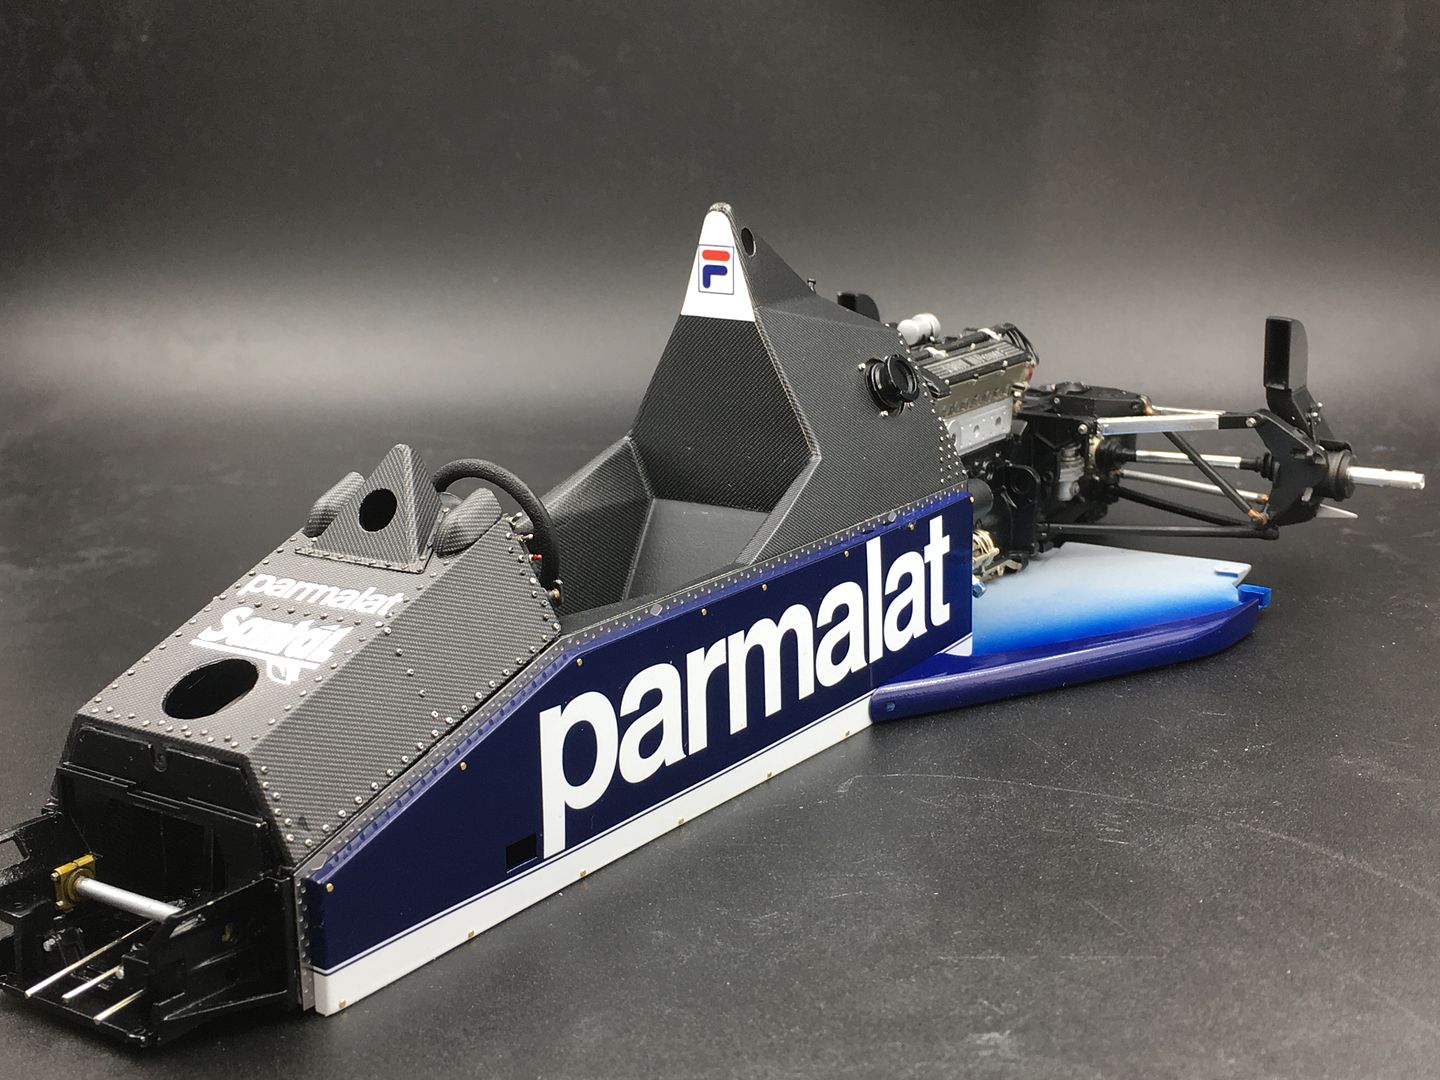
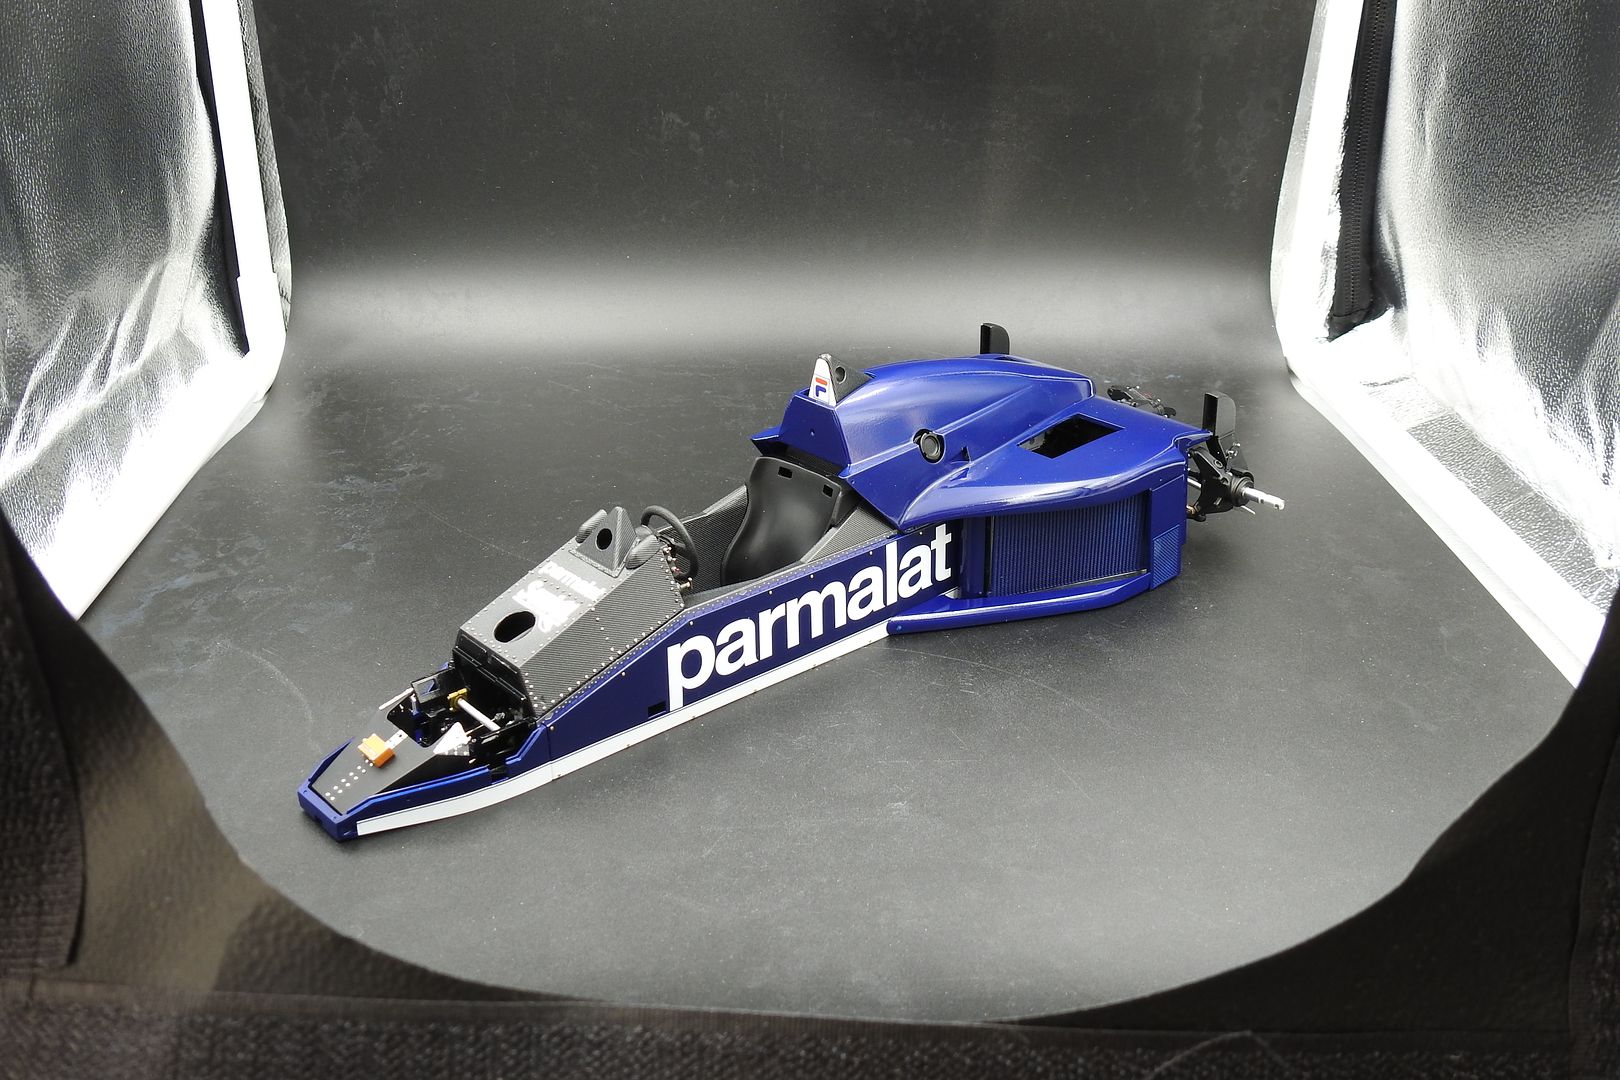
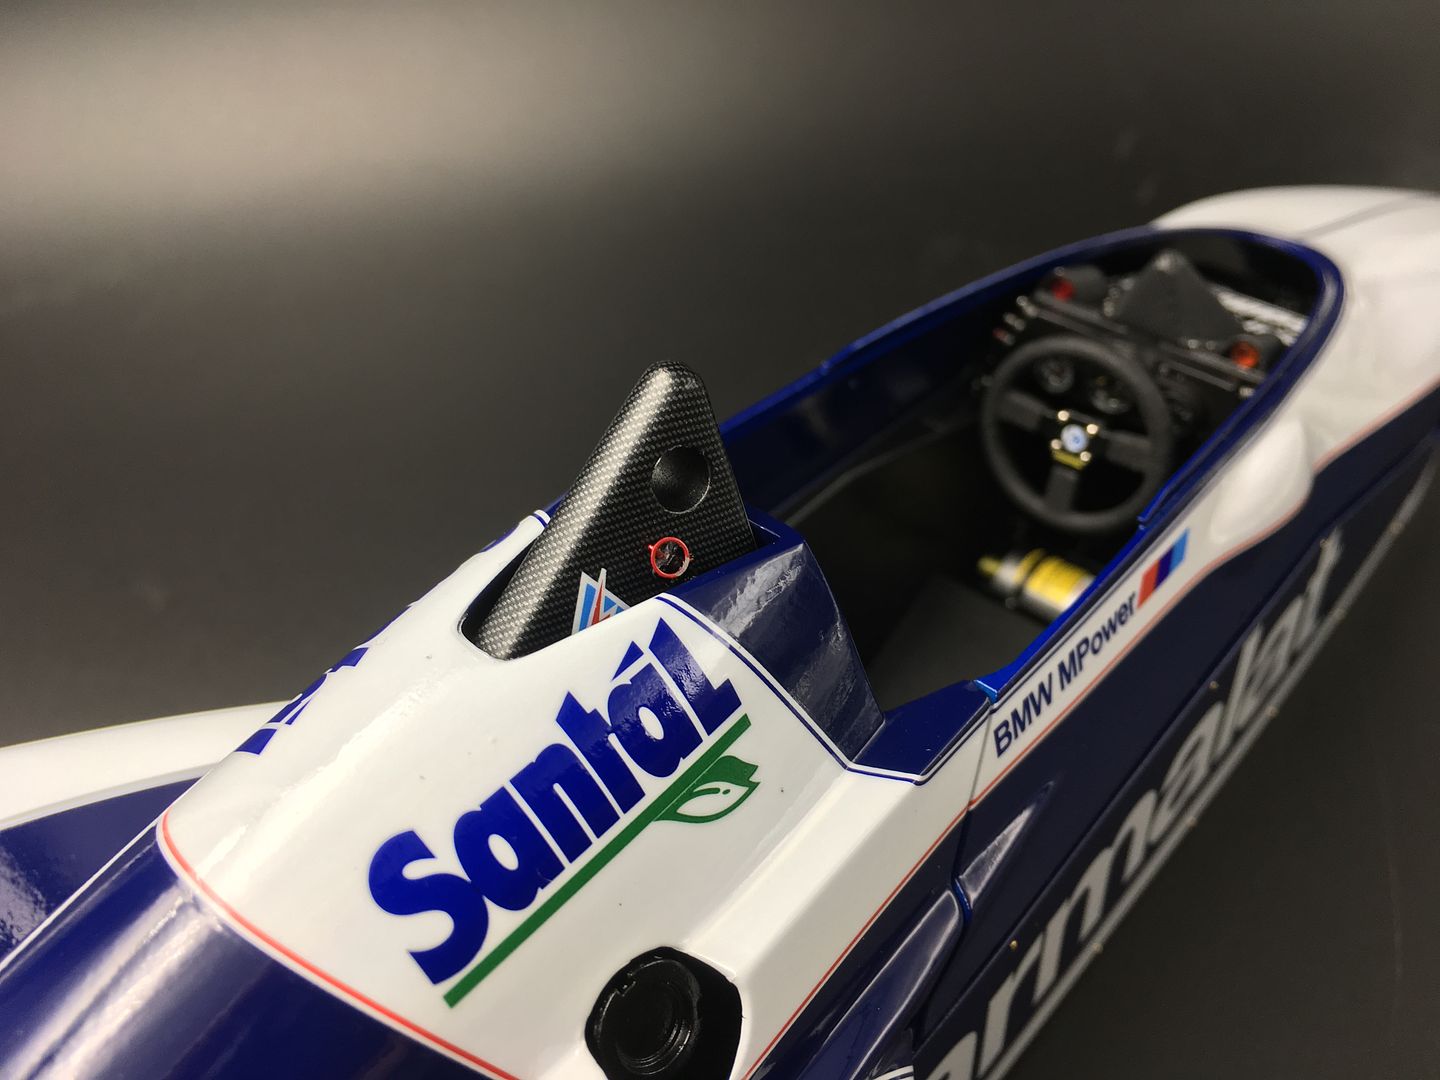
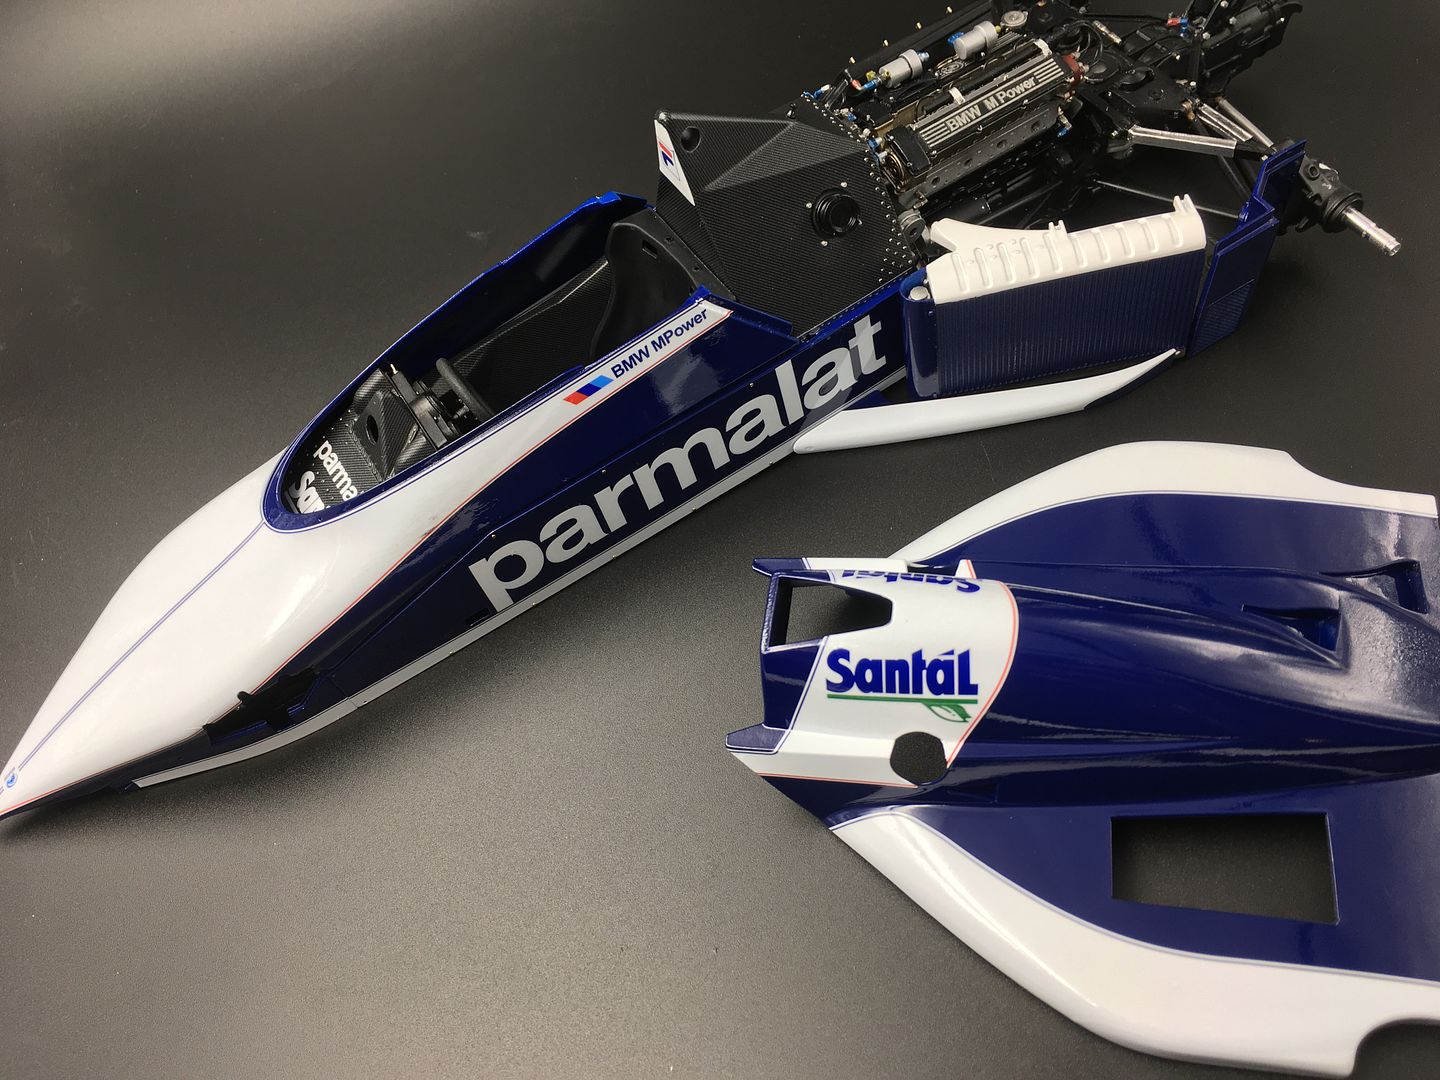
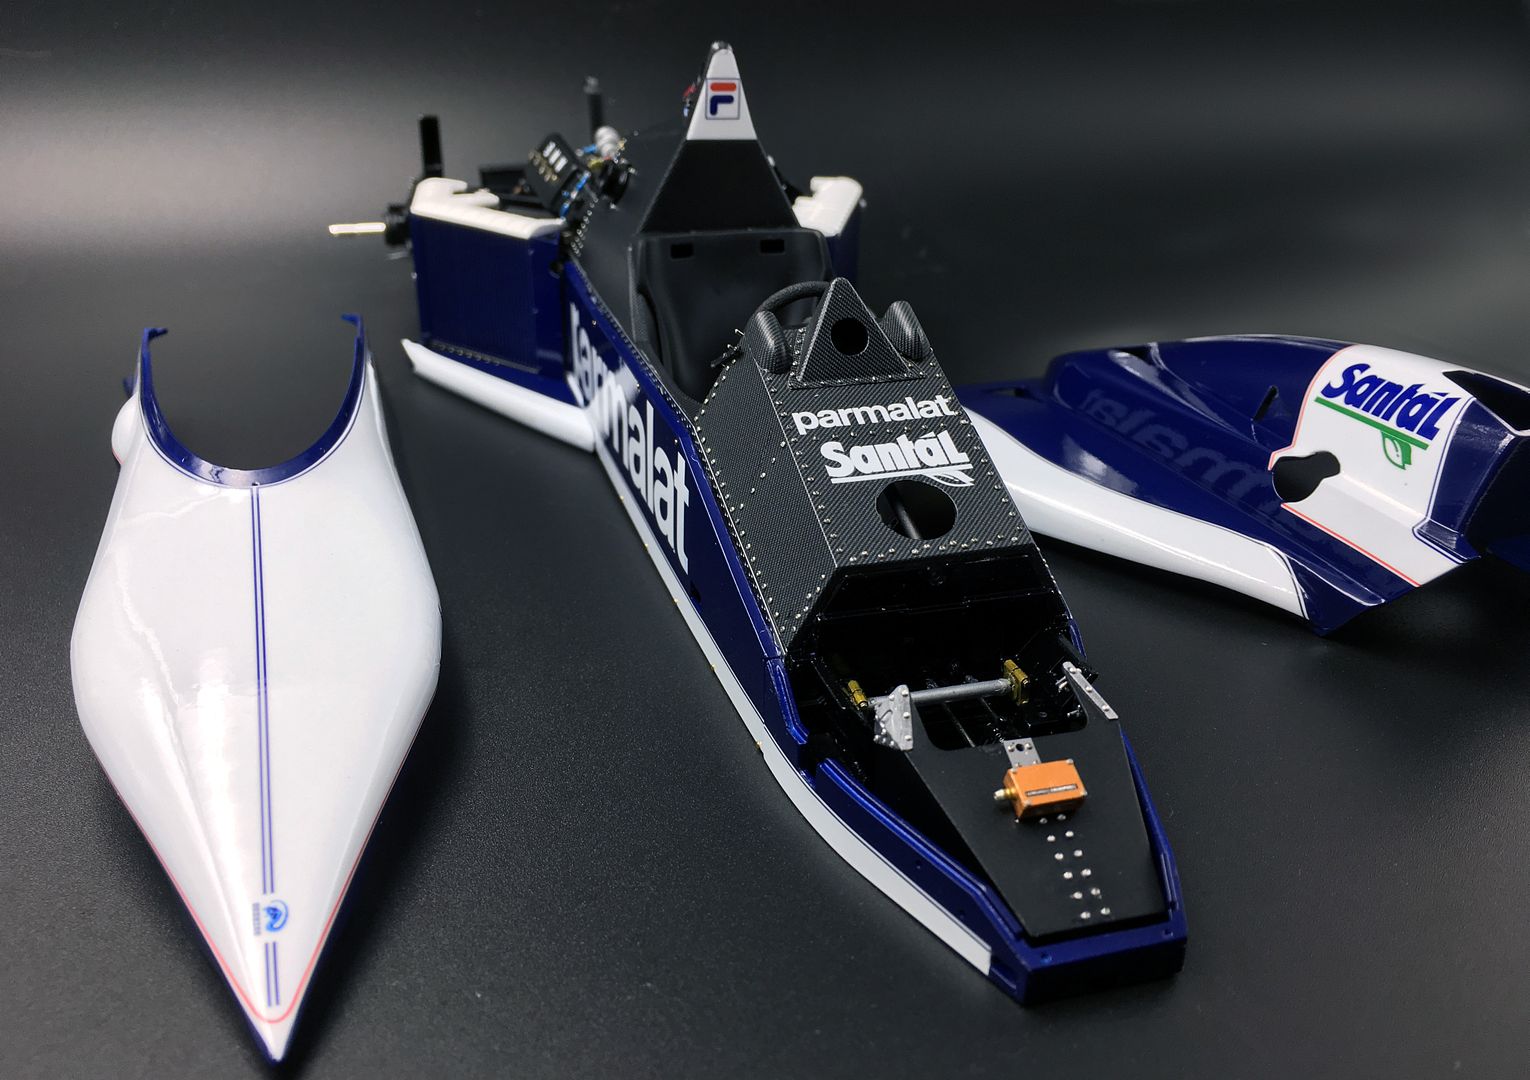
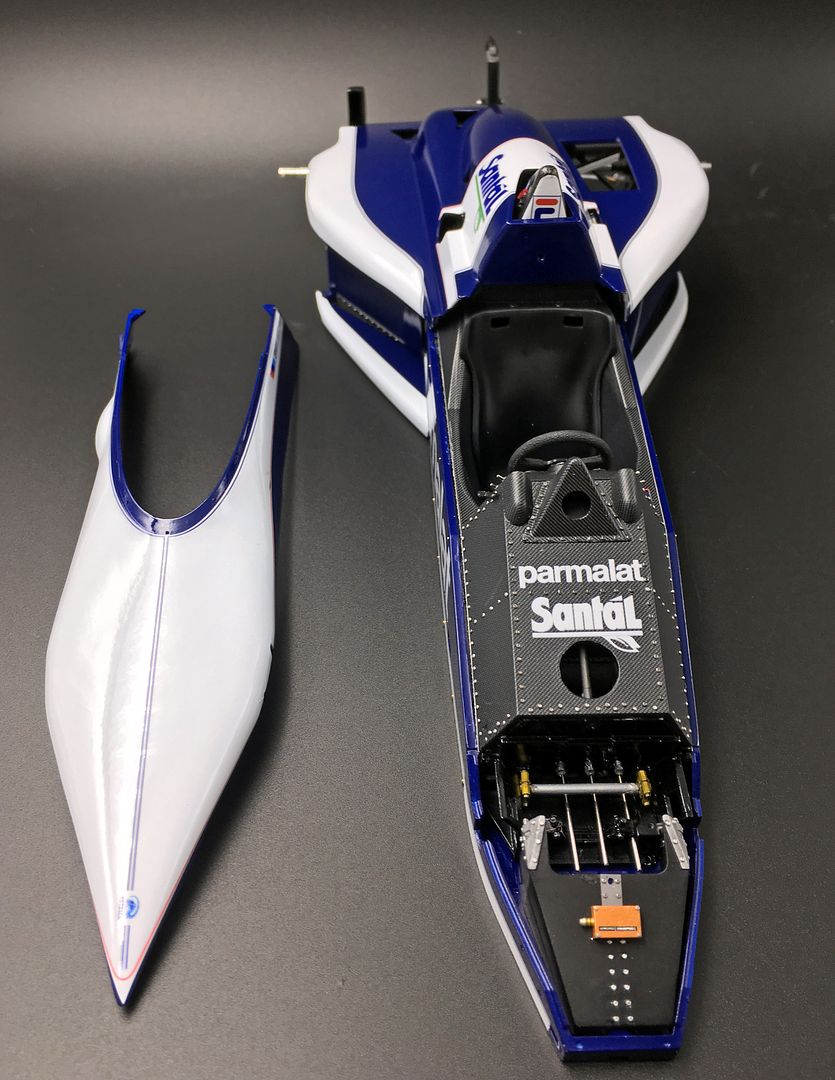
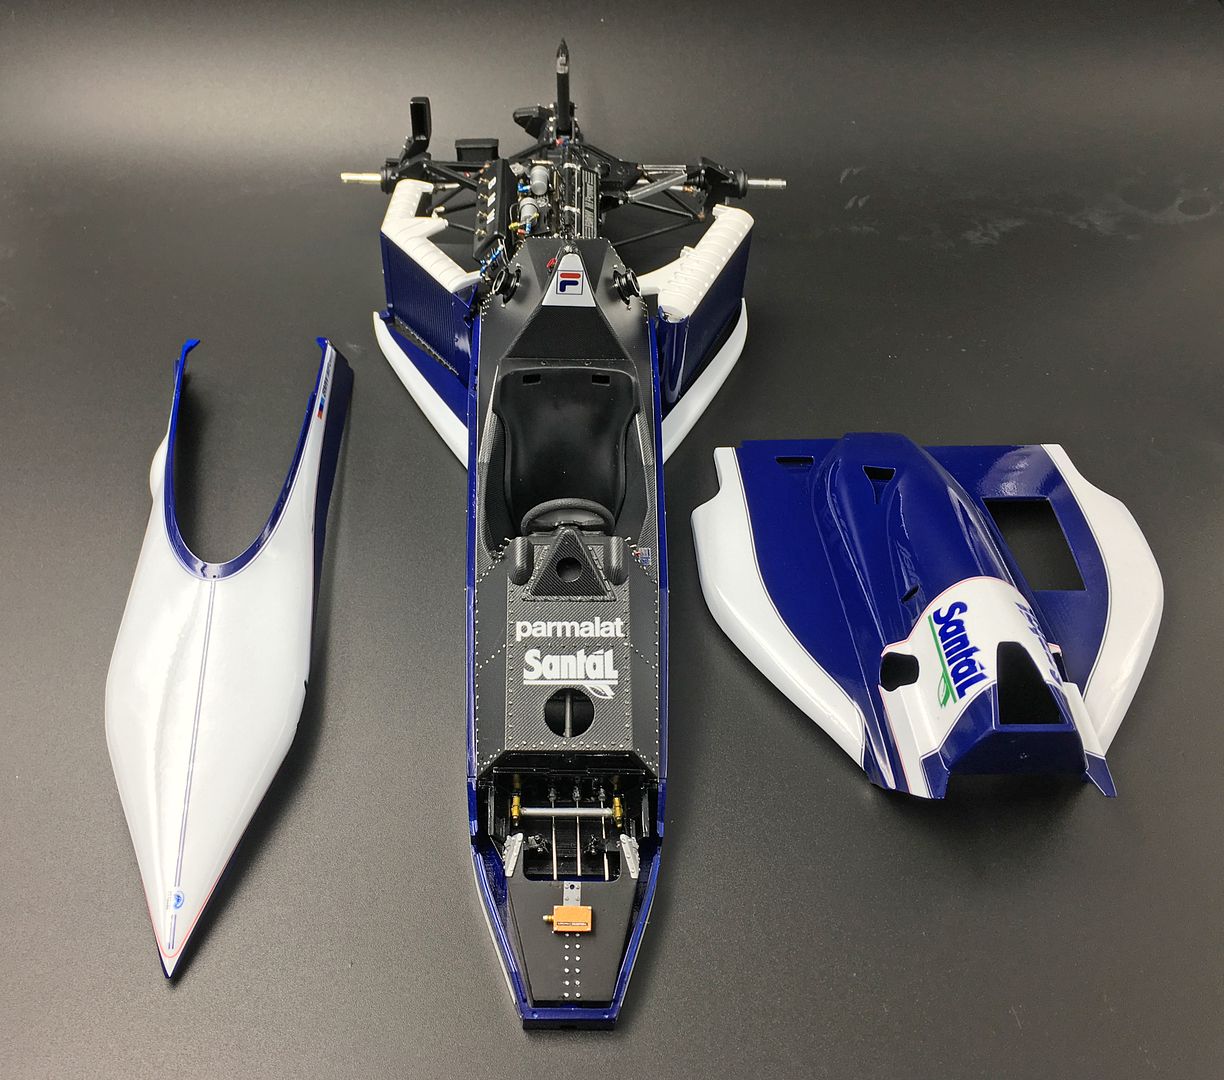
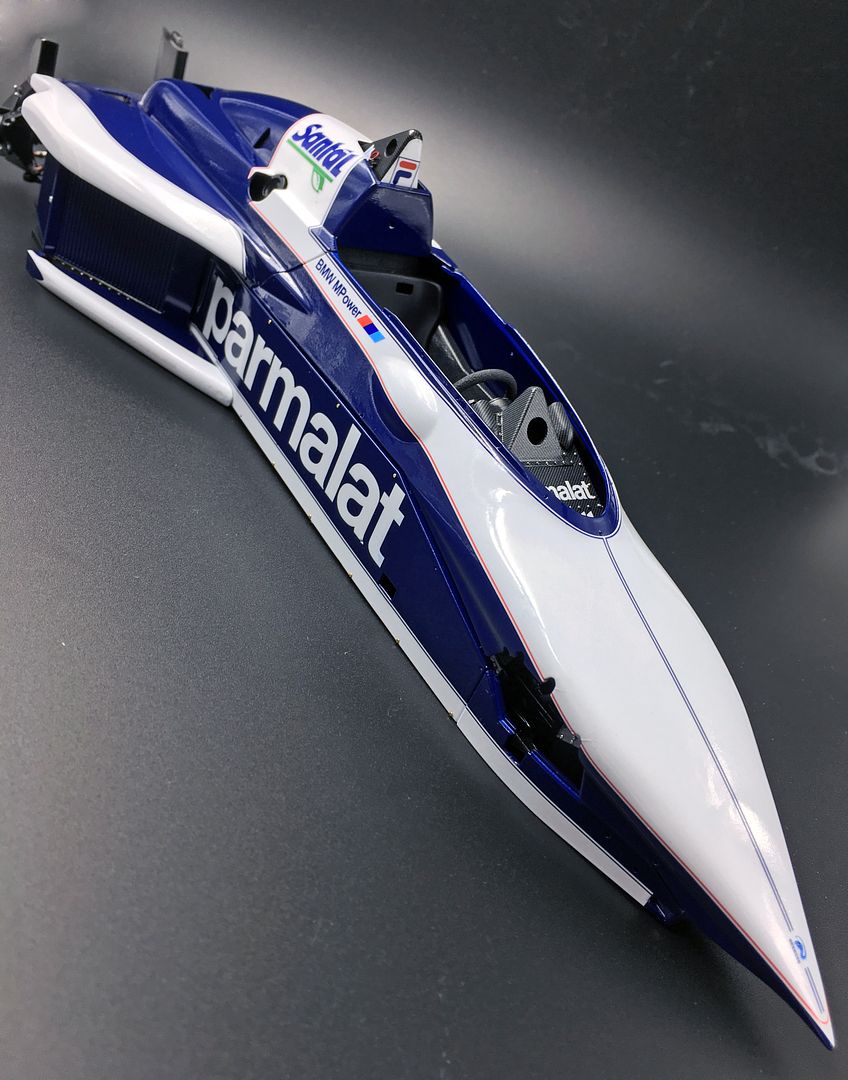
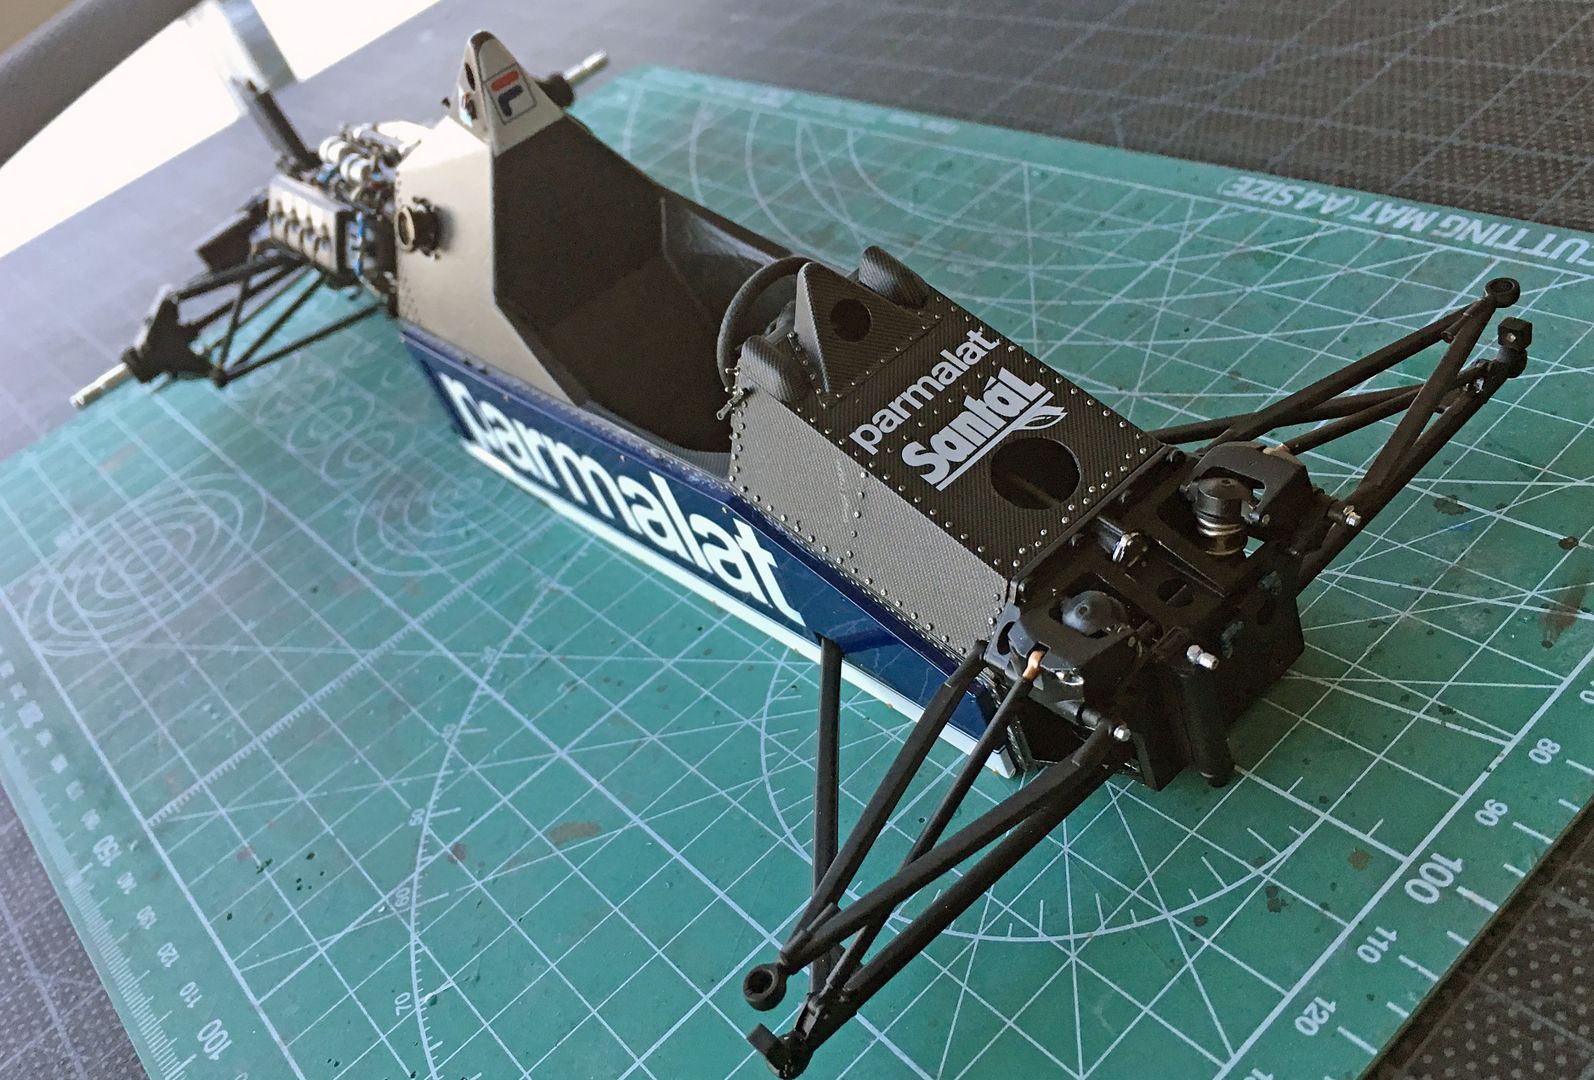
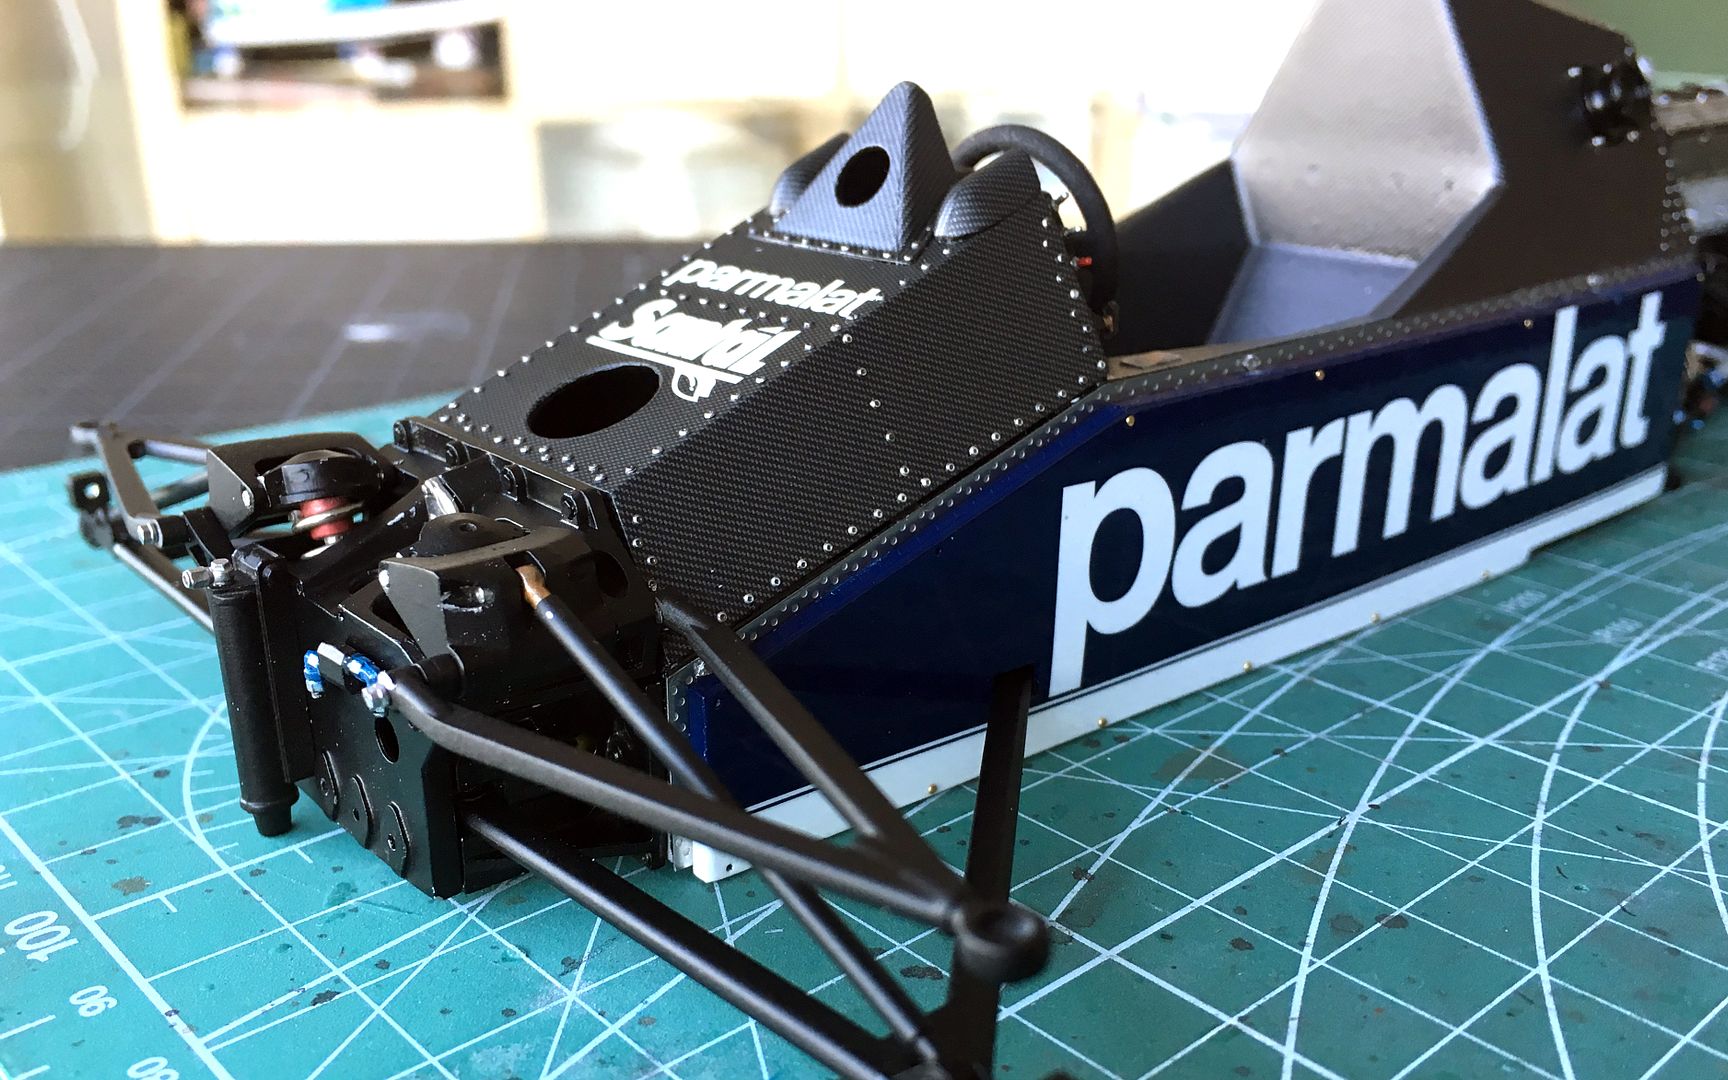
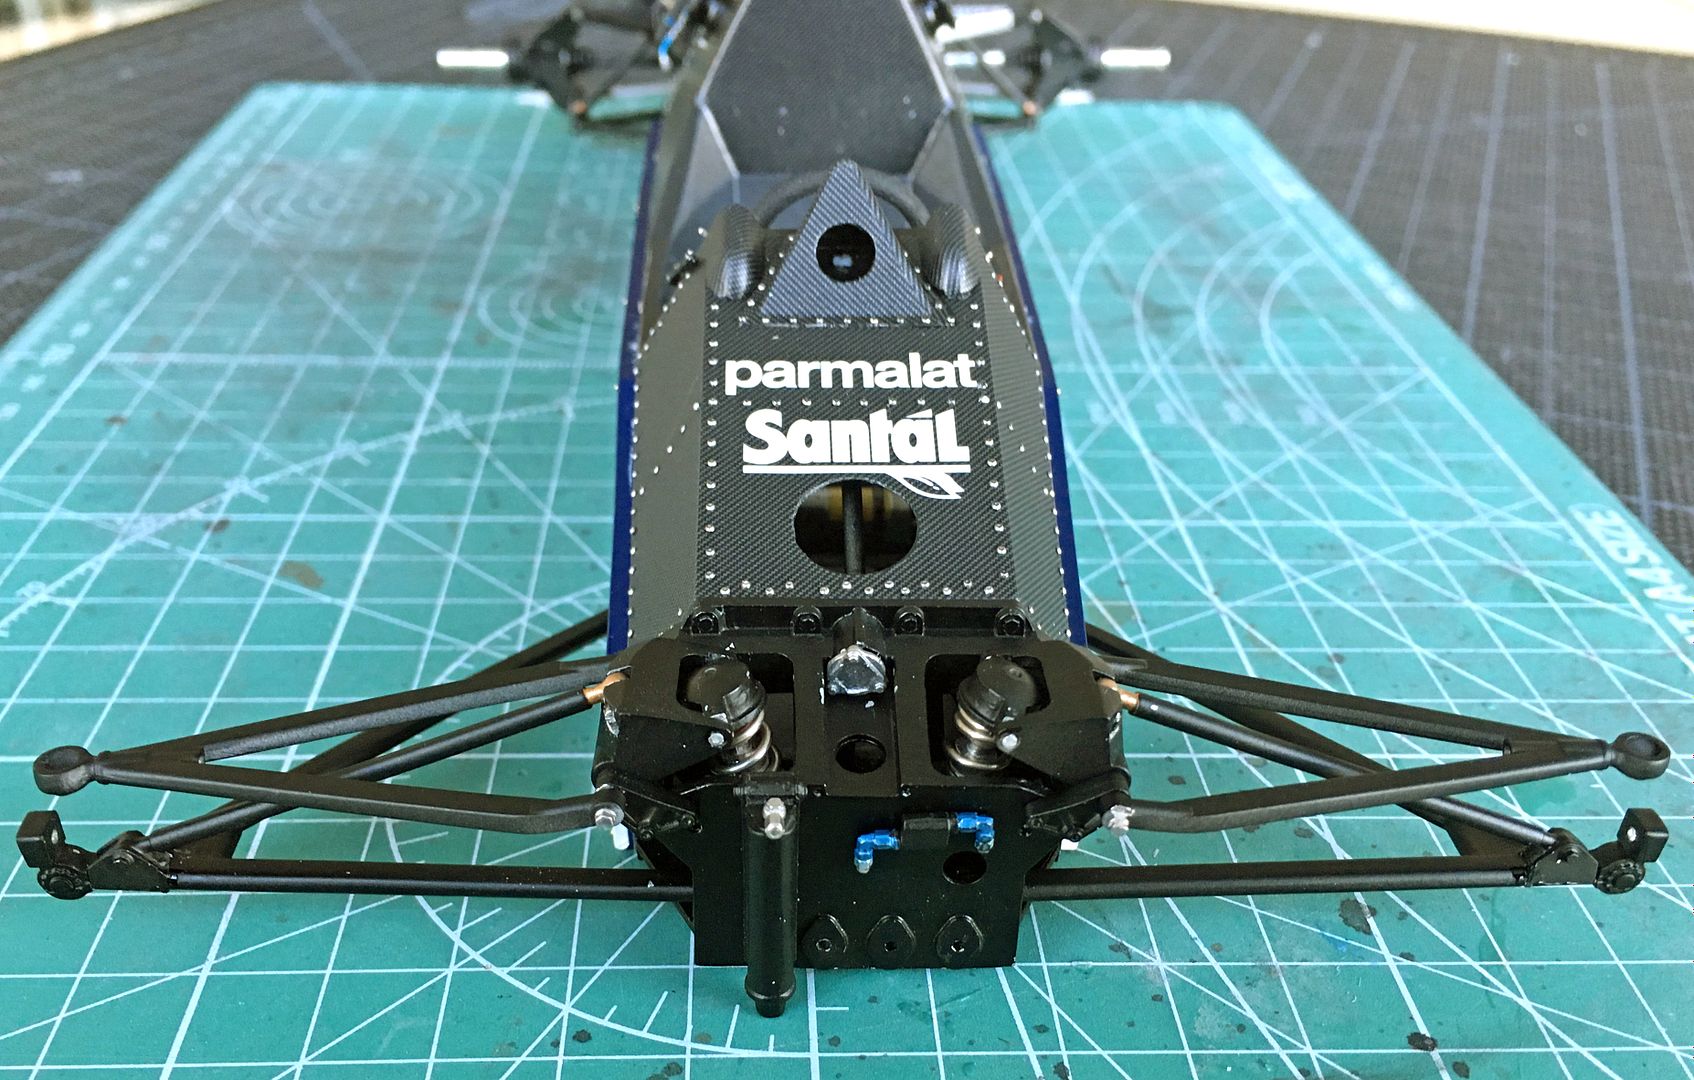
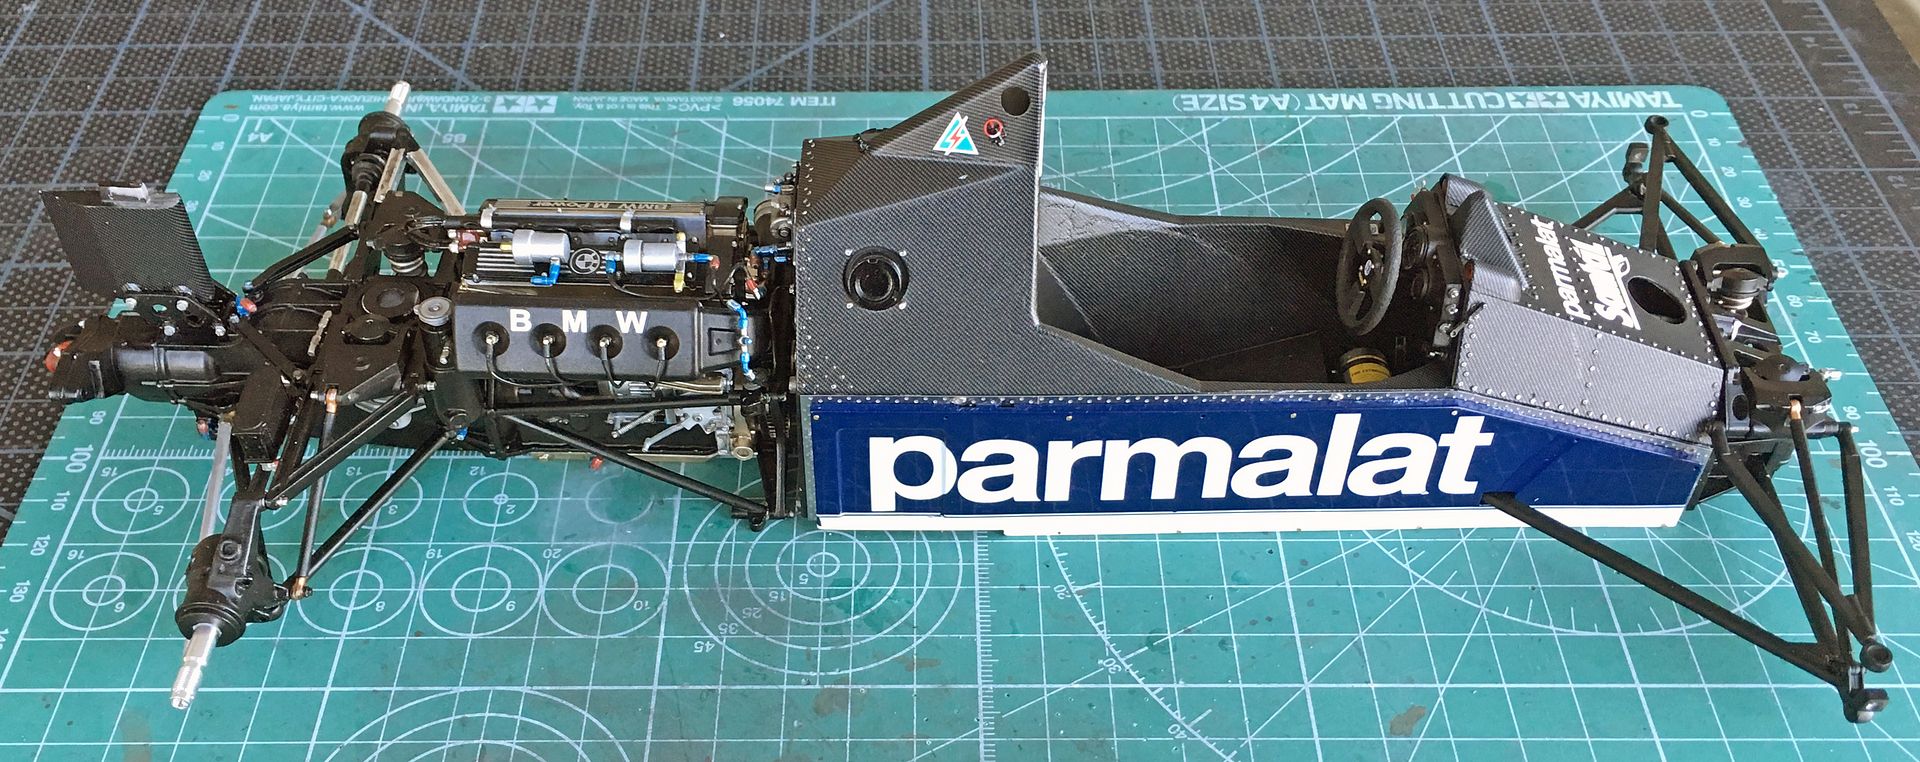
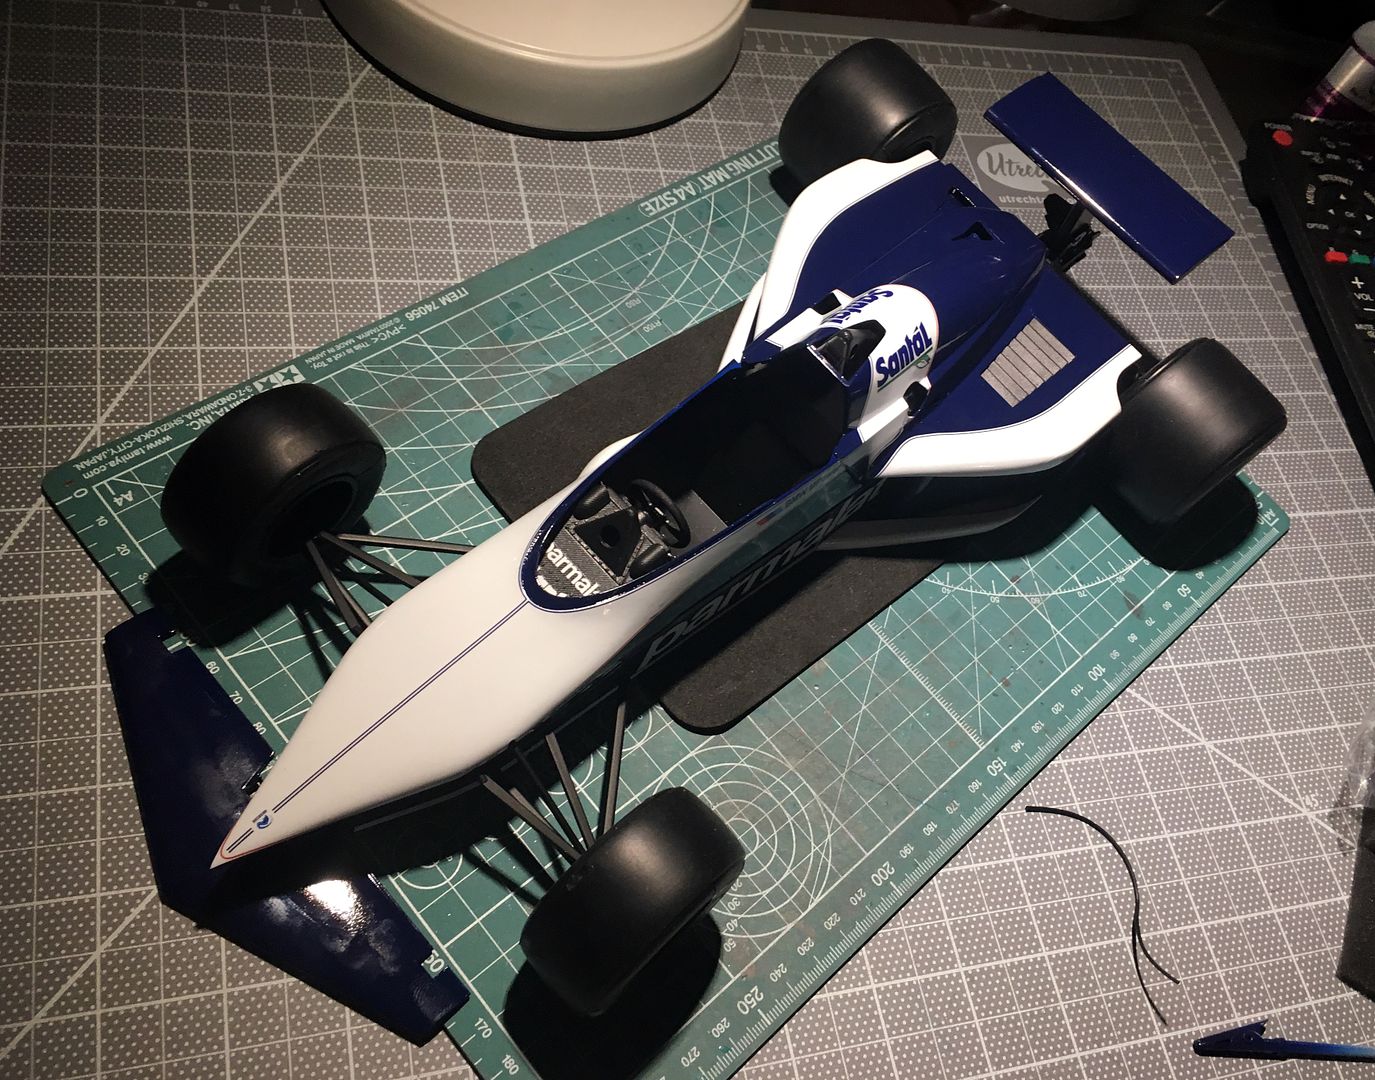
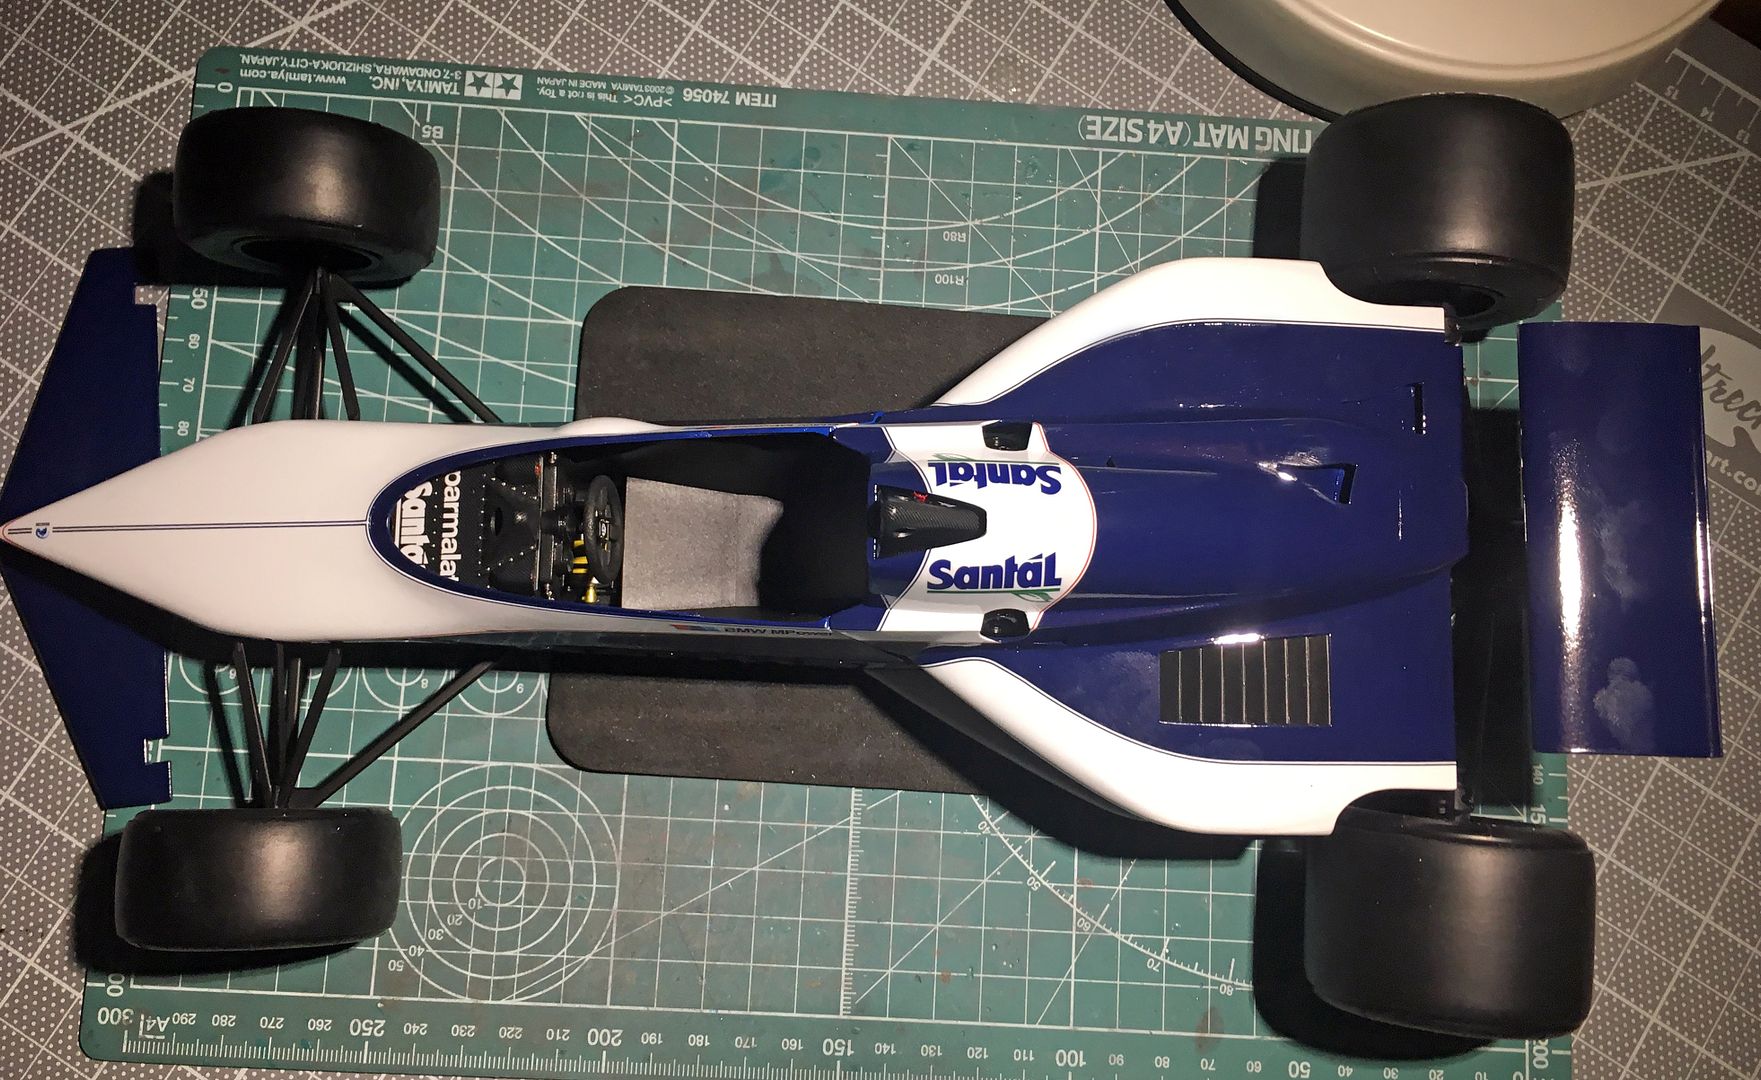
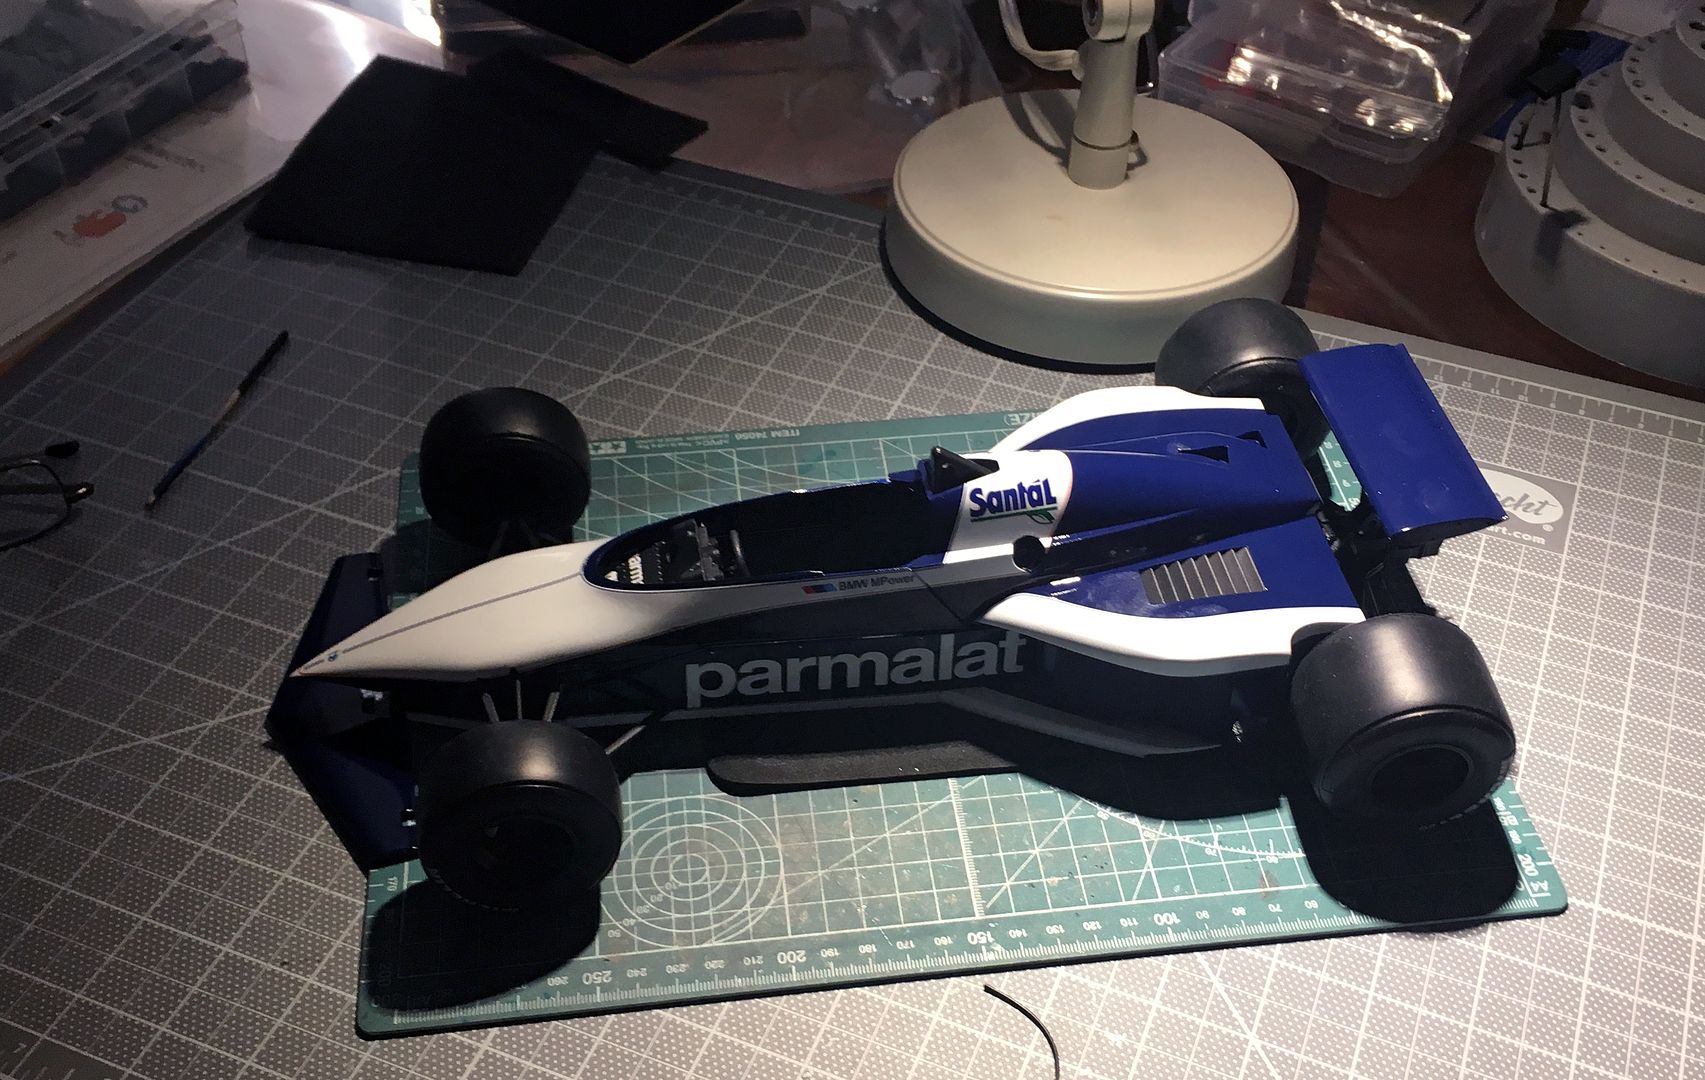
Got visitors for a while, so no more progress for a few days - took some nice pics before packing everything away (I want a shed!!) - this thing is going to photograph so well when she is finished 
...as always, nothing fixed - so ignore any panel gaps, it seems to push together perfectly. Also, ignore the dust and places I need to touch up. The wiring is really going to add a lot as well...
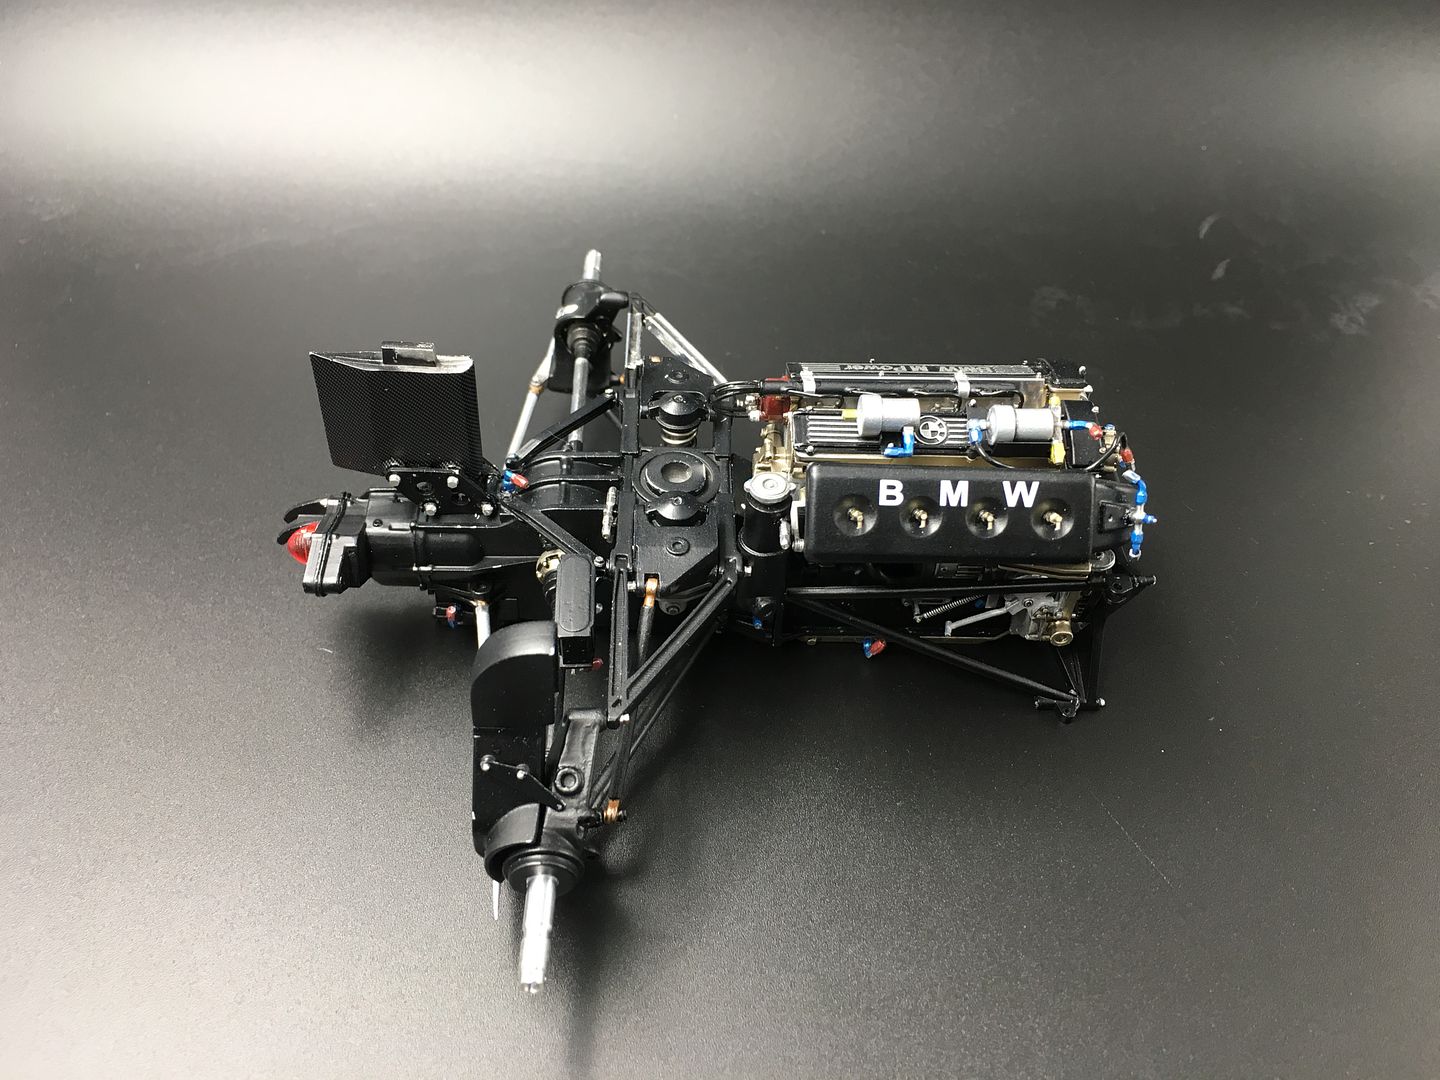
Started like this...

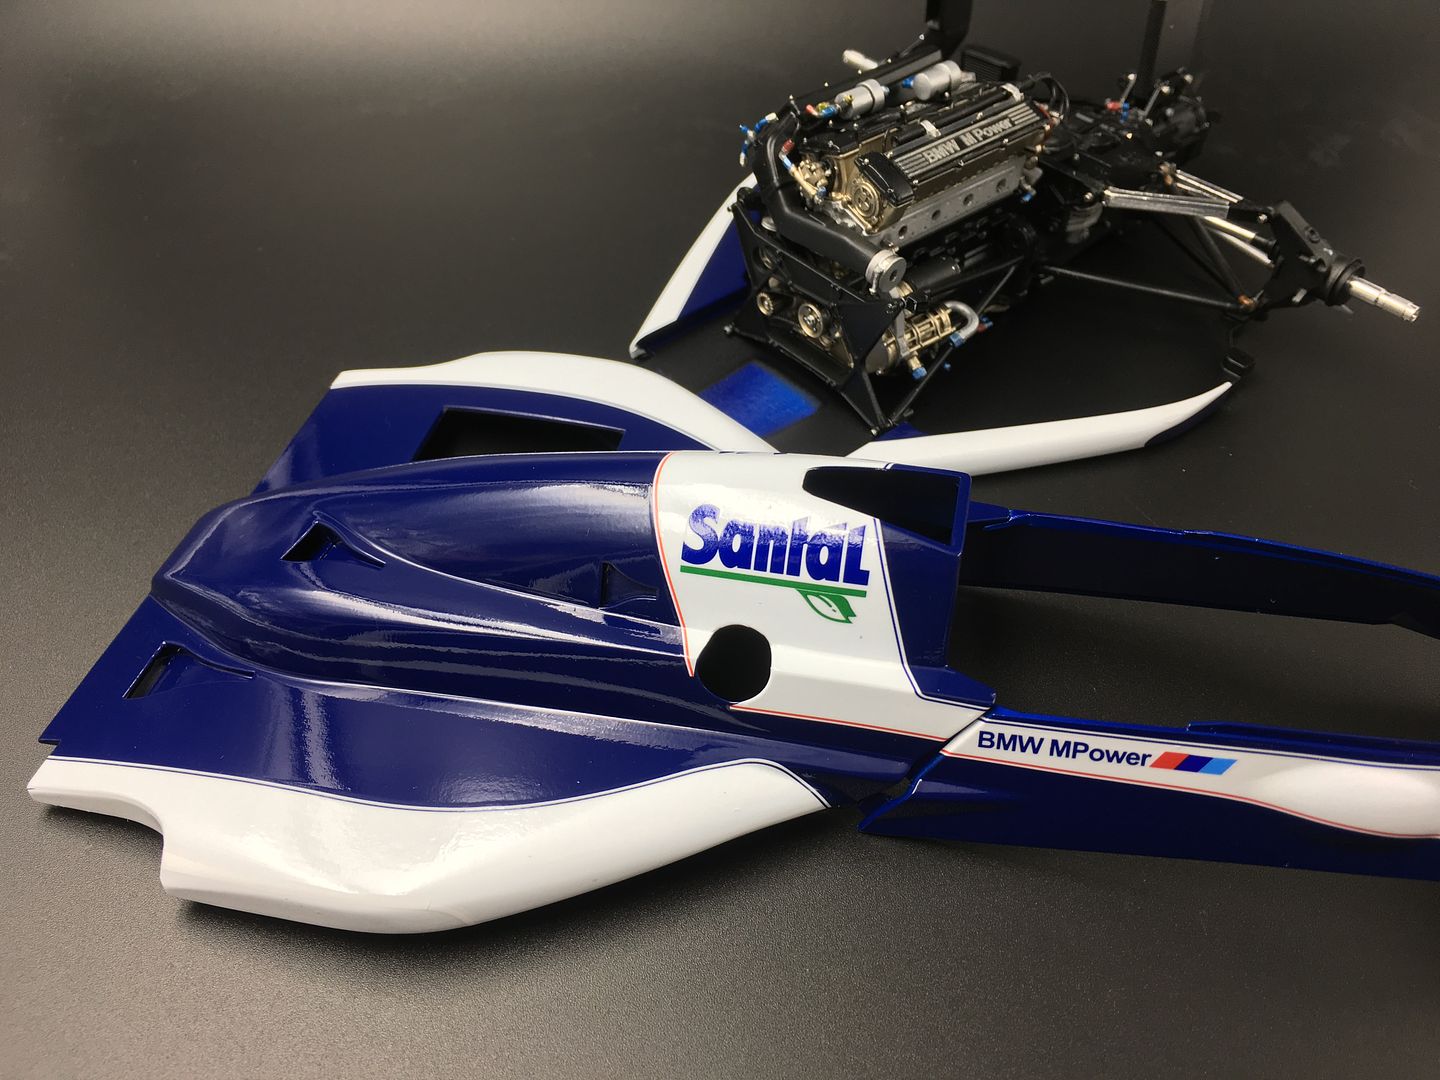

...as always, nothing fixed - so ignore any panel gaps, it seems to push together perfectly. Also, ignore the dust and places I need to touch up. The wiring is really going to add a lot as well...
Started like this...


A few updates...
Test wing fitting!
Started adding wires. I think this will be easier when the engine is joined to the bulkhead (before fitting the floor) as the cables/wires/pipes will have somewhere to go...
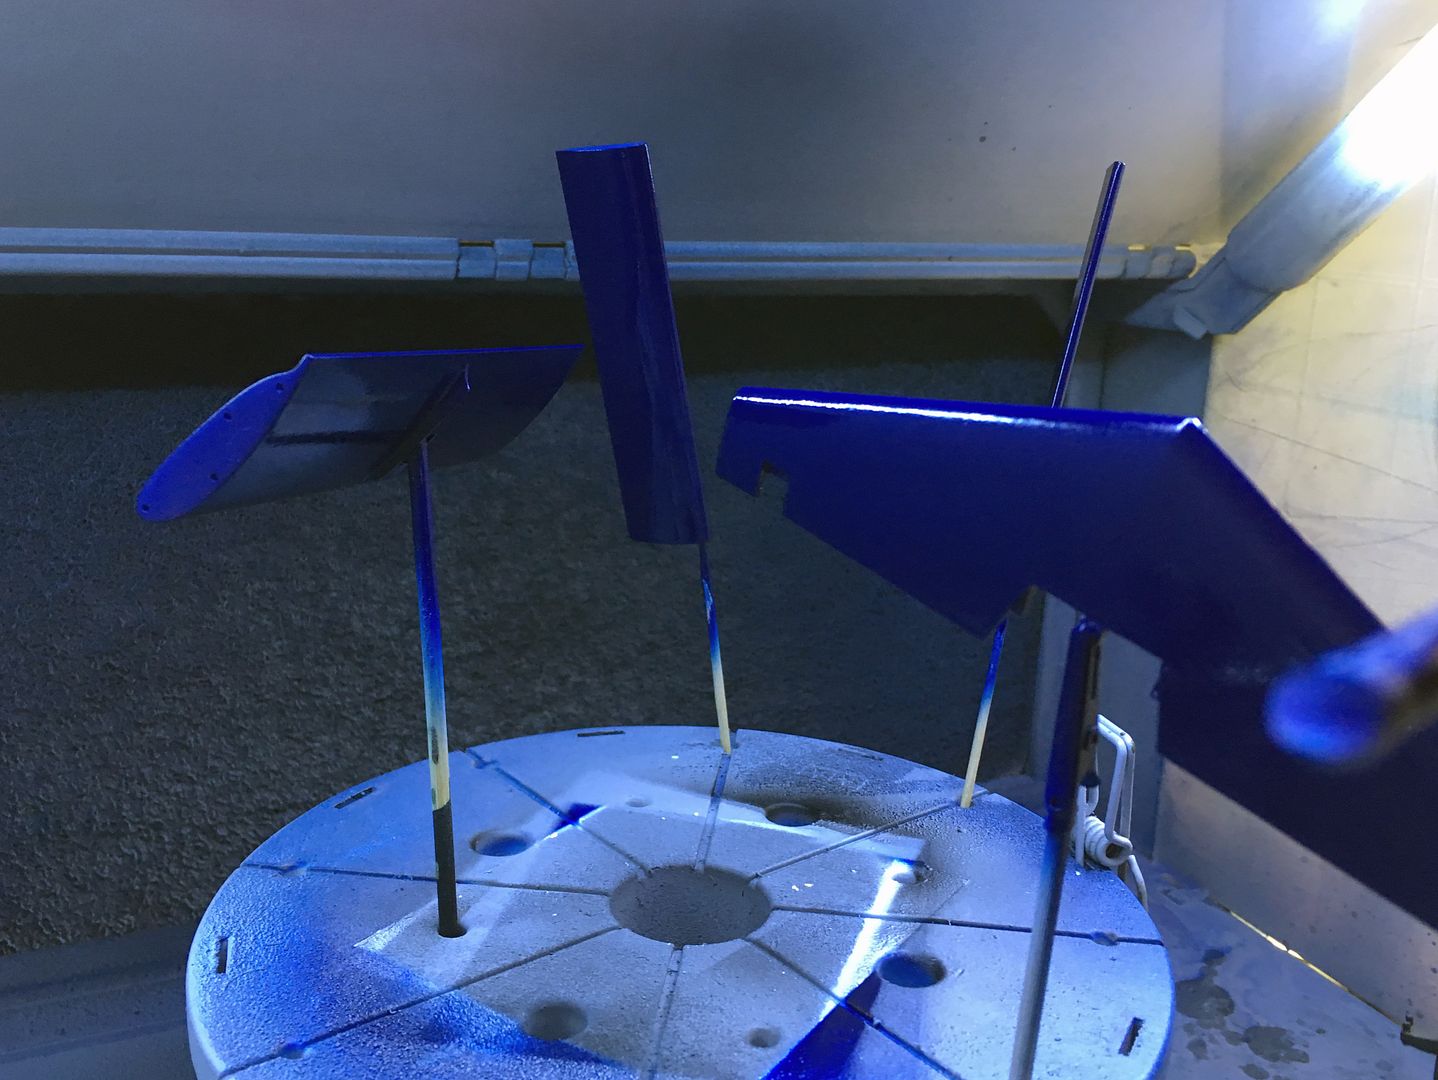
Primed and colored the wing elements. These are resin, and required just about no work before spraying...
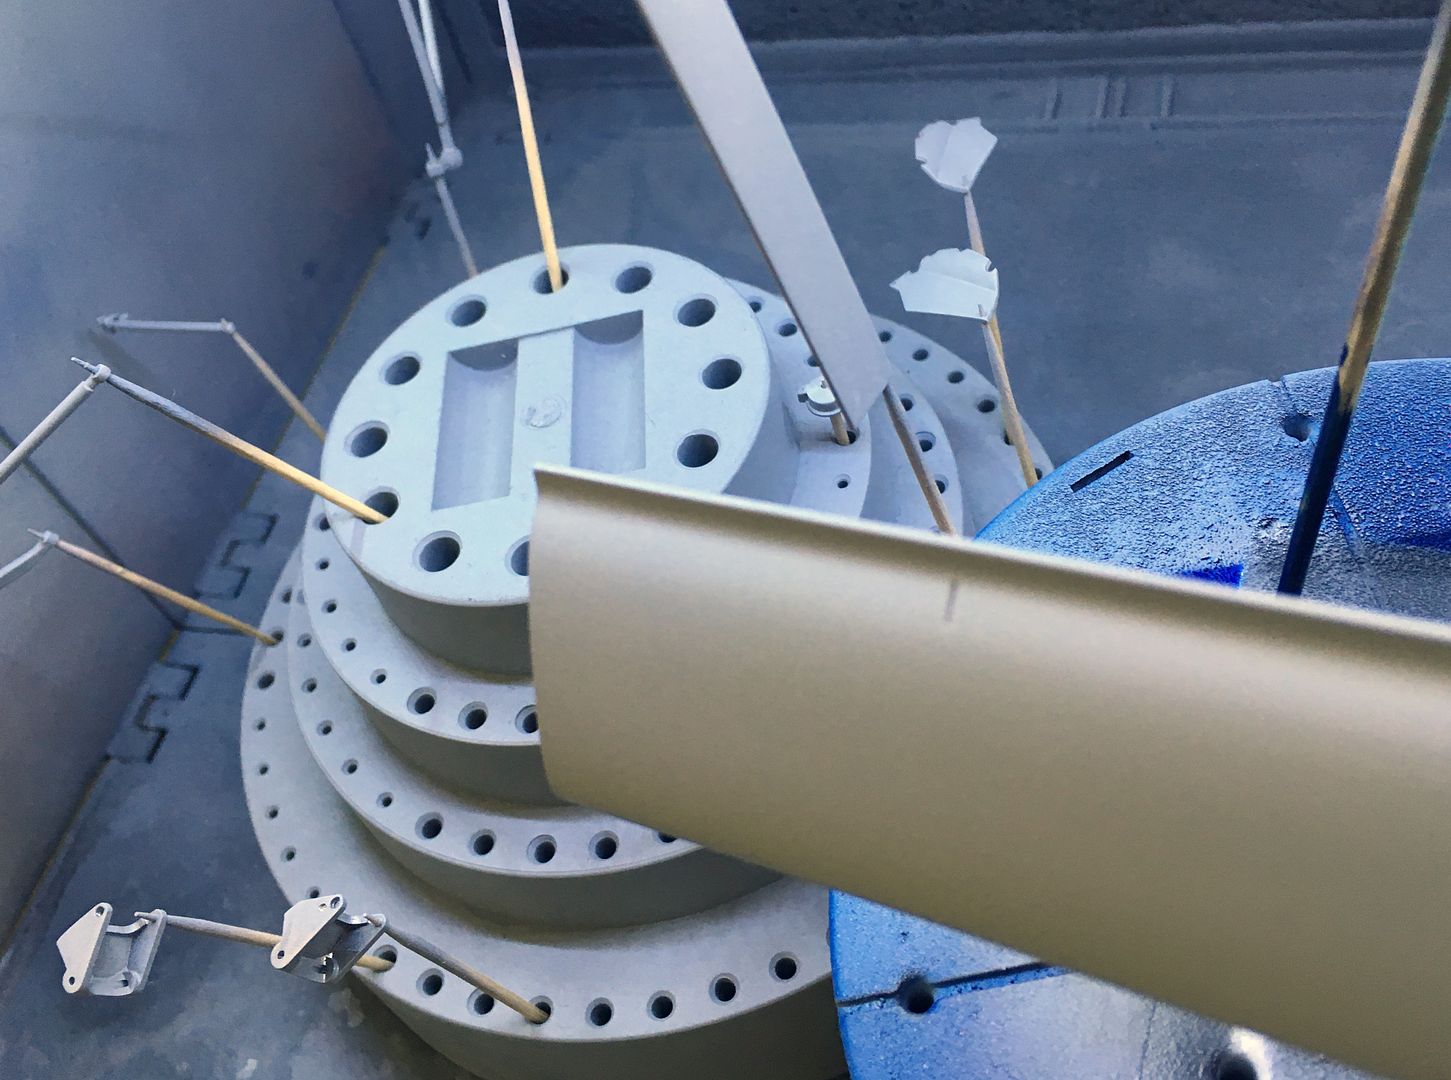
Very light first coat of blue - just a dust really...
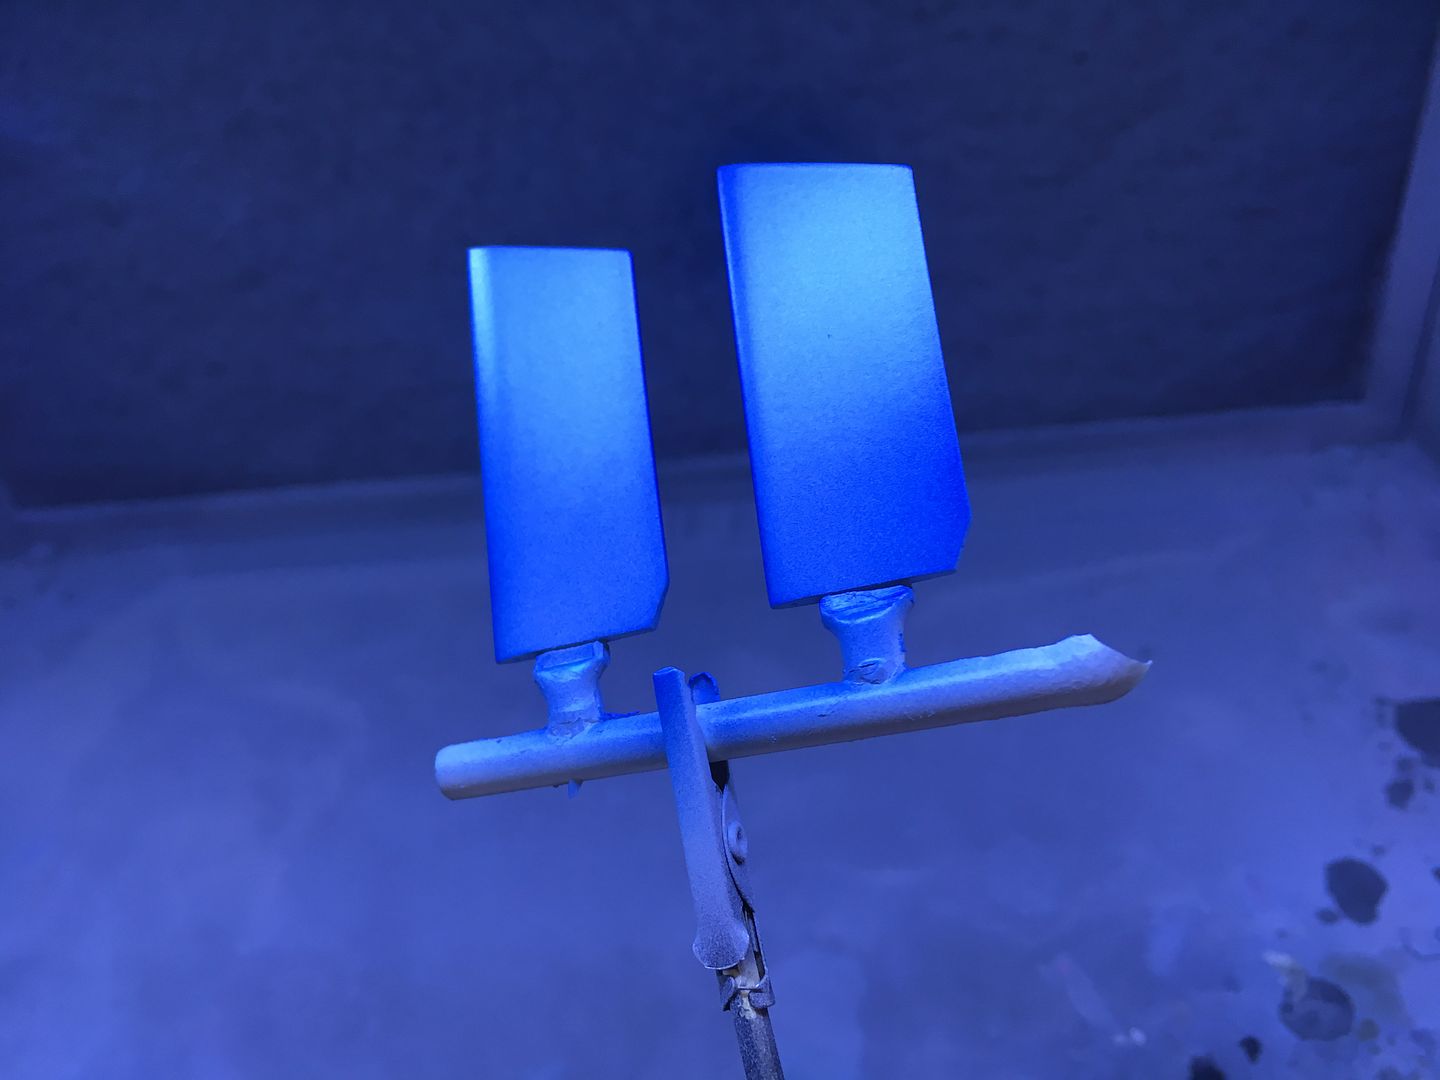
Then quite a few more to get to the dark blue...
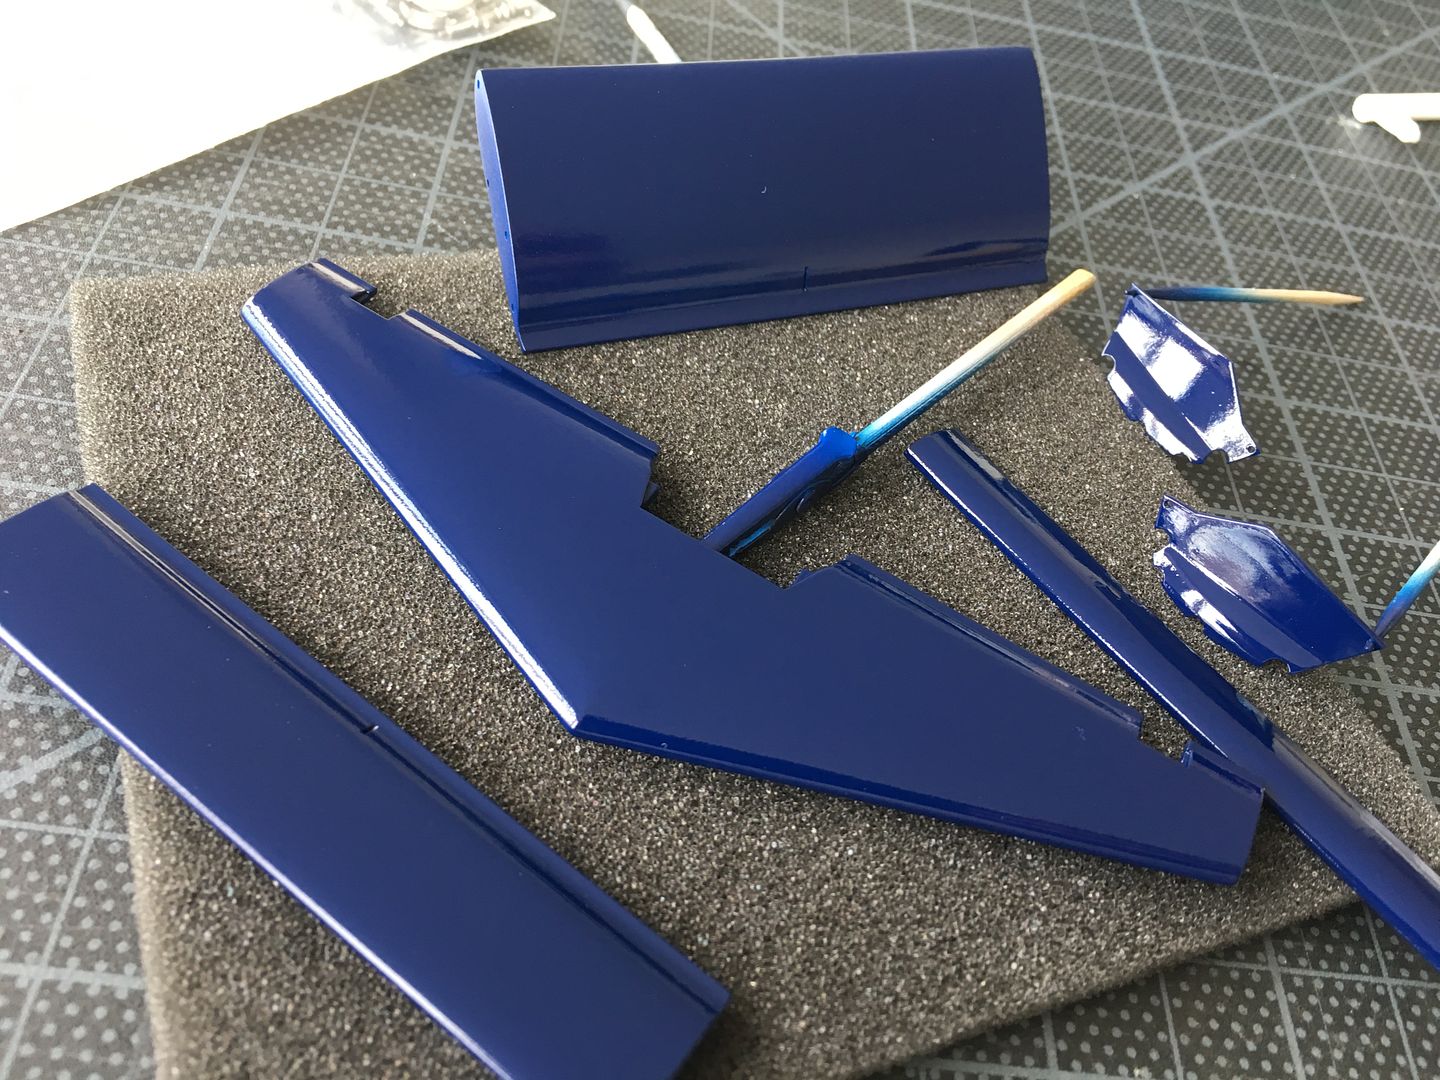
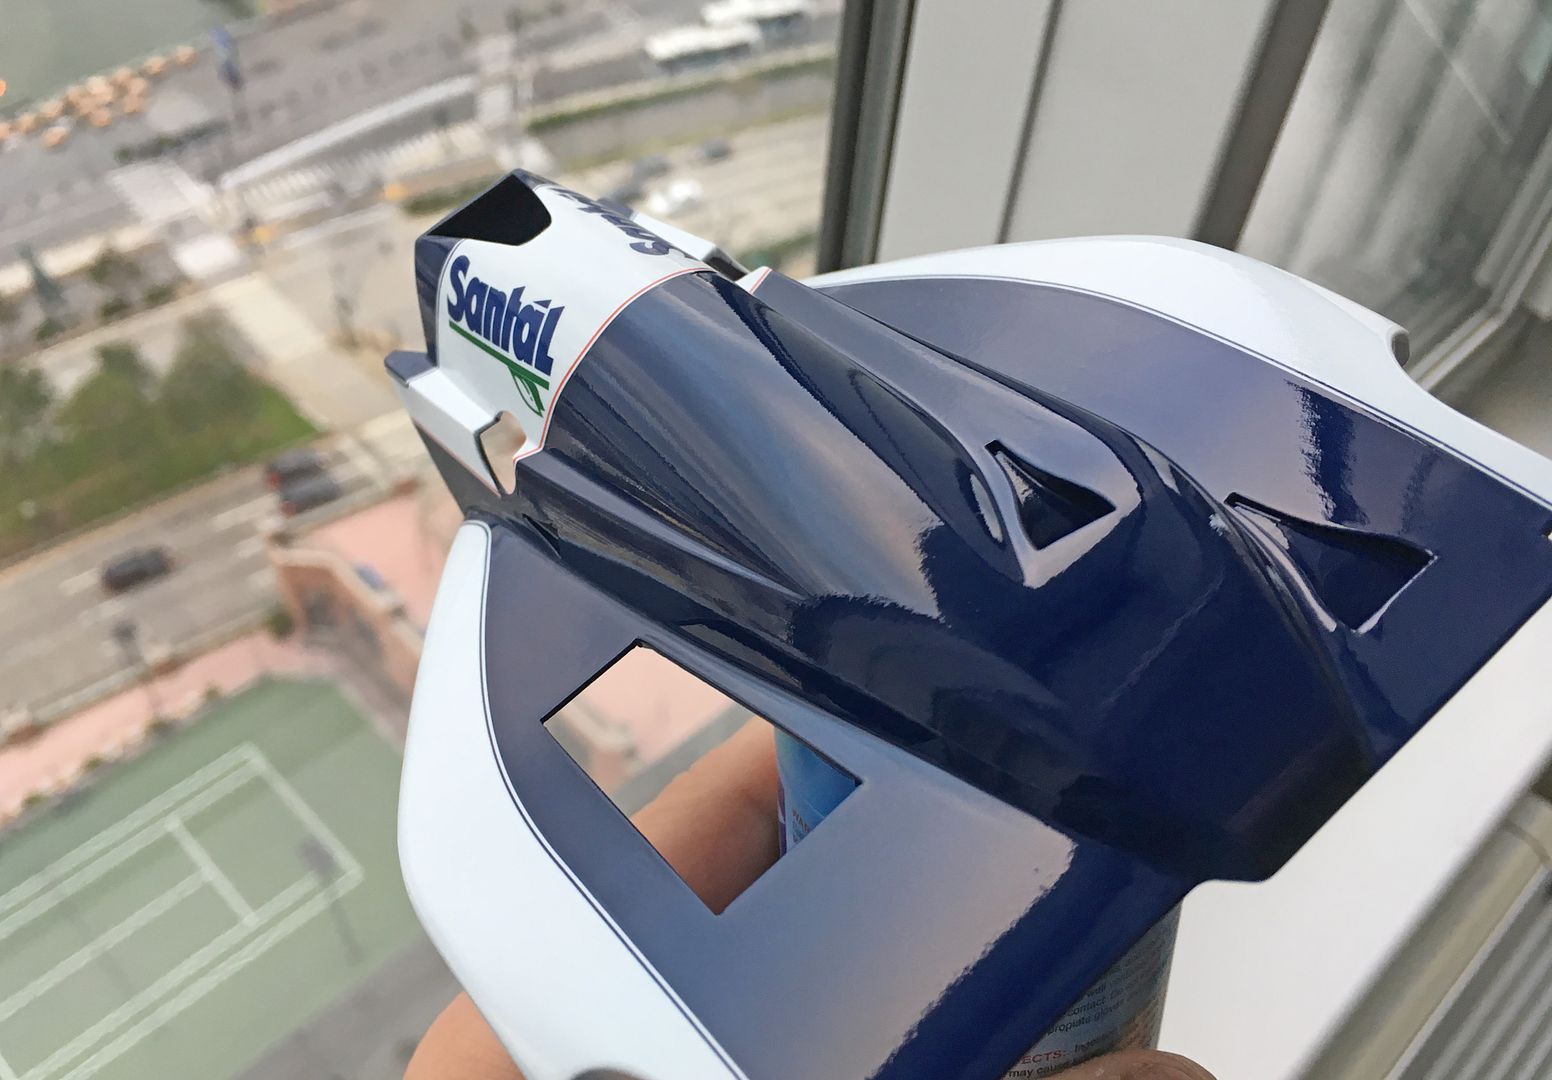
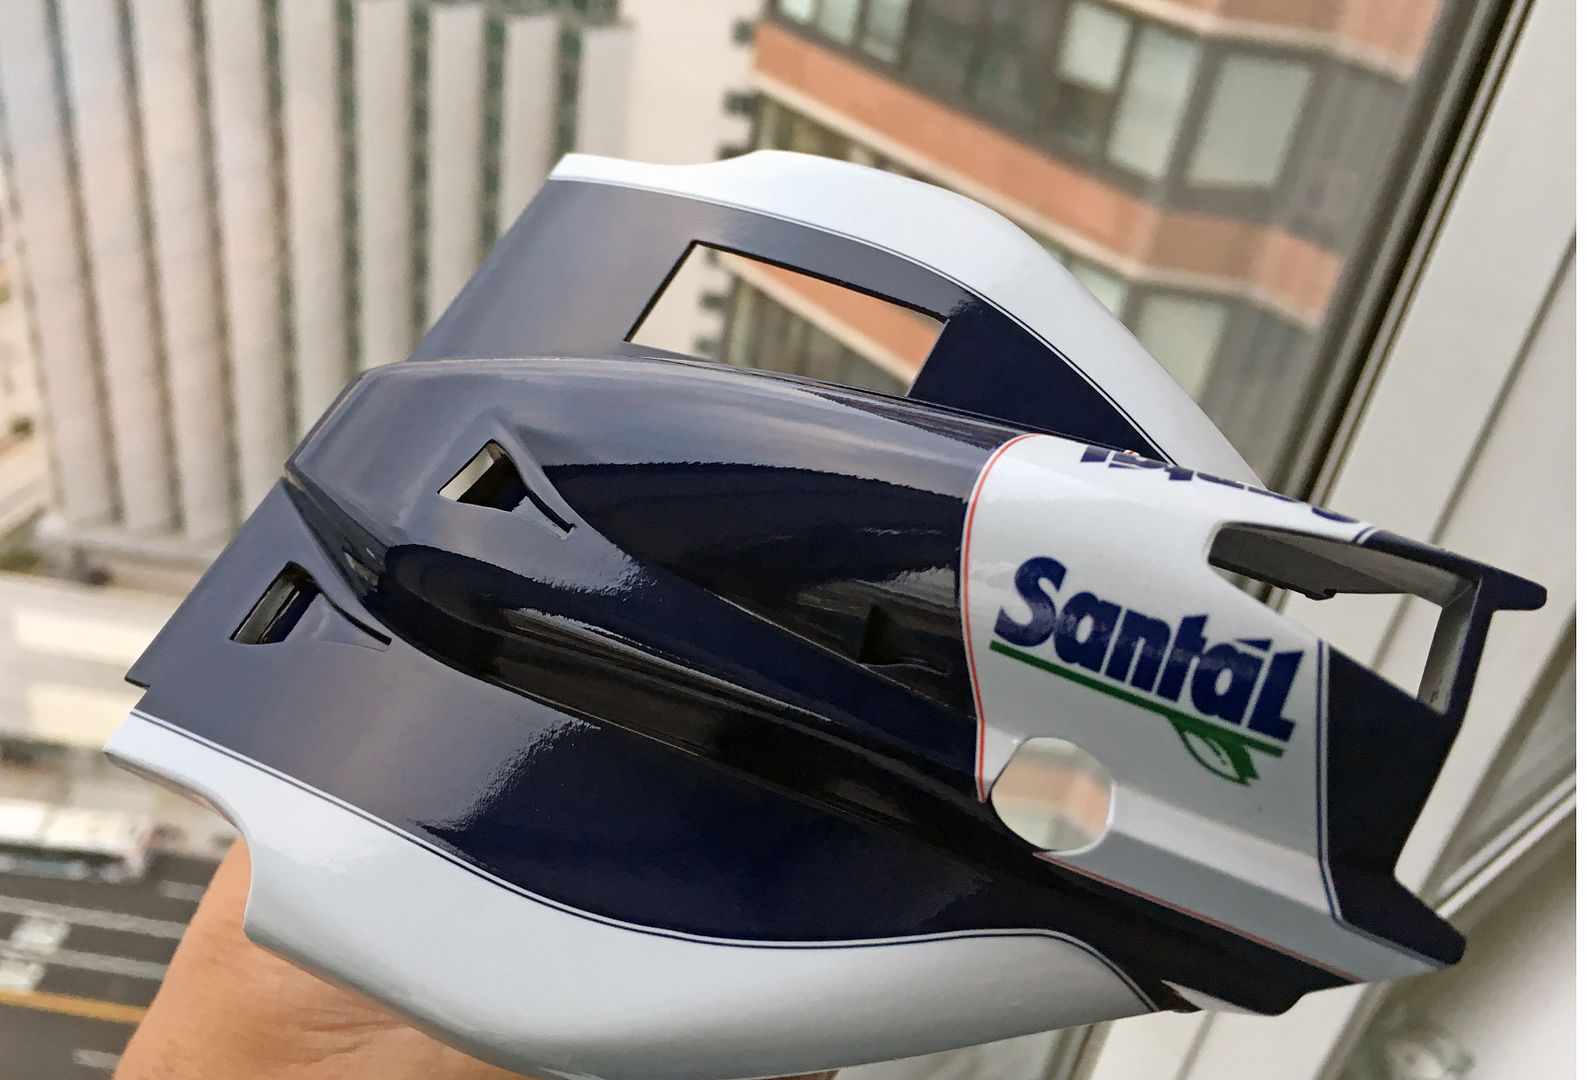
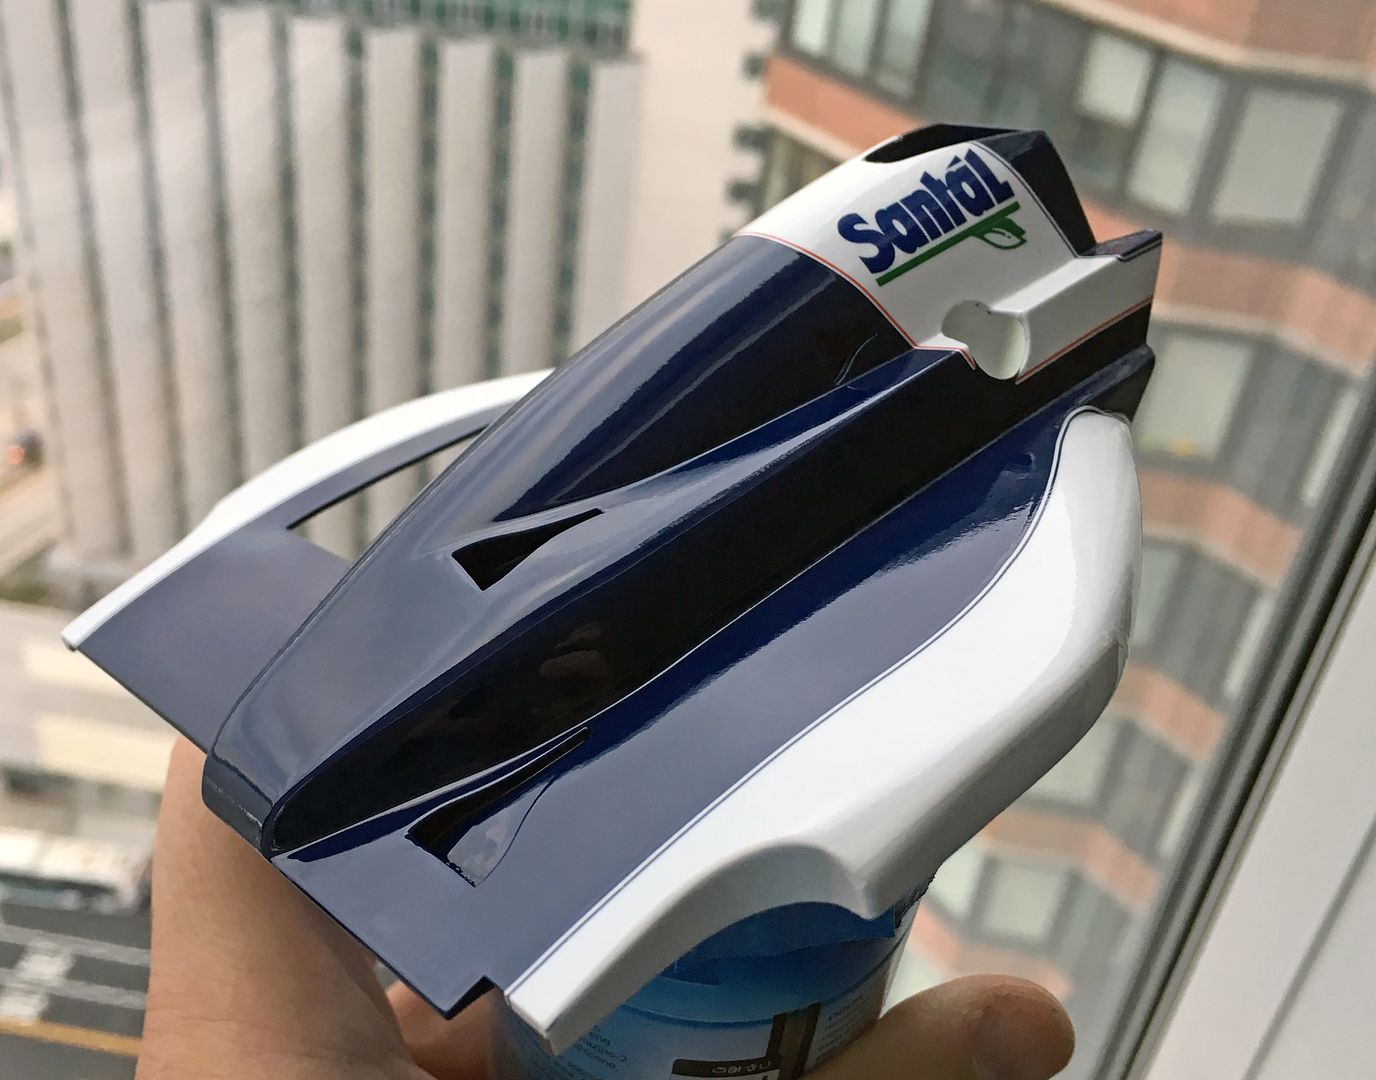
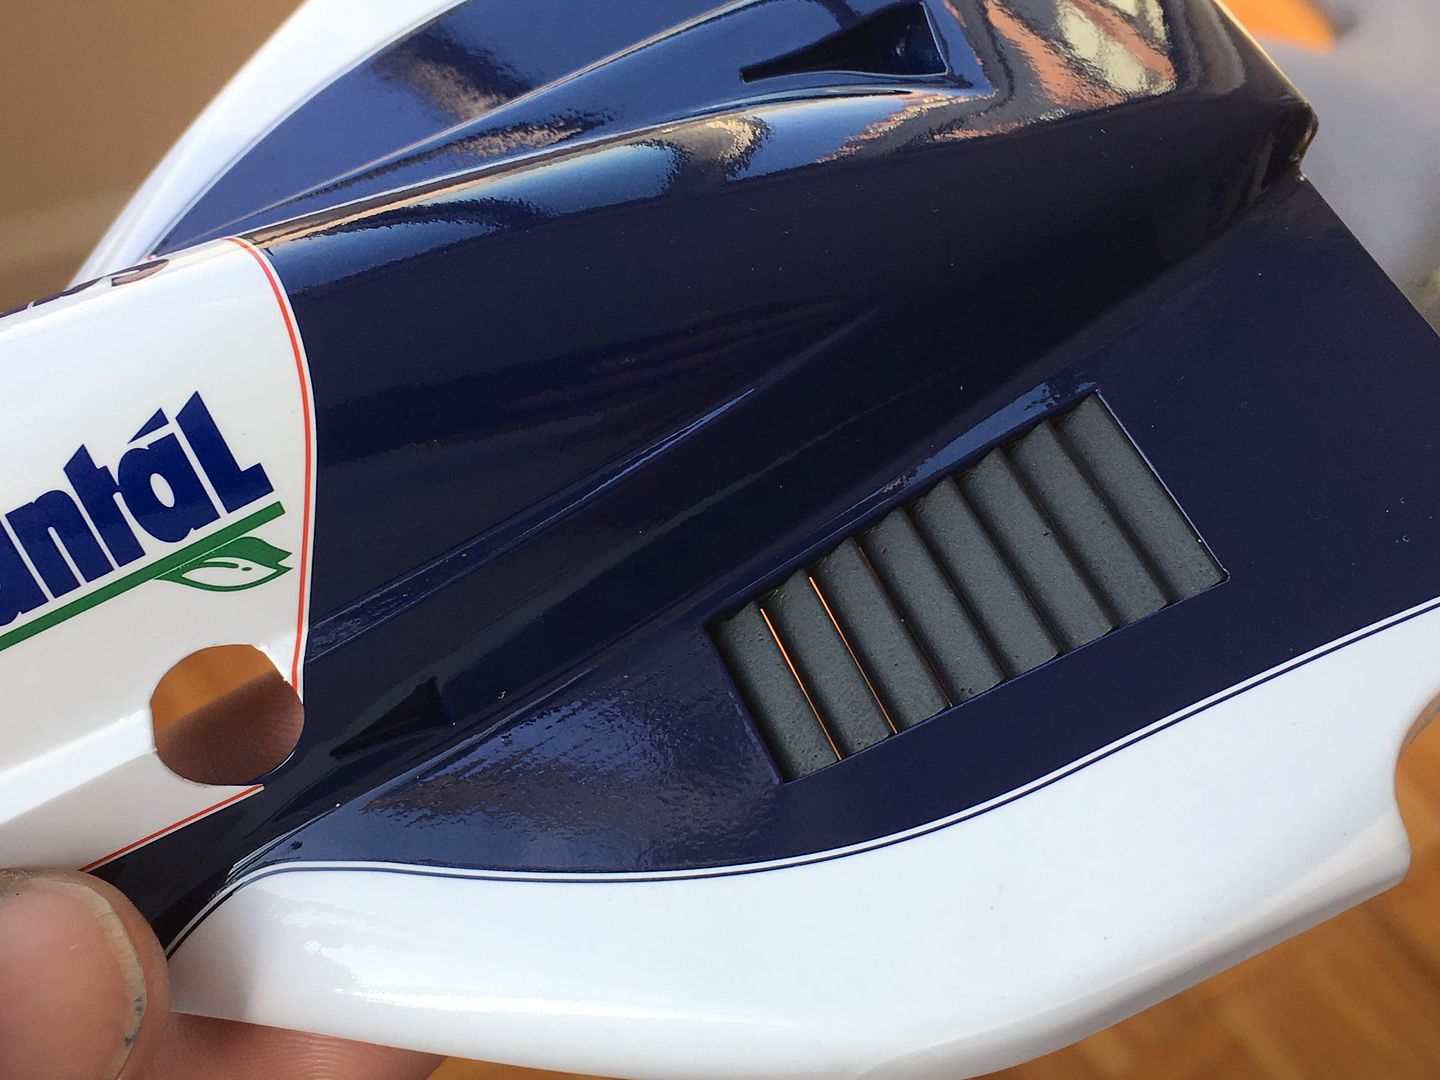
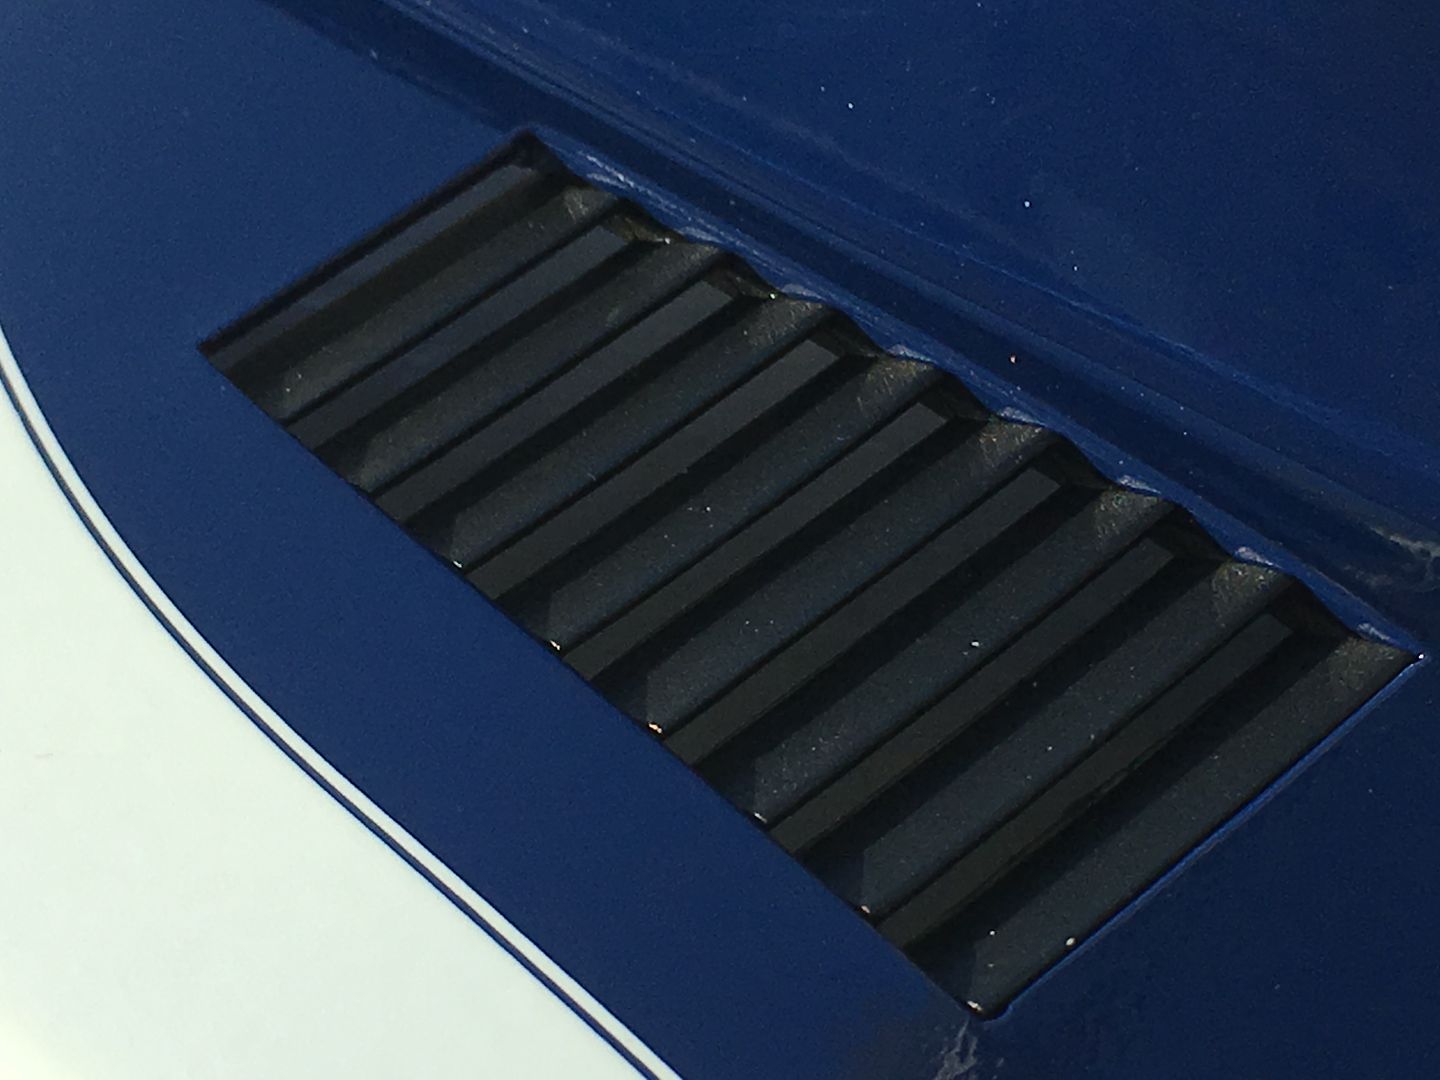
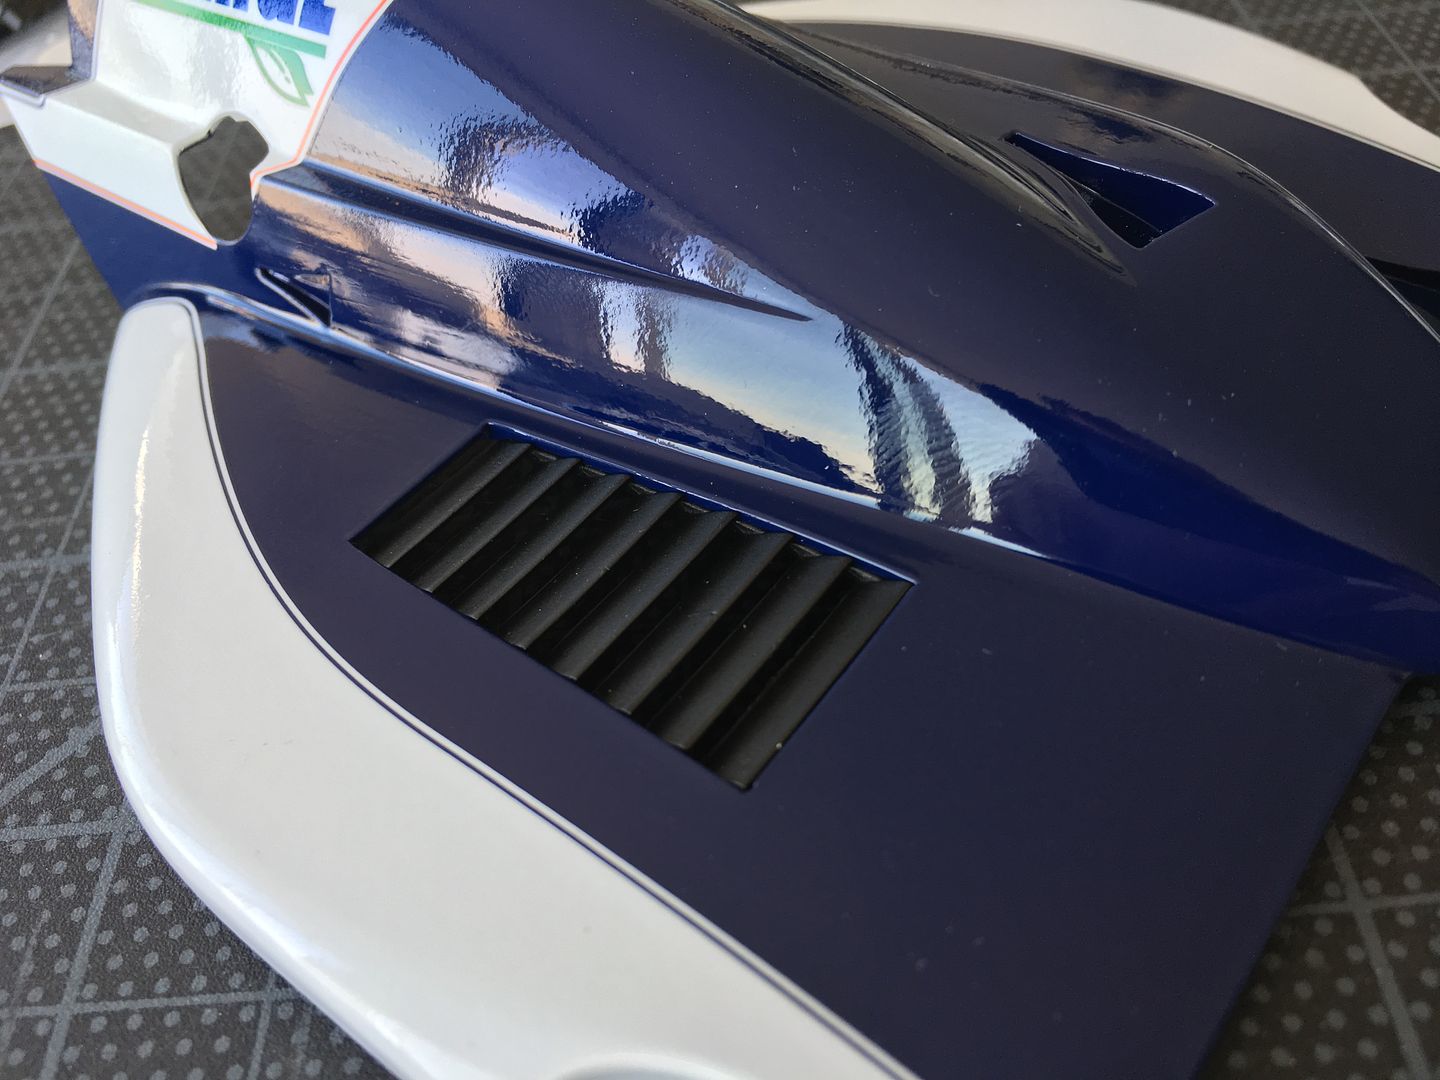
Added some vents to the main upper bodywork...
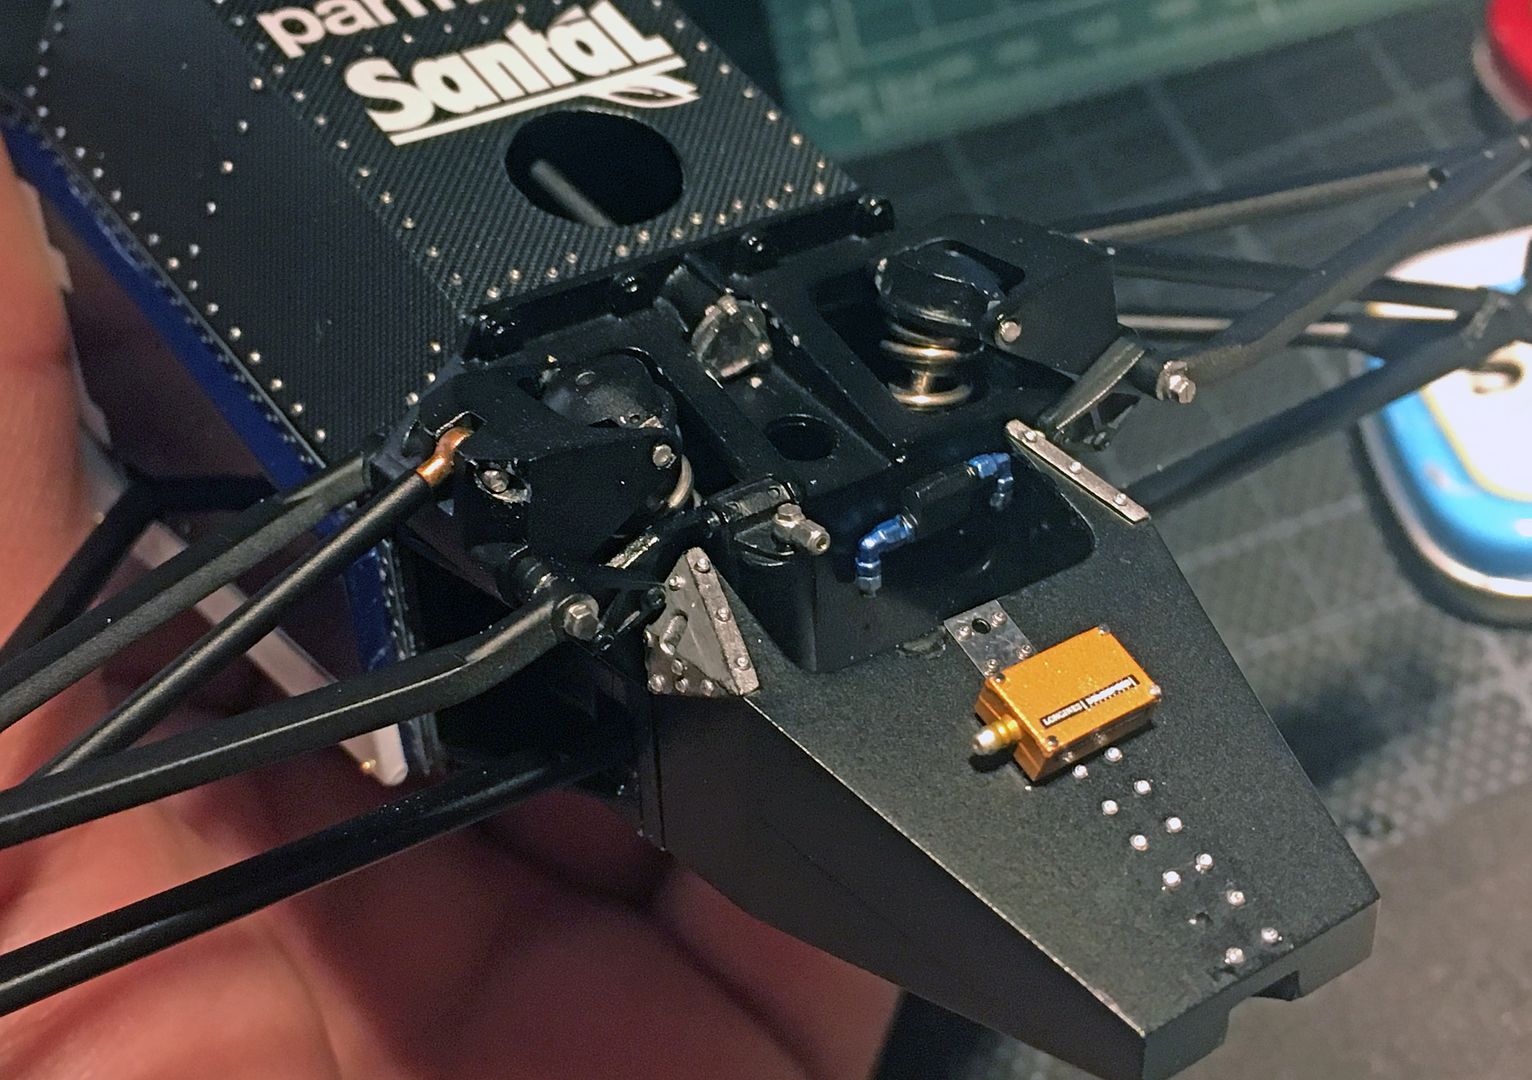
Some other details...
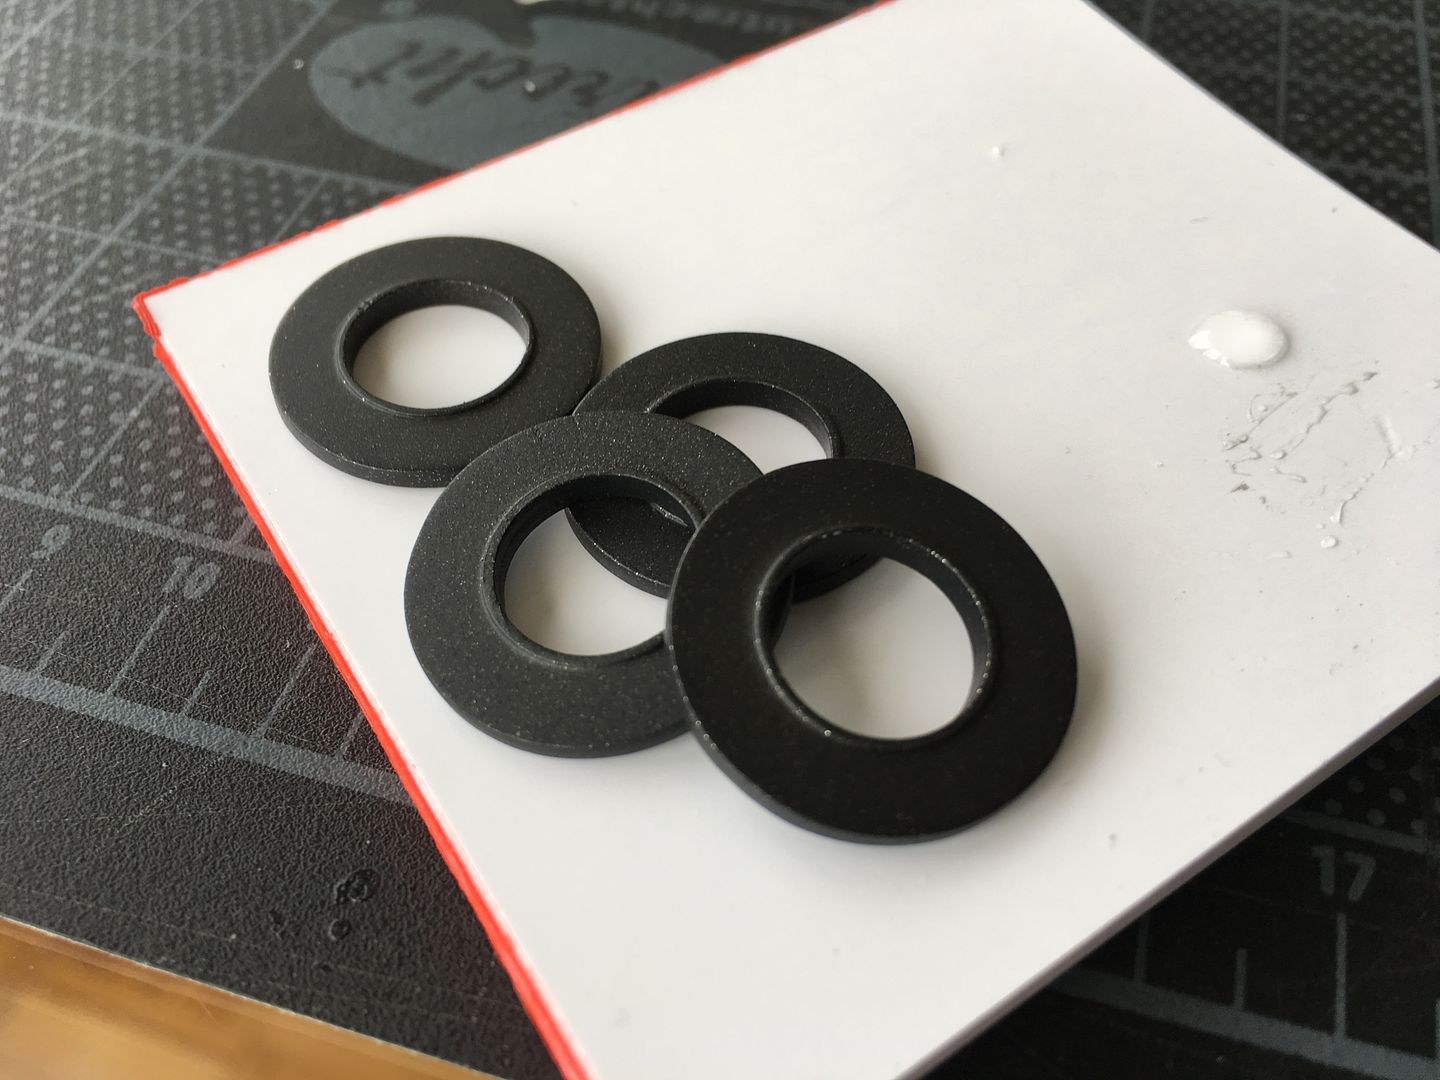
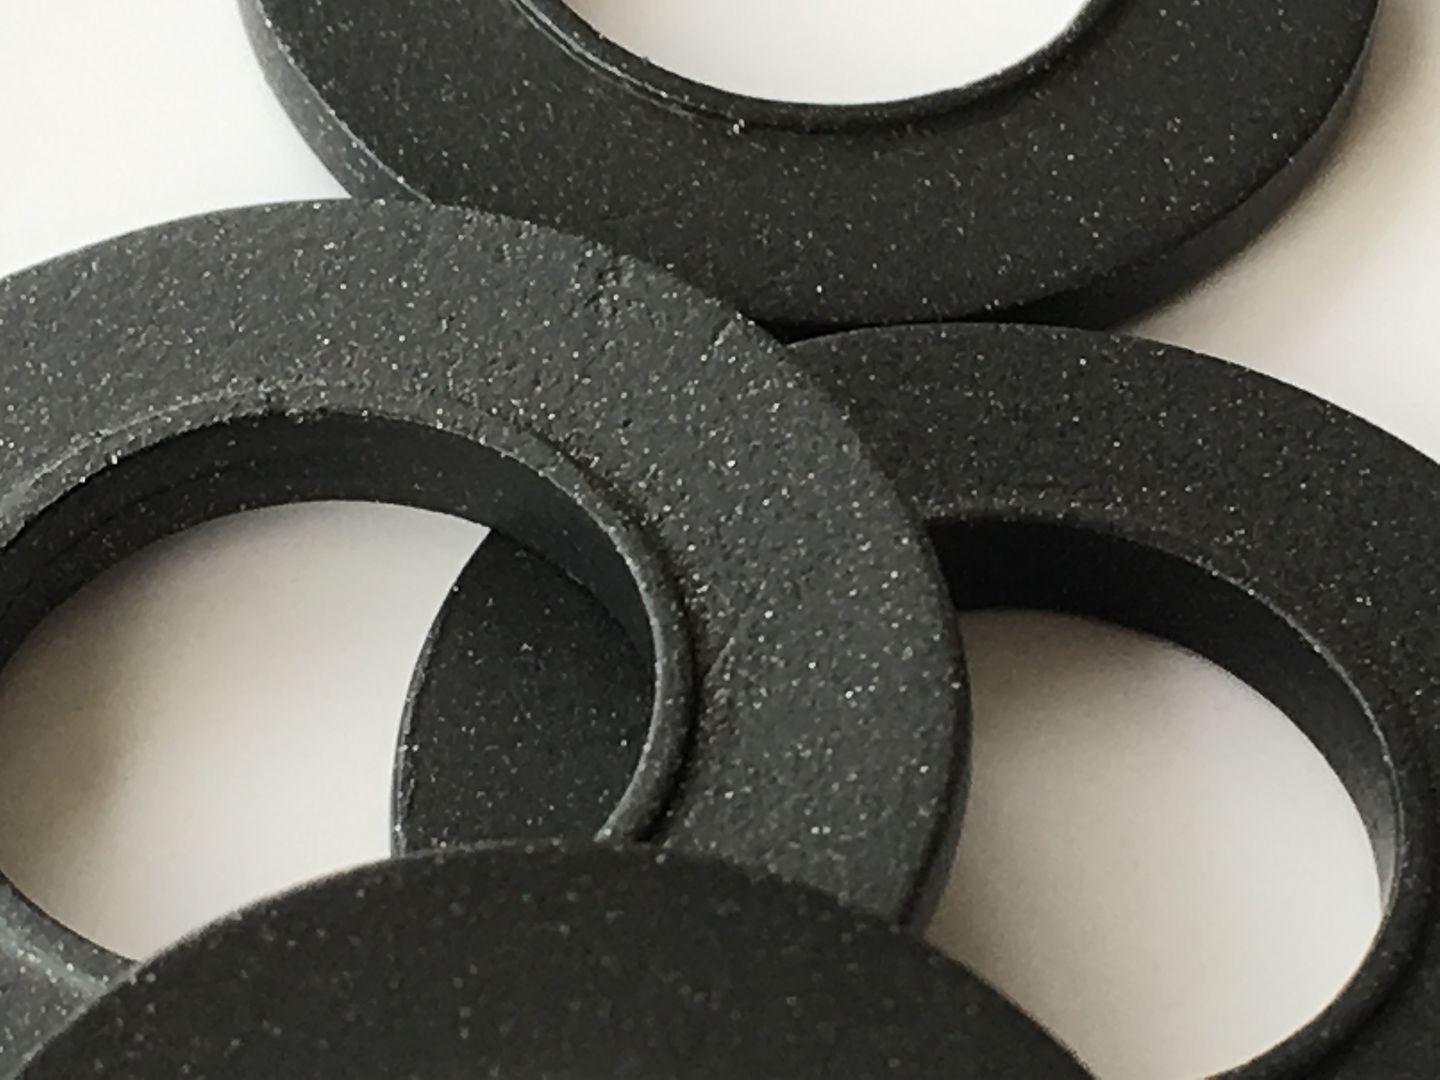
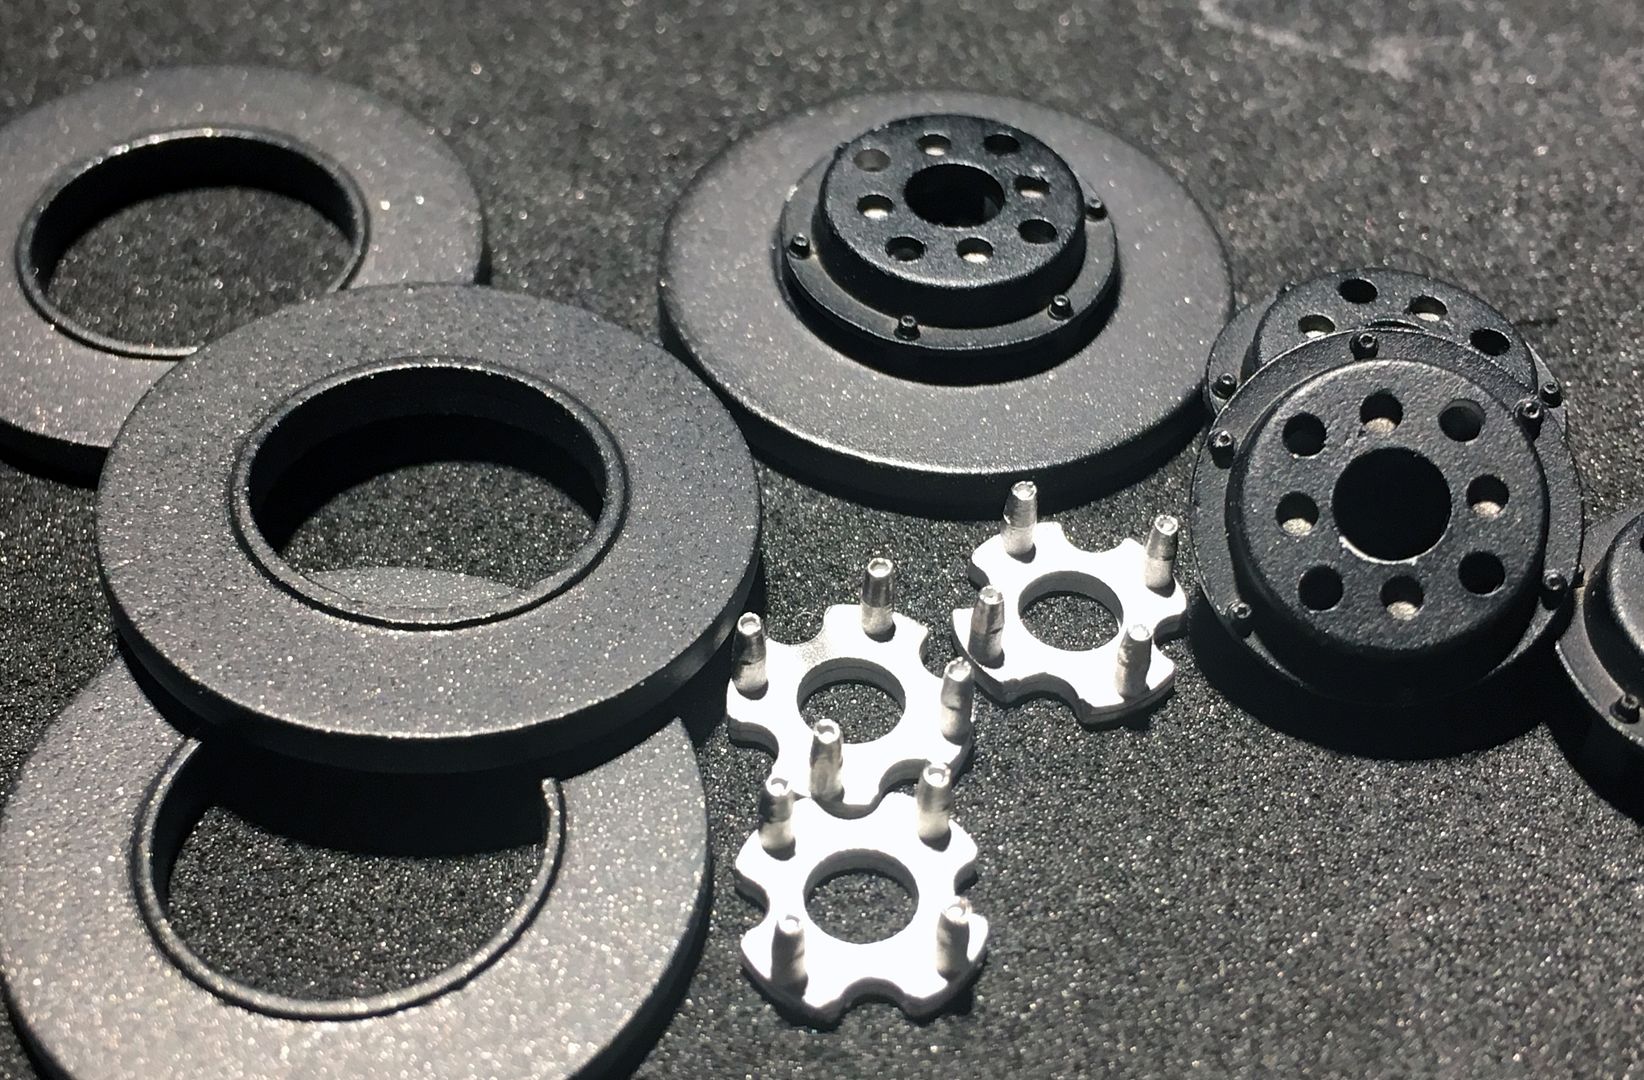
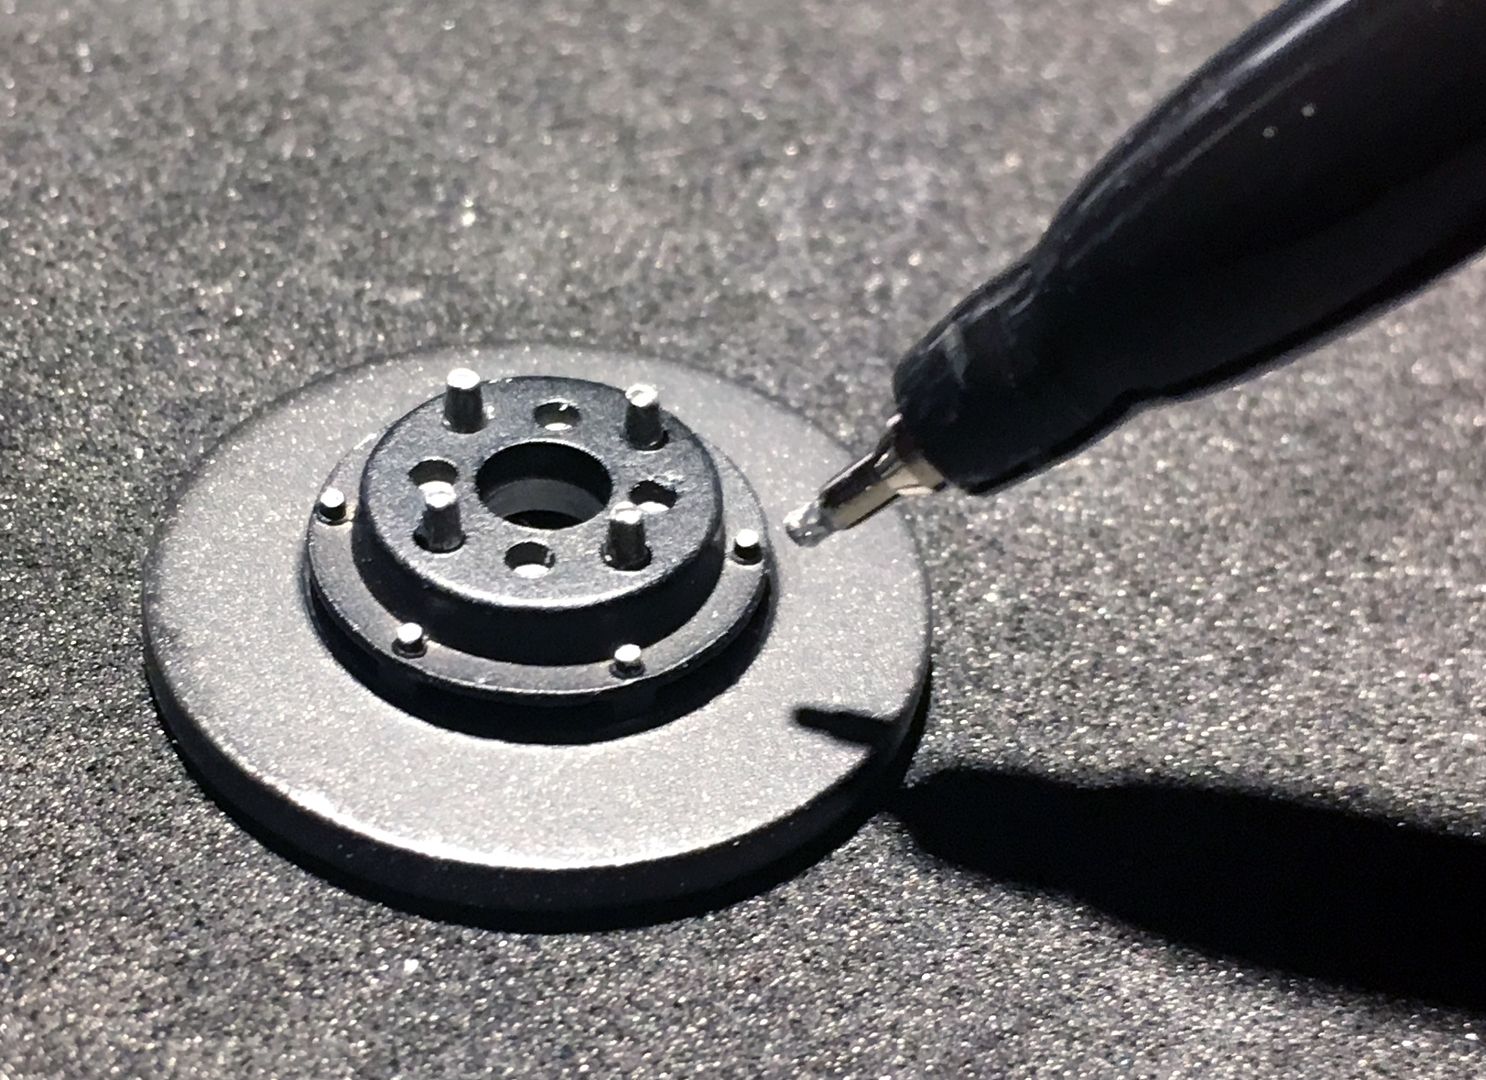
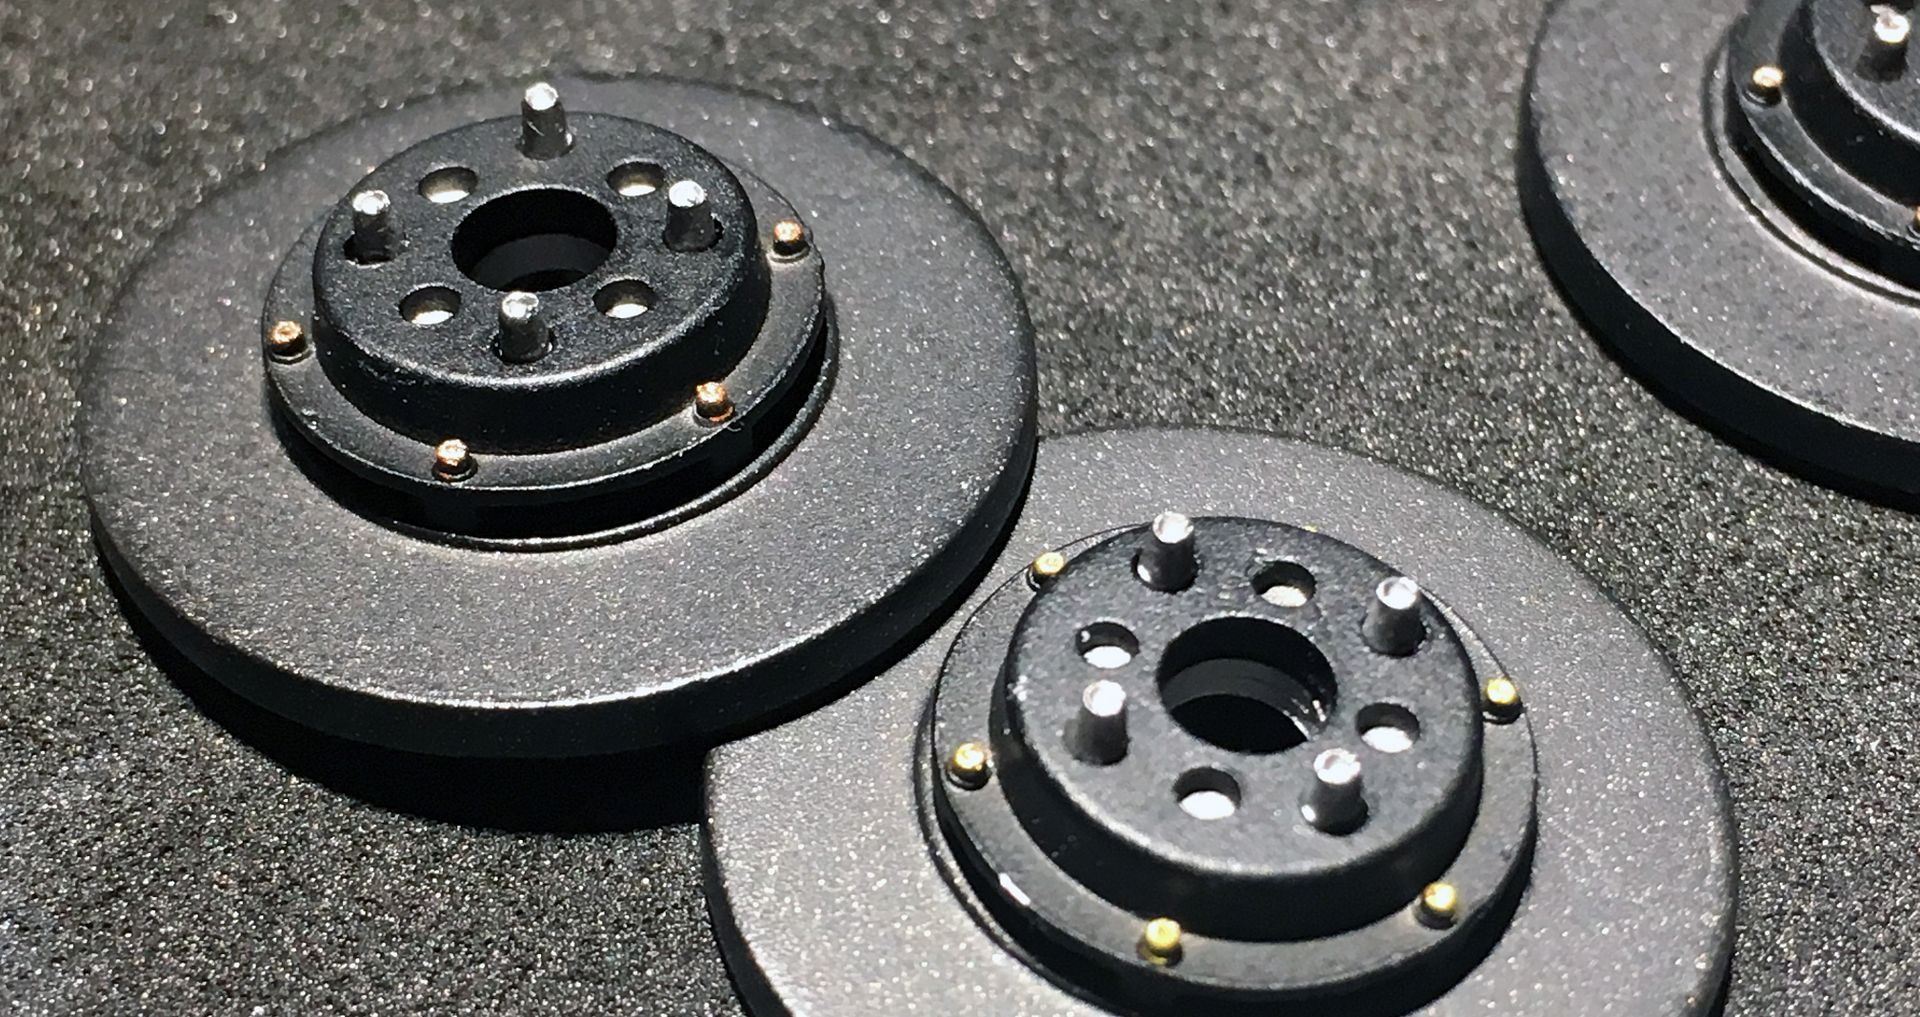
Some - this is cool. Carbon disc spray from Zero. (Not actual name, I'll check and add pic) - sprayed onto the white metal discs for the BT52, and it really does look like carbon - no post work at all, exactly as sprayed.
More later...
Test wing fitting!
Started adding wires. I think this will be easier when the engine is joined to the bulkhead (before fitting the floor) as the cables/wires/pipes will have somewhere to go...
Primed and colored the wing elements. These are resin, and required just about no work before spraying...
Very light first coat of blue - just a dust really...
Then quite a few more to get to the dark blue...
Added some vents to the main upper bodywork...
Some other details...
Some - this is cool. Carbon disc spray from Zero. (Not actual name, I'll check and add pic) - sprayed onto the white metal discs for the BT52, and it really does look like carbon - no post work at all, exactly as sprayed.
More later...


Nice- I have a MFH 1/43rd to do (I had the paint....) - will need stronger magnifying glasses!
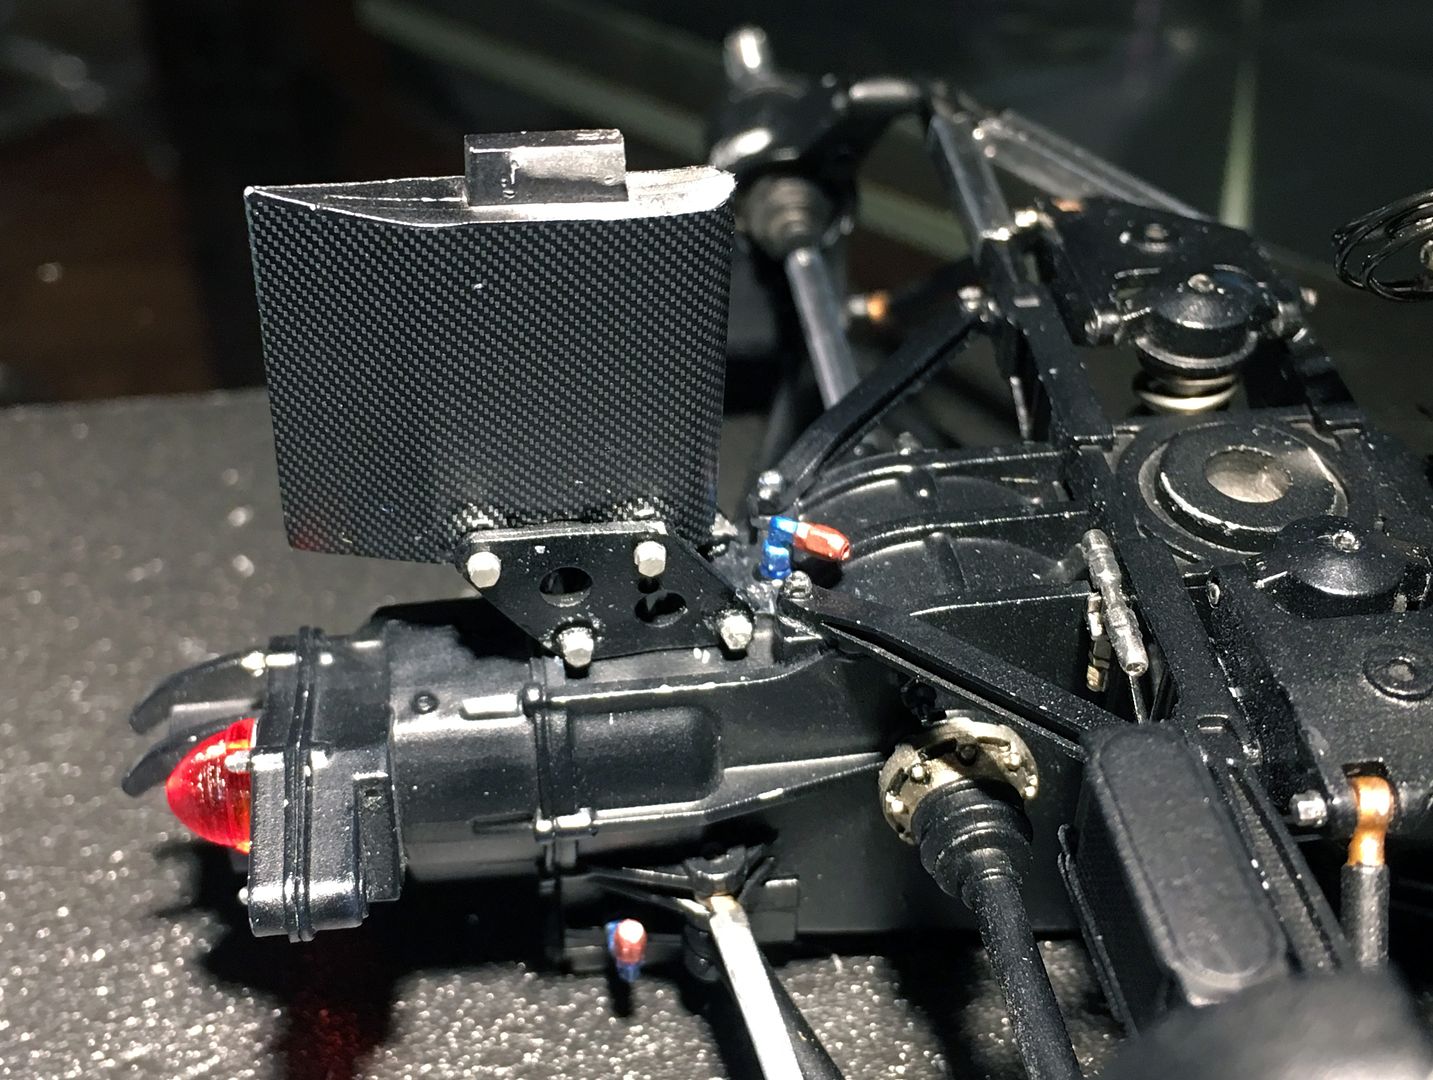
Some heat shielding. I think I'll dull this down a bit - it is very bright and 'fresh'.

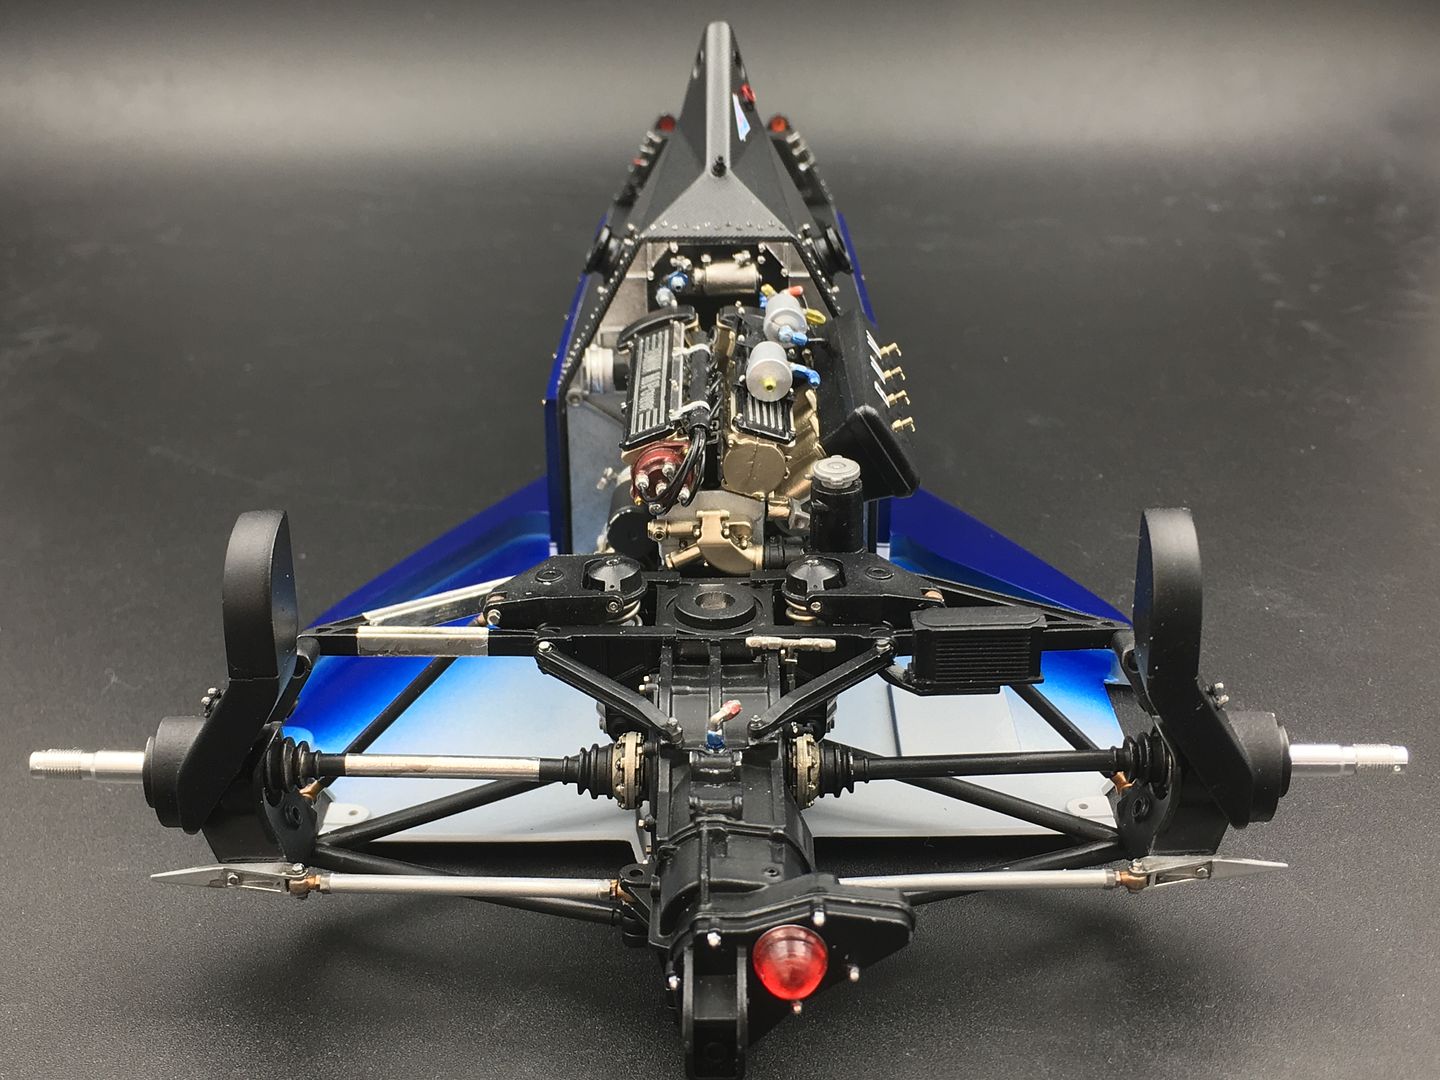
Nothing fixed together in these few shots - just placed!


HAD to play with those slicks - again, just placed, so ignore any weird gaps etc...

Some heat shielding. I think I'll dull this down a bit - it is very bright and 'fresh'.
Nothing fixed together in these few shots - just placed!
HAD to play with those slicks - again, just placed, so ignore any weird gaps etc...
Gassing Station | Scale Models | Top of Page | What's New | My Stuff