MFH 1/12 BT52b
Discussion


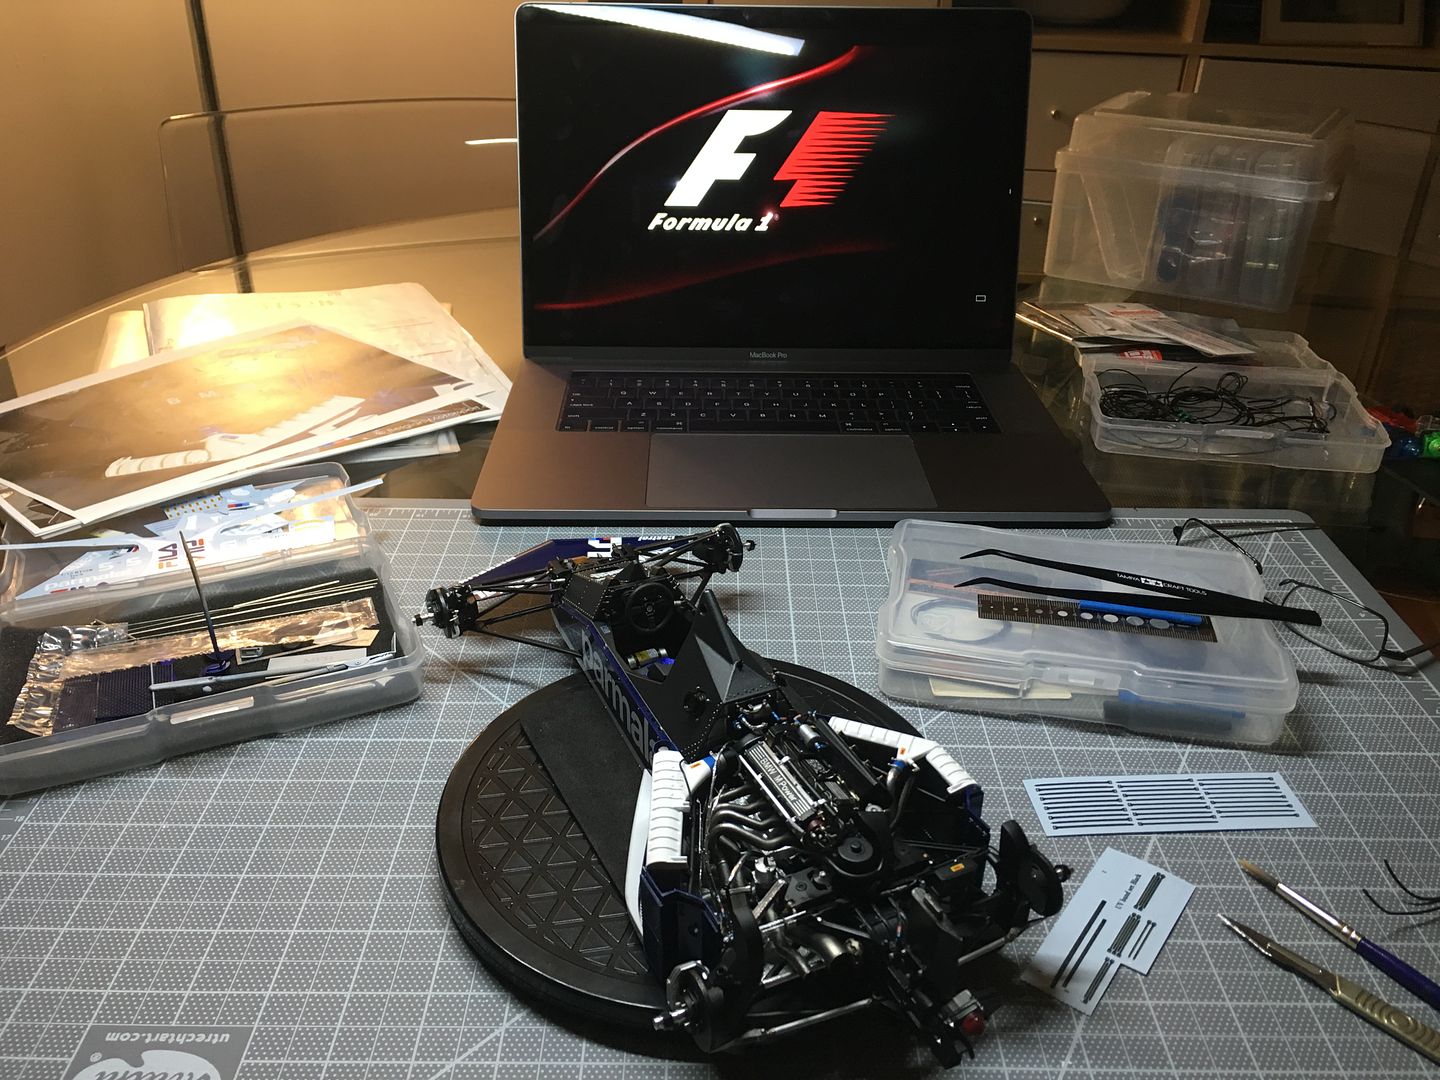
At last! Photobucket has been having a bit of a fit - seems to be ok now, so prepare for loads of new pics!!
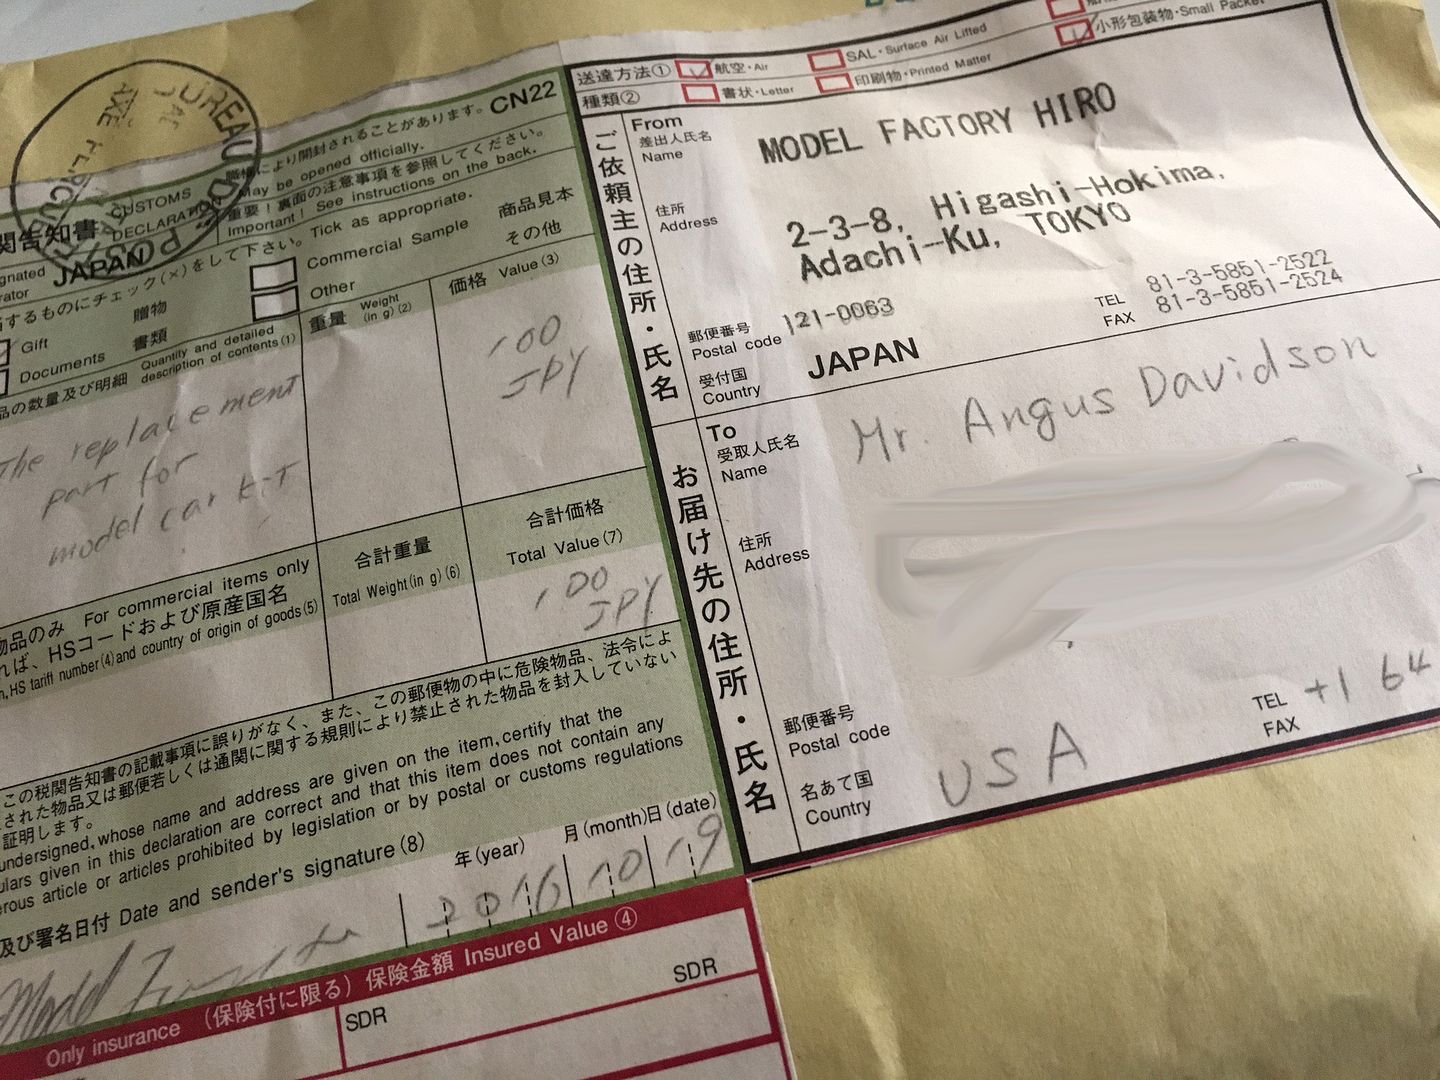
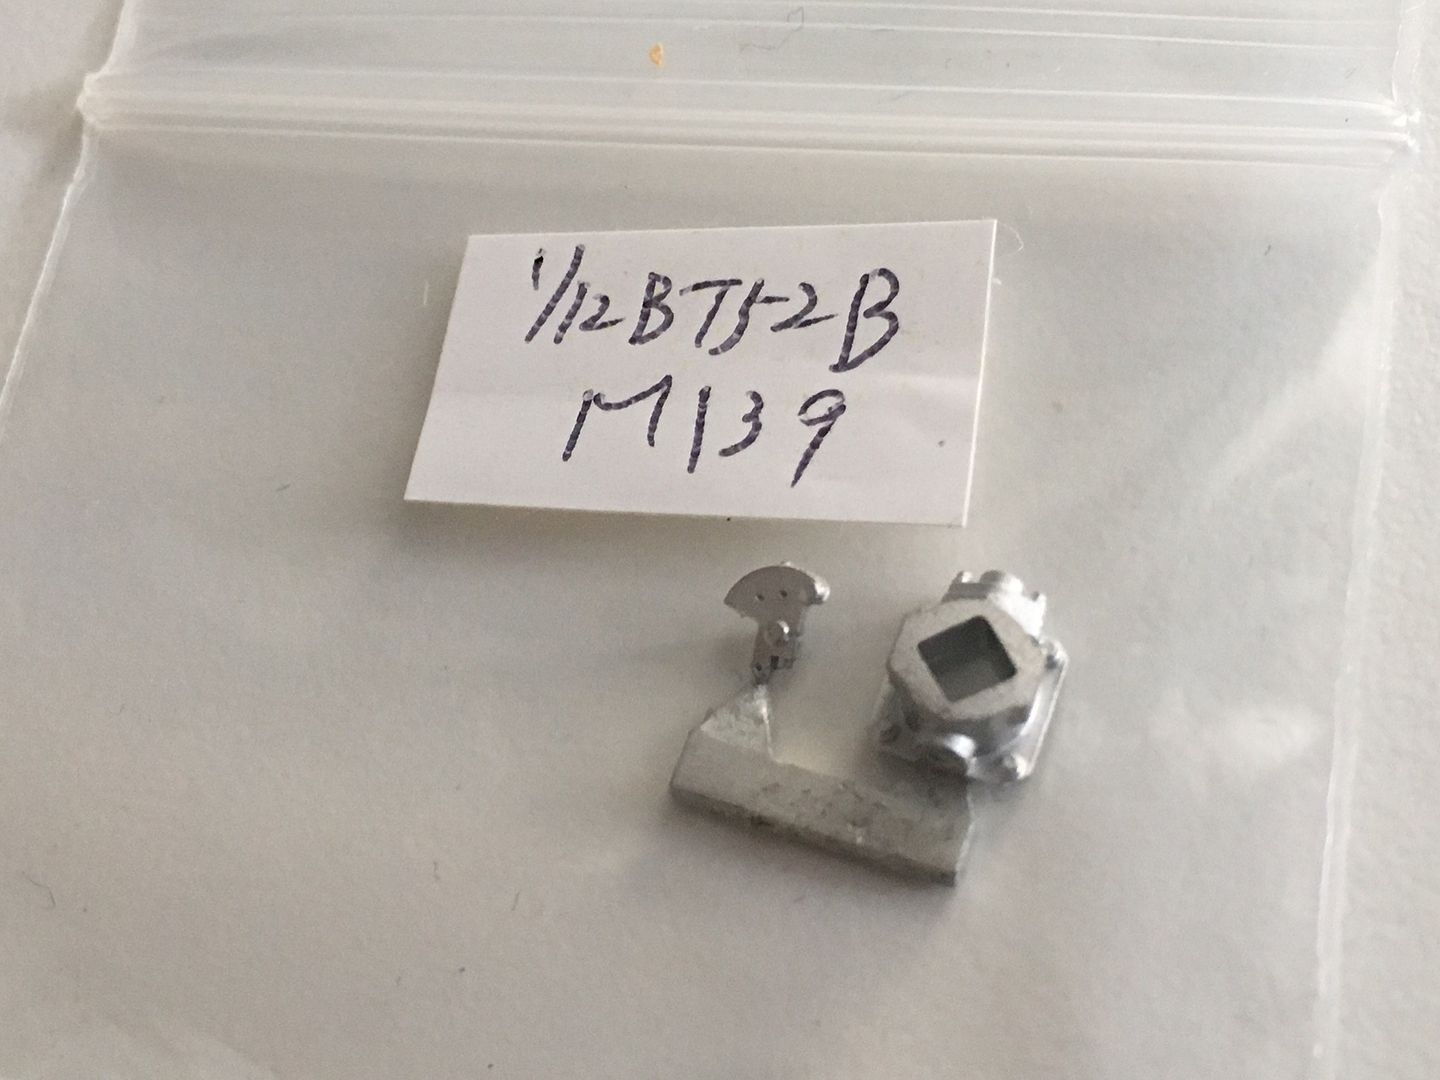
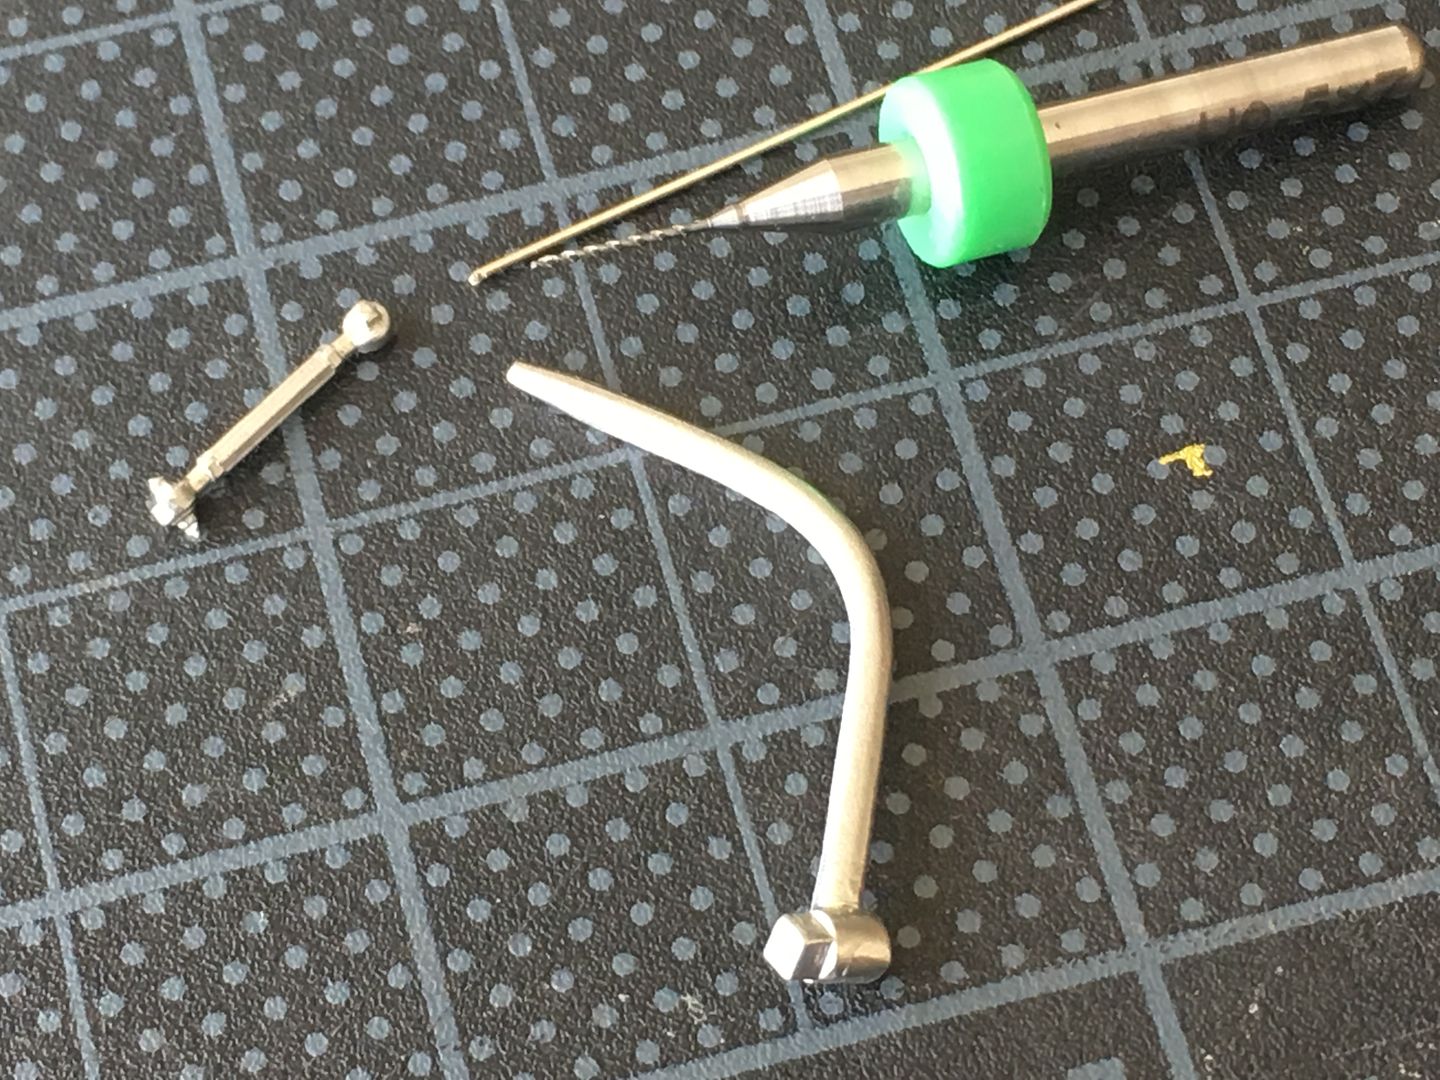
But first - THANK YOU MFH - I lost one part. Joins the turbo/exhaust system together.
Emailed the guys at MFH, and they sent me this VERY quickly.....
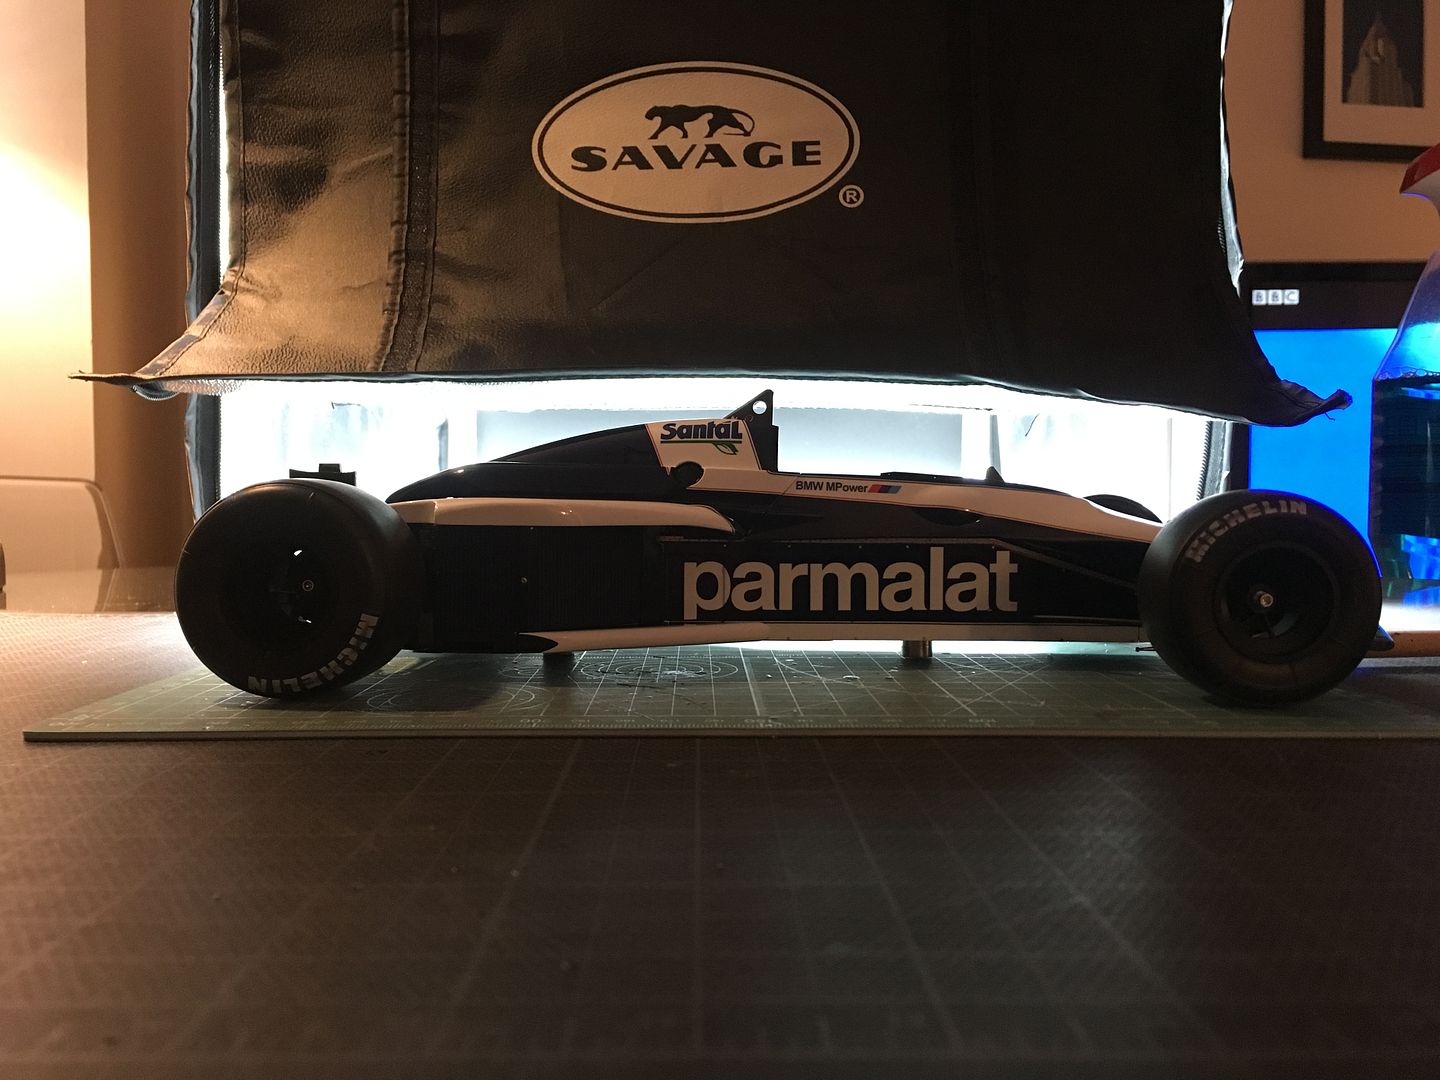
..but now, coming to a light box/photo cube near you - some decent pics for a change!
But first - THANK YOU MFH - I lost one part. Joins the turbo/exhaust system together.
Emailed the guys at MFH, and they sent me this VERY quickly.....
..but now, coming to a light box/photo cube near you - some decent pics for a change!
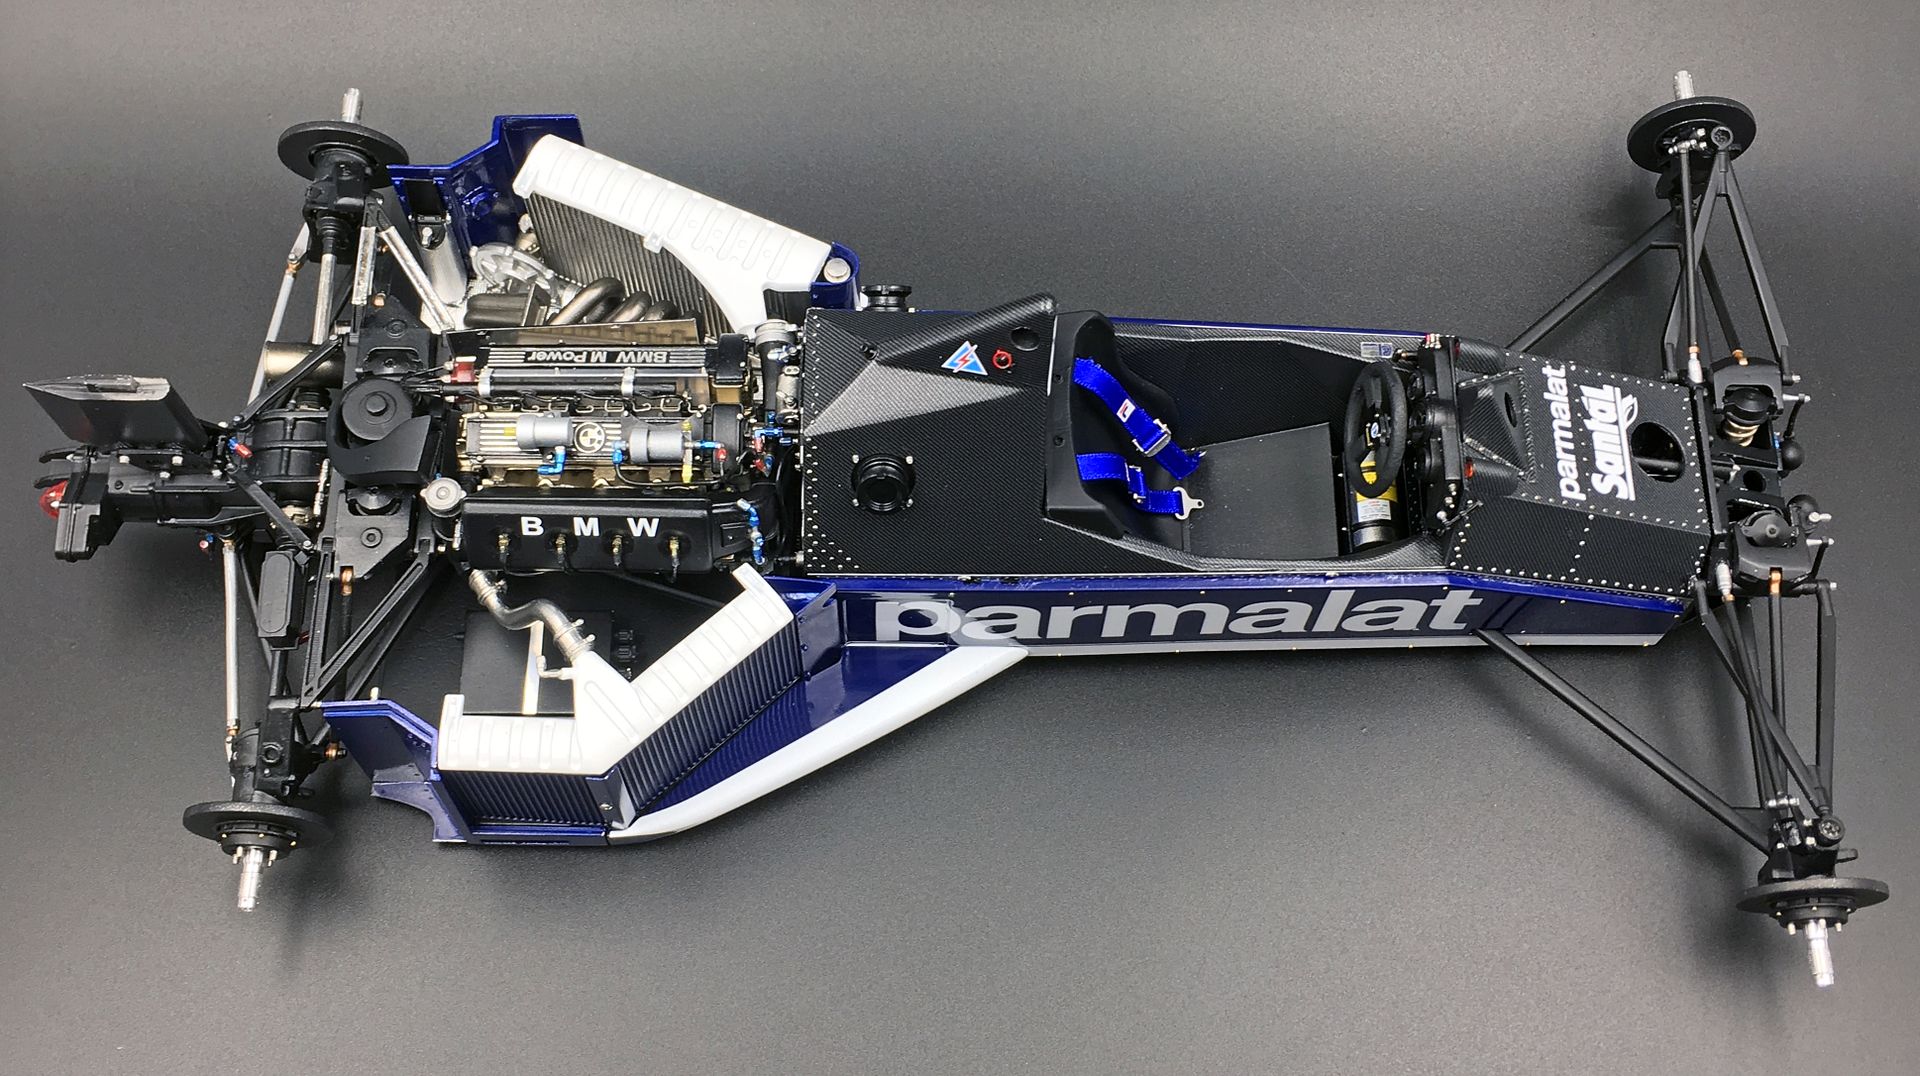
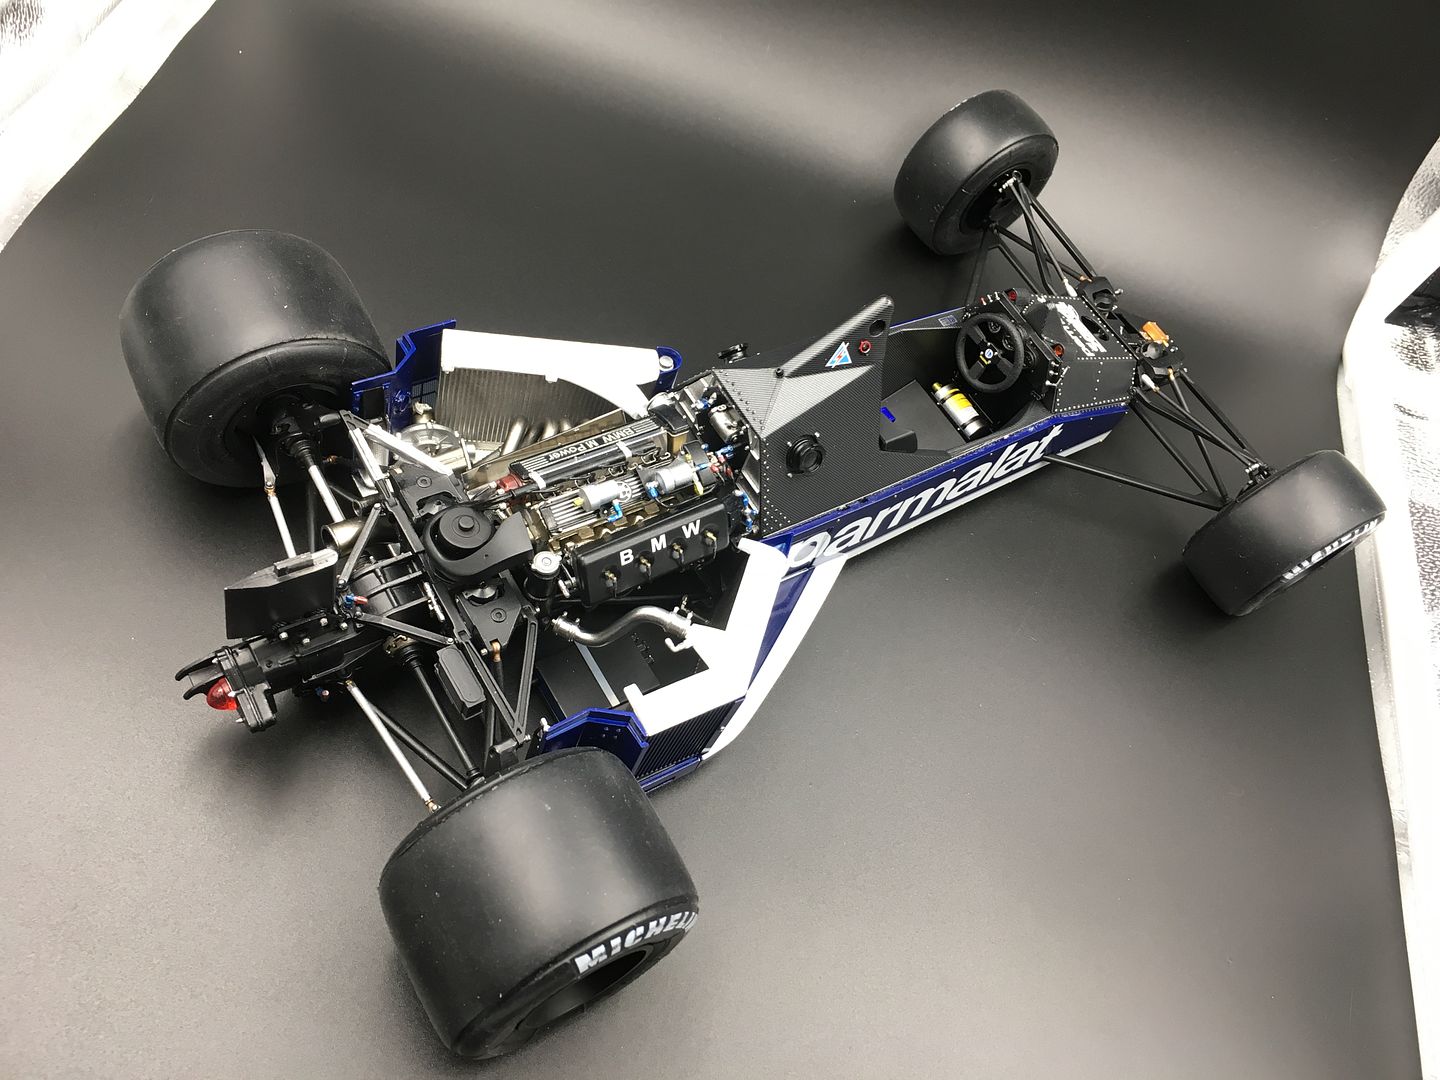
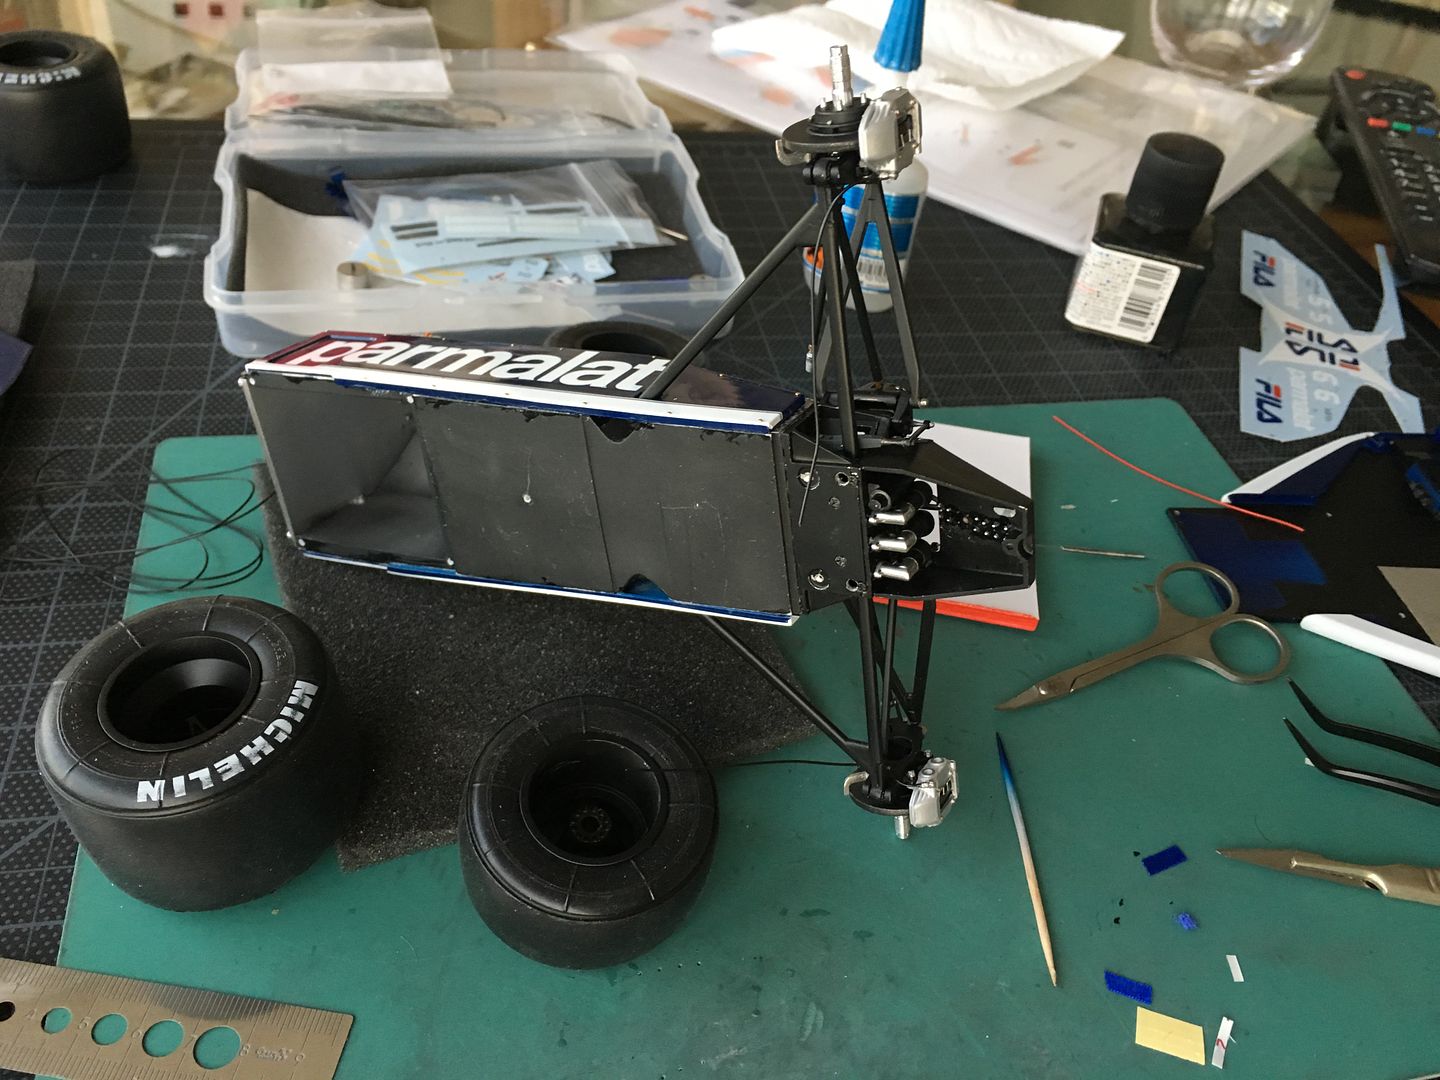
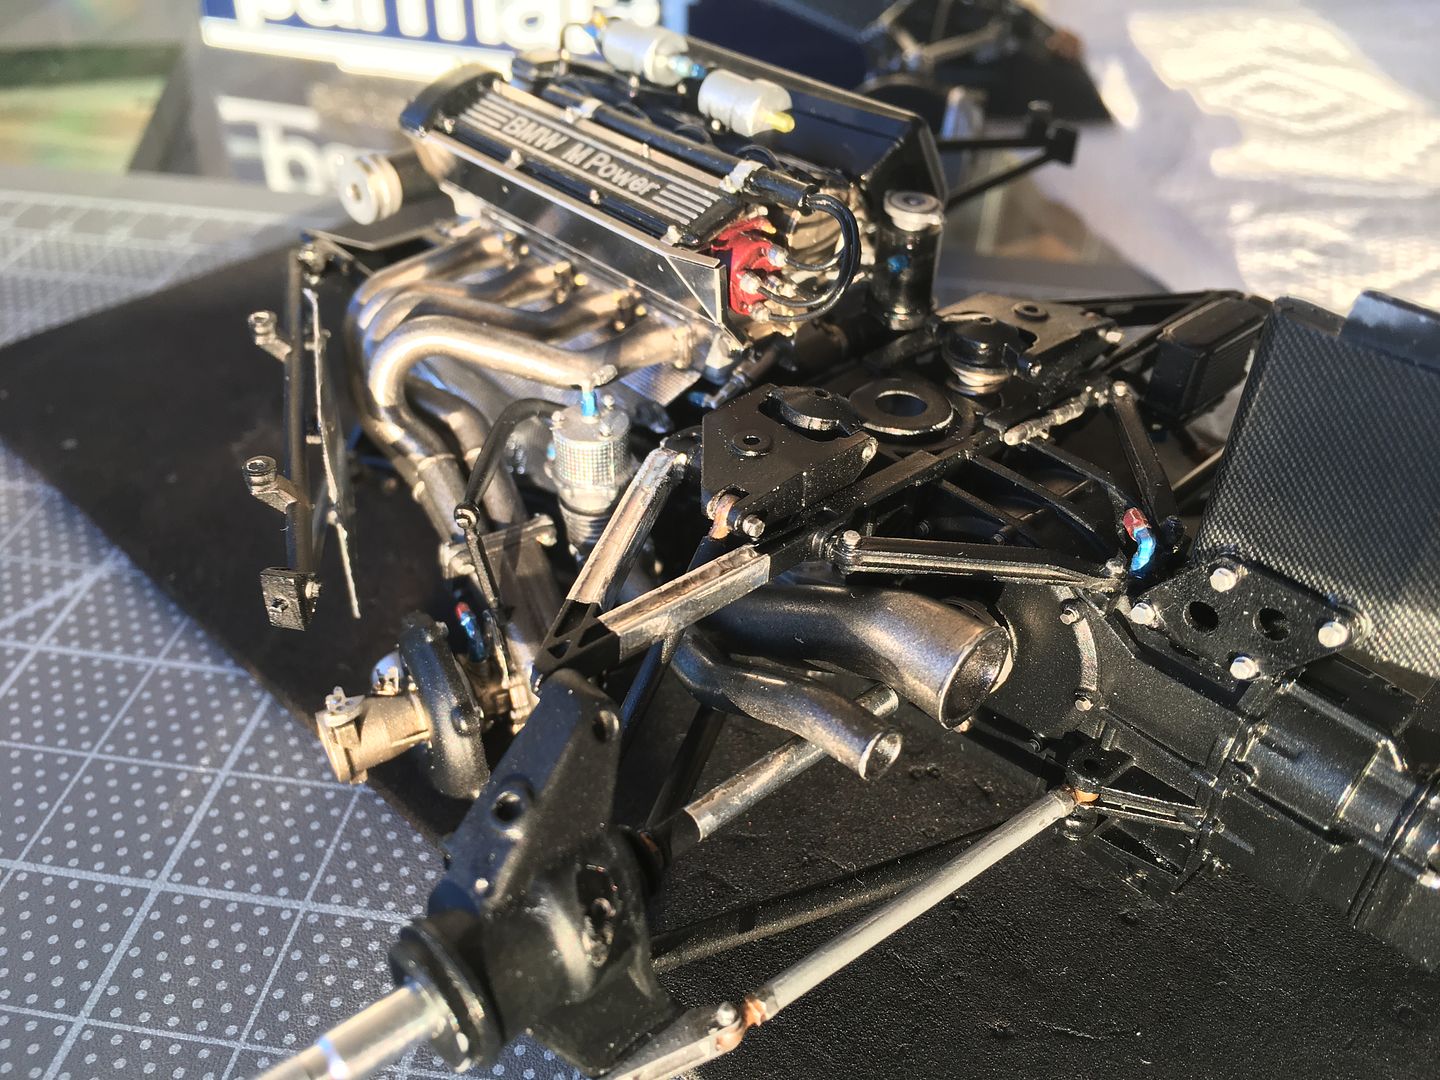
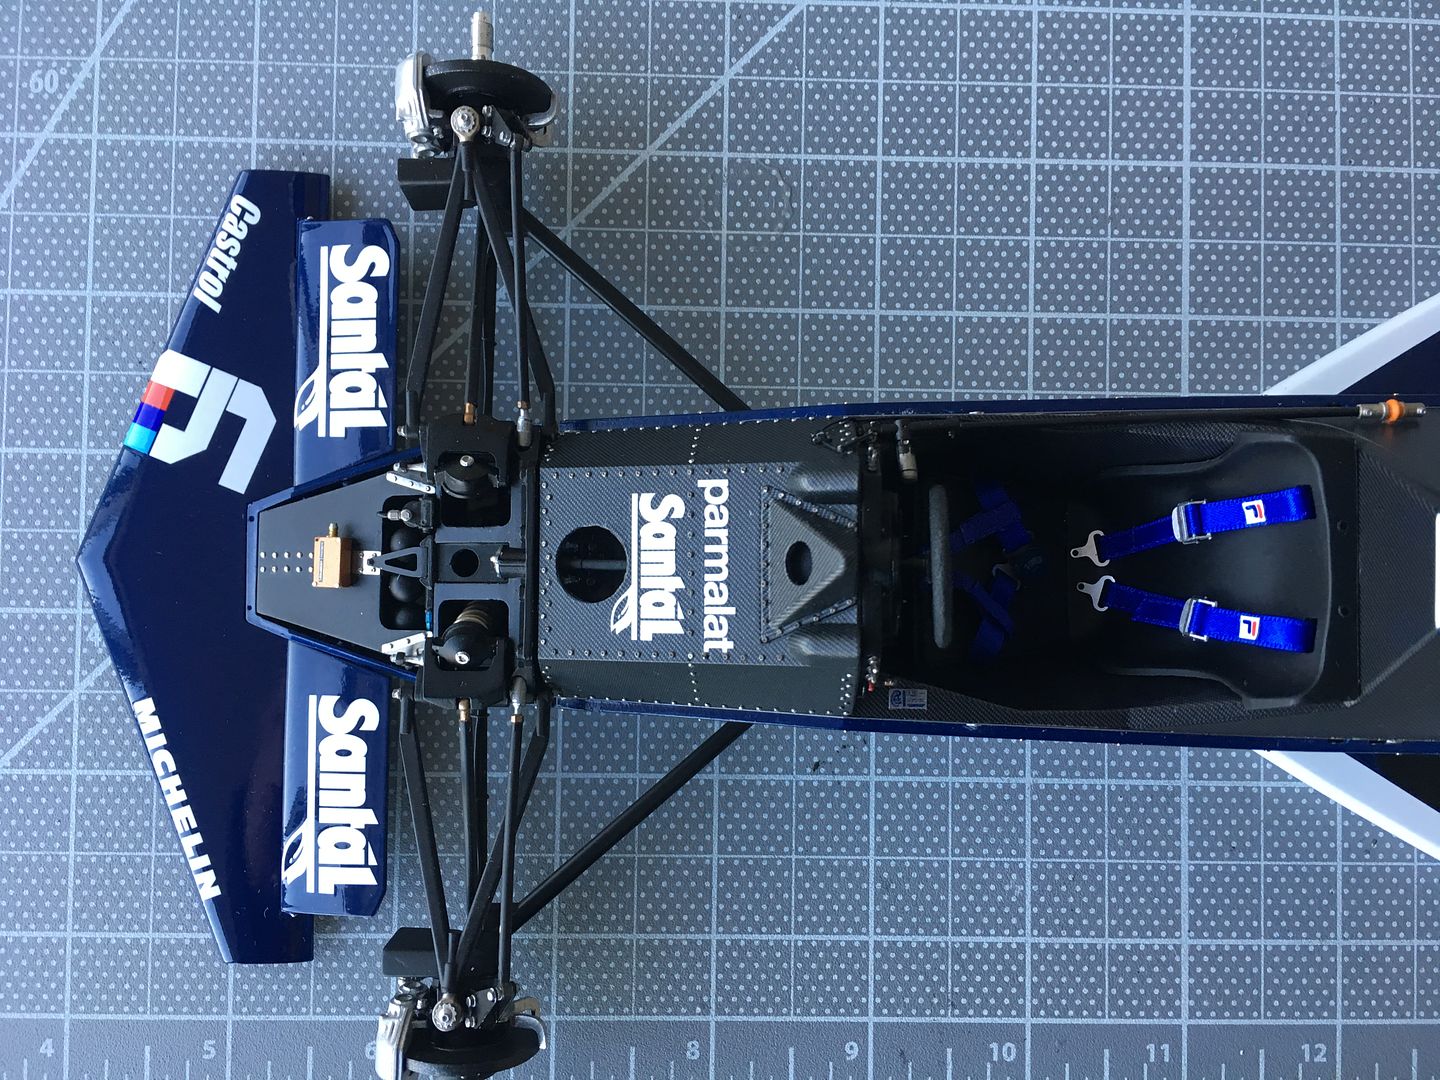
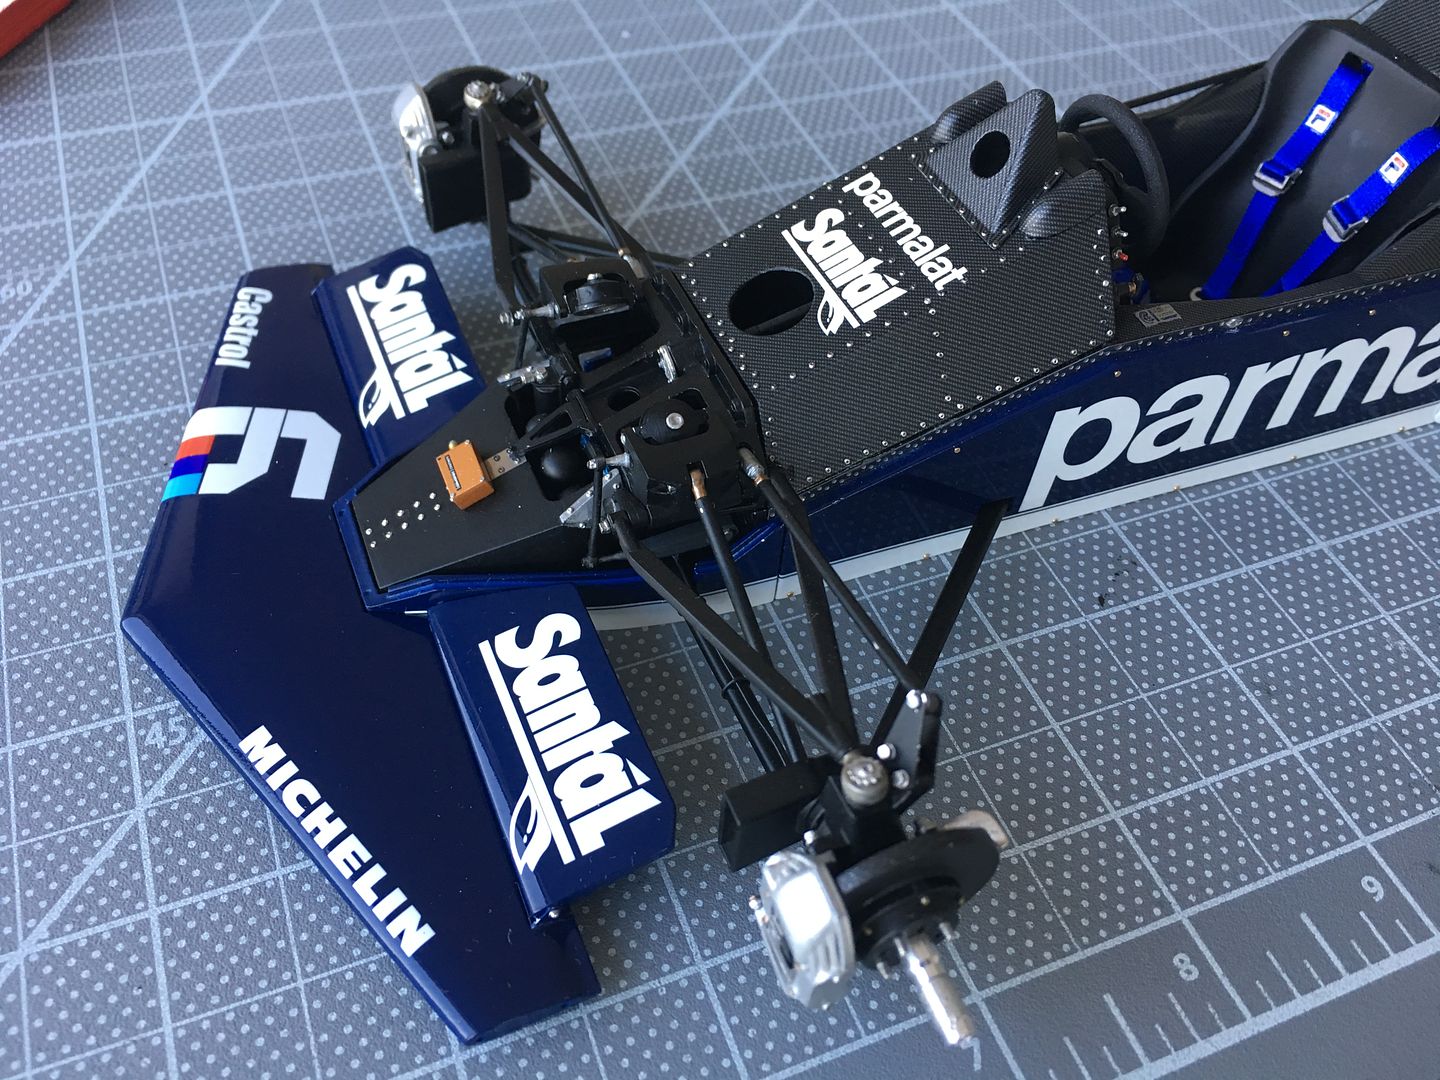
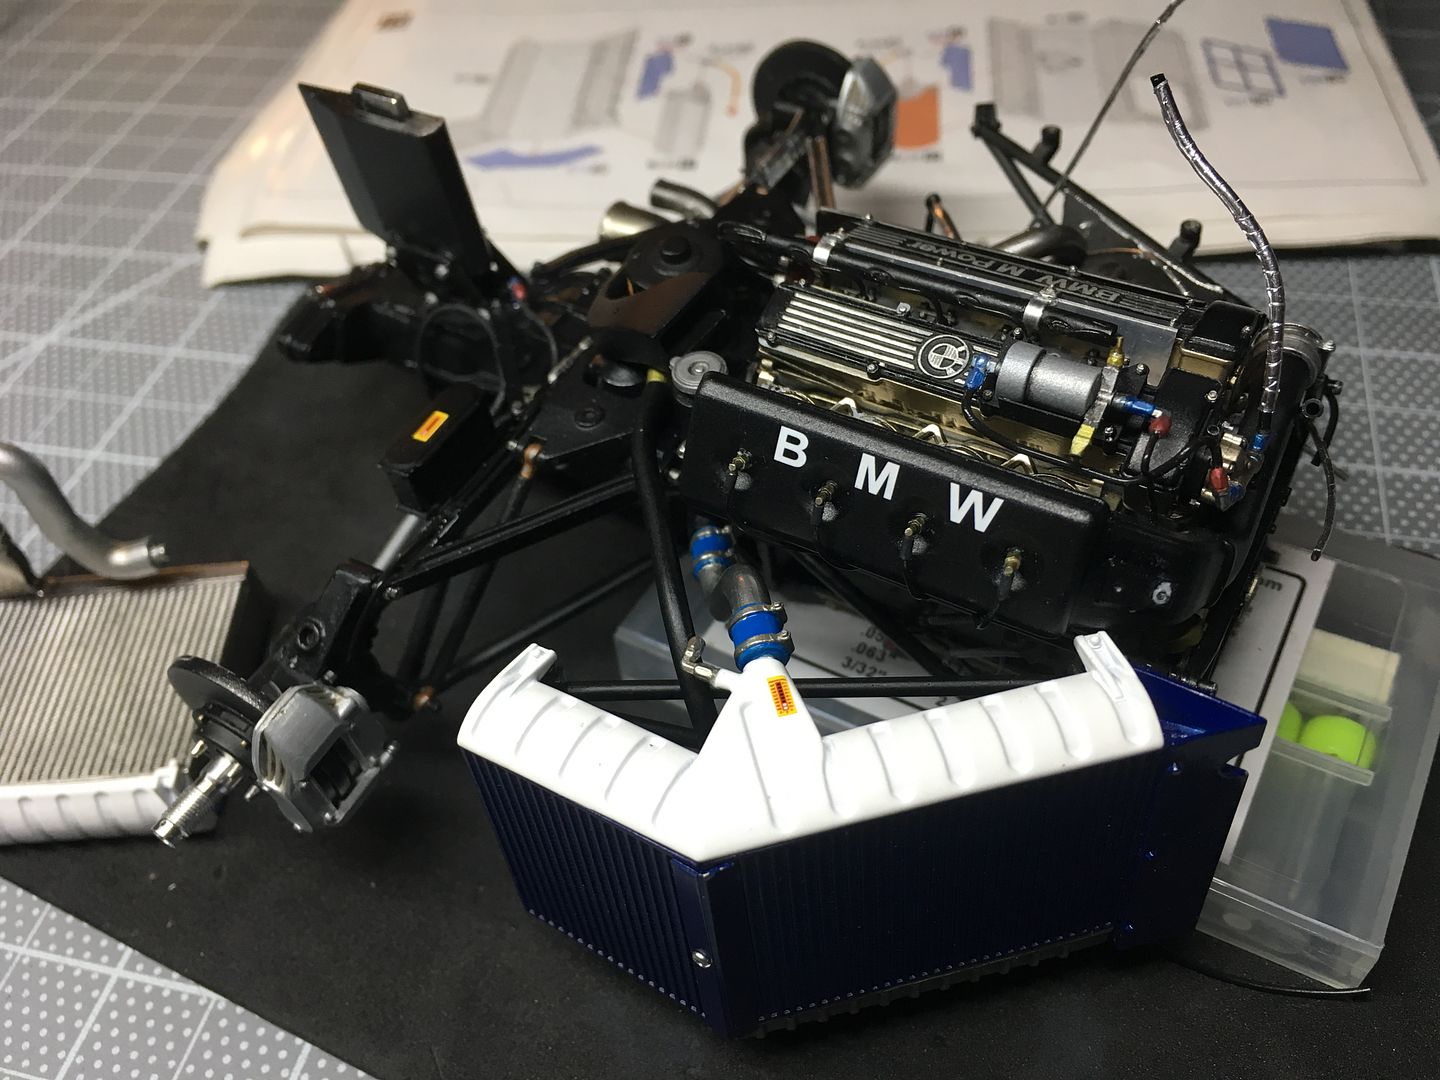
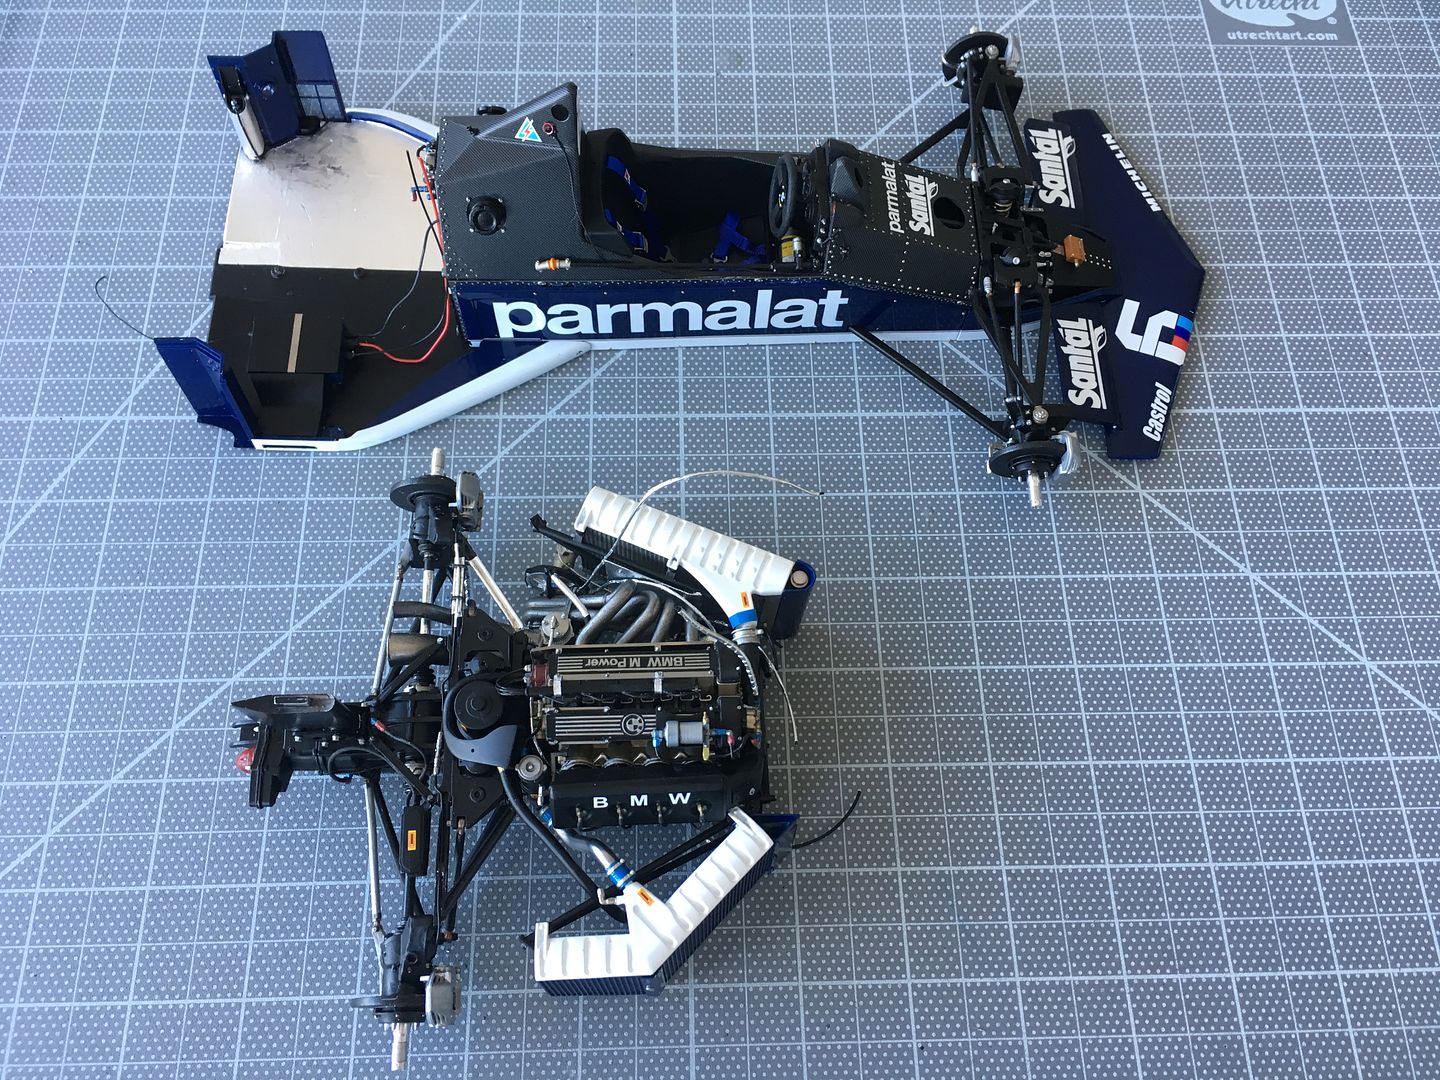
Another big picture dump -and again, many things are not fixed - so the exhaust and turbo area has parts almost literally thrown in - nothing fixed - same with wheels, body panels etc - lots of details to add before anything gets joined together, but I wanted to get some nice pictures whilst still 'in progress...'

I'm going to have a lot of fun with this with photoshop when it is done


I'm going to have a lot of fun with this with photoshop when it is done
 ks - I have!! 90 degrees out - will correct!!
oh, no idea! Tends to be a few hours in the evenings after work, but travel, having to tidy up and life gets in the way...
Ok -some more weekend work!
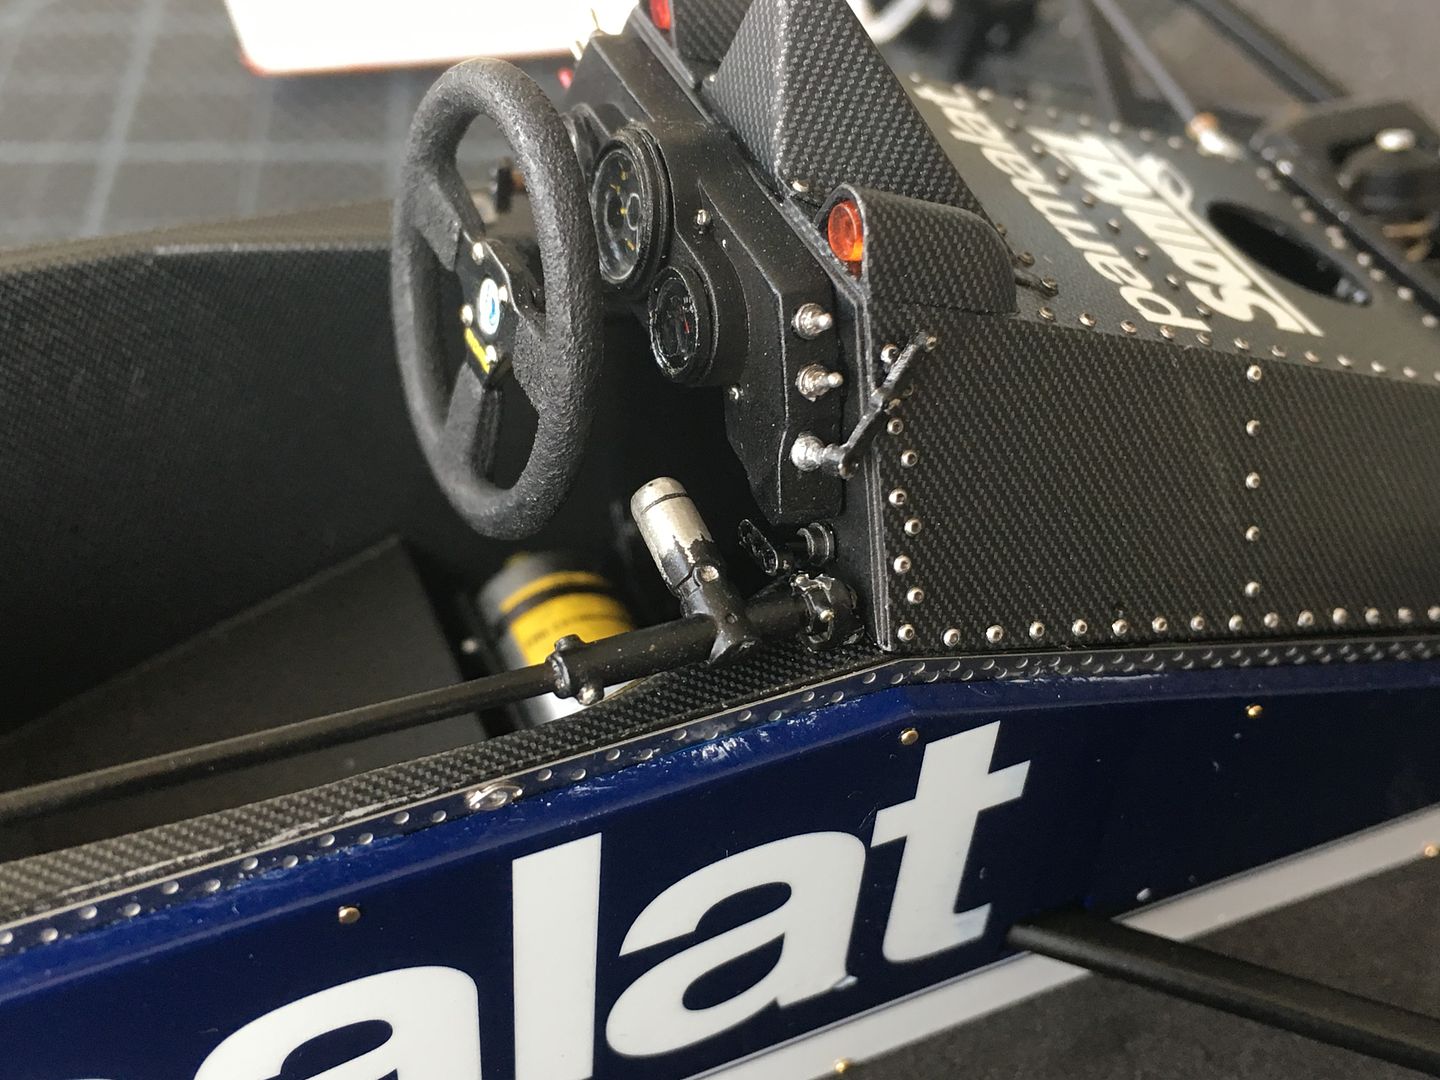
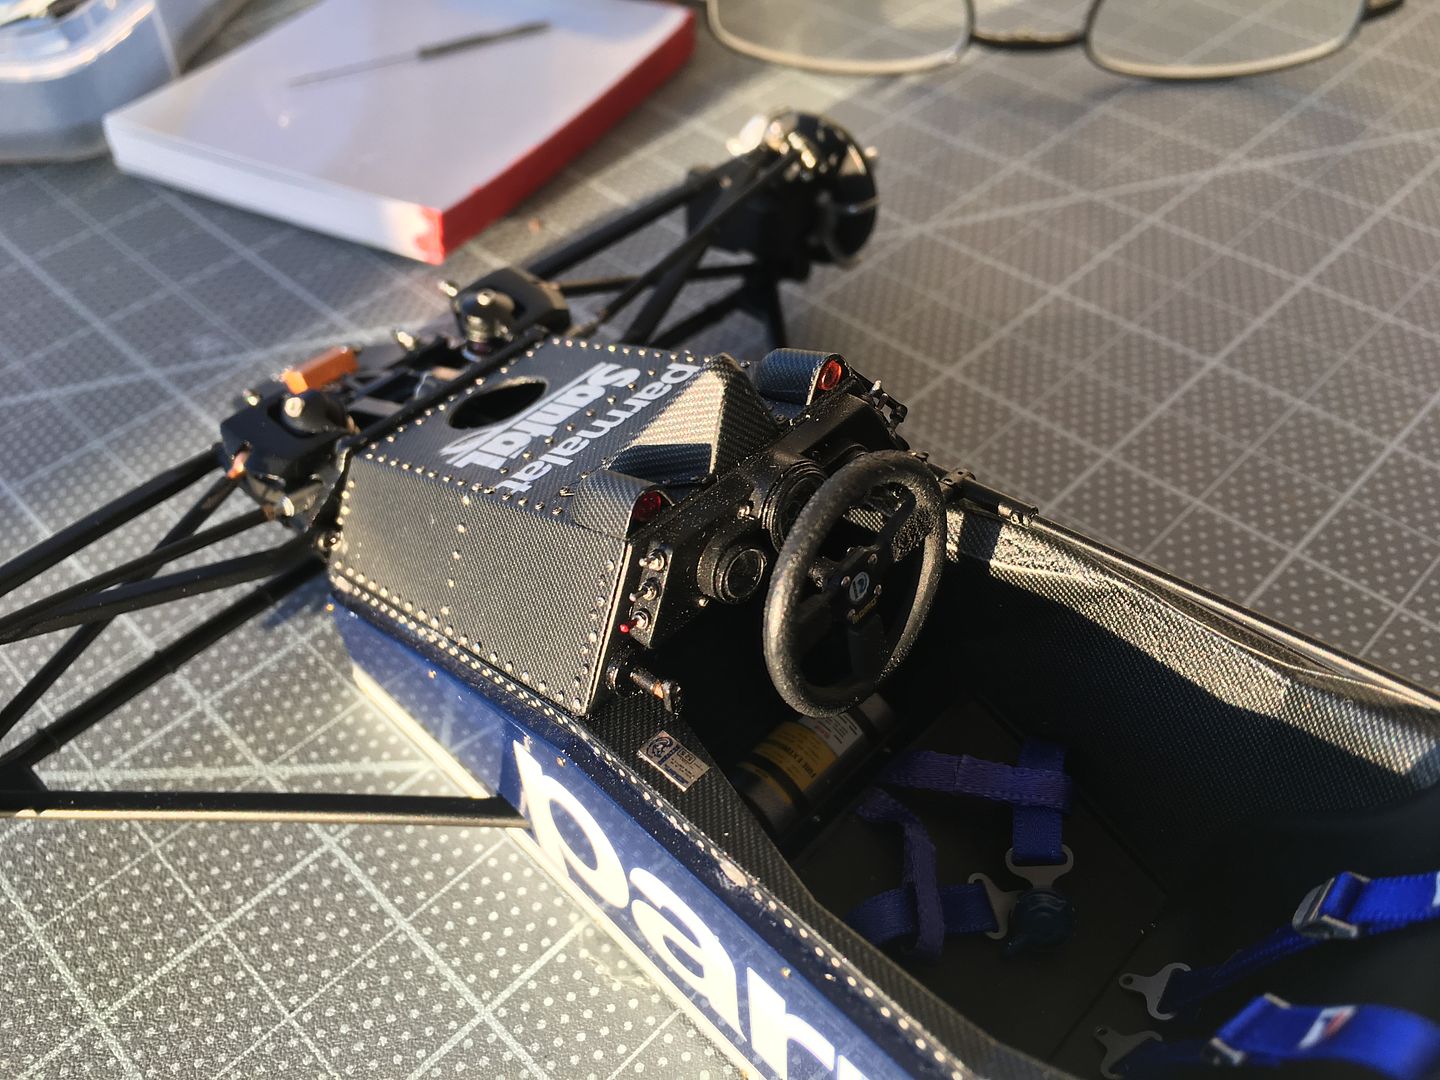
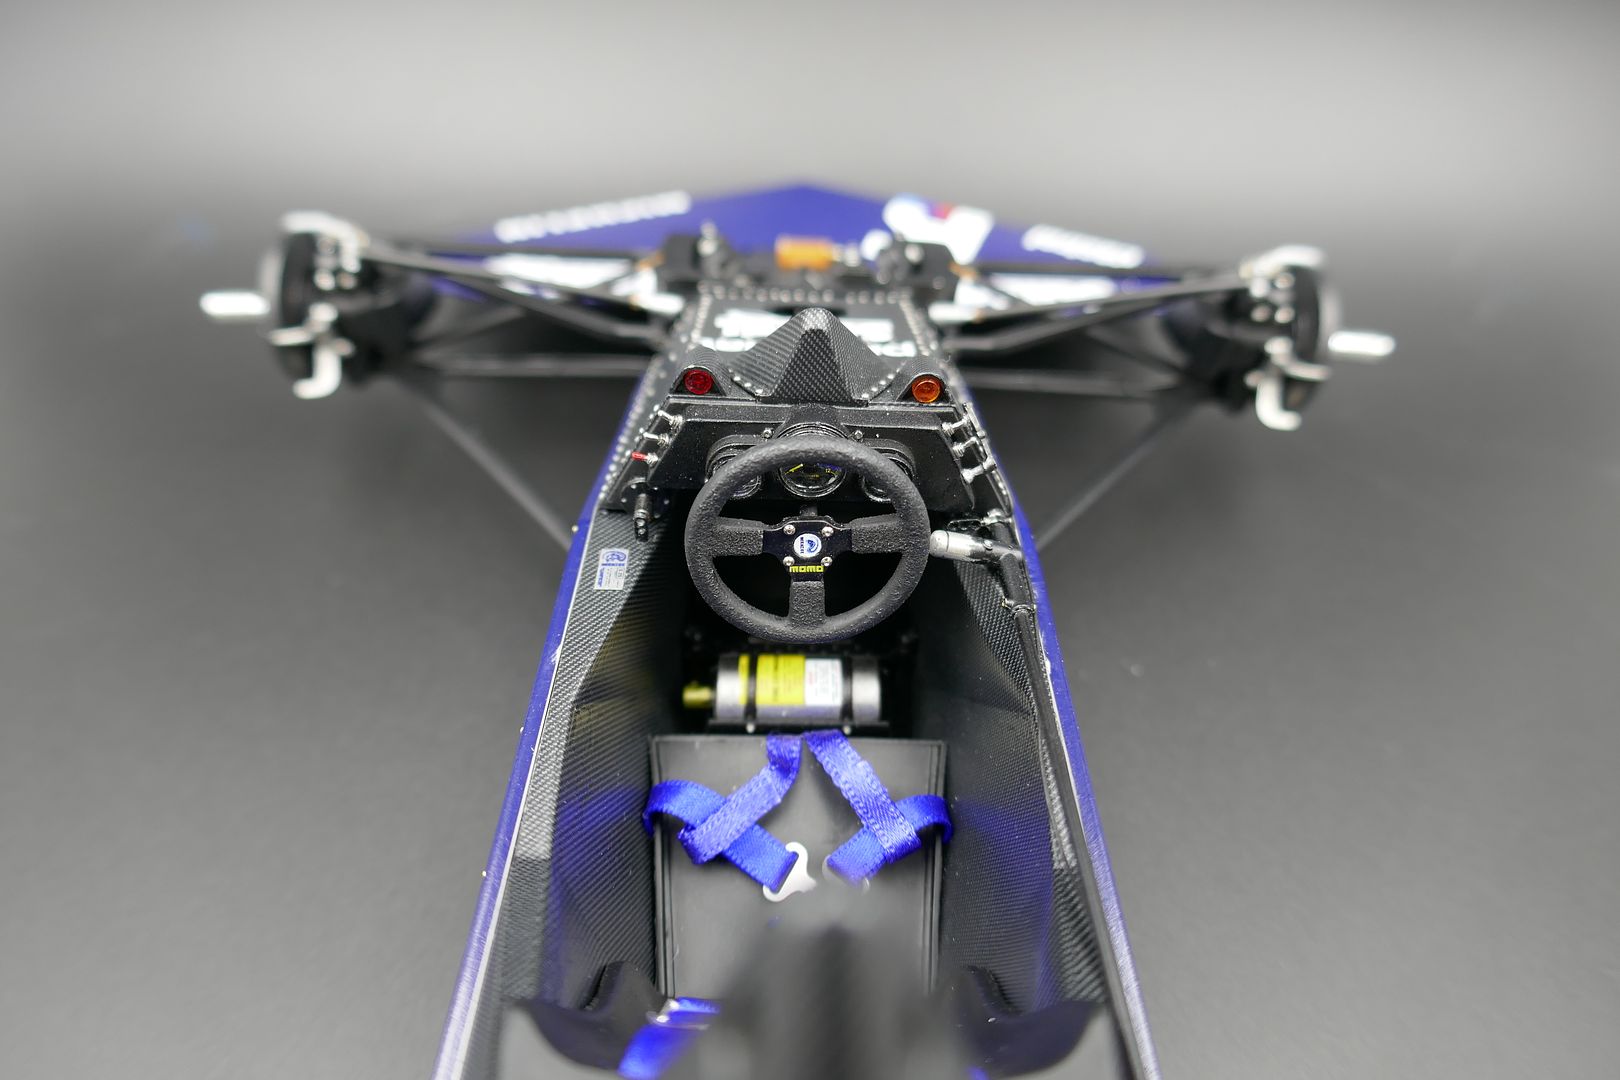
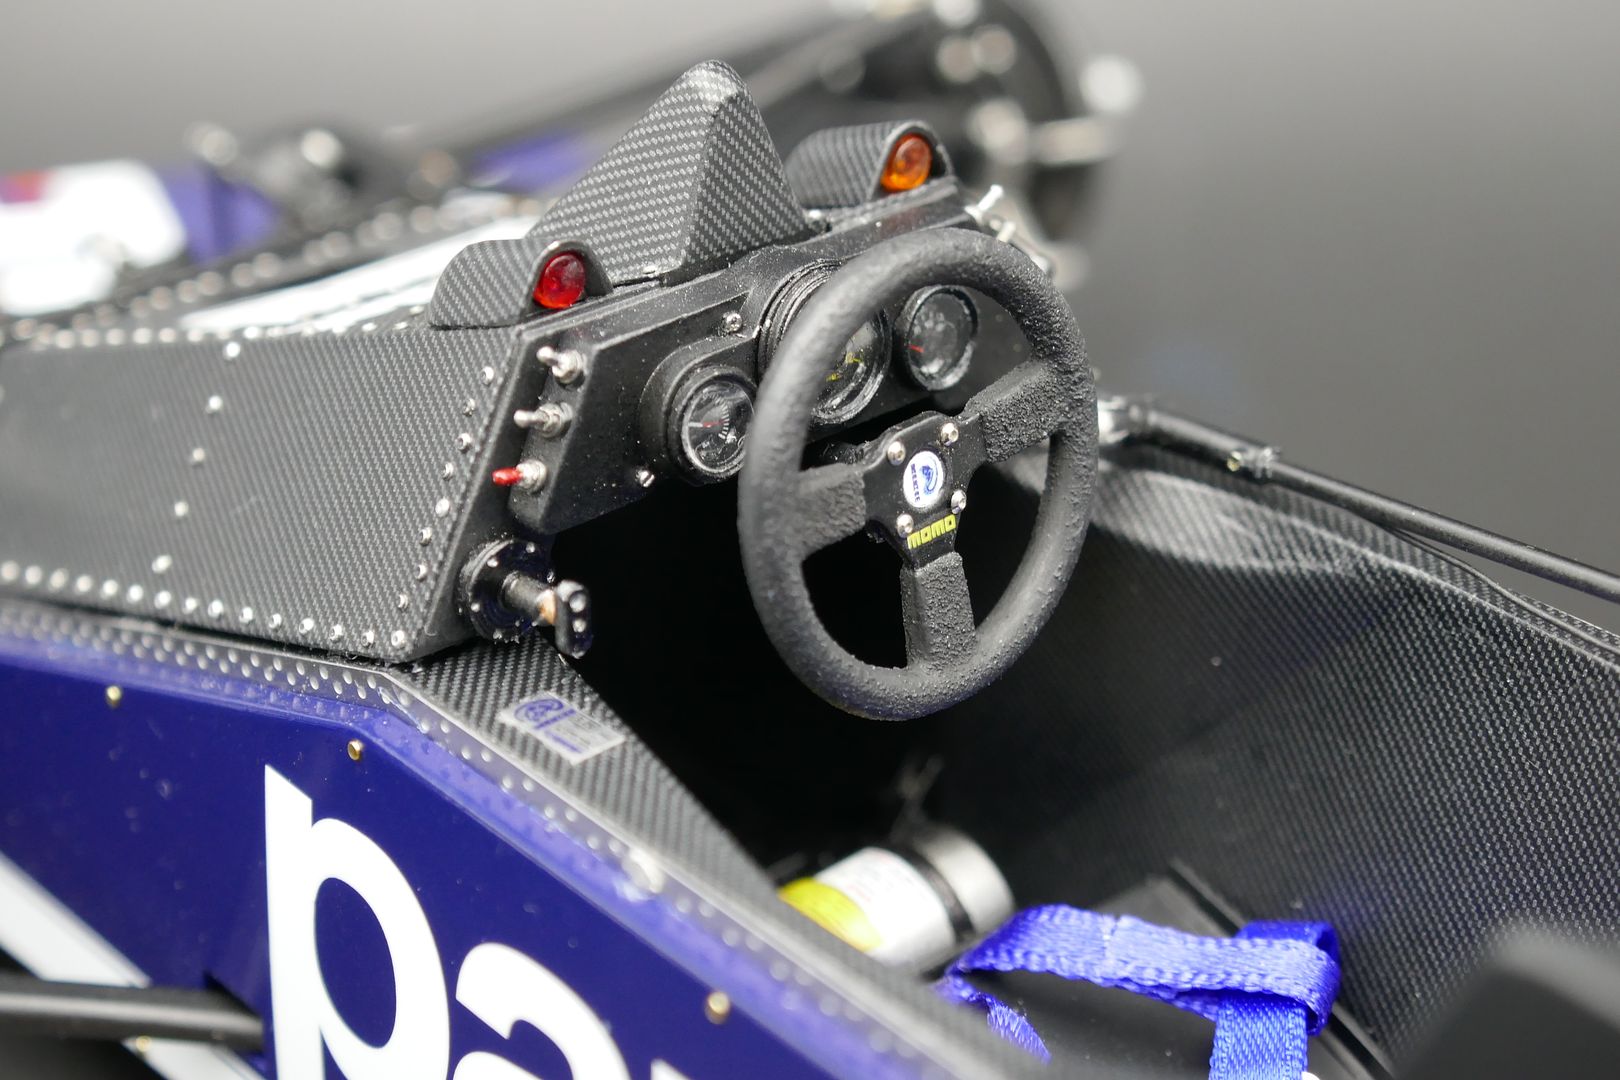
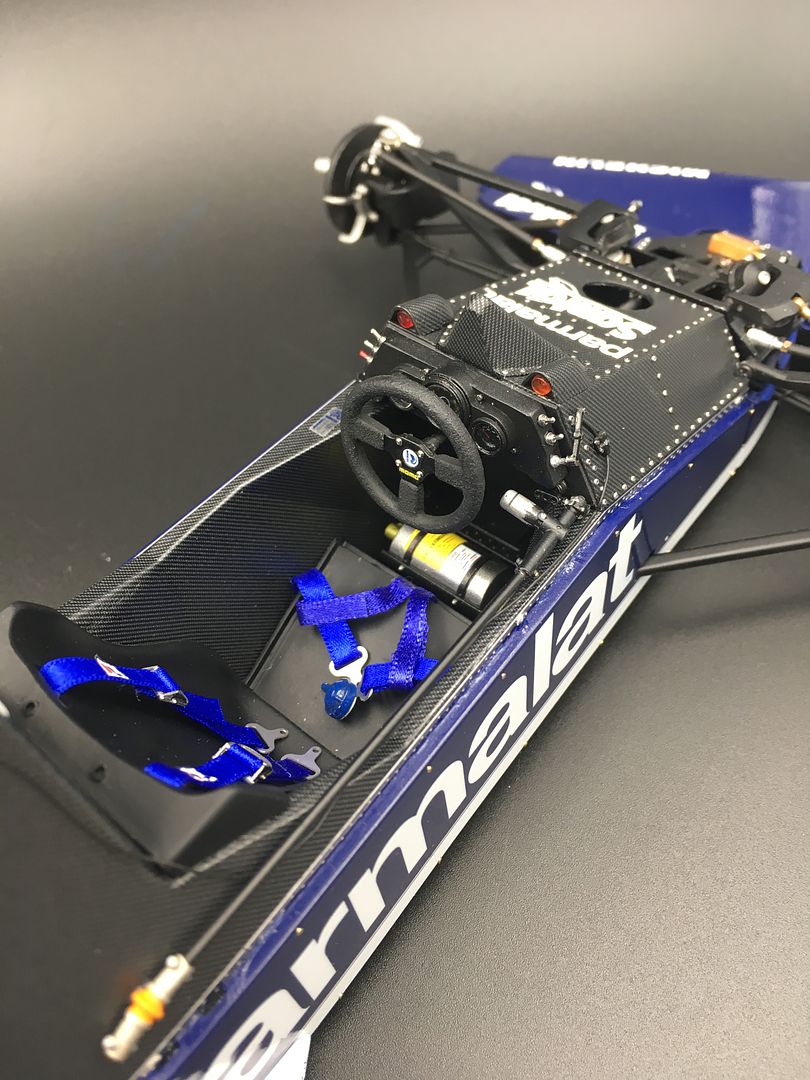
Finished the 'pedal box' area - and promptly covered it, never to be seen again!
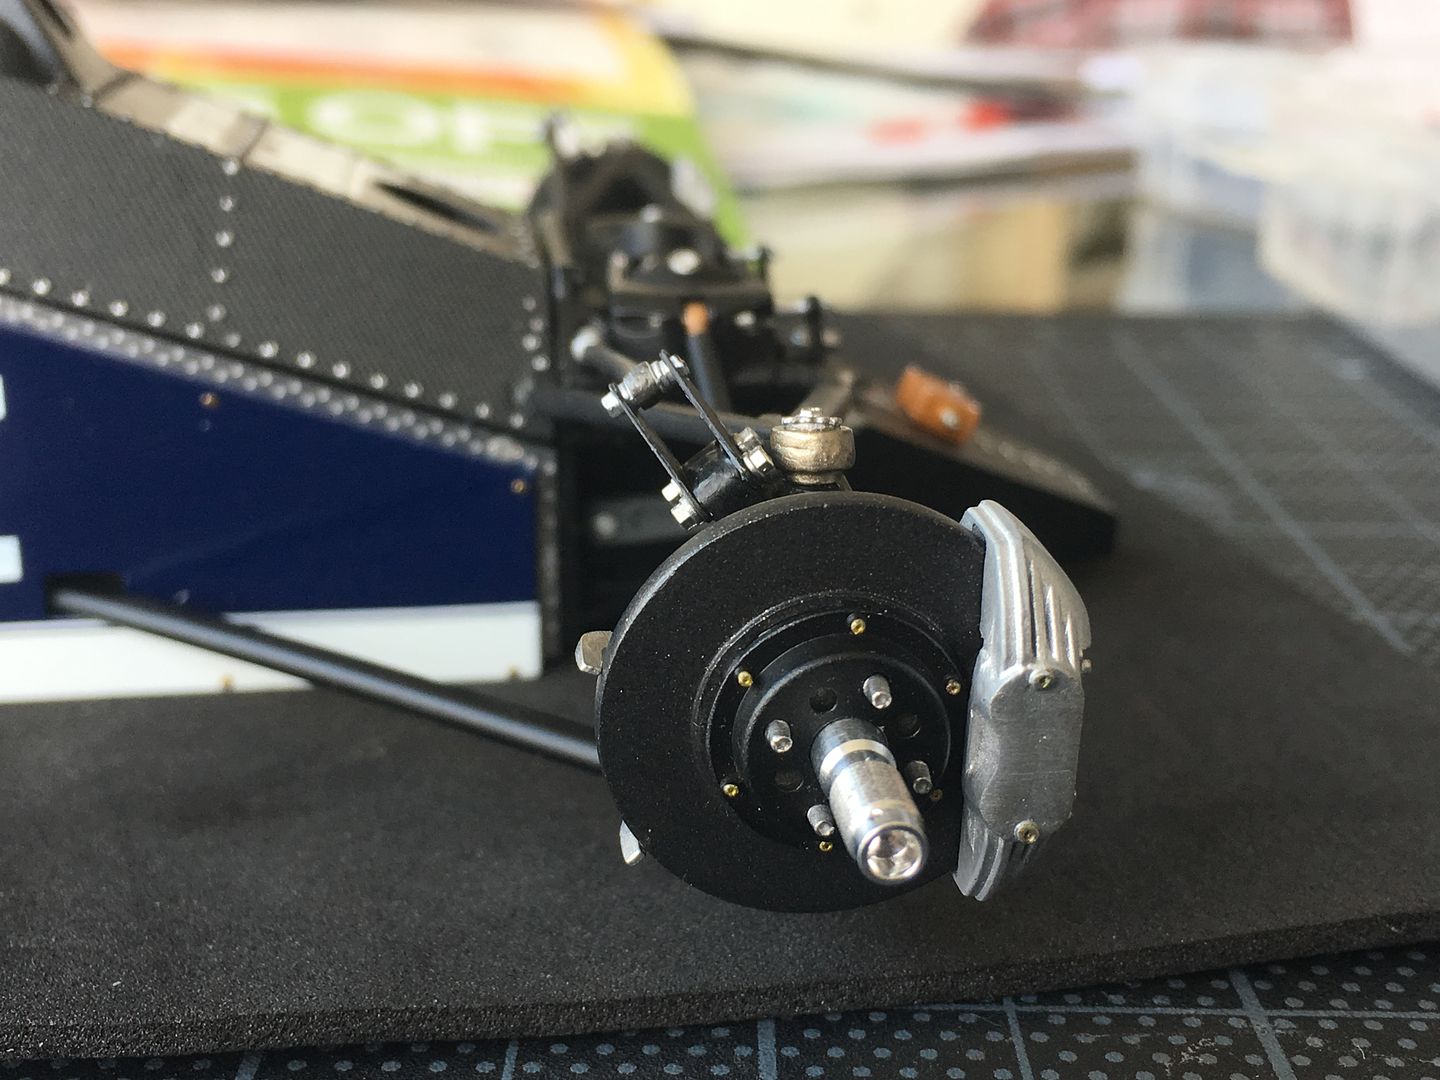
...also added the brakes, having first painted the pads with the same carbon look...
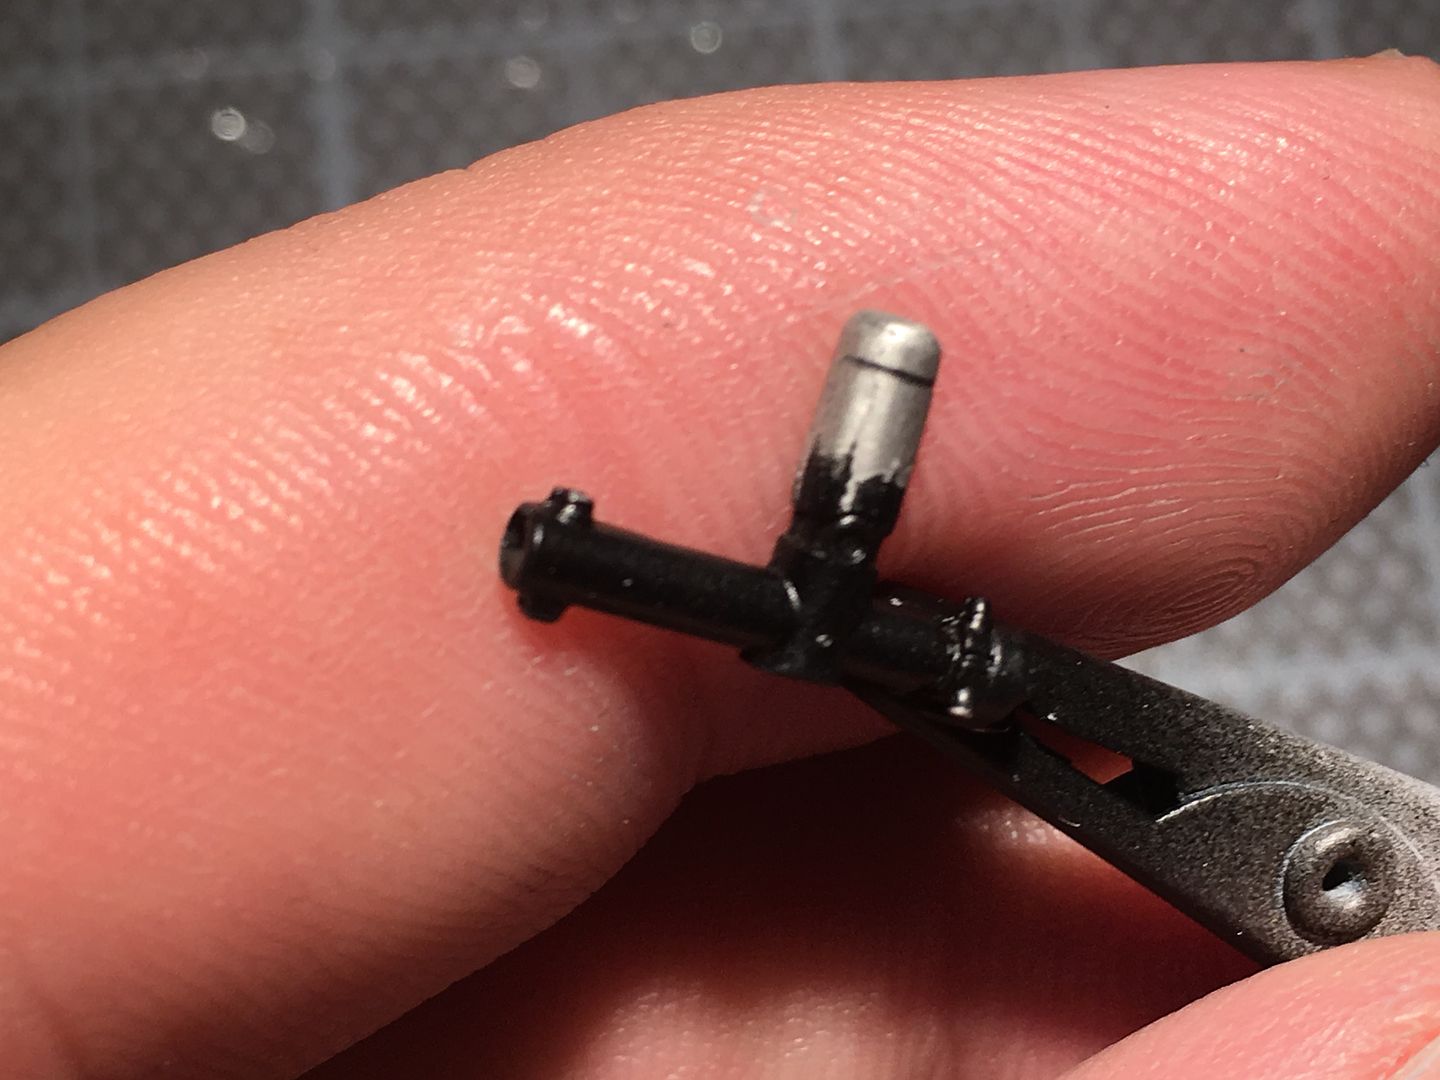
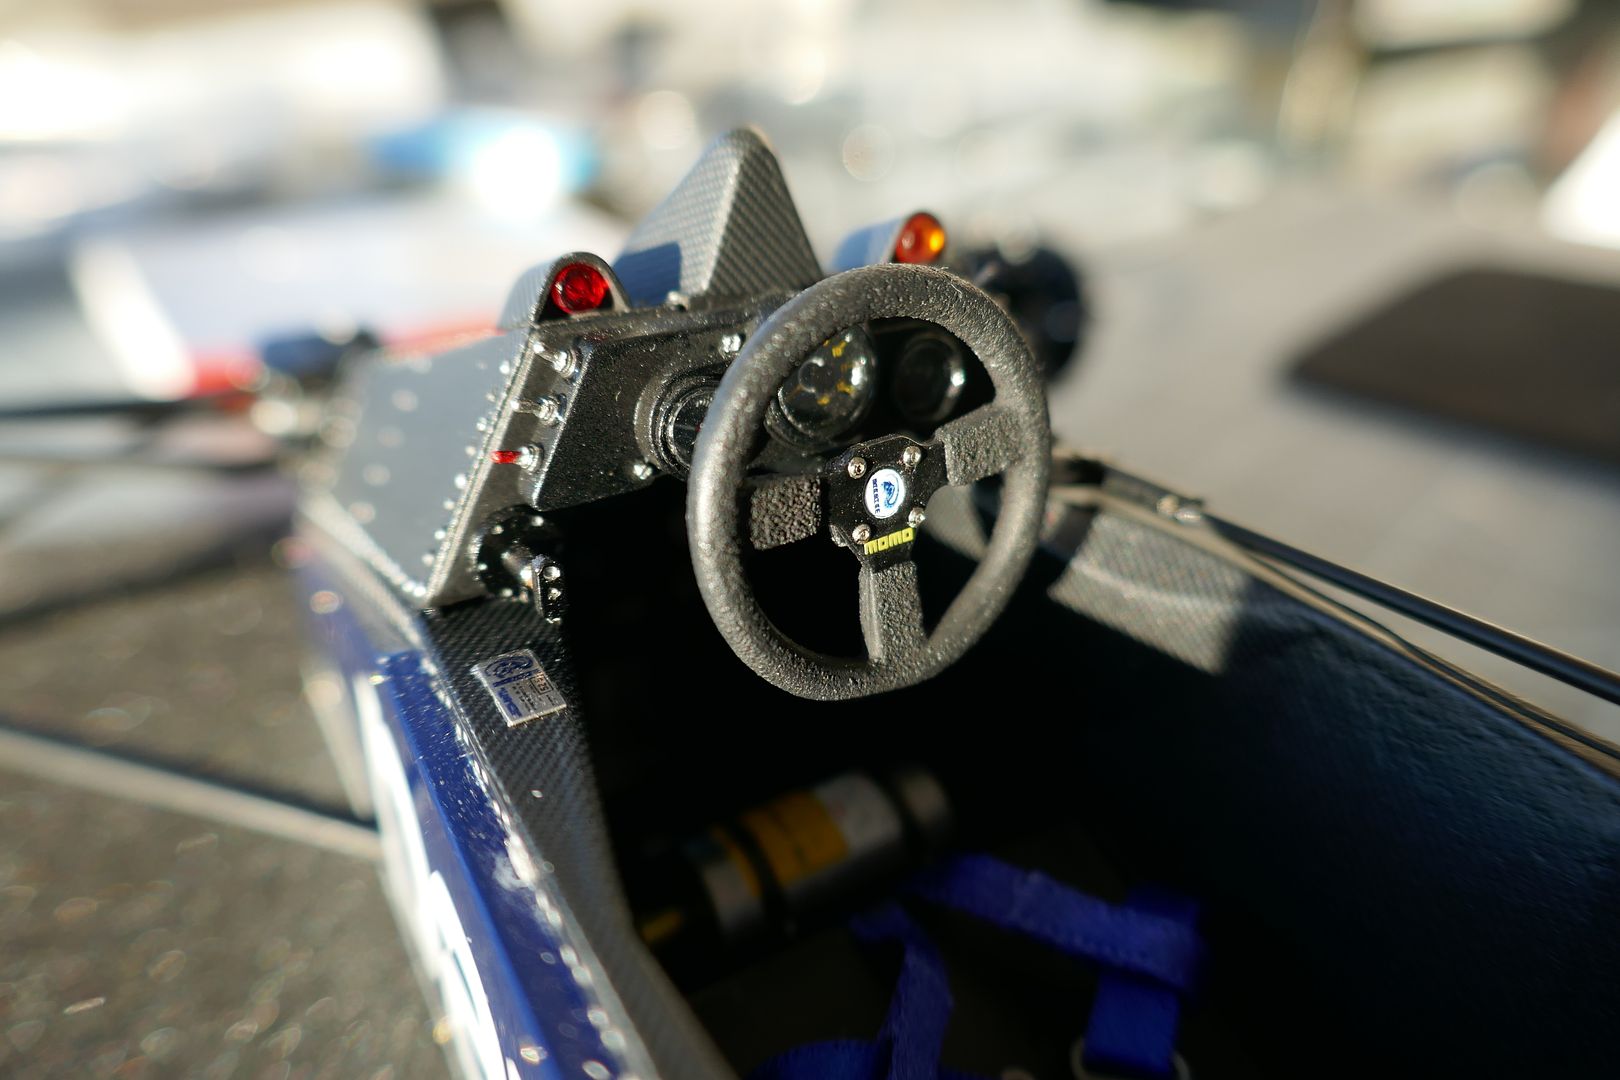
Gear linkage and gear shift. The kit says silver, the photos show it as black, with a hand-worn grip that I created by sanding the paint back to the metal finish, and then using flat clear...
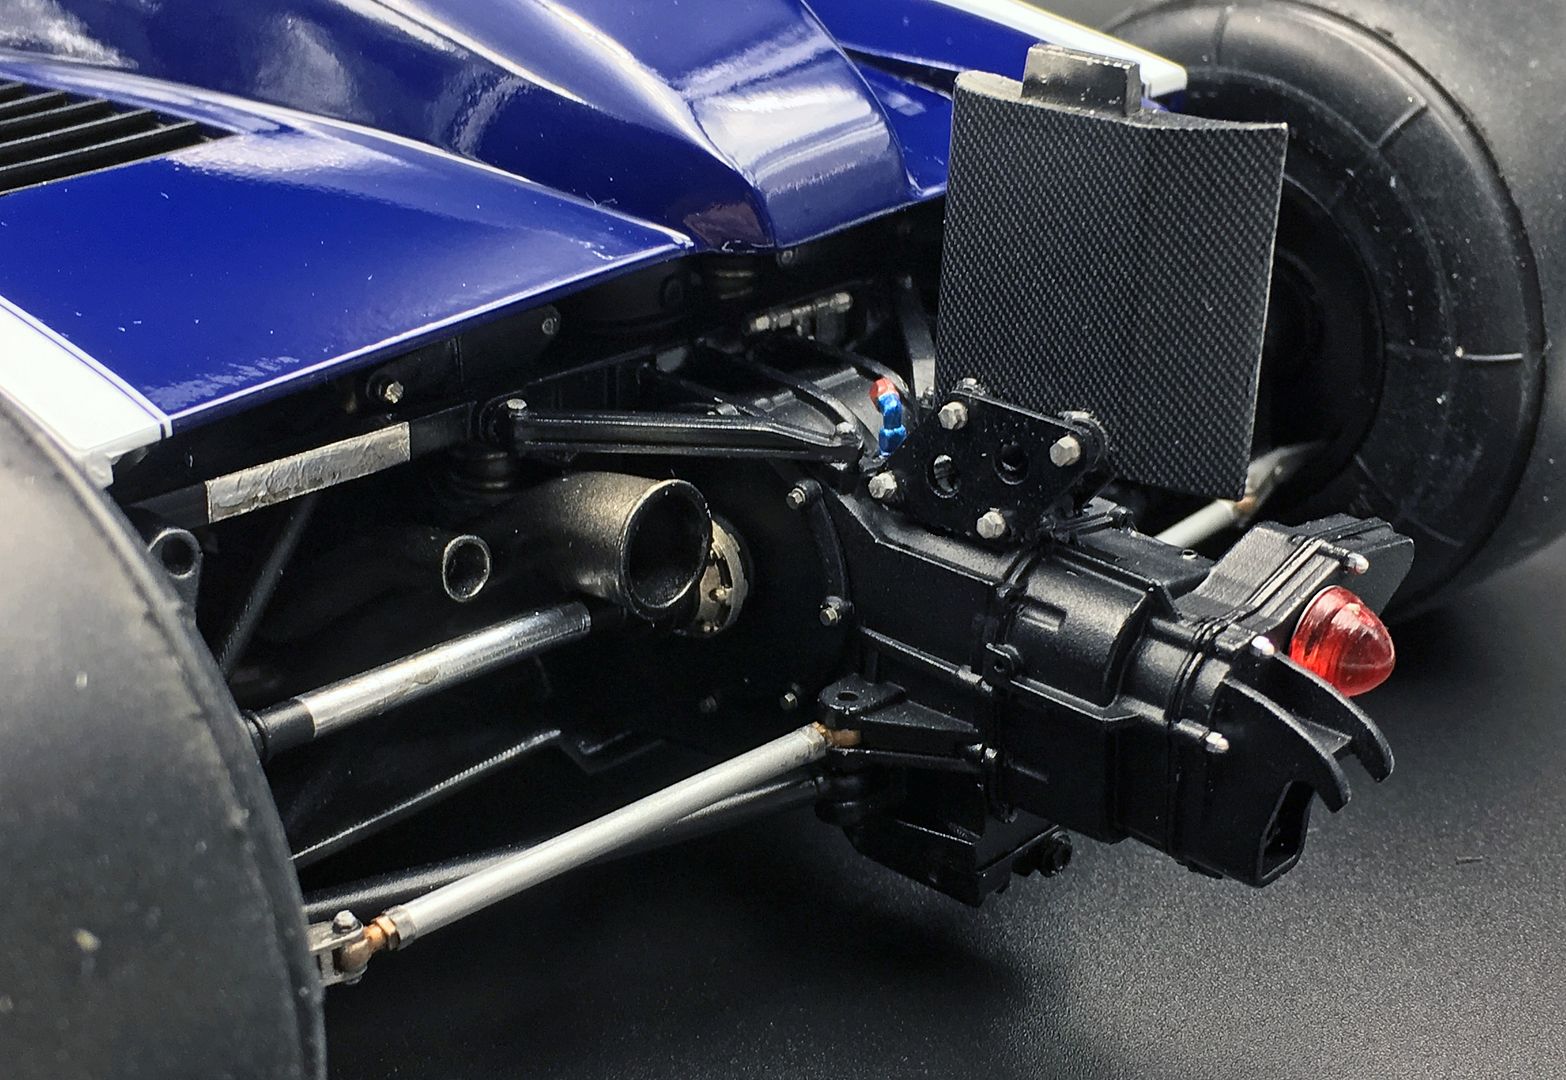
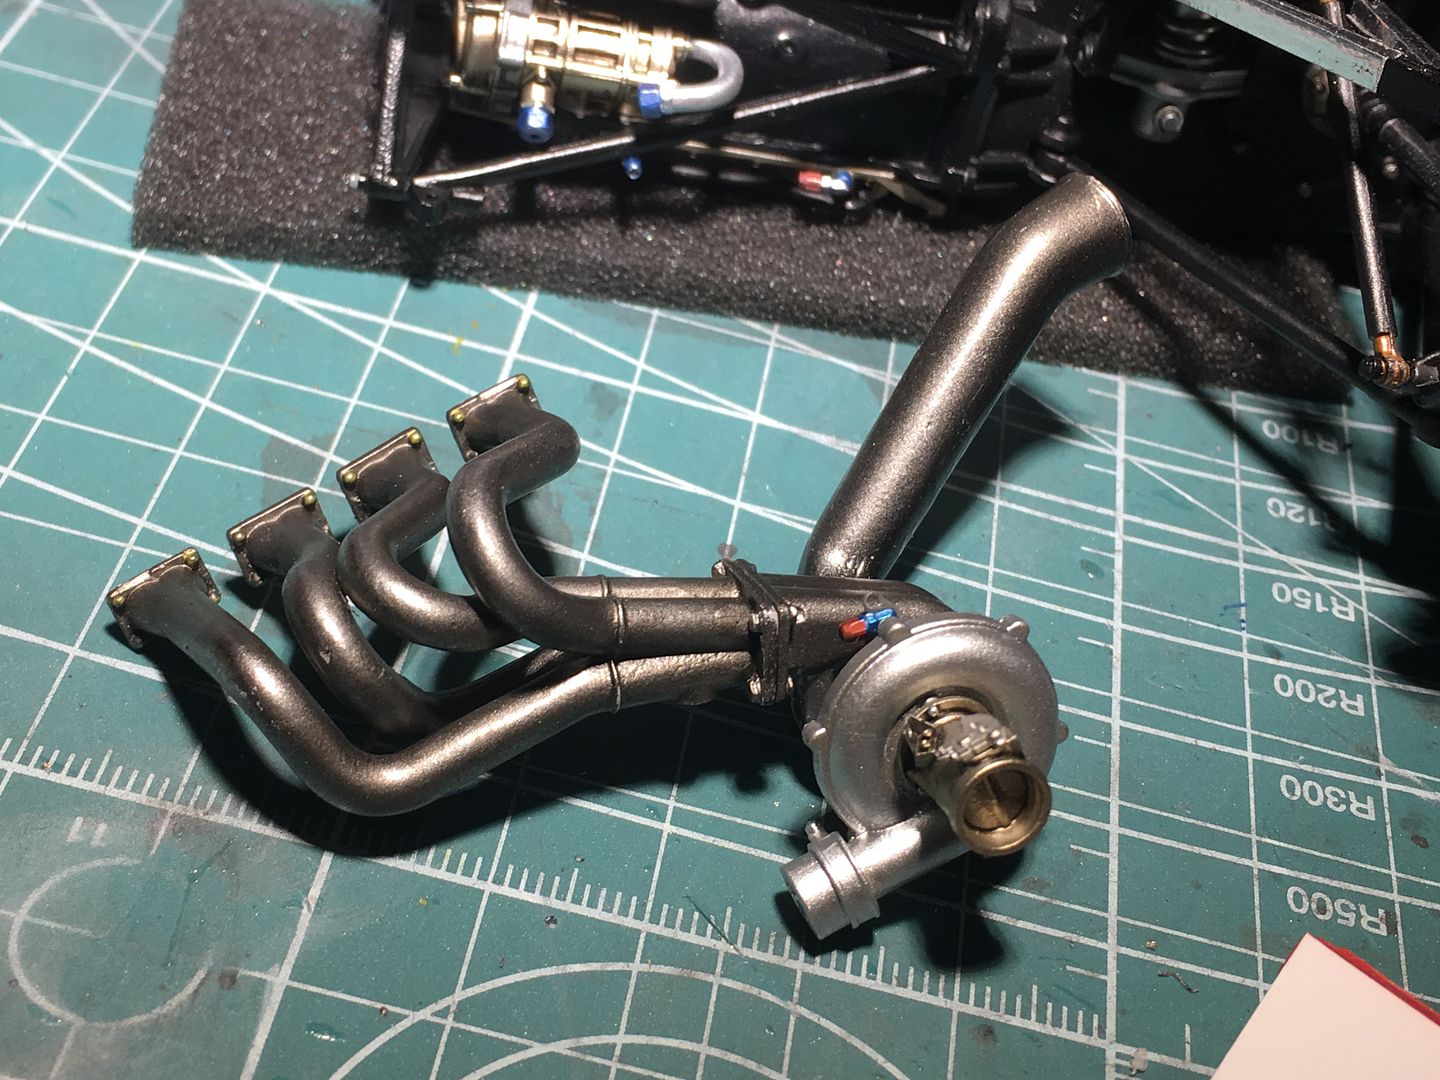
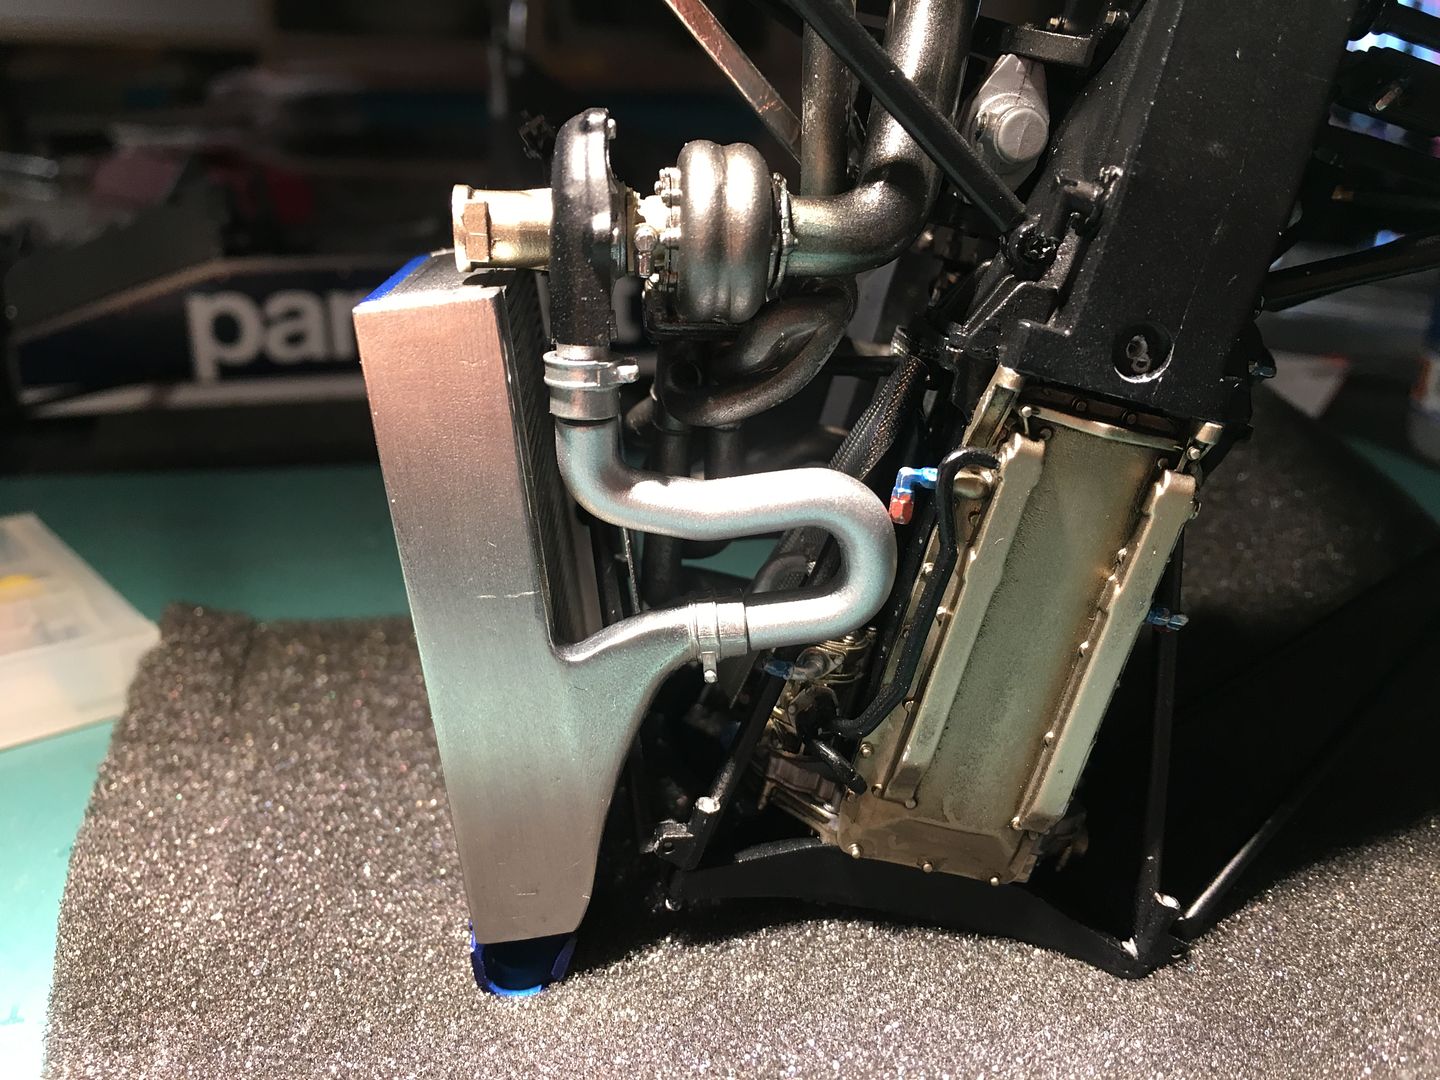
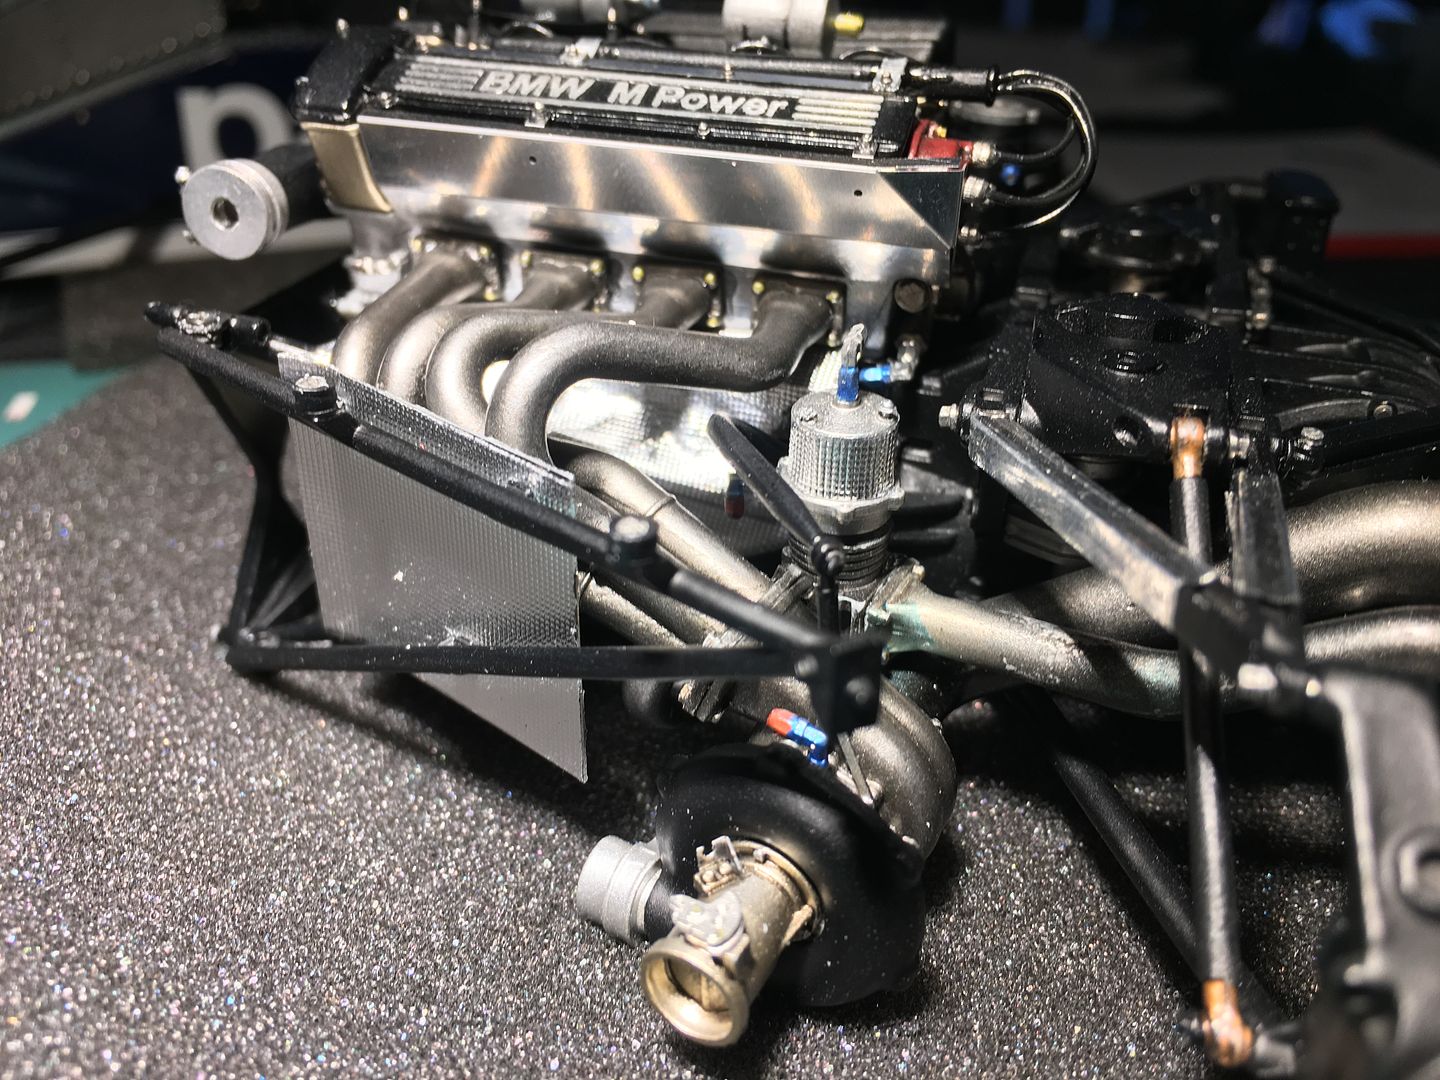
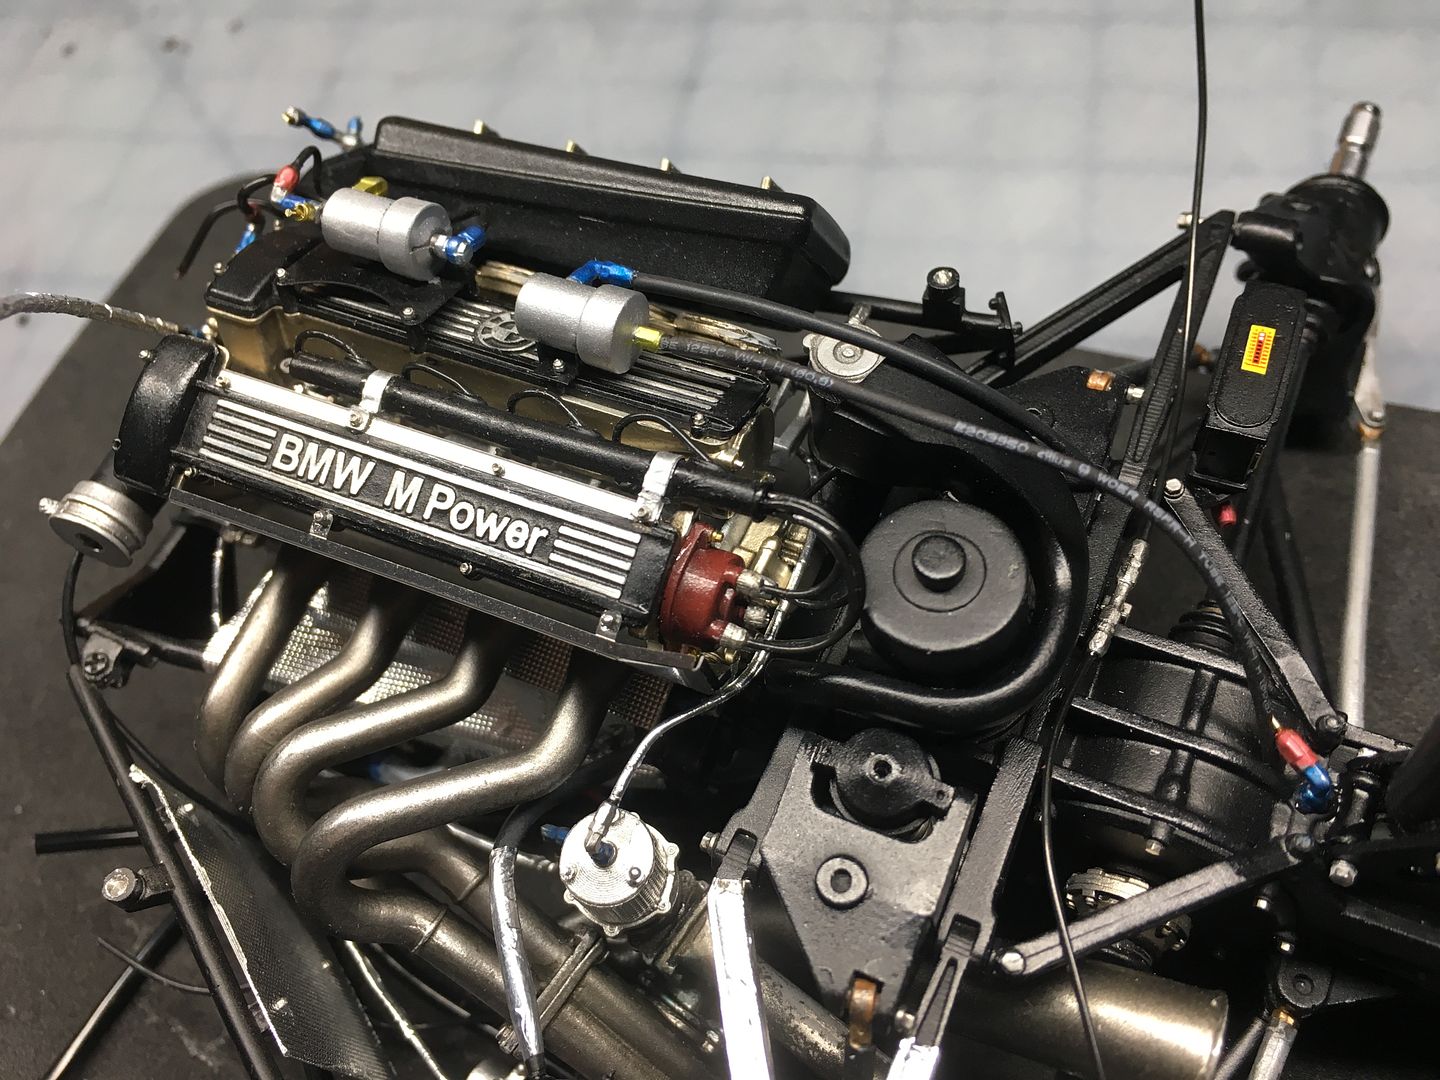
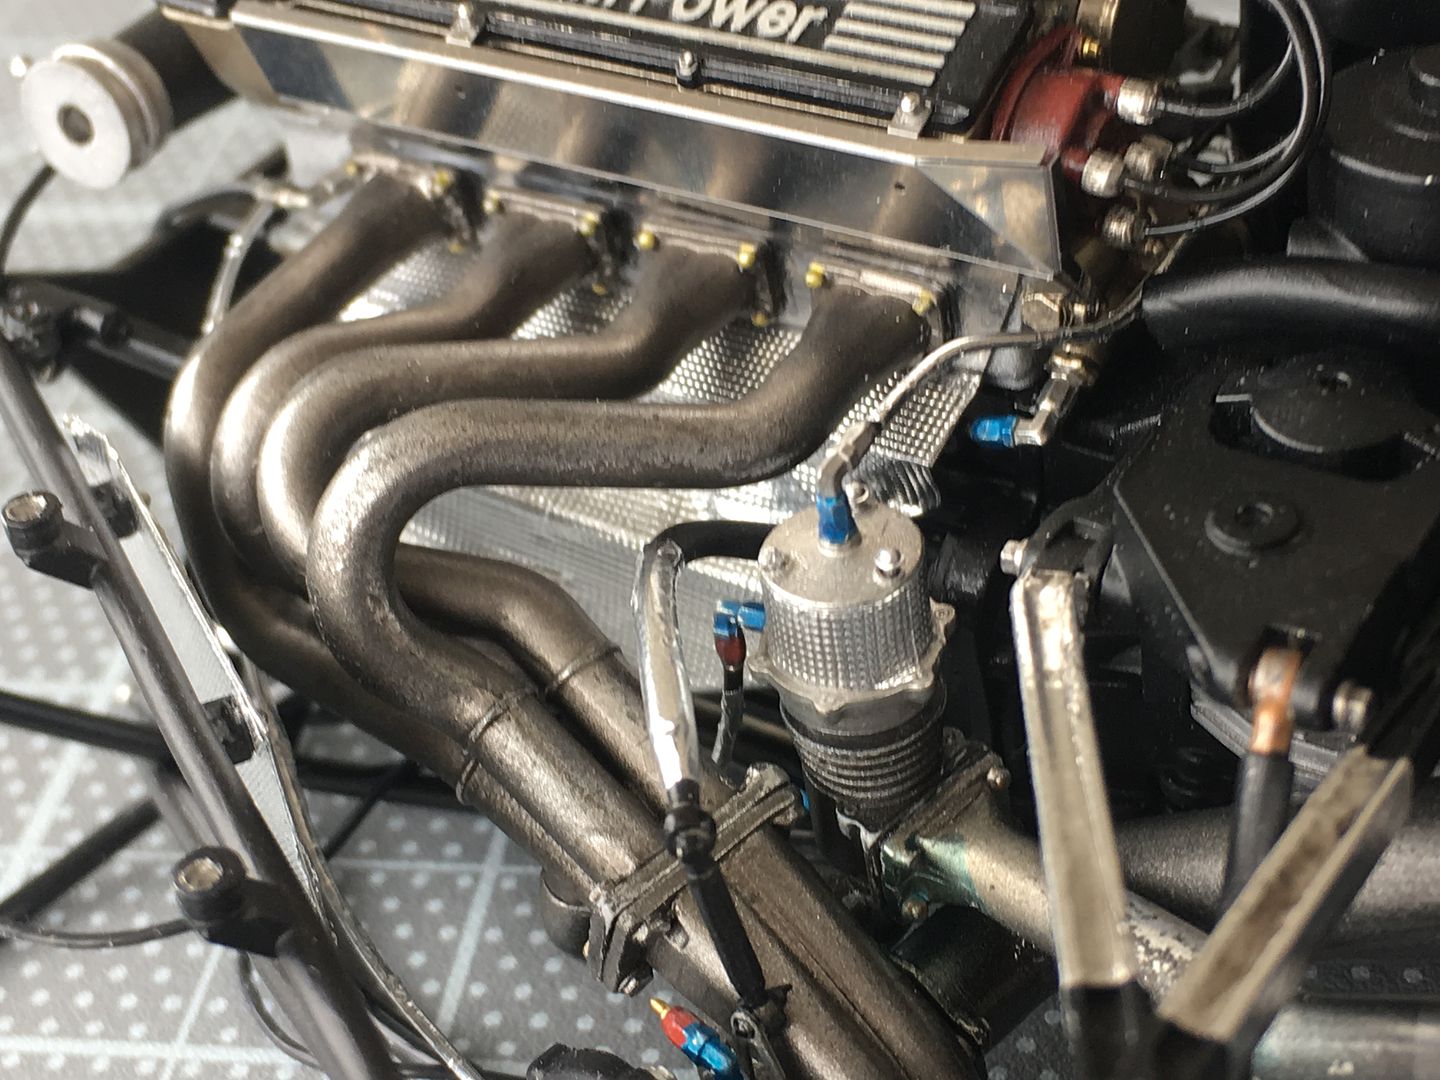
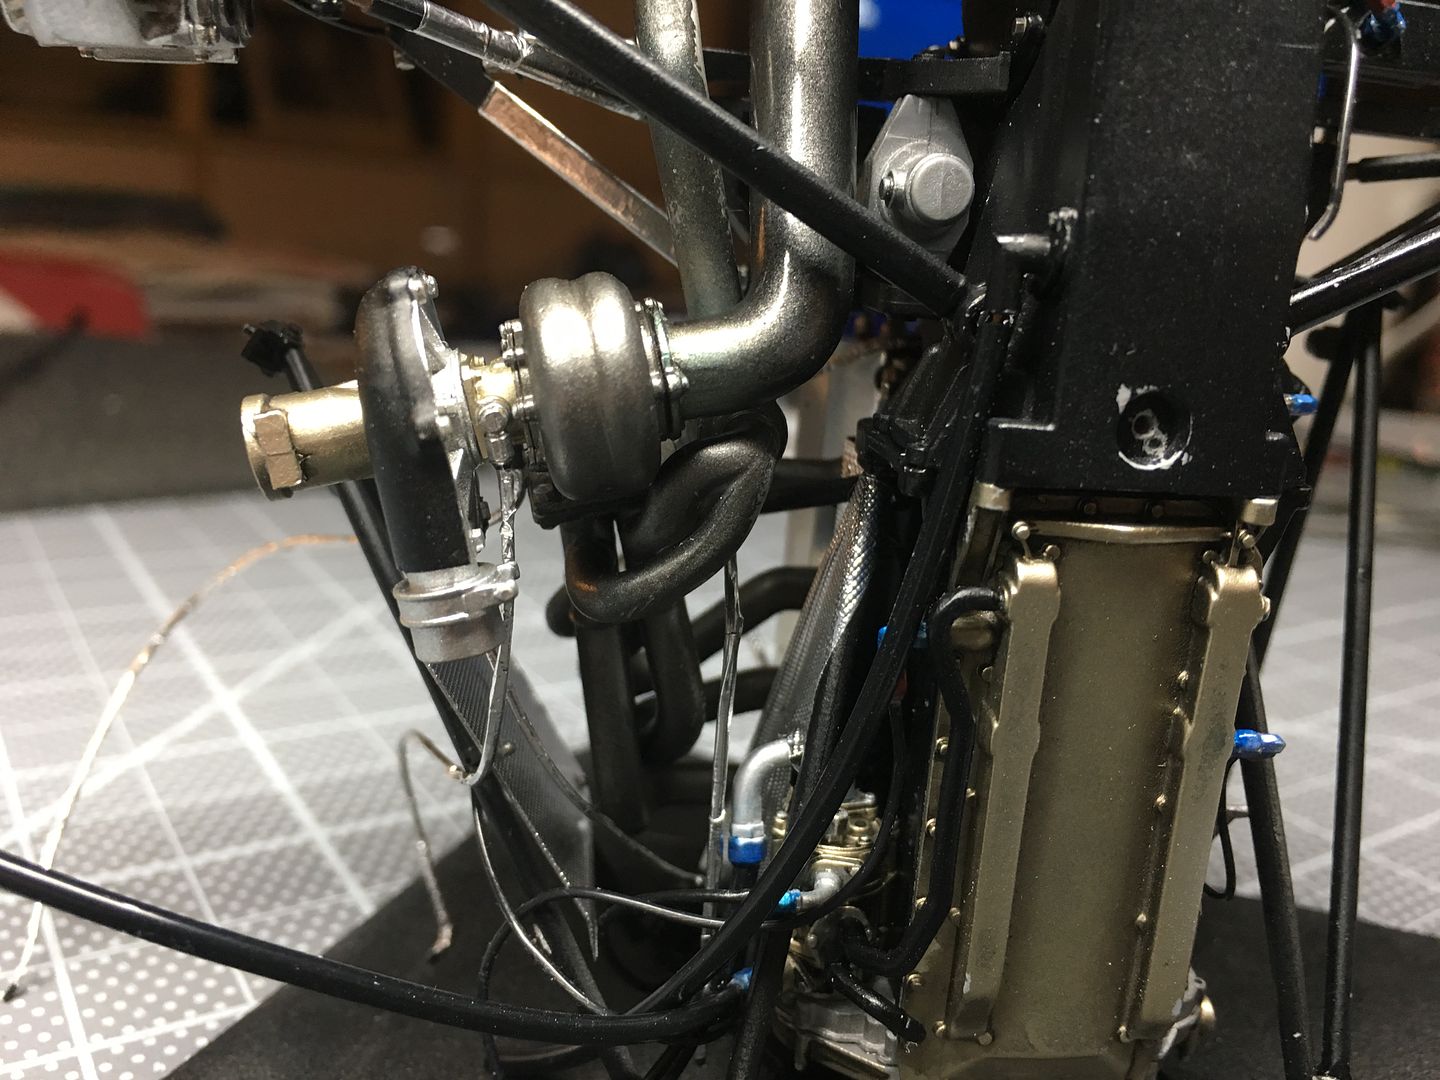
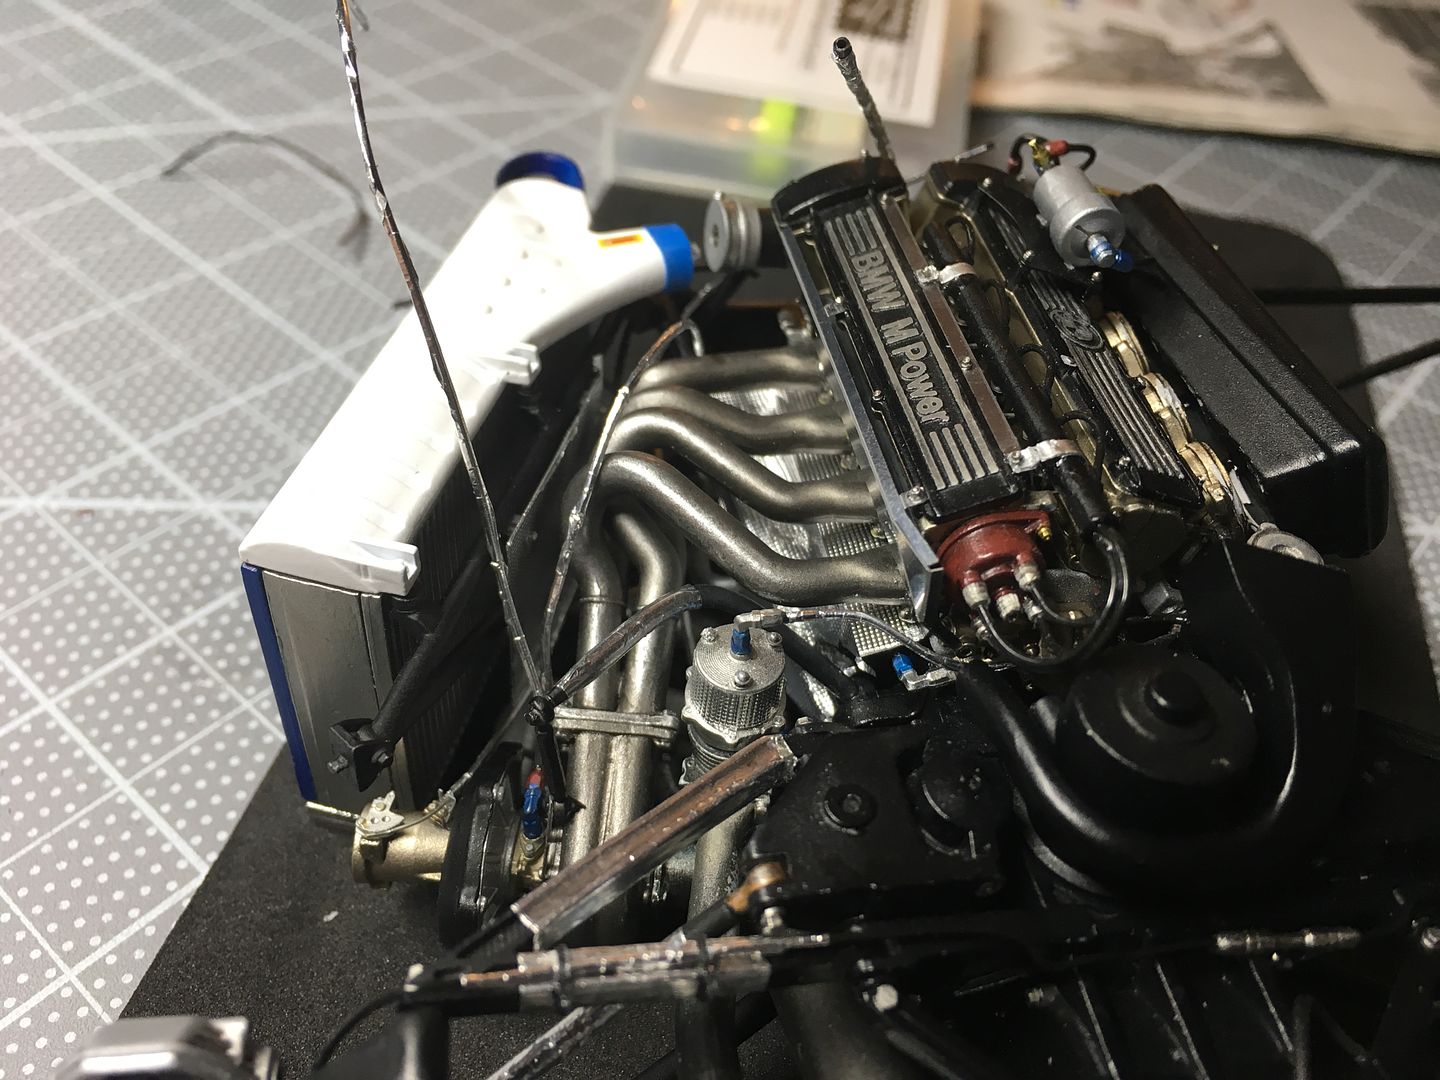
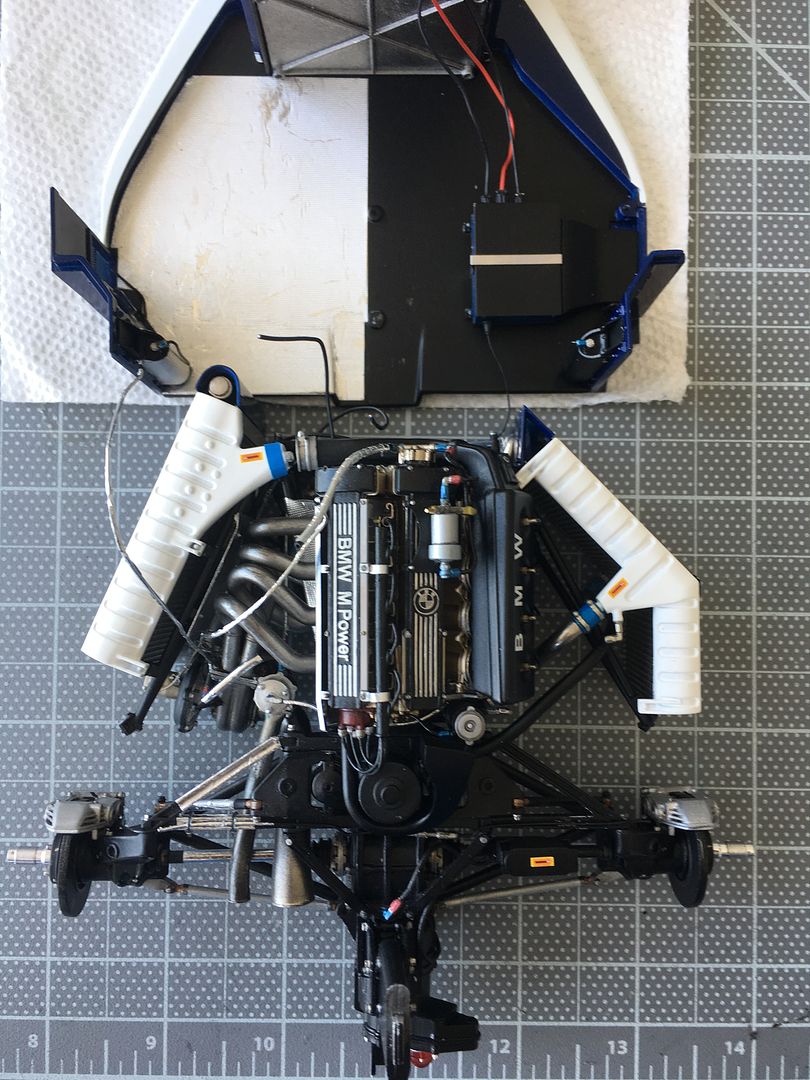
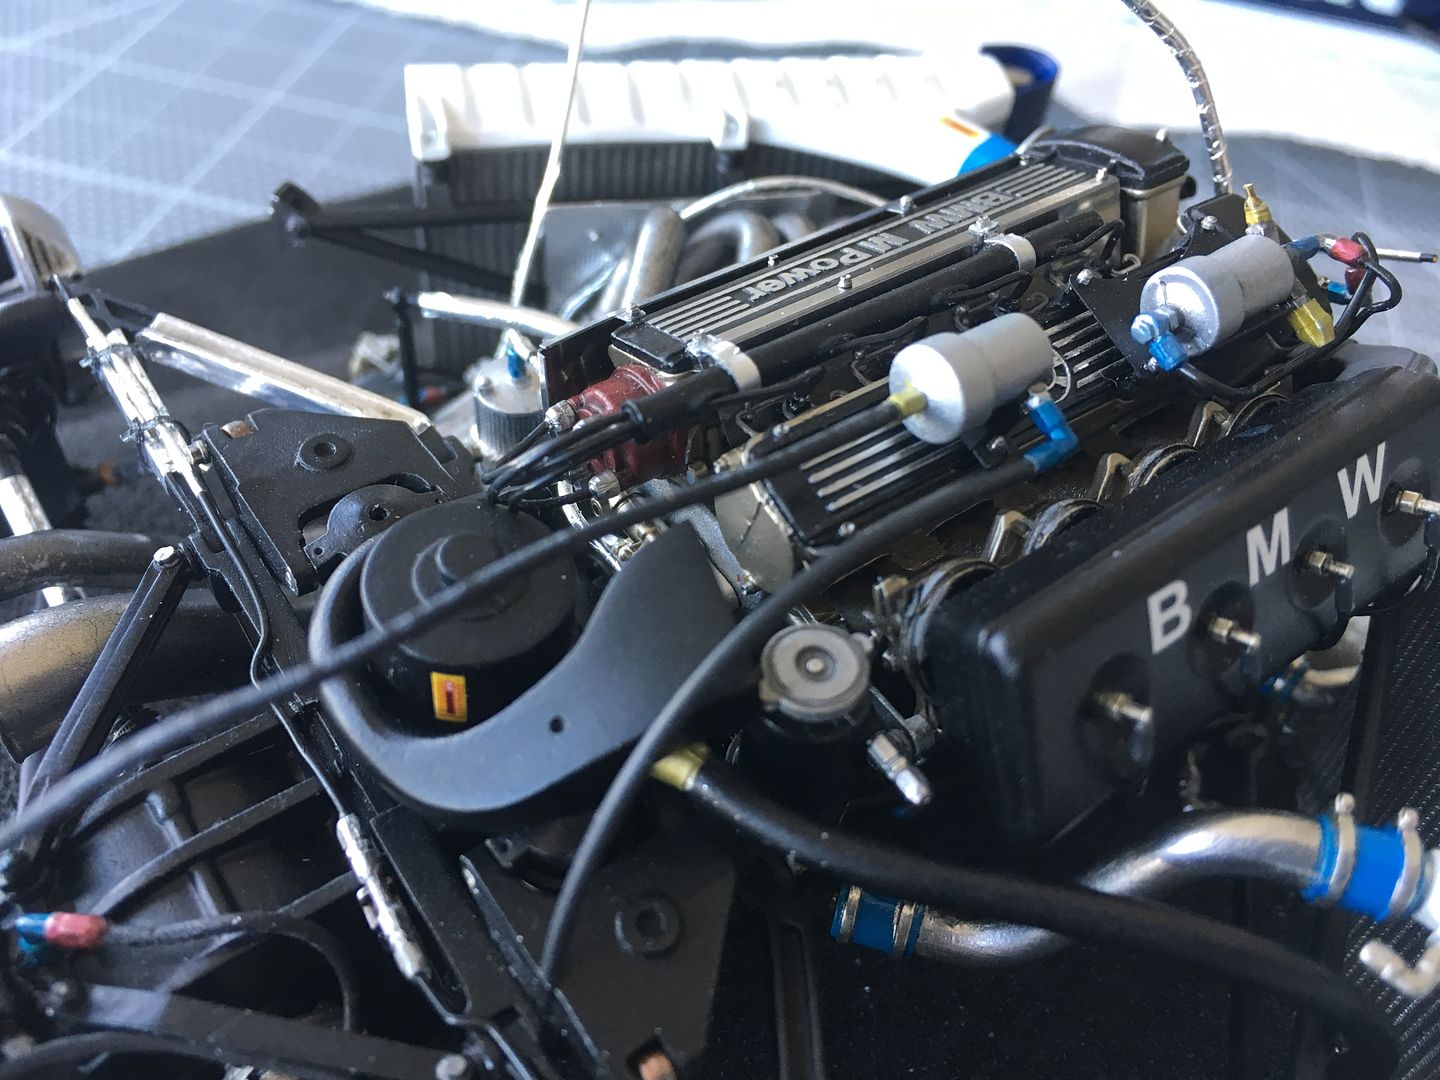
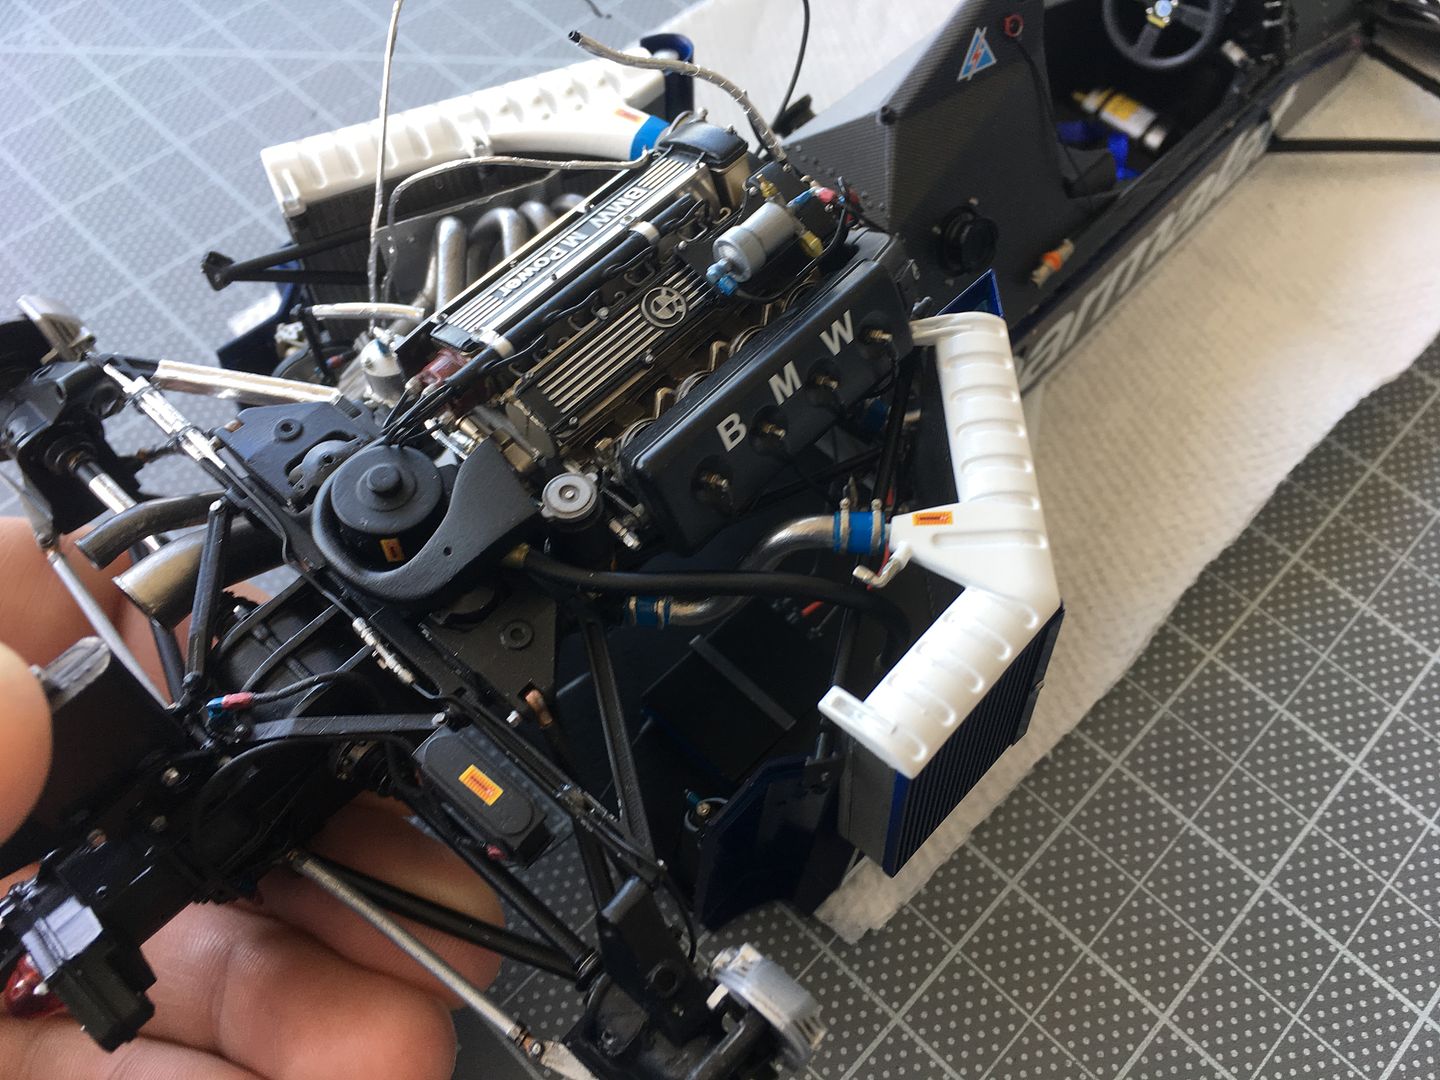
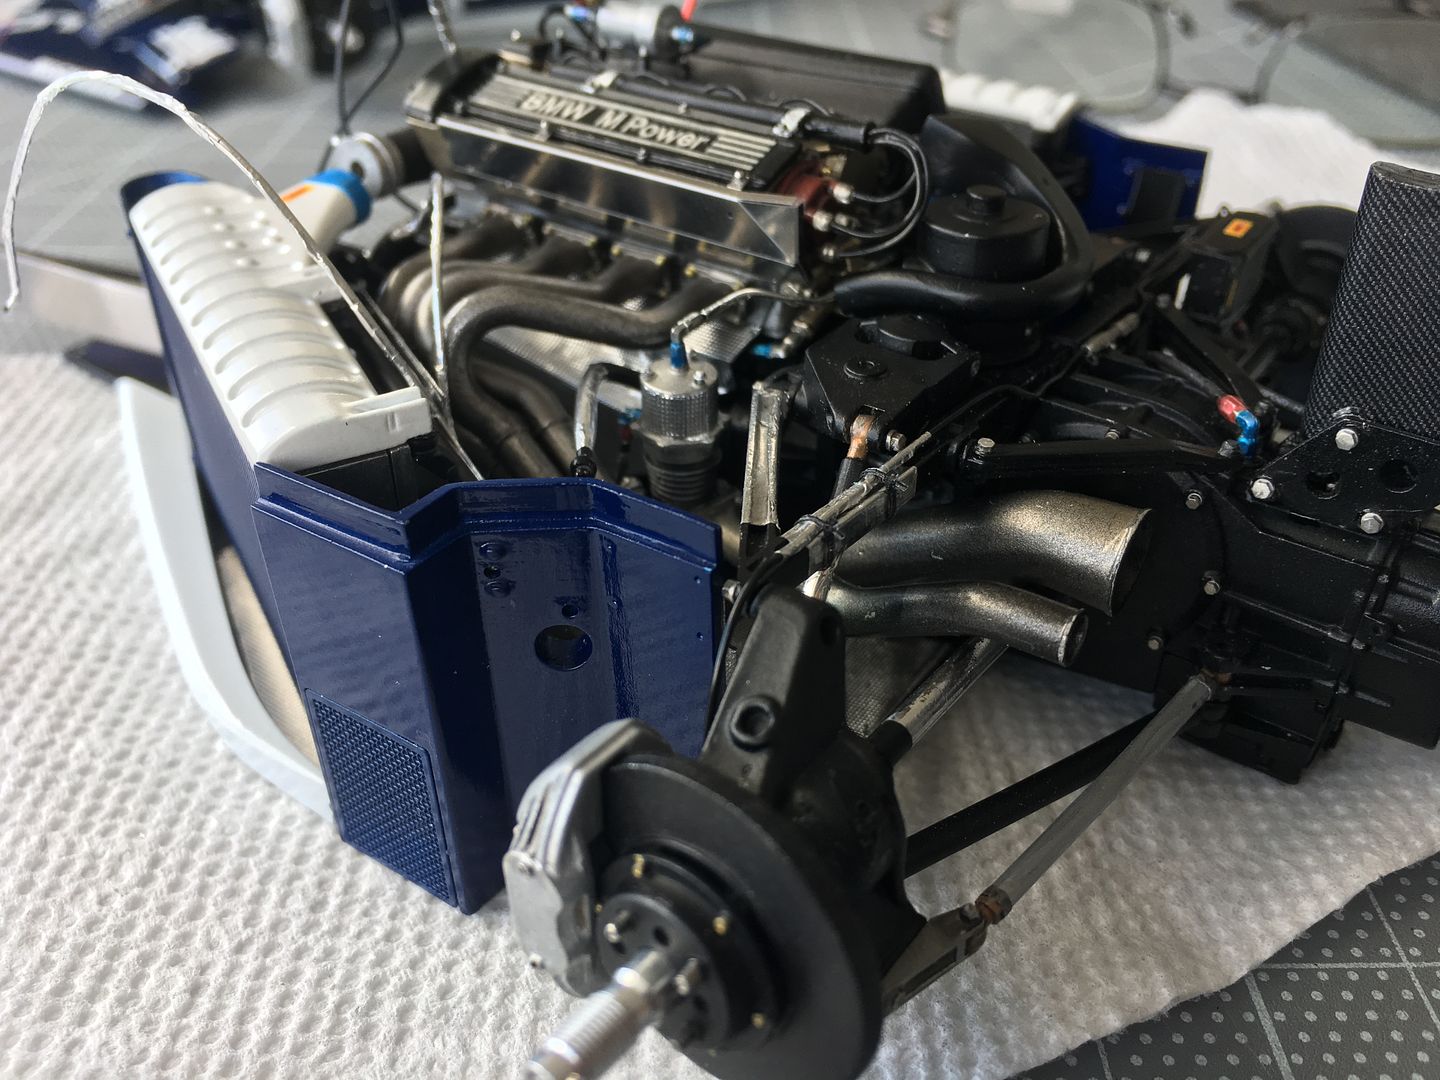
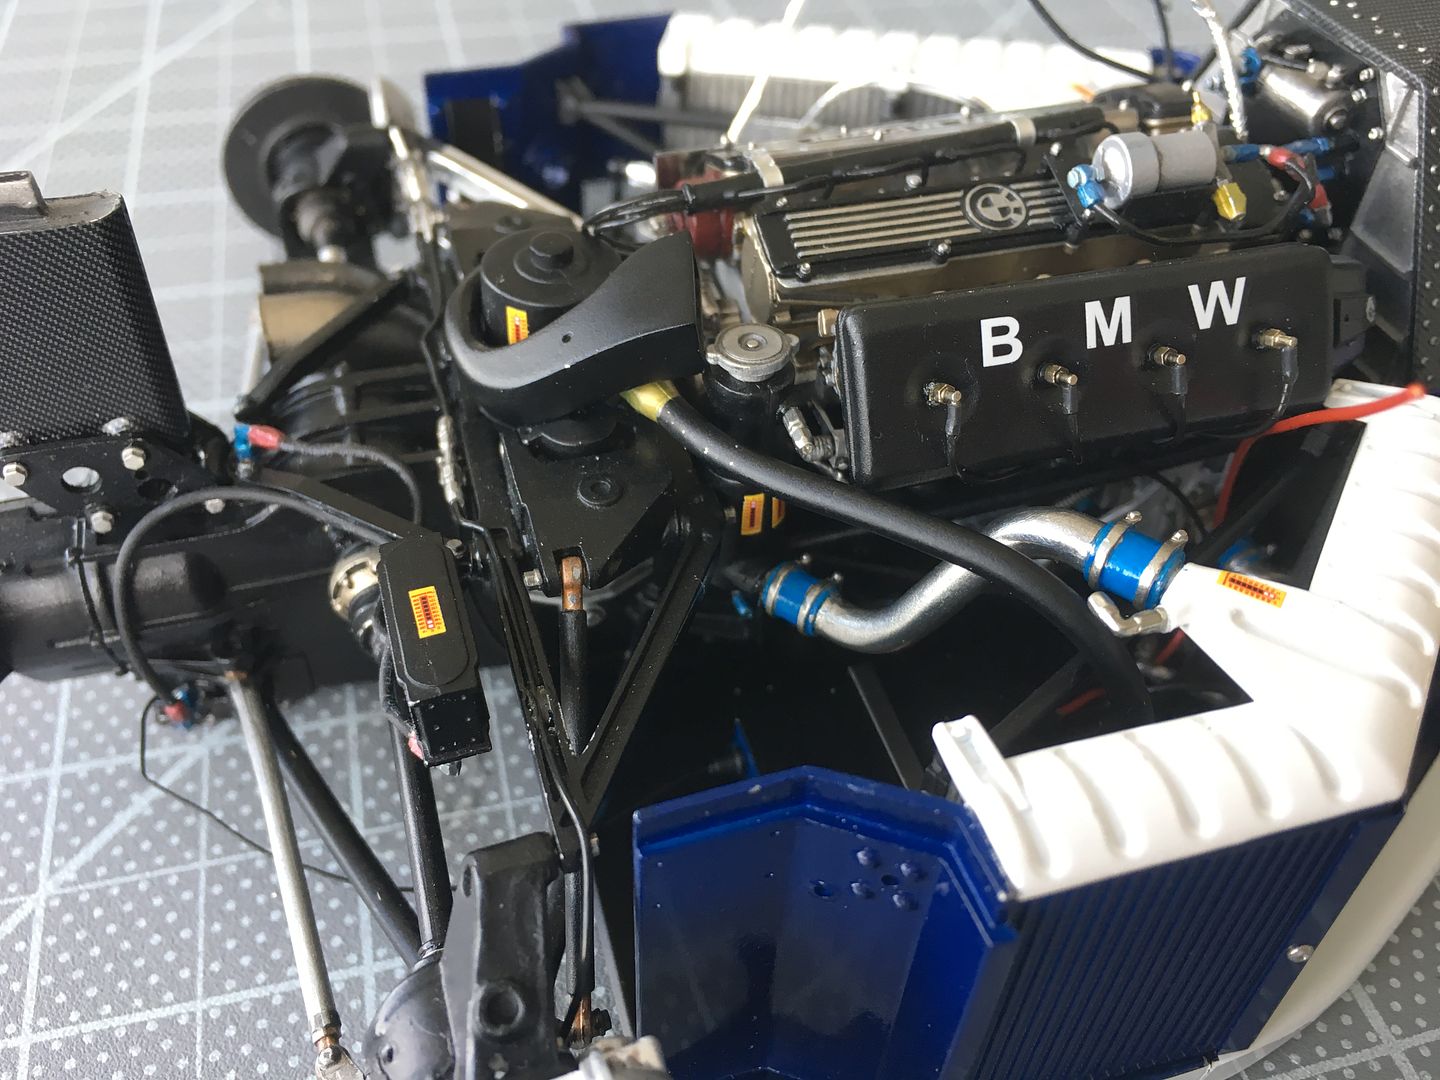
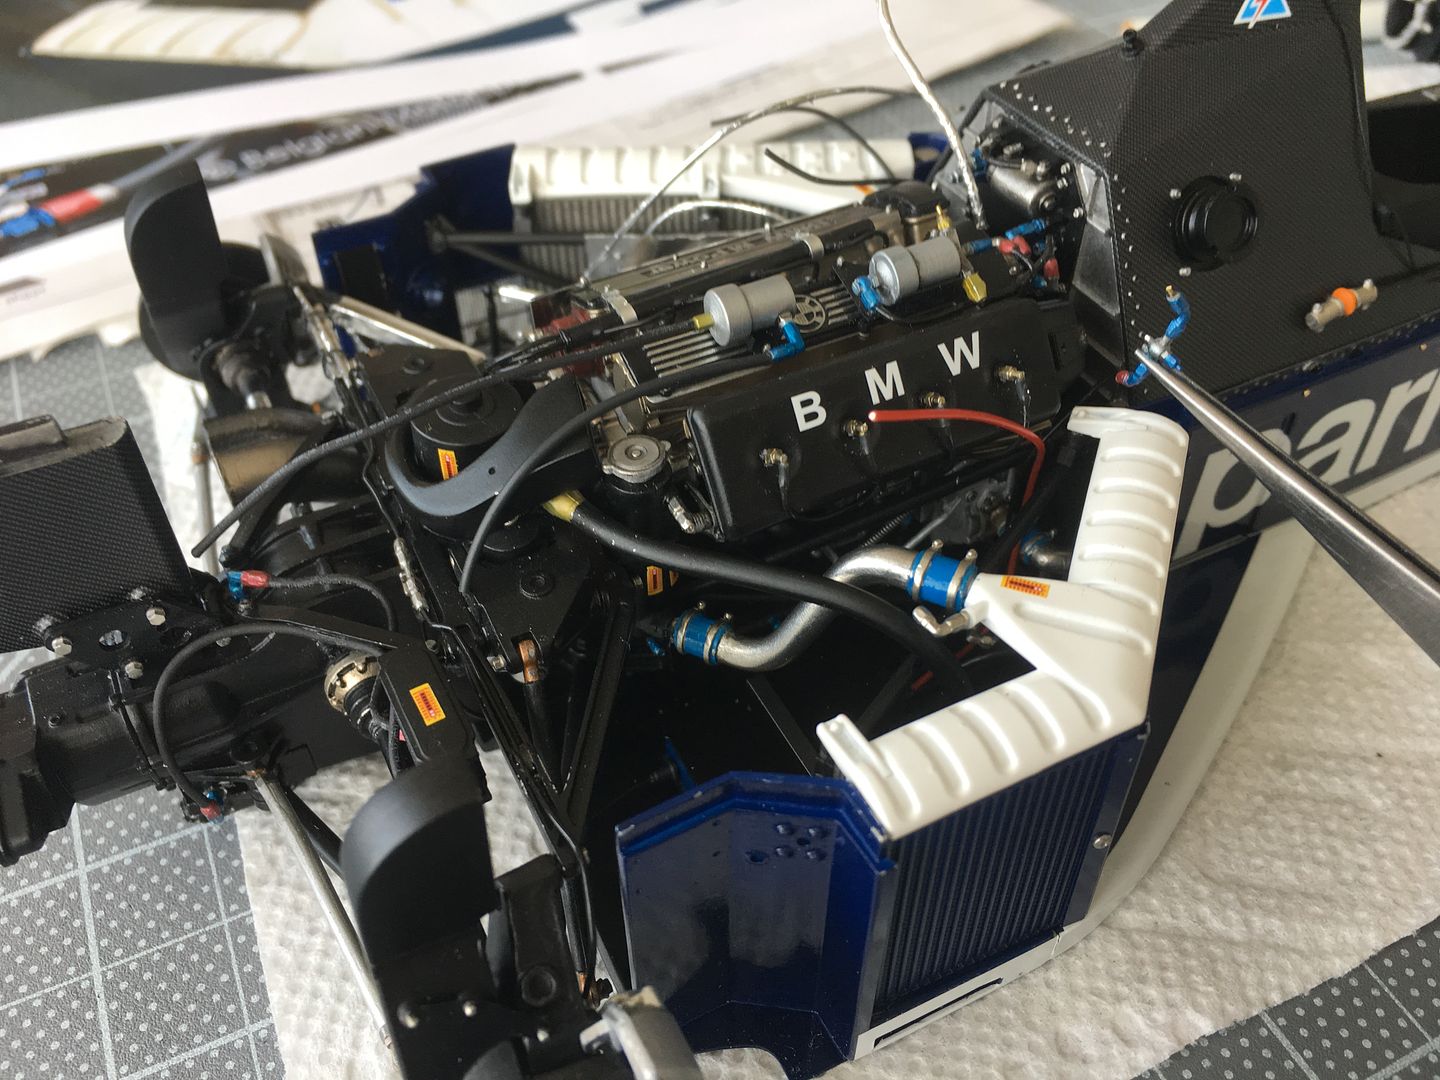
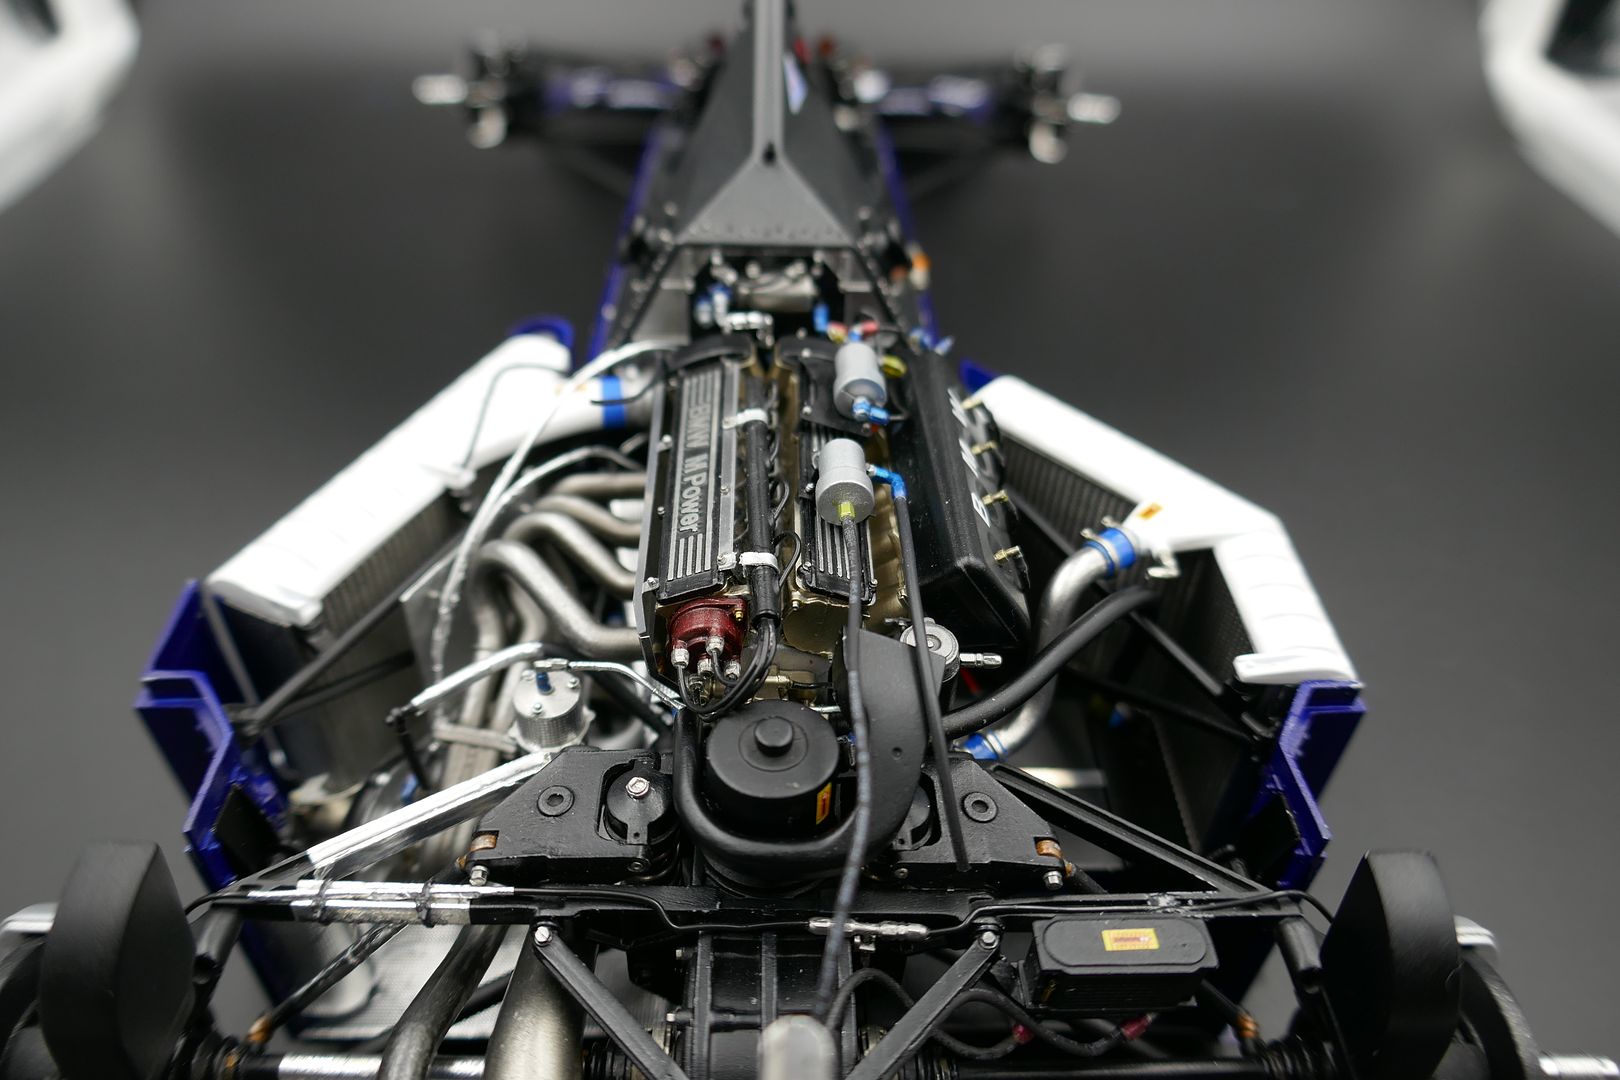
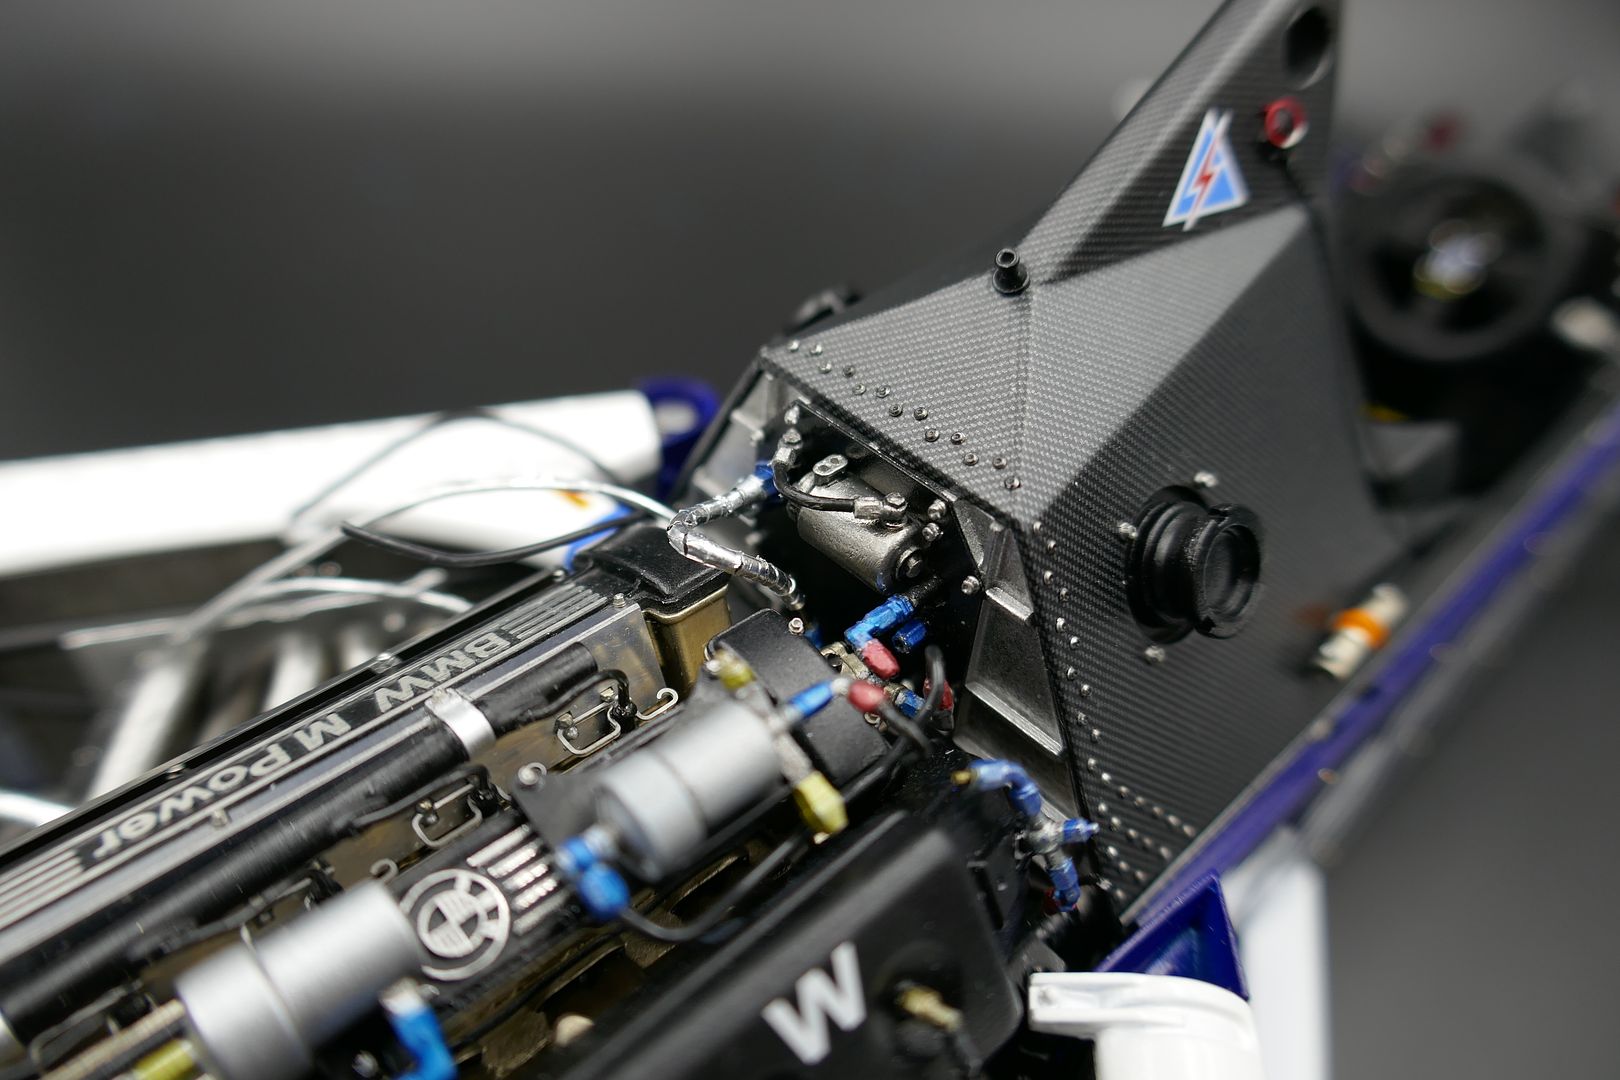
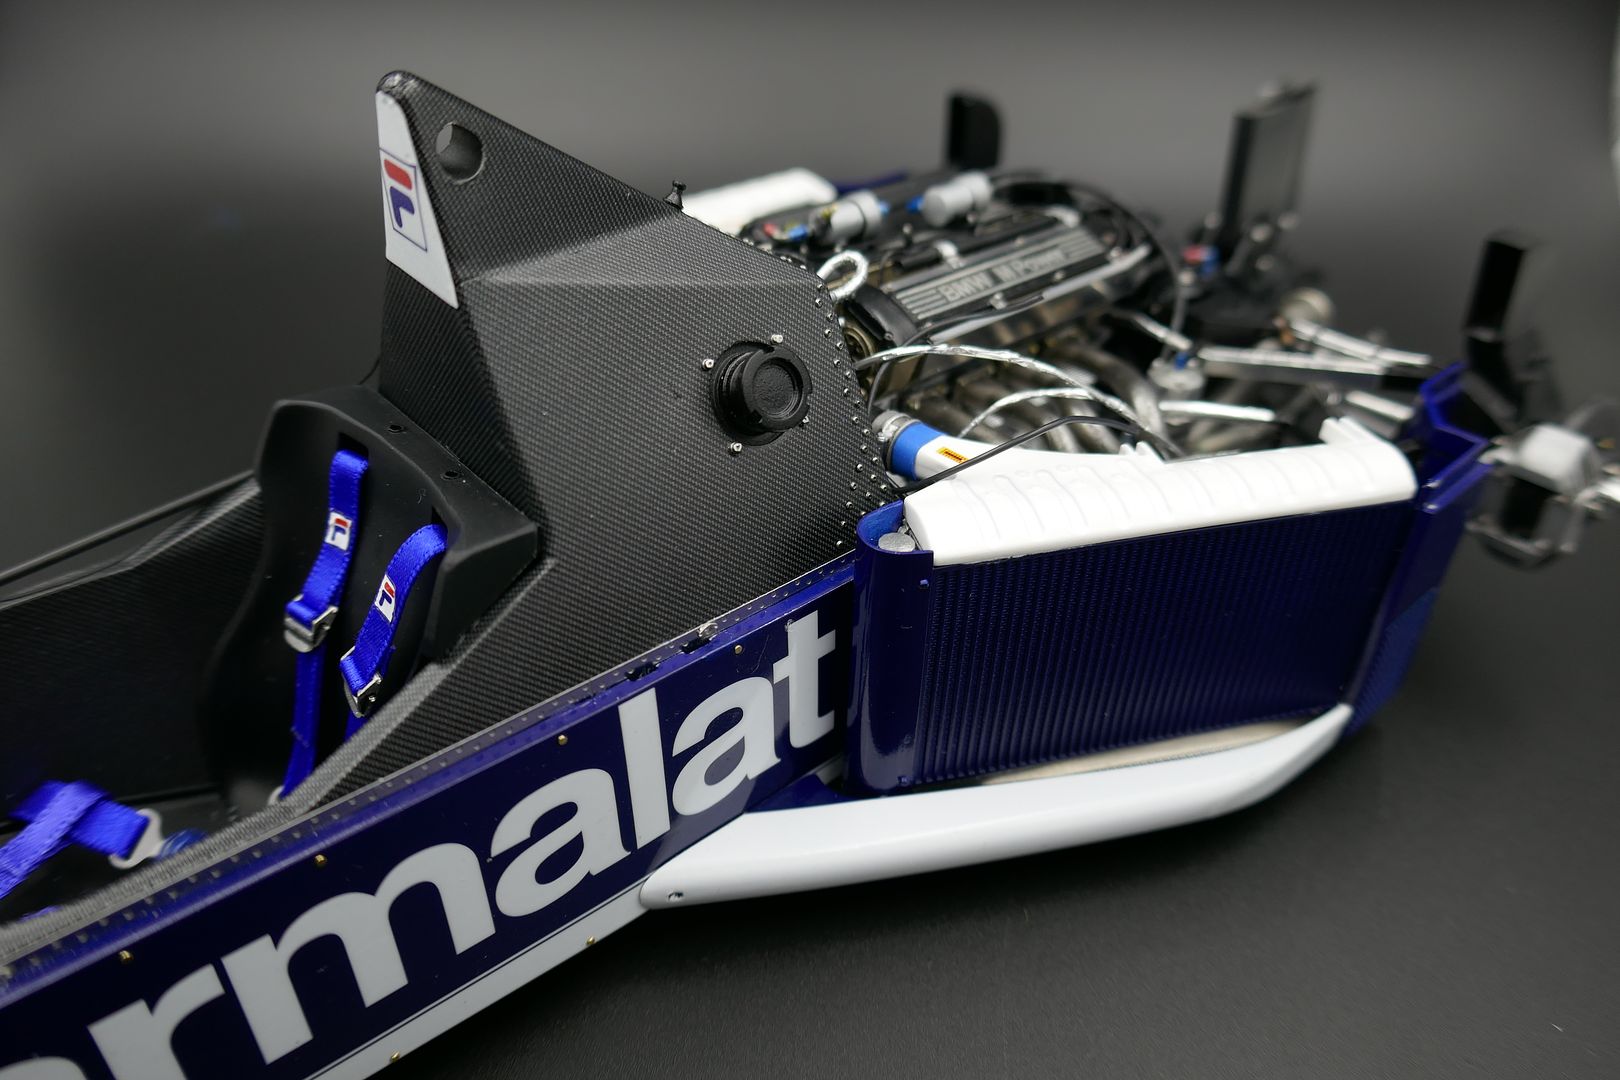
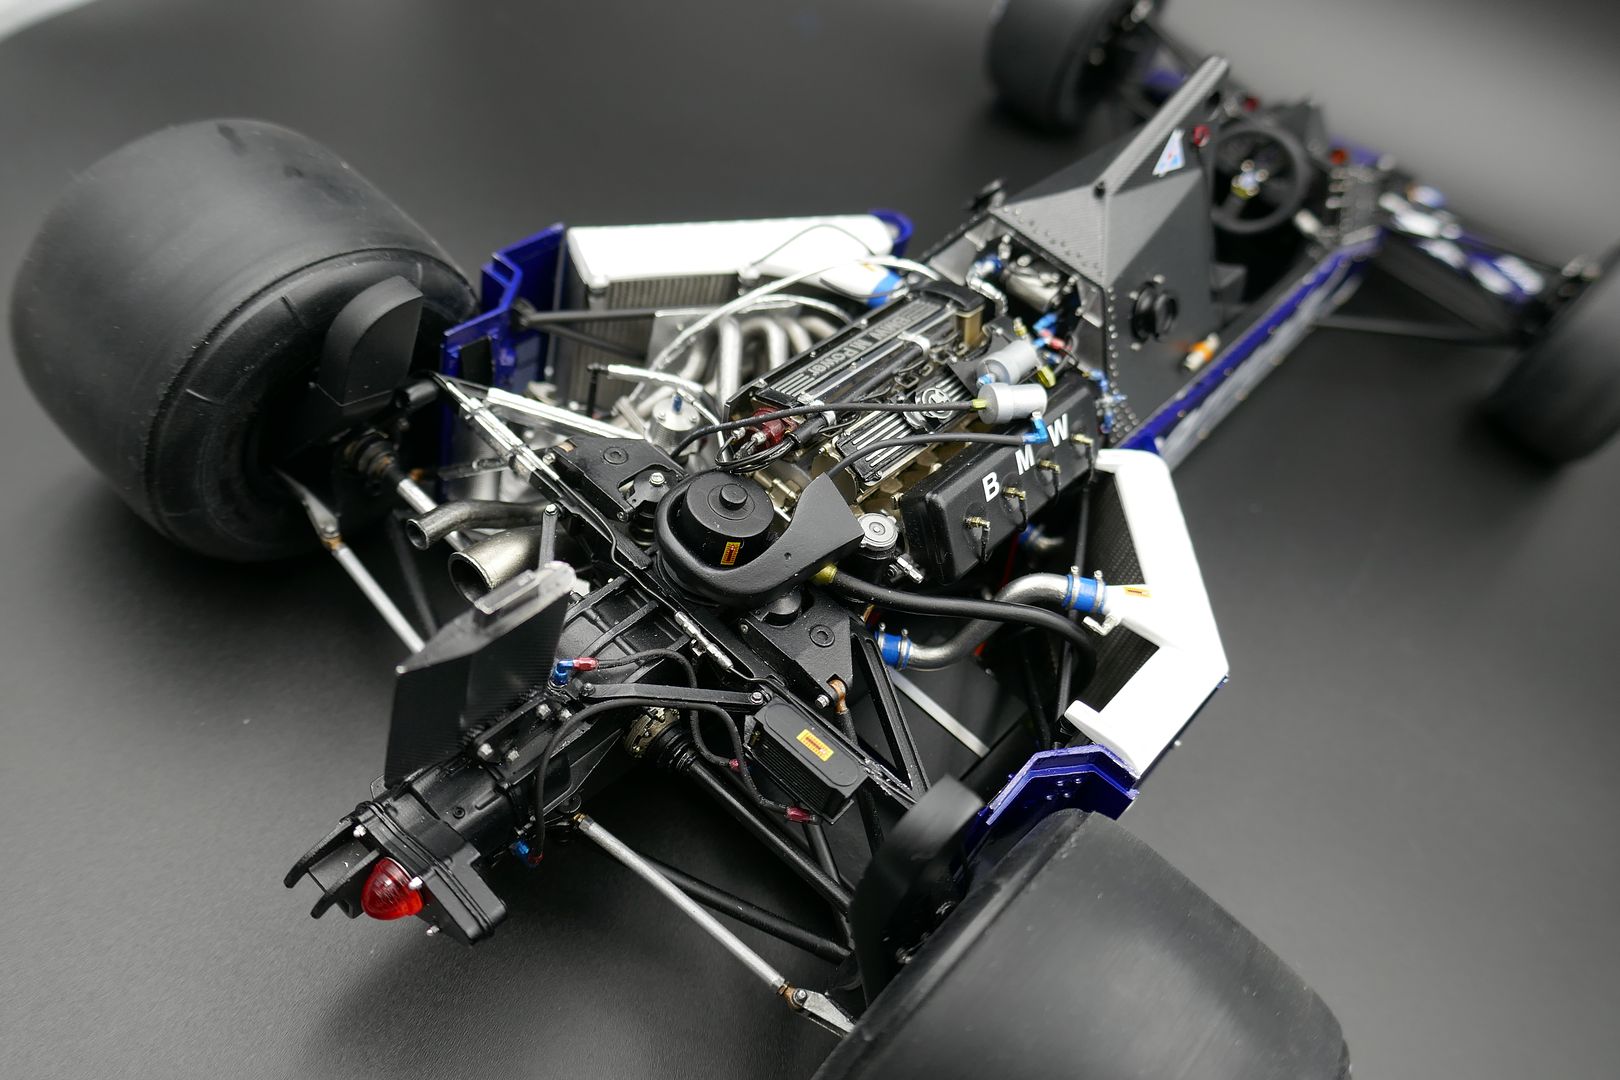
Now MFH had sent me the part I lost, I could carry on with the turbo/exhaust area....
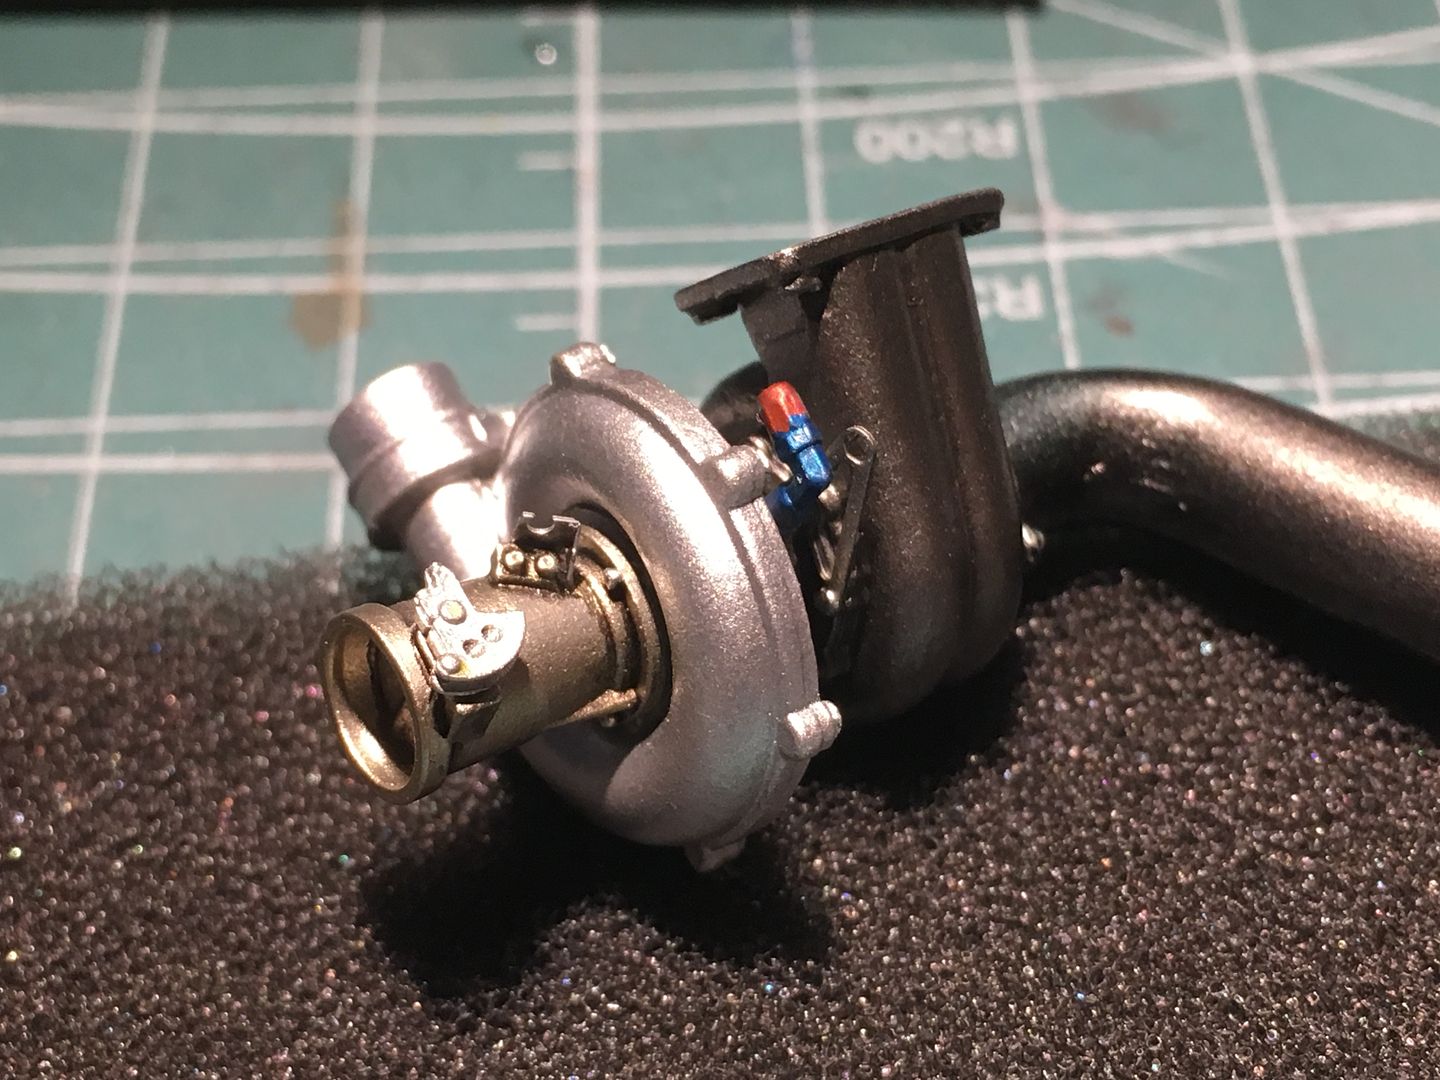
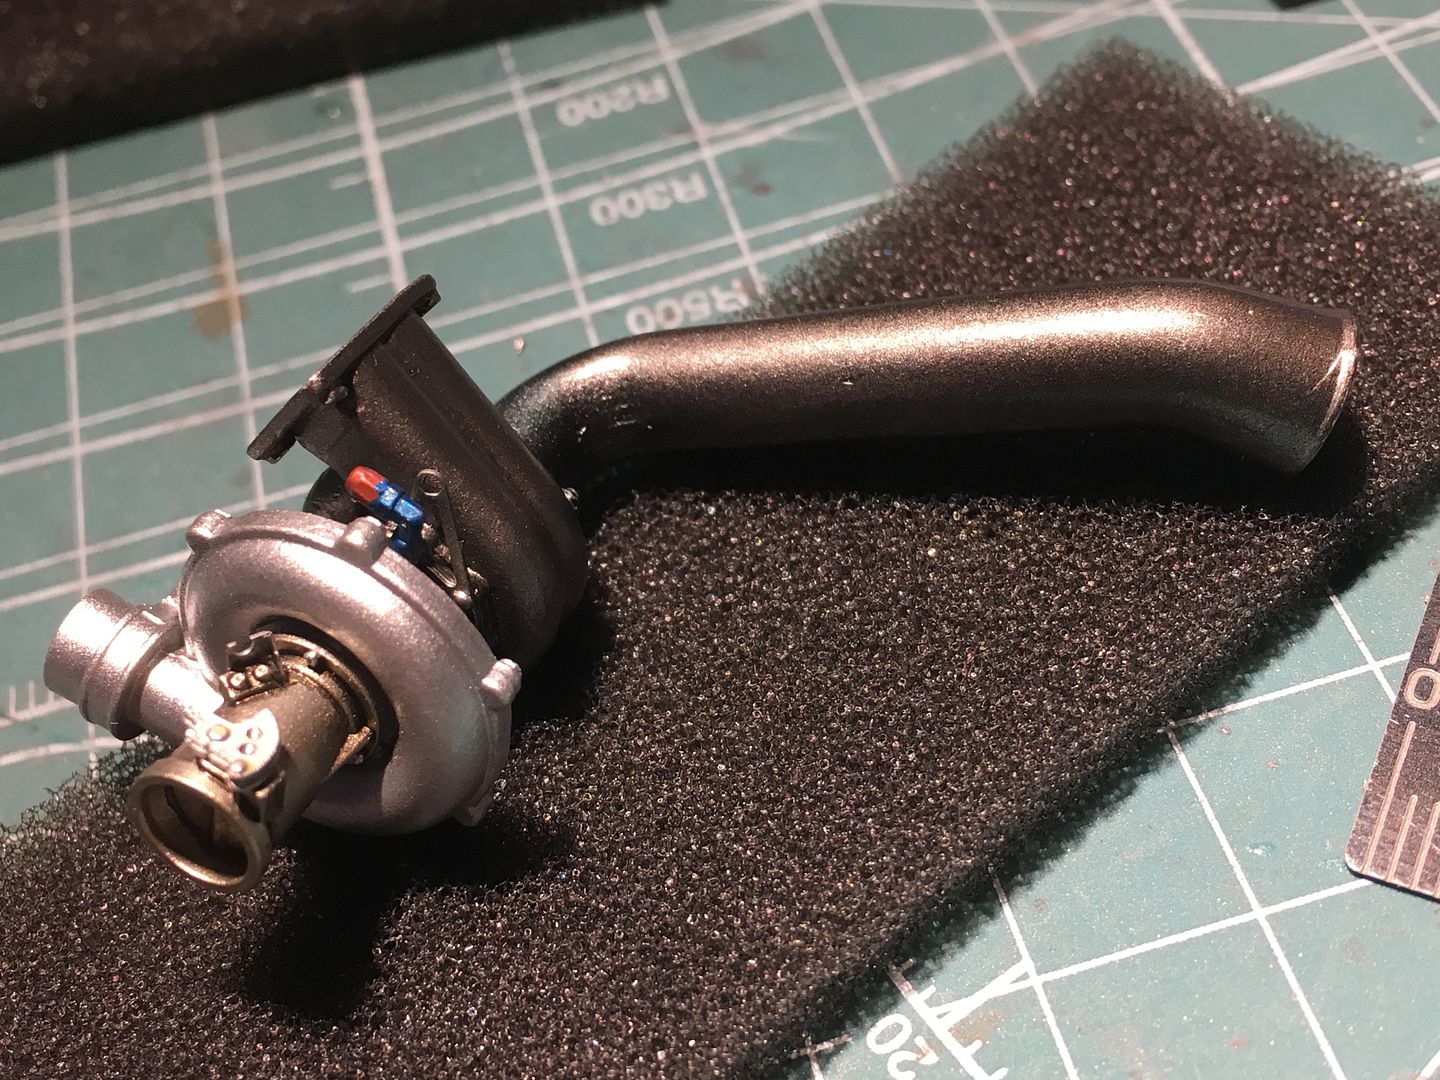
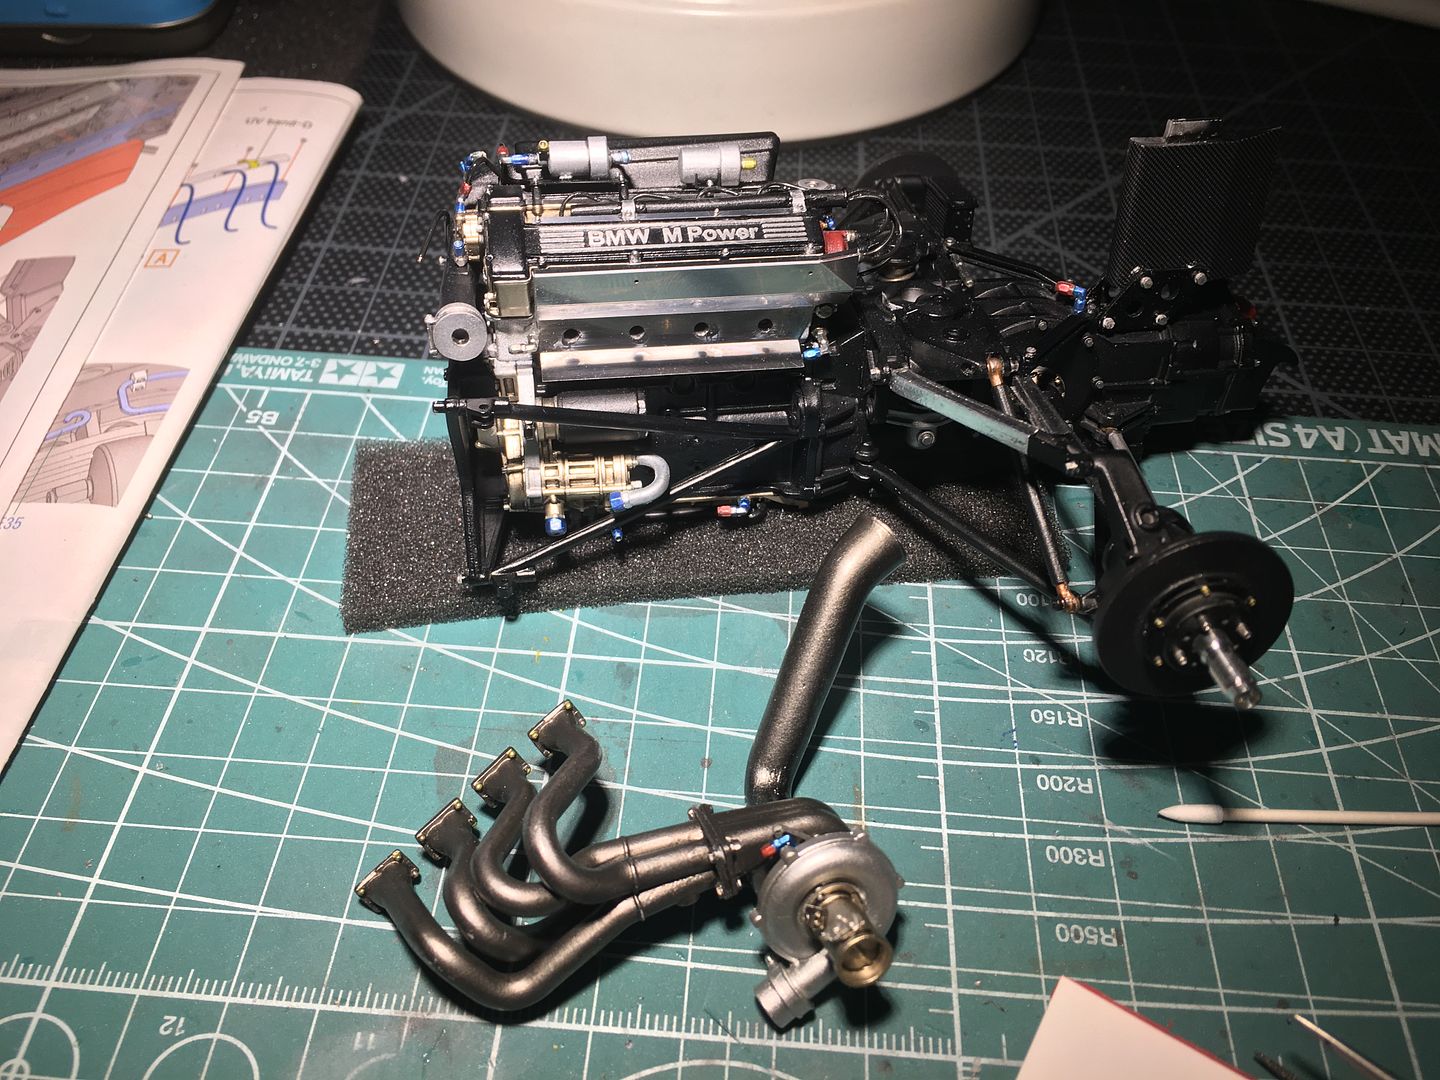
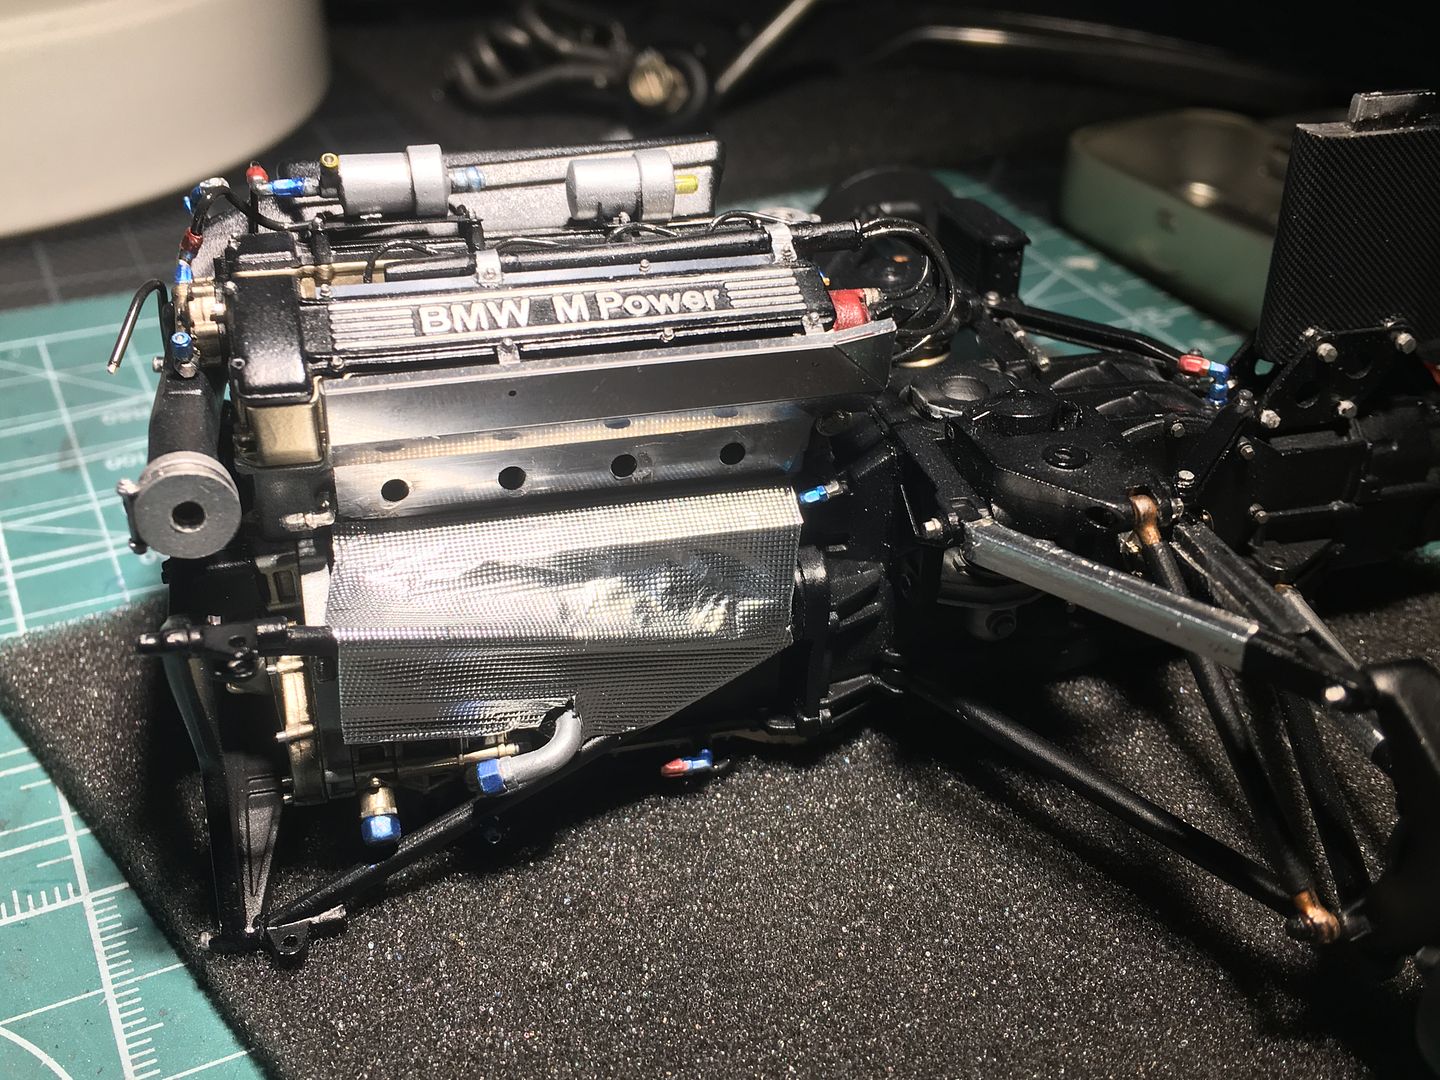
Sadly, it was now a case of covering up a lot of that lovely engine with heat shield foil!

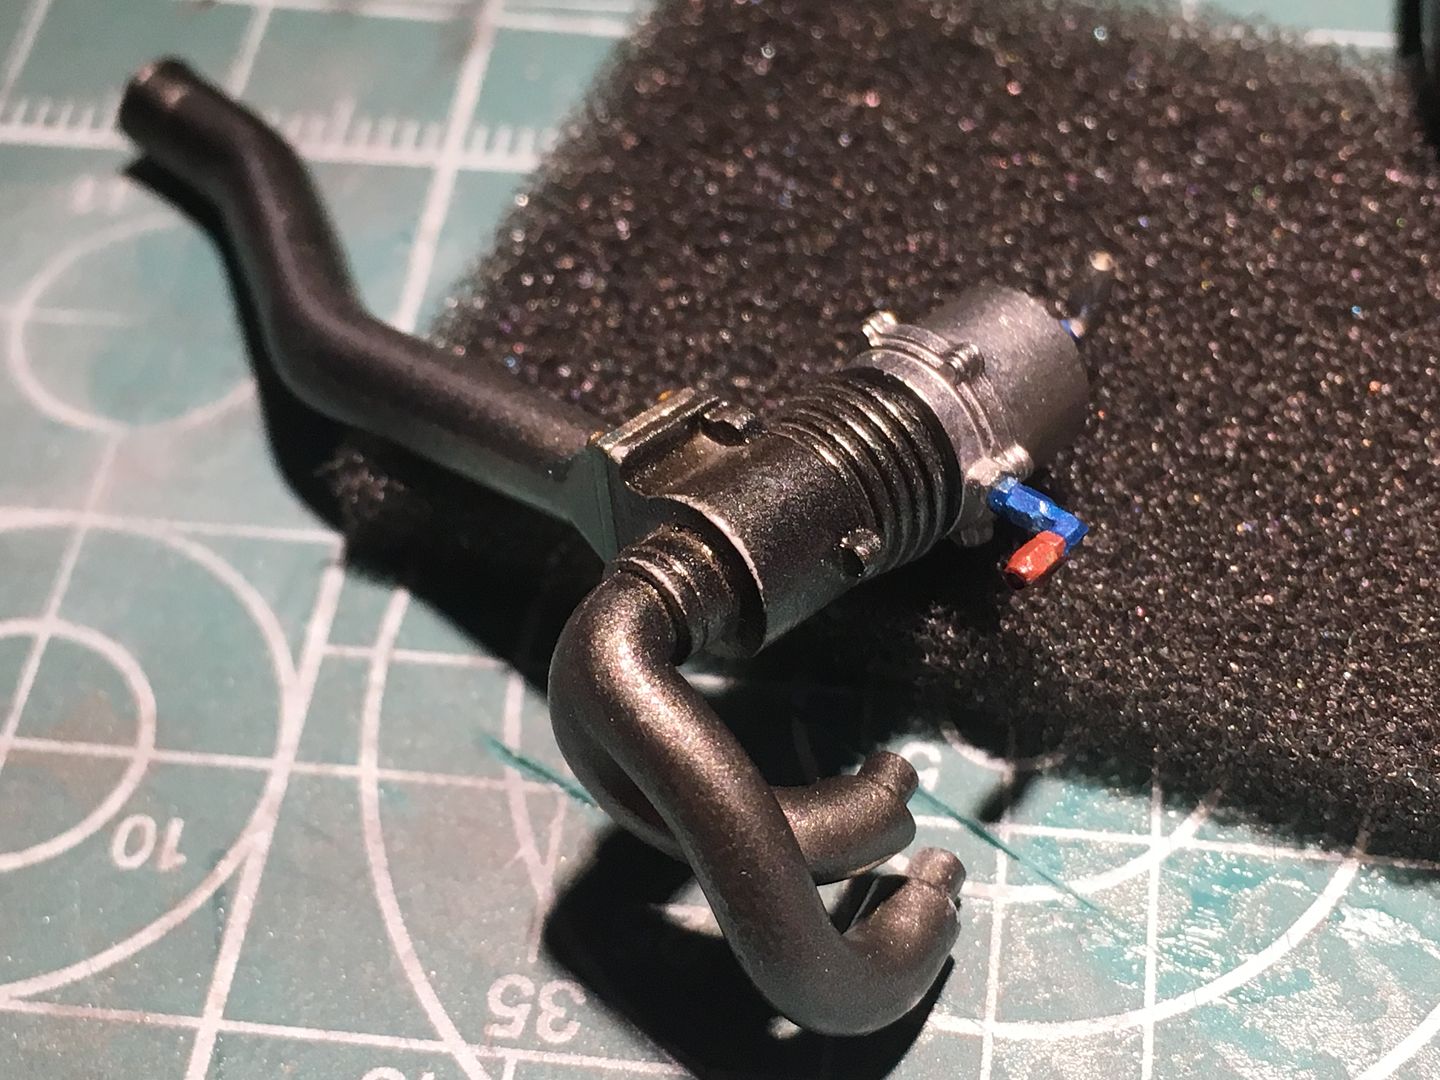
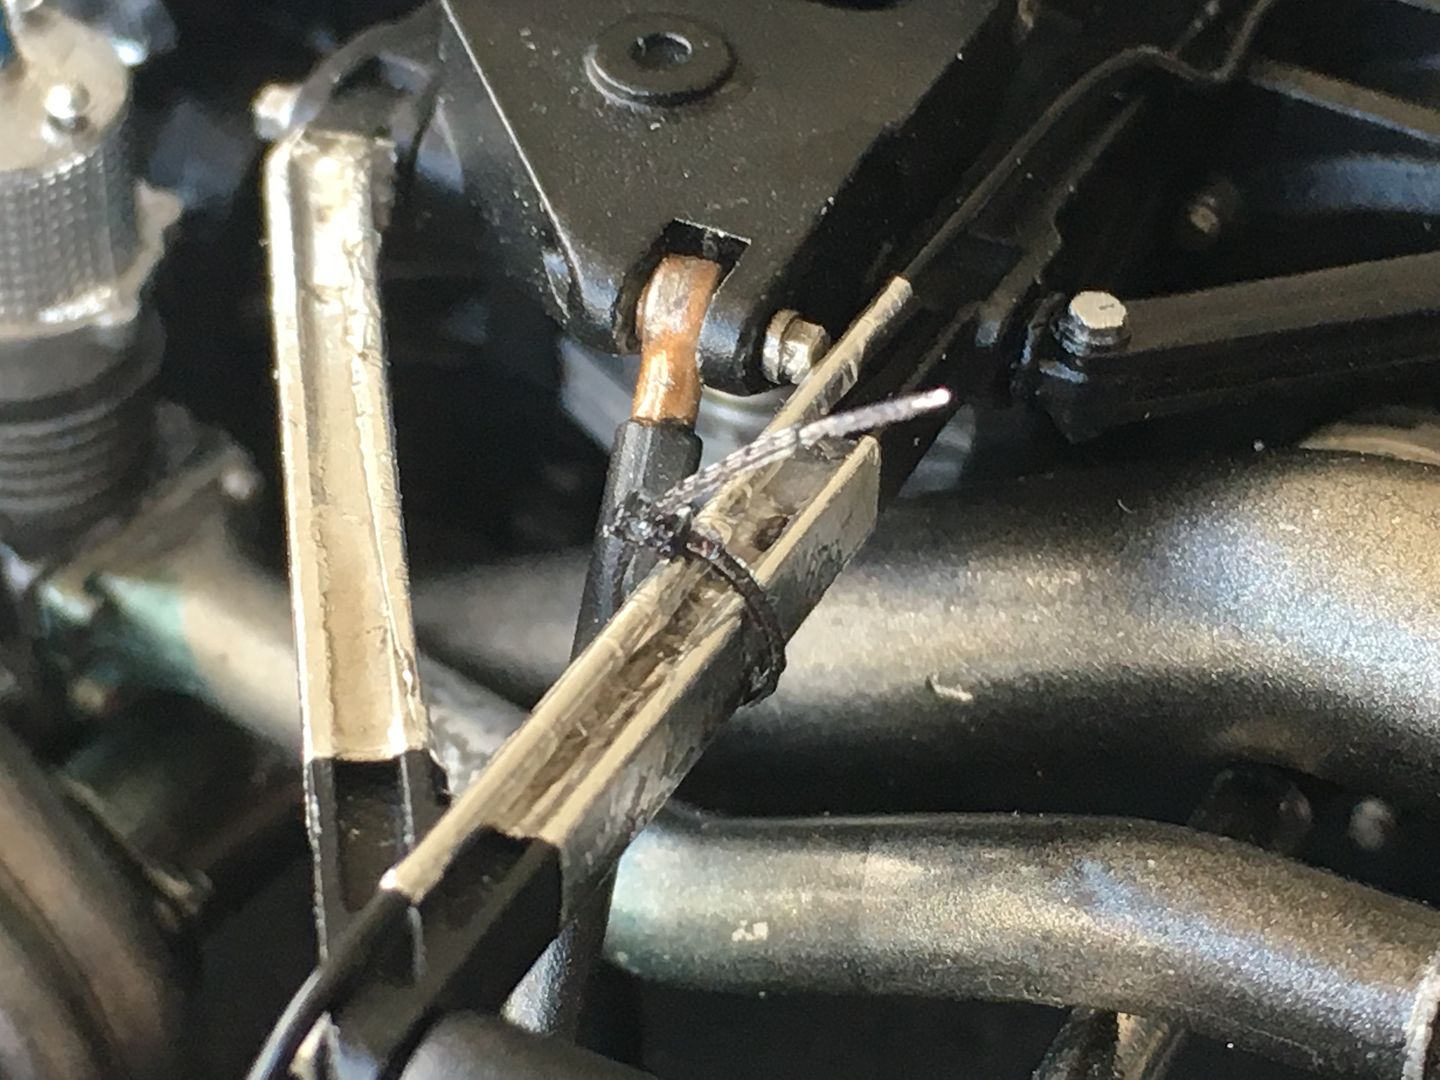
See that very thin, arcing black metal support, that the turbo 'hangs' from? That was one part - waaaaay too small a joint that snapped even before I came to use it - so I had to drill a very very thin hole in both parts and join with some wire - works fine - led to a stabbed thumb as the drill slipped, but all went ok in the end!!
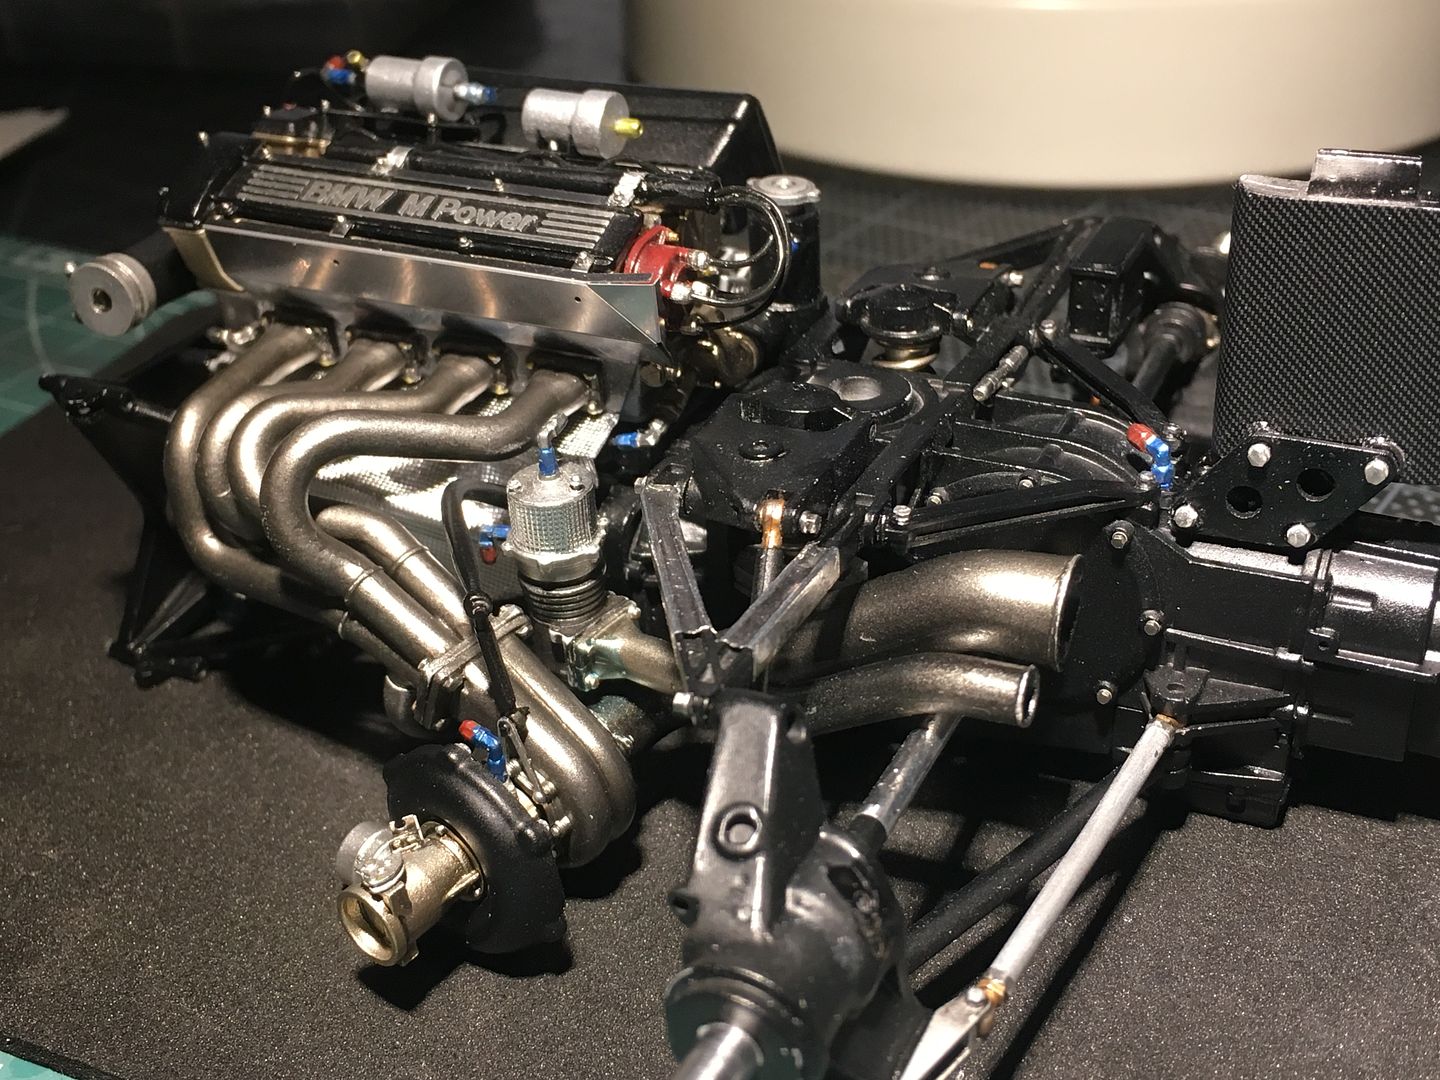
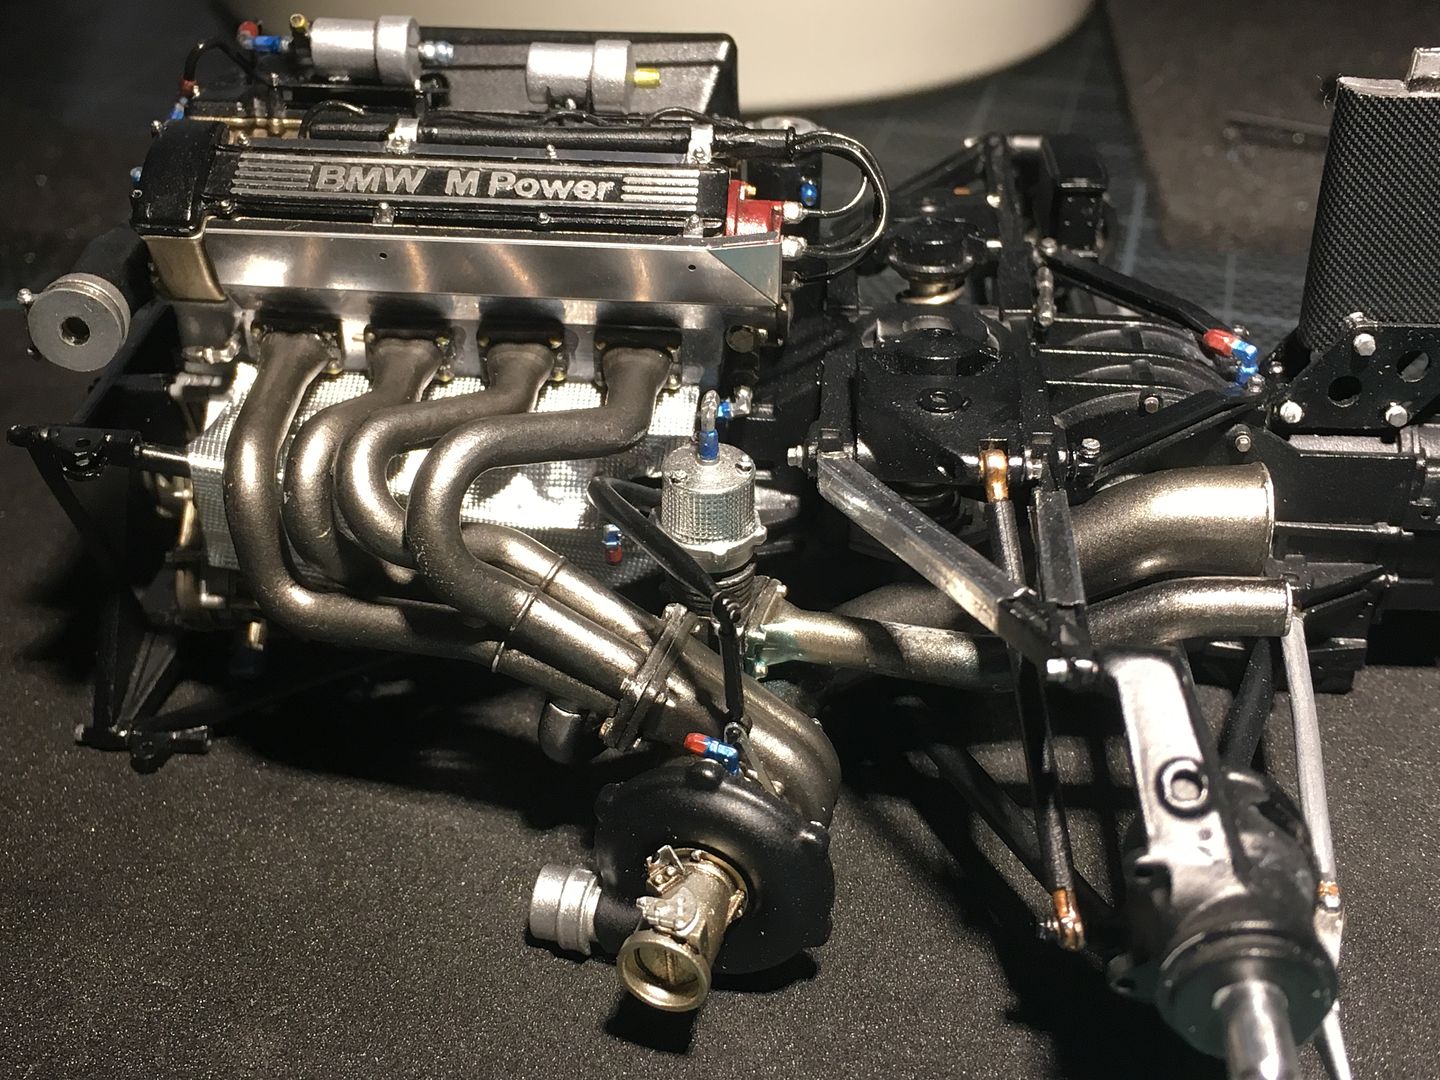
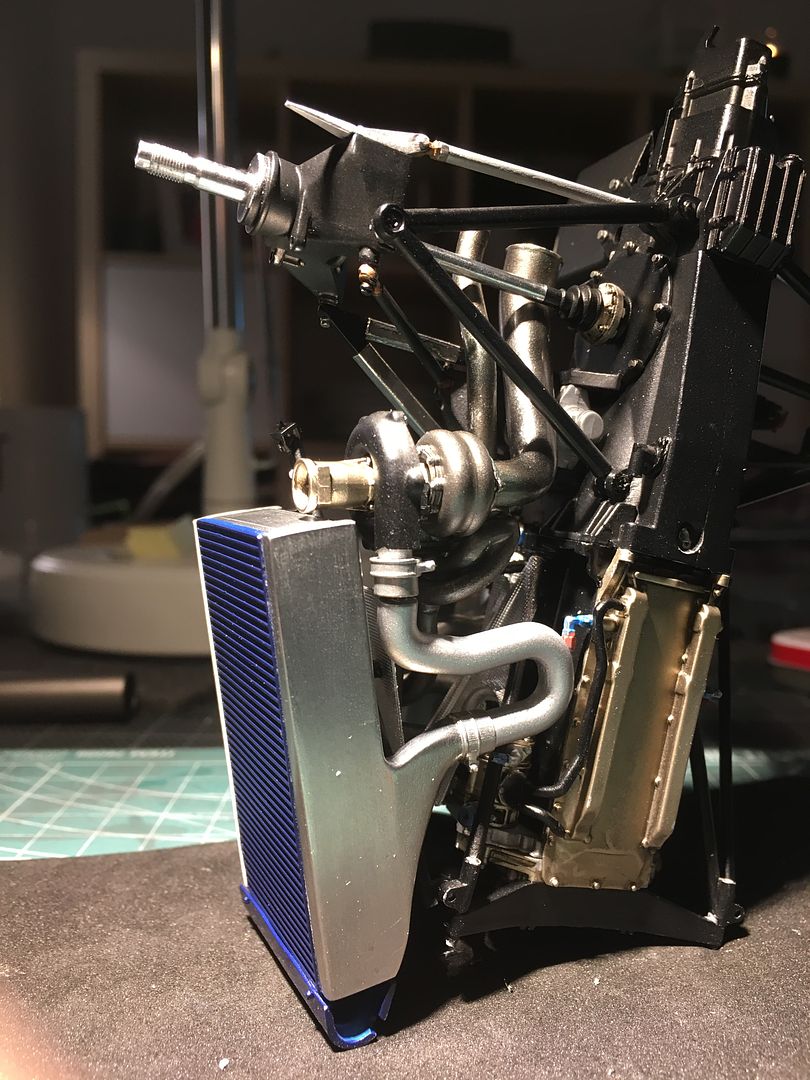
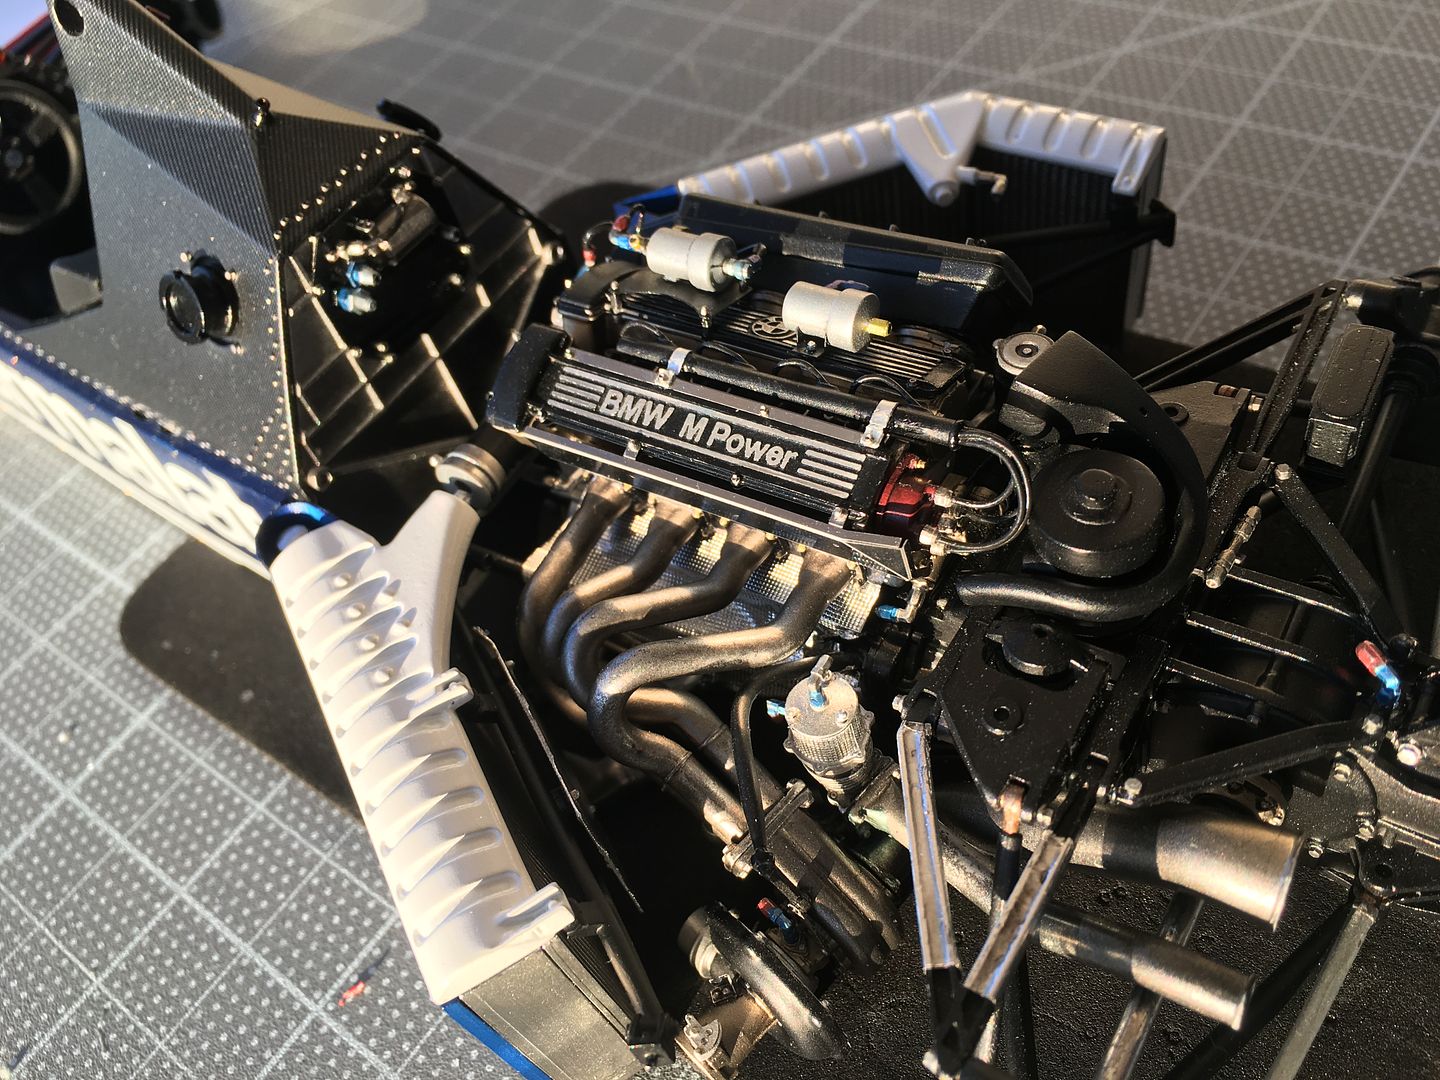
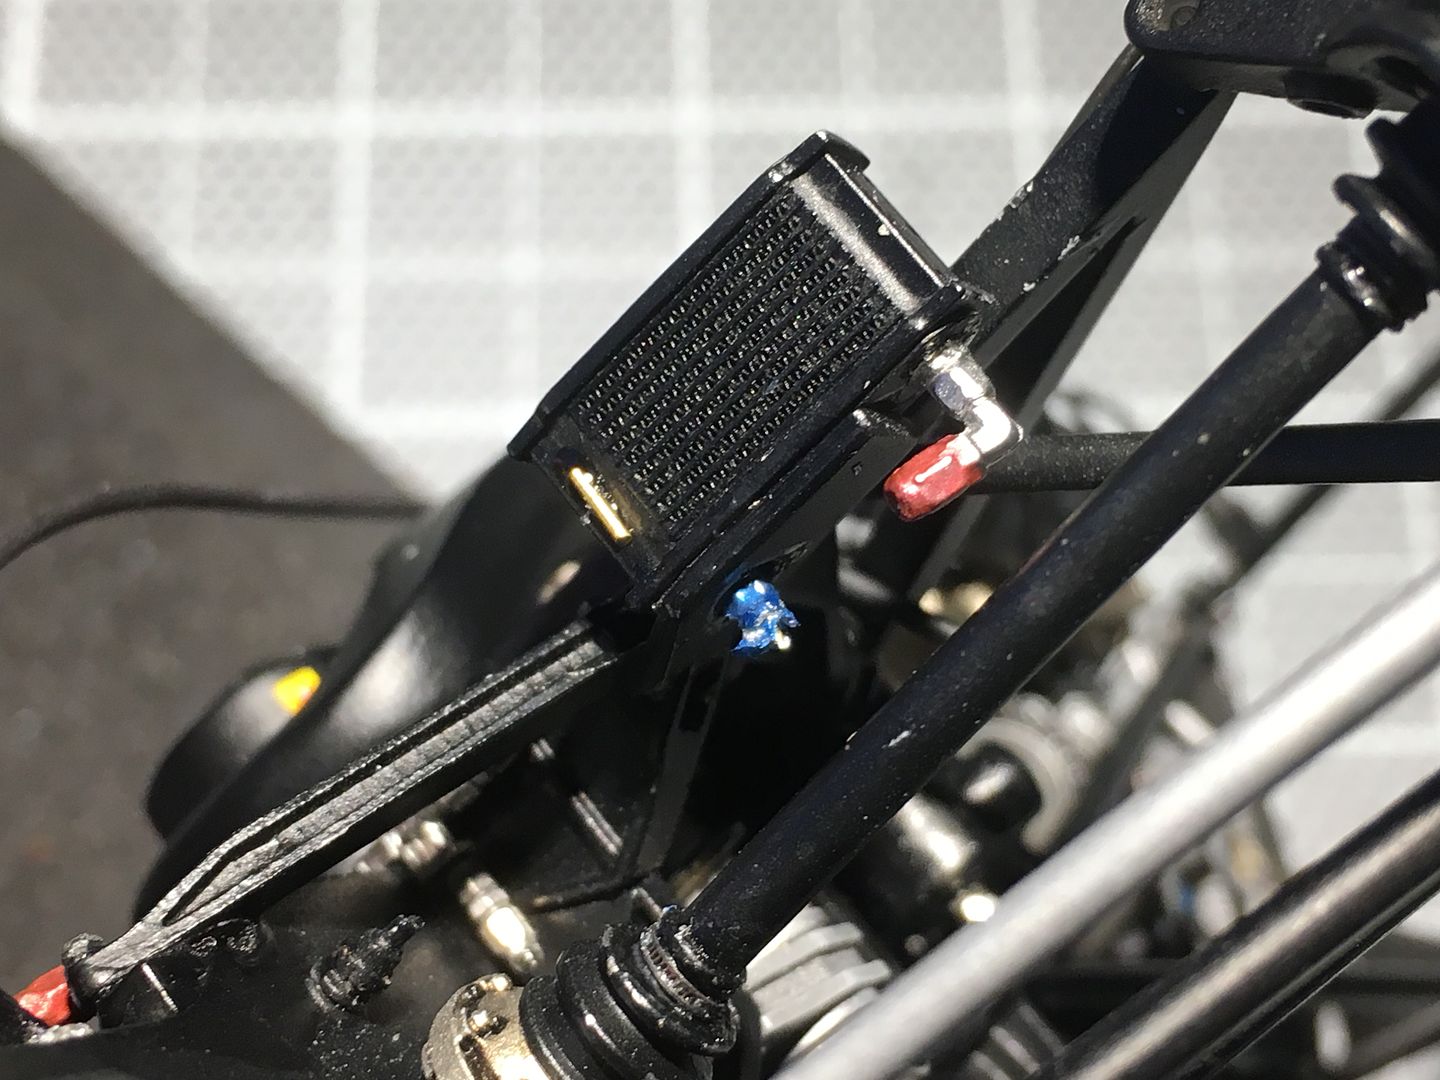
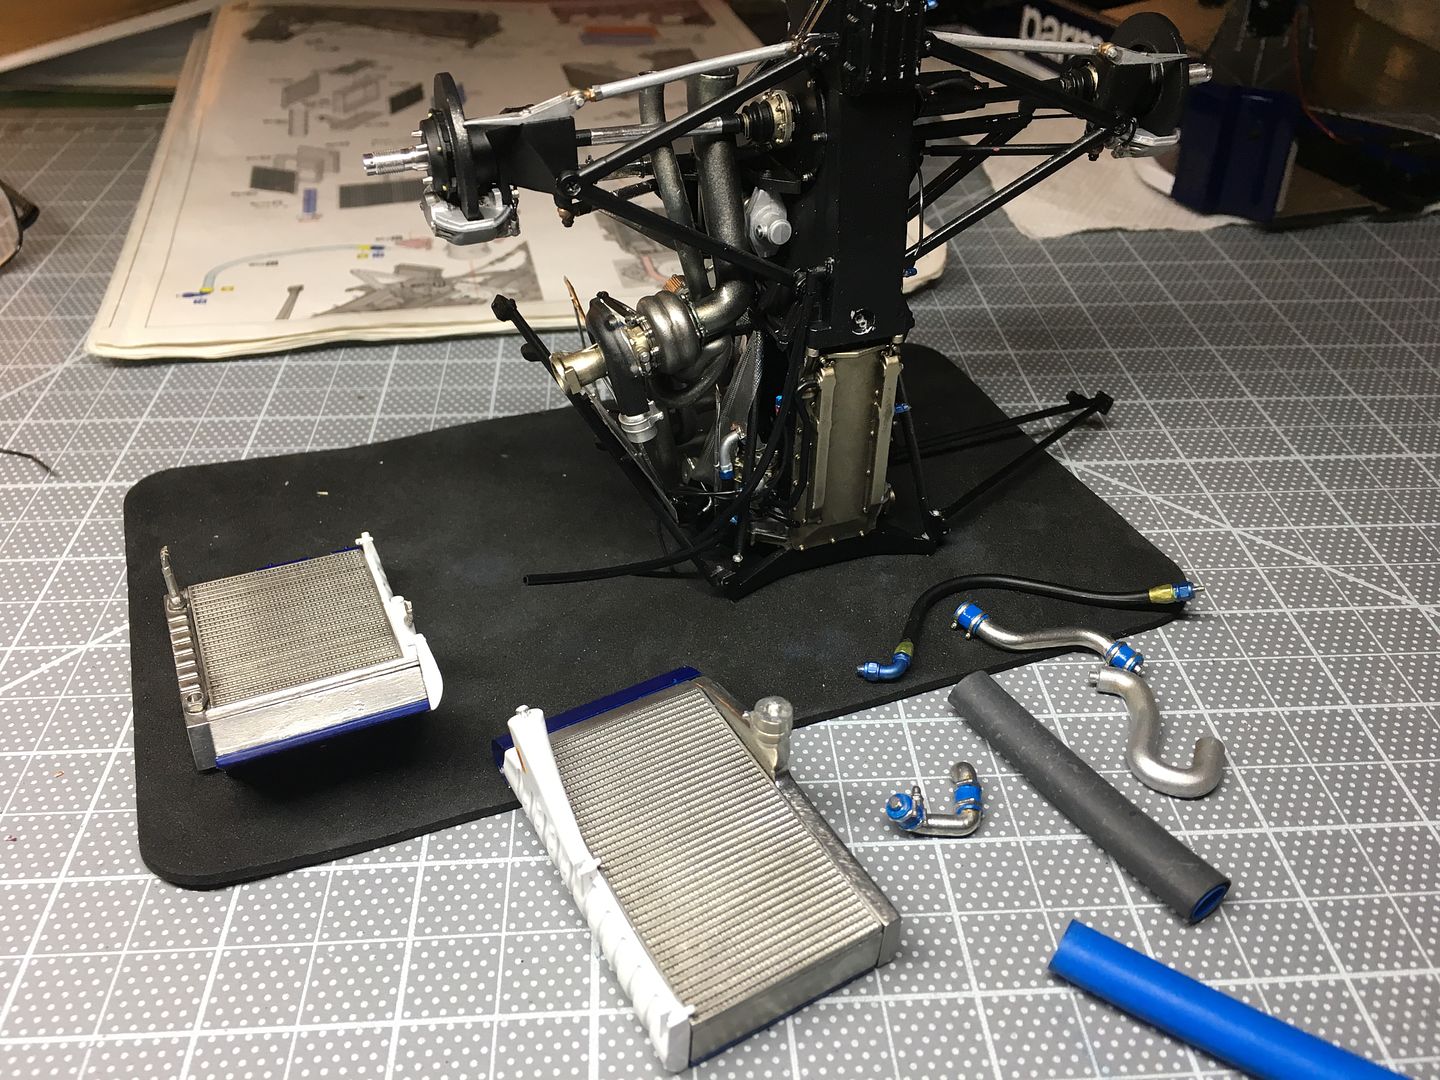
There is a lot of weight in this bit, with radiators etc, that will be supported by the floor when assembled, but at this point it is a bit delicate - I'm not gluing the rads until I have done a lot more wiring and cabling, and the engine is fixed to the floor...
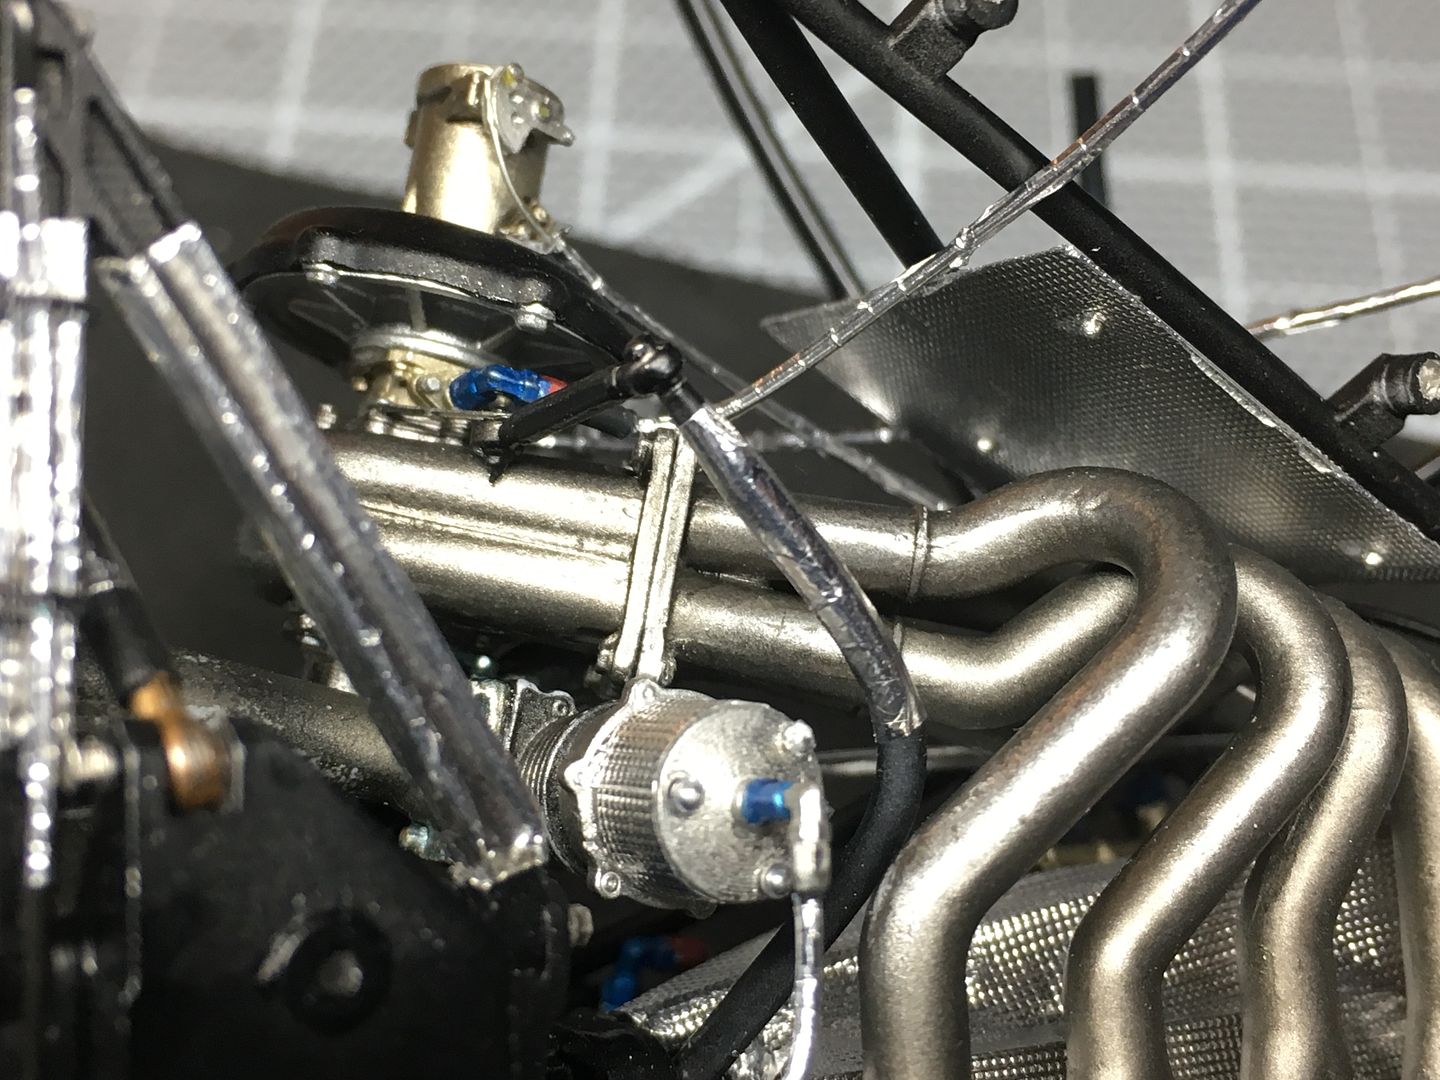
More heat shielding to hide the sexy stuff!
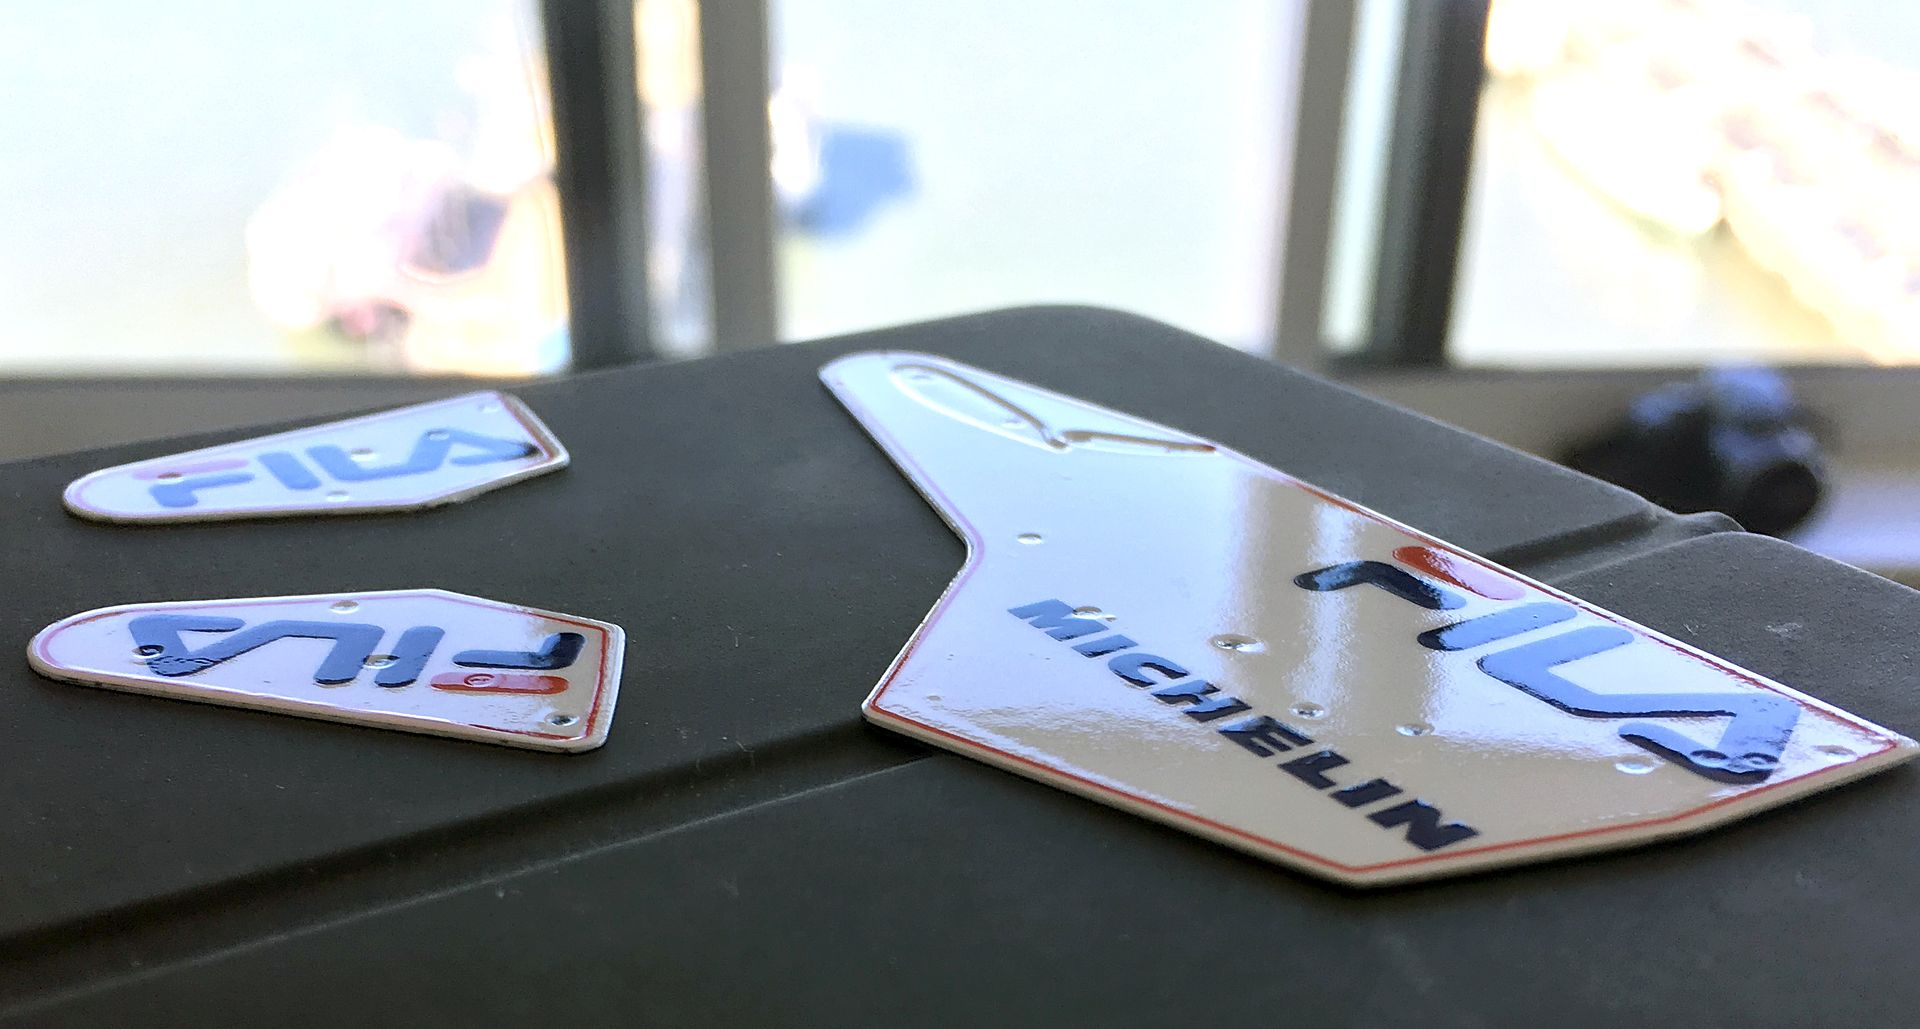
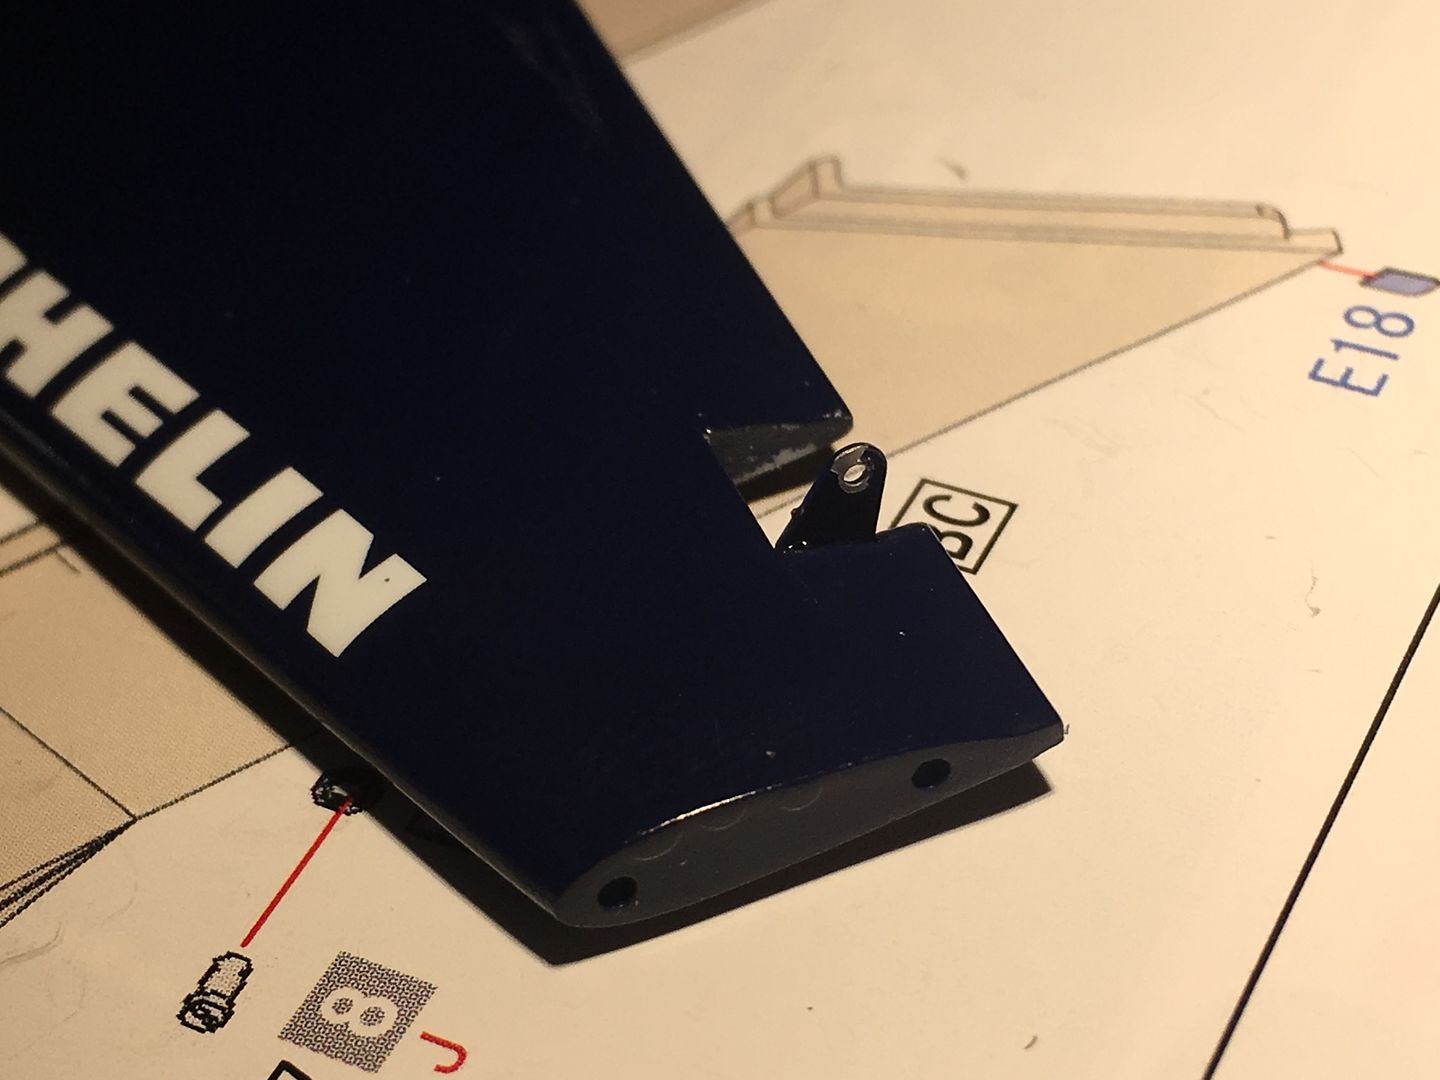
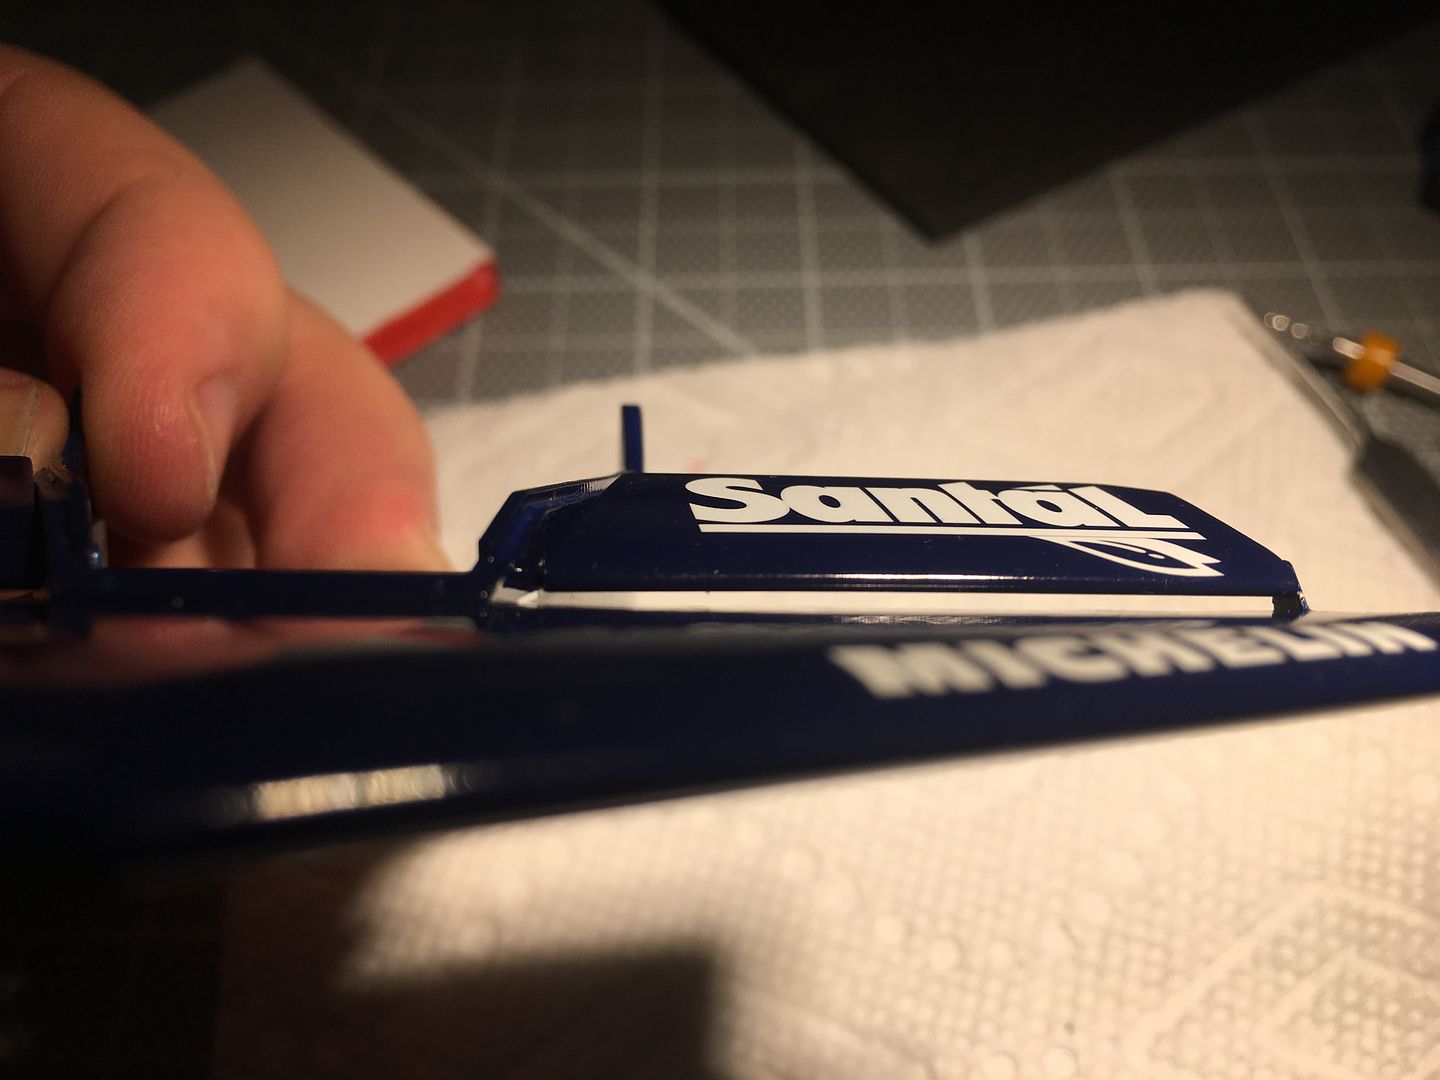
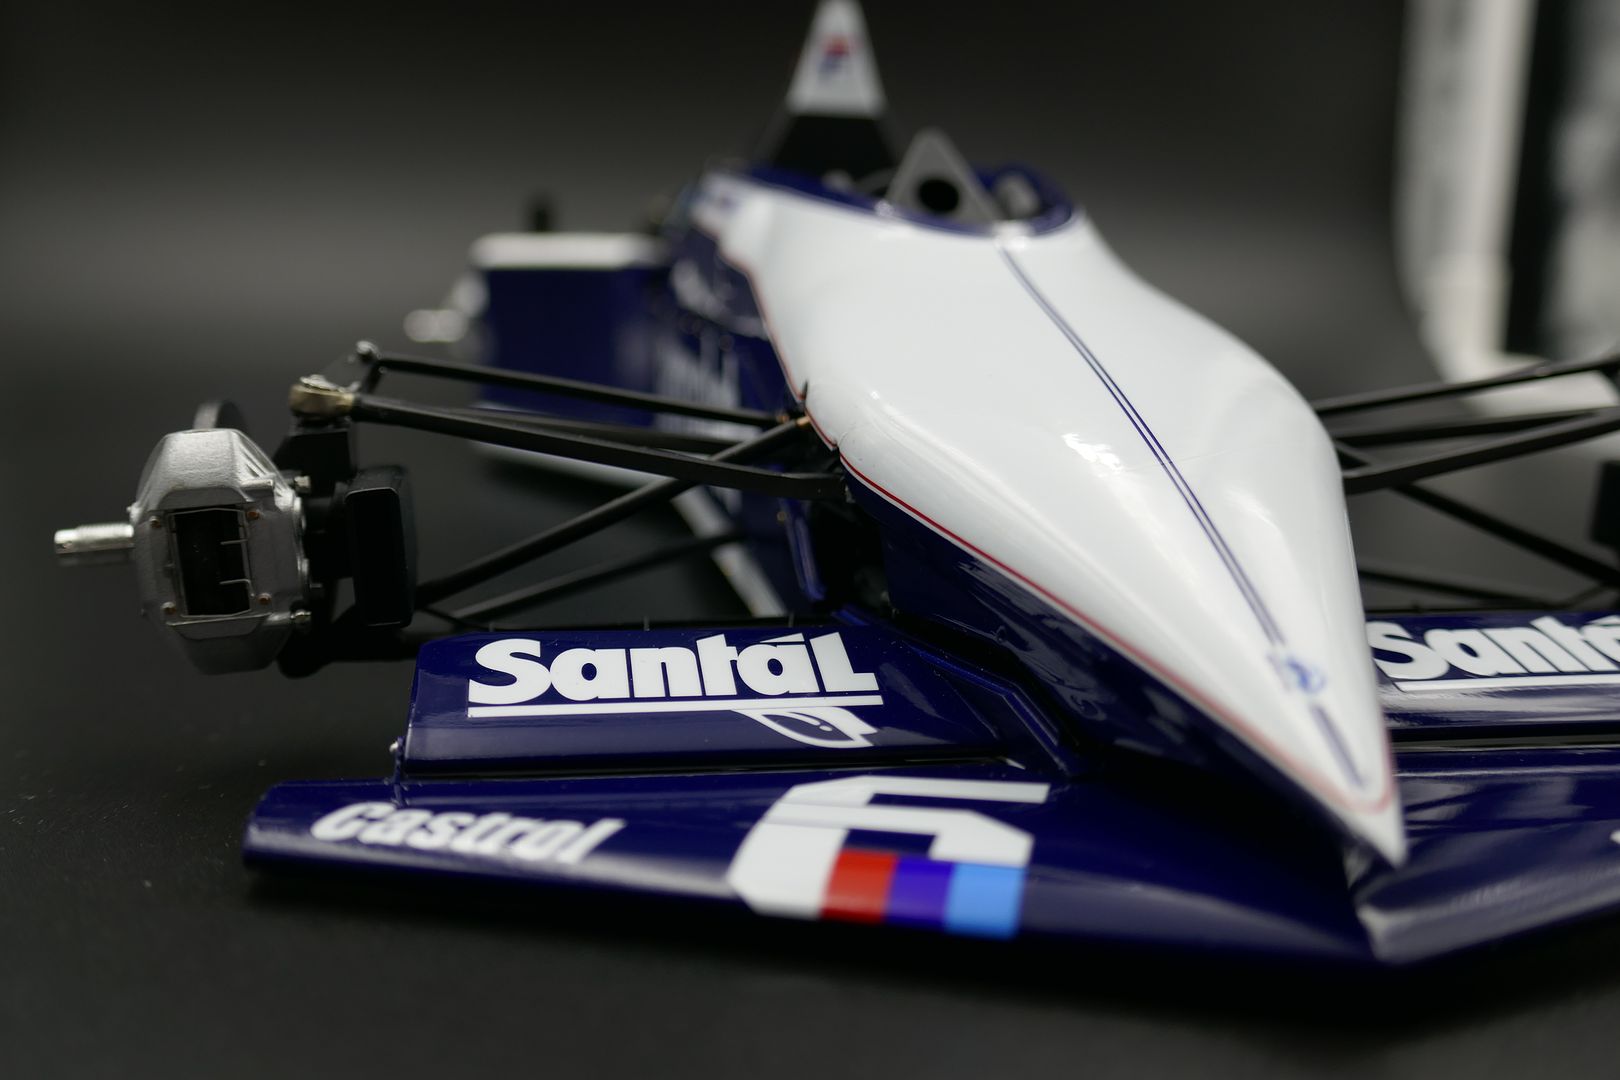
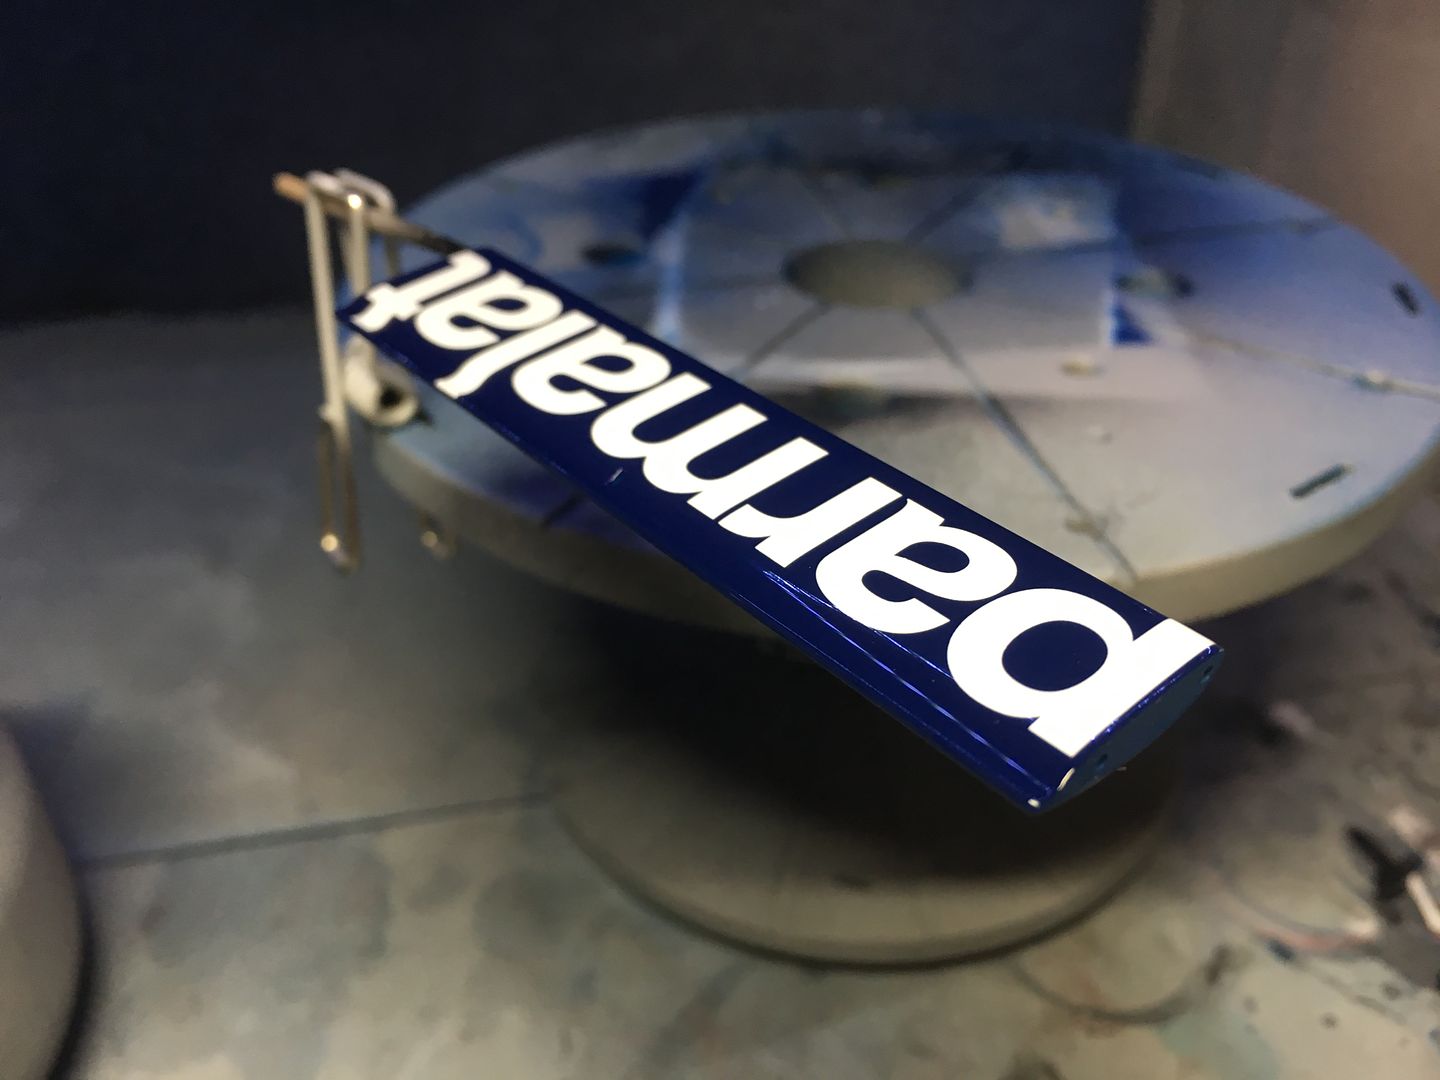
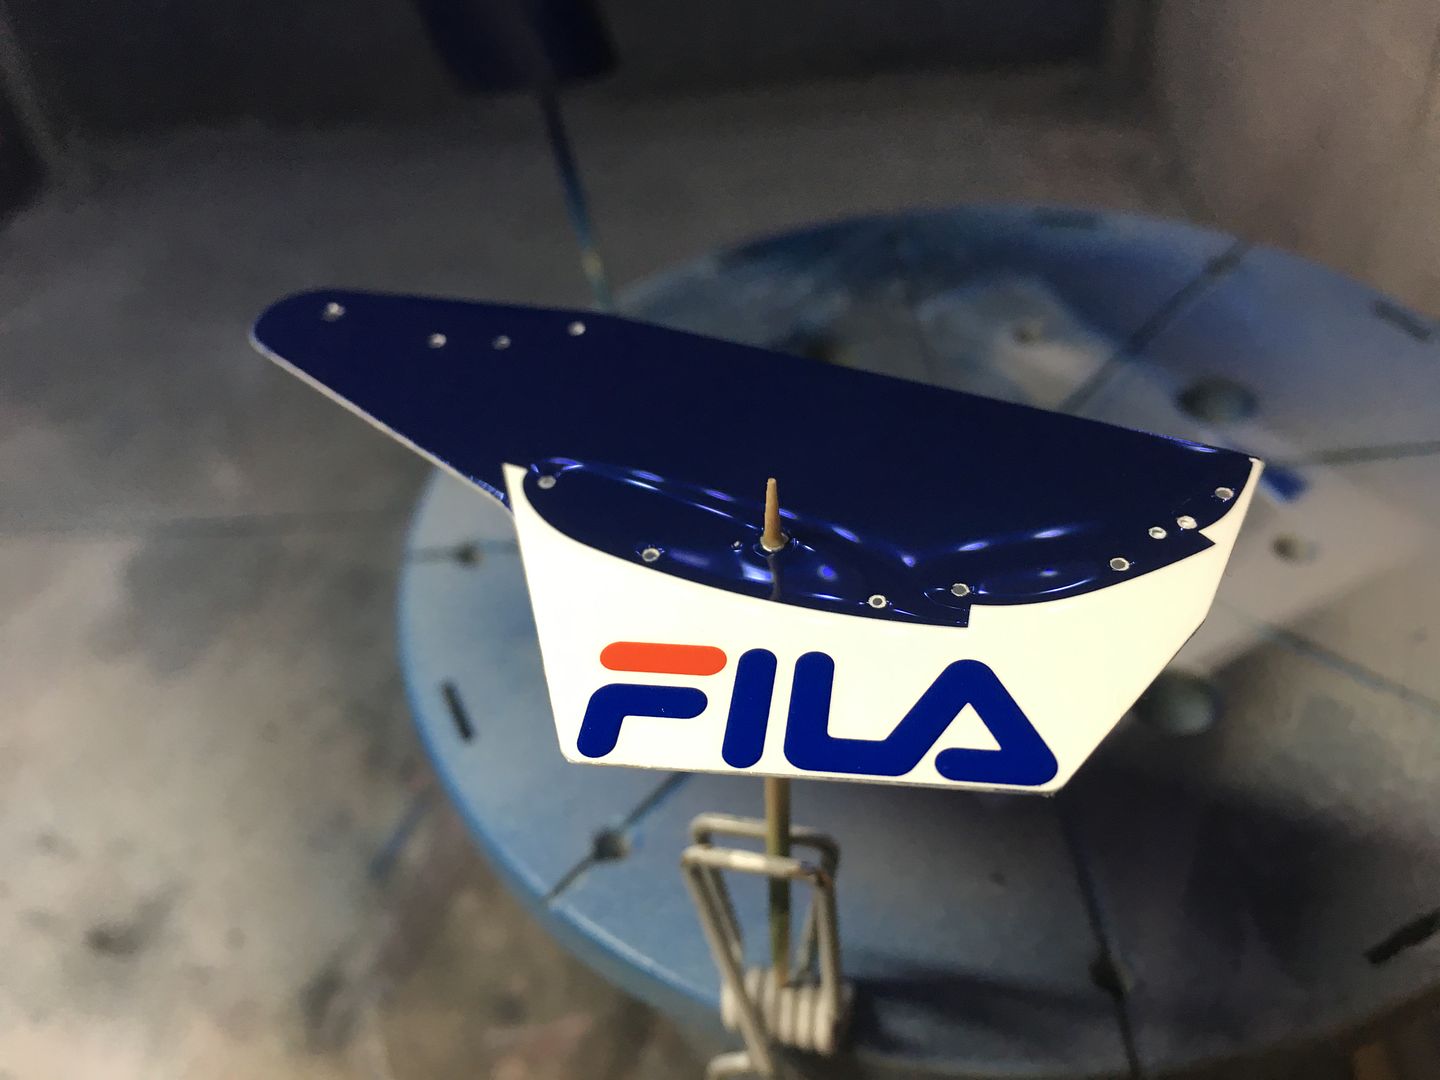
Then moved on to some wing action.
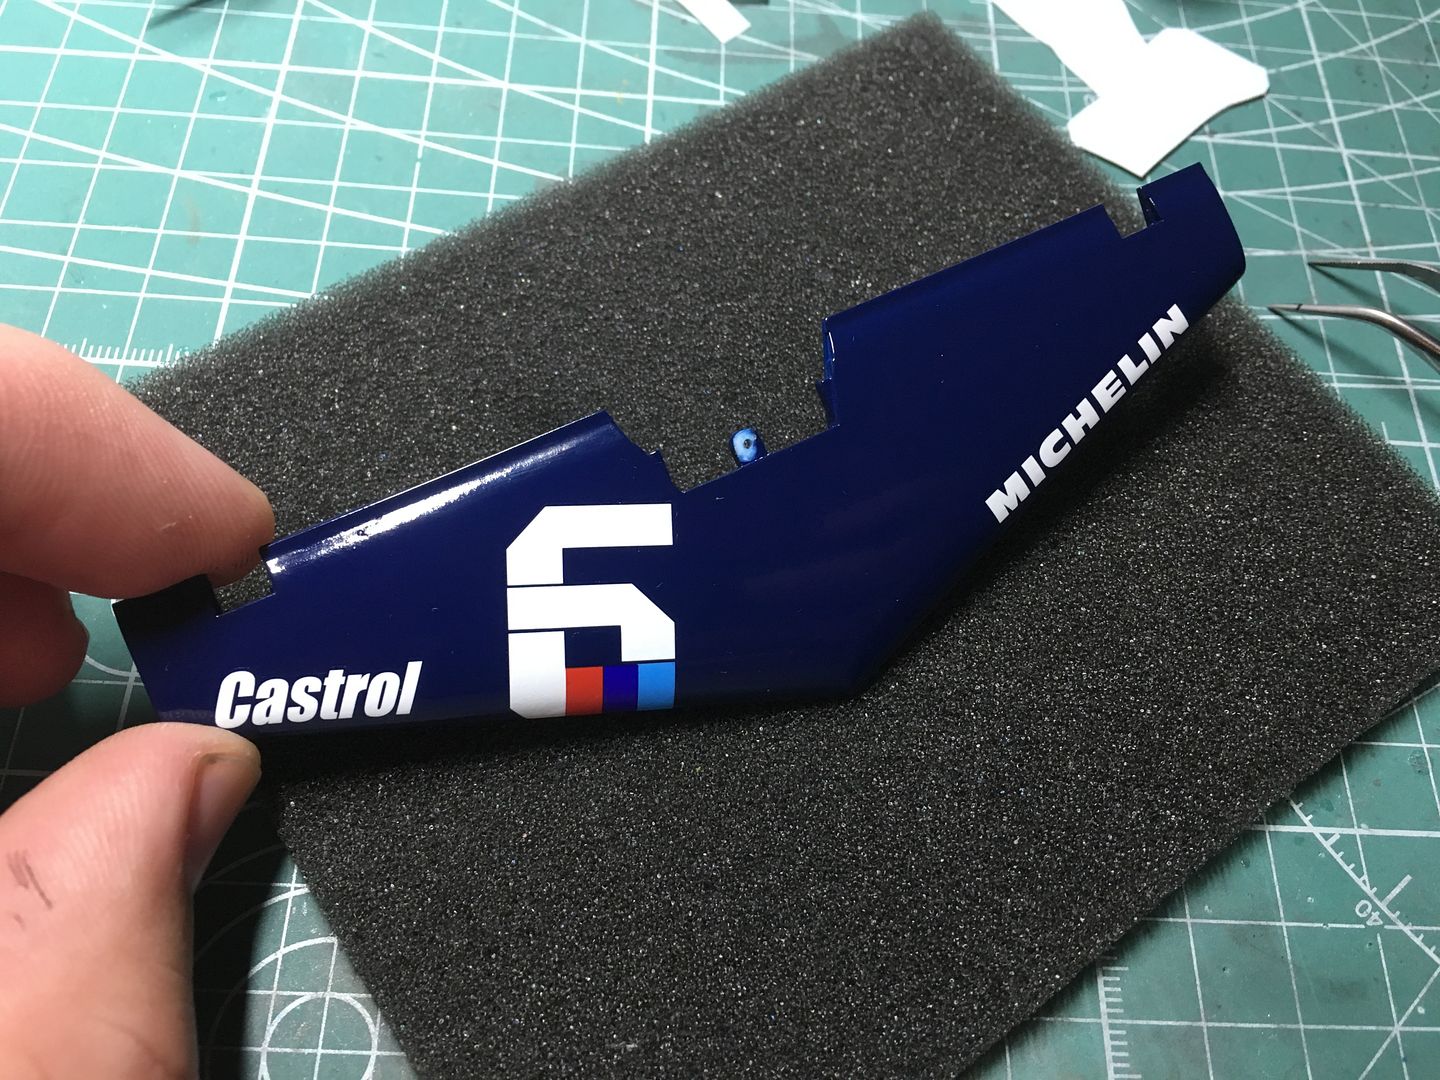
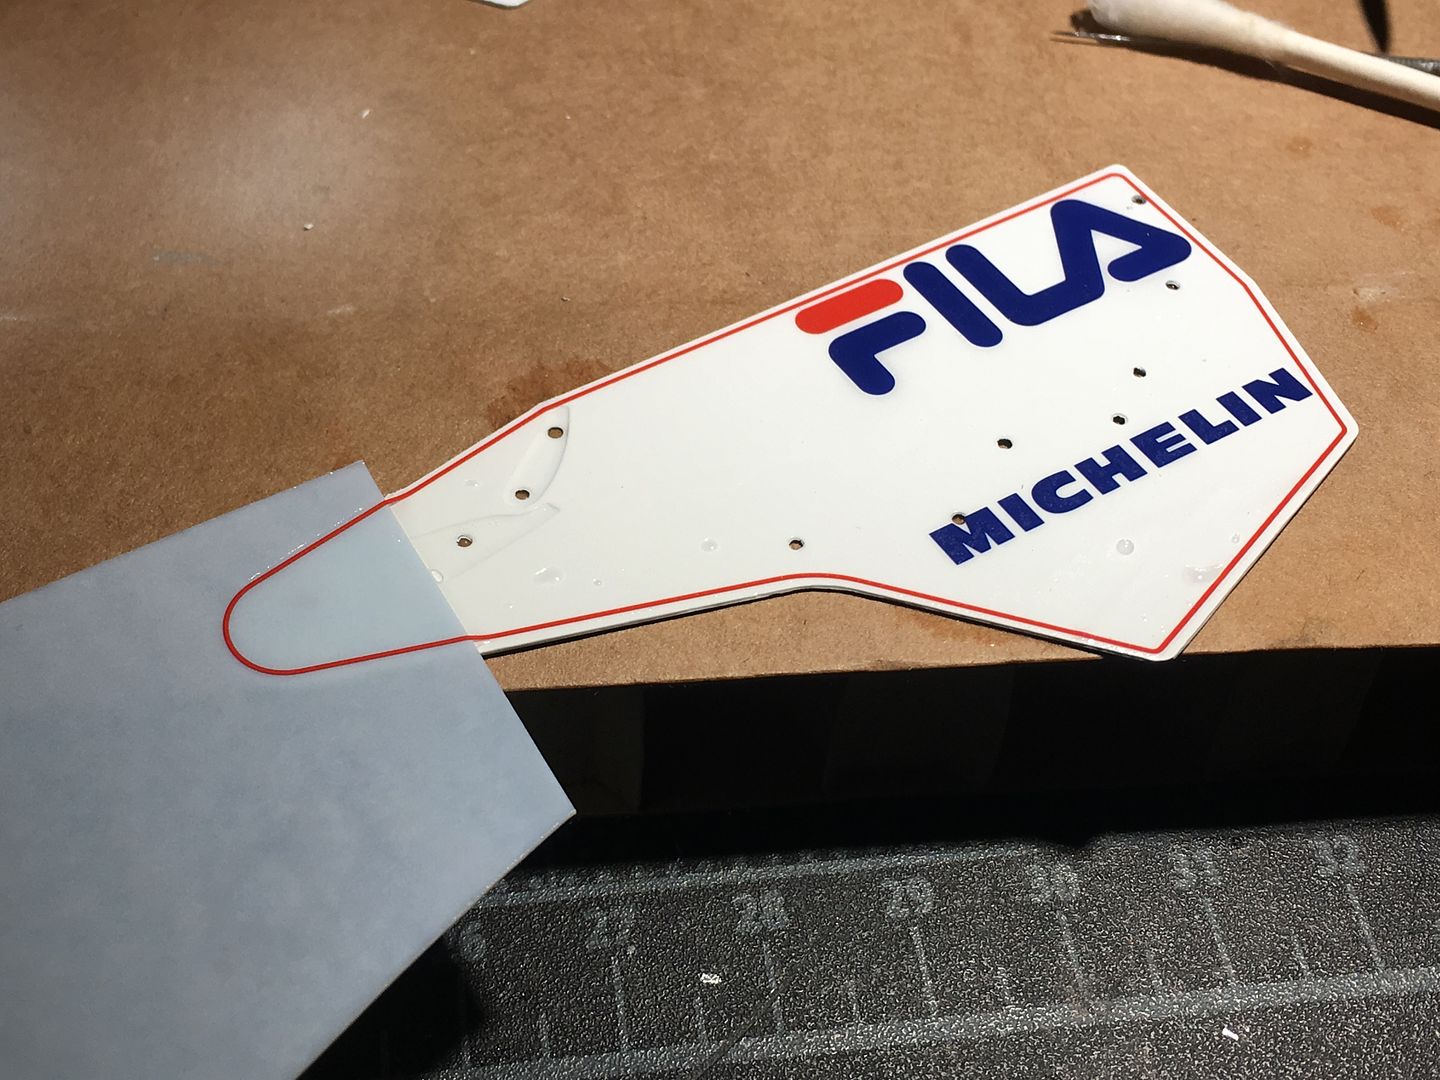
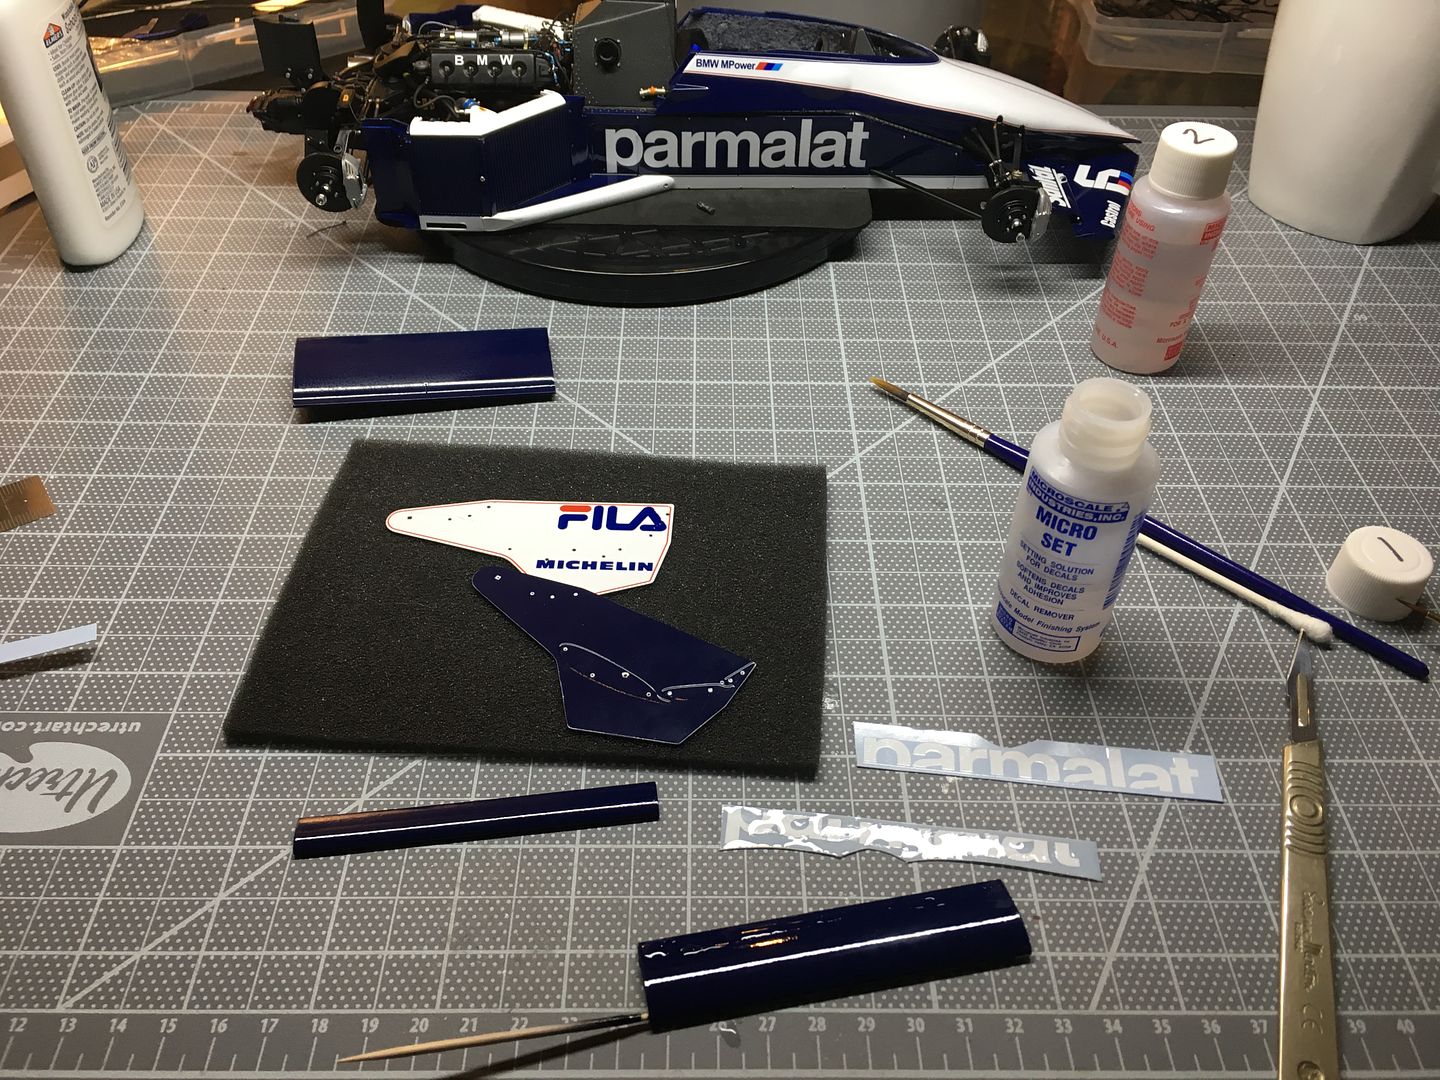
I had sprayed the blue on one side, now had to spray white on the other - the outer side, which would have the 'Fila' decals on. Was worried about spray finding its way through or around holes, but was careful with the masking tape - EXCEPT TAMIYA TAPE LEFT A RESIDUE ON THE BLUE SURFACE! I cleaned it off with very fine wet n' dry, but I was not expecting that - real pain. Need to find an alternative...
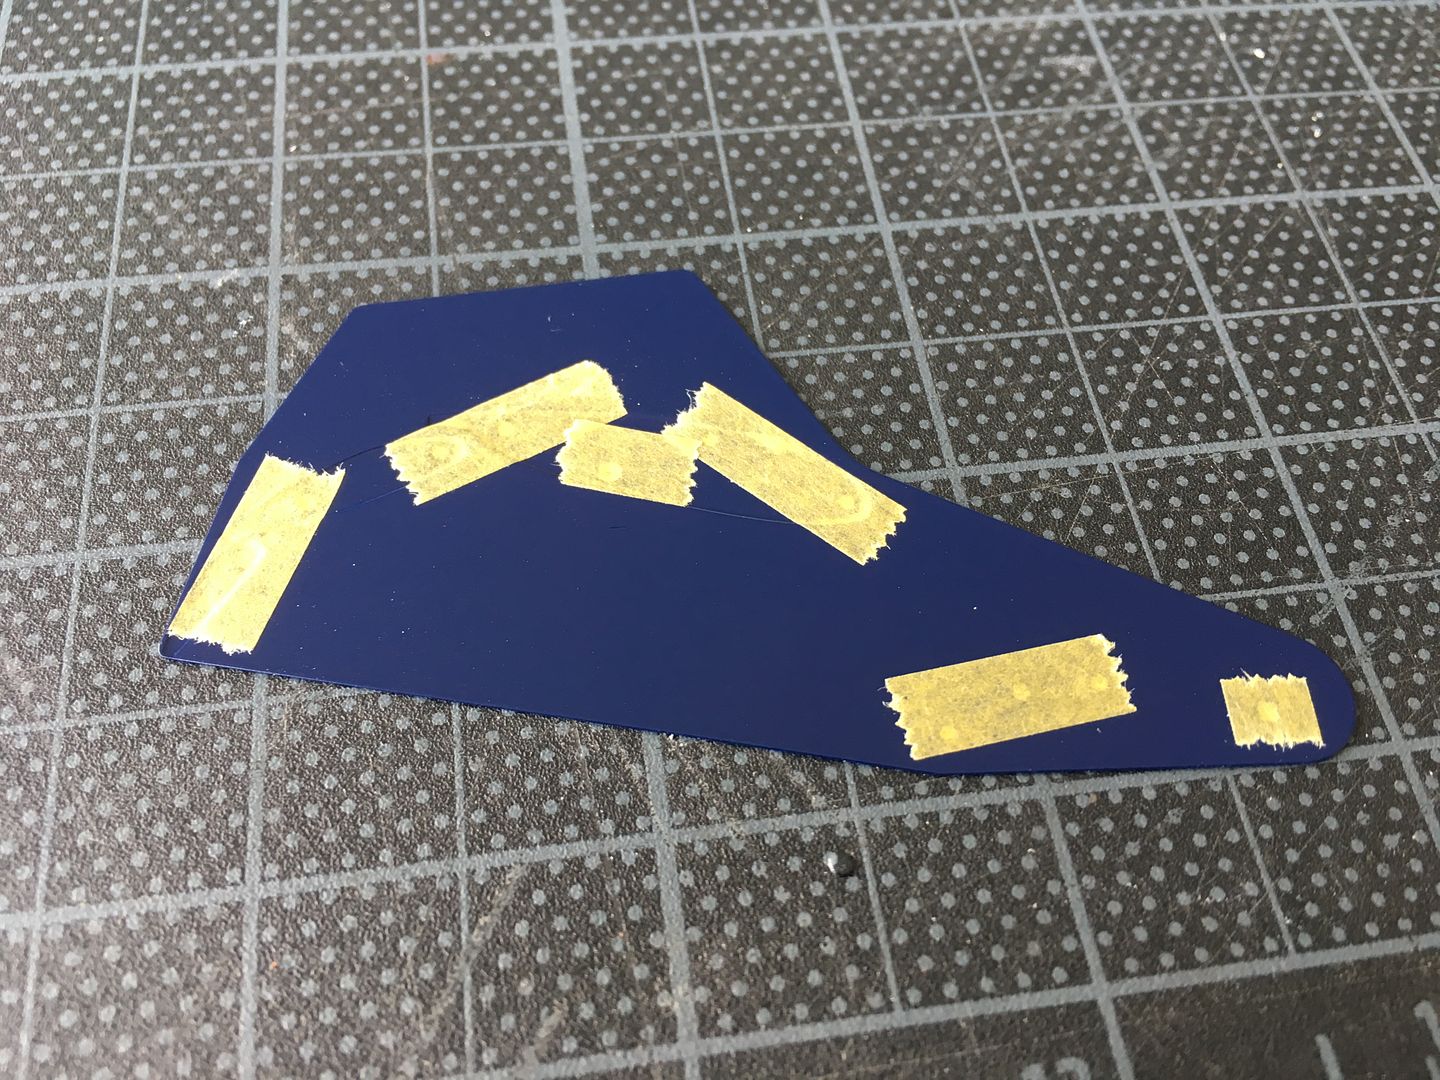
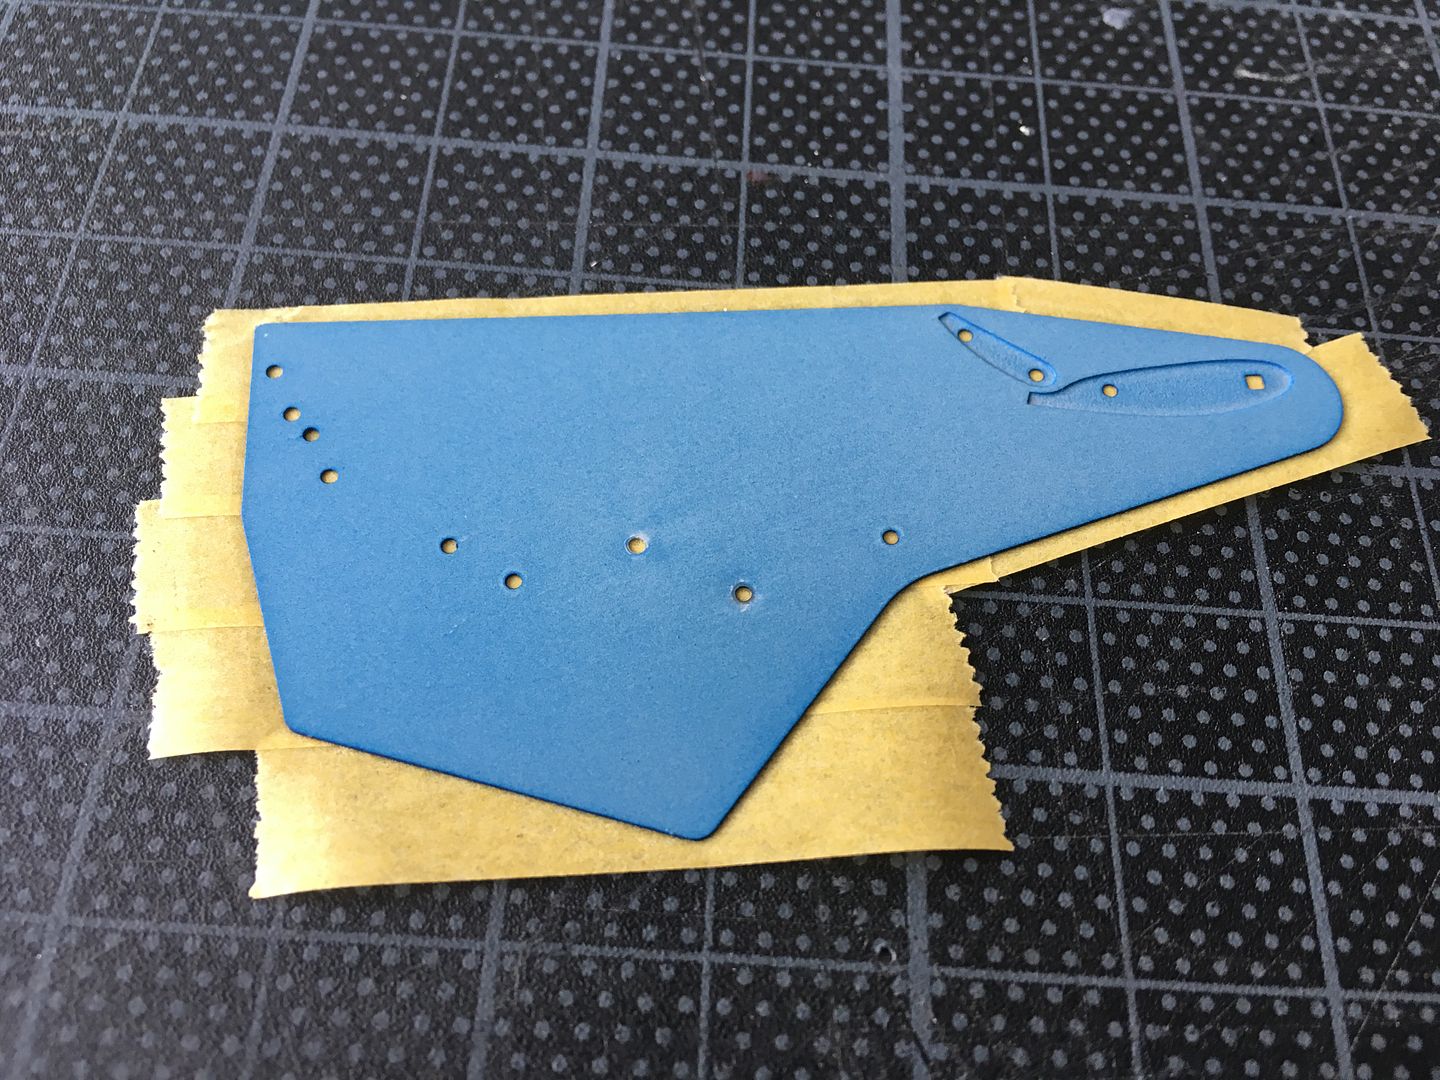
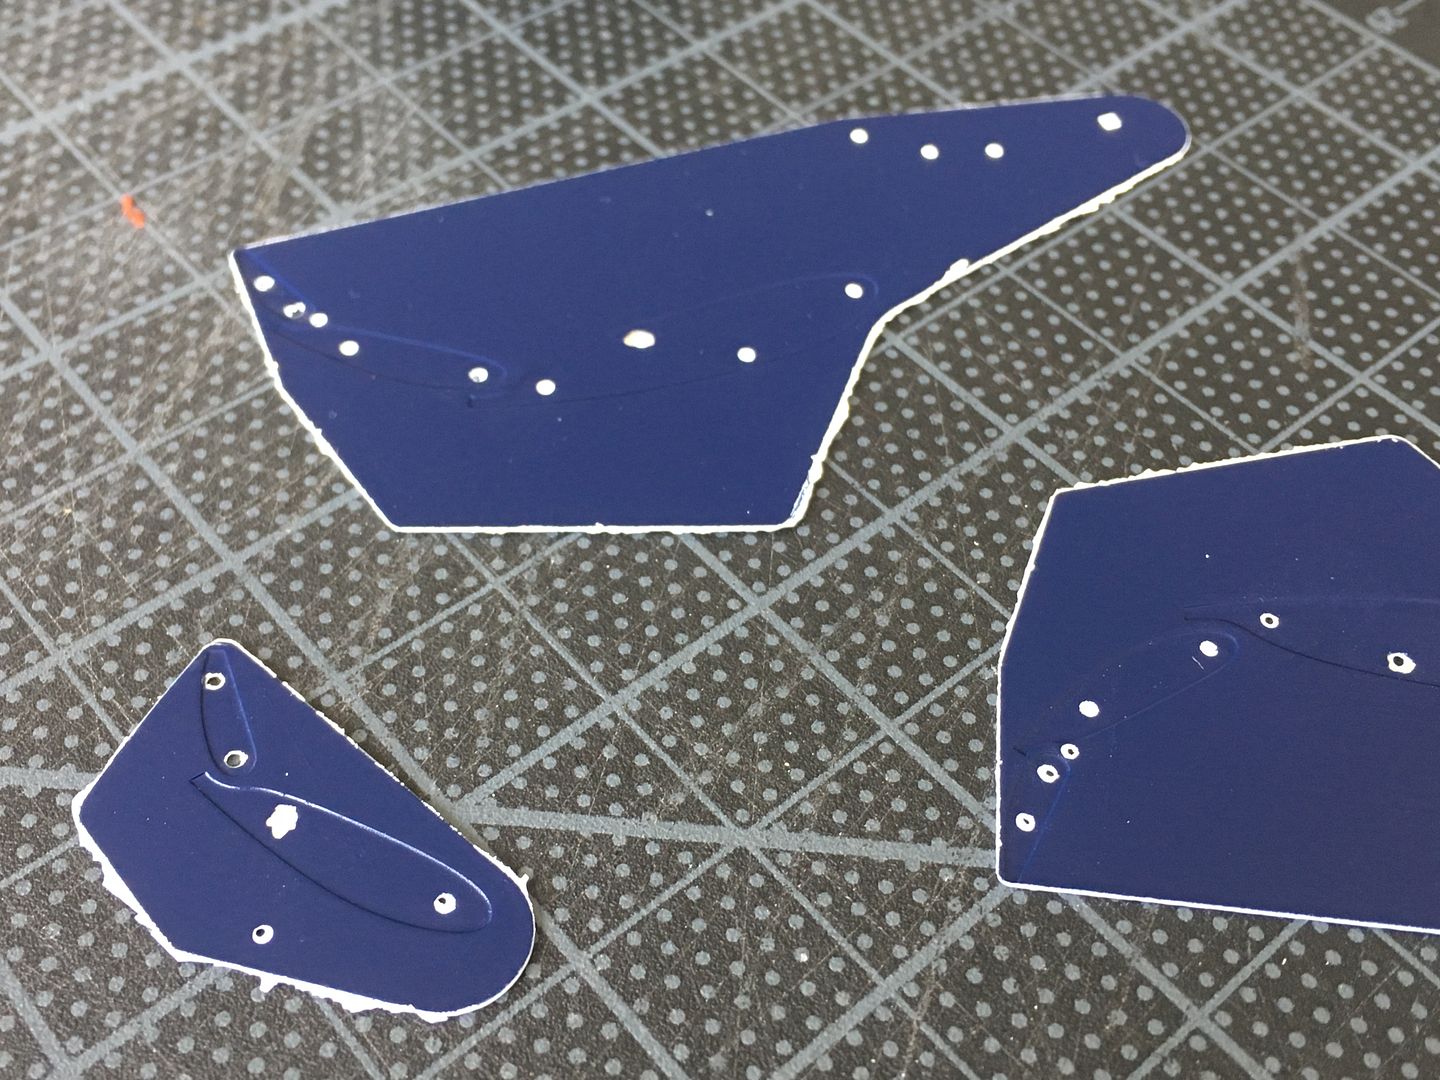
...white 'edges' came off with gentle sanding of edge...most of the holes are located 'behind' wing ends, so won't be seen.
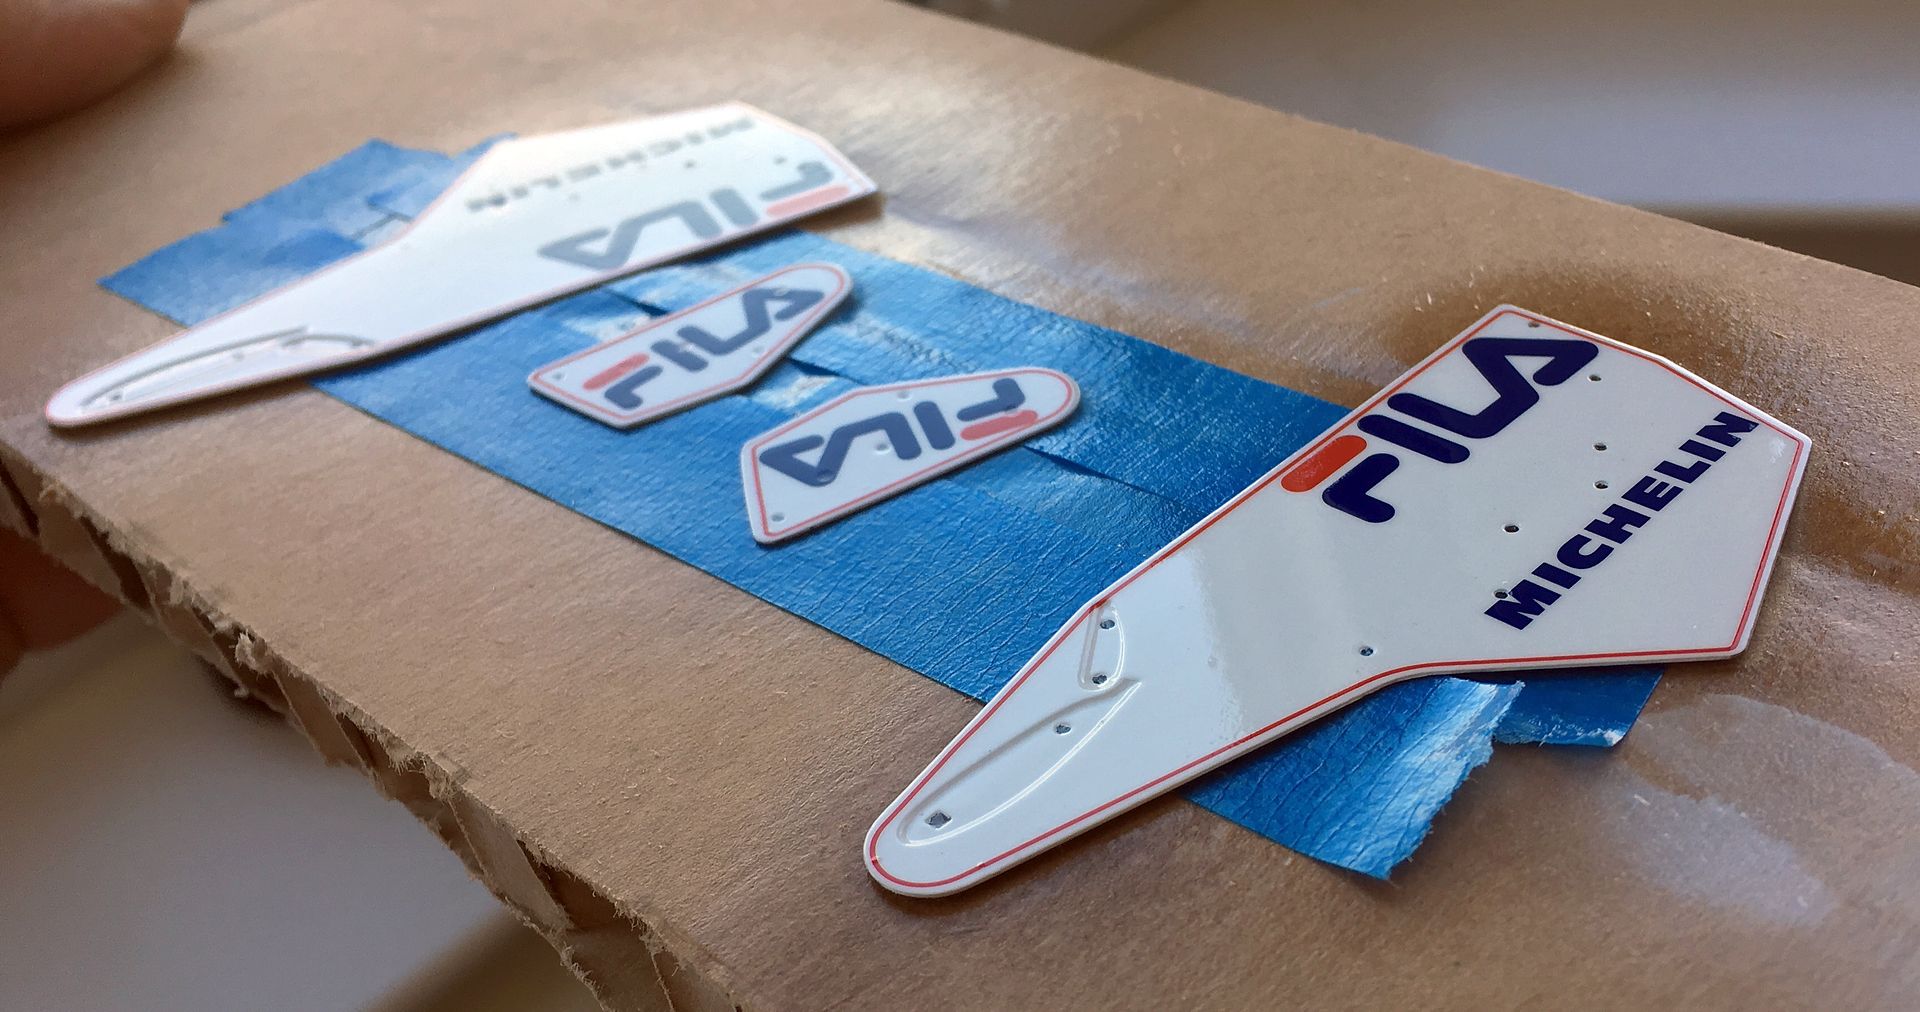
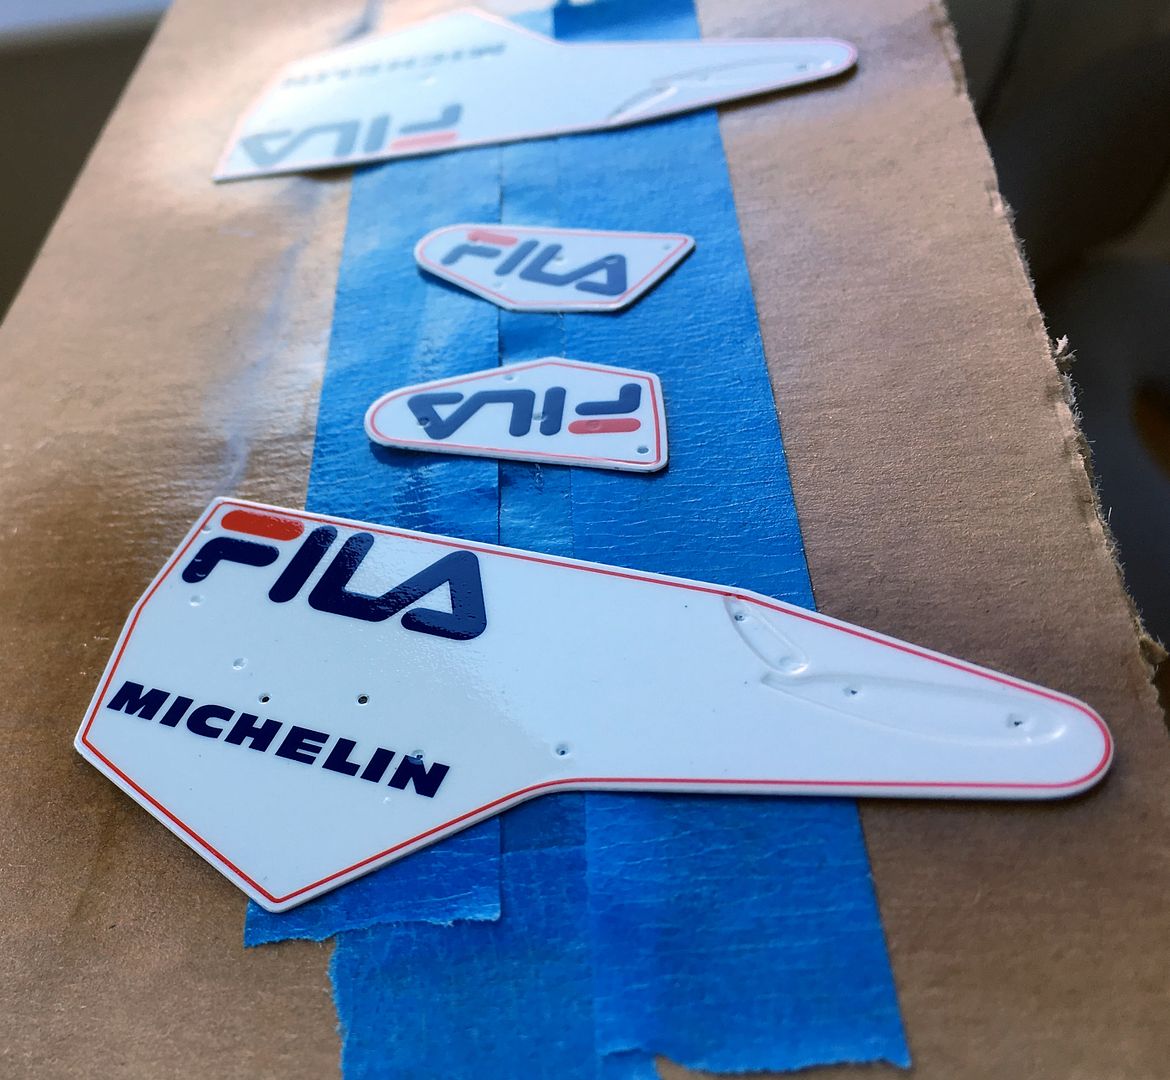
I sealed the white (zero) with one layer of clear and went direct to the decals - the ones on the largest end plates are full coverage, so I was worried about bubbles etc, but actually they went on very well - and actually lucked out on positioning right away with decent spacing around that outer red line!
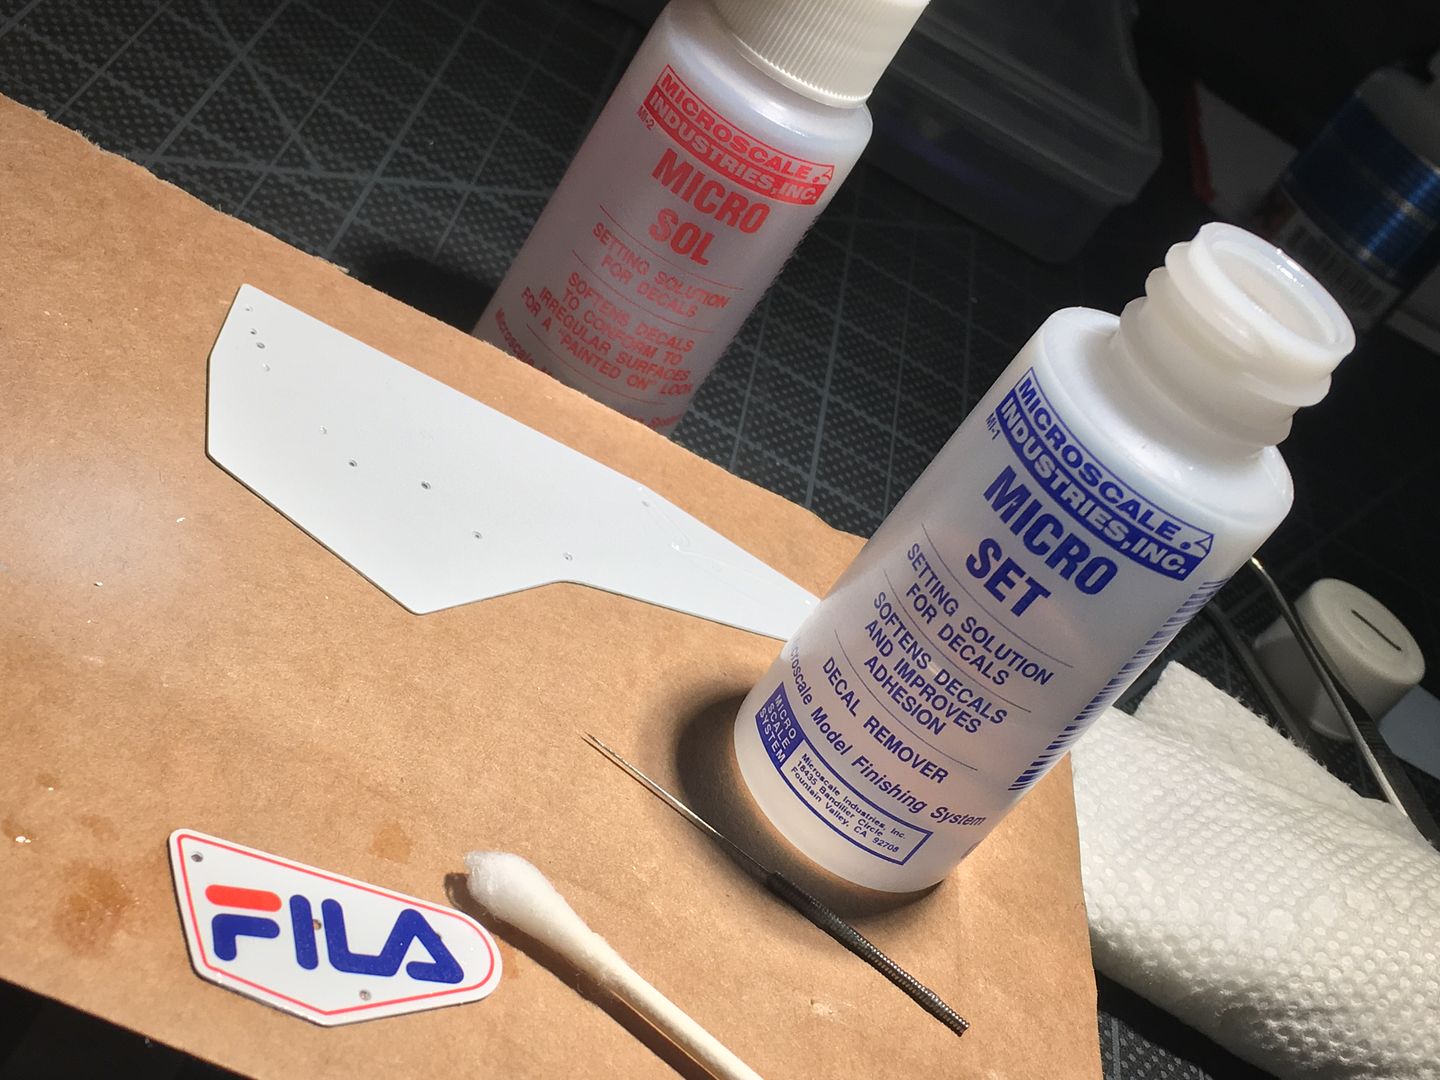
Result!
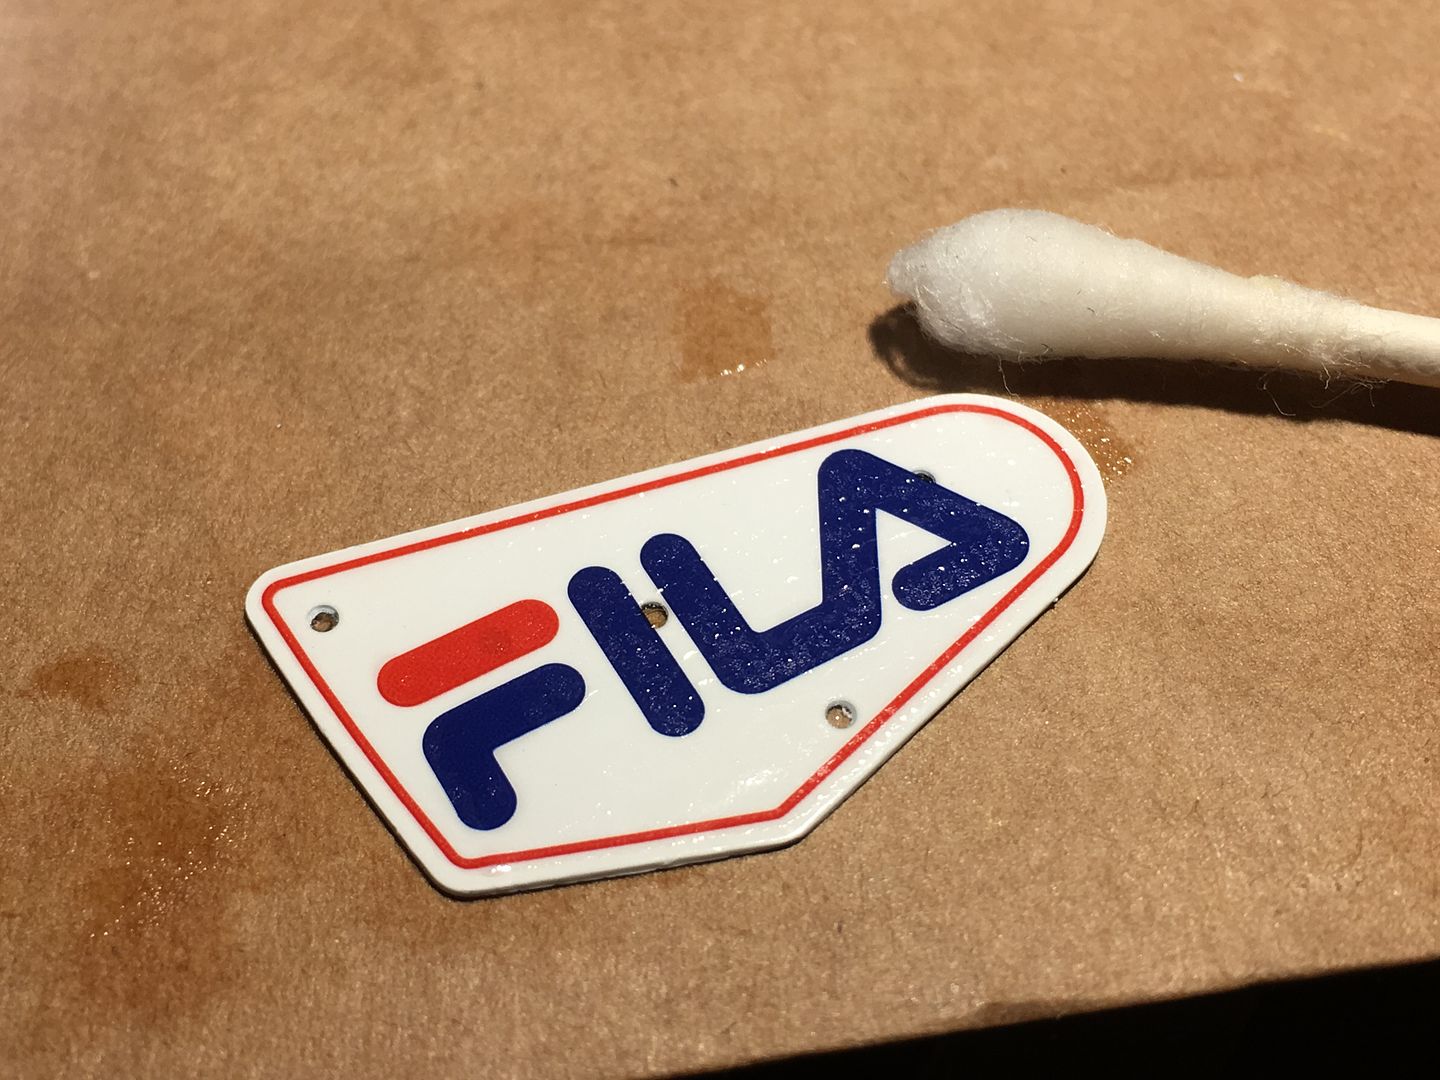
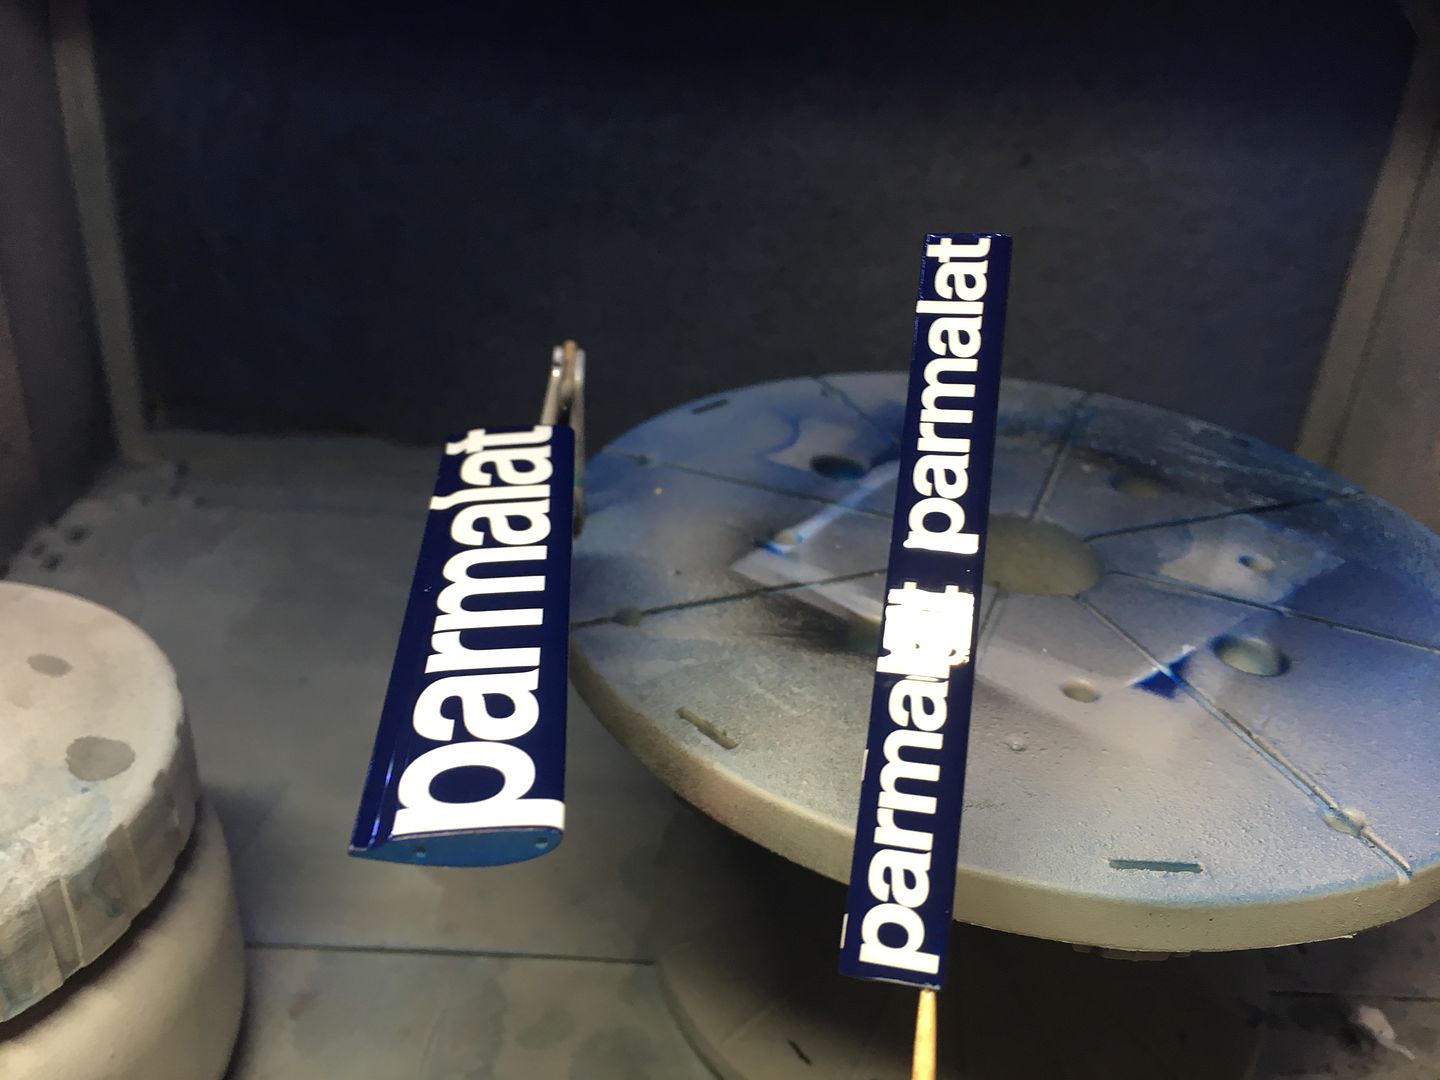
Once dried over night, I added more clear - touch wood it has gone on ok!
Ok -some more weekend work!
Finished the 'pedal box' area - and promptly covered it, never to be seen again!
...also added the brakes, having first painted the pads with the same carbon look...
Gear linkage and gear shift. The kit says silver, the photos show it as black, with a hand-worn grip that I created by sanding the paint back to the metal finish, and then using flat clear...
Now MFH had sent me the part I lost, I could carry on with the turbo/exhaust area....
Sadly, it was now a case of covering up a lot of that lovely engine with heat shield foil!
See that very thin, arcing black metal support, that the turbo 'hangs' from? That was one part - waaaaay too small a joint that snapped even before I came to use it - so I had to drill a very very thin hole in both parts and join with some wire - works fine - led to a stabbed thumb as the drill slipped, but all went ok in the end!!
There is a lot of weight in this bit, with radiators etc, that will be supported by the floor when assembled, but at this point it is a bit delicate - I'm not gluing the rads until I have done a lot more wiring and cabling, and the engine is fixed to the floor...
More heat shielding to hide the sexy stuff!
Then moved on to some wing action.
I had sprayed the blue on one side, now had to spray white on the other - the outer side, which would have the 'Fila' decals on. Was worried about spray finding its way through or around holes, but was careful with the masking tape - EXCEPT TAMIYA TAPE LEFT A RESIDUE ON THE BLUE SURFACE! I cleaned it off with very fine wet n' dry, but I was not expecting that - real pain. Need to find an alternative...
...white 'edges' came off with gentle sanding of edge...most of the holes are located 'behind' wing ends, so won't be seen.
I sealed the white (zero) with one layer of clear and went direct to the decals - the ones on the largest end plates are full coverage, so I was worried about bubbles etc, but actually they went on very well - and actually lucked out on positioning right away with decent spacing around that outer red line!
Result!
Once dried over night, I added more clear - touch wood it has gone on ok!
Right - back with another 3 years of work Visa for the States....and now back to the model.
Small detail stuff now really - apart from final assembly, which looks a pig - getting all the radiators, joining pipes and chassis framework lined up and fixed is going to be a pain - I can tell already!!
Nothing above is actually fixed yet!
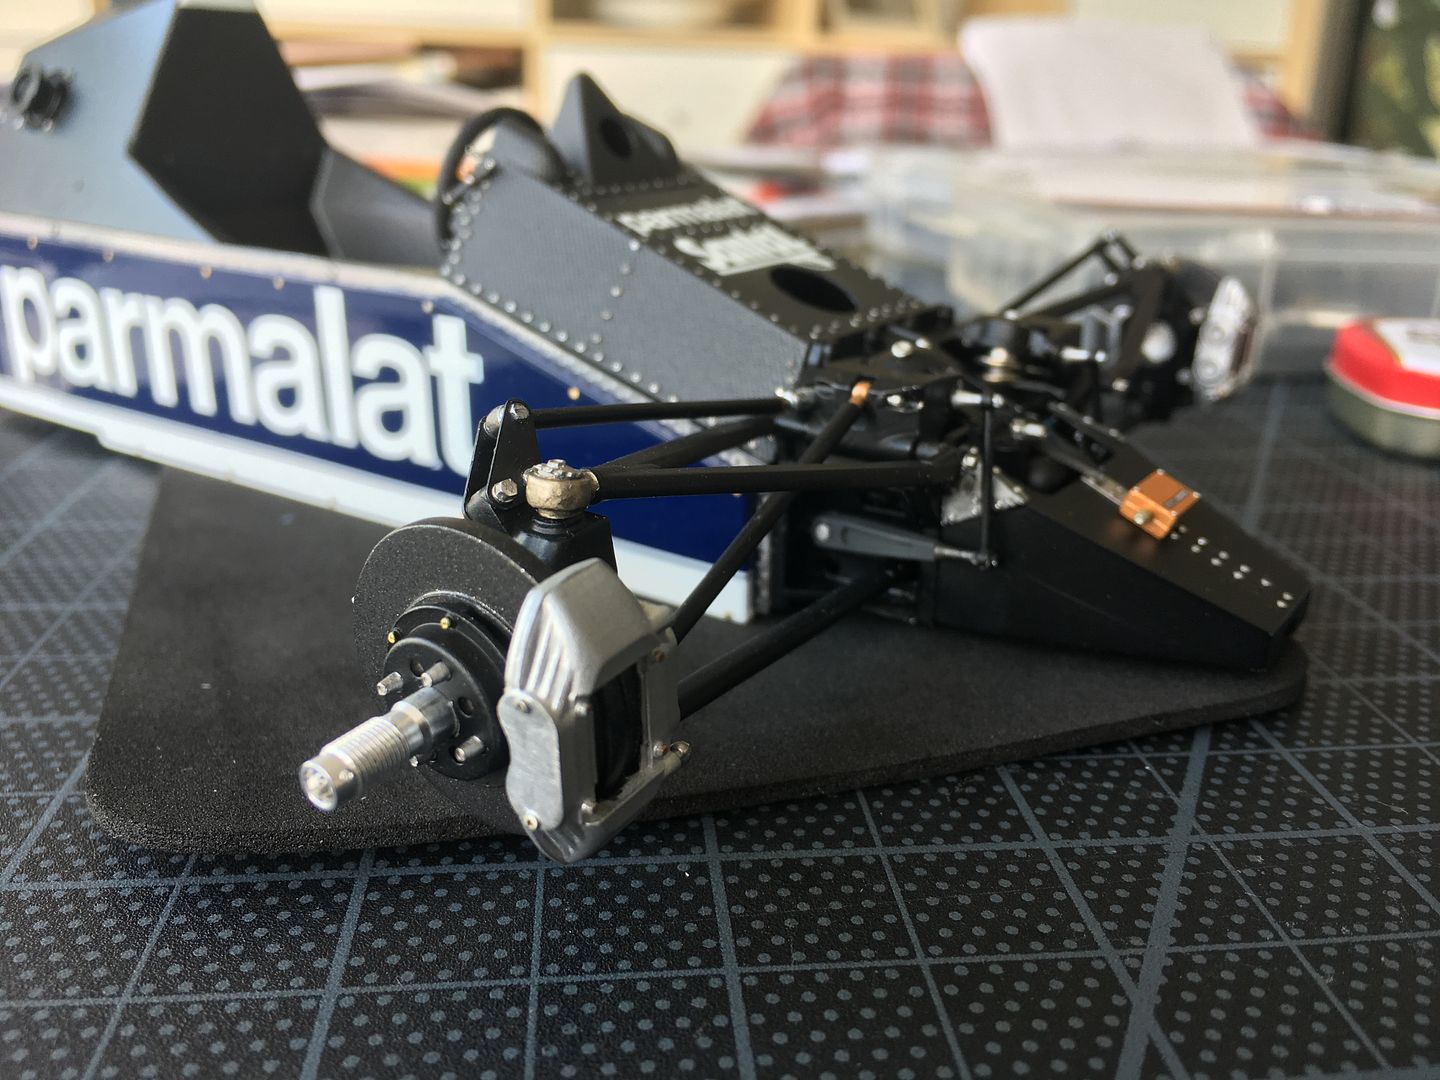
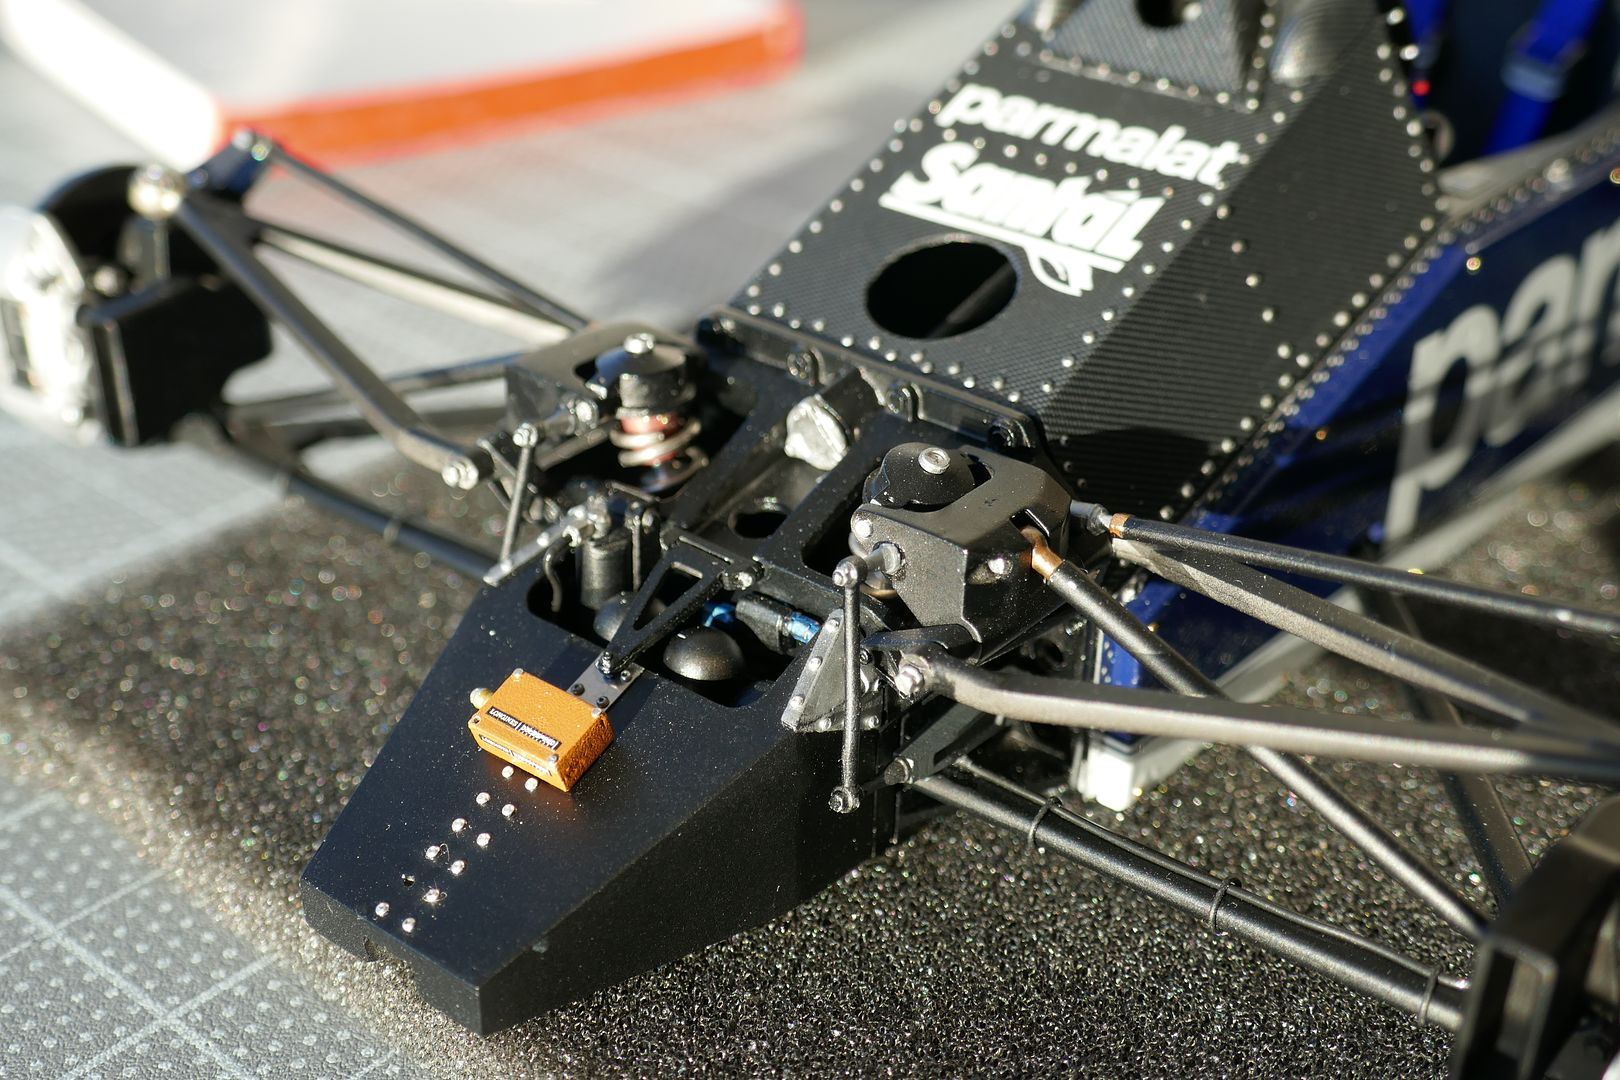
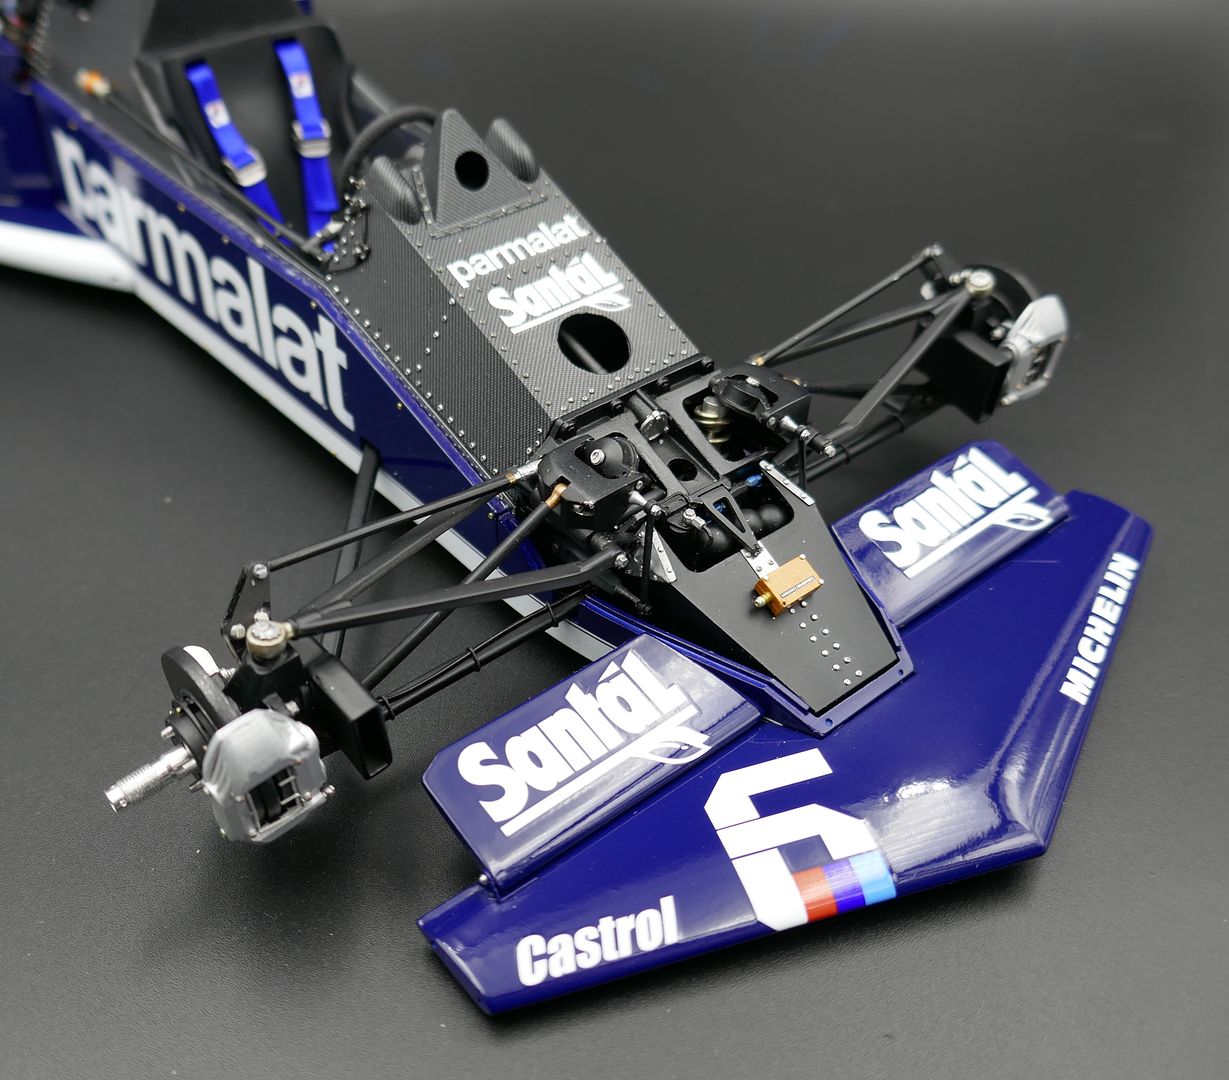
Adding brake pipes to the front suspension struts...
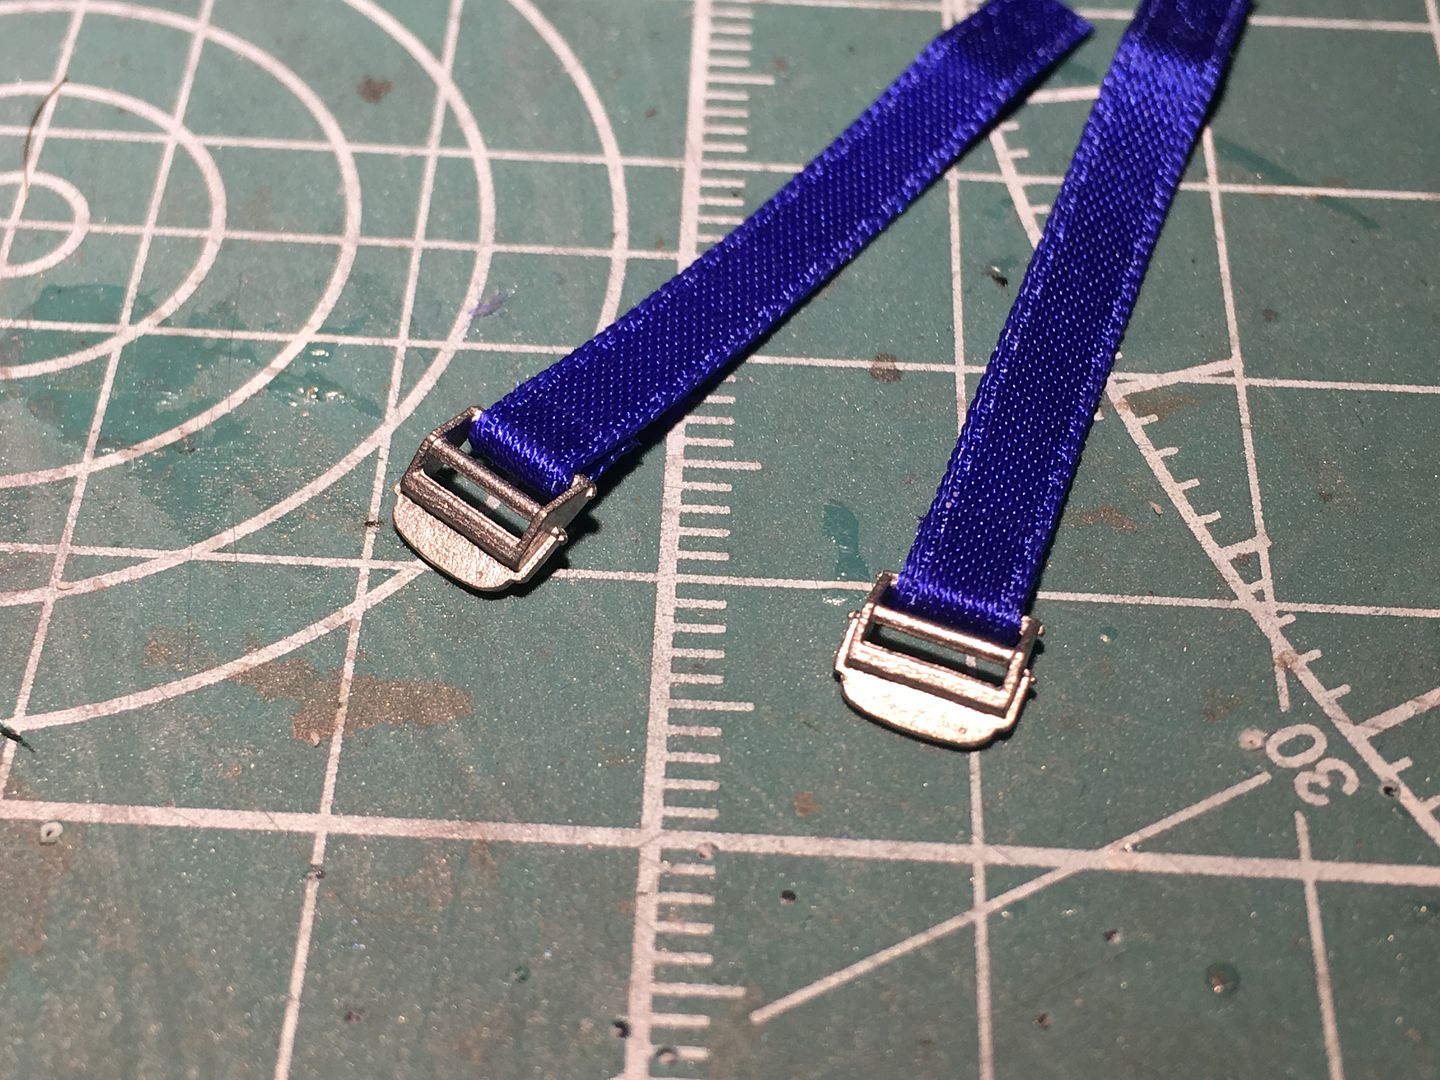
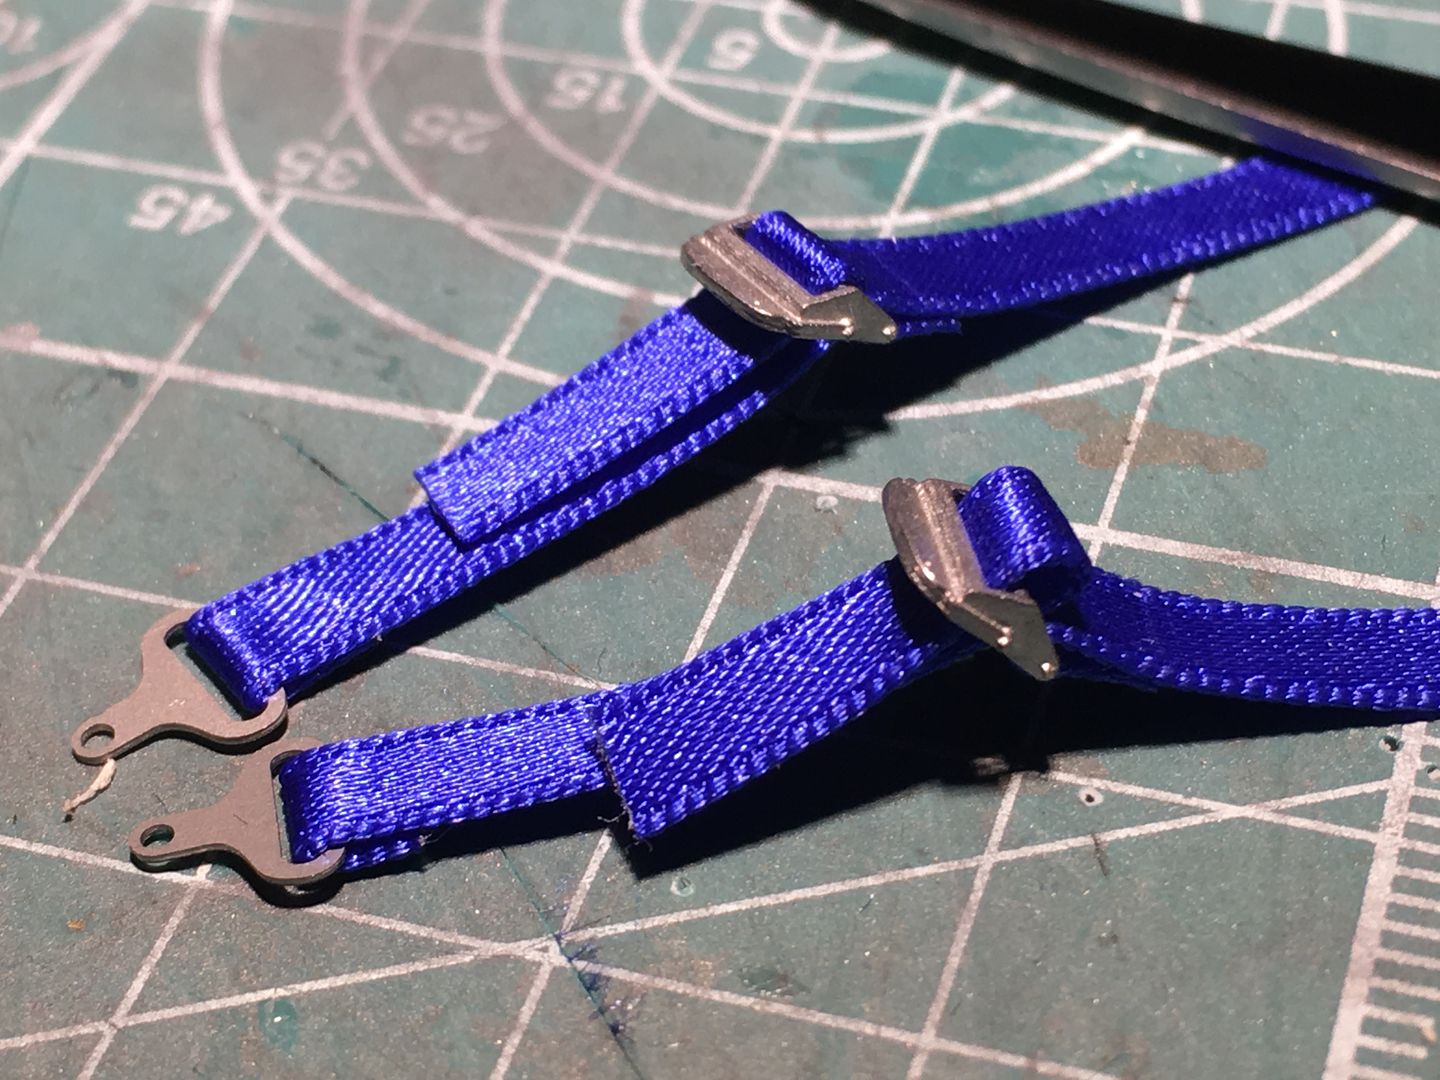
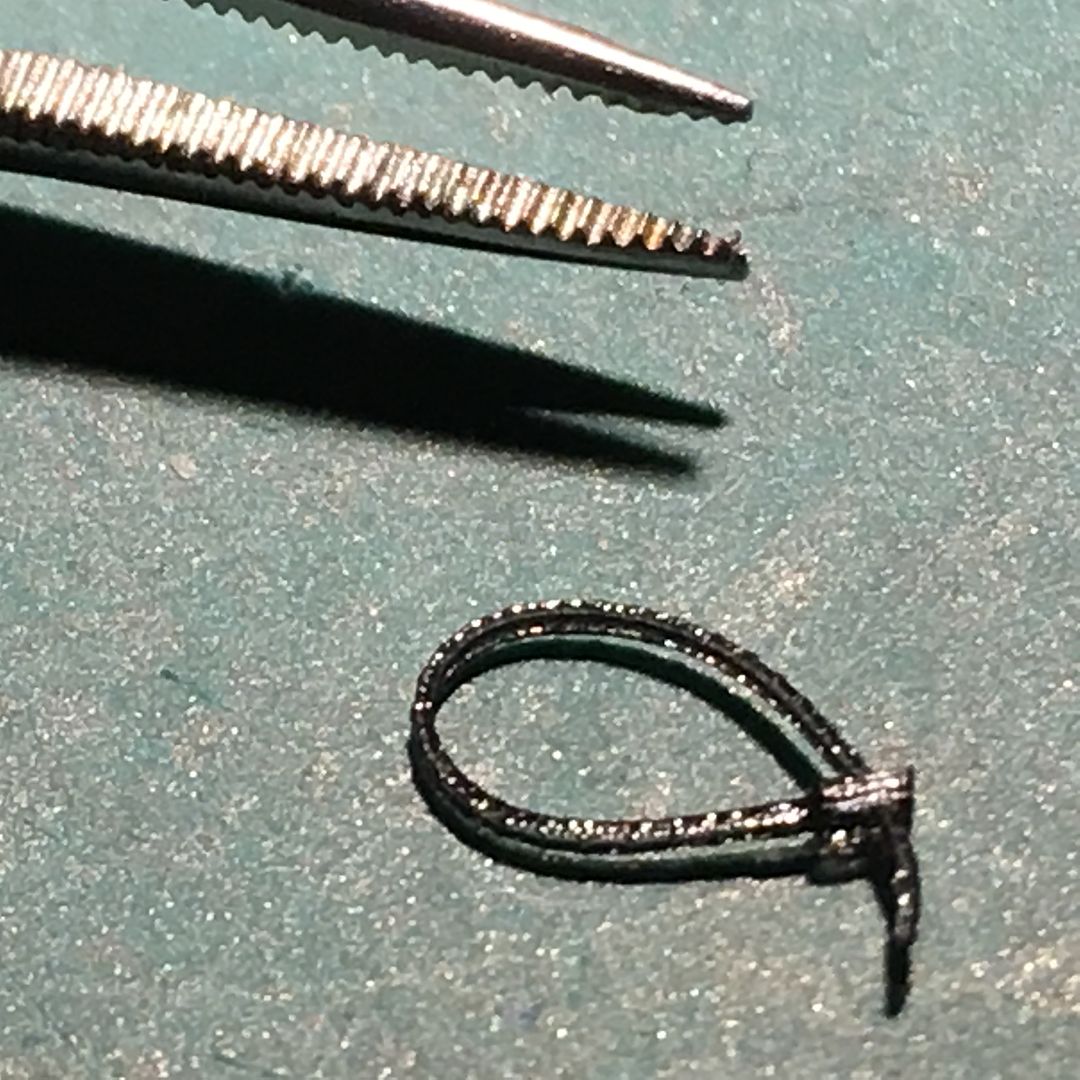
I wanted to use these - the tie-wraps that MFH now make - they look 3D printed - BUT - I have not successfully managed to use one yet. They are so brittle and fragile. They have used a similar strip for the belts on the engine, and they just crack. You get the tooth detail, but it snaps off - prefer the molded or rubber bands!!
Anyone managed to use these on anything with success?!
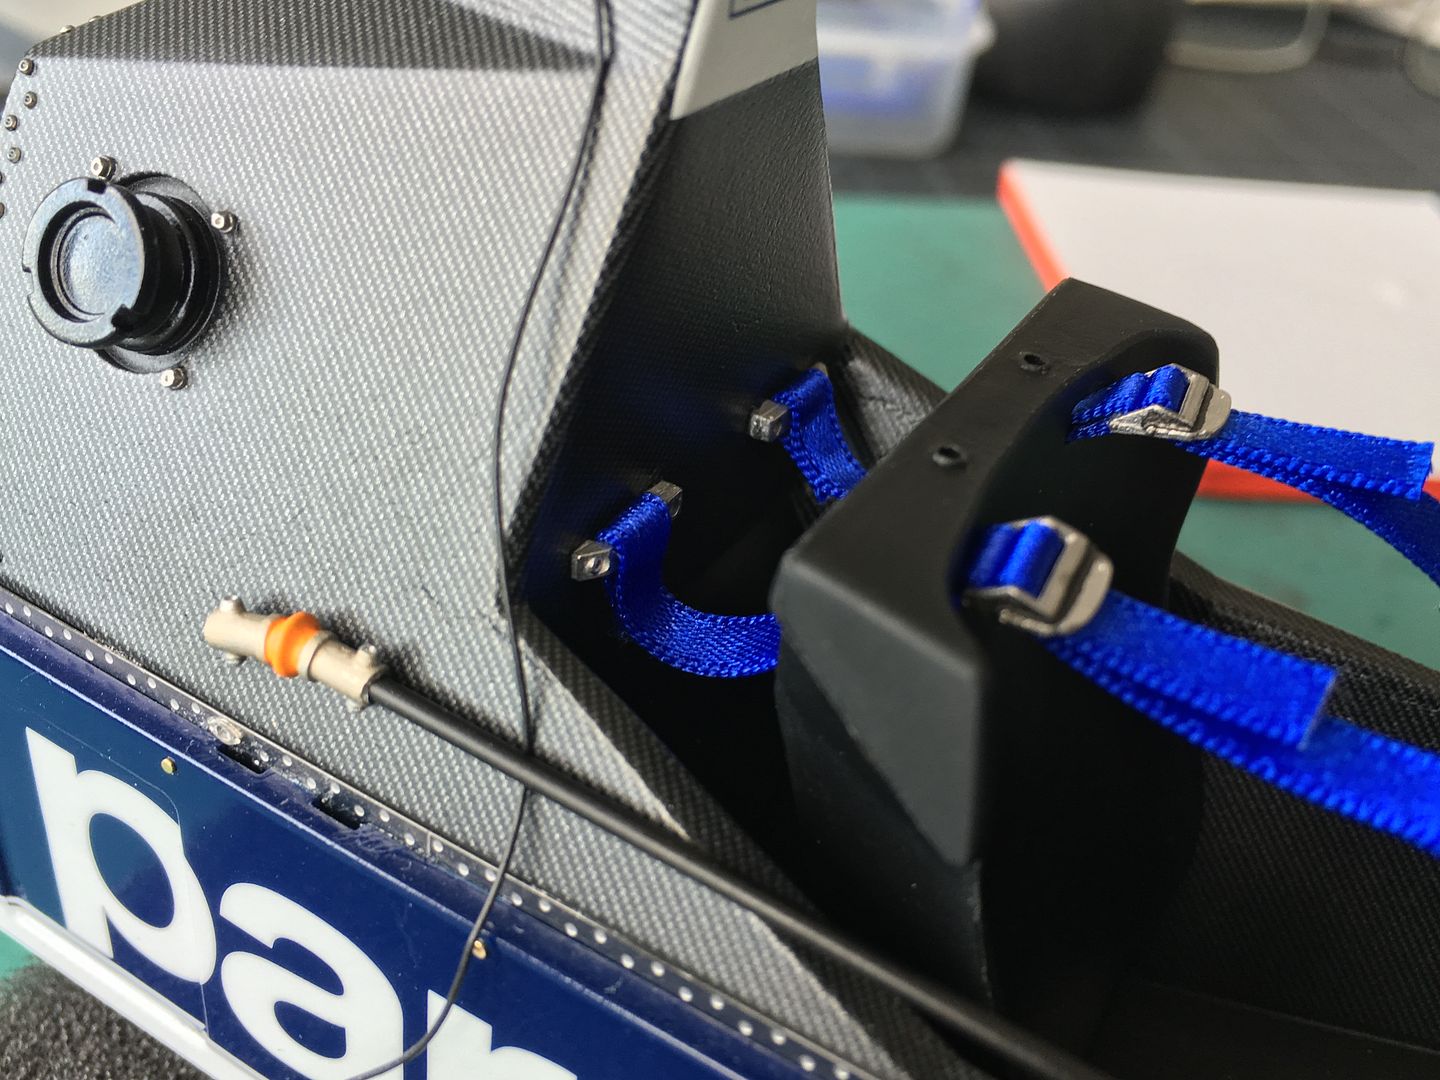
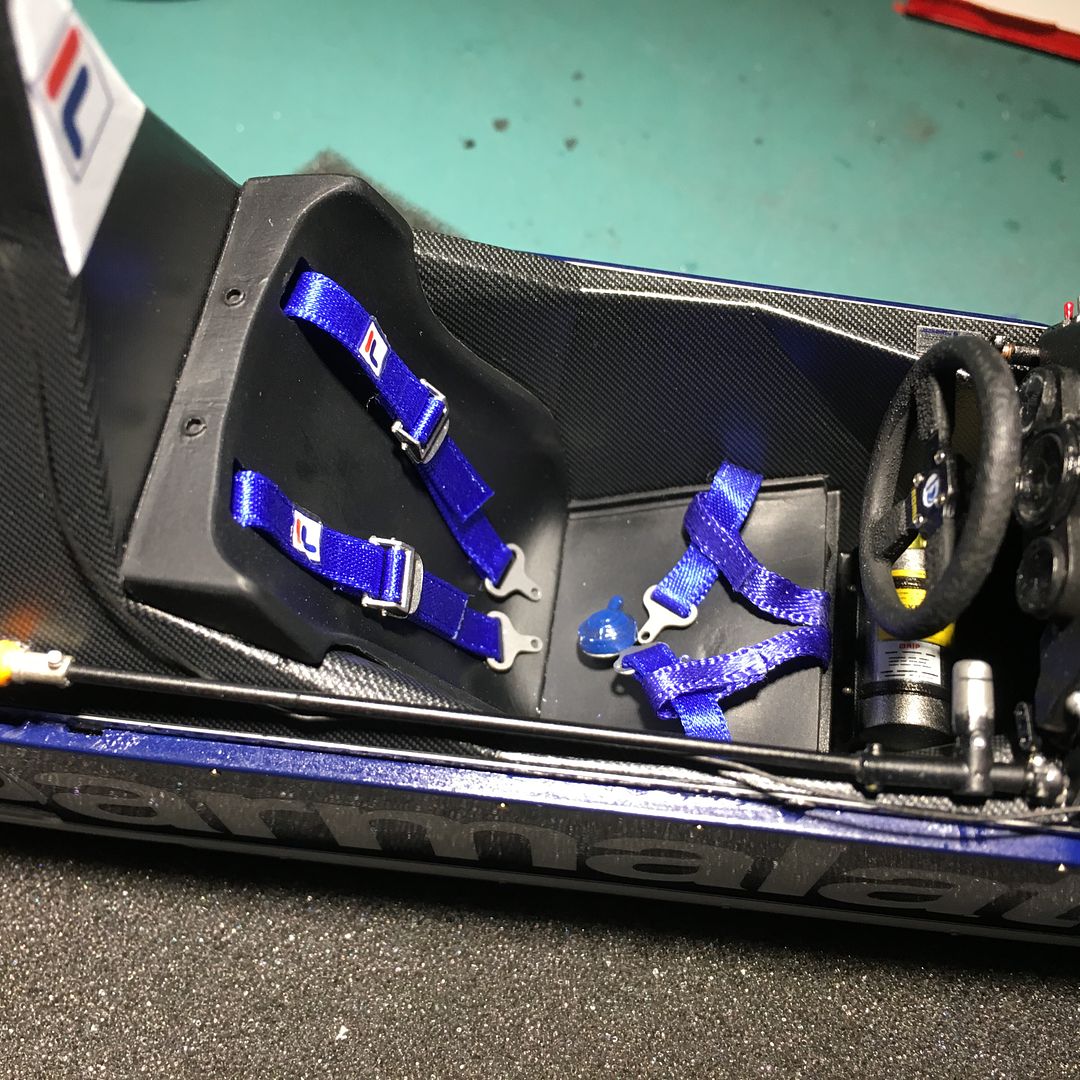
More detail never to be seen - seat belt mounts behind the seat molding...
Small detail stuff now really - apart from final assembly, which looks a pig - getting all the radiators, joining pipes and chassis framework lined up and fixed is going to be a pain - I can tell already!!
Nothing above is actually fixed yet!
Adding brake pipes to the front suspension struts...
I wanted to use these - the tie-wraps that MFH now make - they look 3D printed - BUT - I have not successfully managed to use one yet. They are so brittle and fragile. They have used a similar strip for the belts on the engine, and they just crack. You get the tooth detail, but it snaps off - prefer the molded or rubber bands!!
Anyone managed to use these on anything with success?!
More detail never to be seen - seat belt mounts behind the seat molding...
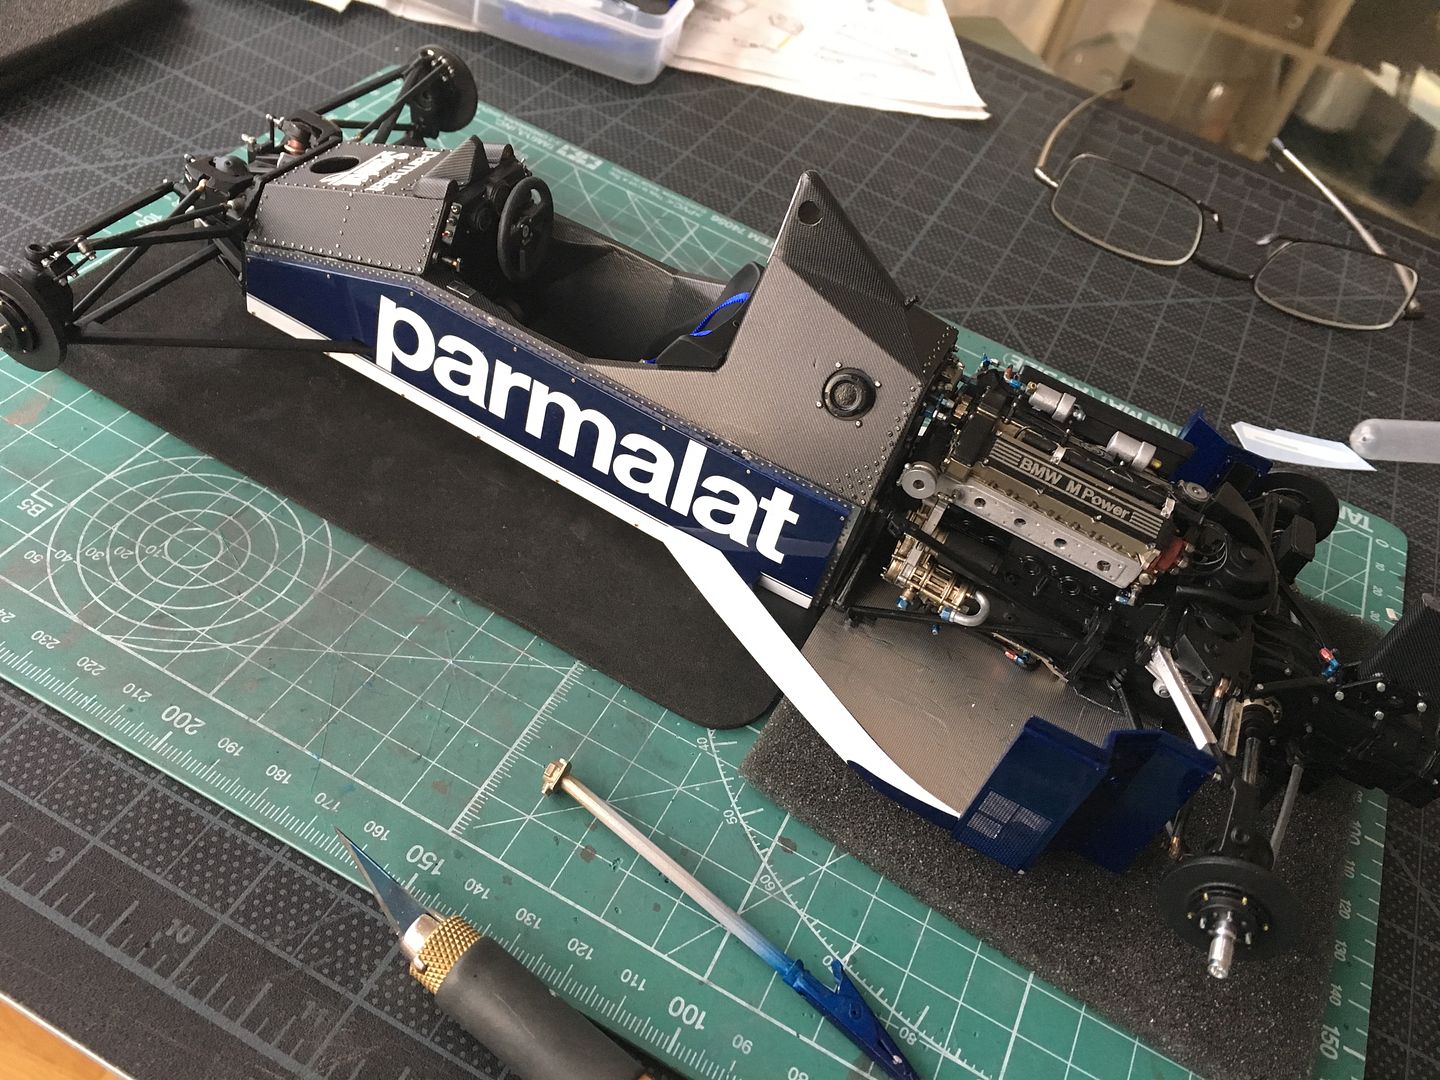
ok - back on this puppy after a bit of a break.
Few pics for 'where I am'...

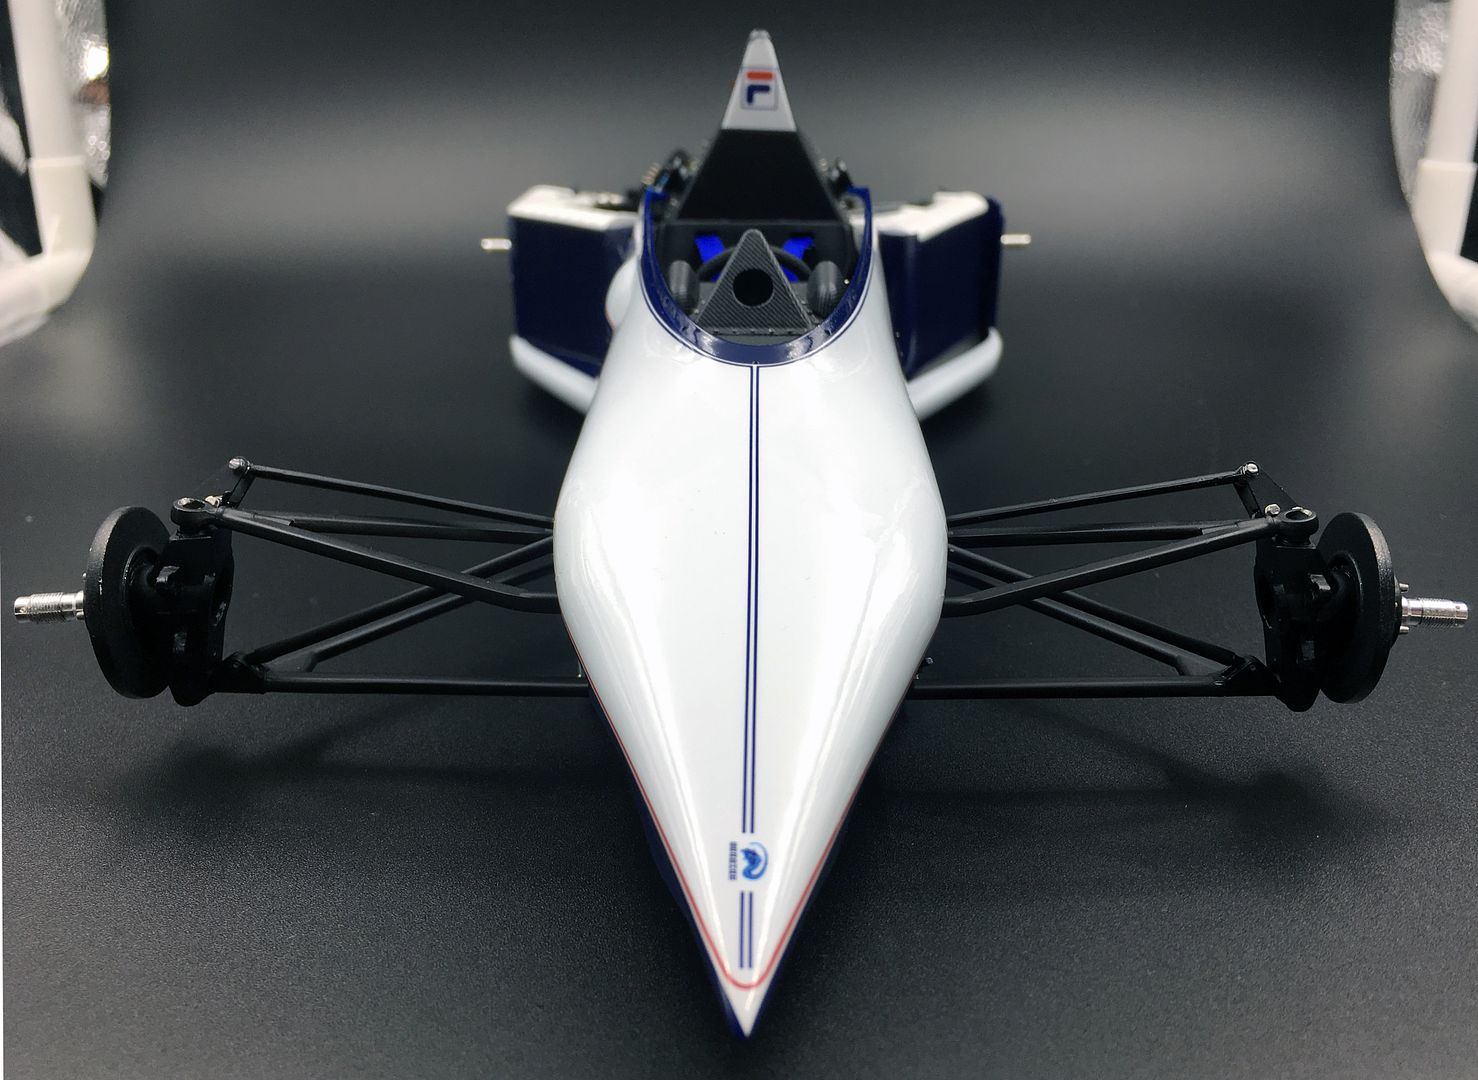
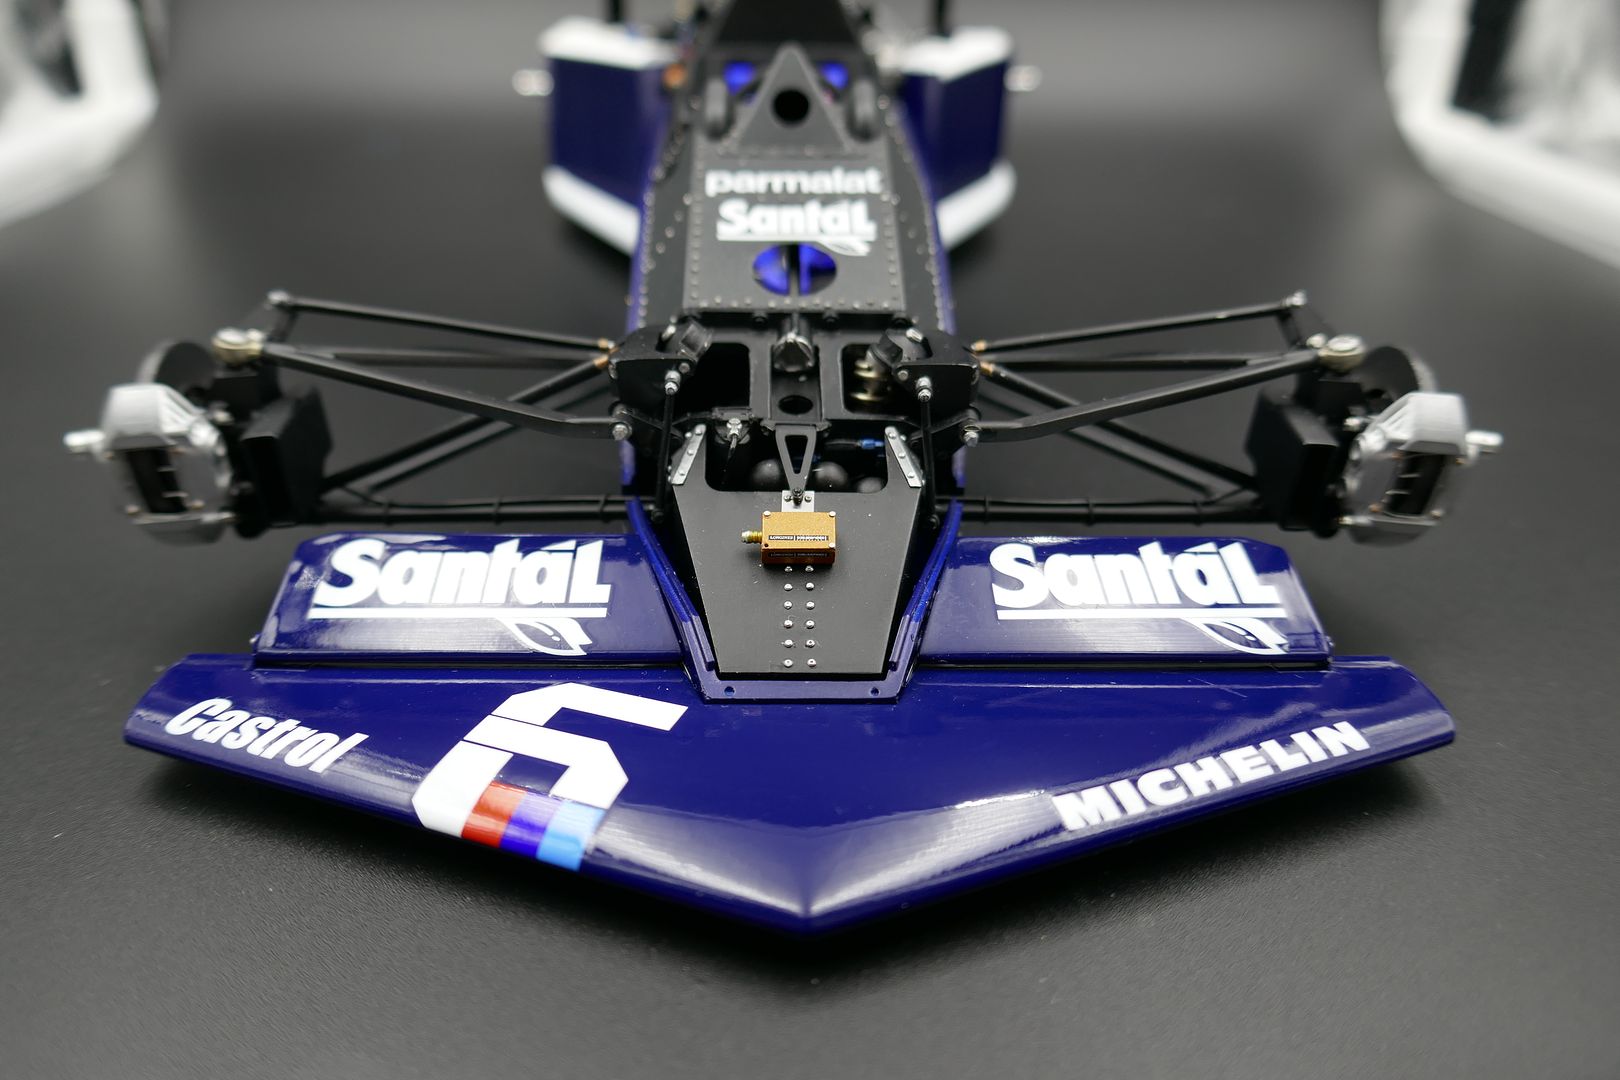
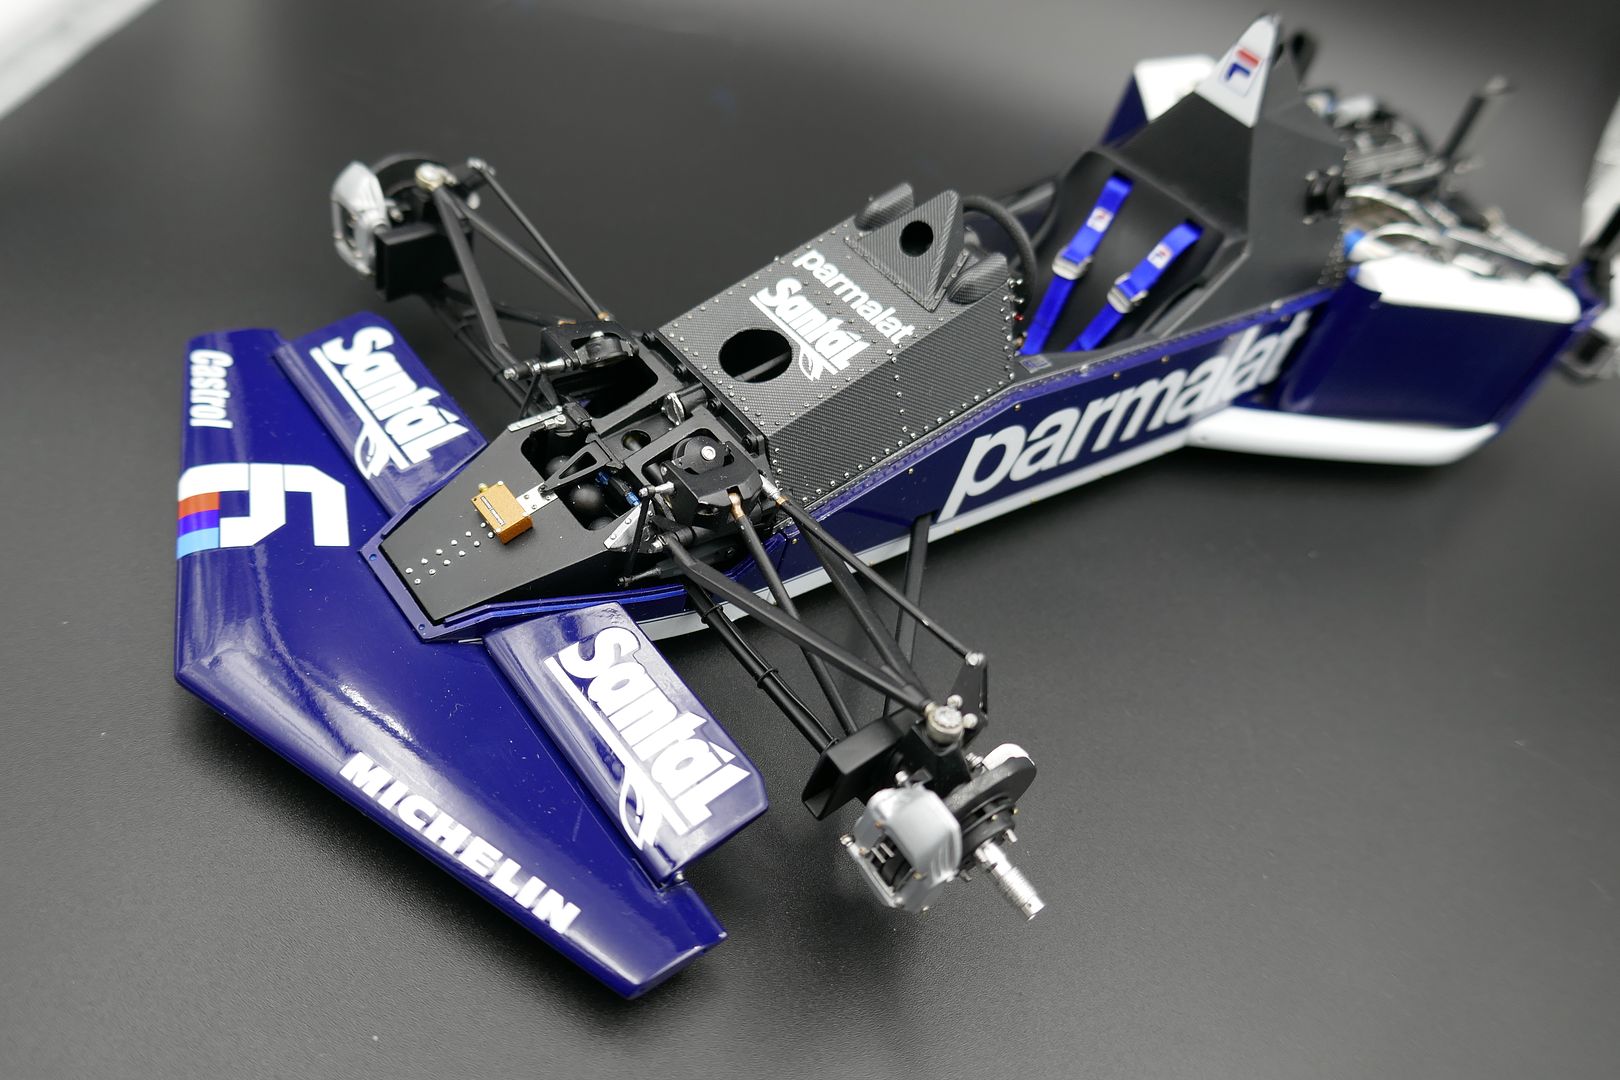
So I worked on the front wing - pretty straight forward, except that I should have assembled the brackets and square filling pieces before painting, so I could have filled the gaps - mostly hidden by the winglets, so I'll live!
Bit of paint touch up needed as well....
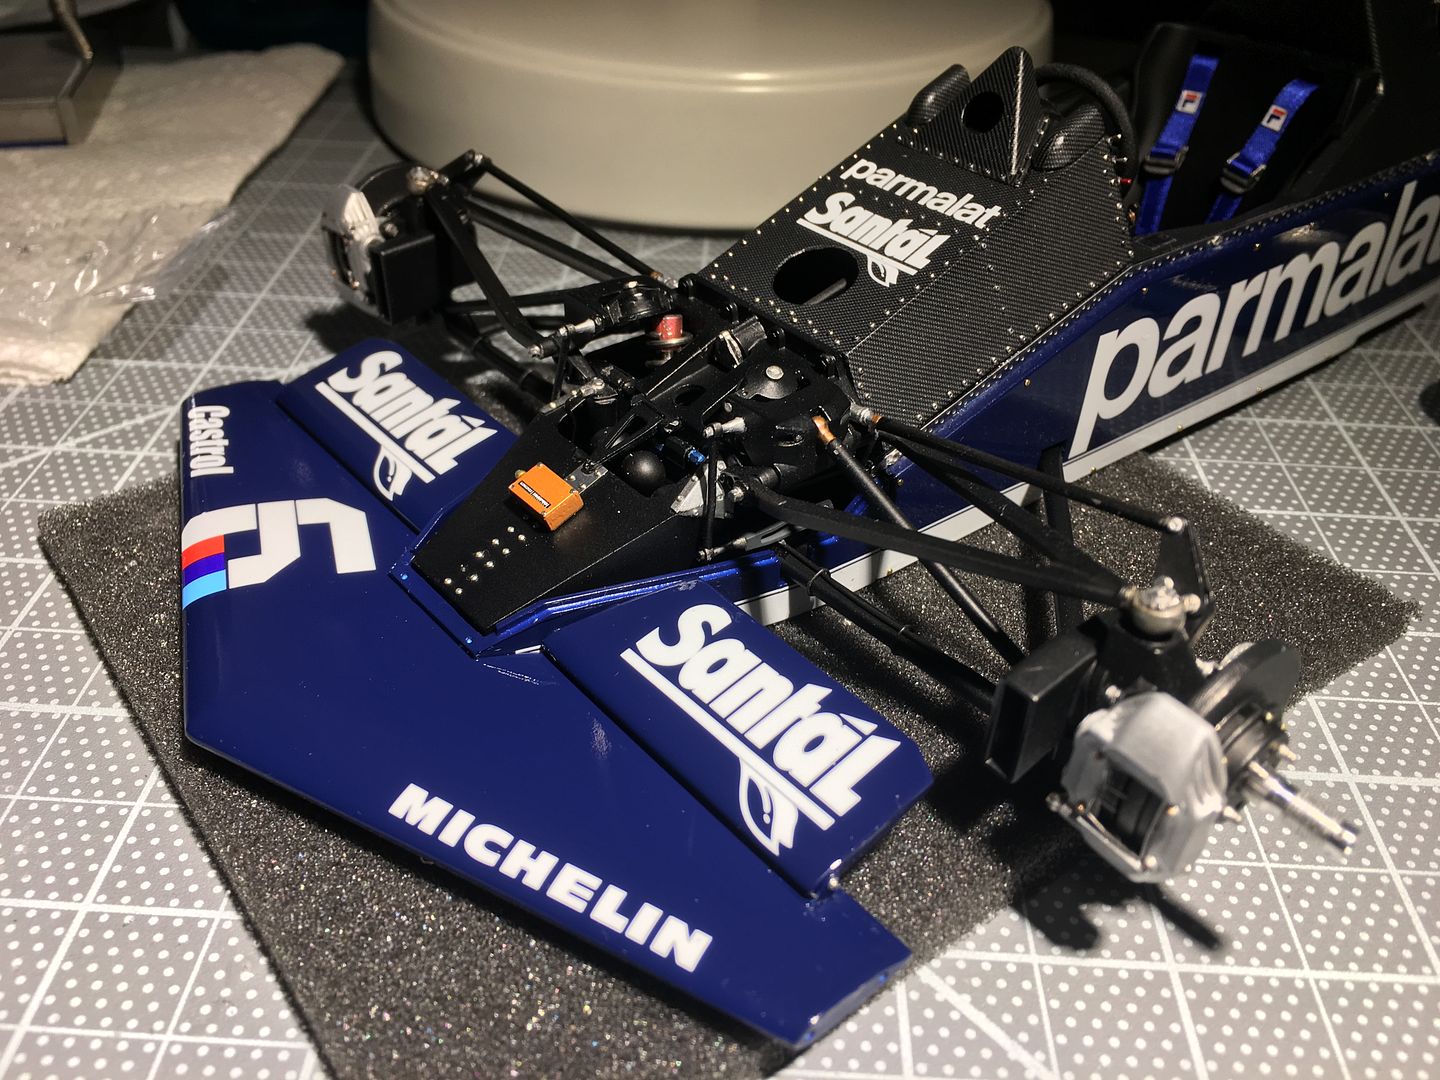
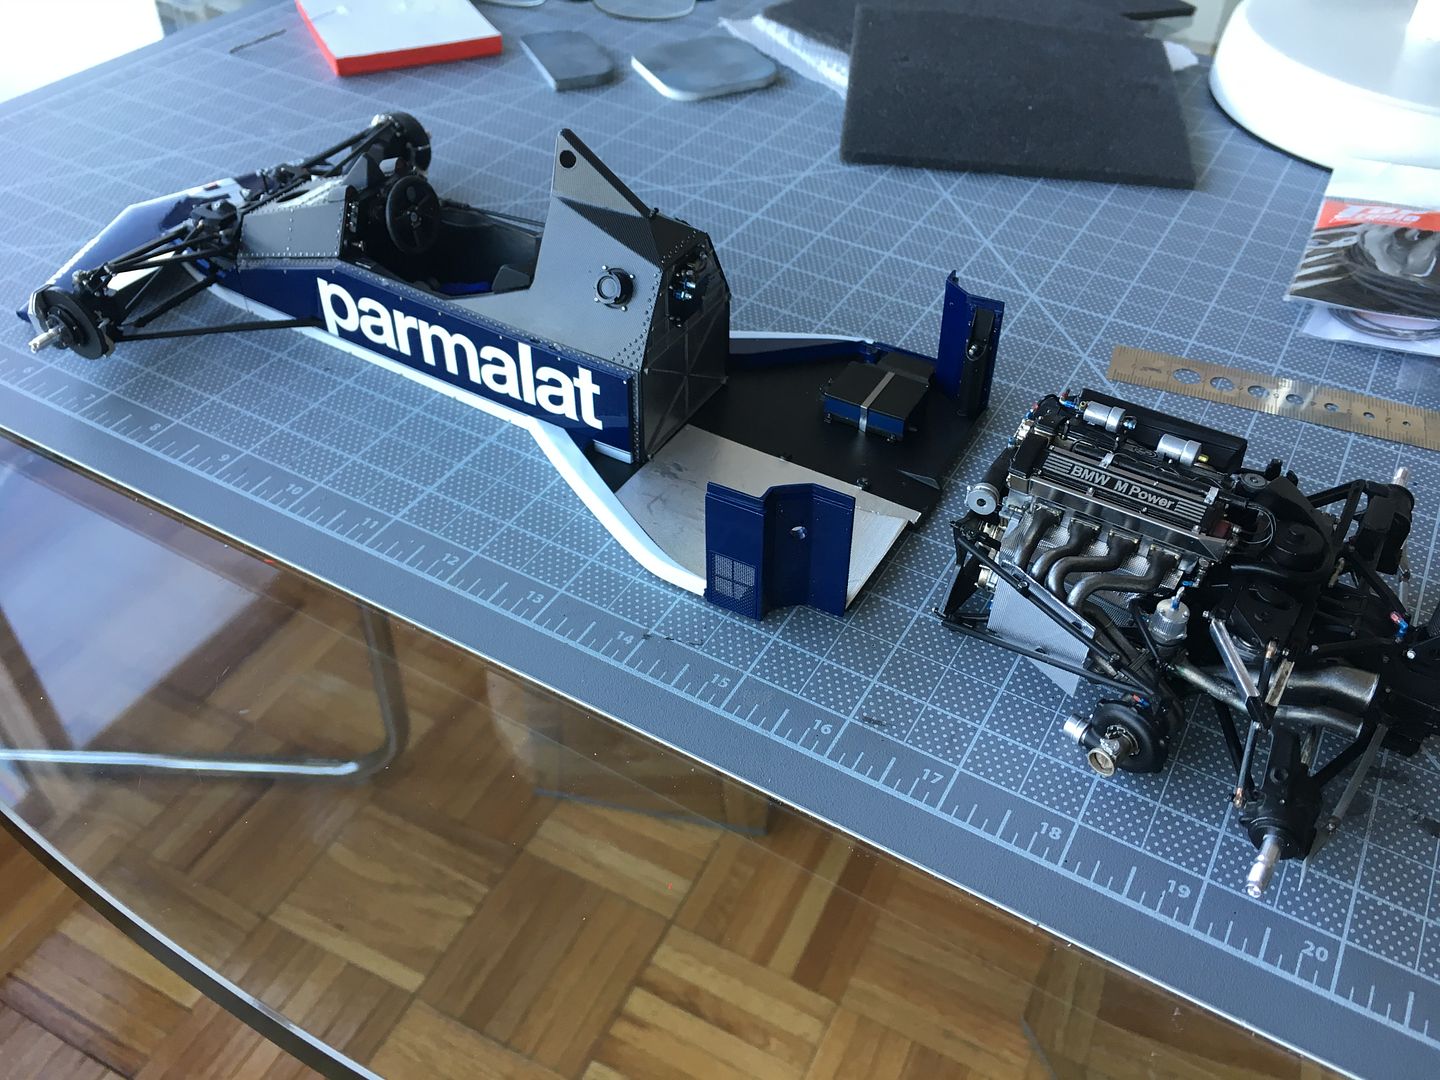
Most of these shots show bits pushed together - I wanted to assemble the side rads and pipe work, but I can't avoid doing wiring - this usually makes the model, and I don't mind the process, but I need to find the right wire to use - the stuff with the kit is too stiff, and can pull tiny components off....
...oh yes, I I think I lost the wing end-plates - cant find them anywhere....grrrr
Few pics for 'where I am'...
So I worked on the front wing - pretty straight forward, except that I should have assembled the brackets and square filling pieces before painting, so I could have filled the gaps - mostly hidden by the winglets, so I'll live!
Bit of paint touch up needed as well....
Most of these shots show bits pushed together - I wanted to assemble the side rads and pipe work, but I can't avoid doing wiring - this usually makes the model, and I don't mind the process, but I need to find the right wire to use - the stuff with the kit is too stiff, and can pull tiny components off....
...oh yes, I I think I lost the wing end-plates - cant find them anywhere....grrrr
Started the wiring - using small wire 'pins' to make the joints stronger, as I will have to bend and fold the wires when it comes to assembly. Cant see most of these lower ones.
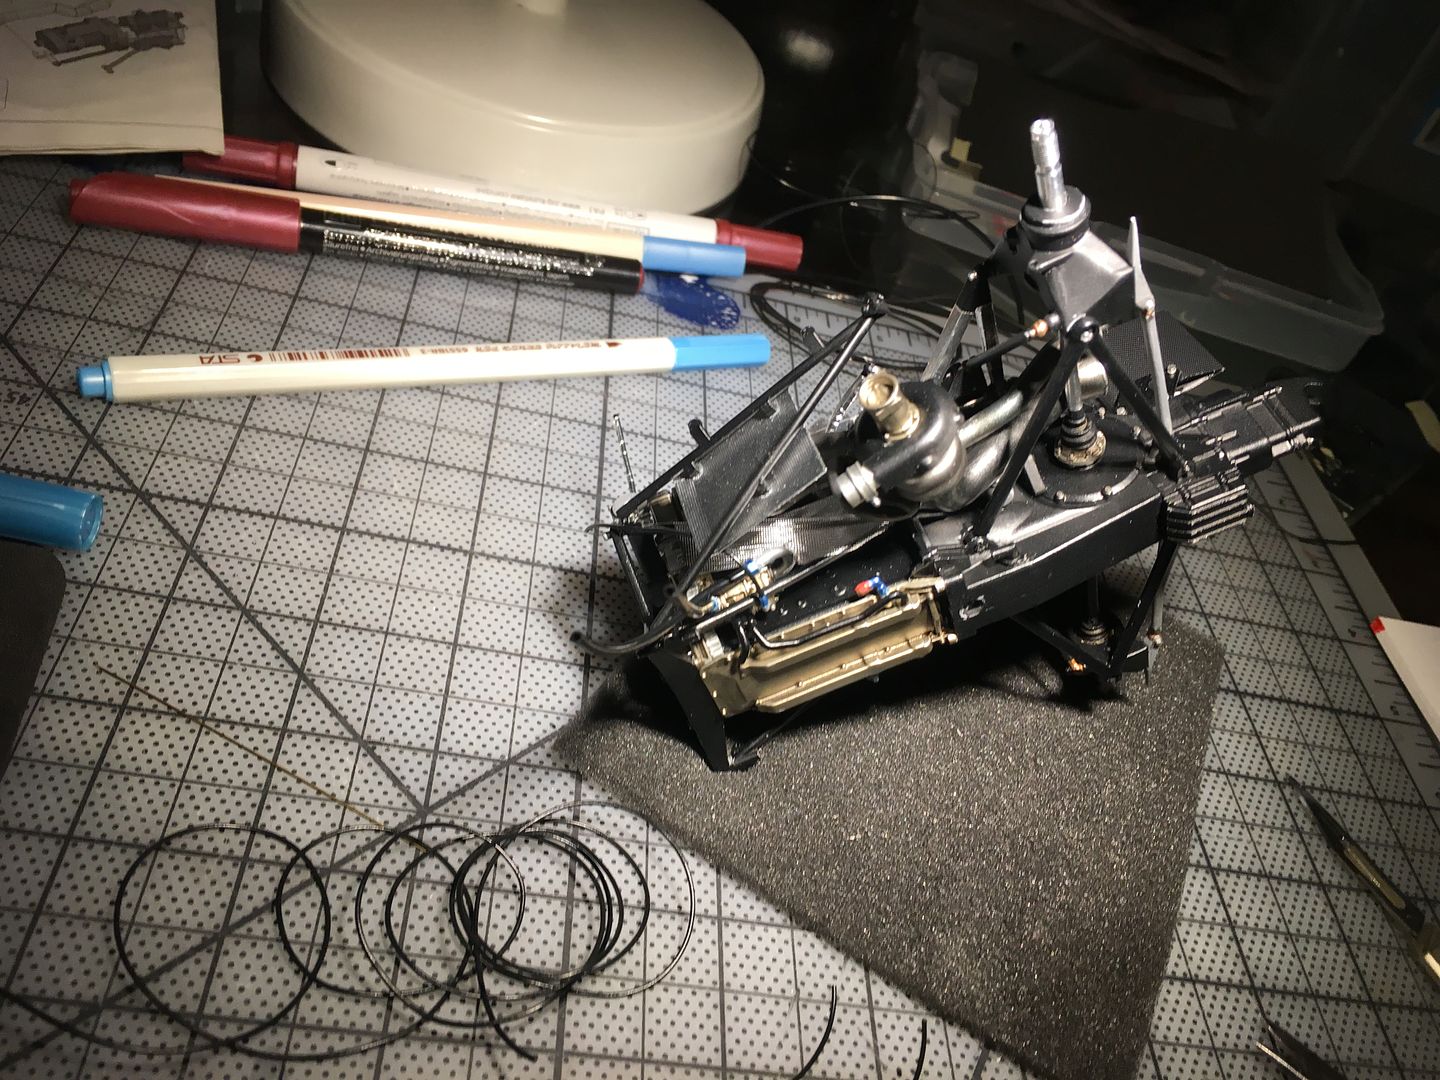
I wish MFH did a much better job of showing where the wires routed, and what they joined up - they just give a length and an arrow off the page. Matching them up takes ages, and there are many I simply can't trace!
I find the 0.8mm wire in the kit way too stiff - have managed to find some better, softer wire to use, which will be easier to route later.
I'll also use some heat-shrink later...early days!
Right - got a good bit of work done this weekend....mainly wiring!
A few decals...

At this point I am just adding wires - they all need to be tied up etc later! I'm keen to fix the ones underneath, so I can 'mount' the rear of the chassis to the front...once the rads are fixed, access will be very difficult!
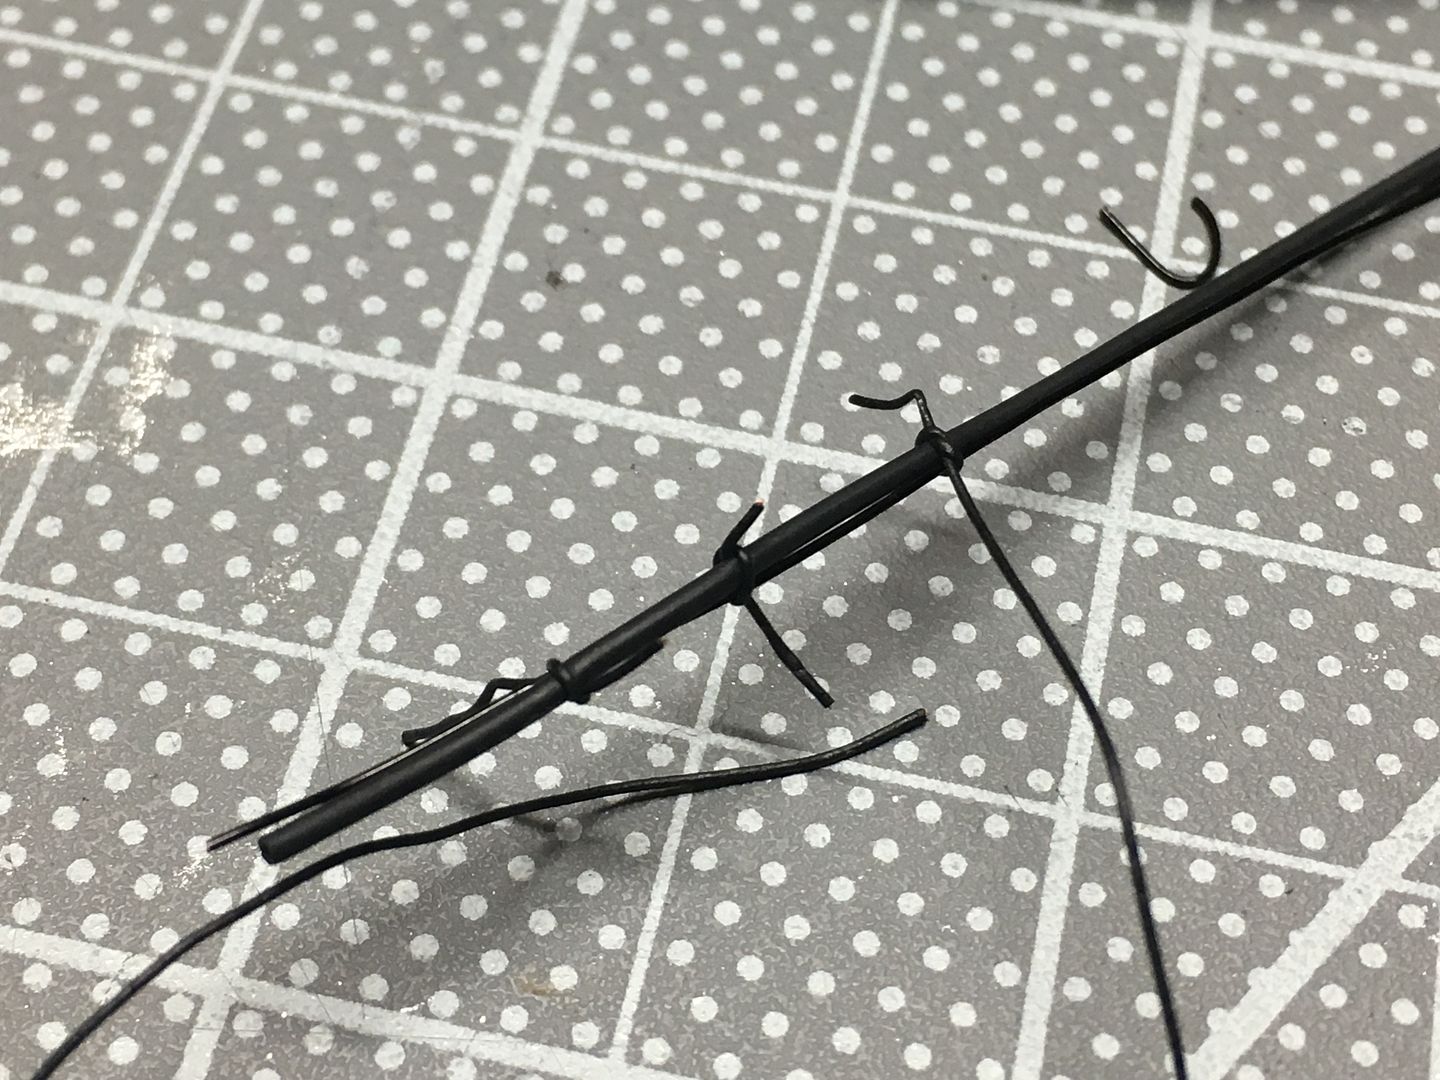
Ok - has ANYONE managed to use these damn MFH tie wraps successfully?!!! This is one of only 2 I have managed to use - the 15 others have always snapped when trying to thread - a real pain - cannot recommend them I am afraid.
Had a few fittings break as I try and fit wire - lesson learnt - epoxy is better in some places, than the CA I have exclusively used - I 'pinned/pegged' many fittings this weekend - especially during the engine fitting, that required lots of shoving and bending!
I like the heat shrink tube, that you heat to get nice and small - much easier to thread onto pins, and the tiny writing looks cool!
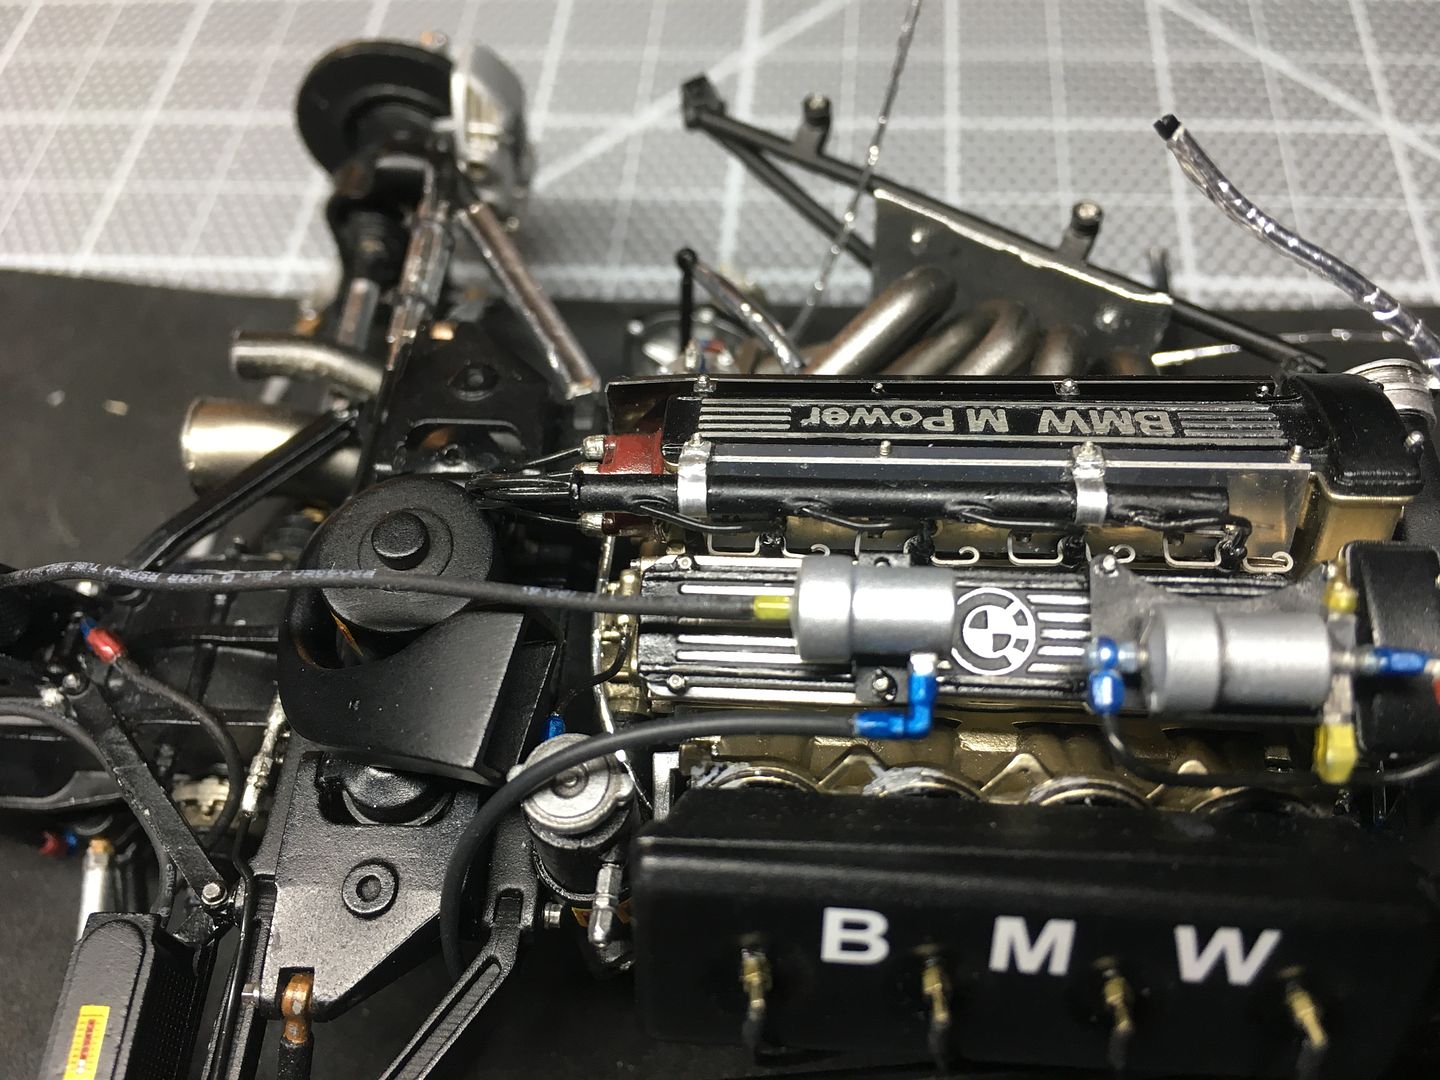
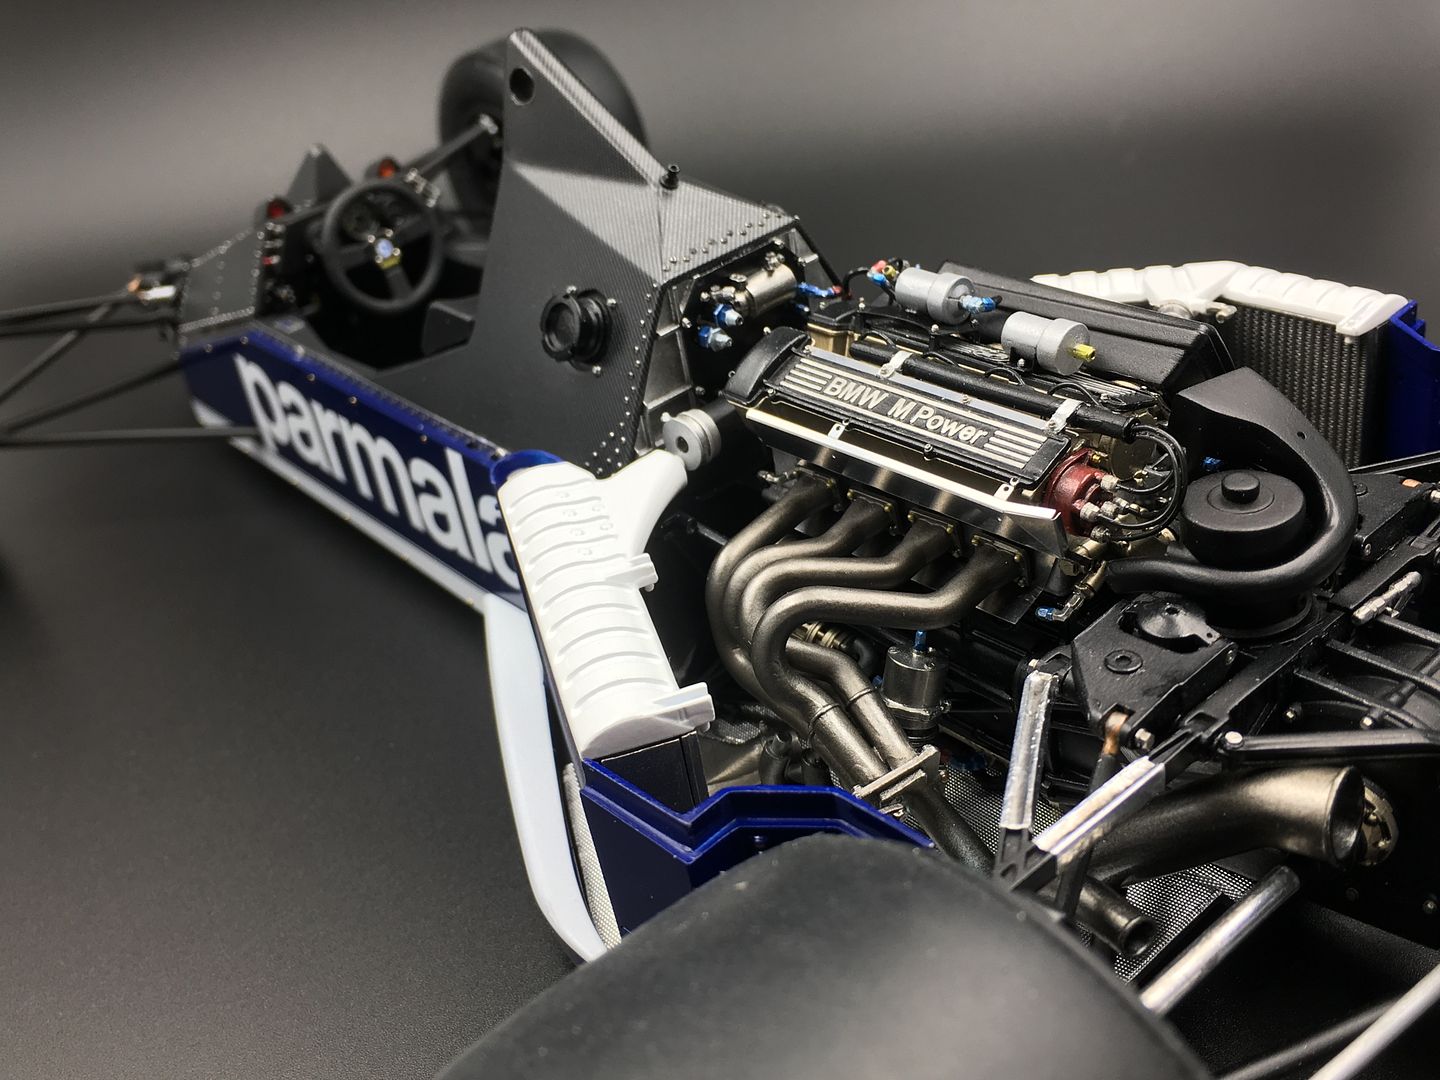
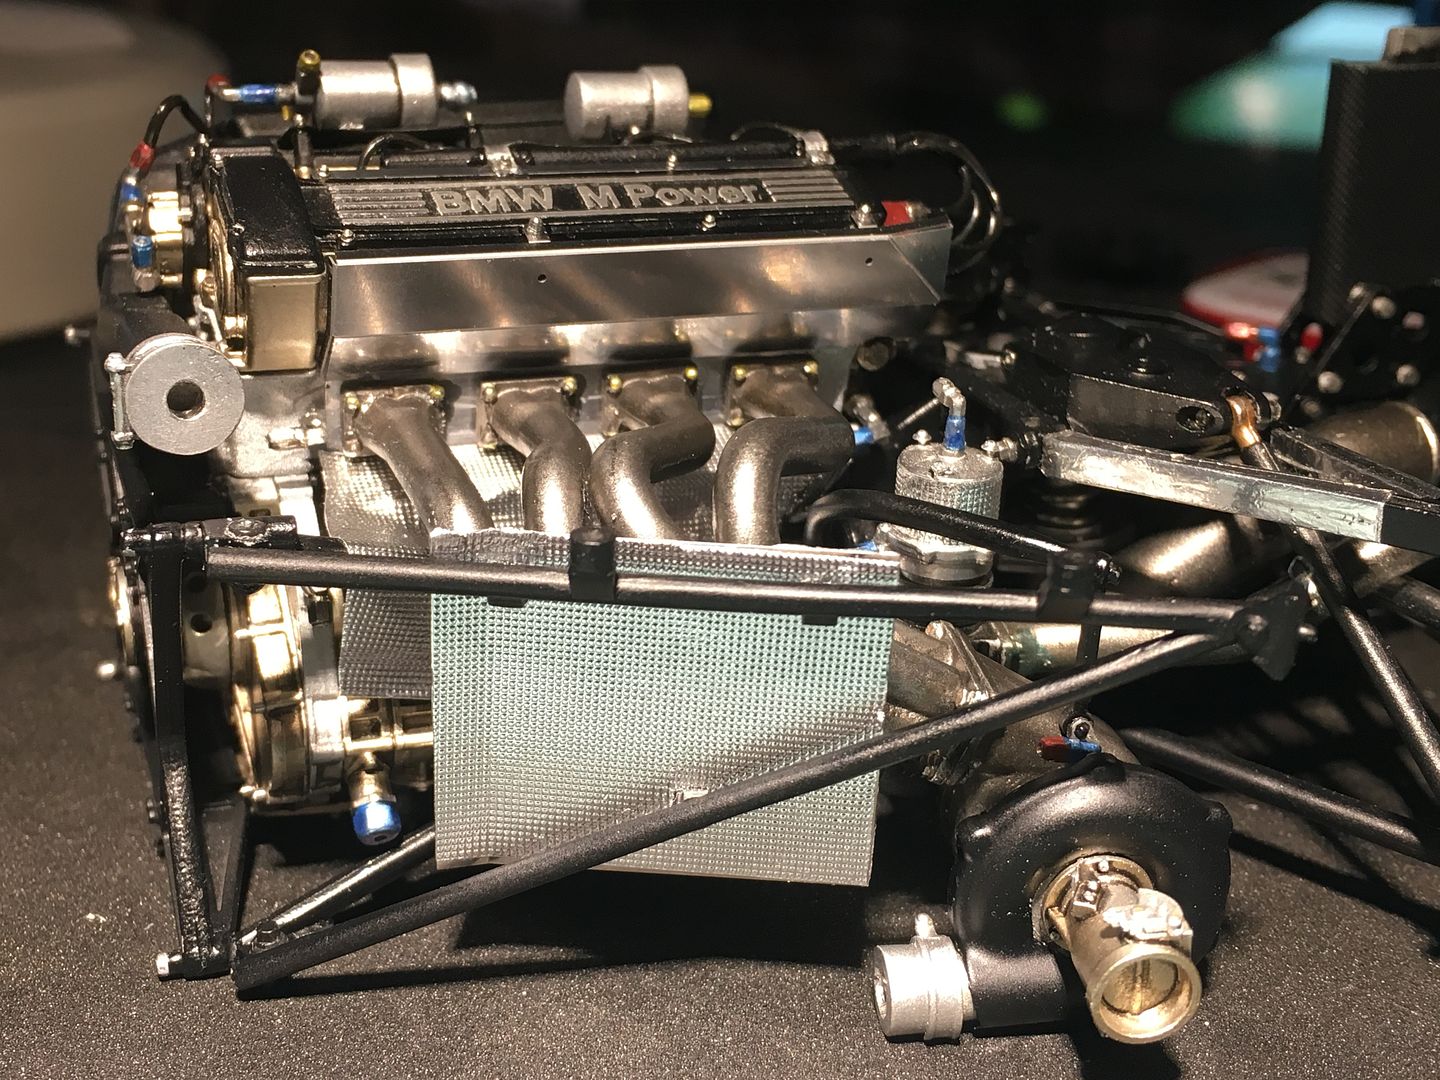
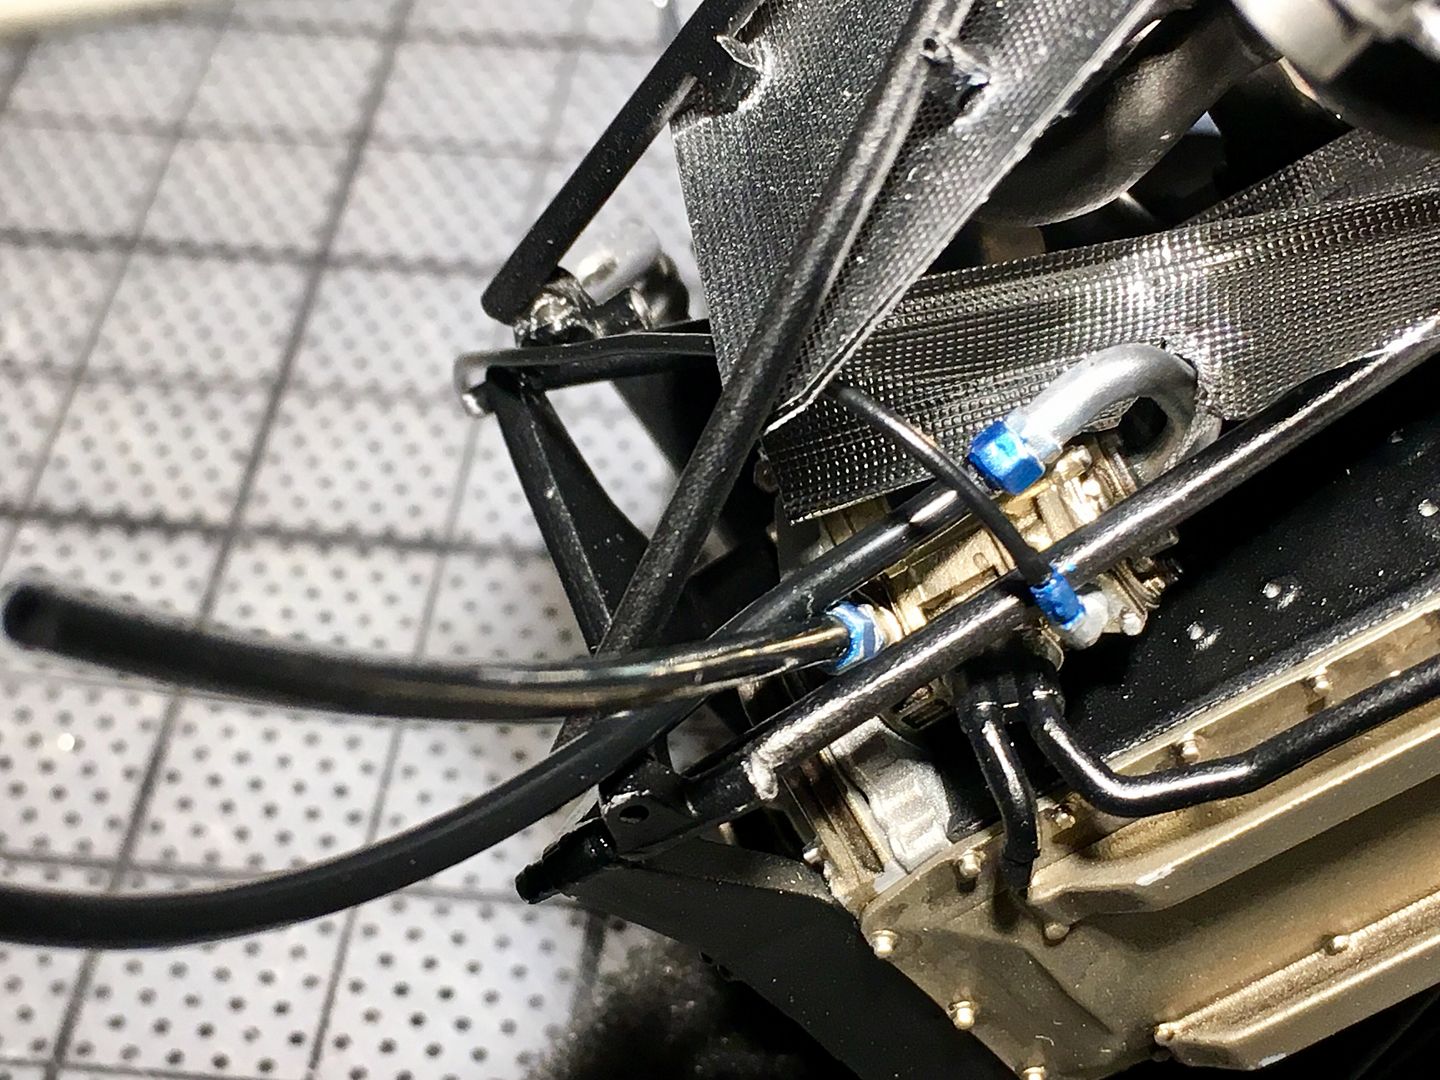
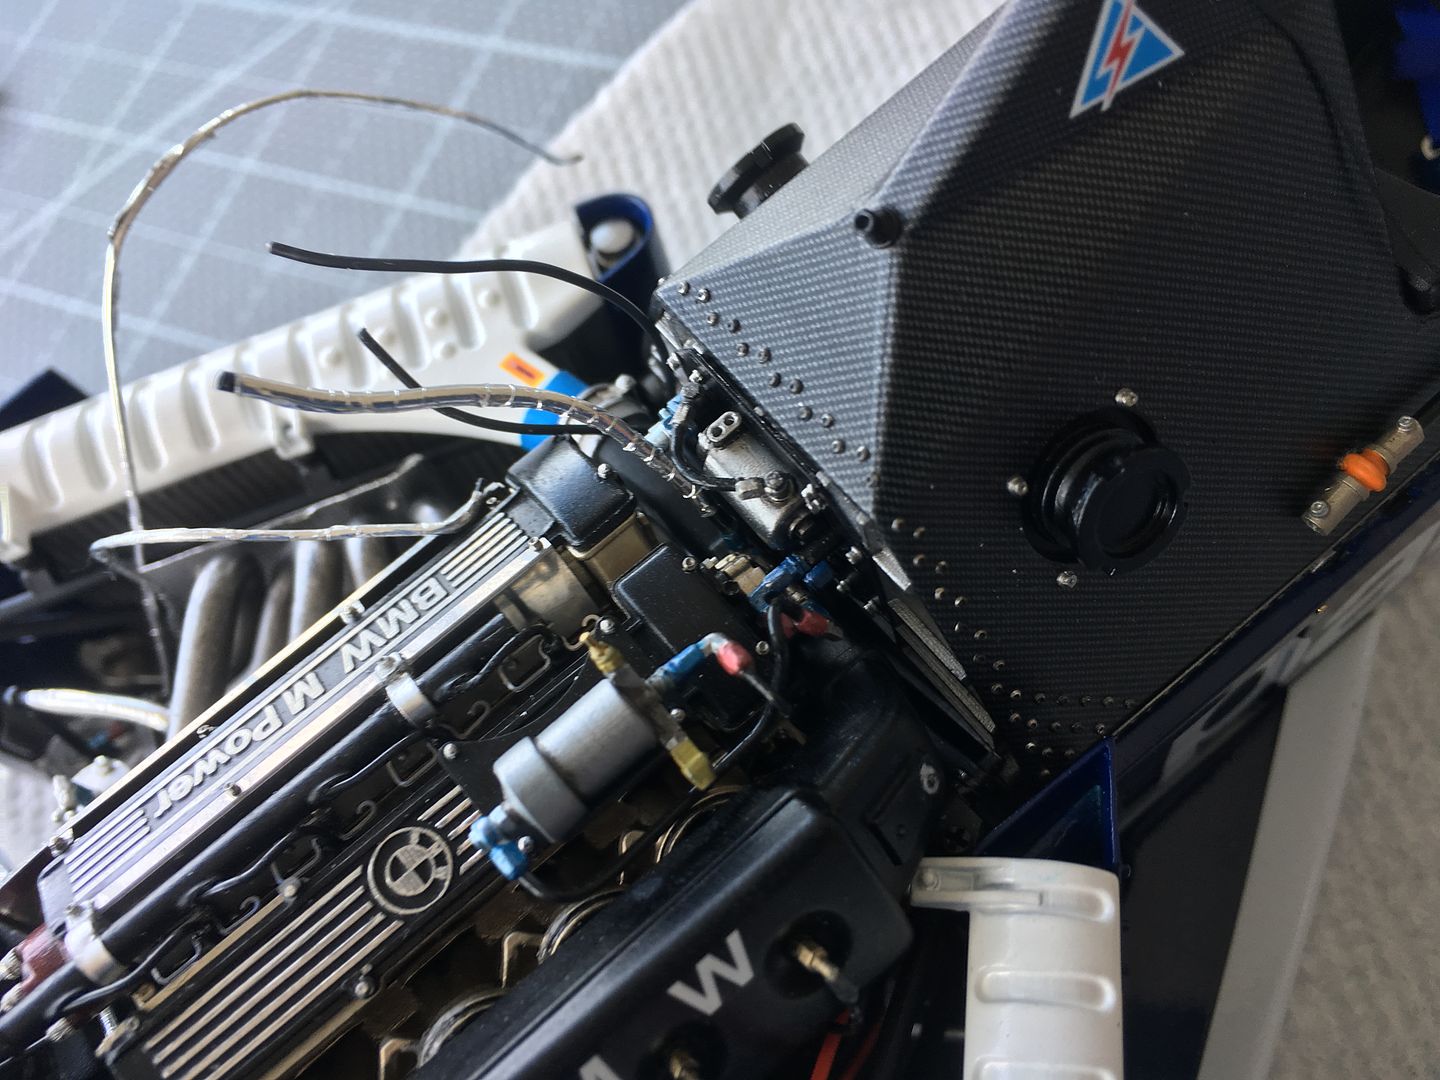
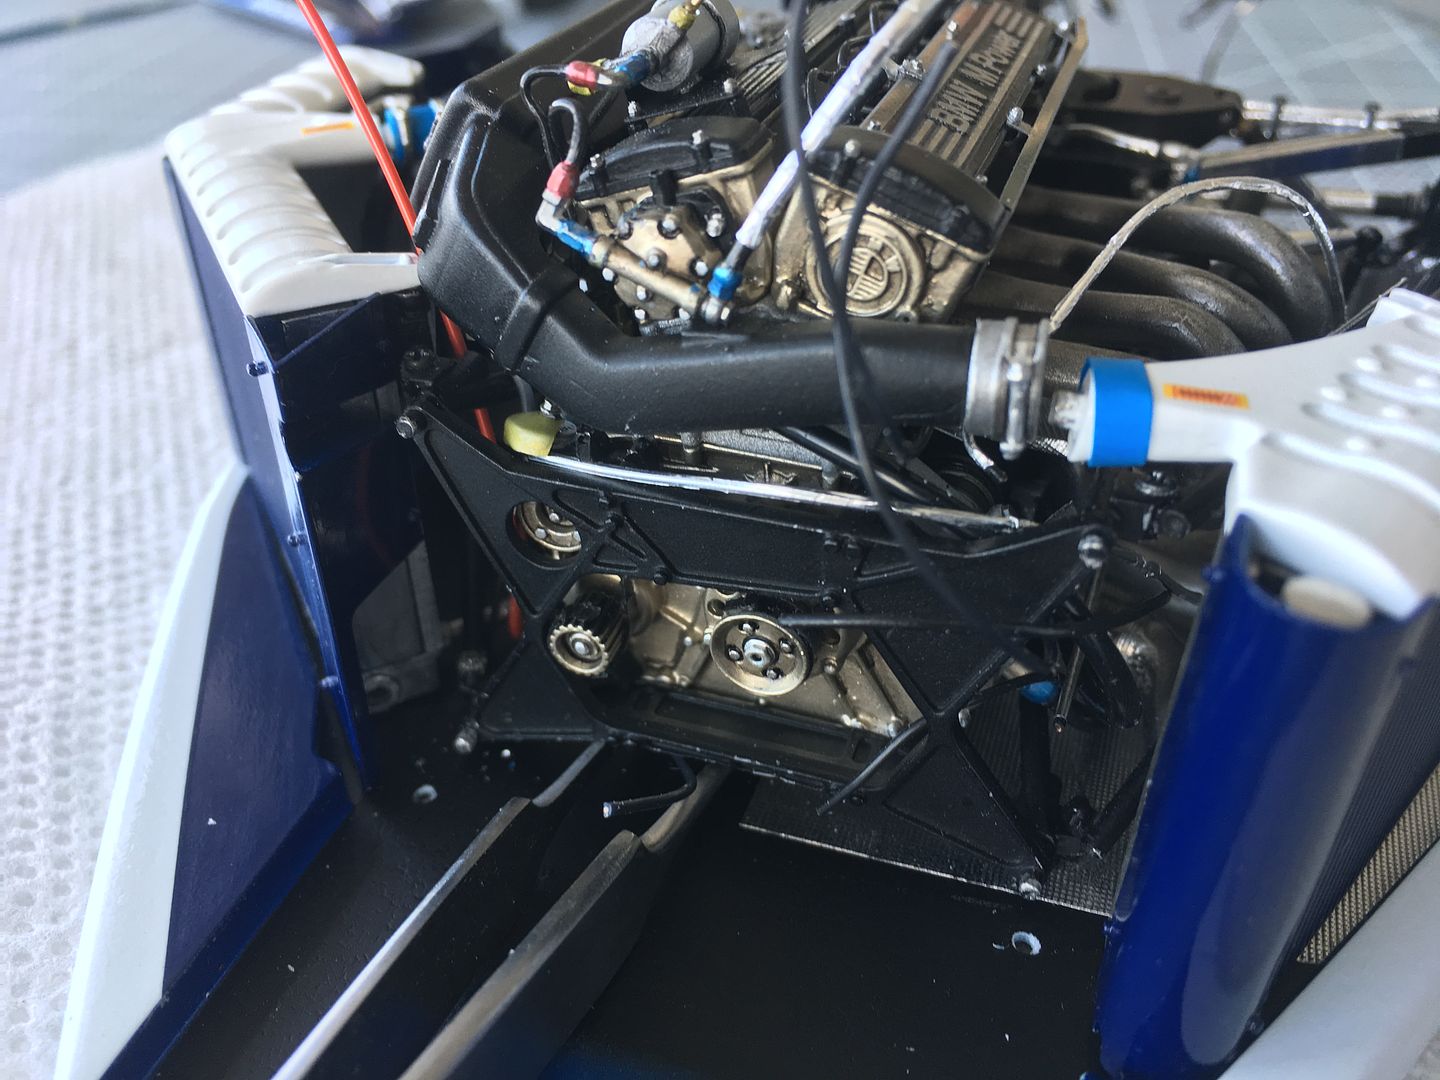
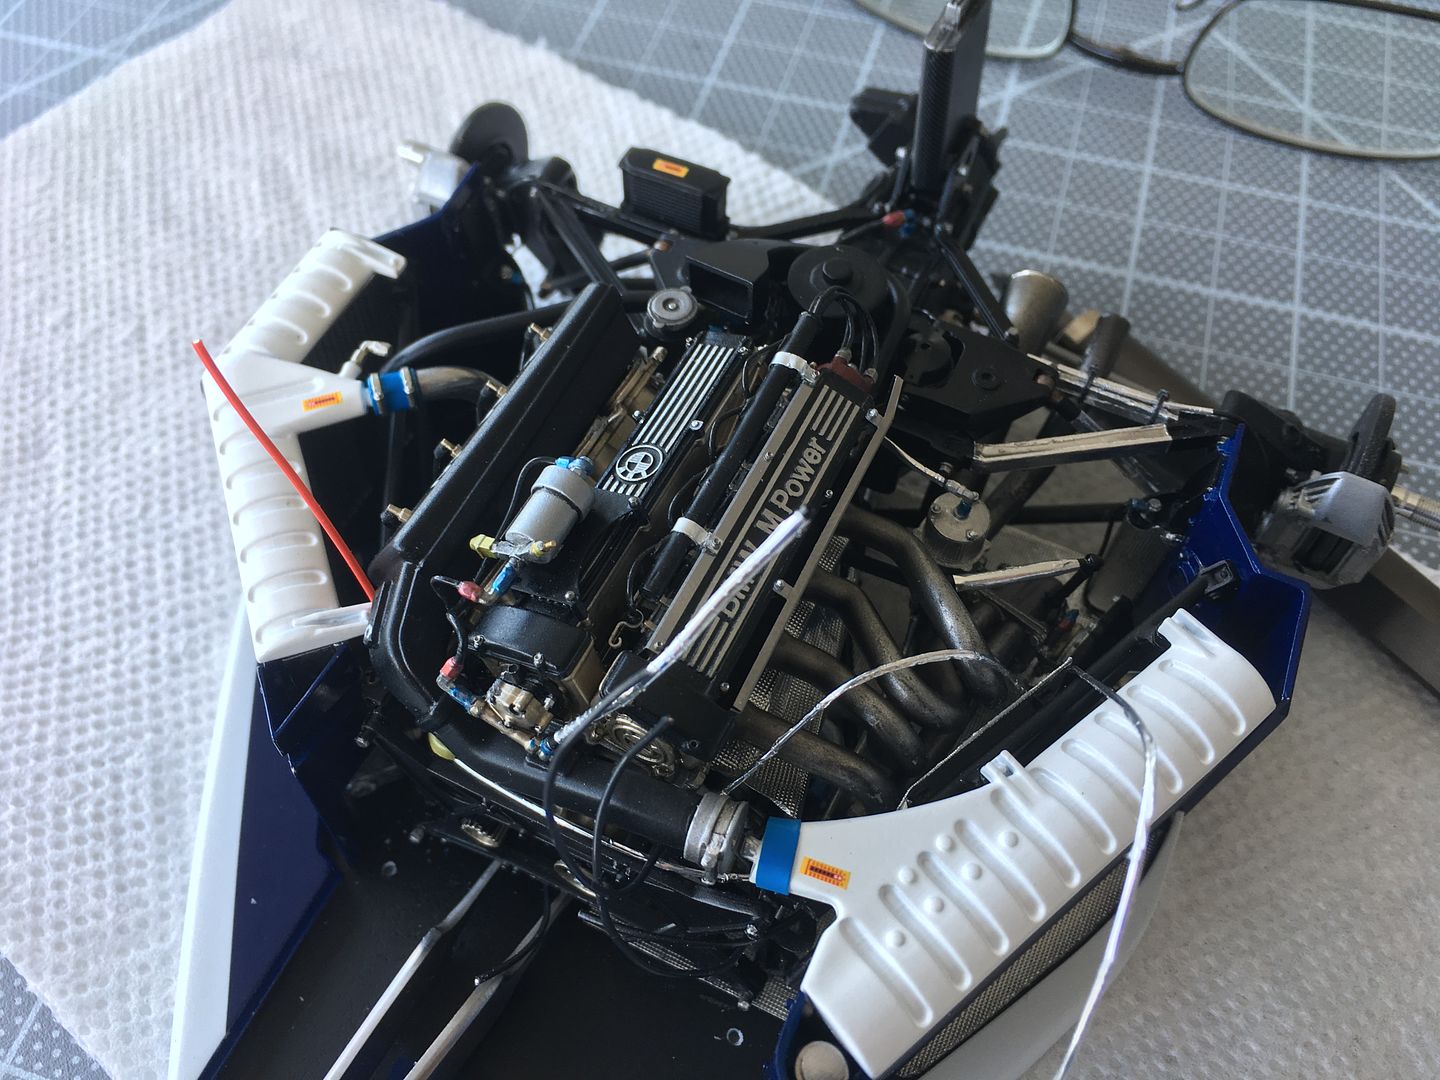
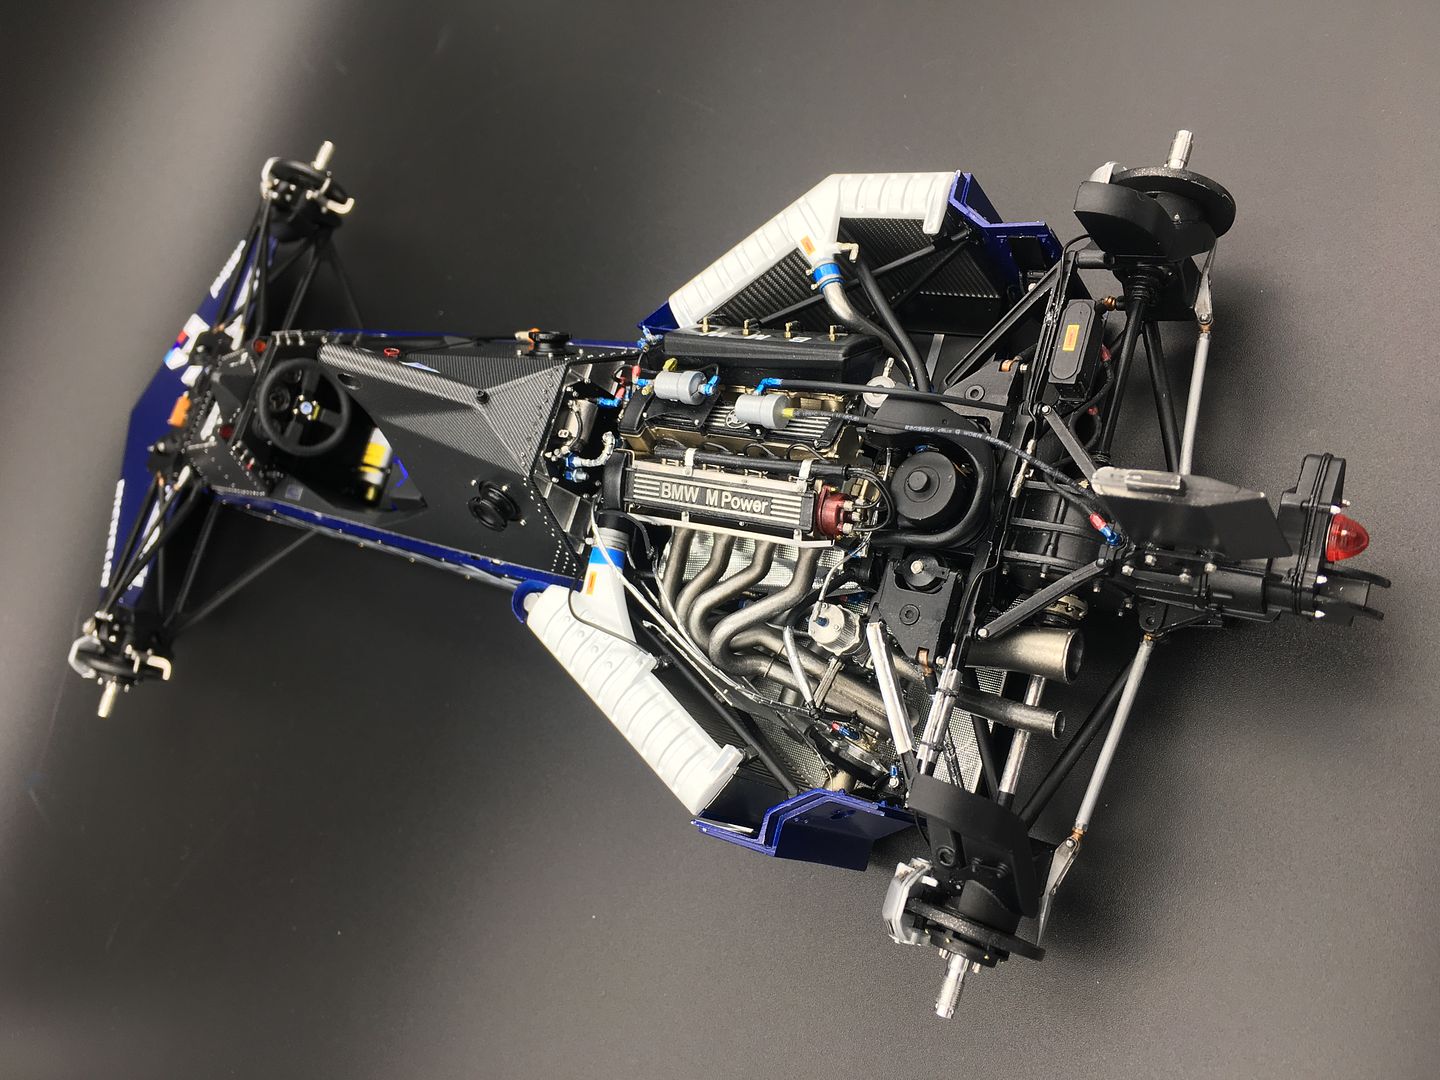
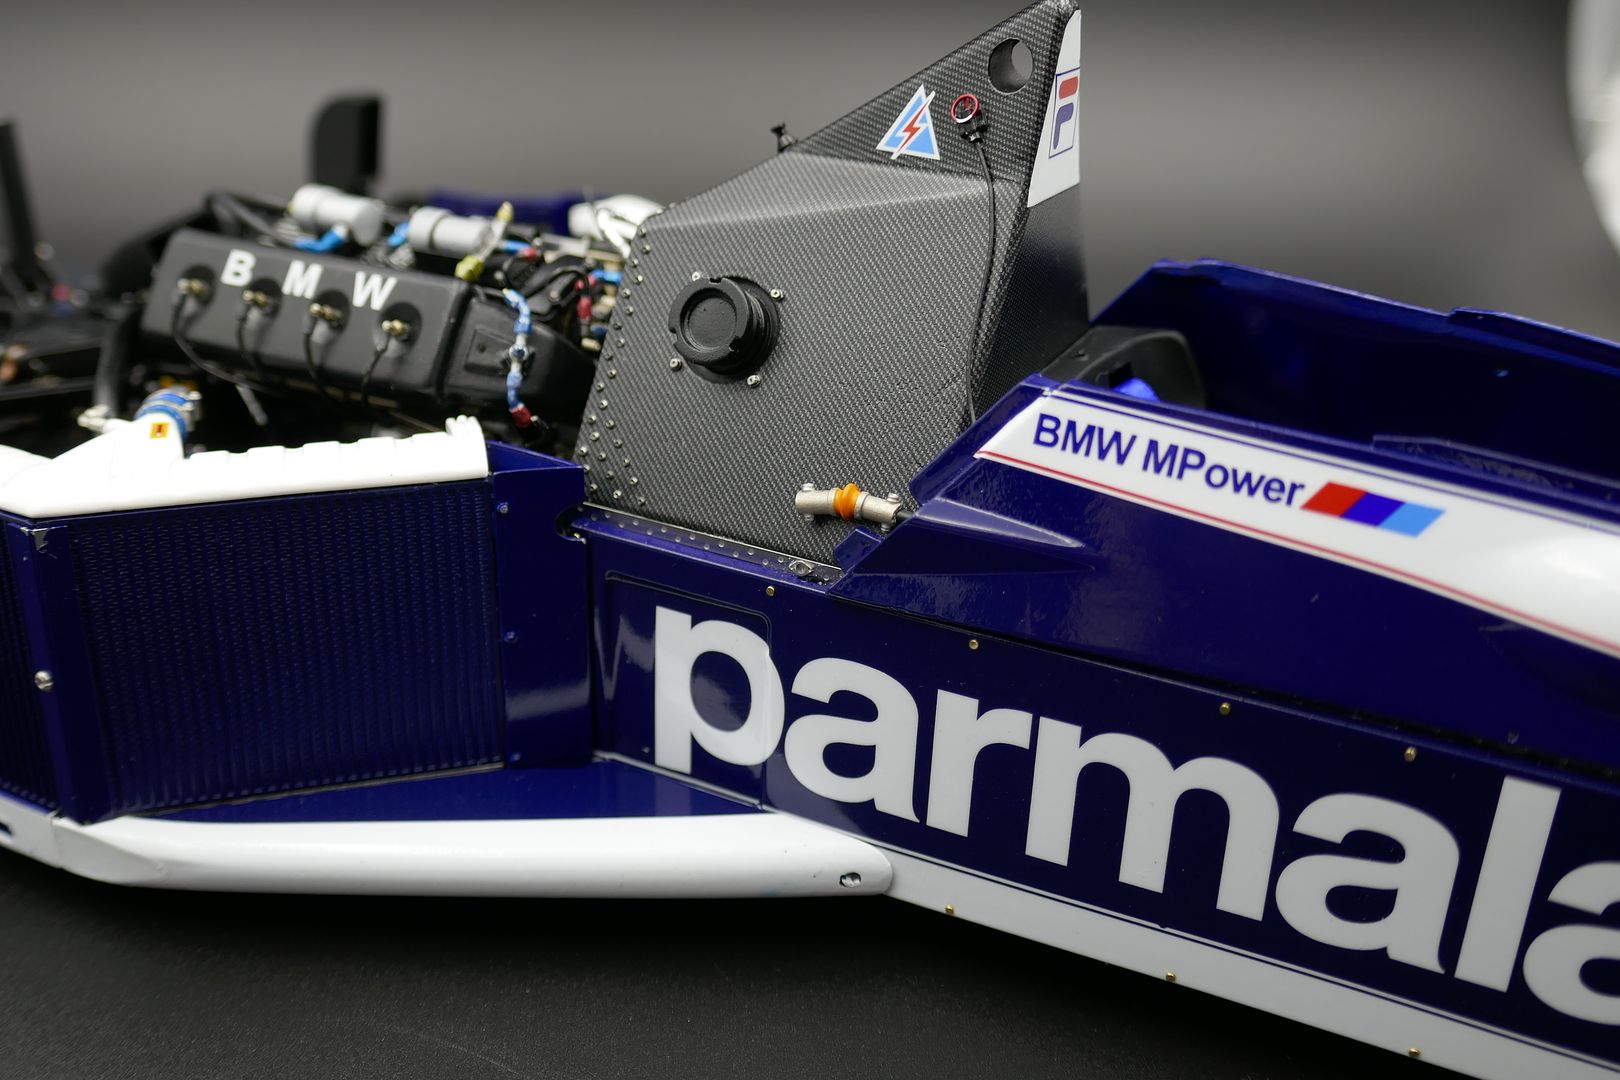
Quite a few foil-wrapped cables and wires - kit uses self adhesive foil that works well - to represent heat protection, particularly around the exhaust and turbo...
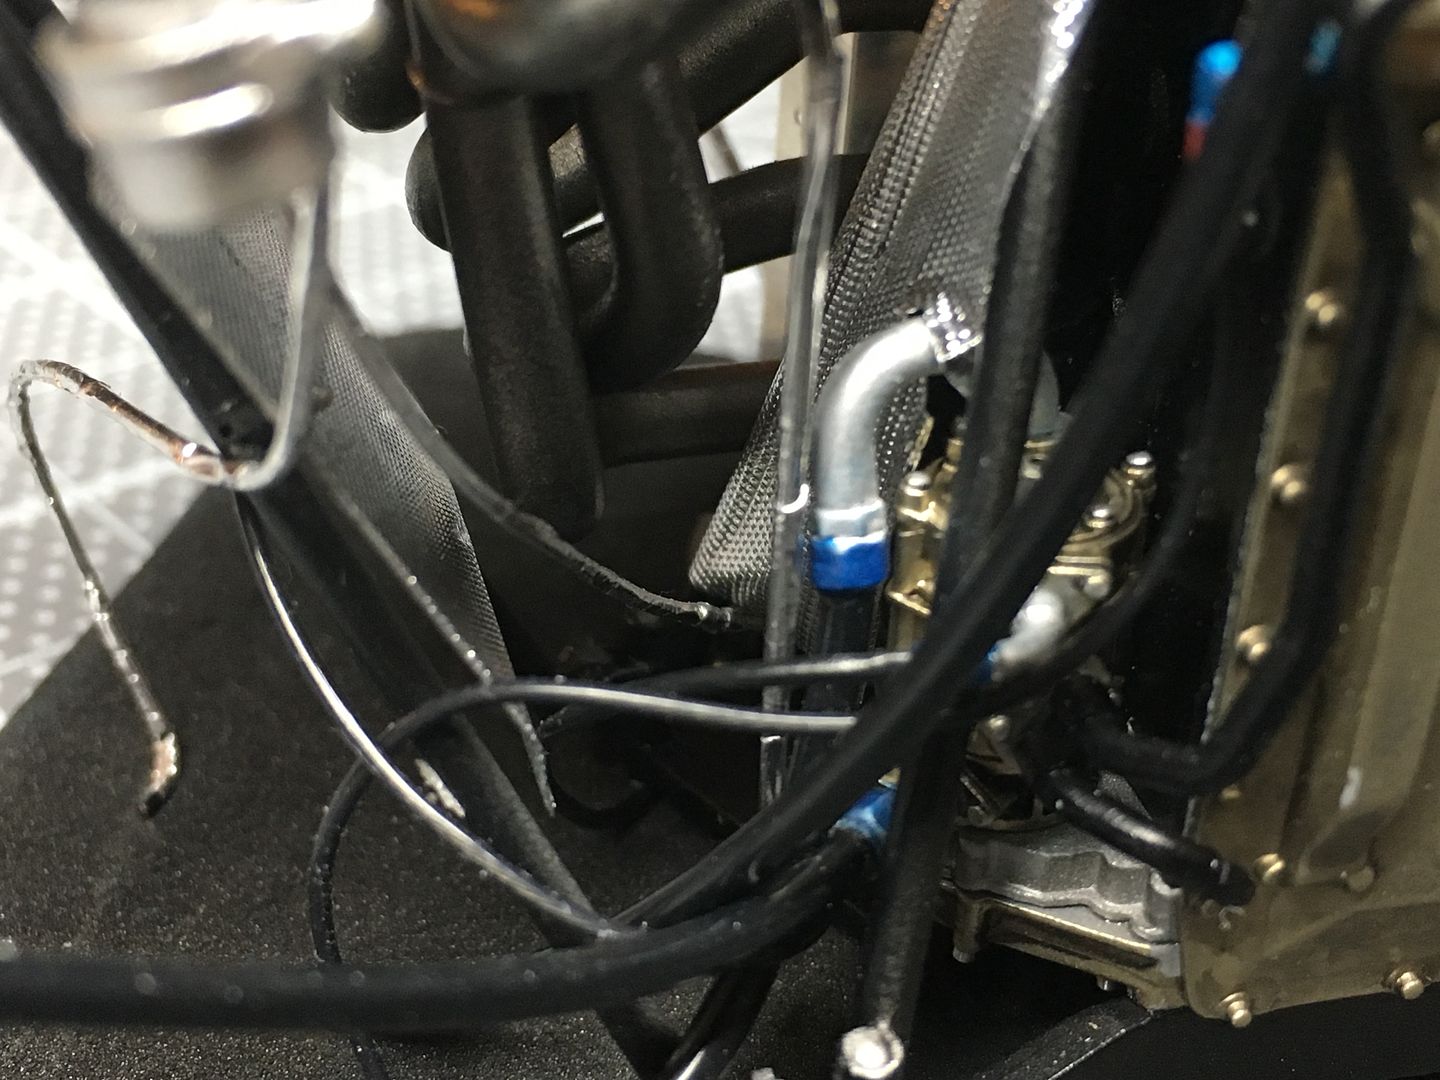
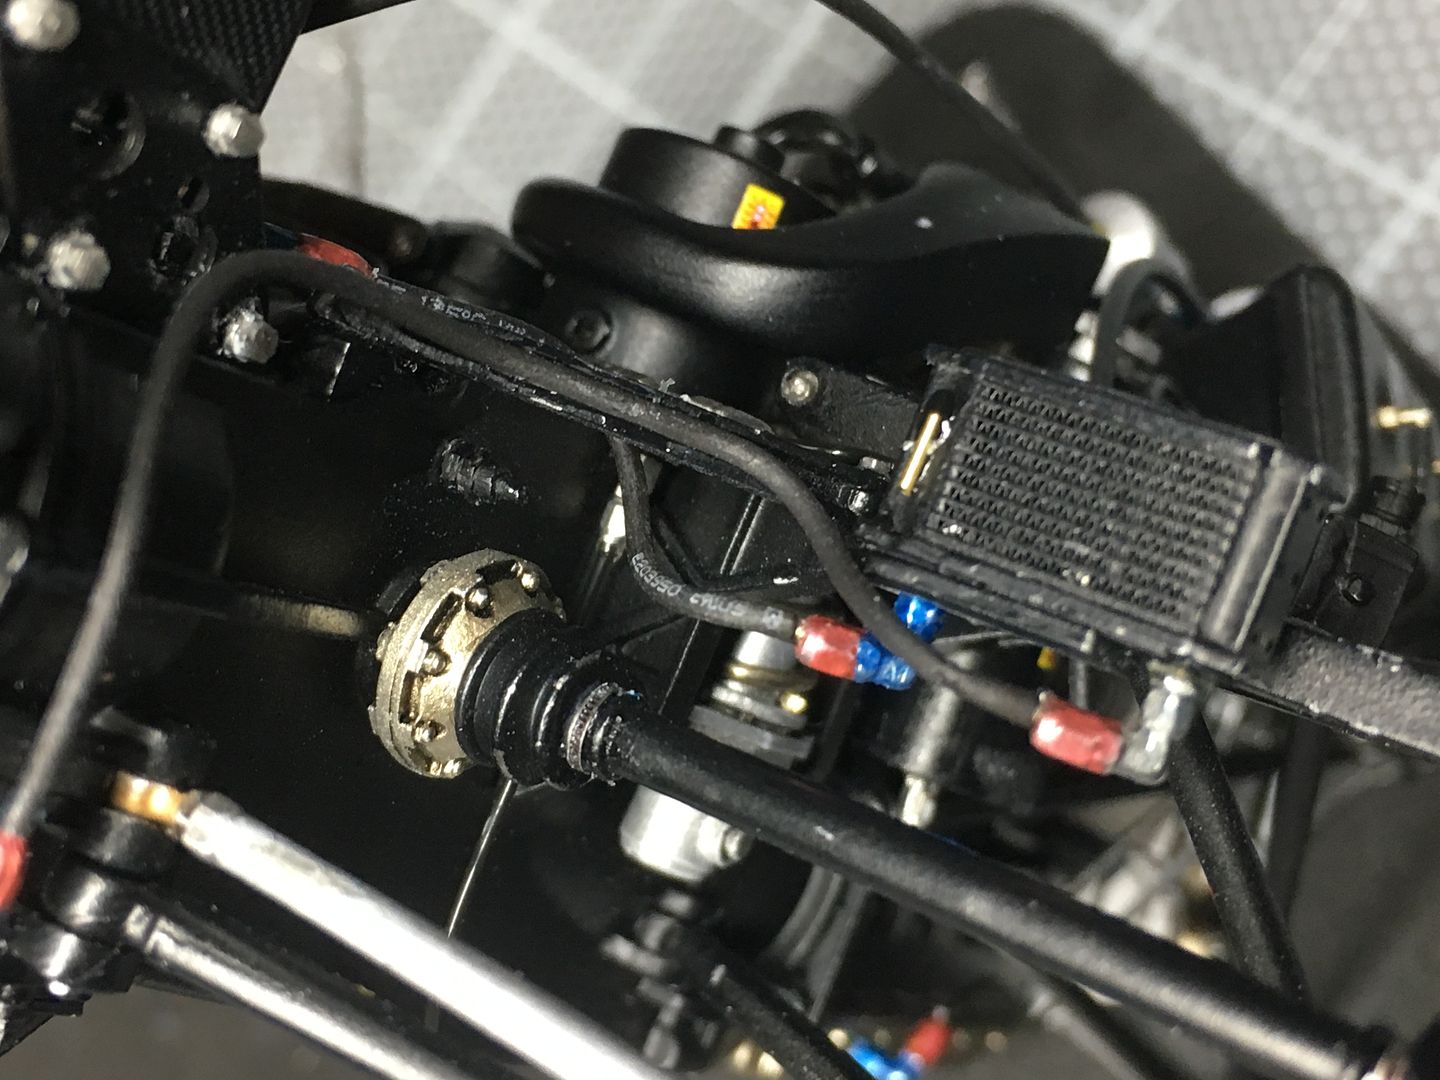
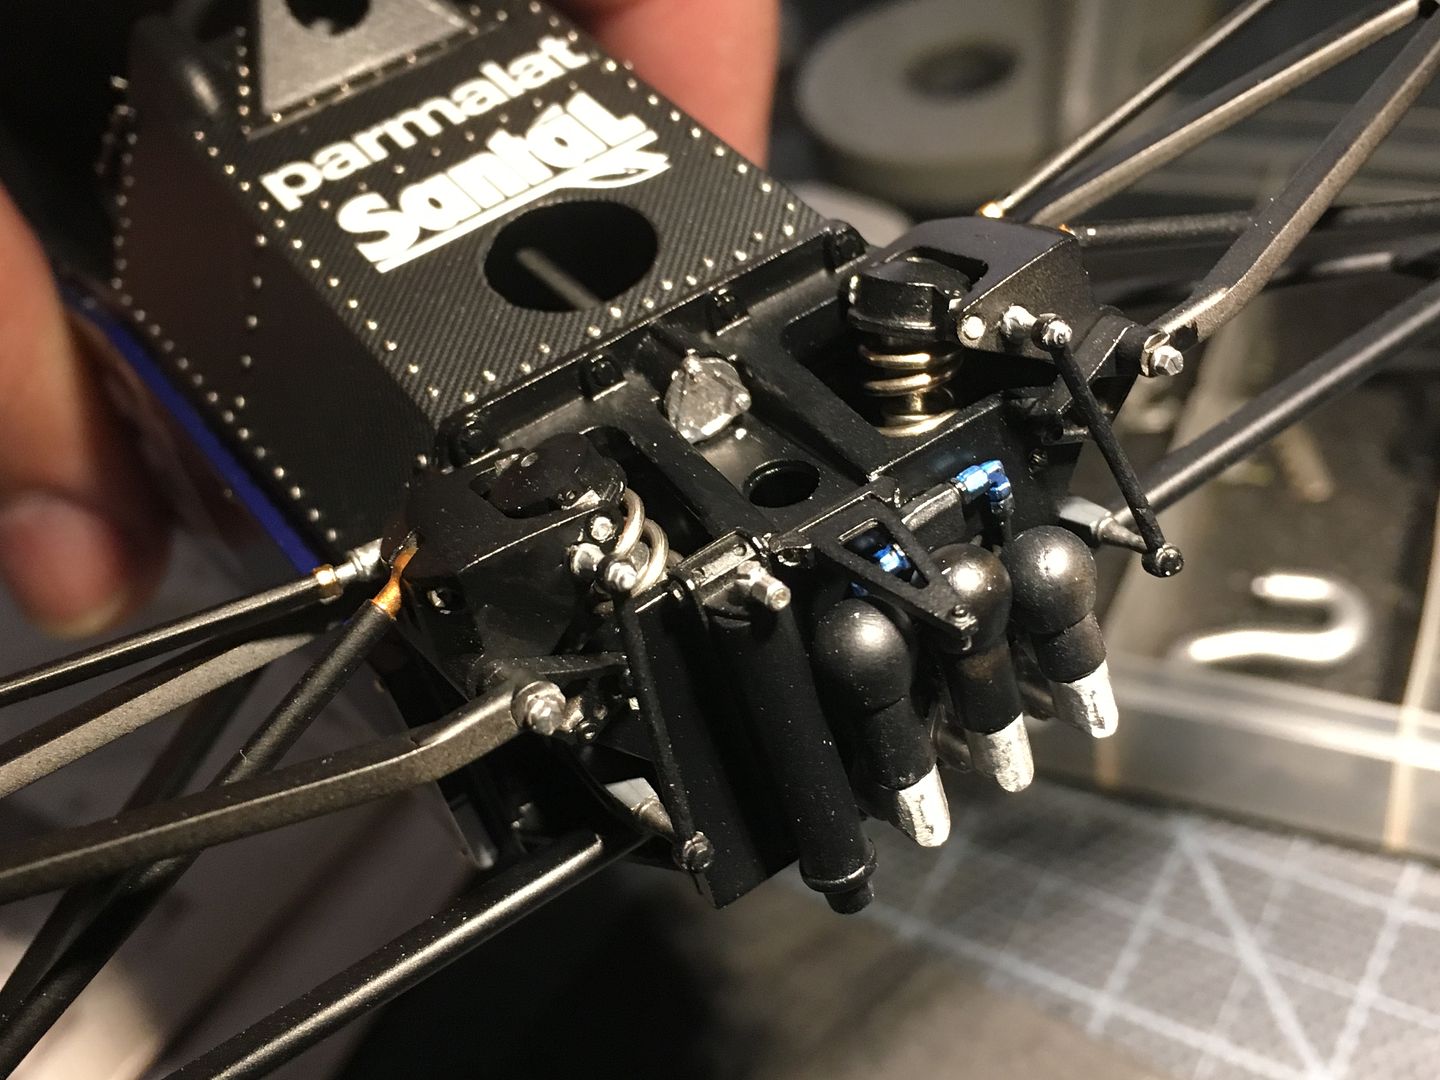
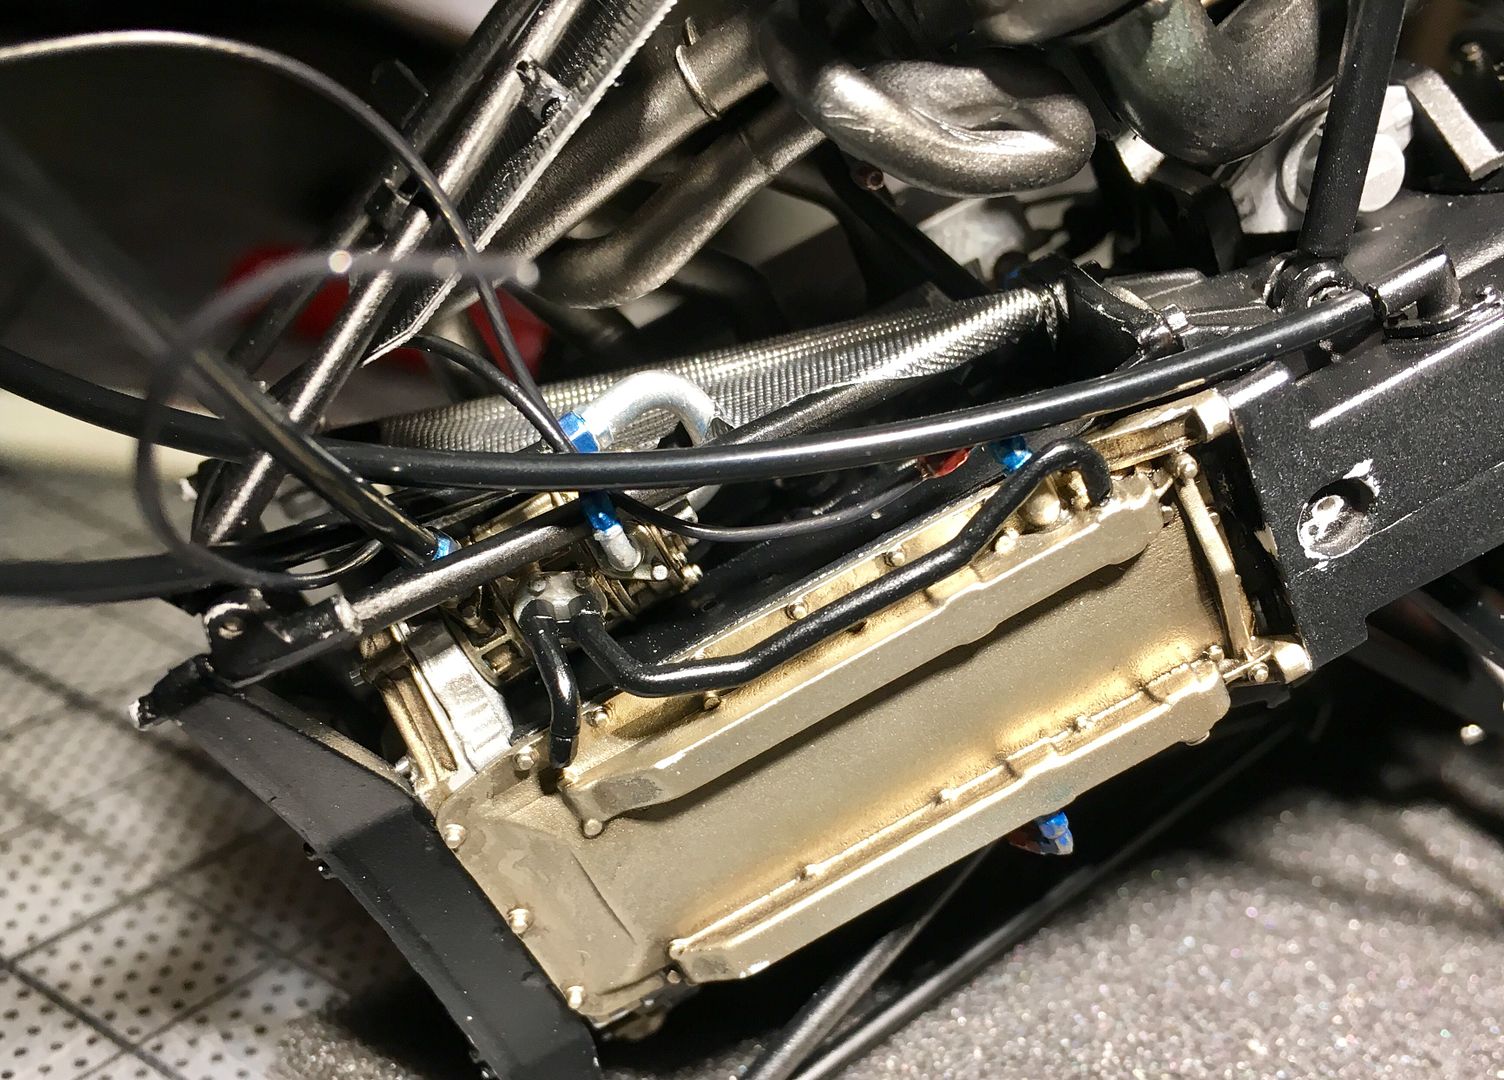
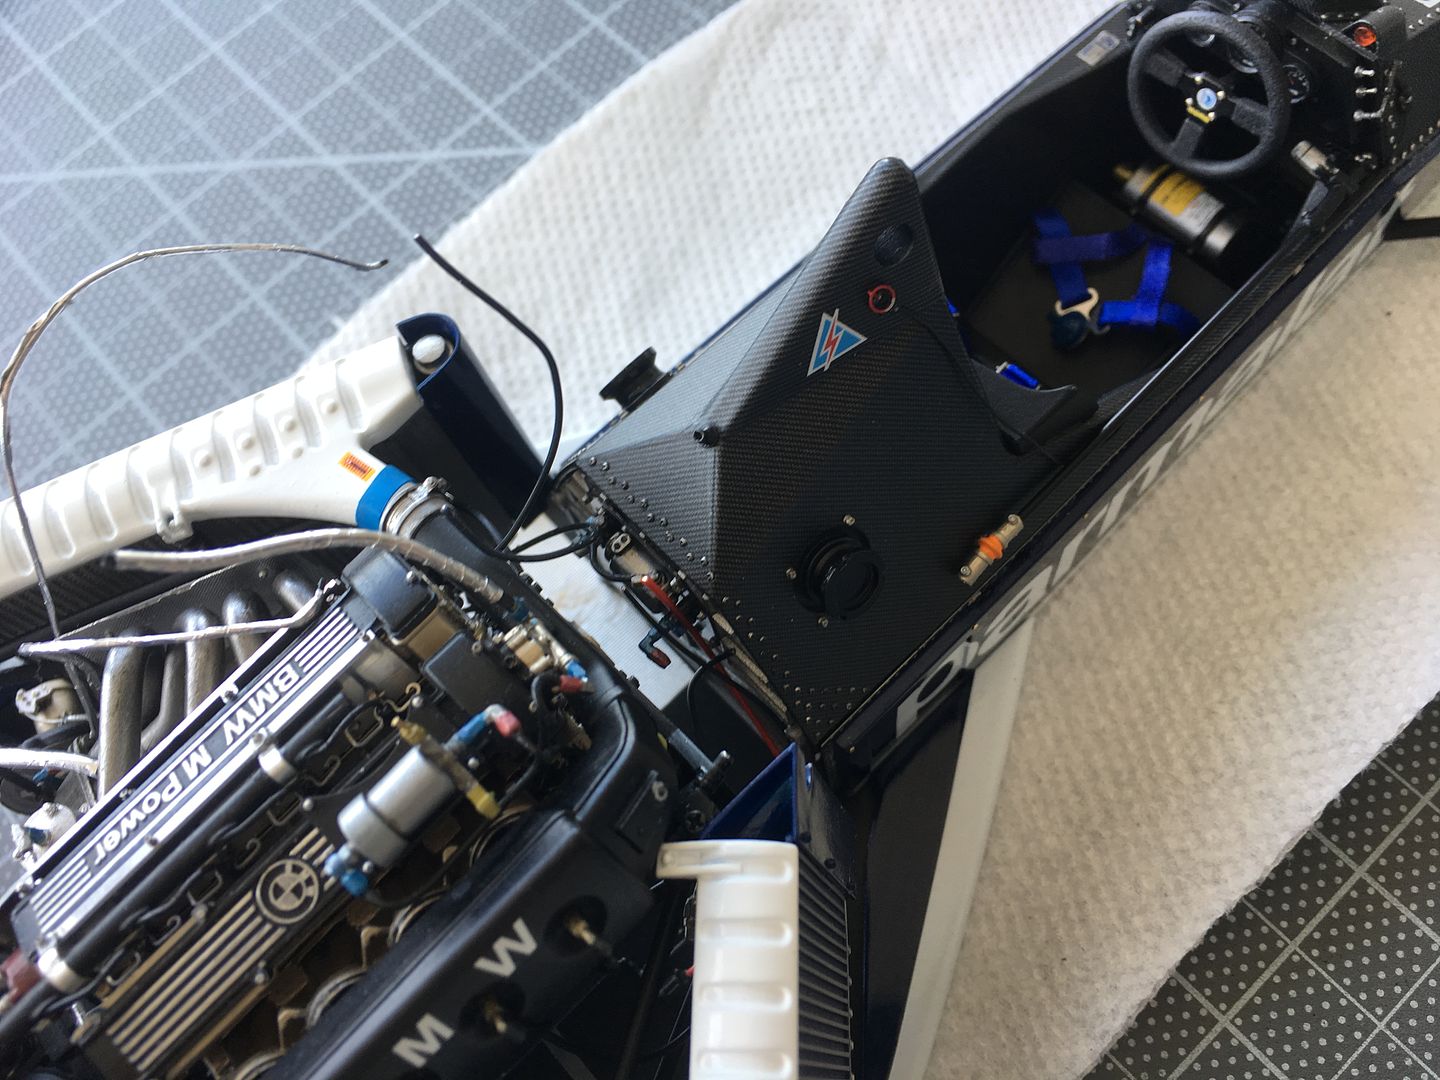
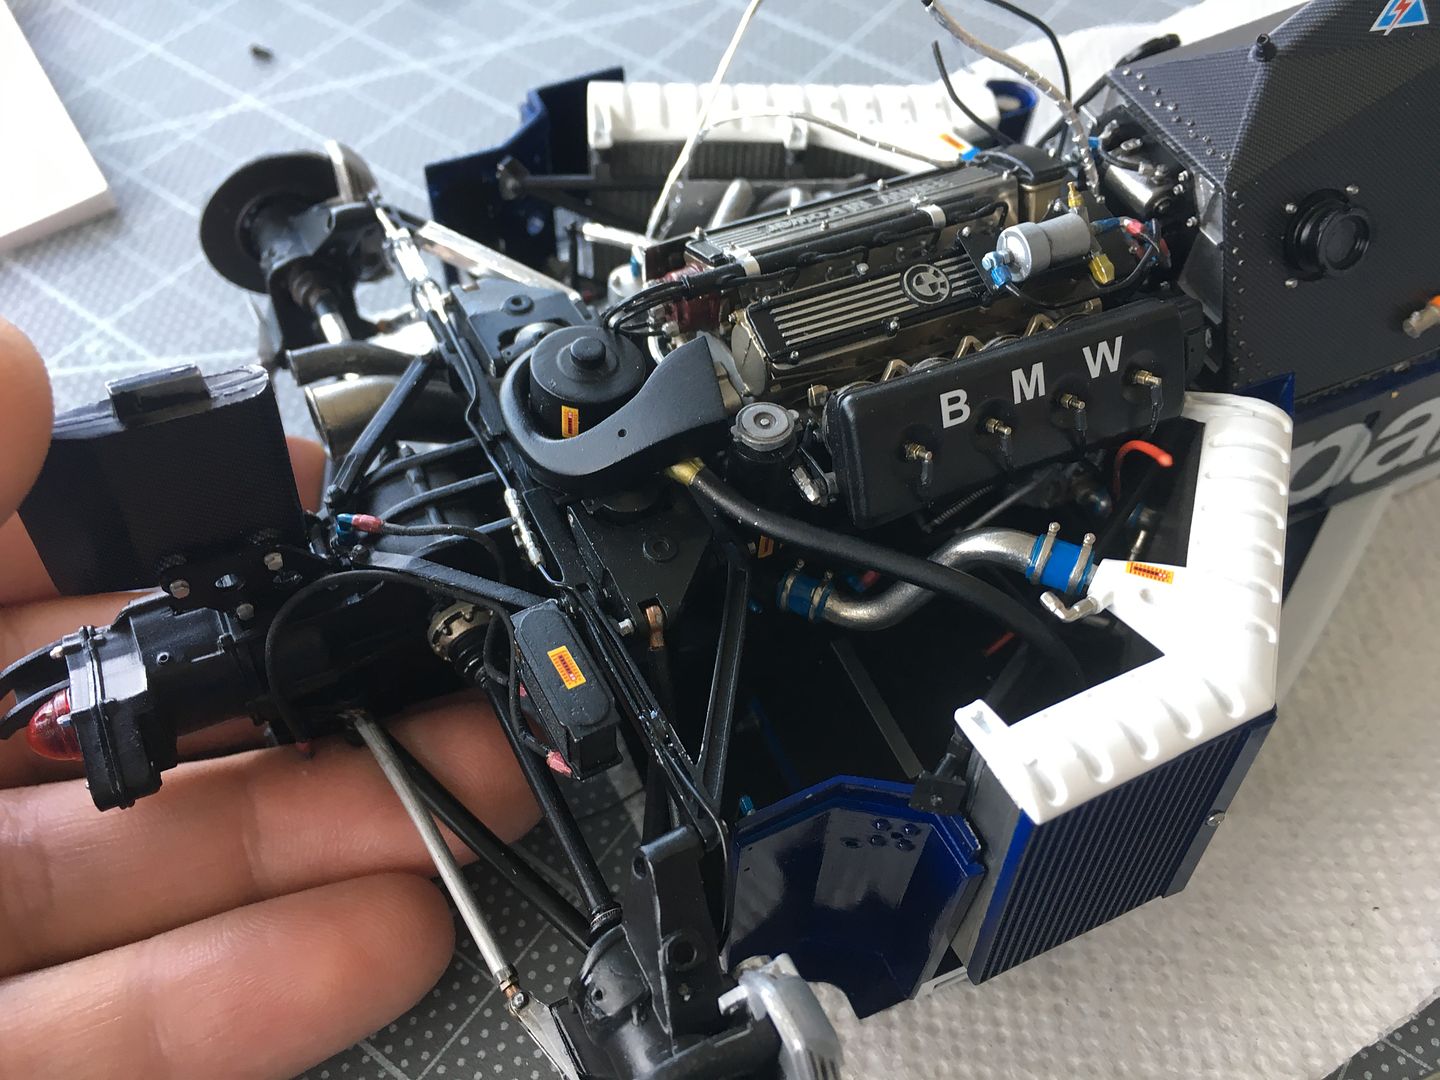
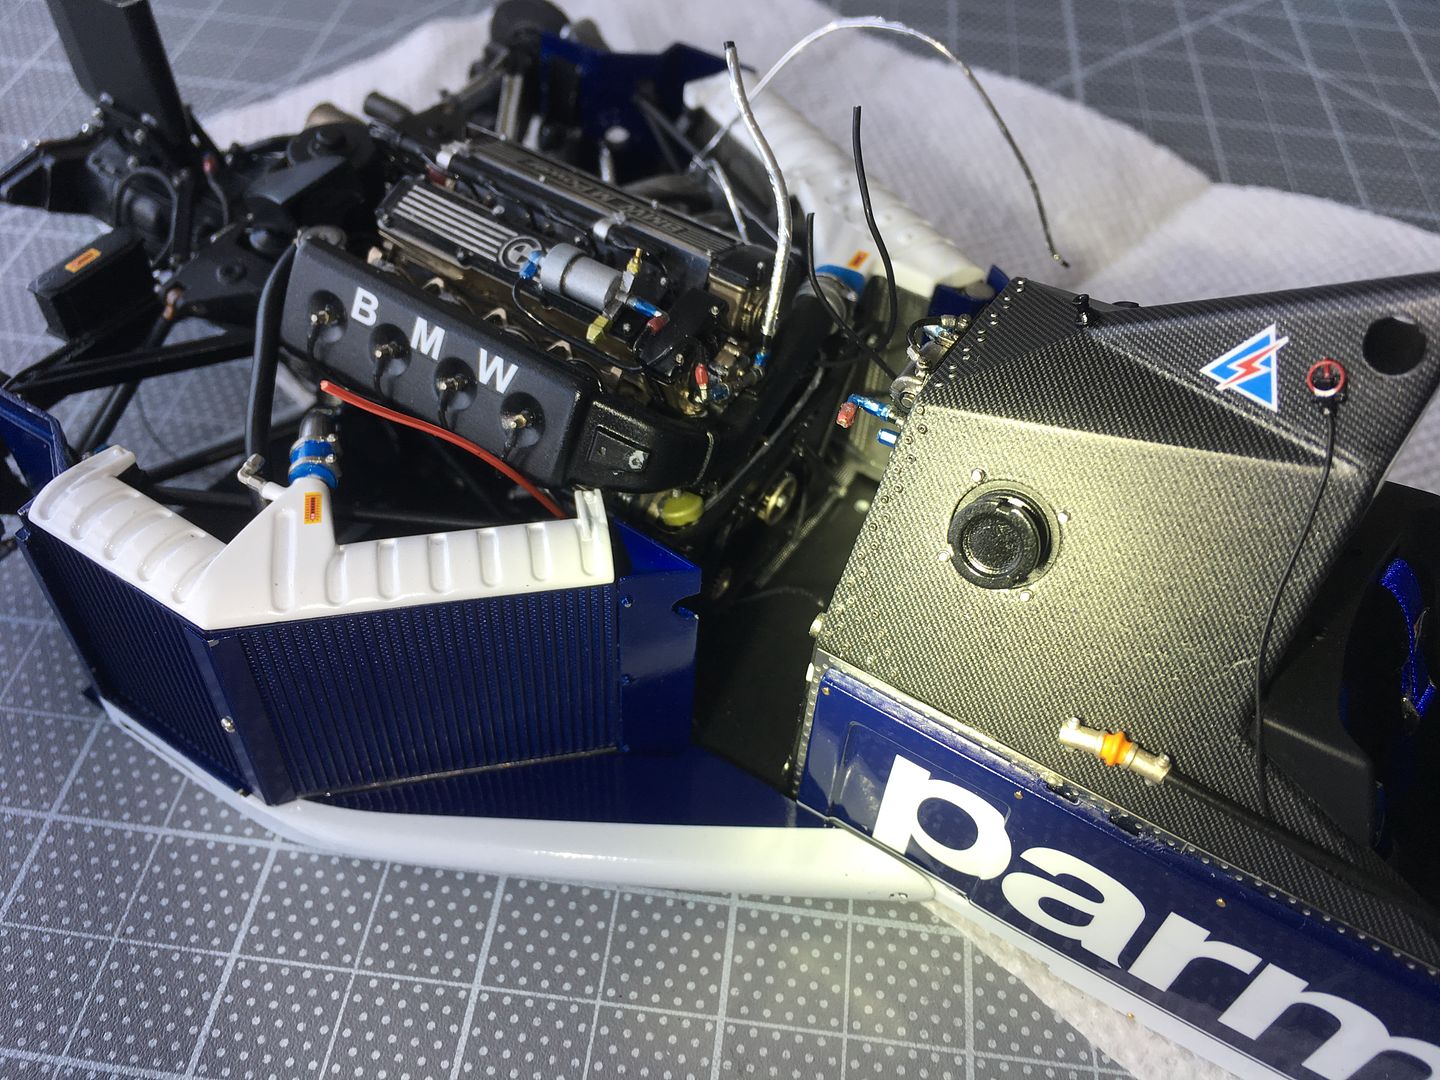
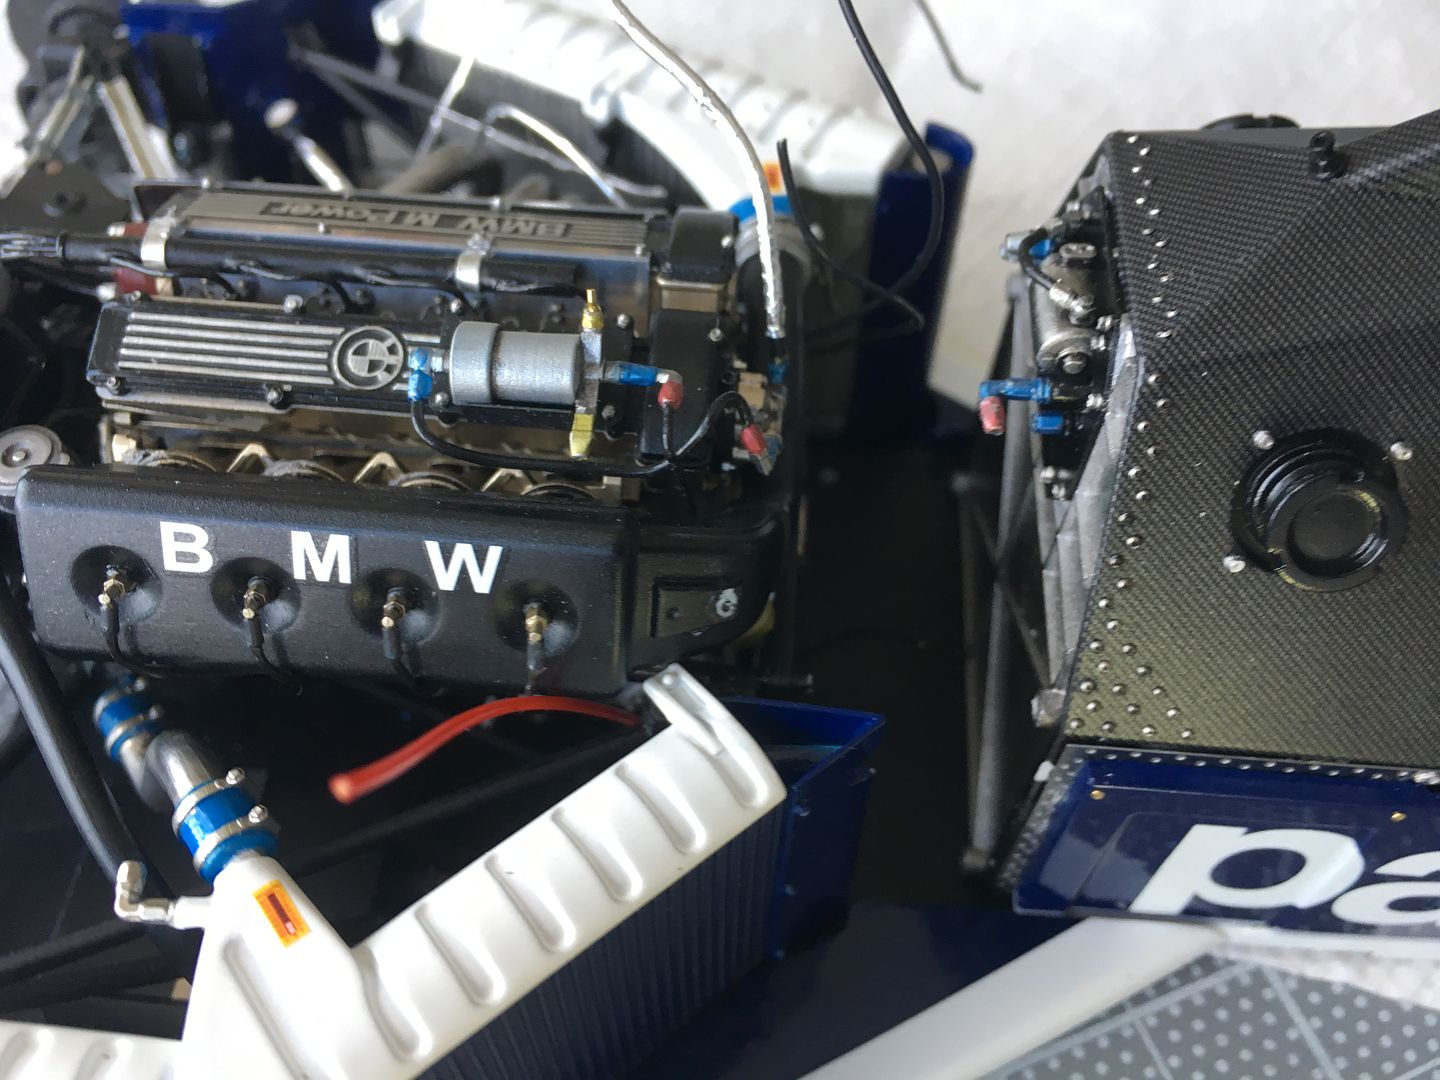
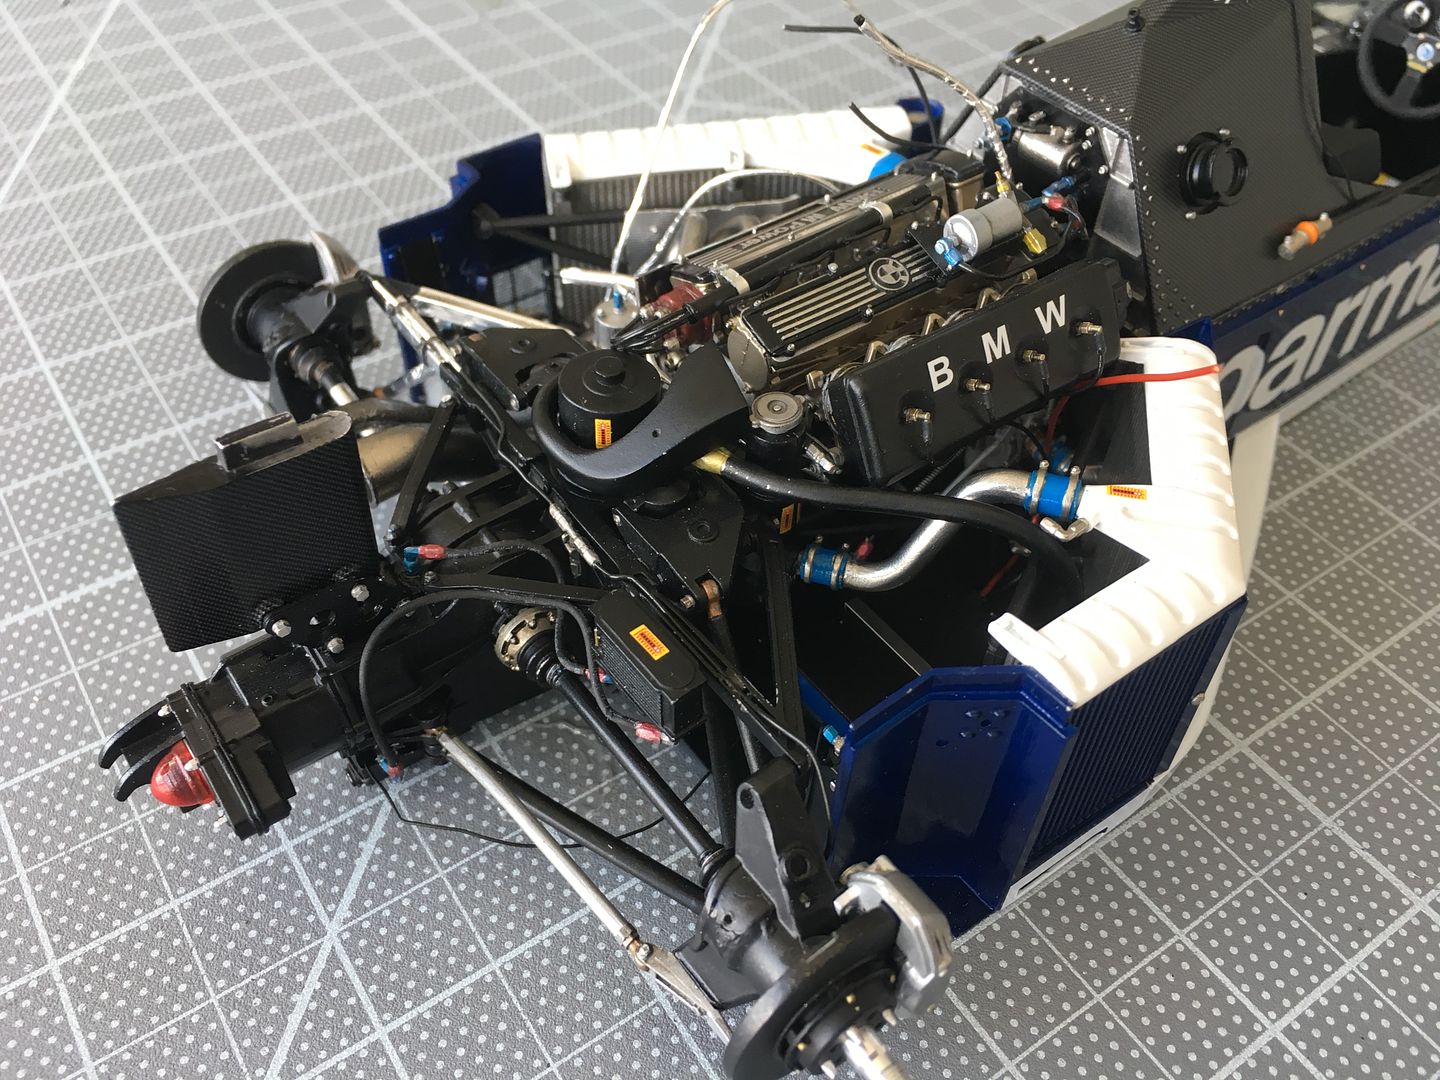
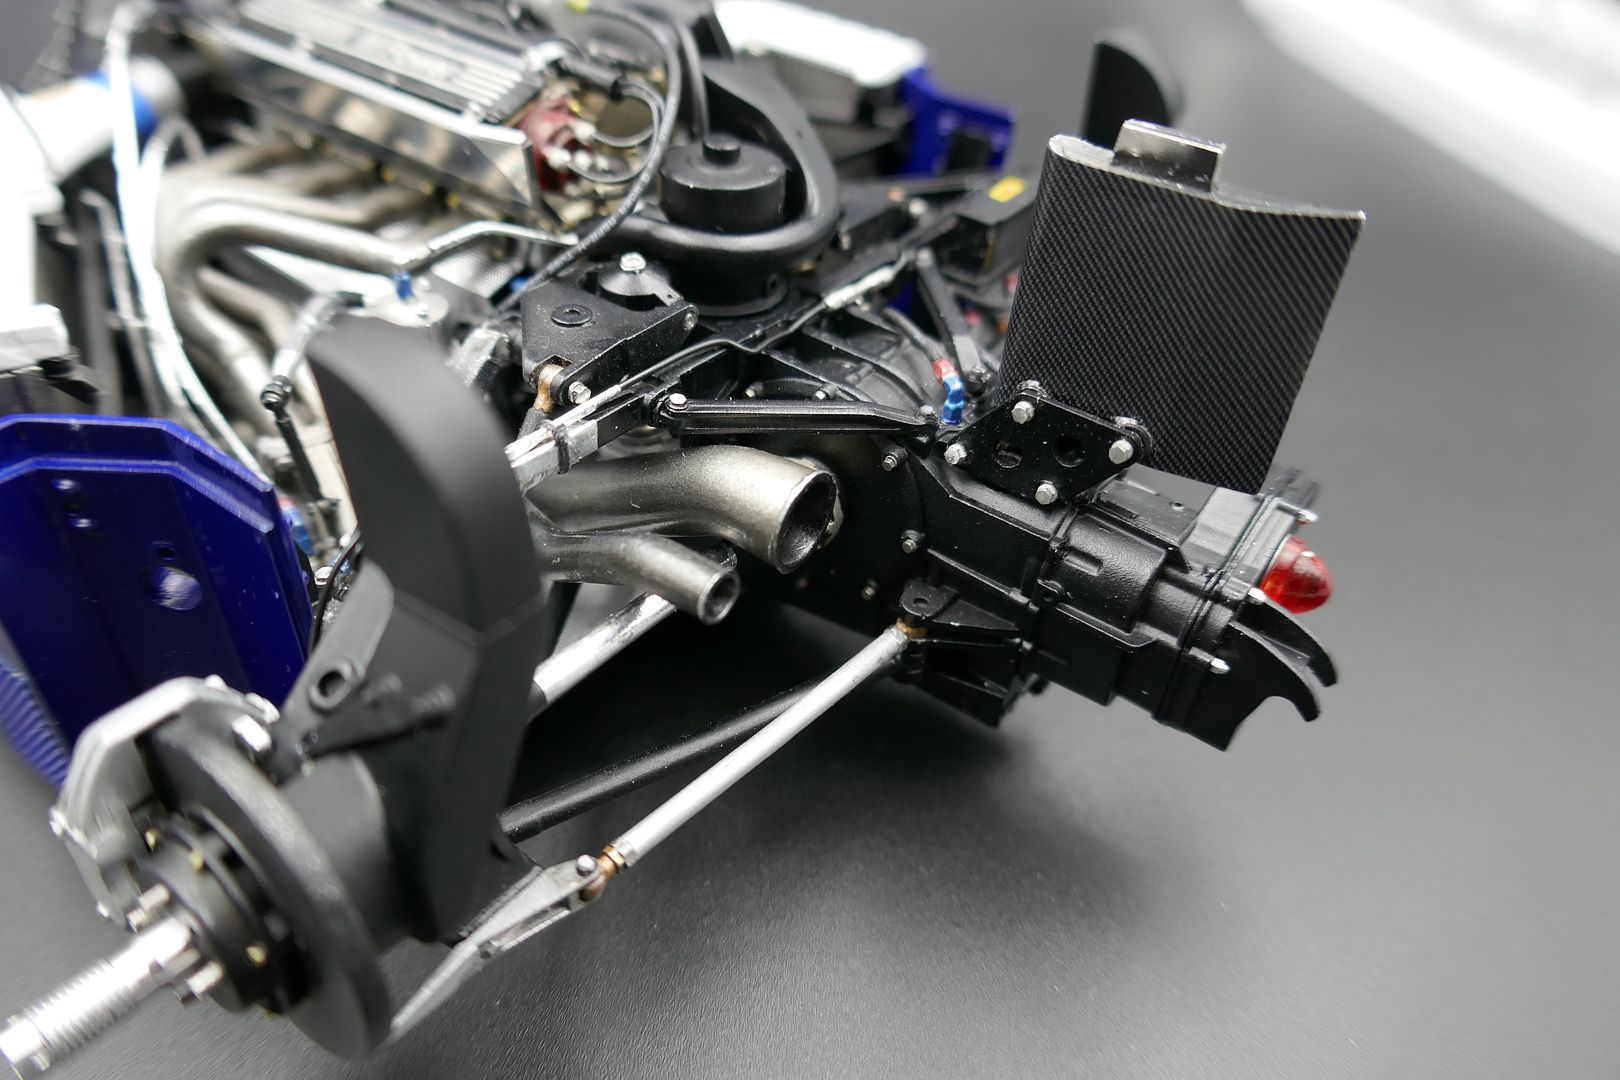
At this point I was impatient to fix the engine, rads etc together, and into the car. This is a b*gger of a job, as there are many 'hard' pipes that connect everything together - ali-water pipes etc - and you have to fit both ends at the same time to hold it all together - you have to glue, but also accept that you then have to line everything up as the whole sub-assembly is lifted onto the floor of the car, and then attached to the bulkhead - but there were no short cuts here - I still had wiring to do that would be impossible to do later...
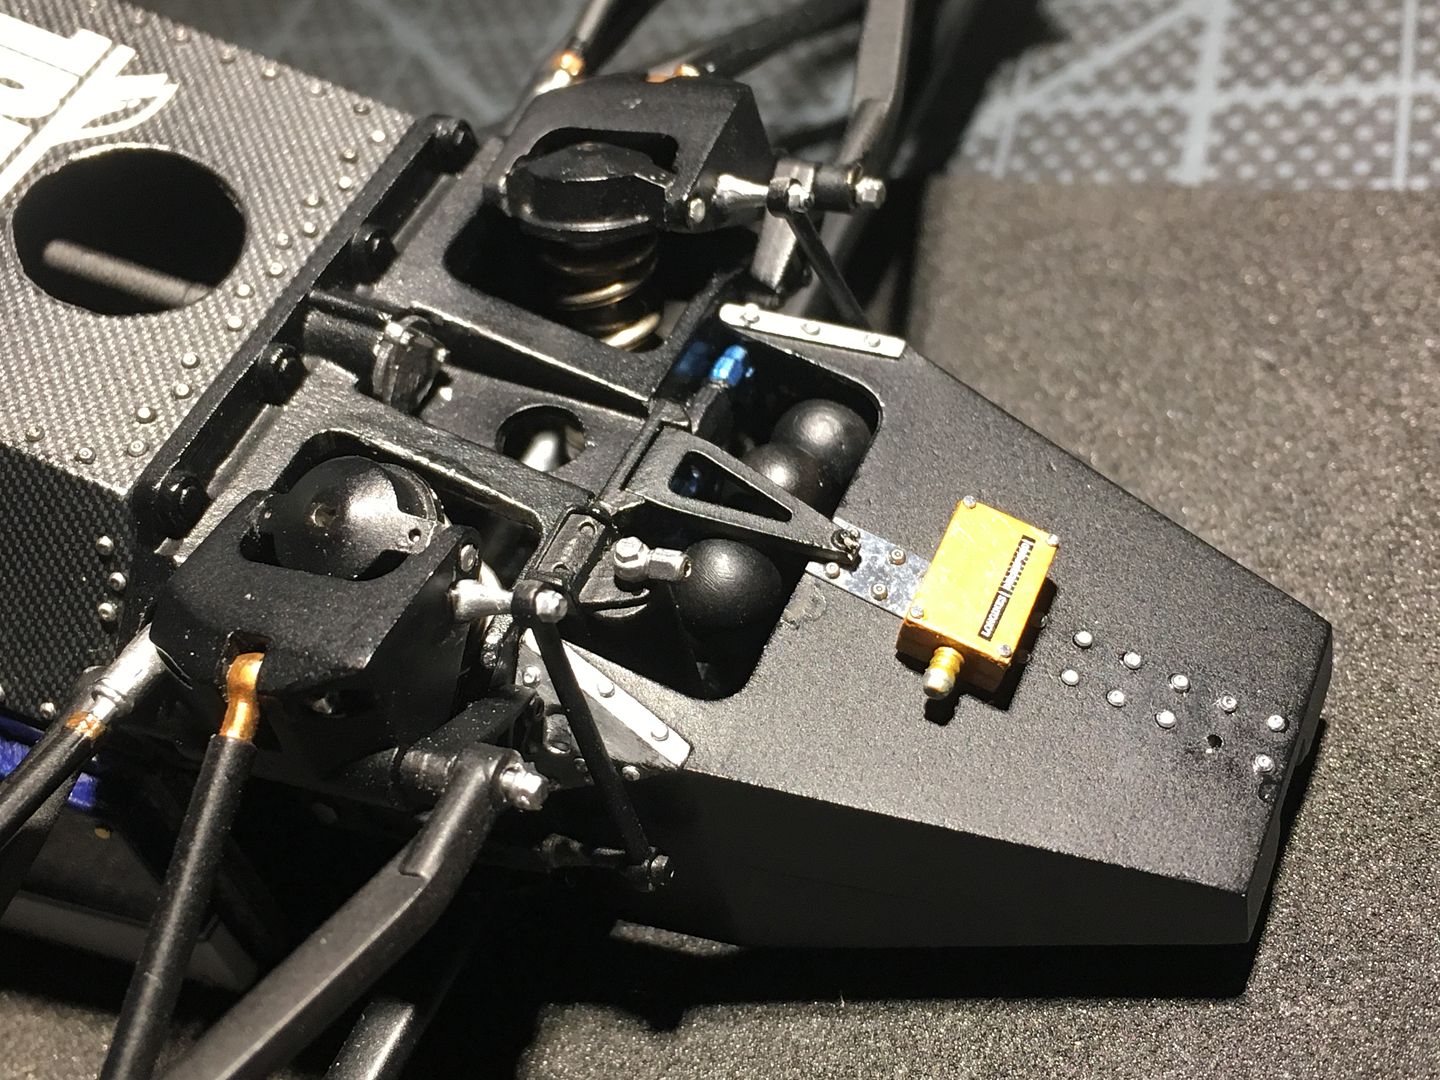
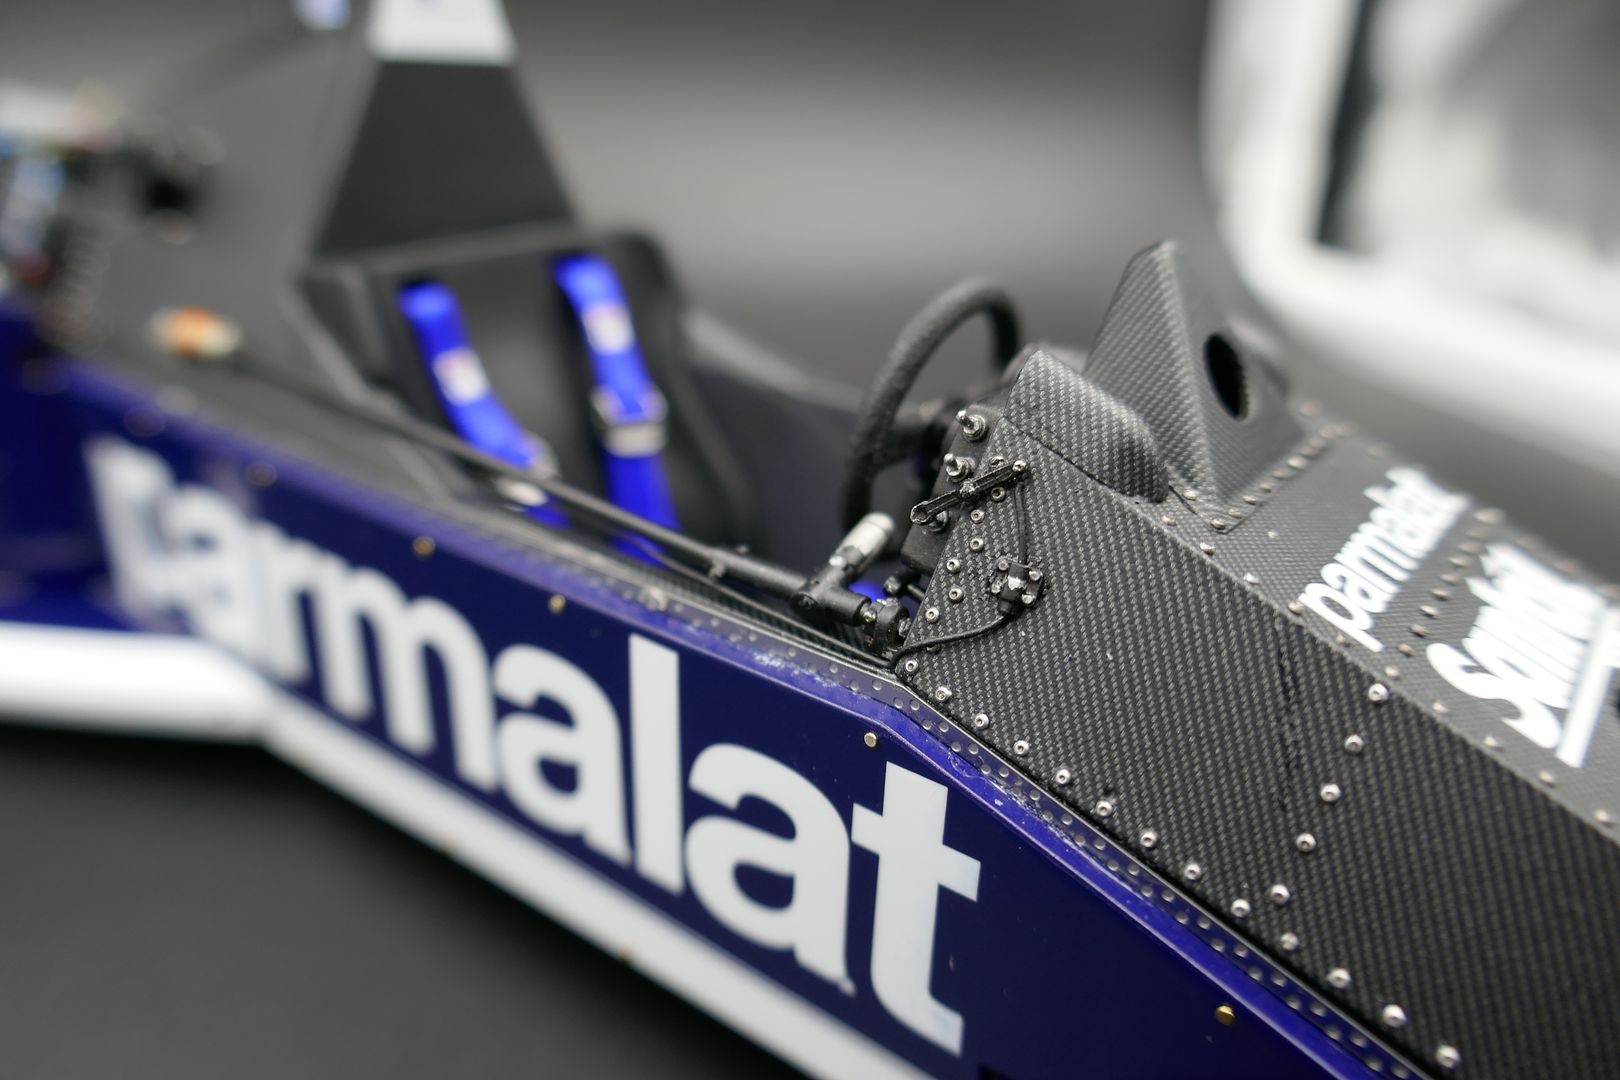
...including on the bulkhead itself...
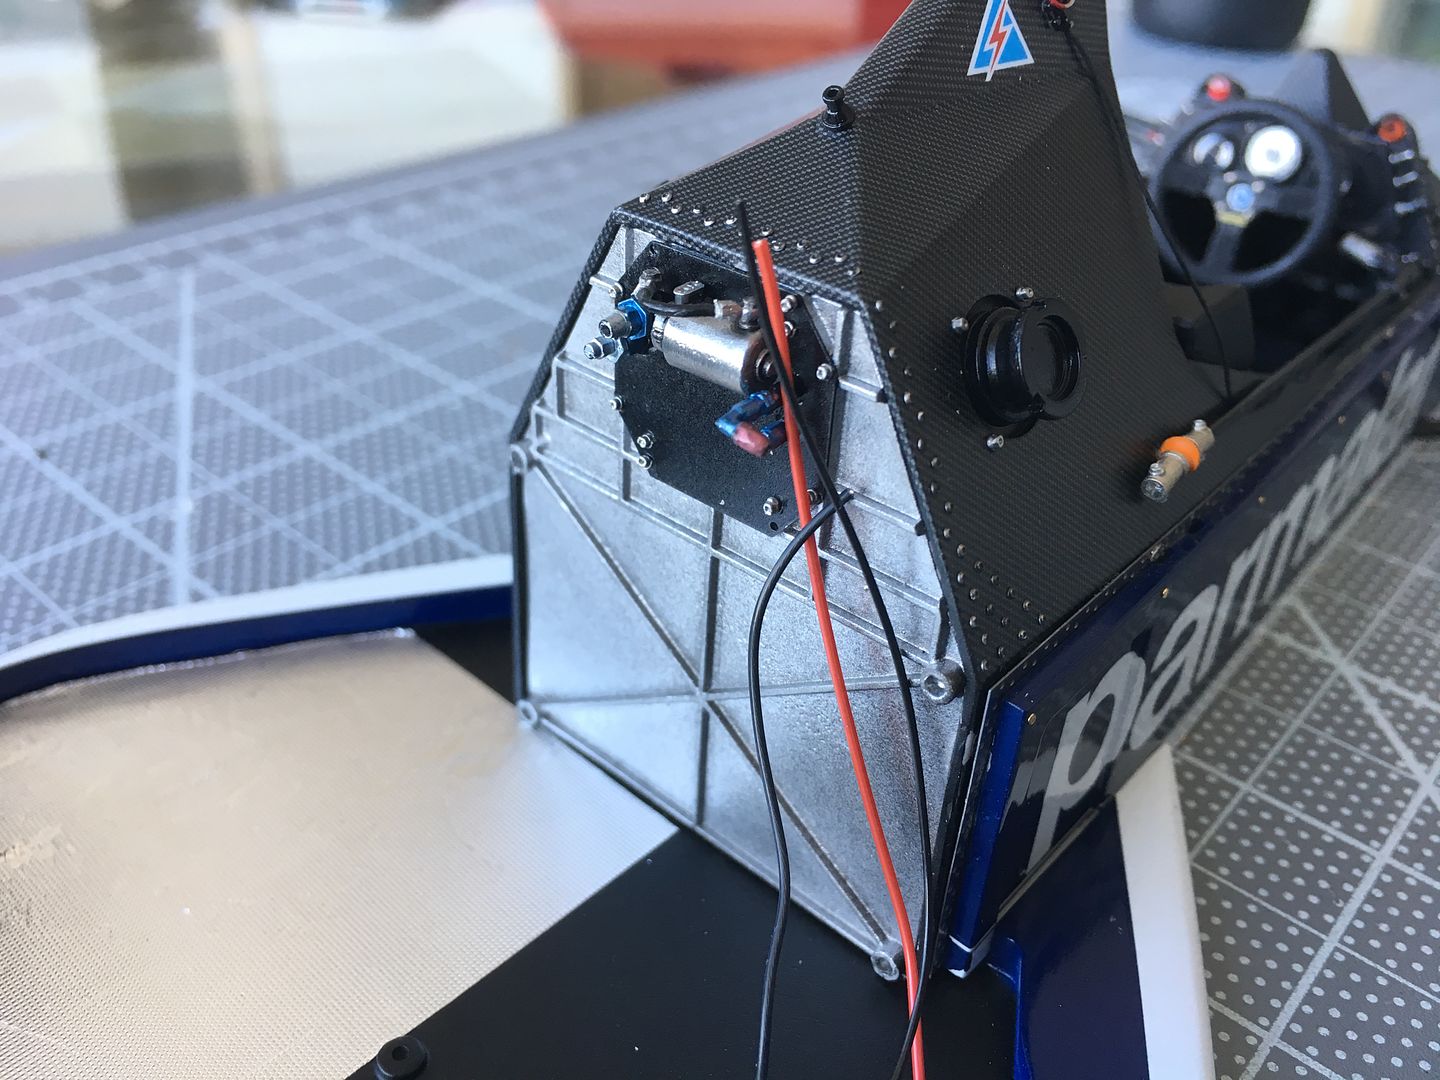
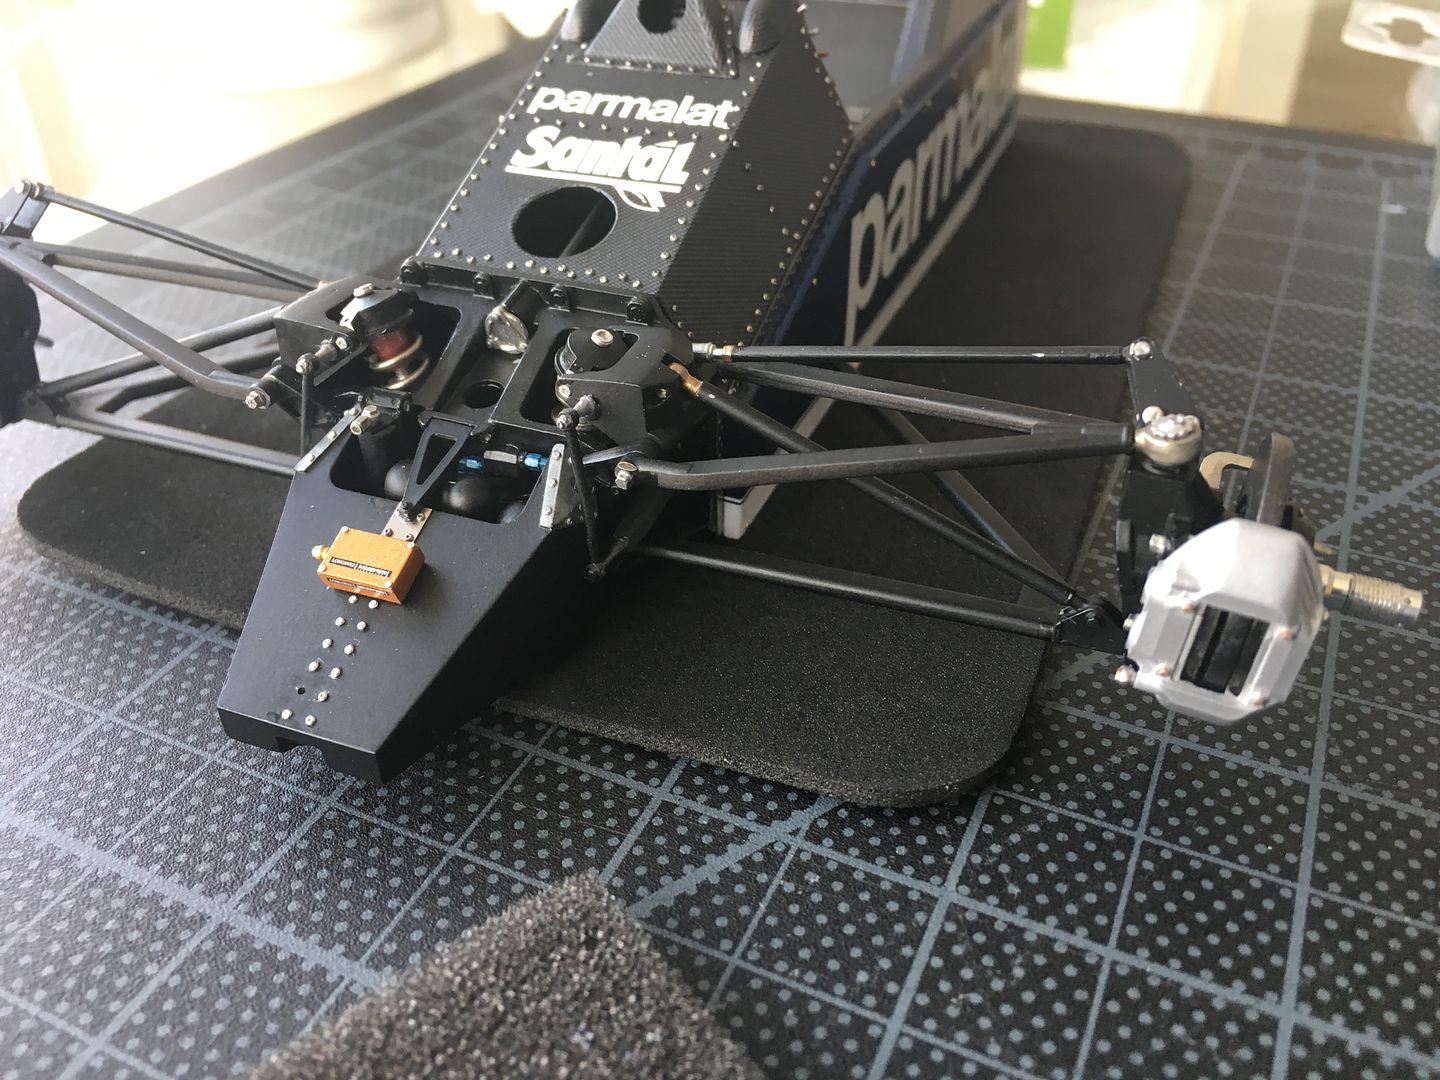
...and the electrical box on the chassis floor.
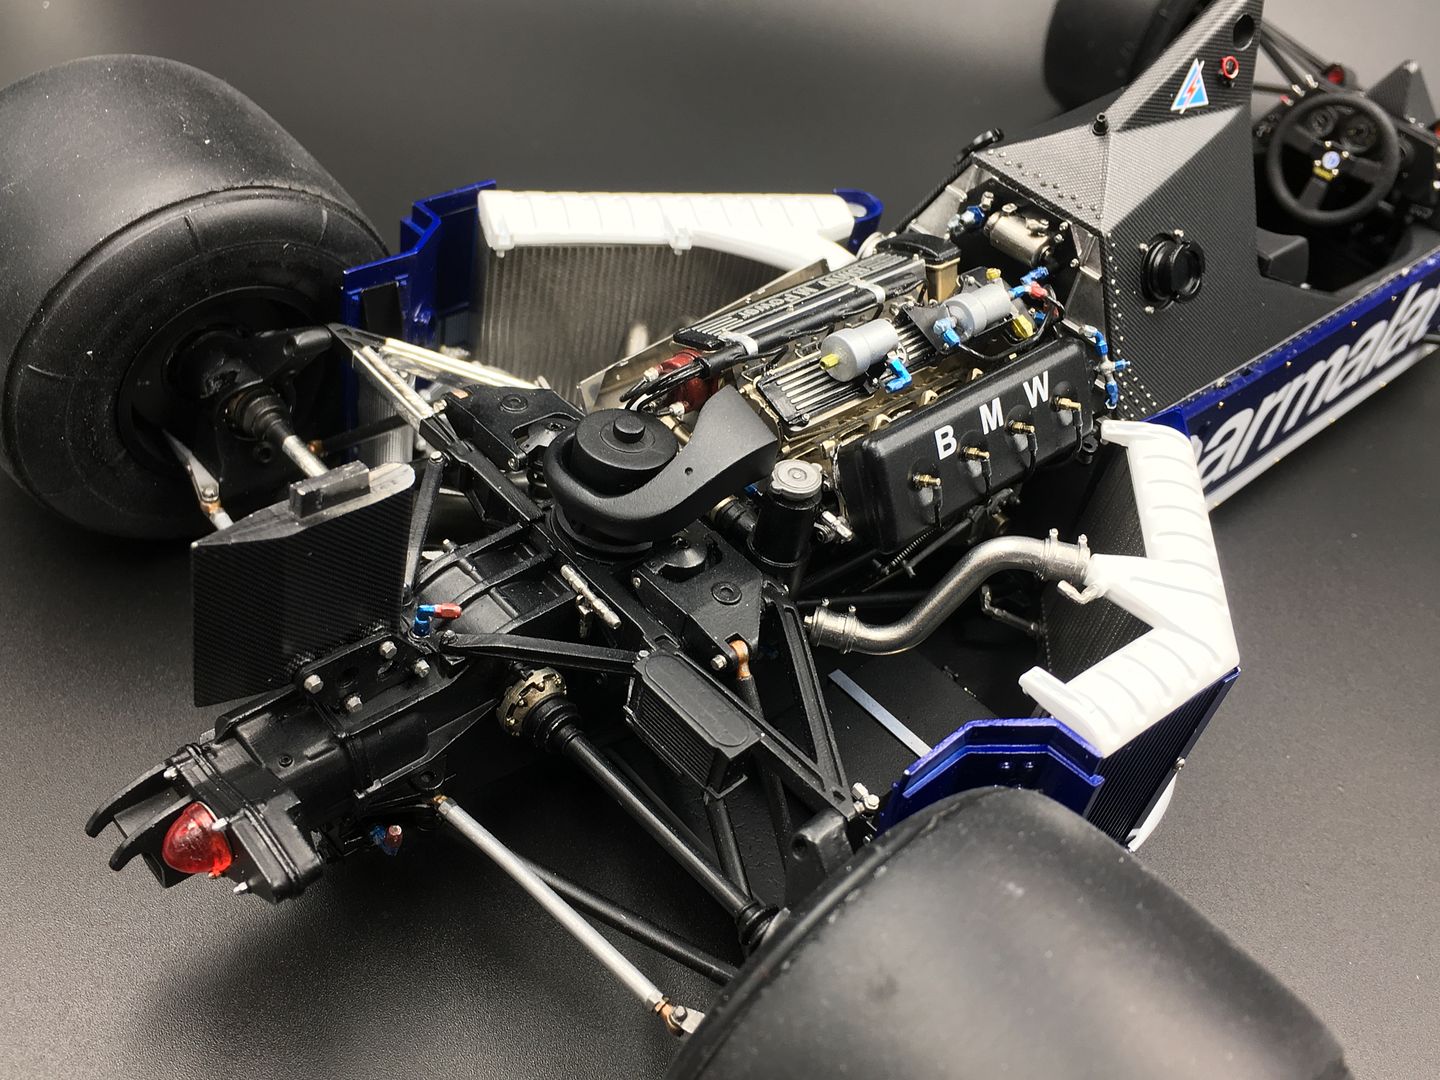
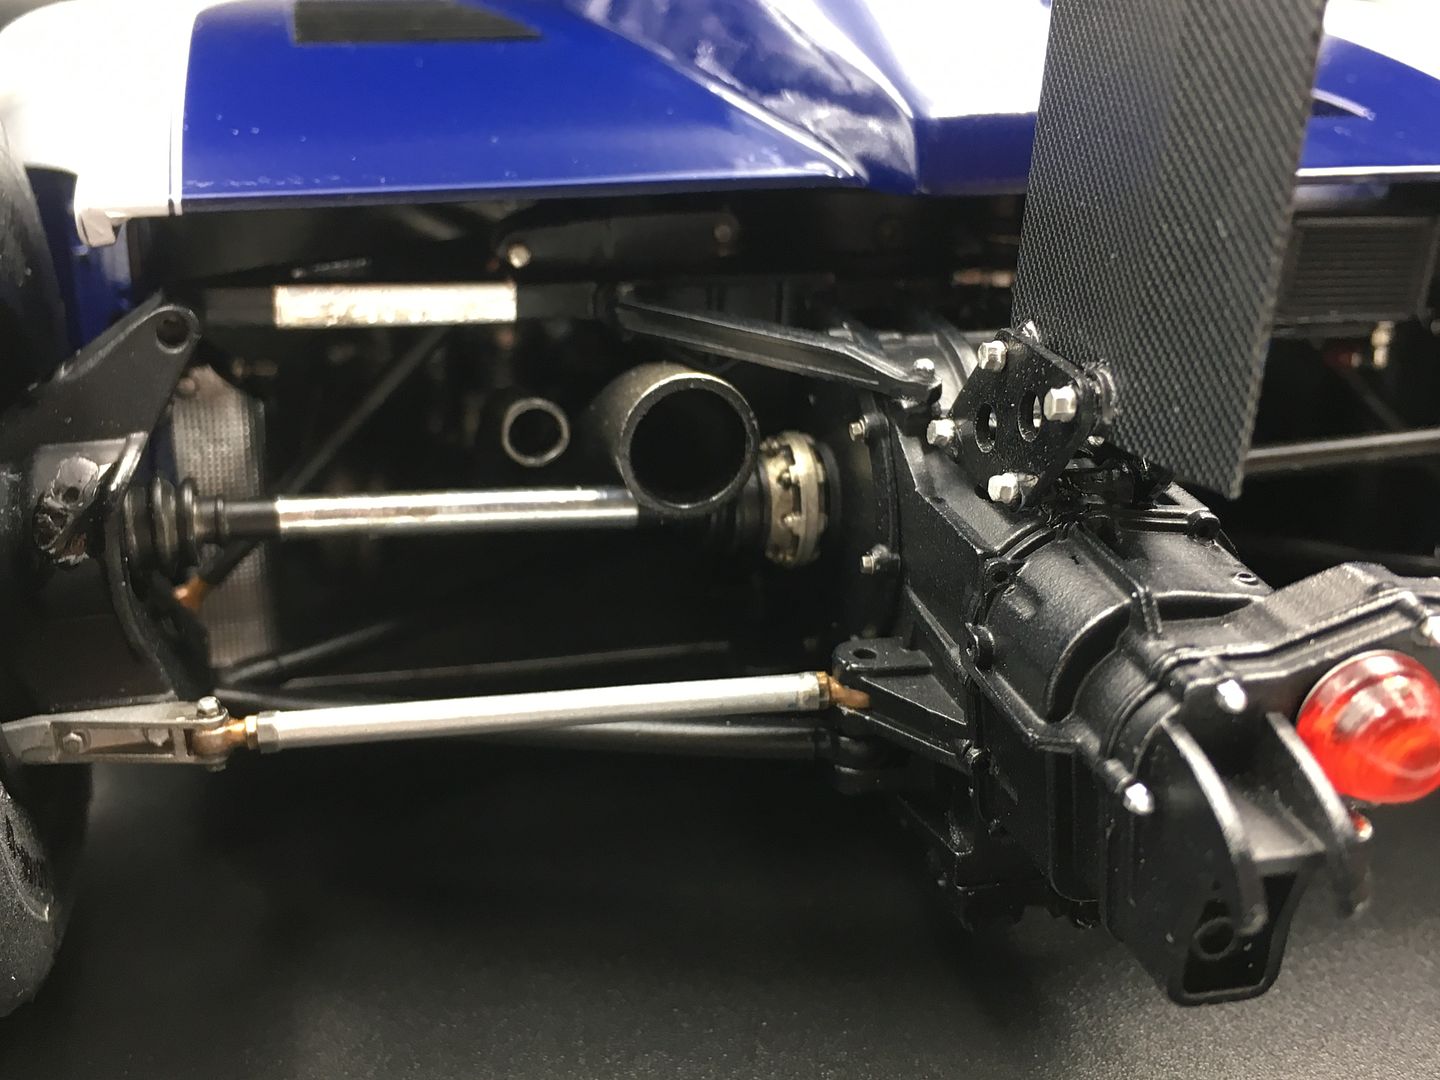
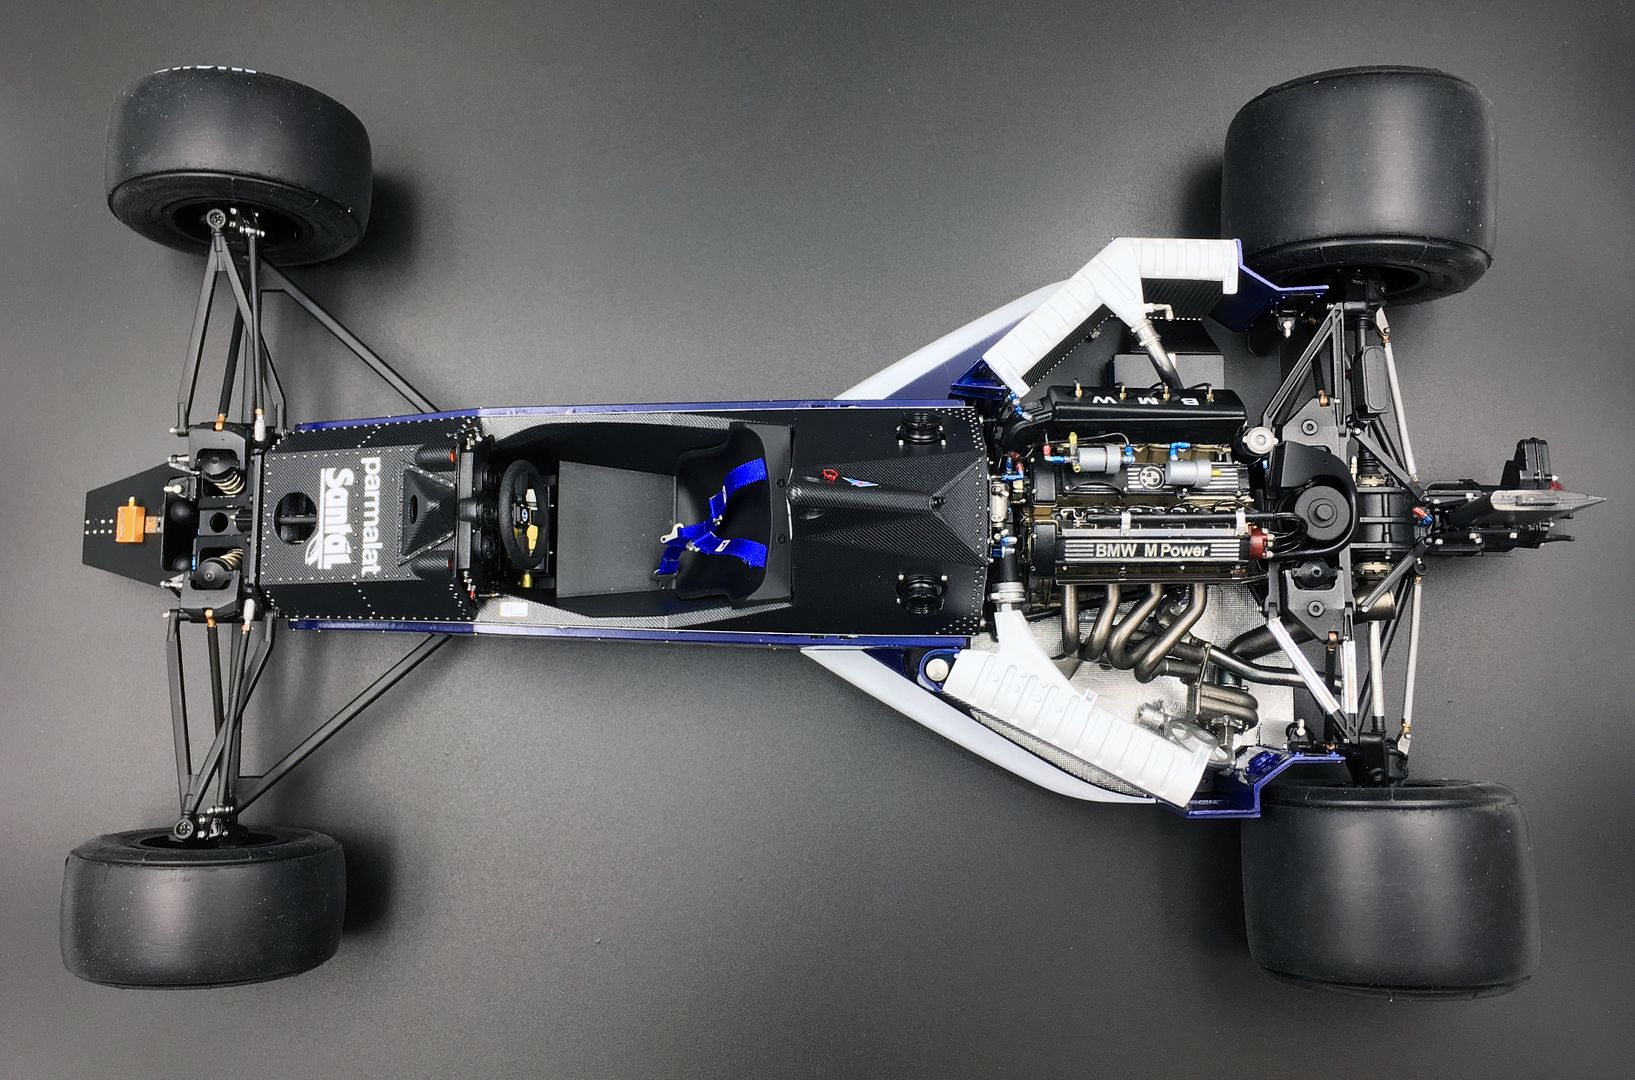
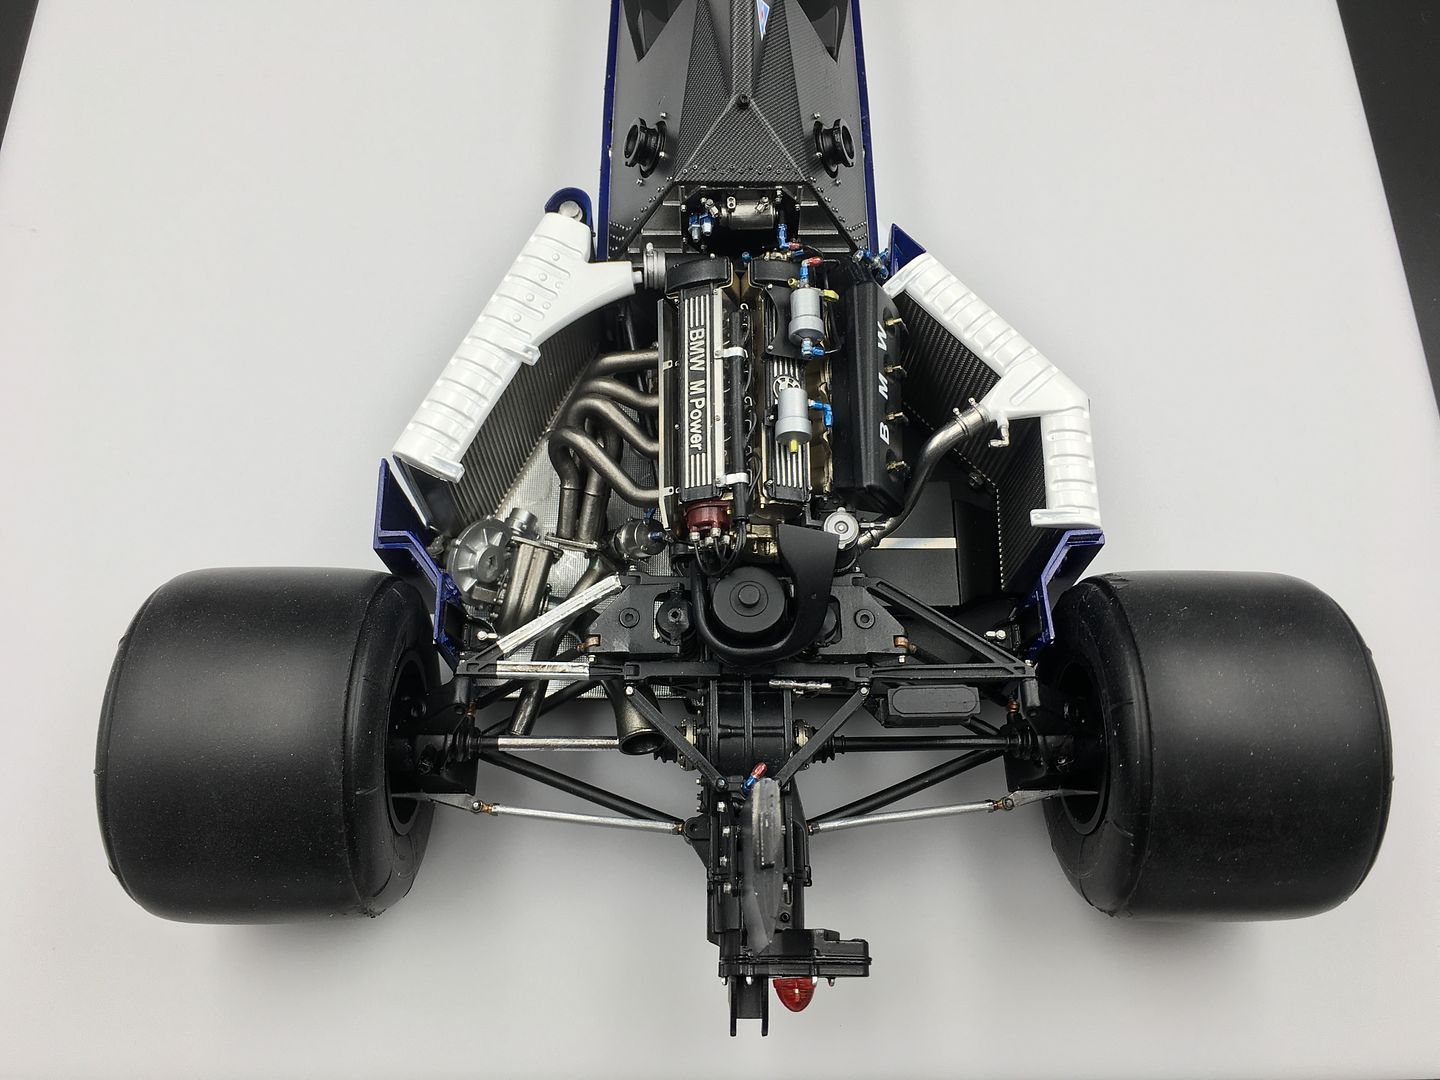
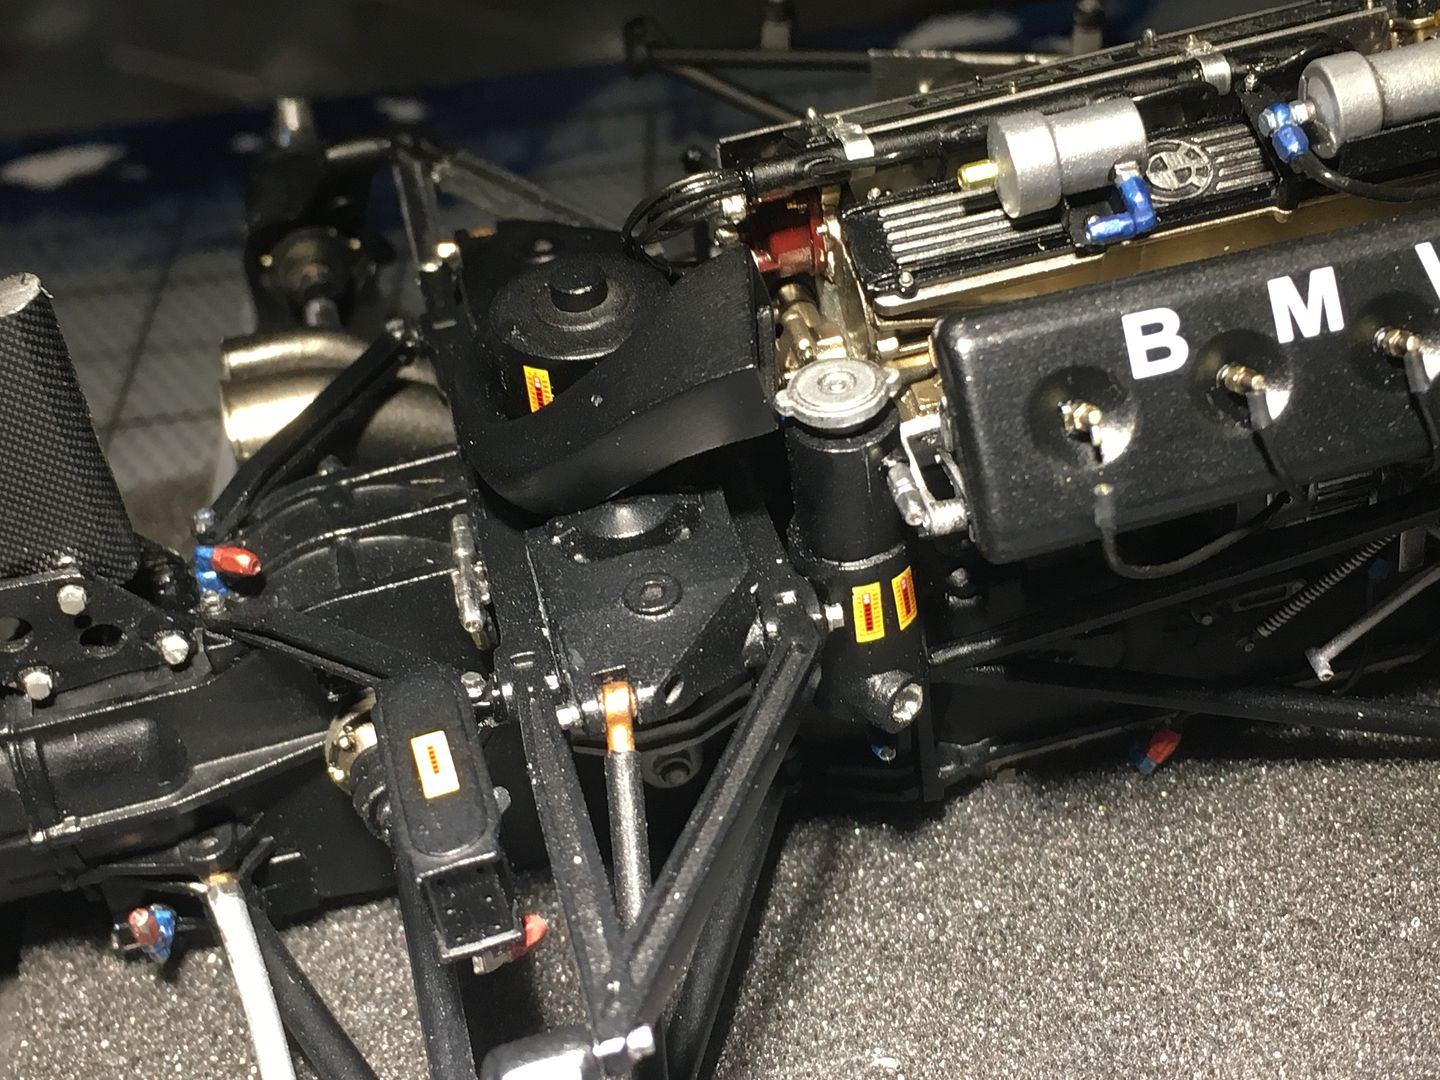
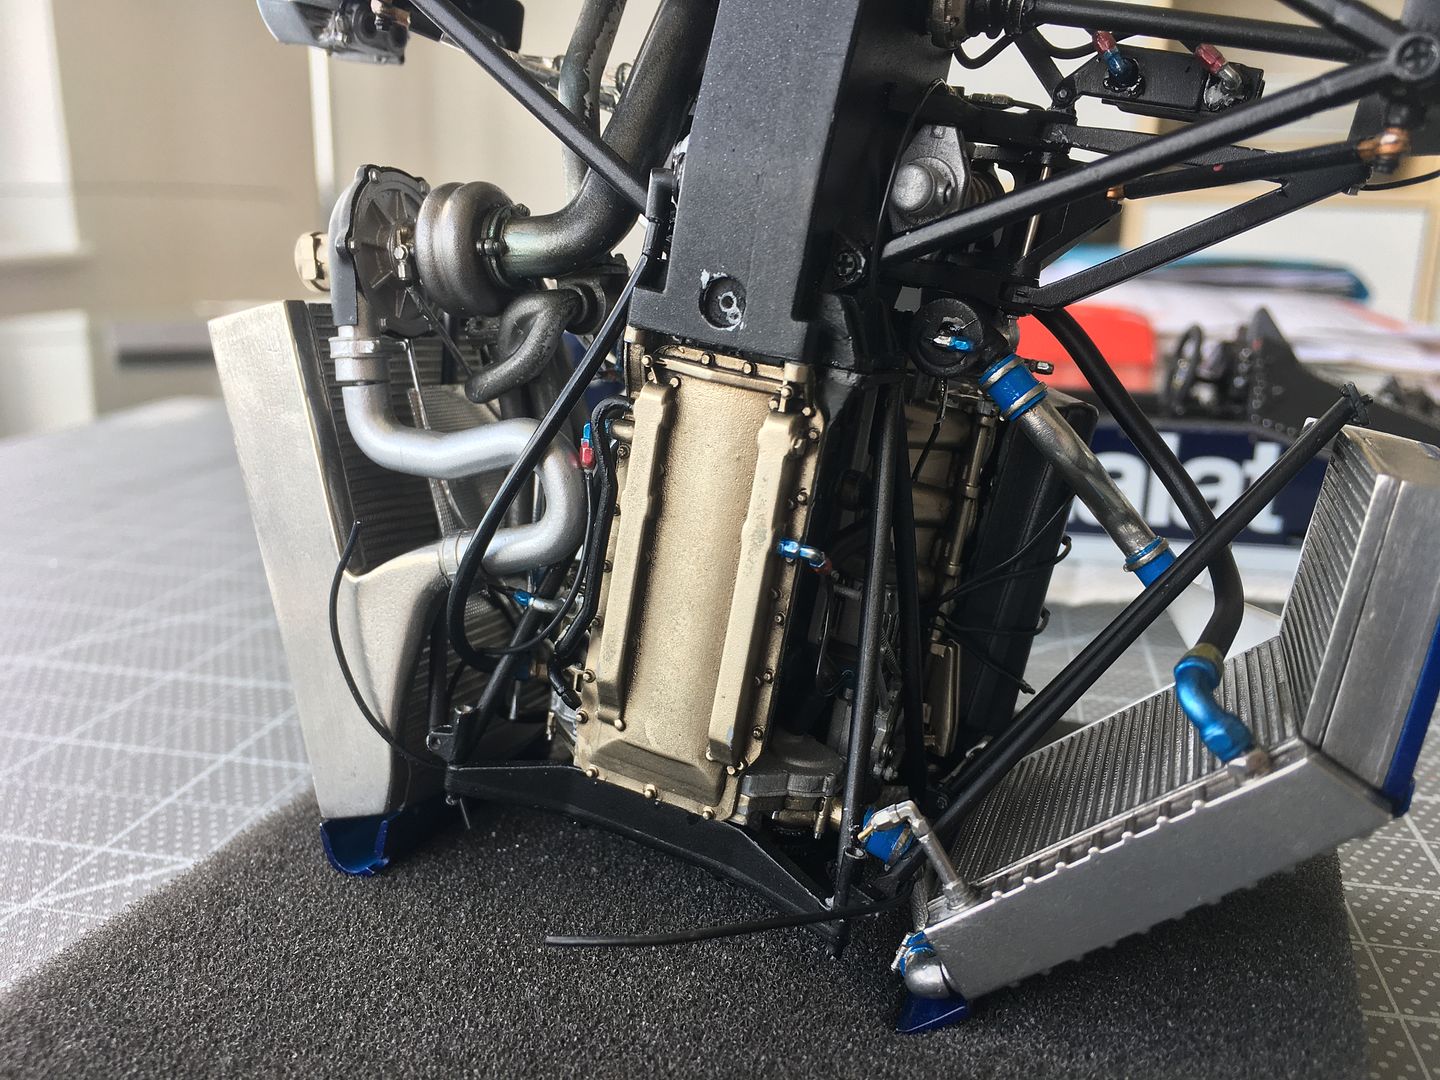
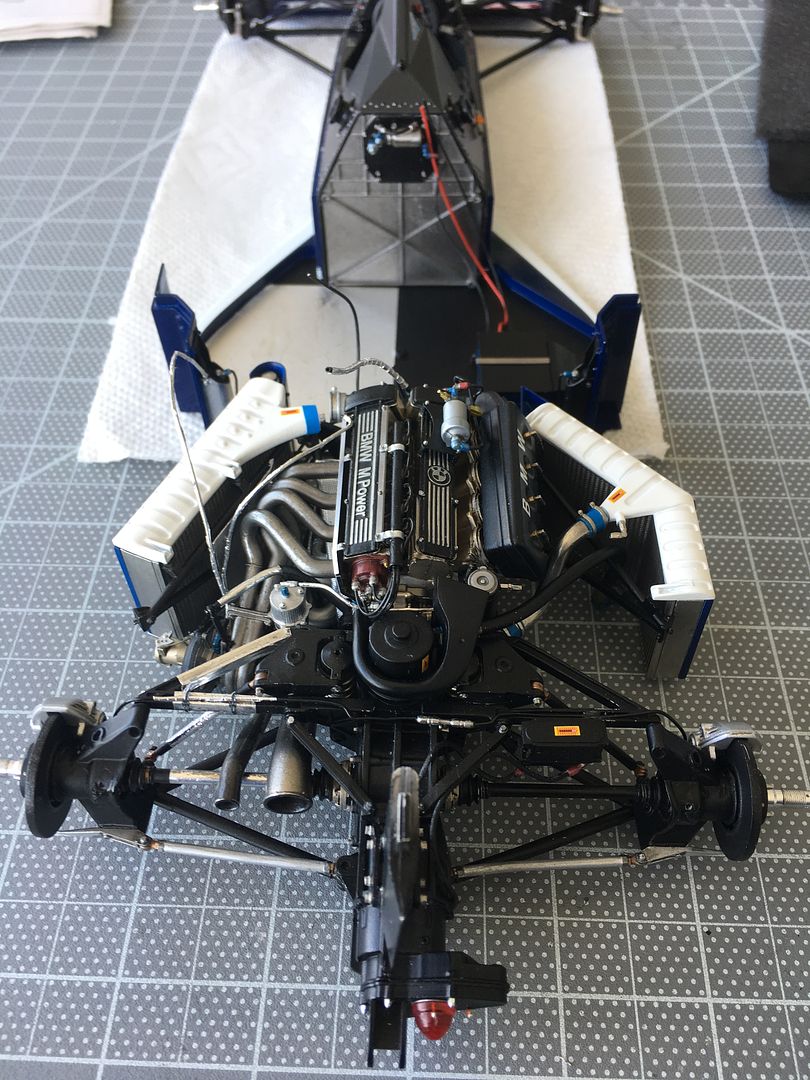
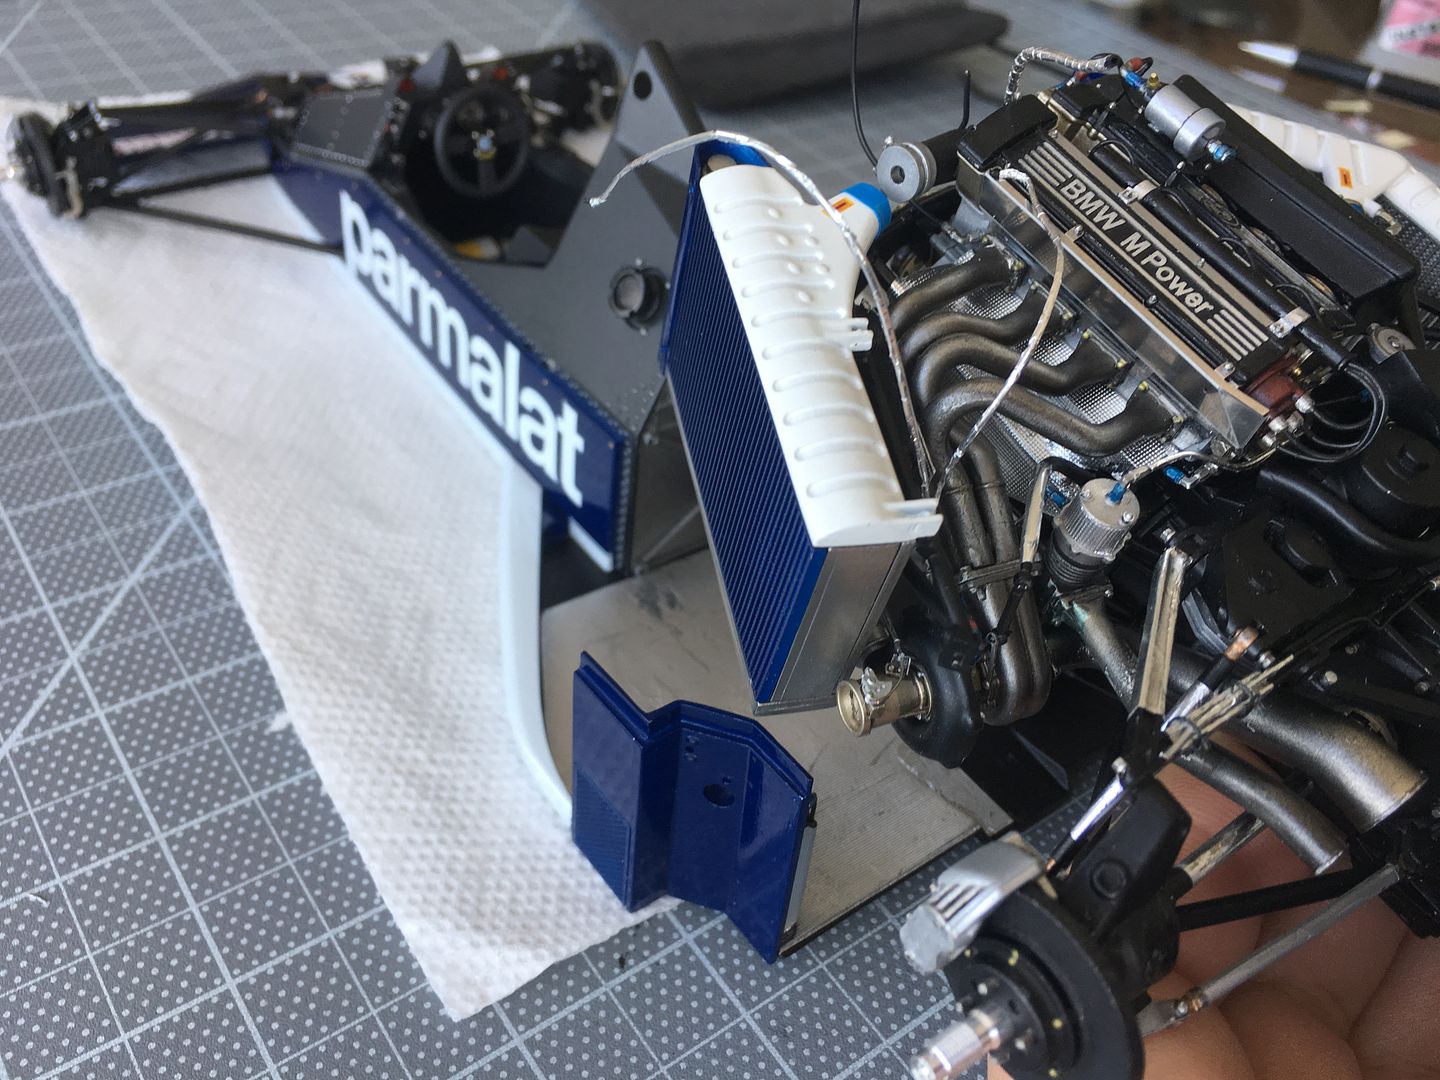
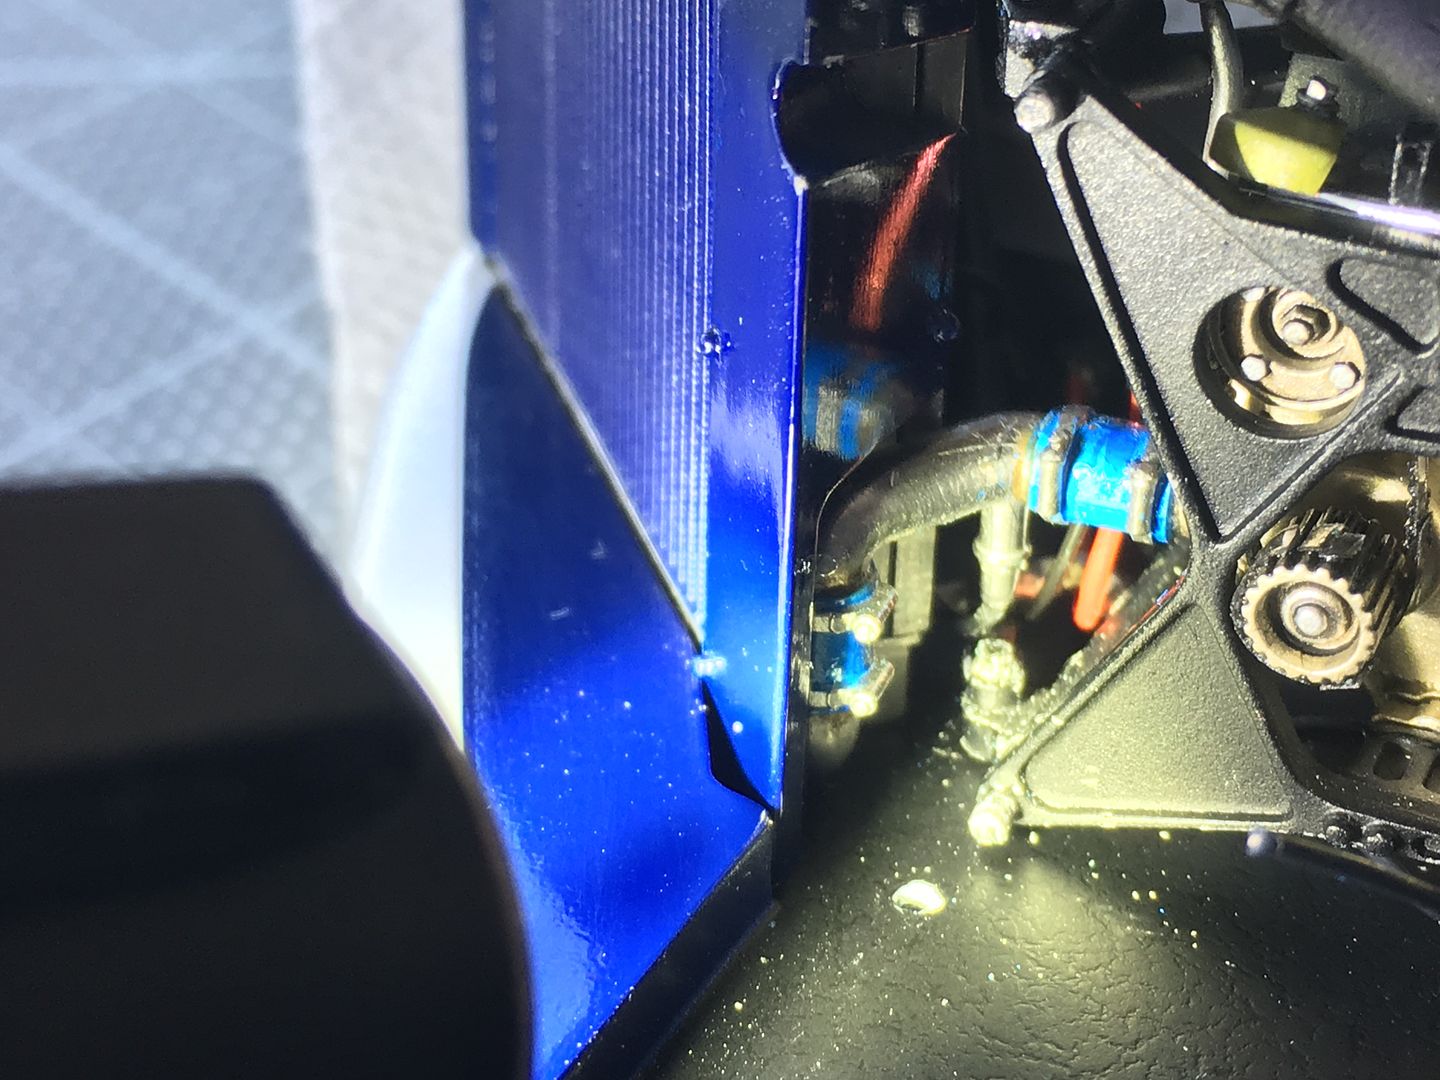
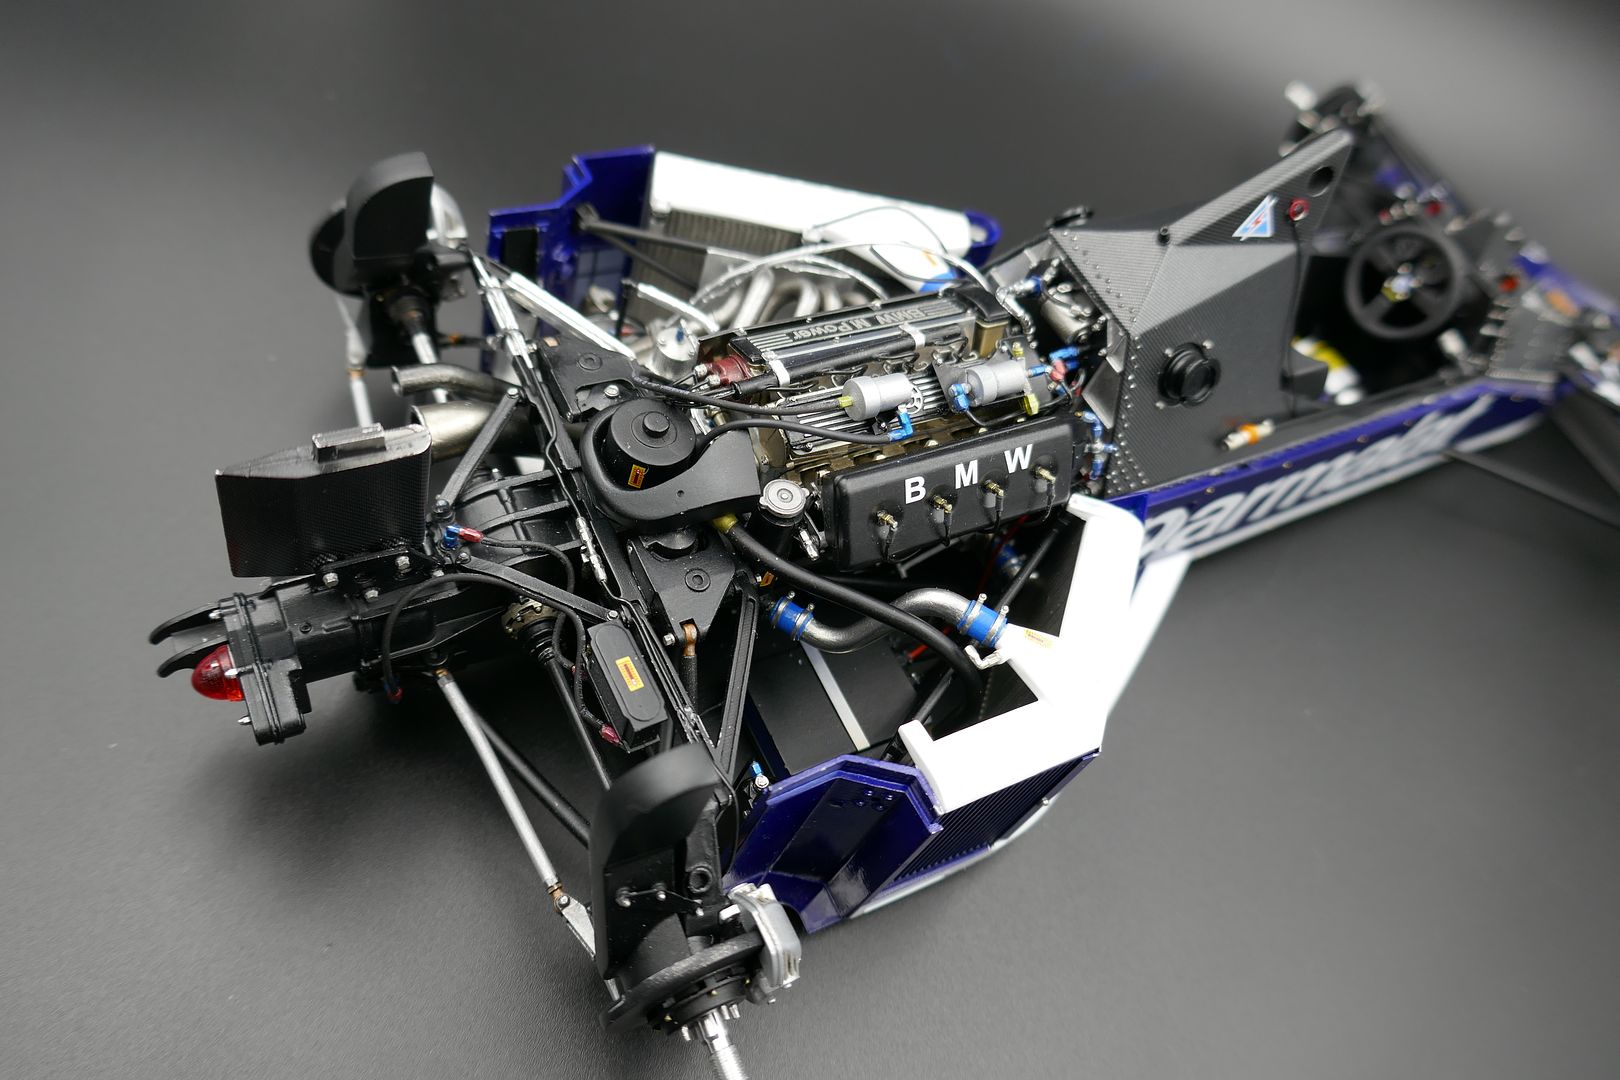
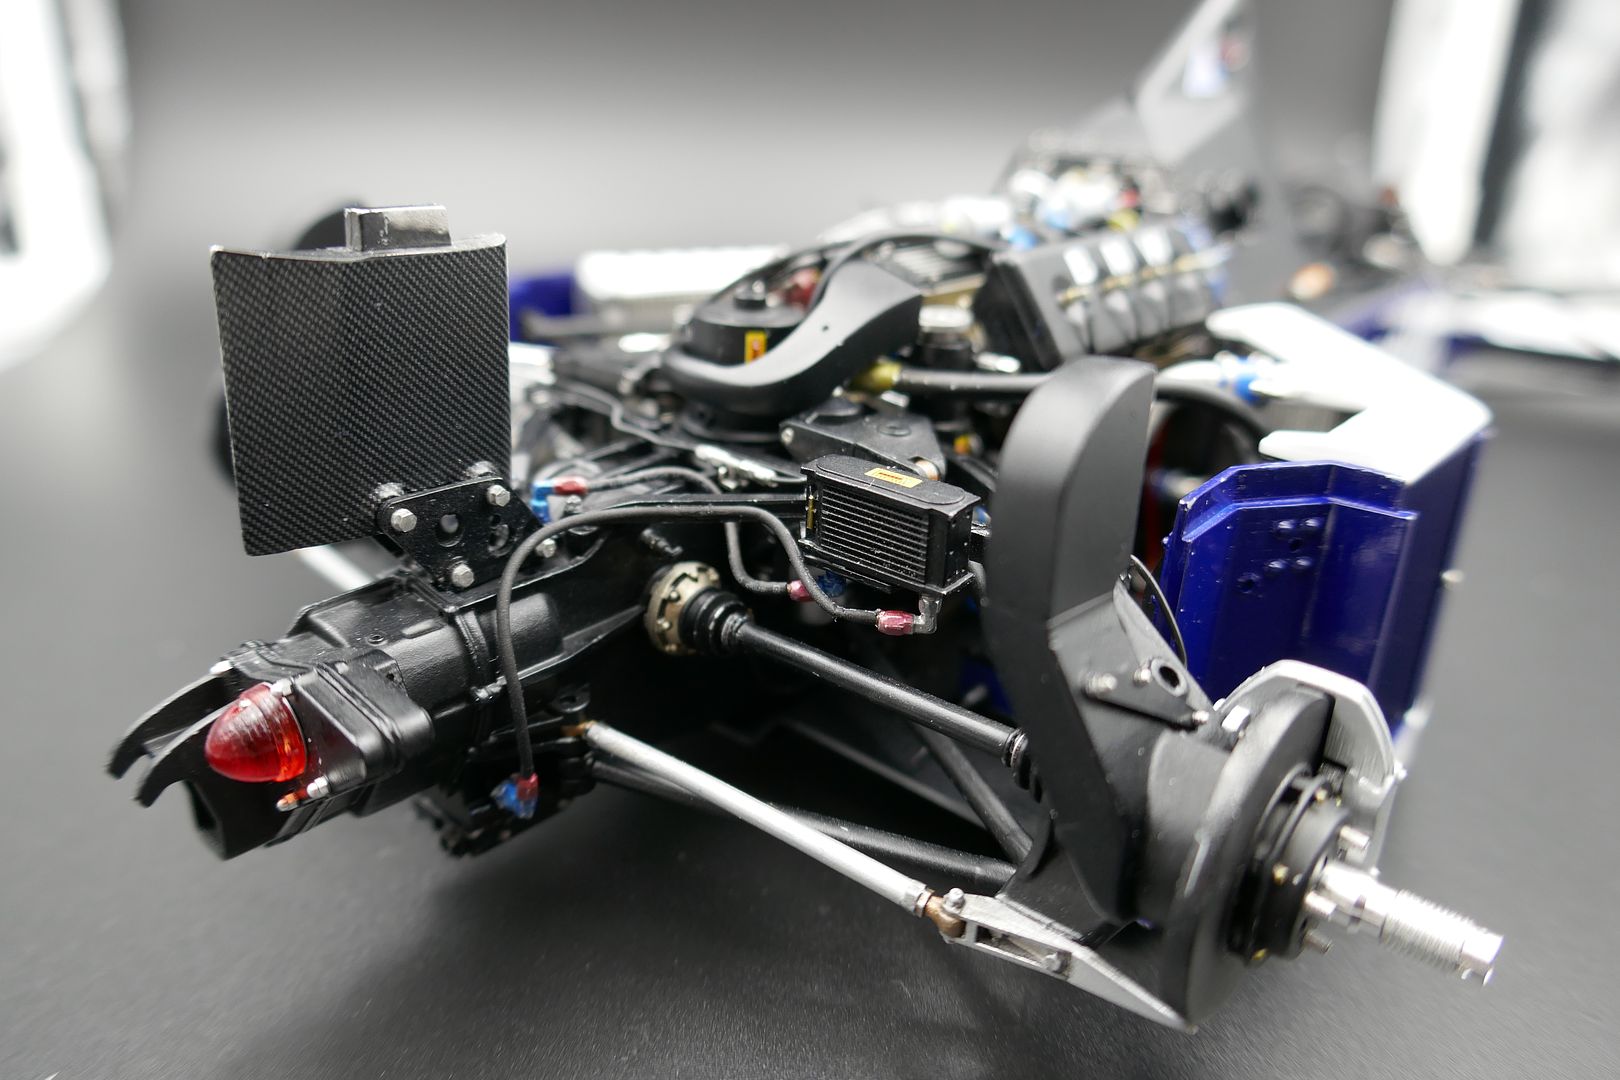
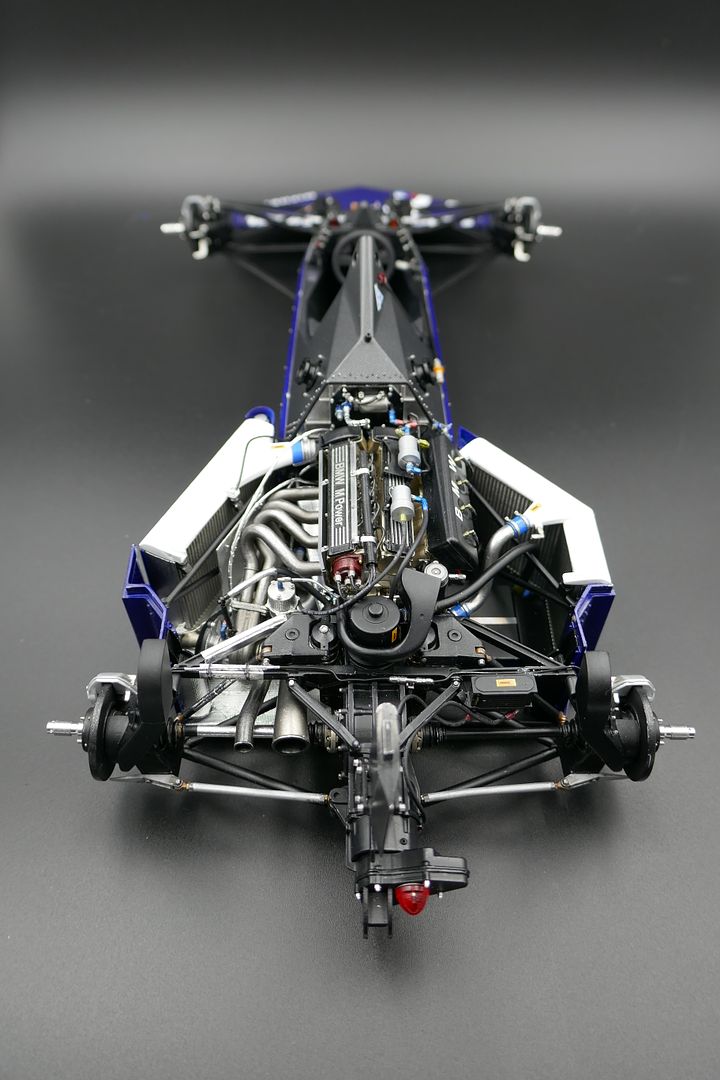
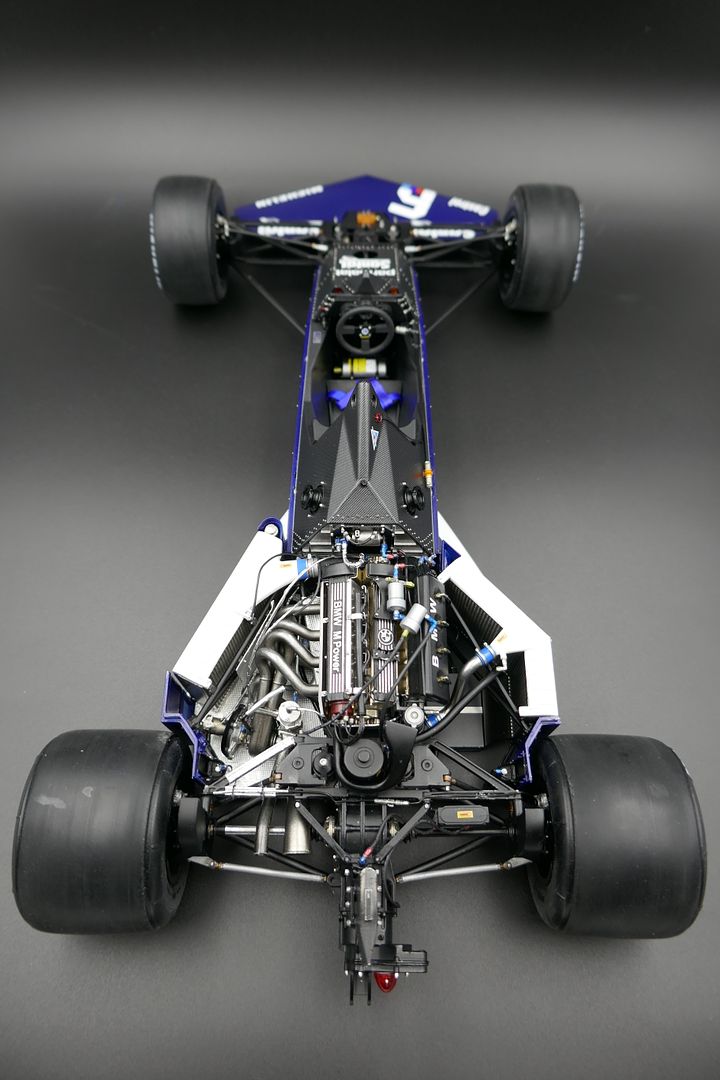
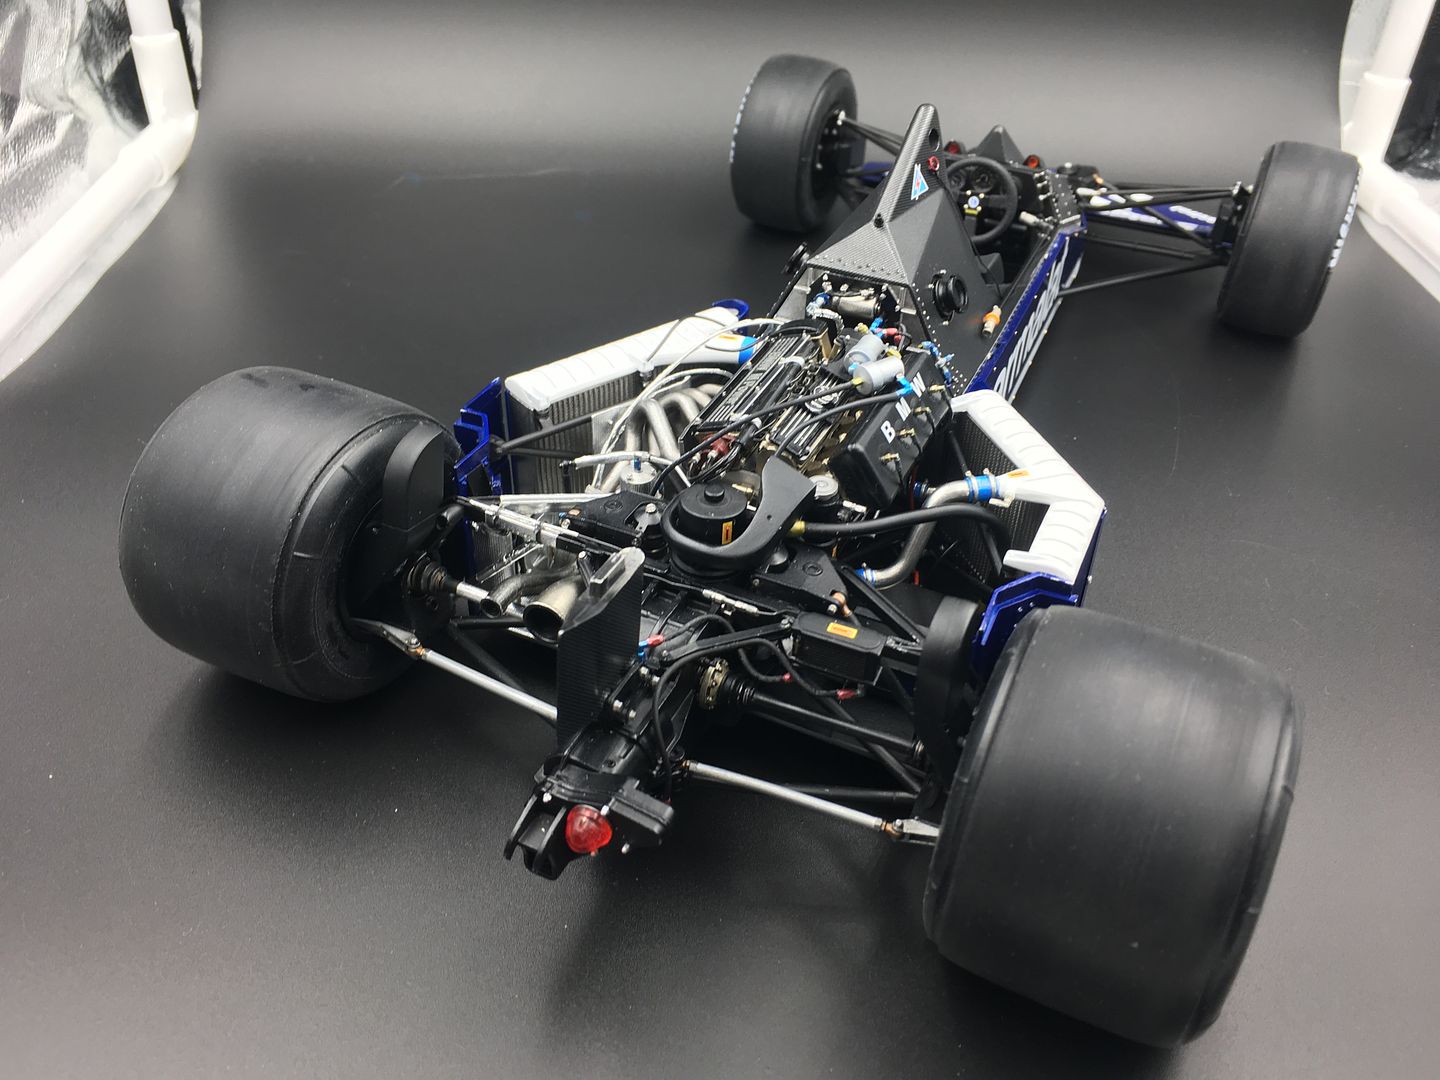
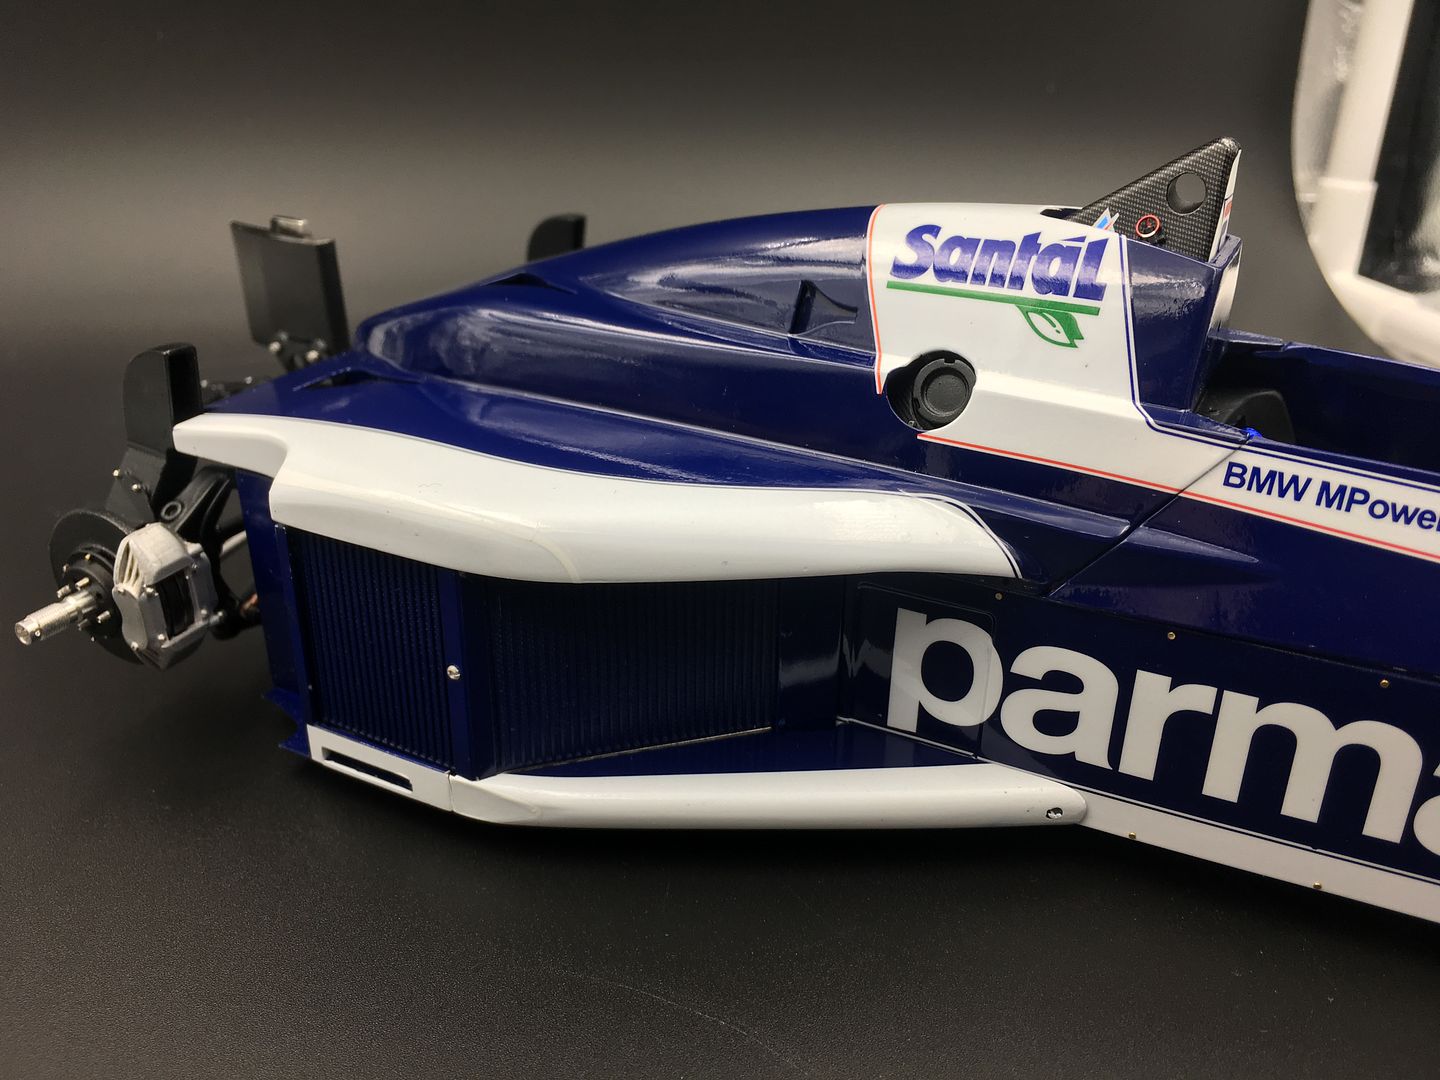
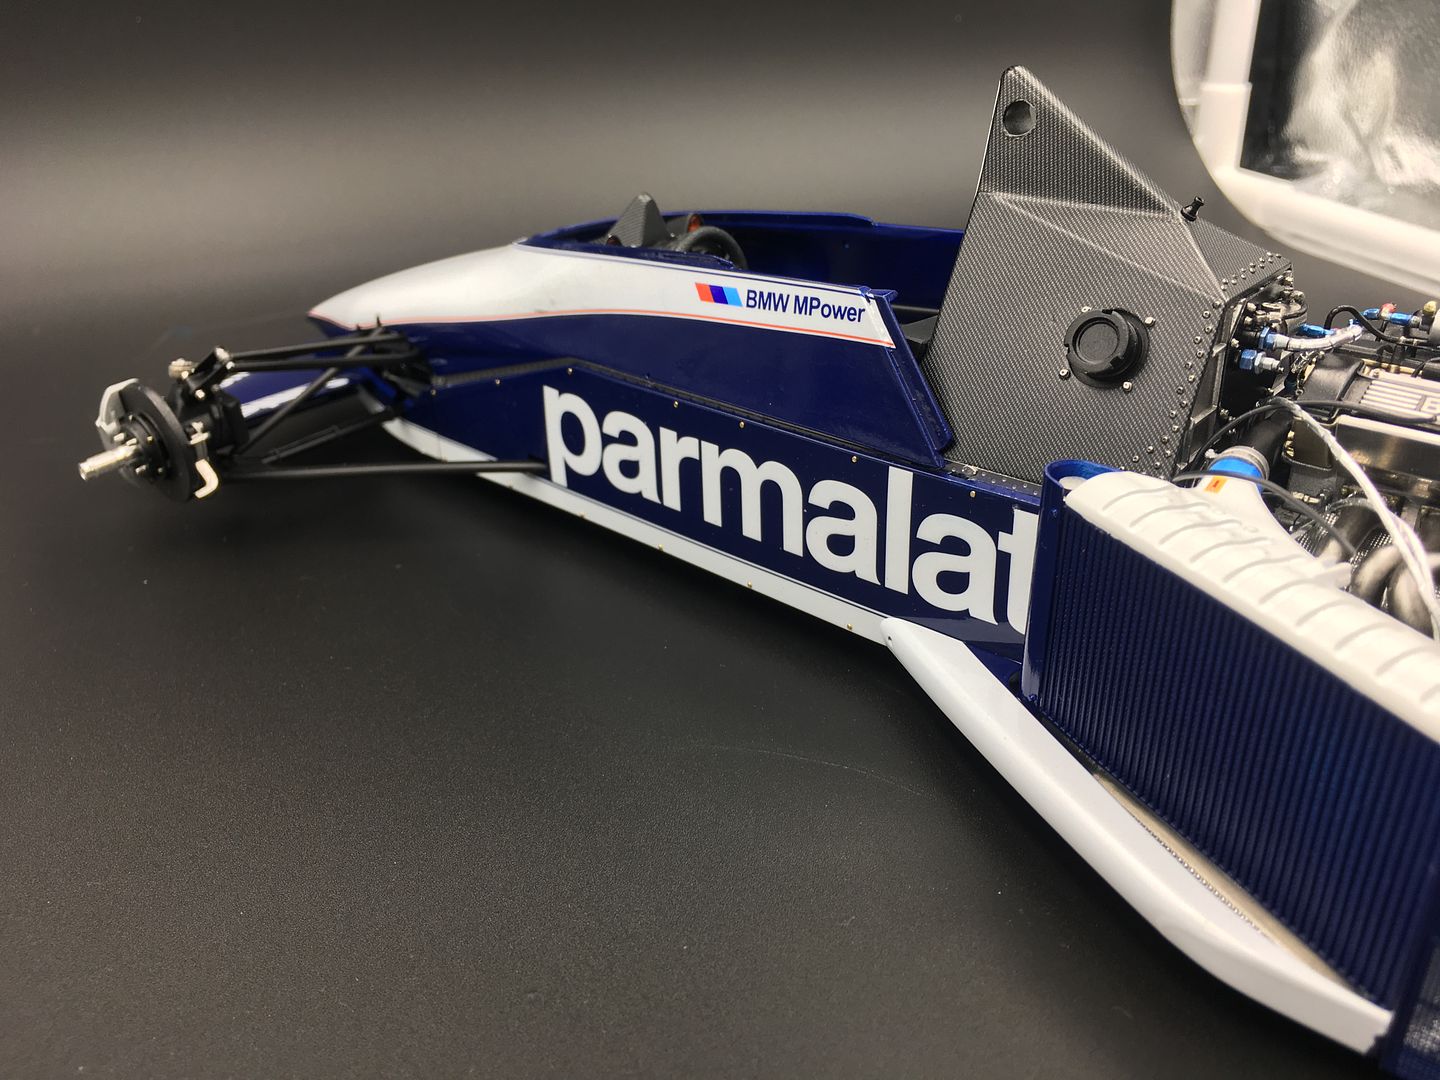
You can see from these shots, how many pipes there are that connect the rads to each side. This process is made more difficult by the fact that all this is very heavy! Its all white metal, no resin.The rads are fixed to triangular frames that swing out into position, so everything is moving around as well, until fixed to the floor!

Nothing is fixed in those shots.
So - it was back to more wiring...

(yes, the belt has come off!)
But finally I reached a point where I felt I could join it all up.....
A few decals...
At this point I am just adding wires - they all need to be tied up etc later! I'm keen to fix the ones underneath, so I can 'mount' the rear of the chassis to the front...once the rads are fixed, access will be very difficult!
Ok - has ANYONE managed to use these damn MFH tie wraps successfully?!!! This is one of only 2 I have managed to use - the 15 others have always snapped when trying to thread - a real pain - cannot recommend them I am afraid.
Had a few fittings break as I try and fit wire - lesson learnt - epoxy is better in some places, than the CA I have exclusively used - I 'pinned/pegged' many fittings this weekend - especially during the engine fitting, that required lots of shoving and bending!
I like the heat shrink tube, that you heat to get nice and small - much easier to thread onto pins, and the tiny writing looks cool!
Quite a few foil-wrapped cables and wires - kit uses self adhesive foil that works well - to represent heat protection, particularly around the exhaust and turbo...
At this point I was impatient to fix the engine, rads etc together, and into the car. This is a b*gger of a job, as there are many 'hard' pipes that connect everything together - ali-water pipes etc - and you have to fit both ends at the same time to hold it all together - you have to glue, but also accept that you then have to line everything up as the whole sub-assembly is lifted onto the floor of the car, and then attached to the bulkhead - but there were no short cuts here - I still had wiring to do that would be impossible to do later...
...including on the bulkhead itself...
...and the electrical box on the chassis floor.
You can see from these shots, how many pipes there are that connect the rads to each side. This process is made more difficult by the fact that all this is very heavy! Its all white metal, no resin.The rads are fixed to triangular frames that swing out into position, so everything is moving around as well, until fixed to the floor!
Nothing is fixed in those shots.
So - it was back to more wiring...
(yes, the belt has come off!)
But finally I reached a point where I felt I could join it all up.....
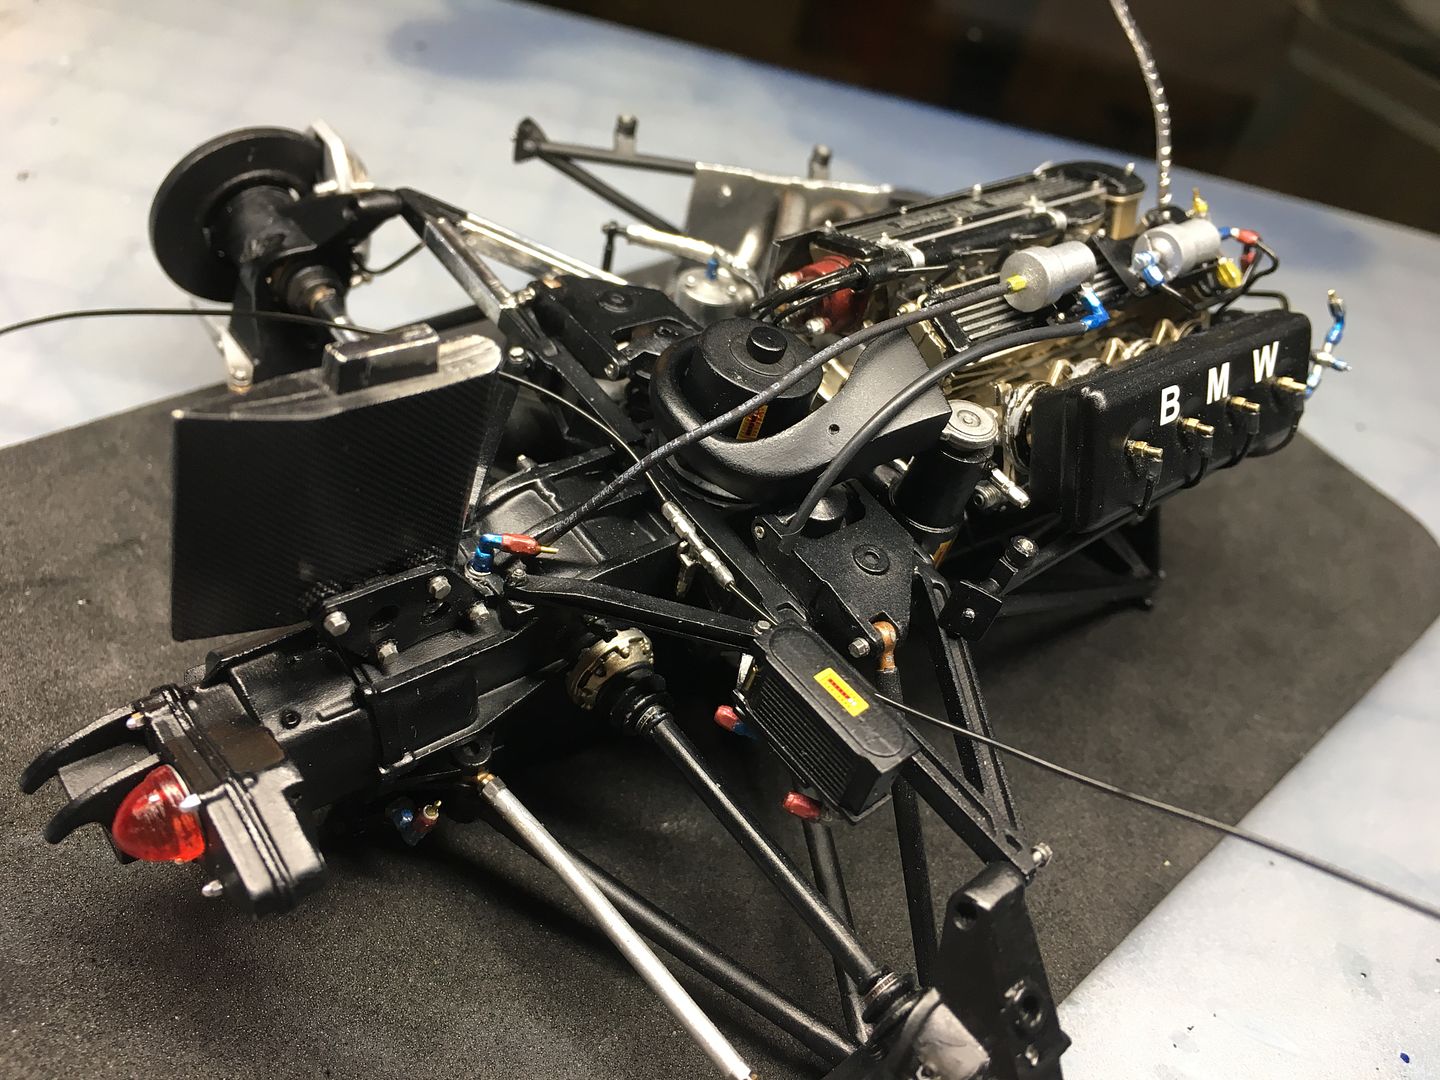
So, it was in with the big lump! It fixes by 4 locating pics on the bulkhead, and there is one model screw up from the base into the engine block. It weighs a ton, but is well supported by the floor once in position - the floor fixes to the cockpit base with 4 screws and a decent surface area.
But lifting it into place whilst trying to flex radiators apart, stop tubes popping off etc etc is a real job!
Gradually closes up...
At this point I realized I was going to have to separate rear chassis floor from bulkhead/tub to get to some tubes to fit - luckily I had not applied any glue at this point, so no big deal...
Mainly because of this little pipe, which you will probably never see again, but it slipped!
Had to prop the engine up to the level it would be once supported by the bulkhead - so heavy (for a kit!)

Eventually got it glued in place.

So it was then back to sliding everything together again!
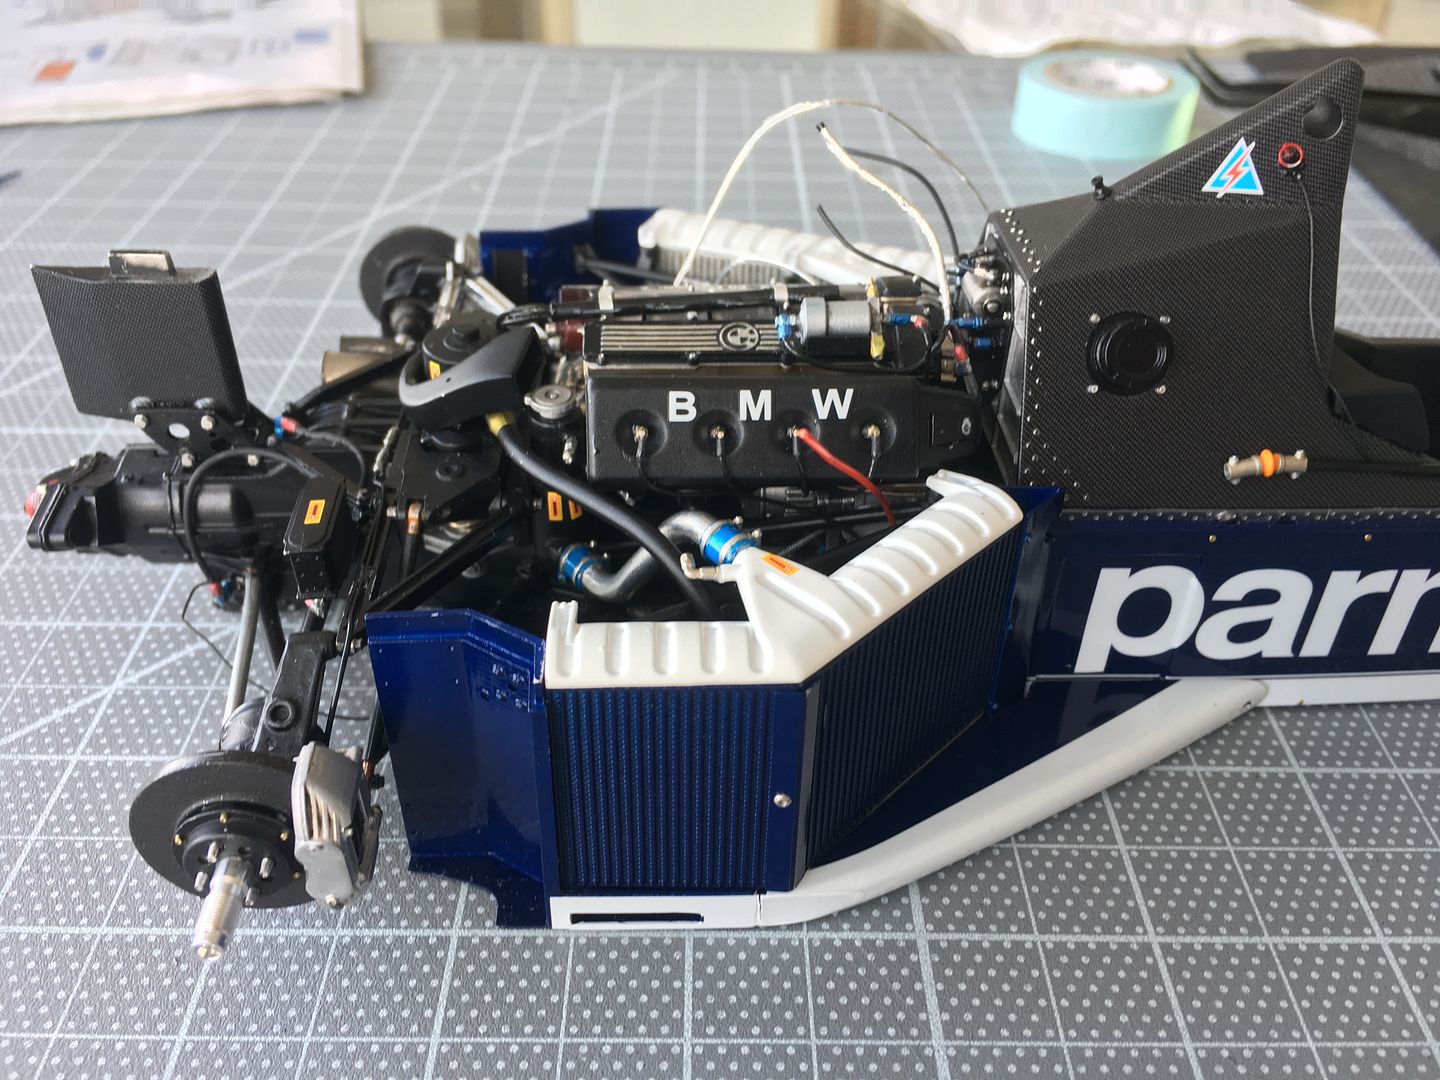
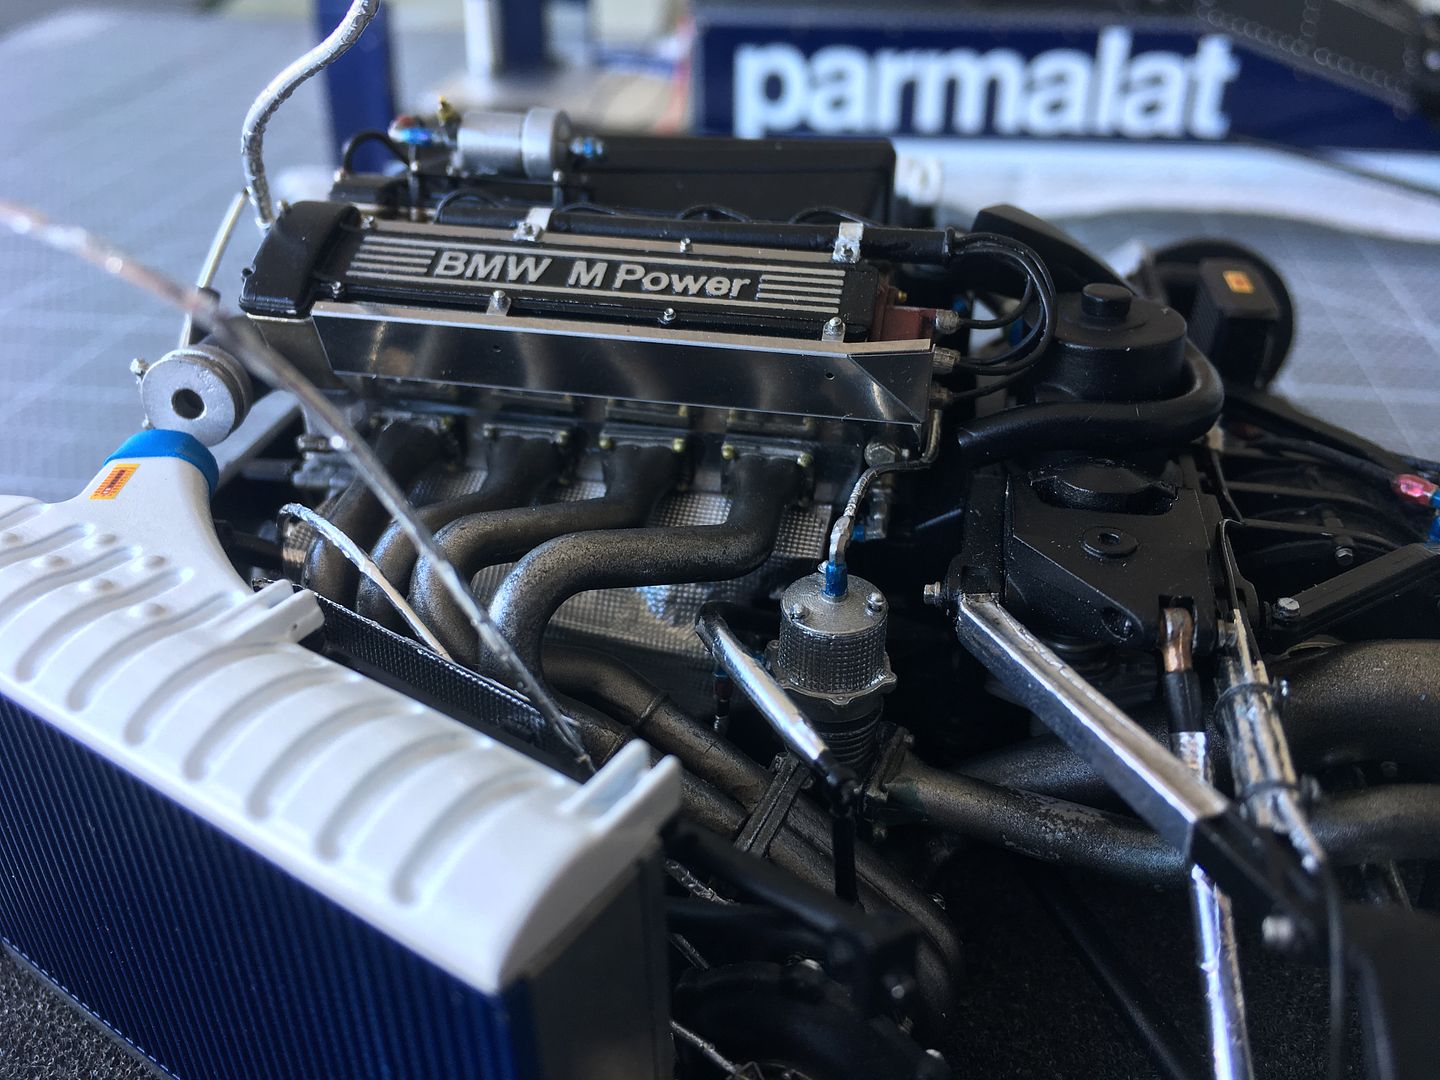
...and refitting/tweaking all the water pipes that had moved, or needed squeezing in...
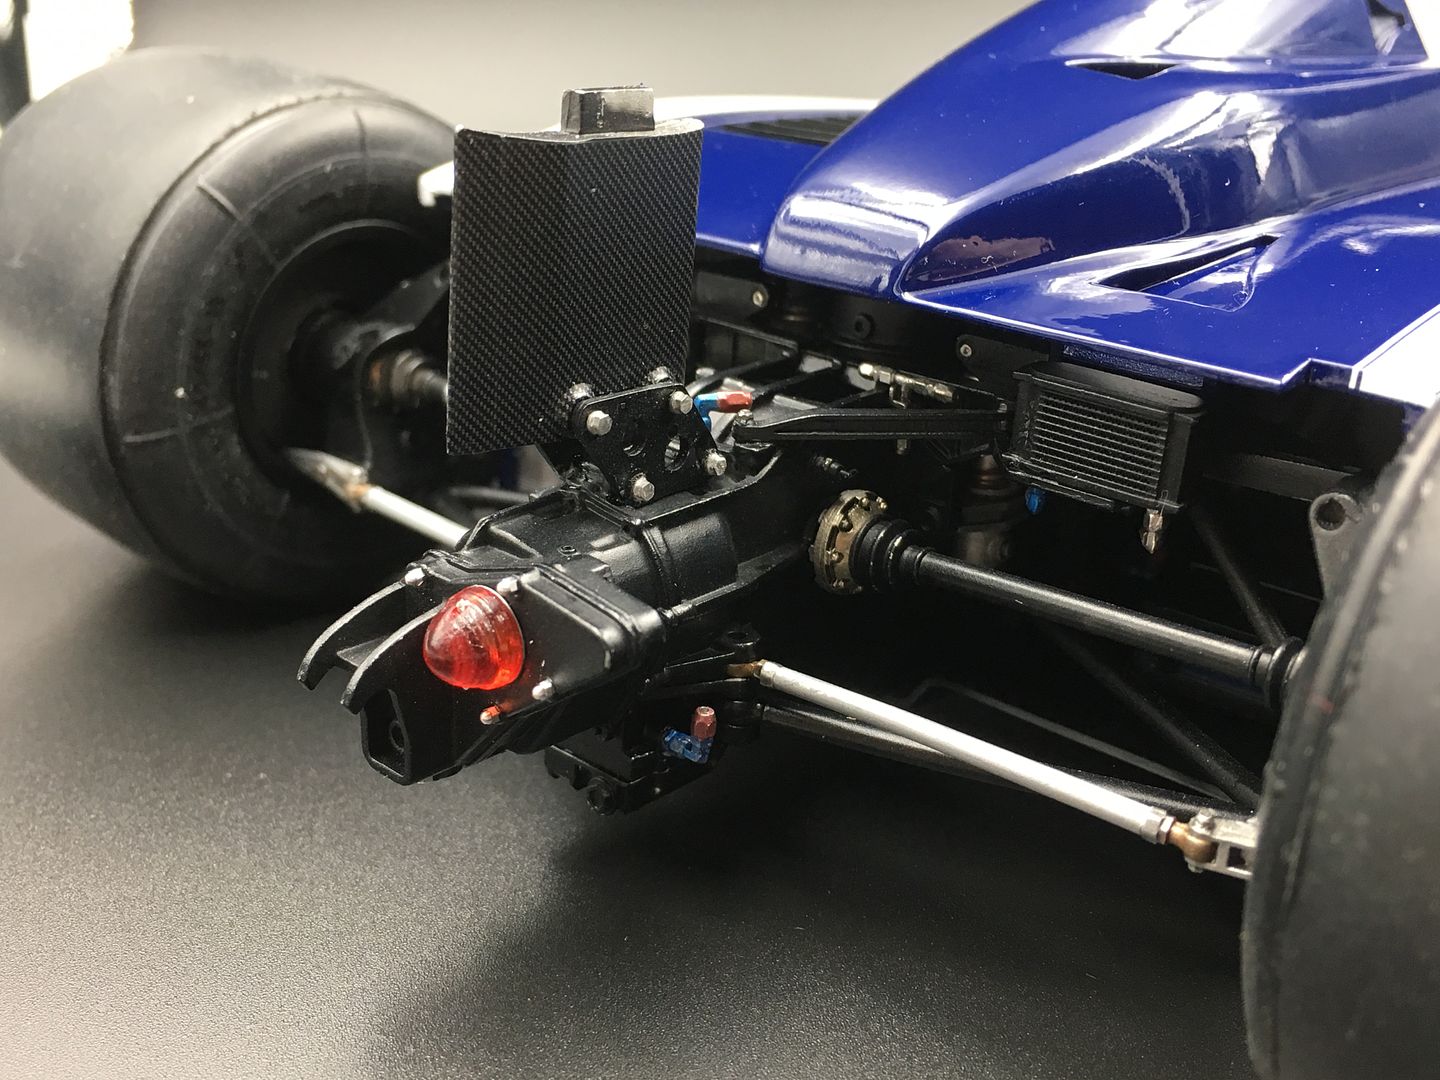
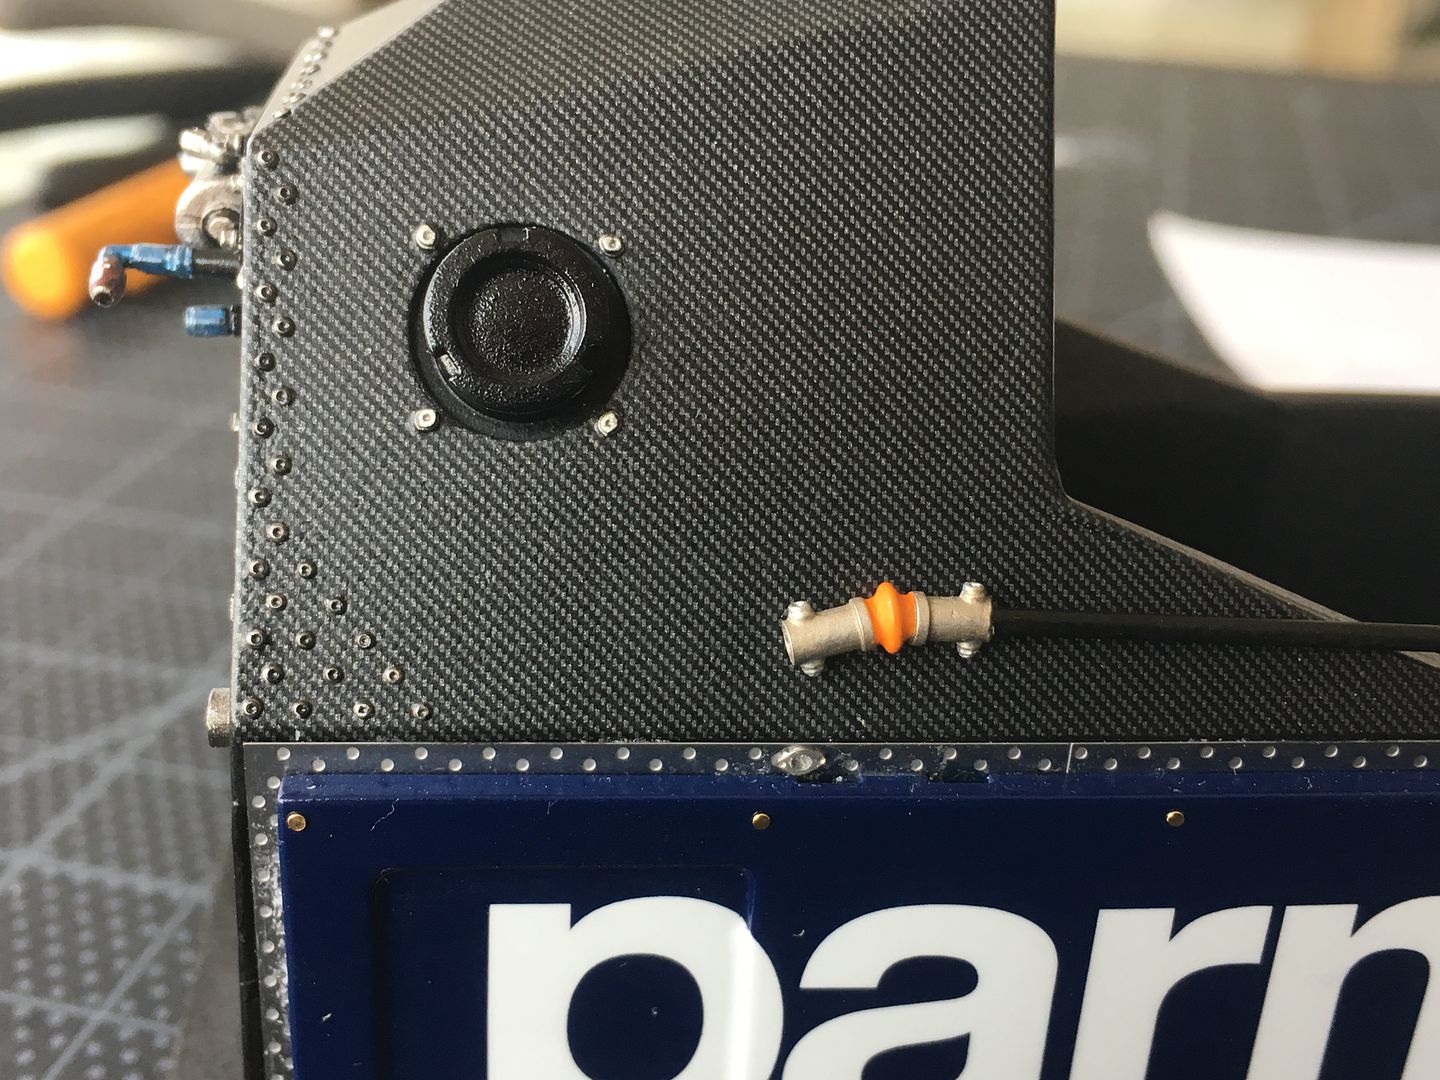
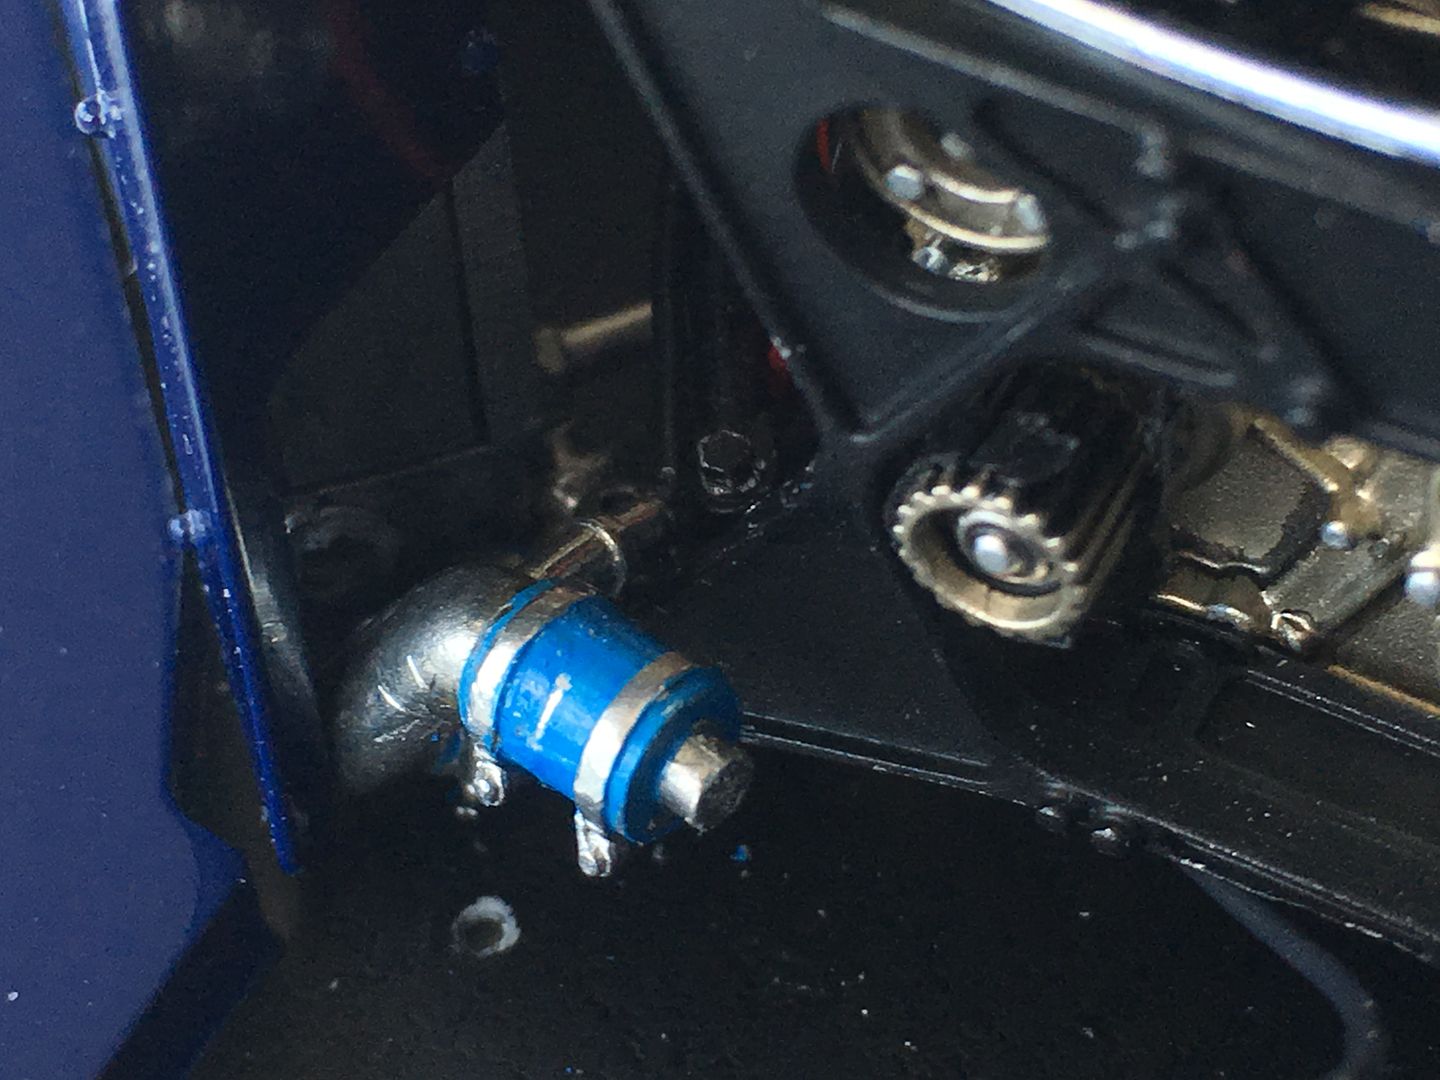
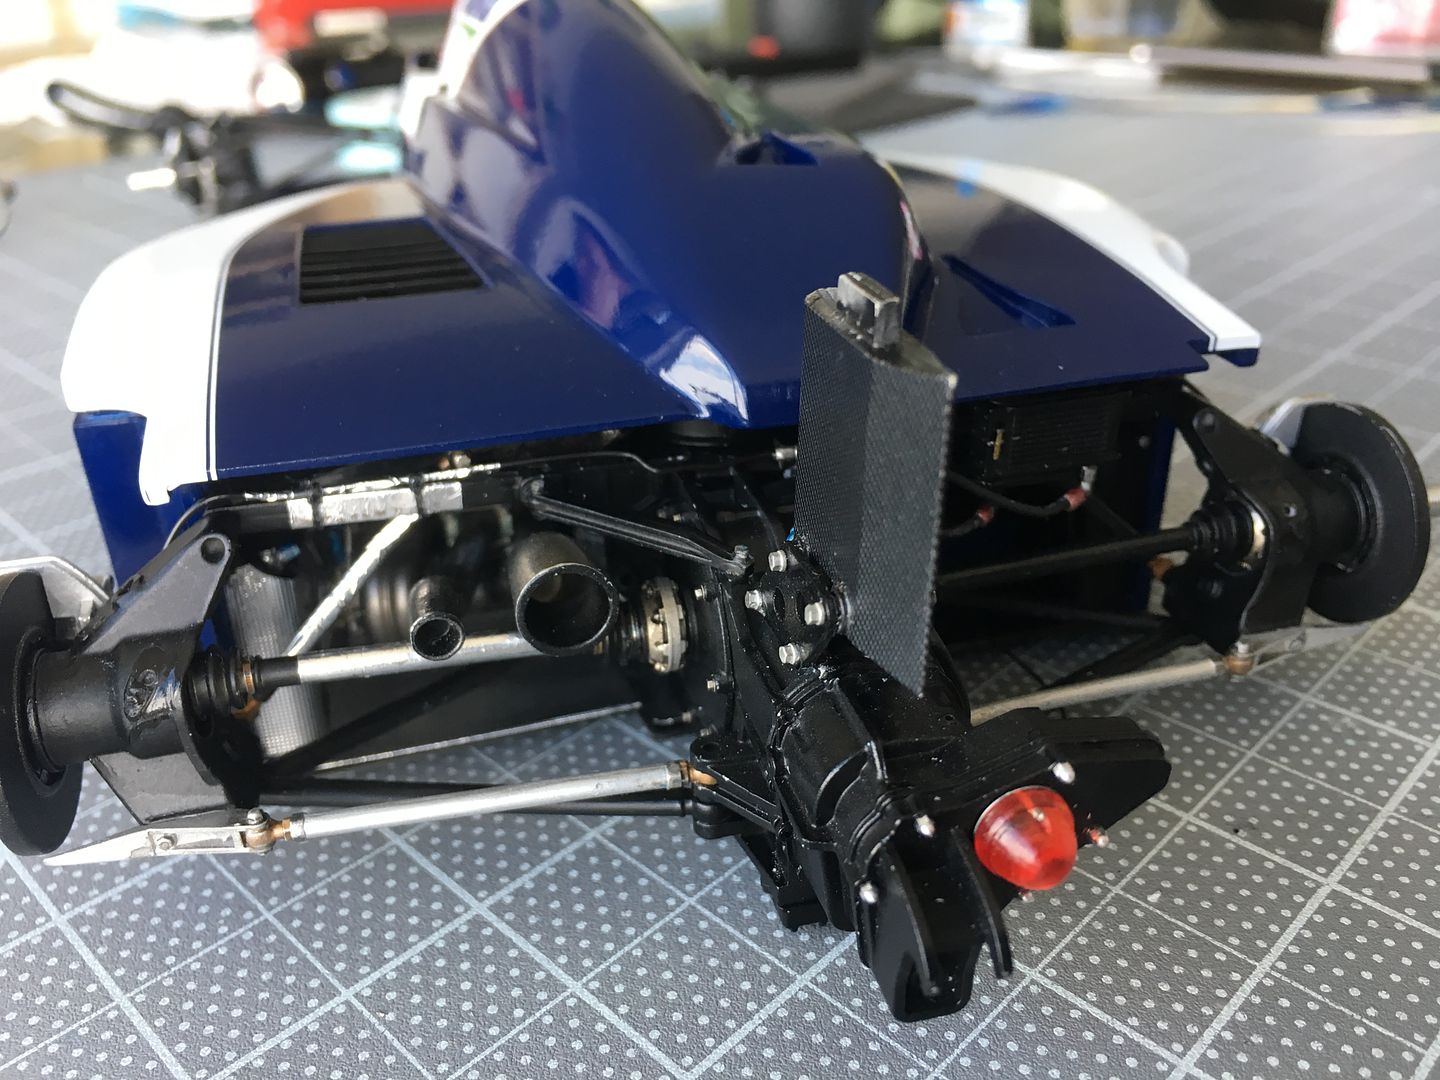
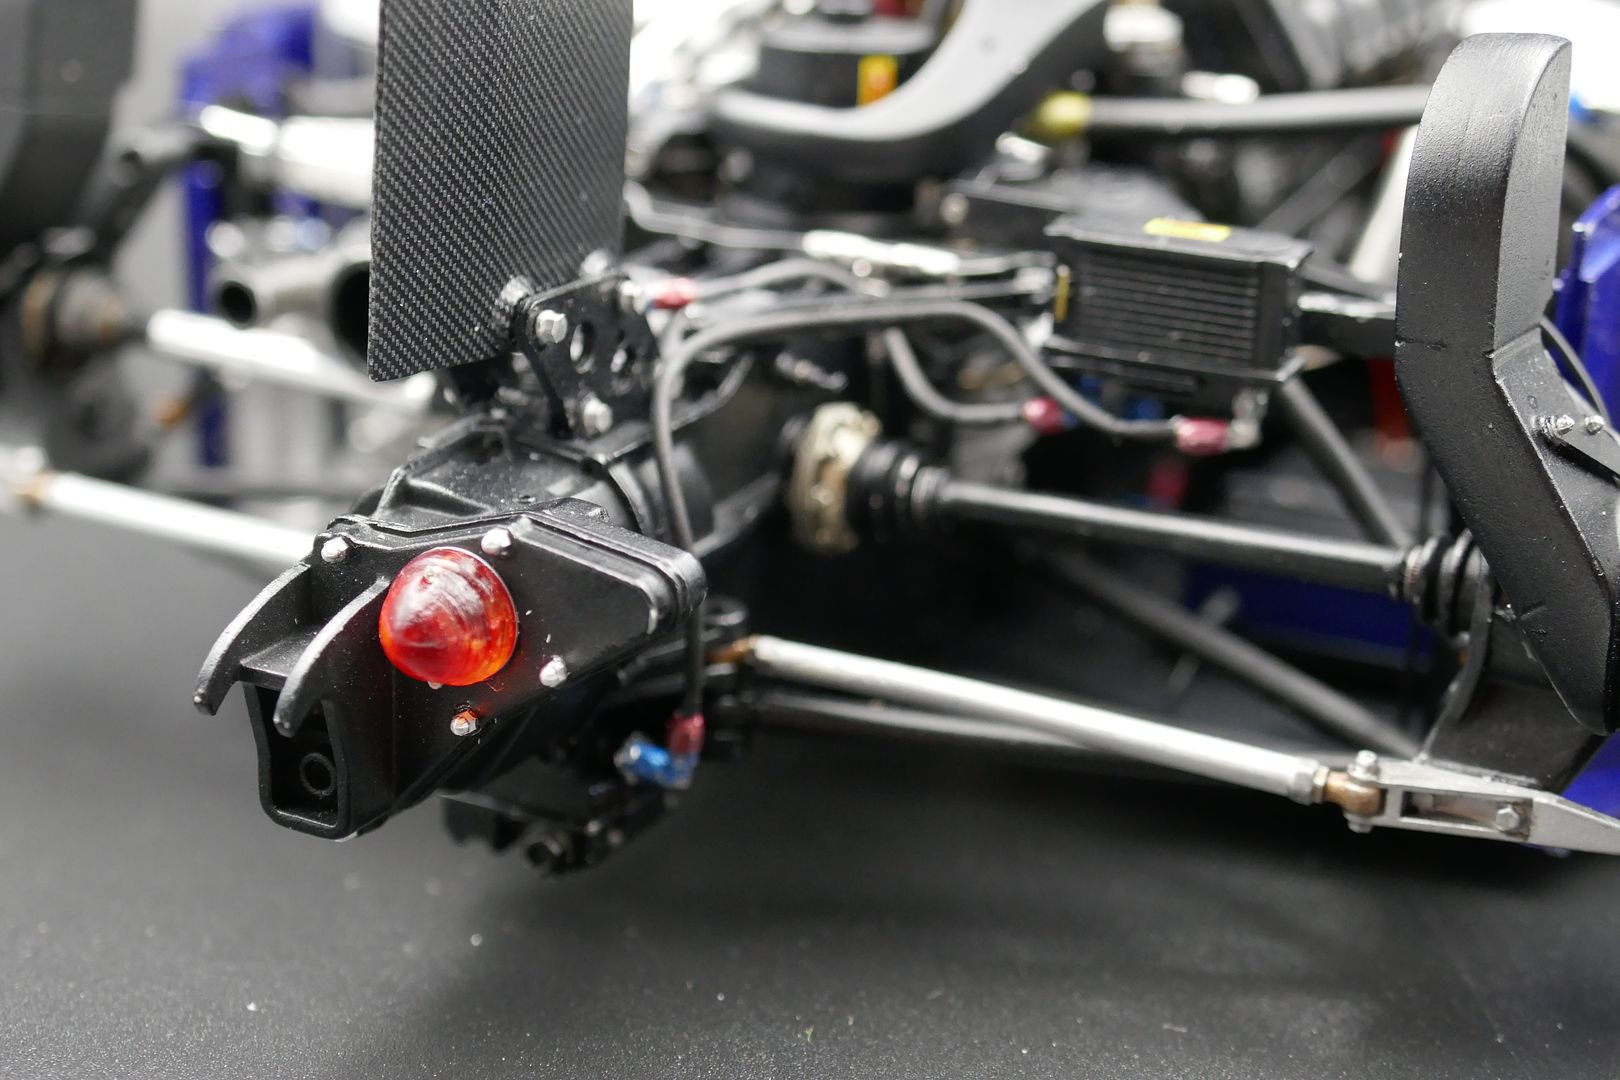
Both the silver pipe and the thin black pipe in the photo above are metal.

But eventually everything seemed to fit together - amazing!
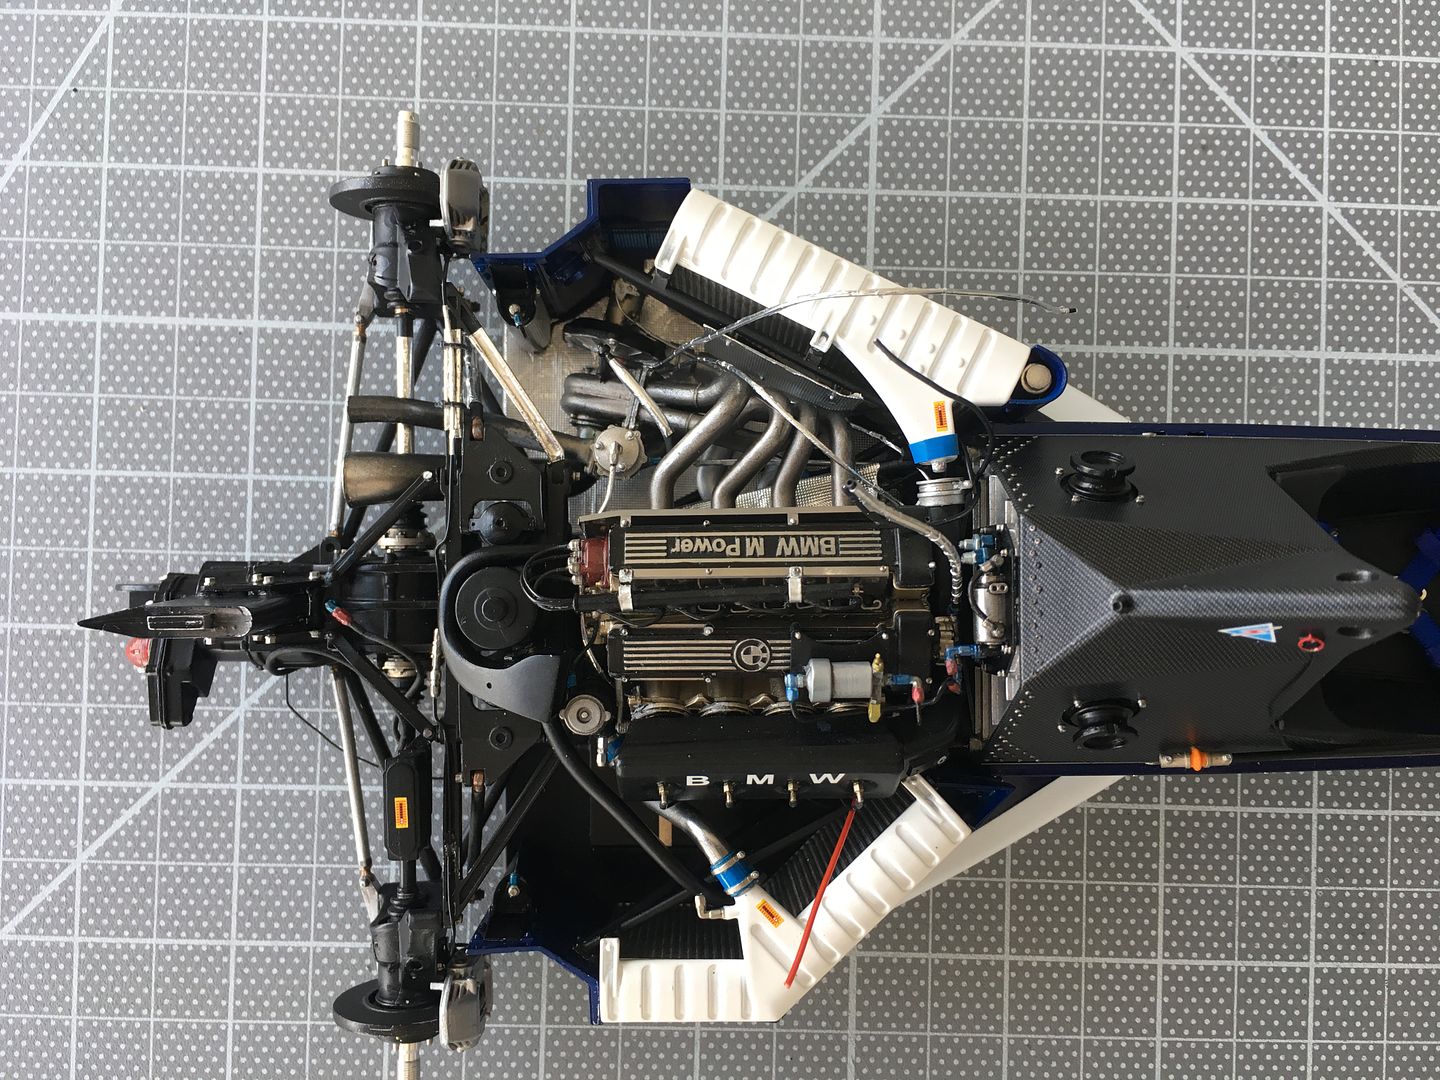
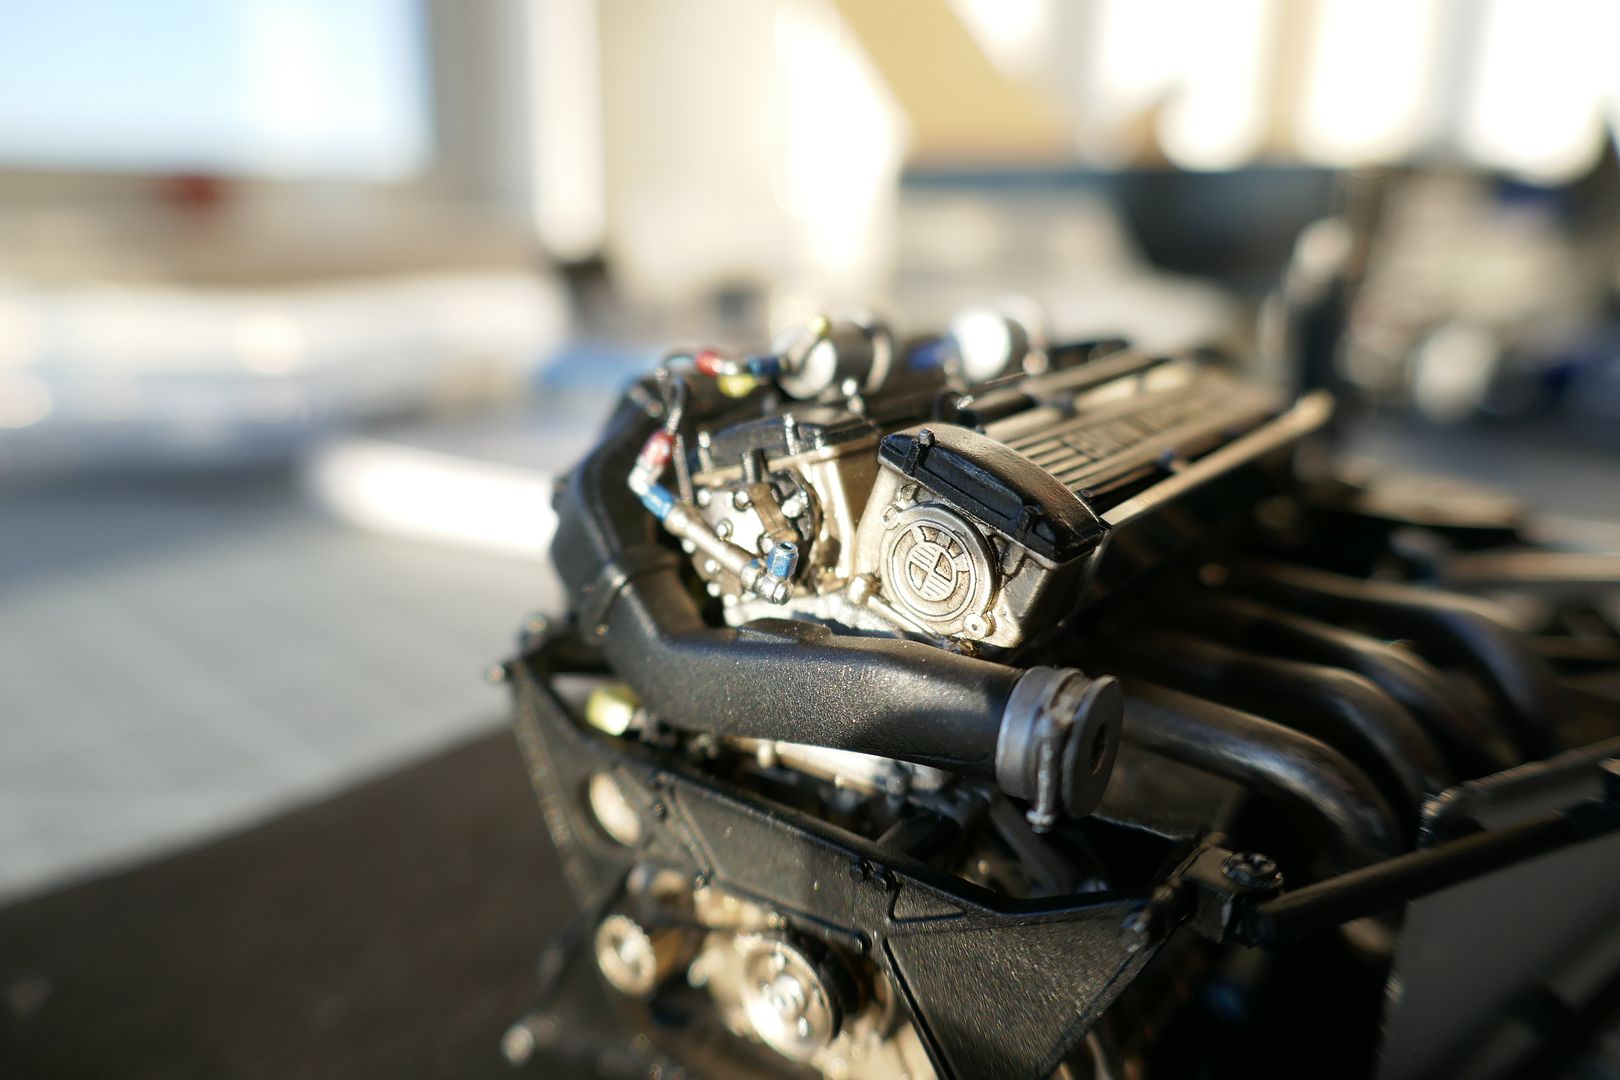
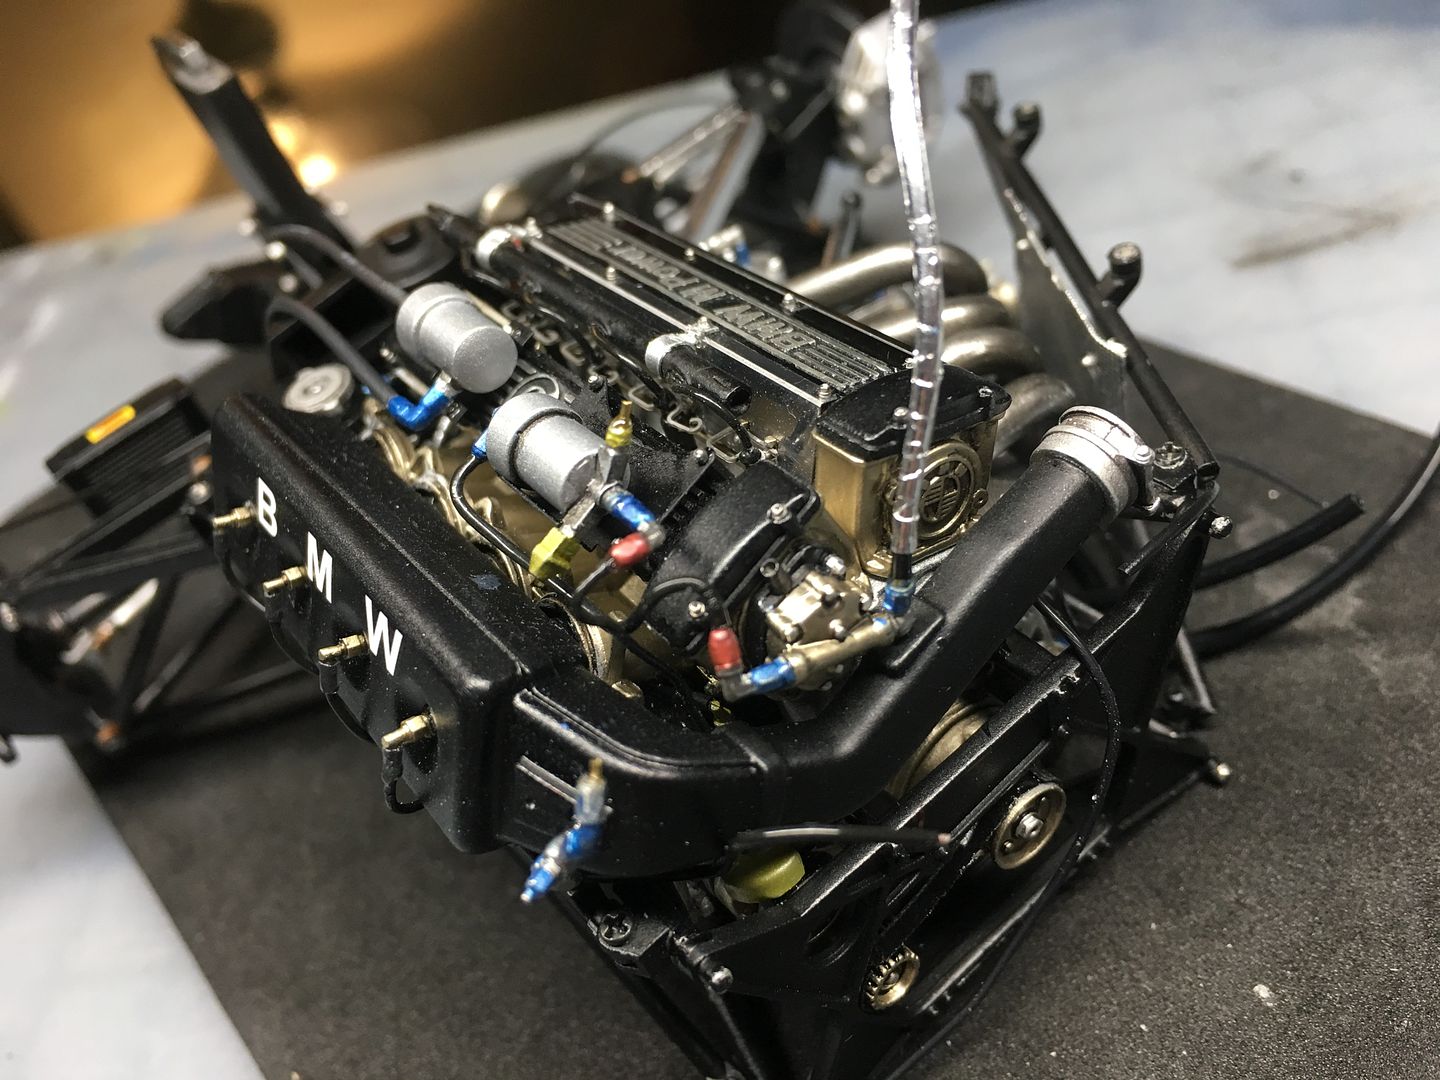
At some point in the process, one of the cans on the top of the cam cover came off - no issue, just glued it back after all the mucking around...
Thanks guys -
A bit pic heavy I'm afraid!
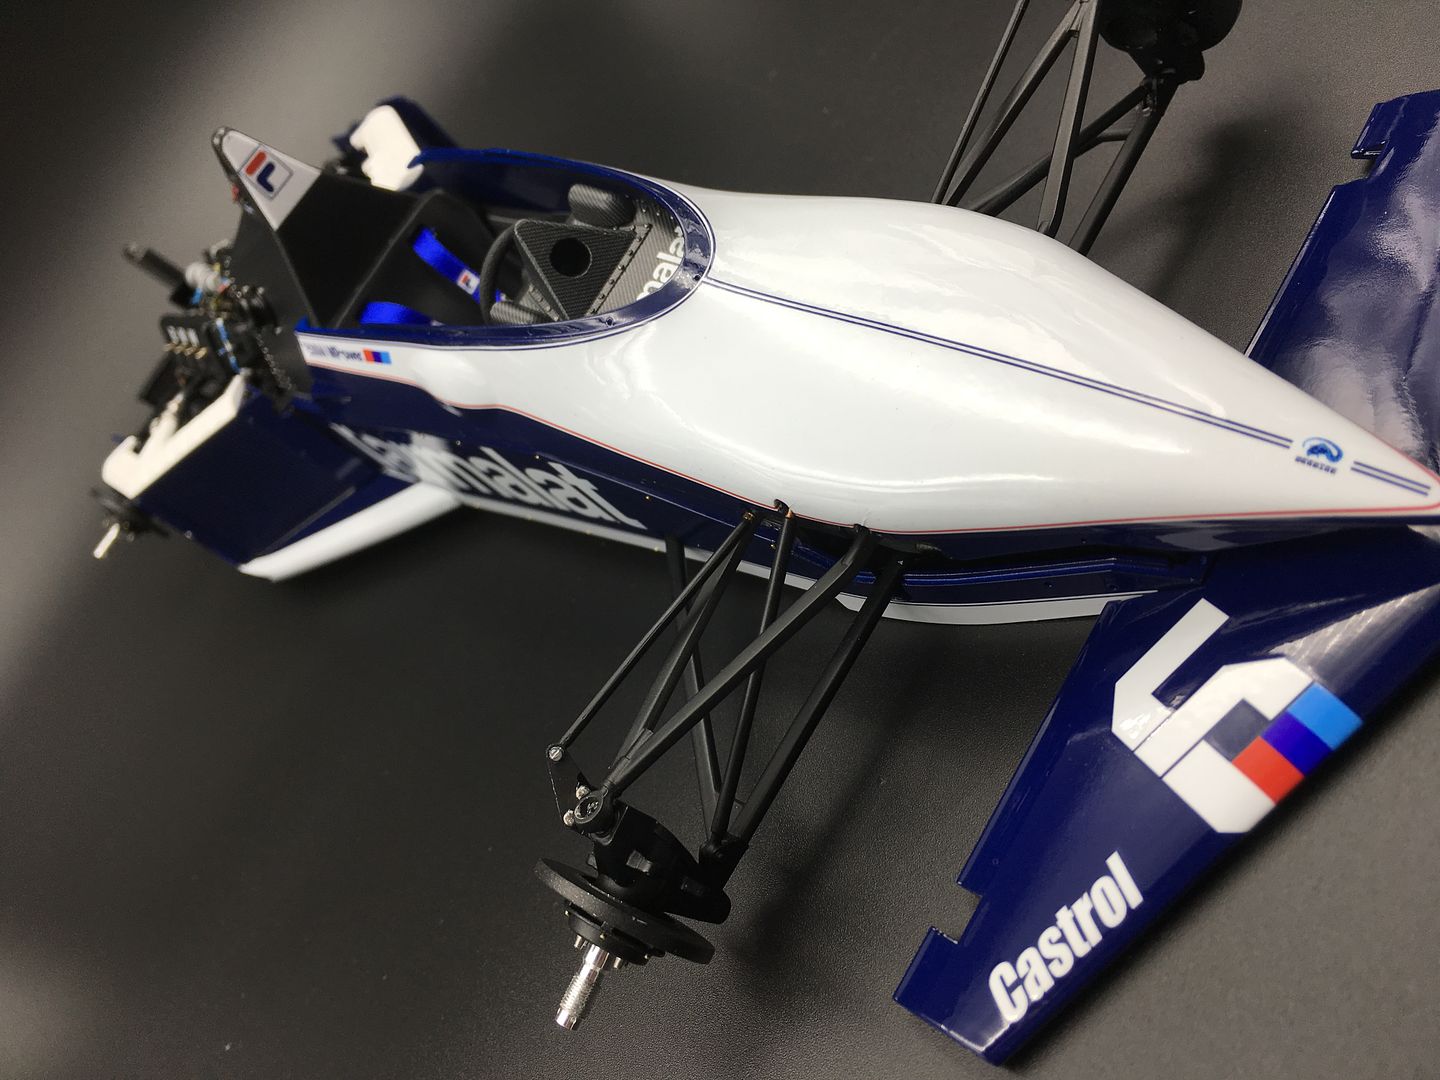
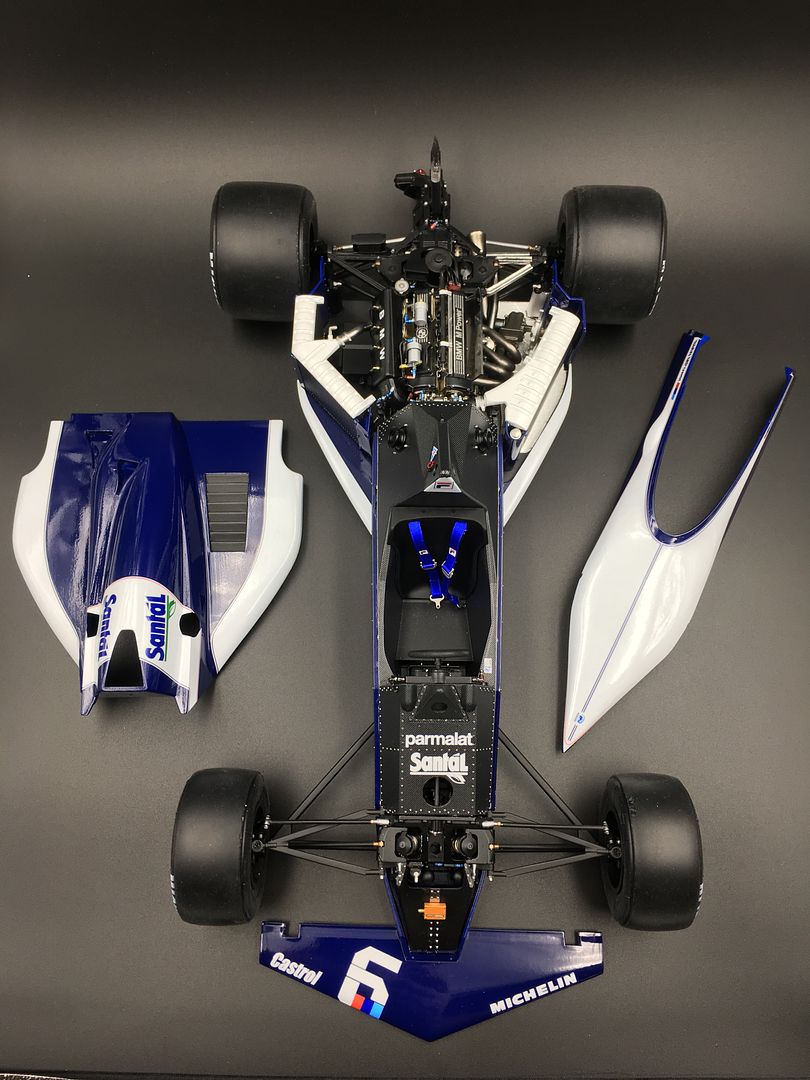
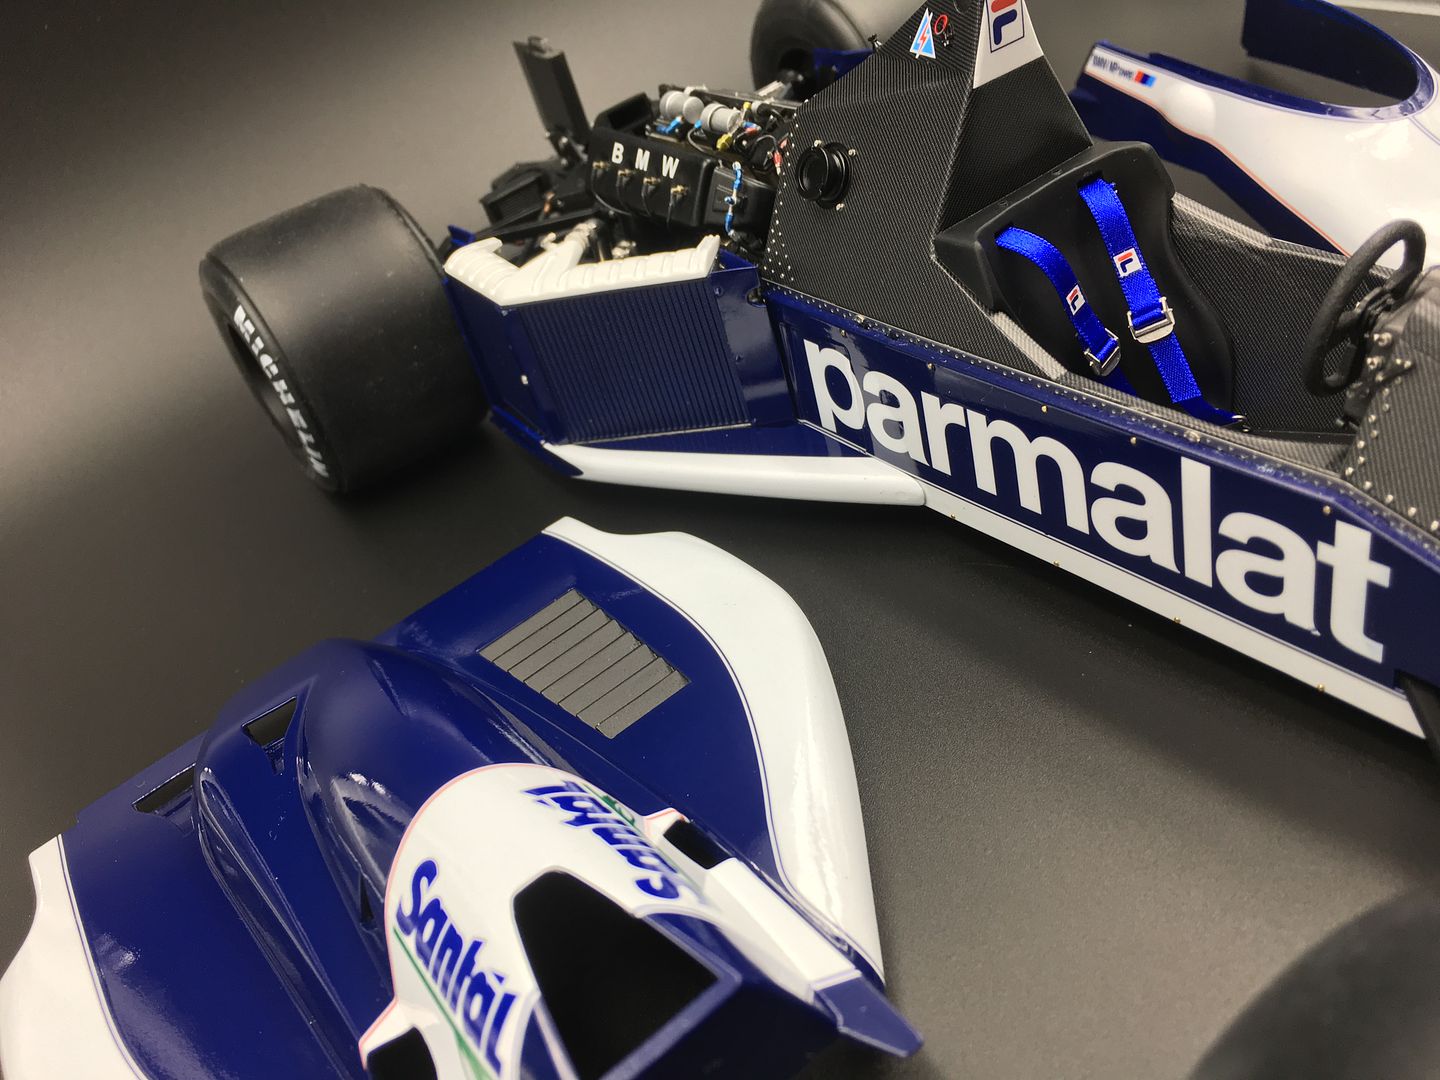
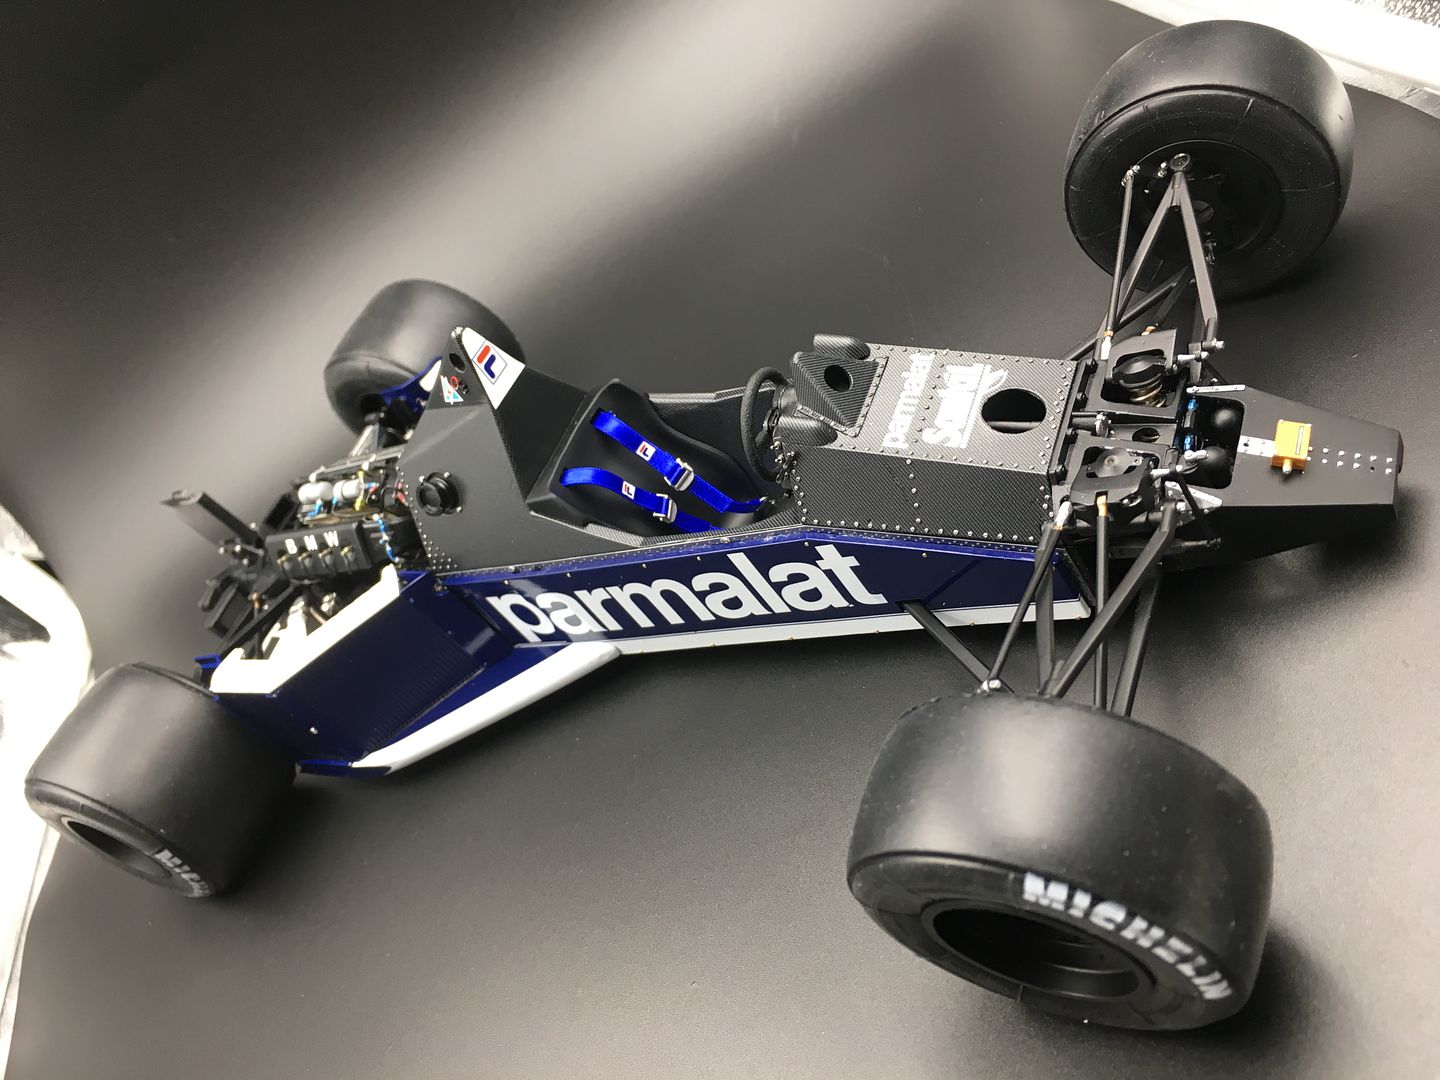
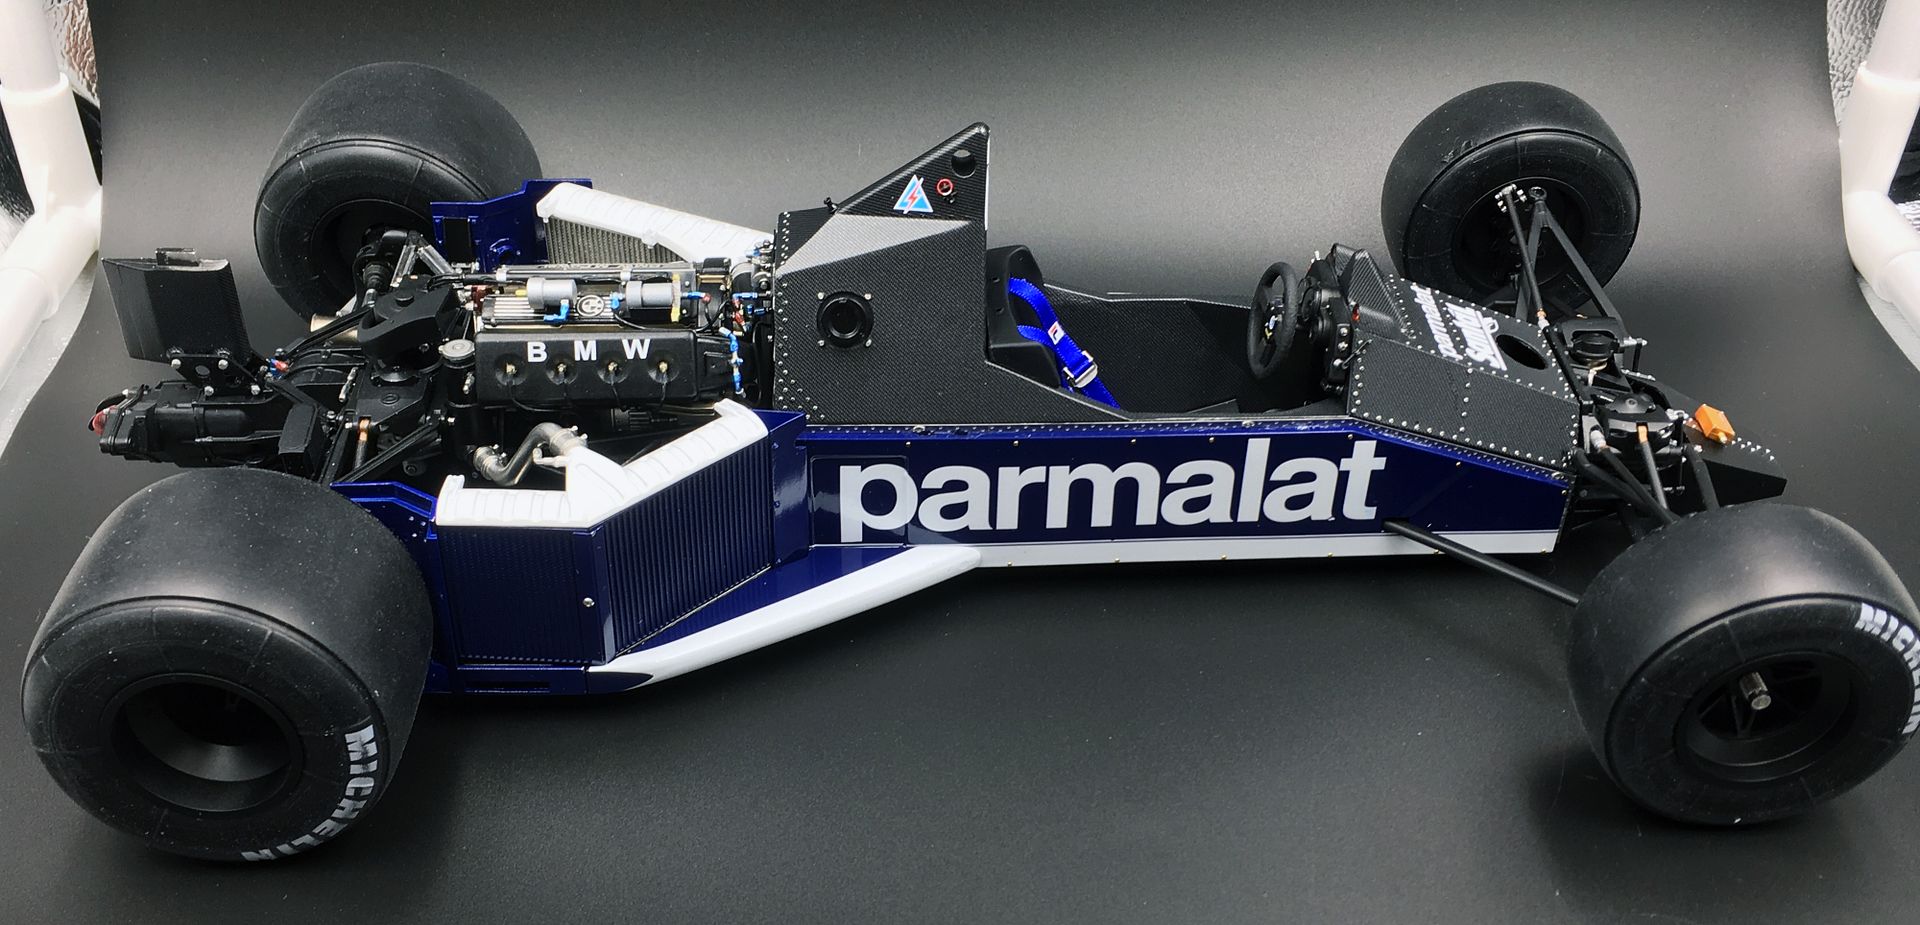
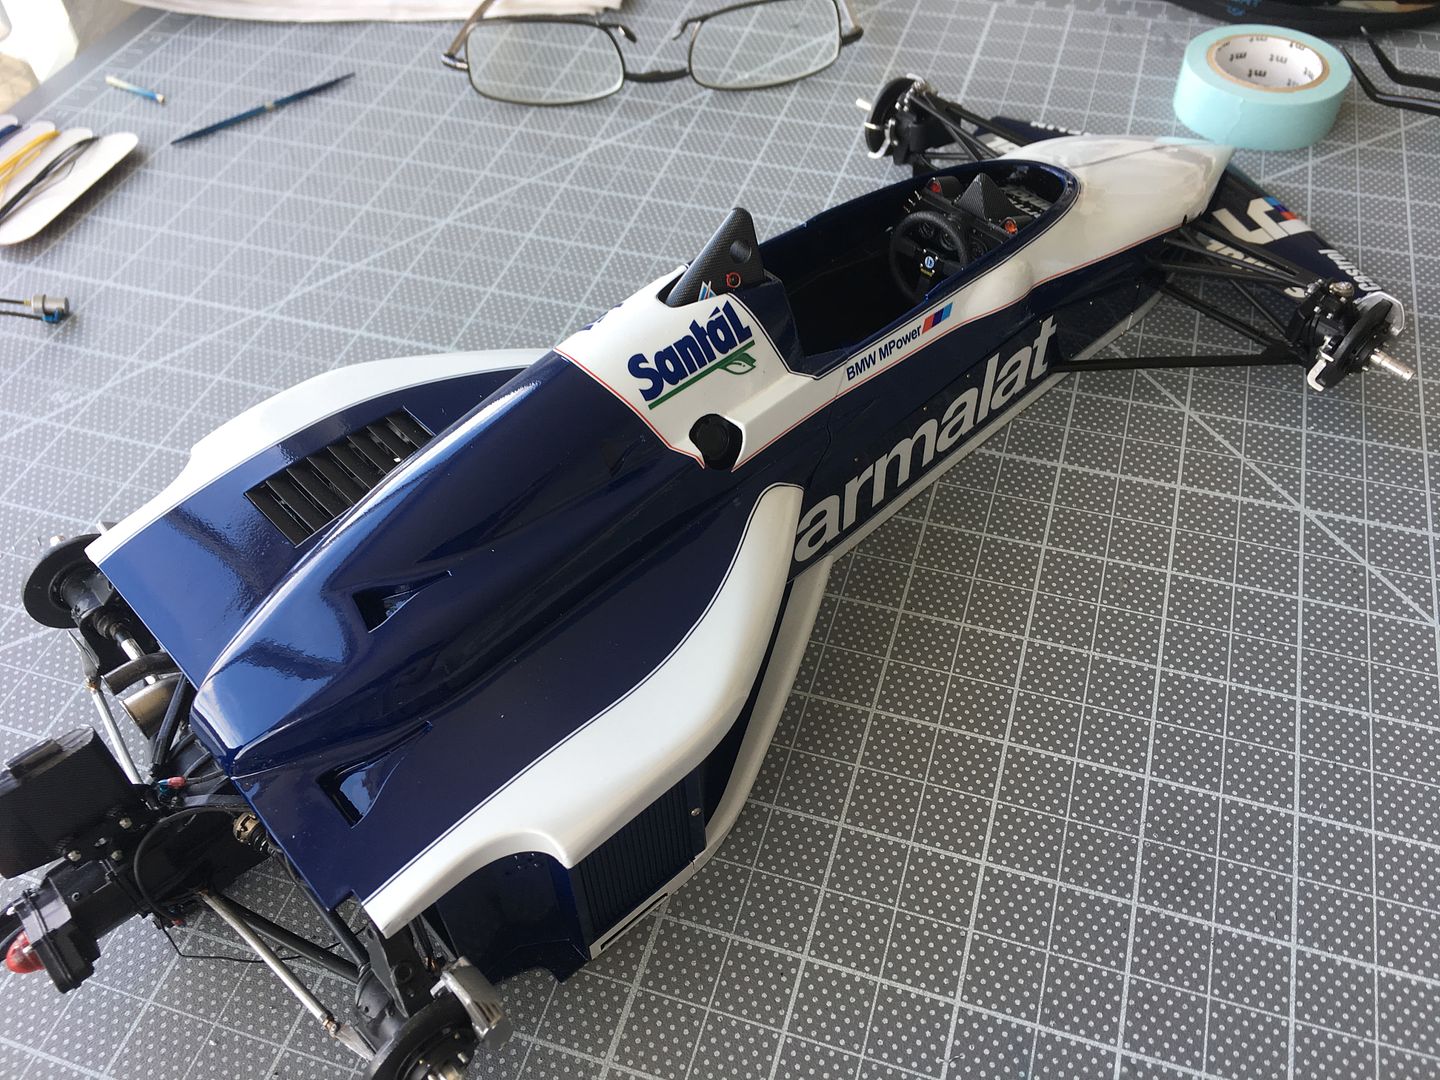
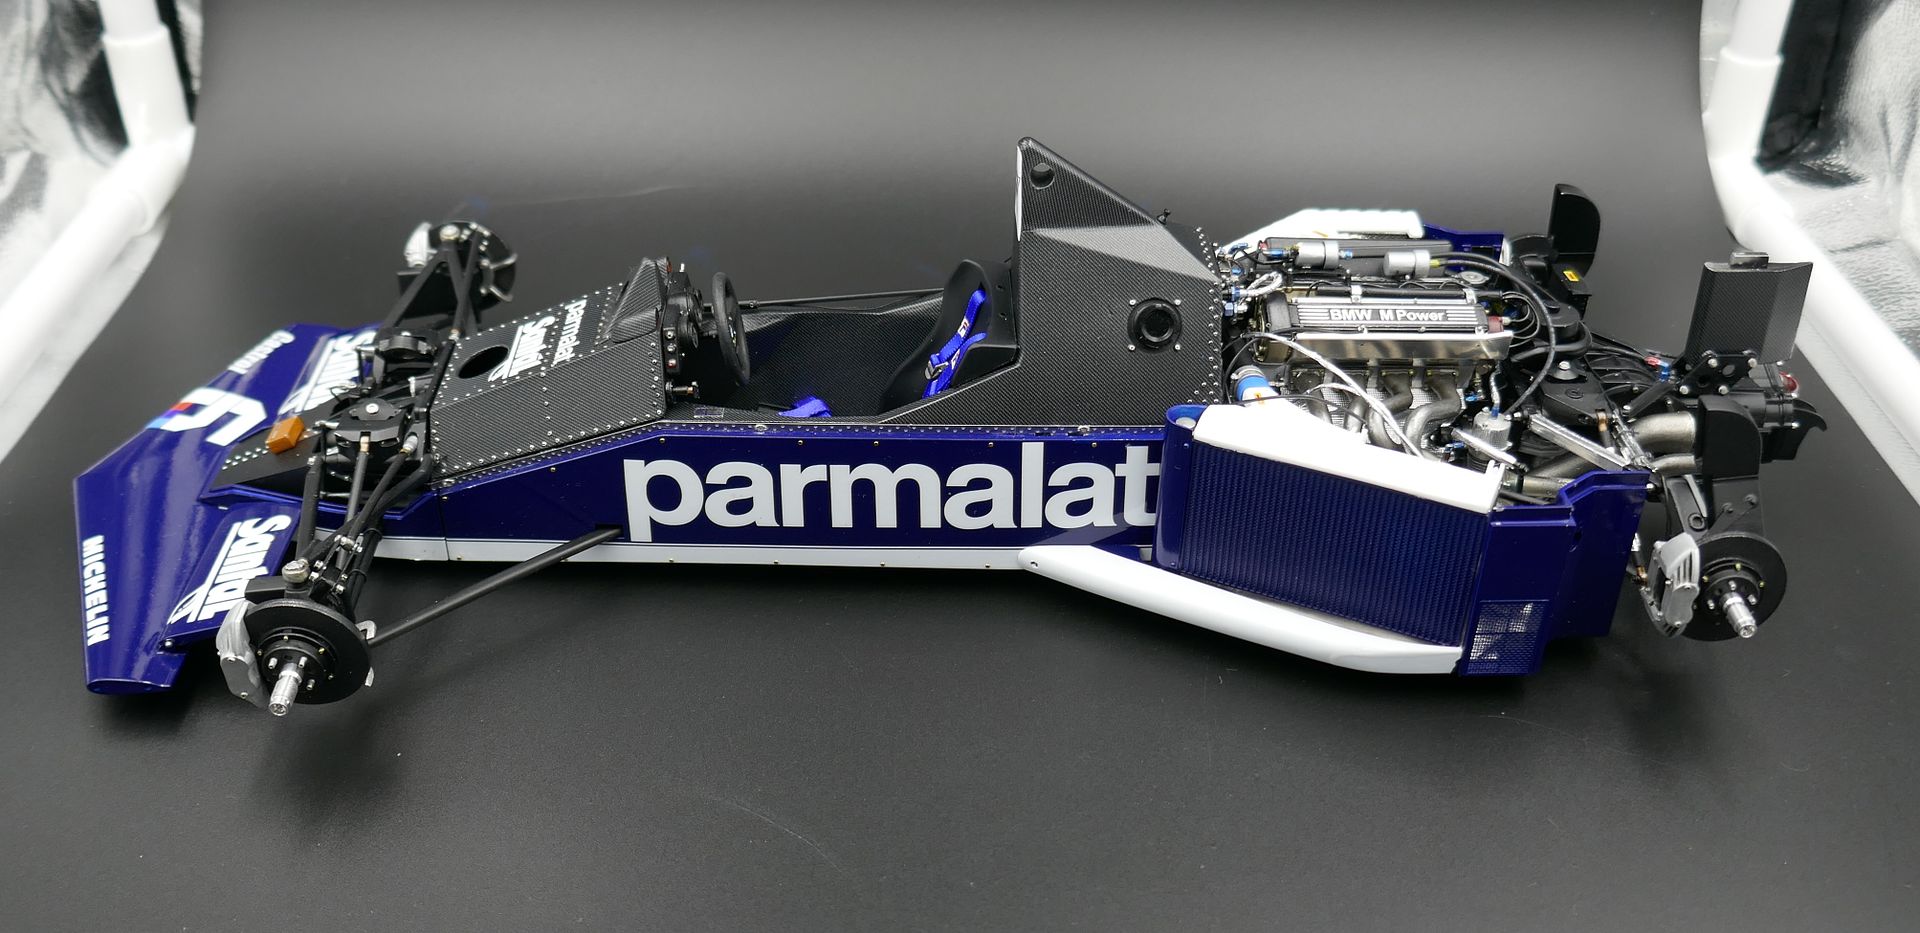
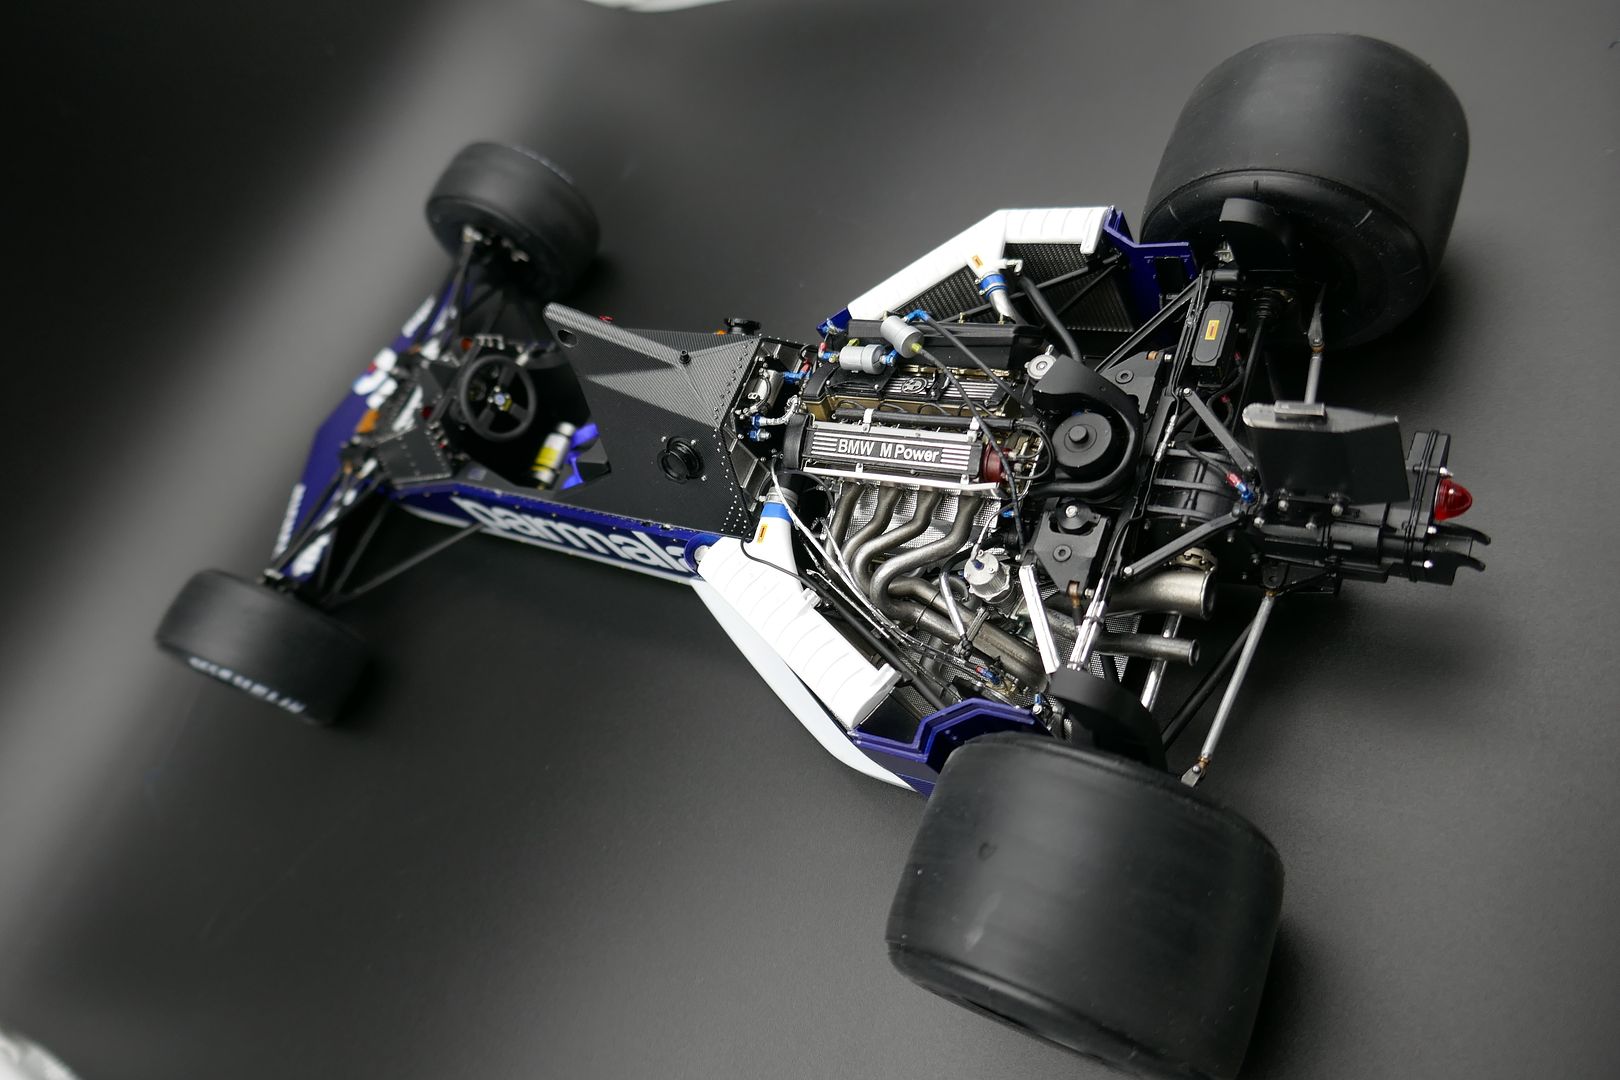
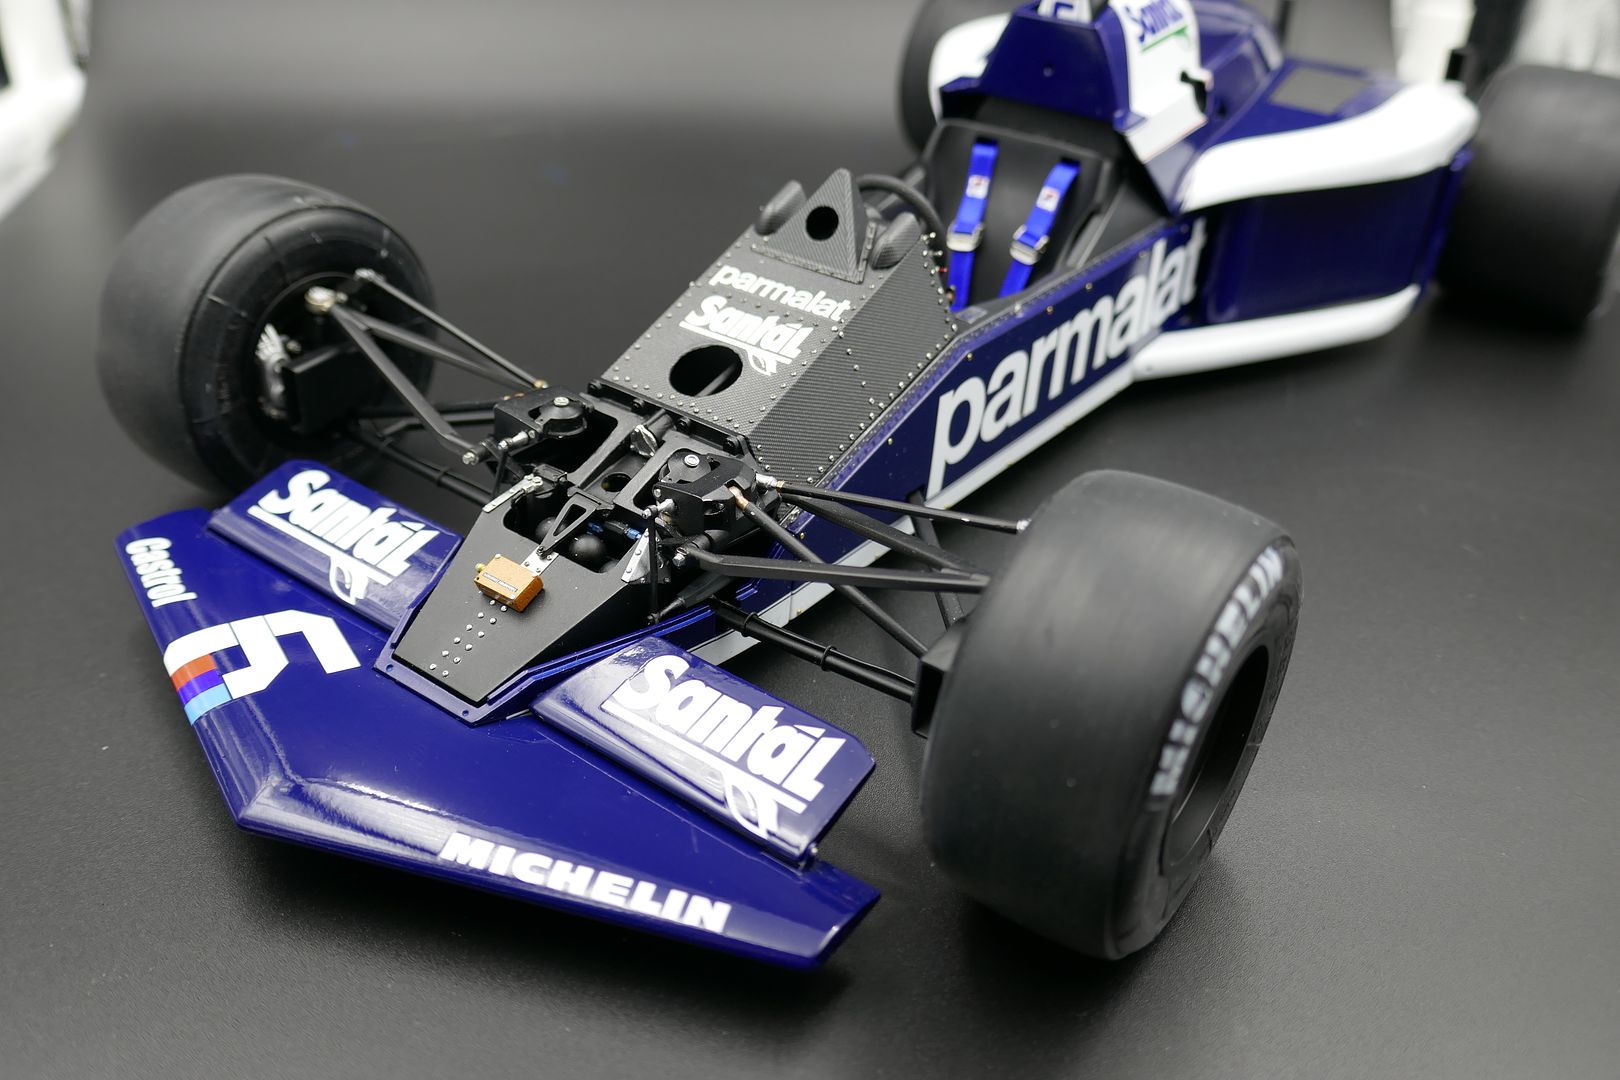
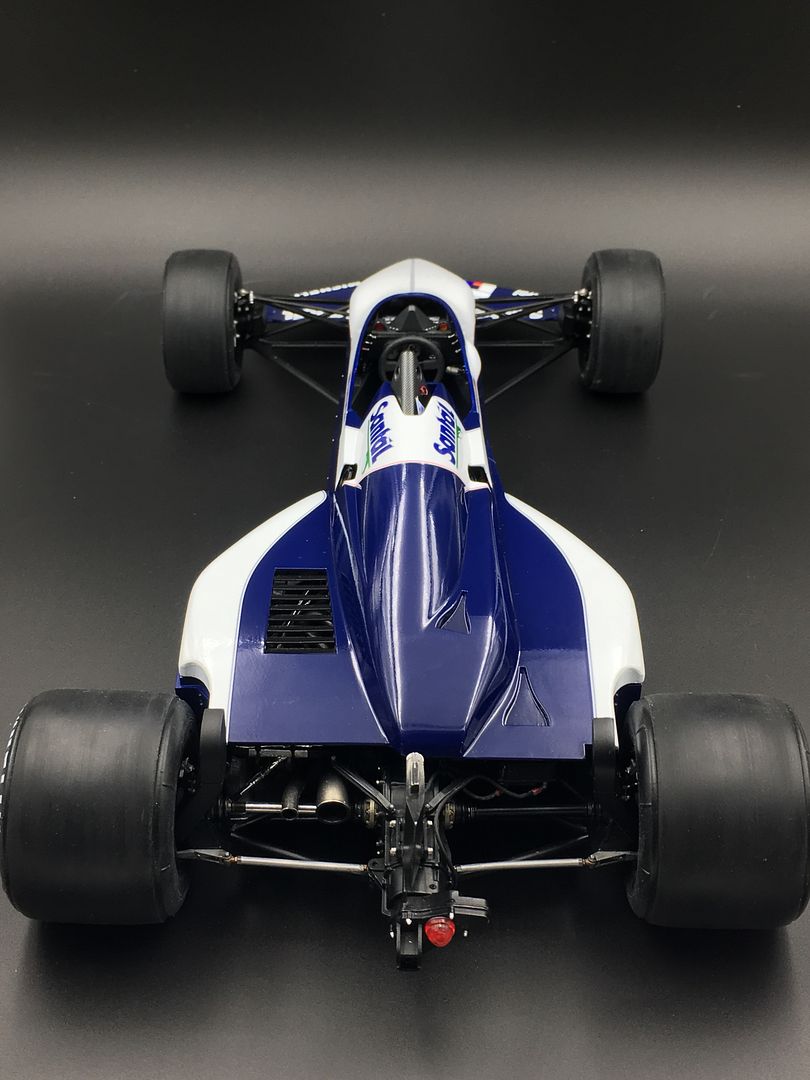
...of course I could not resist adding the bodywork to see how it was looking - the rear section fits ok, but the front will need some work over the front suspension. Although to be honest, I am not likely to want to hide all that chassis work, so may display 'sans bodywork'.
back to more fittings...
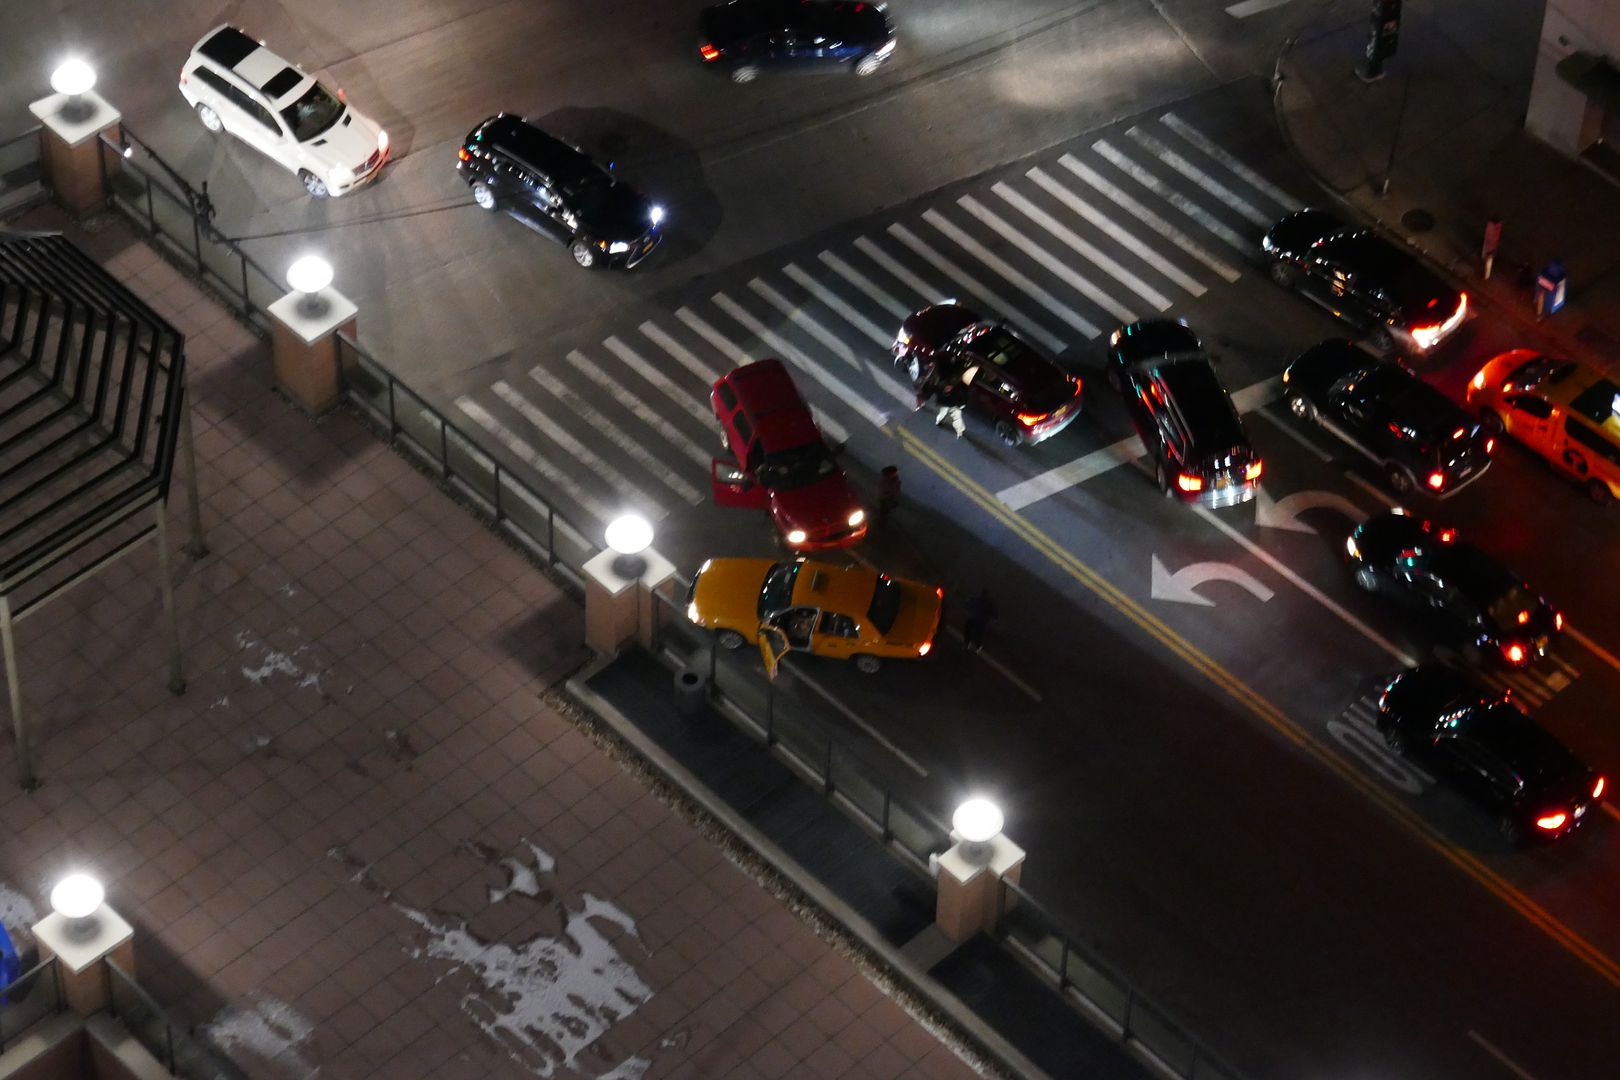
Then, after the distraction of an accident down on the street below...
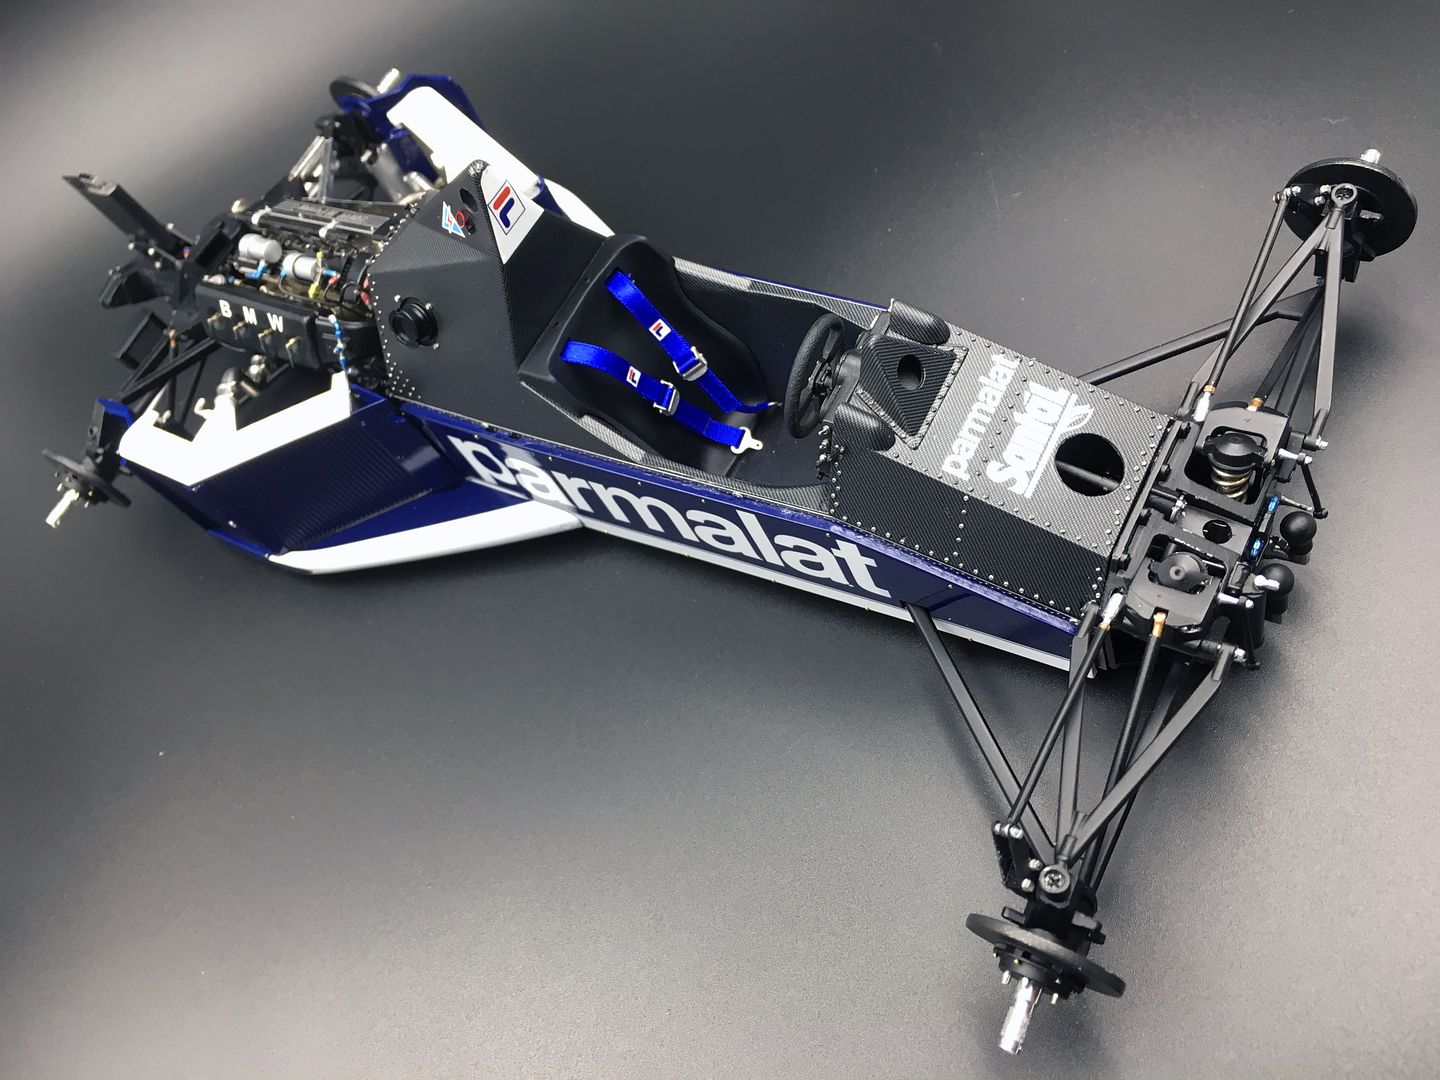
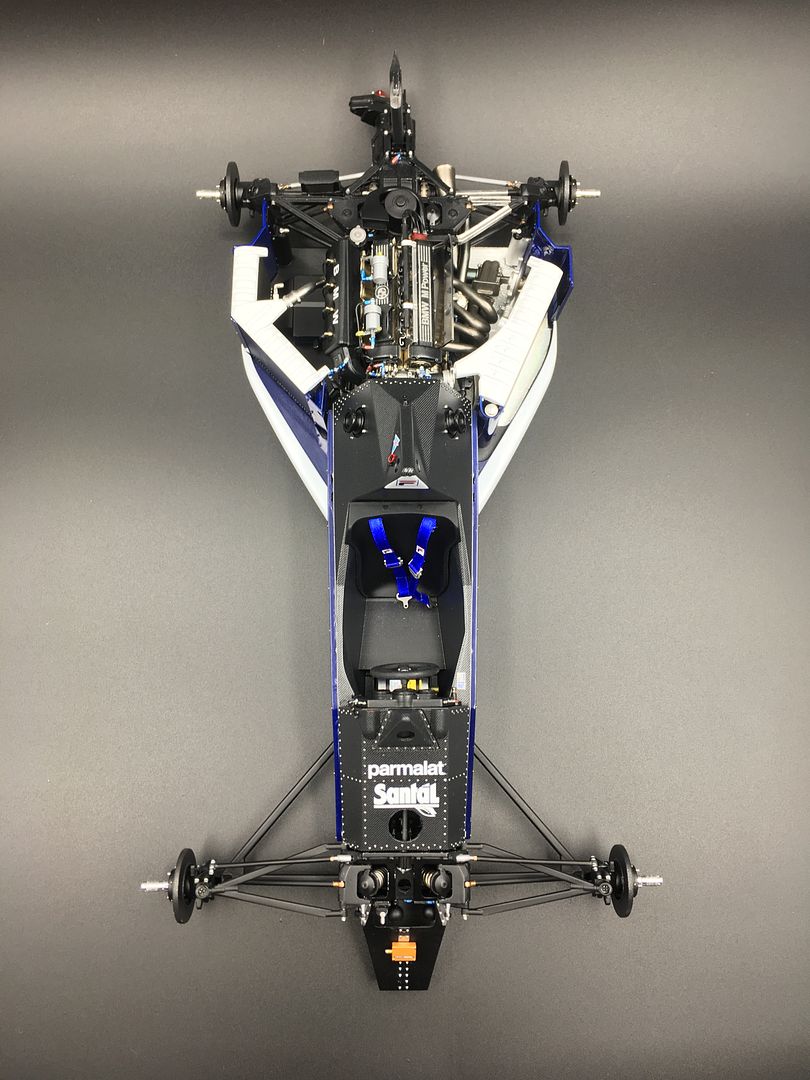
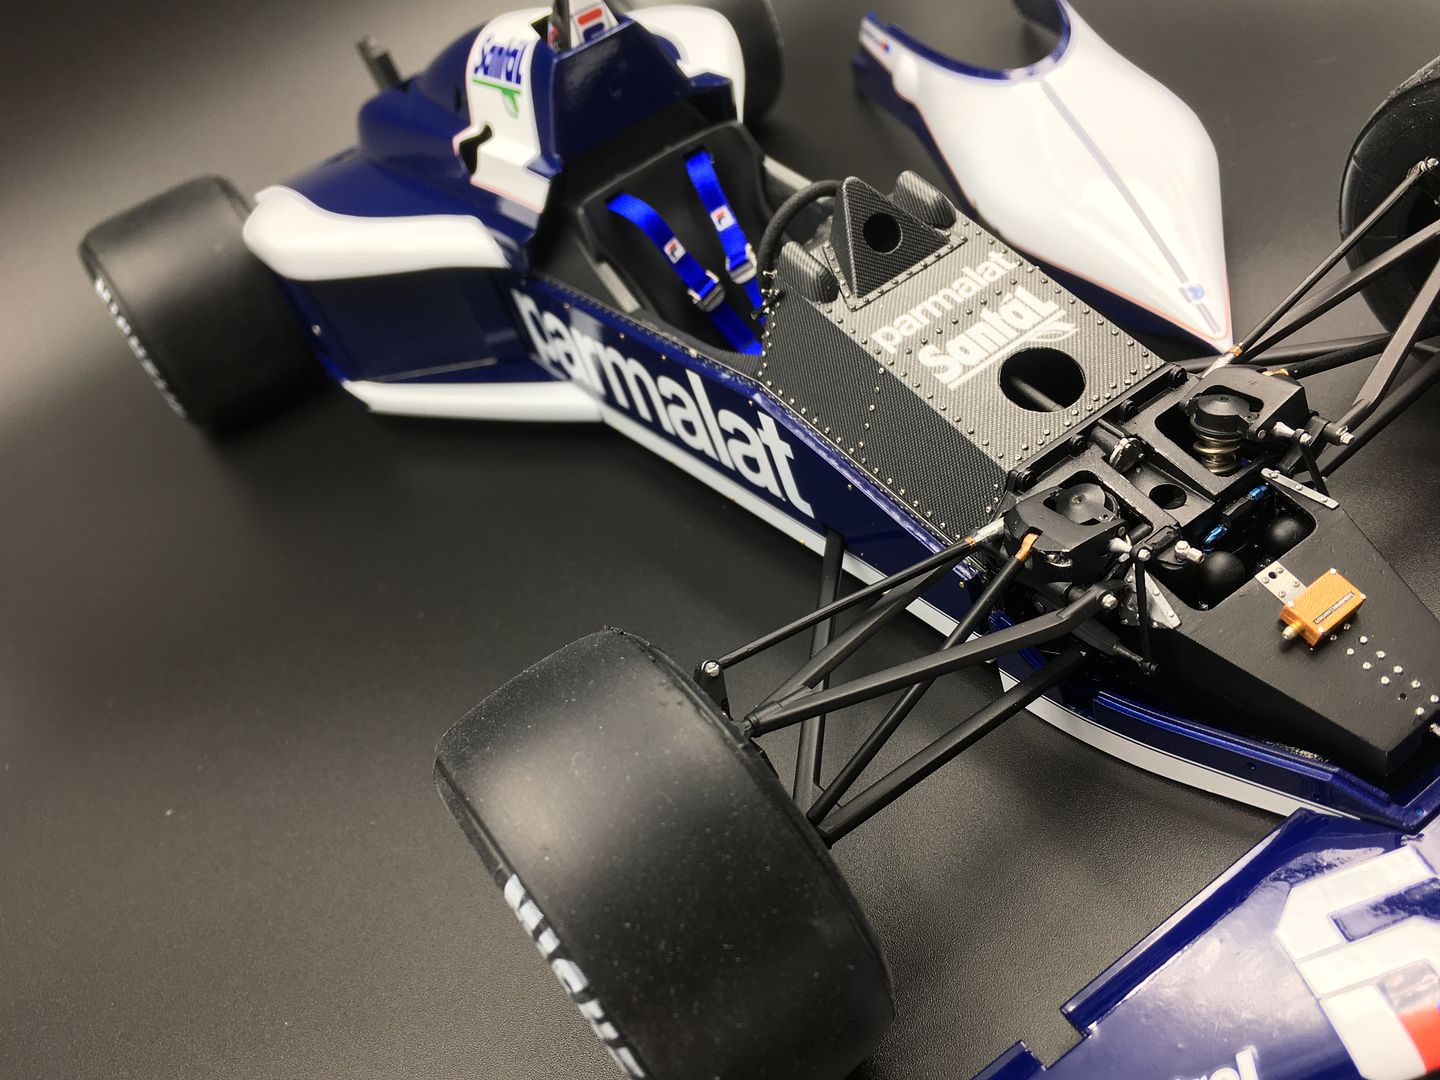
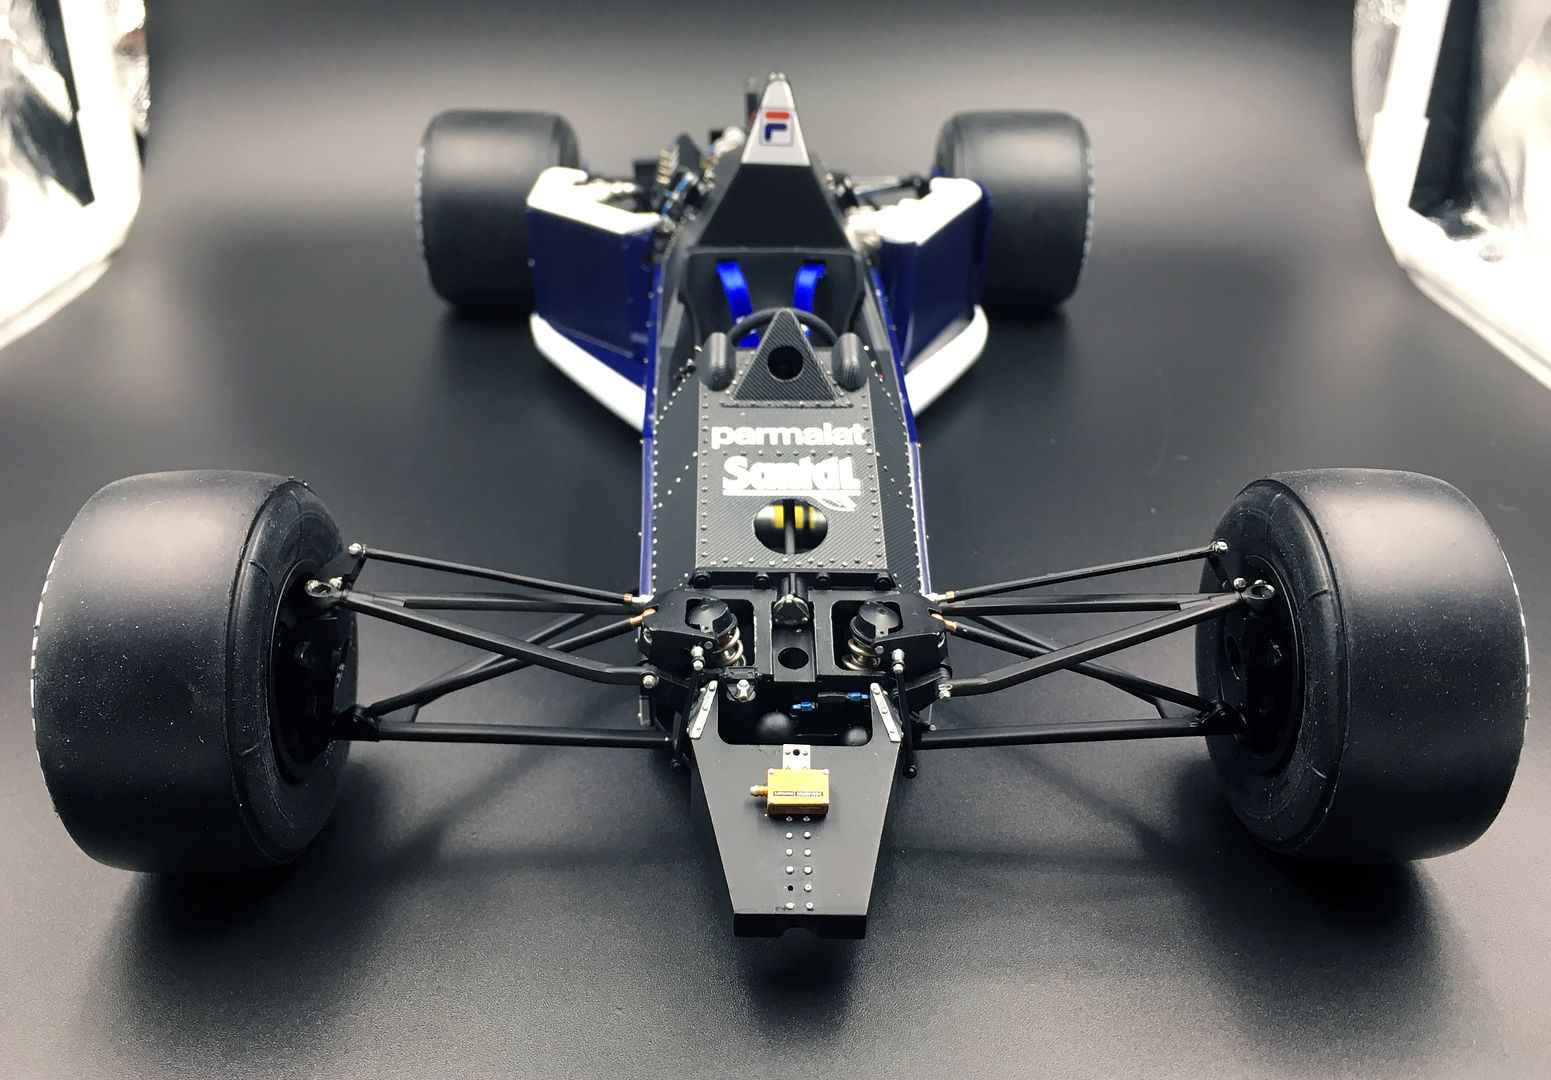
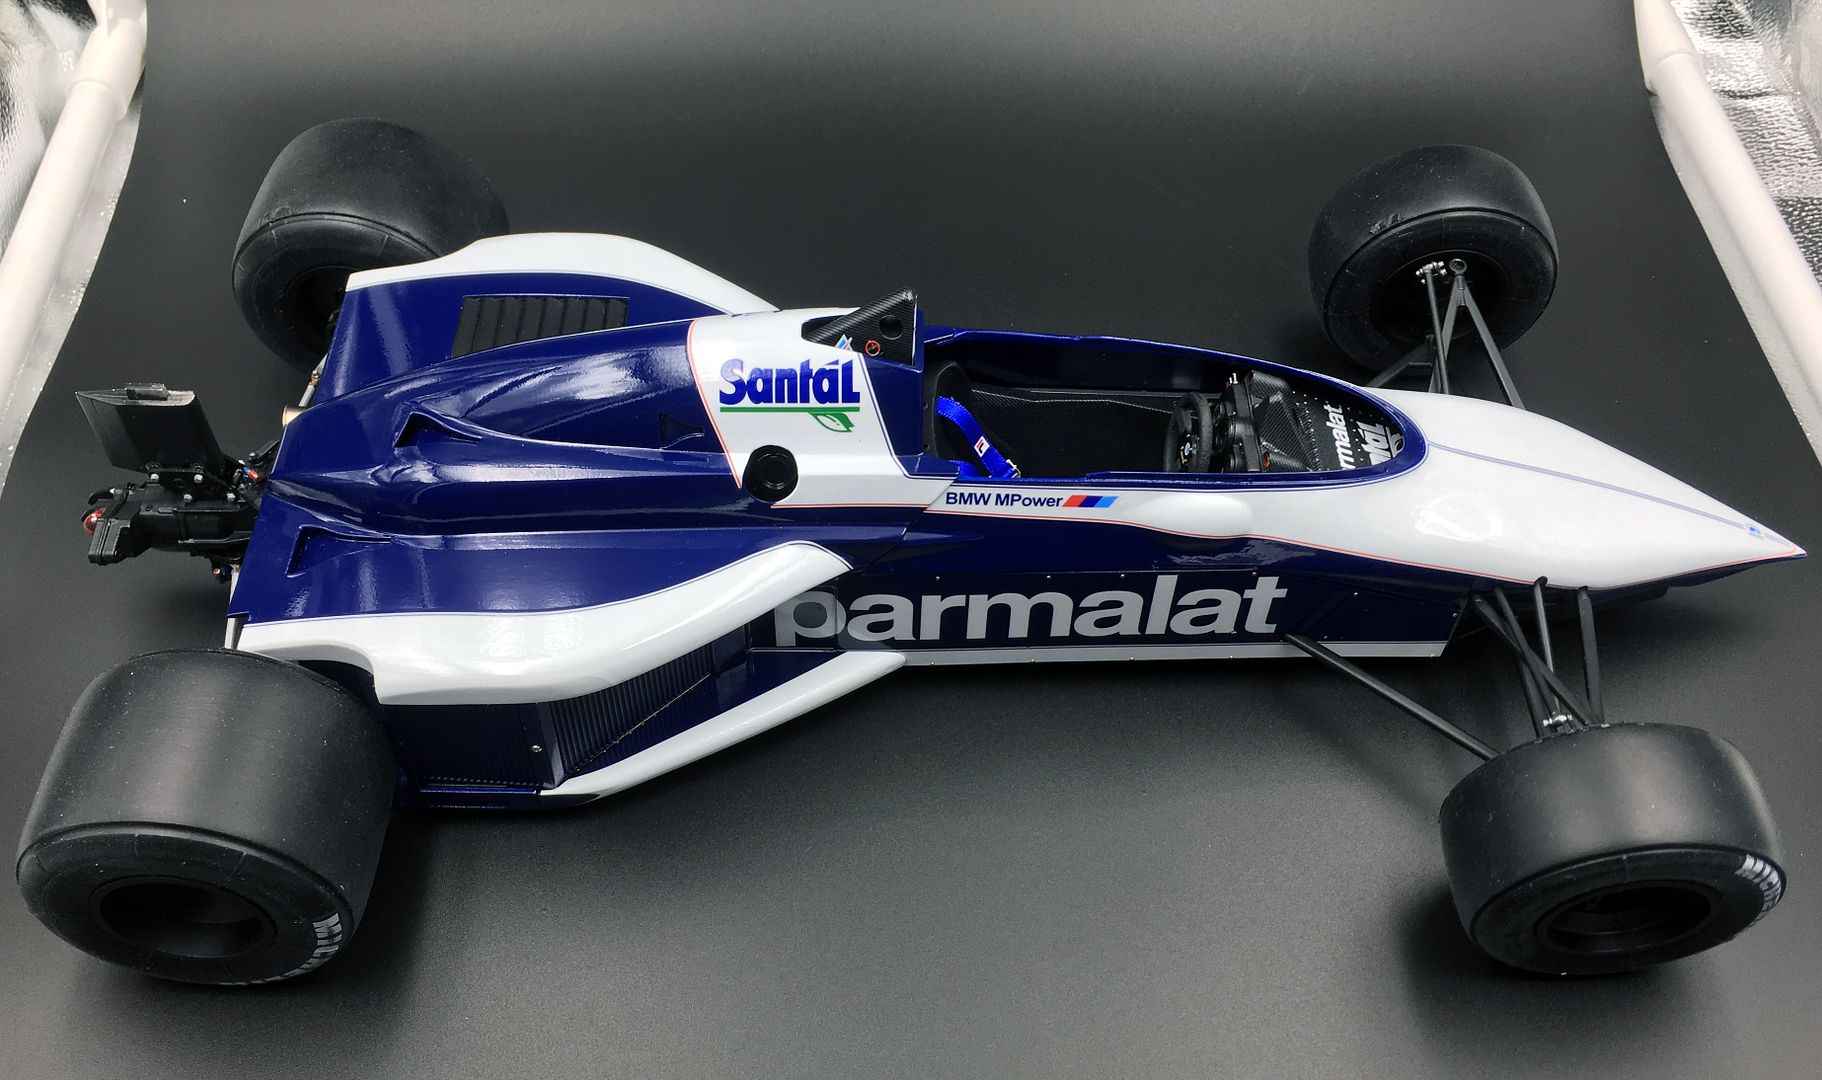
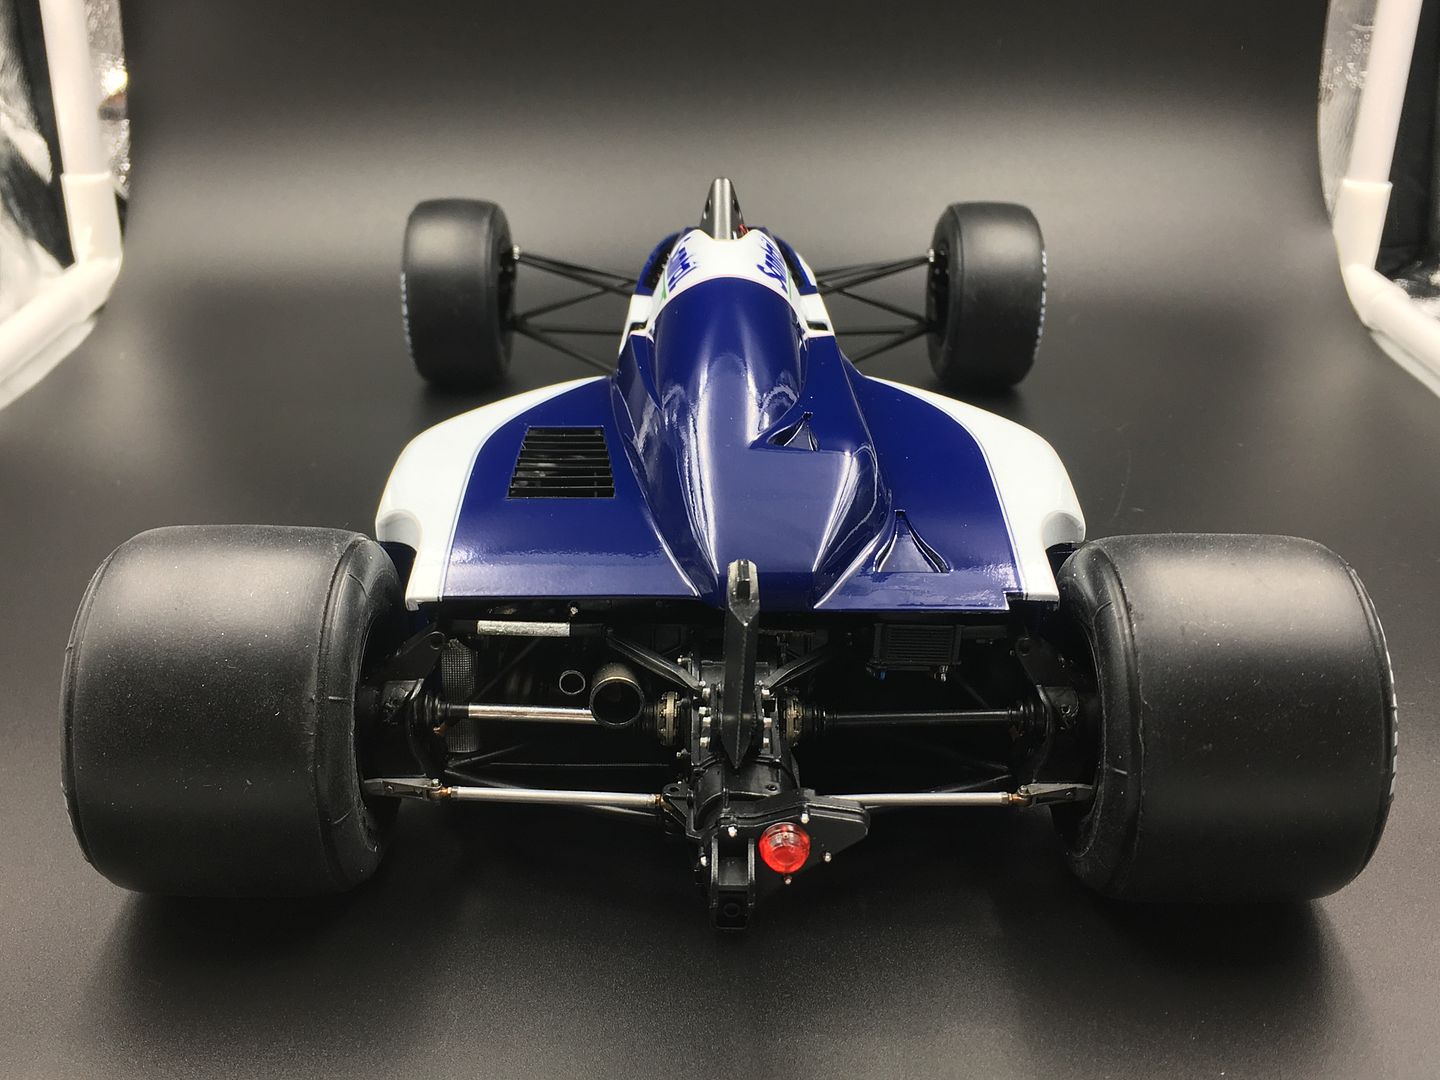
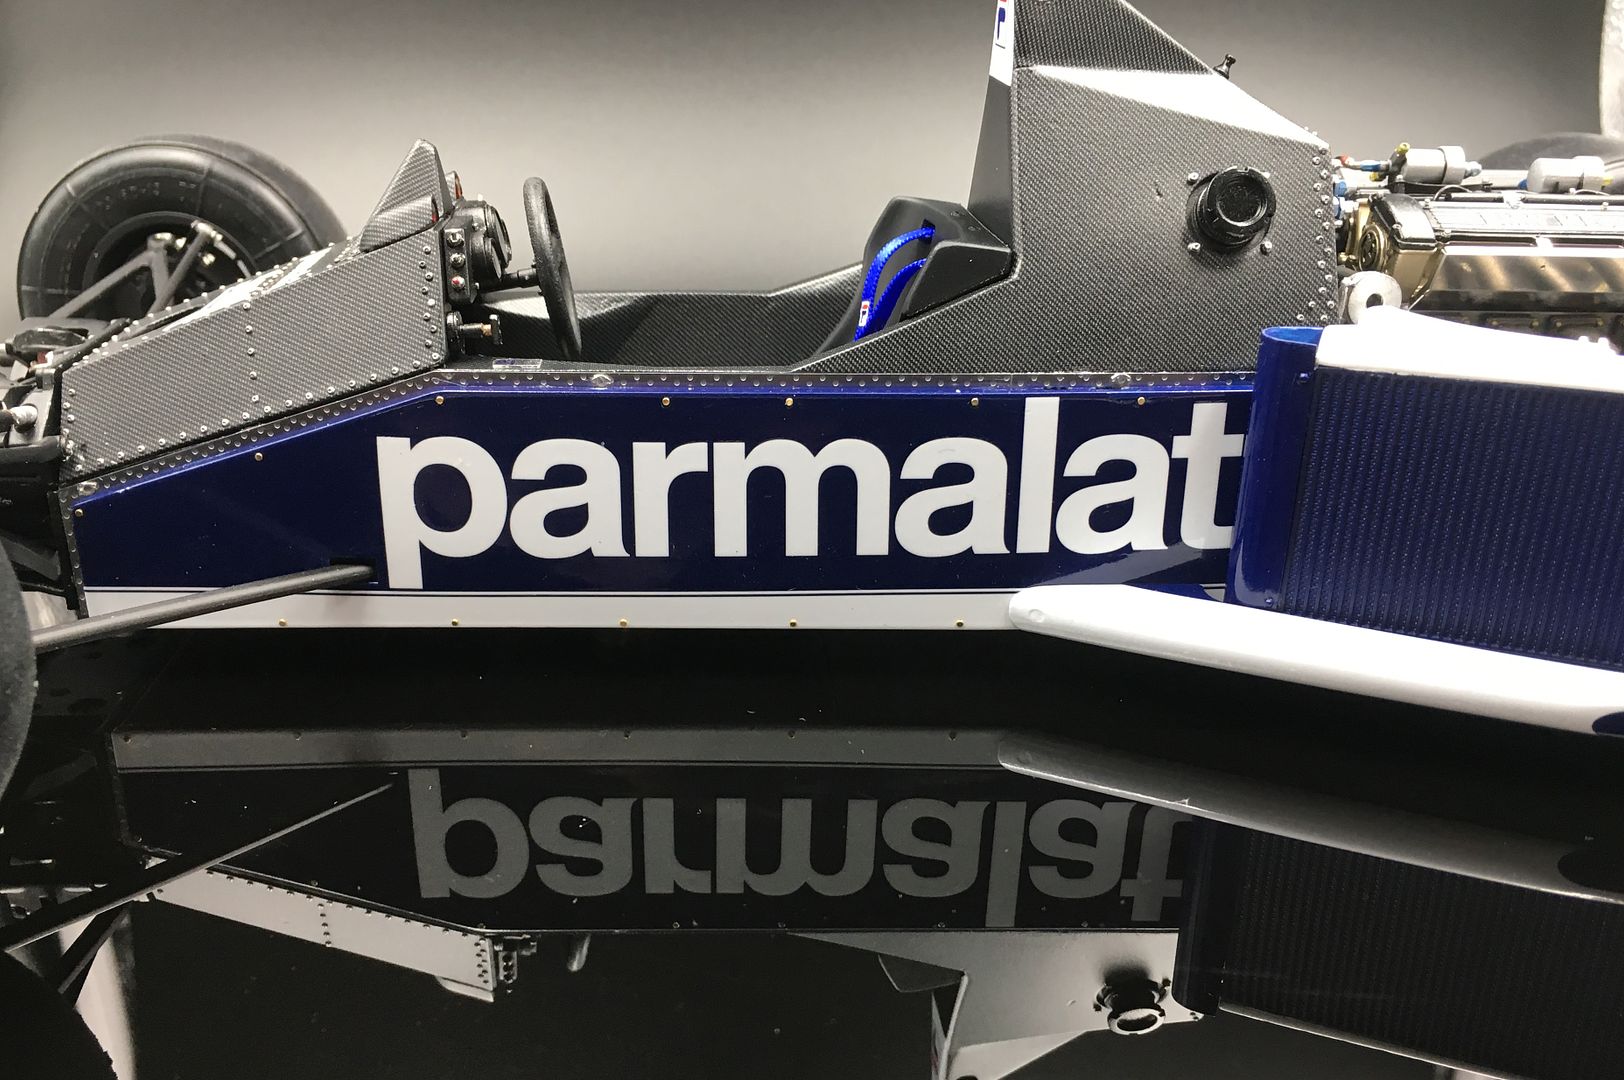
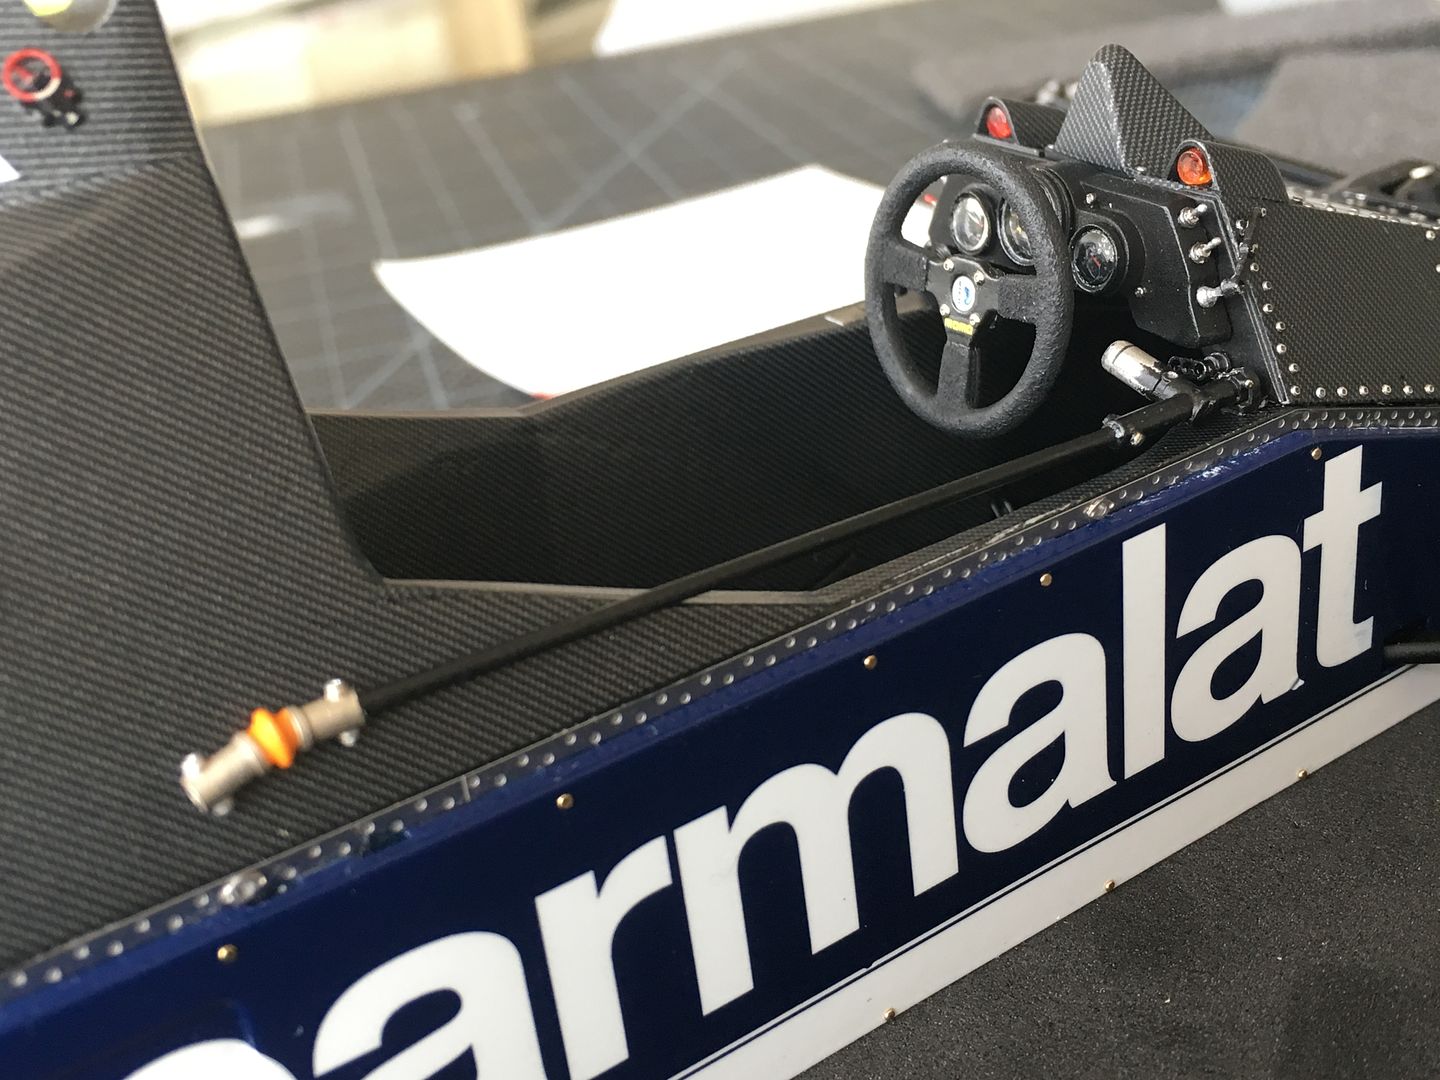
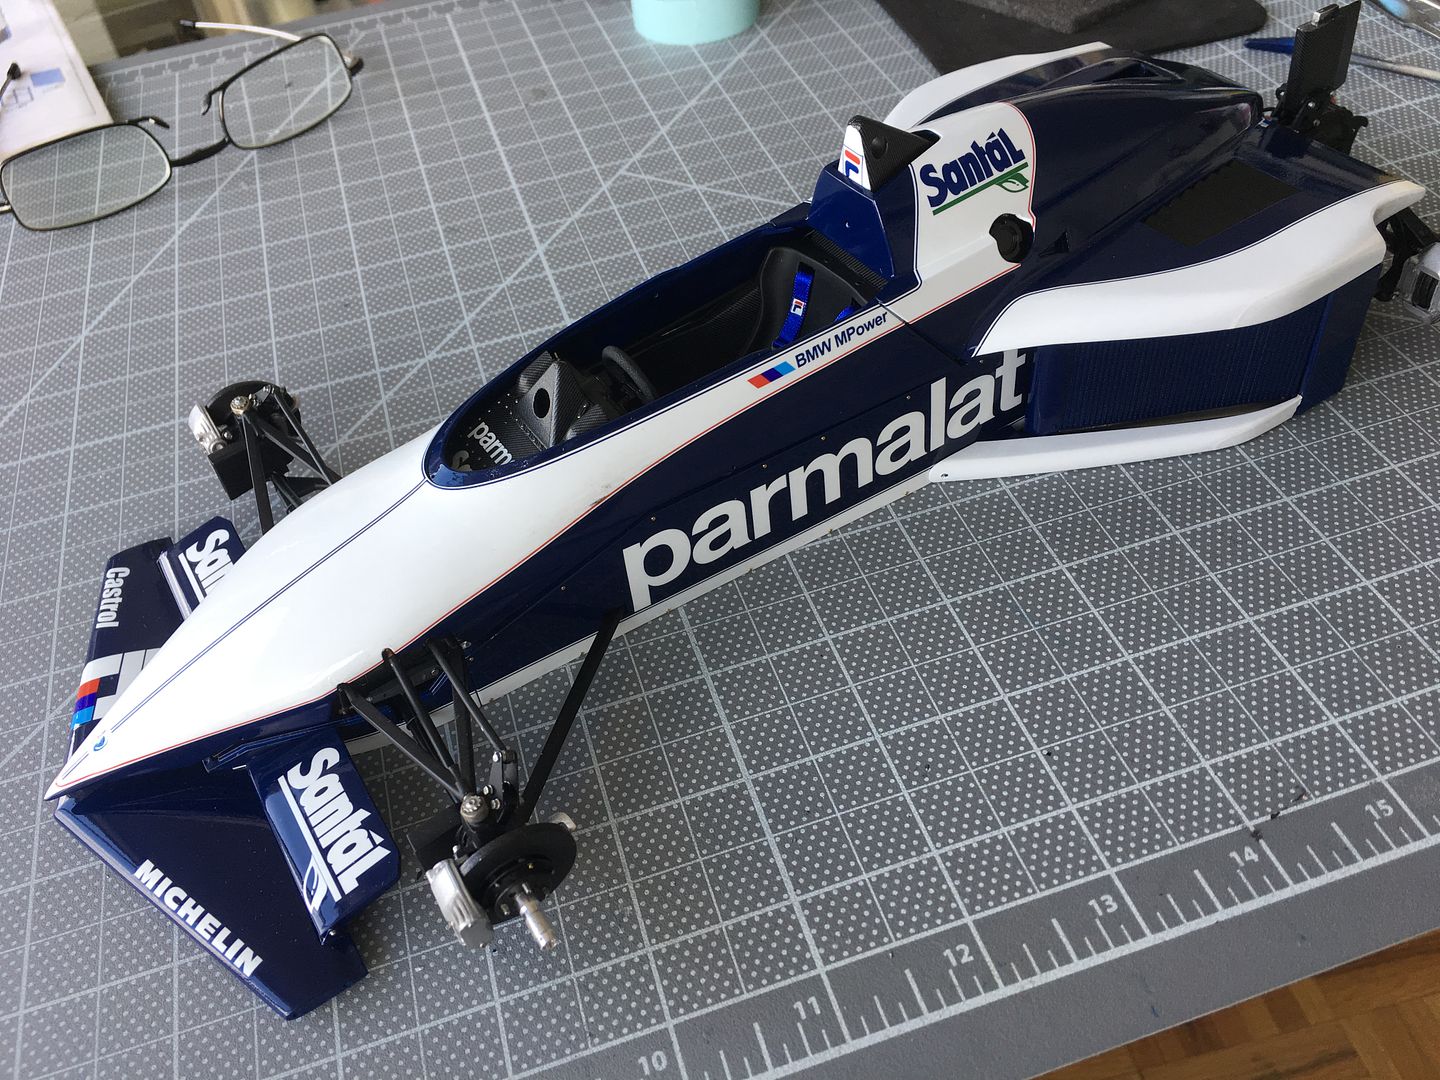
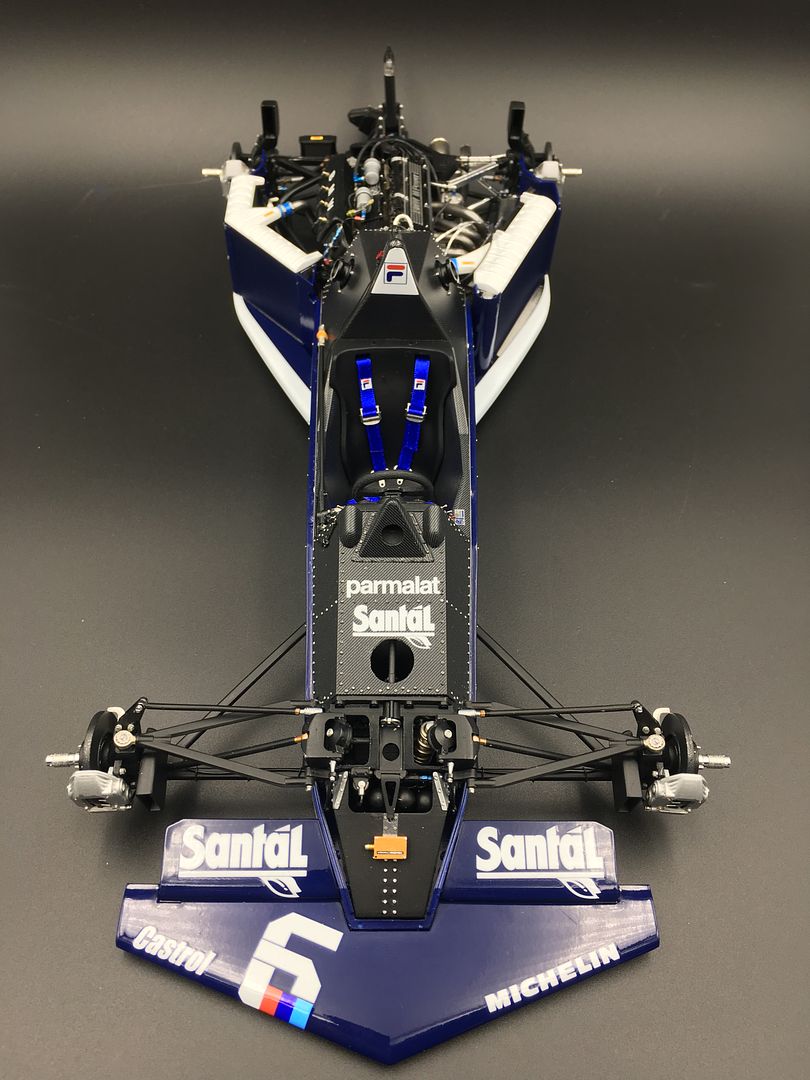
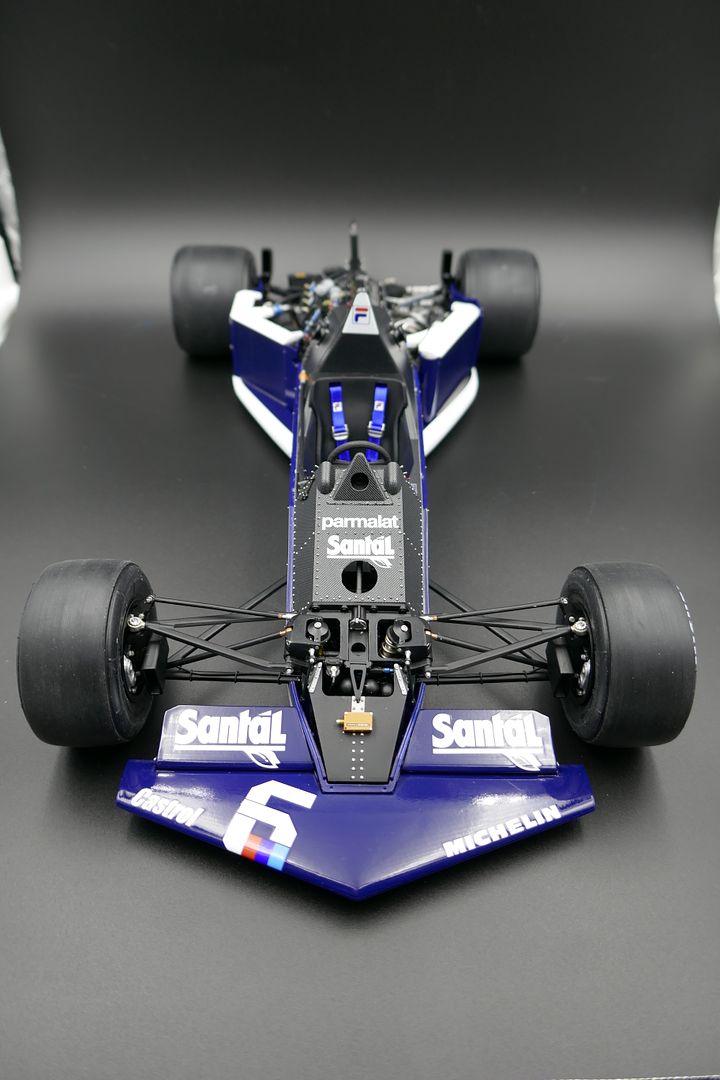
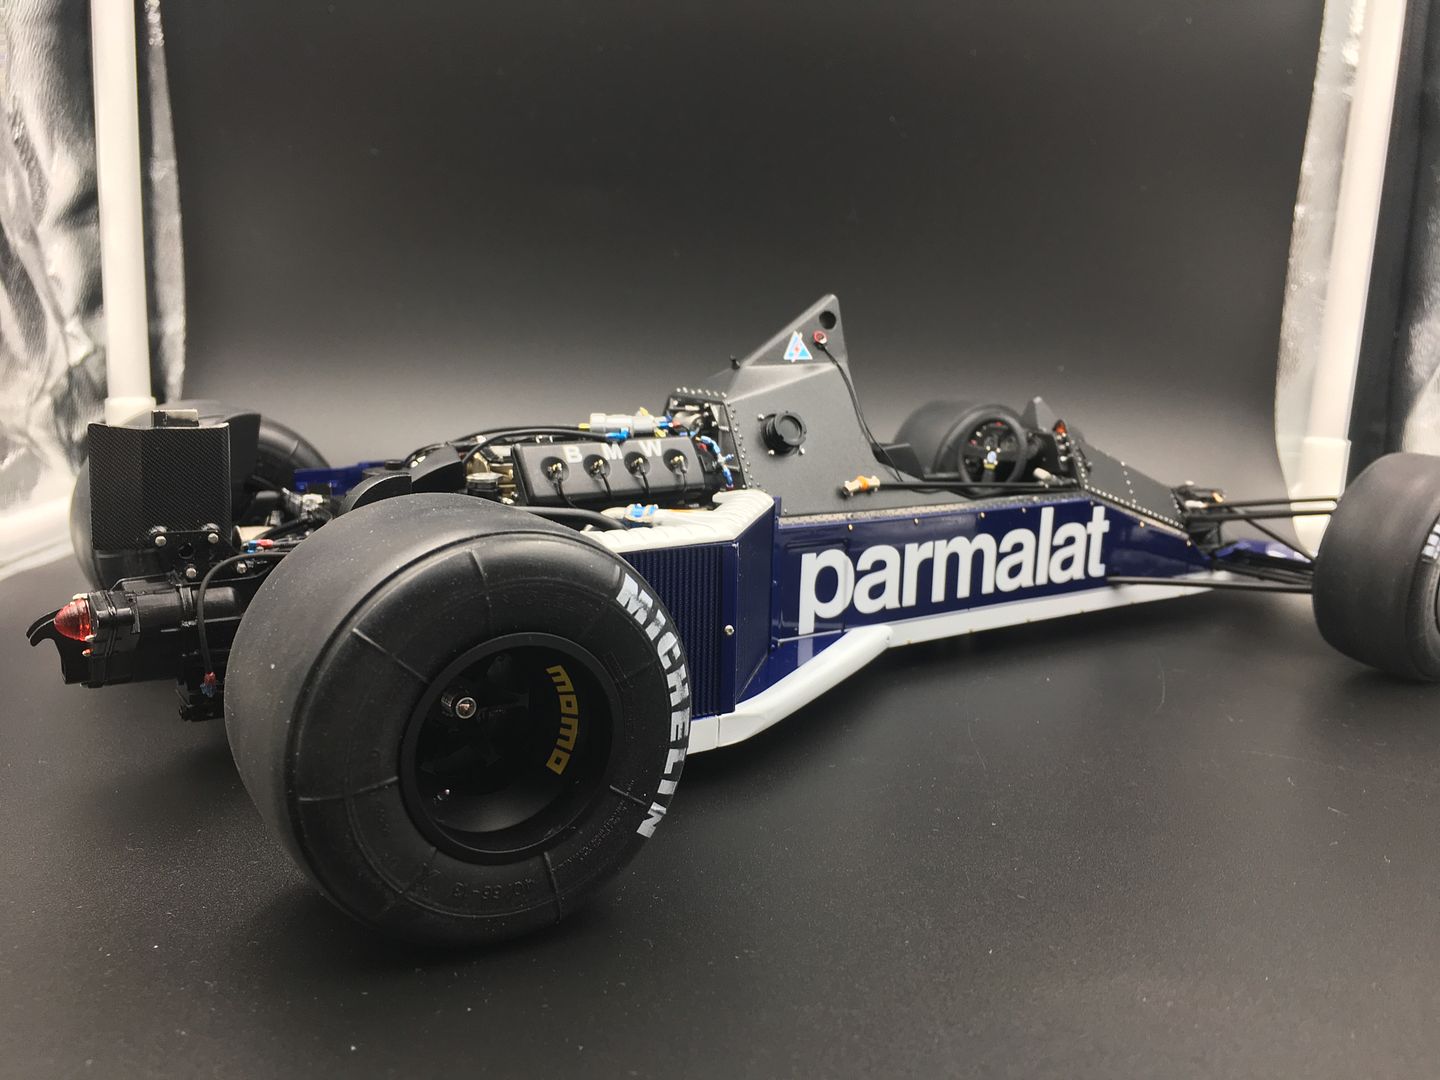
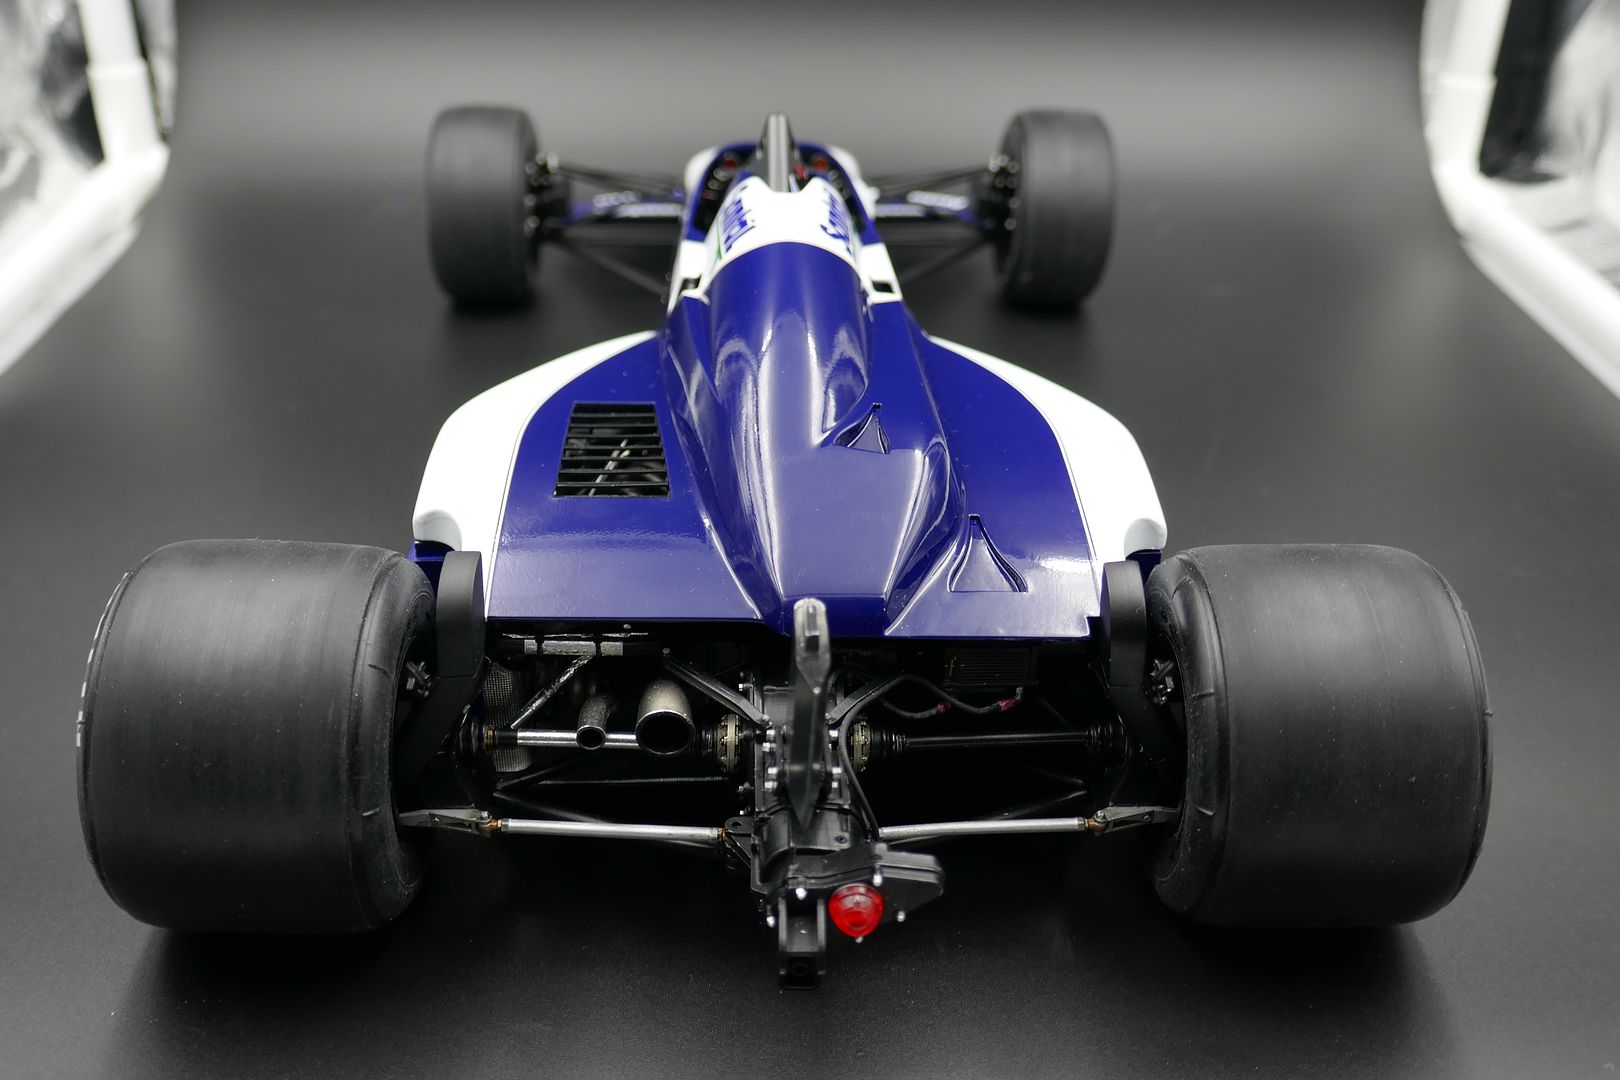
...I set up the photo cube for some sexy shots. Loads to still do, but it is nice doing these shots because it makes the model look so cool! (So lots of wires don't go anywhere yet!)
I added the decals to the wheels, and used some TS air valves - the kit came with some of course, but these are a little sharper...
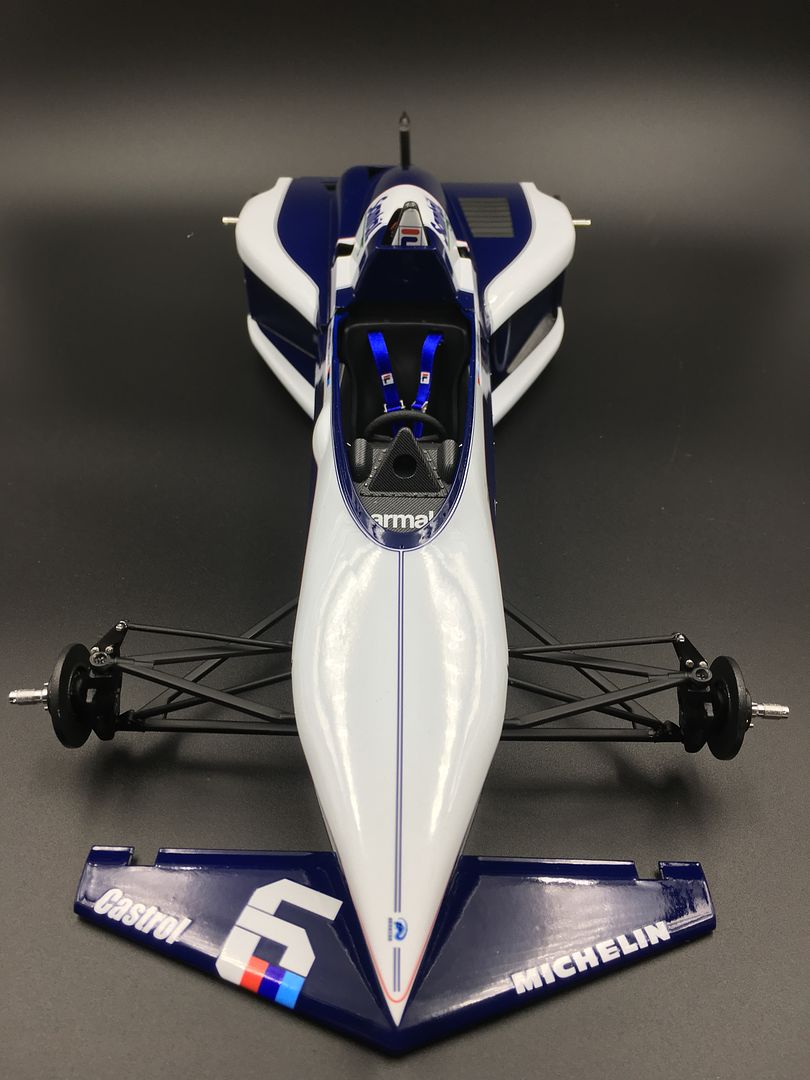
So - now a shed load of pictures! Photos not cropped or edited yet - just for ref. I need a bigger cube, as this model is now really long!
Jobs to do - find the front wing end plates!! Rear wing, lots more detail wiring, wing mirrors and fittings....
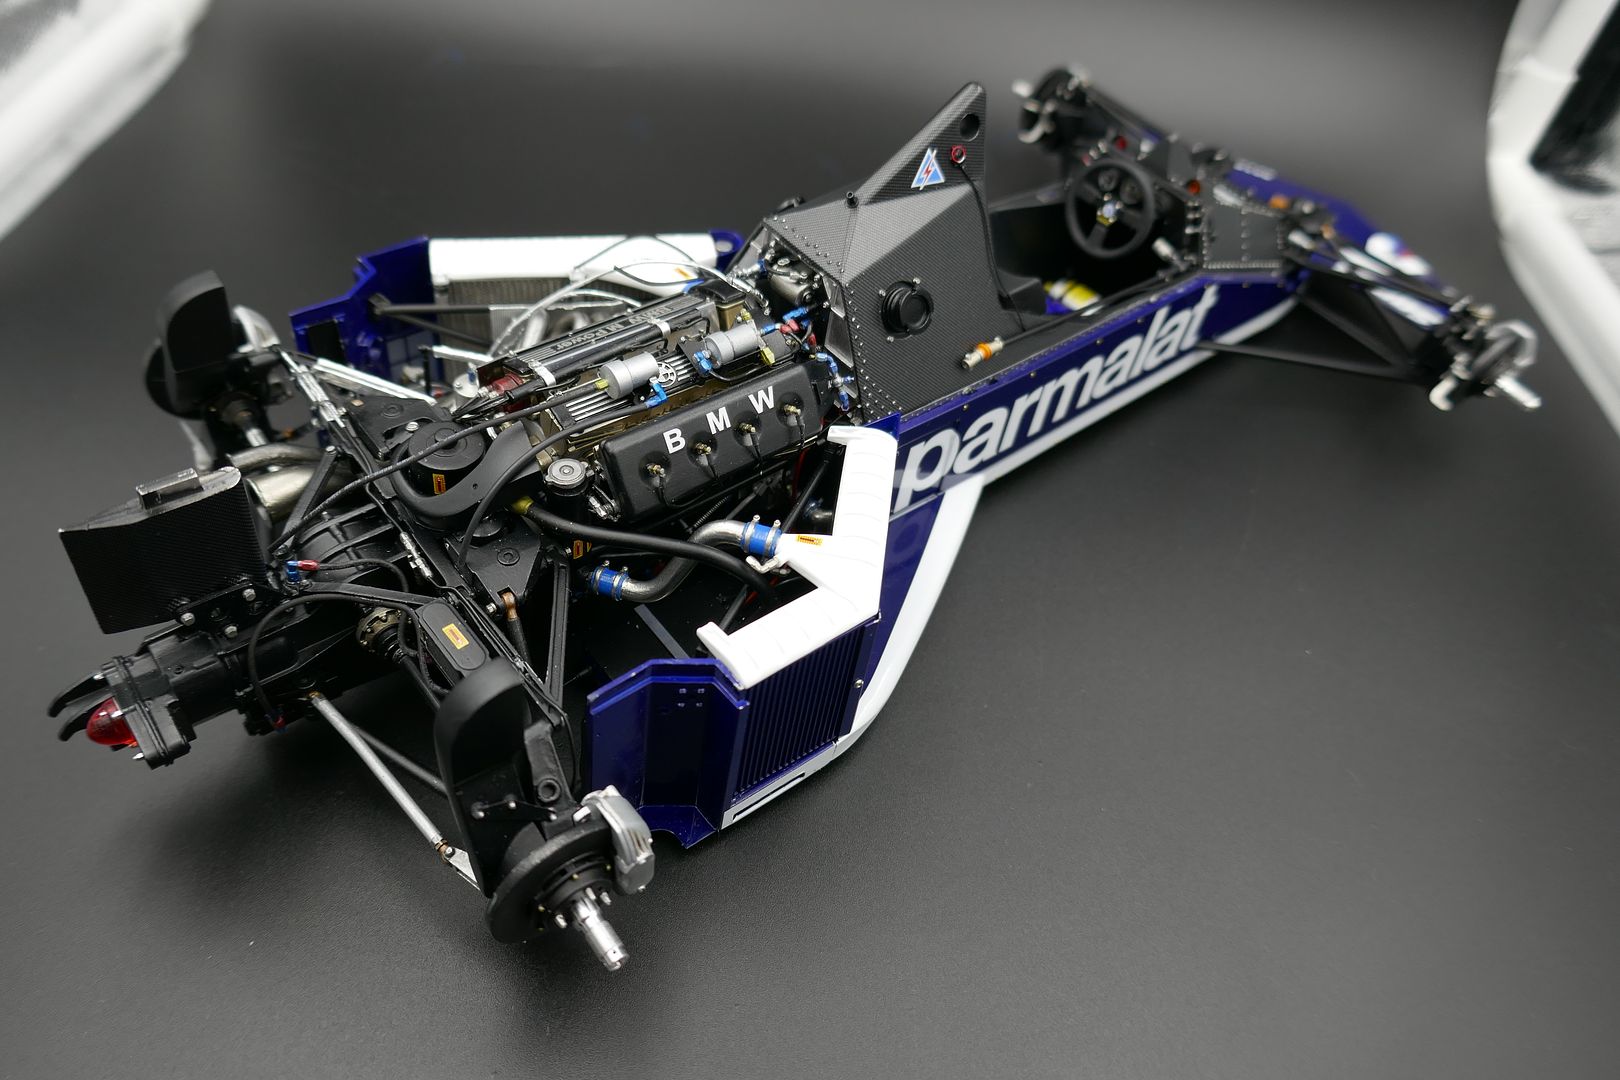
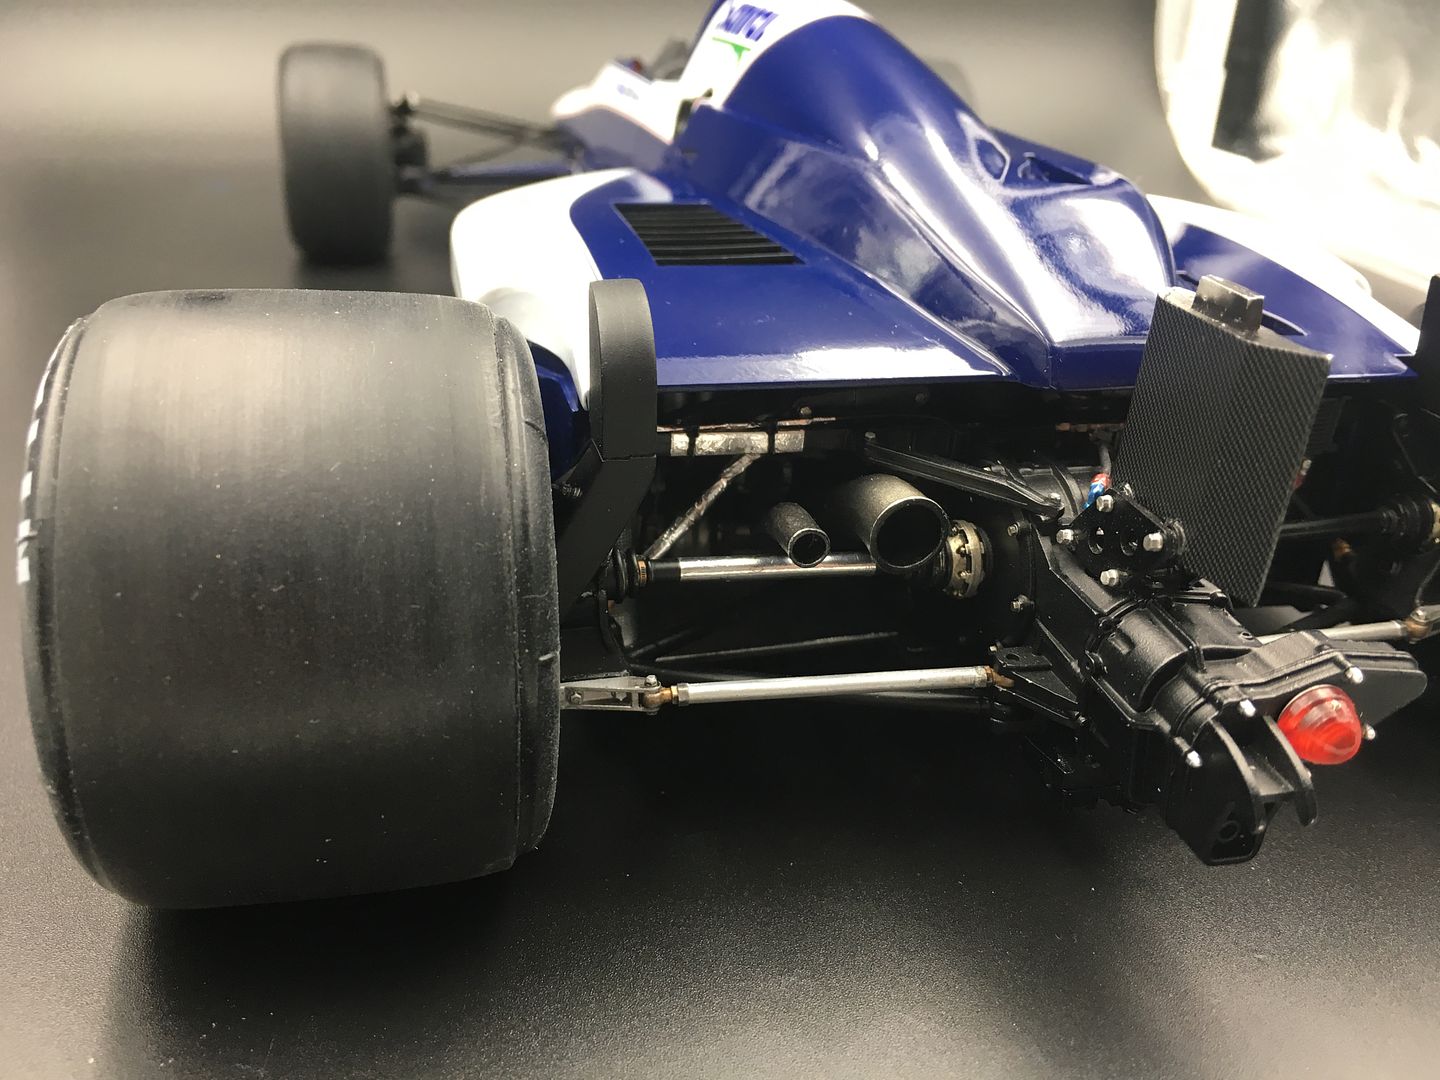
You can see I have also added the brake cooling ducts....

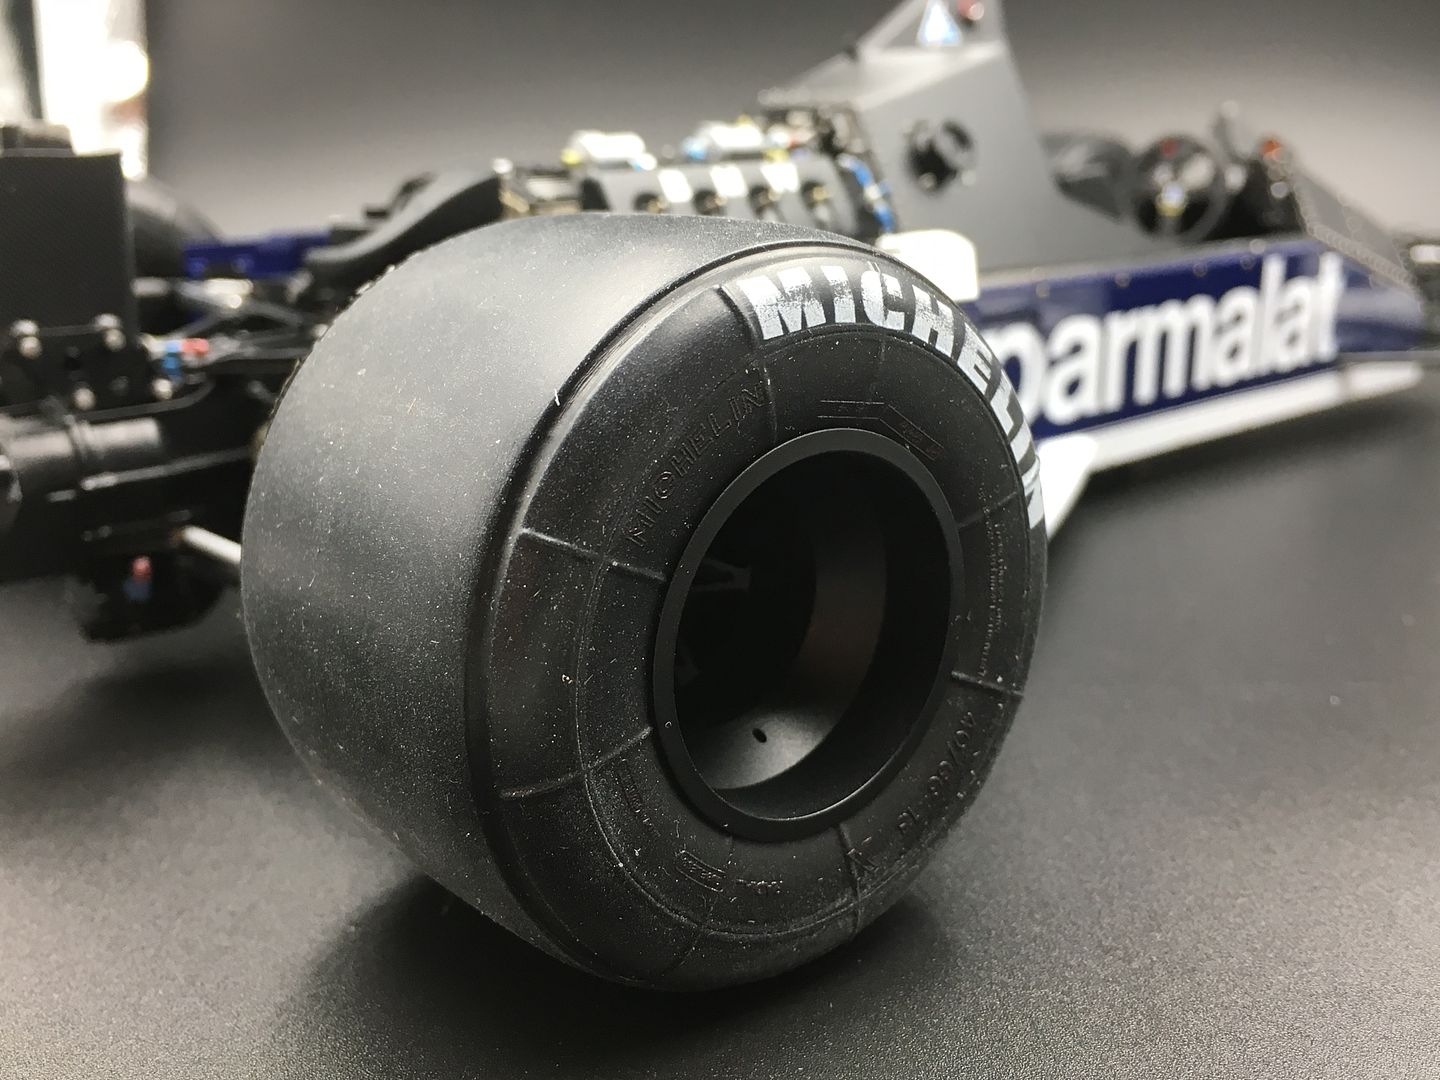
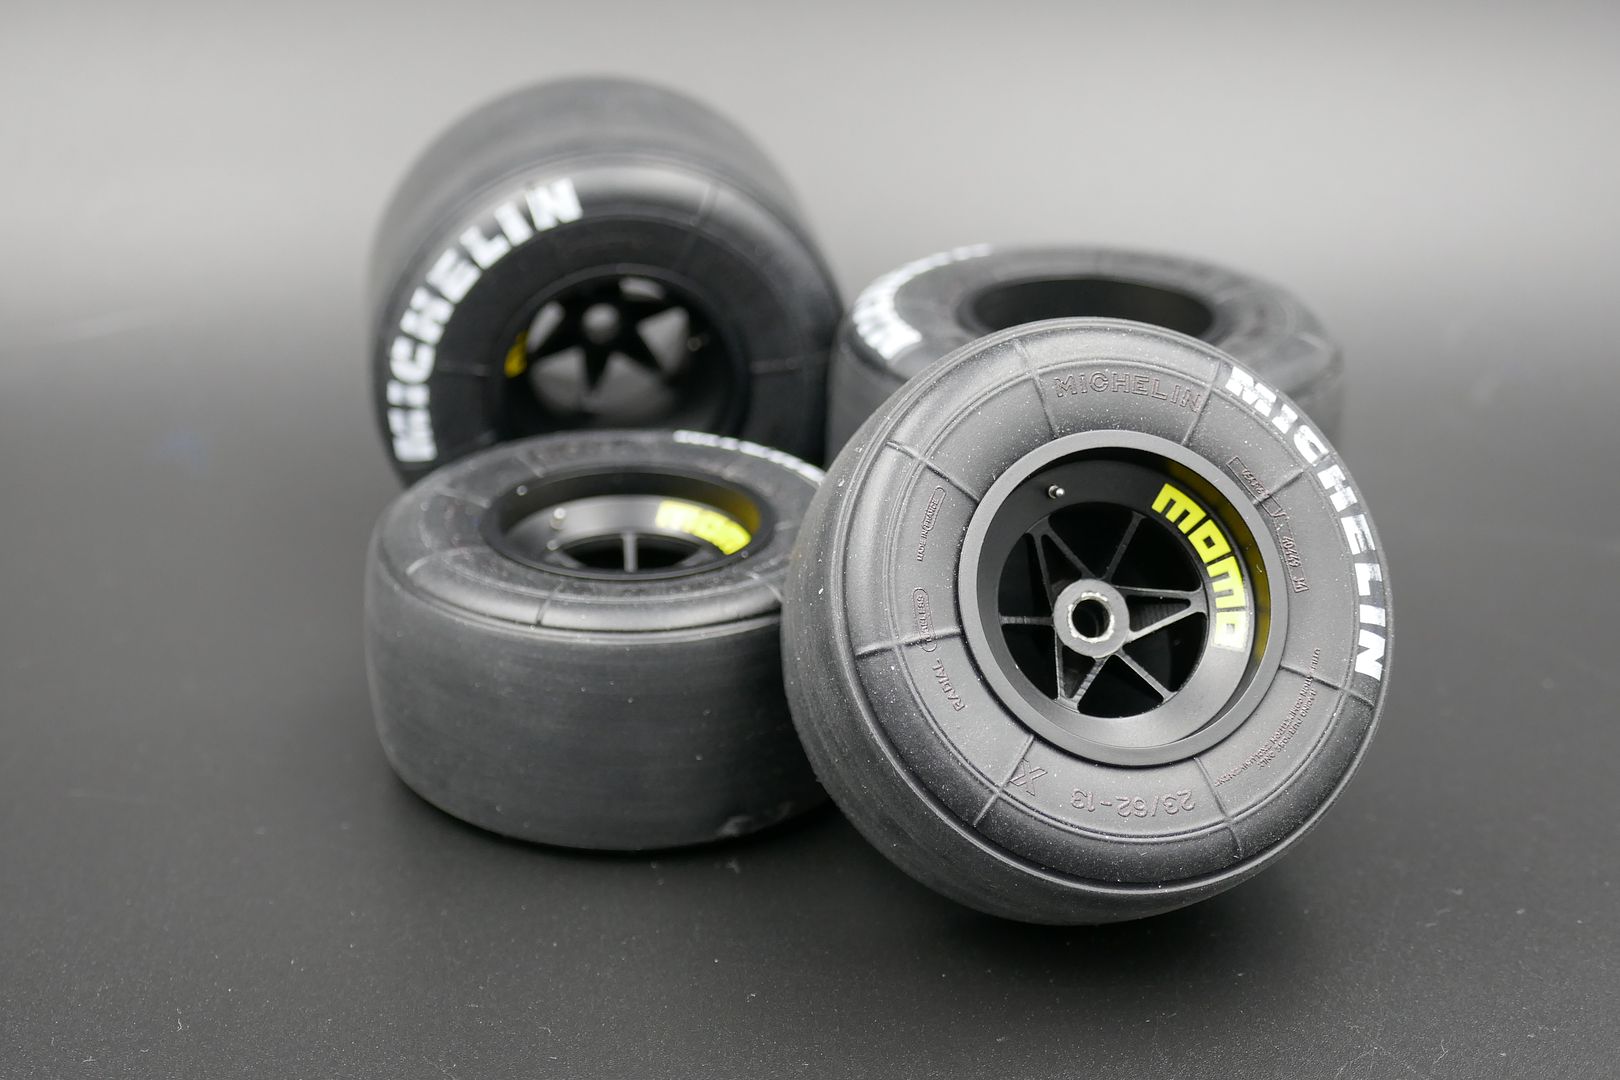
...and next, my favorite shots - getting those big slicks on!
A bit pic heavy I'm afraid!
...of course I could not resist adding the bodywork to see how it was looking - the rear section fits ok, but the front will need some work over the front suspension. Although to be honest, I am not likely to want to hide all that chassis work, so may display 'sans bodywork'.
back to more fittings...
Then, after the distraction of an accident down on the street below...
...I set up the photo cube for some sexy shots. Loads to still do, but it is nice doing these shots because it makes the model look so cool! (So lots of wires don't go anywhere yet!)
I added the decals to the wheels, and used some TS air valves - the kit came with some of course, but these are a little sharper...
So - now a shed load of pictures! Photos not cropped or edited yet - just for ref. I need a bigger cube, as this model is now really long!
Jobs to do - find the front wing end plates!! Rear wing, lots more detail wiring, wing mirrors and fittings....
You can see I have also added the brake cooling ducts....
...and next, my favorite shots - getting those big slicks on!
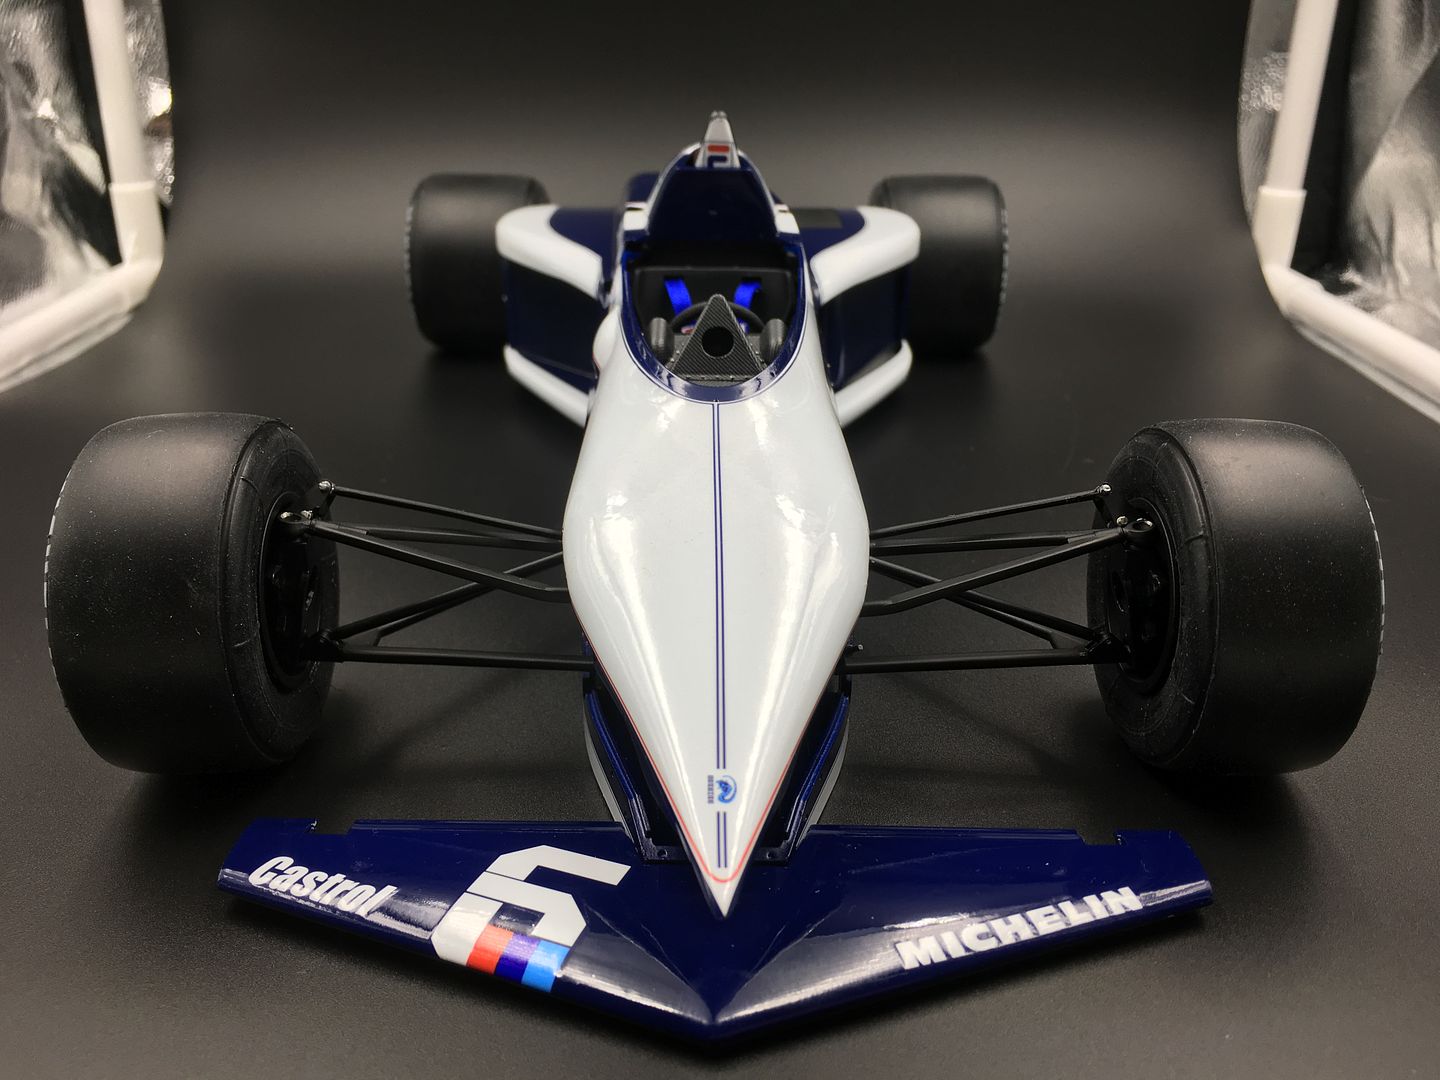
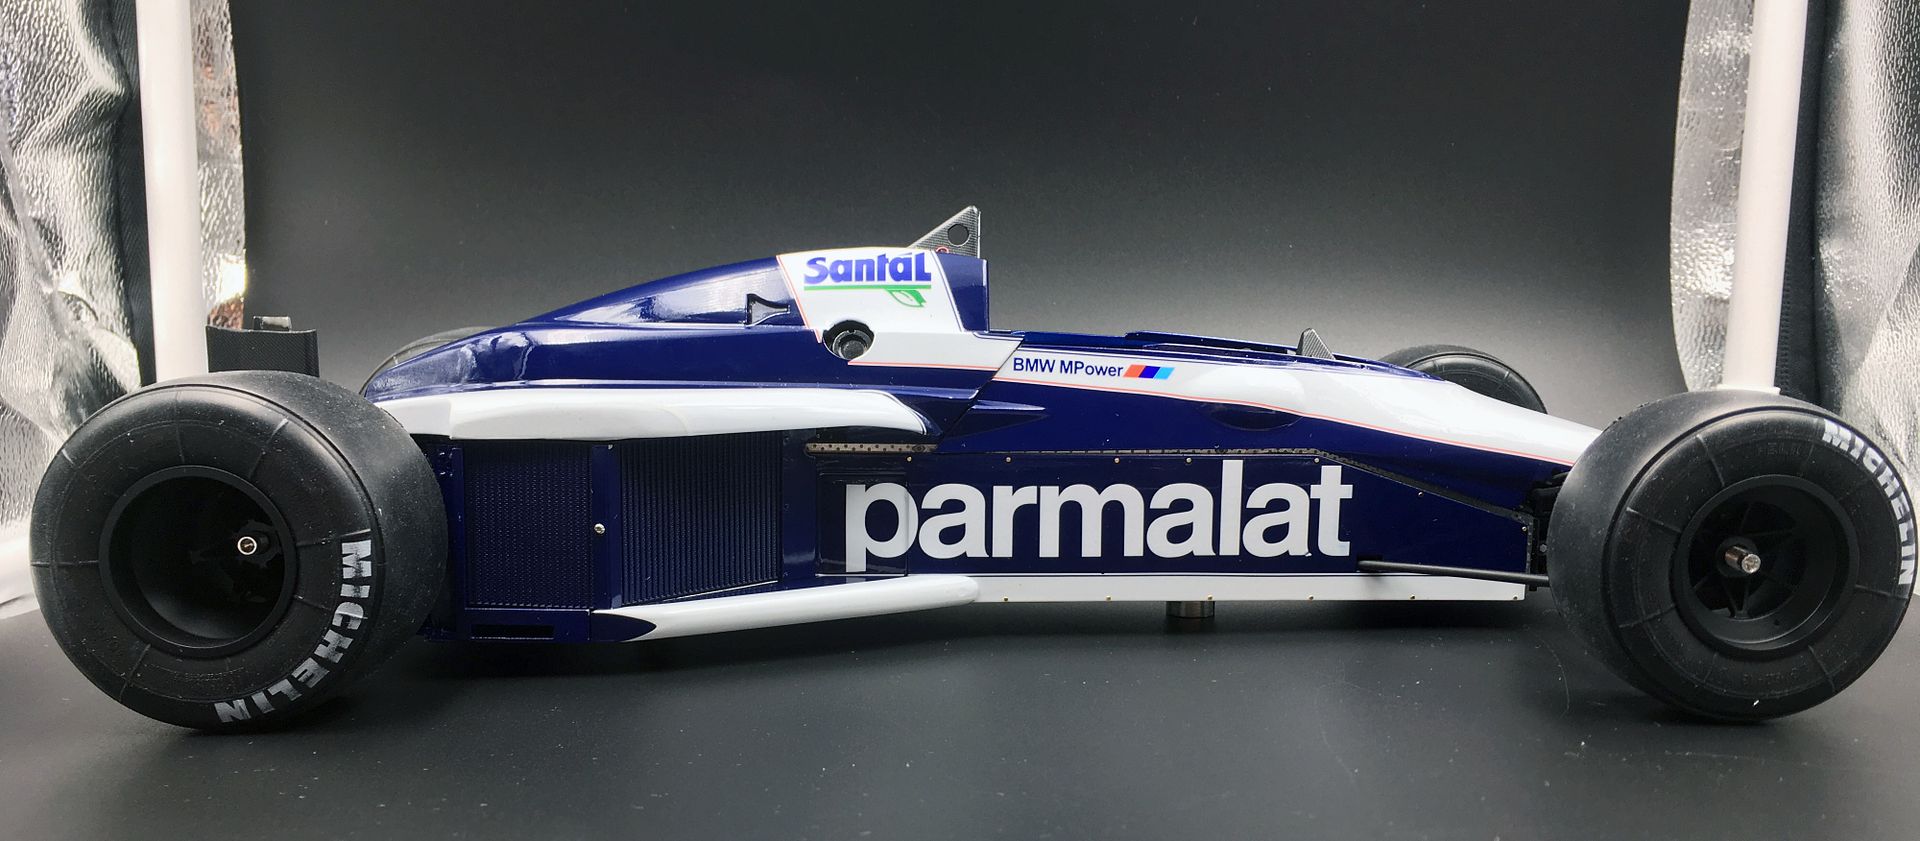
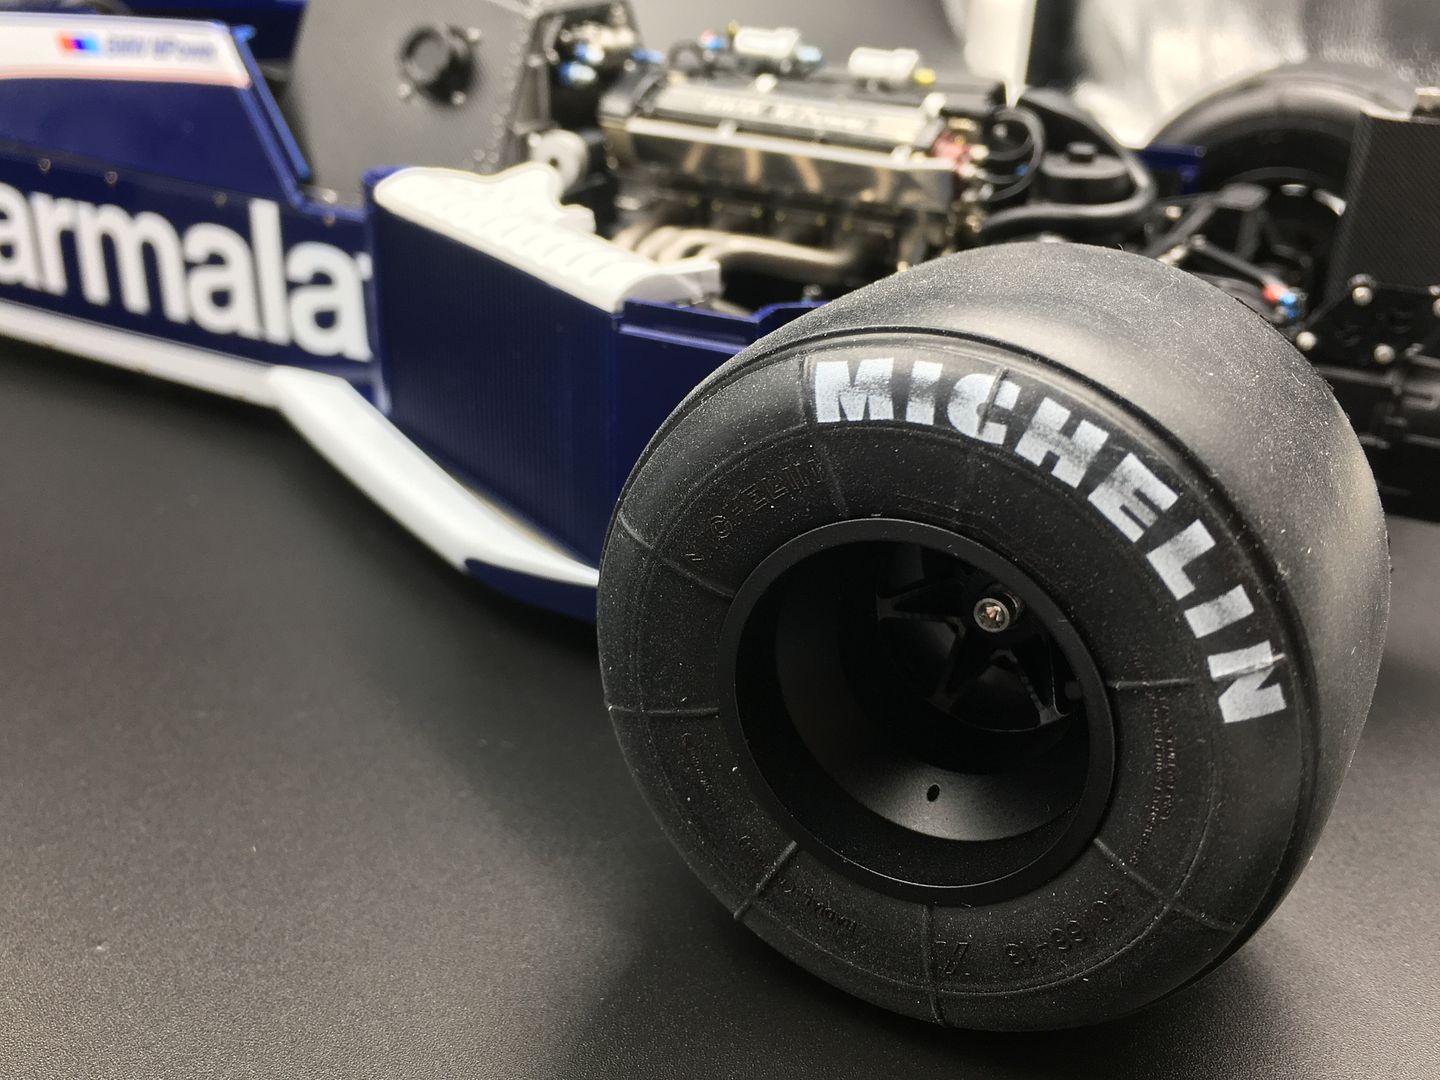
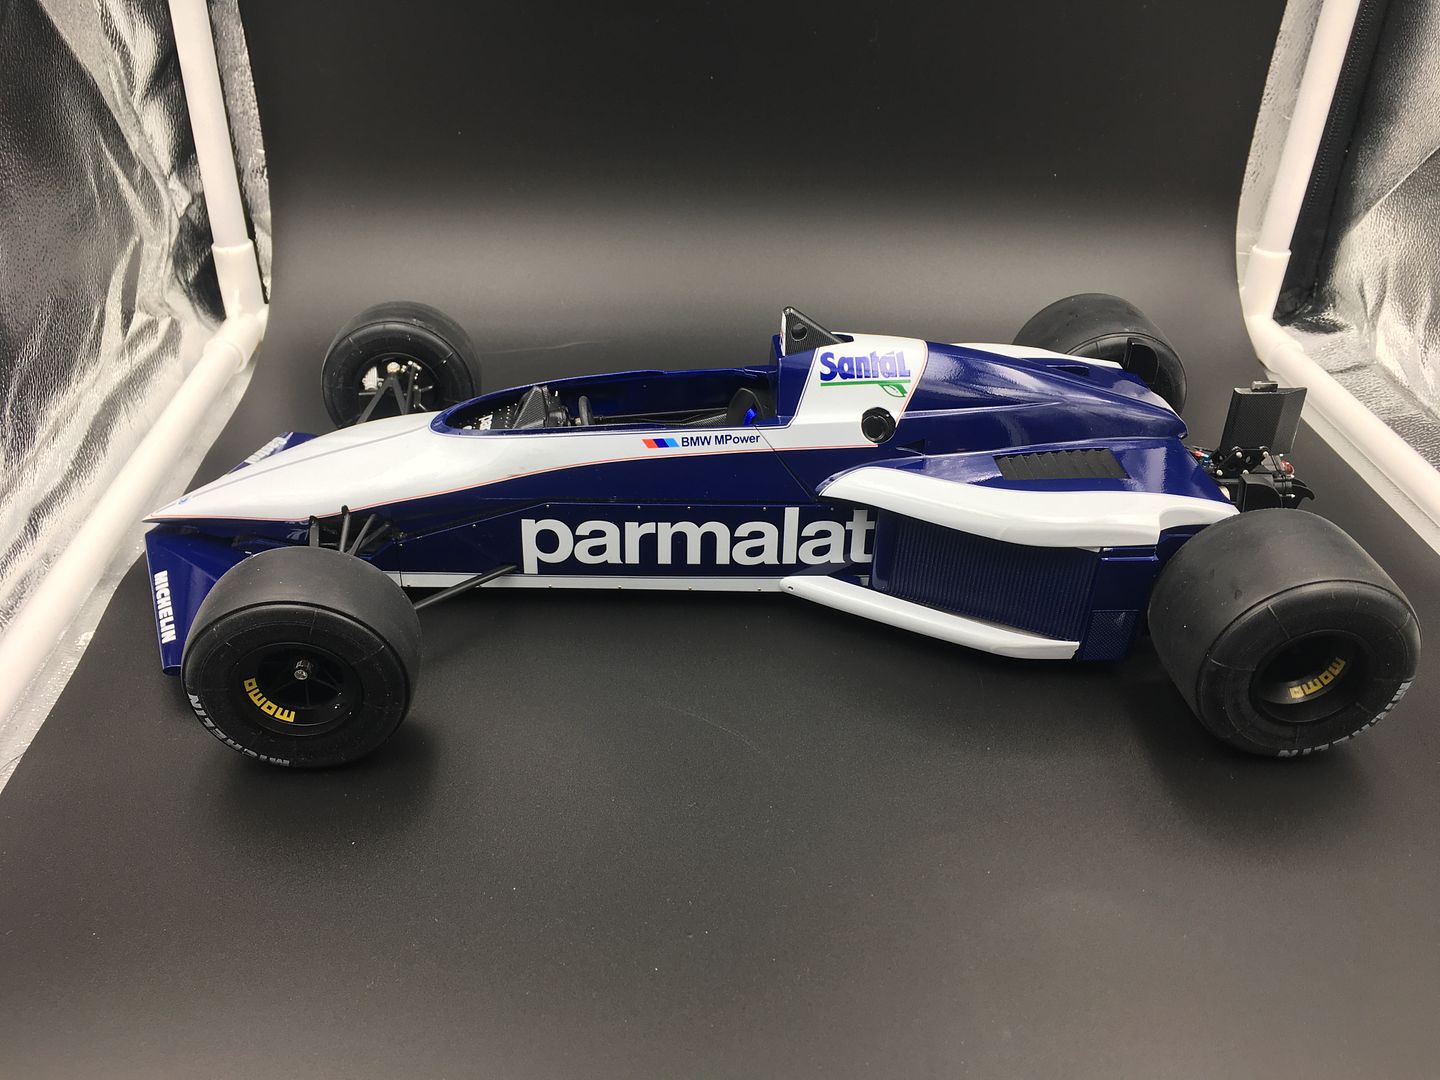
Right - those slicks...
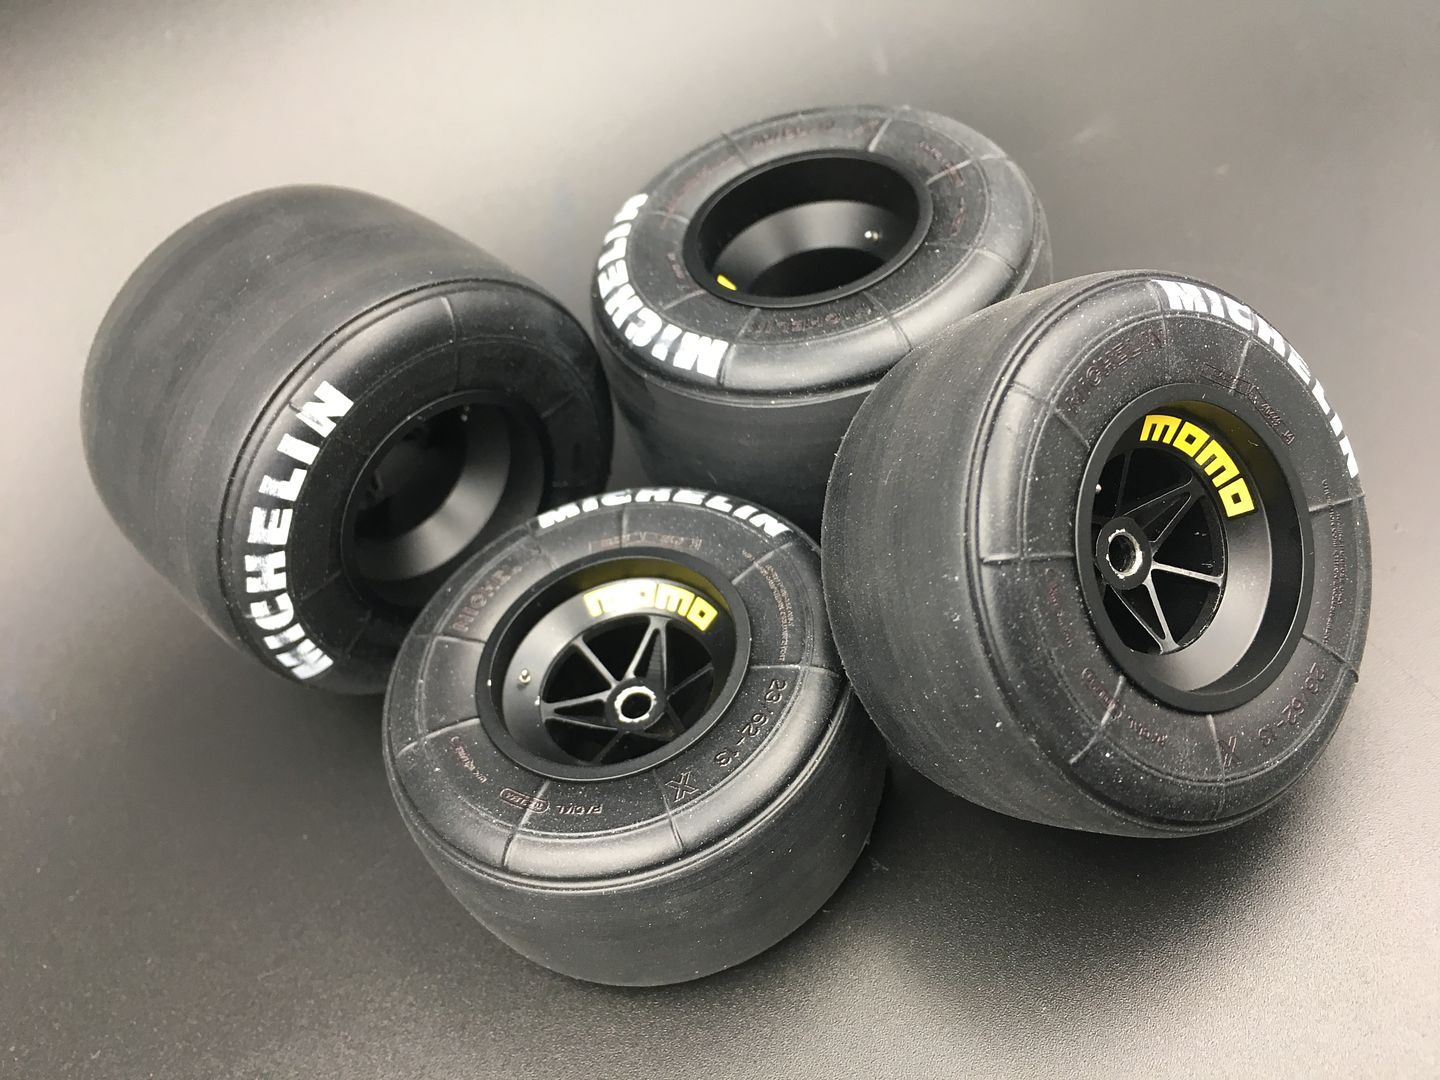
I fitted these to a dremel and ran them whilst holding coarse sand paper to get that scrubbed-in look.

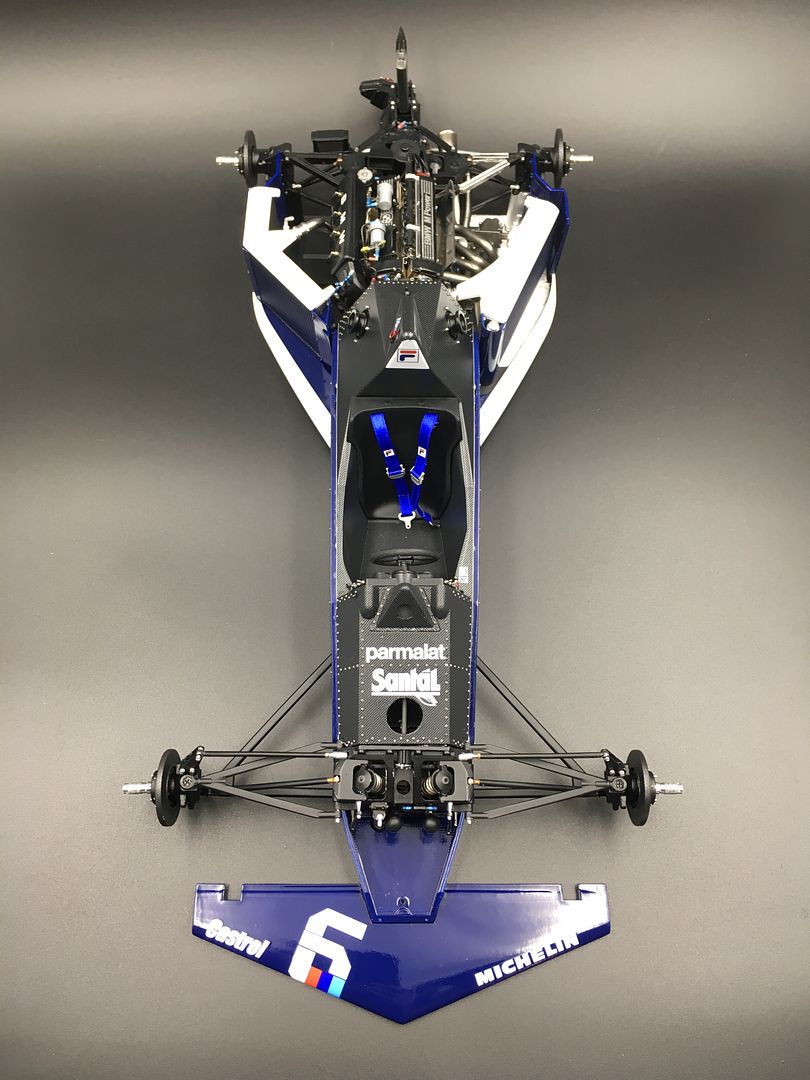
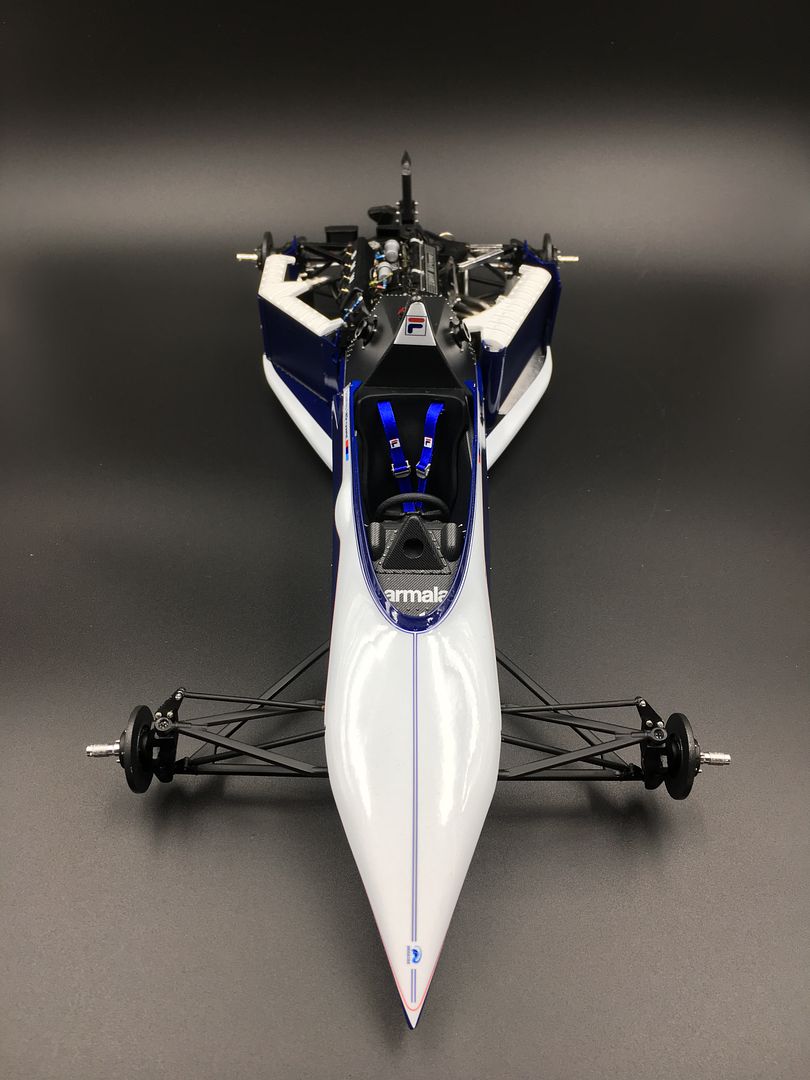
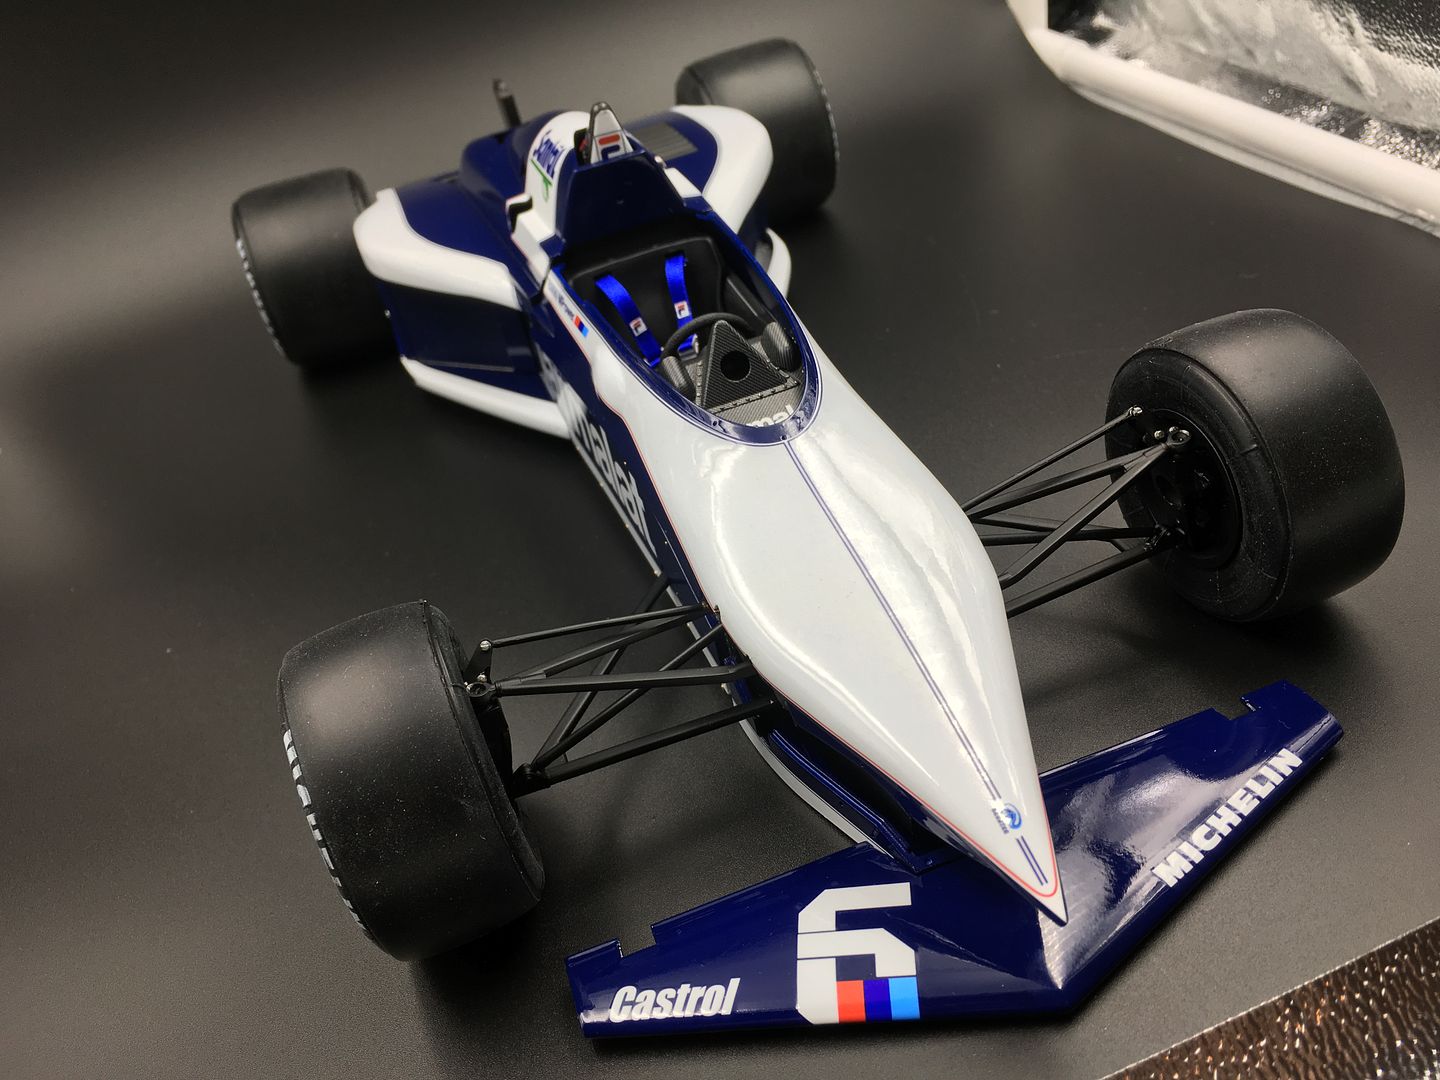
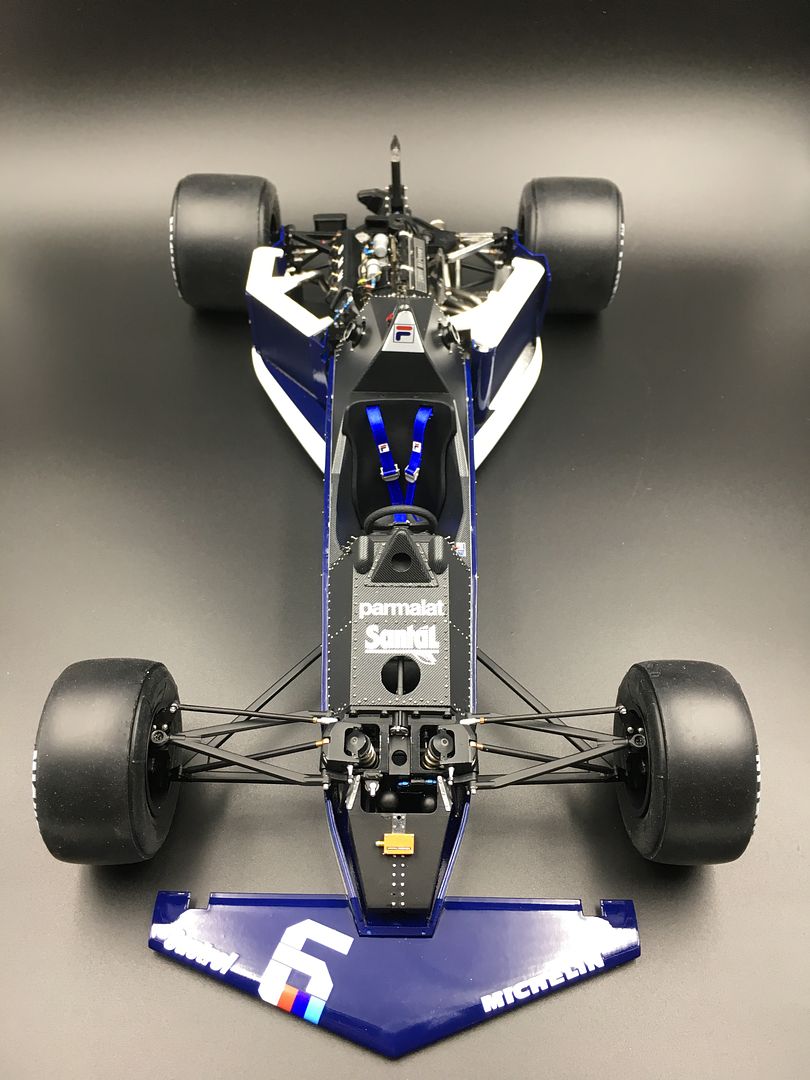
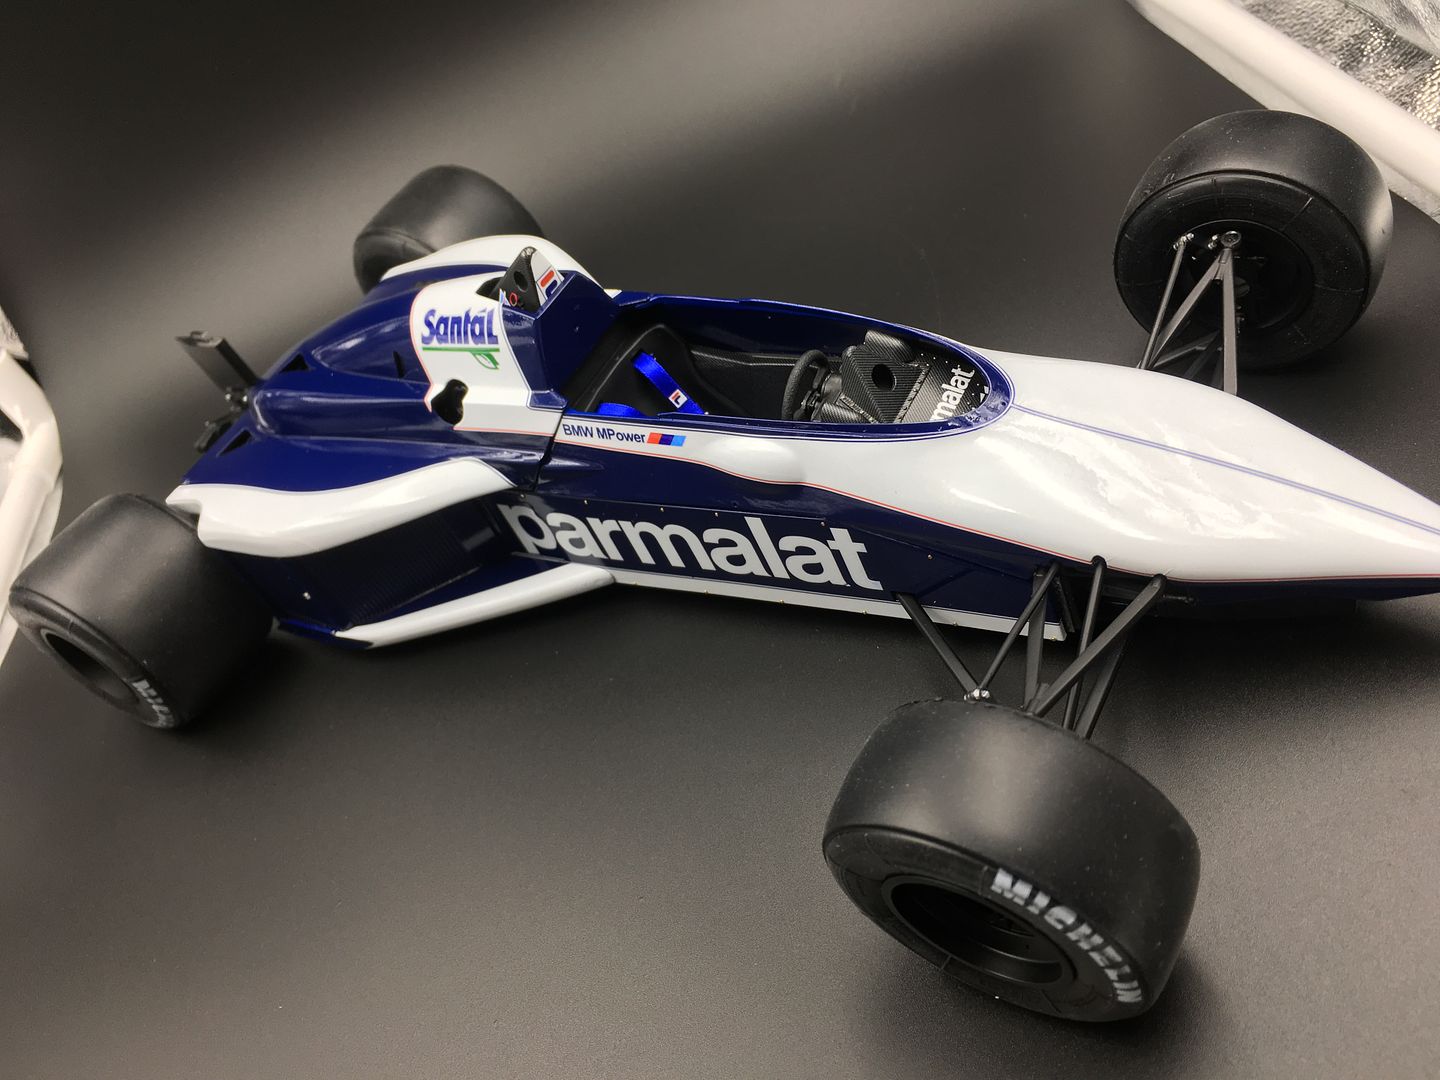
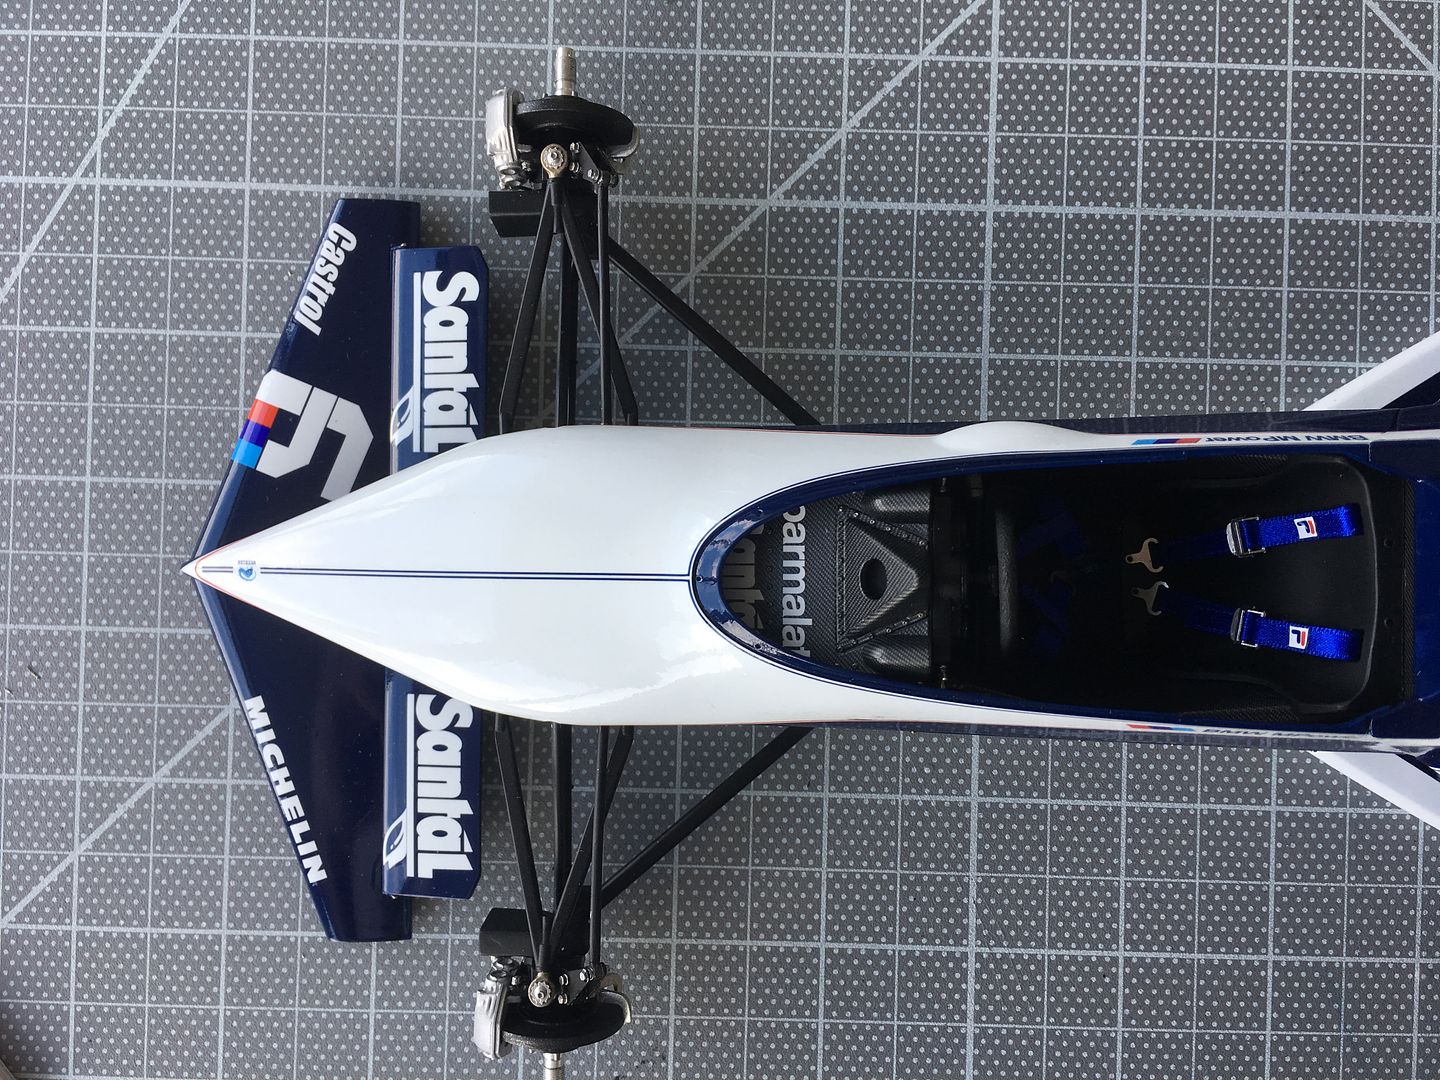
....and next a few shots with bodywork literally just placed in situ - not fixed down, or tabbed etc, so ignore the panel gaps!!
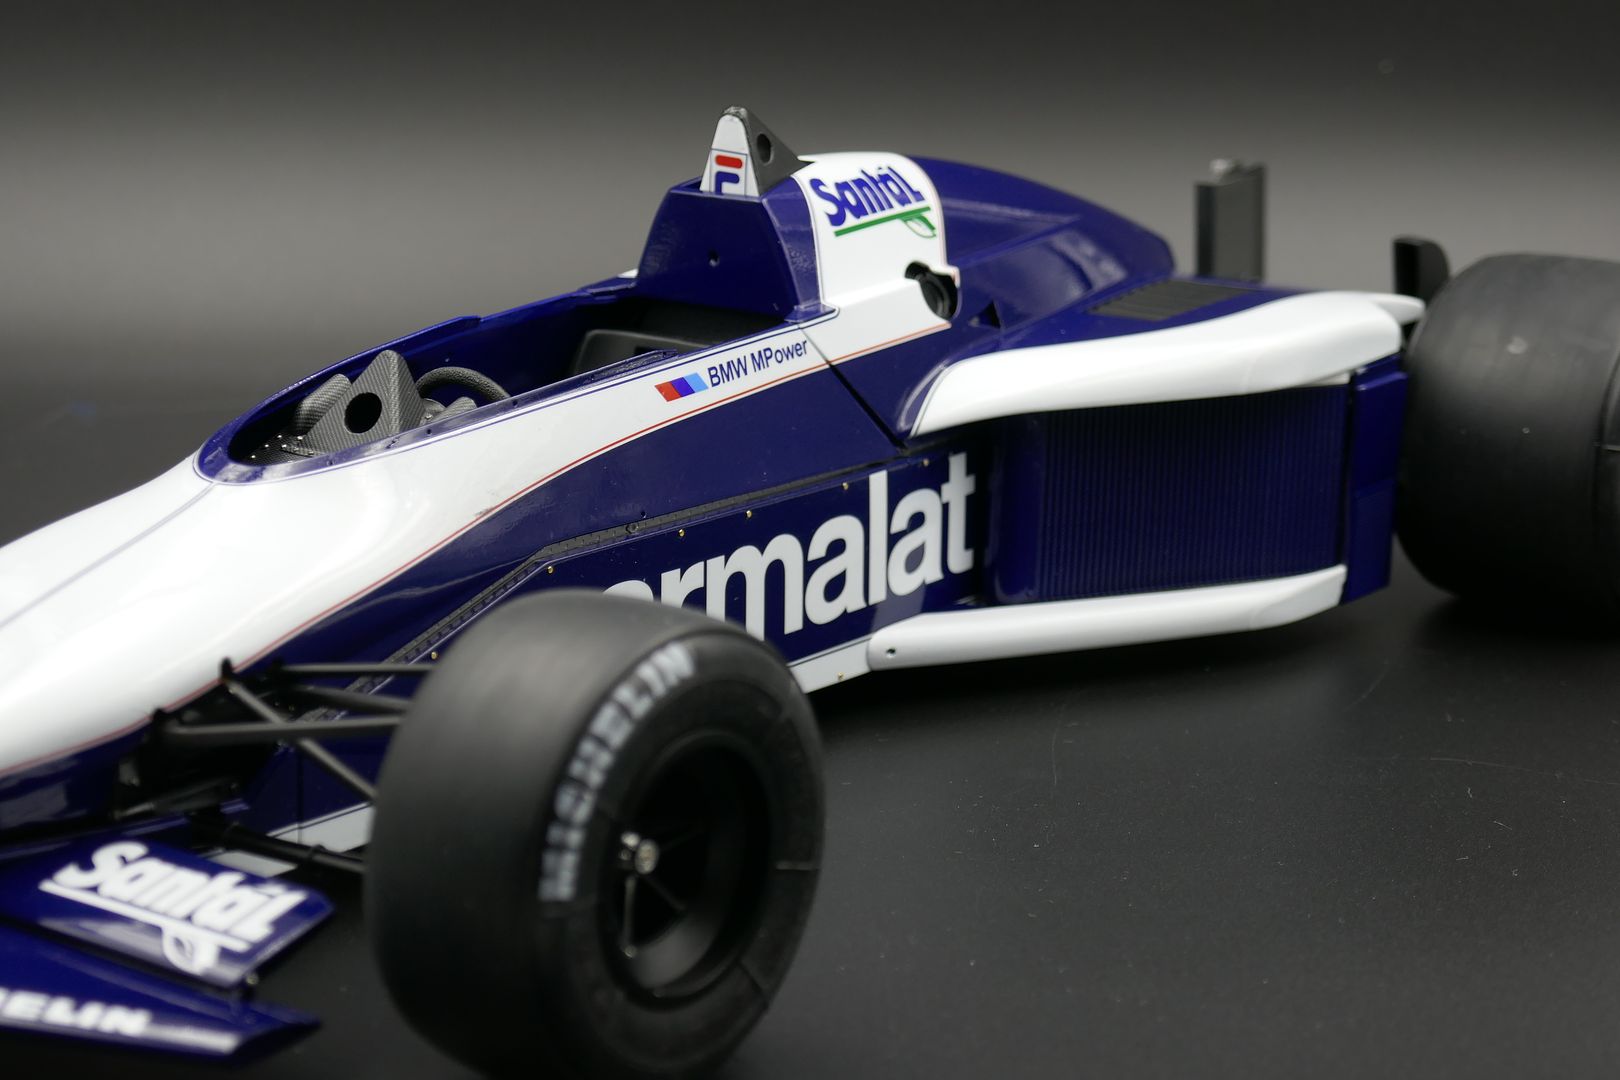

....and that is it for now.
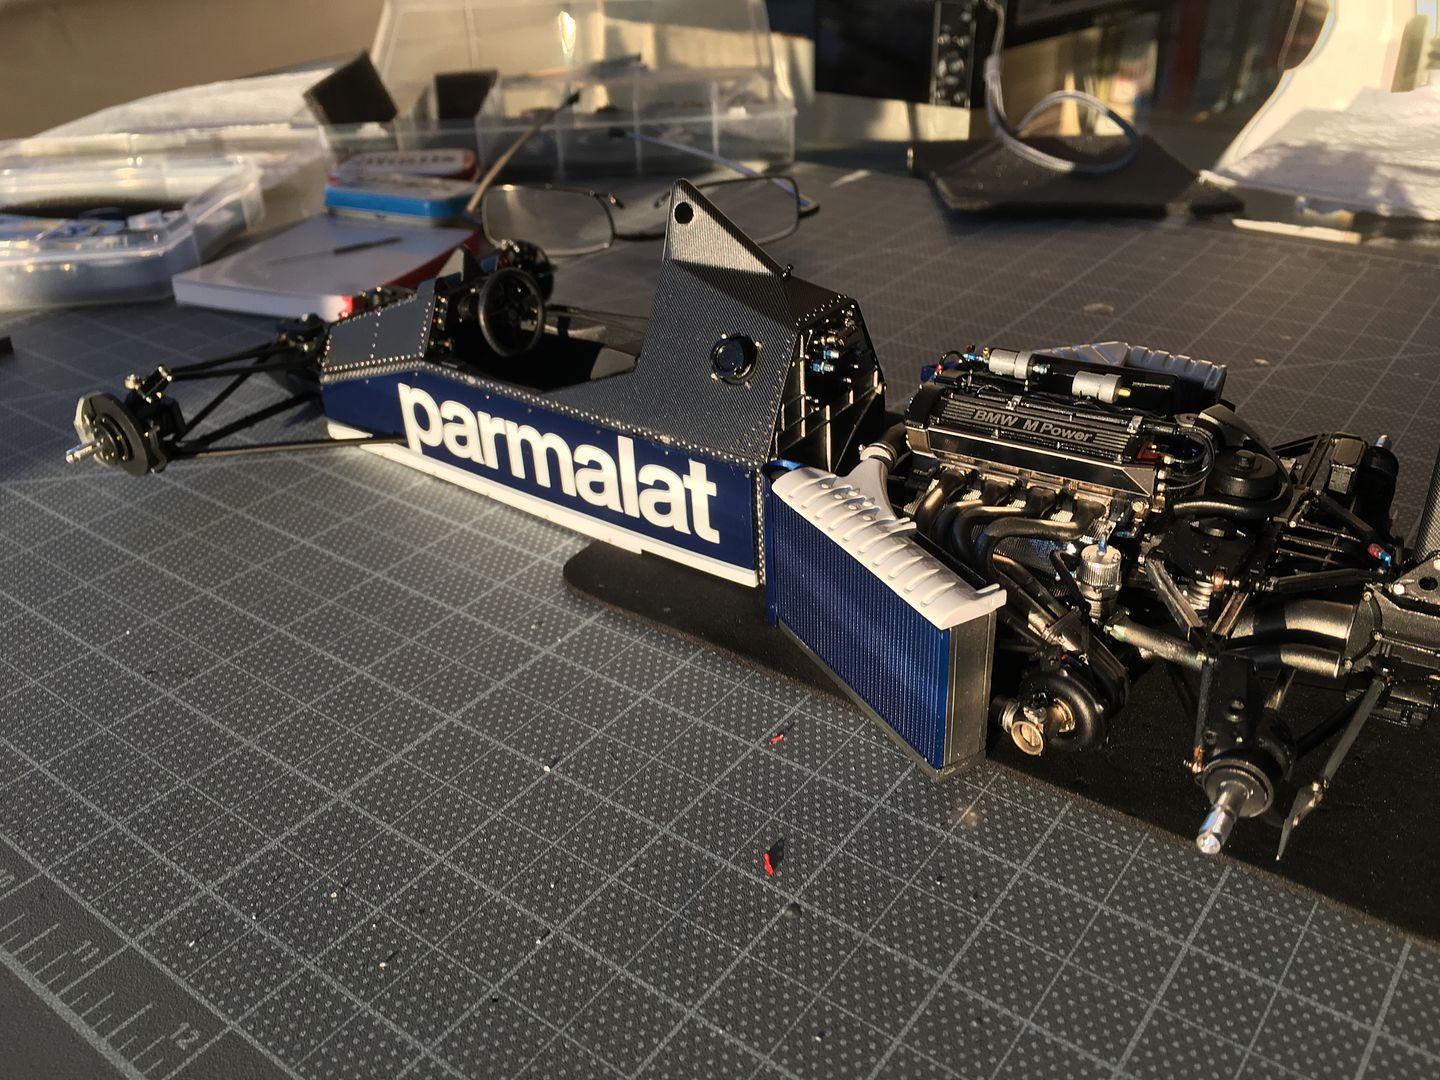
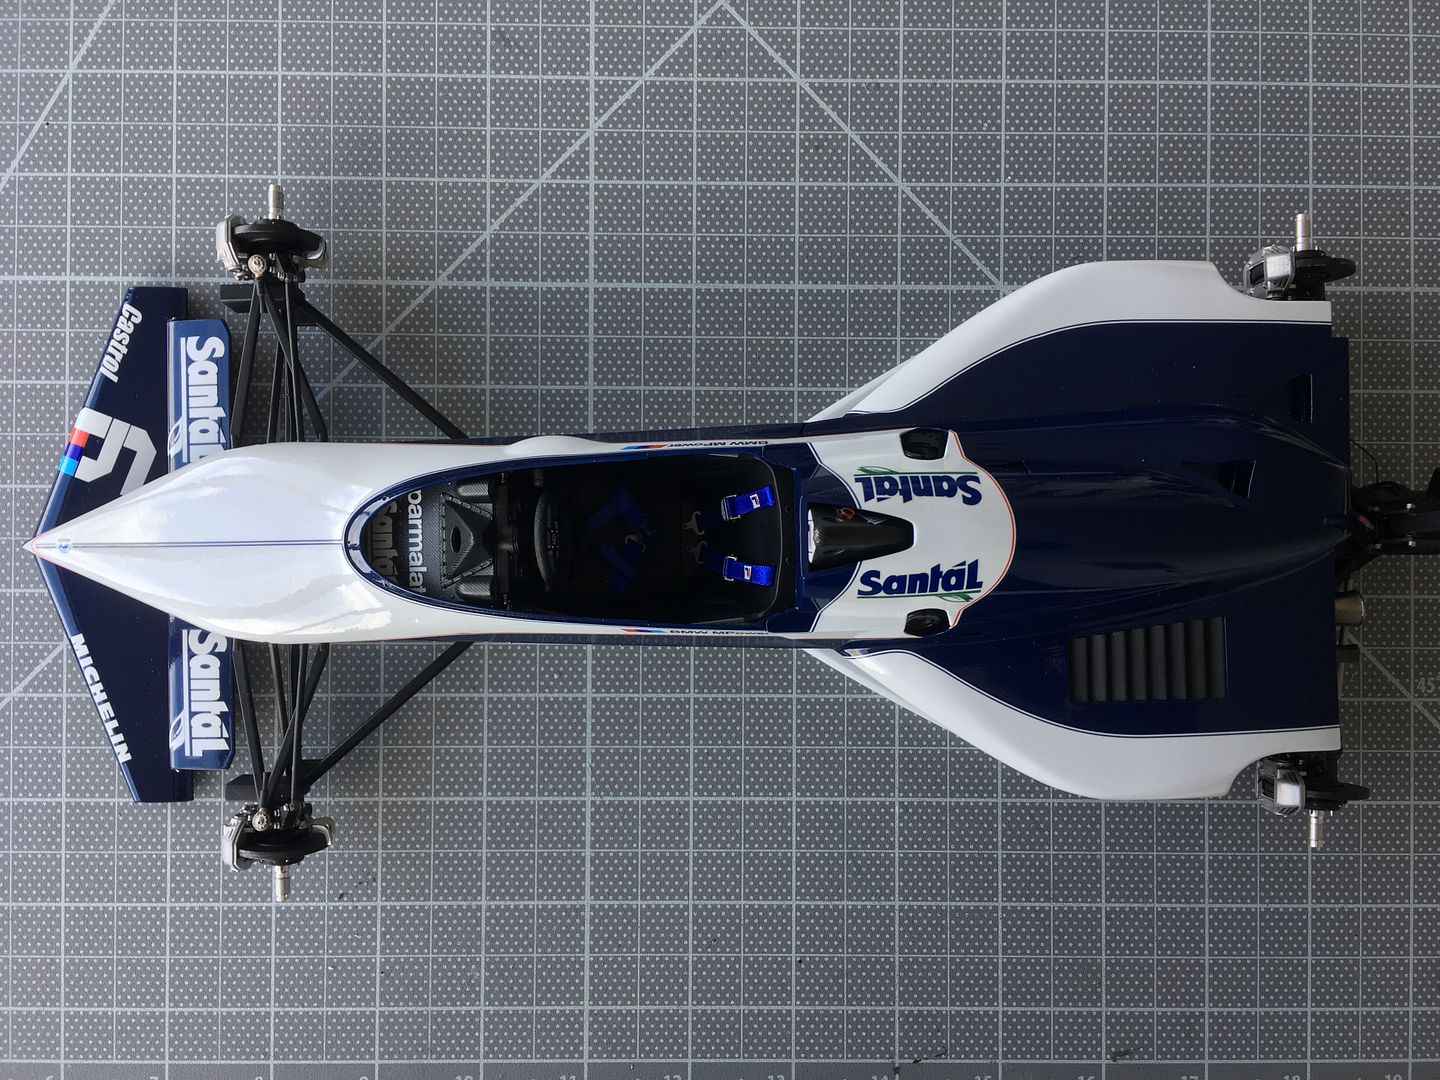
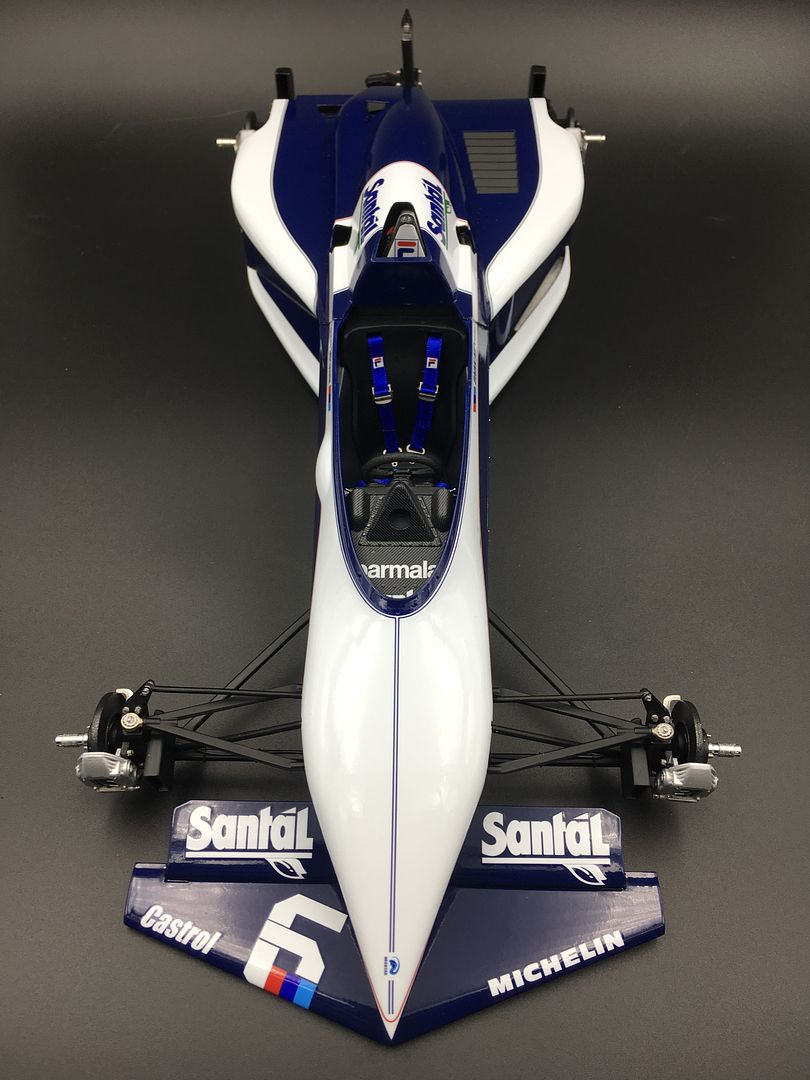
I think the main reason for the positive responses to this kit is that it is a beautiful car - so pure, and shaped like a rocket. There are so many 'red' kits, and McLarens, that this blue just looks a bit different. Thanks you Gordon Murray!!
I fitted these to a dremel and ran them whilst holding coarse sand paper to get that scrubbed-in look.
....and next a few shots with bodywork literally just placed in situ - not fixed down, or tabbed etc, so ignore the panel gaps!!
....and that is it for now.
I think the main reason for the positive responses to this kit is that it is a beautiful car - so pure, and shaped like a rocket. There are so many 'red' kits, and McLarens, that this blue just looks a bit different. Thanks you Gordon Murray!!
Some nice clear middle-of-the-night hrs to welcome F1 back meant I could get on with some bits and bobs..
Some more wiring - given up on the MFH tie-wraps - just cannot get more than 1 in 10 to work...
Wings needed more decals, and I did a bit of sanding, respraying the large main wing section. The white decals go on well enough - but they are thick, the clear coat almost exaggerates this...
Folded the gurney flap pieces - not sure if I will use these or not...the potential for mucking them up and damaging the rest of the paint finish is high!
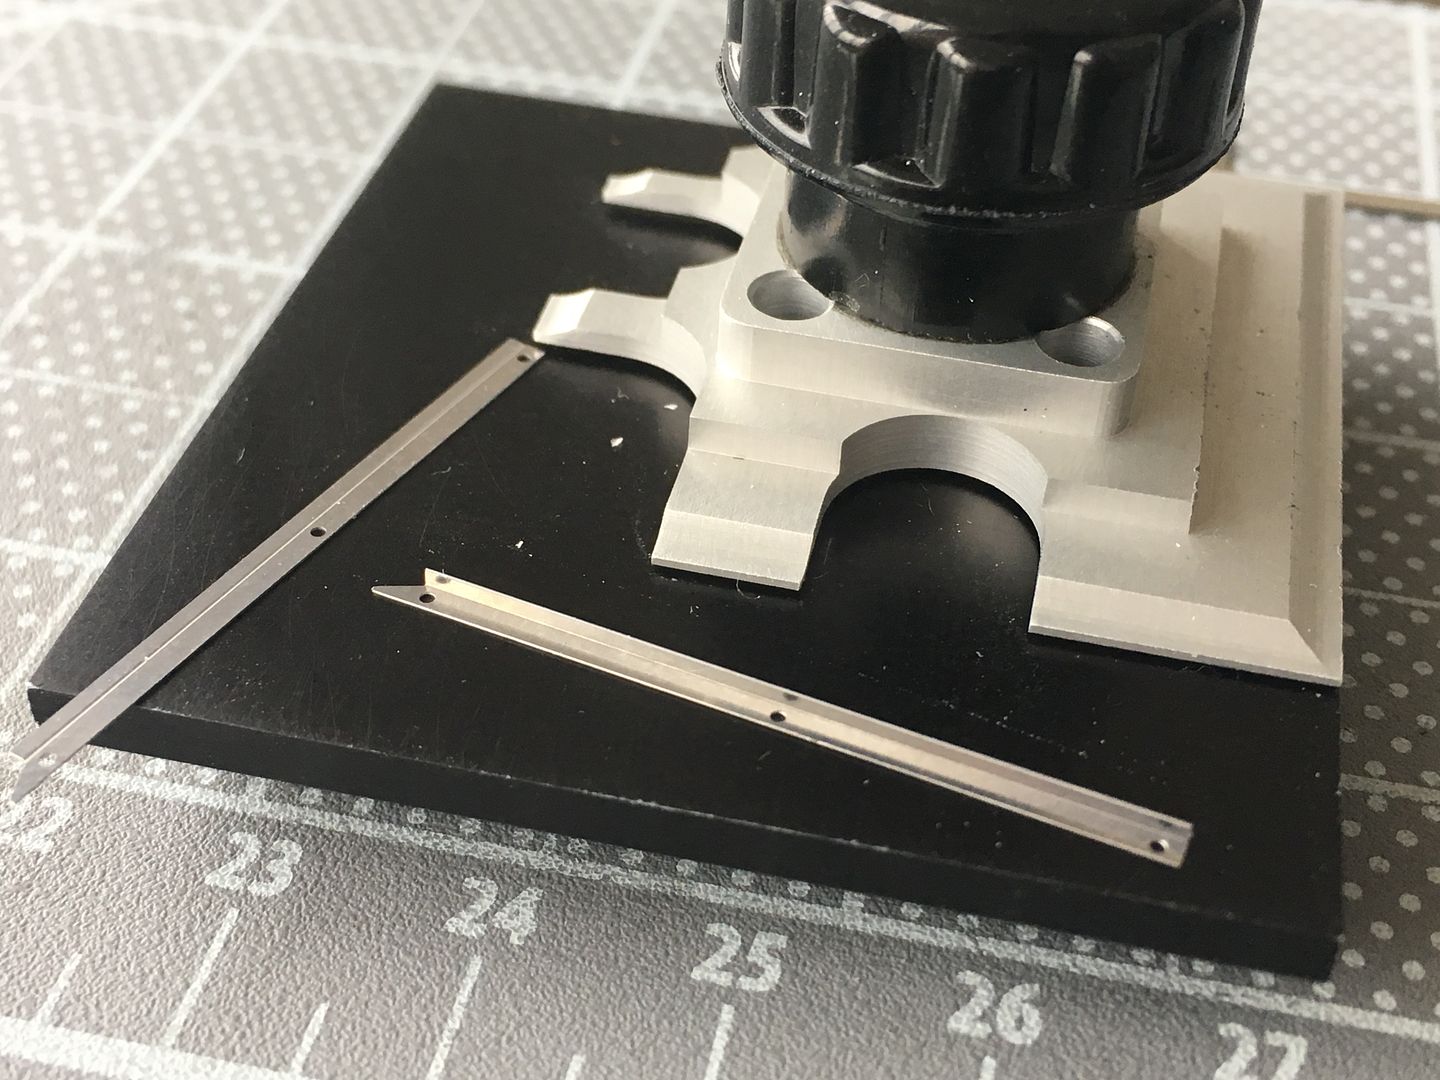
One of these PE folding clamps is vital for this sort of thing.
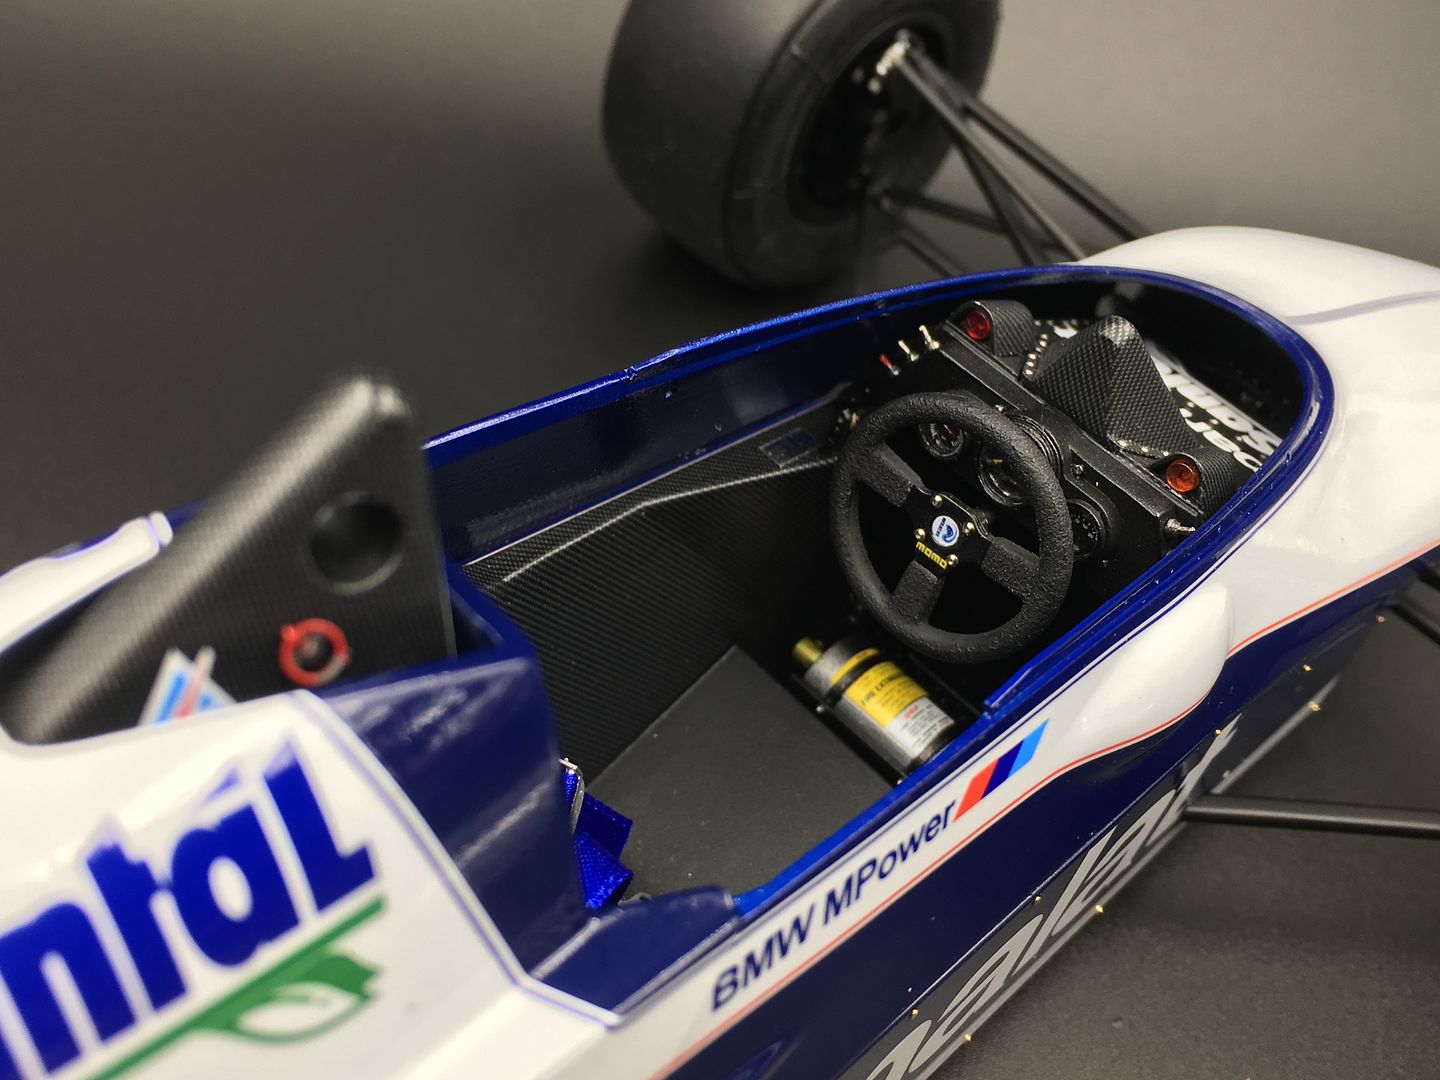
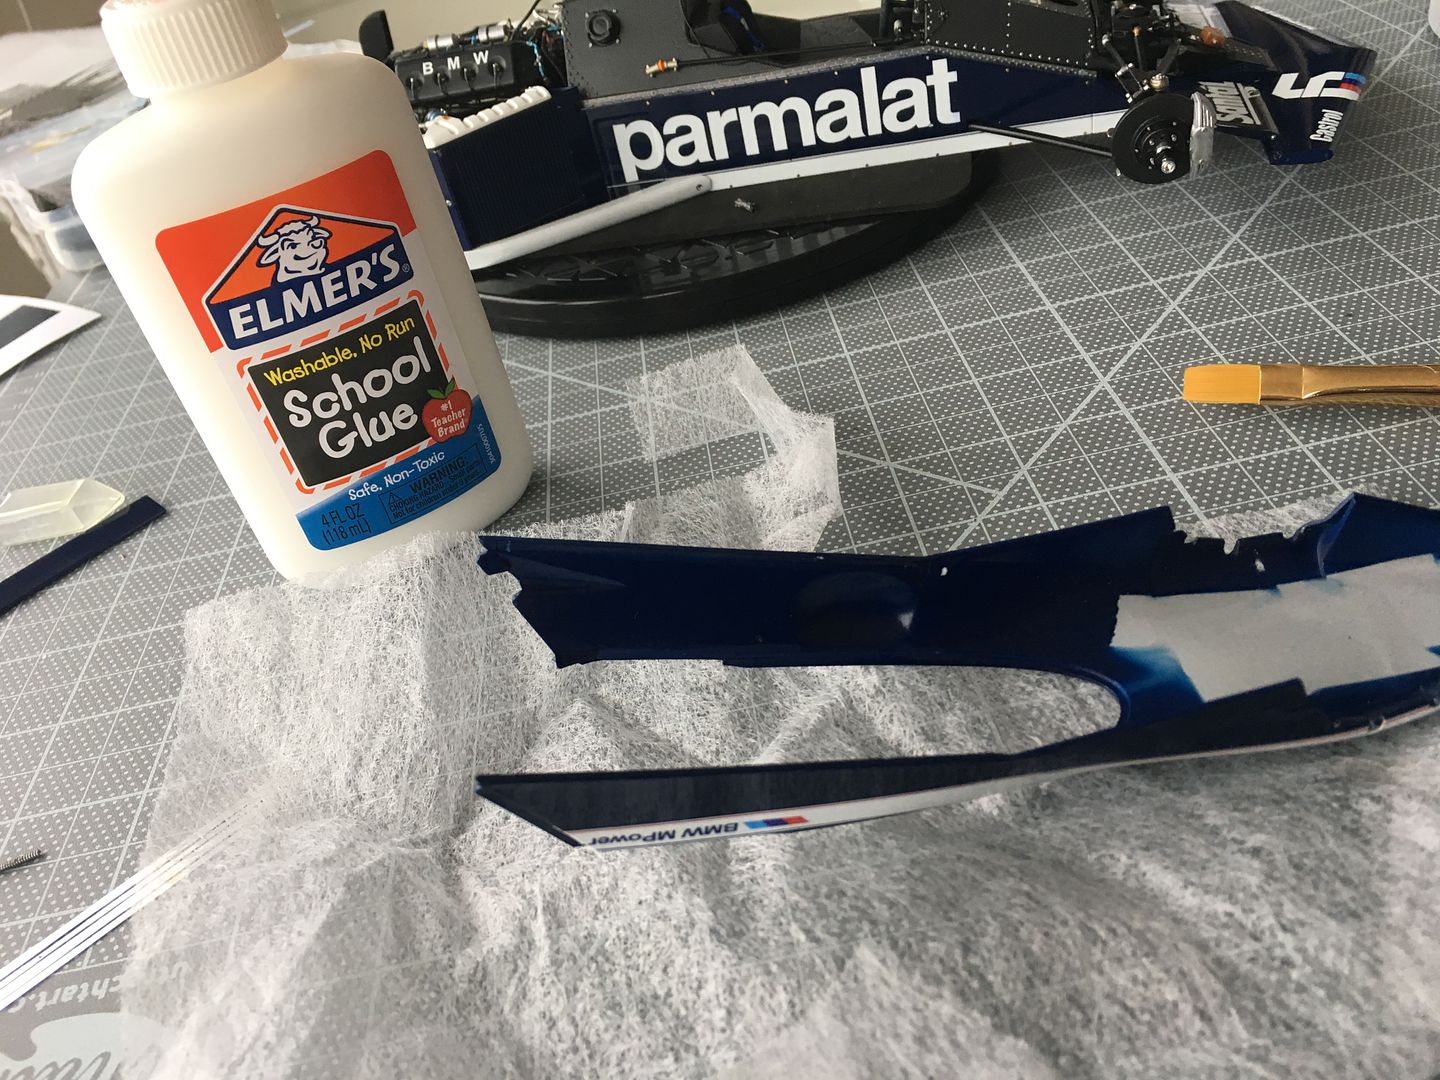
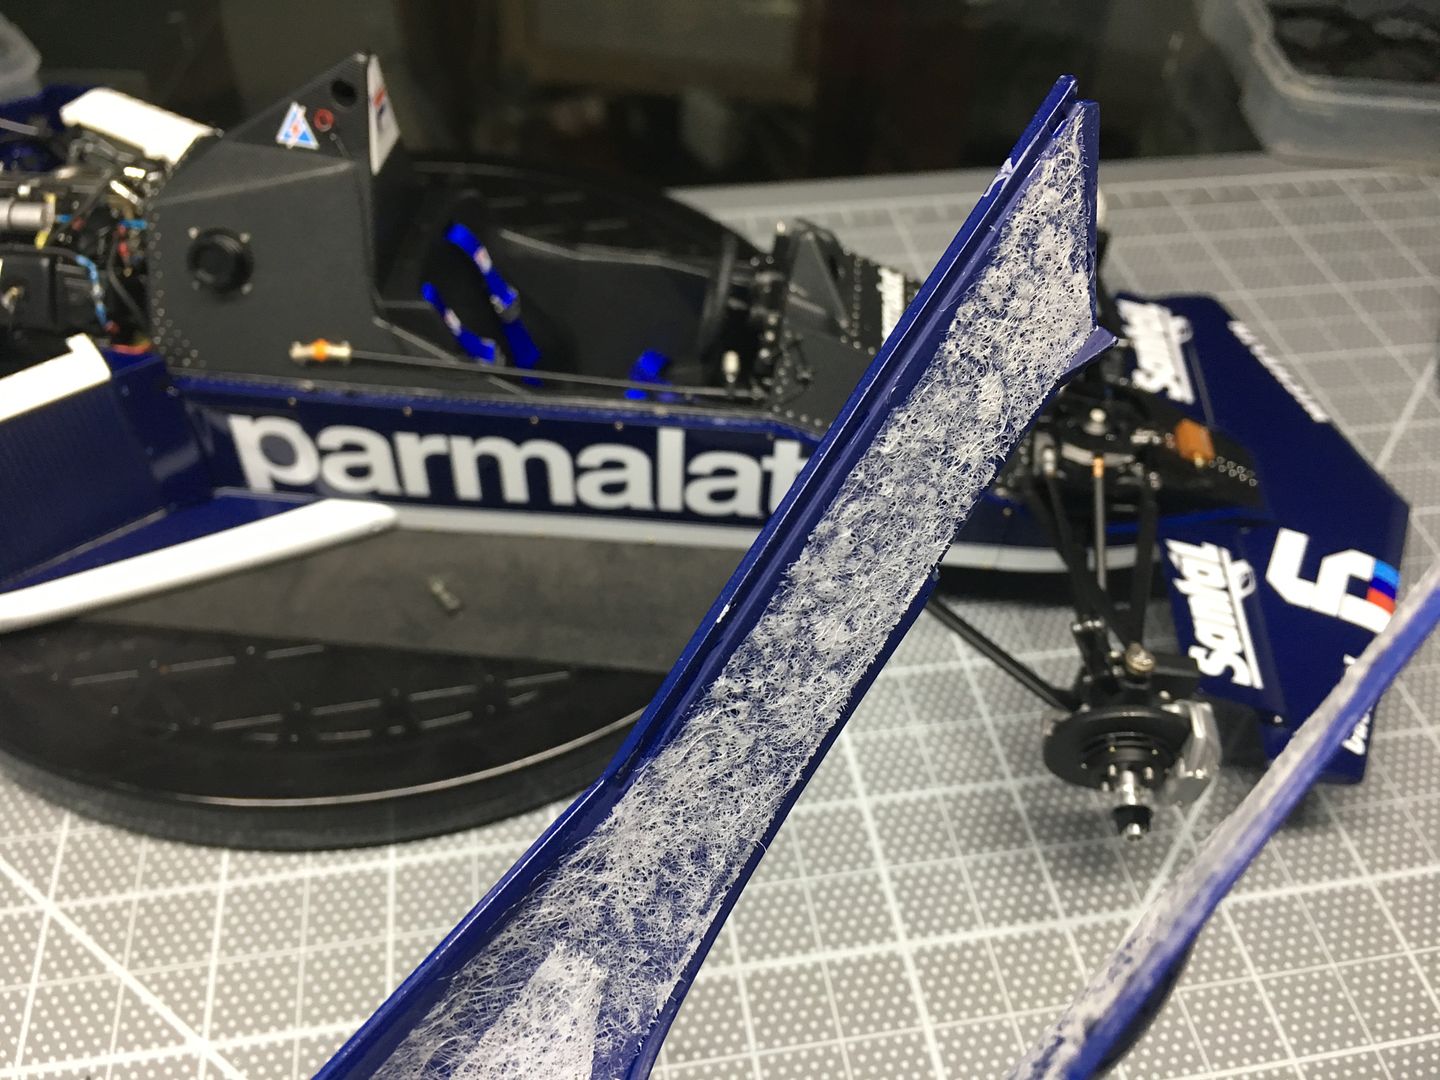
So then I went off-piste a bit. The inside of the cockpit is flat black and quite rough - laid-up carbon fiber/composite. Having just done the laundry, I thought I would try using the USED laundry dryer fragrance tissues, and line the inside of the bodywork, sticking it down with watered down PVA glue.
I know that tissue paper has been used to create this rough (smooth-rough!) effect but it is quite delicate - thought I would give it a go - these USED tissues are actually very tough, so easy to pull around and handle. I say used because the pre-used ones are stiffer and full of....smell!
I'll hand paint this area tonight with flat black and see how it looks...it might be too crude...

Some more wiring - given up on the MFH tie-wraps - just cannot get more than 1 in 10 to work...
Wings needed more decals, and I did a bit of sanding, respraying the large main wing section. The white decals go on well enough - but they are thick, the clear coat almost exaggerates this...
Folded the gurney flap pieces - not sure if I will use these or not...the potential for mucking them up and damaging the rest of the paint finish is high!
One of these PE folding clamps is vital for this sort of thing.
So then I went off-piste a bit. The inside of the cockpit is flat black and quite rough - laid-up carbon fiber/composite. Having just done the laundry, I thought I would try using the USED laundry dryer fragrance tissues, and line the inside of the bodywork, sticking it down with watered down PVA glue.
I know that tissue paper has been used to create this rough (smooth-rough!) effect but it is quite delicate - thought I would give it a go - these USED tissues are actually very tough, so easy to pull around and handle. I say used because the pre-used ones are stiffer and full of....smell!
I'll hand paint this area tonight with flat black and see how it looks...it might be too crude...
Gassing Station | Scale Models | Top of Page | What's New | My Stuff