MFH 1/12 BT52b
Discussion


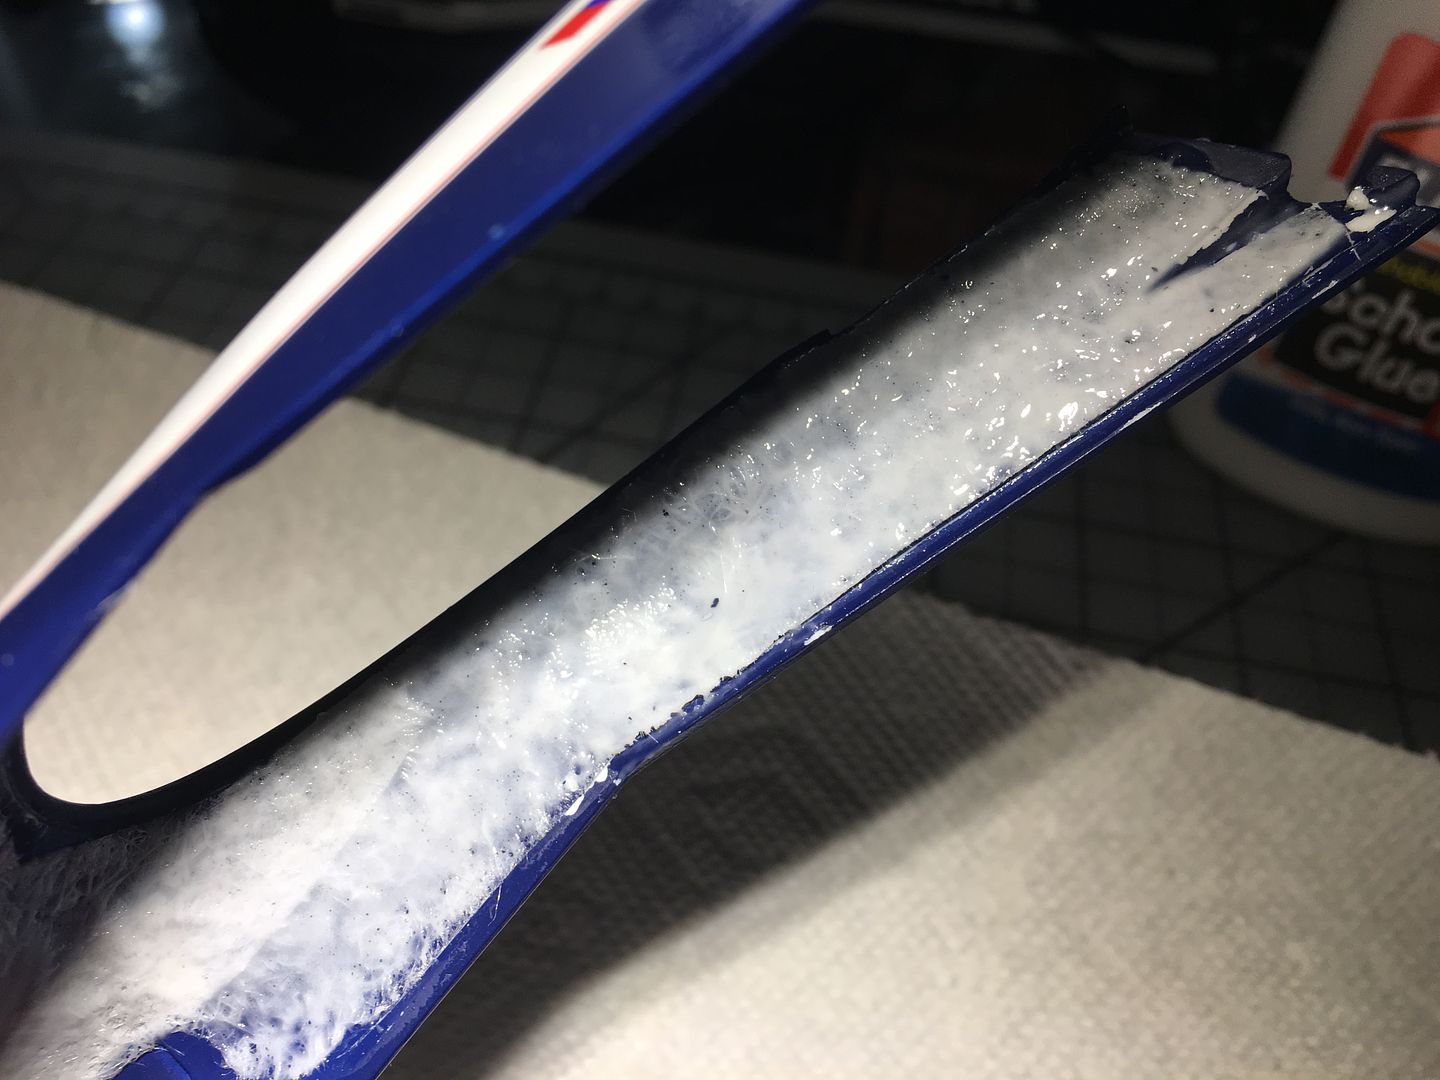
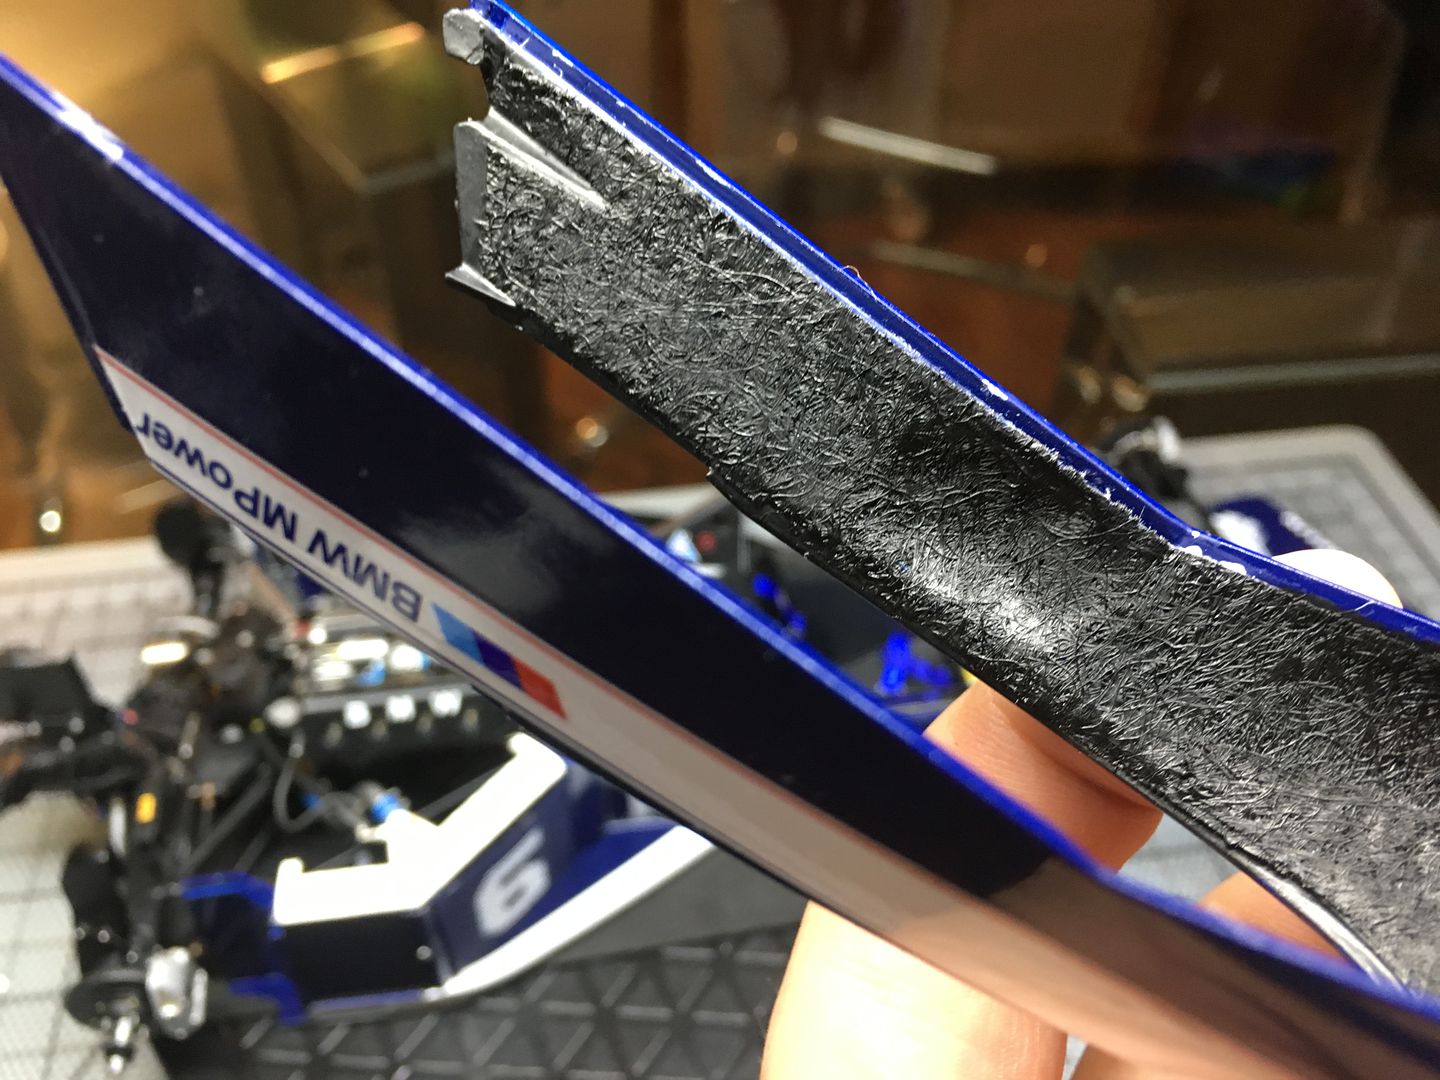
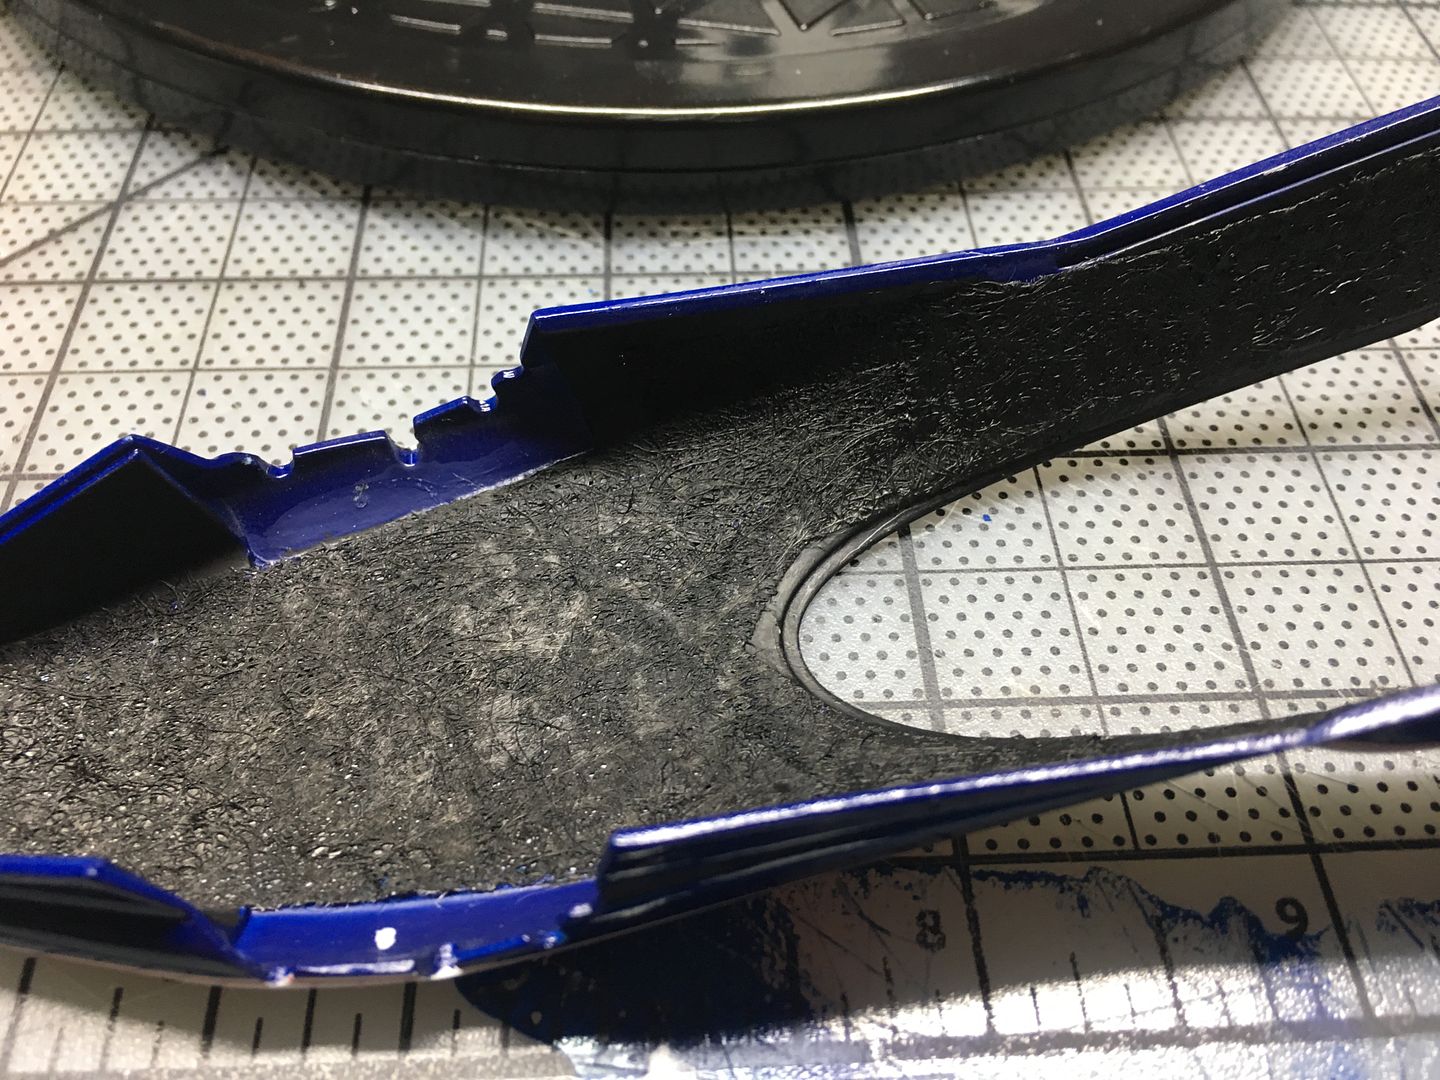
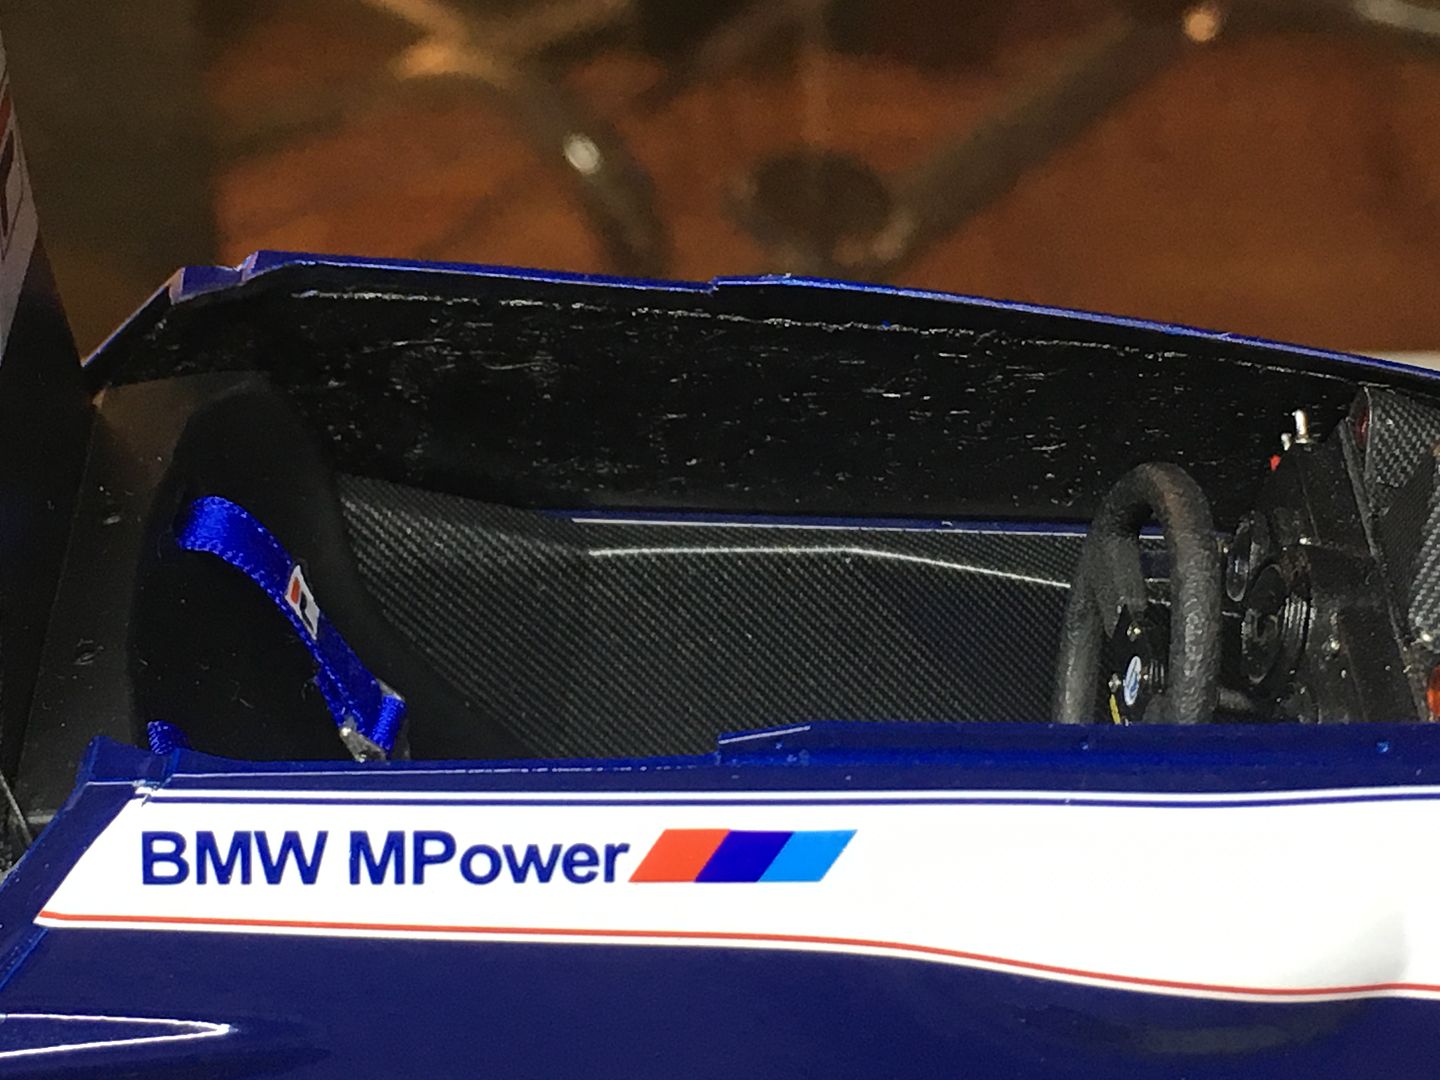
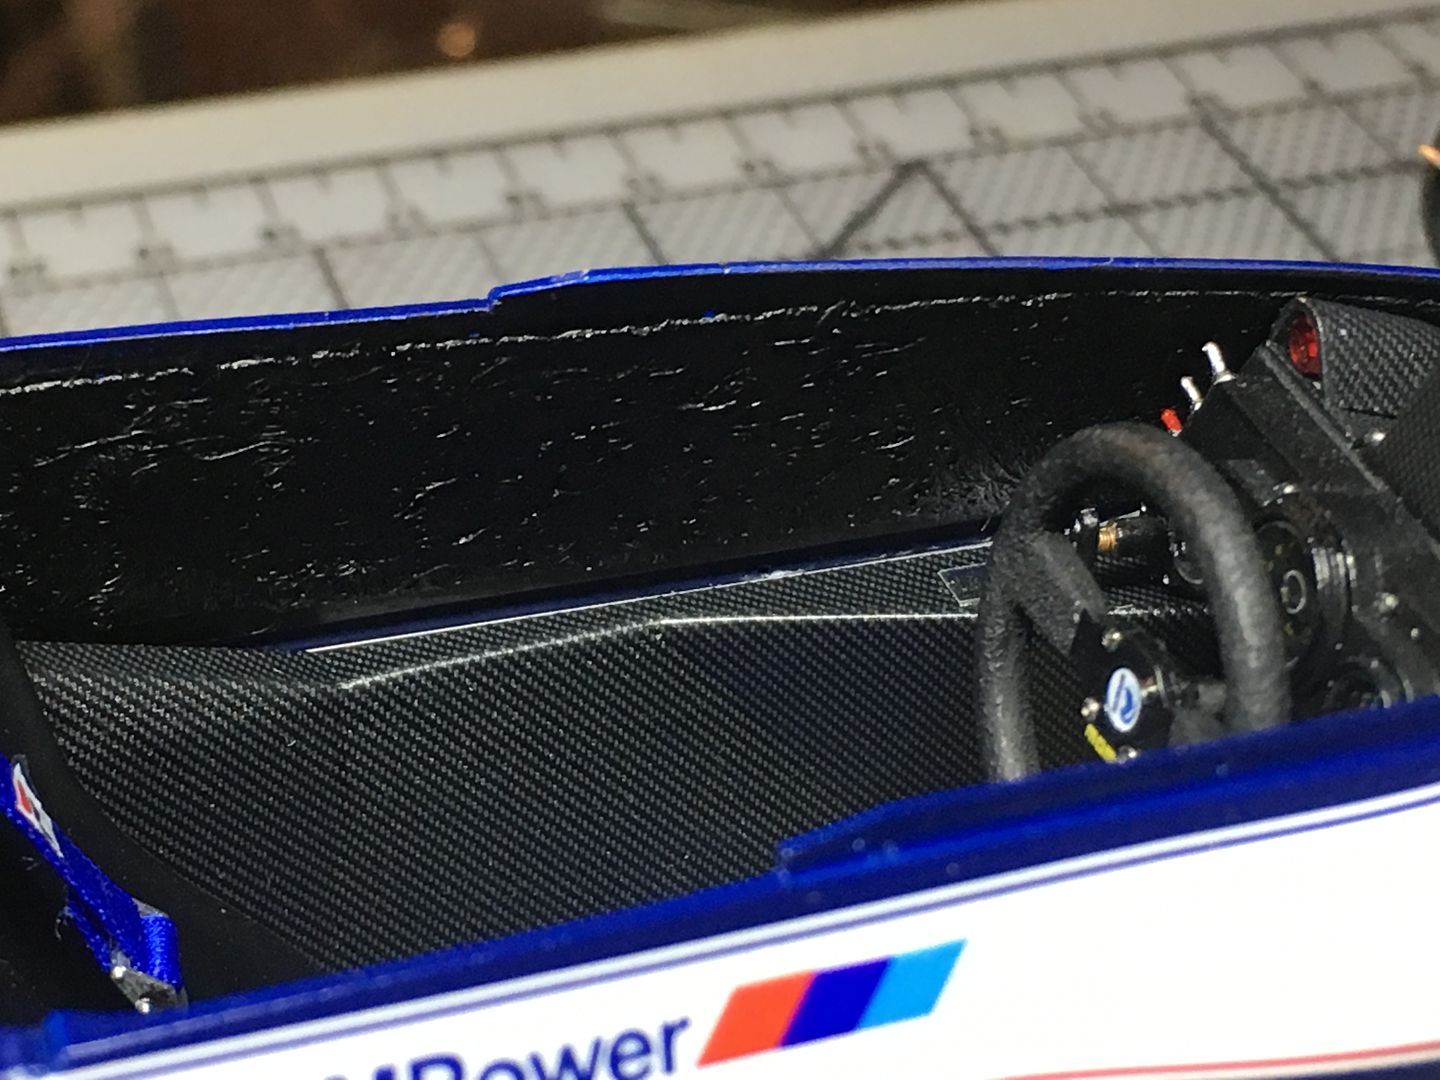
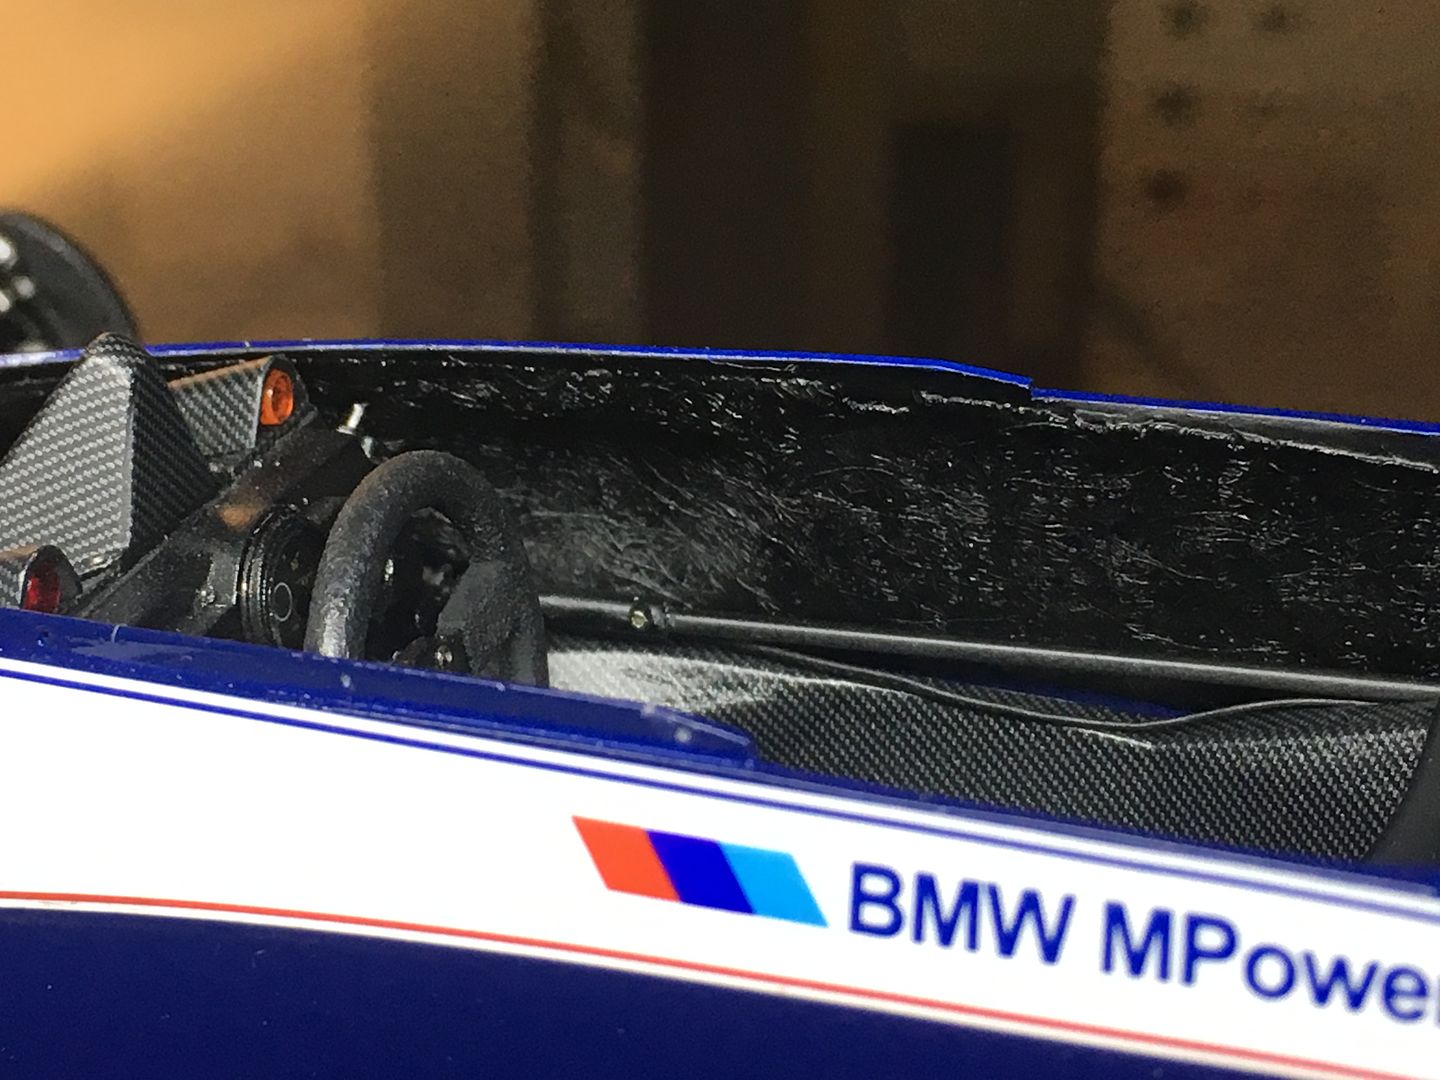
I smoothed it out more last night, and hopefully I'll add some black tonight and we'll see how it looks - bit of an experiment, but I'm hoping it will look ok! Going from pics of the real car, the finish is not like those laid-up carbon sheet finsihed you see on the MP4/4 chassis - more like the inside of a GRP canoe we used to make at school!
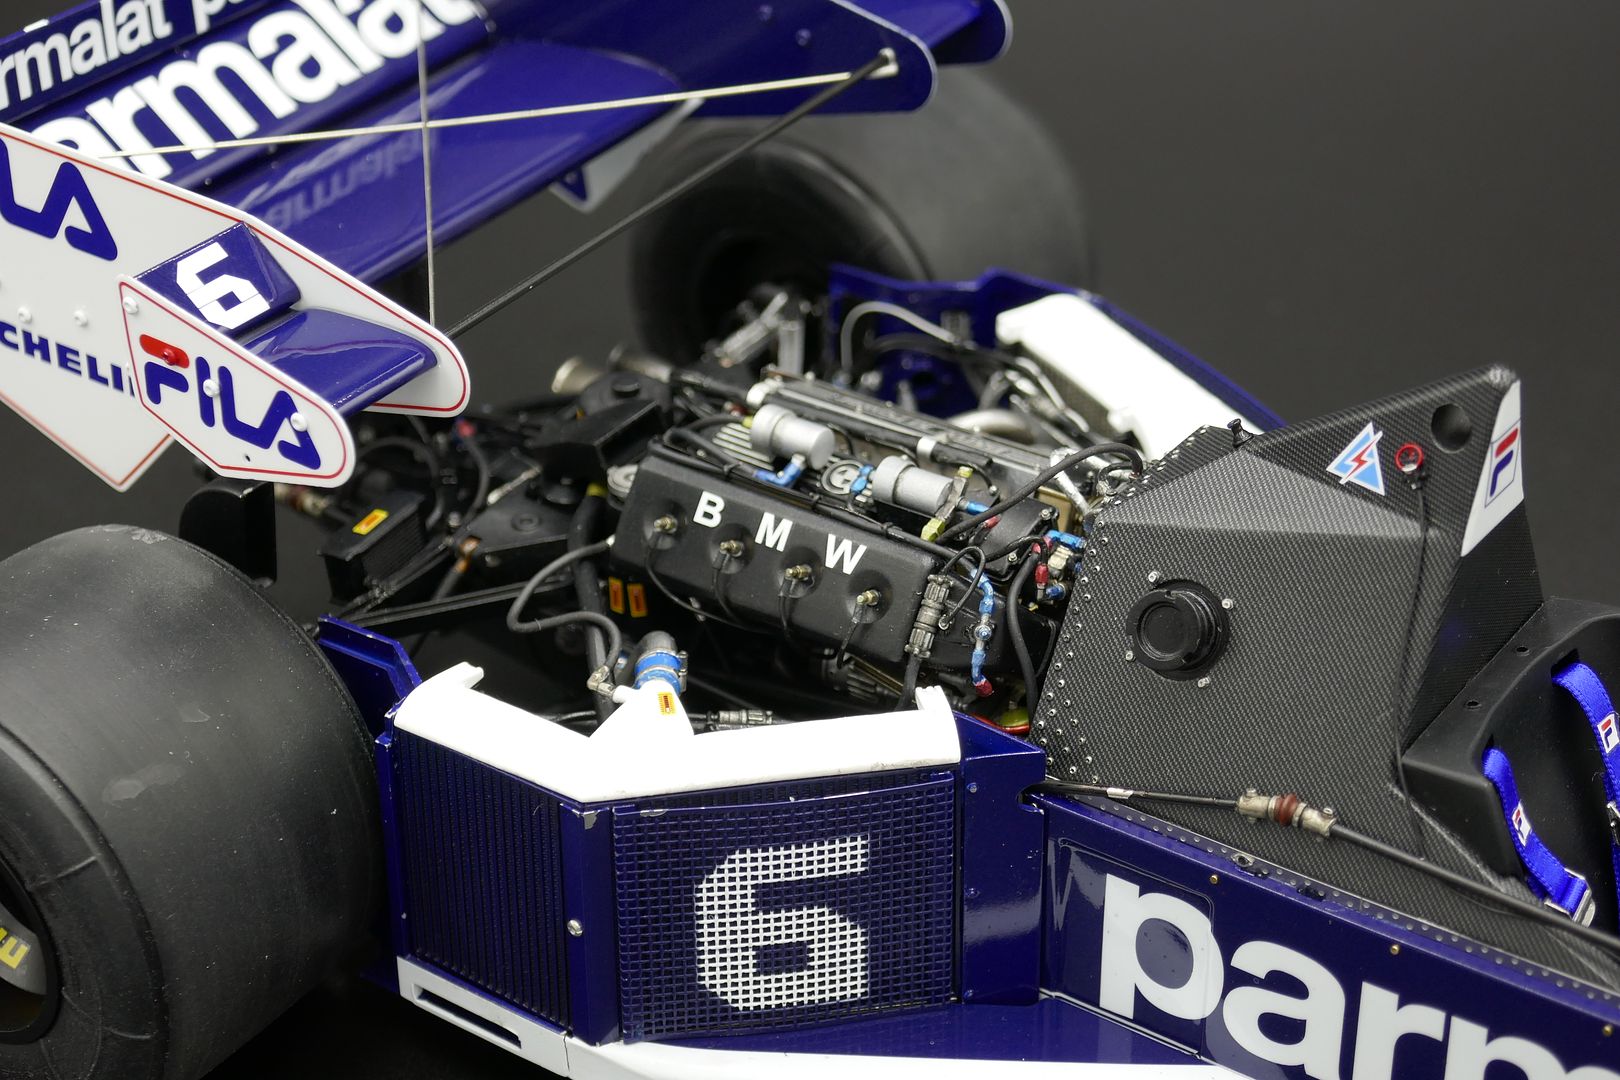
I also added the radiator mesh covers - gradually getting there - last big job is going to be that very complex rear wing!
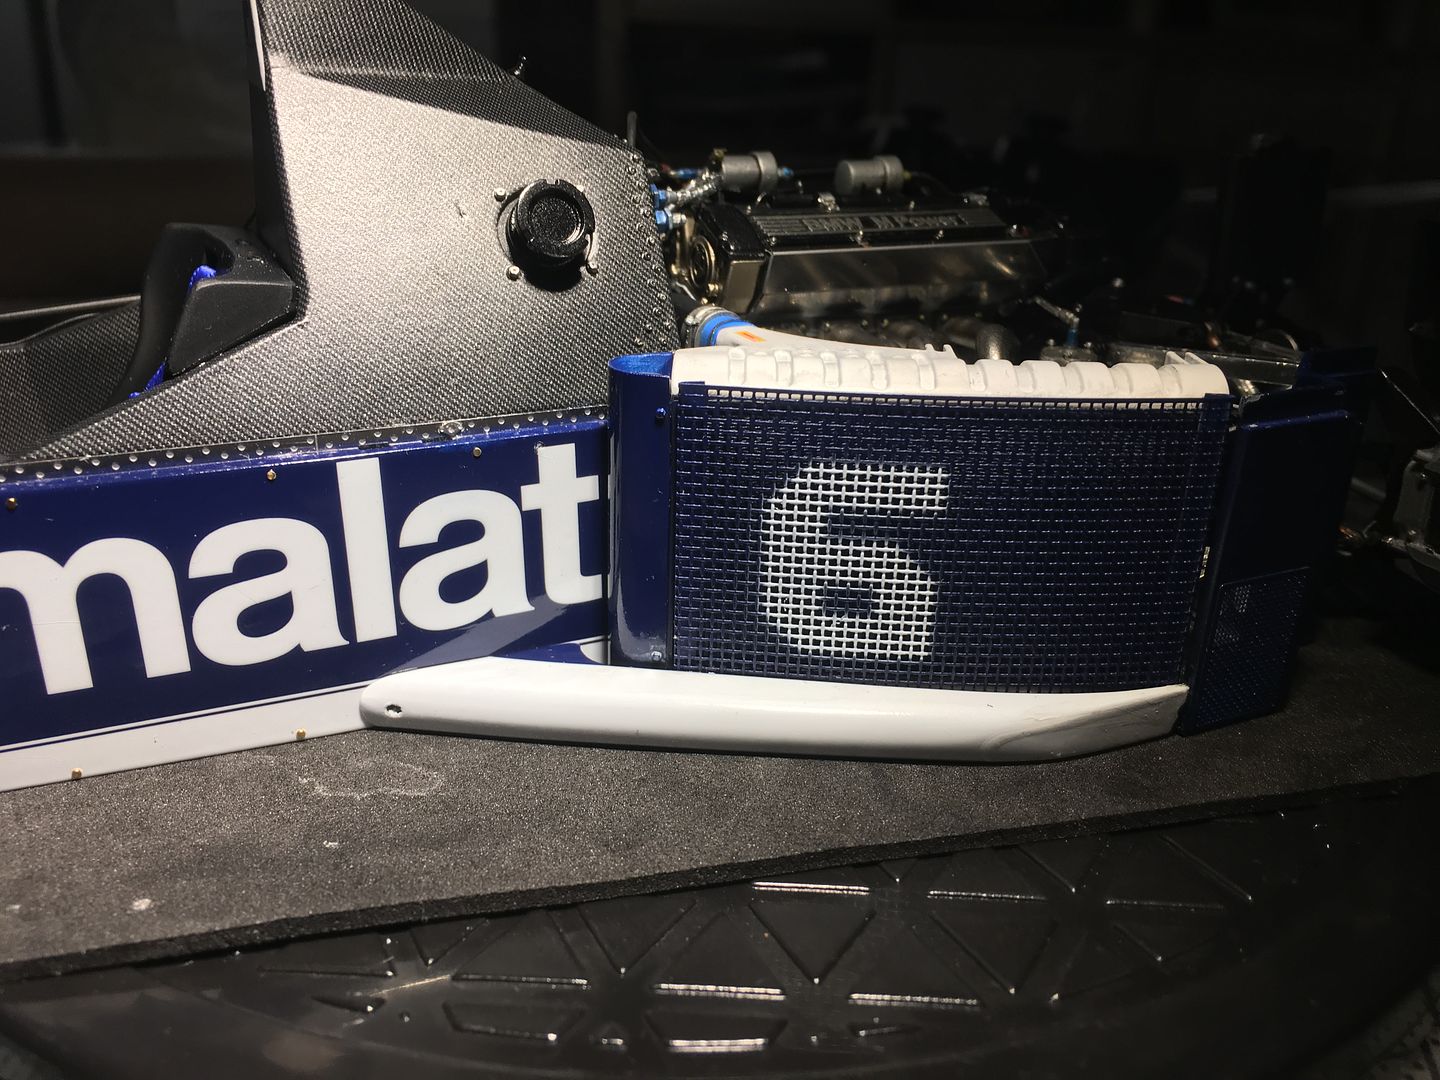

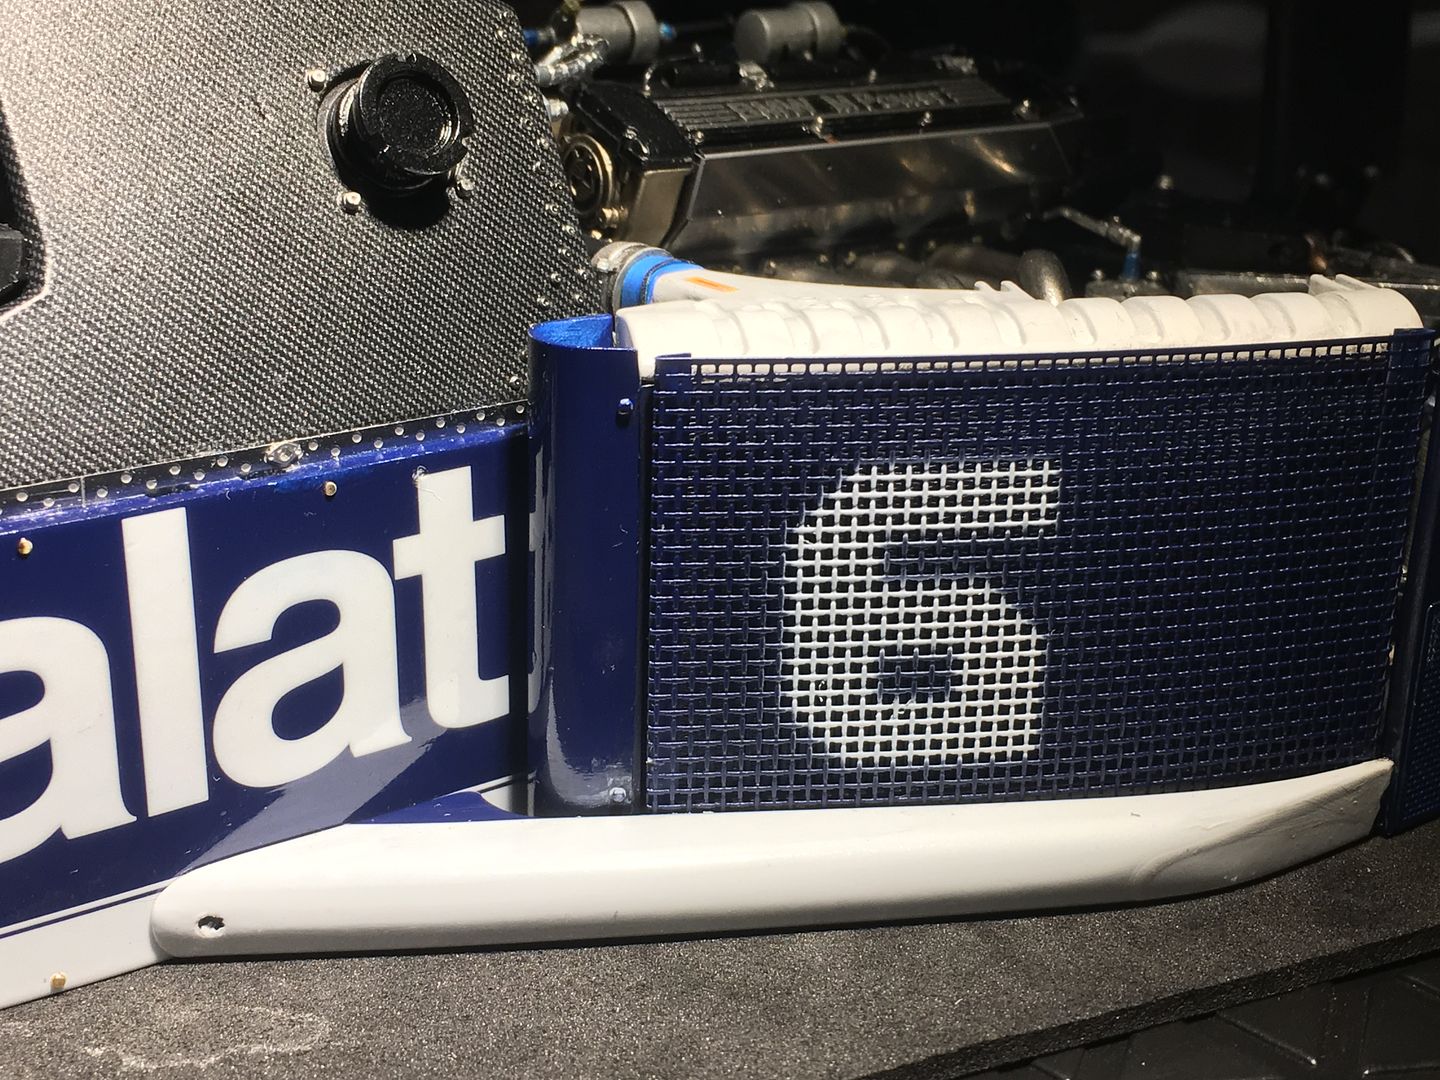
I also added the radiator mesh covers - gradually getting there - last big job is going to be that very complex rear wing!
Right - I'm pleased with the results - the photos maybe exaggerate the texture through reflections, and I will make the finish more matt - but overall, as a first time impulse experiment I think I have got away with it!
This photo makes it look rougher than it is...
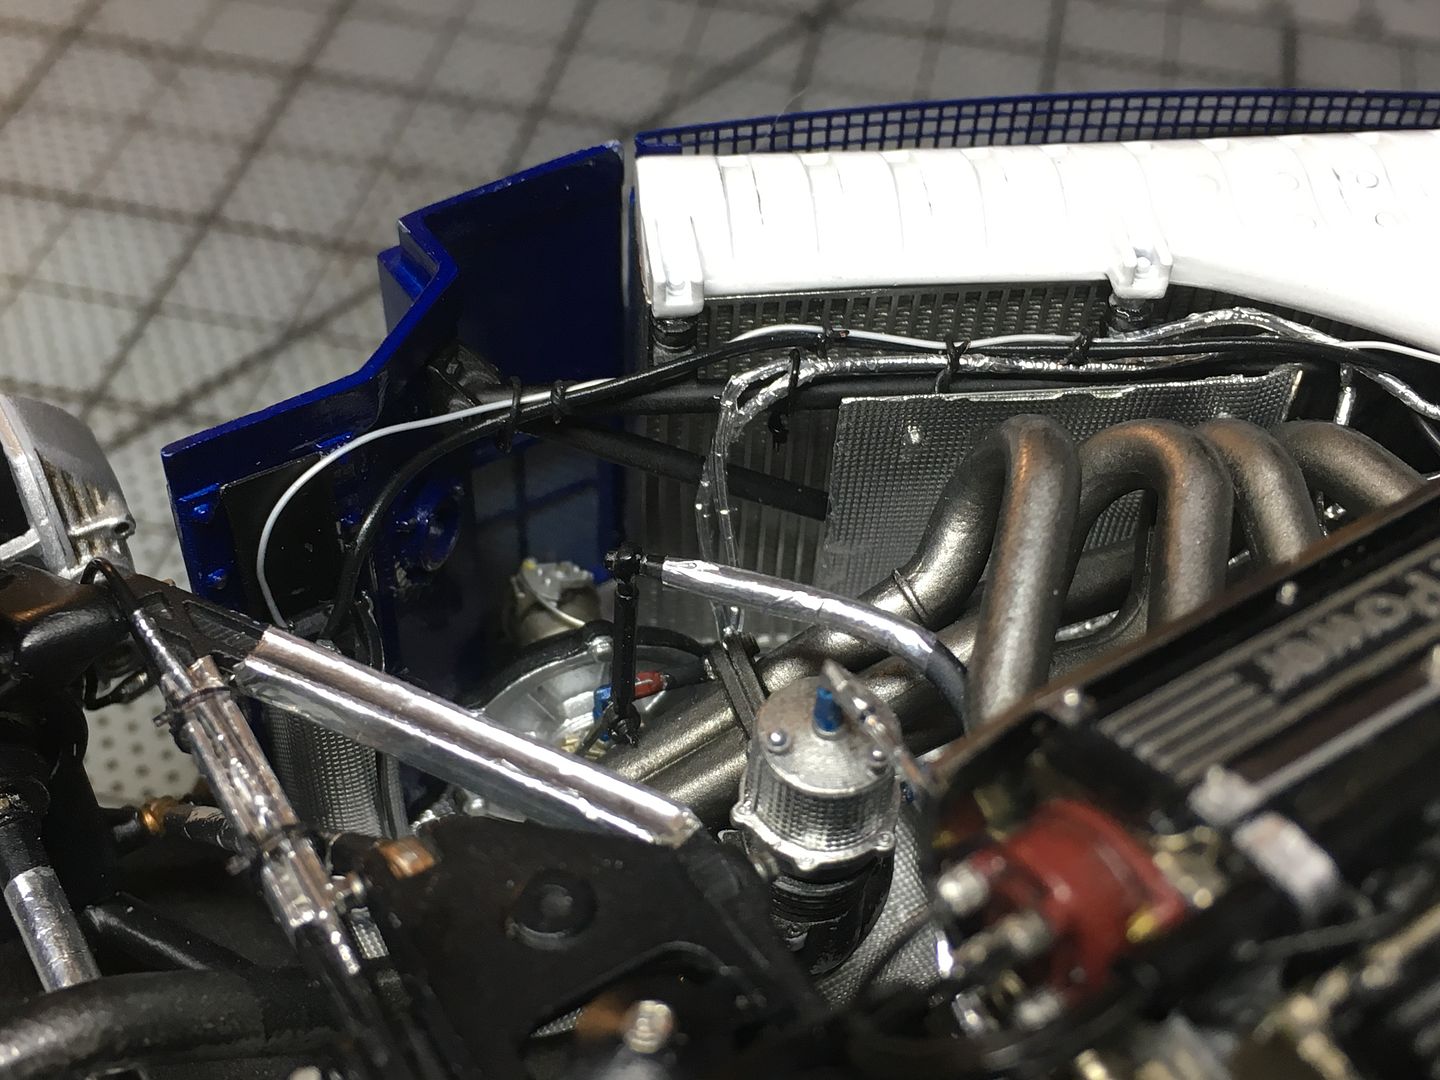
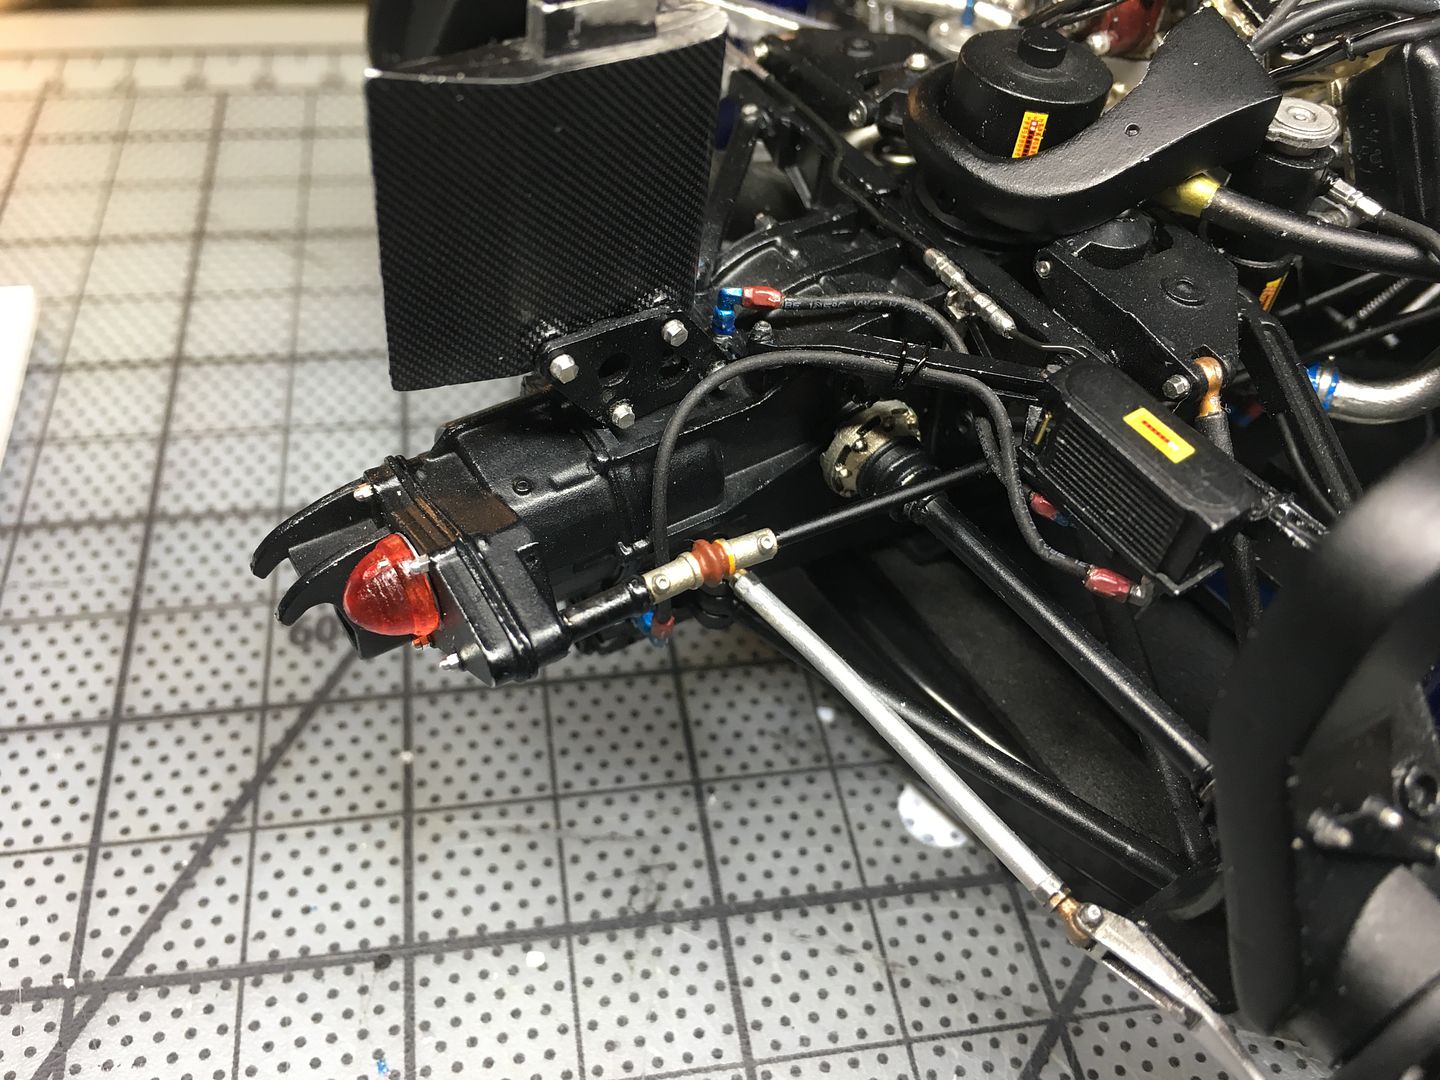
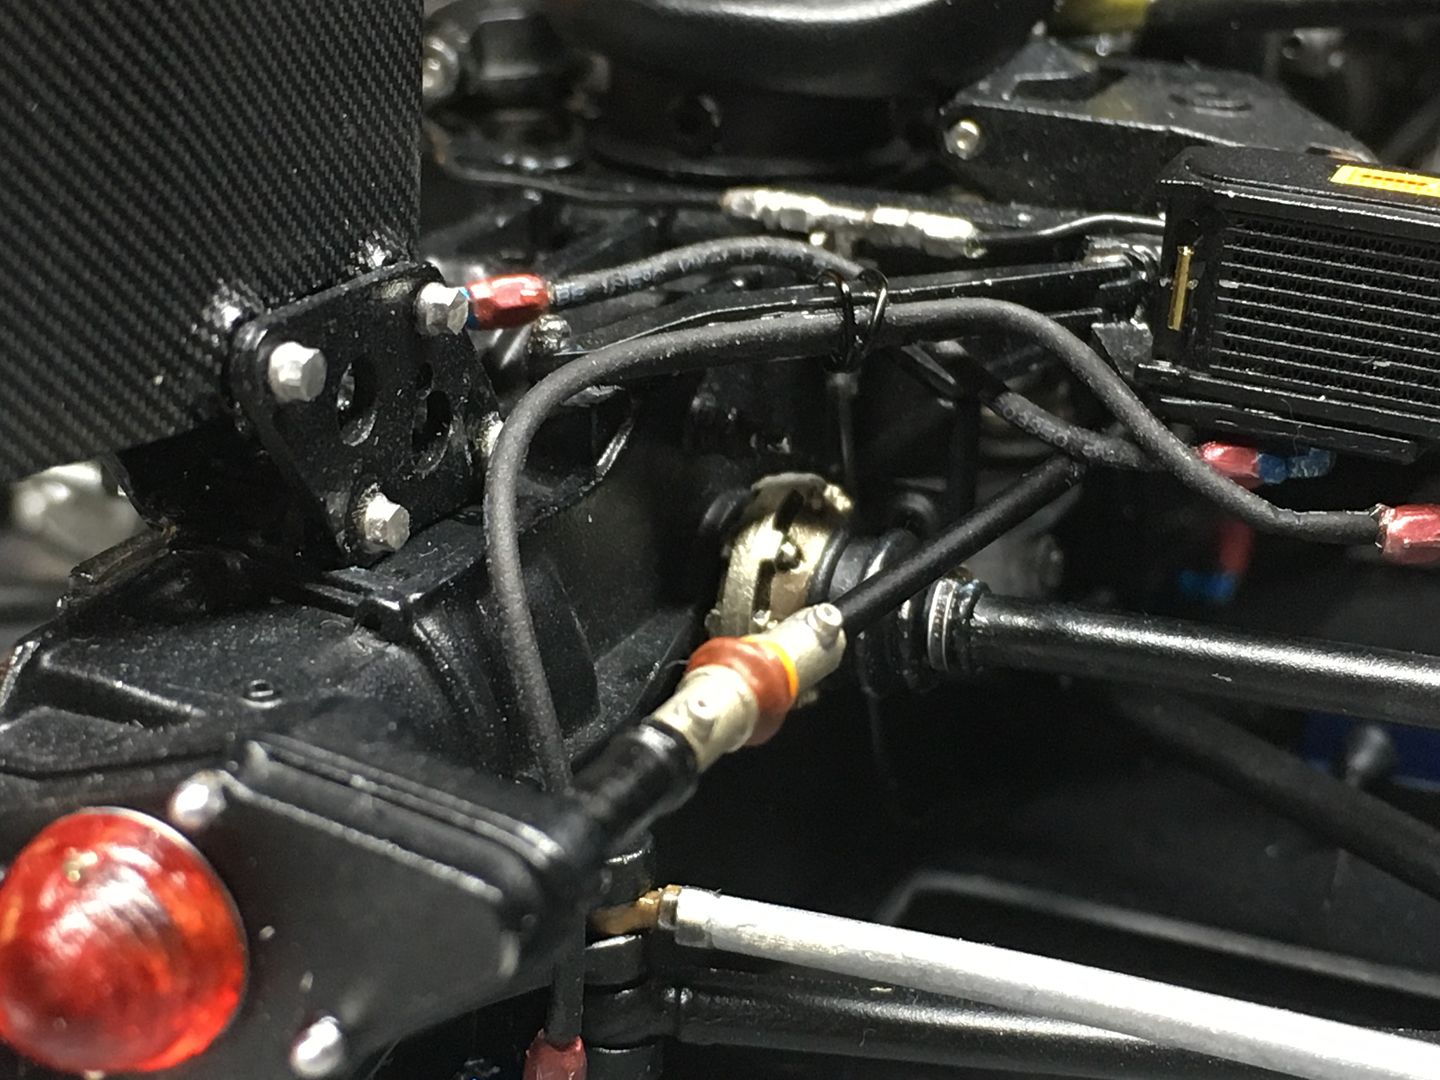
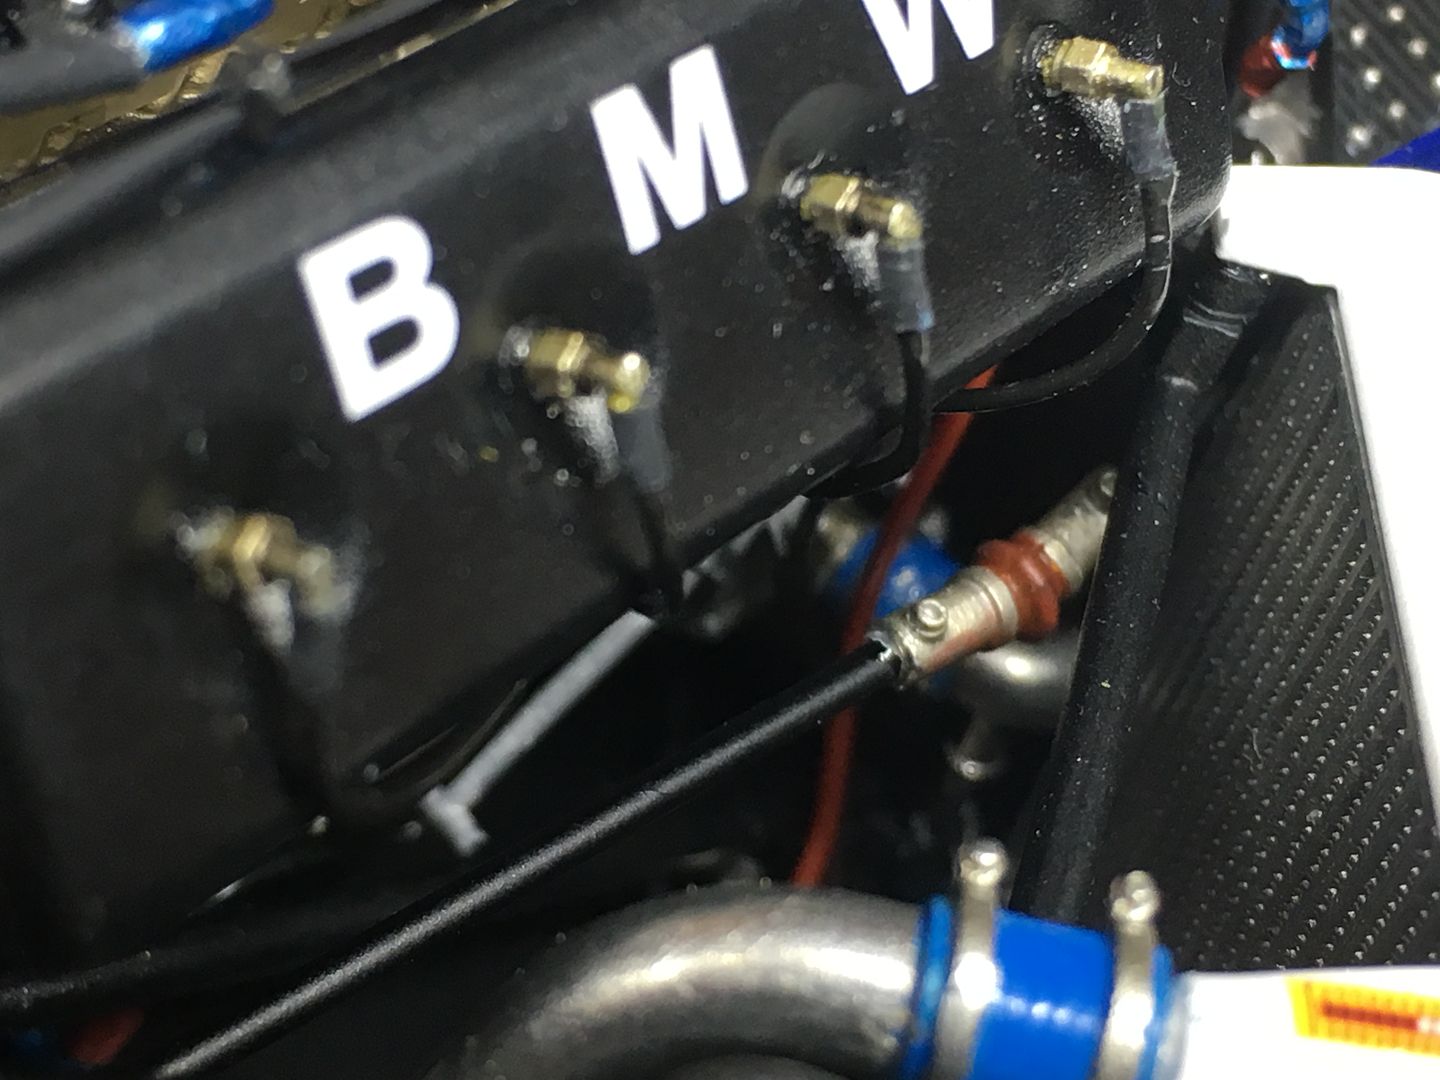
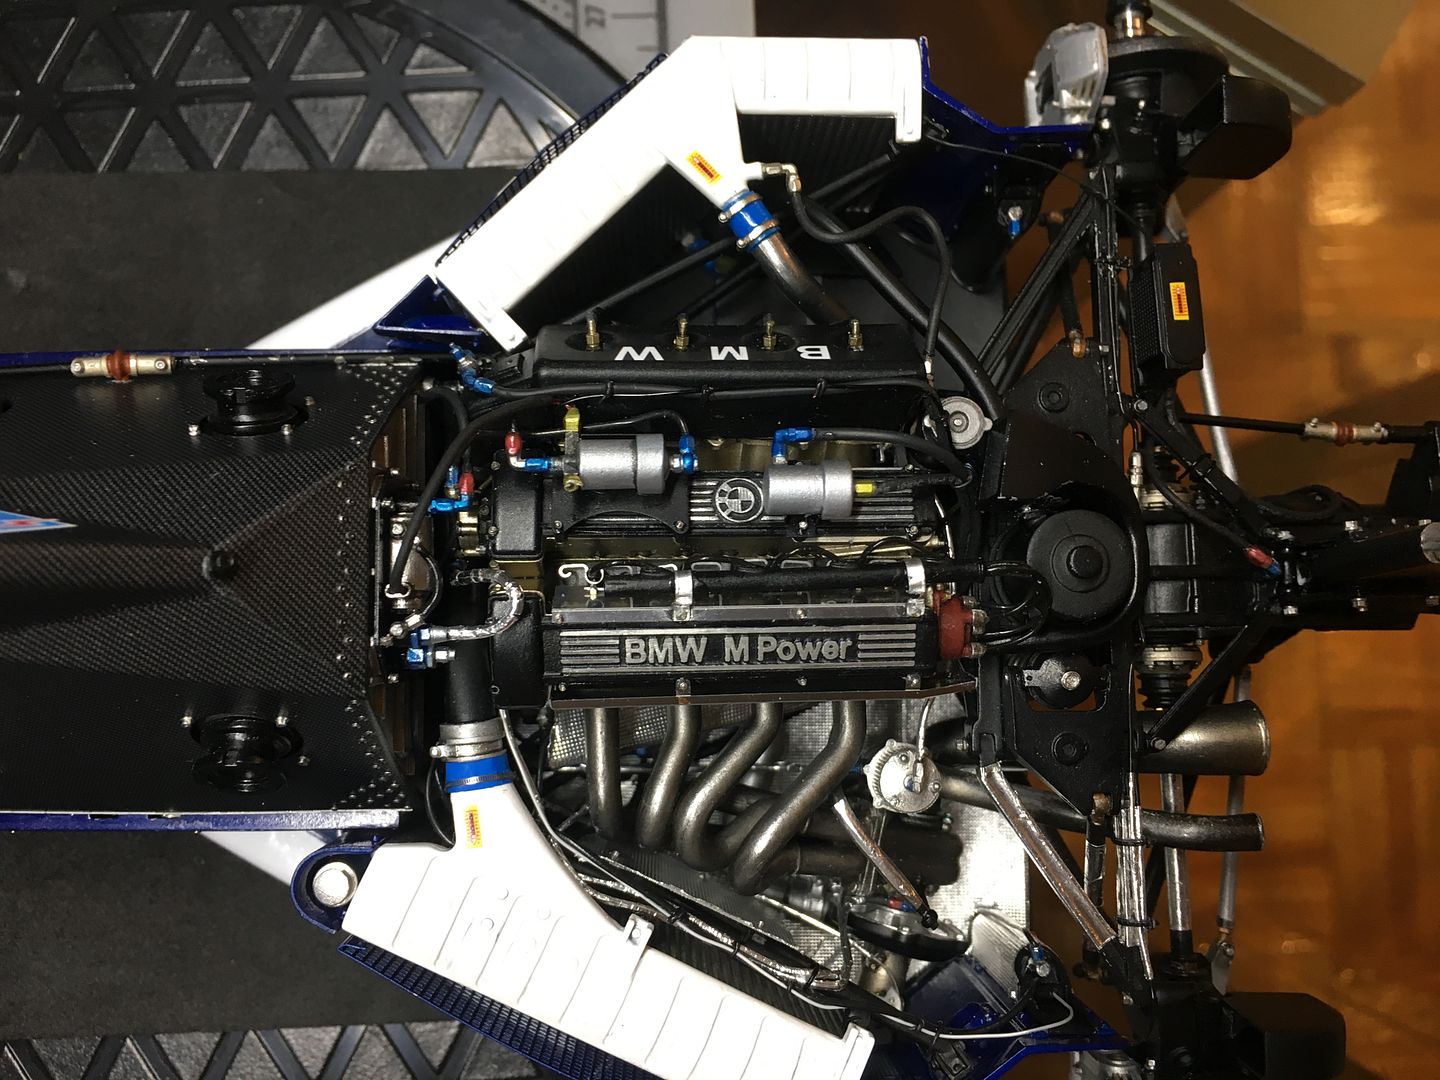
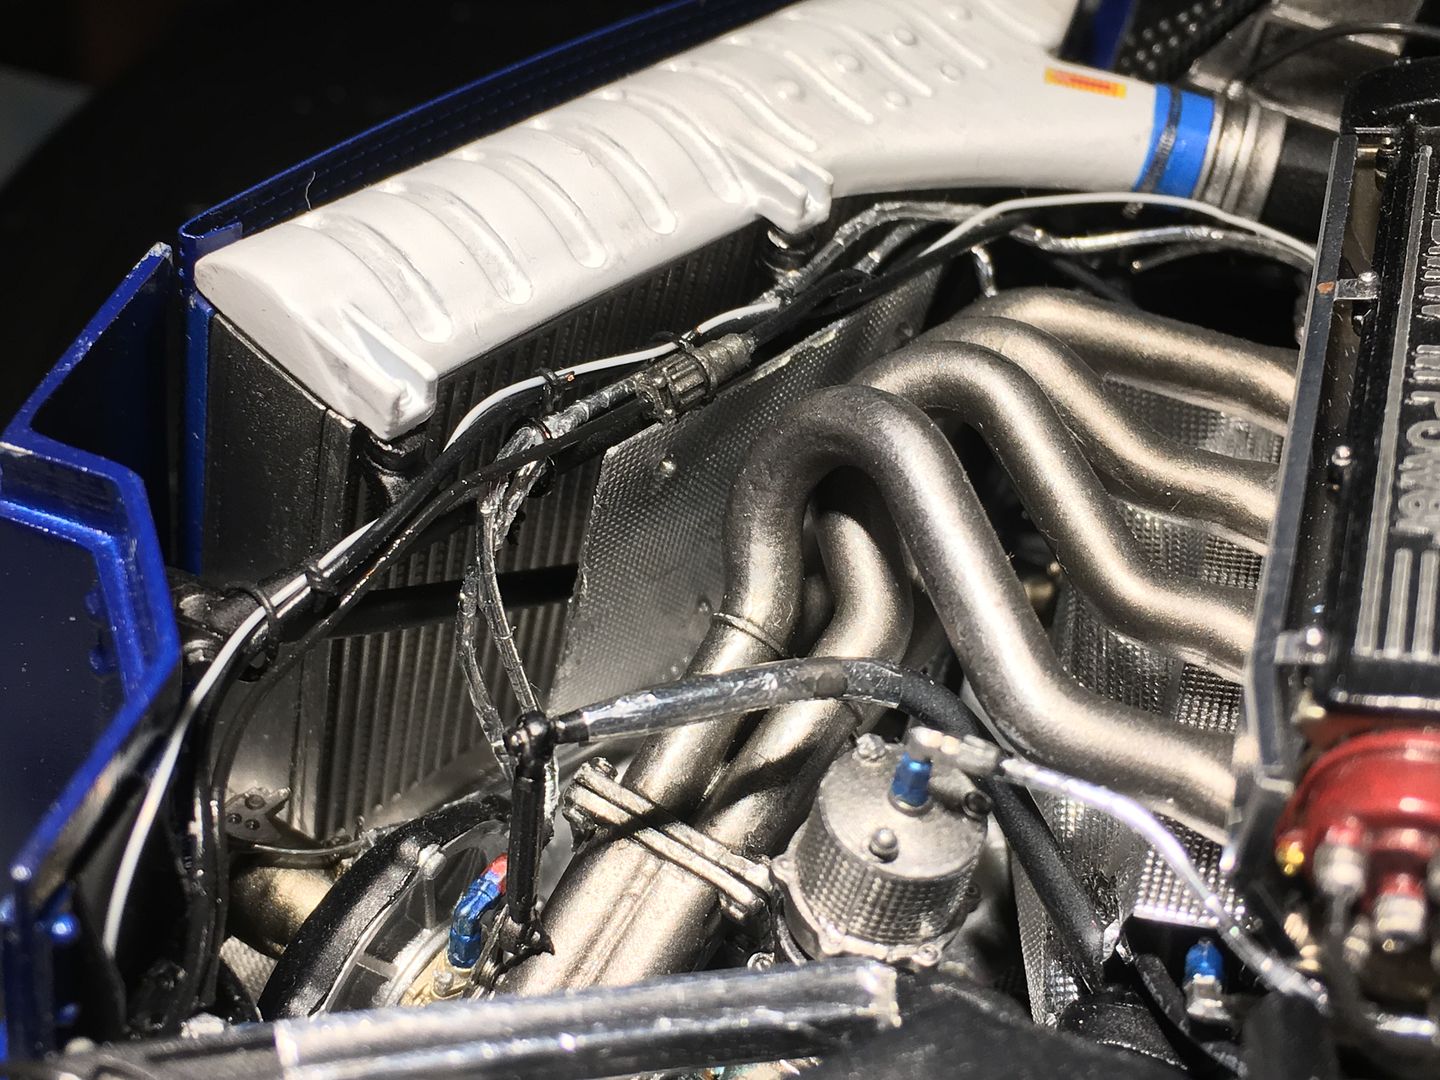
A final few photos of the additional wiring I have finished...


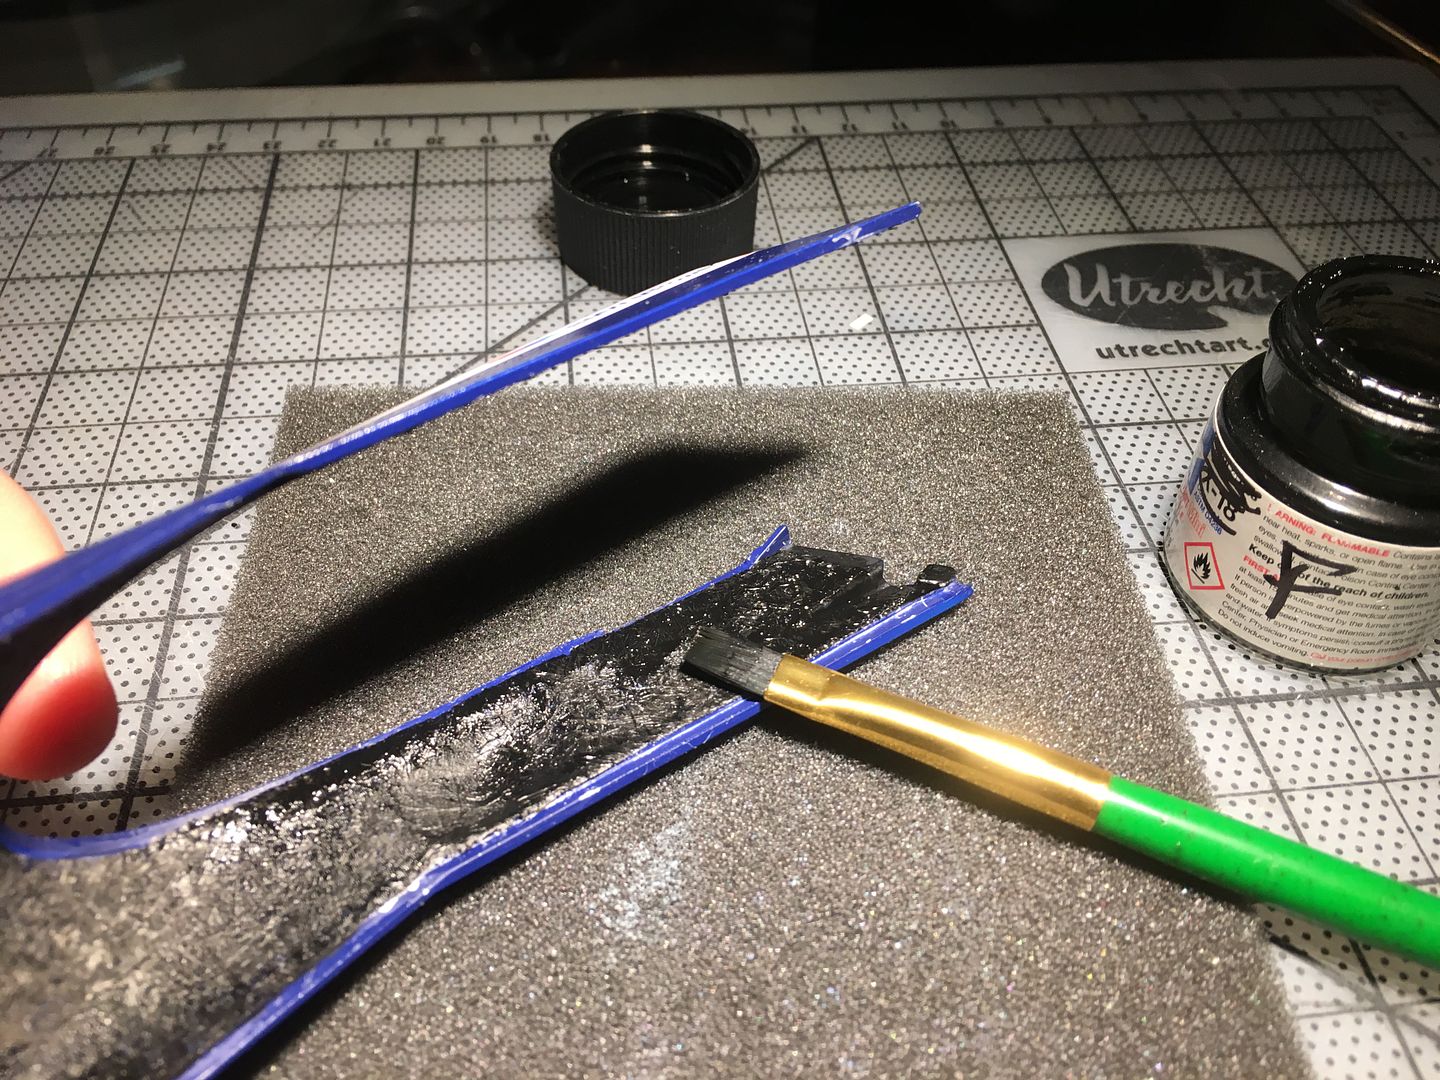
Lots of little small jobs to do - I'll touch up all the paint at the end, but i wanted to tweak the colour of the gear changing rod joints, MFH said orange, but pictures of the real car show a darker red-brown colour...
Both shown here:

Paint on the wire rods is a bugger not to scratch, so more touching up on that later!
This photo makes it look rougher than it is...
A final few photos of the additional wiring I have finished...
Lots of little small jobs to do - I'll touch up all the paint at the end, but i wanted to tweak the colour of the gear changing rod joints, MFH said orange, but pictures of the real car show a darker red-brown colour...
Both shown here:
Paint on the wire rods is a bugger not to scratch, so more touching up on that later!
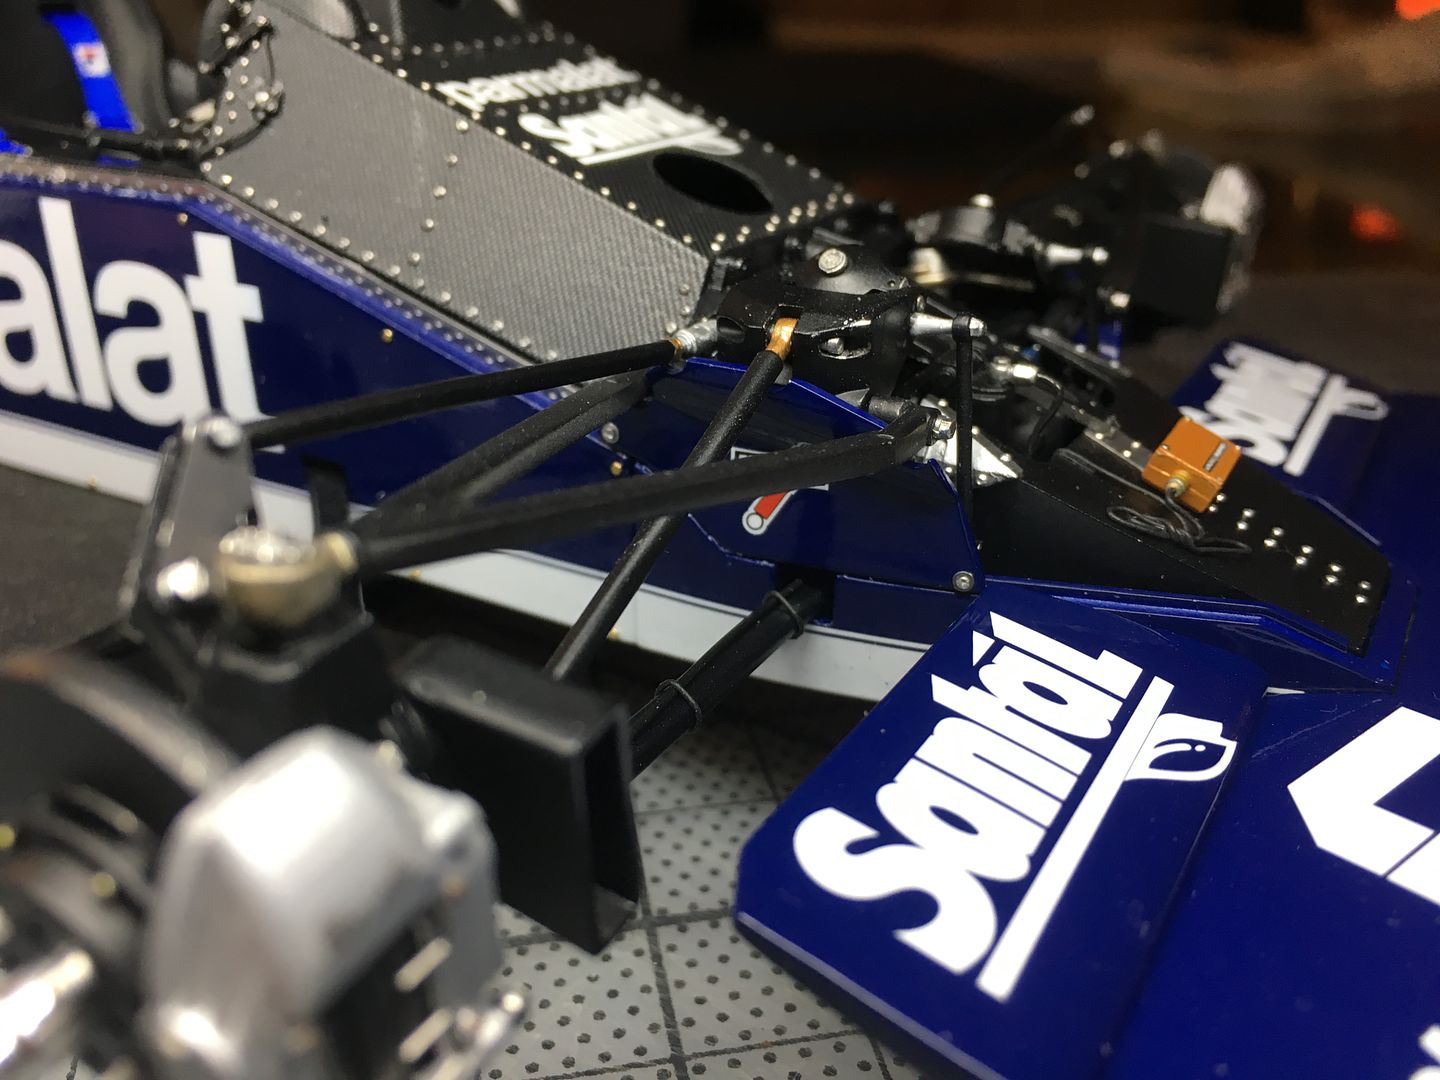
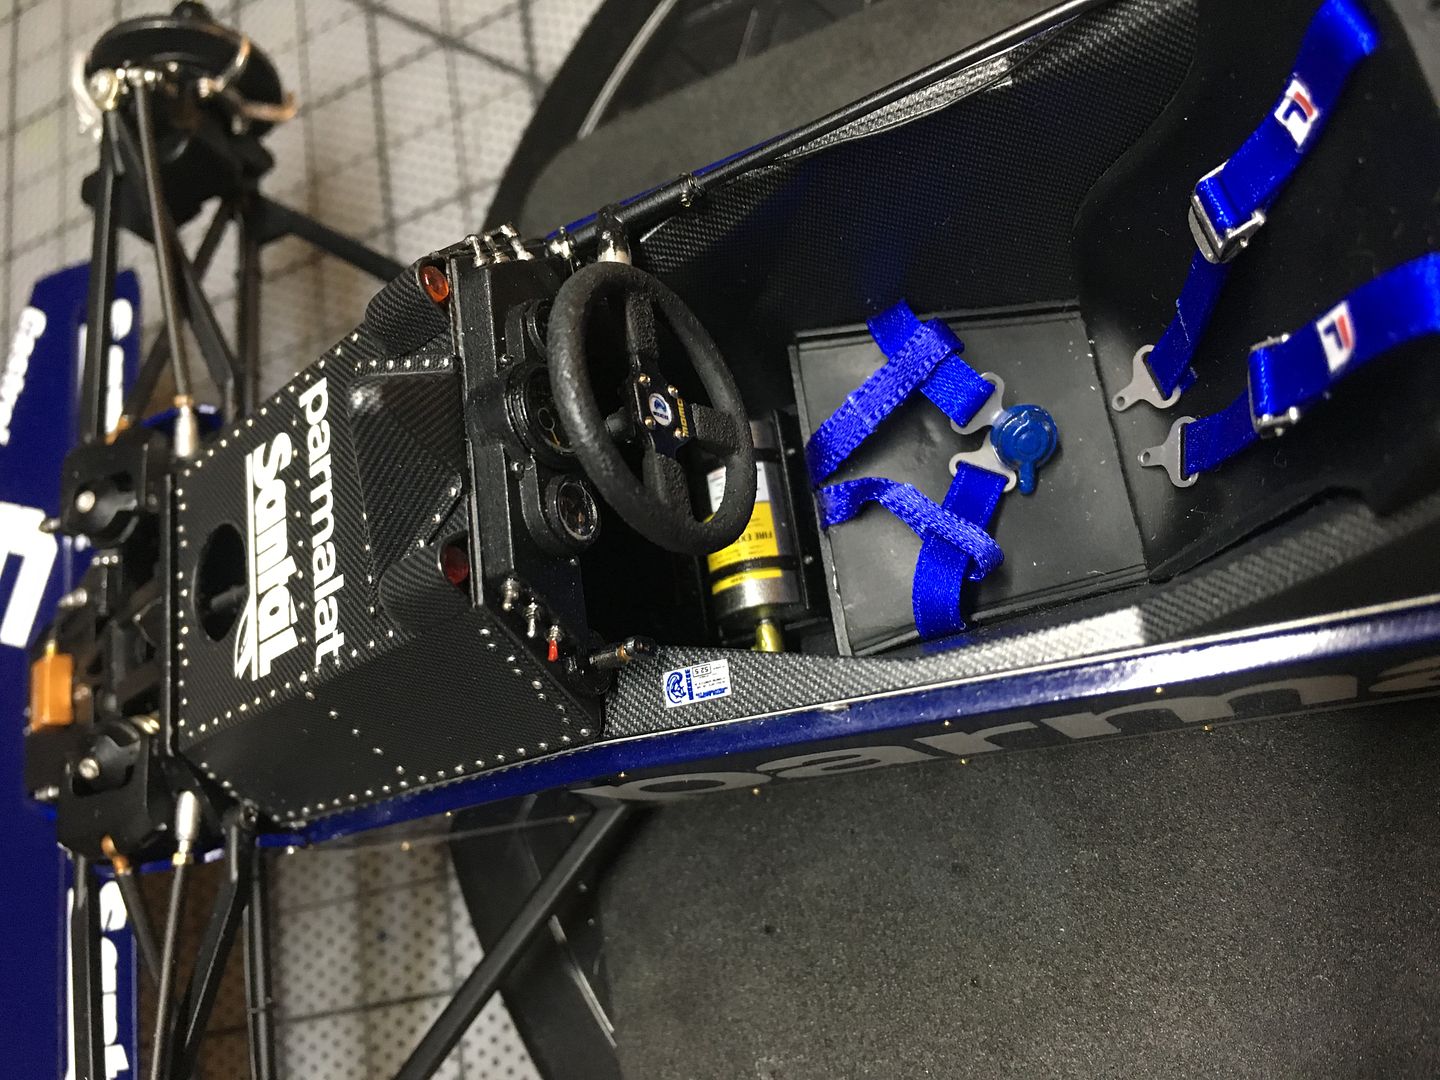
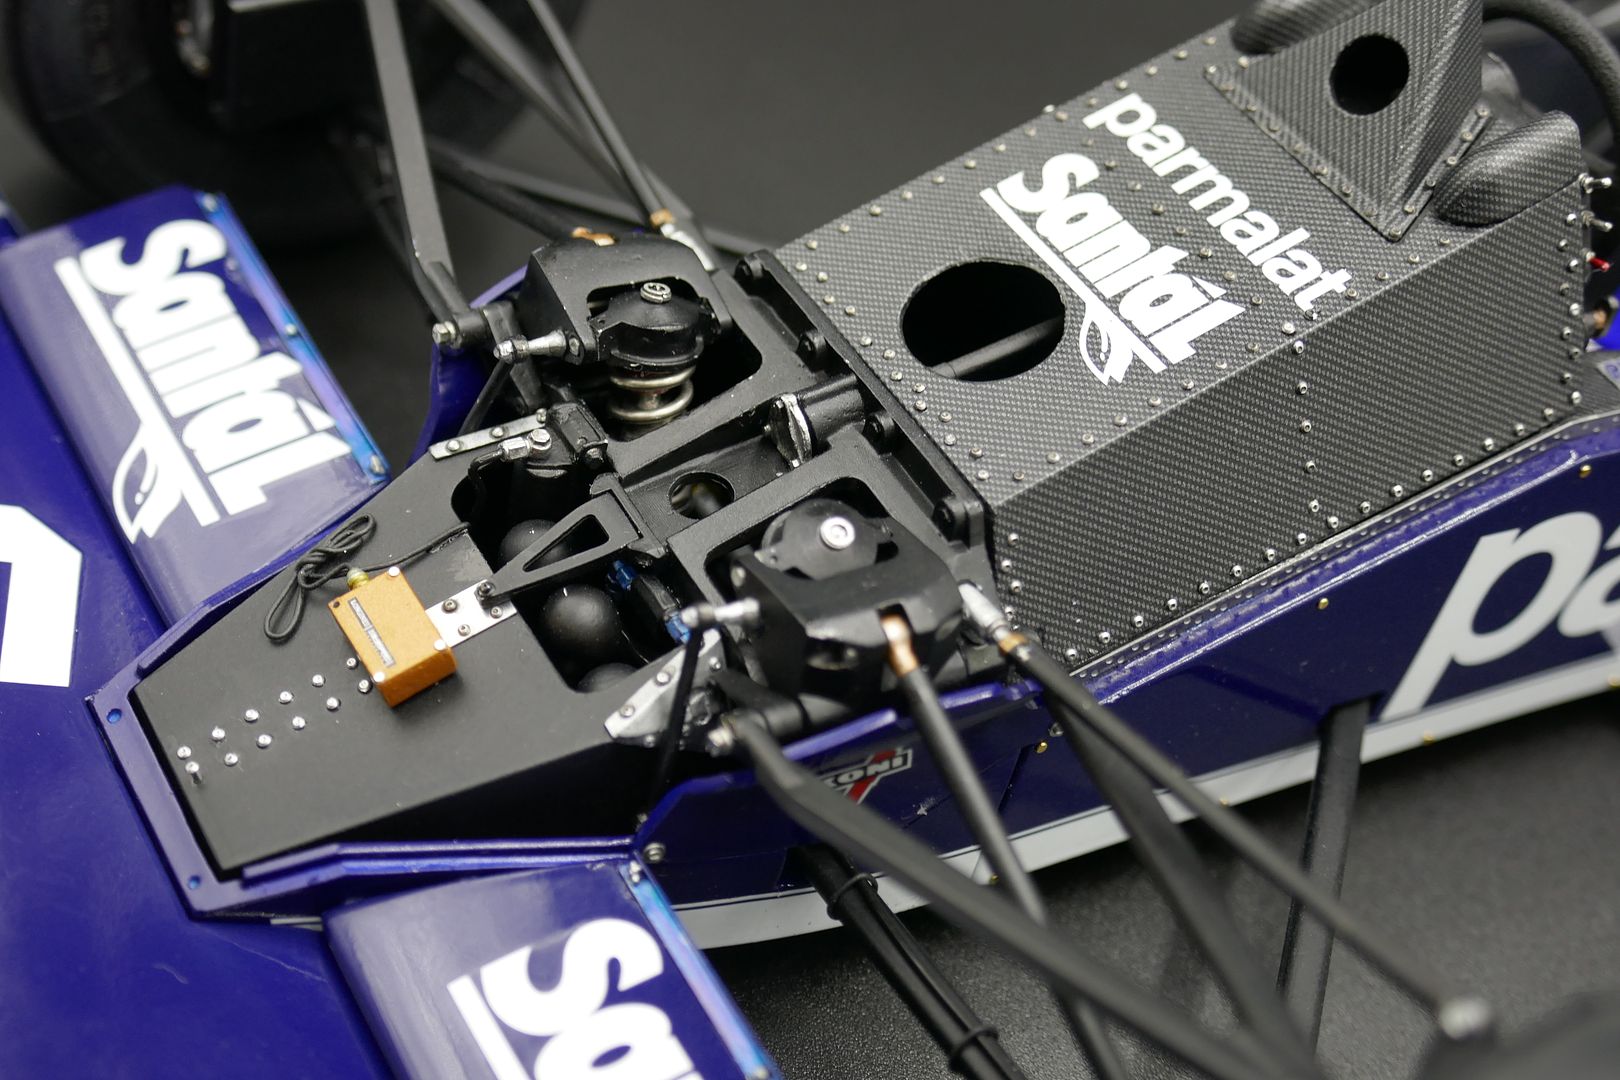
Typical of these models - I noticed this tie rod had come off the roll bar (I assume) attachment arm...so I carefully re-attached the components - and then proceeded to cover this area, never to be seen again!!
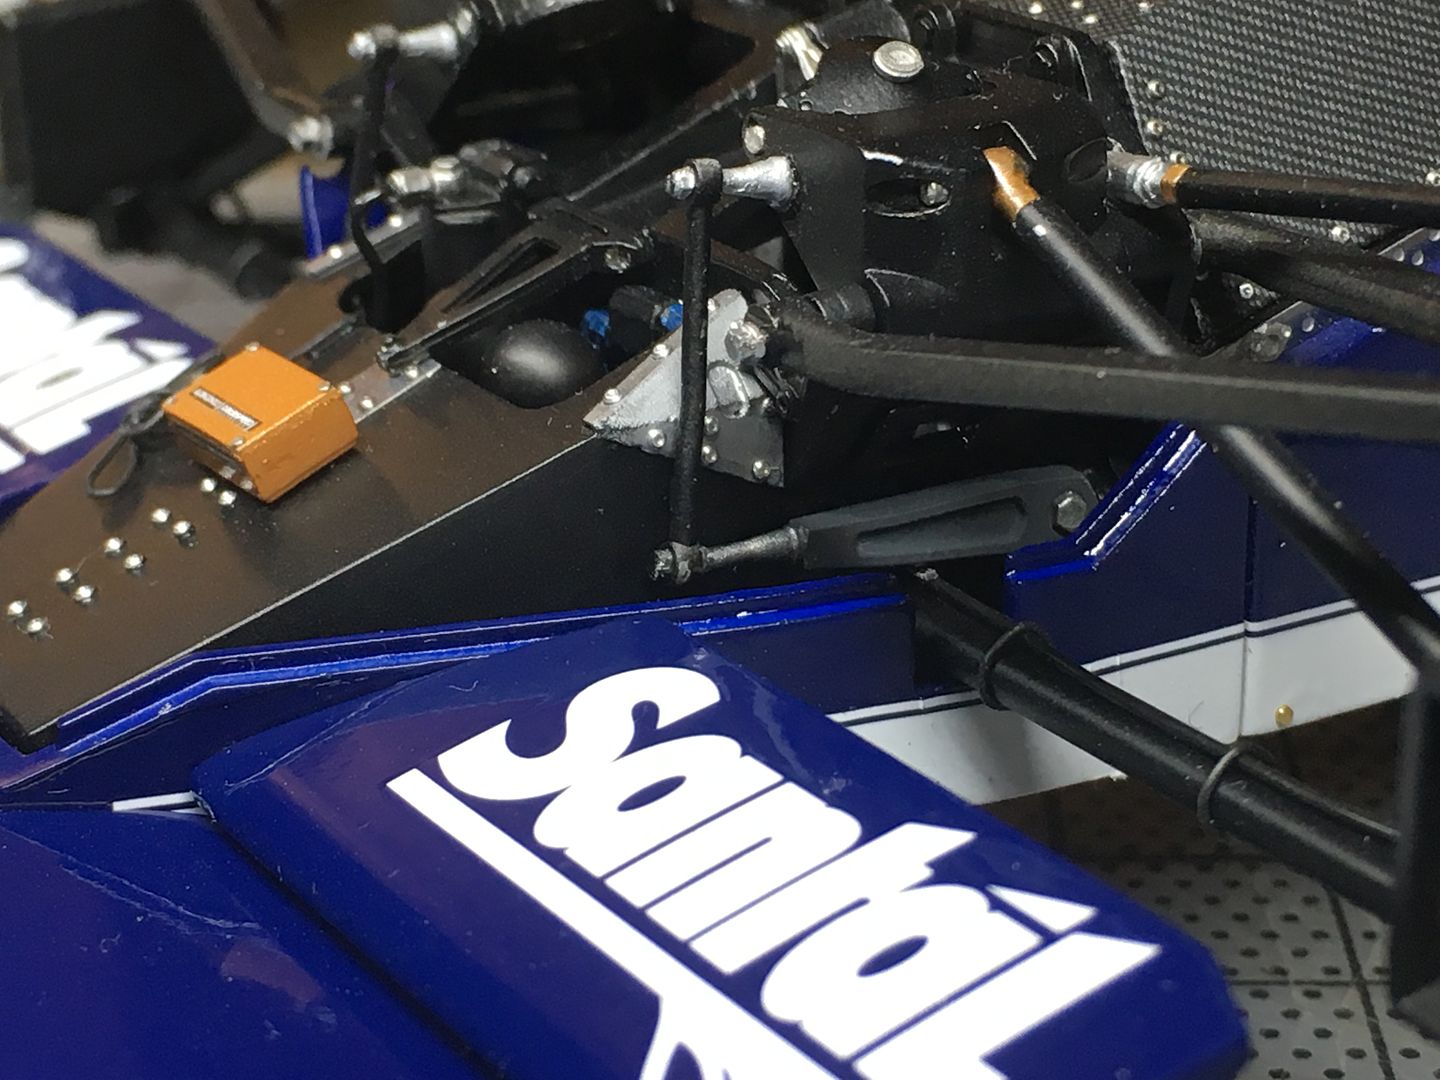
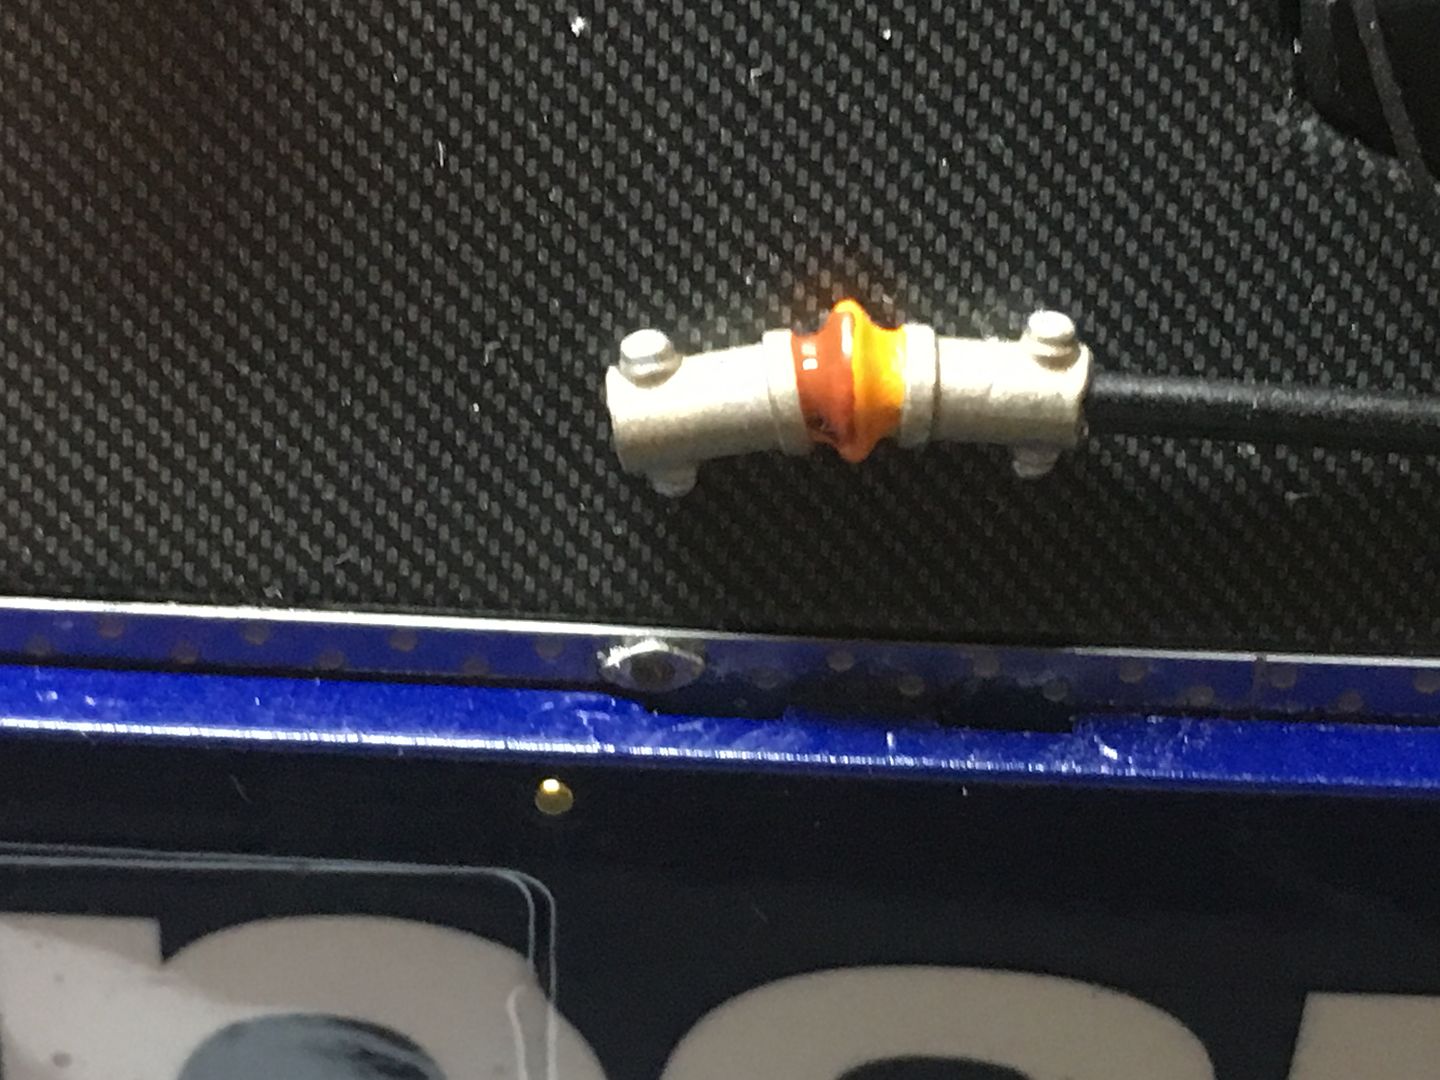
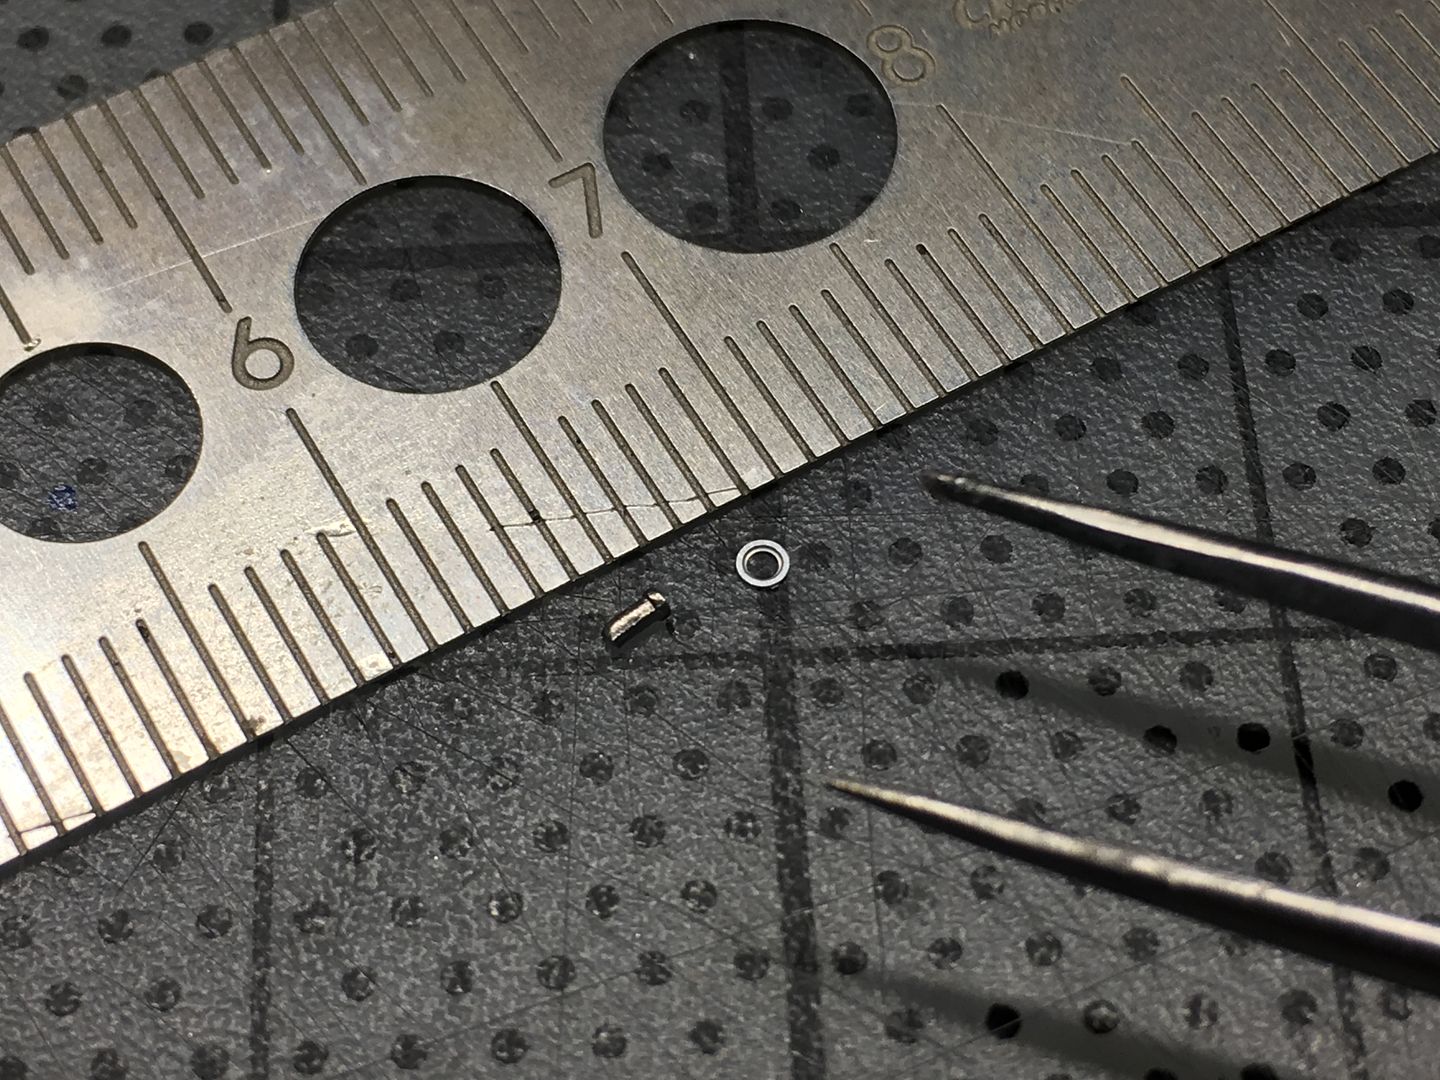
Two small access panels cover the area around the wishbones and steering arms. They fit ok - awkward to reach, but the fit is good. The TINY washers and quarter-turn fittings are just for show - and TINY!

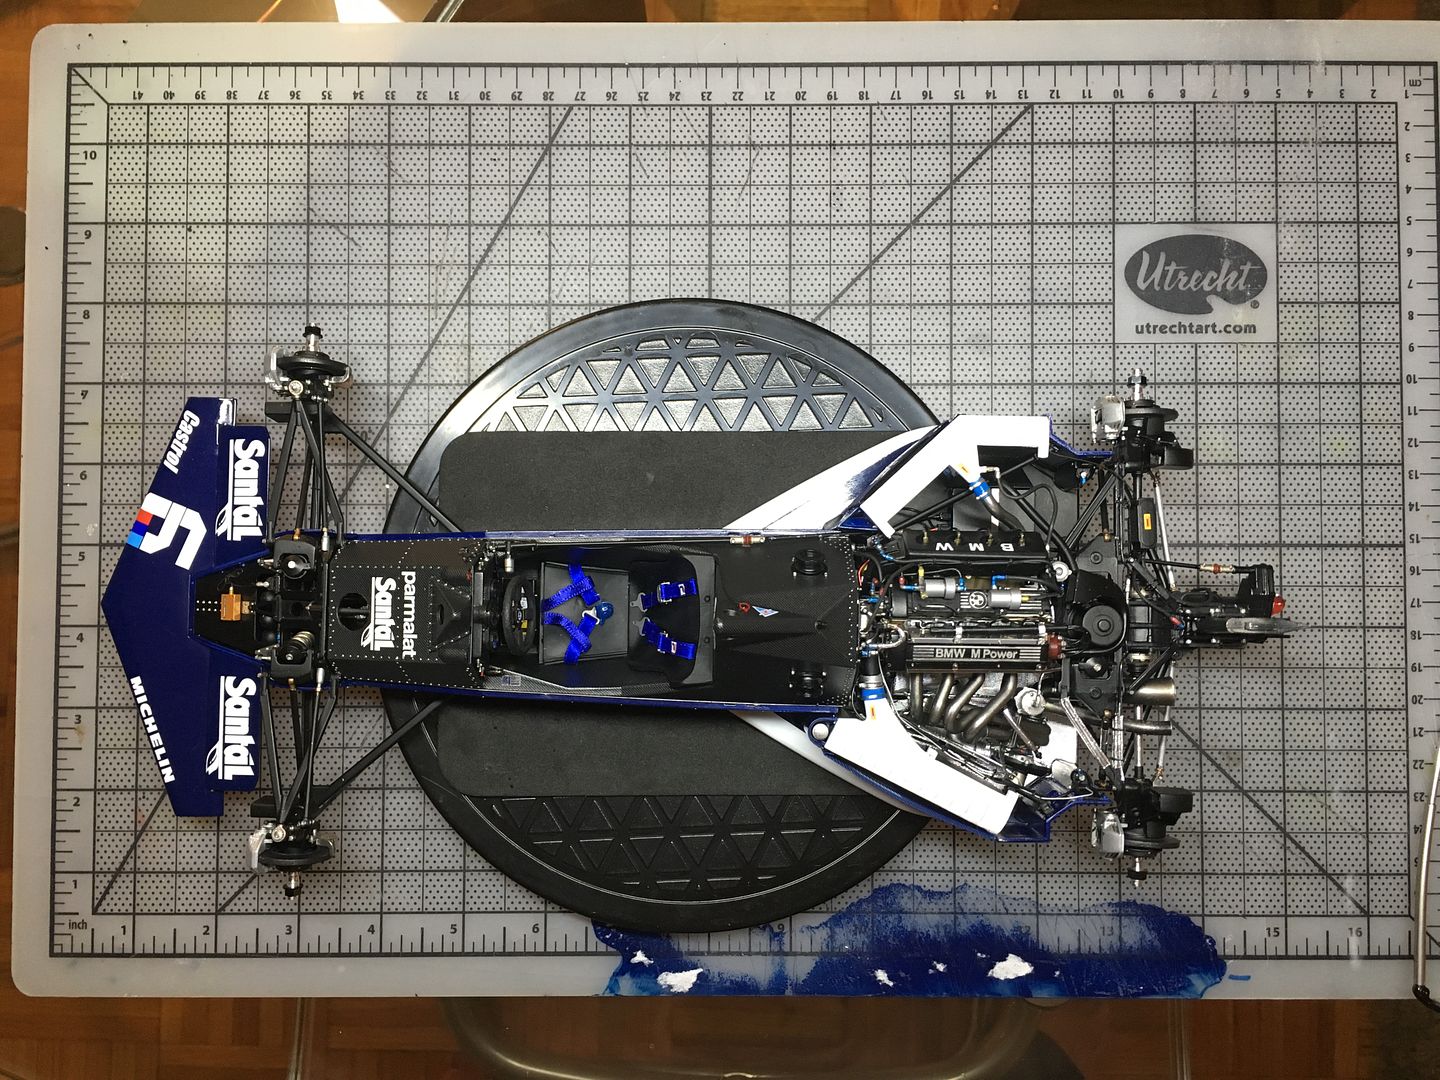
Top tip - the turntable you can see in these pictures came with the generic grey spray booth (as far as I remember) - VERY useful at this stage of the build - the rear of the model is VERY heavy (hence the offset) and twirling the model around on this as opposed to constantly lifting and turning it is so much easier, and puts less stress on the kit...
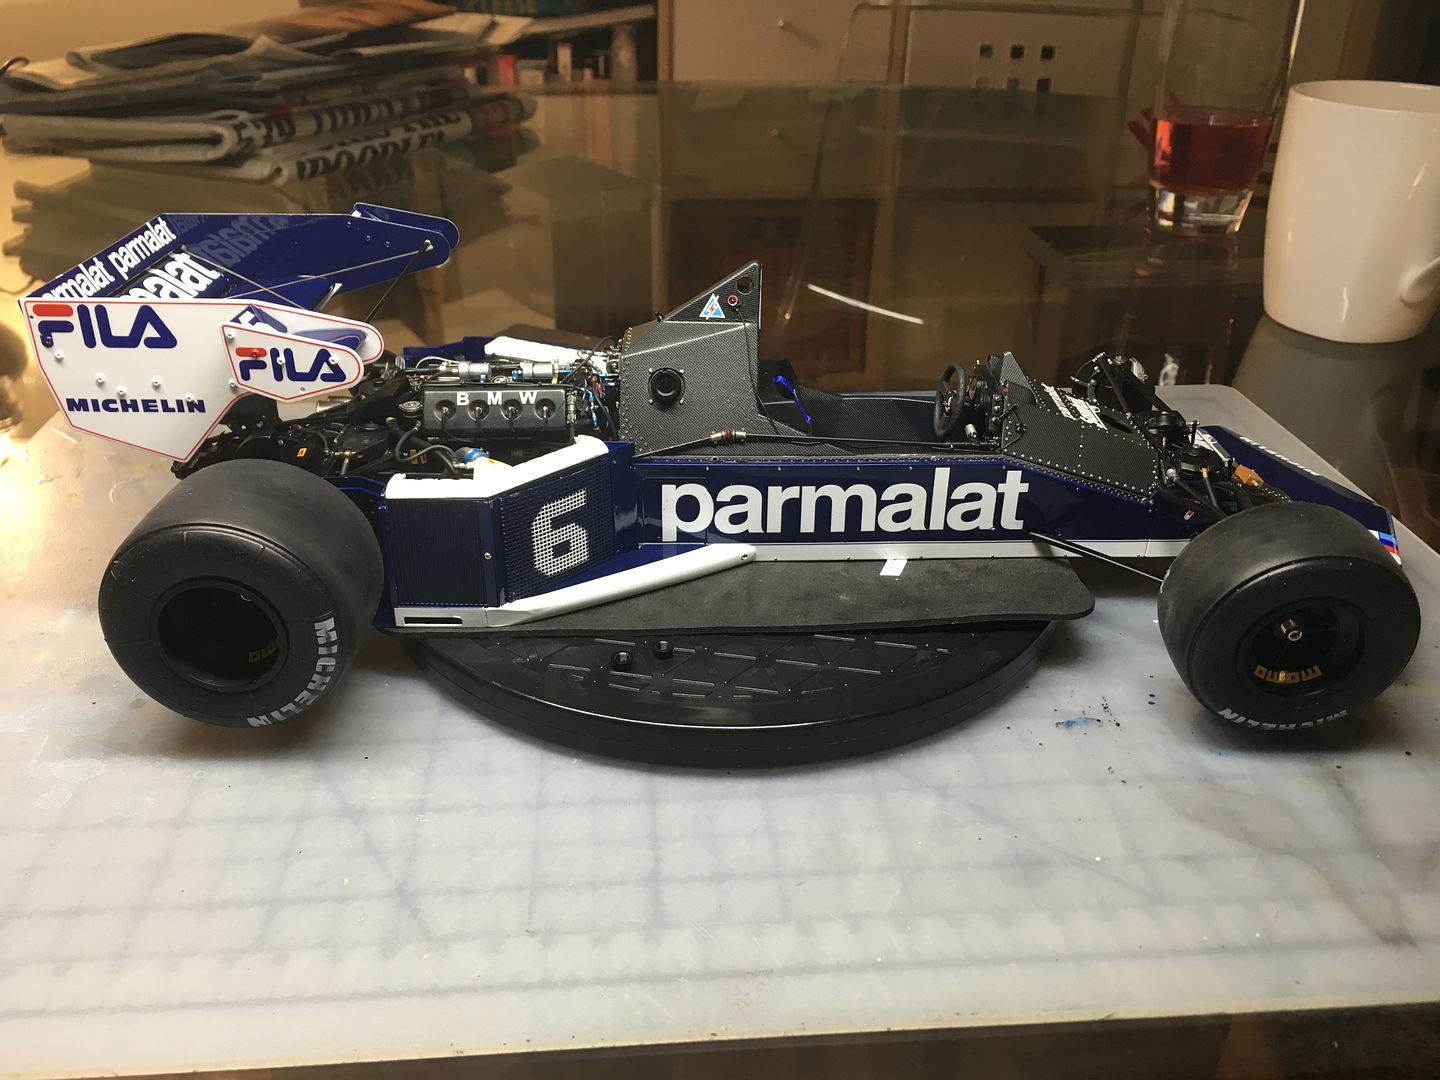
This final photo shows the size of the car (scale on the cutting mat) - anyone know where I can get a display case this big? I don't mean to 'display' - more to protect!
Two small access panels cover the area around the wishbones and steering arms. They fit ok - awkward to reach, but the fit is good. The TINY washers and quarter-turn fittings are just for show - and TINY!
Top tip - the turntable you can see in these pictures came with the generic grey spray booth (as far as I remember) - VERY useful at this stage of the build - the rear of the model is VERY heavy (hence the offset) and twirling the model around on this as opposed to constantly lifting and turning it is so much easier, and puts less stress on the kit...
This final photo shows the size of the car (scale on the cutting mat) - anyone know where I can get a display case this big? I don't mean to 'display' - more to protect!
ok - another thread update - this covers a few months, just catching up from other forum...
I'm so close to finishing now, and as I progress I come across bits I'd do differently, bits I should have spent more time on, c*ck ups etc etc...this is a learning process (I guess all builds are) as my first model (finished) for a very very long time, and first mfh.
So - almost done:
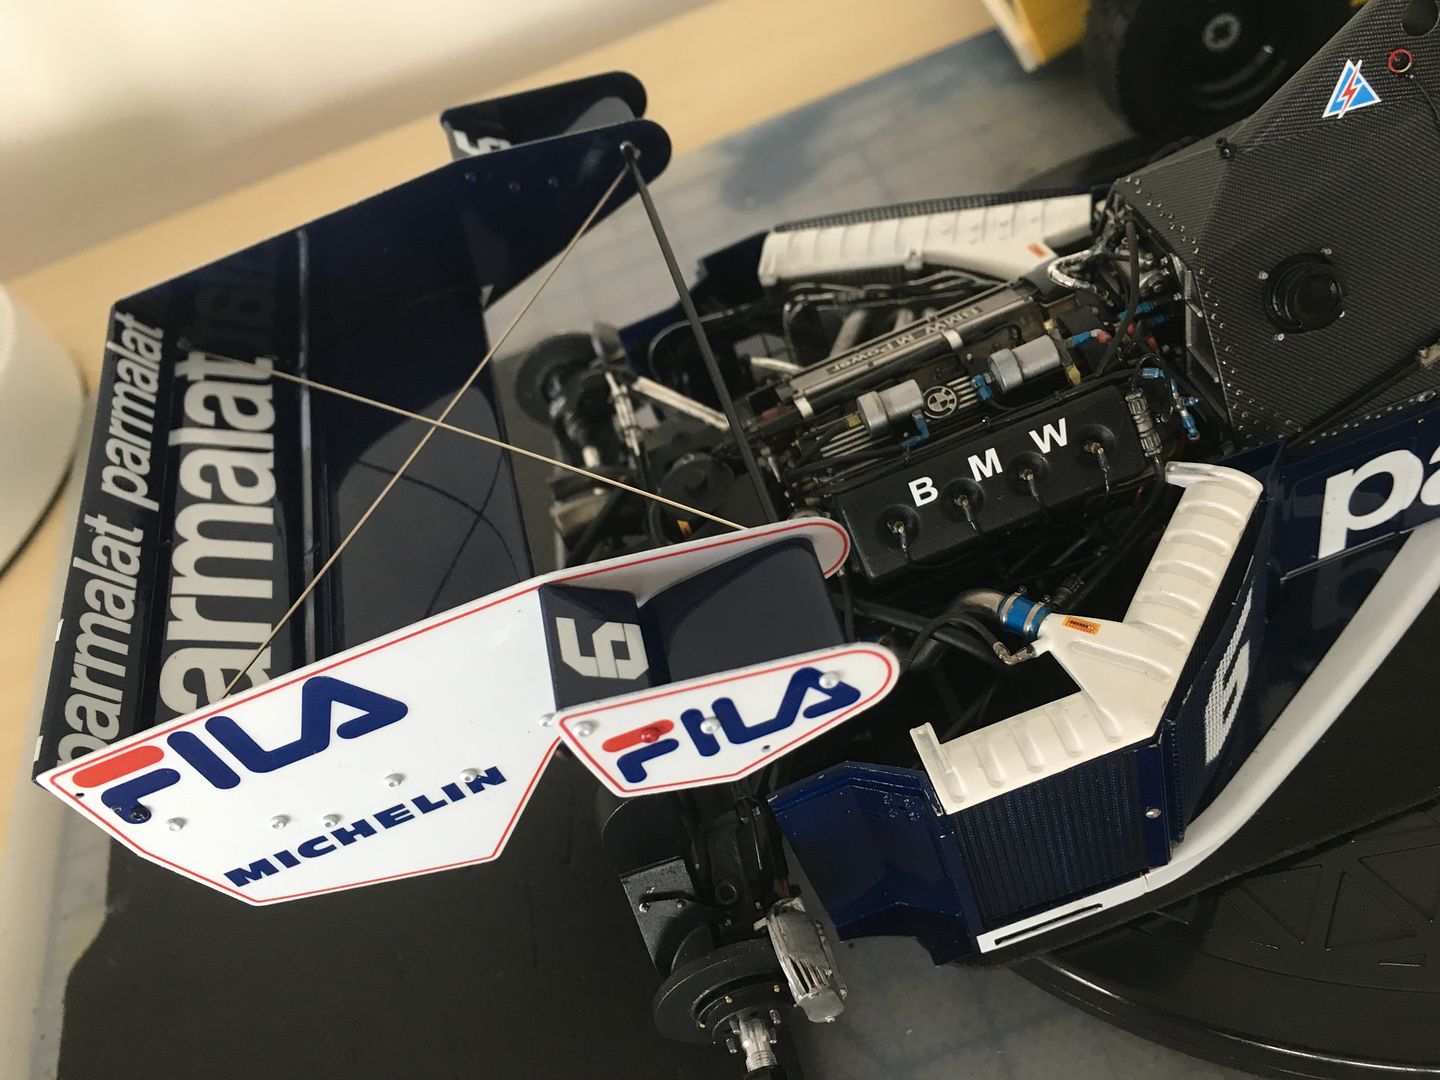
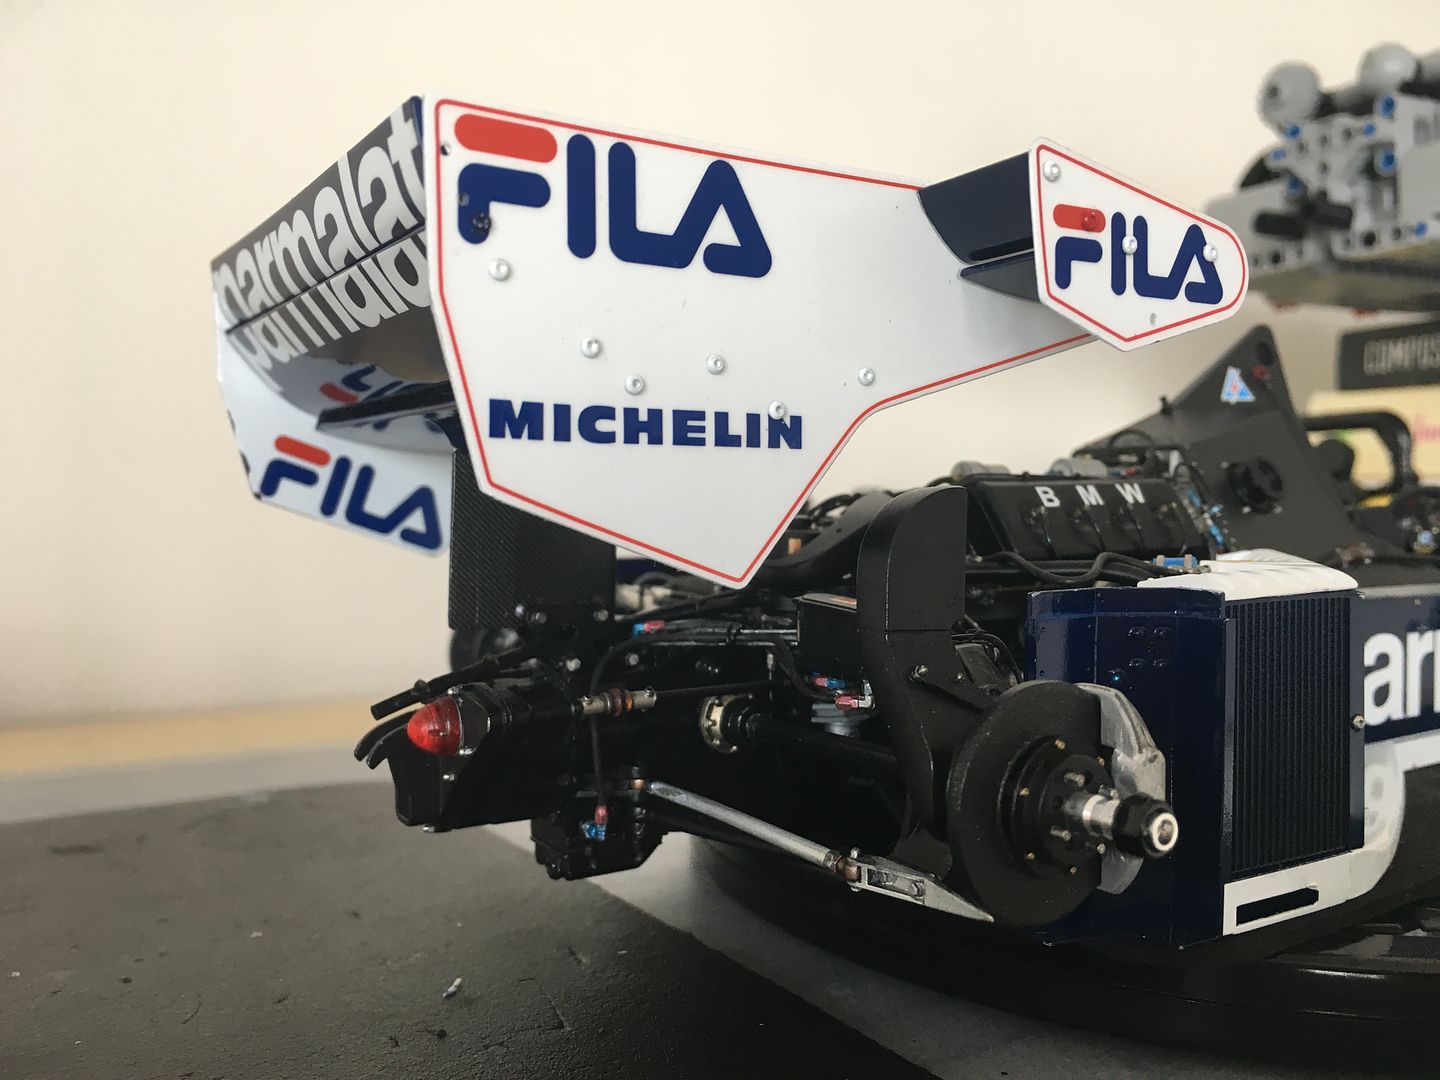
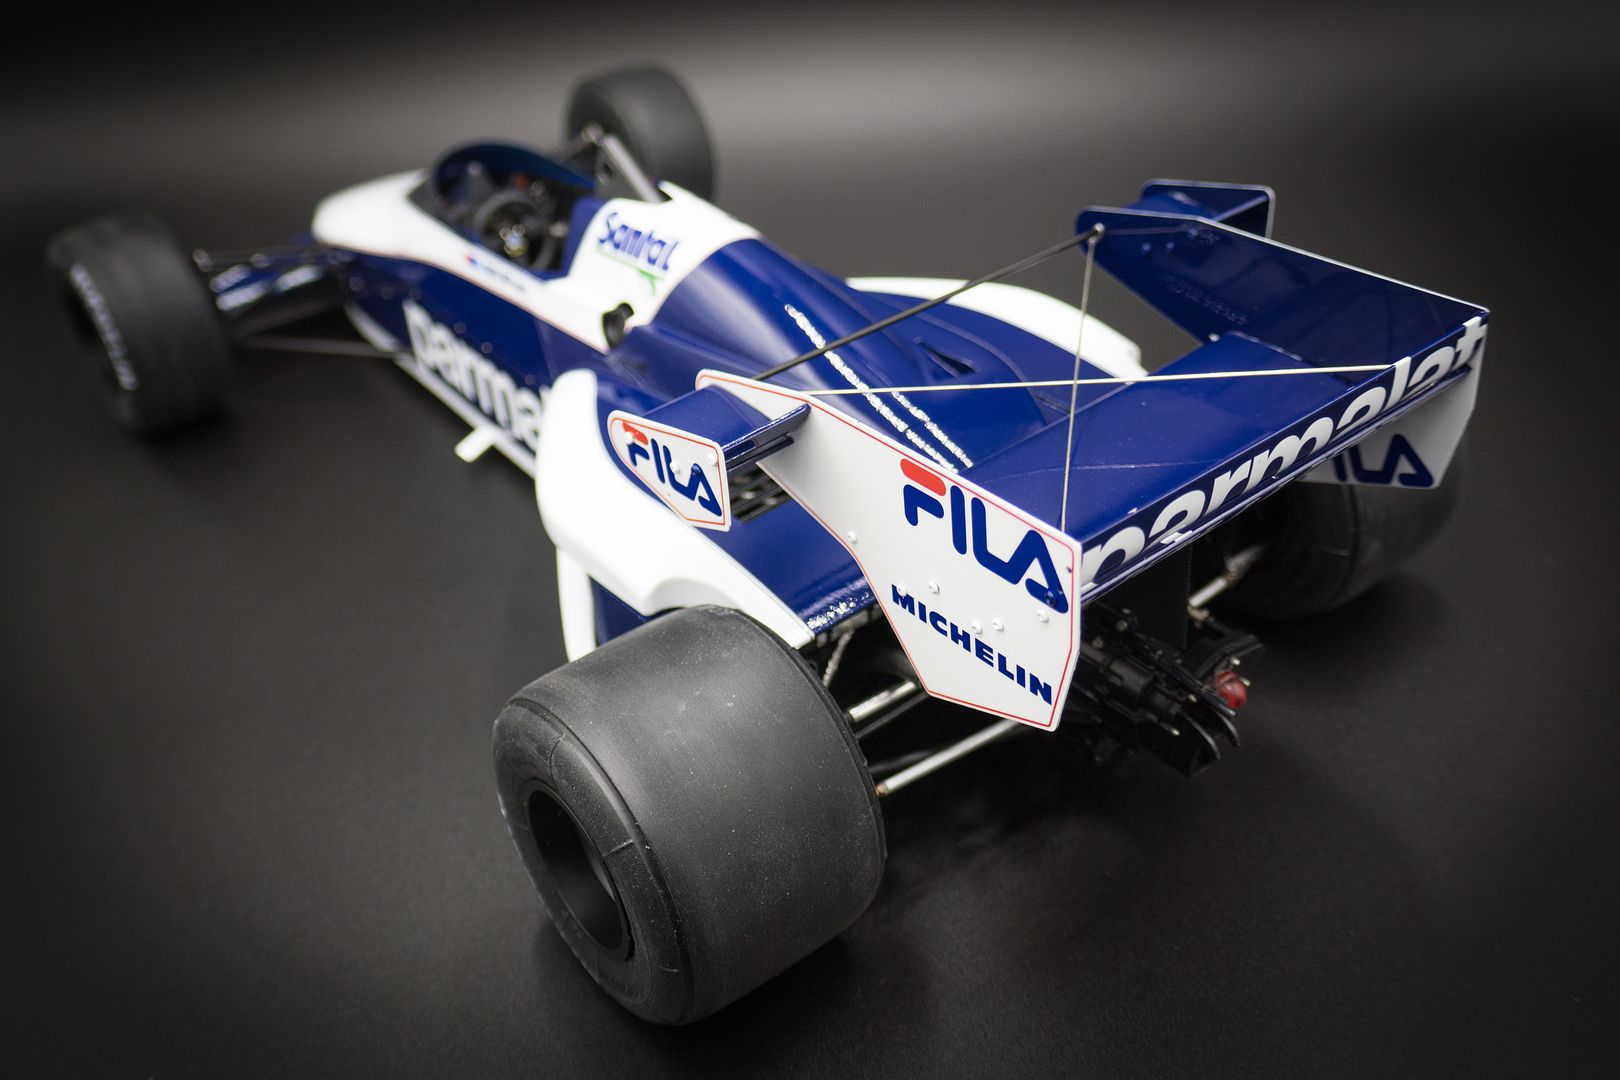
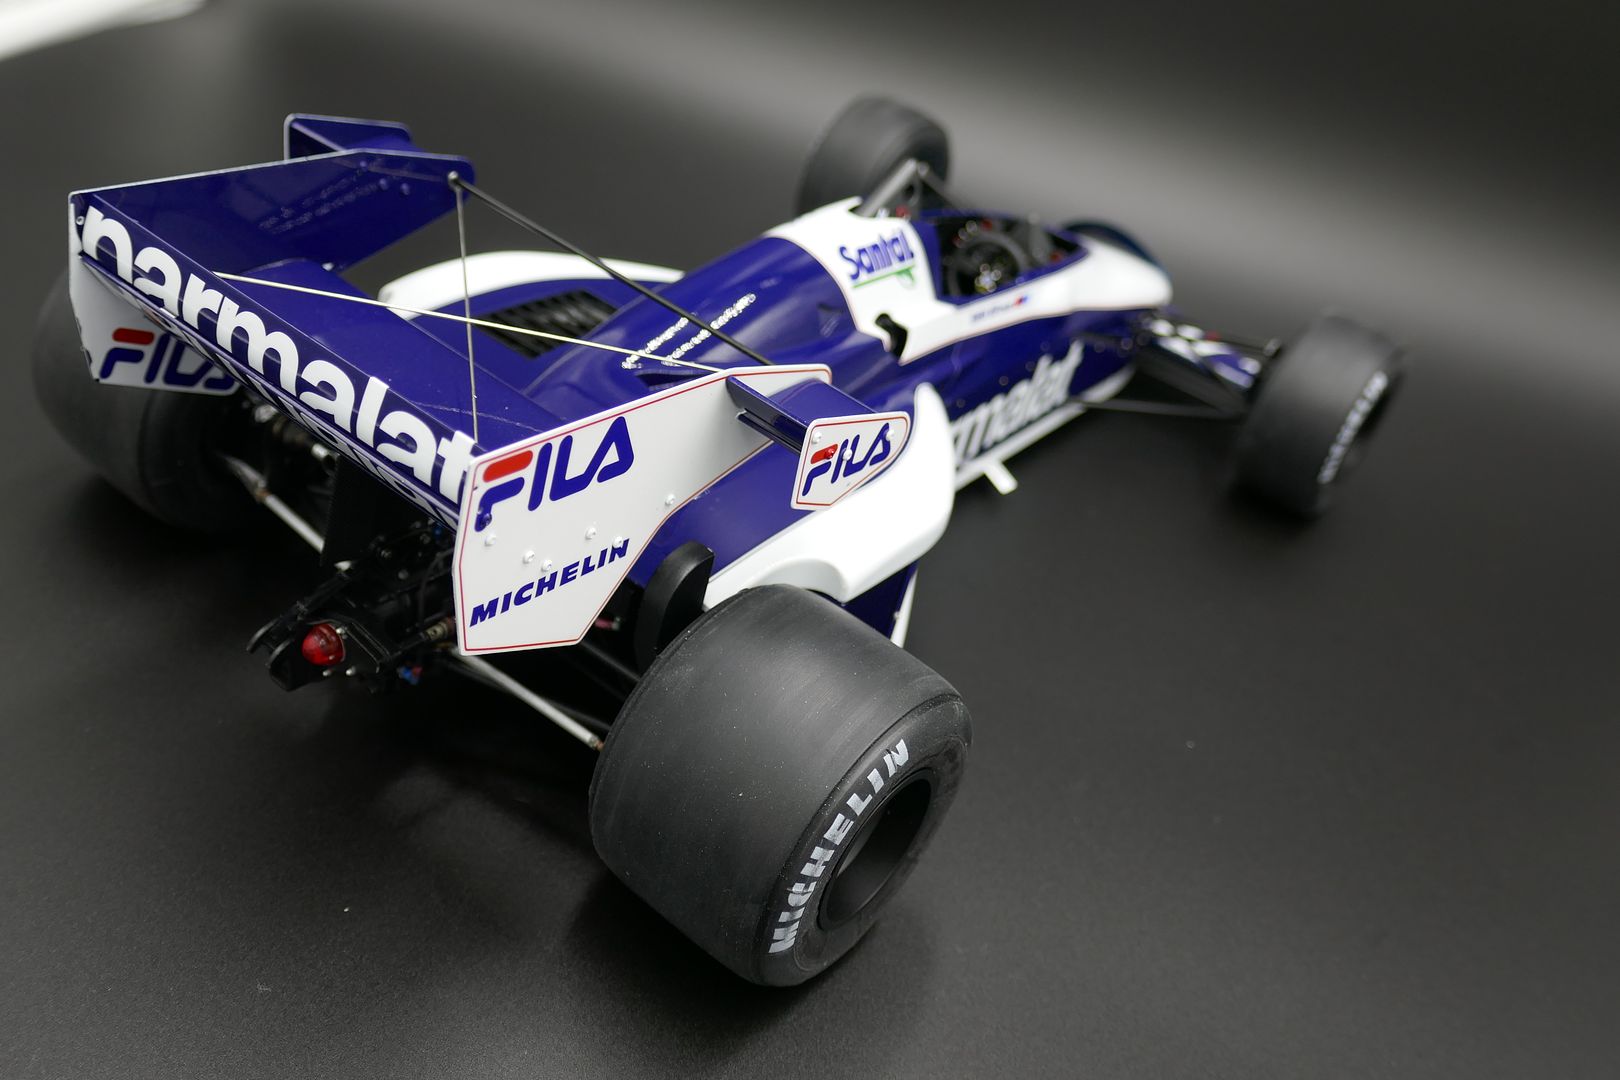
Rear wing - complicated!
Front wing end-plates - recreate as I seem to have lost the PE ones!
Wing mirrors
All the bodywork fittings.
Polish!
'stance'...
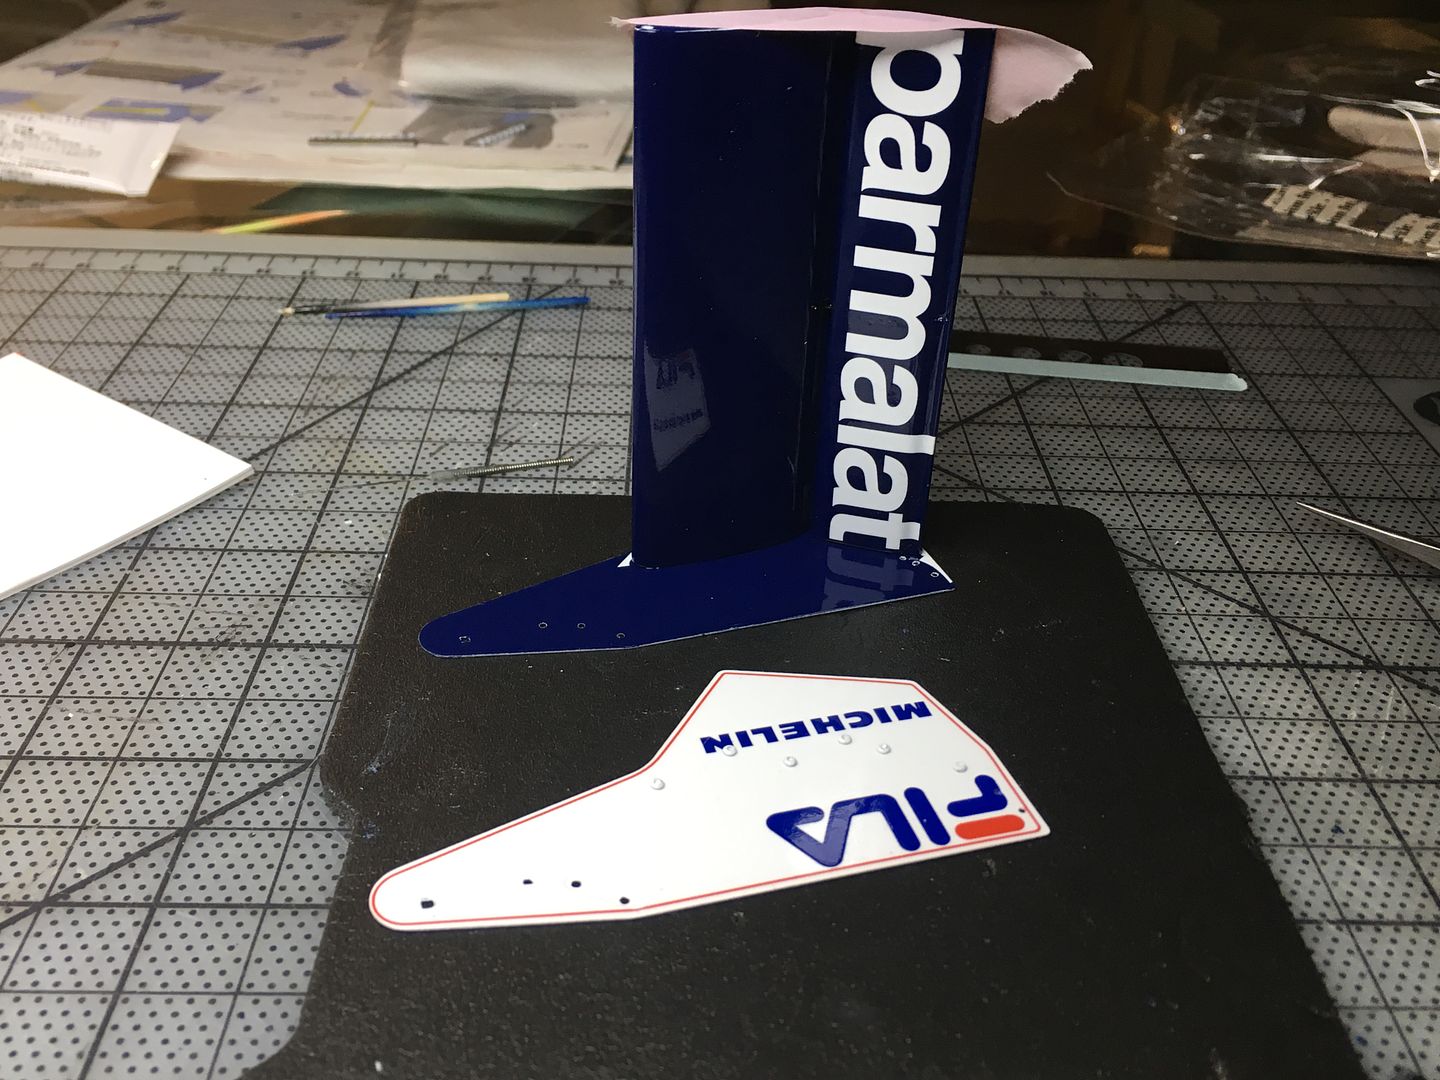
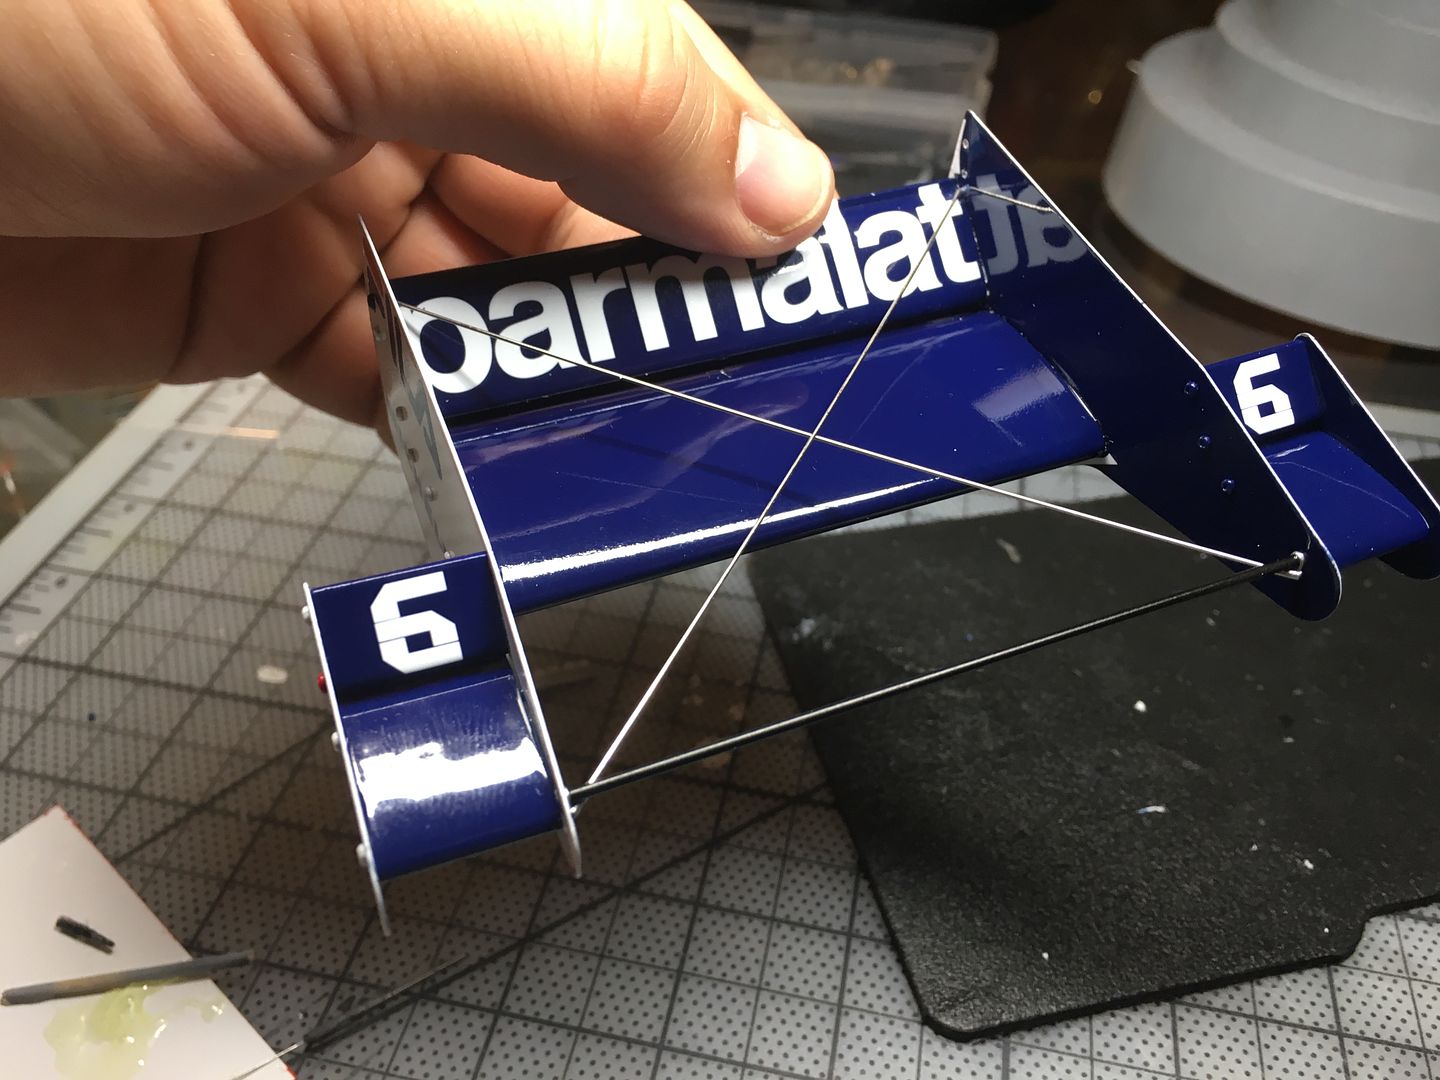
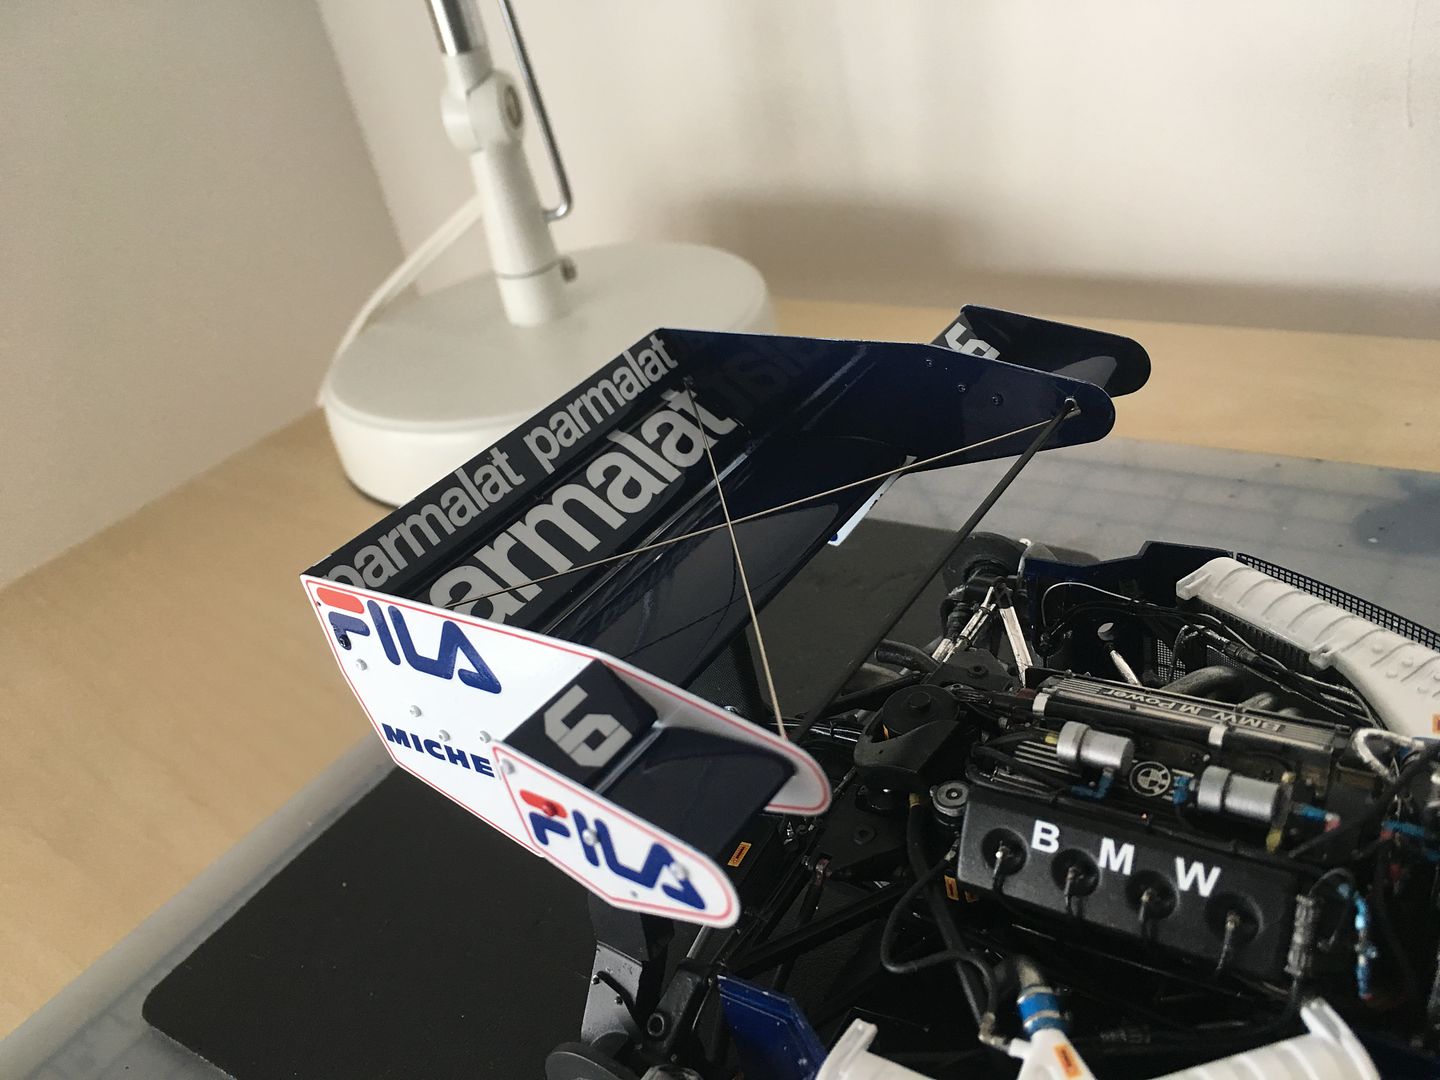
So - that rear wing.
As Allan had pointed out, this one could be a pain to assemble - especially with those way too-short rivets MFH supply! grrr
But in the end it went ok - I hope - except for one glaring decal error...later.
These are all the rivets that stick through to insert into the hole son the wing elements - waaay too short for any meaningful support!
They are enough to 'locate' but that is about it. Although the PE wing end plates have recesses for the wing aerofoils, I have managed to 'round them off' quite a bit with the paint and lacquer - the blue colour required about 6 layers to get the dark colour, which has built up - no big deal in the end.
I have used two-part epoxy to glue - CA would not have been strong enough - in fact i have gone back to a few parts and re-glued with the epoxy due to breakages...
I also admit to doing this 'by eye' (and used a steel rule for the 90 degree bits initially) - I had plans to make a jig etc, but in the end I trusted my designers eye and I seem to have got it pretty good! (in terms of being square)
The most time consuming part of this was colour coding the rivets! About a dozen white and blue, and one red (Fila logo!)
Of course, have to balance in place to see how it will look!
That top element is only wedged in to place for now - for reasons that will become apparent...
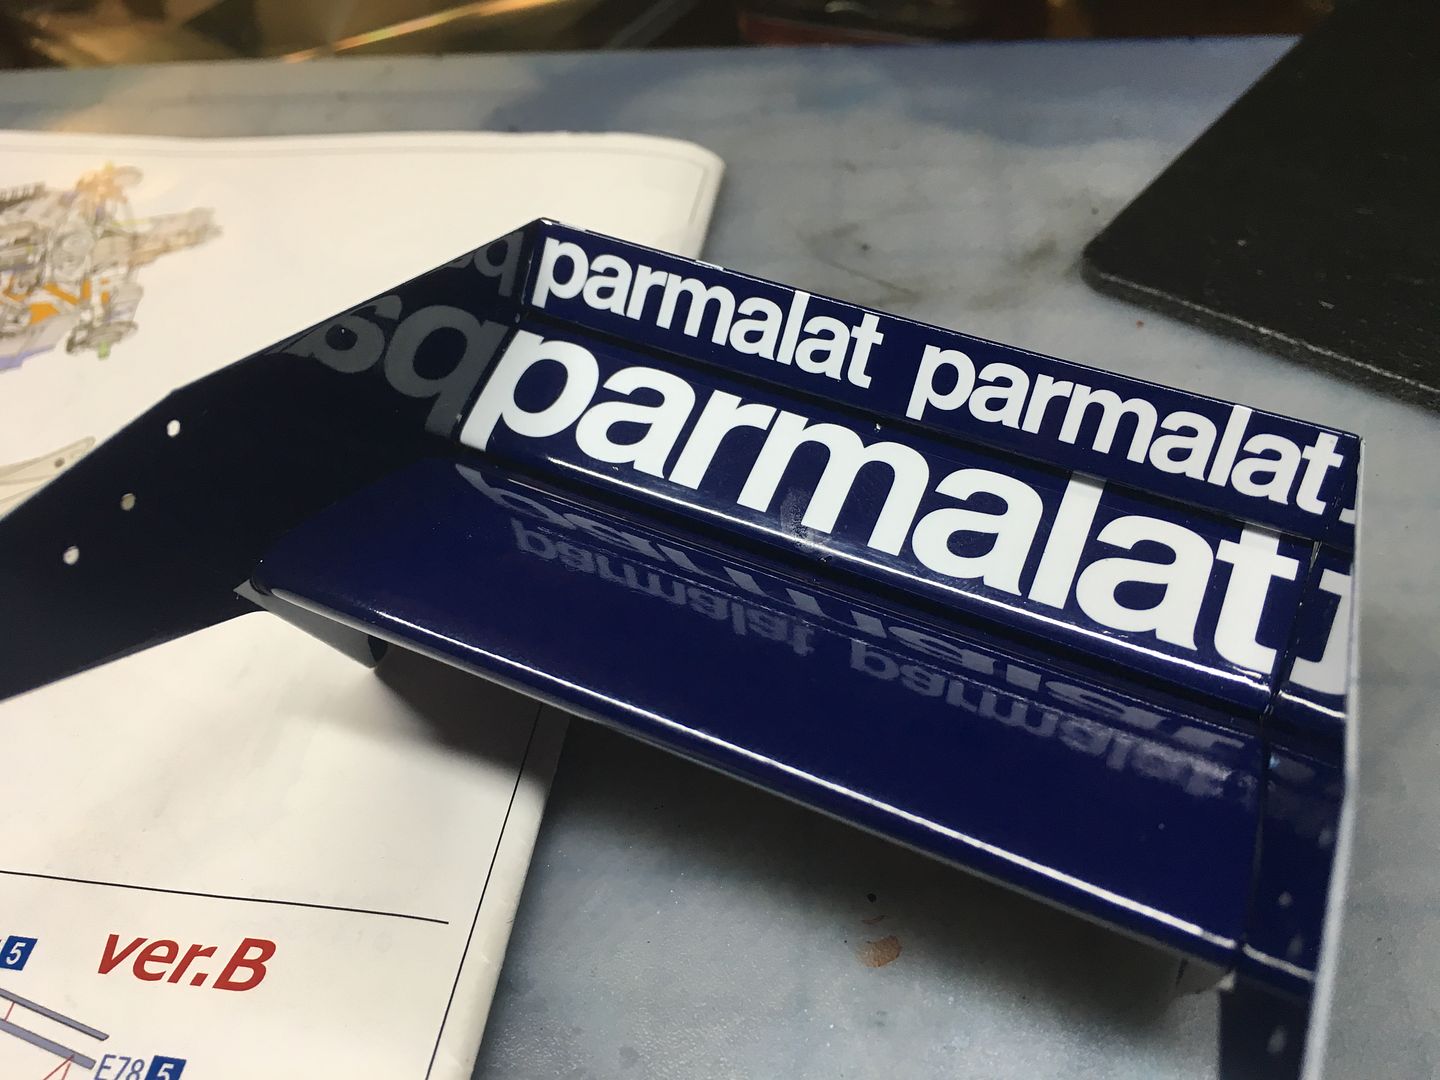

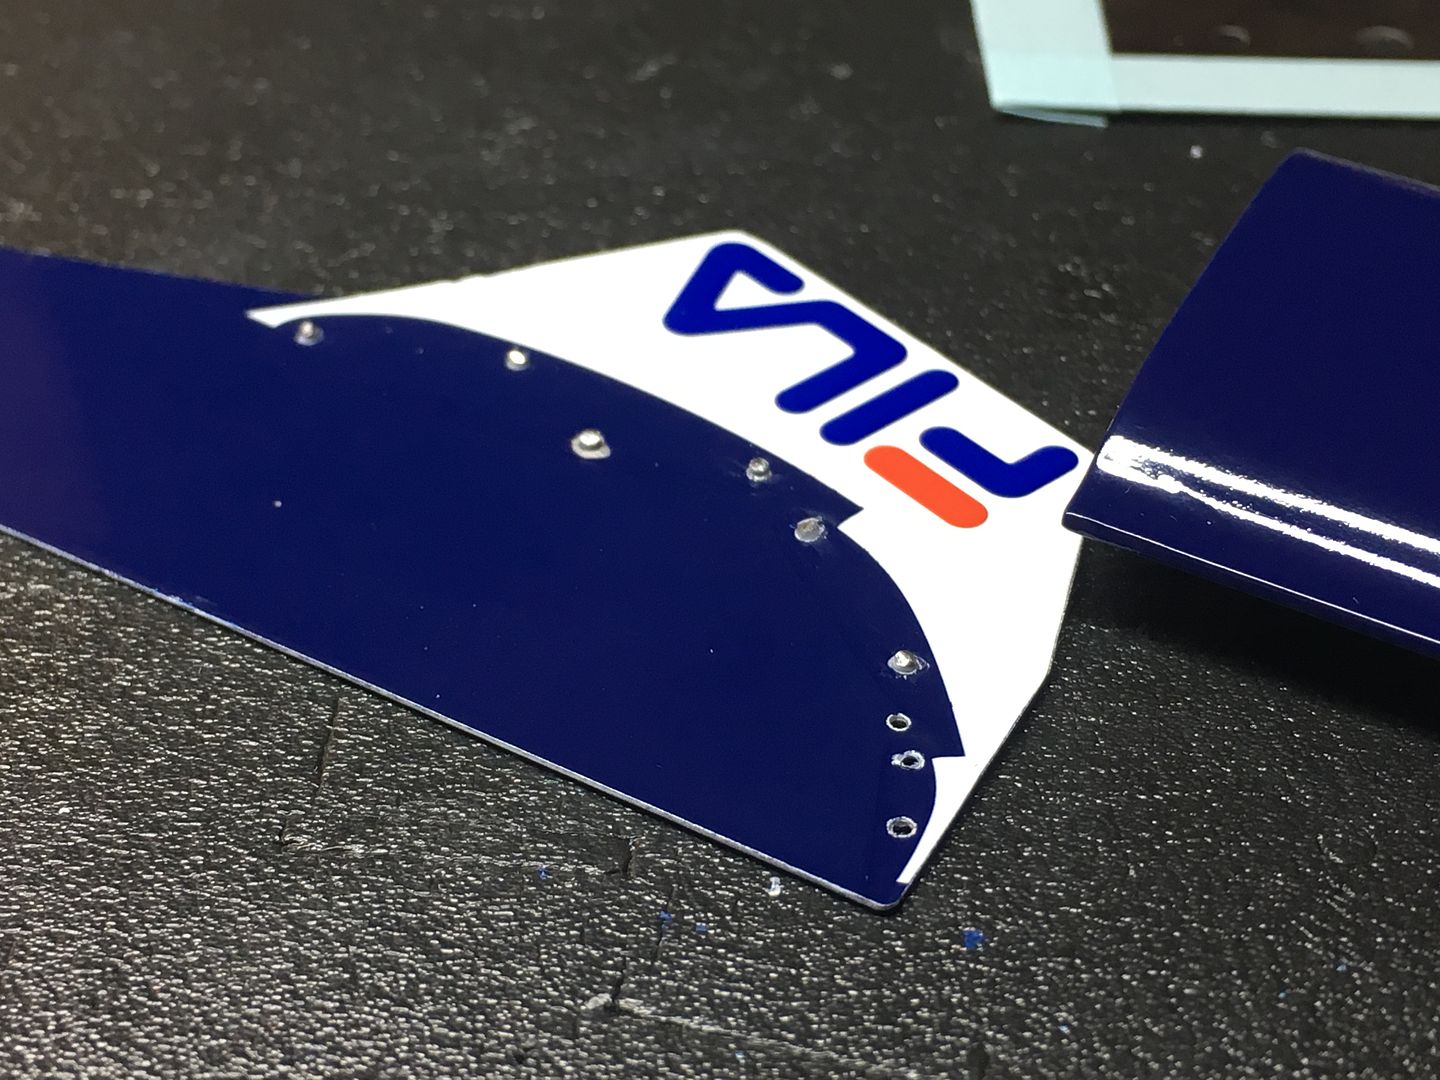
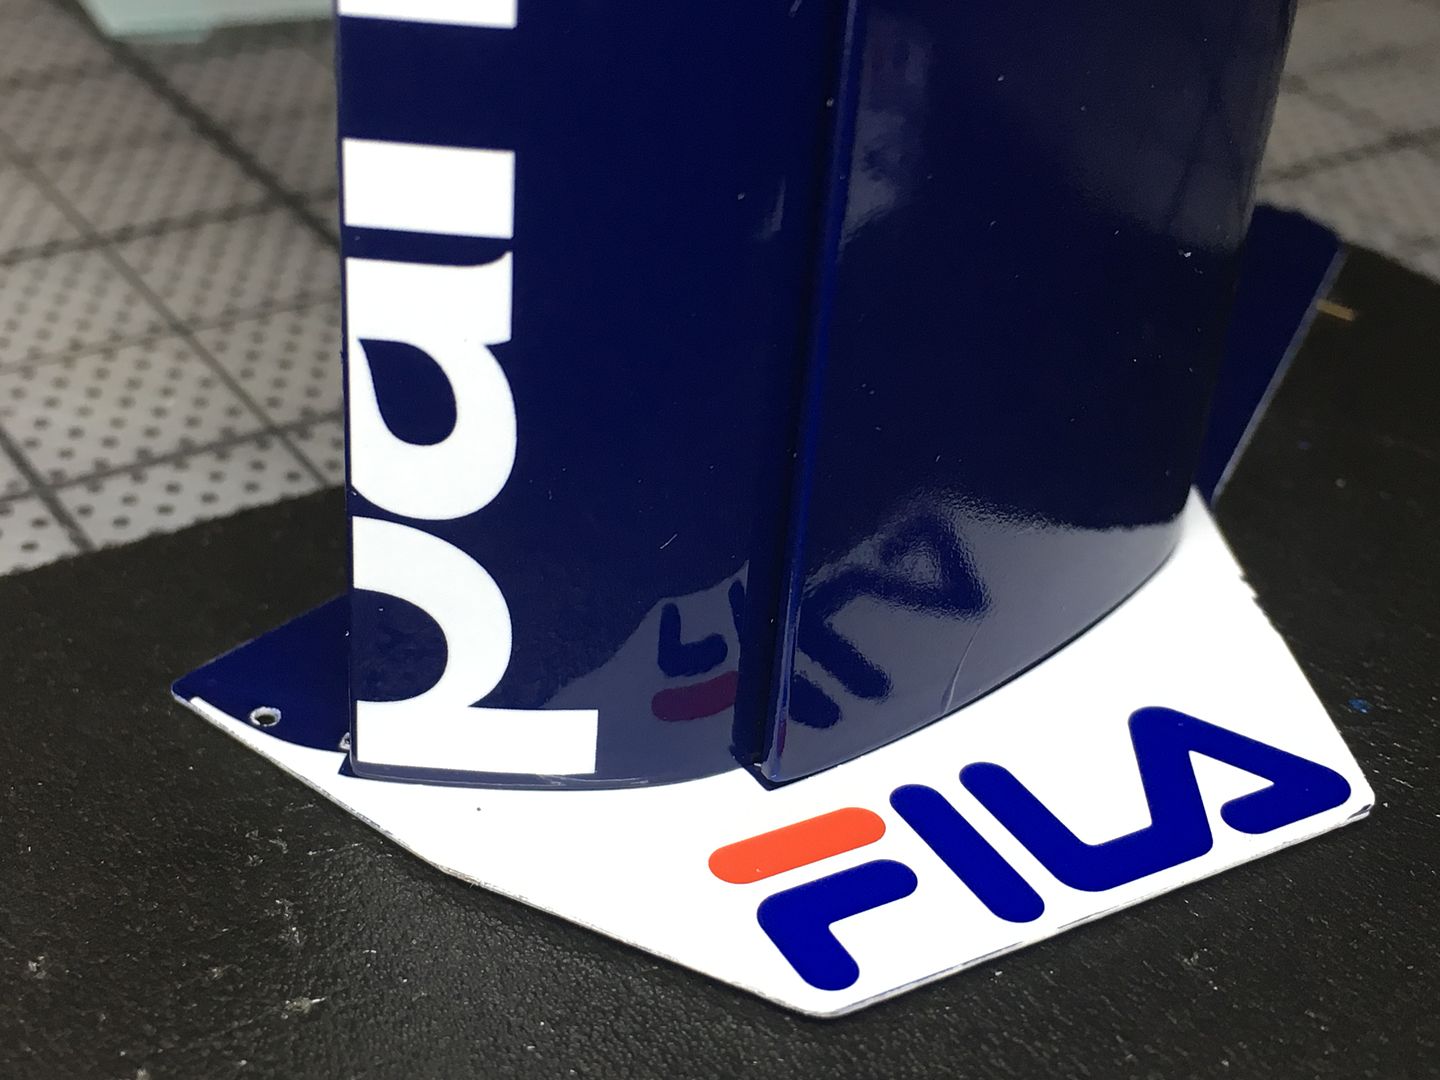
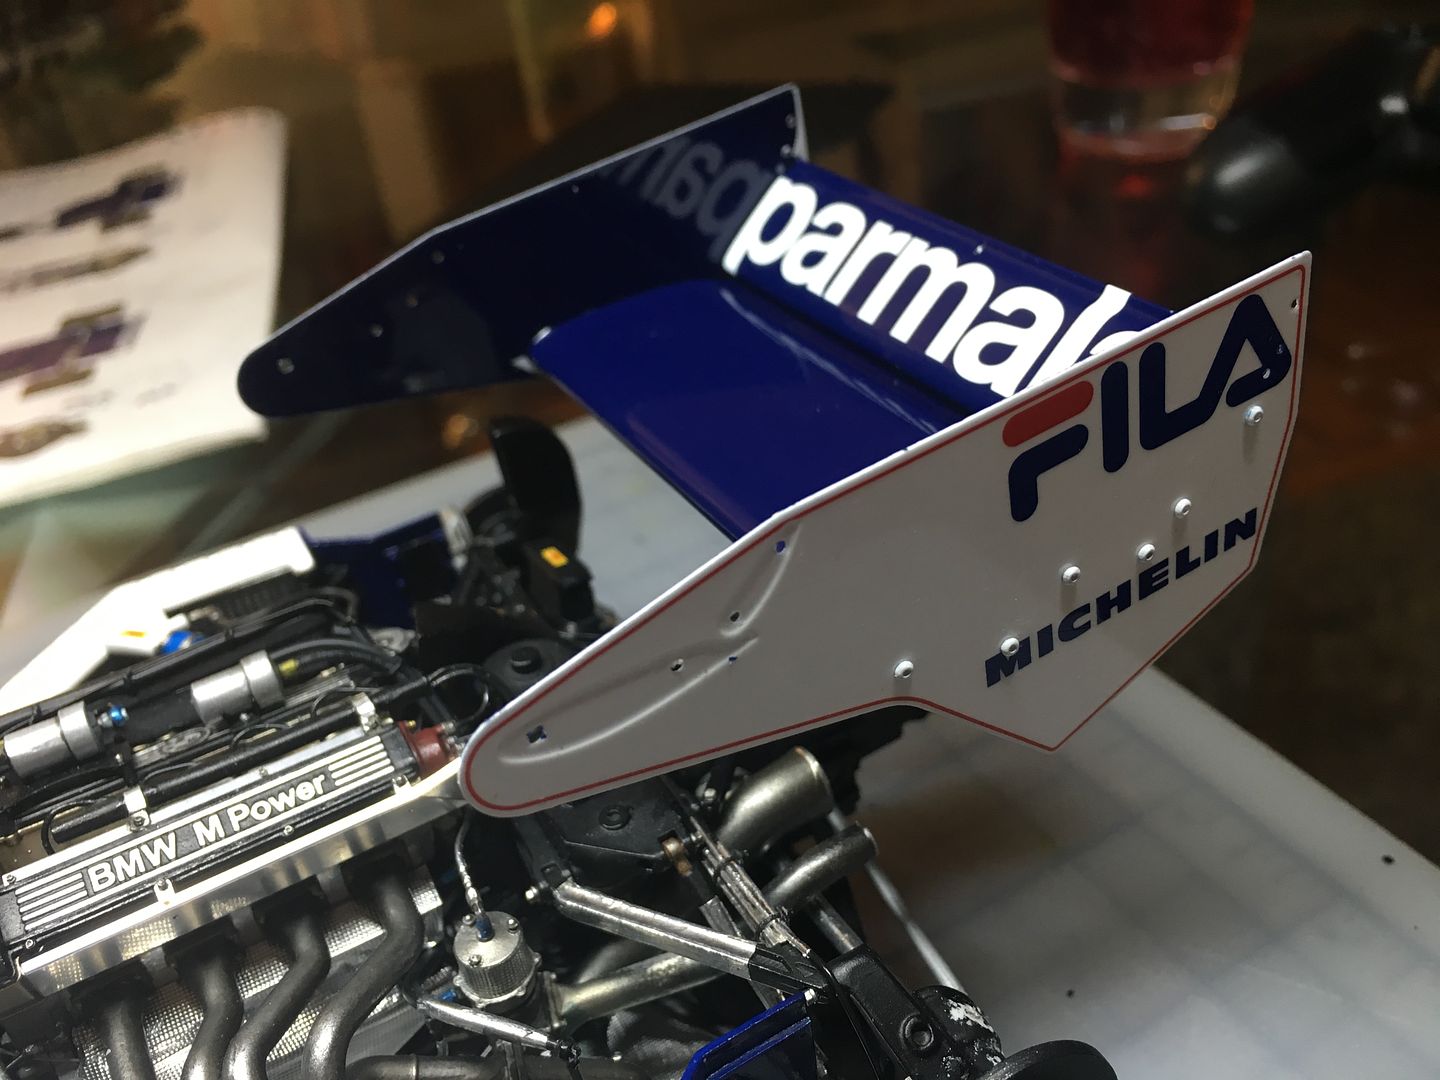
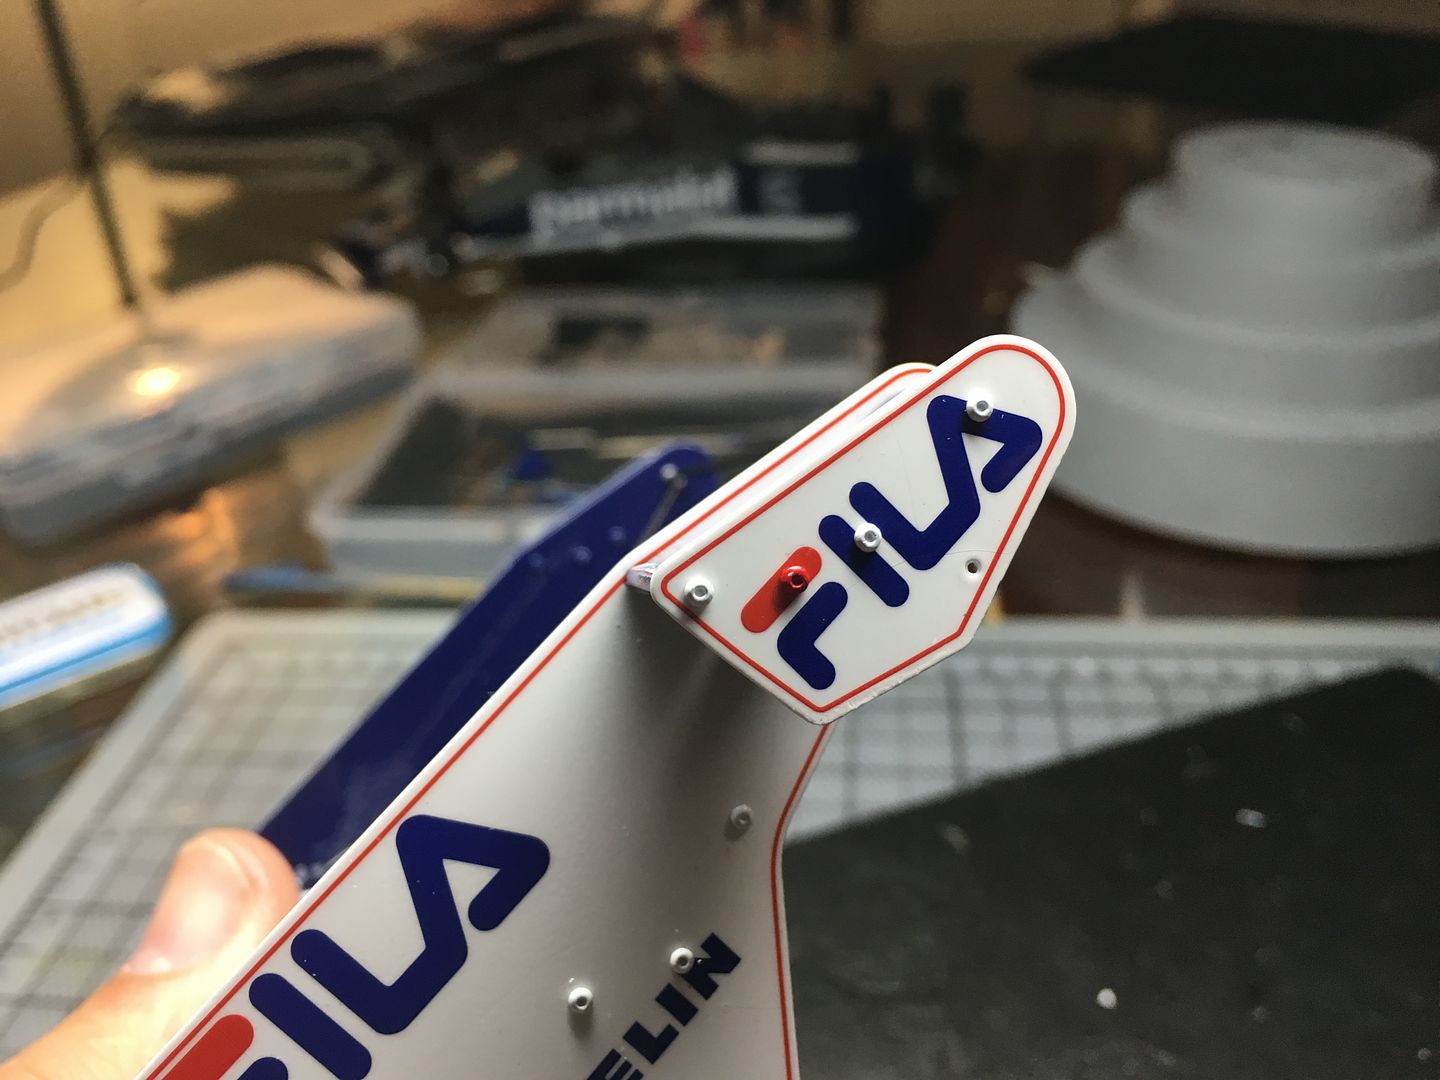
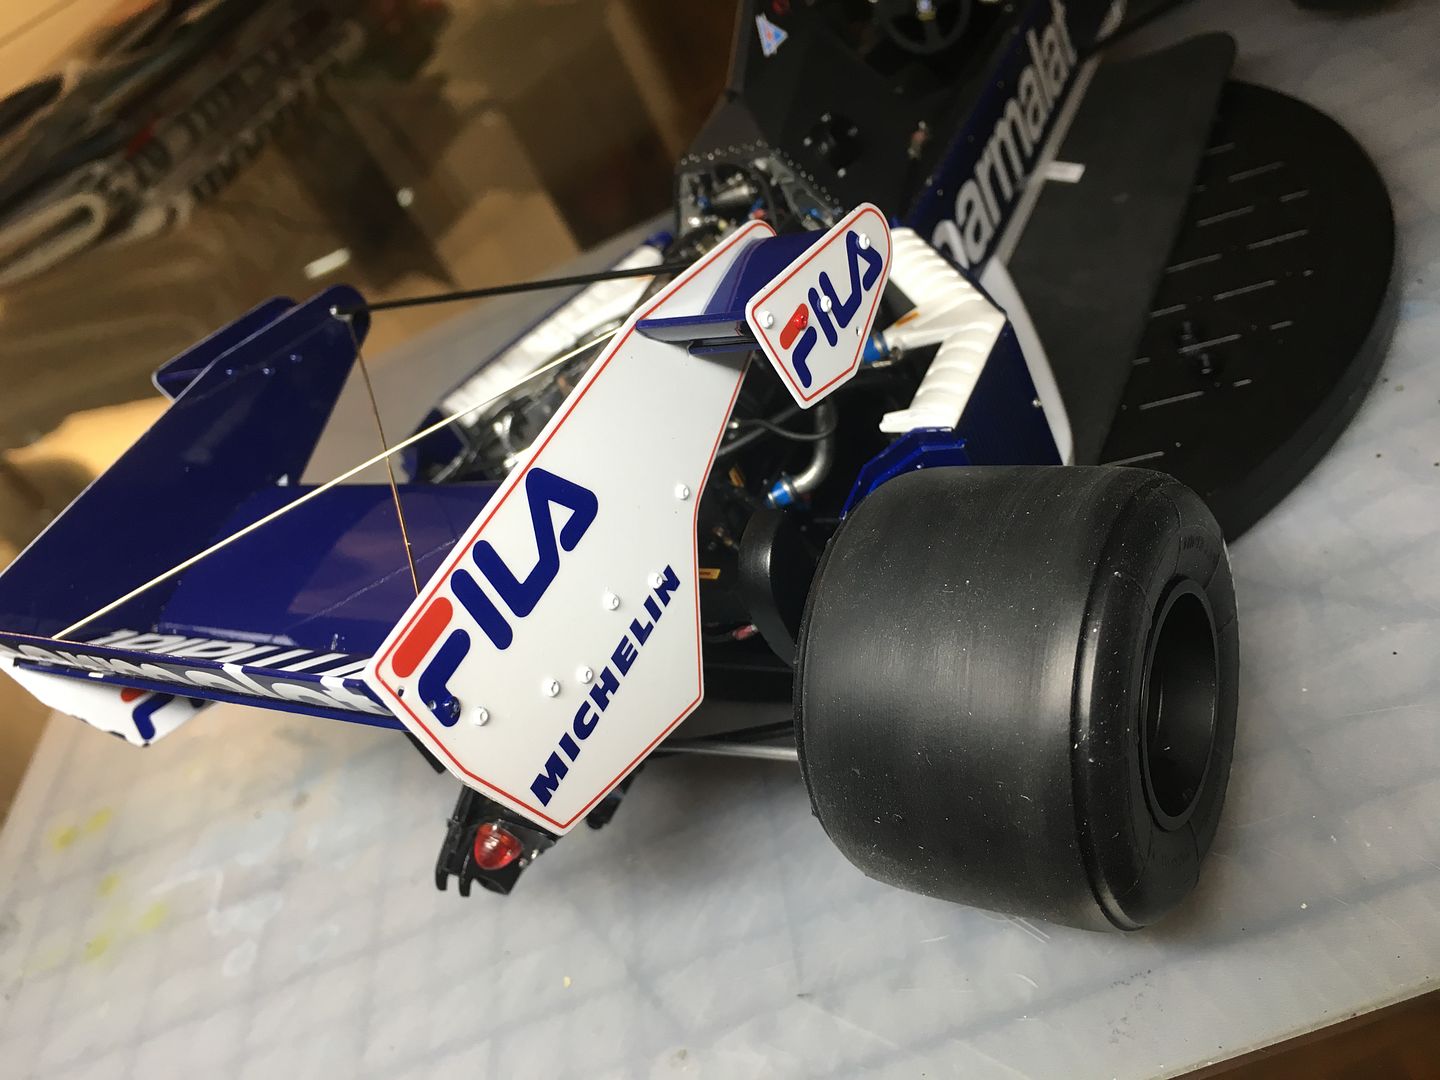
BIG ERROR:
So, when applying the decals to these wing elements, I thought I was being clever by positioning the top half of the parmalat logo up slightly on the thin top element, so that when it was in position, slightly tucked behind the next bigger element below it - the letters would line up. Of course all this was done waaay before the wing was being assembled - and is all nicely lacquered. On fitting this top element I see that MFH allowed for that overlap, by 'overlapping' the decal coverage. If I had simply lined up the decal along the bottom edge of the top element, all would have been well....it is all much clearer in the picture below!
arrrrrgh!! Most obvious on the 'a's. So - plan is to try and get a replacement decal part, strip that side of the top element, and re-paint etc - but just not now. I'll loosely fit the wing as it is now for 'finished' photography then replace in the future - I'm not going to wait a couple of weeks at this stage. You can't see it from any other angle, and I may well even photoshop the completed photos for now! :shock:
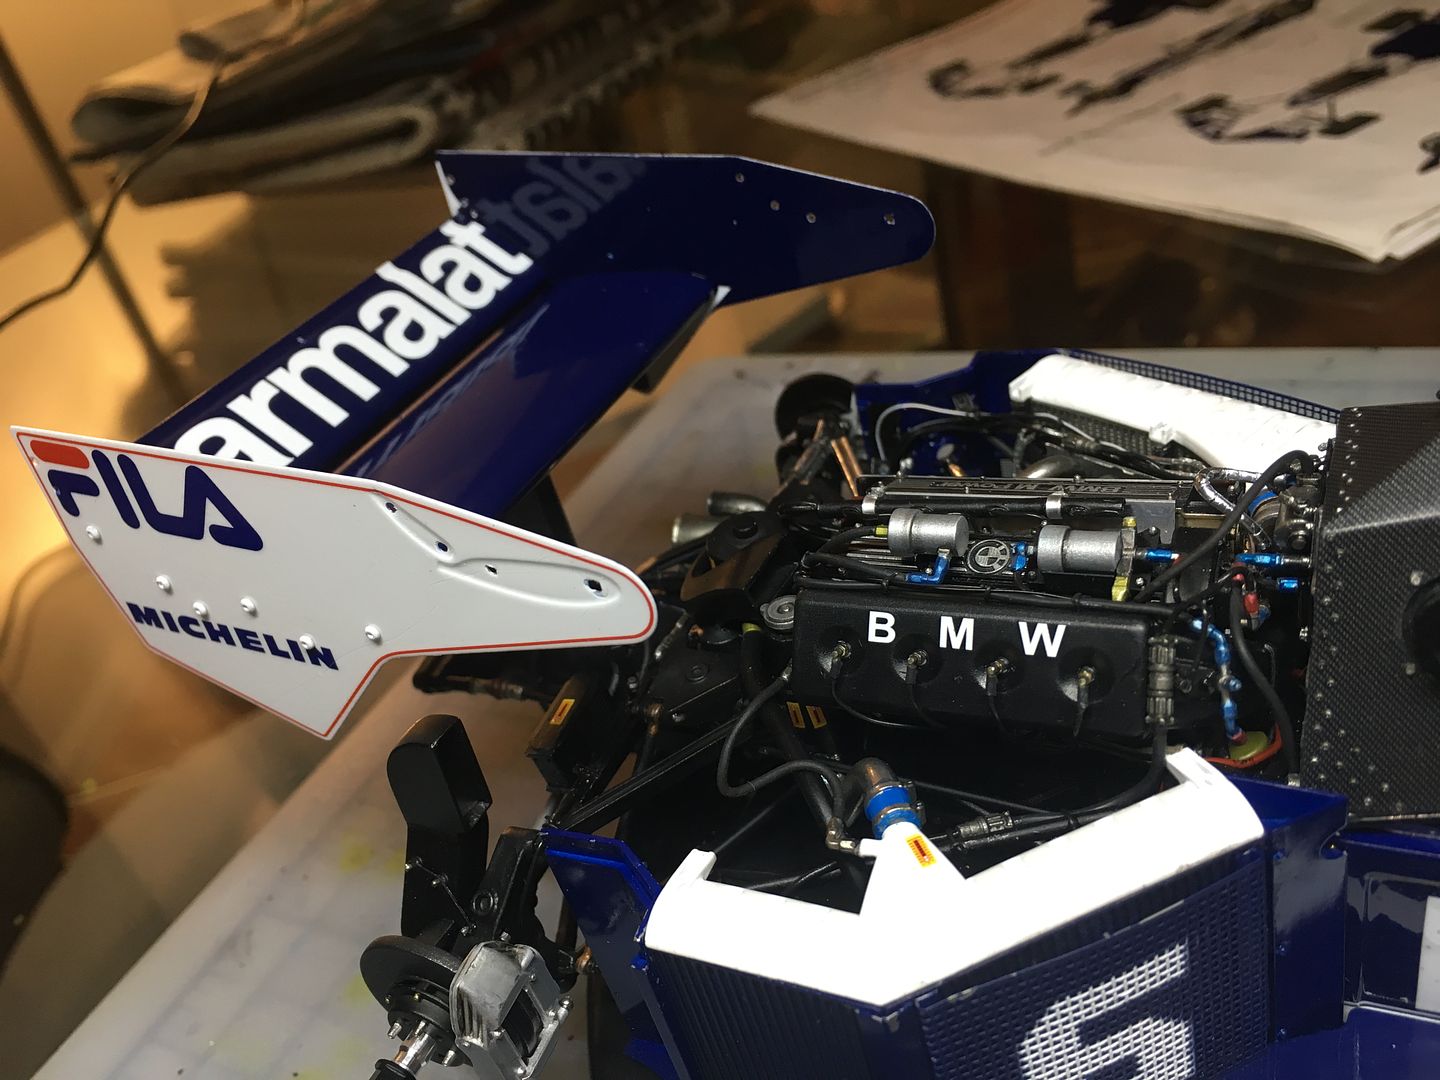
Next stage is all the wire supports and the end winglets...
I'm so close to finishing now, and as I progress I come across bits I'd do differently, bits I should have spent more time on, c*ck ups etc etc...this is a learning process (I guess all builds are) as my first model (finished) for a very very long time, and first mfh.
So - almost done:
Rear wing - complicated!
Front wing end-plates - recreate as I seem to have lost the PE ones!
Wing mirrors
All the bodywork fittings.
Polish!
'stance'...
So - that rear wing.
As Allan had pointed out, this one could be a pain to assemble - especially with those way too-short rivets MFH supply! grrr
But in the end it went ok - I hope - except for one glaring decal error...later.
These are all the rivets that stick through to insert into the hole son the wing elements - waaay too short for any meaningful support!
They are enough to 'locate' but that is about it. Although the PE wing end plates have recesses for the wing aerofoils, I have managed to 'round them off' quite a bit with the paint and lacquer - the blue colour required about 6 layers to get the dark colour, which has built up - no big deal in the end.
I have used two-part epoxy to glue - CA would not have been strong enough - in fact i have gone back to a few parts and re-glued with the epoxy due to breakages...
I also admit to doing this 'by eye' (and used a steel rule for the 90 degree bits initially) - I had plans to make a jig etc, but in the end I trusted my designers eye and I seem to have got it pretty good! (in terms of being square)
The most time consuming part of this was colour coding the rivets! About a dozen white and blue, and one red (Fila logo!)
Of course, have to balance in place to see how it will look!
That top element is only wedged in to place for now - for reasons that will become apparent...
BIG ERROR:
So, when applying the decals to these wing elements, I thought I was being clever by positioning the top half of the parmalat logo up slightly on the thin top element, so that when it was in position, slightly tucked behind the next bigger element below it - the letters would line up. Of course all this was done waaay before the wing was being assembled - and is all nicely lacquered. On fitting this top element I see that MFH allowed for that overlap, by 'overlapping' the decal coverage. If I had simply lined up the decal along the bottom edge of the top element, all would have been well....it is all much clearer in the picture below!
arrrrrgh!! Most obvious on the 'a's. So - plan is to try and get a replacement decal part, strip that side of the top element, and re-paint etc - but just not now. I'll loosely fit the wing as it is now for 'finished' photography then replace in the future - I'm not going to wait a couple of weeks at this stage. You can't see it from any other angle, and I may well even photoshop the completed photos for now! :shock:
Next stage is all the wire supports and the end winglets...
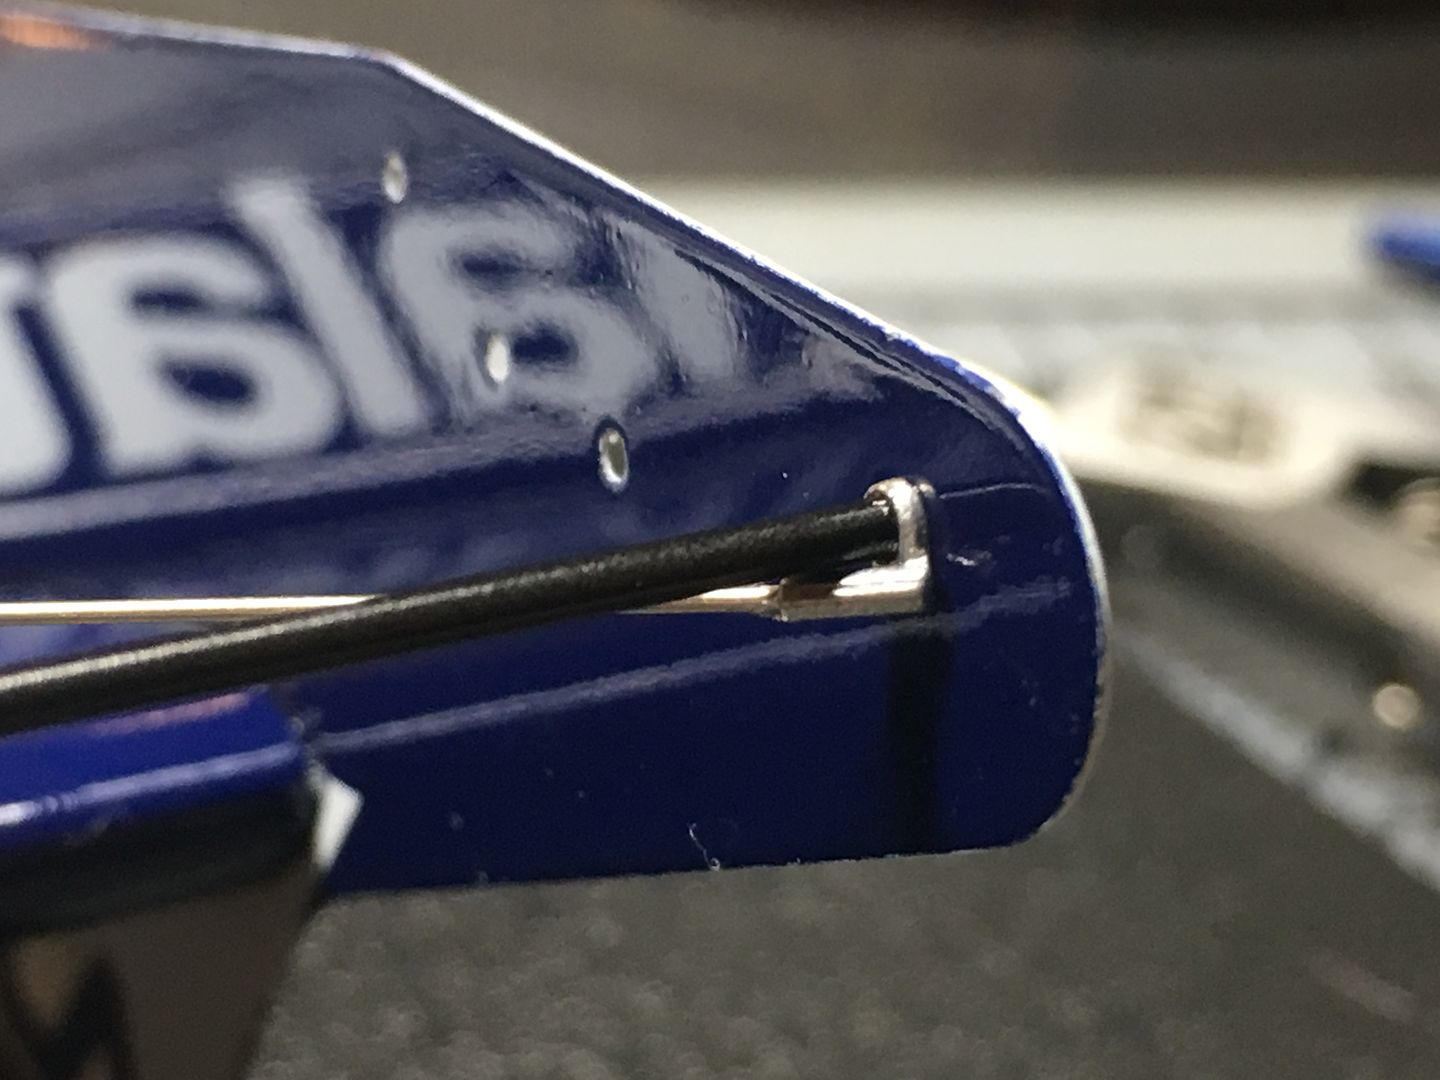
Lots of nice precision fittings - as long as you cut the wire to the correct length!
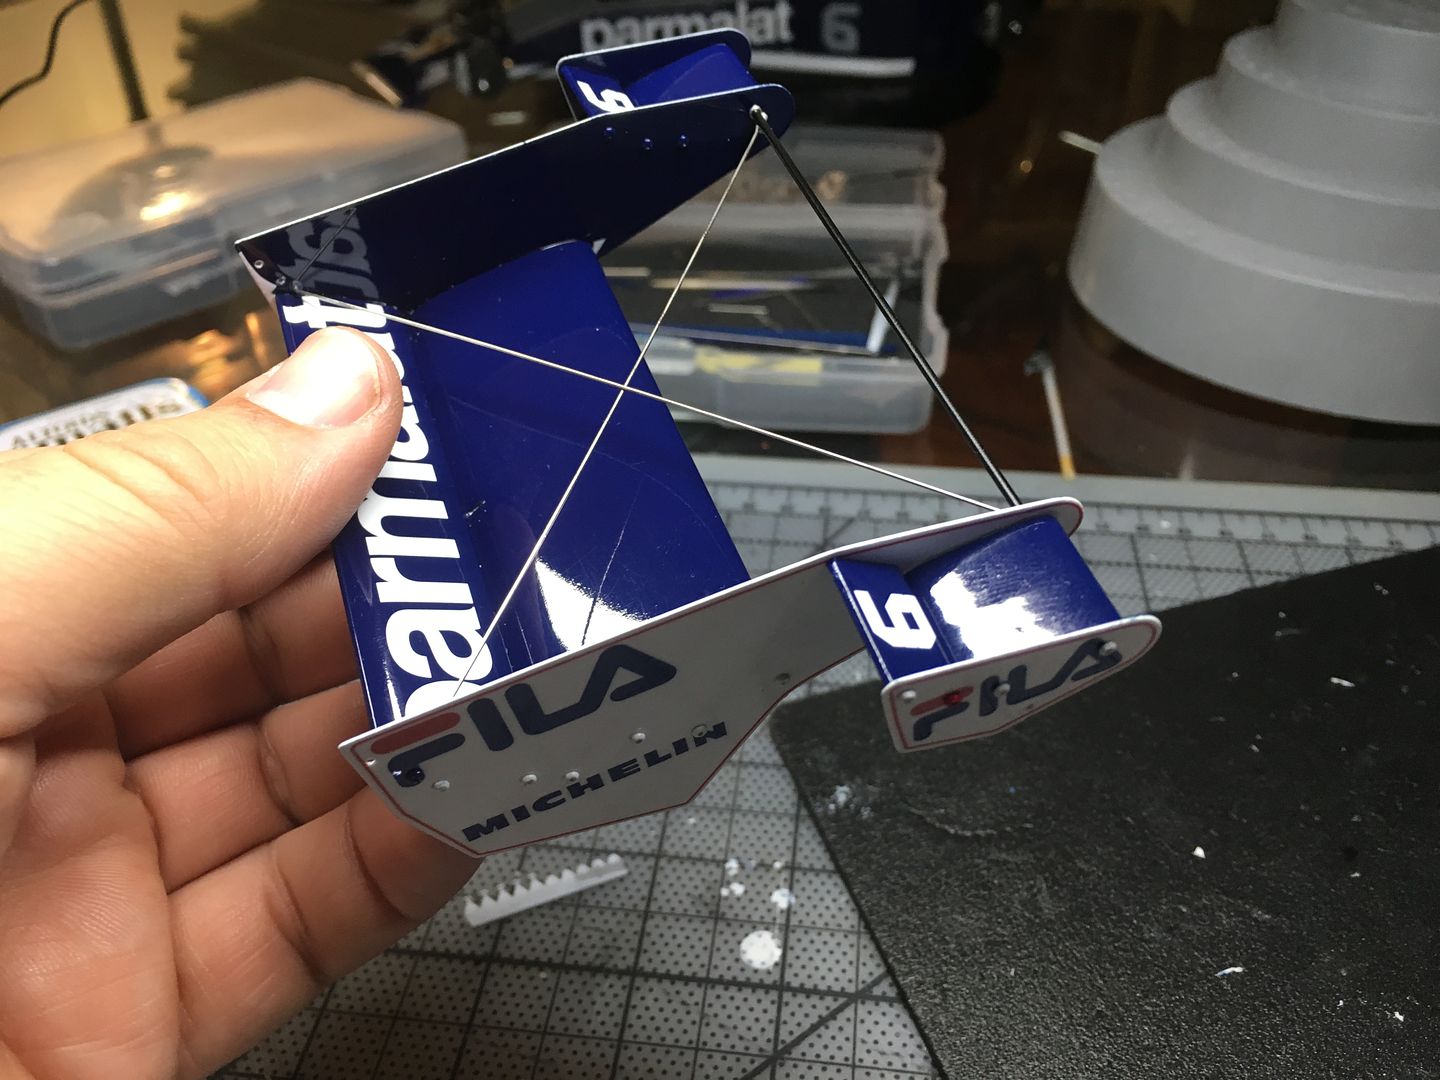
No real issues here - I did the end plates and small wings by eye again...one tiny thing I noticed after glue had dried, was that the black tube that runs across the front of the wing assembly is possibly 1-2mm too long, so it is spreading the front of the main side wing endplates slightly...will only be visible on a directly-above shot - next time!
Those wires are also going to make any final polishing of the wing elements a bit of a b*gger to do...
Coloured rivets!
Had to add a slick!
...or two.
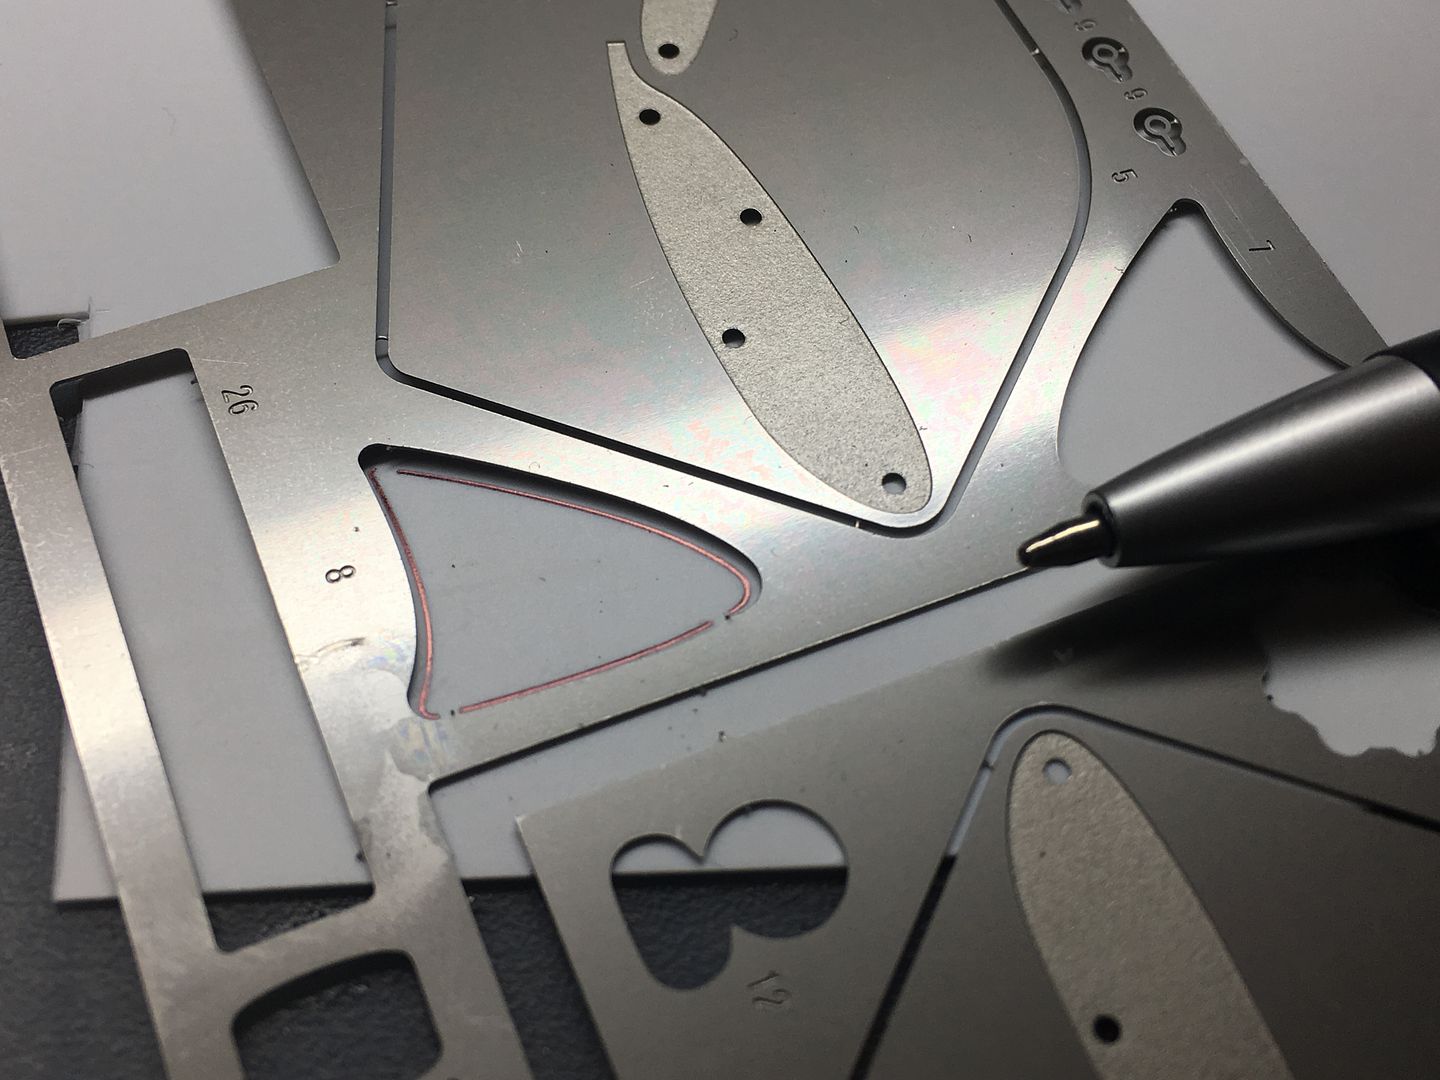
Just the front wing end plates to do now - which I have lost (the risk in having to unpack/pack everytime I want to do any modelling - oh for a shed!)
I'd obviously popped them out of the PE sheet and probably painted them when I di the rest of the wings months ago - but cannot find them anywhere...I thought about using the 'spare' main wing endplates as cutting new ones, but settled on using very thin plasticard - they are so tiny. The PE worked as a perfect template - width of the biro accounted for the thin split line that there had been...
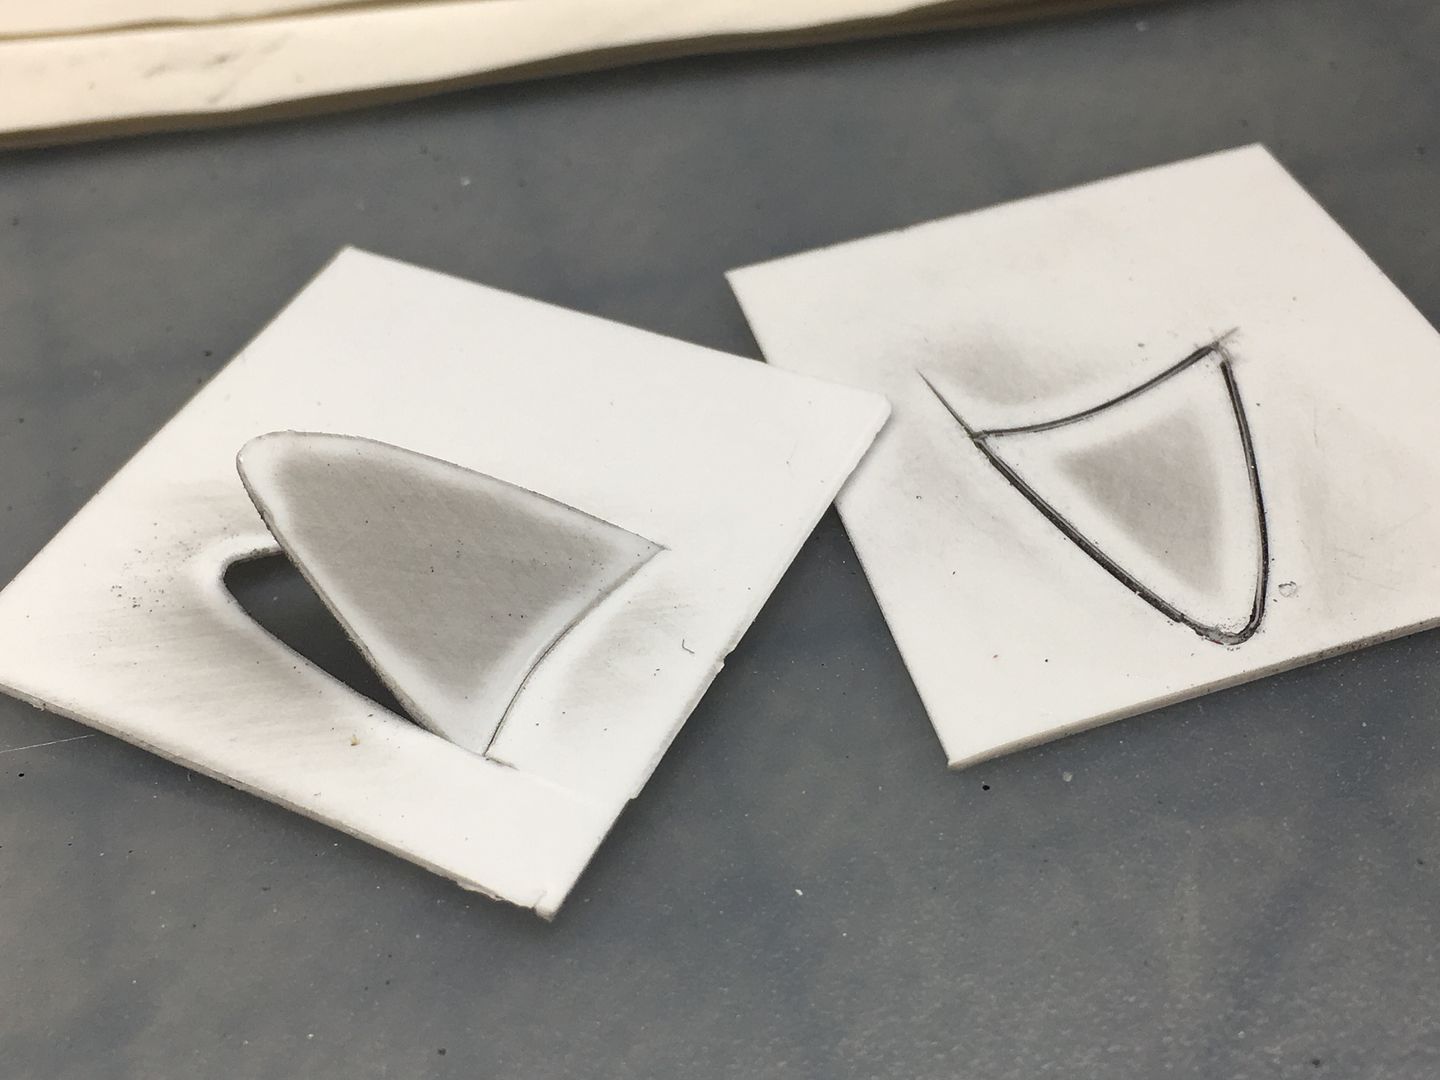
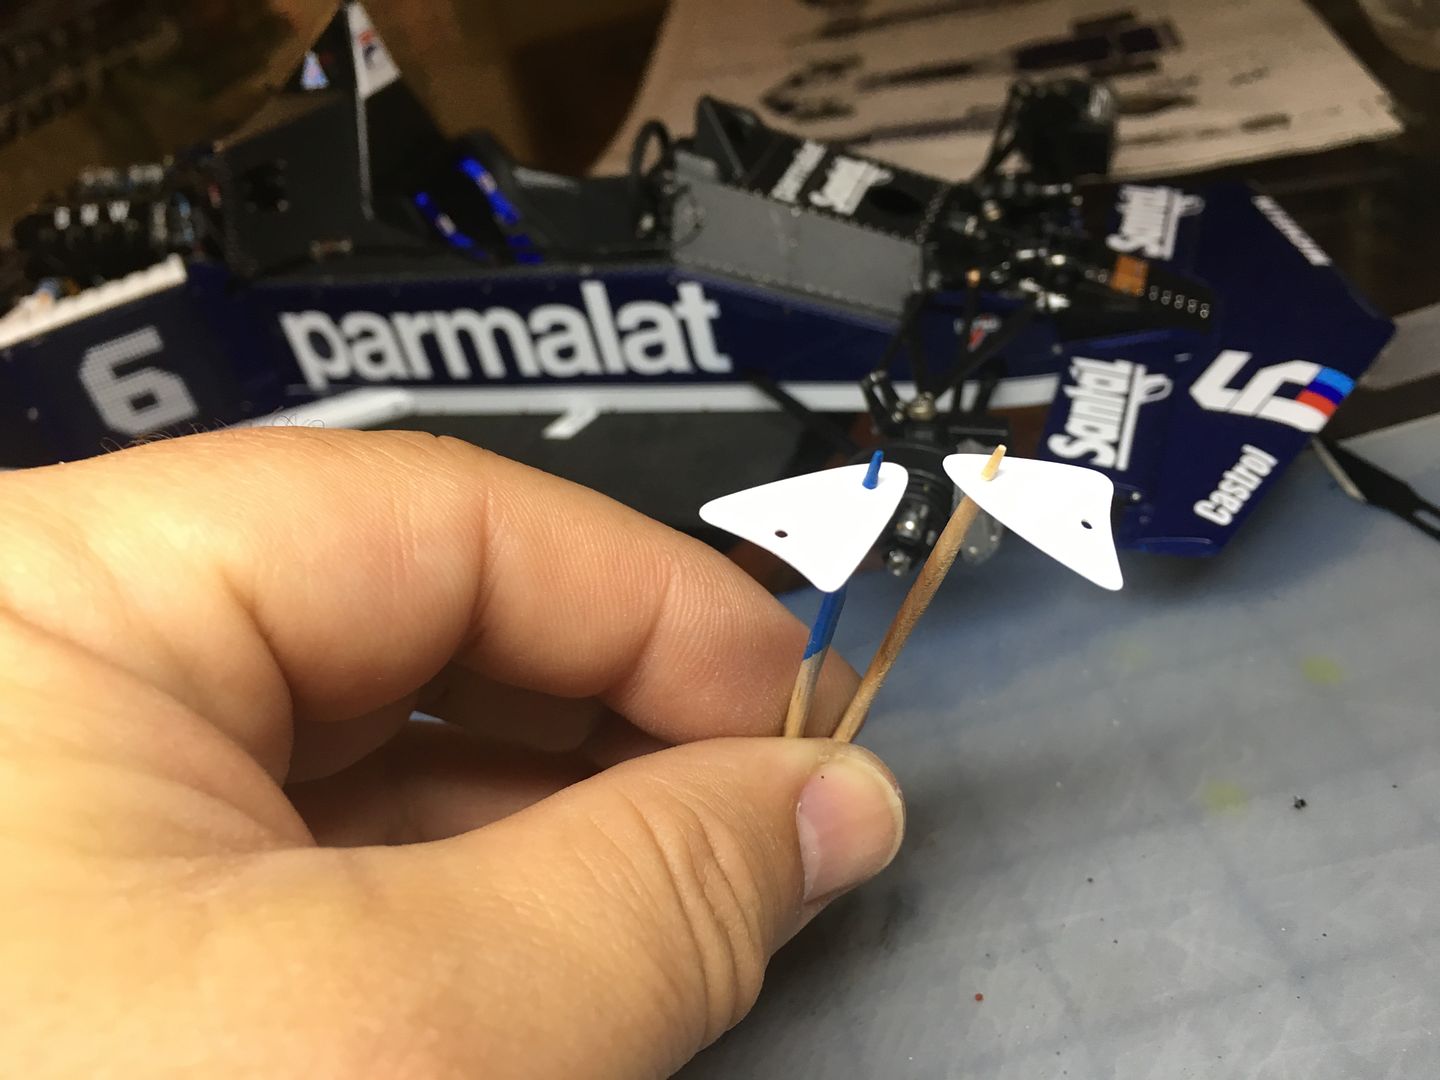
Painted the blue side last night - white tonight, lacquer, decal and fit.
Then wing mirrors....and that is almost it - except I keep forgetting about the windscreen! Have to cut that out of the vac forming provided, and tint blue! It seems the first few kits had blue screen provided - not sure why later ones didn't - I ordered mine pretty early on! I may contact MFH and ask...
The balls-up's are coming thick and fast :lol:
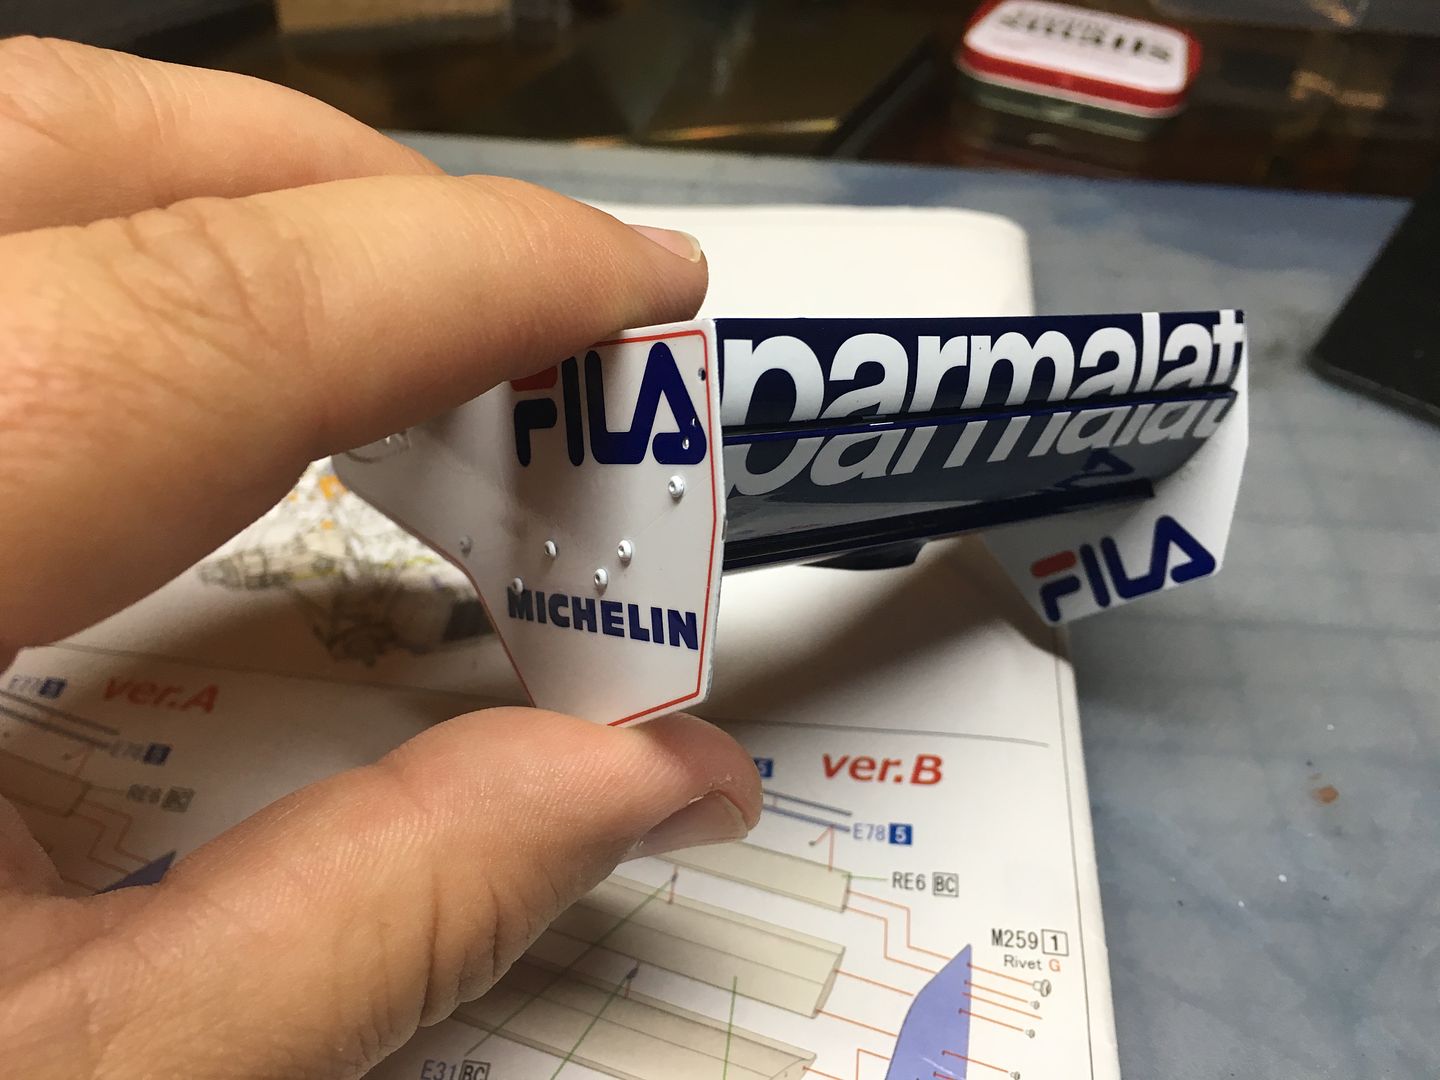
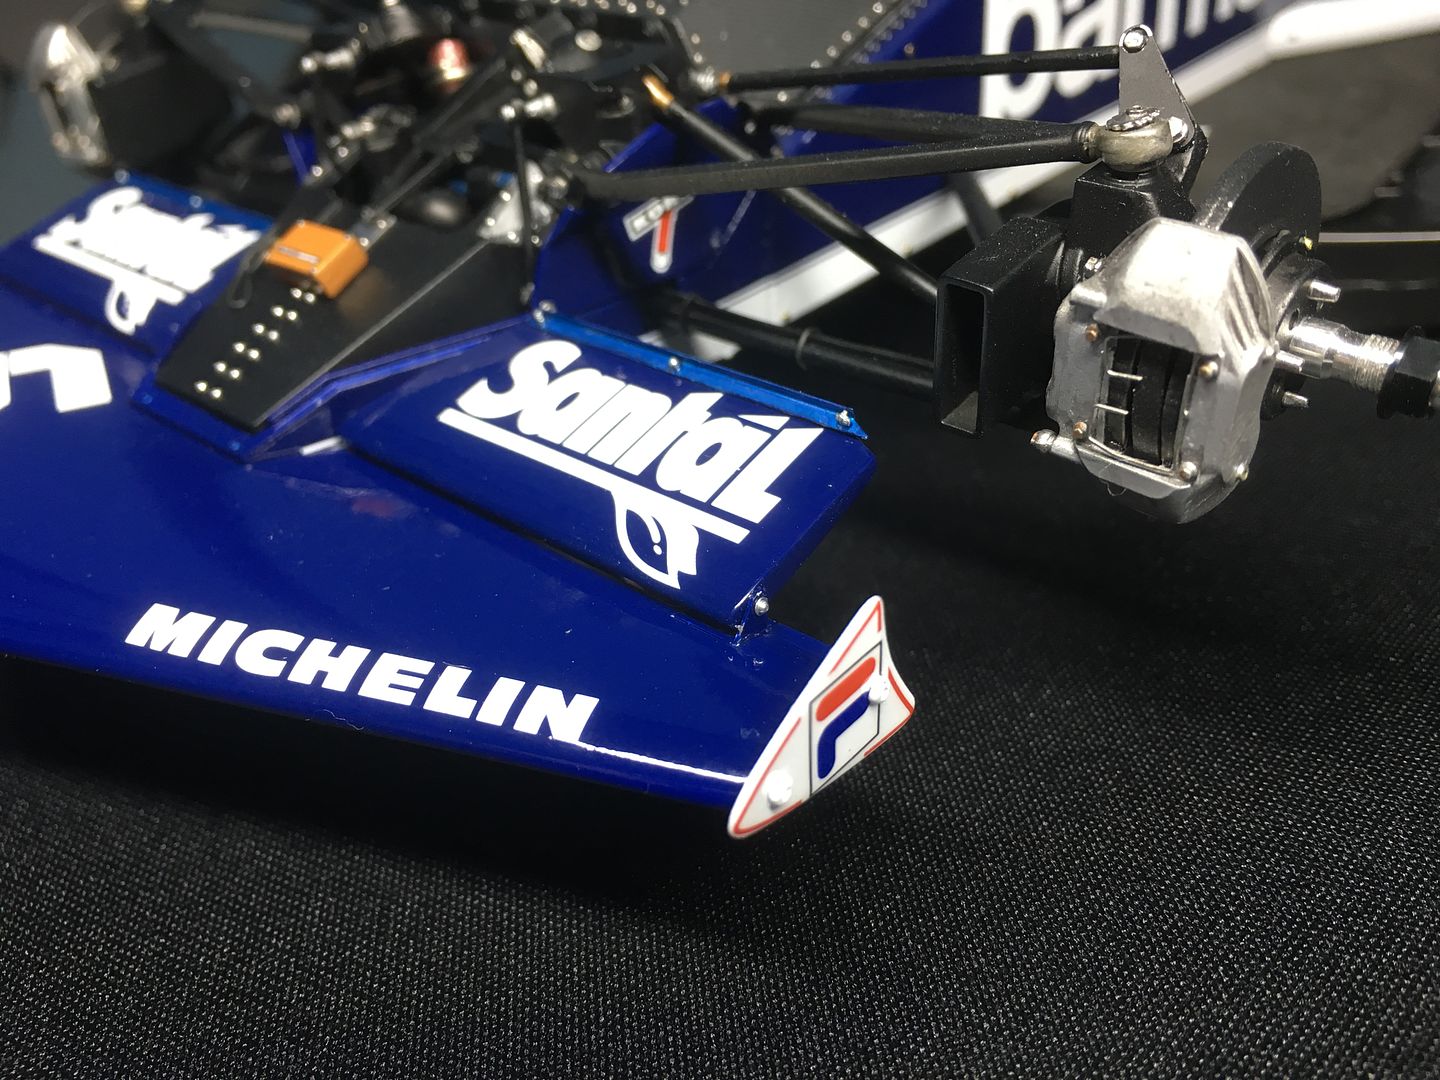
If you look closely at the picture below, you will see that I had sprayed up these two end plates both as 'left handed' - they are blue on the other side so cant be reversed - anyway, corrected now - but grrr!
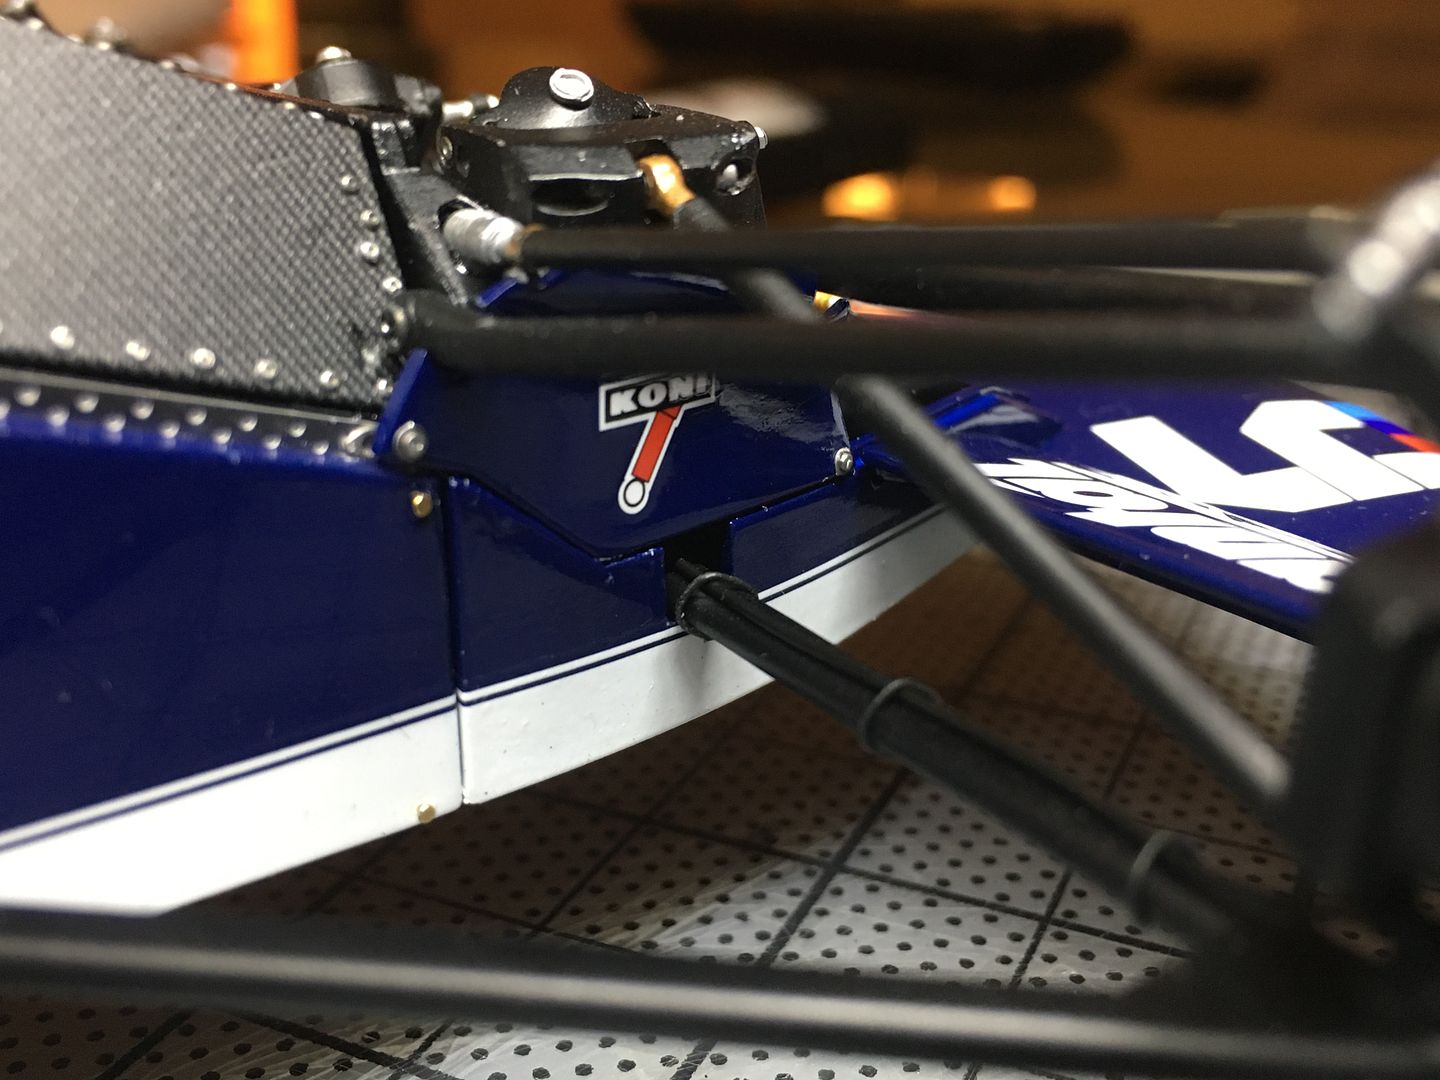
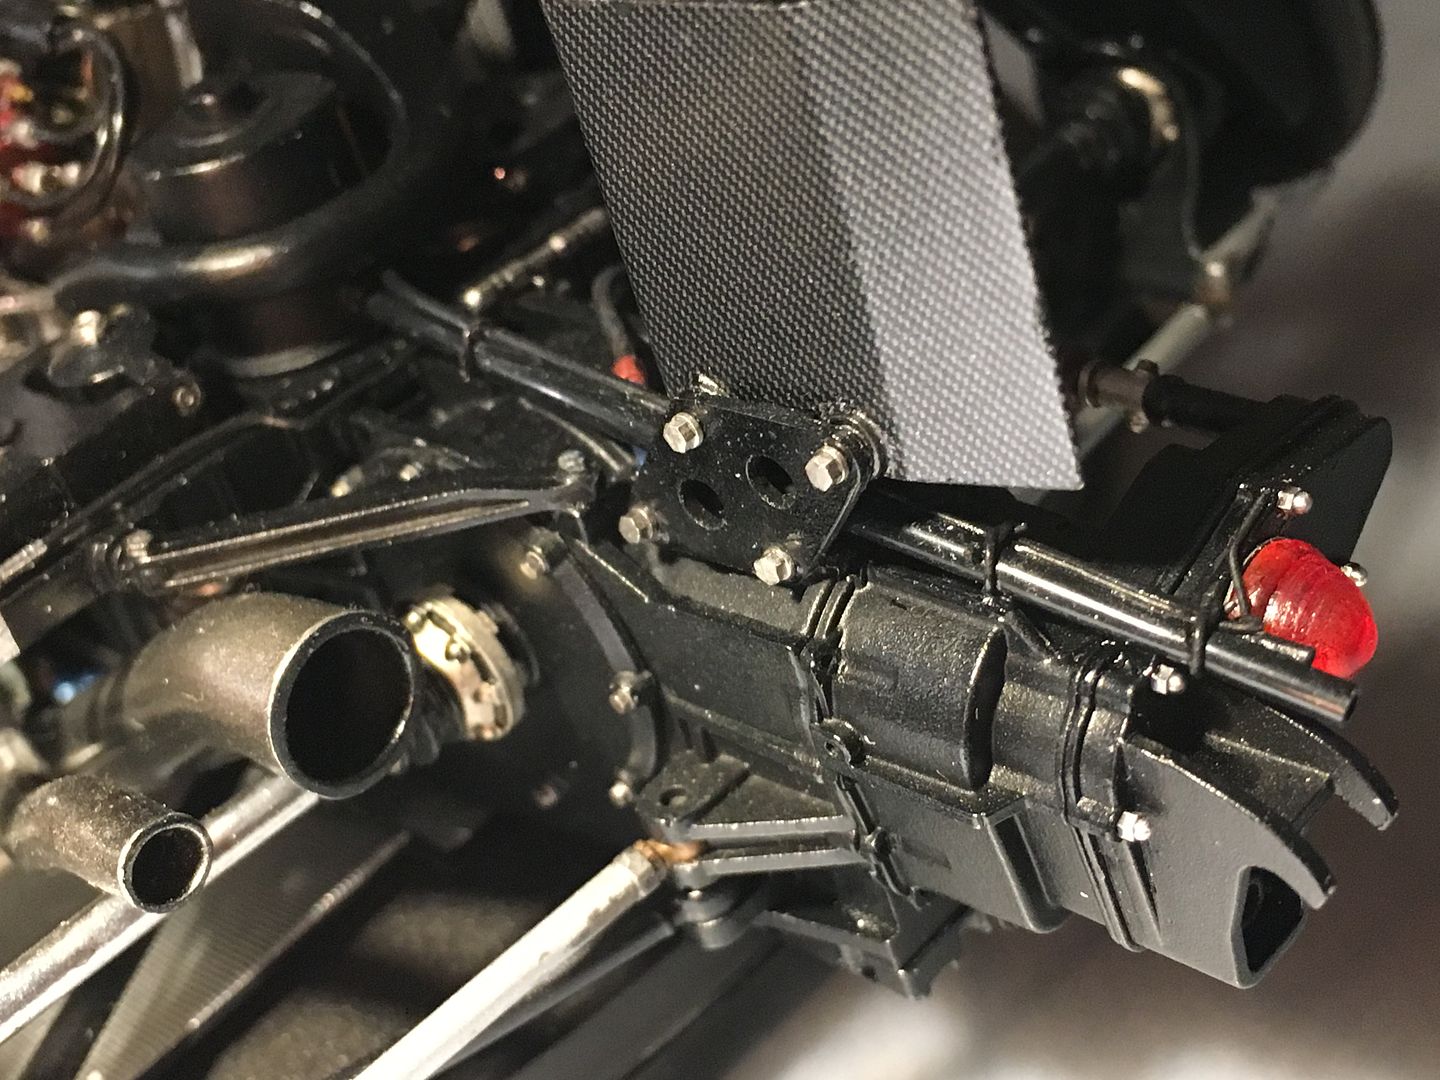
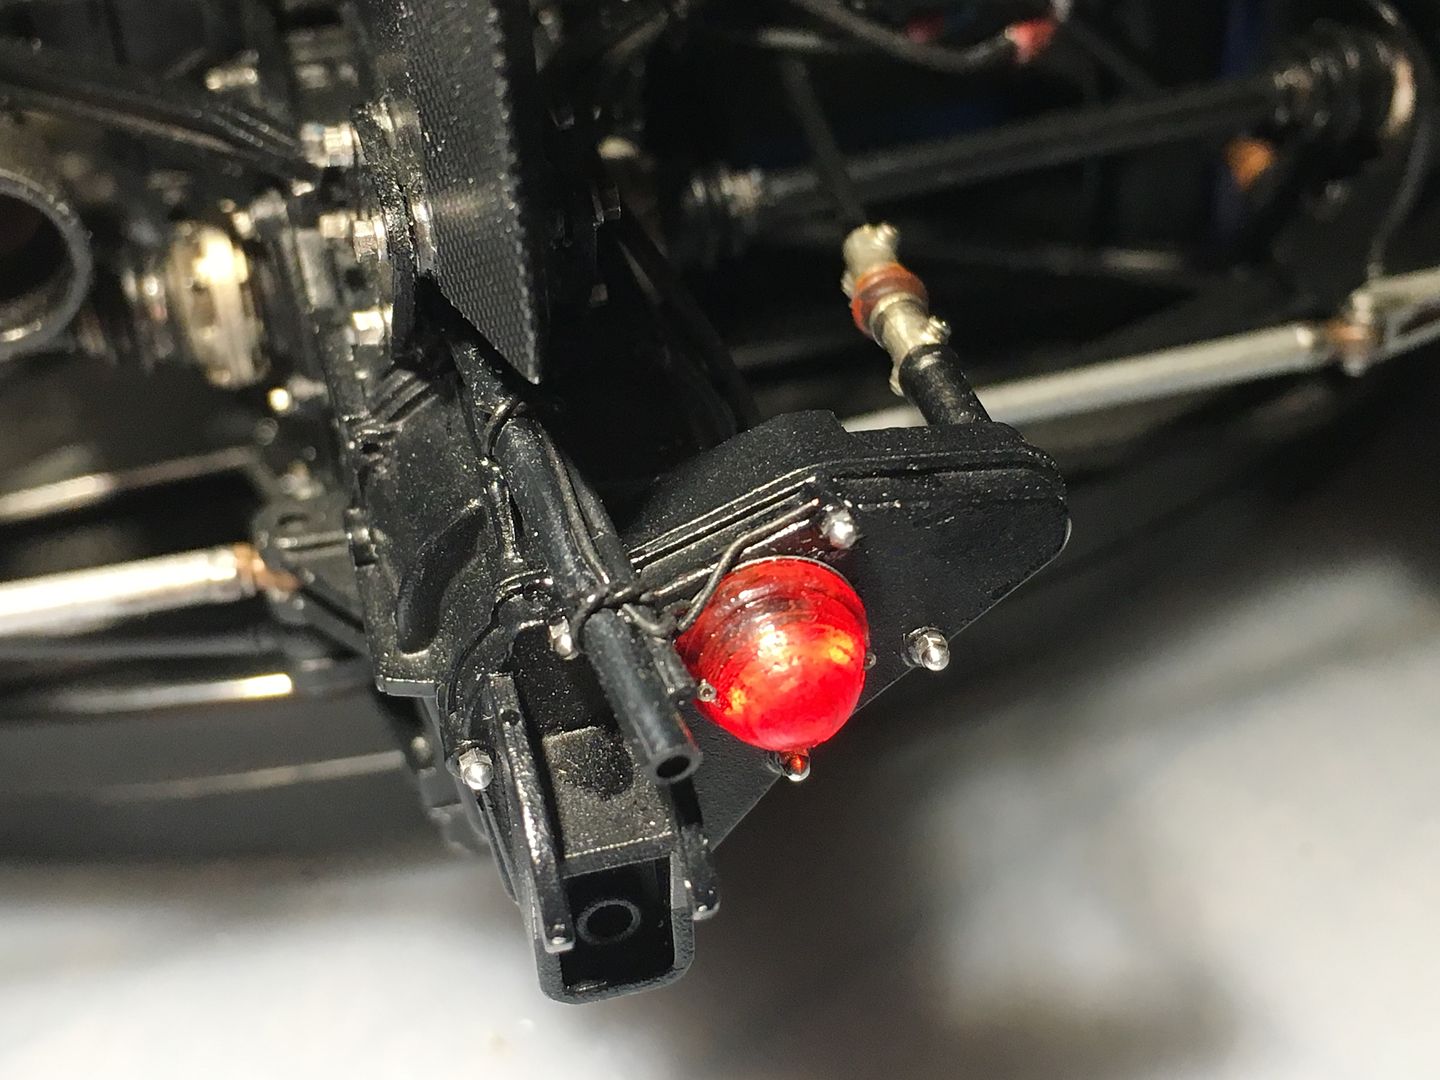
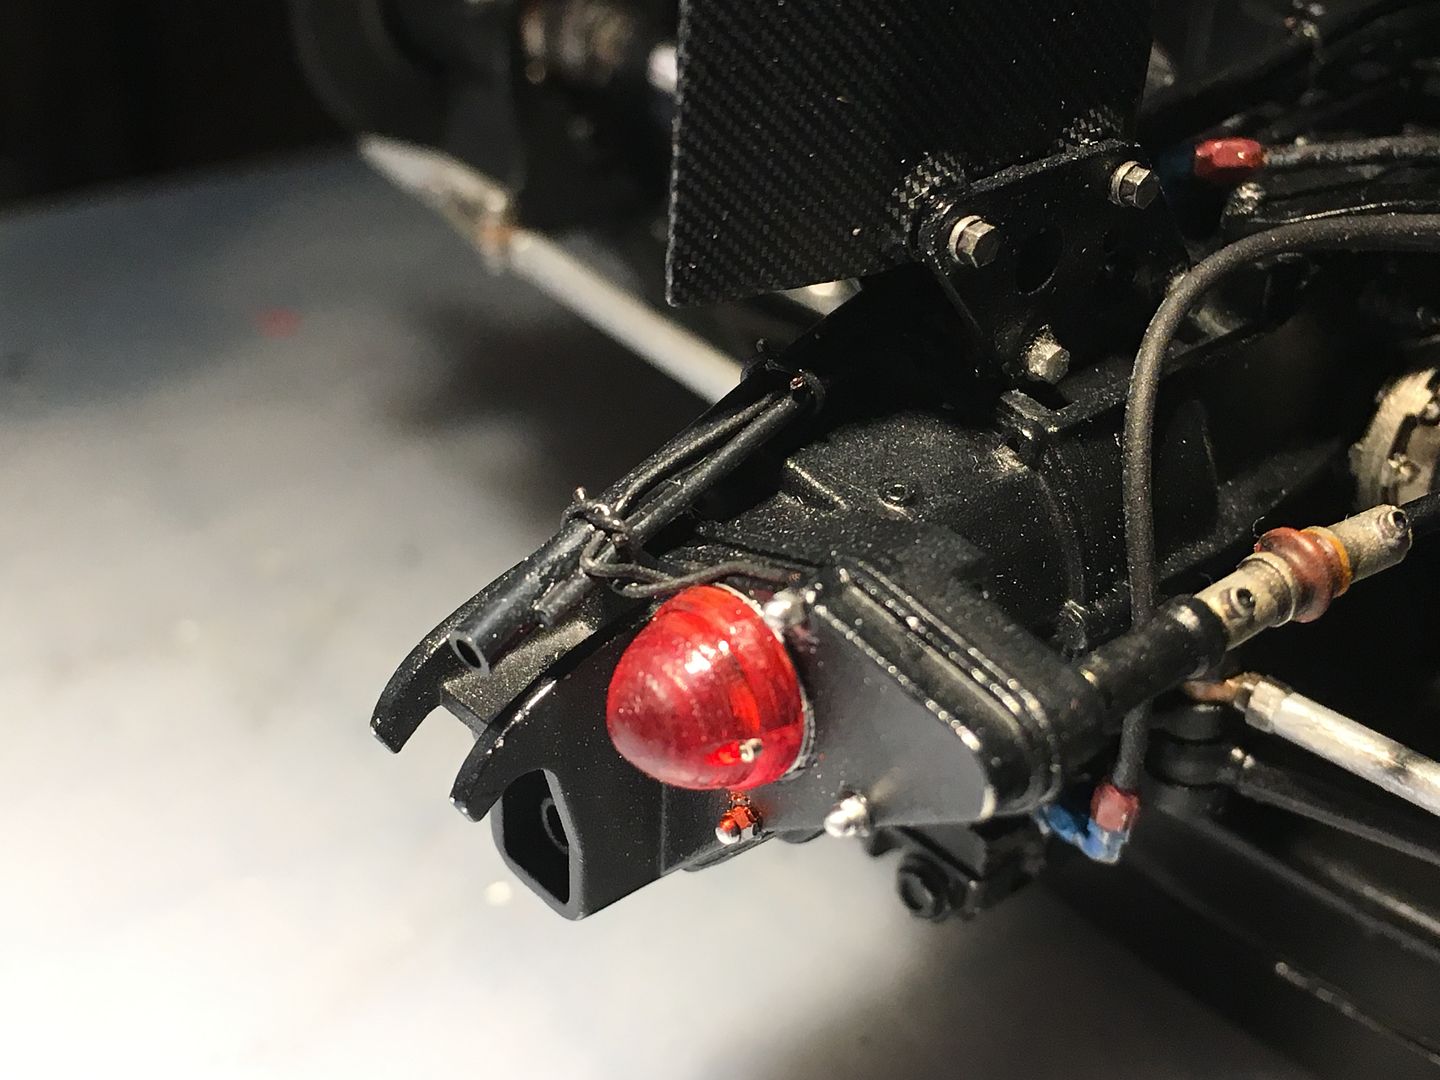
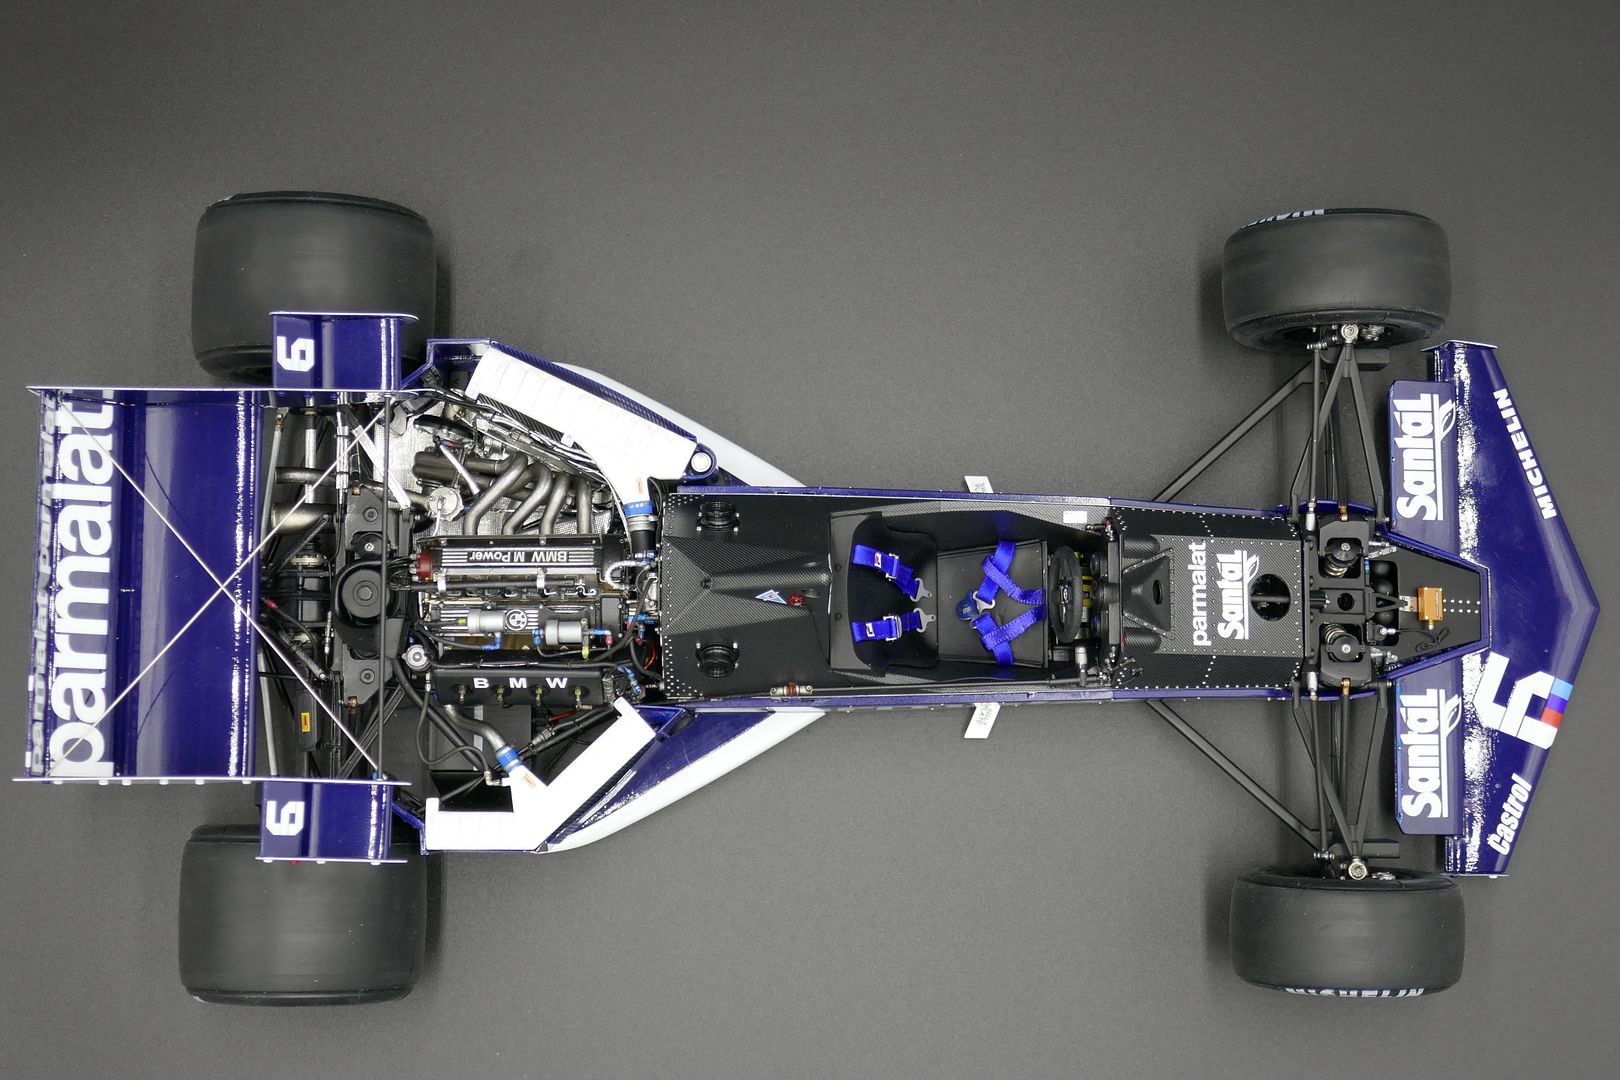
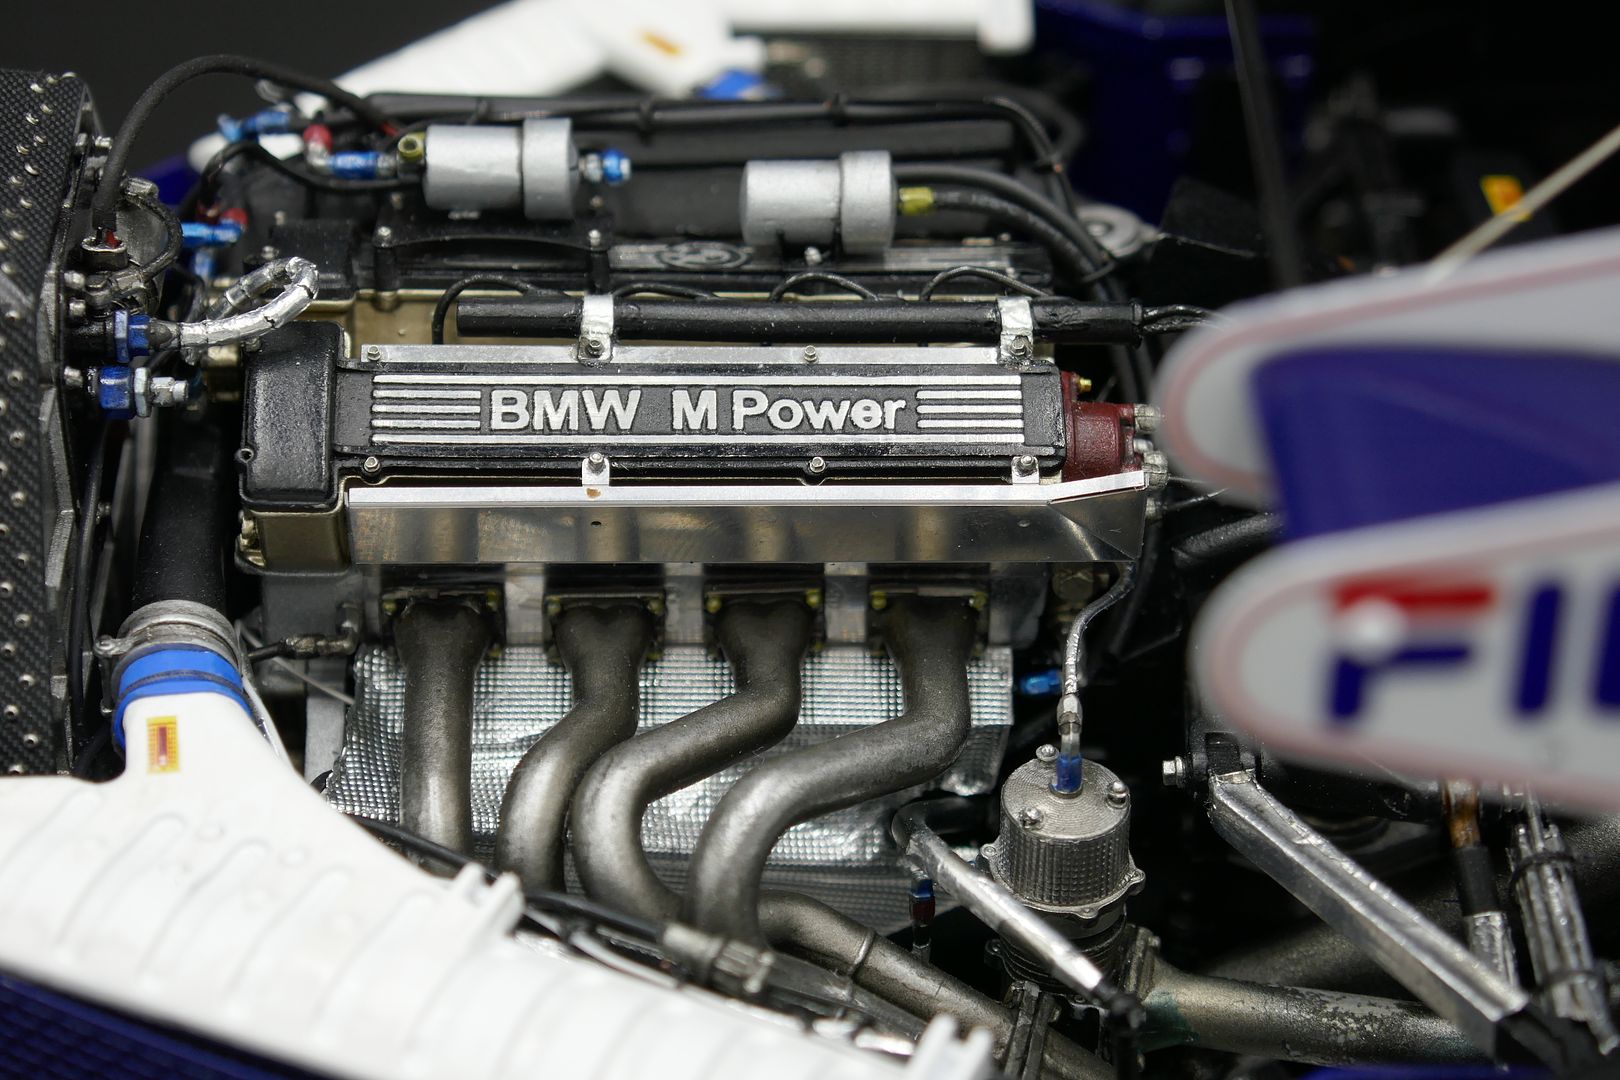
Here are a few pics of the extra wiring I have added - first shows quite a big pipe - a breather I think - that you see on a lot of pictures, but wasn't detailed in the kit....I've also added some 'ground' wires - and wired the wet-weather light!
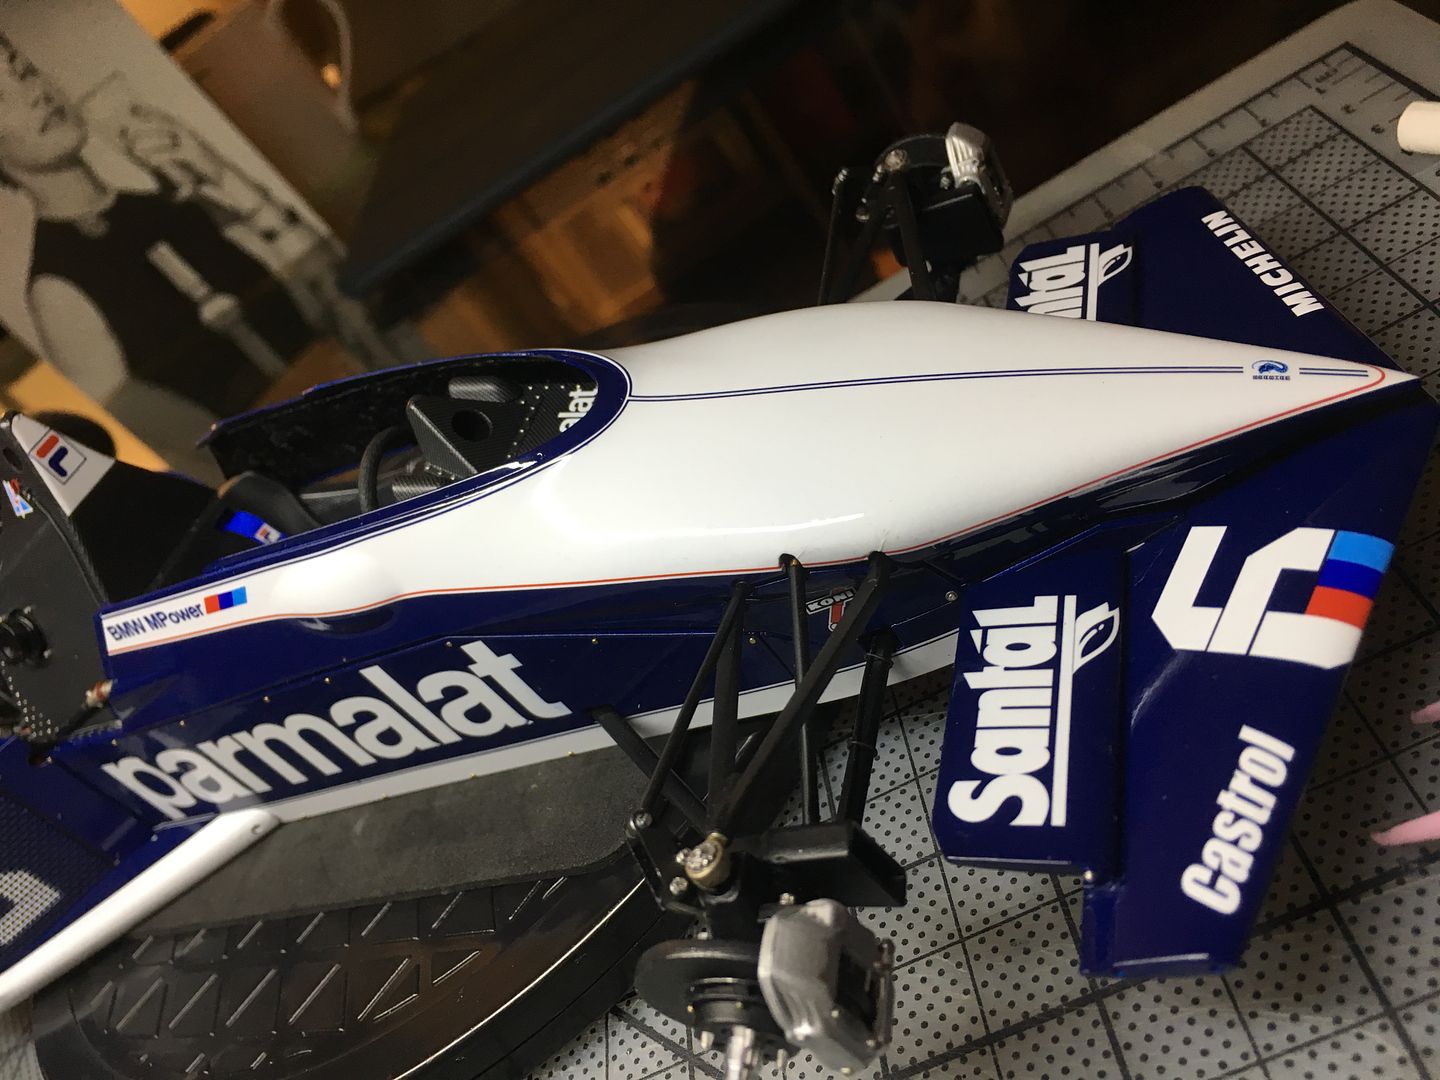
Once I get the dust off all these, I reckon these will actually look like the 'real' version
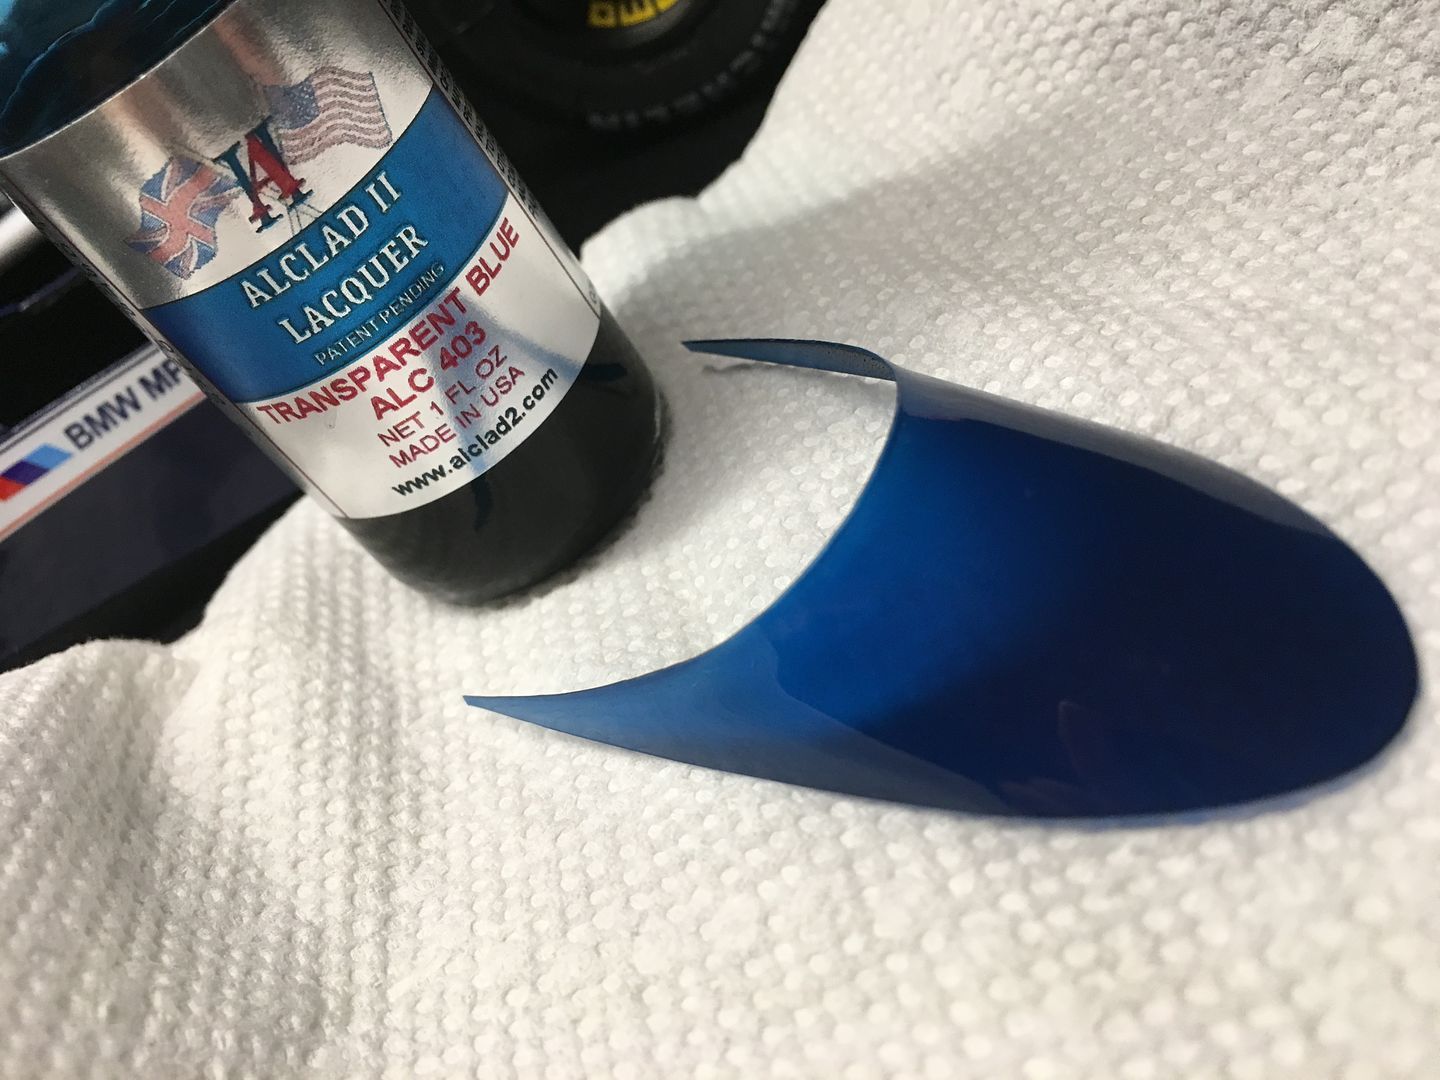
Right - needed quite a dark blue tint, so I used airbrushed clear blue Alclad on the 'inside' - went on fine, taking care to keep it even.
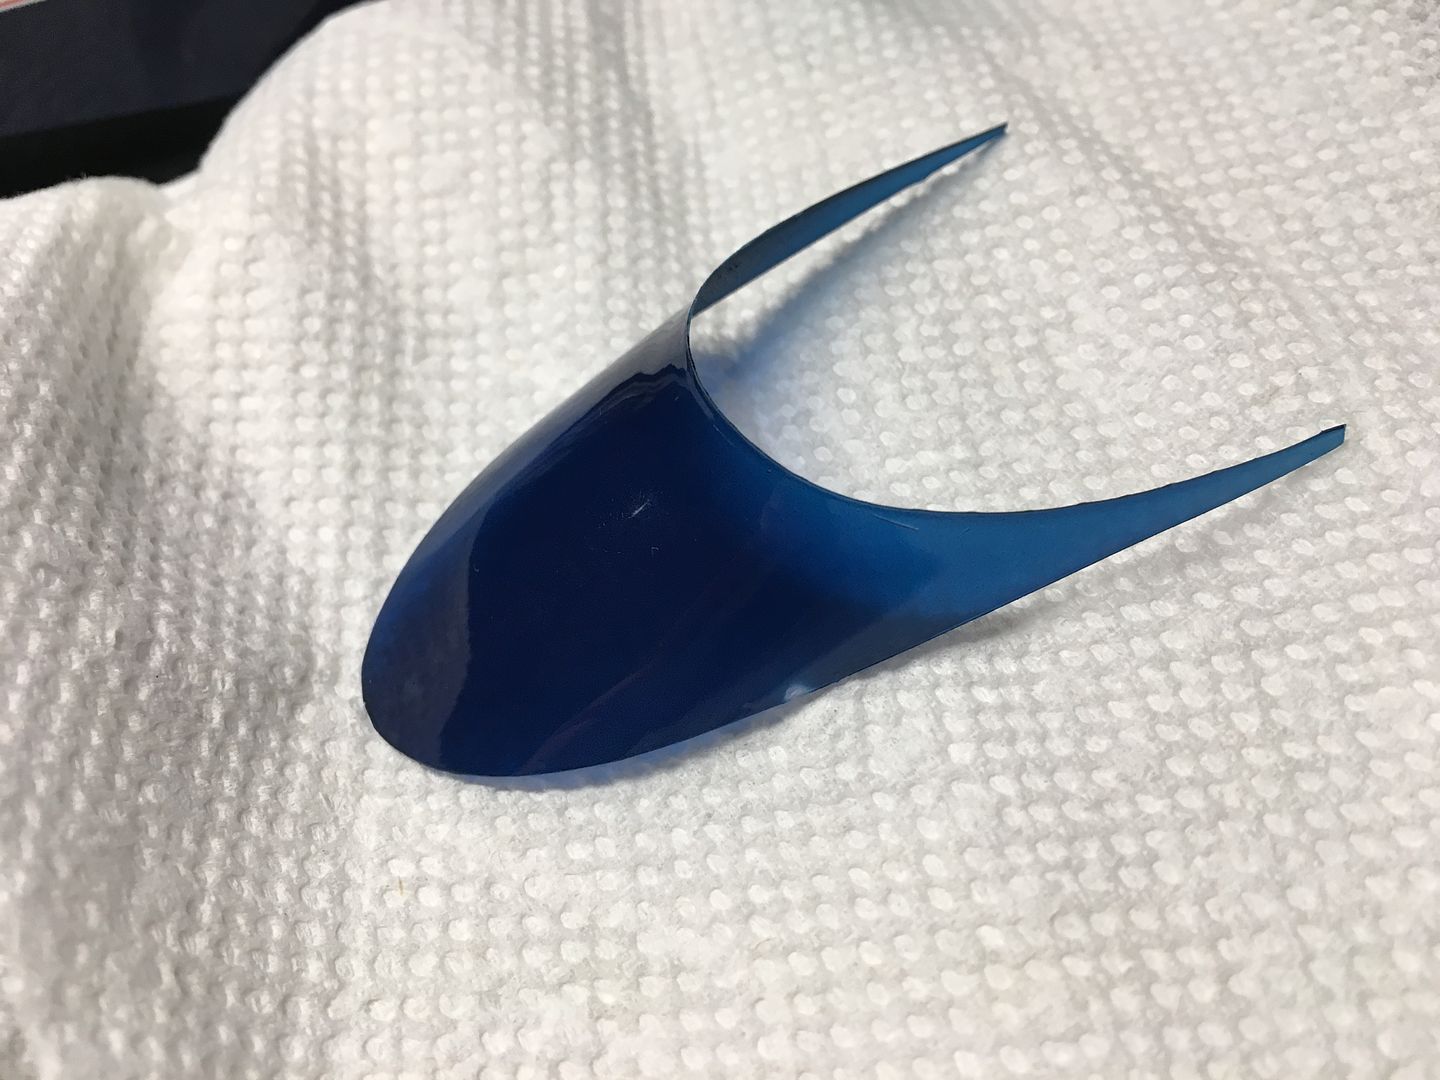
I'd cut the screen out with shark small scissors - needs to be 'riveted' in place...test fit before colouring:
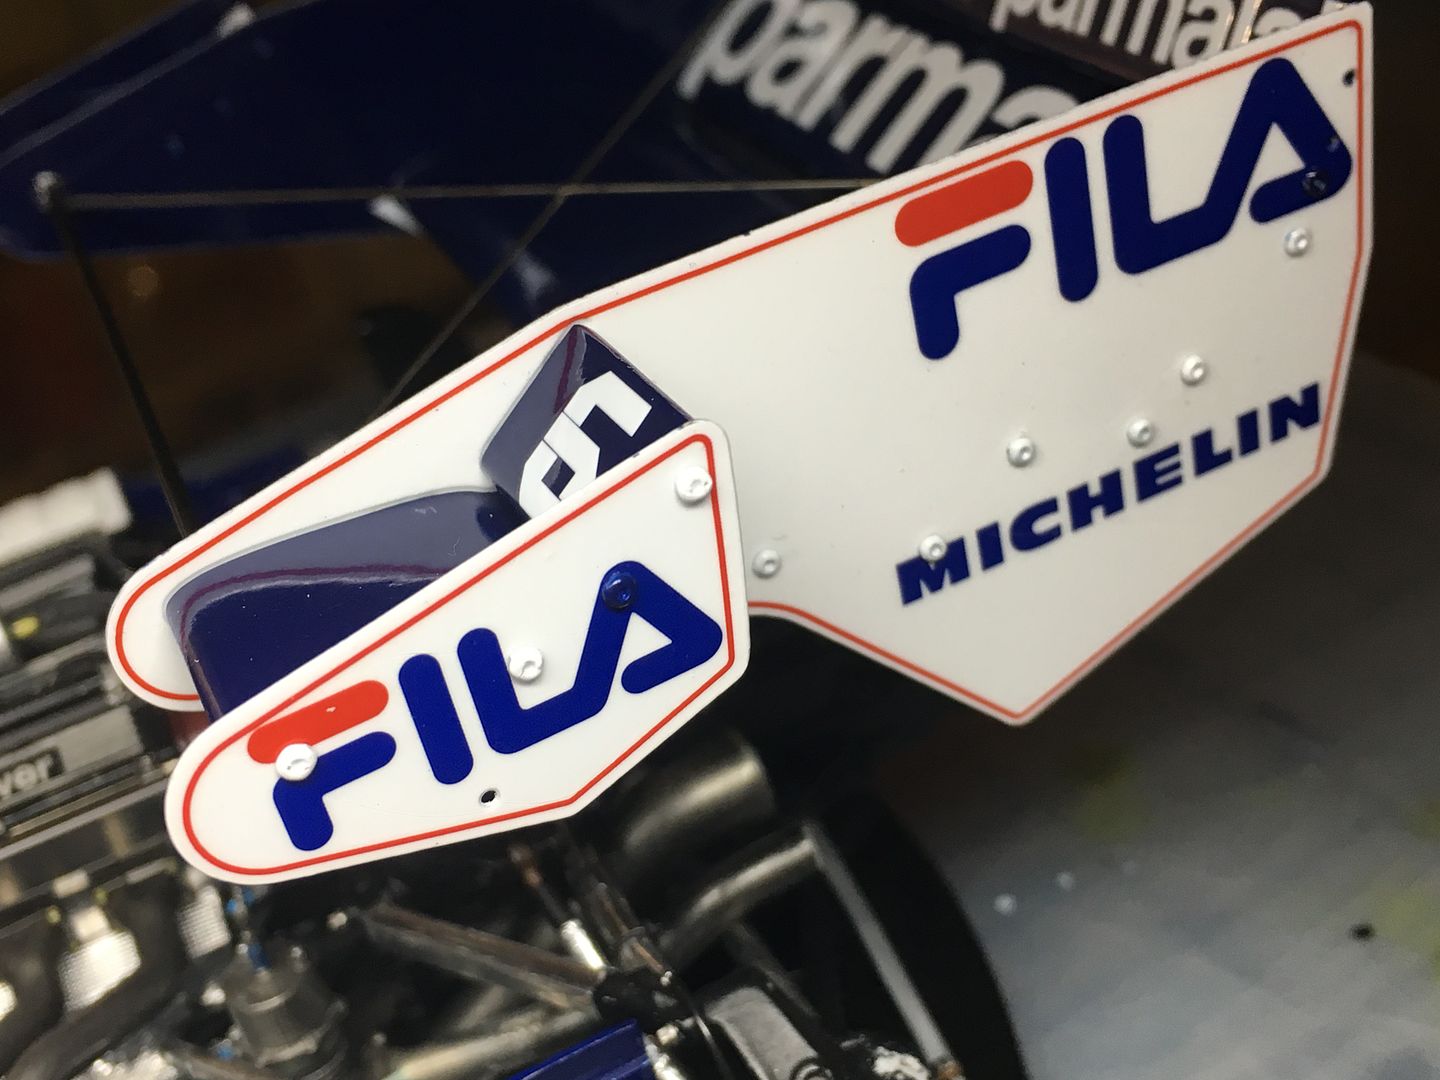
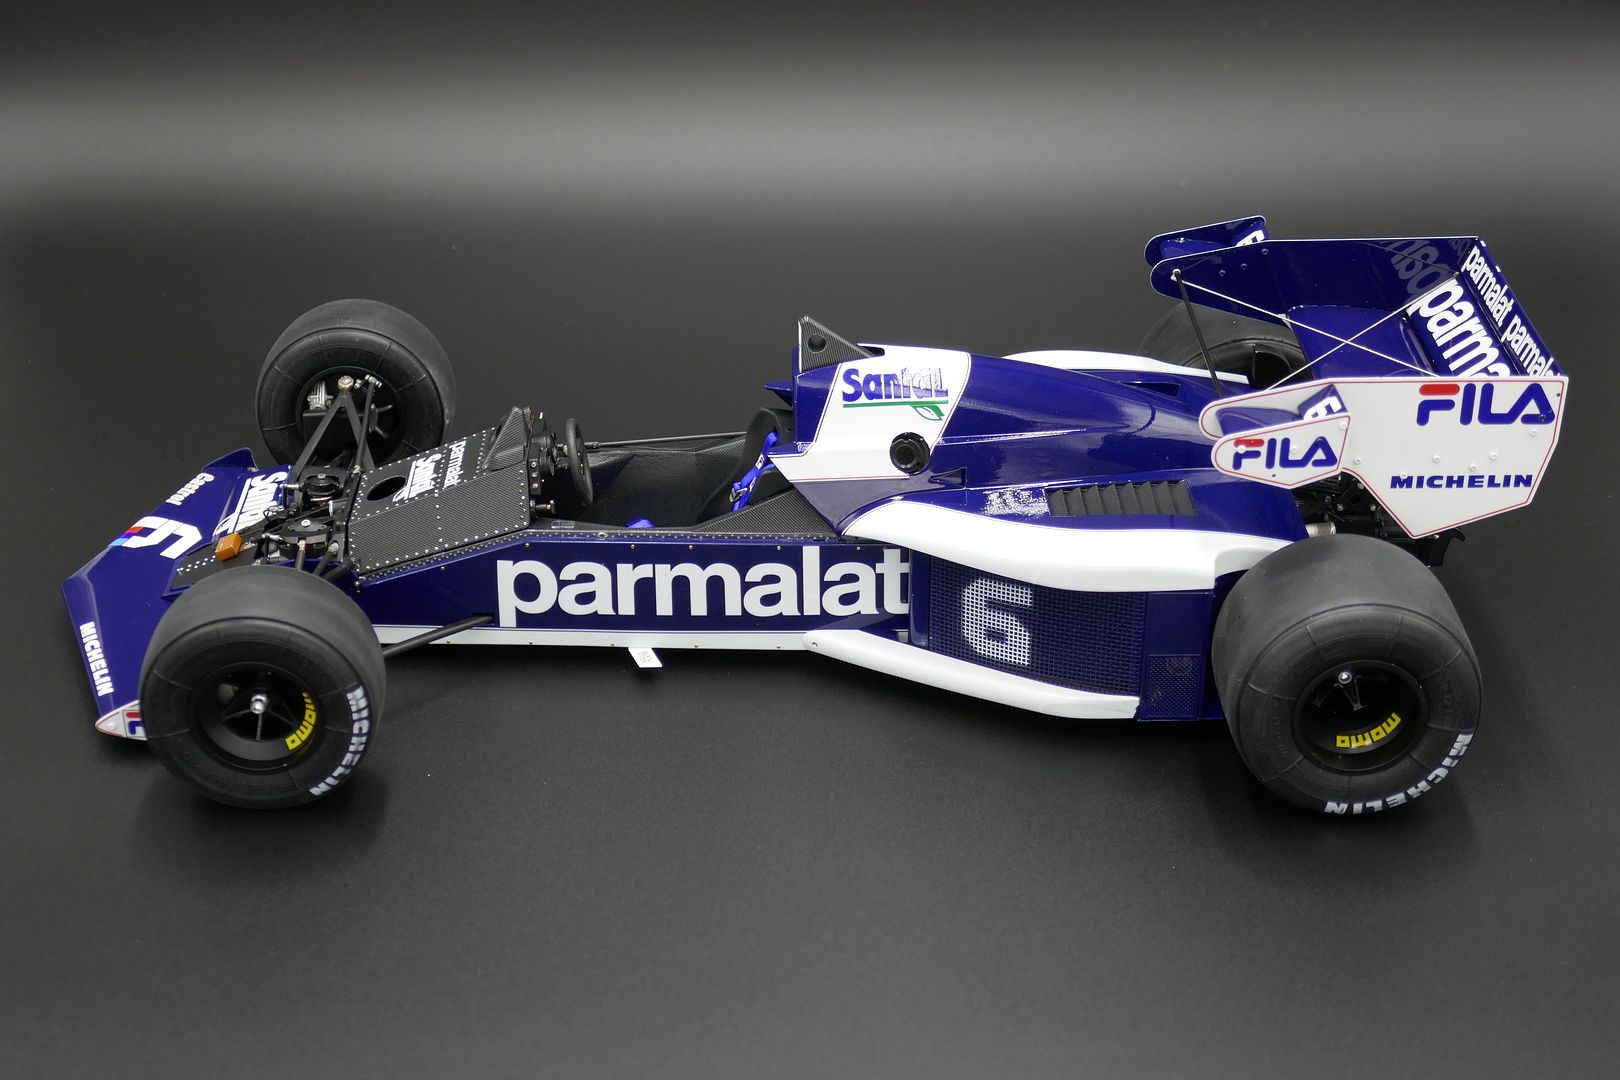
Wing end plates went on...I also added the gurney flaps.
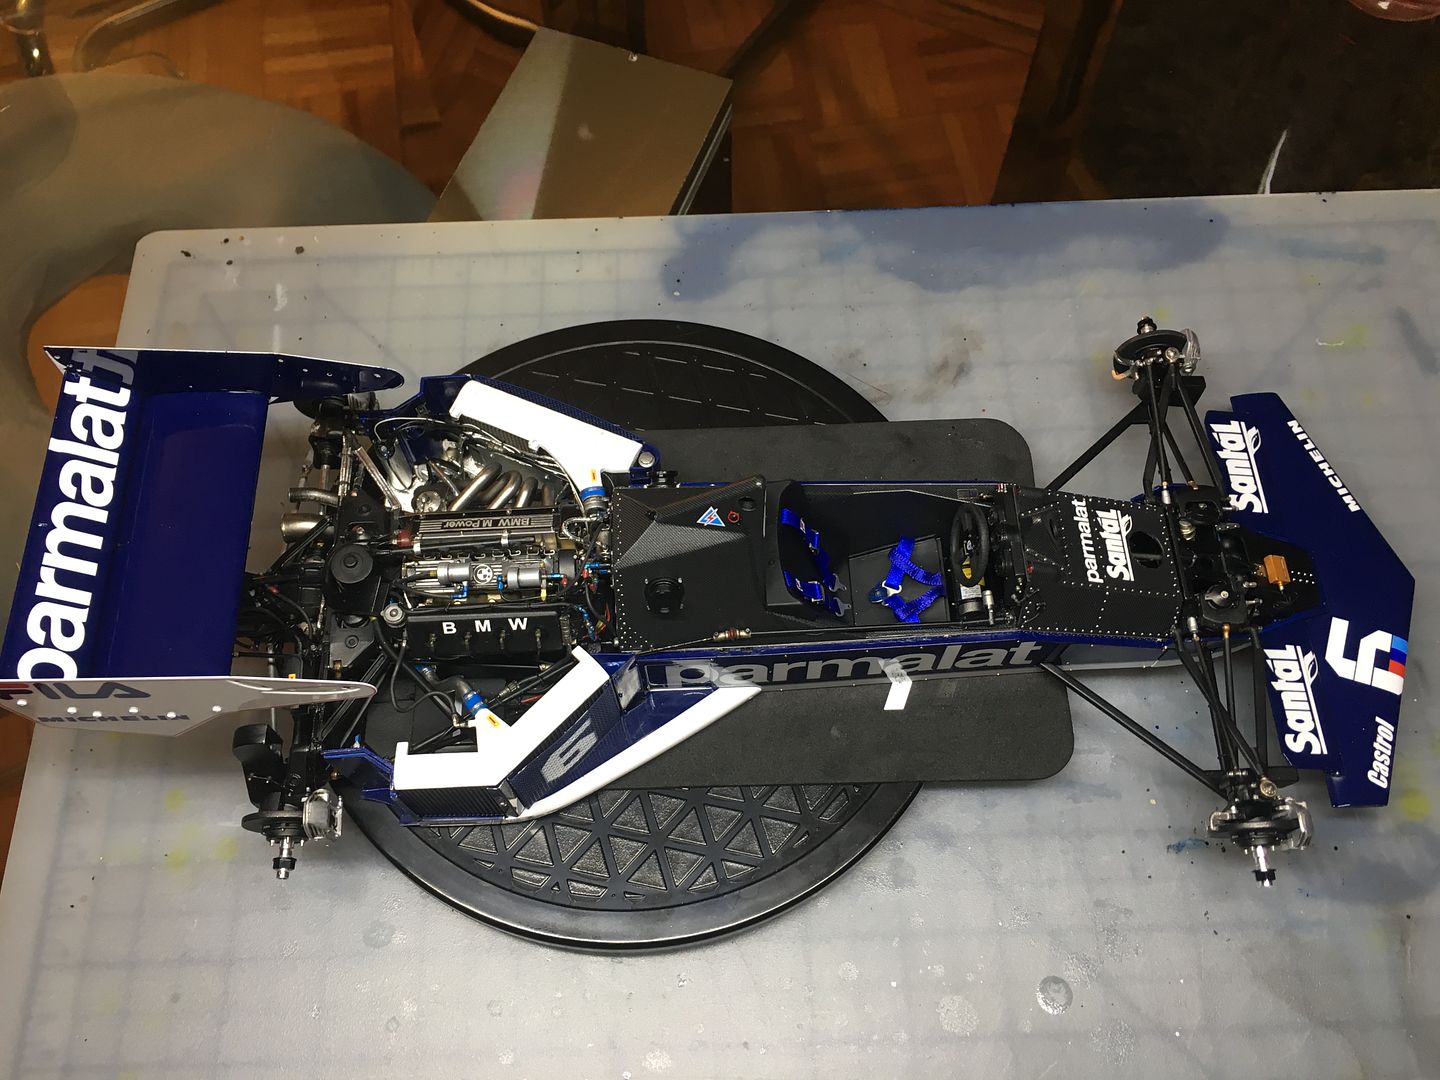
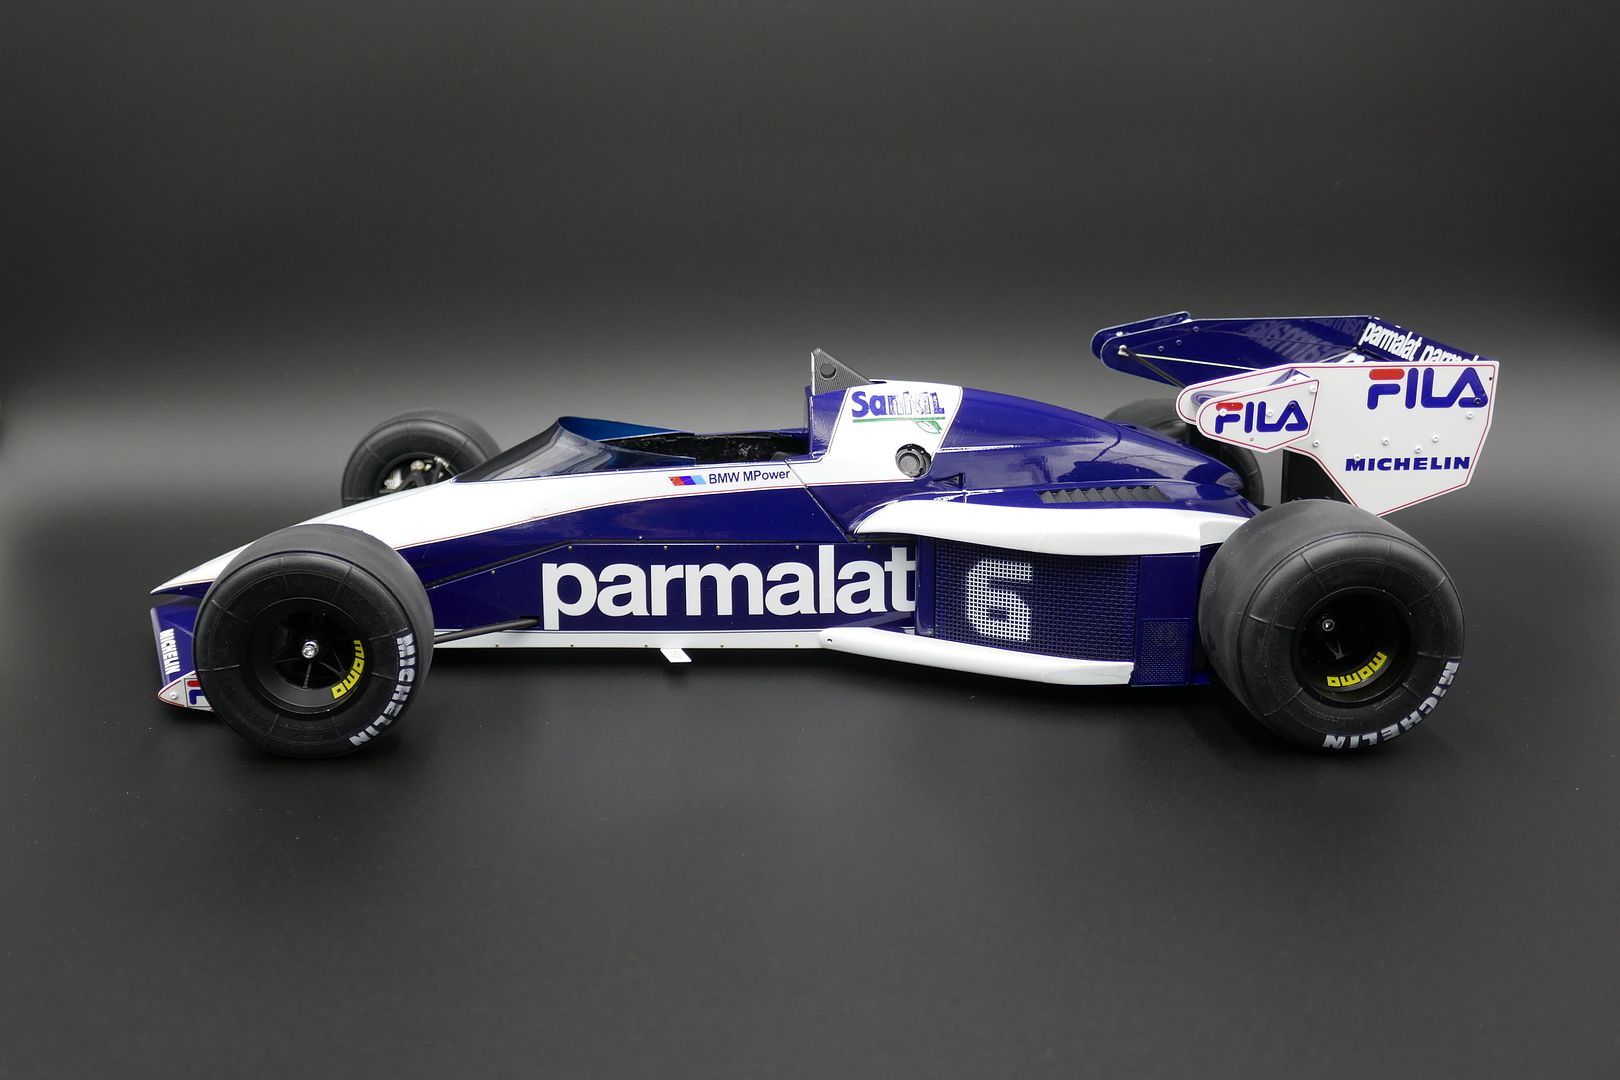
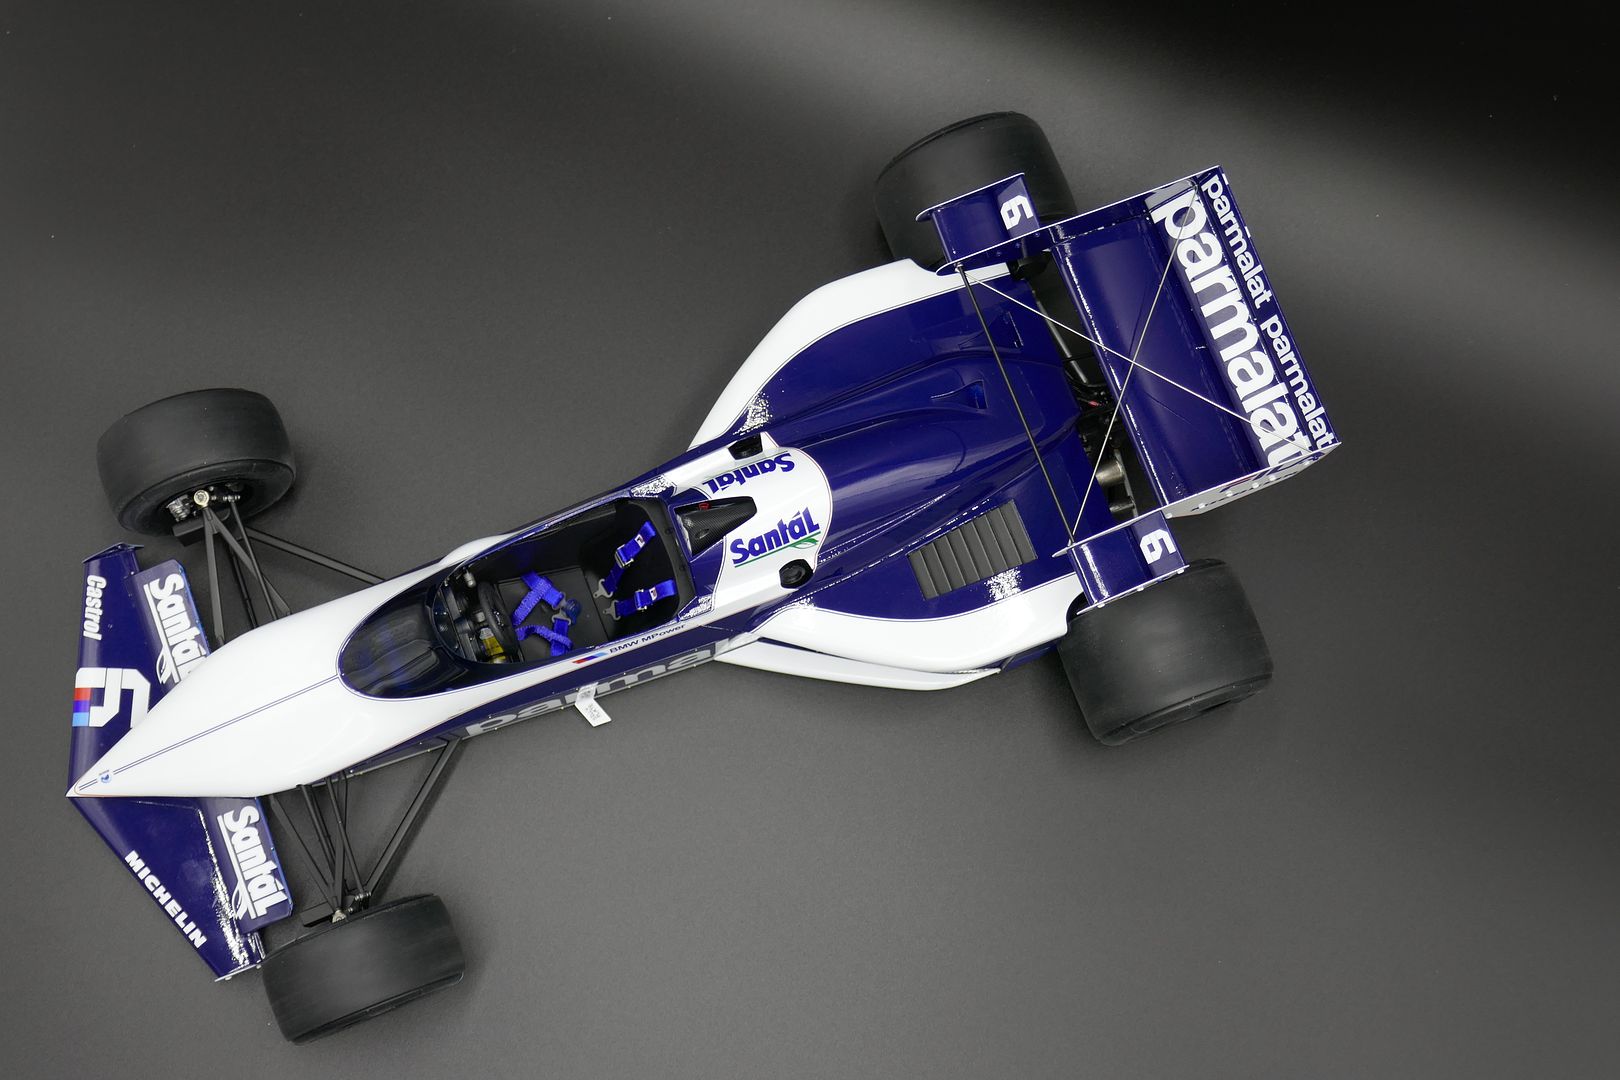
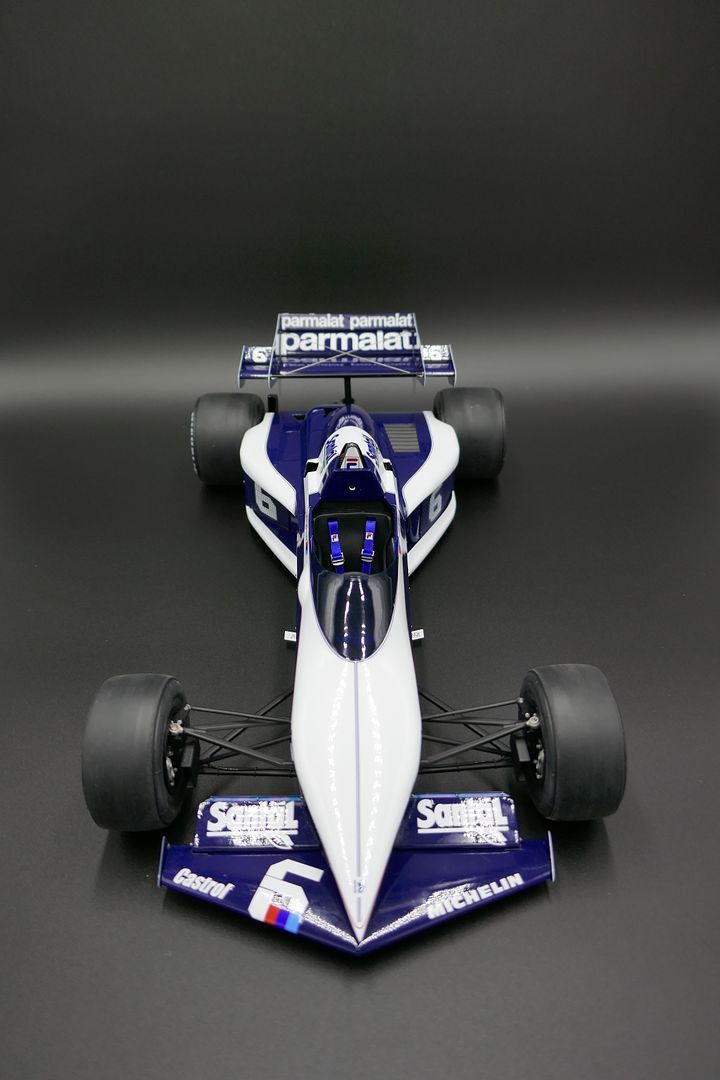
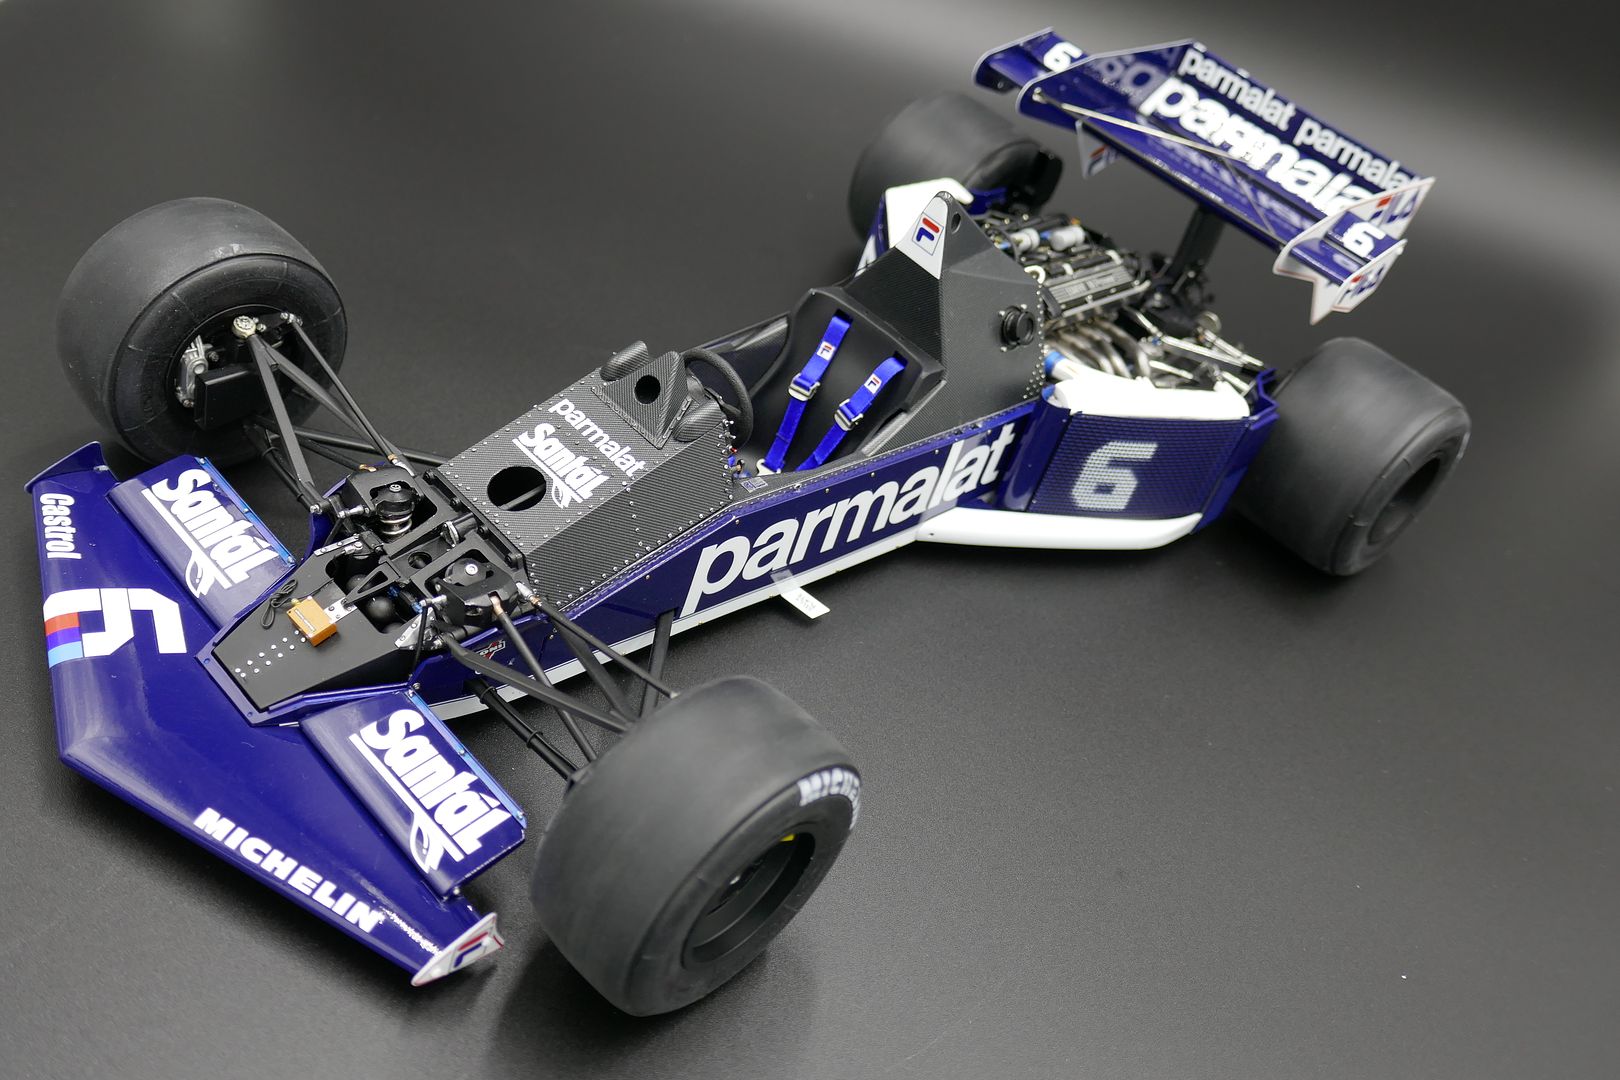
...and you know what - that is ALMOST it!
Need to fit the wing mirrors, rivet screen into place, fix rear wing (in any shots here it is just resting in place) - go over the whole model and tidy it up - touch up the chips etc! I also want to give a little depth to elements with VERY light highlighting etc.
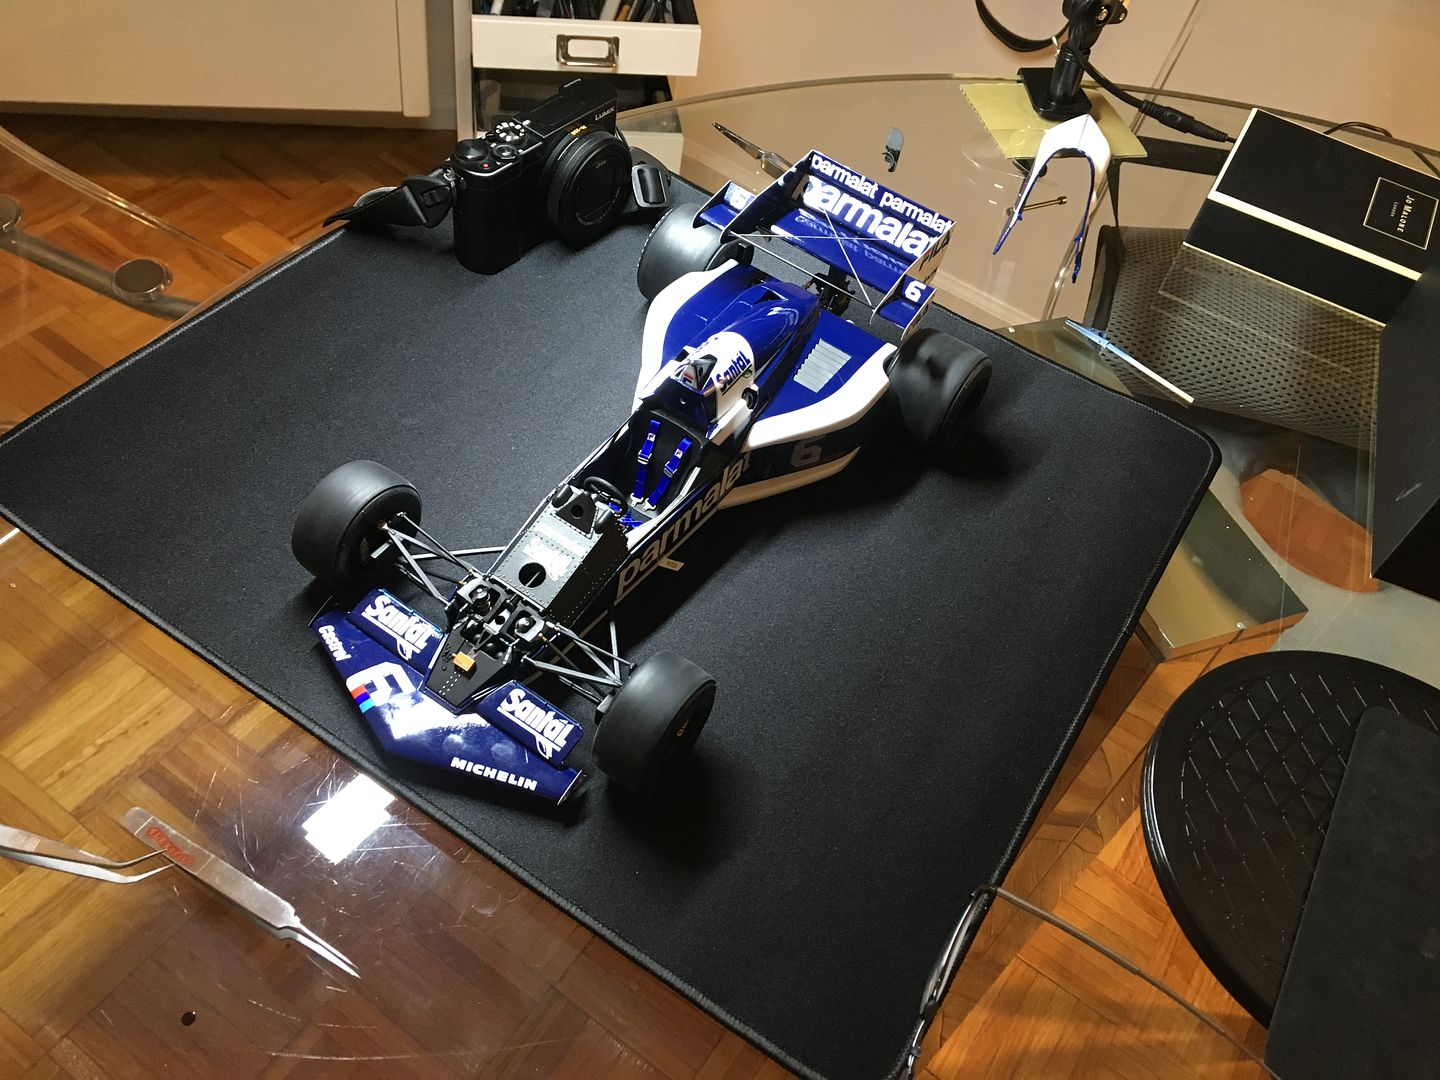
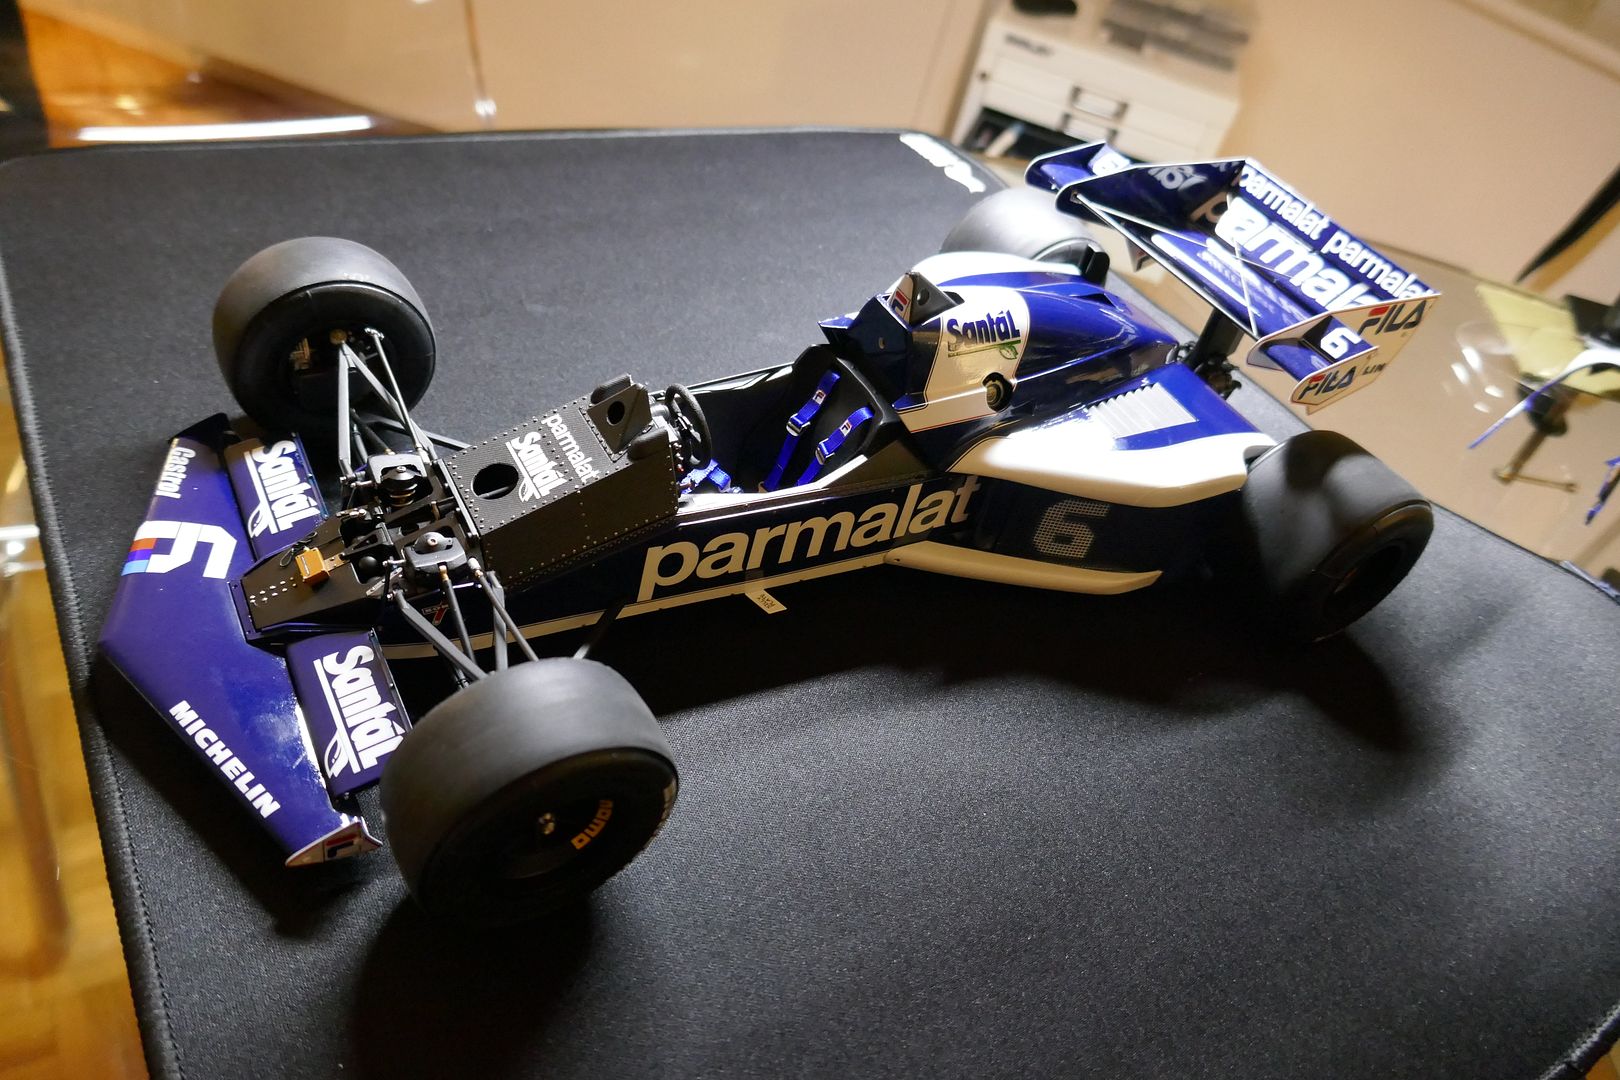
But it is SO close I couldn't resist taking some nice pics - I'll post them here, finish the last bits and bobs and then do a 'finished' thread hopefully at the weekend!!
If you look closely at the picture below, you will see that I had sprayed up these two end plates both as 'left handed' - they are blue on the other side so cant be reversed - anyway, corrected now - but grrr!
Here are a few pics of the extra wiring I have added - first shows quite a big pipe - a breather I think - that you see on a lot of pictures, but wasn't detailed in the kit....I've also added some 'ground' wires - and wired the wet-weather light!
Once I get the dust off all these, I reckon these will actually look like the 'real' version
Right - needed quite a dark blue tint, so I used airbrushed clear blue Alclad on the 'inside' - went on fine, taking care to keep it even.
I'd cut the screen out with shark small scissors - needs to be 'riveted' in place...test fit before colouring:
Wing end plates went on...I also added the gurney flaps.
...and you know what - that is ALMOST it!
Need to fit the wing mirrors, rivet screen into place, fix rear wing (in any shots here it is just resting in place) - go over the whole model and tidy it up - touch up the chips etc! I also want to give a little depth to elements with VERY light highlighting etc.
But it is SO close I couldn't resist taking some nice pics - I'll post them here, finish the last bits and bobs and then do a 'finished' thread hopefully at the weekend!!
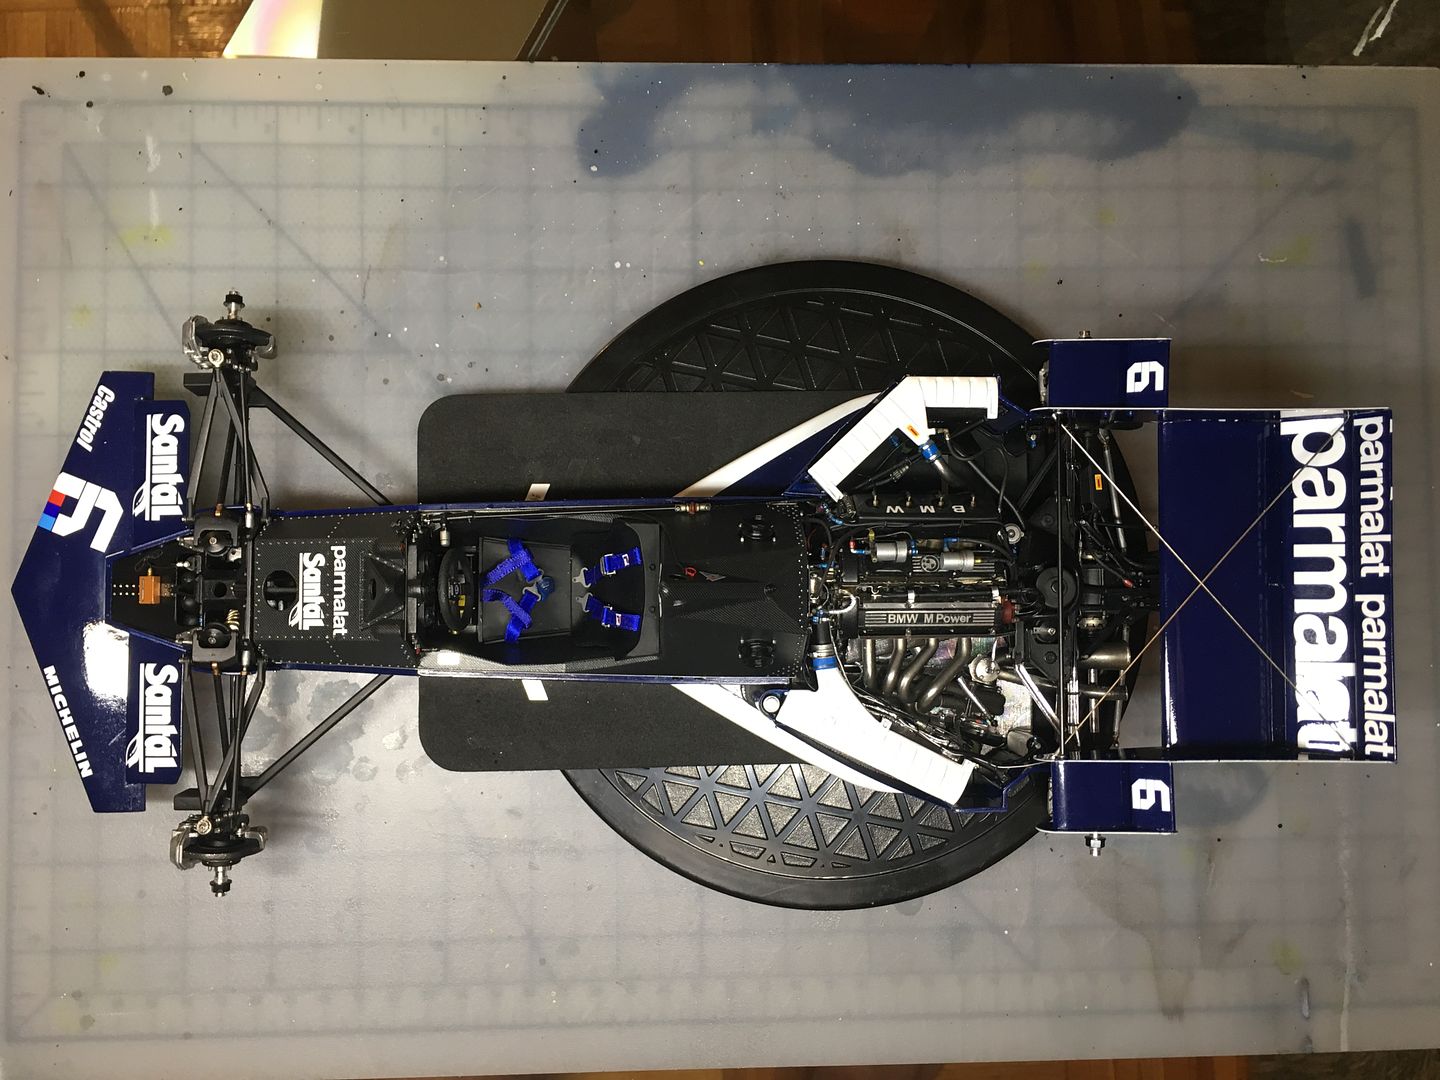
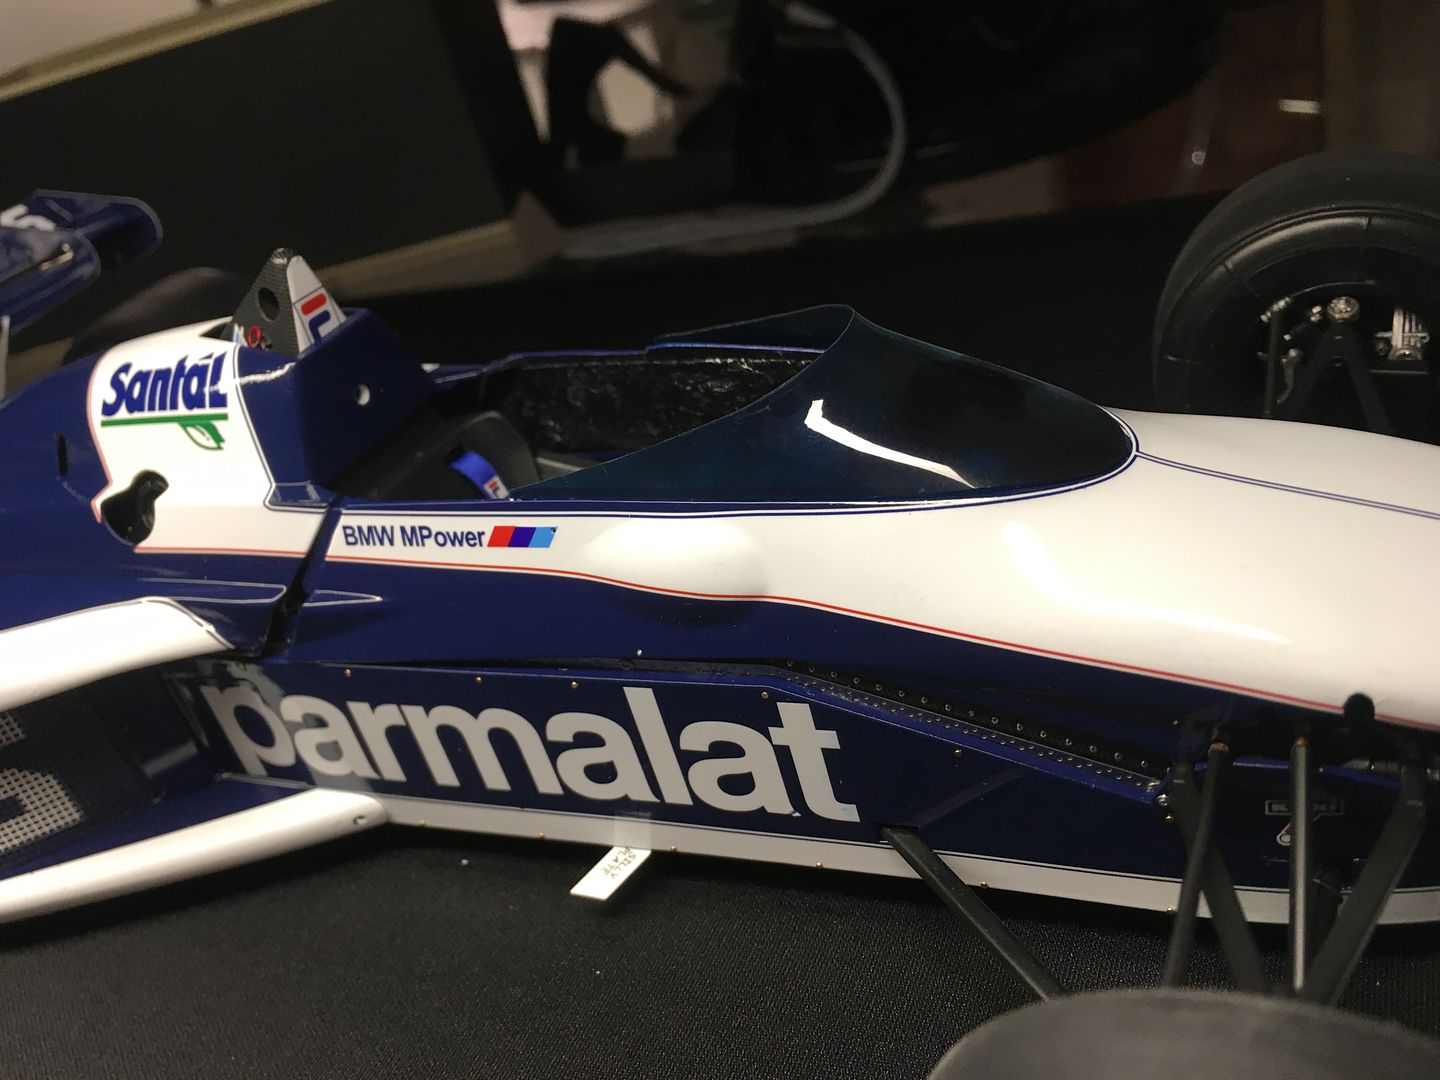
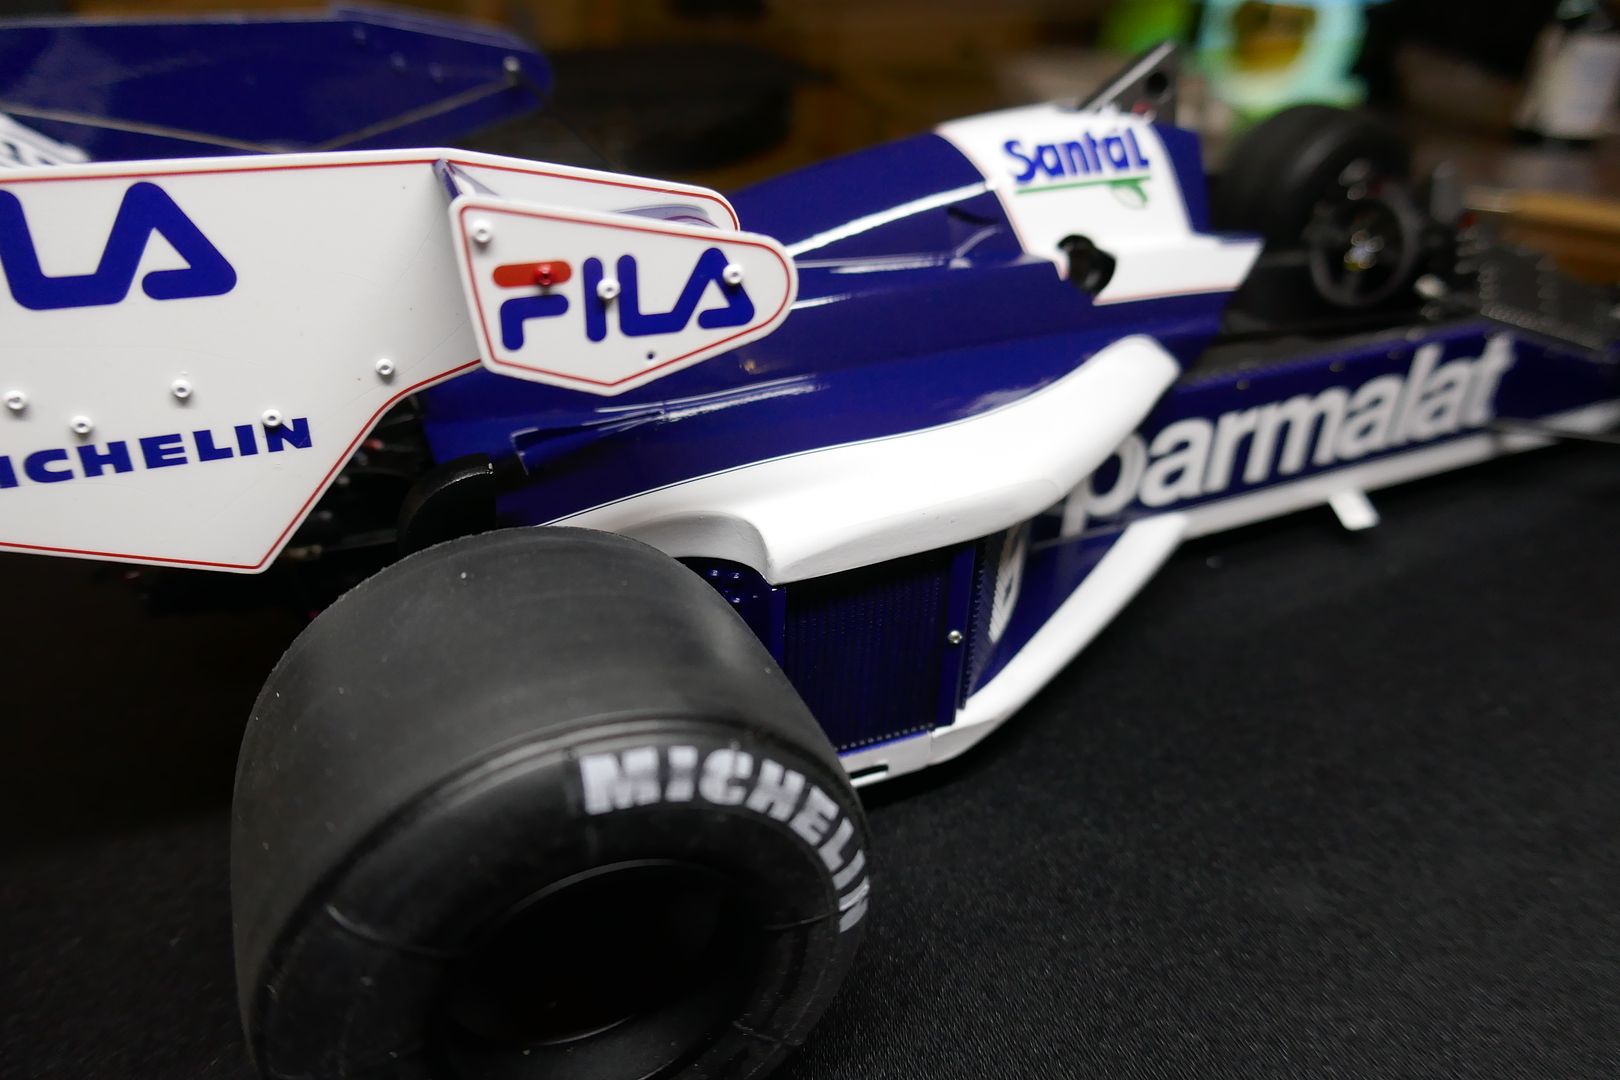
So - remember, not finished - quite!
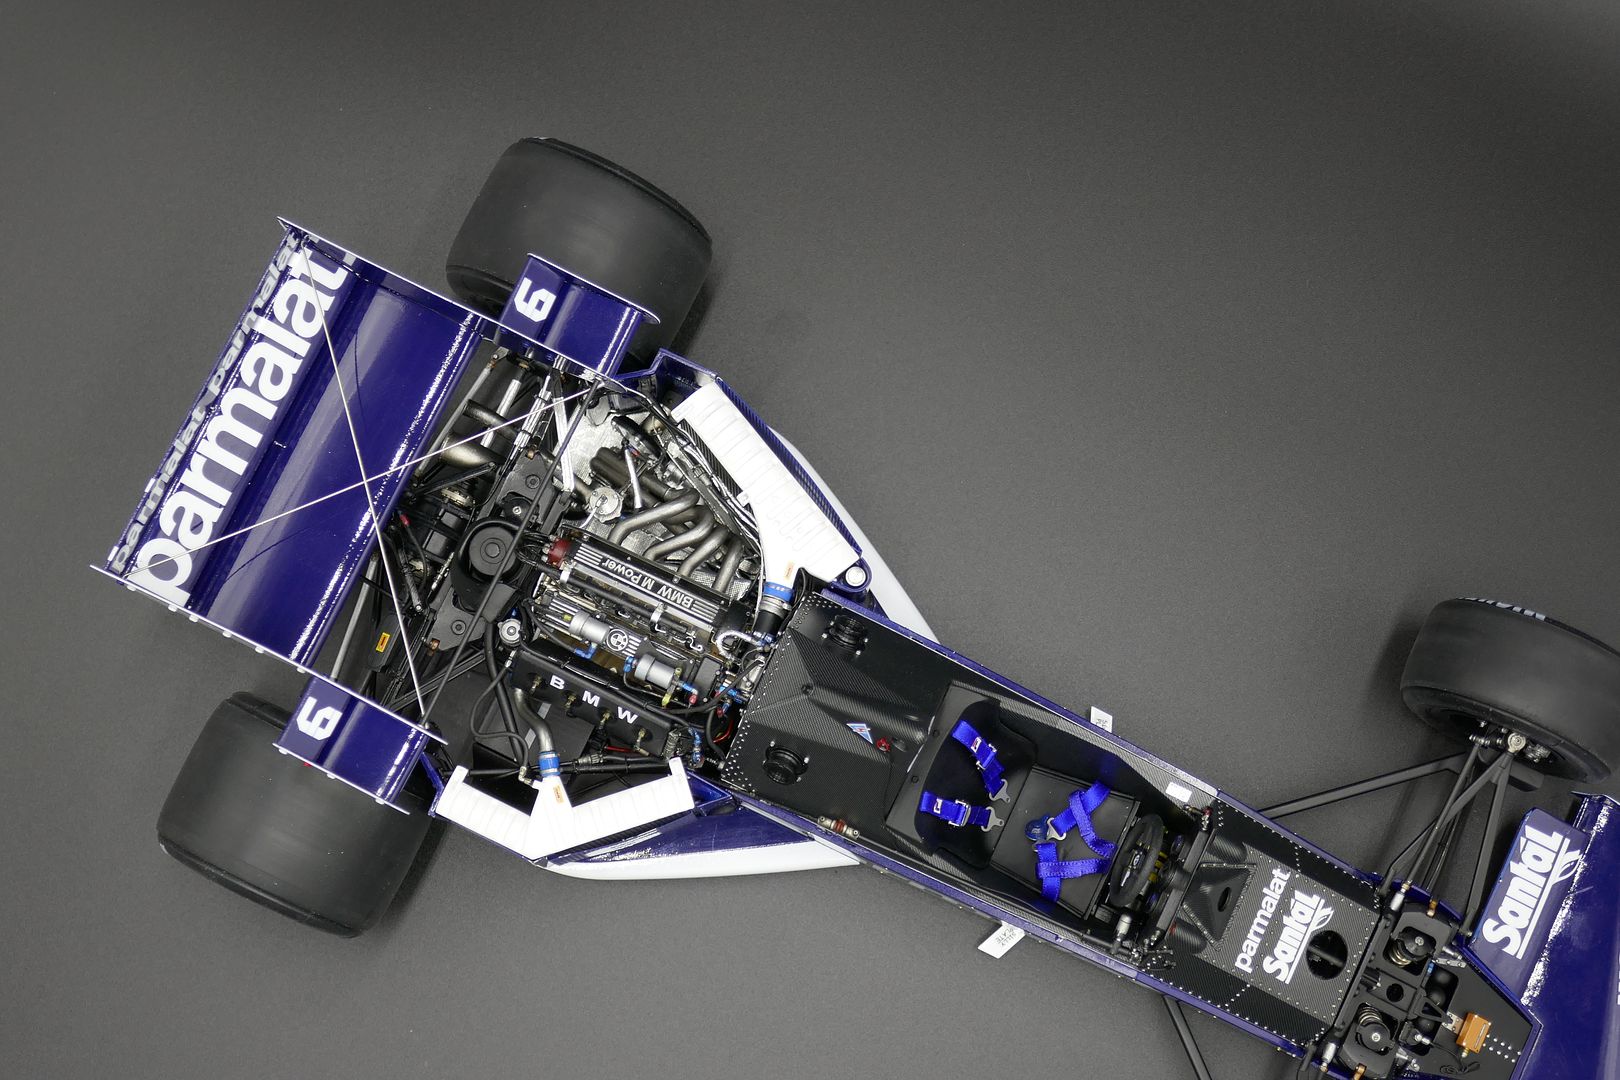
Spot the loose rivet!
...I expect that is almost that for this thread! YEAH!!!!
Thank you SOOO much for following...my first MFH (and indeed finished kit for decades!) and I have learned so much from loads of you guys on here, wither through looking at your superb models, or from you guys answering my questions - cheers!
I will do a 'conclusion' post as well - highlighting any problems with the kit, issues I had, tips, errors, corrections etc etc...
Gassing Station | Scale Models | Top of Page | What's New | My Stuff