Pocher Lamborghini Aventador Roaster - 1/8 scale model kit
Discussion


Thanks for the support guys. We're doing well with the kits at the moment, picked up a load last montjl. Only problem is the boxes are huge and weigh a ton!! You should see the look on the couriers face when they come and pick up 30 odd!
I have spoken to pocher about the older models and it's all dead in the water. Just the lambos and the Ducati for now...
I have spoken to pocher about the older models and it's all dead in the water. Just the lambos and the Ducati for now...
Pitty, as I enjoyed the Lambo build and would like to do something similar again, but I'm not into bikes.
For anyone building the kit, I seriously recommend Paul Koos DVD http://www.ebay.co.uk/itm/POCHER-1-8-LAMBORGHINI-A...
Lots of tips, all with annotated photographs, usually several for each step in the instructions, some hints on how to add extra detail plus a shedload of reference photos. I believe its now available as a download as well as a physical DVD, saving on postage. No connection apart from a satisfied user.
lufbramatt said:
I thought the Ducati was a much more enjoyable build than the Lambo, lots more metal parts, working suspension, floating discs, metal chain etc. The only downside is lots of the detail is hidden, you build up all the intake manifold with throttle bodies, injectors, ECUs etc, but it all disappears once the fuel tank and fairings are in place. But at the larger scale all the parts are much more realistic with less compromises for moulding.
On display for a few days before I had to give it back :


Did the assembly involve much painting? Thanks indeed.On display for a few days before I had to give it back :

tvrtuscans said:
Did the assembly involve much painting? Thanks indeed.
None whatsoever, it's all either painted already or moulded in the right colour plastic. assembly is a mixture of screws and superglue. Quite a few decals for detailing the switches, emblems etc. You could go crazy painting all the tiny details but that model was straight from the box.lufbramatt said:
tvrtuscans said:
Did the assembly involve much painting? Thanks indeed.
None whatsoever, it's all either painted already or moulded in the right colour plastic. assembly is a mixture of screws and superglue. Quite a few decals for detailing the switches, emblems etc. You could go crazy painting all the tiny details but that model was straight from the box.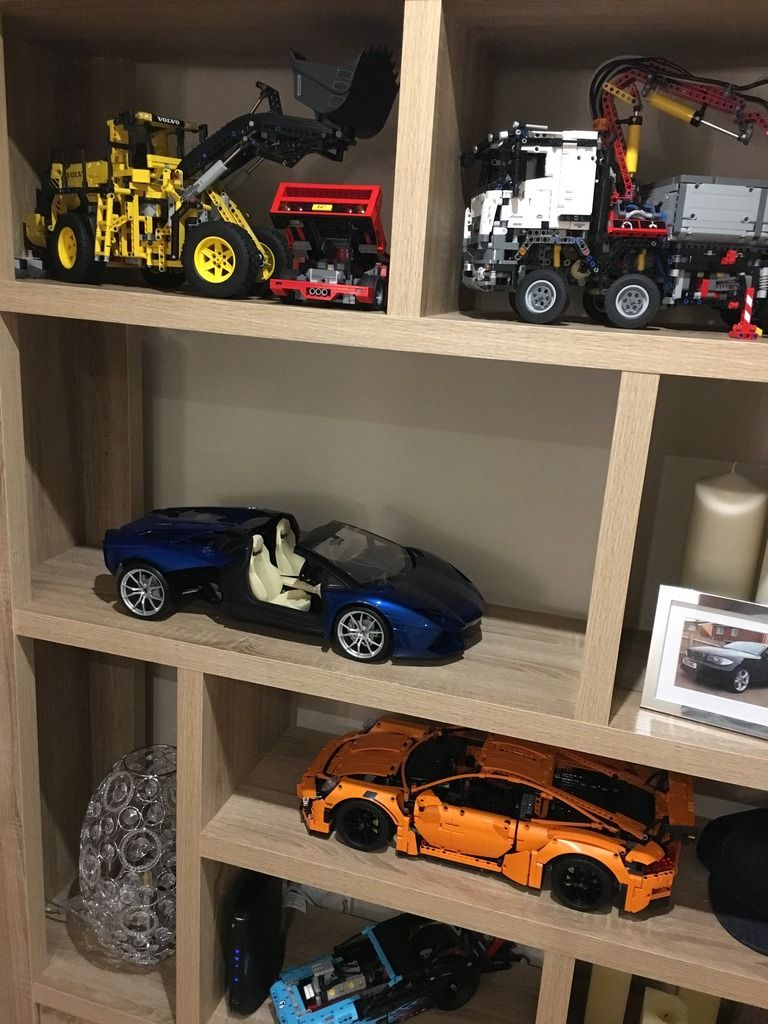
Trigbert said:
Mines just arrived from Jadlam, blimey the box is mahoosive.
Reading up on some build threads and trying to decide whether to build vanilla or do a few mods. I particularly like the idea of the easily removable rear body.
Now just need to find somewhere to put the box....
I know haha...too nice to throw away though Reading up on some build threads and trying to decide whether to build vanilla or do a few mods. I particularly like the idea of the easily removable rear body.
Now just need to find somewhere to put the box....
lufbramatt said:
tvrtuscans said:
Did the assembly involve much painting? Thanks indeed.
None whatsoever, it's all either painted already or moulded in the right colour plastic. assembly is a mixture of screws and superglue. Quite a few decals for detailing the switches, emblems etc. You could go crazy painting all the tiny details but that model was straight from the box.tvrtuscans said:
lufbramatt said:
tvrtuscans said:
Did the assembly involve much painting? Thanks indeed.
None whatsoever, it's all either painted already or moulded in the right colour plastic. assembly is a mixture of screws and superglue. Quite a few decals for detailing the switches, emblems etc. You could go crazy painting all the tiny details but that model was straight from the box.lufbramatt said:
tvrtuscans said:
lufbramatt said:
tvrtuscans said:
Did the assembly involve much painting? Thanks indeed.
None whatsoever, it's all either painted already or moulded in the right colour plastic. assembly is a mixture of screws and superglue. Quite a few decals for detailing the switches, emblems etc. You could go crazy painting all the tiny details but that model was straight from the box.tvrtuscans said:
OK thanks indeed. I have just bought this kit...and after some 40 years, will venture back into the world of kit assembly over Christmas...tally ho!
Great stuff! Couple of tips- get a plastic organiser compartment box as there are about 23 different types of screw and you don't want to mix them up. Also get a decent set of small cross head screwdrivers. On the metal parts, make sure you run a screw into the holes before you assemble the parts to cut a thread, will make it easier to assemble, especially when you get to the front cowling and rear view mirrors which is probably the trickiest part of the build.tvrtuscans said:
OK thanks indeed. I have just bought this kit...and after some 40 years, will venture back into the world of kit assembly over Christmas...tally ho!
Heehee, yep 35 years since my last effort at badly painting a Tomcat and hanging it on cotton from the ceiling. Thought this would be a good way back in without buying loads of tools and painting stuff (airbrushes look pricey).Anyway question for the experienced:
Noticed quite a few comments on forums about swapping some of the Philips head screws for hex head on visible areas, makes sense to me but is this worth doing? Been spending some time searching but struggling to find best place to source these things. Any suggestions where to get them?
lufbramatt said:
Great stuff! Couple of tips- get a plastic organiser compartment box as there are about 23 different types of screw and you don't want to mix them up. Also get a decent set of small cross head screwdrivers. On the metal parts, make sure you run a screw into the holes before you assemble the parts to cut a thread, will make it easier to assemble, especially when you get to the front cowling and rear view mirrors which is probably the trickiest part of the build.
+1 on this!lufbramatt said:
tvrtuscans said:
OK thanks indeed. I have just bought this kit...and after some 40 years, will venture back into the world of kit assembly over Christmas...tally ho!
Great stuff! Couple of tips- get a plastic organiser compartment box as there are about 23 different types of screw and you don't want to mix them up. Also get a decent set of small cross head screwdrivers. On the metal parts, make sure you run a screw into the holes before you assemble the parts to cut a thread, will make it easier to assemble, especially when you get to the front cowling and rear view mirrors which is probably the trickiest part of the build.Trigbert said:
Noticed quite a few comments on forums about swapping some of the Philips head screws for hex head on visible areas, makes sense to me but is this worth doing? Been spending some time searching but struggling to find best place to source these things. Any suggestions where to get them?
I would be interested in this too...tho slippery slope away from out of the box......Gassing Station | Scale Models | Top of Page | What's New | My Stuff