Lego VW Camper trailer
Discussion


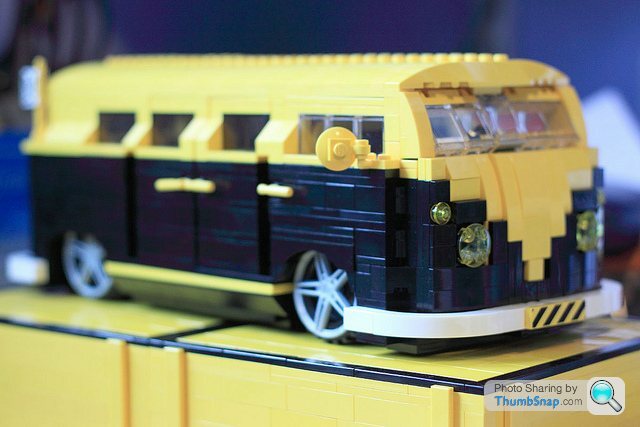
I was searching google images for Camper modifications to see what people had come up with, and found this photo:

I had to have it!
Another quick search found custombricks.de who sold it as a kit for 259 euros. I didn't really want to pay that much so dismissed the idea.
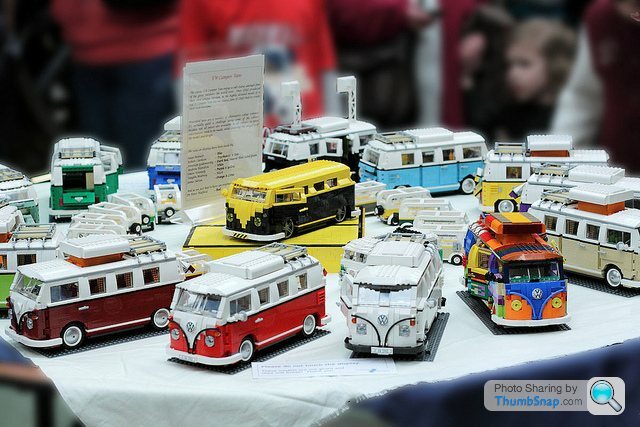
(They also sell lots of other trailers designed to match the Mini and Beetle for those interested)
I later went back to the site and realised that they also sold the instructions on their own for 12 euros, much better!
It also included a full inventory that you could load into a Bricklink wants list.
All 1433 bricks!
I had a huge box of random Lego, so I hoped I would be able save a bit of cash. I managed to find 19% of them, then placed 12 separate orders to get the other 81% sorted.
Slowly they started to arrive:

After 3 or 4 got here I thought I'd see if I could start building it as I was itching to!
Frustratingly I got to stage 2 and needed some bricks that hadn't arrived yet
Cue more time waiting.... finally I could get started!
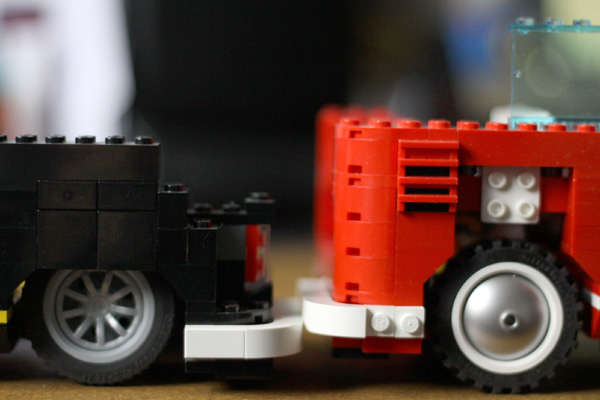
My first thought was, its so big!! It really is as big as the camper. Straight away I thought it was too big and maybe I should have got the single axle smaller trailer they also sold.
But as I've started to build it, I've realised that it is actually perfect, and will look amazing once its finished


If anything, the detail is even better than the Camper, there has clearly been a lot of work and thought put into designing it.
The instructions are very similar to Lego ones, but I do get the feeling that some sections that Lego would have made into 3 or 4 separate steps, they are all in 1 on these.
It certainly makes it more challenging, and one that I am really enjoying. I'd say its more enjoyable to build than the Camper, and I really loved doing that.
I've found it is essential to pick out all of the bricks needed for a stage before starting it, as otherwise it is very easy to miss something.
Also, on Lego instructions you can often find a subsection showing assembly before then adding it to the main build.
Some times on this it just shows the complete item on the main build. It's never very hard to work out though.
An example of a stage:

That pretty much brings it up to where I am now, about 5 hours of work so far:


I am now sat waiting for the last 2 orders to arrive until I can continue, hopefully they will be here on Monday or Tuesday.
The camper has a few mods, more to come, but so far it is just yellow front fog lamps, a 2nd door mirror, RHD conversion, white handle instead of grey on rear window, colour coded red handle on the engine cover, VW logo fuel filler cap, and a couple more I forget at the moment.
I also included in my orders enough flat 2x4 tiles to smooth off the whole roof.
I would love to lower the camper, but as I had already decided on getting the trailer before I built it, I wanted to finish both before working out how to go about it as I would want to lower the trailer too. Has anyone lowered their Camper or have any other good mods to share?
I had to have it!
Another quick search found custombricks.de who sold it as a kit for 259 euros. I didn't really want to pay that much so dismissed the idea.
(They also sell lots of other trailers designed to match the Mini and Beetle for those interested)
I later went back to the site and realised that they also sold the instructions on their own for 12 euros, much better!
It also included a full inventory that you could load into a Bricklink wants list.
All 1433 bricks!
I had a huge box of random Lego, so I hoped I would be able save a bit of cash. I managed to find 19% of them, then placed 12 separate orders to get the other 81% sorted.
Slowly they started to arrive:
After 3 or 4 got here I thought I'd see if I could start building it as I was itching to!
Frustratingly I got to stage 2 and needed some bricks that hadn't arrived yet
Cue more time waiting.... finally I could get started!
My first thought was, its so big!! It really is as big as the camper. Straight away I thought it was too big and maybe I should have got the single axle smaller trailer they also sold.
But as I've started to build it, I've realised that it is actually perfect, and will look amazing once its finished
If anything, the detail is even better than the Camper, there has clearly been a lot of work and thought put into designing it.
The instructions are very similar to Lego ones, but I do get the feeling that some sections that Lego would have made into 3 or 4 separate steps, they are all in 1 on these.
It certainly makes it more challenging, and one that I am really enjoying. I'd say its more enjoyable to build than the Camper, and I really loved doing that.
I've found it is essential to pick out all of the bricks needed for a stage before starting it, as otherwise it is very easy to miss something.
Also, on Lego instructions you can often find a subsection showing assembly before then adding it to the main build.
Some times on this it just shows the complete item on the main build. It's never very hard to work out though.
An example of a stage:
That pretty much brings it up to where I am now, about 5 hours of work so far:
I am now sat waiting for the last 2 orders to arrive until I can continue, hopefully they will be here on Monday or Tuesday.
The camper has a few mods, more to come, but so far it is just yellow front fog lamps, a 2nd door mirror, RHD conversion, white handle instead of grey on rear window, colour coded red handle on the engine cover, VW logo fuel filler cap, and a couple more I forget at the moment.
I also included in my orders enough flat 2x4 tiles to smooth off the whole roof.
I would love to lower the camper, but as I had already decided on getting the trailer before I built it, I wanted to finish both before working out how to go about it as I would want to lower the trailer too. Has anyone lowered their Camper or have any other good mods to share?
The mrs went out for the evening so I thought I'd have another hour, 3 hours later I got a bit carried away

The detail is excellent, here's a few shots before it gets hidden by the windows and roof:


Starting to look good now!

It was when I came to put the two chairs in that I came to my first real problem with the instructions that totally stumped me!
The construction of them shows a single robot arm hanging down at the rear of the chair, which seems to be the only method of installing them, and I can only assume they somehow attach to the two hooks sticking out (pic from an earlier stage)


After messing about I gave up as I could not find any method that attached them so they wouldn't fall off as soon as it was moved, so I went for a different approach.
I removed the 2x4 grey tiles from above the hooks and replaced them with 2x4 plates. Then put a 2x2 plate on top of that and then the seat sits on top of that and is rock solid.
I would of removed the hooks but they were so buried I would have to taken tons of it apart to do so. They are totally hidden under the seats anyway so its not a problem.
I was expecting them to clip to the short horizontal section of the hook, but the robot arm is too thick to slot into the gap. Oh well, I prefer my method
One other observation with the seats is the way the back attaches to the bar, I cannot understand why they only used one plate with horizontal clip rather than two.
Two would stop it being wobbly. I might add two to my next Bricklink order to improve them.
As you may see, I'm missing a few blue tiles from the seats, at least I can easily add them when they arrive!
The detail is excellent, here's a few shots before it gets hidden by the windows and roof:
Starting to look good now!
It was when I came to put the two chairs in that I came to my first real problem with the instructions that totally stumped me!
The construction of them shows a single robot arm hanging down at the rear of the chair, which seems to be the only method of installing them, and I can only assume they somehow attach to the two hooks sticking out (pic from an earlier stage)
After messing about I gave up as I could not find any method that attached them so they wouldn't fall off as soon as it was moved, so I went for a different approach.
I removed the 2x4 grey tiles from above the hooks and replaced them with 2x4 plates. Then put a 2x2 plate on top of that and then the seat sits on top of that and is rock solid.
I would of removed the hooks but they were so buried I would have to taken tons of it apart to do so. They are totally hidden under the seats anyway so its not a problem.
I was expecting them to clip to the short horizontal section of the hook, but the robot arm is too thick to slot into the gap. Oh well, I prefer my method
One other observation with the seats is the way the back attaches to the bar, I cannot understand why they only used one plate with horizontal clip rather than two.
Two would stop it being wobbly. I might add two to my next Bricklink order to improve them.
As you may see, I'm missing a few blue tiles from the seats, at least I can easily add them when they arrive!
Edited by djdest on Sunday 15th January 01:15
 .
.Yep, that made no difference either!
I forgot to say, when I first said I couldn't continue due to waiting on bricks, I had a look at what was needed for where, and as it was only 4 1x2 dark tan bricks that made the ends of the sofa I decided to do them in white instead. They don't look out of place, but are easily accessible incase my OCD wants to replace them when the dark ones arrive
I forgot to say, when I first said I couldn't continue due to waiting on bricks, I had a look at what was needed for where, and as it was only 4 1x2 dark tan bricks that made the ends of the sofa I decided to do them in white instead. They don't look out of place, but are easily accessible incase my OCD wants to replace them when the dark ones arrive
I agree, but even if it did fit I don't think it is adequate to hold the seat in place.
Still sat here building! I think I'll call it a day now.
I really am stuck too, somehow I've managed to end up with a 4x2 wedge plate instead of a 3x2, so definitely going to have to place an order now.
I'll post some pics in the morning....
Still sat here building! I think I'll call it a day now.
I really am stuck too, somehow I've managed to end up with a 4x2 wedge plate instead of a 3x2, so definitely going to have to place an order now.
I'll post some pics in the morning....
Finally managed to get it finished! I'm really pleased with it, and easily enjoyed building as much as the Camper.
There has been a few bits I've changed/modified/added but overall it is built as per the instructions.
When taking the photos I noticed the bottom white line on the camper does not go around the rear as it does on the trailer, so I might change that at some point.
I also need to change the back of the trailer lights so they have a red background rather than black.
Edited by djdest on Wednesday 25th January 12:57
djdest said:
It was when I came to put the two chairs in that I came to my first real problem with the instructions that totally stumped me!
The construction of them shows a single robot arm hanging down at the rear of the chair, which seems to be the only method of installing them, and I can only assume they somehow attach to the two hooks sticking out (pic from an earlier stage)
After messing about I gave up as I could not find any method that attached them so they wouldn't fall off as soon as it was moved, so I went for a different approach.
I removed the 2x4 grey tiles from above the hooks and replaced them with 2x4 plates. Then put a 2x2 plate on top of that and then the seat sits on top of that and is rock solid.
I would of removed the hooks but they were so buried I would have to taken tons of it apart to do so. They are totally hidden under the seats anyway so its not a problem.
I was expecting them to clip to the short horizontal section of the hook, but the robot arm is too thick to slot into the gap. Oh well, I prefer my method
One other observation with the seats is the way the back attaches to the bar, I cannot understand why they only used one plate with horizontal clip rather than two.
Two would stop it being wobbly. I might add two to my next Bricklink order to improve them.
As you may see, I'm missing a few blue tiles from the seats, at least I can easily add them when they arrive!
Just reading this, is the intention with the seats that they fold in to convert from seats and a table to a bed. Once complete, fold away the table, move the seat bases inwards on the robot arm and fold the seat backs down, and it forms an extra single bed?The construction of them shows a single robot arm hanging down at the rear of the chair, which seems to be the only method of installing them, and I can only assume they somehow attach to the two hooks sticking out (pic from an earlier stage)
After messing about I gave up as I could not find any method that attached them so they wouldn't fall off as soon as it was moved, so I went for a different approach.
I removed the 2x4 grey tiles from above the hooks and replaced them with 2x4 plates. Then put a 2x2 plate on top of that and then the seat sits on top of that and is rock solid.
I would of removed the hooks but they were so buried I would have to taken tons of it apart to do so. They are totally hidden under the seats anyway so its not a problem.
I was expecting them to clip to the short horizontal section of the hook, but the robot arm is too thick to slot into the gap. Oh well, I prefer my method
One other observation with the seats is the way the back attaches to the bar, I cannot understand why they only used one plate with horizontal clip rather than two.
Two would stop it being wobbly. I might add two to my next Bricklink order to improve them.
As you may see, I'm missing a few blue tiles from the seats, at least I can easily add them when they arrive!
Yes that is correct. The idea is great, however, having the whole thing supported on a single robot arm just doesn't work to the weight of it, plus it is impossible to fit it onto the hook in any way.
The solution I used in the end is much better, assuming you don't actually want to "play" with it of course
The solution I used in the end is much better, assuming you don't actually want to "play" with it of course
Gassing Station | Scale Models | Top of Page | What's New | My Stuff