HMV SMS Von Der Tann (Bitten off more than I can chew)
Discussion


Ok, slight swerve - a change of plan if you will. My Steve Irwin arrived, but it was creased to all hell (thanks posty) I may be able to salvage it but I can't bear to look at it at the moment.
However, Karma came to my rescue. I have a cousin who emigrated to Australia, and several months ago I'd sent him a care package of (now) vintage Football tops for his mancave. Literally the day after the Steve Irwin package was mangled, this arrived, with a note "Cheers from OZ. Mick"
http://www.kartonmodellbau.de/Battlecruiser-SMS-Vo...
I don't know where he'd sourced it from, and there's no lasercut set, but work is quiet at the moment, so I've made a start on this "minor" project, Mainly as child no.2 wants a boat for his room.
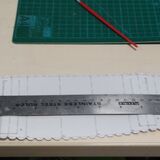
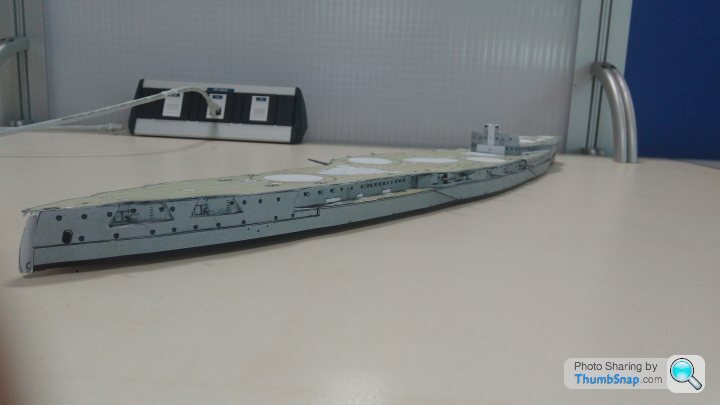
The baseplate is 687mm, and prepared in three sections with biscuits joining them.

Weighted down, the central spine is also in three sections. there is some slight warpage on the baseplate, maybe a rise of 1mm at the joins, but these are all internal and will be covered in the final build.
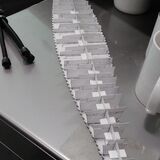
24 ribs fitted. these were done individually and again, weighted. They look out of line in this picture but as the next steps are completed, they'll be pulled true.
More internal sections fitted. there is a 12cm section that is actually externally visible, so a little bit of extra care has been taken to make sure these are level.
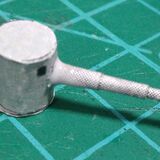
6" gun emplacement. Barrel is appx 1mm diameter and 20mm long, made of three parts. I actually cheated and replicated them on thinner paper to allow easier rolling. The design is complex, three part washer through the deck to allow for rotation, internal hinge section to allow for elevation change. As it's going to a three year old, (probably four by the time it's completed) the guns are fixed in position
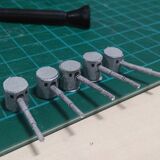
Repeat. This is one side. Need another five for the other side. Several hours here - the joins aren't perfect but less than the front 180° is visible, and the top and bottom are covered snugly
Mounted.
The sides are (again) truer than they appear in this picture, the tabs aren't uniformly bent, and it will be hidden by the hull sides anyway.
I'm currently on halfway through step 5 of 39. This is going to be a long one.
However, Karma came to my rescue. I have a cousin who emigrated to Australia, and several months ago I'd sent him a care package of (now) vintage Football tops for his mancave. Literally the day after the Steve Irwin package was mangled, this arrived, with a note "Cheers from OZ. Mick"
http://www.kartonmodellbau.de/Battlecruiser-SMS-Vo...
I don't know where he'd sourced it from, and there's no lasercut set, but work is quiet at the moment, so I've made a start on this "minor" project, Mainly as child no.2 wants a boat for his room.
The baseplate is 687mm, and prepared in three sections with biscuits joining them.
Weighted down, the central spine is also in three sections. there is some slight warpage on the baseplate, maybe a rise of 1mm at the joins, but these are all internal and will be covered in the final build.
24 ribs fitted. these were done individually and again, weighted. They look out of line in this picture but as the next steps are completed, they'll be pulled true.
More internal sections fitted. there is a 12cm section that is actually externally visible, so a little bit of extra care has been taken to make sure these are level.
6" gun emplacement. Barrel is appx 1mm diameter and 20mm long, made of three parts. I actually cheated and replicated them on thinner paper to allow easier rolling. The design is complex, three part washer through the deck to allow for rotation, internal hinge section to allow for elevation change. As it's going to a three year old, (probably four by the time it's completed) the guns are fixed in position
Repeat. This is one side. Need another five for the other side. Several hours here - the joins aren't perfect but less than the front 180° is visible, and the top and bottom are covered snugly
Mounted.
The sides are (again) truer than they appear in this picture, the tabs aren't uniformly bent, and it will be hidden by the hull sides anyway.
I'm currently on halfway through step 5 of 39. This is going to be a long one.
My Eyes....
3.85" guns under construction. 4 for the fore mounted battery.
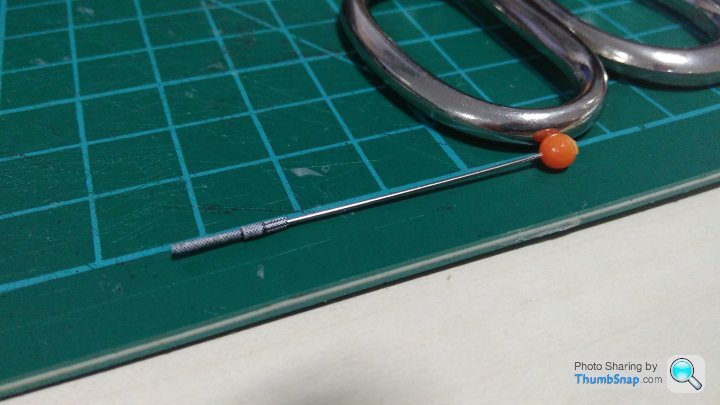
Total no. Barrels completed so far. 14.
No. Tiny tubular sections rolled around a pin? 38.
Next up is a chunk of deck. The challenge is to keep it from warping, then the sides go on and a multitude of sins disappear.
3.85" guns under construction. 4 for the fore mounted battery.
Total no. Barrels completed so far. 14.
No. Tiny tubular sections rolled around a pin? 38.
Next up is a chunk of deck. The challenge is to keep it from warping, then the sides go on and a multitude of sins disappear.
It's strange that some steps take hours and don't add much to the model, and others take significantly less time and add so much more.
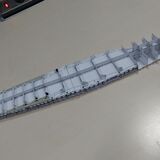
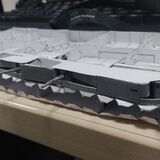
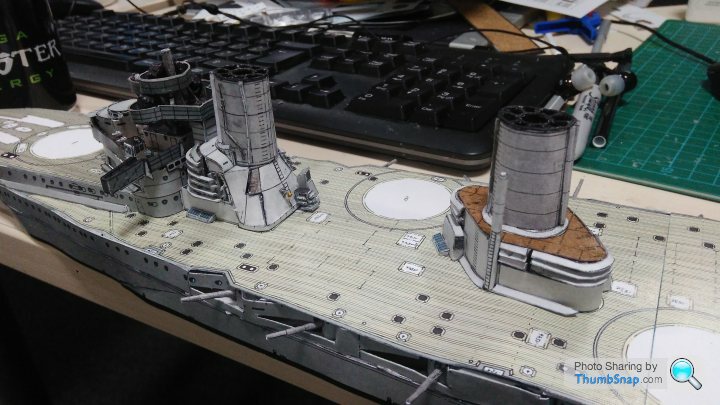
Huge chunk of deck added. I ended up using superglue because the instant bite was just what I needed
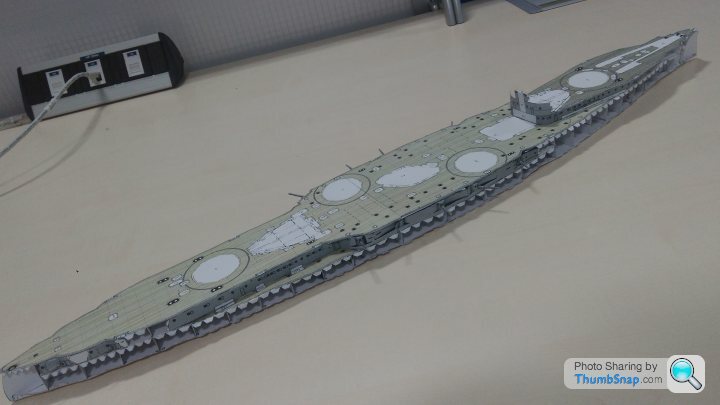
It's decidedly more battleship shaped now, and the upper deck is nicely flat.
Hull sides now. Wish me luck, this will make or break it.
Huge chunk of deck added. I ended up using superglue because the instant bite was just what I needed
It's decidedly more battleship shaped now, and the upper deck is nicely flat.
Hull sides now. Wish me luck, this will make or break it.
One side done. It's looking a hell of a lot tidier. Monday will see the other side attached and the hull 'watertight'
I need four more 3.85" guns for the rear ports but I need to find them on the parts sheets (and reproduce them on thinner paper). They're easy enough to fit though so that can wait.
This will take me to step 6 complete, then work begins in earnest (a famous shipyard) on the superstructure.
It's actually going together reasonably easy so far, the instructions aren't great (the part numbers are 'flexible') but it's the sheer volume of parts that's still faunting
Einion Yrth said:
Is "epic" modeller slang for "a fecking nightmare"? If so I suspect I would agree.
It's not actually too bad to build - so far. There is a lot to it, but so far it's no more fiddly than any of the other HMV models I've built.Note: I may well end up eating my words. If so, I'll print them, form them into a dinghy and post photos

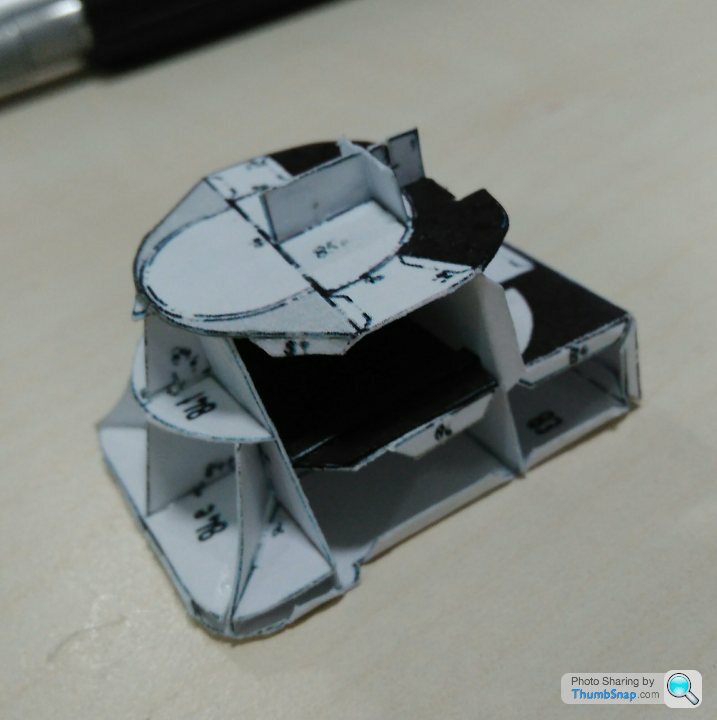
It just takes patience and a little thought...
i.e. - in the below steps, 84e needs to be fitted before 84c & 84d
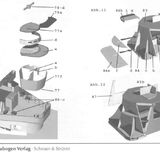
Always cut the parts for each step and dry fit before gluing.

perdu said:
Well that was worthy of a decent chuckle

This looks pretty well show stopping as well
Lots of time before Huddy now too
You're right about the lots of time. Judging what's left to do, it might be finished by huddy 2020This looks pretty well show stopping as well
Lots of time before Huddy now too
(Actually, I have a big job upheaval in the works, and the new site may be less conducive to building during lunch and whilst on teleconferences)
It's also nowhere near the standard needed to enter, unless I pretend the youngest built it.
Edit. Having said that, the northern model show is about 5 mins walk from my house.
Edited by shortar53 on Sunday 19th February 17:37
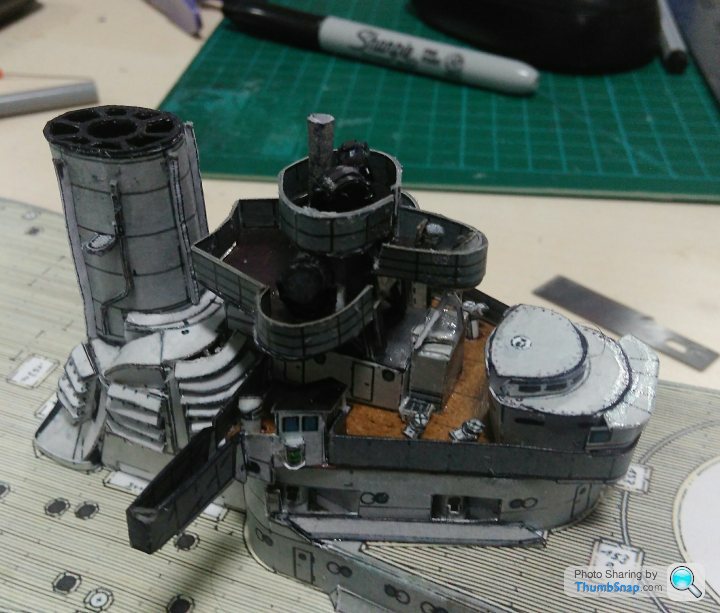
Been stuck on an emergency 'call' all day so a bit of progress.
Two funnels, both numbered the same. One with a fillet cut to fit the base. Numbnuts of course made the wrong one up and cut it to fit before realising.
Luckily I'd scanned the pages before I started so I can replace the broken one.
Lots of excess PVA to be removed once things have set, crap picture but you get the idea.
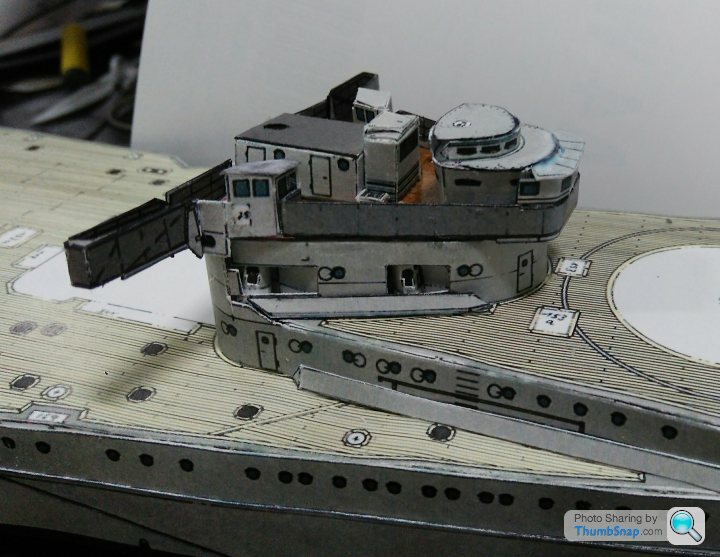
Twenty six supports to hold the louvred vents around the bottom of the second funnel... Twenty bloody six!

They're gone now, hidden behind the louvres. Assorted greebling has taken place since this pic, the funnel is attached and the section is affixed to the deck.
Several miniscule winches need to be built to complete this section, so I'll be breaking out the super glue at lunch tomorrow to speed that up. Helpfully, the railings aren't numbered on the instructions for this section. I think I've found them but I'll be double checking before attaching.
dr_gn said:
Looking fine - just remember that all these tiny - seemingly insignificnat - parts will add up to something pretty spectacular in the end.
Thanks Doc. I'm actually enjoying it, despite the instructions, and the guys at work keep complimenting it, even if they do think I'm slightly insane...Probably shooting myself in the foot, but not found anything 'hard' yet, but there is just a lot still to do.
Edit... Quick pic
Edited by shortar53 on Thursday 23 February 08:14
Gassing Station | Scale Models | Top of Page | What's New | My Stuff