Modelling Tool Box
Discussion


After the interminable Bf109 build, I decided to get a storage box that I could put all my modelling gear in after a 'session' rather than have it covering my workbench for the best part of 9 months. I couldn't find exactly what I was looking for, but this was on offer at £20 from B&Q:


It's a bit crappy TBH, but it does the job. I've got a much smaller box for the airbrush, and a plastic thing from WHSmith for plasticard, wire, photo-etch etc.
It's a bit crappy TBH, but it does the job. I've got a much smaller box for the airbrush, and a plastic thing from WHSmith for plasticard, wire, photo-etch etc.
I really ought to copy you TBH but this is what I have in my "paint drawer" tonight after a hiatus since 1982 ish
My Paasche airbrush sits happily in its box supplied by my ancient Badger 250 Airbrush
For some reason only known to GOD and some angels (maybe) there is also a 2lb ball pein hammer
You could also note a bag with some NEW Swann-Morton knife blades
I do like Tamiya Paints though too
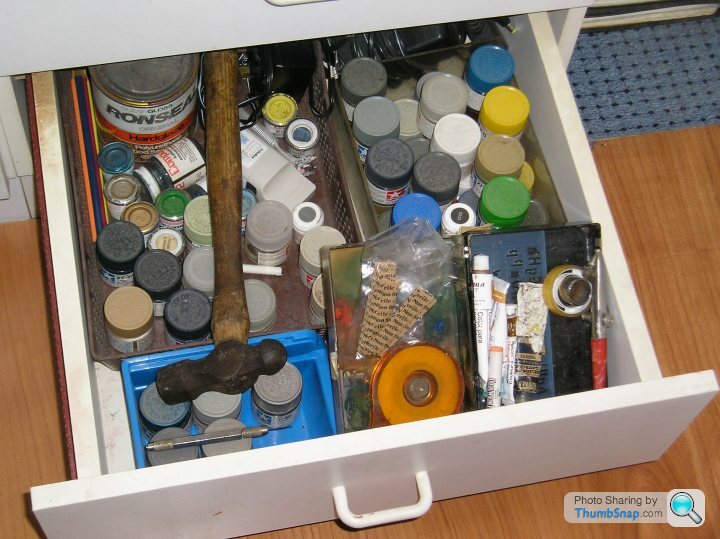
edit... that might just be a one pound hammer, I didn't look
My Paasche airbrush sits happily in its box supplied by my ancient Badger 250 Airbrush
For some reason only known to GOD and some angels (maybe) there is also a 2lb ball pein hammer
You could also note a bag with some NEW Swann-Morton knife blades
I do like Tamiya Paints though too
edit... that might just be a one pound hammer, I didn't look
Edited by perdu on Sunday 28th November 01:13
perdu said:
I really ought to copy you TBH but this is what I have in my "paint drawer" tonight after a hiatus since 1982 ish
My Paasche airbrush sits happily in its box supplied by my ancient Badger 250 Airbrush
For some reason only known to GOD and some angels (maybe) there is also a 2lb ball pein hammer
You could also note a bag with some NEW Swann-Morton knife blades
I do like Tamiya Paints though too
edit... that might just be a one pound hammer, I didn't look
That's a BIG hammer!My Paasche airbrush sits happily in its box supplied by my ancient Badger 250 Airbrush
For some reason only known to GOD and some angels (maybe) there is also a 2lb ball pein hammer
You could also note a bag with some NEW Swann-Morton knife blades
I do like Tamiya Paints though too
edit... that might just be a one pound hammer, I didn't look
Edited by perdu on Sunday 28th November 01:13
1982??? It's been too long Perdu...
I like Tamiaya paint too for airbrushing, but it's expensive. Vallejo Air is good, but it dries very quickly (usually around the airbrush nozzle). I'm wondering whether to revert to gloss enamels in future. Might be better for applying washes and decals, although MIG washes are enamel, so I'd need a Klear coat too and if I miss a bit it's game over. Tricky one!
Eric Mc said:
Have you tried Xtracrylix yet?
I've had no trouble with them at all - although I do use their dedicated thinner.
Nope, but I did use their Xtracolour XDFF enamel matt varnish and thinners on the '109 - very impressed overall although I should have just put a mist coat on. Took a day to dry properly.I've had no trouble with them at all - although I do use their dedicated thinner.
As an aside, if you coat a model with Klear as a final coat, and you decide to wash dust off it at some point, will the Klear come off? Surely it must be highly water soluble if it's a floor cleaner, although people have said paint it on old decals before use, so...maybe not?
Hard-Drive said:
Dr Gn, following your most excellent 109 build, could you actually divulge the contents of your toolbox to someone wanting to have another crack at modelling?
And is there info on all these washes/varnishes etc and how to best use them?
WHAT?And is there info on all these washes/varnishes etc and how to best use them?
Divulge the contents of my toolbox?
Info on washes?
How best to use things?
You want the moon on a stick too?

Hard-Drive said:
Dr Gn, following your most excellent 109 build, could you actually divulge the contents of your toolbox to someone wanting to have another crack at modelling?
And is there info on all these washes/varnishes etc and how to best use them?
OK, here is my take on washes. Ask someone else and they’ll probably give you a different opinion:And is there info on all these washes/varnishes etc and how to best use them?
Apply the wash after putting decals on, but before any exhaust/gun/dust/oil staining.
After a lot of trial and a lot of error, the best wash to use – for me at least – is MIG Dark Wash. It’s enamel, so you have to apply it over an acrylic base coat. If you apply/remove any excess MIG wash directly onto/from an enamel base coat, you will dissolve the base coat and then everything is ruined. Even if you use a satin or matt acrylic base coat to start with, it needs to be glossy, or else the wash will soak into the grain of the paint and it will be stained permanently. I use Johnsons Klear (very thin clear acrylic), sprayed over the base coat (camoflague or whatever) in several coats. Then leave this to fully cure in a warm place for at least 24 hours. Then apply the MIG wash to panel lines/rivets/raised detail with a small brush, and let capillary action have its wick-ed (ha ha) way with the surface of the model. Leave it ½ hour or so in a warm place, then wipe the excess wash away very lightly– in the direction of airflow – with a lint free cloth moistened with MIG/enamel thinners. I use a lens cleaning cloth, wetted in turn from another lightlydamped lens cloth. You REALLY don’t want to put a lot of thinners near the surface whether it’s got a coat of Klear or not. It will abrade off very quickly.
Other washes I have tried are:
Oil Paints (removed with white spirit). I found these to be very grainy and not easy to remove or correct. Can also give bad staining after removal.
Promodeller washes (removed with water). These can work well, but are in general fairly grainy, and don’t appear to work very well with shallow panel lines. They can however be removed completely with water, so it’s a low risk option.
Pastels mixed with water. This just didn’t work for me.
Having said all that, It takes some balls to use a MIG wash on a 99% finished model, because if it goes wrong, it’s curtains. I ended up using it by default because I wasn’t happy with the results of the others above. The first time I used it on a test piece it removed some of the Klear and looked a total mess. I realised that I hadn’t put enough Klear on, or hadn’t left it to fully cure. BTW I still can’t do a wash on raised detail very well. The above applies to inscribed panel lines as far as I’m concerned.
Moving quickly on to the contents of my Box!
PAINTING / VARNISHING / WEATHERING
Tamiya, RevellAquaColour, Citadel & VallejoAir acrylic paint & thinners (for large areas).
VallejoAir Satin Varnish.
VallejoAir Gloss Varnish.
Humbrol/Revell enamel paint & thinners (mainly for small details).
Xtracolour XDFF enamel matt varnish & thinners (very, very matt varnish).
Johnsons Klear floor polish (for sealing paint before washes, dipping clear parts to make them more transparent & bonding small detail parts like wires).
Tamiya Weathering Master sets (extremely good coloured pastels for weathering on all surfaces).
MIG Dark Wash (Enamel based pre-mixed wash – the best, but high-risk).
Promodeller Light and Dark Washes (water soluble, easy to use and low-risk, but grainy and unrefined).
Metal bottle of cellulose thinners (for cleaning enamel off brushes).
Glass bottle of Isopropyl Alcohol (for cleaning acrylic off brushes).
Paintbrushes (3 good quality flat and round brushes, 7 poor quality ones).
Lens Cleaning Cloth (lint-free, for removing excess wash).
Small Sponge (as above, but can also be used for dabbing Maskol on aluminium paint for chipping details).
Small Ceramic mixing Palette (used for decanting glue and paint into before applying to model).
MicroSet (helps decals seat on surfaces – hardly ever use it).
MicroSol (softens decals and helps them conform to surface details – always use it).
Also, (not in box) cans of:
Mr.Metal Primer (for priming photo-etch).
Tamiya Fine Surface Filler (for priming plastic).
FILLERS
Mr.Surfacer 1200 (fills small surface cock-ups, can be sanded when set).
Milliput (2 part filler, smoothable with water).
SANDING / SMOOTHING
Set of Mylar sanding/polishing sticks.
Fibreglass Pencil (polishes photo-etch and removes crap gently from surfaces).
Set of Needle Files.
MASKING
Humbrol Maskol (liquid latex, can be brushed on as a masking medium. Smells like horse piss, and attacks Johnsons Klear, so beware).
Tamiya masking tape (10mm, 18mm – the best masking tape for modelling. Can also be used for making seat belts and cable clips).
Cheap masking tape (use expensive Tamiya for edges, cheap stuff for the middle).
White/BlueTack - great for holding parts for painting and masking camo to give a feathered edge).
Dymo Plastic Tape (for use as a scribing guide on tightly curved surfaces).
ADHESIVES
Liquid Cement (for plastic).
Araldite (for dissimilar materials).
Low/medium/high viscosity cyanoacrylate adhesive (for bonding photo-etch to plastic).
Cyanoacrylate accelerator (cyano needs moisture and pressure to set. You can’t always get this combination with very small parts like photo-etch. Accelerator cures it on contact).
Formula 560 Canopy Glue (PVA with plasticiser; bonds transparent plastic and dries clear).
Pringles lids/Credit cards/Business cards (for mixing Araldite on).
CUTTING
Scalpels (4 sizes, Swann-Morton & X-Acto handles, with a selection of surgical & general purpose blades).
Medium Scissors (for cutting parts off sprues and cutting out decals).
Also, not in box:
Small Self-Healing Cutting Mat (buy a big one ie A2 size. Mines too small).
Small square of Granite worksurface (for cutting photo-etch. It's best to cut it on a hard surface to prevent distortion. And stick some masking tape to the p/e first to stop the bits pinging off into the carpet)
GENERAL TOOLS
Glue Applicator (made by my Dad in about 1980).
Cocktail Sticks (for holding parts while painting, and mixing Araldite).
Wooden Stirrers (as above, but totally free from Starbucks).
Dressmaking Pins (for applying cyano).
Clothes Pegs (for clamping parts while glue sets).
Standard & Lockable Forceps (as above, and also for holding parts while painting).
Tweezers (four types; straight, angled, flat and reverse action).
Scribing tools (Tamiya & BareMetalFoil – for scribing panel lines on plastic).
Scribing Templates (assorted curves and shapes for use as scribing guides).
6” Steel Rule (for slicing masking tape).
Small Steel Square (marking out, and aligning parts).
Pin Drill Chuck (Eclipse).
Pin Drills (Maplin, but I advise getting a quality set).
Riveting Wheel (indents plastic to represent lines of rivets, various spacings).
0.3mm Mechanical Pencil (writing/marking stuff).
Candle (for sprue stretching).
Hypodermic needle (not sure why that’s there).
Photo-Etch Bending Tool (home made tool to give sharp corners).
Small Flat Pliers (for bending simple photo etch parts).
2 Small Screwdrivers (for opening enamel paint tins).
I’ve also got another small wooden wine box for airbrush stuff:
AIRBRUSHING
DeVilbiss Super’63 Model “E” (dual action airbrush).
Airbrush Holder/Cleaning Pot.
Disposable plastic droppers (for decanting paints into airbrush).
Collection of small glass jars (for mixing /thinning paints).
Paintbrush (for cleaning airbrush paint well).
I’ve also got a respirator with an organic filter which I keep in a sealed container.
And another A4 container for detailing materials:
DETAILING MATERIALS
A selection of:
Lead wire.
Guitar string.
Fuse wire.
Telephone wire.
Plasic card.
Brass tube & rod.
Plastic strip / rod.
Aluminium (flattened Coke Cans).
Tin Foil.
Spare Decals.
I hope you’re happy now!
Wow! Thanks for letting us in on the tricks of the trade!
I've actually got an unbuilt model of a 1960s cargo ship that's been sat around for years (must be ancient, MV Benledi is the vessel's name) and I was thinking of having a go at it.
Being such a small scale kit, I can probably get away with large-scale numptiness when it comes to the building and painting. But I'm just fascinated how you got that model 109 looking nothing like, erm, a model!
Hard-Drive said:
Wow! Thanks for letting us in on the tricks of the trade!
I've actually got an unbuilt model of a 1960s cargo ship that's been sat around for years (must be ancient, MV Benledi is the vessel's name) and I was thinking of having a go at it.
Being such a small scale kit, I can probably get away with large-scale numptiness when it comes to the building and painting. But I'm just fascinated how you got that model 109 looking nothing like, erm, a model!
No problem!I've actually got an unbuilt model of a 1960s cargo ship that's been sat around for years (must be ancient, MV Benledi is the vessel's name) and I was thinking of having a go at it.
Being such a small scale kit, I can probably get away with large-scale numptiness when it comes to the building and painting. But I'm just fascinated how you got that model 109 looking nothing like, erm, a model!
I've got a 1974 Revell catalogue with that ship in it - white & yellow isn't it? I read that catalogue cover to cover a million times when I was a kid!
Yep, that's the one.
Well, inspired by the 109 I started it yesterday and trundled off to the model shop today for supplies. Let's just say that Milliput is indeed the devil's work!
Basically any join lines along the spine, or little indentations where the kit has been moulded, would look pants. So I wanted to get rid of these lines...being such an old kit it did not line up perfectly!
However I just can't get on with Milliput...after mixing it seems rock hard, and although I get the water smoothing thing (I think) I seem to end up applying a lump the consistency of toffee, and then when I try the water thing I end up with the stuff running away (with the consitency of a thick soup) and hey presto the void is visible again.
Should it not be something more like peanut butter? Can you actually add water to the mix to thin it out? I've now got quite a lot on, and with the warning of it setting rock hard overnight, I have a feeling when I try and sand it, the model will happily dissapear and the Milliput will stay put!
Hard-Drive said:
Yep, that's the one.
Well, inspired by the 109 I started it yesterday and trundled off to the model shop today for supplies. Let's just say that Milliput is indeed the devil's work!
Basically any join lines along the spine, or little indentations where the kit has been moulded, would look pants. So I wanted to get rid of these lines...being such an old kit it did not line up perfectly!
However I just can't get on with Milliput...after mixing it seems rock hard, and although I get the water smoothing thing (I think) I seem to end up applying a lump the consistency of toffee, and then when I try the water thing I end up with the stuff running away (with the consitency of a thick soup) and hey presto the void is visible again.
Should it not be something more like peanut butter? Can you actually add water to the mix to thin it out? I've now got quite a lot on, and with the warning of it setting rock hard overnight, I have a feeling when I try and sand it, the model will happily dissapear and the Milliput will stay put!
Get as much of it off as possible as soon as you can! Dunk it in a sink of hot water and detergent and use a credit card to scrape it off if you need to! Whatever it takes...Well, inspired by the 109 I started it yesterday and trundled off to the model shop today for supplies. Let's just say that Milliput is indeed the devil's work!
Basically any join lines along the spine, or little indentations where the kit has been moulded, would look pants. So I wanted to get rid of these lines...being such an old kit it did not line up perfectly!
However I just can't get on with Milliput...after mixing it seems rock hard, and although I get the water smoothing thing (I think) I seem to end up applying a lump the consistency of toffee, and then when I try the water thing I end up with the stuff running away (with the consitency of a thick soup) and hey presto the void is visible again.
Should it not be something more like peanut butter? Can you actually add water to the mix to thin it out? I've now got quite a lot on, and with the warning of it setting rock hard overnight, I have a feeling when I try and sand it, the model will happily dissapear and the Milliput will stay put!
Milliput takes a bit of practice.
First, make sure you mix it together very well, for about 5 minutes. I use a wooden coffee stirrer and pummel it on a piece of granite (an old tile would be good too). If it's too thick for you, add a bit of water while you're mixing it. If you try to add water later, it doesn't seem to thin it because it doesn't seem to penetrate the surface very well. You have to almost knead the water into it.
When you 've got it to a decent consistency, break a bit off and hold it between your finger an thumb, then 'scrape' it over the gap side to side until the gap is filled with the stuff. If necessary, press the stuff into the gap with the tip of a screwdriver or cocktail stick or something. You can then smooth it with a bit of spit on your finger, or if it's an easy geometry to sand, leave it to set and sand it back with a file or whatever.
If you've got any filler on the surface detail of the model, wipe it away as soon as possible with a small sponge/water until it's all gone.
If you're filling a gap near panel lines or other fine surface detail, I use masking tape applied as close to the edge of the gap as possible, then remove it when filled and do the final thing with the sponge at that stage.
Remember if you try this with most fillers, you have no chance to get rid of any excess! At least Milliput diappears with water.
Good Luck.
Hmmm, does not look too bad this morning after a light sand, but will need another pass. But Milliput does seem to make a mess everywhere, and is a pain to mix, although taking the good Dr's advice I di get a better consistency adding water at the beginning! I do wonder if it's better at fabricating something, and the tamiya stuff (must try some!) is better at smoothing out low points in the moulding?
Really, really wishing that I had not tried a 40 year old kit as my first return to modelling!
Really, really wishing that I had not tried a 40 year old kit as my first return to modelling!
Hard-Drive said:
Hmmm, does not look too bad this morning after a light sand, but will need another pass. But Milliput does seem to make a mess everywhere, and is a pain to mix, although taking the good Dr's advice I di get a better consistency adding water at the beginning! I do wonder if it's better at fabricating something, and the tamiya stuff (must try some!) is better at smoothing out low points in the moulding?
Really, really wishing that I had not tried a 40 year old kit as my first return to modelling!
I've never used Tamiya filler, but based on thier other products, it will probably work very well. I get on fine with Milliput for filling gaps and even making fairly big changes to geometry. I had to reprofile the cowling to match the photo etch windscreen frame on the '109 I used Milliput, sanded to final shape. All the white bits on there are Milliput (wings roots etc):Really, really wishing that I had not tried a 40 year old kit as my first return to modelling!

Gassing Station | Scale Models | Top of Page | What's New | My Stuff