Updating my Tamiya Manta Ray
Discussion


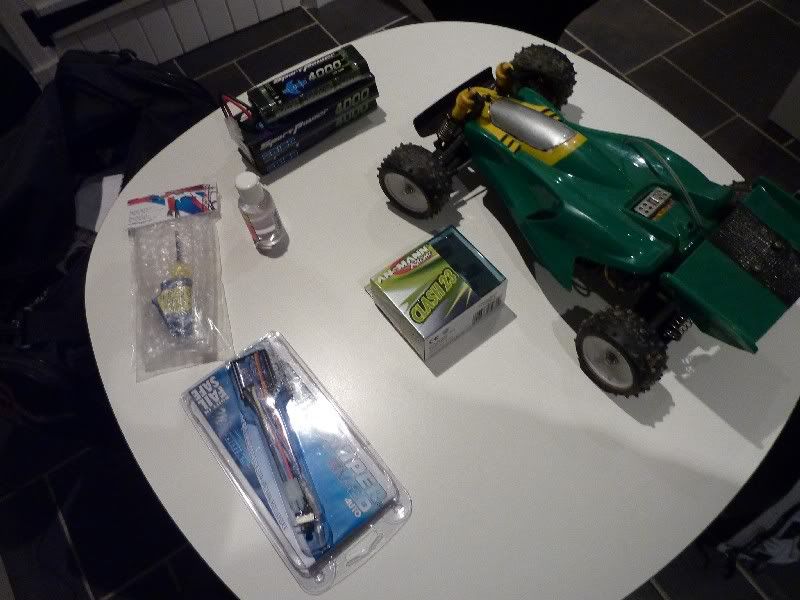
So, after help on my last thread here, about what to replace my original (over 20 year old) Manta Ray with, instead I'm breathing new life into it (hopefully  ). I bought:
23 turn motor (decided against 21T in favour of a little more torque - it's supposed to be an off road buggy after all. But then motors are cheap so I may get different ones and see if I can tell!)
Basic ESC
Couple of battery sticks (NiMh is an upgrade in itself for this car ).
Also some new shock oil (original pot is Tamiya's "soft", so went with 60 grade which should be the firm end of medium, I think) and lubes. All the shocks were still full of their OE oil - no leakage at all!
So, bits ready to go:
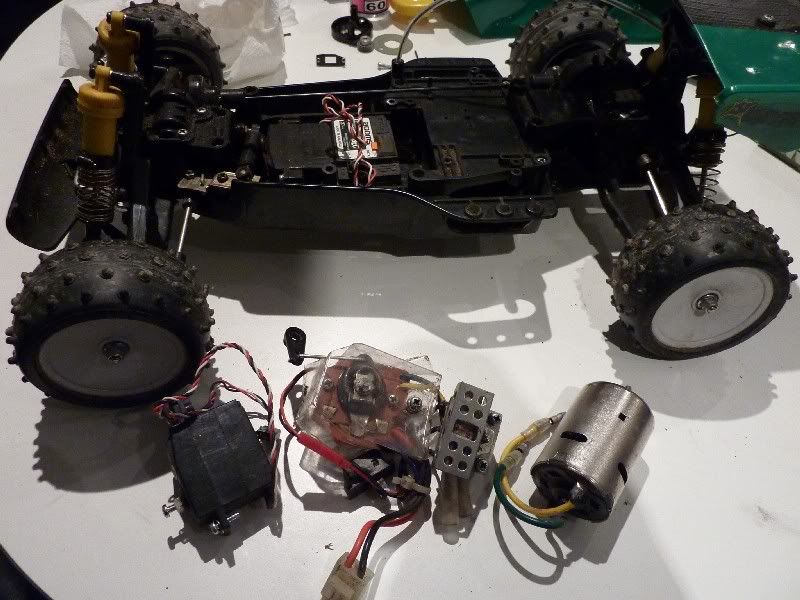
Out with the old:
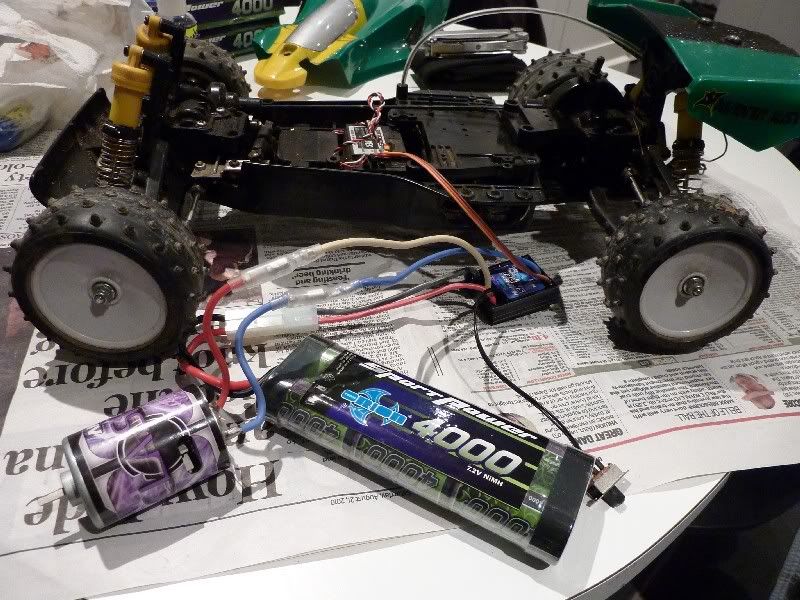
Testing the new.
The instructions weren't very clear, and it took a bit of Googling, but the ESC also supplies power to the receiver via the 3 wire plug, so the old extra connection from the MSC (straight from the battery leads) could be ditched. Also, the ESC assumes that the first signal it recieves from the controller's "speed" channel is "forward" so no need to worry about motor connection polarity
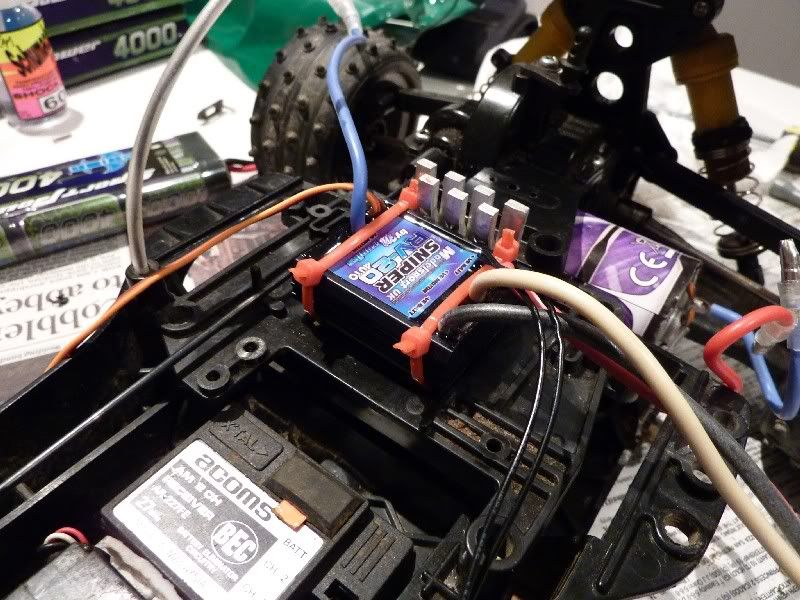
Now, the ESC was a lot smaller than I expected and clearly the bottom half was all heat sink. Strapping or sticky-padding that to a slab of plastic, deep under the shell, didn't seem like a brilliant idea. So I popped out to the shed and cut a piece off an ally heat sink I'd scavenged from an old PSU. Mounted that up on stickies, and drilled some holes for cable ties. Then spread a bit of TIM across the surafce of the heatsink (which I also had to flatten a bit).
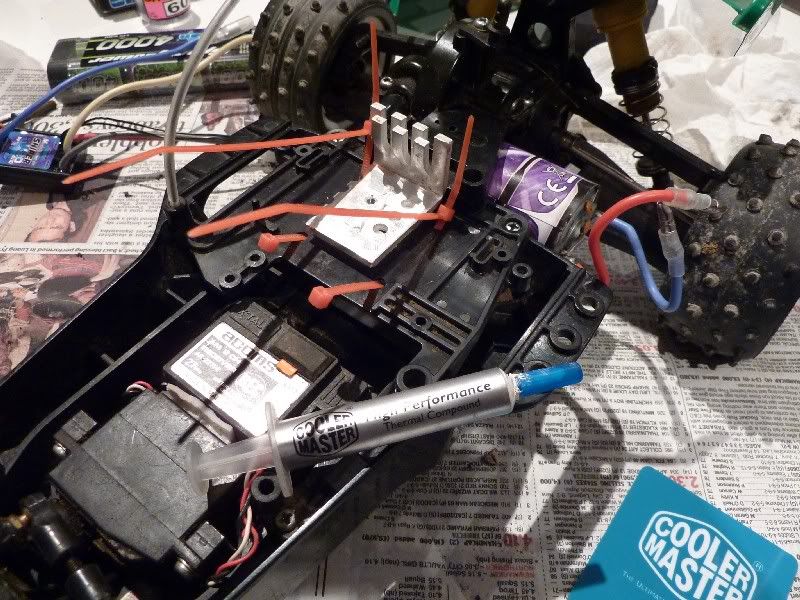
ESC bedded down on the TIM and held forever more (a double layer of stickies under the HS gave the cable ties some "spring" to work against):
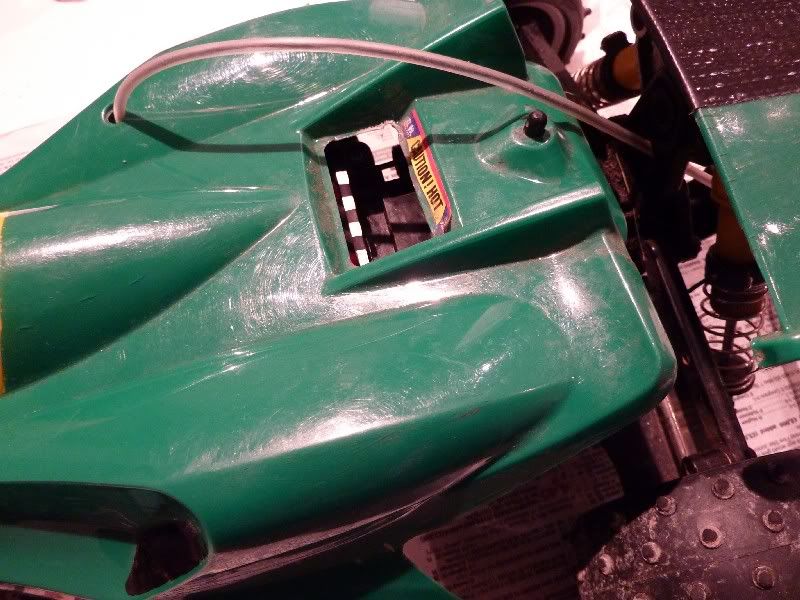
The vanes on the HS just about appear in the hole in the shell where the old resistor pack lived, so it all seems very appropriate to me:
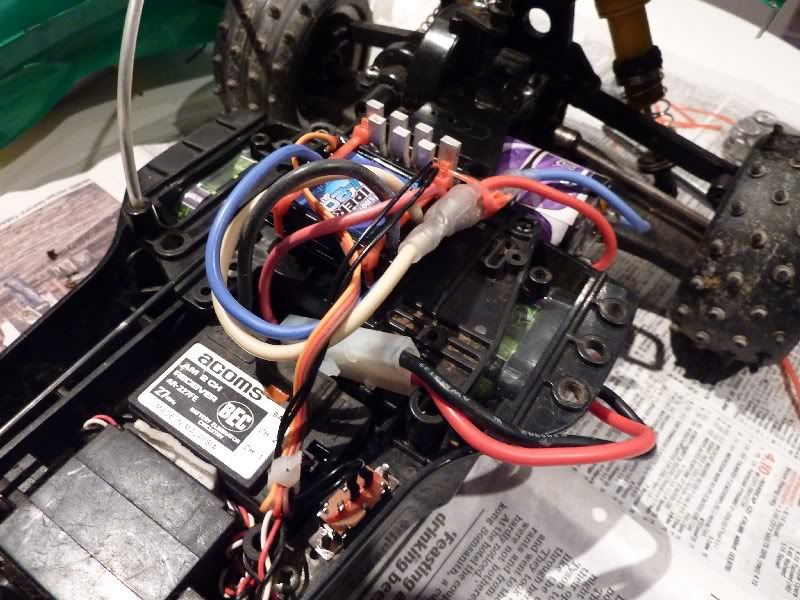
Then tied all the wiring down:
No idea how long the batteries last, or how fast it'll go, as all I had time for tonight was a quick run up and down the patio. It was certainly nippy, and certainly not getting to full speed in the space I had I'm not sure if the ESC actually brakes the motor too, but it stops bloody well now (Maybe it's just not having to pass through the other steps on the MSC?)
Off to the park for some trail bashing at the weekend
The only thing I have noticed I'm not so sure about is that the reverse takes a moment to kick in, and longer again to allow speed to build. I'm used to just throwing this car around in either direction.....
Anyhow, it's been a fun evening's tinkering and I think I'll be looking for a new body shell (and wing!!) and maybe tyres soon.....
). I bought:23 turn motor (decided against 21T in favour of a little more torque - it's supposed to be an off road buggy after all. But then motors are cheap so I may get different ones and see if I can tell!)
Basic ESC
Couple of battery sticks (NiMh is an upgrade in itself for this car
).Also some new shock oil (original pot is Tamiya's "soft", so went with 60 grade which should be the firm end of medium, I think) and lubes. All the shocks were still full of their OE oil - no leakage at all!
So, bits ready to go:
Out with the old:
Testing the new.
The instructions weren't very clear, and it took a bit of Googling, but the ESC also supplies power to the receiver via the 3 wire plug, so the old extra connection from the MSC (straight from the battery leads) could be ditched. Also, the ESC assumes that the first signal it recieves from the controller's "speed" channel is "forward" so no need to worry about motor connection polarity
Now, the ESC was a lot smaller than I expected and clearly the bottom half was all heat sink. Strapping or sticky-padding that to a slab of plastic, deep under the shell, didn't seem like a brilliant idea. So I popped out to the shed and cut a piece off an ally heat sink I'd scavenged from an old PSU. Mounted that up on stickies, and drilled some holes for cable ties. Then spread a bit of TIM across the surafce of the heatsink (which I also had to flatten a bit).
ESC bedded down on the TIM and held forever more (a double layer of stickies under the HS gave the cable ties some "spring" to work against):
The vanes on the HS just about appear in the hole in the shell where the old resistor pack lived, so it all seems very appropriate to me:
Then tied all the wiring down:
No idea how long the batteries last, or how fast it'll go, as all I had time for tonight was a quick run up and down the patio. It was certainly nippy, and certainly not getting to full speed in the space I had
I'm not sure if the ESC actually brakes the motor too, but it stops bloody well now (Maybe it's just not having to pass through the other steps on the MSC?)Off to the park for some trail bashing at the weekend
The only thing I have noticed I'm not so sure about is that the reverse takes a moment to kick in, and longer again to allow speed to build. I'm used to just throwing this car around in either direction.....
Anyhow, it's been a fun evening's tinkering and I think I'll be looking for a new body shell (and wing!!) and maybe tyres soon.....
Looks very similar to my new ESC (as the standard tamiya one went pop)
if that's the case, then it most certainly does brake using the motor.
you say reverse takes a second to kick in? try hitting reverse on the stick, letting it back to neutral, then back into reverse - see if that helps.
on my piston grip remote, first press is brake, then you need to release then "reverse" again to go backwards. takes some getting used to.
I loved the old Manta Ray. I used to race one years ago and spent far too much money upgrading it to Top Force spec 
We have someone at our club racing one in our vintage series and it's great.
If you want more wheels and tyres, then any 12mm hex wheel should fit - Tamiya DF02 or DF03 & Kyosho will go straight on as will the Fastrax range. Any Schumacher tyre will fit them.
The delay before reverse kicks in is deliberate to stop the esc blowing and is standard on all speedos these days.
I would be tempted to change the tamiya battery connectors for some Deans style as they are less prone to melting! http://demonpowerproducts.co.uk/product_info.php?m...
Check out http://www.tamiyaclub.com/forum/ if you need anything for these fine machines, they'll be able to help
Sorry, just noticed the bit about getting a new shell. Try Kamtec!
http://www.kamtec.co.uk/index.php?page=shop.produc...
Edited by PeetBee on Friday 7th January 11:26
Not sure if you have done this but if not..
Remove the switch box from the old tamiya speed controller and fit over the new Mtroniks switch. Also worth looking at the soldering to the switch as this is the weak point on these.
The three core servo wire is also really stiff, be careful a. not to bend it back on itself where it exits the esc and also b. fix it so that it doesnt move about too much. Warming gently before install will help you get it nice and neat.
Finally, swap out the Tamiya connectors to Deans when you have a moment.
Edited by Simond S on Friday 7th January 12:33
shortar53 said:
try hitting reverse on the stick, letting it back to neutral, then back into reverse - see if that helps.
on my piston grip remote, first press is brake, then you need to release then "reverse" again to go backwards. takes some getting used to.
I'll have a play about then, thanks on my piston grip remote, first press is brake, then you need to release then "reverse" again to go backwards. takes some getting used to.
Simond S said:
Remove the switch box from the old tamiya speed controller and fit over the new Mtroniks switch. Also worth looking at the soldering to the switch as this is the weak point on these.
Sorry, what do you mean by switch box? If it's just the on/off switch, it seems fine on the new one.... I'll not be throwing the old bits away anyway Simond S said:
The three core servo wire is also really stiff, be careful a. not to bend it back on itself where it exits the esc and also b. fix it so that it doesnt move about too much. Warming gently before install will help you get it nice and neat.
Doesn't have a retaining clip on it either, unlike the original servo plug. Was tempted to cut and solder old plug onto new wires but decided that's a job for it it turns out to actually be a problem.Simond S said:
Finally, swap out the Tamiya connectors to Deans when you have a moment.
And some Deans! Thanks to Peetbee too for the links + advice
Well, that didn't last long 
Car went really well, probably not much faster than when new, but with attitude.
Track rod popped out of one hub upright a couple of times (a spilt in it) so screwed it into the hole further in and reset the tracking.
Then glanced it against a log, and the front diff broke in half
Hey ho, guess that's what happens when you try and run a 20 year old car with 10,000 previous crashes under its belt back at "youngster" speed.
Off to look for the strongest kit I can find now...... seems a shame to not use all the new bits again....


Right, quick update.
Missed 3 2nd hand mantas on ebay (2 went for too much, one was a better price as no electrics or tyres - which would have suited me fine - but I missed the end of the auction. Ho hum) and so hatched a plan to sort gte the car running again more or less as is.
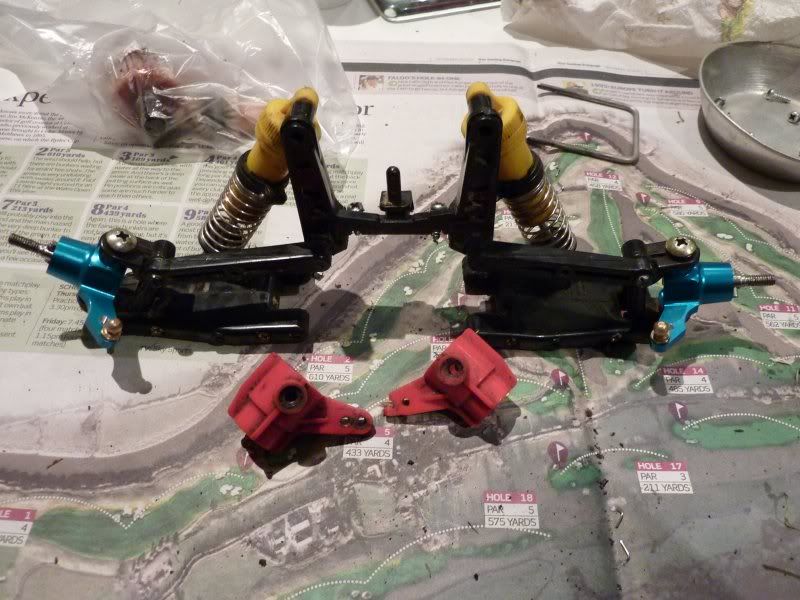
First I got a pair of shiny aluminium hubs from ebay to replace the knackered originals:
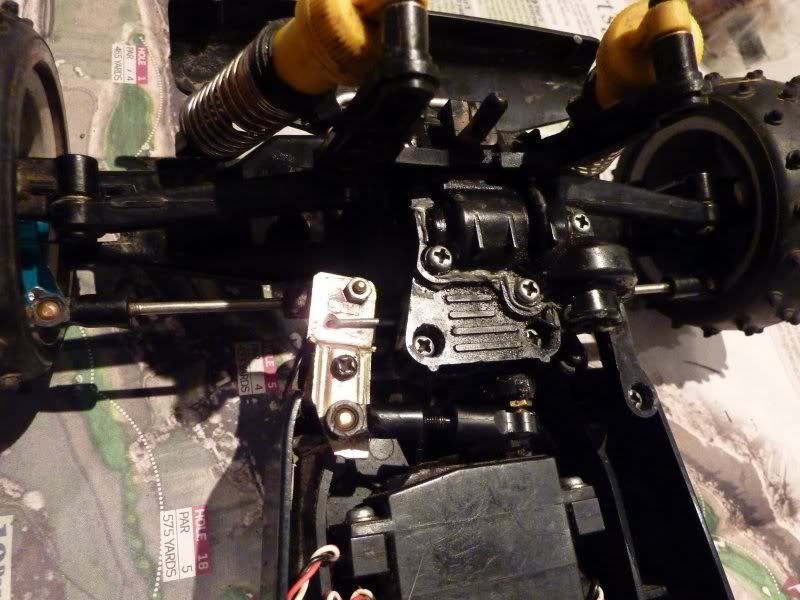
Then, I figured, the gearbox casing is now useless, but the gearbox is a discrete part so I can mess with it and still replace it just as easily as ever if it doesn't work out. So I've opened it up, taken out all the gears, and then superglued (and taped) it back together, while filling the hole where the gears used to be with chemical metal. So now the gearbox is one solid unit, and my manta's 2wd!
Should be a nice day tomorrow, so who wants a sweepstake on what breaks next, and how long it takes?
ETA: ah ha, just managed to win some ebay bits, so I'll be able to re-re-rebuild into 4wd again
Missed 3 2nd hand mantas on ebay (2 went for too much, one was a better price as no electrics or tyres - which would have suited me fine - but I missed the end of the auction. Ho hum) and so hatched a plan to sort gte the car running again more or less as is.
First I got a pair of shiny aluminium hubs from ebay to replace the knackered originals:
Then, I figured, the gearbox casing is now useless, but the gearbox is a discrete part so I can mess with it and still replace it just as easily as ever if it doesn't work out. So I've opened it up, taken out all the gears, and then superglued (and taped) it back together, while filling the hole where the gears used to be with chemical metal. So now the gearbox is one solid unit, and my manta's 2wd!
Should be a nice day tomorrow, so who wants a sweepstake on what breaks next, and how long it takes?
ETA: ah ha, just managed to win some ebay bits, so I'll be able to re-re-rebuild into 4wd again
Edited by defblade on Saturday 22 January 13:37
Sweepstake results: 30 secs, front shock tower.
Oh well, looks like there's a couple of sets of towers in the ebay bits I won earlier, so hopefully I'll be back in business next weekend. Again.
Something new, probably by Traxxas, looking better all the time though. I'm sure the car's not that much faster than it used to be, so I don't think it's the new parts overwhelming as such, instead I think age and old use/abuse seem to be throwing me constant problems. Evertything seems to be brittle now where it used to bounce back from stuff (happens to the best of us ).
Oh well, looks like there's a couple of sets of towers in the ebay bits I won earlier, so hopefully I'll be back in business next weekend. Again.
Something new, probably by Traxxas, looking better all the time though. I'm sure the car's not that much faster than it used to be, so I don't think it's the new parts overwhelming as such, instead I think age and old use/abuse seem to be throwing me constant problems. Evertything seems to be brittle now where it used to bounce back from stuff (happens to the best of us
). If you want really strong shock towers try the top force versions here:
http://www.fibre-lyte.co.uk/fl/cars/tamiya/topforc...
http://www.fibre-lyte.co.uk/fl/cars/tamiya/topforc...
Here we go again.....
ebay bits arrived, bits found in shed to make extra strong bumper.
Metal shock towers from ebay:
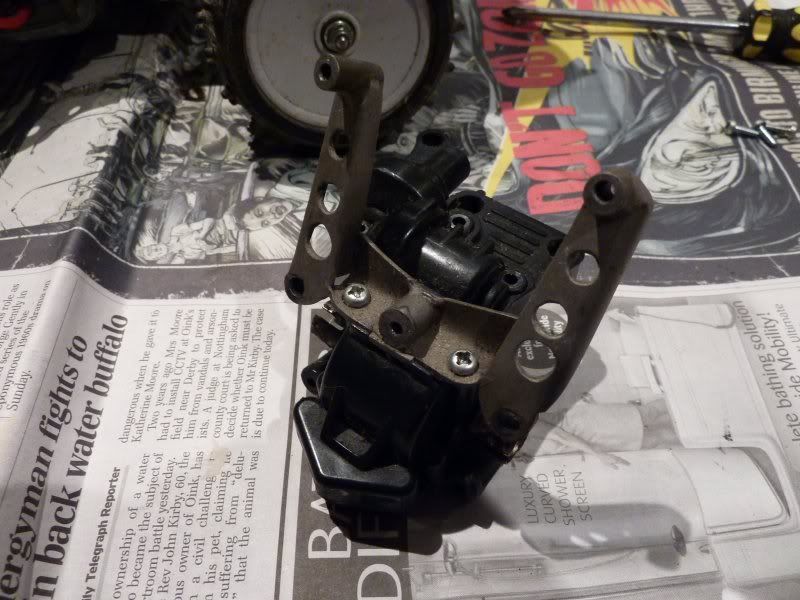
And gear box, so back to 4WD
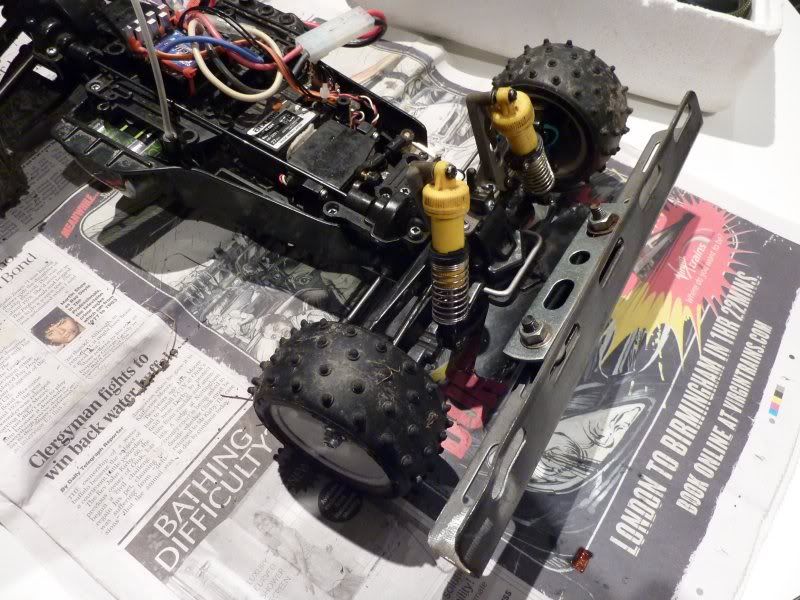
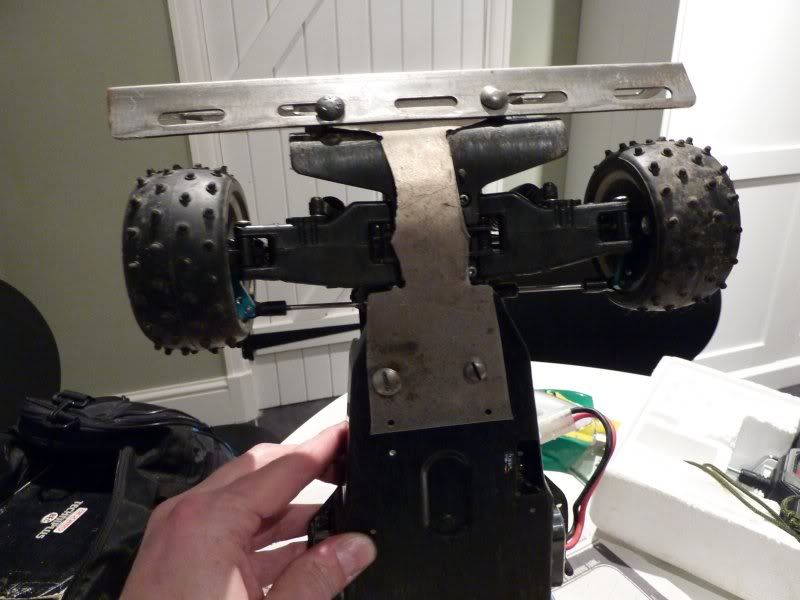
And now the Mad Max bumper - designed to protect the wheels, and transfer some impact force into the chassis tub instead of through the gearbox. I apologise for my poor metal working skills - done in a dimly lit shed on a very cold night with a nibbler, an angle grinder and some approximate guesswork

This really is the last money I'm spending on this now.... if it still breaks, and I've not got bits to fix it, it'll be time for a new toy!
ebay bits arrived, bits found in shed to make extra strong bumper.
Metal shock towers from ebay:
And gear box, so back to 4WD
And now the Mad Max bumper - designed to protect the wheels, and transfer some impact force into the chassis tub instead of through the gearbox. I apologise for my poor metal working skills - done in a dimly lit shed on a very cold night with a nibbler, an angle grinder and some approximate guesswork
This really is the last money I'm spending on this now.... if it still breaks, and I've not got bits to fix it, it'll be time for a new toy!

At last!
Batteries lasted about 20 minutes each, ran it up and down hills, over jumps, into rocks, off the side of ramps, all sorts, far more than's broken it so far...... no problems
Now I can't really spend money on a new toy
(Although my little lass said "yes you can dad, then we can have races!" Good girl!)
Wow! Year-on update....
Ran it a good few times until smoke started coming out of the motor on a bike-ramp-obsticle thing and then it went back in the cupboard for a while.
Bought 2 new motors - 35t and 27t this time - it could still stand to lose some top end and I burnt the last one out going up a big ramp, after all.
So I fitted the 35t, while noticing one of the screws holding the motor mounting plate was just turning now.
Run time approx 15 seconds.... mounting plate now has 2 cracked posts and the pinion's got some new and even more interesting wear than before
So, off to the land of cheap alloy bits (aka Hong Kong) and I now have coming a metal mounting plate, a new pinion (22 teeth, up from 21, which should go further into less top end and more torque if I've got it the right way round. 21s were out of stock, anyway...) and, while I was there and following comments on other forums, a more solid prop shaft (the wire one can twist with more power it seems and I noticed mine looks a little bowed...) and a new set of (metal) bits to replace the bodge up I made of the steering joints when the plastic one went many years ago
And this is
absolutely
finally
definately
the last I'm spending on this car!
Until it breaks again
Gassing Station | Scale Models | Top of Page | What's New | My Stuff