Frog (Rovex) Hawker Typhoon build [not GB]
Discussion


Eric, Yertis, hey no
I don't mind there being a general Frog Nostalgia kick on this theme
For one thing when I let it slip back down the listings a "general topic additional" helps keep it alive.
(As long as I can mention my Tiffie too )
)
I just bought a pot of Humbrol 78 cockpit grengrey, would that do it better for me I wonder?
Does the side wall detail look too dark on the pics to you guys
I don't mind there being a general Frog Nostalgia kick on this theme
For one thing when I let it slip back down the listings a "general topic additional" helps keep it alive.
(As long as I can mention my Tiffie too
)I just bought a pot of Humbrol 78 cockpit grengrey, would that do it better for me I wonder?
Does the side wall detail look too dark on the pics to you guys
perdu said:
Eric, Yertis, hey no
I don't mind there being a general Frog Nostalgia kick on this theme
For one thing when I let it slip back down the listings a "general topic additional" helps keep it alive.
(As long as I can mention my Tiffie too )
I just bought a pot of Humbrol 78 cockpit grengrey, would that do it better for me I wonder?
Does the side wall detail look too dark on the pics to you guys
Perdu, progress looks good. Very good.I don't mind there being a general Frog Nostalgia kick on this theme
For one thing when I let it slip back down the listings a "general topic additional" helps keep it alive.
(As long as I can mention my Tiffie too
)I just bought a pot of Humbrol 78 cockpit grengrey, would that do it better for me I wonder?
Does the side wall detail look too dark on the pics to you guys
As you probably gathered I can't help you with colours, there are only three shades of any colour as far as I'm concerned: light, medium and dark.
I'd be well up for a Frog GB too at some point.
RE. eyesight: my resin cockpit arrived today. Some of the parts I honestly can't see. Some of them aren't there to begin with I'm pretty sure, but having taken the magnifier back to work today I'm stuffed until the weekend! Having said that, the detail on the sidewalls is brilliant, and would take weeks of work to get anywhere close by scratchbuilding. As I said before, for the sake of £10 it's rude not to...
Making small pieces is getting difficult
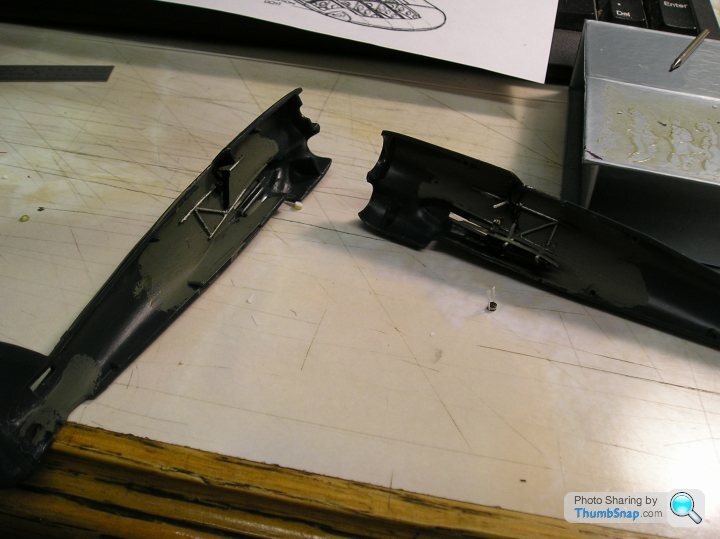
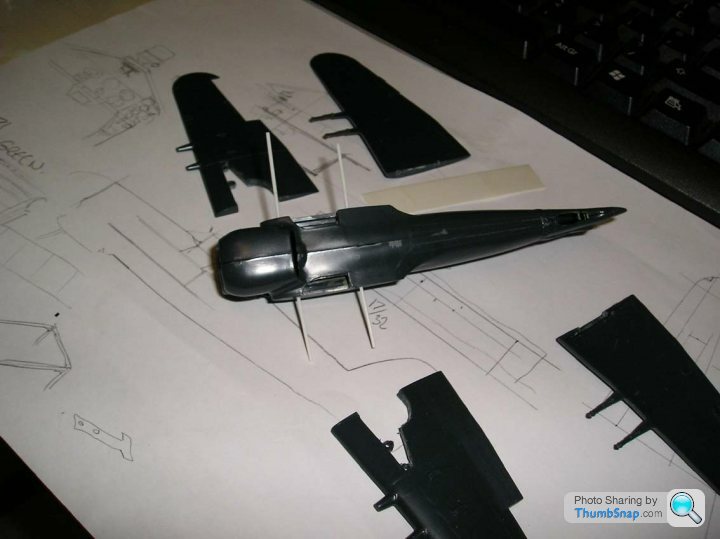
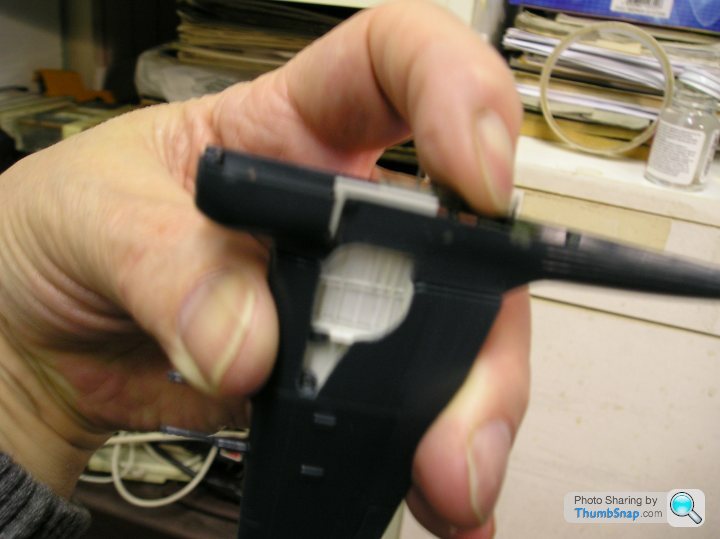
You can't hardly see the ruddy things and sure will not be able to with the canopy on but here are the stick and rudder pedals (with toe brake bars) in place above the floor boards. On the port cockpit wall is the throttle quadrant with lever, made but not fitted is the u/cart lever.
Across the fuselage now is the centre brace bar of the space frame, when closed up it will join together the sides of the plane and also carry the magnetic compass. This is partly made and awaits trimming and painting on fixing. It can be seen with its hanging braces sitting in front of the starboard fuselage.
The Mkll gunsight will sit on its own section of spaceframe where other aircraft have a dash panel cover
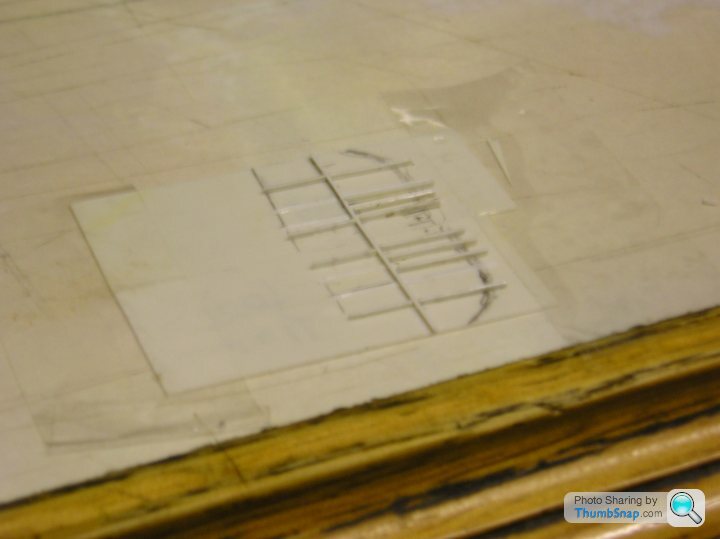
The blind flying panel has vague scratches and paint blobs on it preparatory to having gloss varnish glazing put on, though I may try Klear instead. It's been sitting unused on my shelf for all this time
Now to find out where you guys get that lead tape that the doc swears by...
???
The Frog seat will do the job after a leetle loving attention
Bugger me I am enjoying this again!
Mrs P is NOT
You can't hardly see the ruddy things and sure will not be able to with the canopy on but here are the stick and rudder pedals (with toe brake bars) in place above the floor boards. On the port cockpit wall is the throttle quadrant with lever, made but not fitted is the u/cart lever.
Across the fuselage now is the centre brace bar of the space frame, when closed up it will join together the sides of the plane and also carry the magnetic compass. This is partly made and awaits trimming and painting on fixing. It can be seen with its hanging braces sitting in front of the starboard fuselage.
The Mkll gunsight will sit on its own section of spaceframe where other aircraft have a dash panel cover
The blind flying panel has vague scratches and paint blobs on it preparatory to having gloss varnish glazing put on, though I may try Klear instead. It's been sitting unused on my shelf for all this time
Now to find out where you guys get that lead tape that the doc swears by...
???
The Frog seat will do the job after a leetle loving attention
Bugger me I am enjoying this again!
Mrs P is NOT
Lead wire (and loads of other stuff) : Little Cars :
http://www.little-cars.co.uk/toolsacc.htm
Looking good Perdu!
http://www.little-cars.co.uk/toolsacc.htm
Looking good Perdu!

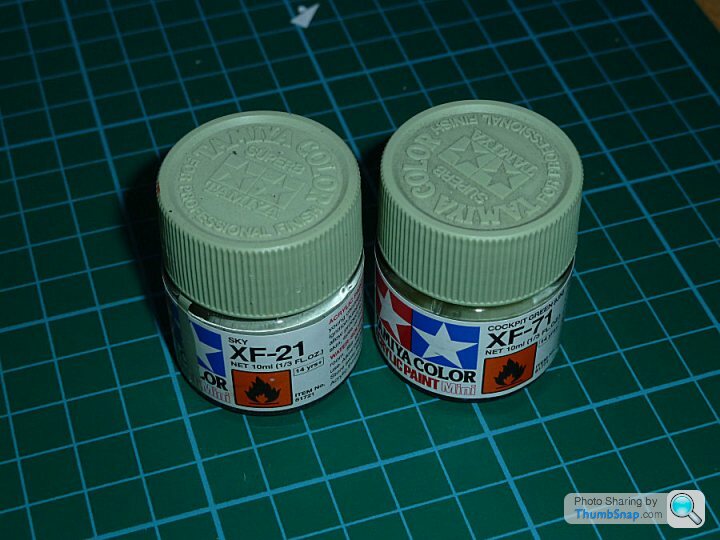
Thanks for the additional research, but TBH I have already popped into Mike's Models and liberated XF-71 anyway on your recomendation. 
Looks good to me
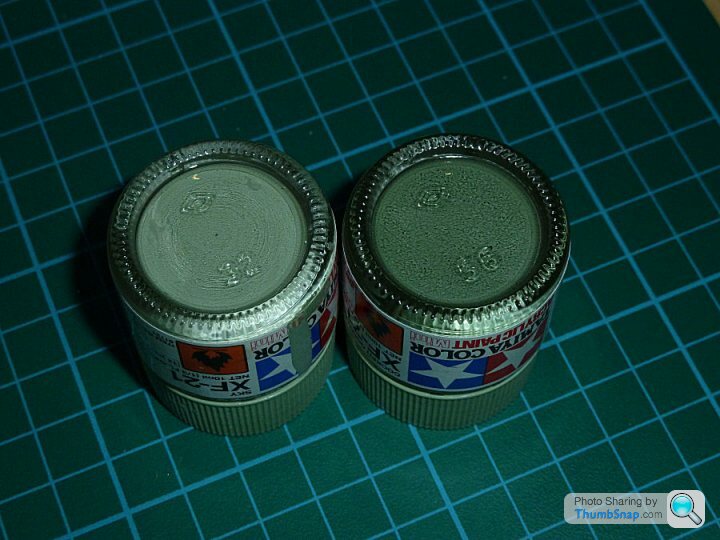
To me both colours look too pale, I'd look at something darker. But it only matters what you like and how you see it doesn't it.
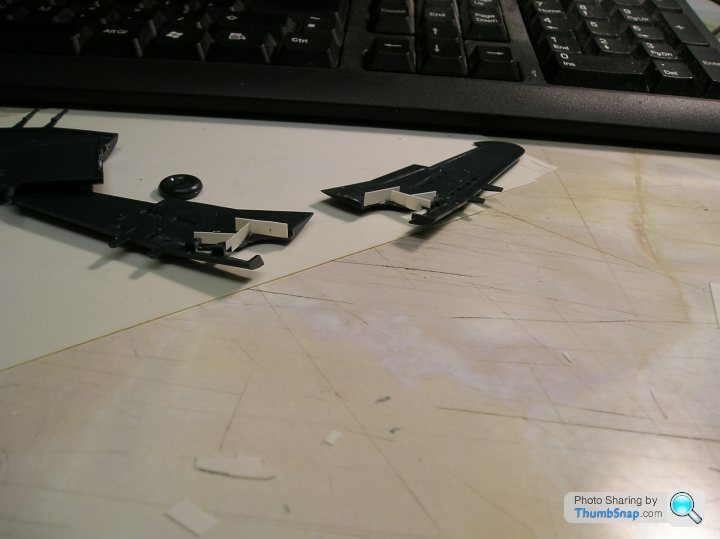
I started cutting the wing slot area off the fuselage halves last night and will carry on with that tonight, (been busy living real life today dammit) I may be able to make the new wheel well inners without removing ALL of the root tab but if not I will drill and peg the wing roots so I can get enough visible depth in there
And I will repaint the cockpit side walls
Eric, I think she'd rather I played "piano inna brothel" instead of restarting modelling
Not gonna happen tho'
I'm a crap pianist and my eyes ain't what they wus
edit to allow for a suddenly appearing picture that was hiding
Looks good to me
To me both colours look too pale, I'd look at something darker. But it only matters what you like and how you see it doesn't it.
I started cutting the wing slot area off the fuselage halves last night and will carry on with that tonight, (been busy living real life today dammit) I may be able to make the new wheel well inners without removing ALL of the root tab but if not I will drill and peg the wing roots so I can get enough visible depth in there
And I will repaint the cockpit side walls
Eric, I think she'd rather I played "piano inna brothel" instead of restarting modelling
Not gonna happen tho'
I'm a crap pianist and my eyes ain't what they wus
edit to allow for a suddenly appearing picture that was hiding
Edited by perdu on Saturday 22 January 17:04
perdu said:
To me both colours look too pale, I'd look at something darker. But it only matters what you like and how you see it doesn't it.
I'm guessing, but by no means sure, that on a tiny model like this it might be better to go for lighter colours anyway. Once you've added a wash and weathering it'll soon get darker.I'm going for the Green wheel wells and flap inners. Both appear to be valid, and silver looks a bit naff to me. Call it modellers license!
All being well I should get some green on the flaps and wells by tomorrow evening.
Slow stuff this weekend, damn that real life stuff
Families, who'd have 'em?
Anyway
Finished cutting out the wheelwells and as I sort of suspected I had to remove all of the locating tabs to make space for the sculptured wheel well doors and a wheel in each one
Set out the locating dowels to use instead and carved out the spaces. I think I will do the silver "celly" finish instead at painting time, maybe even repaint the tail wheel space silver too. Not a lot of detail info for this out there...
And having bought the new Tamiya cockpit green and used it, well, I like it.
So that is one problem outta the way
I have near enough finished the cockpit section except for the armour plating and redoing the rather poor seat.
The cockpit instrumentation will do now, just needs the blind flying panel, and the mkll reflecting sight fixing to its cradle
You might just see the magnetic compass hanging off the fuselage crossbrace just above the rudder pedals which needs the excess trimming off after the cement has set solid tomorrow
To be honest I have overdone the detail in there just for the sake of it, most of it will vanish once the two halves are closed up
Just need to paint the throttle lever's quadrant in grey so the throttle is visible...
More to do tomorrow
Re. the wheel wells: you might be better off removing the sidewalls completely, and building new ones slightly inset from the well edges. The Academy ones aren't like that, and aren't realistic because some pipework and bracing is partly nclosed under the wheel opening 'lip'. Just an observation!
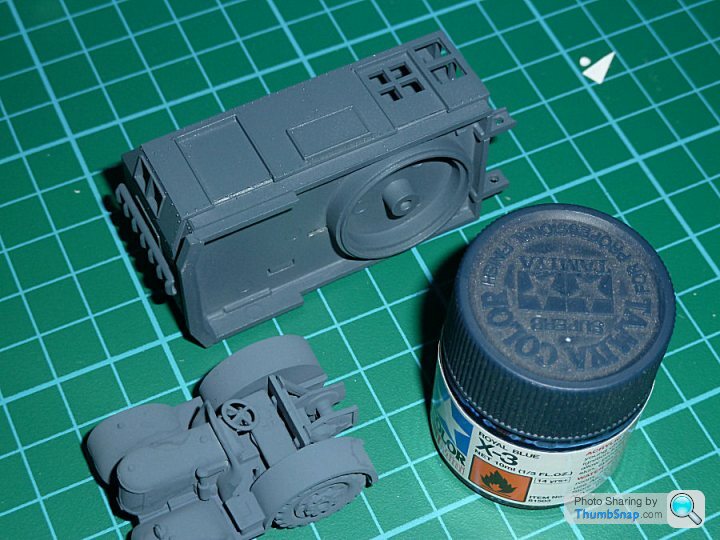
Also, the Tamiya "Royal Blue" is way too bright for the tractor. The railway crane is now nearly complete, and the blue is much darker (dark wash plus dark weathering added). I'll post pics later perhaps, but I think the tractor/trolley will look ok with the same treatment.
Cheers
Also, the Tamiya "Royal Blue" is way too bright for the tractor. The railway crane is now nearly complete, and the blue is much darker (dark wash plus dark weathering added). I'll post pics later perhaps, but I think the tractor/trolley will look ok with the same treatment.
Cheers
I am expecting to sculpt away the sidewalls of the wells. A very thin plasticard stripe will make the new walls, didn't you do similar things to the 109?
Quite looking forwards to closing the fuselage, maybe tonight and beginning to make the wings "right" too
Yes that blue needs to be justa weathered dark blue
Airfix "used" to make a good colour match out of the tin, many years ago, I remember using their matt dark blue on the tractor from my brother's Stirling. (I wasn't allowed to make the bomber!)
Not sure why we didn't paint the bomb trollies though...
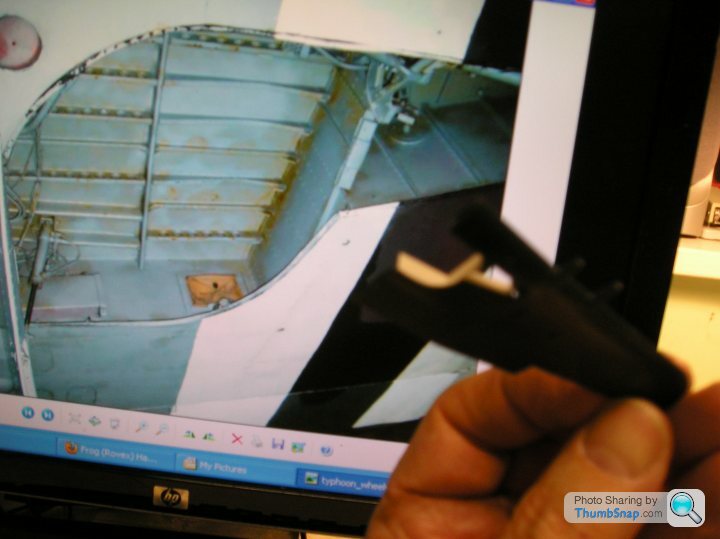
Although the Tiffie has slight differences in the wheel well area to the Tempest I like the idea of maybe using milliput carved clear of the edge of the hole and covering the top with a plasticard skin (already cut out to be trimmed up with rib details as per the photo I posted of Tiffie's well on your thread---which feels like years ago now )
Milliput carves beautifully for these operations
I just re read your Tempest thread from the start...
The blue I was talking about?
The tractor was near enough right in my memory before you repainted!

) Milliput carves beautifully for these operations
I just re read your Tempest thread from the start...
The blue I was talking about?
The tractor was near enough right in my memory before you repainted!
perdu said:
The blue I was talking about?
The tractor was near enough right in my memory before you repainted!
Yeah, Even though I painted it nearly 30 years ago, I rememebr it was a Airfix paint pot, and dried very fast.The tractor was near enough right in my memory before you repainted!
I don't understand why they re-specced the paint (to be Humbrol #67, which is lighter than the original Airfix blue) for the 2010 refuelling tender, because it was exactly the same spec as it was for the Tractor back in 197-X) All very confusing, but it'll be alright on the night.
It'll all be all right on the night
Spent a quiet evening plotting out, cutting out and staking out the first three inner wheel well plates
And not a few minutes enjoying Google's set of Tiffie pics
Here're the rear walls and the centre fillets in place for the wells, both sides.
Omigod doesn't Mek still stink
A poor look up into the port side inner well now
blurry as buggery but you might see, through a thick fog
Really must learn to take photos
I'm sure dr_gn will sort out that blue on the tractor, wish I'd remembered seeing it earlier
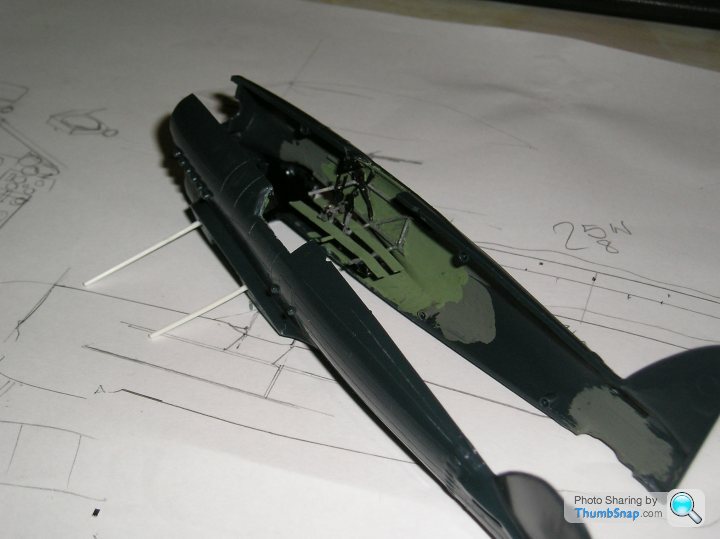
Now then, a few more bits of the wheel wells done tonight
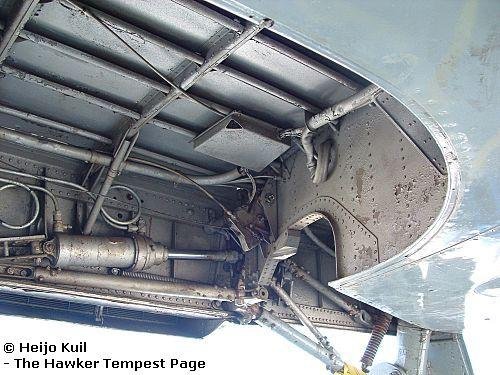
The roof/ceiling of the wells was made up in tandem and has been ribbed in a similar (not entirely, at 1/72 I think the extra detail would swamp the eyes) manner to Hawker's factory method
Most of these parts were made from 0.010" plasticard with additional detail from 0.005" (the shallow braces across the roof)
I have been carving away some of Frog's fine but blooming hard plastic to allow the wings with the wheel well pieces added to fit into the fuselage and the wings at the same time
A roughish shot or two here
Noticed already haven't you? I haven't finished the fuselage internals yet, but there is still a little more to do. Armour plate to make and decide whether to carry on with what Eric described as a not very nice (in other words though!) pilot's seat. Also detailing to taste, buttons and switches from dabs of paint next, safety harness, still can't fit the BF panel either until the halves are together.
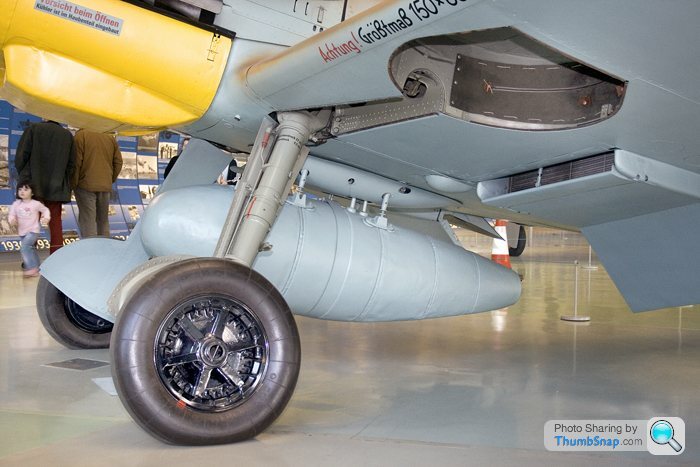
I need to make the same decisions that the Tempest builders have and decide which colour the wheel wells should be, my picture shows an apparently pale bluish cast to what may be silver paint...
Still that is for another day.
I'm only doing a little bit at a time, enjoying finding new tests for myself by adding the unecessary details.
This may end up taking longer that your GB
And I really don't care, it's fun again
The roof/ceiling of the wells was made up in tandem and has been ribbed in a similar (not entirely, at 1/72 I think the extra detail would swamp the eyes) manner to Hawker's factory method
Most of these parts were made from 0.010" plasticard with additional detail from 0.005" (the shallow braces across the roof)
I have been carving away some of Frog's fine but blooming hard plastic to allow the wings with the wheel well pieces added to fit into the fuselage and the wings at the same time
A roughish shot or two here
Noticed already haven't you? I haven't finished the fuselage internals yet, but there is still a little more to do. Armour plate to make and decide whether to carry on with what Eric described as a not very nice (in other words though!) pilot's seat. Also detailing to taste, buttons and switches from dabs of paint next, safety harness, still can't fit the BF panel either until the halves are together.
I need to make the same decisions that the Tempest builders have and decide which colour the wheel wells should be, my picture shows an apparently pale bluish cast to what may be silver paint...
Still that is for another day.
I'm only doing a little bit at a time, enjoying finding new tests for myself by adding the unecessary details.
This may end up taking longer that your GB
And I really don't care, it's fun again
Gassing Station | Scale Models | Top of Page | What's New | My Stuff