Frog (Rovex) Hawker Typhoon build [not GB]
Discussion


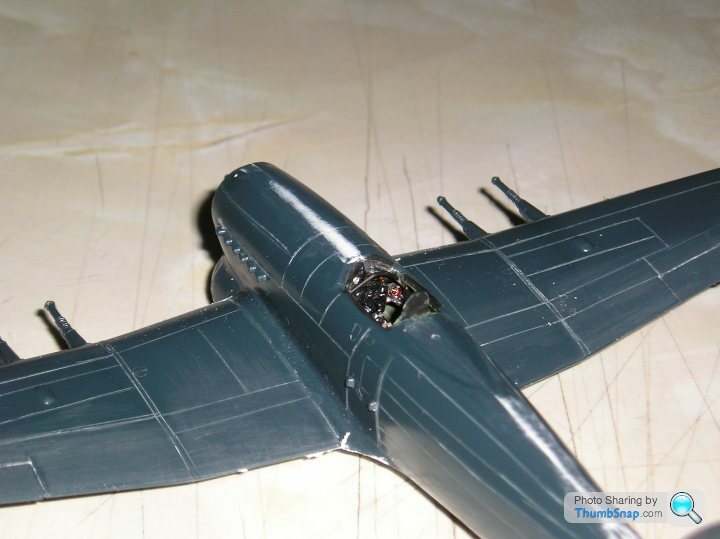
here is the first picture of the upper frame tubing that will be the gunsight support framing
And from the other side of the fuselage
I have the mainplanes in place now, dihedral looks good as does the inner anhedral section
here is the White Stuff filler drying before tonight's onslaught
and finally the aperture for the landing lights cut out of the leading edge
Some extra creative thinking required for this section next. It might be a "bad thing", maybe I should have painted it instead


I rather like the Humbrol Acrylics, very easy to use without leaving a "Bill is bloody modelling again" signature...

Wonder how they will spray, should I use Tamiya thinners when airbrushing? I wonder...

Yes they are truly piffing me off too
I think I will be modelling a machine with the later faired in cannons so they are, for now, just for indication...
There is due to be much work on and around the wings before any serious further progress is made
And I still have to mix a flattish blue-greyish silvery colour for the wheel wells and doors
perdu said:
Yes they are truly piffing me off too
I think I will be modelling a machine with the later faired in cannons so they are, for now, just for indication...
There is due to be much work on and around the wings before any serious further progress is made
And I still have to mix a flattish blue-greyish silvery colour for the wheel wells and doors
The main reason I went for green rather than silver wells was that silver is a b*tch to get looking right, at least for me. If I weather it, it looks grey. If I don't weather it, it looks chrome.I think I will be modelling a machine with the later faired in cannons so they are, for now, just for indication...
There is due to be much work on and around the wings before any serious further progress is made
And I still have to mix a flattish blue-greyish silvery colour for the wheel wells and doors
BTW, check these guys out:
http://www.master-model.pl/index.php?lang=en
I know it's not your thing to buy details, but these really are the dogs b
 ks. I used them on the Bf109, and there is no comparison, even with aftermarket resin. If it's in machined metal on the prototype, it will almost always look best in metal on the model IMO.
Very nice if you need to use metal
I'll be turning down a set for myself from plastic rod or sprue
probably Monday or Tuesday
I have an MG spares Day to attend tomorrow and much socialising to endure/enjoy
( A collection of friends and acquaintances to choose from )
So little chance of working on Tiff til tomorrow night
Also have Brum IPMS mates to meet in the late afternoon
Busy day
I'll be turning down a set for myself from plastic rod or sprue
probably Monday or Tuesday
I have an MG spares Day to attend tomorrow and much socialising to endure/enjoy
( A collection of friends and acquaintances to choose from
)So little chance of working on Tiff til tomorrow night
Also have Brum IPMS mates to meet in the late afternoon
Busy day
Odd day and little time for fettling this evening, just a few smaller than usual bits
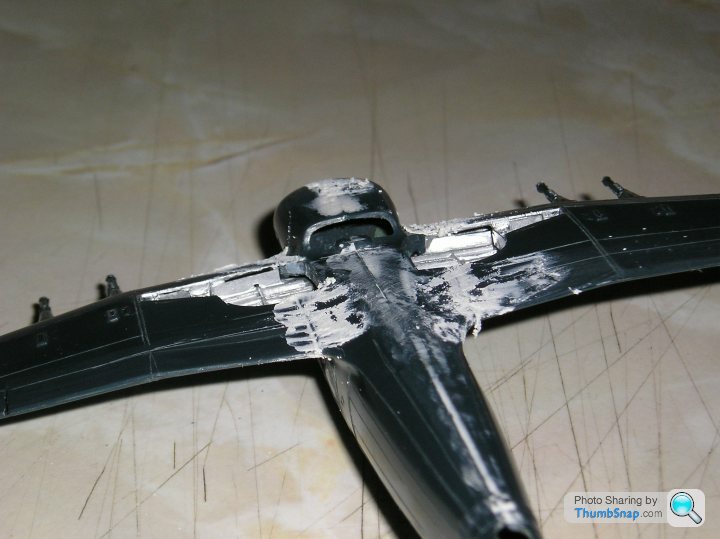
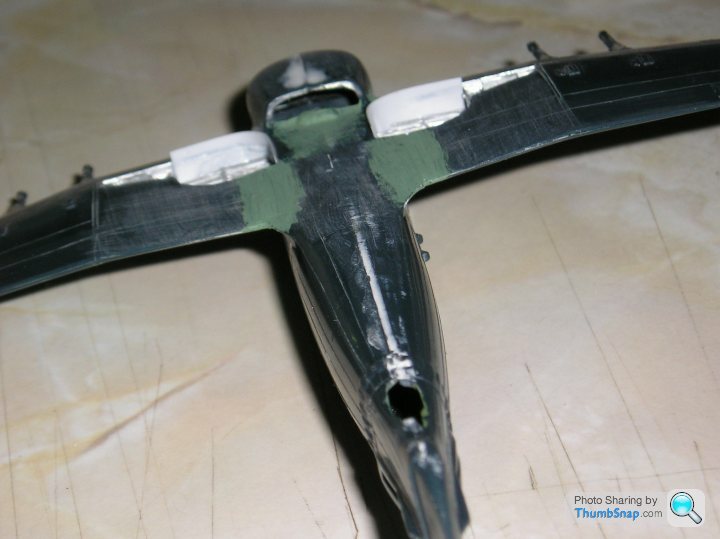
The starboard fuselage wing joint was pretty poor (prolly as a result of cutting off the locating tabs to allow wheel well details to be "done") so I added a little Squadron White Putty, which I bought to try instead of the old Green Stuff I used to overdose on.
I like it, dries quickly and takes a good finish and details when needed
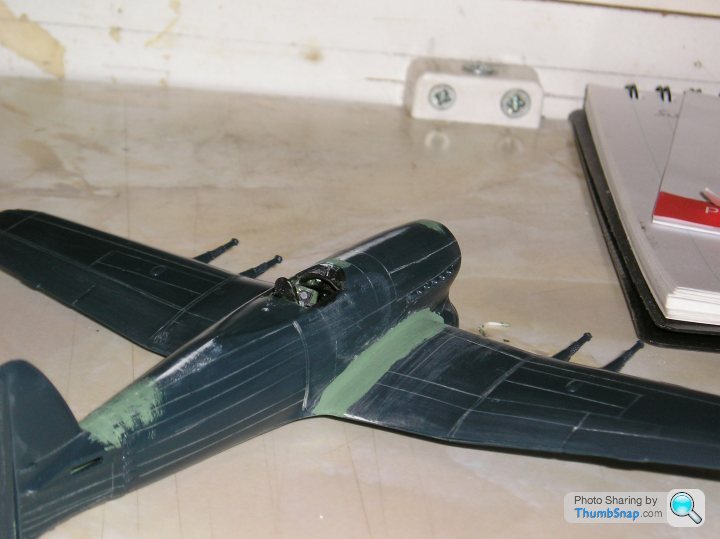
After filling and smoothing off yesterday I painted a coat of cockpit green just as a discloser coat that can be rubbed away, like here.
The port side seen during cleaning up
I see many of my retouched panel lines need a second cut to sort out the look of them, straightening and suchlike
Some have already been done tonight and others will get the treatment during quiet minutes this coming week
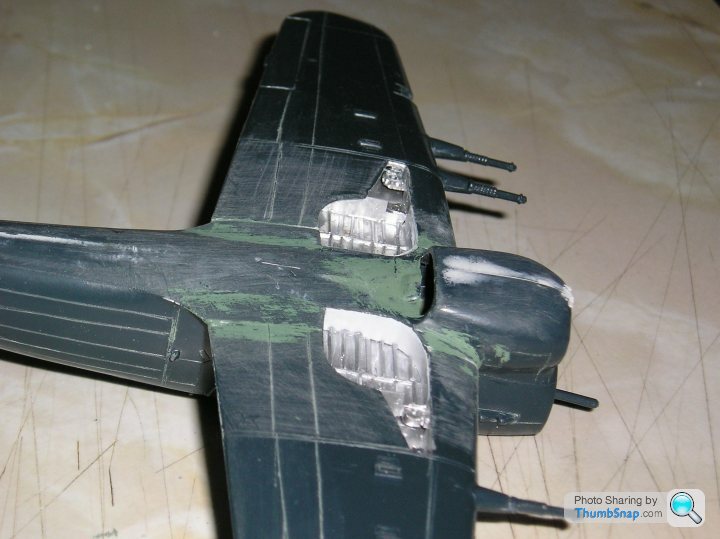
Here is some of the work entailed when closing off the wheel wells trimming of the 0.005" plates around the edge here
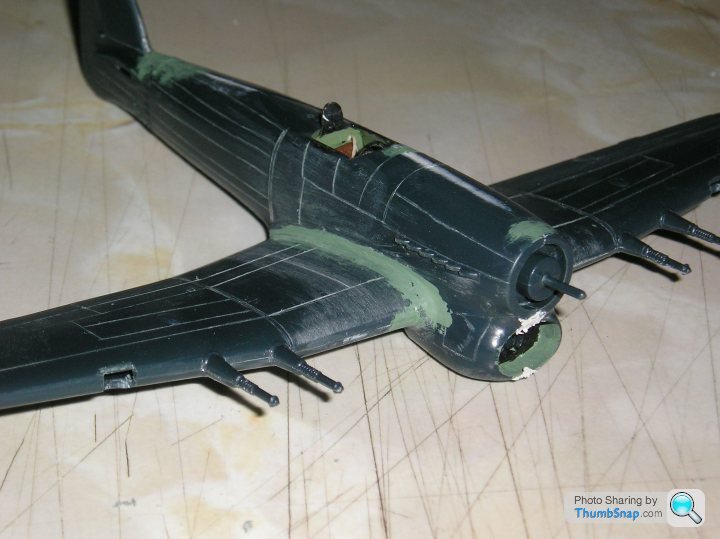
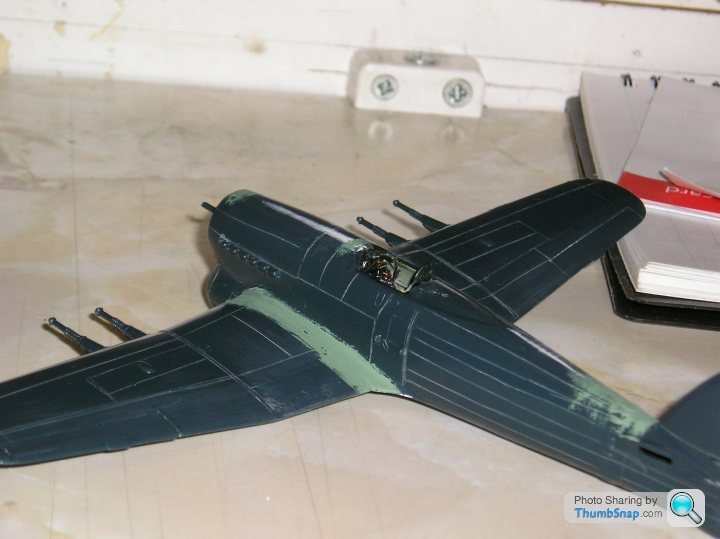
rescribed panel lines after rubbing down the disclose coat
still plenty to do but coming along slowly
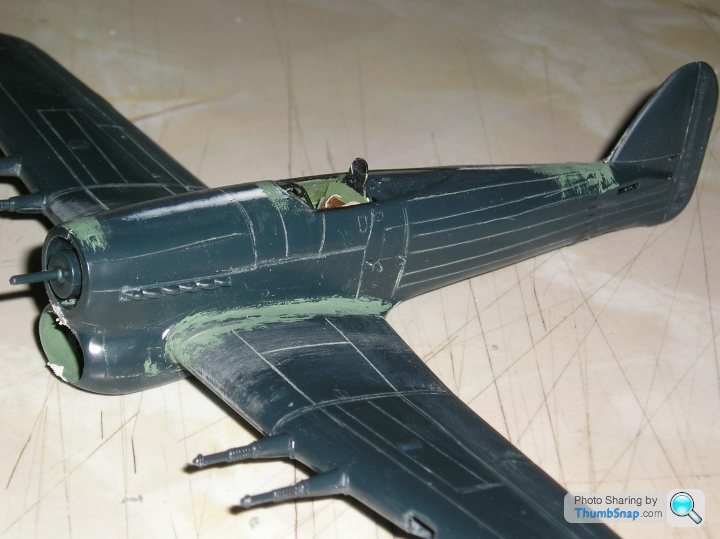
really good view of really crap rear end panel lining
Has been sorted since but no picture
This and the previous one show the extra White Filler on the intake cowling, Frog's fit round here was unusually bad for one of their mouldings, I always expected better component fit from Frog
I expect to get the tailplanes on and faired in and maybe a coat of Sea Grey Medium this week
Fingers crossed we have a better week than last, it'd have to be a stinker to be worse...
edit why the hell do I ALWAYS miss seeing the spoiling mostokes first time around?
The starboard fuselage wing joint was pretty poor (prolly as a result of cutting off the locating tabs to allow wheel well details to be "done") so I added a little Squadron White Putty, which I bought to try instead of the old Green Stuff I used to overdose on.
I like it, dries quickly and takes a good finish and details when needed
After filling and smoothing off yesterday I painted a coat of cockpit green just as a discloser coat that can be rubbed away, like here.
The port side seen during cleaning up
I see many of my retouched panel lines need a second cut to sort out the look of them, straightening and suchlike
Some have already been done tonight and others will get the treatment during quiet minutes this coming week
Here is some of the work entailed when closing off the wheel wells trimming of the 0.005" plates around the edge here
rescribed panel lines after rubbing down the disclose coat
still plenty to do but coming along slowly
really good view of really crap rear end panel lining
Has been sorted since but no picture
This and the previous one show the extra White Filler on the intake cowling, Frog's fit round here was unusually bad for one of their mouldings, I always expected better component fit from Frog
I expect to get the tailplanes on and faired in and maybe a coat of Sea Grey Medium this week
Fingers crossed we have a better week than last, it'd have to be a stinker to be worse...
edit why the hell do I ALWAYS miss seeing the spoiling mostokes first time around?
Edited by perdu on Monday 21st February 00:00
Eric Mc said:
I've given up on Green Stuff as well. It also melts the plasric slightly. My favourite "old style" filler is Humbrol - which seems quite neutral. I find Milliput messy to use.
Increasingly, I use super-glues, Tippex and have just started to use Mr Surfacer.
I've got #1200 Mr.Surfacer, but it takes a few coats to fill larger gaps. I'm guessing the larger sizes will fill better. Increasingly, I use super-glues, Tippex and have just started to use Mr Surfacer.
Mr Surfacer?
new to me
fancy describing it and how you use it please
(no work done tonight, shoulder no fun and too restless to get down to it)
I ifnd the white putty far better than the Green Stuff they make, maybe there's a differentyformulation
The green on the model is just a paint film that gets rubbed away when doing the wet'n'drying, 'tisn't Green Stuff
I use paint as a filler when getting down to it this way
With 1200 grit w'n'd it can easily polish flat and smooth
Gassing Station | Scale Models | Top of Page | What's New | My Stuff