Discussion


Can anyone help me with the assembly of the crank and bottom bracket please? I've only ever assembled a one-piece crank before (no joke intended but it was rather good, no?  ).
).
I have:
2x bearings in their cups
6x various thickness "spacers"
2x shallow conical-shapes
1x Blue tube
Can I confirm sequence:
).I have:
2x bearings in their cups
6x various thickness "spacers"
2x shallow conical-shapes
1x Blue tube
Can I confirm sequence:
- Press in one bearing/cup
- Insert blue tube, so that it is inside the bottom bracket. Possibly hold it in place with axle?
- Press in second bearing/cup
- Slide conical-shape over each end of axle. They are different depths. Which one which side?
- Add spacers to suit. How do I know? What am I hoping to achieve?
- Add chainring. There's an additional shallow "top hat" spacer which fits nicely inside the chainring's axle-hole. which side should the flange be?.. inside or outside?
- Slide crank arms on. What presses them against the bearing and how much pressure against the bearing?
Edited by Mars on Sunday 3rd April 21:58
OK, even that ^^^ doesn't describe everything in my Redline BB kit.
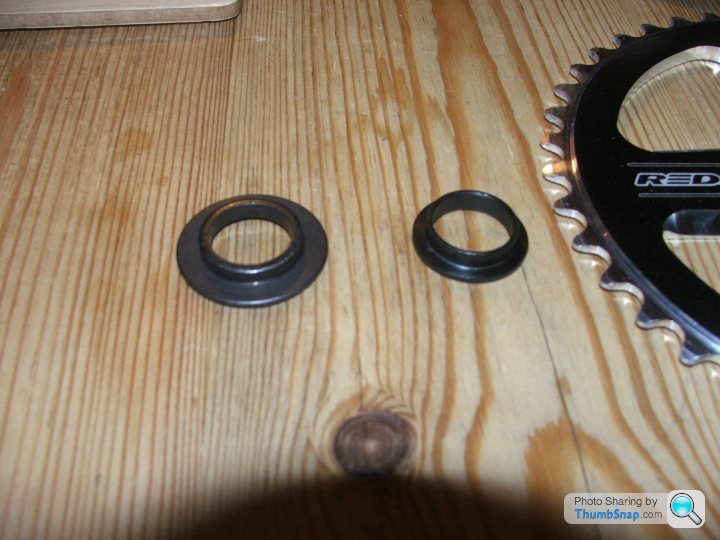
There's a couple of conical spacers. I am now assuming the thinner one goes on the chainwheel side, and the thicker one on the left. The 6x conventional spacers will either help to pack out the blue tube (which says 52.6mm on the side) if necessary, or will help to provide whatever offset I need on either side of the crank. I suppose the chainwheel just has to align with the freewheel, and the other side to my own preference.
But there's one other part. Unlike the spacers described so far, which are made from ali and anodized black (except the blue tube) there's a top-hat type of steel spacer. It's very similar to the 19mm adapter found with the chainwheel but it's steel, and it's wall-thickness makes it too thick to be used instead of the adapter that came with the chainwheel.
Is it just another chainwheel adapter, in case I bought one with an even wider axle-hole?.. or does it play some other part?
The one on the left is the steel one:
shalmaneser said:
just choose the chain ring adapator that fits in the chainring hole, there are two sizes (22 and 24mm?!?! maybe) so your ring will be one or the other. The spare adaptor can be binned. Or kept in a 'bits box' for all eternity (my personal favorite choice)
That's definitely what it is then? Just seemed strange that the steel one came with the BB set, which was otherwise all aluminium, and the nice aluminium one (which fits) came with the chainring.Thanks.

Tioga Beartrap turned up today. That's one more crossed off the list. Update:
- Skyway Graphites - Dispatched today. Should be here in 2-3 days.
- Dia Compe MX1000s (white) - these are NOS and are on back-order. They should be with me in May sometime.
- Redline seatpost - Ordered a chrome one on Saturday.
- Odyssey Aaron Ross handlegrips - on order due this week.
- Tioga Beartrap headset - Received today (from Vert-Ego - not cheap but they have some proper old school stuff there)
- Redline Flight cranks - Collection of "incorrect" ones tomorrow. Should get new ones couple of days later.
Little word of warning about Vert-ego. From some of the bmx forums i visit it would seem he is a bit hit and miss with his deliveries. I have never bought from him myself and i don't really do badmouthing people but i have heard a good few stories about his stock availability. I guess he doesn't update his site as often as he should as people have waited months for stuff or had the nearest replacement type stuff turn up.
Anyway, glad you got your part. looking forward to seeing the final build images
how about a pic of you doing a tail whip
Anyway, glad you got your part. looking forward to seeing the final build images
how about a pic of you doing a tail whip
allegro said:
Little word of warning about Vert-ego. From some of the bmx forums i visit it would seem he is a bit hit and miss with his deliveries. I have never bought from him myself and i don't really do badmouthing people but i have heard a good few stories about his stock availability. I guess he doesn't update his site as often as he should as people have waited months for stuff or had the nearest replacement type stuff turn up.
Anyway, glad you got your part. looking forward to seeing the final build images
To be honest, I doubt he's alone in this. I ordered my wheels from one shop along with a load of other stuff, only to find out when they dispatched the majority of it that the wheels won't be available until July. I promptly cancelled that part of the order and went with Parkers of Bolton instead. That order was placed on Friday and they have dispatched them today.Anyway, glad you got your part. looking forward to seeing the final build images
I'm not bothered though. AlansBMX acknowledged on his website that the MX1000s wouldn't be available until May, so I bought them with the full knowledge of the extended delivery times.
I think I should have everything by the end of this week, except for the calipers.
allegro said:
how about a pic of you doing a tail whip
I guess you're talking about something we used to call a whip-floater? 180, land on the back wheel then 180 pivot around on the back wheel to complete the circle?If so then... ha ha ha ha ha ha ha... not for the past 25 years anyway.

This is the sort of thing i was thinking of:
http://www.youtube.com/watch?v=sUU9hQpkRVM&fea...
2 days of trying and 1 sore big toe later i managed to get it so i could do it pretty regular
Next is to try it without treading on the front wheel
Seems to take me three times as long to learn stuff than it used to but bloody good fun
check out this trick around 2.56 unbelievable!!
http://www.youtube.com/watch?v=Tt0foYesgTk


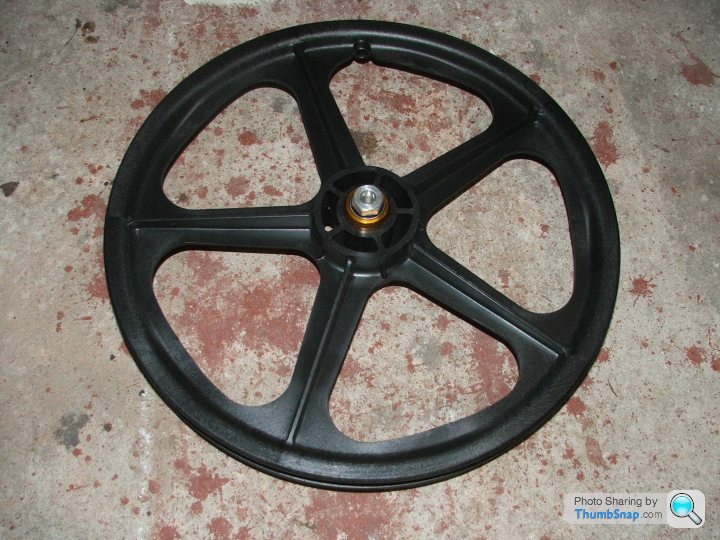
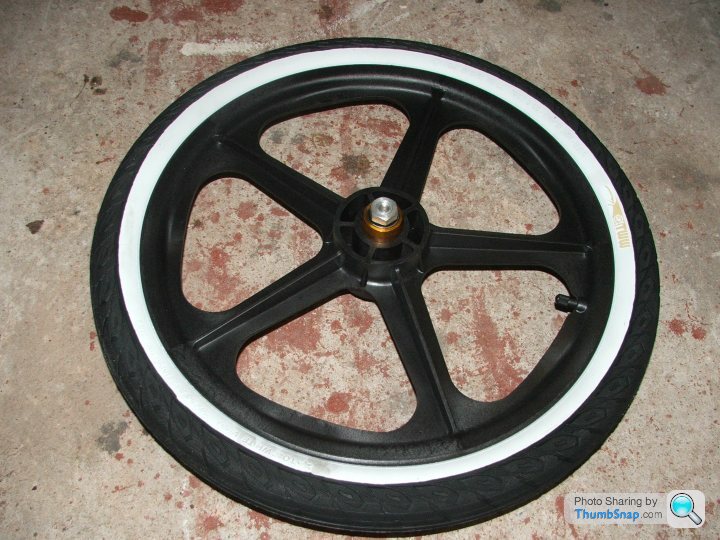
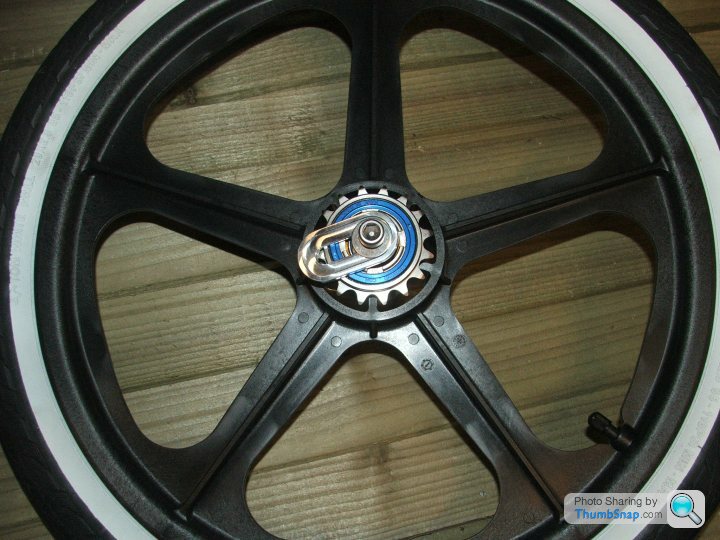
The front wheel was a bit of a nightmare to attach to the bike thanks to the lawyer-lugs on the front drop-outs. The original Tuff IIs I on my original Skyway had grooves in the axle for this purpose. There is no axle on these wheels, just long bolts that screw into the bearings on each side. Still, it looks effin' ace:

That's a Redline seatpost and a modern Odyssey seatpost clamp which I had to modify with a vice to get it to fit. First time I did it up, the nut spun in the cutouts. I managed to hold the nut still but the cheap bolt threaded. I put an RS-sources nickle-plated bolt and nyloc in there instead which held until I snapped the bolt doing it up. Then I measured the TA frame's seatpost and remembered I had this problem with my original Skyway (funny the level of detail you can remember some 28 years later) and resorted to padding that one with something (forget now). Today I managed to decrease the curve of the clamp a fair bit to the point that it fitted snugly.
Hopefully the replacement cranks will turn up tomorrow, so I can at least ride it up and down the road, even if I can't use it properly (grips next week and calipers in May sometime).

Gassing Station | Pedal Powered | Top of Page | What's New | My Stuff