Unusual job on the bench today
Discussion


Agrilla said:
Fantastic work! I really liked the engagement ring/ wedding band/opal & emerald eternity ring and I bet your customer was pleased as punch!
I've only ever had one ring made, to a design drawn out onto the back of an envelope. It worked out better value than off the peg retail, and the result was superb - I'd have loved to have seen photos of the process.
I shall have to just live vicariously through this thread instead! Thankyou so much for posting - it really is interesting, especially for a paper-pushing desk waller like me.
Many thanks for the kind words. I'm glad its appreciated and you all seem to be enjoying it. I've only ever had one ring made, to a design drawn out onto the back of an envelope. It worked out better value than off the peg retail, and the result was superb - I'd have loved to have seen photos of the process.
I shall have to just live vicariously through this thread instead! Thankyou so much for posting - it really is interesting, especially for a paper-pushing desk waller like me.
Oddly its not a job i hugely enjoy (well, i enjoy having happy smiling customers) but seem to be half decent at it. Given its one of those jobs not everyone has an aptitude for i feet the need to keep at it and as a result seem to be making a decent business of it. The updates will continue so keep your eyes peeled.
MrBig said:
The experience of designing and following the process was great fun too. We went with palladium for the last piece (my wife's eternity ring) which saved us a few quid over platinum and allowed us a bigger budget for the diamonds she wanted. She designed it to fit perfectly against her existing rings.
Hi there. Out of interest who advised you to go with palladium? I don't want to dampen the experience but it's a metal we work hard to avoid because of its fragile nature. Cannot be rhodium plated, it's easily cracked after exposure to heat and bends very easily. Be sure your wife is easy going on it.Sorry for another long delay between posts. The ongoing chemo has whacked me fairly hard the past couple of sessions so I've been doing the easy stuff such as sizing's and refurbs to keep myself busy and letting Joe (father in-law and my teacher) do the bigger jobs. You'd be amazed what these nasty chemicals do to your hands (well, whole body really).
Anyway, after only an hours sleep on Thursday night I did manage to get a decent job out of the way on Friday. One of my favorite ladies had come in last November with her daughter to ask if we could make a pair of earrings to match a ring she had. She's had loads of stuff done with us in the past and with her daughters wedding anniversary looming at the beginning of February I had an obligation to get myself up and on the case.
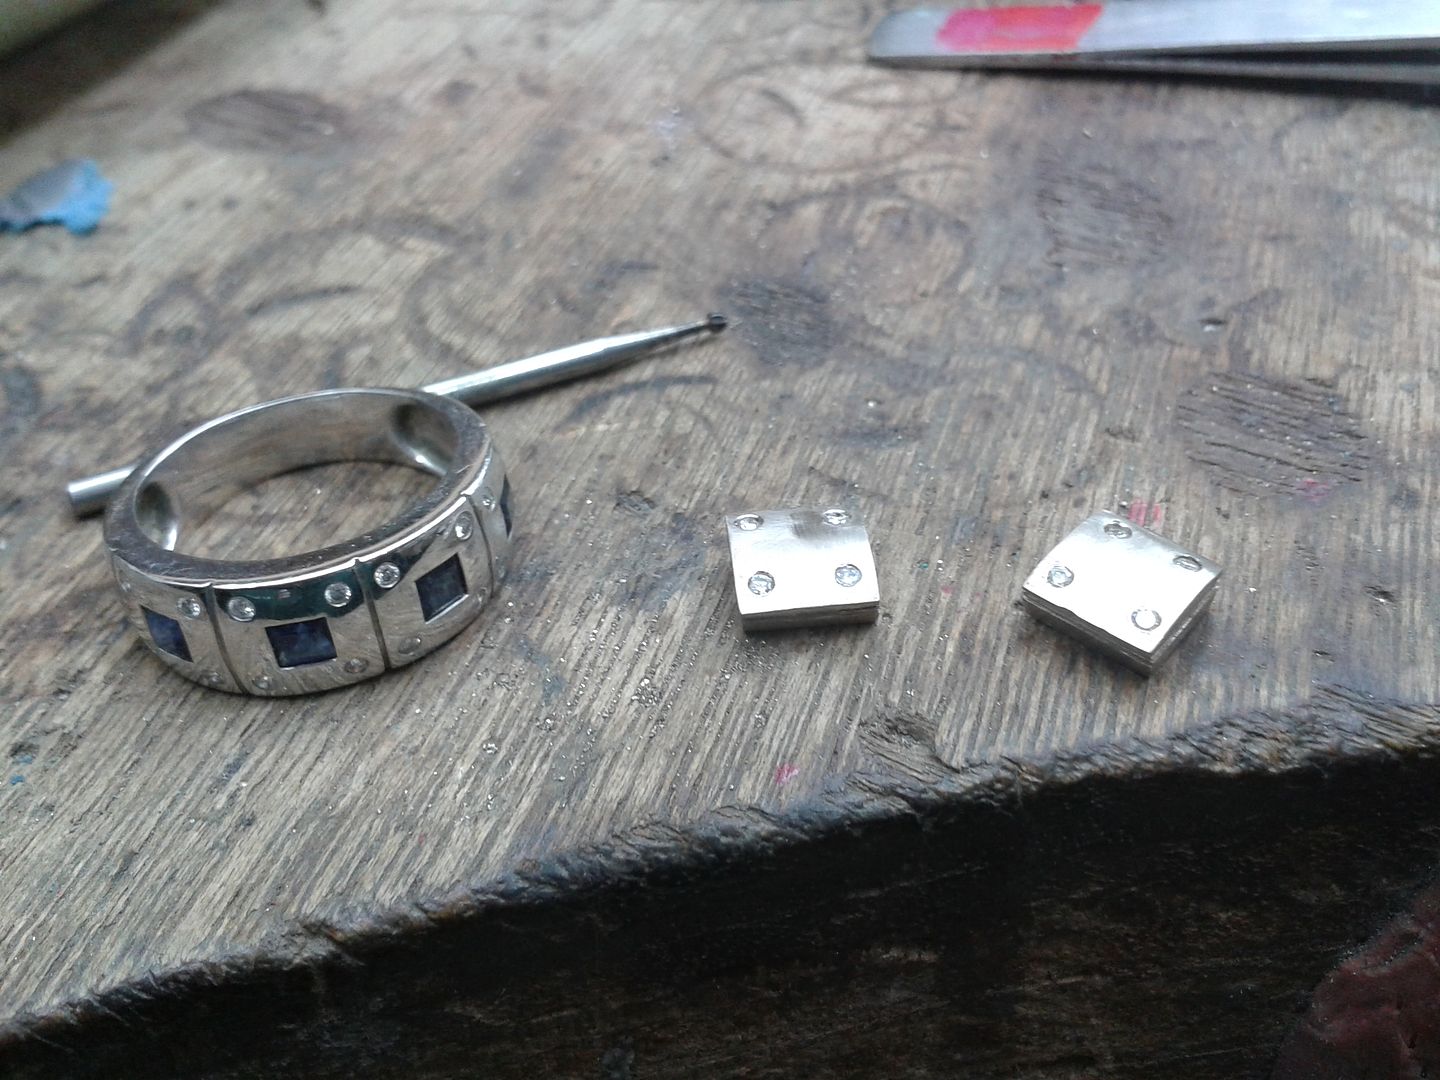
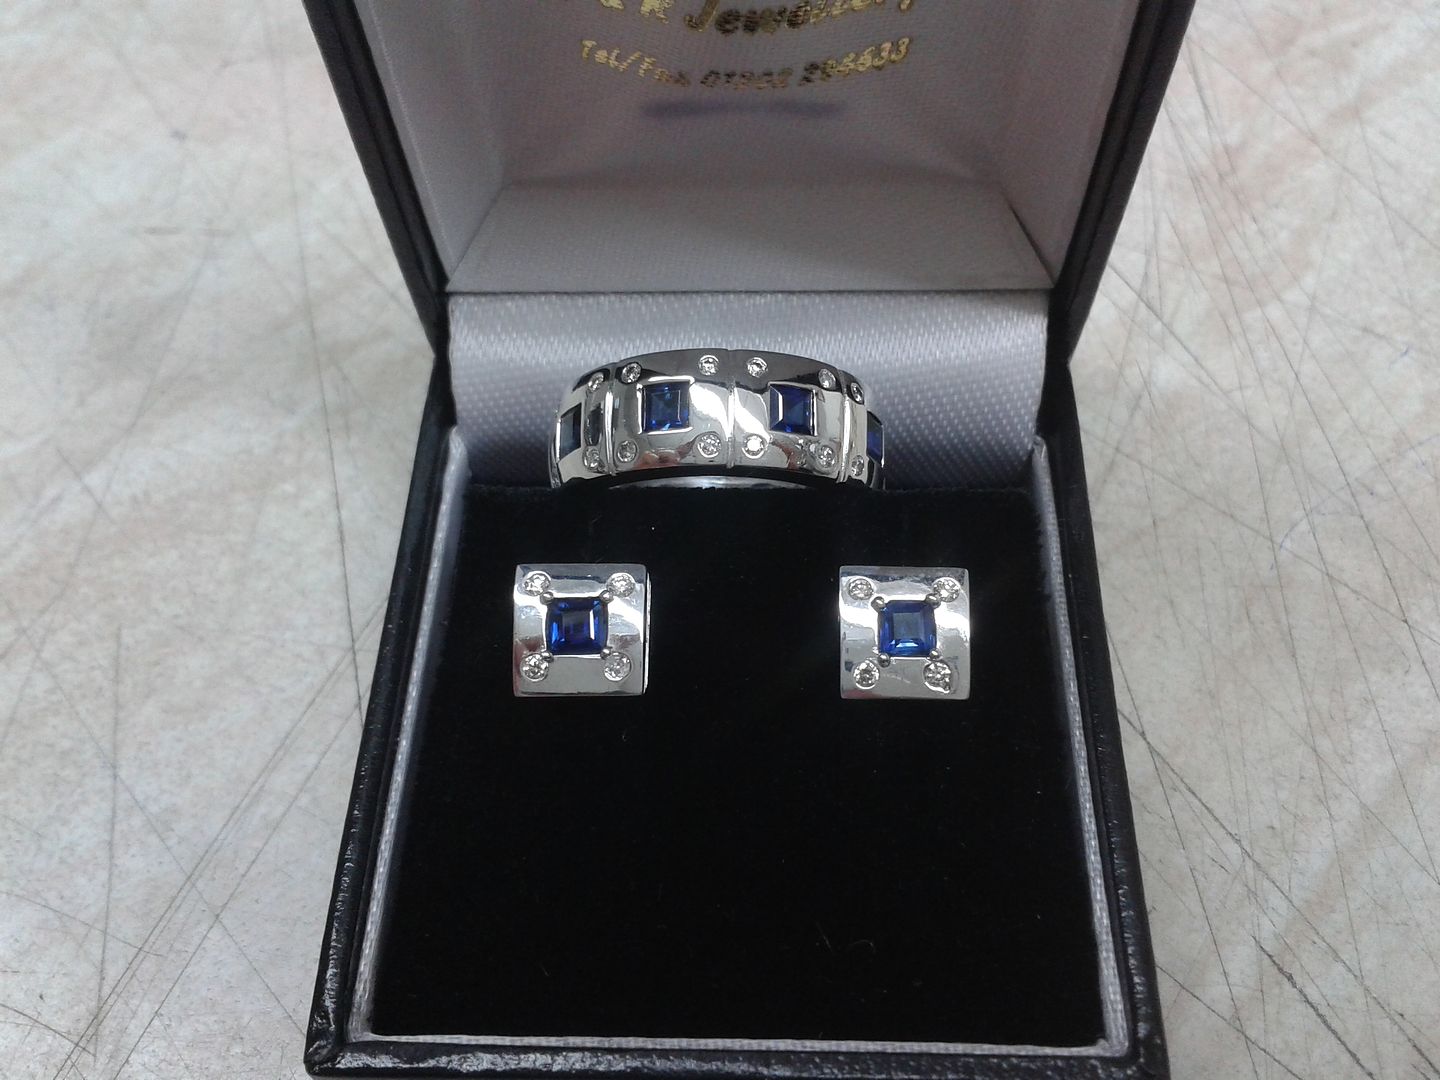
Here is the ring in question: 18ct white gold set with sapphires and diamonds.
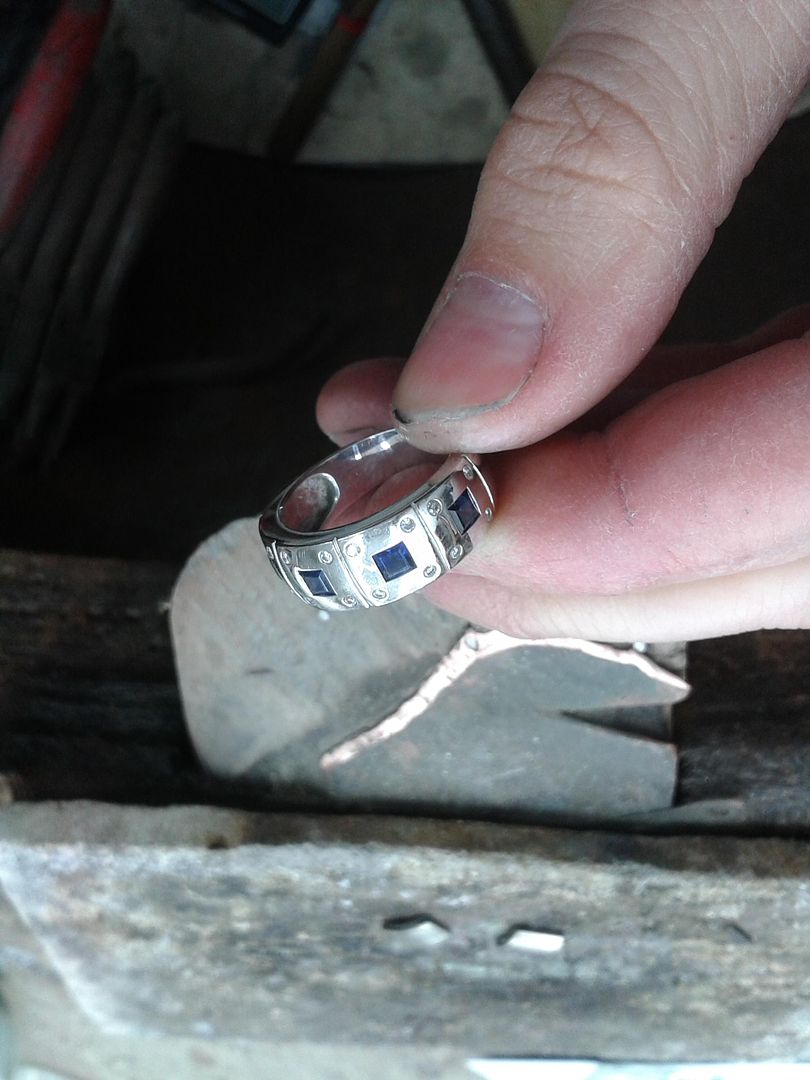
The plan was to make a pair of earrings to match a section of the ring.
So, we start with a 6mm x 6mm bar of 18ct white gold fresh from the dealer. 6mm x 6mm is a good size as it means we can roll it down as we need it and dont have to stock different gauges.
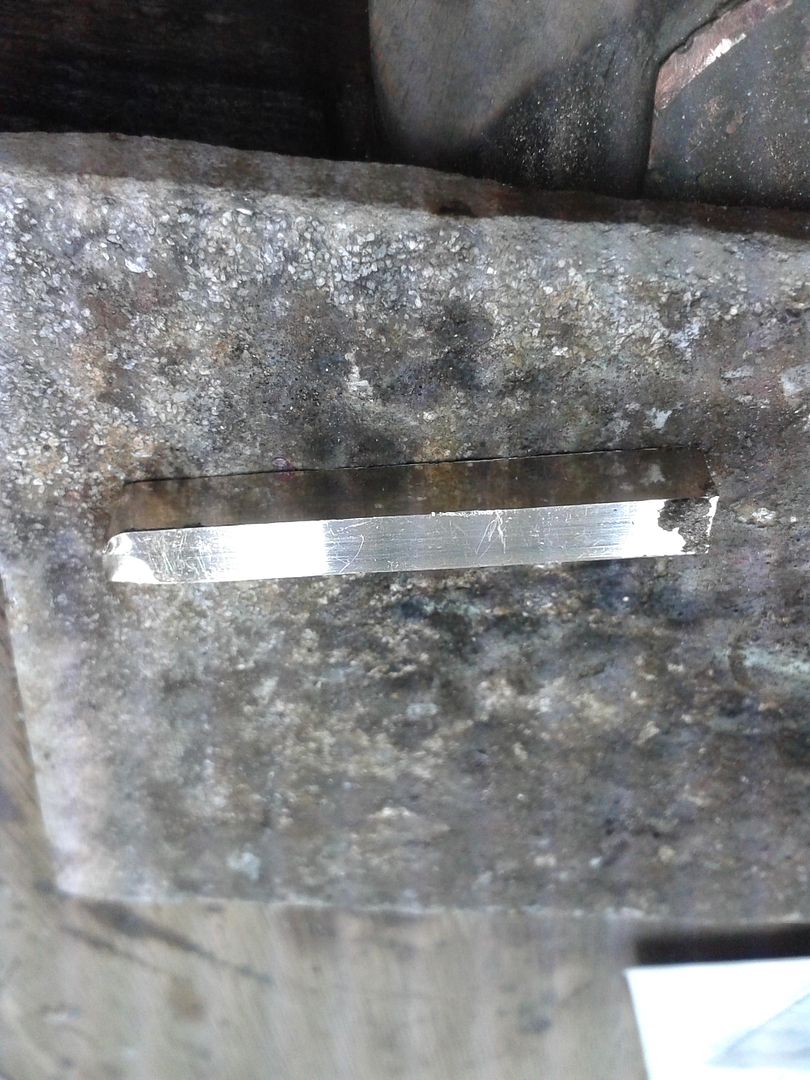
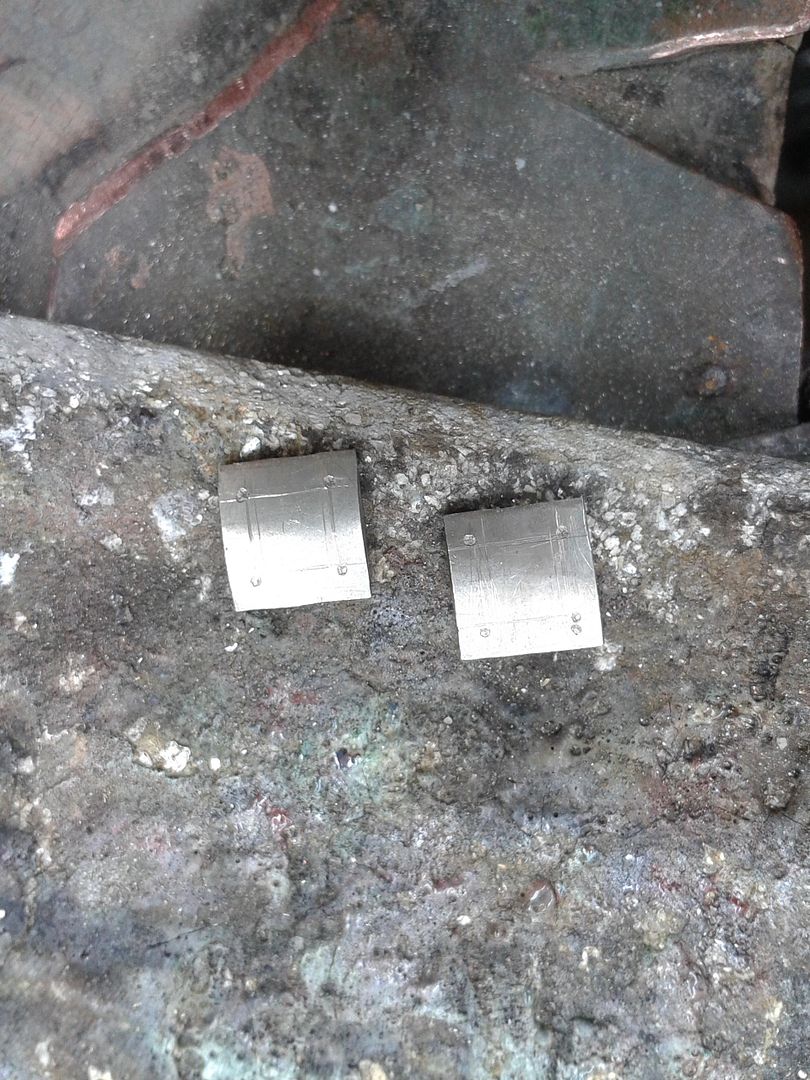
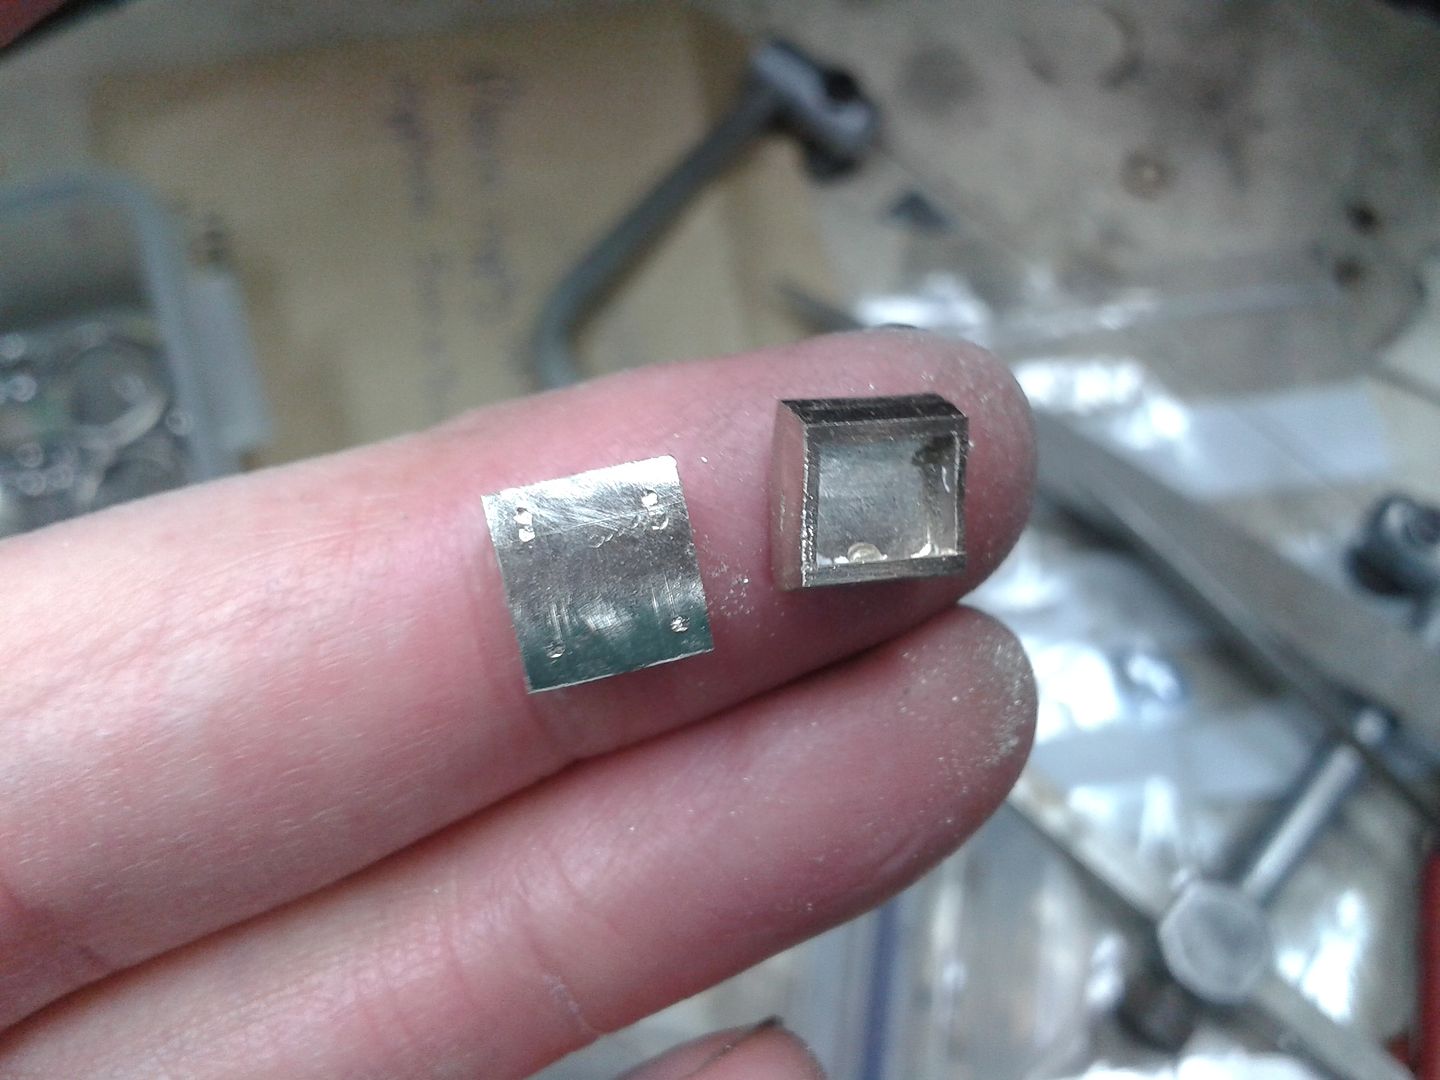
A piece is cut from the bar and rolled to produce enough for 2 x 8mm sqaures, just over 1.5mm thick. It has to be thick enough to allow stone setting. Note ive scribed the rough locations for the stones.
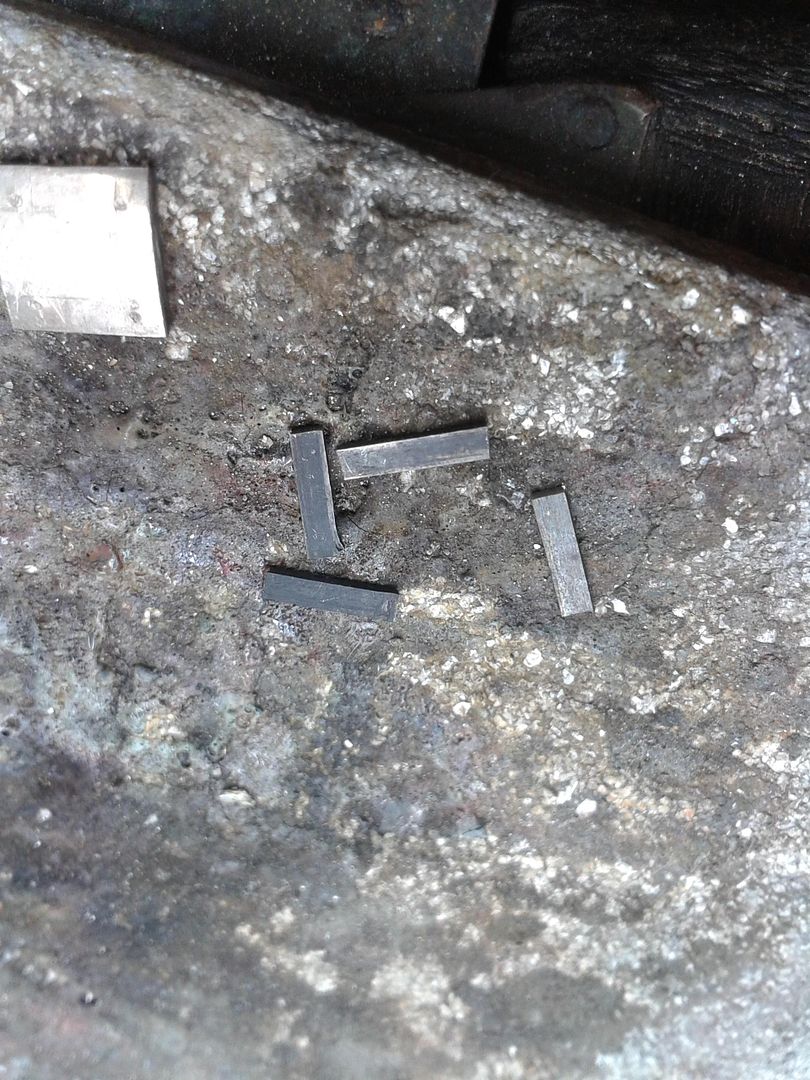
Next I rolled down a bit more gold to produce a 3mm wide strip about 0.75mm thick. This will be used to form the frame for the back of the earrings:
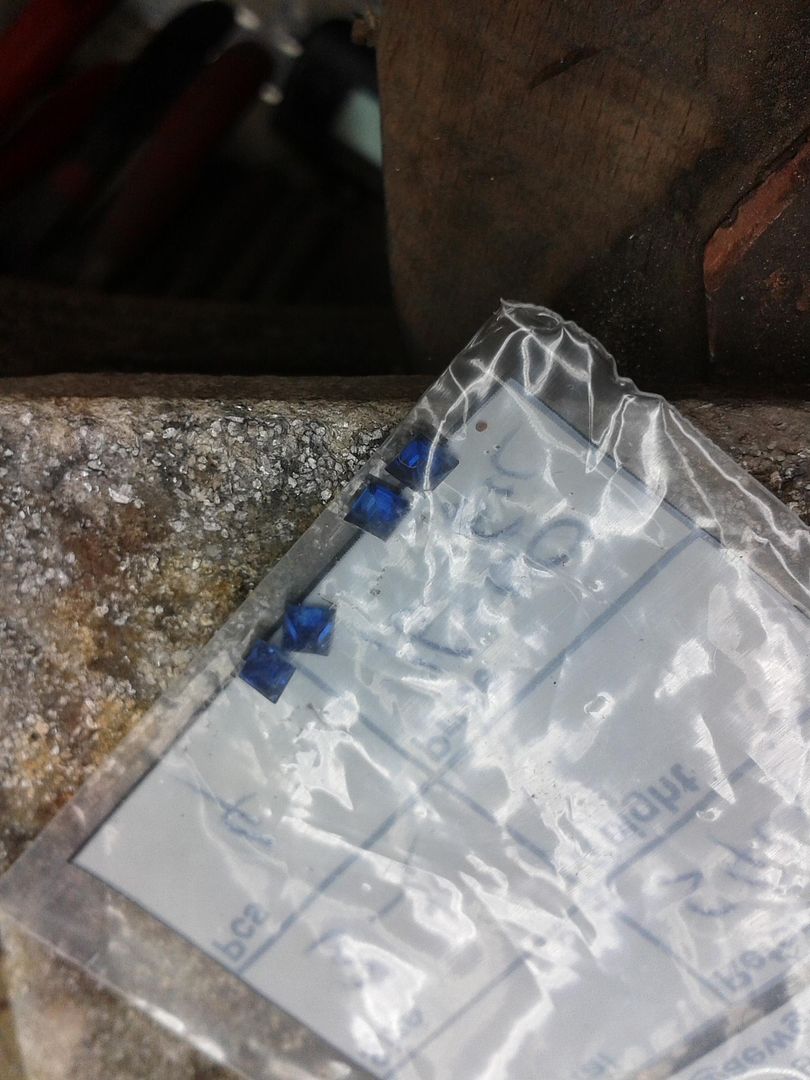
Some sapphires from the supplier:
The strips are soldered to the underside of the plates. Flat ones first:
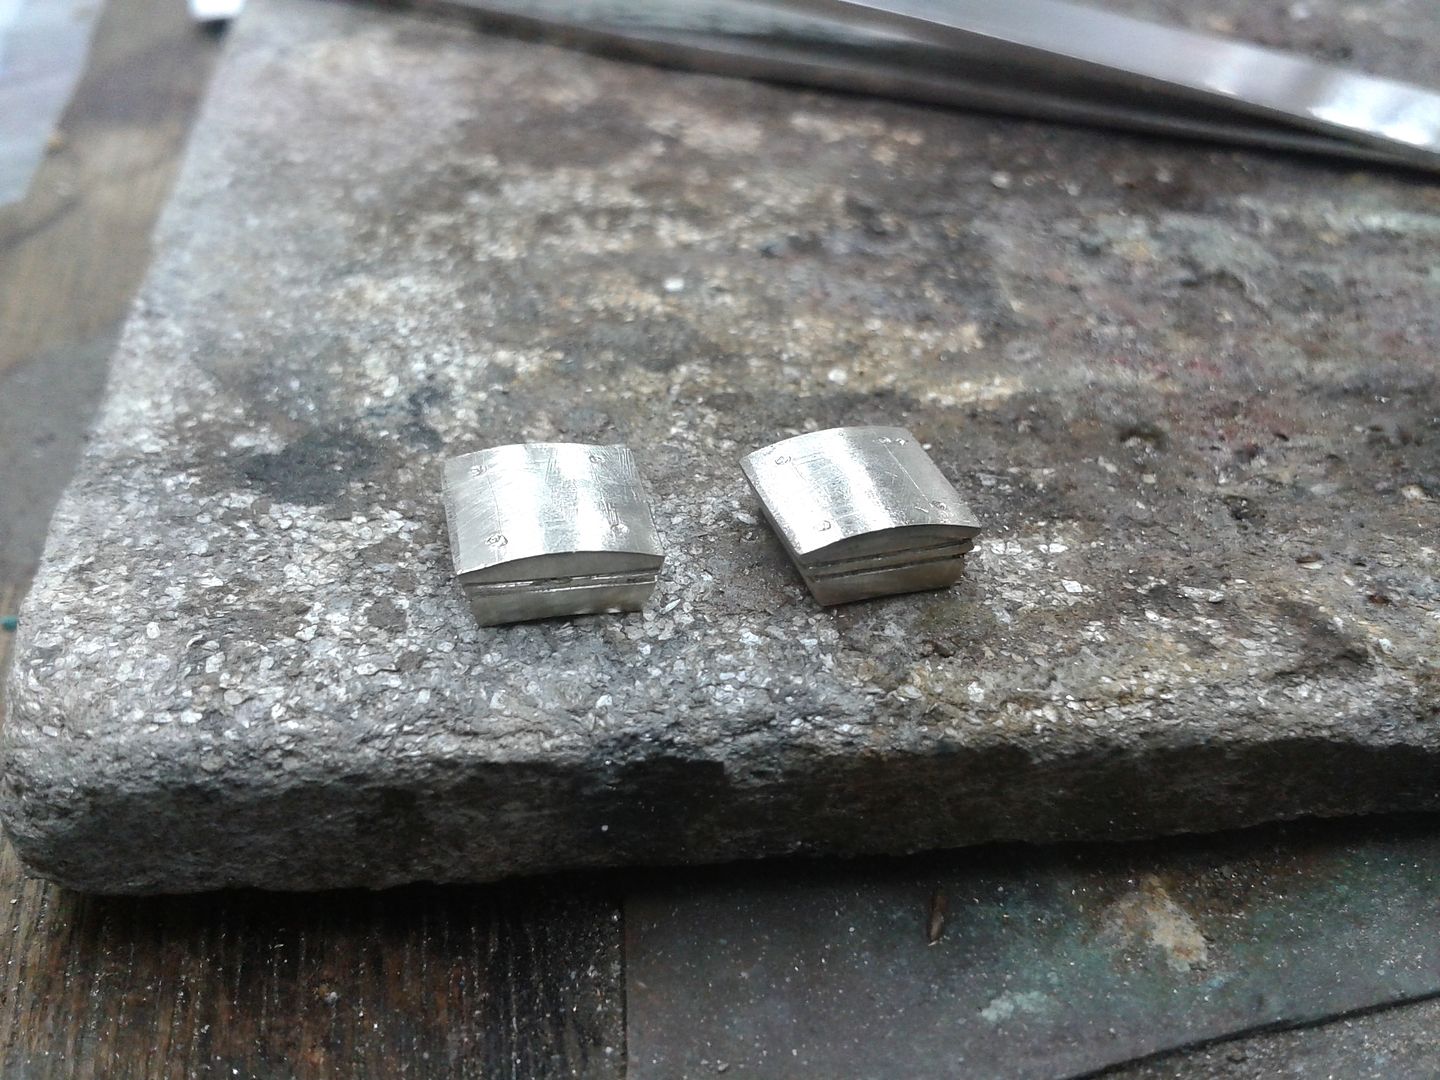
Then the curved ones, which once cleaned show the box frame complete.

I grooved the sides of the earrings to give a little decoration. It also helps to hide any solder lines when polishing:
First the diamonds are set. Usual technique of drilling a tapered hole and then pressing the edges of the setting over the edge of the stones making them neat and secure:
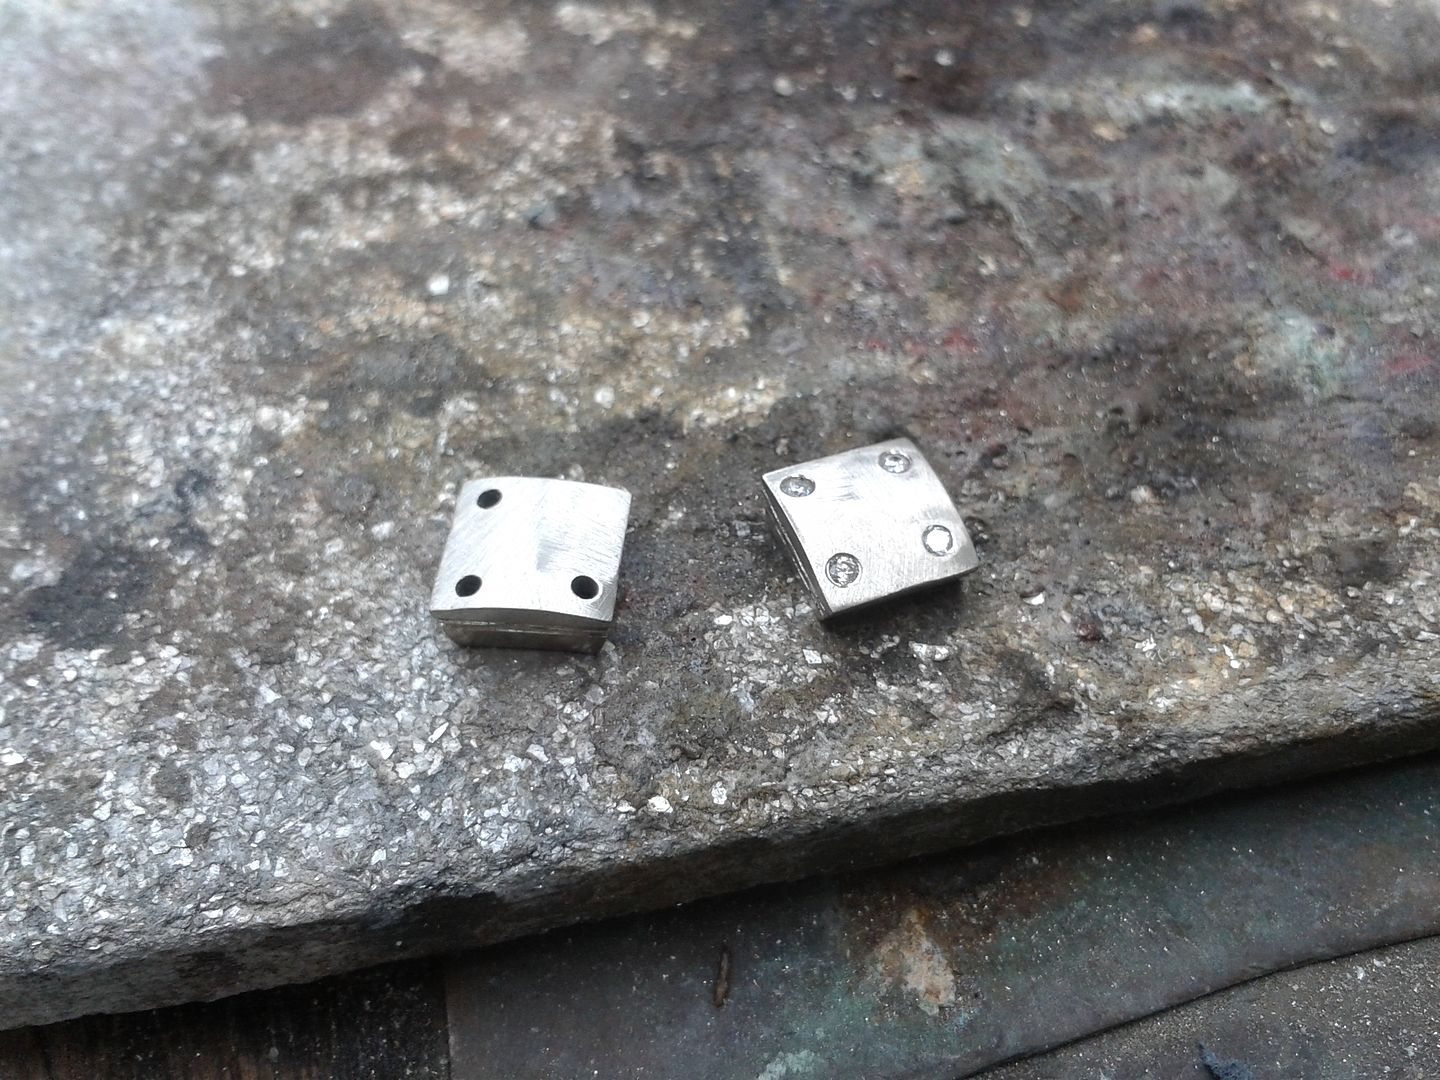
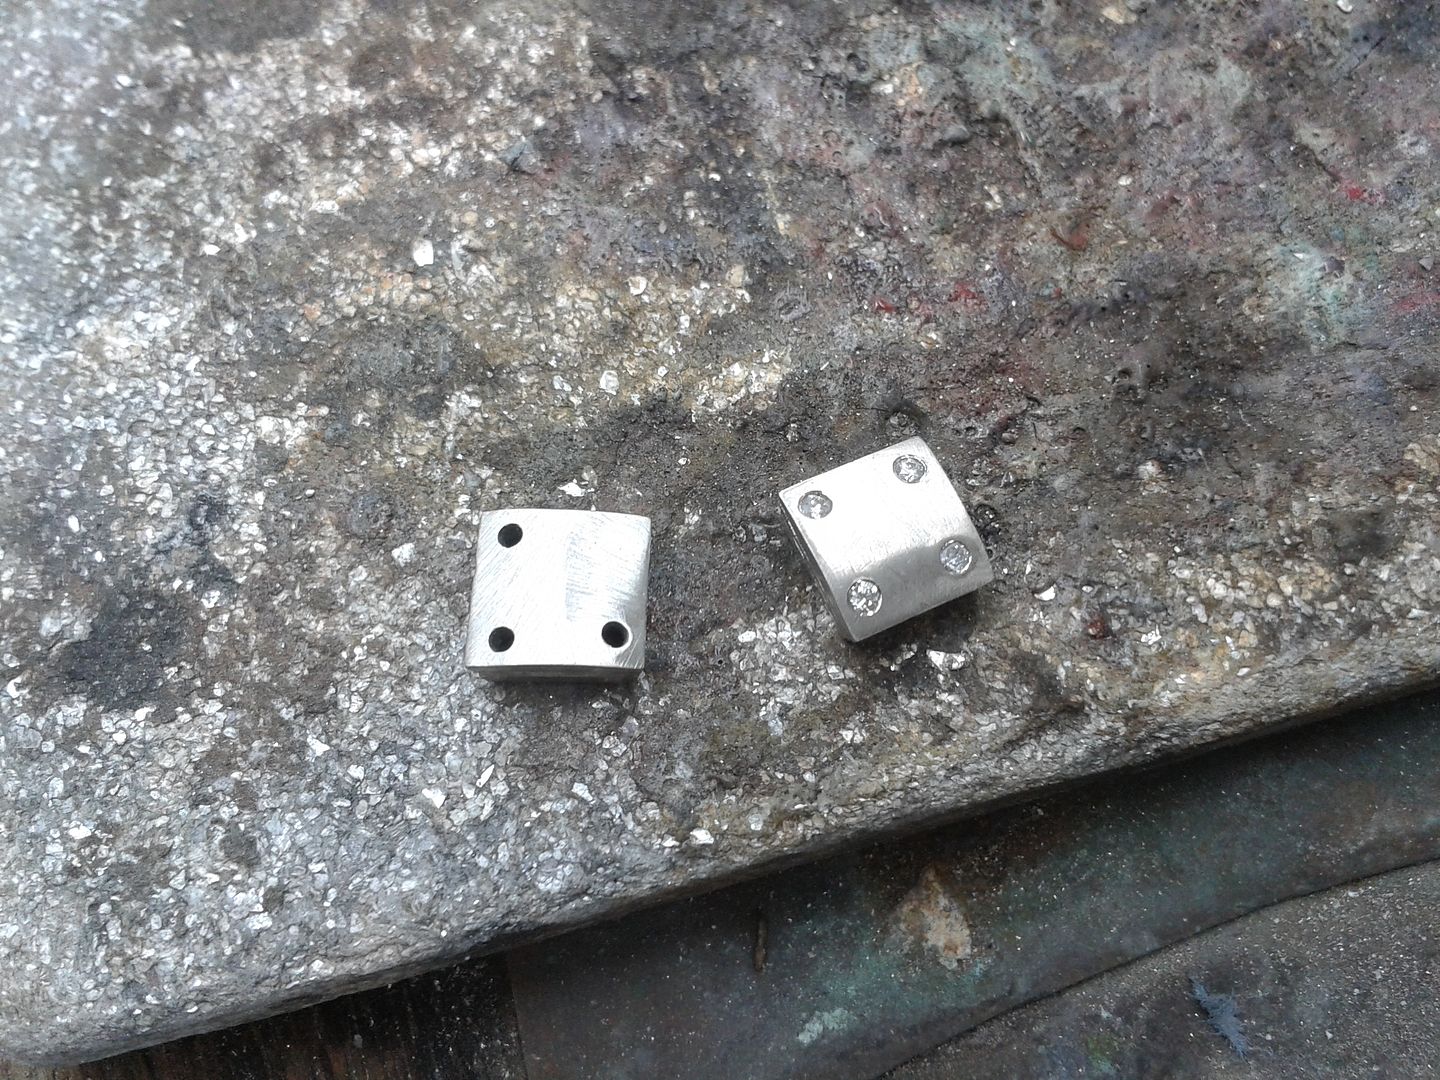
All diamonds set and a comparison to the ring:
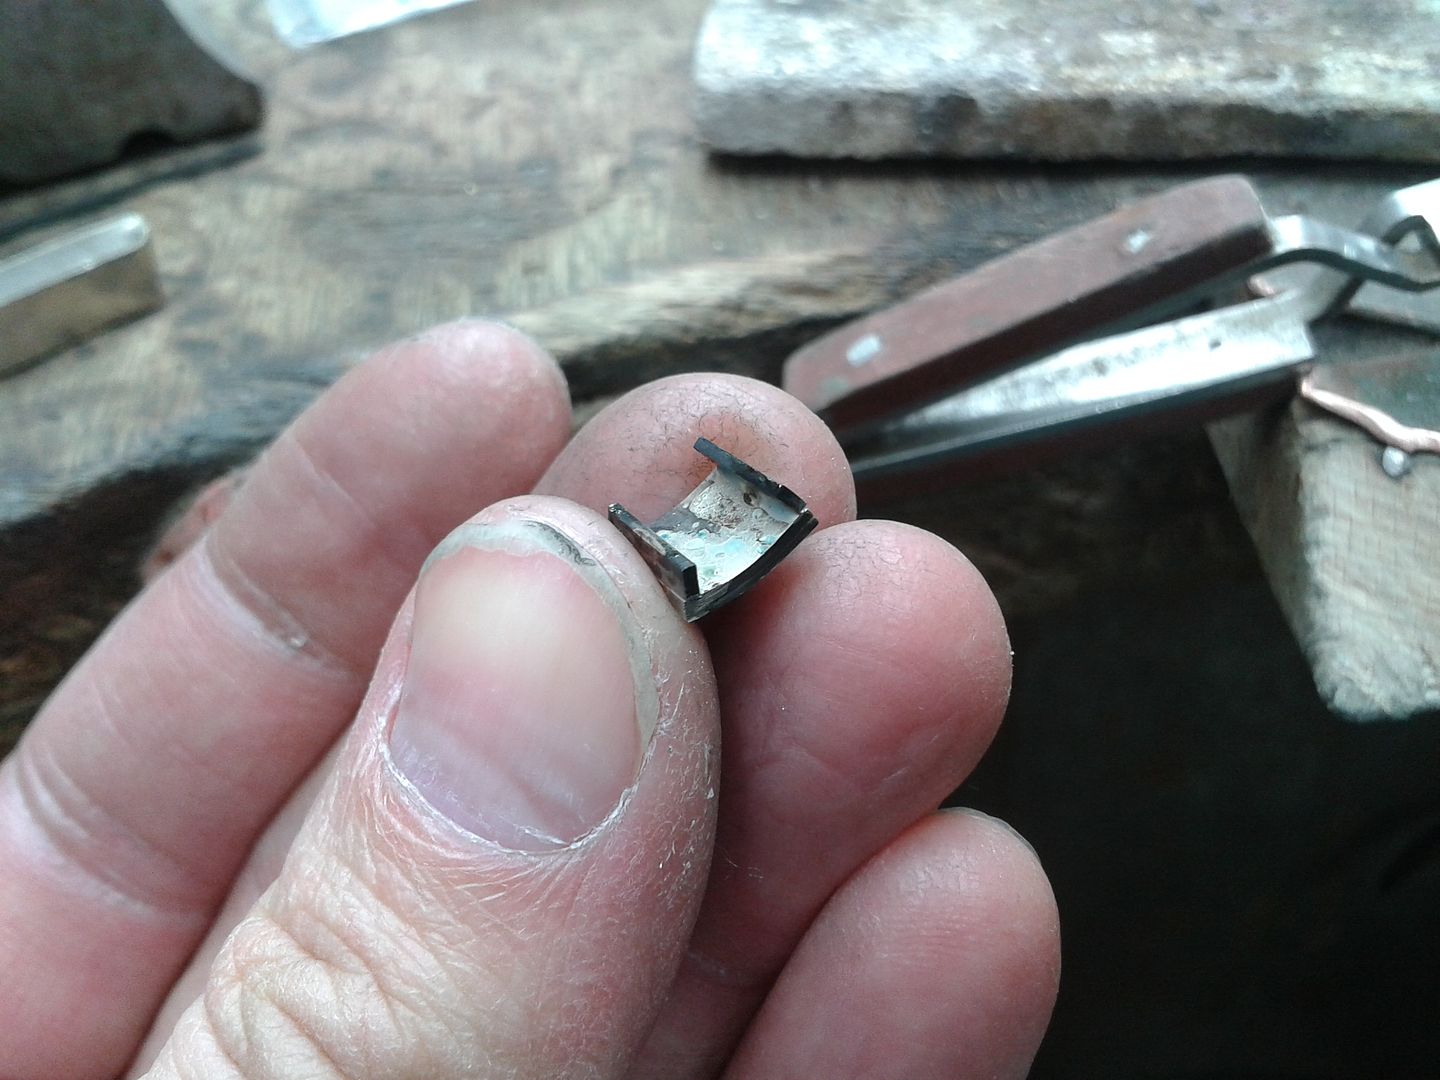
The next job is to set the sapphires. A simple square is cut from the centre of the plate and the inner edges angled to allow the stone to sit snug up against it. Because the sapphires are square its very risky to try to hand set them by pressing the edges of the setting over the stone. In my experience the corners of princess cut and square cut stones are very weak and can easily fracture if too much pressure is applied by the tools, so we opted to grain set at the corners. This is simply soldering tiny balls of gold over the corners of the stone, securing the stone in place. Sapphires can take a lot of heat so there is far less risk with this method. Another advantage in this method is that the stones can be easily unset should the earrings need maintenance or the customer fancy a colour change. The sapphires in the ring are machine set which allows for much more accurate application of pressure around the stone.
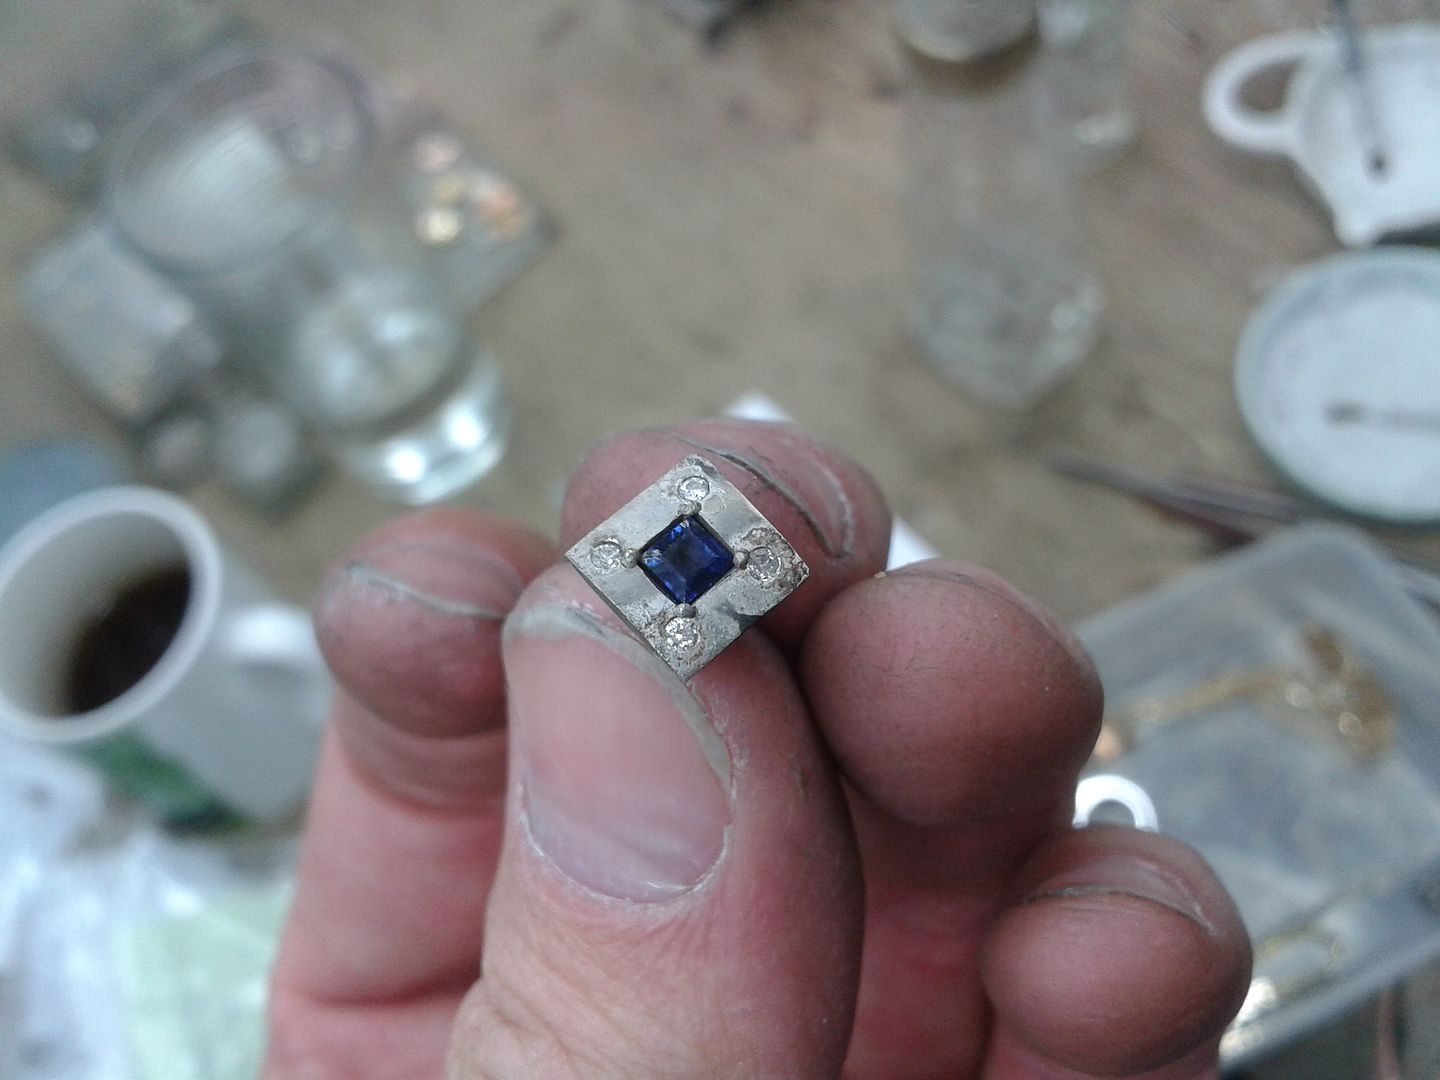
And job done. Polished up, post and butterflies fitted and then rhodium plated:
More soon,
Eddie
Anyway, after only an hours sleep on Thursday night I did manage to get a decent job out of the way on Friday. One of my favorite ladies had come in last November with her daughter to ask if we could make a pair of earrings to match a ring she had. She's had loads of stuff done with us in the past and with her daughters wedding anniversary looming at the beginning of February I had an obligation to get myself up and on the case.
Here is the ring in question: 18ct white gold set with sapphires and diamonds.

The plan was to make a pair of earrings to match a section of the ring.
So, we start with a 6mm x 6mm bar of 18ct white gold fresh from the dealer. 6mm x 6mm is a good size as it means we can roll it down as we need it and dont have to stock different gauges.

A piece is cut from the bar and rolled to produce enough for 2 x 8mm sqaures, just over 1.5mm thick. It has to be thick enough to allow stone setting. Note ive scribed the rough locations for the stones.

Next I rolled down a bit more gold to produce a 3mm wide strip about 0.75mm thick. This will be used to form the frame for the back of the earrings:

Some sapphires from the supplier:

The strips are soldered to the underside of the plates. Flat ones first:

Then the curved ones, which once cleaned show the box frame complete.


I grooved the sides of the earrings to give a little decoration. It also helps to hide any solder lines when polishing:

First the diamonds are set. Usual technique of drilling a tapered hole and then pressing the edges of the setting over the edge of the stones making them neat and secure:


All diamonds set and a comparison to the ring:

The next job is to set the sapphires. A simple square is cut from the centre of the plate and the inner edges angled to allow the stone to sit snug up against it. Because the sapphires are square its very risky to try to hand set them by pressing the edges of the setting over the stone. In my experience the corners of princess cut and square cut stones are very weak and can easily fracture if too much pressure is applied by the tools, so we opted to grain set at the corners. This is simply soldering tiny balls of gold over the corners of the stone, securing the stone in place. Sapphires can take a lot of heat so there is far less risk with this method. Another advantage in this method is that the stones can be easily unset should the earrings need maintenance or the customer fancy a colour change. The sapphires in the ring are machine set which allows for much more accurate application of pressure around the stone.

And job done. Polished up, post and butterflies fitted and then rhodium plated:

More soon,
Eddie
Edited by ecain63 on Tuesday 28th January 19:50
Voldemort said:
Fascinating to read, as ever.
Good luck with the treatment: you can see the rings in your nails! I remember mine well (15 years ago now: never give in, never surrender. f k cancer).
Thanks mate, that's the plan. Finished my 4th (supposed to be my last) chemo session last week and was planning on being in for surgery in a months time once my body had recovered enough to cope. However, the surgeons have booked me in for 2 more rounds of treatment as the chemo is still working really well. The drugs seem to be doing the trick and its good news despite the hardship. What cancer and drugs did you have?Good luck with the treatment: you can see the rings in your nails! I remember mine well (15 years ago now: never give in, never surrender. f
k cancer). Talking of nails: I have a ridge in mine for every chemo treatment I've had. And also a toenail less for each round too. Fun and games!

Dibble said:
What happens to the "bits" of filed off gold? Are they recovered and reused?
Yup, very little is wasted. Filings are gathered up and remelted. Polishings, hooverings and any associated buffing materials are all refined to extract the metals. 2013 saw us reclaim over £13000 in metal extracted from the workshop floors, worktops and filters. You don't throw anything away. Ok, update time again. Today we have a ring to make from scratch.
So, the customer has a 10ct diamond (yes folks, a 10ct diamond), some 2.75mm diamonds and some 18ct white gold scrap. She wants a flower cluster made in an old fashioned style.
Firstly the gold is rolled into a plate and then a 12mm disc is cut from the centre. The diamond is 15mm across so a 1.5mm overlap gives room to hide claws etc. Then a 3.75mm circle is scribed around the outside of the 12mm one. Hey presto!

With the 'halo' shaped plate 12 x spots are marked with a centre-punch to show where the 2.75mm diamonds will sit.

The halo is then domed to give a the head a nice angle.

Take some 1mm square wire made from the off cuts of the plate and make a circle with an inside diameter of 11mm. This is going to form the centre of the setting and ring.

Solder it in place. You can see that it overlaps the inside edge of the halo by 0.5mm.


Pilot holes are drilled where the diamonds will be set.

Just checking the spacing.

2.6mm holes drilled full depth. 2.75mm holes will be drilled half depth.

To shape the halo setting notches are cut between each stone.

With a triangle file the setting starts to take shape. Its fairly rough at this point and will be tidied up later.

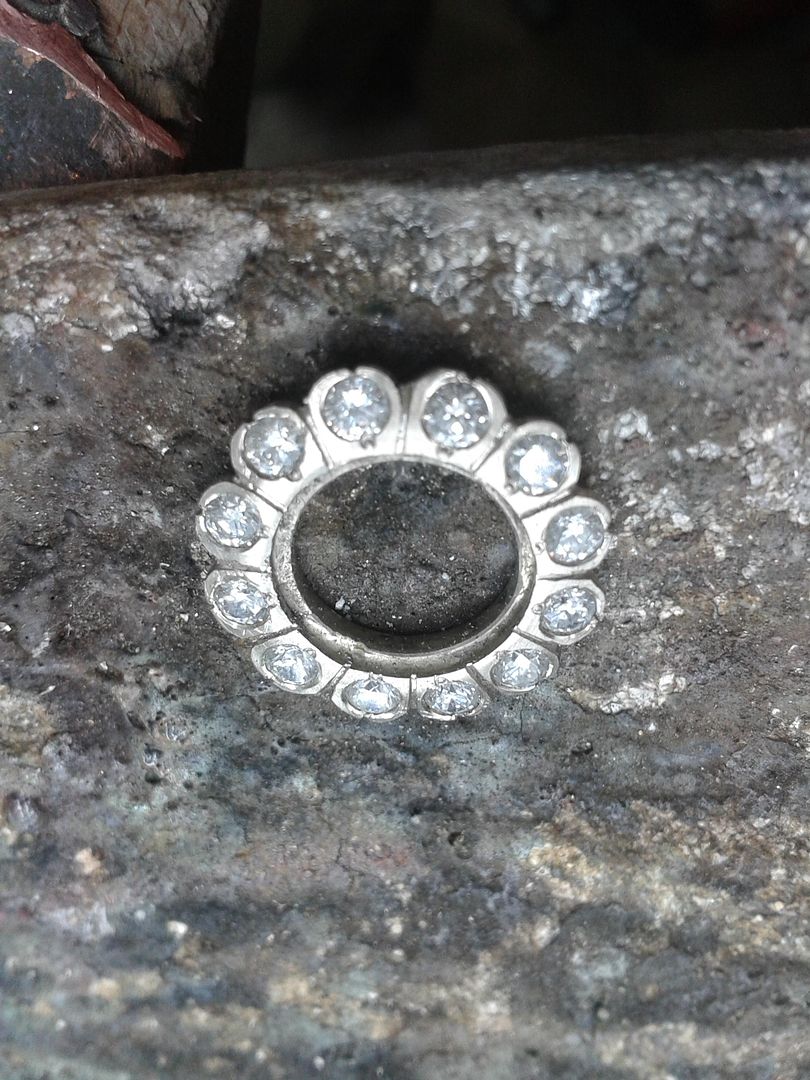
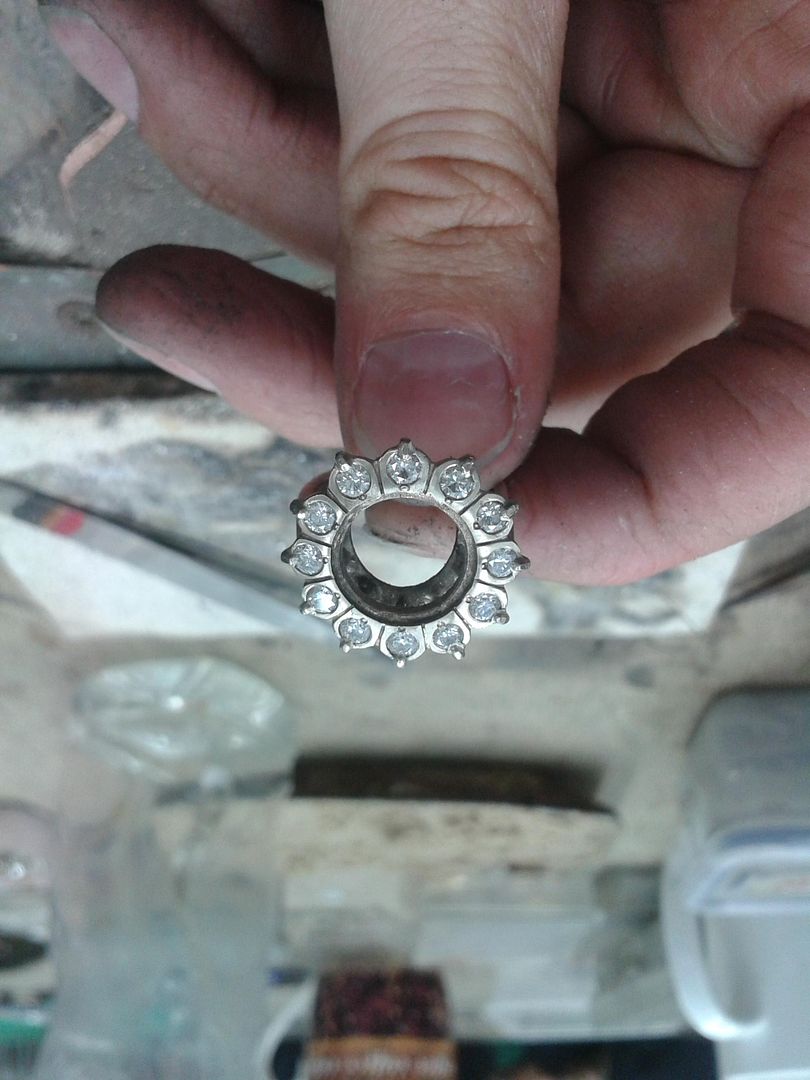
Set the outer stones. Stones are rubover set with an additional 'grain' on the inner edge for security.

With the stones now set the halo can now start to be tidied up. Grooves are cut between the stones for decoration. When polished, the edges of the grooves will add facets to the setting showing more sparkle.


On the ends of each setting a small notch is cut. This is where we will start to construct the under-setting.
12 wires from 12 stones. Wire drawn down from the 1mm wire made earlier.

Borax is applied to the top and bottom of the setting. This will protect the diamonds from direct heat.

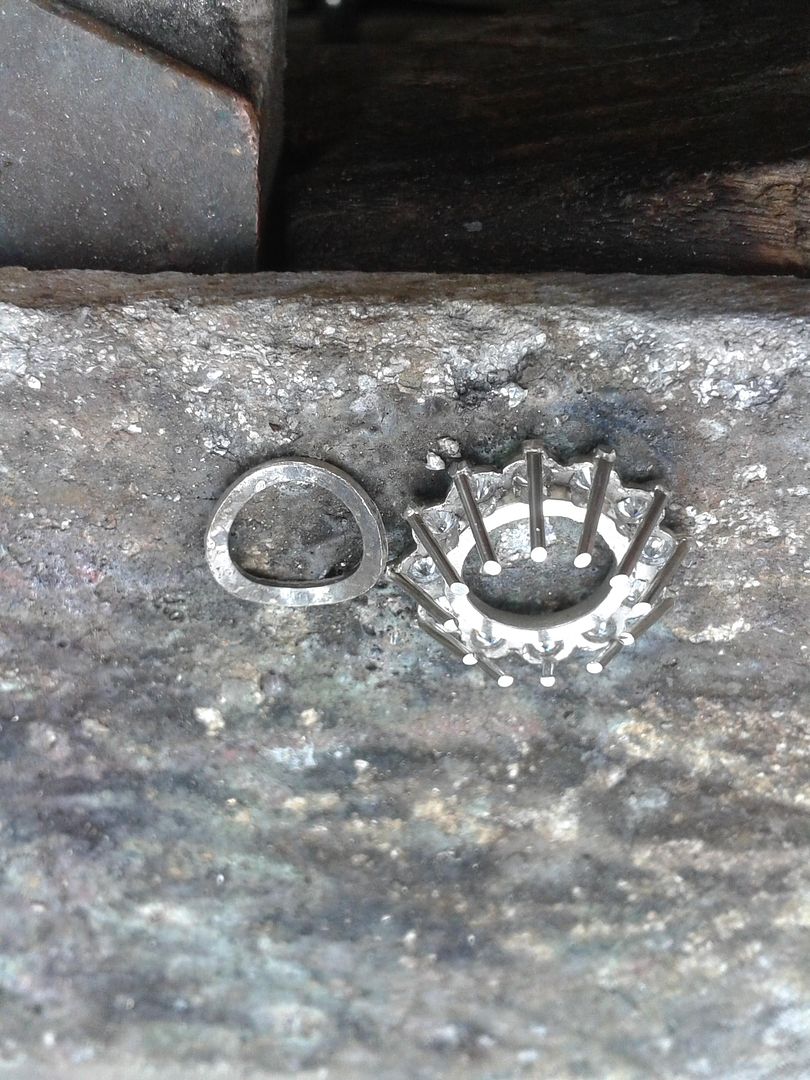
Soldered into each notch we add the wires.

Until all 12 are in place. They will be tidied up and shortened further down the line.


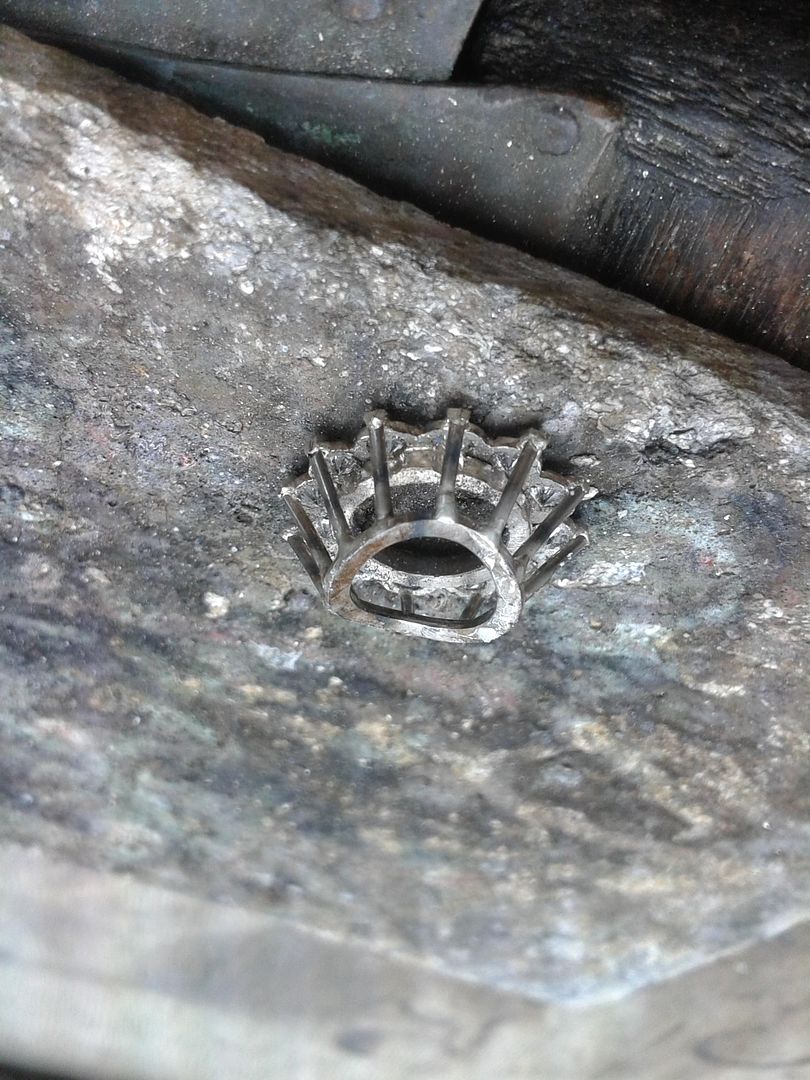
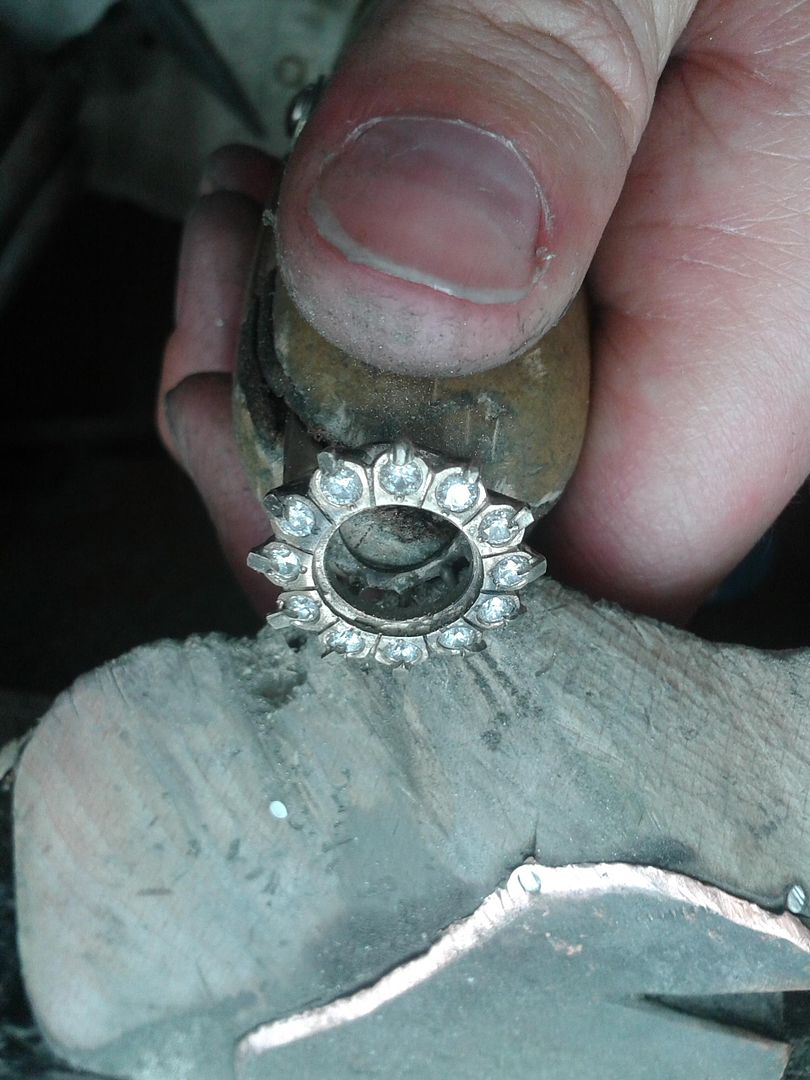
Next we apply some decorative claws over the ends of the settings. This only really served to add decor and a bit of protection for the stones. Again these will be trimmed and shaped when further along the project.

Under wires roughly trimmed and borax removed.


.......And the rest to follow tomorrow as i had to go out and pick up my new watch this avo.
Eddie
So, the customer has a 10ct diamond (yes folks, a 10ct diamond), some 2.75mm diamonds and some 18ct white gold scrap. She wants a flower cluster made in an old fashioned style.
Firstly the gold is rolled into a plate and then a 12mm disc is cut from the centre. The diamond is 15mm across so a 1.5mm overlap gives room to hide claws etc. Then a 3.75mm circle is scribed around the outside of the 12mm one. Hey presto!

With the 'halo' shaped plate 12 x spots are marked with a centre-punch to show where the 2.75mm diamonds will sit.

The halo is then domed to give a the head a nice angle.

Take some 1mm square wire made from the off cuts of the plate and make a circle with an inside diameter of 11mm. This is going to form the centre of the setting and ring.

Solder it in place. You can see that it overlaps the inside edge of the halo by 0.5mm.


Pilot holes are drilled where the diamonds will be set.

Just checking the spacing.

2.6mm holes drilled full depth. 2.75mm holes will be drilled half depth.

To shape the halo setting notches are cut between each stone.

With a triangle file the setting starts to take shape. Its fairly rough at this point and will be tidied up later.

Set the outer stones. Stones are rubover set with an additional 'grain' on the inner edge for security.

With the stones now set the halo can now start to be tidied up. Grooves are cut between the stones for decoration. When polished, the edges of the grooves will add facets to the setting showing more sparkle.


On the ends of each setting a small notch is cut. This is where we will start to construct the under-setting.

12 wires from 12 stones. Wire drawn down from the 1mm wire made earlier.

Borax is applied to the top and bottom of the setting. This will protect the diamonds from direct heat.

Soldered into each notch we add the wires.

Until all 12 are in place. They will be tidied up and shortened further down the line.


Next we apply some decorative claws over the ends of the settings. This only really served to add decor and a bit of protection for the stones. Again these will be trimmed and shaped when further along the project.

Under wires roughly trimmed and borax removed.


.......And the rest to follow tomorrow as i had to go out and pick up my new watch this avo.
Eddie
michael gould said:
Sweet Jesus that is one big rock.....is there a story behind it ?
Not sure, but it is unusual for a small indy like me to get such an item through the door. I get 4ct and 5ct stones all the time but nothing quite this big. Can't be many about. Ive declined to keep it at work for obvious reasons and it'll only be with me whilst i set it into the ring. As for its history i can only imagine that the ring is a long standing family asset. Why its not in the bank i don't know but im proud and privileged to be working on its new housing. speed_monkey said:
Amazing work old bean..... May need to hit you up about something special soonish (if you don't mind?)
I'll be popping the question to Miss Monkey and I can't find anywhere the style of ring she likes..... Other than cheap garbage
Of course squire. I can just as easily create some cheap garbage if it makes things easier for you and yours. B&Q do some lovely copper items.I'll be popping the question to Miss Monkey and I can't find anywhere the style of ring she likes..... Other than cheap garbage
Just let me know what you need and ill see what i can do.

speed_monkey said:
What I want to know is how you went from playing in rubber dinghies to making beautiful things?!
PM sent
Had a really busy tour of Afghan in 2006 / 2007 where it was only a matter of time before I got seriously injured or more probably killed. Look up the conflicts in Garmsir around that time. With that the missus became less impressed by being a bootneck WAG / probable widow. The father in law offered me a job outside and I reluctantly accepted. A few years of being the apprentice and now im running the place for myself and all is looking good. Civvies still suck though.PM sent
michael gould said:
Do you know anything about colour or clarity ? Is it brilliant or old cut ?
10c can only be described as vulgar
As yet I know little of the stone other than it exists. I cannot imagine it being an amazing quality stone but even if its poor the fact it's 10ct will hold weight with the public. I agree that its too big to look real and will probably even look daft. 3ct is about the limit of what looks good on a finger I reckon. I'll post pics when it's in obviously. 10c can only be described as vulgar
NeMiSiS said:
ecain63 said:
PHOTO 1
PHOTO 2
1. This would worry me a bit, all that work to get it to the stage in photo 1, then a load more work until photo 2, then it looks like you've ruined it. PHOTO 2

2. Do you ever/seldom/often have to start again ?
3. When working with precious metals and stones why do you work on a piece of rough stone ?
Looking forward to the next bit.

Be 'clever' with what and when you post, no one needs to know when items are arriving or when you are working on a particular piece. For example the large diamond ring in this post was actually built in March last year, and is now in the owners safe, you have just found time in your busy schedule to arrange the post for your adoring fans....

Enjoy your new watch.
1. Yeah, when i first started i used to buff and polish everything between every step of the build. Its annoying seeing your nice shiny peice of gold blackened and burnt but if you keep cleaning it and polishing it, it will eventually wear thin and need redoing. Im quite anal about keeping it looking new and pristine but you have to bite your lip and hold back in this case.
2. Do i ever? In the case of the ring above its all gone swimmingly but a lot of jobs get started, remelted and then restarted again due to errors (normally a bit too much heat was used and it melted or youve slipped with a file or grinding tool. But that's the beauty of working with these metals. They have a lot of tolerance to being reused, although 9ct white can be a brittle bugger once remelted. The only time you nearly lose the plot is if you mess it up at the end, or when setting the final stone after a 2 day build. Emerald rings seem to by jinxed when retipping claws. You get to the last claw and it'll snap off, meaning that you have to undo all the work and take ALL the emeralds back out as they don't like any form of heat. But otherwise i'd say 95% of jobs go without issue.
3. It's not stone. Its a gauze plate that helps with even heat distribution and absorbs dirt and grime so it doesnt contaminate the metal. You'll see in the following pics that it has a clean side and a dirty side. Clean side for specail occasions and dirty for every day stuff.
......... how do you know i didnt do it weeks ago and am just constructing a story? lol
So yesterday we had pretty much finished the head of the ring. Today we.............
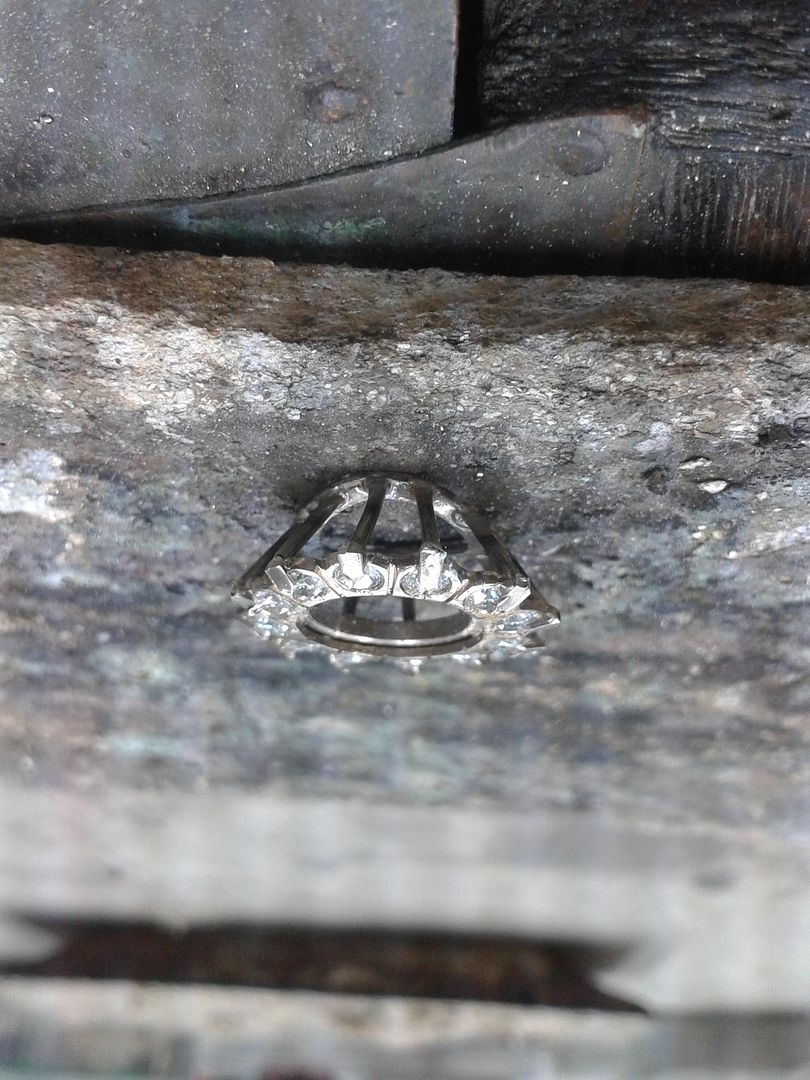
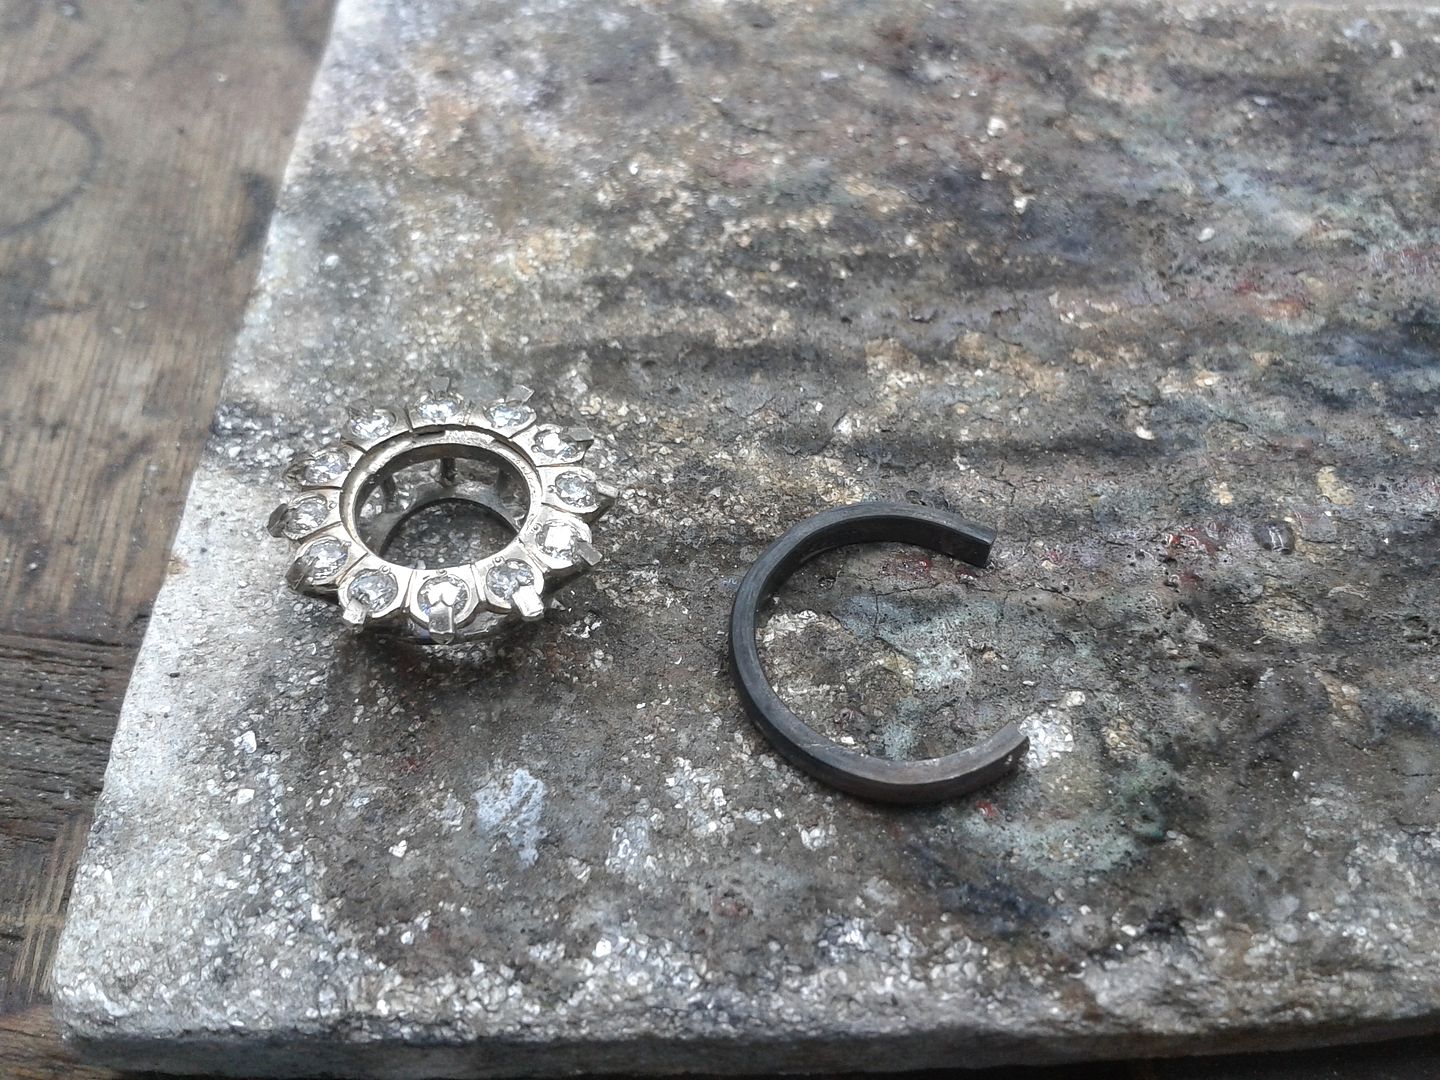
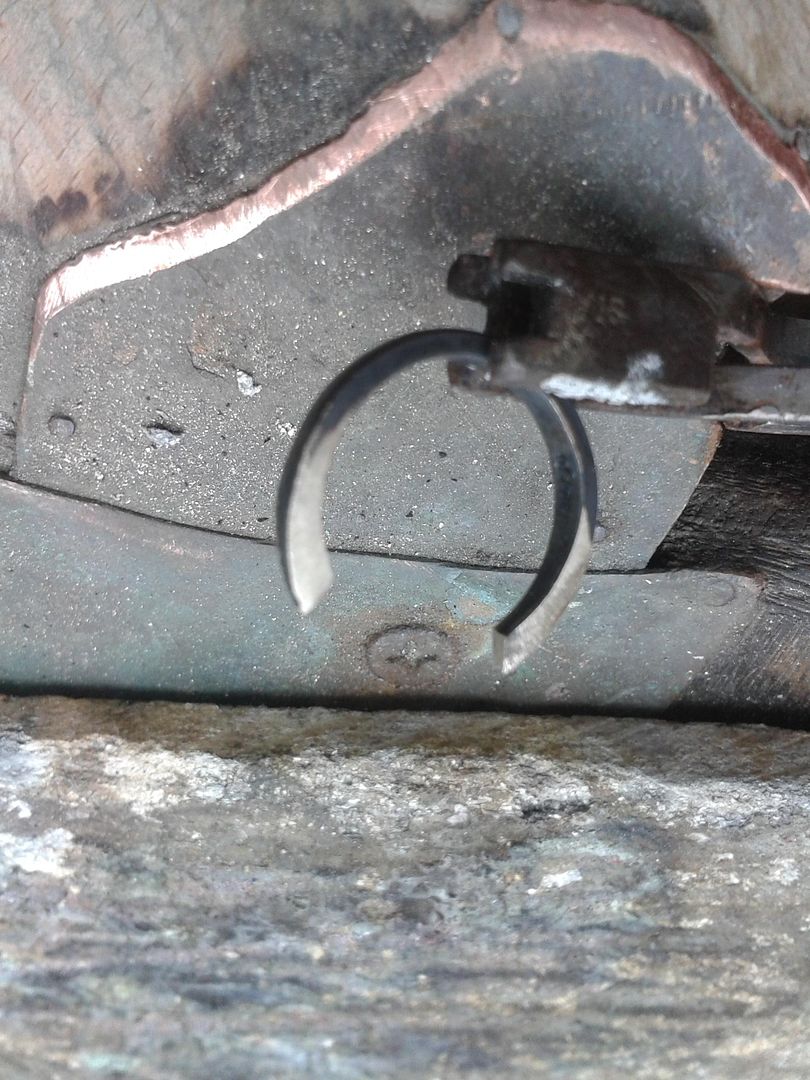
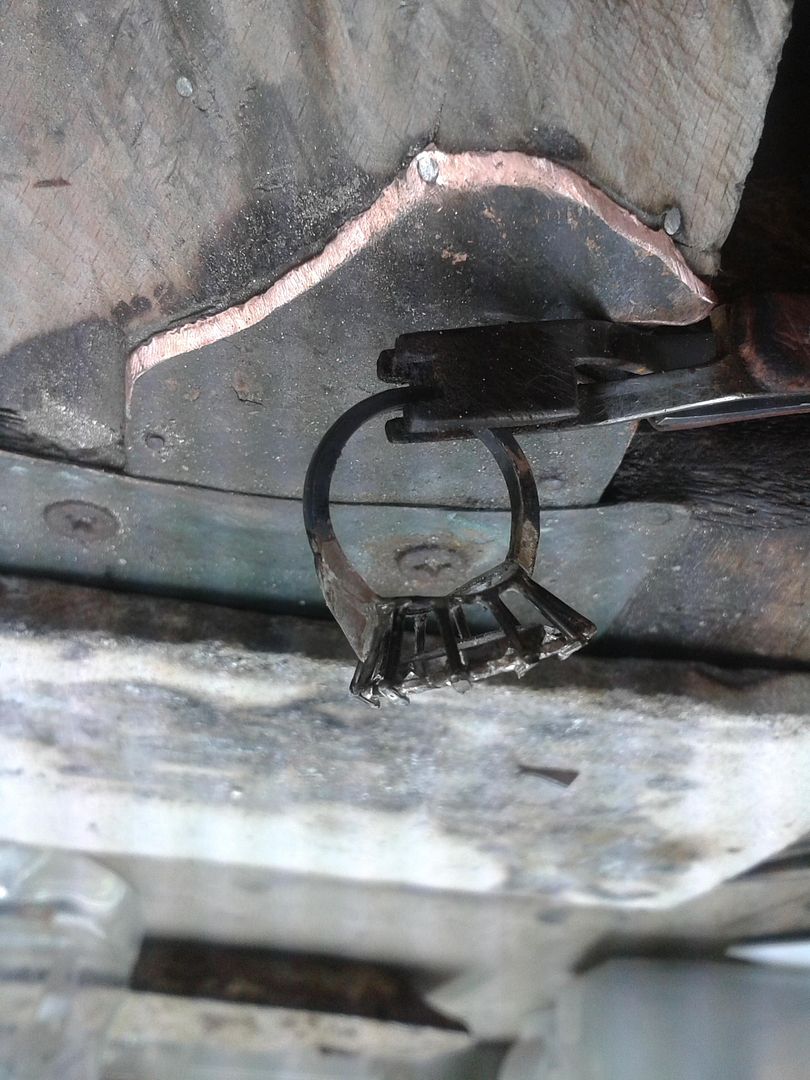
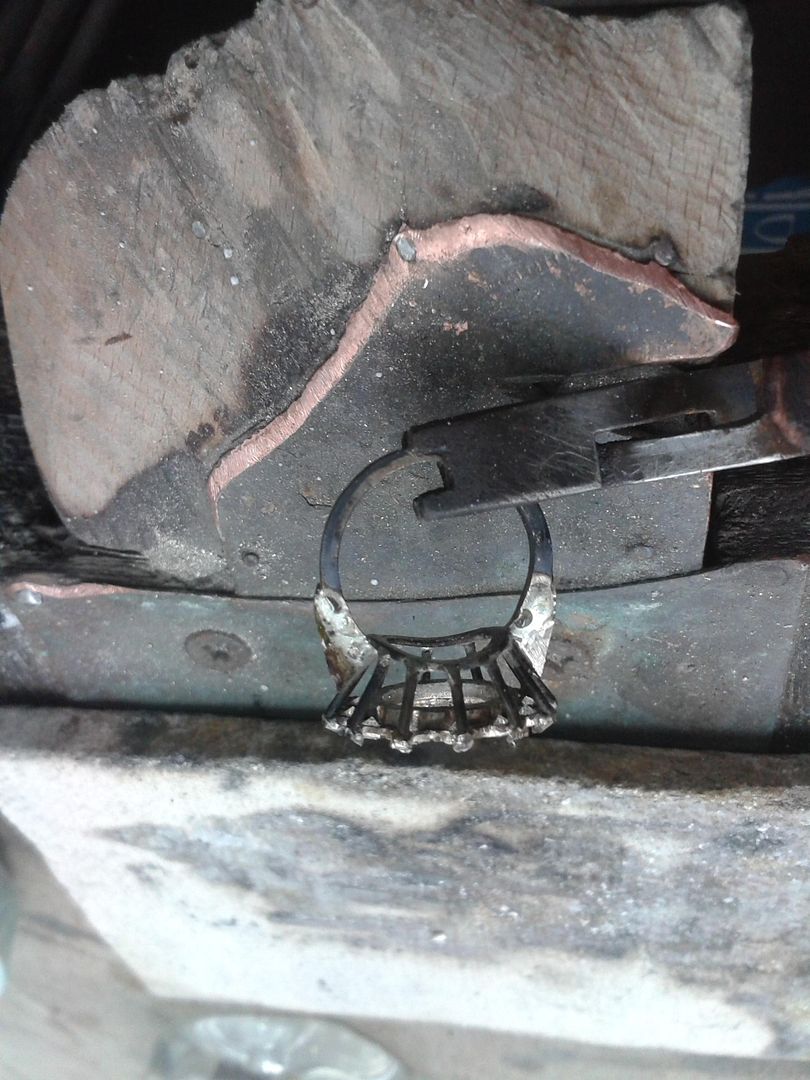
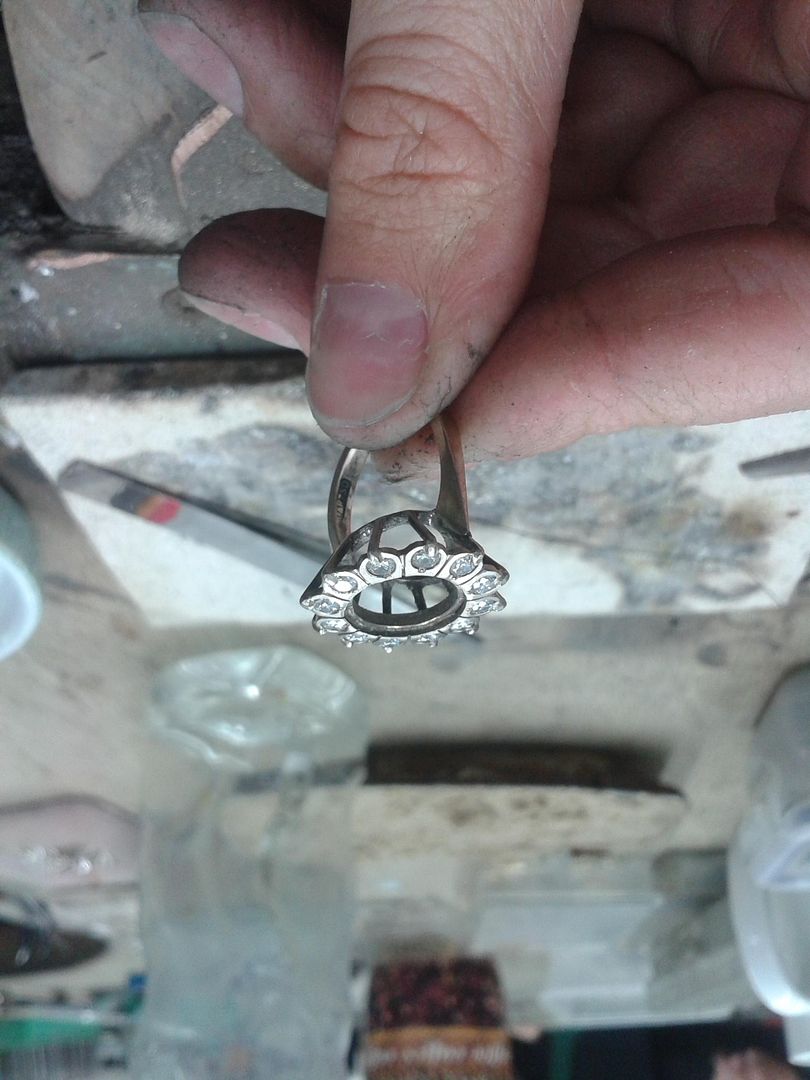
are going to make an underbezel in the same way we made the halo part of the top setting. Cut out 1 x disc of 18ct white gold and then cut out 1 x ring from the inside of that. Then bend it to match the curve needed to match a size M ring (customers size). You can see ive also filed the bars to equal lengths because i was being a bit anal in my prep.
The bars are then filed down from the centre out to match the curve of the disc. Its then soldered in place.
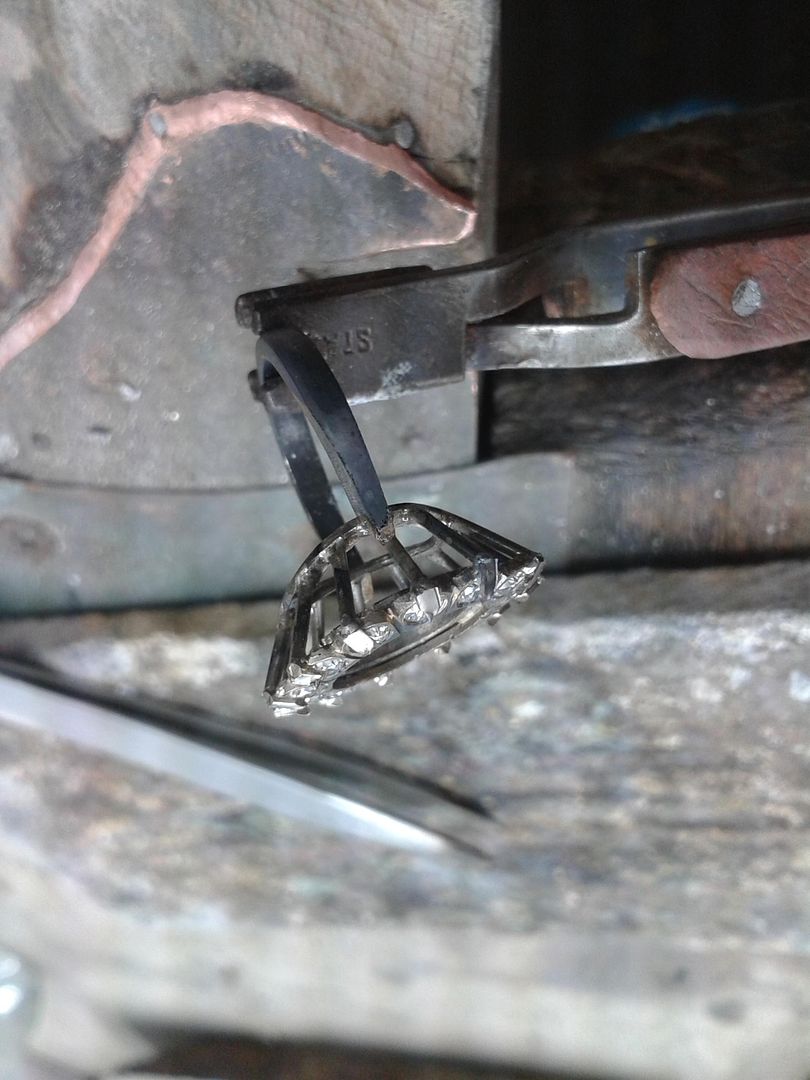
Other way up.
From the undeside.
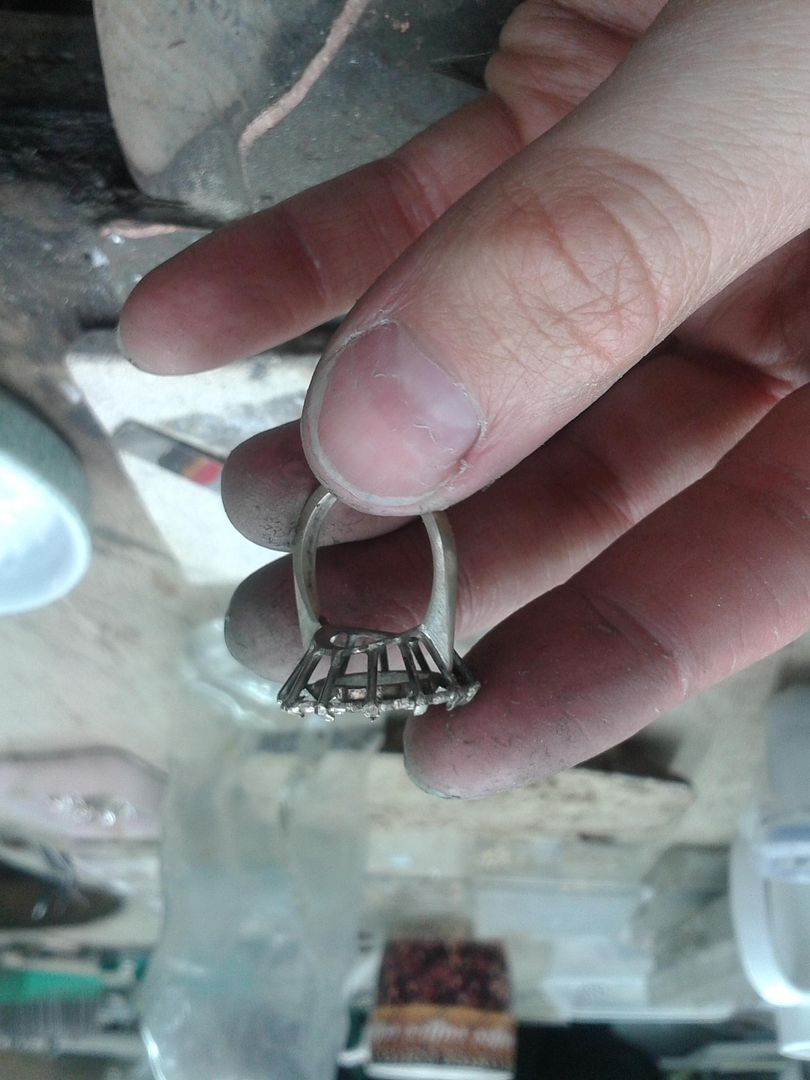
Melt some more of the scrap 18ct white gold along with any offcuts used so far. This is going to be turned into the ring shank and shoulders.
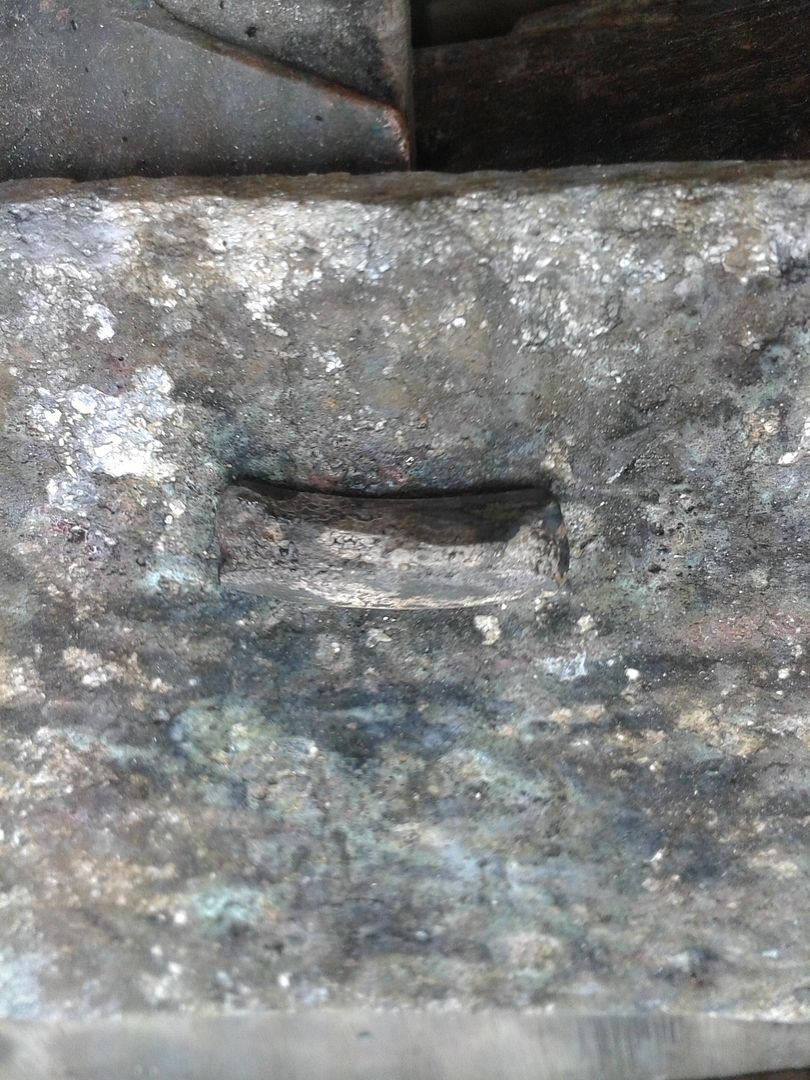
1 x rough shank made. 2.5mm wide and 1.75mm thick.
Hammer the shoulders to create a tapered edge. Blacksmithing skills but smaller!

File the sides of the shoulders to get rid of hammer marks (and because it looks bad)

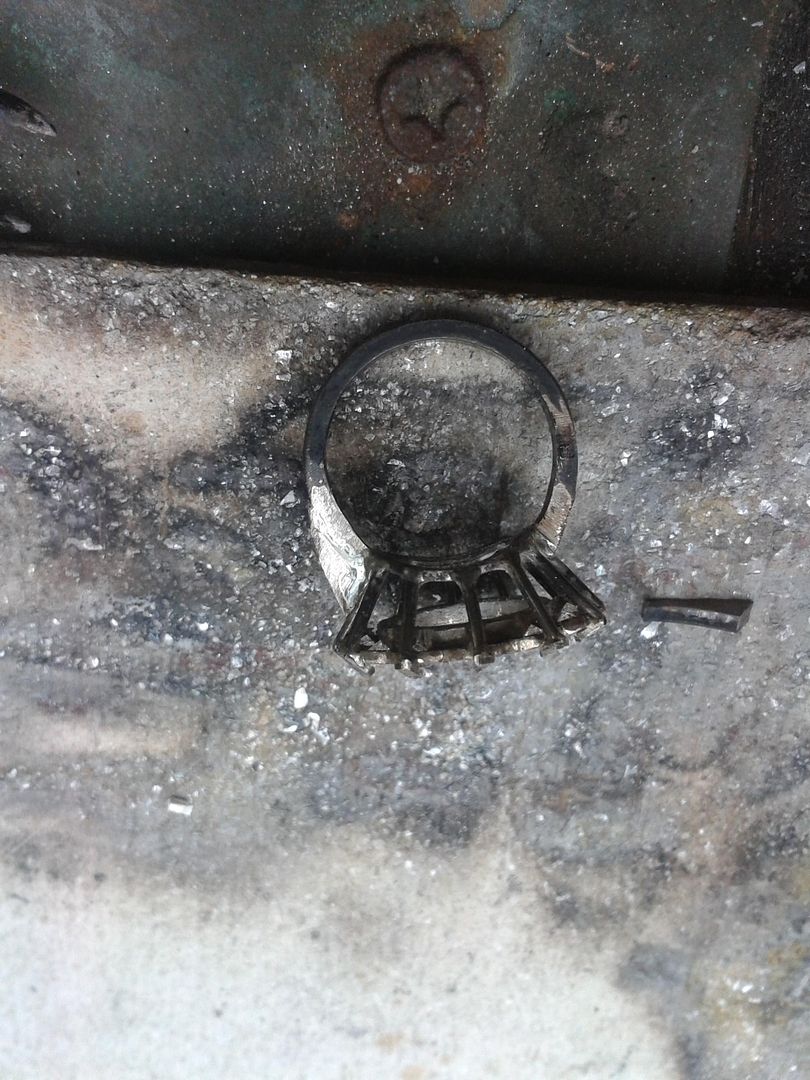
Solder it to the ring. Starting to look like a ring now eh!!

Check the alignment.
Next, take a small section of the left over shank and cut it diagonally with a fine saw to make the shoulders.

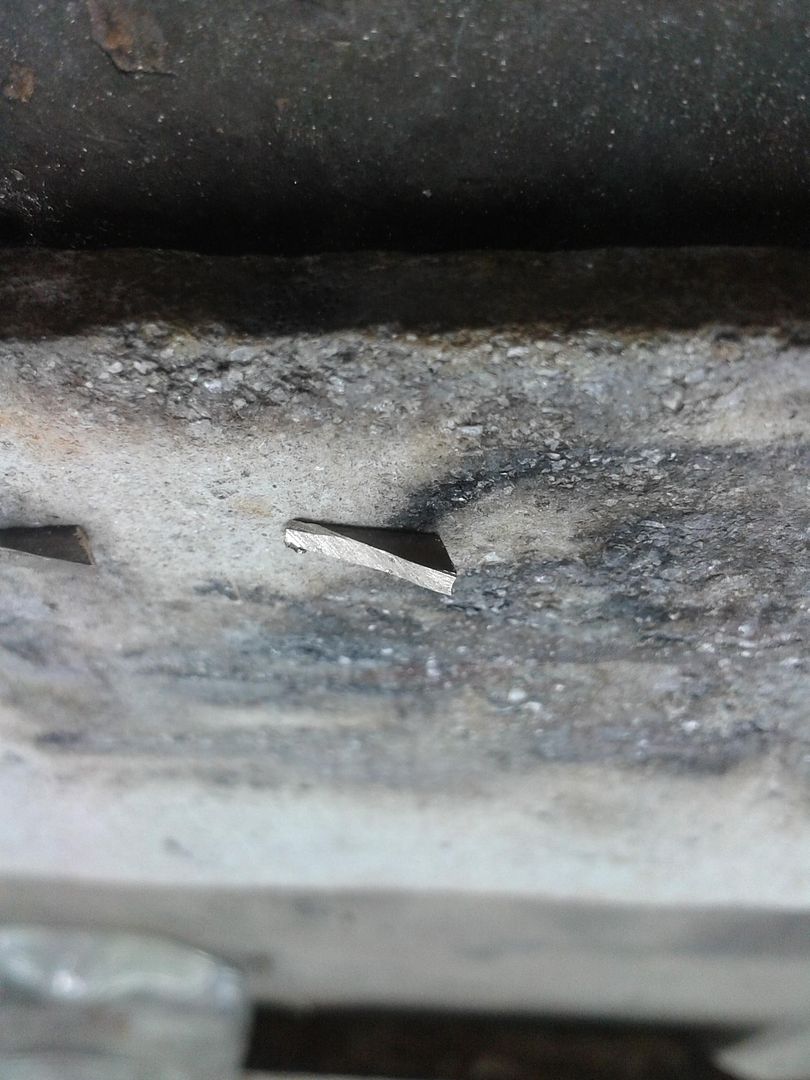
Solder one on.
Then the other.
And then file and buff to shape.
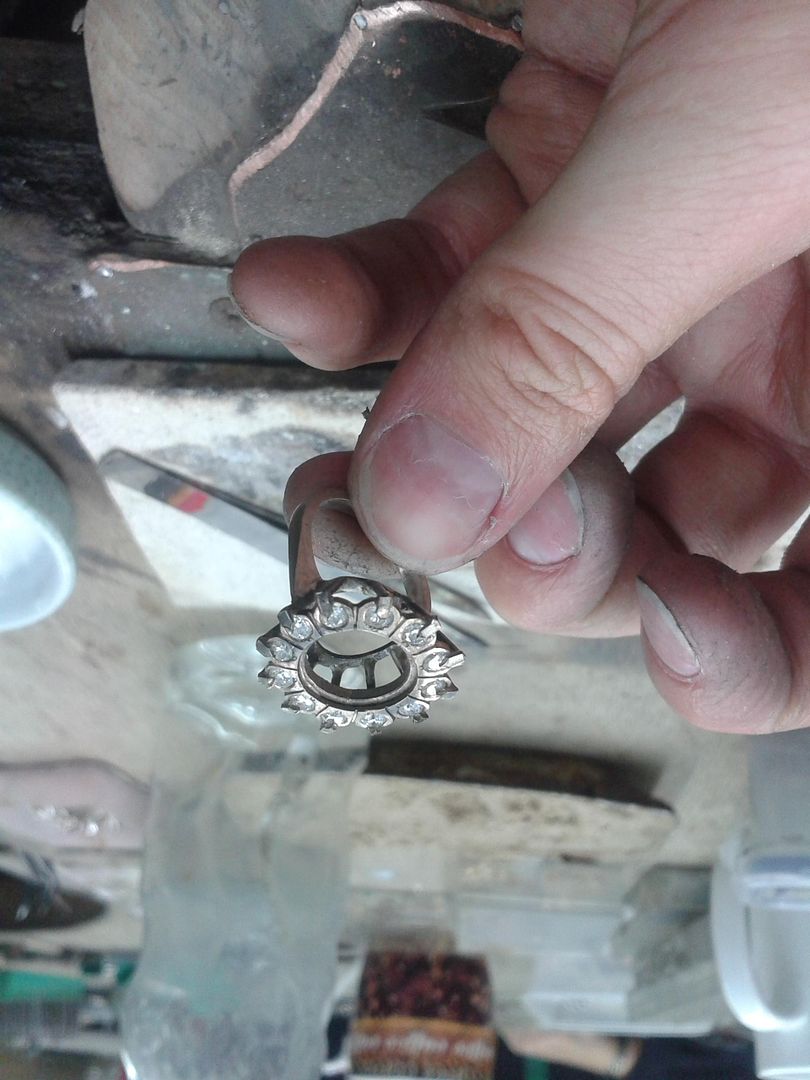
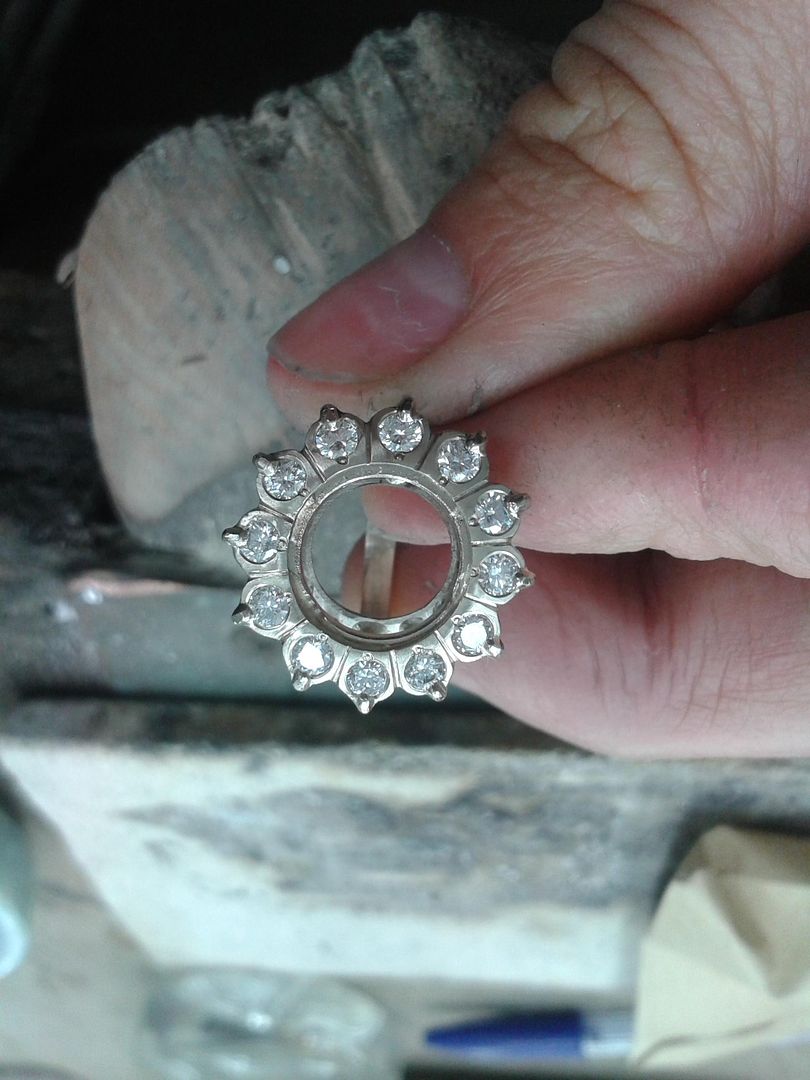
Now it's time to start tidying the claws up and finishing the ring prior to getting the diamond in. As per previous jobs the claws are filed to profile.


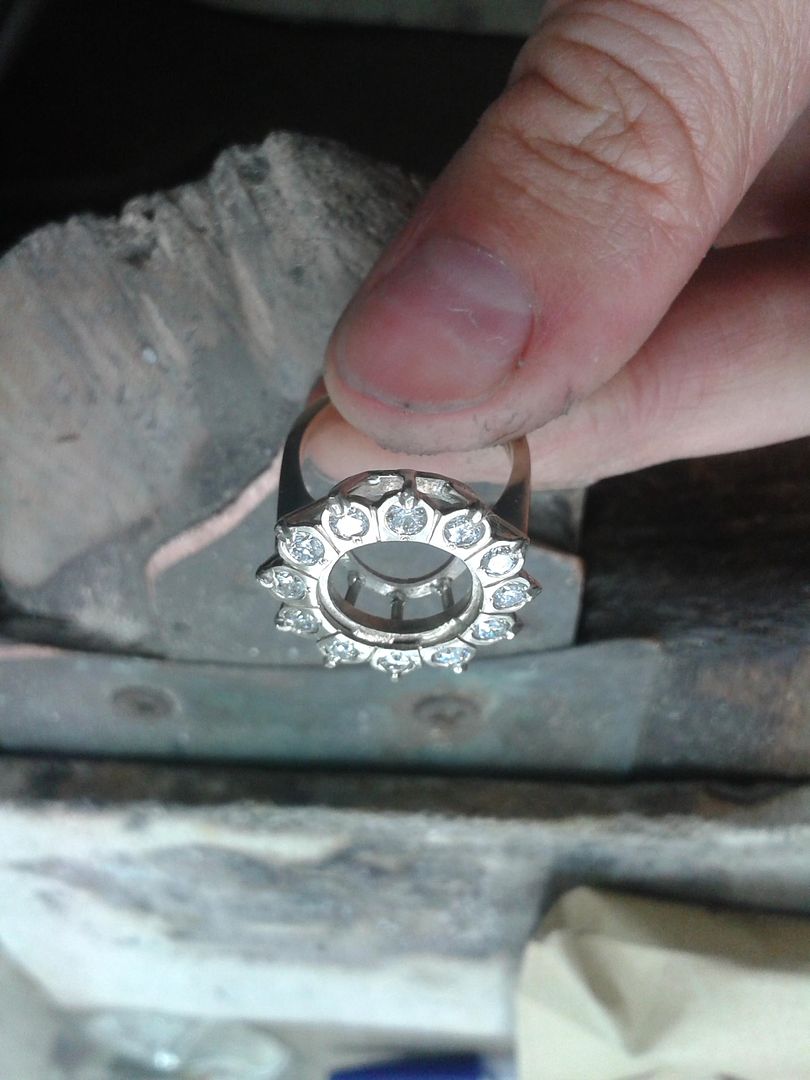
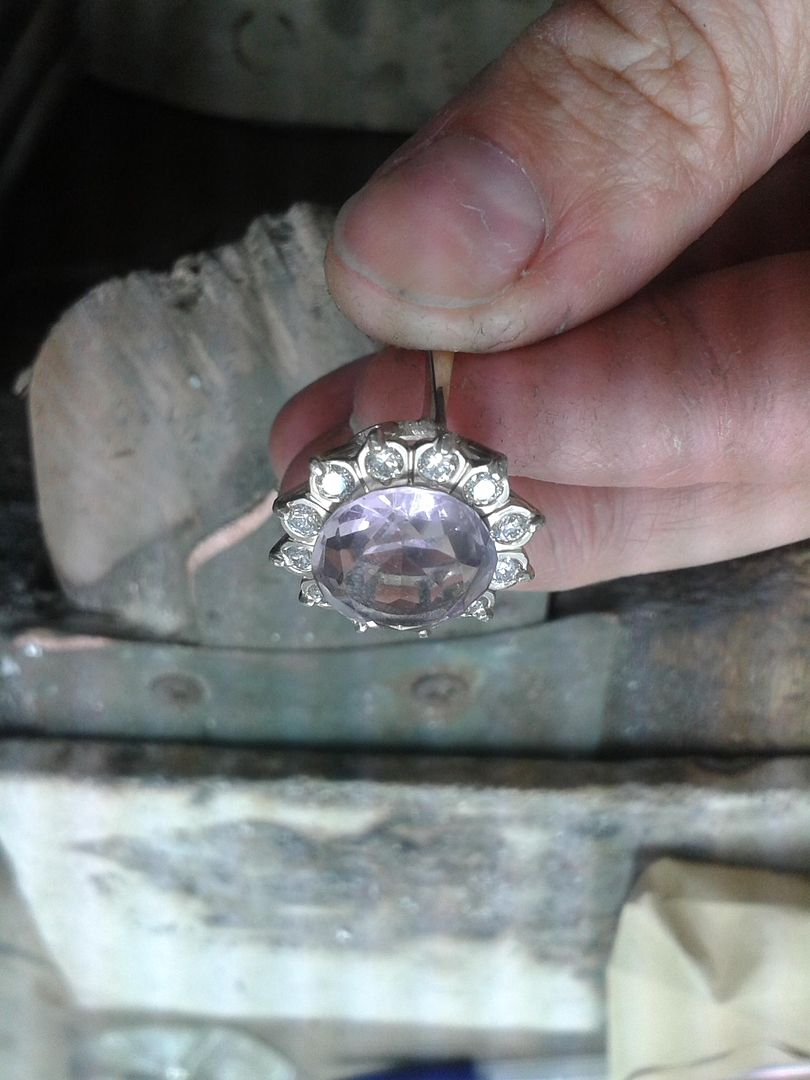
Give it all a fine buffing and it's done. Ready for 'the rock' to arrive and make the centre setting.

And to give a rough idea of what it'll look like (minus centre claws) i found a 10ct, 15mm Amethyst.


I'll fire the final pics up when my customer gets round to popping in.
Hope you enjoyed,
Eddie
are going to make an underbezel in the same way we made the halo part of the top setting. Cut out 1 x disc of 18ct white gold and then cut out 1 x ring from the inside of that. Then bend it to match the curve needed to match a size M ring (customers size). You can see ive also filed the bars to equal lengths because i was being a bit anal in my prep.

The bars are then filed down from the centre out to match the curve of the disc. Its then soldered in place.

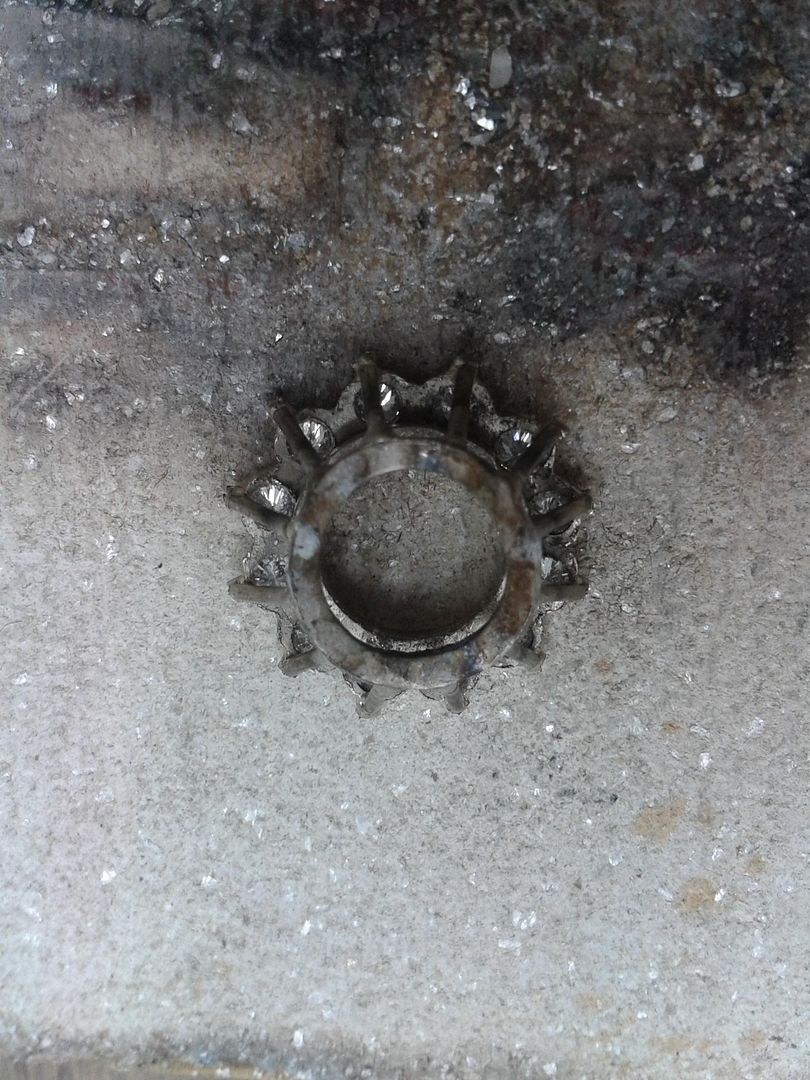
Other way up.

From the undeside.

Melt some more of the scrap 18ct white gold along with any offcuts used so far. This is going to be turned into the ring shank and shoulders.

1 x rough shank made. 2.5mm wide and 1.75mm thick.

Hammer the shoulders to create a tapered edge. Blacksmithing skills but smaller!

File the sides of the shoulders to get rid of hammer marks (and because it looks bad)


Solder it to the ring. Starting to look like a ring now eh!!

Check the alignment.

Next, take a small section of the left over shank and cut it diagonally with a fine saw to make the shoulders.


Solder one on.


Then the other.

And then file and buff to shape.


Now it's time to start tidying the claws up and finishing the ring prior to getting the diamond in. As per previous jobs the claws are filed to profile.


Give it all a fine buffing and it's done. Ready for 'the rock' to arrive and make the centre setting.


And to give a rough idea of what it'll look like (minus centre claws) i found a 10ct, 15mm Amethyst.


I'll fire the final pics up when my customer gets round to popping in.
Hope you enjoyed,
Eddie
Gassing Station | Watches | Top of Page | What's New | My Stuff