Unusual job on the bench today
Discussion


Note to above:
You can get hold of me via PH email and we'll take it from there. I'm not allowed to give direct email on here for obvious reasons.
Tool I couldn't do without: Probably the hand vice, pictured in the following build. Saved my fingers from slipping blades more than once. I've caused myself some proper injuries in this job so good tools are a must.
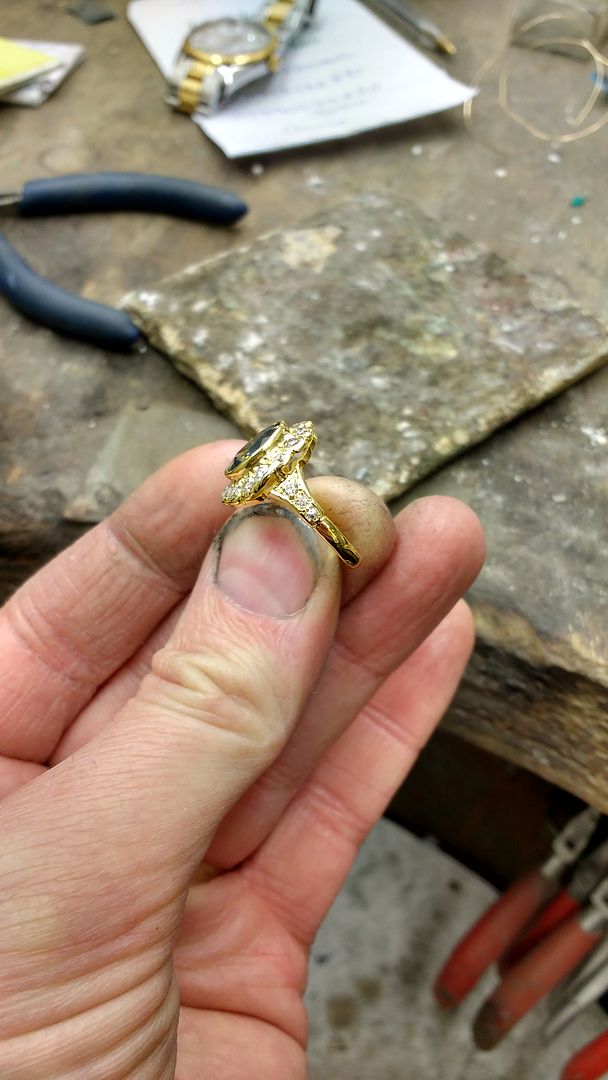
Today I had another refurb job in. Job spec was to make a new setting for the sapphire fit a new shank with keeper-balls in:
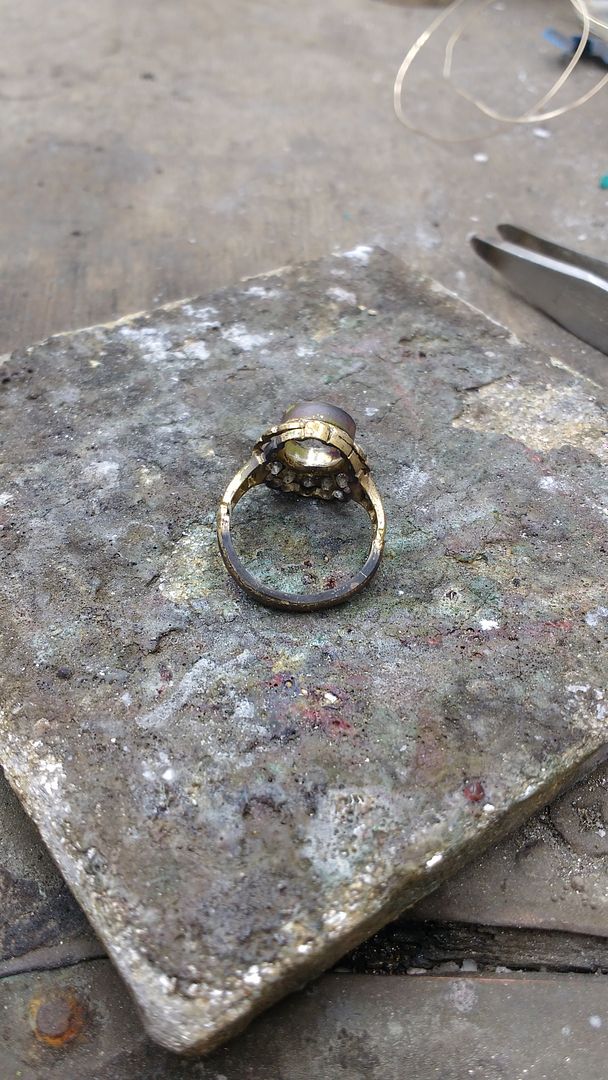
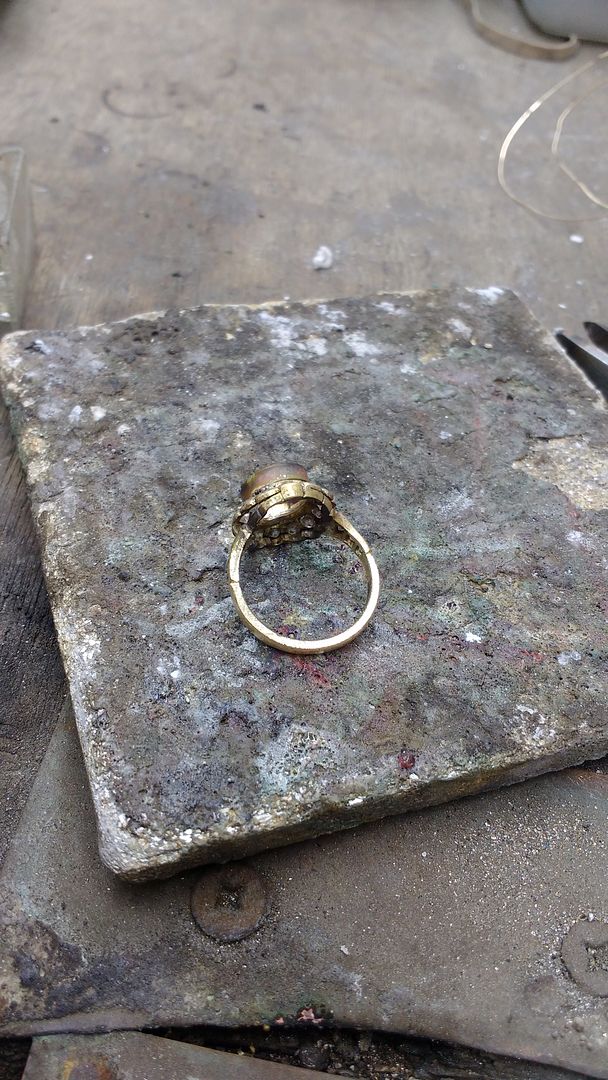
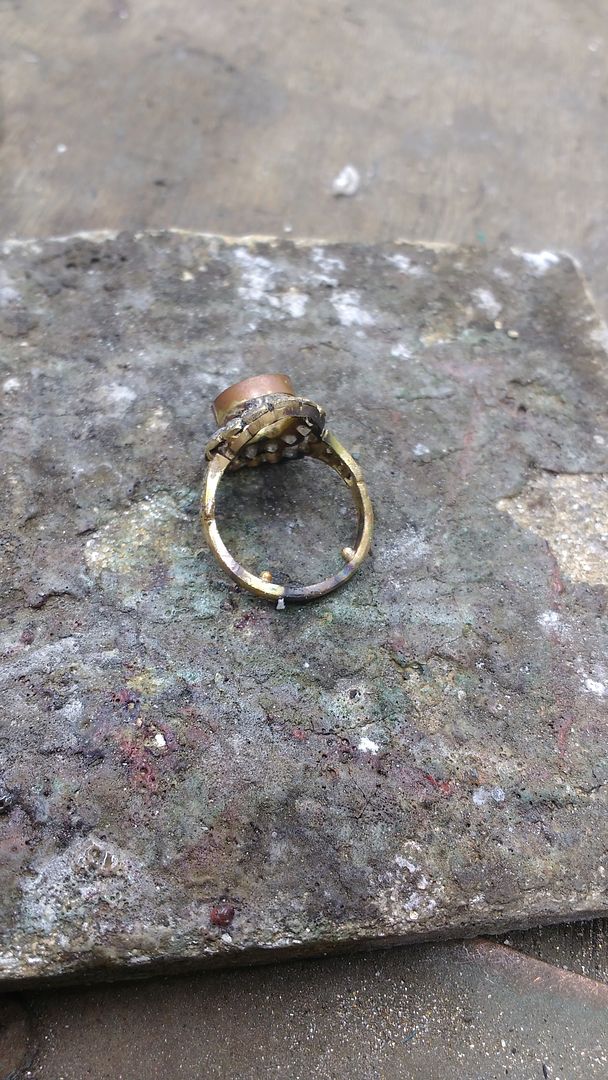
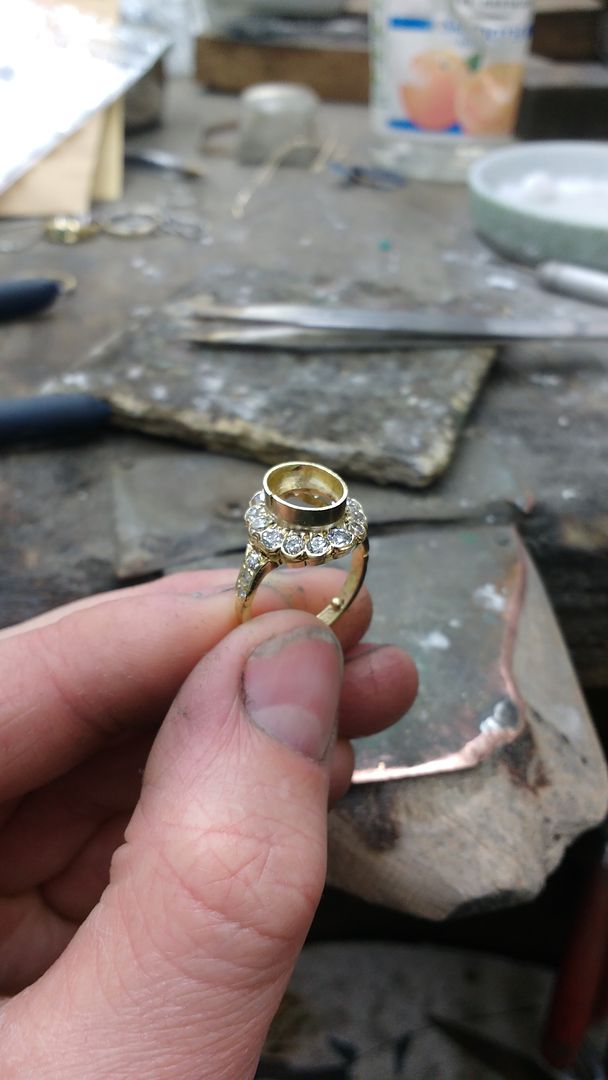
I can't find the image of the job pre build so we are starting from the point where the old centre setting has been removed and a new 18ct yellow gold oval sleeve made. Here it is sat on top of the ring:
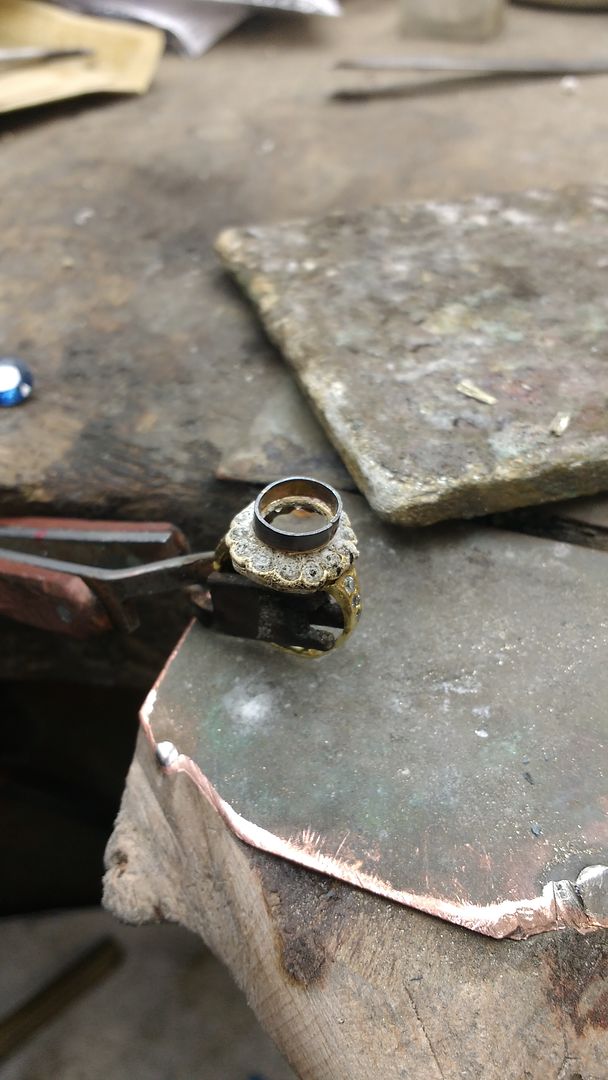
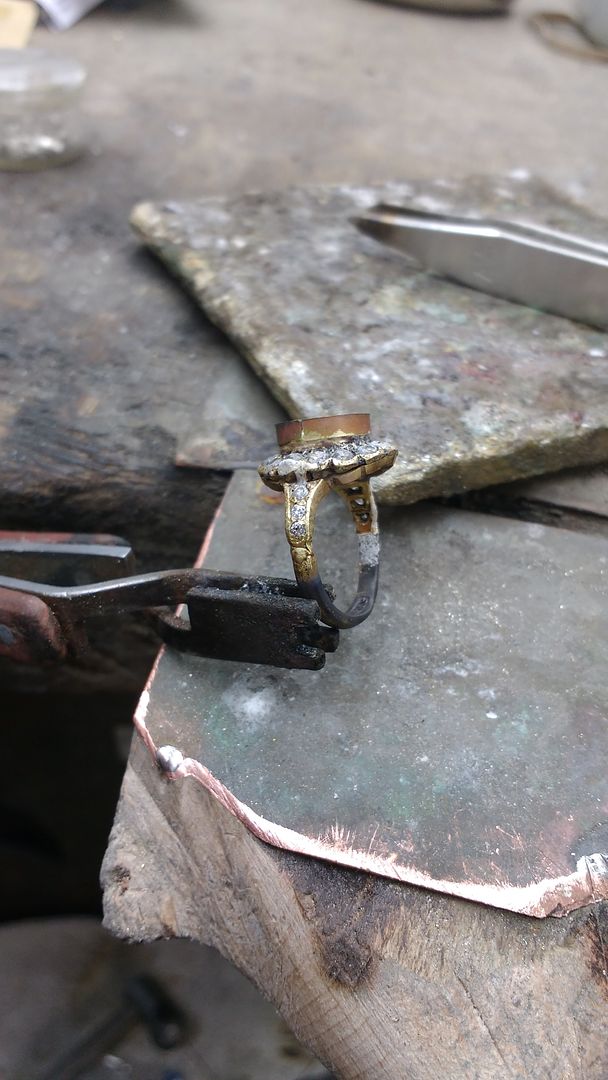
And soldered on using low temperature 18ct yellow solder. The diamonds are protected with borax. Sapphire pictured in the background:

Check the stone fits nicely inside the setting:
Before the stone is set I make some 18ct yellow gold shank and stamp it as such:
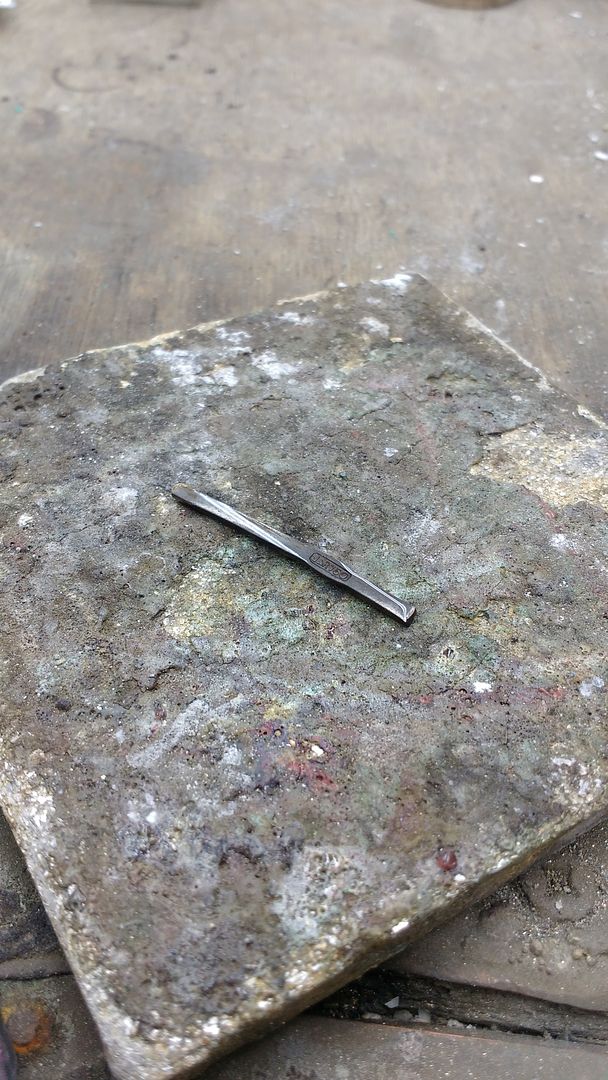

Cut to length, bent to shape and ready to solder on:
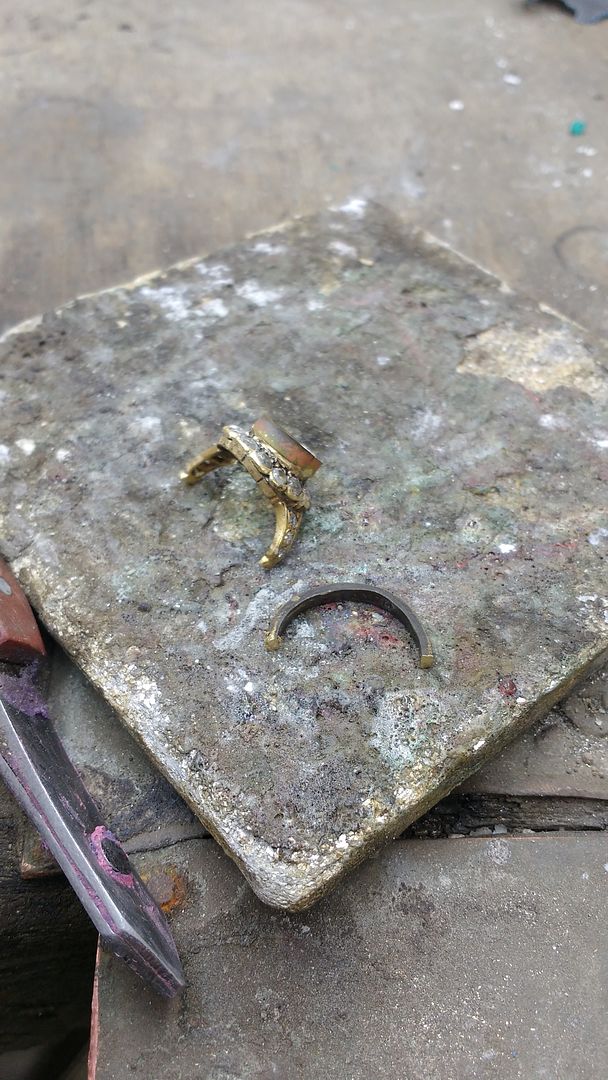
Soldered on:
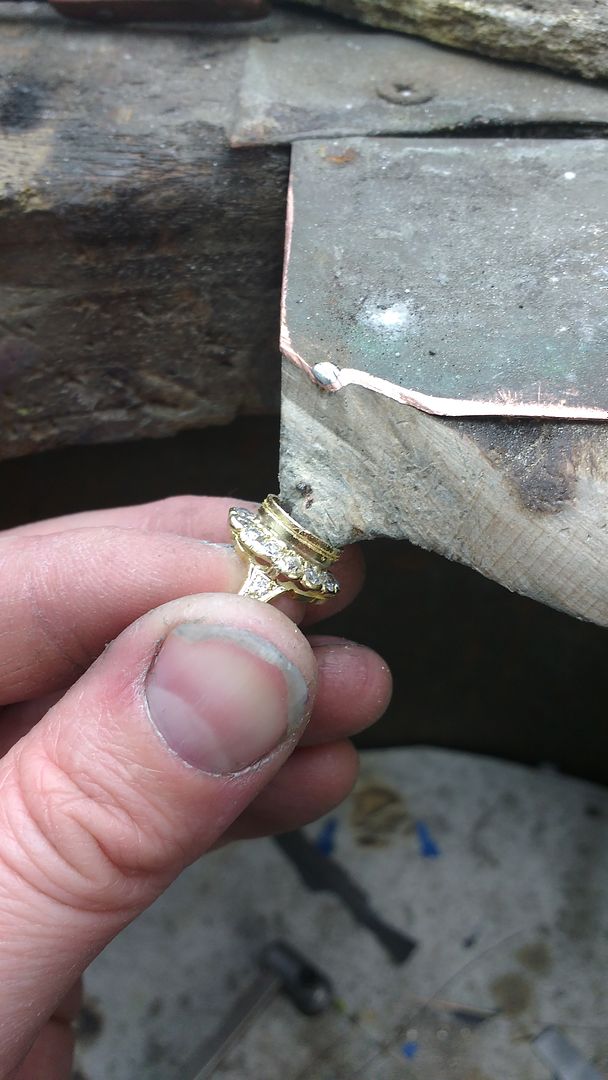
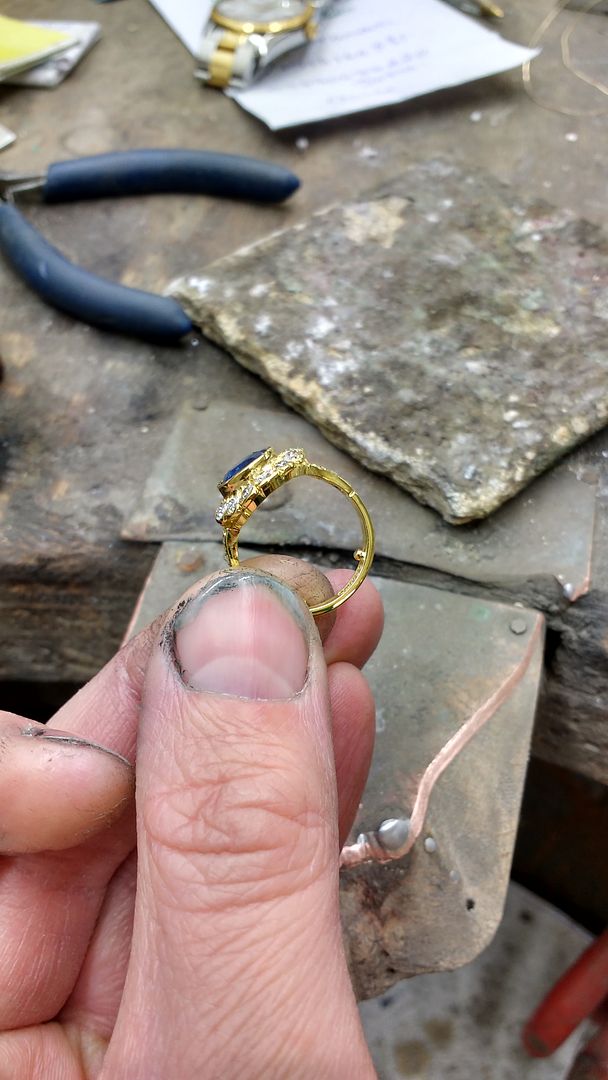
The ring is then made round and the shank profiled to suit:
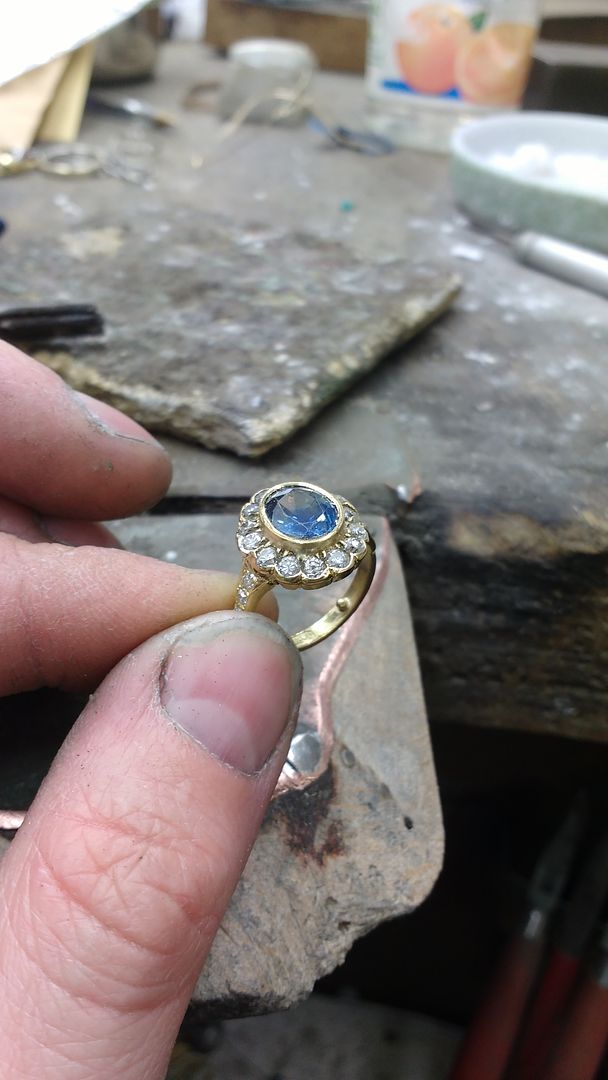
The customer is rather aged so her knuckles are a problem for her when wearing regular rings. We get around this by oversizing the ring and fitting balls into the shank to take up the slack whilst providing grip on the finger:
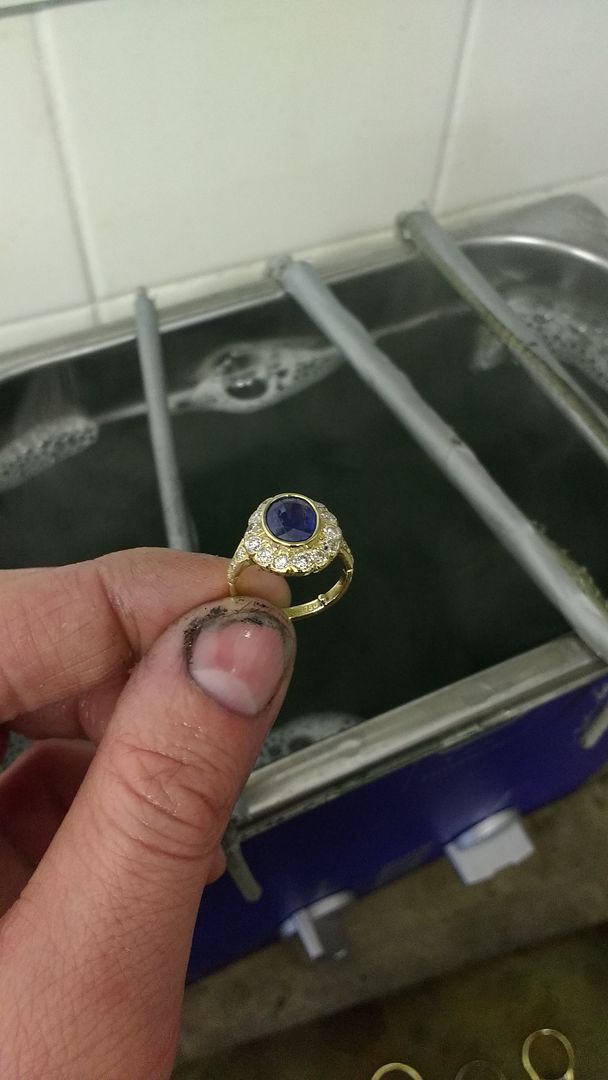
Ring cleaned up a bit ready for stone setting and final tweaking::
The setting is cut to the right height:

Check the stone still fits:
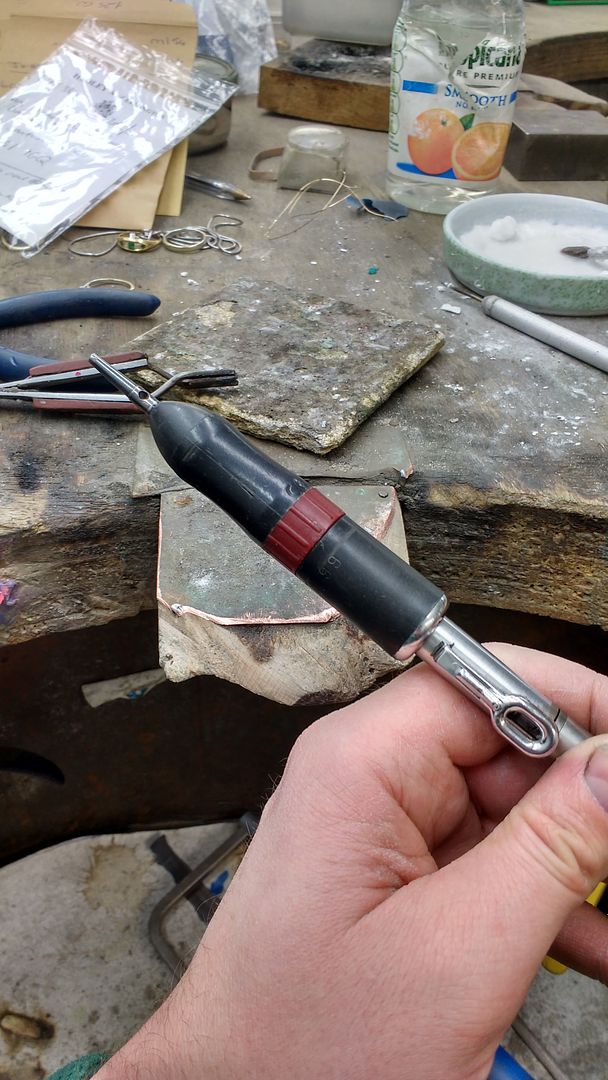
This is a good tool. A 'pusher' used to press the metal over the edge of the stone. Hopefully without breaking the stone. Note hand vice:
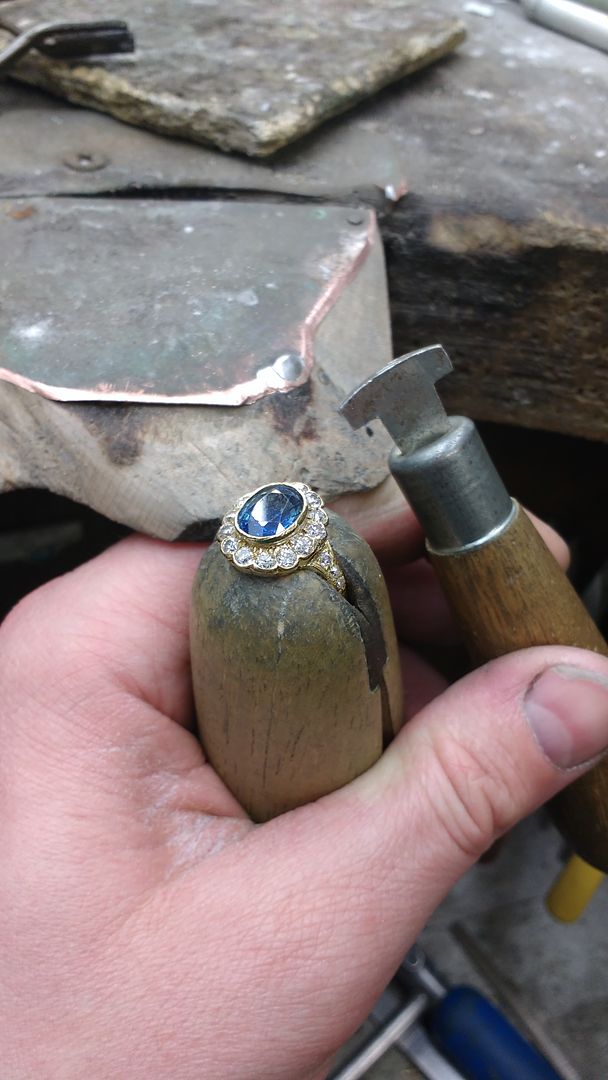
This is a hammer drill and is another attachment of the ever handy pendent drill. This is a very risky tool to use around such an expensive sapphire but it's a necessary part of the process. A slip of the hand or a tap in the wrong place will shatter the stone. Luckily i'm half decent at this lark:
Setting going well. Plenty of metal over the edges:
I then use a round ended pusher to press the metal hard up against the stone. Again, it's a risky job but it went well:

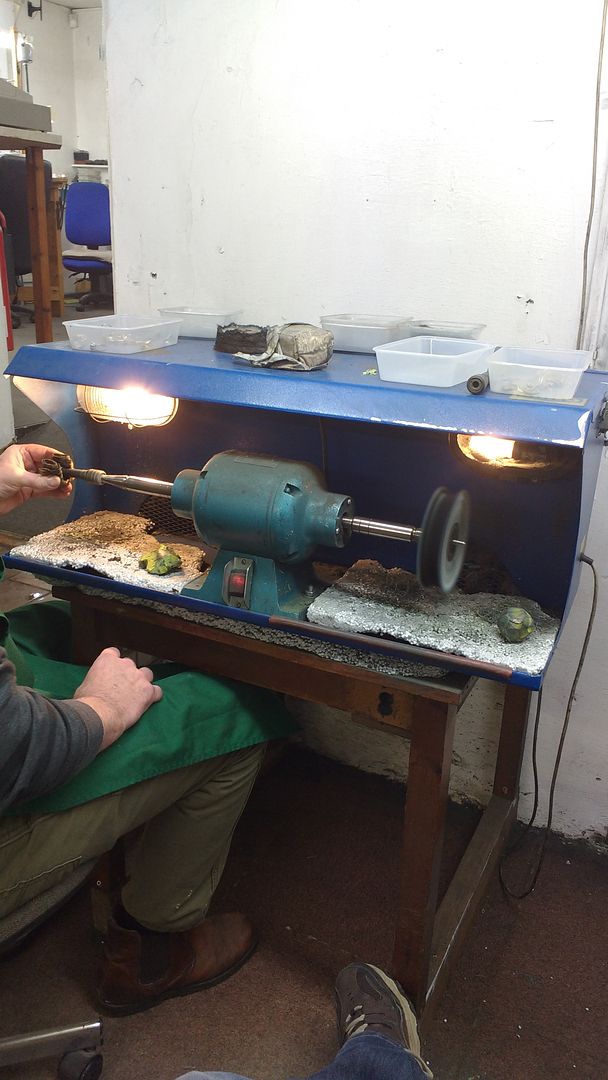
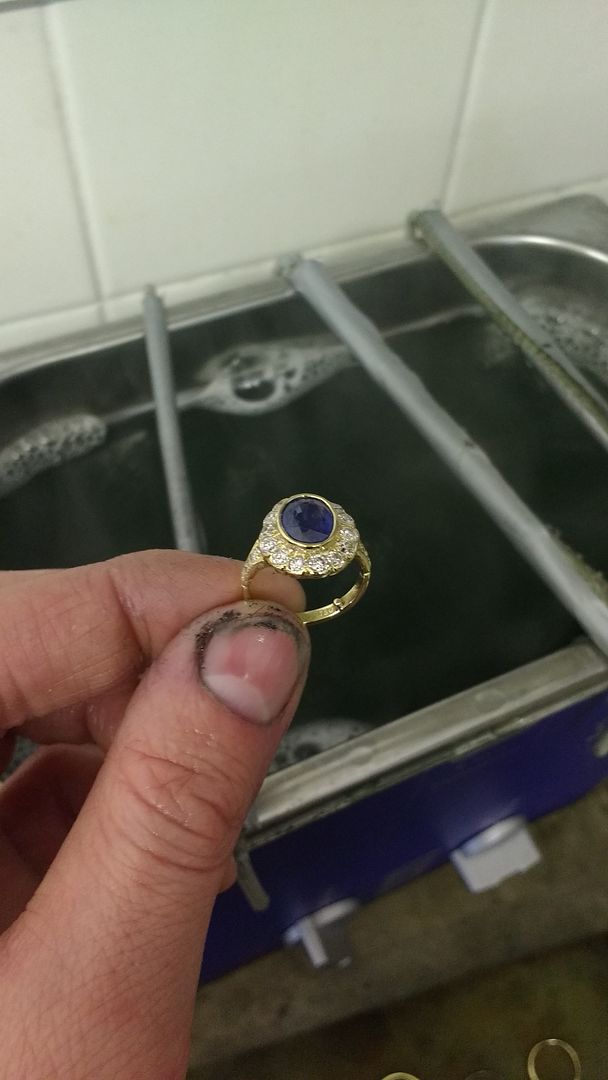
After that the ring is cleaned up and we go for polishing:
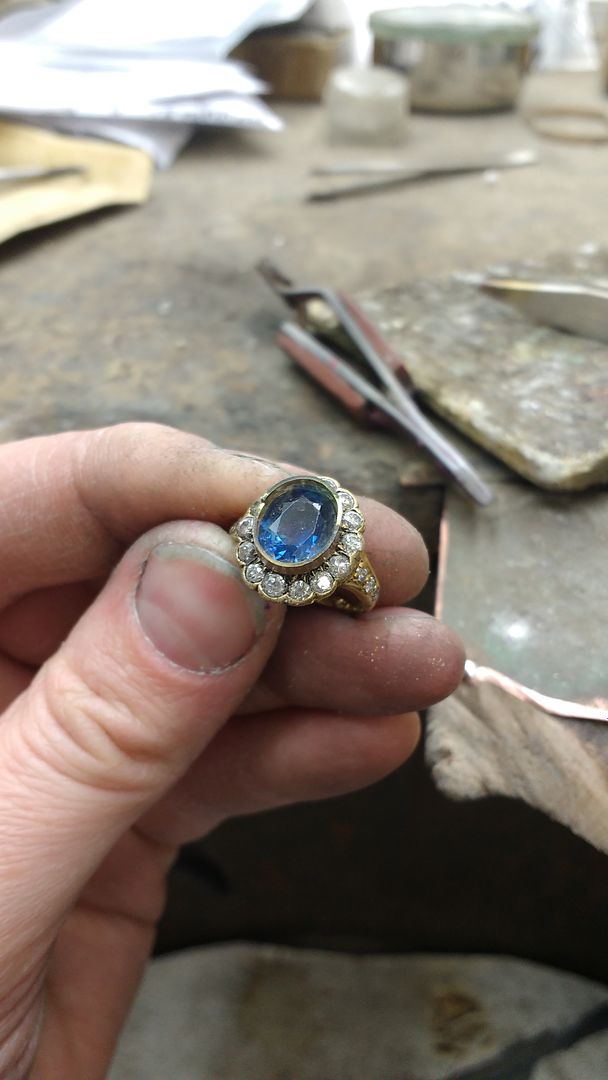
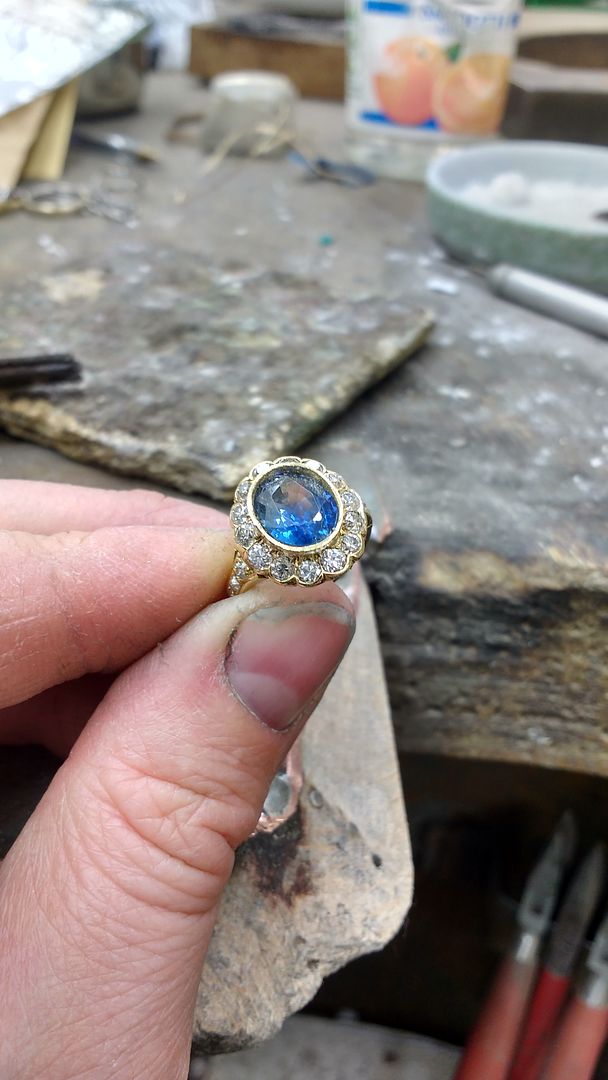
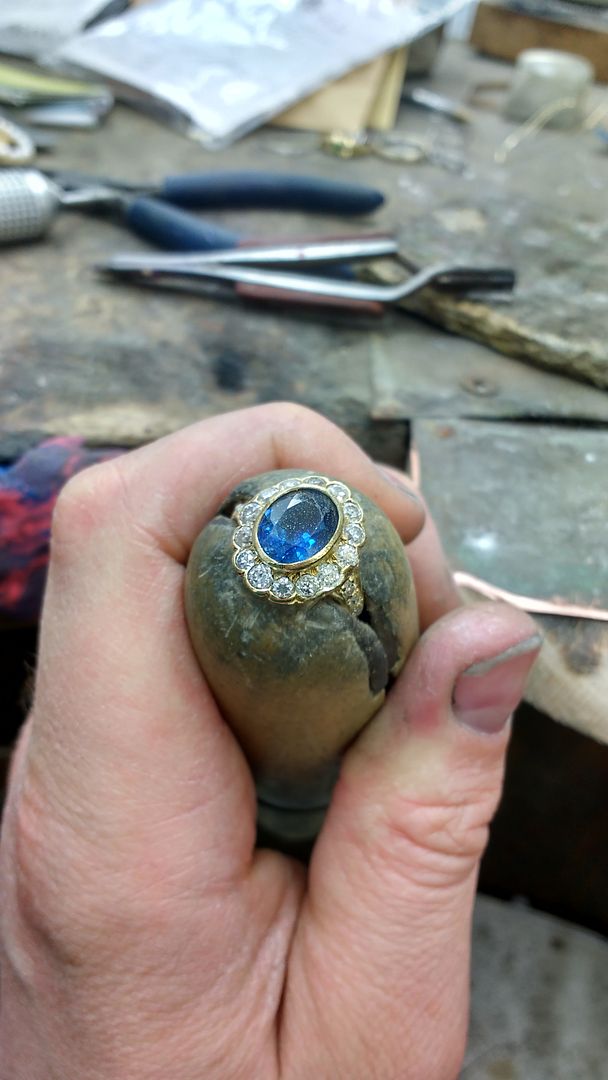
And cleaning. Lovely stone eh!:
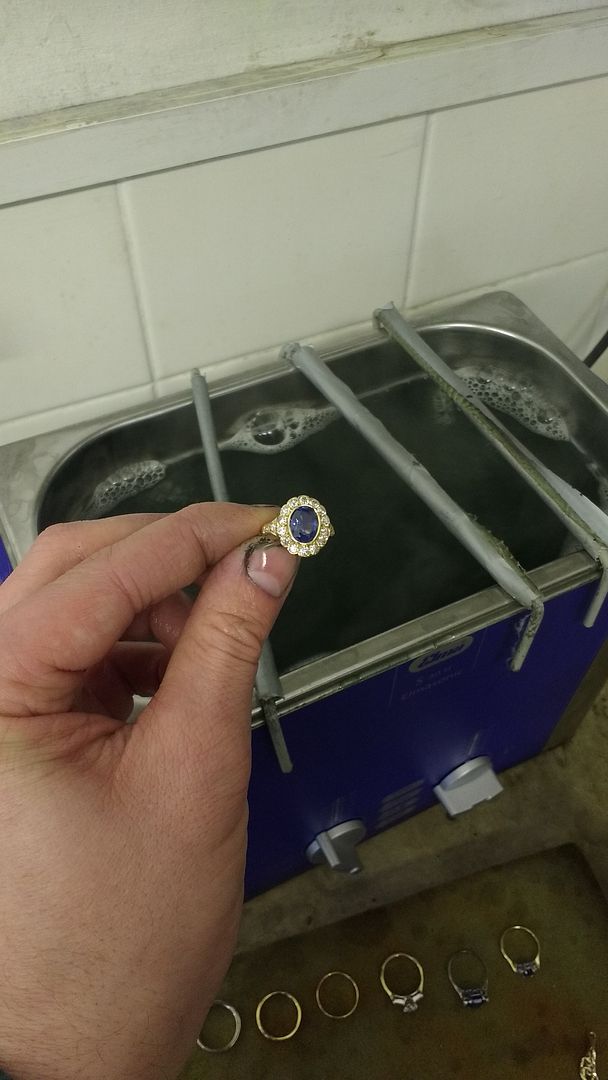
All done. At this point we check all the stones for security and generally make sure it's fit for use:

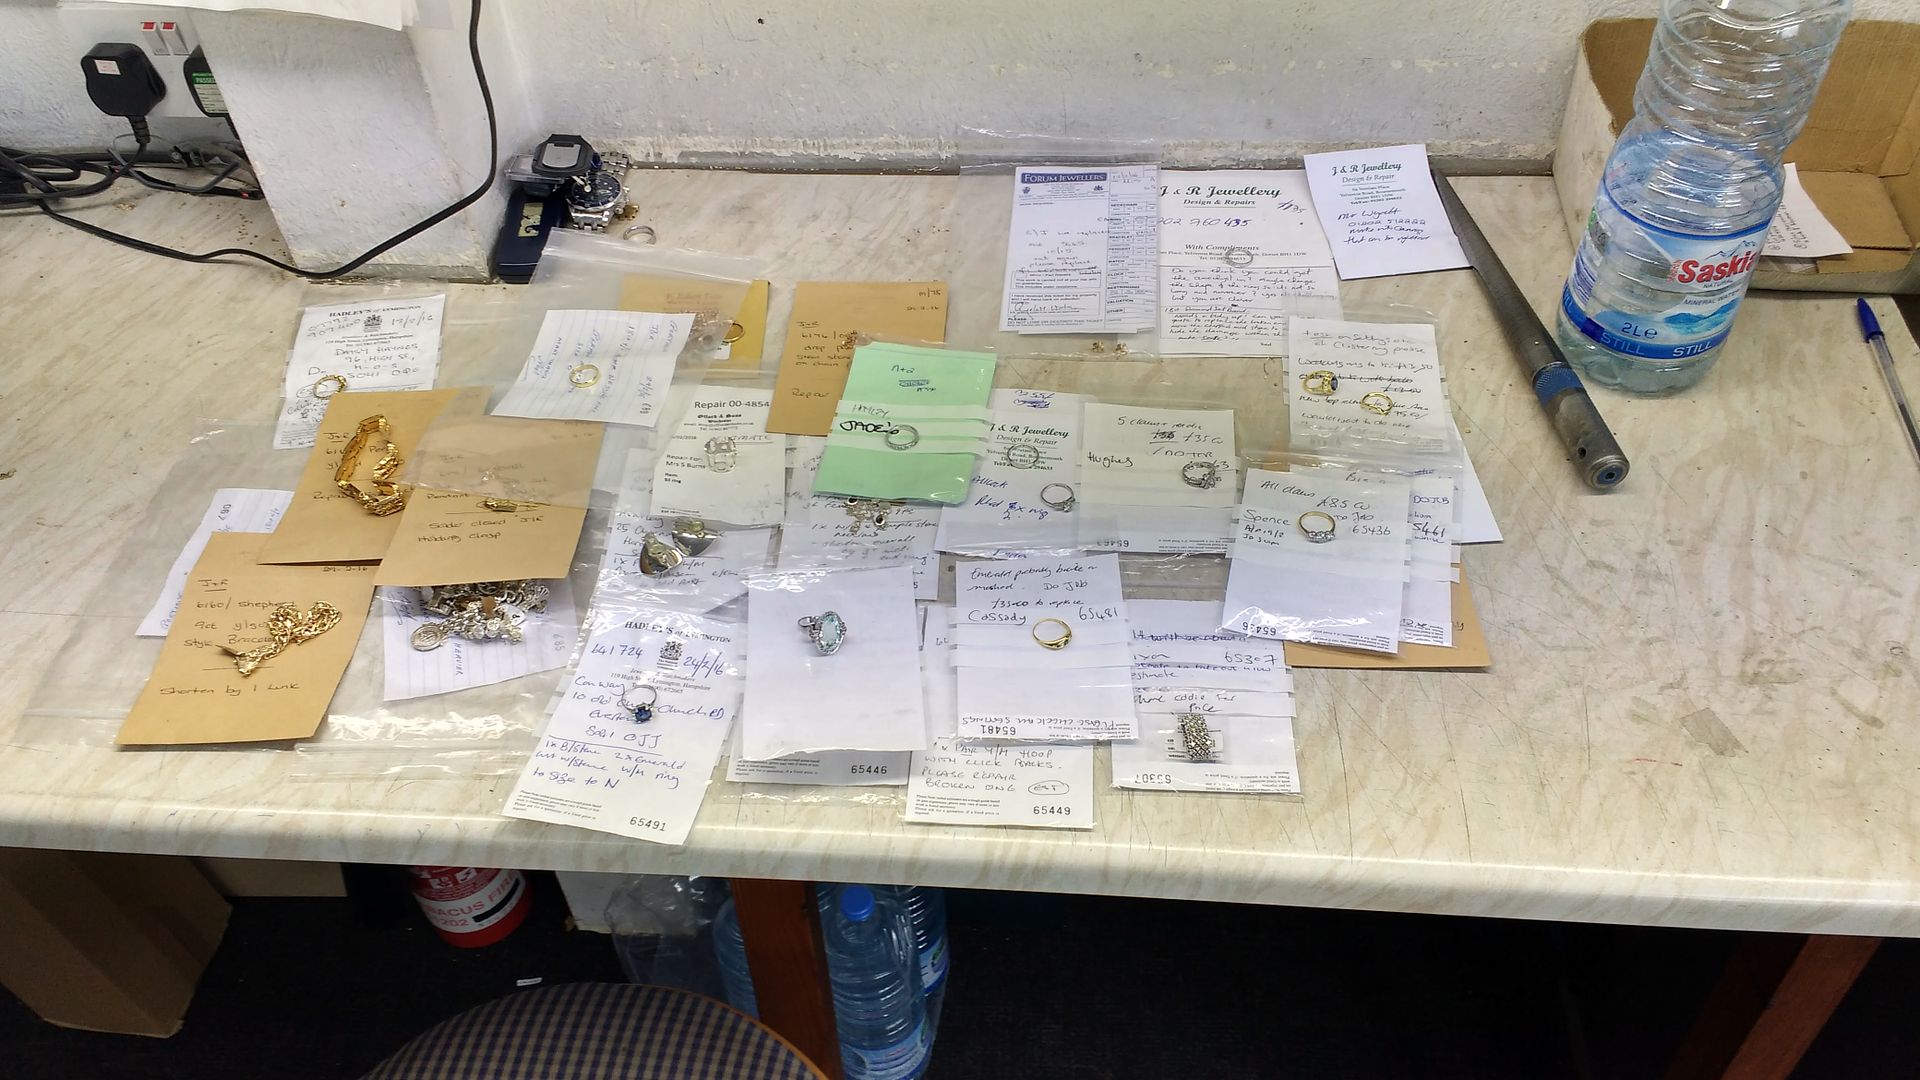
And in with the rest of the days graft. Ha!
Eddie
You can get hold of me via PH email and we'll take it from there. I'm not allowed to give direct email on here for obvious reasons.
Tool I couldn't do without: Probably the hand vice, pictured in the following build. Saved my fingers from slipping blades more than once. I've caused myself some proper injuries in this job so good tools are a must.
Today I had another refurb job in. Job spec was to make a new setting for the sapphire fit a new shank with keeper-balls in:
I can't find the image of the job pre build so we are starting from the point where the old centre setting has been removed and a new 18ct yellow gold oval sleeve made. Here it is sat on top of the ring:

And soldered on using low temperature 18ct yellow solder. The diamonds are protected with borax. Sapphire pictured in the background:

Check the stone fits nicely inside the setting:

Before the stone is set I make some 18ct yellow gold shank and stamp it as such:


Cut to length, bent to shape and ready to solder on:

Soldered on:


The ring is then made round and the shank profiled to suit:

The customer is rather aged so her knuckles are a problem for her when wearing regular rings. We get around this by oversizing the ring and fitting balls into the shank to take up the slack whilst providing grip on the finger:

Ring cleaned up a bit ready for stone setting and final tweaking::

The setting is cut to the right height:


Check the stone still fits:

This is a good tool. A 'pusher' used to press the metal over the edge of the stone. Hopefully without breaking the stone. Note hand vice:

This is a hammer drill and is another attachment of the ever handy pendent drill. This is a very risky tool to use around such an expensive sapphire but it's a necessary part of the process. A slip of the hand or a tap in the wrong place will shatter the stone. Luckily i'm half decent at this lark:

Setting going well. Plenty of metal over the edges:

I then use a round ended pusher to press the metal hard up against the stone. Again, it's a risky job but it went well:


After that the ring is cleaned up and we go for polishing:

And cleaning. Lovely stone eh!:


All done. At this point we check all the stones for security and generally make sure it's fit for use:


And in with the rest of the days graft. Ha!

Eddie

ecain63 said:
[...] Maybe Joe / Variomatic could put up a watch build??
Funny you should say that, but had something a little unusual on the bench here today. One of my local regulars had brought in a Dunhill quartz chrono with an ETA 251.471 movement. He'd bought it off ebay, not working (all sub hands snapped off with their spindles) but with a (supposedly) good spare movement to fit. The only thing is, the spare movement was completely missing its 1/10th second train - the coil, rotor and both wheels just weren't there.
The movement is available factory sealed but, at a cost price of around £160, it's one of the rare times when it's worth stripping and repairing a quartz rather than simply replacing. So I ordered the 1/10 second counting wheel (the one the 1/10th hand fits to) and salvaged the other missing parts from the old movement.
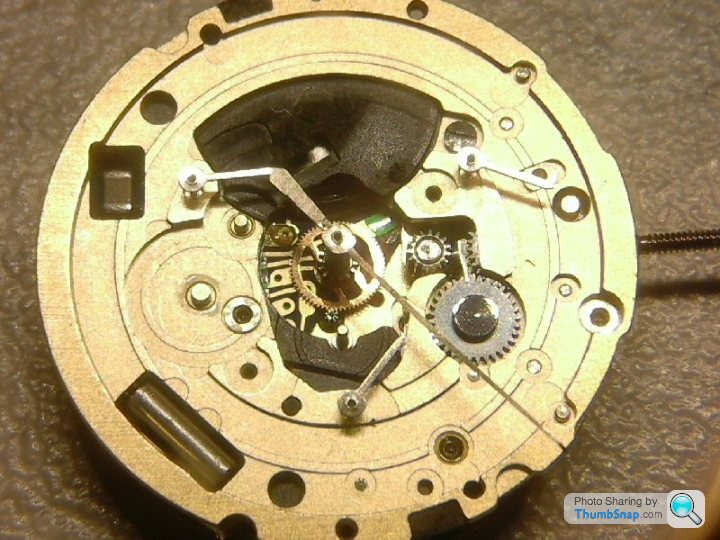
Stripped to the main plate, with the assorted wheels fitted and ready to reassemble, it looks like this:

Now, for those who claim that quartz watches are "just a circuit board" - that's 8 wheels and 3 very magnetic rotors that sit in two groups. The bigger group (6 wheels and 2 rotors) covers an area about the size of your little fingernail.
If we take a closer look at that group, it's made of two separate trains:
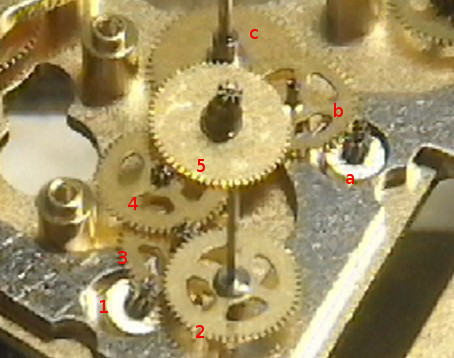
The rotor (1) drives wheels (2 - sub seconds counting wheel) and (3 - first intermediate). (3) drives (4 - second intermediate), which drives (5). Note that (5) has teeth at its very top end - that's where the drive for the hour and minute hands comes from.
Meanwhile rotor (a) drives intermediate (b) which drives centre chrono seconds wheel (c).
Remember there are another two entirely separate trains in there as well for the 1/10th and minute counters.
Notice that most of the wheels are more or less upright, but the rotors are leaning over. that's because (as mentioned) the rotors are very magnetic and will try to grab hold of any iron or steel within about 3 or 4 inches of themselves, including the soft iron stators that they sit inside.
That causes problems with the next part - fitting the bridge:

The first thing is to get the 3 extended pivots up through their pipes. That's not as easy as it sounds because they have to be absolutely lined up, at the same time, with their own weight (and those magnetic rotors) trying to pull them over sideways. Still, once they're in nearly there, eh?
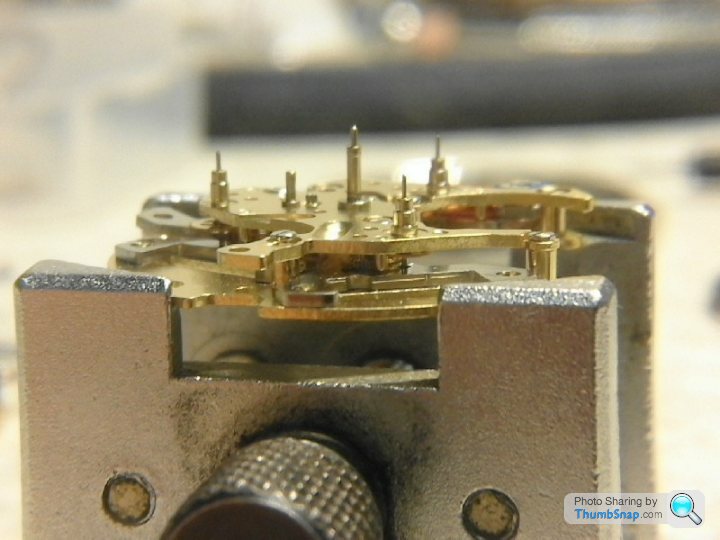
Wrong! Looking from the side of the movement, you can see that there are still 8 pivots, around .005" diameter each, that need to be lined up with jewelled holes that are about 0.0052" diameter and with no chamfer or other lead-in to help:

Not only that, if you dislodge any of the wheels from their lower pivot holes those rotors will grab hold of them and pull out any others in the way as they do it. There is no trick to that bit - it's just patience, a steady hand, and a sense of humour on your 7th or 8th attempt!
Incidentally, I can't think of a single mechanical movement with that many pivots held by a single bridge or needing to all be fitted together - the most off the top of my head is about 6, and typical would be 3 or 4. Mechanicals also tend to have bigger pivots and heavier wheels, which helps to keep everything in place better as you work.
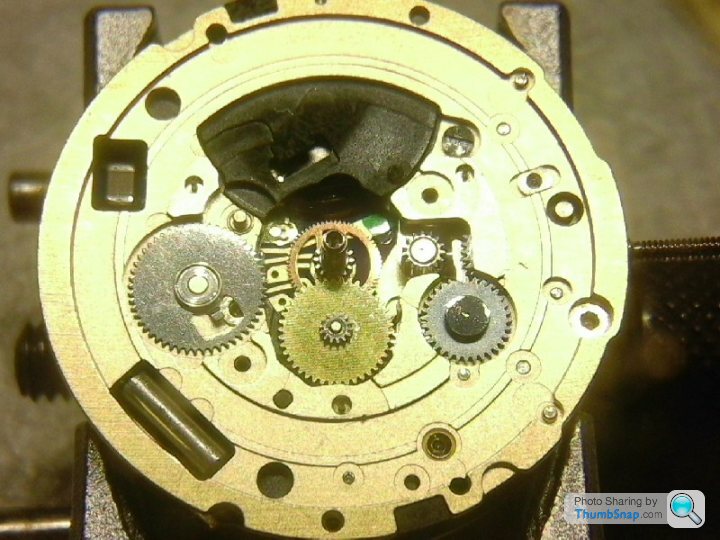
Still, sooner or later you'll be rewarded with this:
All wheels in place, all trains moving freely, and the plates snugged down where they belong. So now we oil the 22 pivots (11 front and 11 back):

To give an idea of the amount of oil used, that's under 20x magnification and a single dip of the tip of oiler (the rod coming in from the right) into the oil pot will pick up enough oil for about 3 - 5 pivots, giving a very quick touch to each. On each dip you oil from "big" pivots to smaller ones so that the bigger pivots naturally get more oil than the smaller ones. Too much is liable to run through the jewel hole and bridge between the plate and the wheel. Just the surface tension of that bridge can be enough to stop a quartz movement!
That's most of the mechanical assembly done, so then it's on to the electronics and front plate....
First we refit the drive coils. there's nothing particularly difficult about that but they do need careful handling - the wire they're wrapped from is a few 10000ths of an inch in diameter and breaks very easily if you slip with tweezers / screwdriver / fingernail or even (if you're unlucky) just drop them on the bench:

A little diversion back to the mechanical stuff here - the cannon pinion. This acts as a clutch between the train and the hands, so that you can turn the hands for setting without spinning the entire wheel train:

The drive from the movement goes through the brass wheel, which is a clipped-on friction fit to the steel centre. The joint must be lubricated. If it's not, the first sign will be the handset feeling "tight" and the next (usually sooner rather than later) will be teeth ripped off something if you continue trying to set the hands.
The circuit itself is simply screwed down, again taking care not to slip near any of the coils, and the cannon pinion slips on over the top, engaging with the teeth I mentioned earlier on the 5th wheel:

With those in place, the front plate (with the handsetting works) can be fitted. It basically drops into place and is held by 3 screws, but you have to avoid breaking any of the extended sub-hand pivots as you get it into place, and also make sure that the hacking switch (thin gold plated rod just over half way up on the left) is in the correct position or the watch will either continue to run in handset or fail to run at all:

With that in place, you can fit the sub- and centre seconds hands and test the movement for basic operation. Only, in this case, there were 3 new (non original) sub hands to fit which needed sizing to the movement (it's rare that they're exactly right out of the packet):
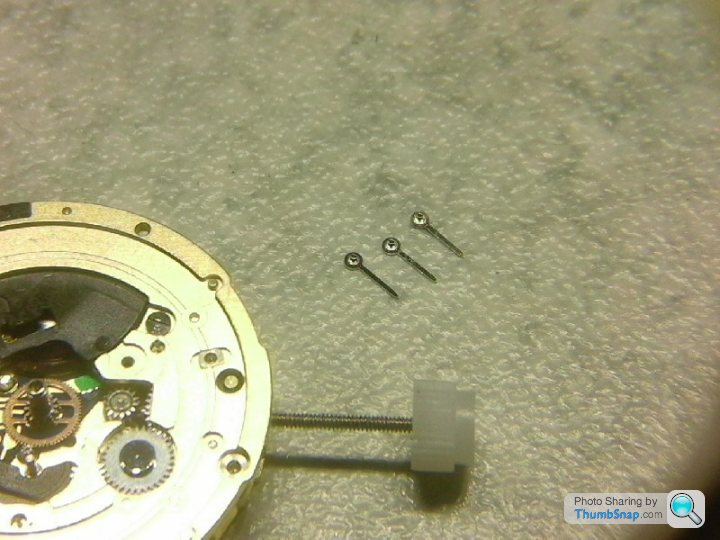
The movement requires 0.20mm holes in the hands but the 0.20 hands ordered were about .01mm under-size. 1/100th of a mm may not sound like much, but it's enough to either stop them fitting or risk breaking the spindle trying. Given that would mean stripping the lot again, better to size the hands to fit.
That's done by hand / "feel" using a 5-sided cutting broach. Remember, the hole is about 0.19mm diameter, and you only want to open it by about 0.01mm unless you want problems with hands falling off:

Once they're ready, we can temporarily fit them and check that the various trains move freely under their own power:
You can get a reasonable idea if they're ok using the chronograph zero function in handset. By pressing and holdin the chrono switches the hands will spin at high speed and any tightness will tend to show up as stuttering. It's not foolproof but it's a good way to spot obvious problems before it's cased up.
Once that's good, the hands come off again for the date-work to be fitted. On this movement it's a very simple affair because there's no fast date change as such - it has an independently adjustable hour hand so you change date by spinning the hour hand through 24 hours. That saves a lot of complication on the dial side:

From this point it's effectively a simple movement change - fit the dial and hands and re-case:

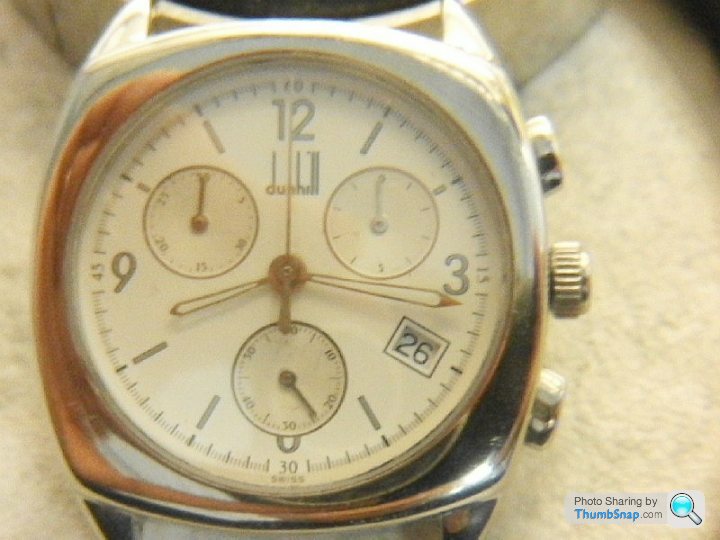
All that inside a 32mm (35mm with crown) case. Anyone still say quartz are "just a circuit board"?
A little diversion back to the mechanical stuff here - the cannon pinion. This acts as a clutch between the train and the hands, so that you can turn the hands for setting without spinning the entire wheel train:
The drive from the movement goes through the brass wheel, which is a clipped-on friction fit to the steel centre. The joint must be lubricated. If it's not, the first sign will be the handset feeling "tight" and the next (usually sooner rather than later) will be teeth ripped off something if you continue trying to set the hands.
The circuit itself is simply screwed down, again taking care not to slip near any of the coils, and the cannon pinion slips on over the top, engaging with the teeth I mentioned earlier on the 5th wheel:
With those in place, the front plate (with the handsetting works) can be fitted. It basically drops into place and is held by 3 screws, but you have to avoid breaking any of the extended sub-hand pivots as you get it into place, and also make sure that the hacking switch (thin gold plated rod just over half way up on the left) is in the correct position or the watch will either continue to run in handset or fail to run at all:
With that in place, you can fit the sub- and centre seconds hands and test the movement for basic operation. Only, in this case, there were 3 new (non original) sub hands to fit which needed sizing to the movement (it's rare that they're exactly right out of the packet):
The movement requires 0.20mm holes in the hands but the 0.20 hands ordered were about .01mm under-size. 1/100th of a mm may not sound like much, but it's enough to either stop them fitting or risk breaking the spindle trying. Given that would mean stripping the lot again, better to size the hands to fit.
That's done by hand / "feel" using a 5-sided cutting broach. Remember, the hole is about 0.19mm diameter, and you only want to open it by about 0.01mm unless you want problems with hands falling off:
Once they're ready, we can temporarily fit them and check that the various trains move freely under their own power:
You can get a reasonable idea if they're ok using the chronograph zero function in handset. By pressing and holdin the chrono switches the hands will spin at high speed and any tightness will tend to show up as stuttering. It's not foolproof but it's a good way to spot obvious problems before it's cased up.
Once that's good, the hands come off again for the date-work to be fitted. On this movement it's a very simple affair because there's no fast date change as such - it has an independently adjustable hour hand so you change date by spinning the hour hand through 24 hours. That saves a lot of complication on the dial side:
From this point it's effectively a simple movement change - fit the dial and hands and re-case:
All that inside a 32mm (35mm with crown) case. Anyone still say quartz are "just a circuit board"?
ecain63 said:
My head just exploded looking at that. Nice work mate.
Thanks, but if I screw up really big time and wilfully keep screwing up until there's nothing left to fix, replacing that whole movement will hit me for £160 or so. How much would that sapphire in your last post cost for one slip while setting?

Variomatic said:
ecain63 said:
My head just exploded looking at that. Nice work mate.
Thanks, but if I screw up really big time and wilfully keep screwing up until there's nothing left to fix, replacing that whole movement will hit me for £160 or so. How much would that sapphire in your last post cost for one slip while setting?
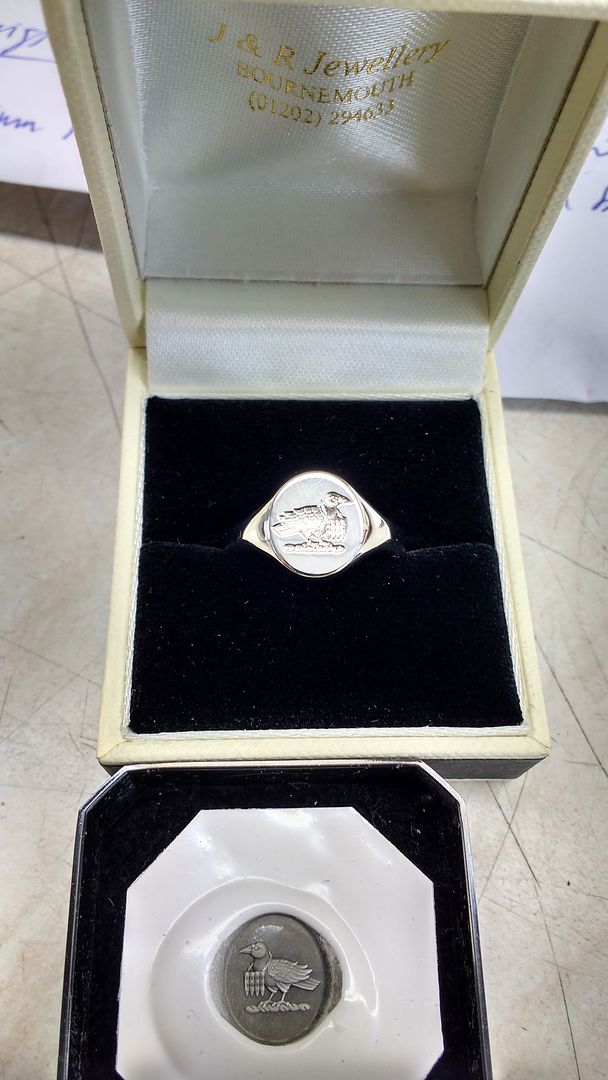
Today we got into signet ring engraving. A customer wanted a platinum signet ring made and the head deep engraved with her husbands family crest. We made the ring and found a fantastic engraver, so we now offer it as a service. It's not cheap but you get what you pay for:
And just in time for the 'year end' i got my tray emptied and sent off to be refined:


And just in time for the 'year end' i got my tray emptied and sent off to be refined:

ecain63 said:
471g of mixed metals. I'm keen to know what it's worth too.
We sent the carpet off a couple of years back and got something like £5500 back.
Probably a stupid question, but how do they value it? The value must depend on the metal mix I guess, but how do they separate this out from the bag of dust?! Or, better yet, from a carpet? We sent the carpet off a couple of years back and got something like £5500 back.
DanL said:
ecain63 said:
471g of mixed metals. I'm keen to know what it's worth too.
We sent the carpet off a couple of years back and got something like £5500 back.
Probably a stupid question, but how do they value it? The value must depend on the metal mix I guess, but how do they separate this out from the bag of dust?! Or, better yet, from a carpet? We sent the carpet off a couple of years back and got something like £5500 back.
Very interesting vario, but surely the labour involved in repairing that is near the £160 for a new movement? There must be a few hours work there!
Can you do an full Auto strip next, maybe ill send my seadweller across for a service and you can do that?
Can you do an full Auto strip next, maybe ill send my seadweller across for a service and you can do that?
Variomatic said:
First we refit the drive coils. there's nothing particularly difficult about that but they do need careful handling - the wire they're wrapped from is a few 10000ths of an inch in diameter and breaks very easily if you slip with tweezers / screwdriver / fingernail or even (if you're unlucky) just drop them on the bench:
A little diversion back to the mechanical stuff here - the cannon pinion. This acts as a clutch between the train and the hands, so that you can turn the hands for setting without spinning the entire wheel train:
The drive from the movement goes through the brass wheel, which is a clipped-on friction fit to the steel centre. The joint must be lubricated. If it's not, the first sign will be the handset feeling "tight" and the next (usually sooner rather than later) will be teeth ripped off something if you continue trying to set the hands.
The circuit itself is simply screwed down, again taking care not to slip near any of the coils, and the cannon pinion slips on over the top, engaging with the teeth I mentioned earlier on the 5th wheel:
With those in place, the front plate (with the handsetting works) can be fitted. It basically drops into place and is held by 3 screws, but you have to avoid breaking any of the extended sub-hand pivots as you get it into place, and also make sure that the hacking switch (thin gold plated rod just over half way up on the left) is in the correct position or the watch will either continue to run in handset or fail to run at all:
With that in place, you can fit the sub- and centre seconds hands and test the movement for basic operation. Only, in this case, there were 3 new (non original) sub hands to fit which needed sizing to the movement (it's rare that they're exactly right out of the packet):
The movement requires 0.20mm holes in the hands but the 0.20 hands ordered were about .01mm under-size. 1/100th of a mm may not sound like much, but it's enough to either stop them fitting or risk breaking the spindle trying. Given that would mean stripping the lot again, better to size the hands to fit.
That's done by hand / "feel" using a 5-sided cutting broach. Remember, the hole is about 0.19mm diameter, and you only want to open it by about 0.01mm unless you want problems with hands falling off:
Once they're ready, we can temporarily fit them and check that the various trains move freely under their own power:
You can get a reasonable idea if they're ok using the chronograph zero function in handset. By pressing and holdin the chrono switches the hands will spin at high speed and any tightness will tend to show up as stuttering. It's not foolproof but it's a good way to spot obvious problems before it's cased up.
Once that's good, the hands come off again for the date-work to be fitted. On this movement it's a very simple affair because there's no fast date change as such - it has an independently adjustable hour hand so you change date by spinning the hour hand through 24 hours. That saves a lot of complication on the dial side:
From this point it's effectively a simple movement change - fit the dial and hands and re-case:
All that inside a 32mm (35mm with crown) case. Anyone still say quartz are "just a circuit board"?
 Brings a whole new meaning to finding money down the back of the
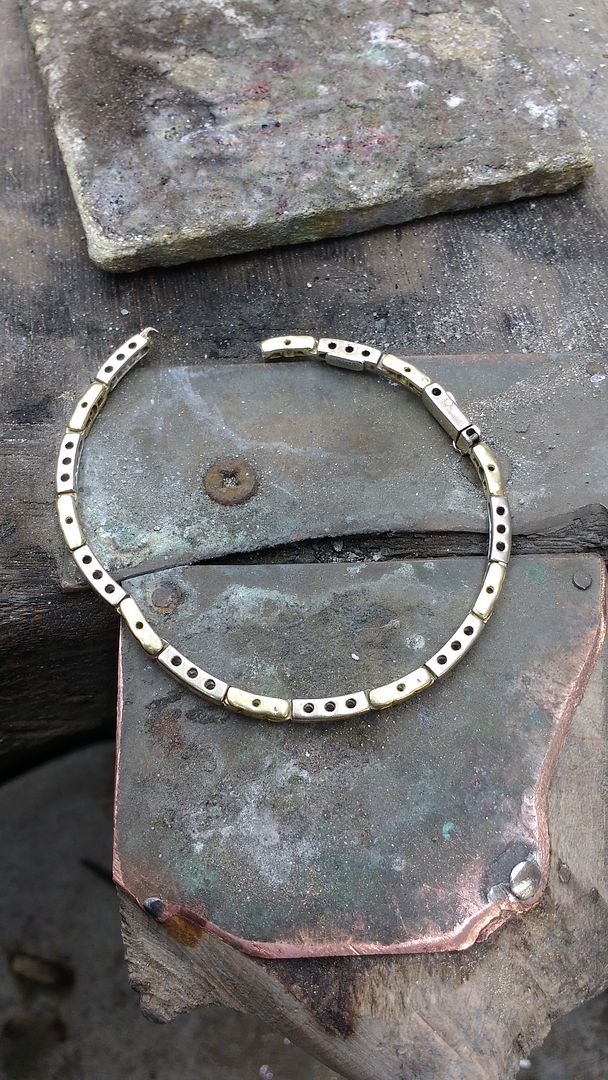
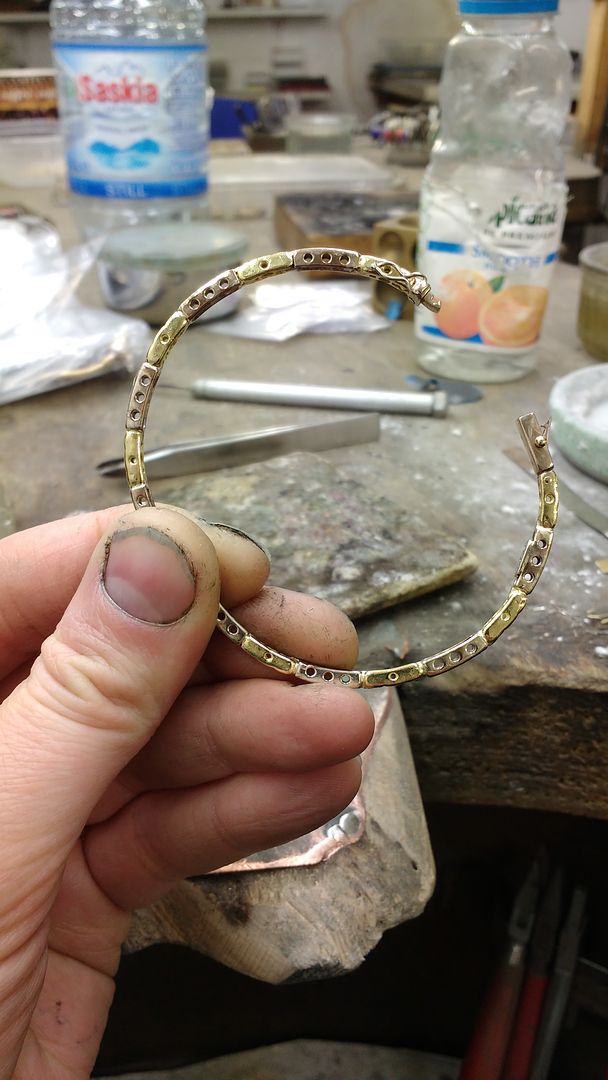
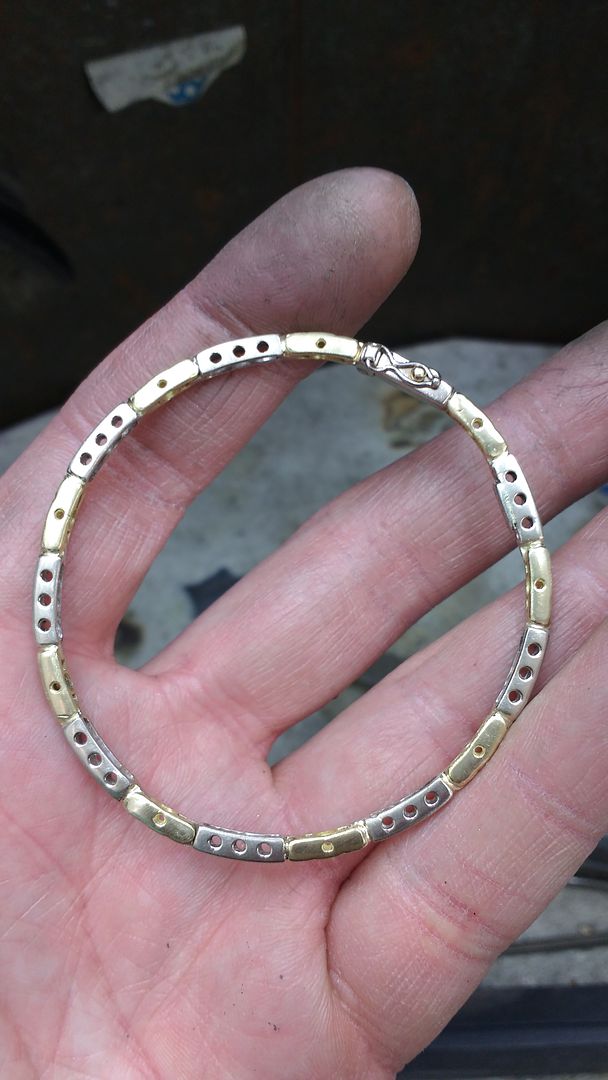
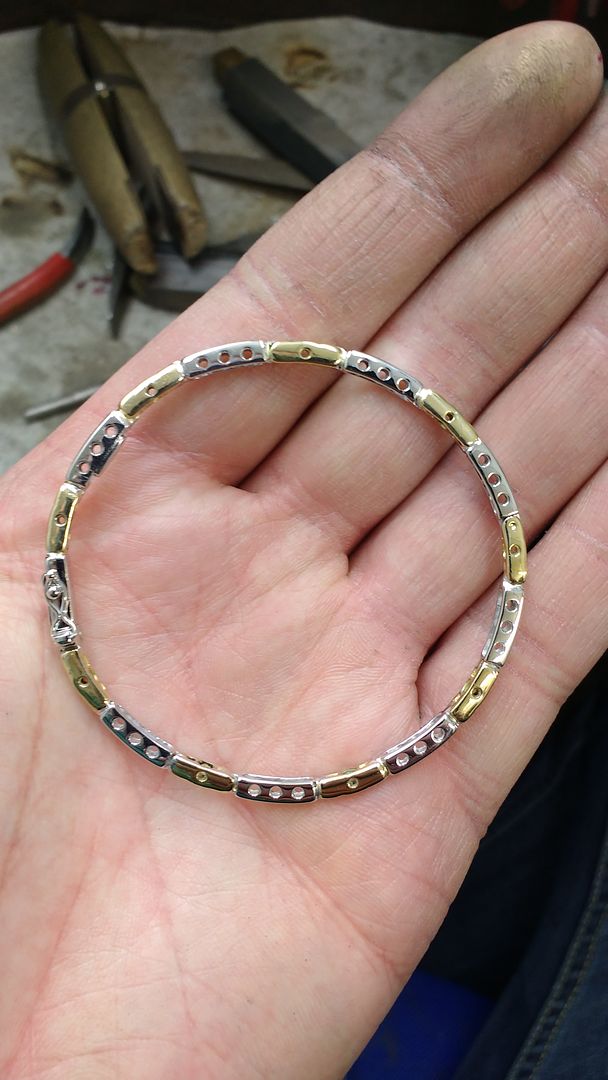
PHer Coneyhurst Blue sent me this little number. A two colour bracelet that had seen many repairs and better days.
The previous repairer had soldered the links together to make a solid bracelet with a hinge in the middle. In theory this is great and had the wearer been a little more forgiving I think the job would have stood the test of time. Very few people know this, but chlorine from the pool, sea water, cosmetics etc all damage gold by destroying the other metals mixed with the gold. 9ct gold is 62.5% other metals so it is quite easy to see how 9ct gold can become brittle over time if used in all environments.
Anyway, the bracelet broke again so here we are: A link broken at the weak point.... the solder joint. It looked a dry joint so maybe the last repairer didn't use the correct flux or didn't clean it before soldering.
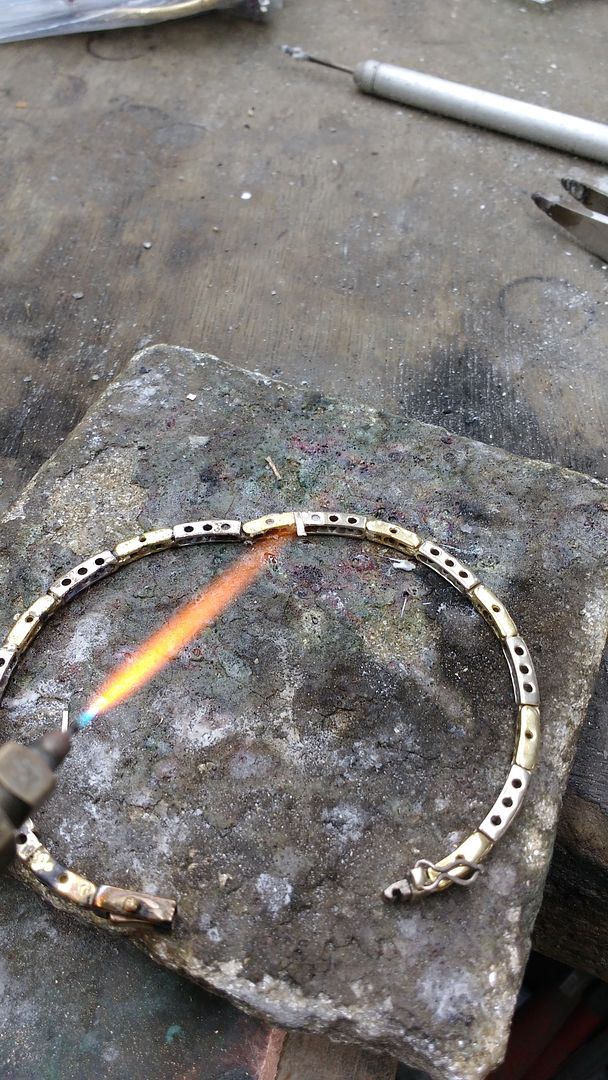
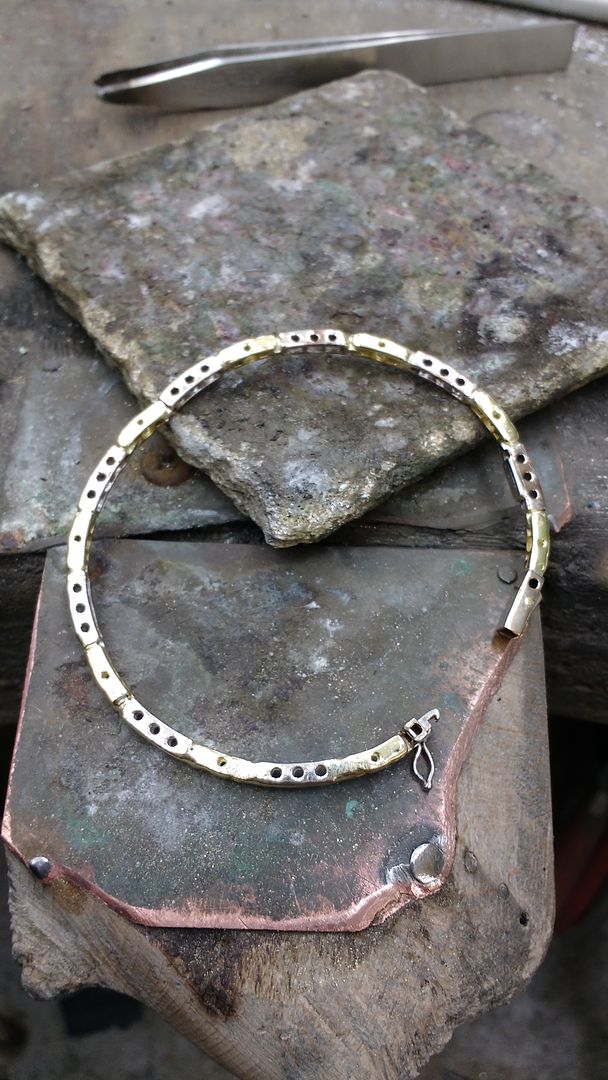
First off I burnt the bracelet to remove the dirt and grease. This was then boiled in the 'pickle' to remove the burnt residue:

I then got on with resoldering the links, adding fresh solder to the existing joints to make sure the solder had run properly and that the solder was strong enough to hold:
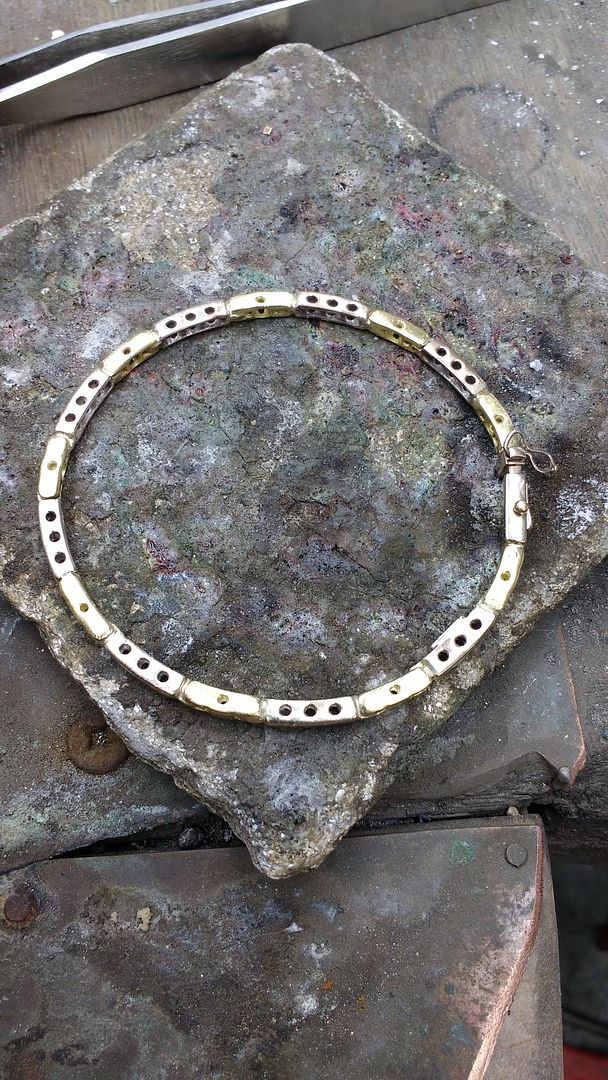
The links are all soldered and the bracelet boiled in the pickle again to remove the borax and stains. I then tap the bracelet on a bangle triblet with a soft mallet to make it round:
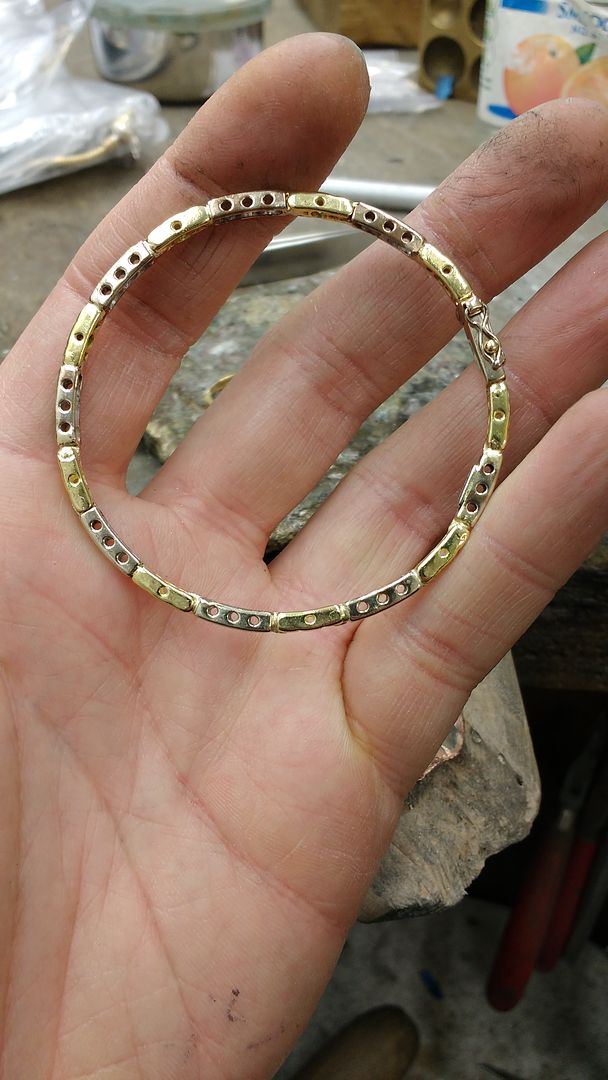
Testing the hinge works:
The excess solder still needs to be removed from between the links:
Triangle files are used to do this:
The bangle is then buffed down to make ready for polishing. 500 grit followed by 2000 grit:
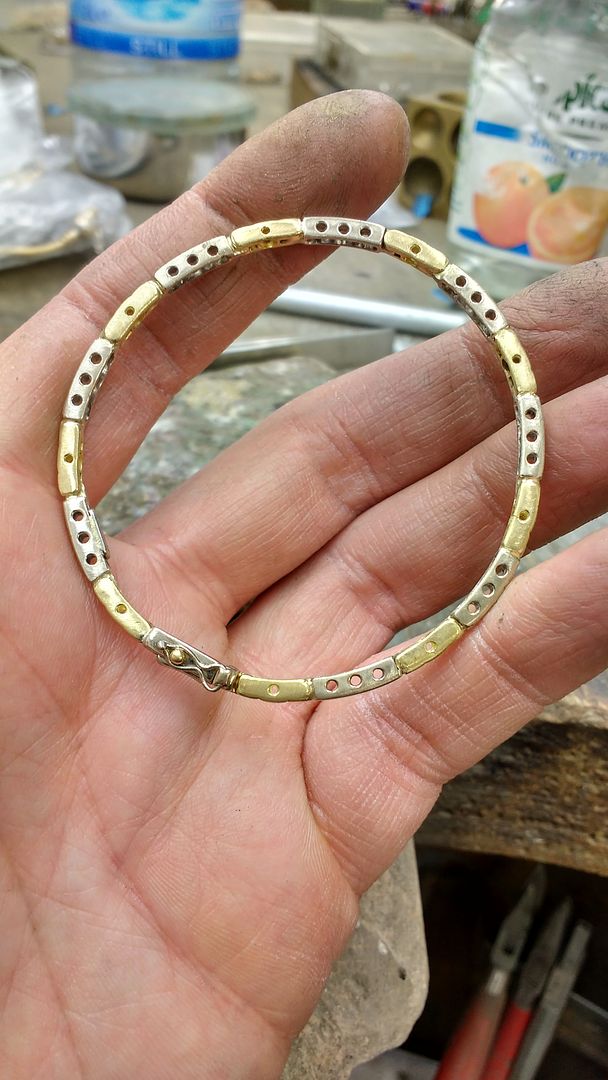
I then polish the bracelet and get it ready for the white sections to be plated. Here you can see my trusty nail varnish is in full use:
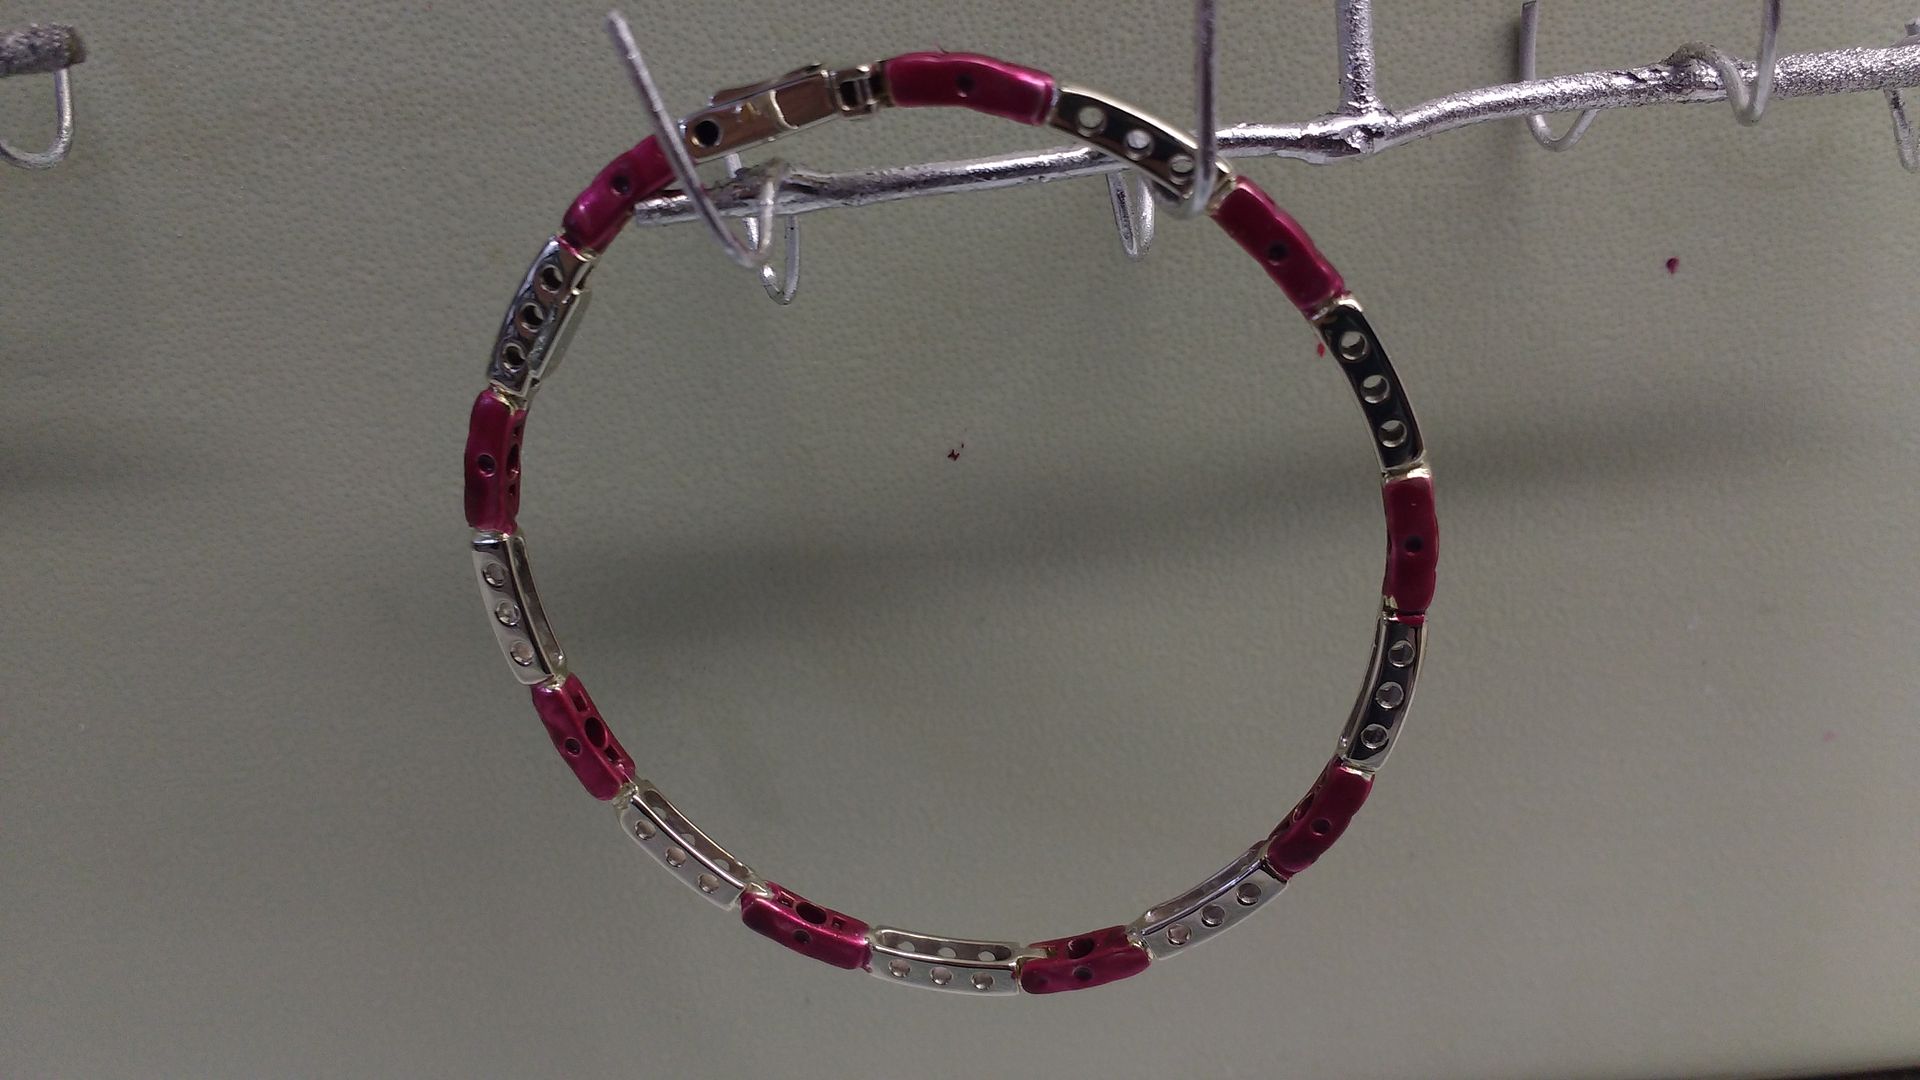
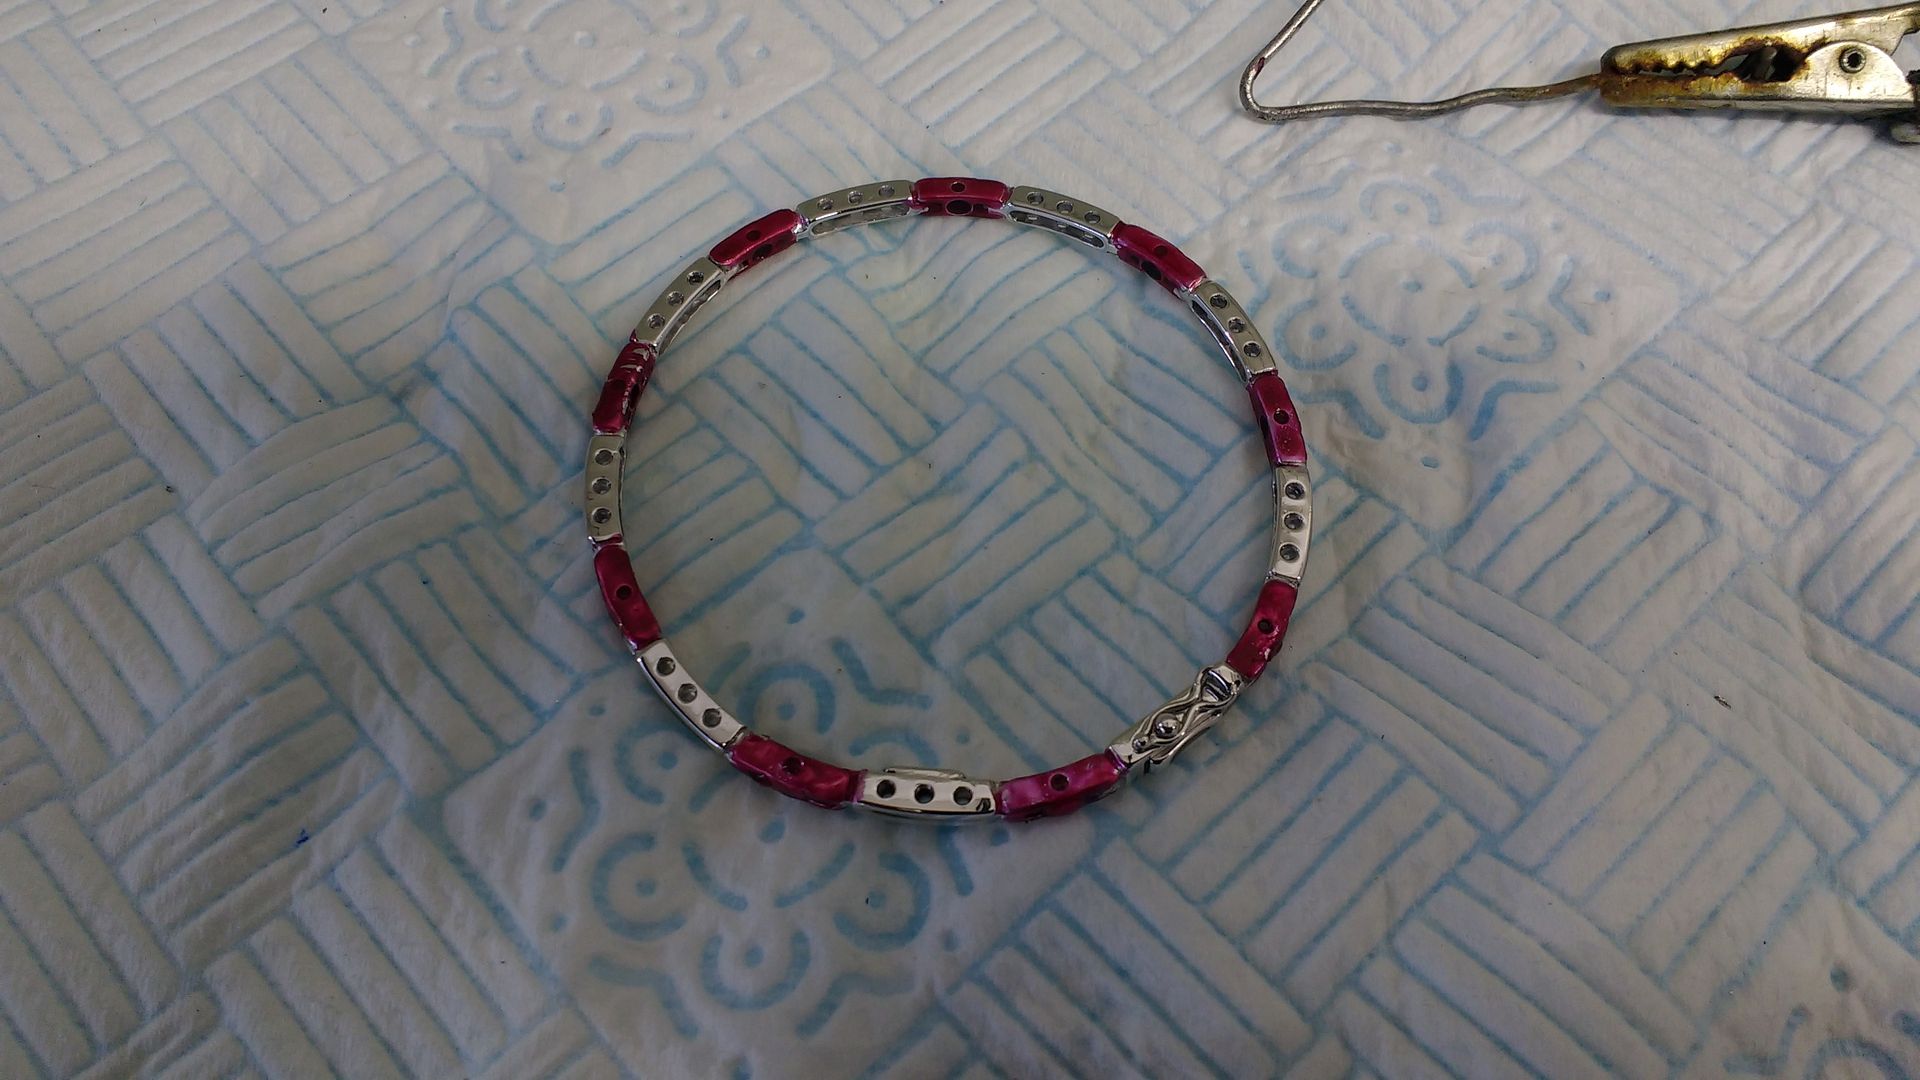
The bracelet is then rhodium plated and the nail varnish stripped off with MEK:
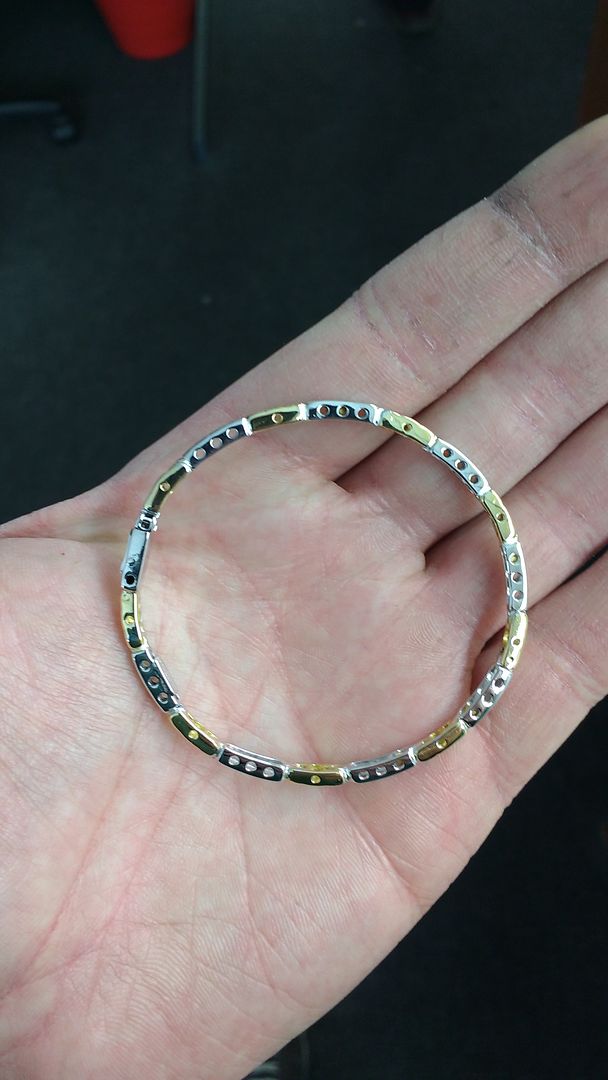
All done. Good to be worn again:
Eddie
The previous repairer had soldered the links together to make a solid bracelet with a hinge in the middle. In theory this is great and had the wearer been a little more forgiving I think the job would have stood the test of time. Very few people know this, but chlorine from the pool, sea water, cosmetics etc all damage gold by destroying the other metals mixed with the gold. 9ct gold is 62.5% other metals so it is quite easy to see how 9ct gold can become brittle over time if used in all environments.
Anyway, the bracelet broke again so here we are: A link broken at the weak point.... the solder joint. It looked a dry joint so maybe the last repairer didn't use the correct flux or didn't clean it before soldering.

First off I burnt the bracelet to remove the dirt and grease. This was then boiled in the 'pickle' to remove the burnt residue:

I then got on with resoldering the links, adding fresh solder to the existing joints to make sure the solder had run properly and that the solder was strong enough to hold:

The links are all soldered and the bracelet boiled in the pickle again to remove the borax and stains. I then tap the bracelet on a bangle triblet with a soft mallet to make it round:

Testing the hinge works:

The excess solder still needs to be removed from between the links:

Triangle files are used to do this:

The bangle is then buffed down to make ready for polishing. 500 grit followed by 2000 grit:


I then polish the bracelet and get it ready for the white sections to be plated. Here you can see my trusty nail varnish is in full use:


The bracelet is then rhodium plated and the nail varnish stripped off with MEK:

All done. Good to be worn again:

Eddie
Edited by ecain63 on Friday 11th March 20:03
Edited by ecain63 on Friday 11th March 20:06
Gassing Station | Watches | Top of Page | What's New | My Stuff