Head gasket advice
Discussion


Morning chaps
Following on from an earlier post I'm pretty certain I've got head gasket issues
I'm losing water and got steam in the exhaust so I'm pretty certain I've blown one
Anyhow I'm replacing with a composite gaskets and I'm certain that the general consensus is to not refit the outer set of bolts (buried down by the exhaust manifold) and do I use later 'stretch' bolts or reuse the bolts that came out ??
Can anyone confirm the above as correct please???
Many thanks Ron
Edited by Rockettvr on Thursday 5th May 12:10
Hi Chris
Been a busy boy this year - more so than normal - we've picked up a contract fir some pub refurb /rewires basically one a month for the next 5 years (hopefully) and I've been wiring a loft conversion in my spare time so not much Tim for anything else lately
Anyway didn't bother with tests as all classic symptoms are there - unexplained loss of coolant - bubbles in coolant - clouds of white steam from exhaust etc
Already started strip down on Monday -need to order parts up so I can continue
Not sure on the bolts though - I'm certain the outer line is left out or only torqued to a low figure but if I do that do I use stretch bolts as per the 10 bolt heads or reuse my existing bolts and torque down as per 14 bolt specification???
Hi Ron
No problems ........
Try this:
Rover V8 14 bolt head bolt tightening sequence
How to Torque up stretch cylinder head bolts.
Stretch head bolts were introduced by Land Rover in approx. 1993/4 when they introduced 10 bolt cylinder heads on the serpentine style engines. And although used as standard on these engines they can also be used, and are preferred for use on the earlier 3.5, 3.9 and 4.2 litre engines. Along with stretch head bolts always use good quality composite head gaskets.
Stretch bolts do not just torque up, these are tightened to a specific torque setting and are then rotated a certain degree (and in the case of head bolts this is done twice)
on 10 bolt and 14 bolt heads.
All early Rover V8 engines were fitted with 14 bolt cylinder heads, it was not until the serpentine style engine was introduced in 1993/4 that the 10 bolt head was designed.
if you are still using an old 14 bolt block then you can re-use the 4 bolts that are fitted to the lower row. However these are only to be torqued to 20NM with lock tight applied. This is simply so they have no effect but fill the holes. This is to be done after torqing the main 10 bolts up as detailed below.

Firstly it is important to tighten the head bolts up in the correct order so that the head pulls down squarely, work from the inside outwards.
Start by torqueing the stretch bolts down to 25NM in the correct order.
It is now a good idea to mark each head bolt with Tippex (or any other brand of white marker) Mark it from the centre upwards in a line.
Next turn each bolt through 90 degrees clockwise. Again in the same order starting from the centre. Once done all white lines should be to the right.
Finally turn each bolt through 90 degrees again in the correct order so that all lines are pointing down.
Check all white marks are pointing down.
Hope that helps Ron
Chris
No problems ........
Try this:
Rover V8 14 bolt head bolt tightening sequence
How to Torque up stretch cylinder head bolts.
Stretch head bolts were introduced by Land Rover in approx. 1993/4 when they introduced 10 bolt cylinder heads on the serpentine style engines. And although used as standard on these engines they can also be used, and are preferred for use on the earlier 3.5, 3.9 and 4.2 litre engines. Along with stretch head bolts always use good quality composite head gaskets.
Stretch bolts do not just torque up, these are tightened to a specific torque setting and are then rotated a certain degree (and in the case of head bolts this is done twice)
on 10 bolt and 14 bolt heads.
All early Rover V8 engines were fitted with 14 bolt cylinder heads, it was not until the serpentine style engine was introduced in 1993/4 that the 10 bolt head was designed.
if you are still using an old 14 bolt block then you can re-use the 4 bolts that are fitted to the lower row. However these are only to be torqued to 20NM with lock tight applied. This is simply so they have no effect but fill the holes. This is to be done after torqing the main 10 bolts up as detailed below.
Firstly it is important to tighten the head bolts up in the correct order so that the head pulls down squarely, work from the inside outwards.
Start by torqueing the stretch bolts down to 25NM in the correct order.
It is now a good idea to mark each head bolt with Tippex (or any other brand of white marker) Mark it from the centre upwards in a line.
Next turn each bolt through 90 degrees clockwise. Again in the same order starting from the centre. Once done all white lines should be to the right.
Finally turn each bolt through 90 degrees again in the correct order so that all lines are pointing down.
Check all white marks are pointing down.
Hope that helps Ron
Chris
 t getting in the holes.
Elring gaskets are the way to go. I think it's what tvr power use as well. You can either omit entirely the 4 outer row bolts (I have and so did tvr power when they rebuilt the engine, or some people just lightly torque them. ARP studs are good (more expensive than bolts) but you would not be able to fit or remove the offside head without lifting the engine significantly.

ARP studs are good but be careful re-fitting the head that you don't catch the flat face on them as it's very easy to score a line across the head.
The driver's side is tricky because of the big lump on the bulkhead, it's easier to unscew the studs at the bulkhead end and fit them after the head goes on. The ones with allen holes are good because you can easily screw/unscrew them (only finger tight though!)
Another advantage of the studs is that you can re-use them.
In terms of testing the coolant I've found a much easier method is to take off the overflow pipe (after the 15lb cap) and let the bubbling gases run through a clear lime solution. If there's CO2 in there it goes cloudy pretty quickly. If it's just steam then it doesn't.
A second test worth doing is to pull off the injector connectors either on 1, 7, or 2 or 8 (the end cylinders) one at a time, then replace it and move to the next one, and if the bubbling stops or slows down, then you know which cylinder is blowing into the coolant.
Personally I have a mild problem still with No 1 cylinder where I think the head might not be trapping the gasket properly and it's blowing again into the water gallery. So I'm considering making up a copper gasket instead - has anyone else used copper and are there any tips to using it?
I have a CNC machine at work that I could make it on, just need to convert a scan of a gasket into a CNC file.
Ron,
The Elring gaskets I know are a multilayer steel design; the ones in the pic look just like the crap gaskets I originally fitted, although they only have 10 bolt holes and the rubbish ones I fitted had 14. The Felpro gaskets look and feel completely different to the ones in the picture.
As far as I know all 3.5L engines had 14 bolts so I'd be suprised if these 10 bolt ones are the correct bore size for the 3.5L. I think I paid about £60 for the felpro gaskets but that's a small price to pay relative to the hassle of having to change the gaskets again.
Are you changing the gaskets with the engine in position? If so start with the head bolt nearest the driver; it's a pig to get to and if it won't budge you'll have to come up with a plan B. You'll probably have to undo the engine mounts and tilt the engine to get access.
Good luck, it's worth it in the end!
Martin
Edited by The Hatter on Thursday 5th May 21:10
adam quantrill said:
Oh yeah top tip (after starting with the hard bolt as Martin says) only undo each one a "crack" first no more than 1/4 turn, then move on to the next one, until you have done all 14, then go round again, or else the last one will be a right bugger to crack off.
Spot on.The 390SE engine was a bored-out 3.5L block so uses the 14-bolt heads. When I had mine rebored it ended up with 94mm bores, the same as a '4L' engine as used in the 400SE and later RangeRovers. So my car has 94mm bore head gaskets with all the bolts fitted and has run perfectly fine like that for 15 years since I last rebuilt it; I'm not sure what the issue is with the outer row of bolts but one wonders how much it's down to wrong installation/torqueing technique (and I'm not claiming to be an expert here).
Wedg1e said:
I'm not sure what the issue is with the outer row of bolts but one wonders how much it's down to wrong installation/torqueing technique (and I'm not claiming to be an expert here).
Its generally understood to cause the heads to be pulled over, eventually leading to sealing problems. The Hatter said:
Ron,
The Elring gaskets I know are a multilayer steel design; the ones in the pic look just like the crap gaskets I originally fitted, although they only have 10 bolt holes and the rubbish ones I fitted had 14. The Felpro gaskets look and feel completely different to the ones in the picture.
As far as I know all 3.5L engines had 14 bolts so I'd be suprised if these 10 bolt ones are the correct bore size for the 3.5L. I think I paid about £60 for the felpro gaskets but that's a small price to pay relative to the hassle of having to change the gaskets again.
Are you changing the gaskets with the engine in position? If so start with the head bolt nearest the driver; it's a pig to get to and if it won't budge you'll have to come up with a plan B. You'll probably have to undo the engine mounts and tilt the engine to get access.
Good luck, it's worth it in the end!
Martin
In the ebay ad it says they do the 14 bolt version - ill message them today to see if its elring or notThe Elring gaskets I know are a multilayer steel design; the ones in the pic look just like the crap gaskets I originally fitted, although they only have 10 bolt holes and the rubbish ones I fitted had 14. The Felpro gaskets look and feel completely different to the ones in the picture.
As far as I know all 3.5L engines had 14 bolts so I'd be suprised if these 10 bolt ones are the correct bore size for the 3.5L. I think I paid about £60 for the felpro gaskets but that's a small price to pay relative to the hassle of having to change the gaskets again.
Are you changing the gaskets with the engine in position? If so start with the head bolt nearest the driver; it's a pig to get to and if it won't budge you'll have to come up with a plan B. You'll probably have to undo the engine mounts and tilt the engine to get access.
Good luck, it's worth it in the end!
Martin
Edited by The Hatter on Thursday 5th May 21:10
Morning peeps
Have sourced and ordered parts so I thought id carry on with the strip down
Top tip Martin re: Tilting engine to get access to bolts
All went well until I got to the head bolts themselves which were extremely tight
Cracked each one a little working my way around until one bugger cracked off literally

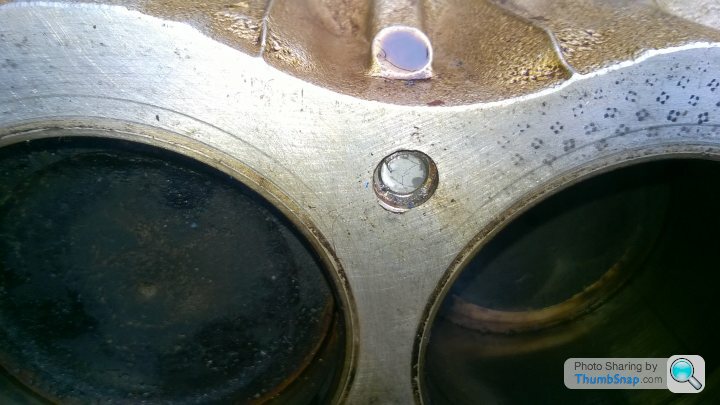
Had enough by then so filled the recess of the bolt in the head with wd 40 to soak overnight - will attack it again today with some screw extractors wd40 and if need be a bit of heat
Have sourced and ordered parts so I thought id carry on with the strip down
Top tip Martin re: Tilting engine to get access to bolts
All went well until I got to the head bolts themselves which were extremely tight
Cracked each one a little working my way around until one bugger cracked off literally
Had enough by then so filled the recess of the bolt in the head with wd 40 to soak overnight - will attack it again today with some screw extractors wd40 and if need be a bit of heat
I'm no engineer or mechanic, but I don't think even using plusgas would help, and you'd have to be very careful that any heat application didn't damage the block face. Using extractors is also fraught with problems - if you break one off, it makes the whole job ten times worse. I'd be thinking about drilling and helicoiling. Hope you can get it fixed Ron.
Gassing Station | Wedges | Top of Page | What's New | My Stuff