New restoration project - what have I done!
Discussion


 Mine were only £100 each
Cheers guys, been a very hard two years, especially hard when my son asked my wife the other day "what is dad going to do when he finishes the house? I don't remember a time when he wasn't doing DIY " kinda of brought it home, that maybe a bit of time off soon is in order, some family time, maybe some golf, and enjoy what we've done... spent the last two days plumbing in bathrooms, and I hate doing that, so it's an even easier decision right now too!

So, general update on the work over the last number of weeks... a lot of weeks!
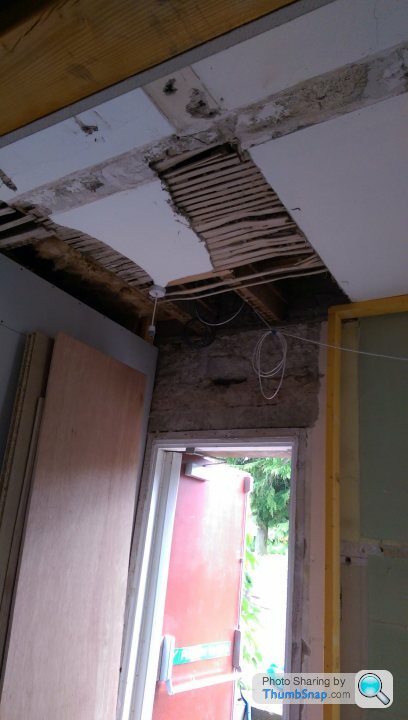
Quick recap, the space I'm working on is the area under the lounge, which is a two storey extension added to the main house a lot of years ago, I don't know when exactly, but it's lath and plaster walls, so circa 100 years ago?
The space is exactly the same size as the lounge and contains the fish tank plant room, another hallway, 3 bedrooms and 3 ensuite bathrooms.
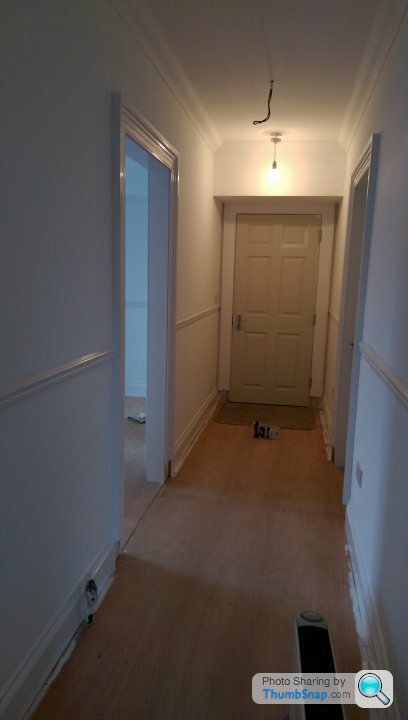
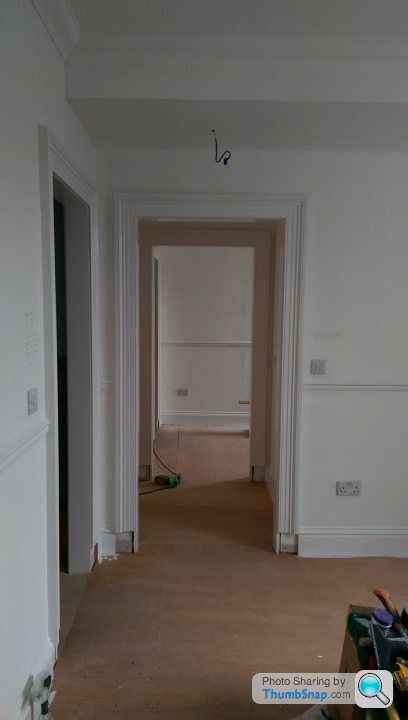
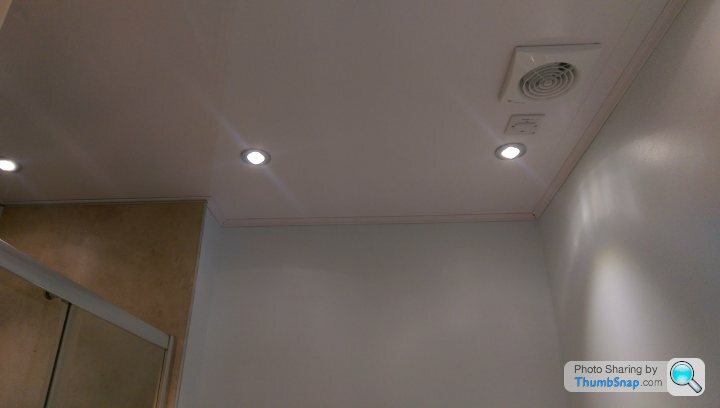
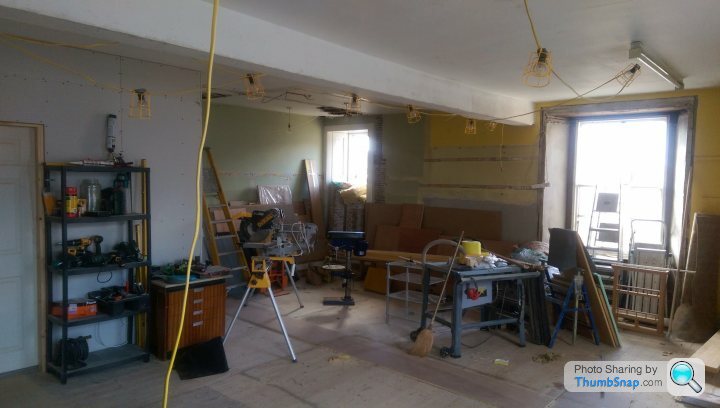
The last update I'd framed up all the exterior walls, insulated and sheeted with duplex board. Built the internal framing to sub divide the space into rooms and started on the false ceilings. Because the ceiling was old lath and plaster it was just too irregular to work with when sub divided up, so each room had a new false ceiling out in, I lowered it to around 2700mm to give some space for insulation and wiring runs. The floor above is full of the old original "deadening" which is cinder bits, so very effective, but he'll of a messy thing to touch. All new cable runs installed, for each room, aerial supplies, cat 6 points and emergency lighting systems for each room. I also extended the fire alarm zone to include the new rooms.
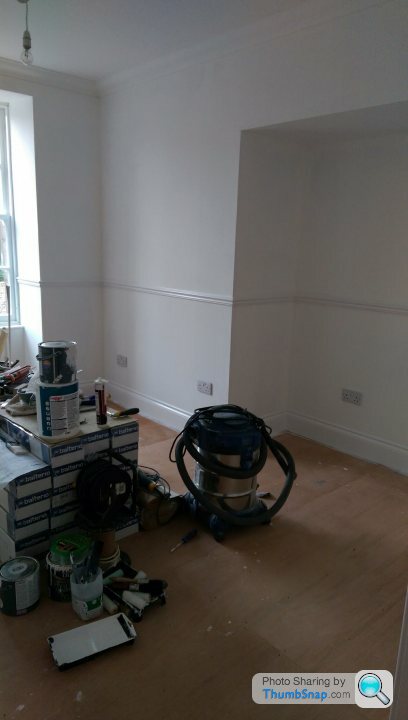
Then started the Ames taping work.. not my favourite job! All rooms taped and filled, sanded 'urgh' and given a couple of coats of plain white paint, coats the walls better before wallpapering, and helps me see any imperfections in my plaster work!
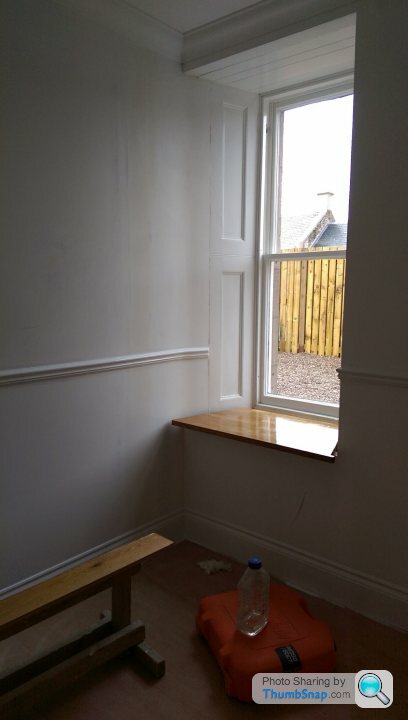
Next job was cornicing, which was pretty knew to me and not something I'd done a lot of before. I understood the compound mitre aspects, but had a serious headache trying to reverse everything to work in the ceiling! Especially as I had 6 boxes of cornice (36 lengths) and I needed exactly 35 1/2 lengths! Lol managed it ok, and pretty happy with the results TBH.
All the floors had some low profile insualation laid down, then every inch of floor was sheeted in 9mm ply to stabilise the sub floor and get rid of any bumps and lumps. Had some serious issues when the timber floor met concrete floor sections, and some "adjustment" was needed.... and a big hammer too!
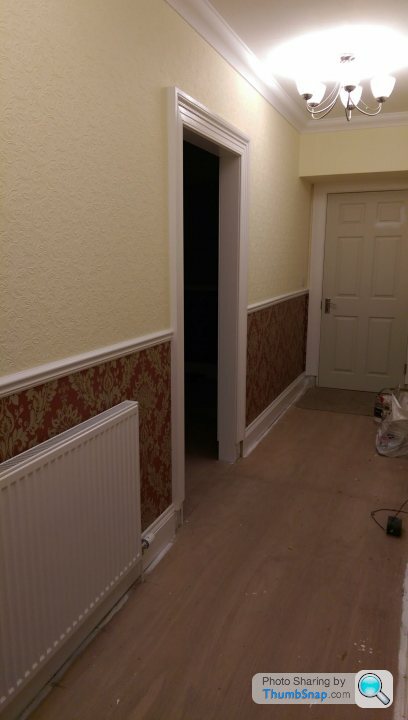
Dado rails in all rooms, next and then 170mm skirting boards, all mdf this time, for speed and durability.
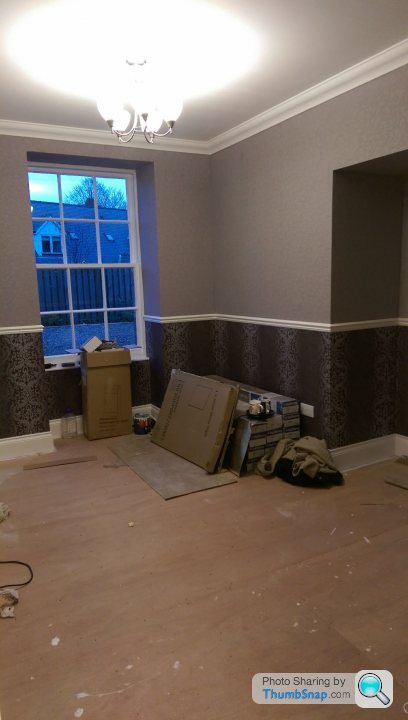
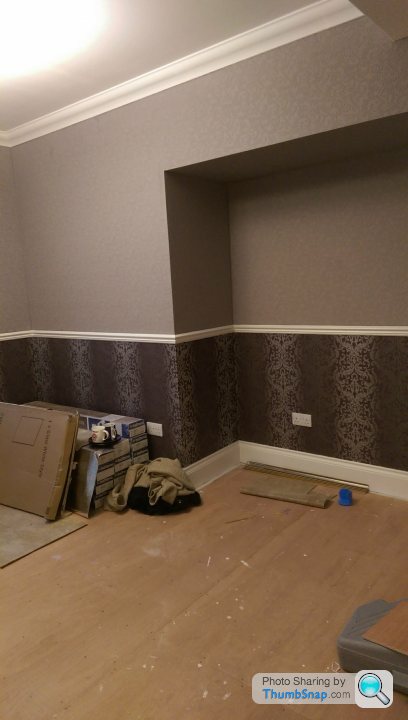
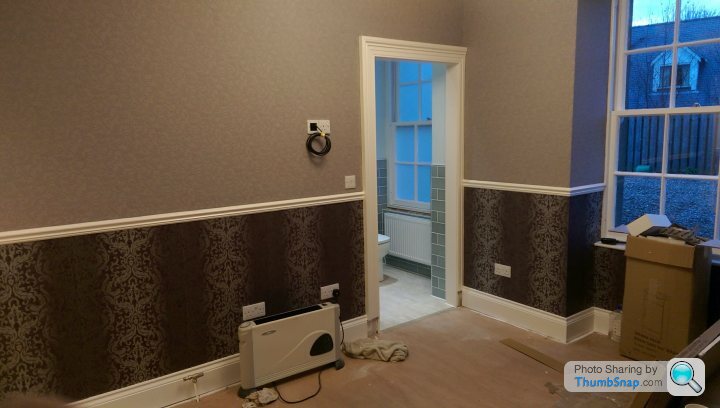
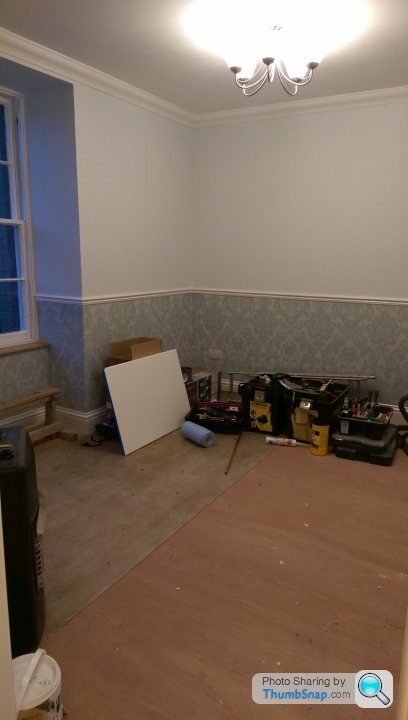
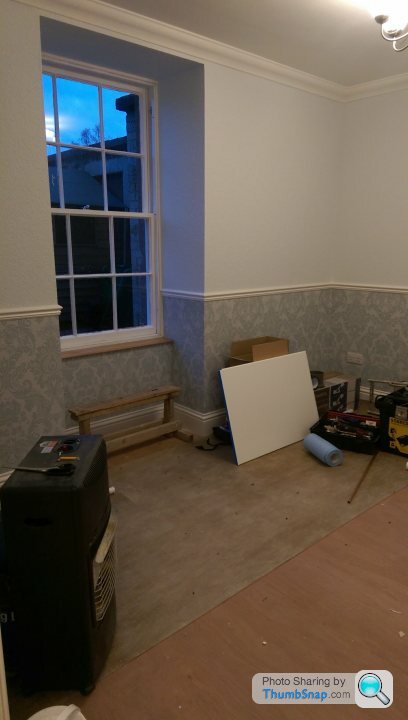
Next, wall papering... all rooms papered in the textured, embossed paper I'd used throughout the house, then painted. Simple sentence, but nearly a weeks work!
The onto the feature wall paper below dado height, a different one in each room, but starting to look like real rooms!
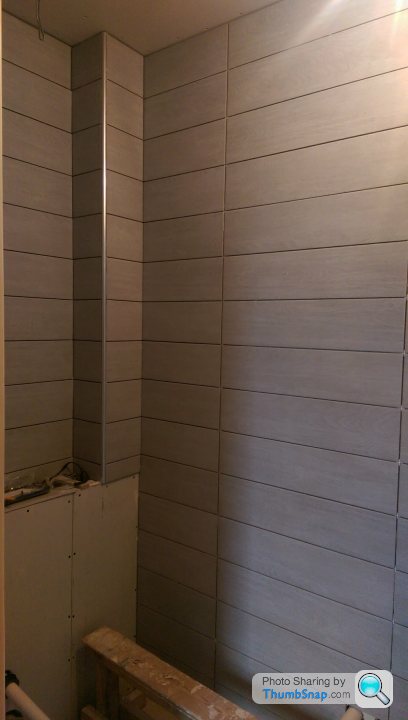
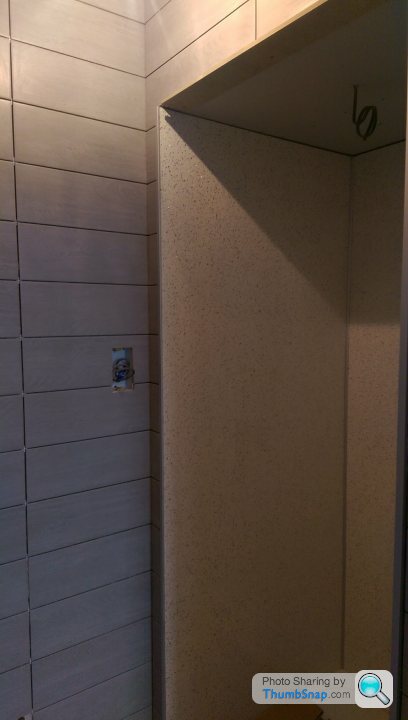
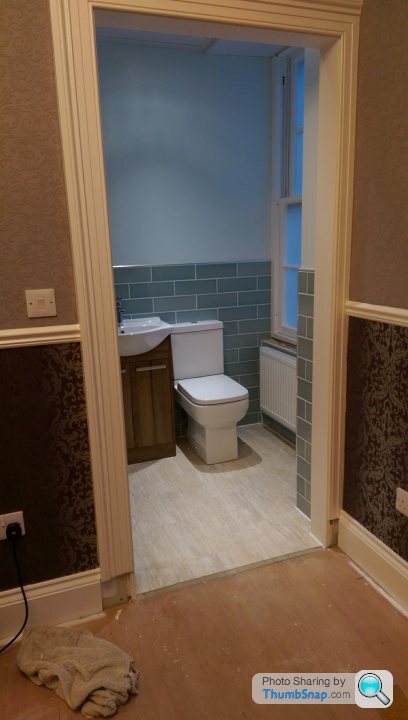
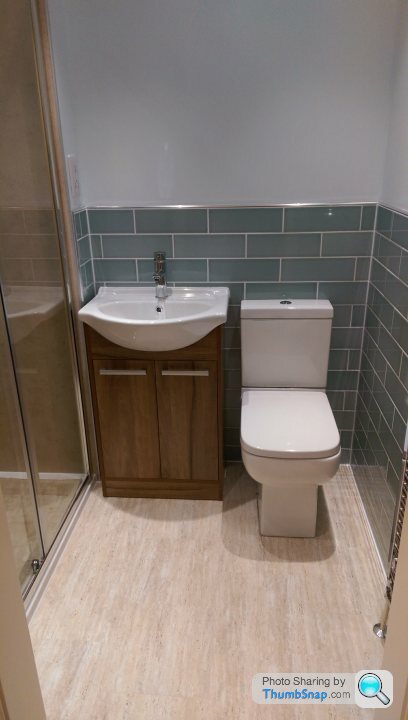
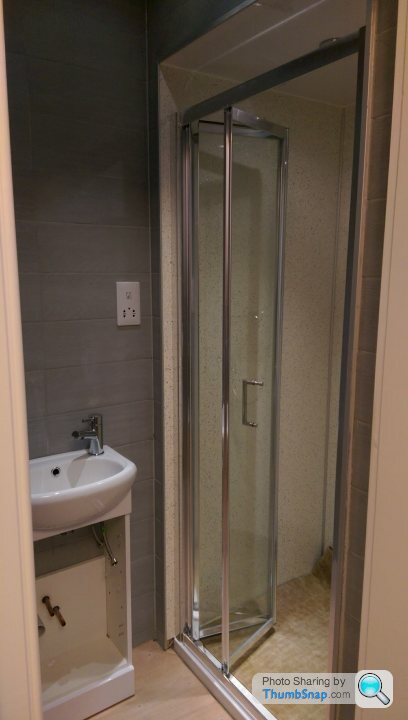
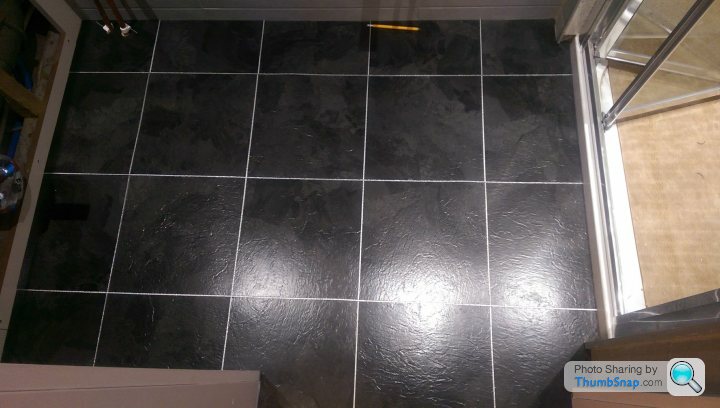
The last 3 bathrooms (bringing the total up to 12 WC's and bathrooms) were nice sized, not huge, but sized to suit the rooms, two were 1400 x 2450mm and the last a smaller one, using the depth of an old exterior door. All of the were wetwalled in the showers, and two were tiled up to dado height with the third fully tiled floor to ceiling. Decided to use Karndean for the floors, as it looks good and is very durable!
Fitted radiators last week. And just one last bathroom to finish final fixing and then I can get the water and heating live in this section of the house, the last leg of plumbing, thank god!
Once the wet works are tested and connected its flooring and finishings! Oh, and 6 doors to paint, fit locks and hardware to, hang and finish...

Quick recap, the space I'm working on is the area under the lounge, which is a two storey extension added to the main house a lot of years ago, I don't know when exactly, but it's lath and plaster walls, so circa 100 years ago?
The space is exactly the same size as the lounge and contains the fish tank plant room, another hallway, 3 bedrooms and 3 ensuite bathrooms.
The last update I'd framed up all the exterior walls, insulated and sheeted with duplex board. Built the internal framing to sub divide the space into rooms and started on the false ceilings. Because the ceiling was old lath and plaster it was just too irregular to work with when sub divided up, so each room had a new false ceiling out in, I lowered it to around 2700mm to give some space for insulation and wiring runs. The floor above is full of the old original "deadening" which is cinder bits, so very effective, but he'll of a messy thing to touch. All new cable runs installed, for each room, aerial supplies, cat 6 points and emergency lighting systems for each room. I also extended the fire alarm zone to include the new rooms.
Then started the Ames taping work.. not my favourite job! All rooms taped and filled, sanded 'urgh' and given a couple of coats of plain white paint, coats the walls better before wallpapering, and helps me see any imperfections in my plaster work!
Next job was cornicing, which was pretty knew to me and not something I'd done a lot of before. I understood the compound mitre aspects, but had a serious headache trying to reverse everything to work in the ceiling! Especially as I had 6 boxes of cornice (36 lengths) and I needed exactly 35 1/2 lengths! Lol managed it ok, and pretty happy with the results TBH.
All the floors had some low profile insualation laid down, then every inch of floor was sheeted in 9mm ply to stabilise the sub floor and get rid of any bumps and lumps. Had some serious issues when the timber floor met concrete floor sections, and some "adjustment" was needed.... and a big hammer too!
Dado rails in all rooms, next and then 170mm skirting boards, all mdf this time, for speed and durability.
Next, wall papering... all rooms papered in the textured, embossed paper I'd used throughout the house, then painted. Simple sentence, but nearly a weeks work!
The onto the feature wall paper below dado height, a different one in each room, but starting to look like real rooms!
The last 3 bathrooms (bringing the total up to 12 WC's and bathrooms) were nice sized, not huge, but sized to suit the rooms, two were 1400 x 2450mm and the last a smaller one, using the depth of an old exterior door. All of the were wetwalled in the showers, and two were tiled up to dado height with the third fully tiled floor to ceiling. Decided to use Karndean for the floors, as it looks good and is very durable!
Fitted radiators last week. And just one last bathroom to finish final fixing and then I can get the water and heating live in this section of the house, the last leg of plumbing, thank god!
Once the wet works are tested and connected its flooring and finishings! Oh, and 6 doors to paint, fit locks and hardware to, hang and finish...


cuneus said:
HughG said:
Great work, is the plan to keep it as a home or use it commercially as a B&B or similar given that you've installed emergency lighting and fire alarms etc.?
Thread read = failMy recollection is that it'll be a family home, but the installations of emergency lighting and proper fire alarm made me query my recollection.
HughG said:
cuneus said:
HughG said:
Great work, is the plan to keep it as a home or use it commercially as a B&B or similar given that you've installed emergency lighting and fire alarms etc.?
Thread read = failMy recollection is that it'll be a family home, but the installations of emergency lighting and proper fire alarm made me query my recollection.
Griff Boy said:
Sorry guys, been too long since my last update. Lots of things going on recently, including deciding to fit out the ground floor as a bed and breakfast with a seperate kitchen, lounge and dining area. The b&b is now open, which has taken a lot of time up recently, hence the slightly slow process on the rest of the rooms.
Shameless plug alert! Anyone wanting to stay in sunny Scotland from PH gets a discount, and a free tour of the house! www.townhead-bedandbreakfast.co.uk email me for details.
Sort of a pity that I am so close, but hey, at least the Town Head Bed & Breakfast would not be a construction site like my place! - Oh wait...Shameless plug alert! Anyone wanting to stay in sunny Scotland from PH gets a discount, and a free tour of the house! www.townhead-bedandbreakfast.co.uk email me for details.
After 57 pages of posts, it's understandable some might get missed! Lol
Yes, we are now open as a b&b, wasn't always the plan, the emergency lighting was installed as a fail safe in case we did decide to go down this route, but the fire alarm systems were deemed essential due to the size of the house and amount of rooms, a few mains linked smoke alarms just wouldn't have cut it!
Ref the plans, I do have some I was hoping to be able to scan in, but ideally I'll get an electronic set put together as the paper ones are A sized, it's on the todo list.....
I've been working on the final bathroom over the last couple of days, finished laying the Karndean flooring, fitted and connected the basin unit, wall mirror and almost the radiator. I say almost, as it was delivered with no fixings, and so far the company supplying it have sent three sets of fixings, all of which have been wrong.. amazes me how these people make any money!
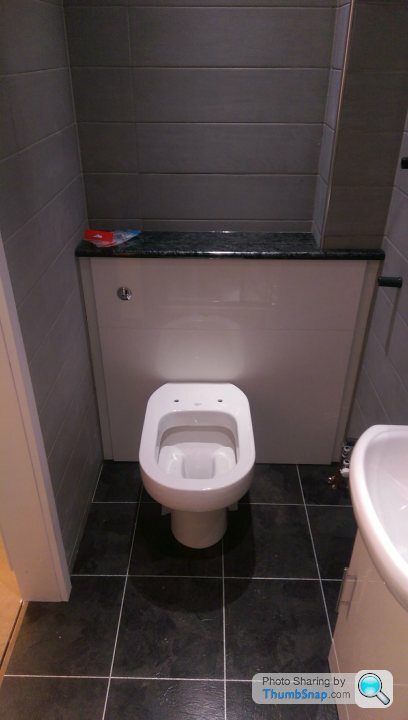
Also wanted to make up a concealed unit for the cistern, the main soil vent pipe goes up in this room, from the WC outlet, so any kind of WC would have looked a mess behind, so I framed up the space and made a set of panels from two white gloss kitchen end panels I had lying around. One was made into the lower WC panel for a btw WC, and the other was ripped down to make a frame and the top panel. I overlaid the fronts onto the frame and centered it onto the wall. The WC is offset to the left to allow space for the bracketless radiator, as the room is only a metre wide it also helps add visual width to the room.

Yes, we are now open as a b&b, wasn't always the plan, the emergency lighting was installed as a fail safe in case we did decide to go down this route, but the fire alarm systems were deemed essential due to the size of the house and amount of rooms, a few mains linked smoke alarms just wouldn't have cut it!
Ref the plans, I do have some I was hoping to be able to scan in, but ideally I'll get an electronic set put together as the paper ones are A sized, it's on the todo list.....
I've been working on the final bathroom over the last couple of days, finished laying the Karndean flooring, fitted and connected the basin unit, wall mirror and almost the radiator. I say almost, as it was delivered with no fixings, and so far the company supplying it have sent three sets of fixings, all of which have been wrong.. amazes me how these people make any money!
Also wanted to make up a concealed unit for the cistern, the main soil vent pipe goes up in this room, from the WC outlet, so any kind of WC would have looked a mess behind, so I framed up the space and made a set of panels from two white gloss kitchen end panels I had lying around. One was made into the lower WC panel for a btw WC, and the other was ripped down to make a frame and the top panel. I overlaid the fronts onto the frame and centered it onto the wall. The WC is offset to the left to allow space for the bracketless radiator, as the room is only a metre wide it also helps add visual width to the room.
Gassing Station | Homes, Gardens and DIY | Top of Page | What's New | My Stuff