New restoration project - what have I done!
Discussion


Mobile Chicane said:
You are having a little joke with the Doric columns in the hallway - aren't you? 
Good history skills, that's exactly what they are, original Georgian Doric columns. Not many people know the names and many seem to assume we've added them in! Look better in white than the bright purple they started off in when we got the place.Pheo said:
That entrance hall is insane. Do mind me why I go off and have a little cry.
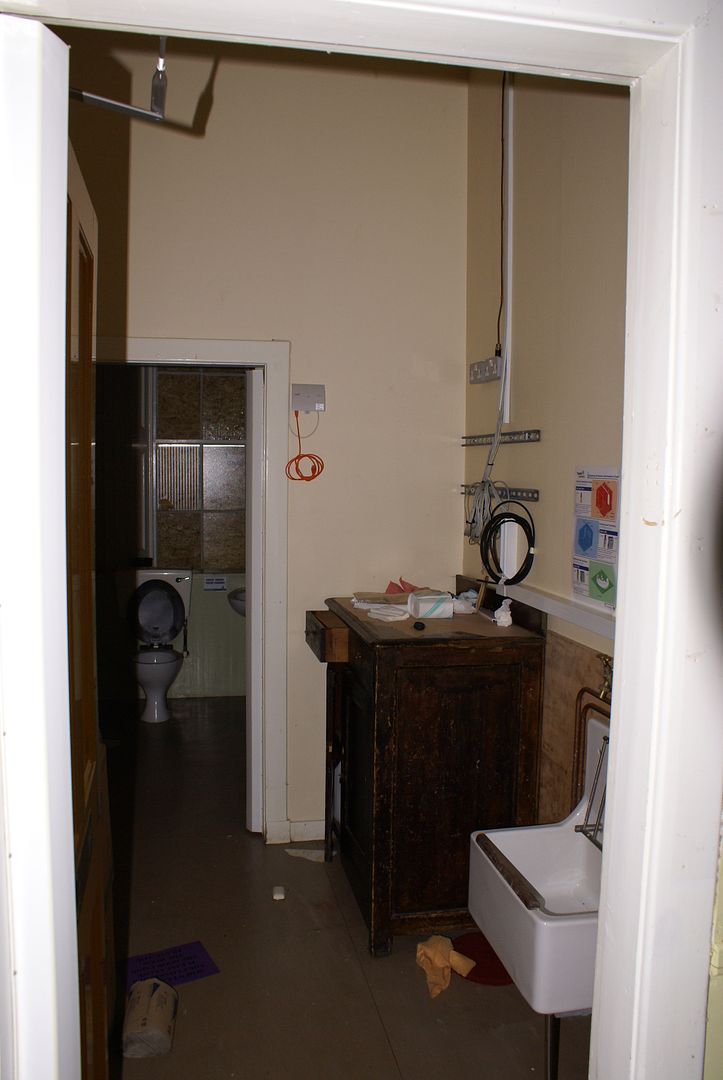
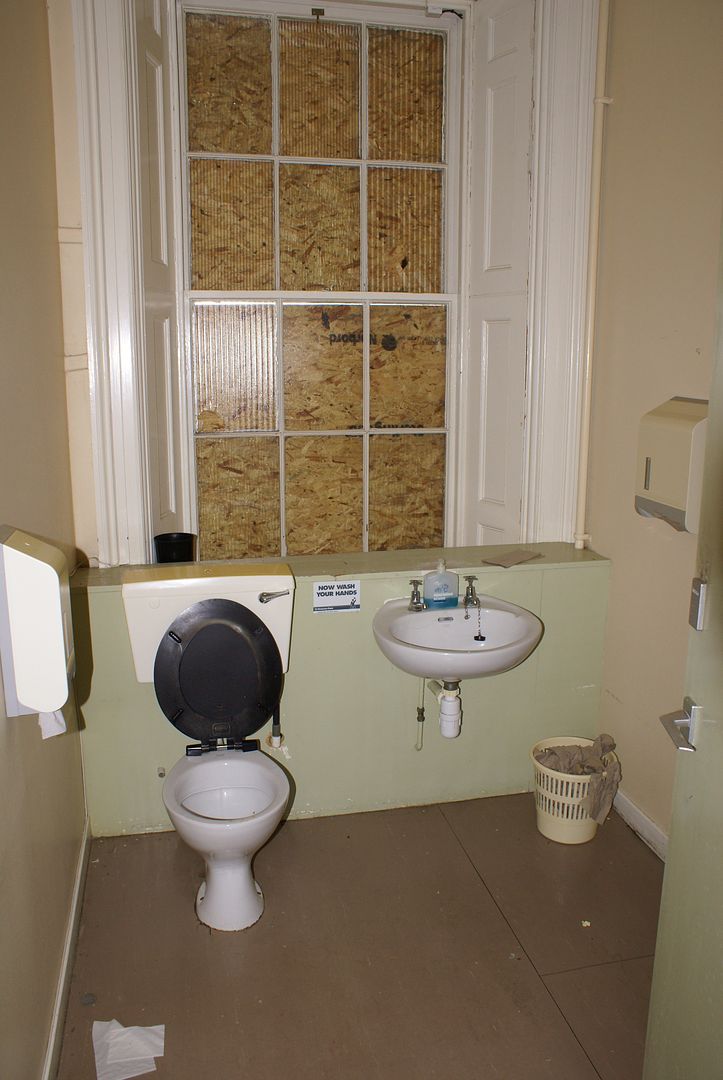
On another , what's the combined toilet/sink unit. Might fit in our bathroom refit (which looks like is smaller than your daughters refit #1stworldproblEms)
Lol, cheers pheo, the maddest thing is that there's another hallway on the ground floor exactly the same size, but with no pillars and a bit lower ceiling! On another , what's the combined toilet/sink unit. Might fit in our bathroom refit (which looks like is smaller than your daughters refit #1stworldproblEms)
And crying a not a problem, I've been tempted a few times when starting jobs like the wallpapering, you hang a few drops, think that looks alright, I'll finish that today no problem, them you look around and think, err no chance!
Griff Boy said:
Mobile Chicane said:
You are having a little joke with the Doric columns in the hallway - aren't you?
Good history skills, that's exactly what they are, original Georgian Doric columns. Not many people know the names and many seem to assume we've added them in! Look better in white than the bright purple they started off in when we got the place.
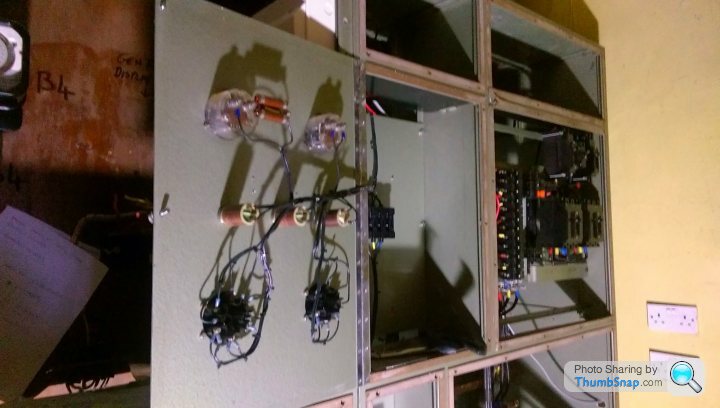
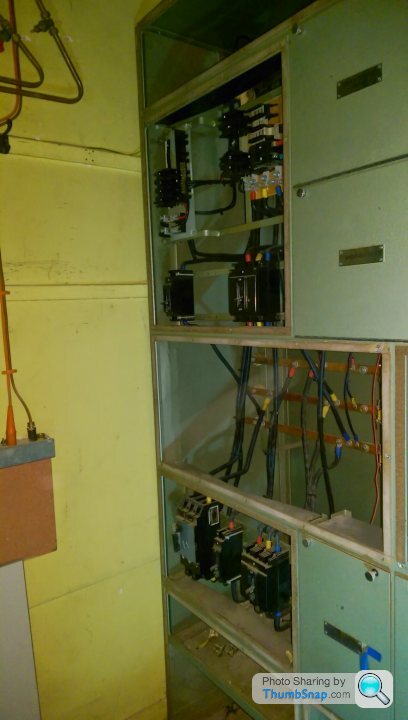
Well, started a job today that I've been putting off for ages! Dismantling the old fuse board. Which I fully appreciate to most people would not be a big thing, but In the place it's a major job. So far it's taken 9 hours of solid work to get it half way removed! Everything in it is made from solid 4mm steel, and even a basic front panel 2ft x 2ft must weigh about 15kg!
Another day planned on it tomorrow, then the wall behind it to come down to open the room up...


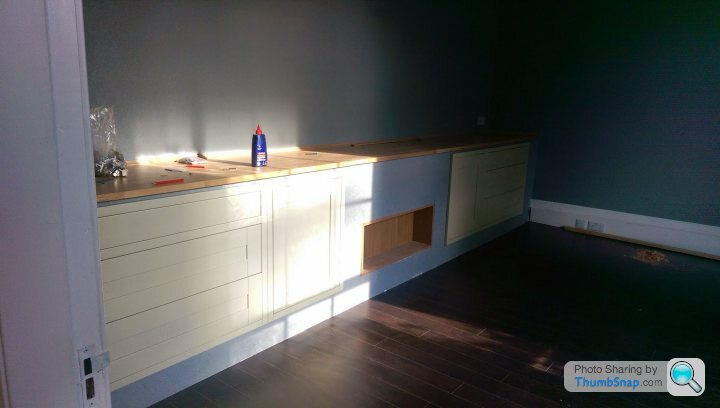
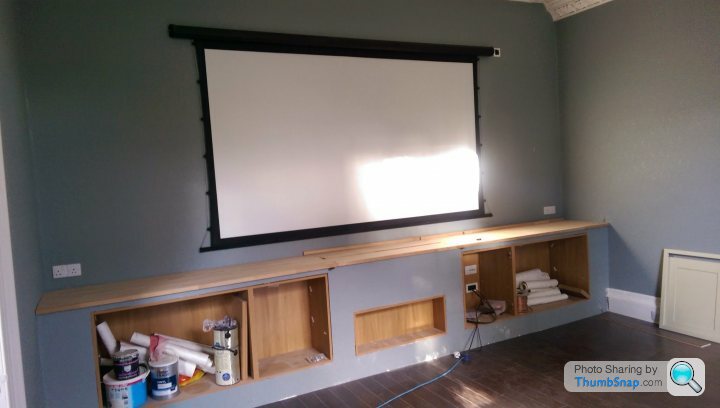
Also been working on the TV room, I've installed the electric 128" projector screen, and made the solid oak worktops over the TV lift system. I ended up fitting a 50" TV, as it was the biggest I could get in the layout. Fitted some solid oak fronts over the built in units, painted in sage green to contrast the walls. I had some in frame doors in stock so thought they would suit the room.
I've been pushing hard on the refurbishment on the interior doors for the house too, my wife has been a doing a sterling job in the basement (not a phrase I thought I ever use!) and we have ended up with our evening project door refurbishment production line. Trying to push on now, as hooping to be in by Christmas, so working a lot of evenings now, although not sure how long I can keep up running my business from 08.00 - 17.00 then straight to the house until 21.30 and home for tea by 10! 7 days a week lately too, but starting to see results!

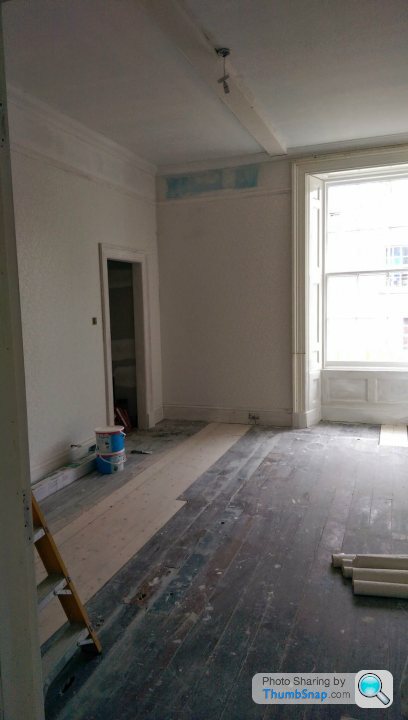
Spent to night wallpapering my curved hallway, which was a total b h, and also first coated the first floor WC, should get some pictures up tomorrow. Got a weeks leave planned as it's the local tattie holidays, so all my guys off for a week. Which means I get a bit of peace and quiet on the phone for a change! Should be much more productive!
Another day planned on it tomorrow, then the wall behind it to come down to open the room up...
Also been working on the TV room, I've installed the electric 128" projector screen, and made the solid oak worktops over the TV lift system. I ended up fitting a 50" TV, as it was the biggest I could get in the layout. Fitted some solid oak fronts over the built in units, painted in sage green to contrast the walls. I had some in frame doors in stock so thought they would suit the room.
I've been pushing hard on the refurbishment on the interior doors for the house too, my wife has been a doing a sterling job in the basement (not a phrase I thought I ever use!) and we have ended up with our evening project door refurbishment production line. Trying to push on now, as hooping to be in by Christmas, so working a lot of evenings now, although not sure how long I can keep up running my business from 08.00 - 17.00 then straight to the house until 21.30 and home for tea by 10! 7 days a week lately too, but starting to see results!
Spent to night wallpapering my curved hallway, which was a total b
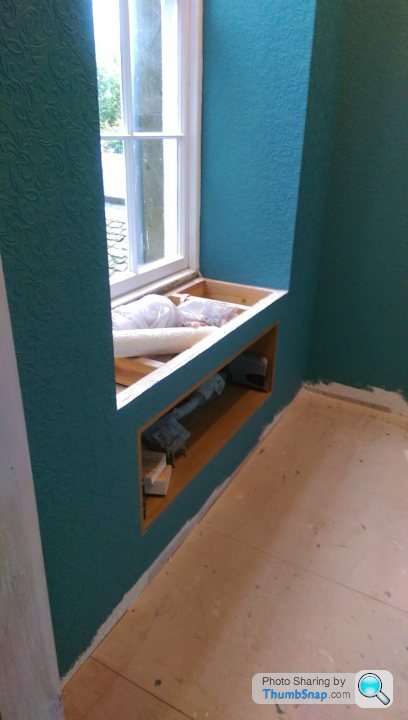
h, and also first coated the first floor WC, should get some pictures up tomorrow. Got a weeks leave planned as it's the local tattie holidays, so all my guys off for a week. Which means I get a bit of peace and quiet on the phone for a change! Should be much more productive! Another area I've been working on is to hide a new soil pipe that had to run through the dining room, wasn't ideal, but the only way to service one of the new bathrooms upstairs. So I started off with a soil pipe in the middle of a wall, and then tried to design a layout around it so that it wouldn't be seen. The idea was to build a false wall housing three storage units, the outer two for DVDs, and centre one for glass display. So I framed up the wall with a false section over the soil pipe and then copied this section further down to make it look planned, then I had one of my suppliers make up some made to measure units, painted in the white satin finish of the rest of the woodwork, and using oak colour carcasses for a contrast (pet hate is white cabinets, always look cheap!)
First frame in place. With wallpaper and picture rail fitted.


Then painted in a bold teal colour, and units fitted ready for trimming, levelling etc.

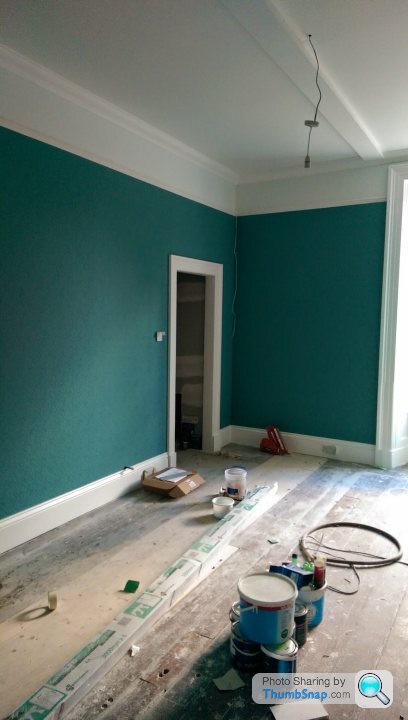
First frame in place. With wallpaper and picture rail fitted.
Then painted in a bold teal colour, and units fitted ready for trimming, levelling etc.

I really am in awe of this project. Simply it's scale and the fact you have to often take 2 steps backward before moving forward. I really do take my hat off to you mate, especially keeping in mind you are still running your business daily. I wouldn't be able to manage this if it were my full time occupation! Incredible. I vote a PH open day once you finish for a guided tour with each of us to contribute a nice bottle of plonk for your cellar in thanks!
That looks like some good progress!
Griff Boy said:
I've been pushing hard on the refurbishment on the interior doors for the house too, my wife has been a doing a sterling job in the basement (not a phrase I thought I ever use!) and we have ended up with our evening project door refurbishment production line. Trying to push on now, as hooping to be in by Christmas, so working a lot of evenings now, although not sure how long I can keep up running my business from 08.00 - 17.00 then straight to the house until 21.30 and home for tea by 10! 7 days a week lately too, but starting to see results!
That is a job I've been putting off for a while, although I don't have the space to set up a production line like that!
Shnozz said:
I really am in awe of this project. Simply it's scale and the fact you have to often take 2 steps backward before moving forward. I really do take my hat off to you mate, especially keeping in mind you are still running your business daily. I wouldn't be able to manage this if it were my full time occupation! Incredible. I vote a PH open day once you finish for a guided tour with each of us to contribute a nice bottle of plonk for your cellar in thanks!
I'm liking this idea, I'm liking it a lot! Thanks for the good words too, it's hard work, but I find it very rewarding, if daunting! Especially when you consider I've on,y really been working on 50% of the house so far..
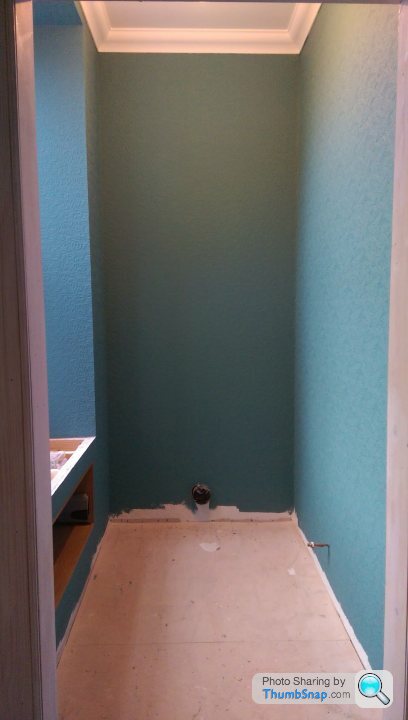
So, another update. The wc has been wallpapered now, and painted ready for the flooring to go down and then the skirtings etc. I've got a piece of solid oak put aside to make a countertop in the window recess, which will have a vessel basin in it. The wc is going to be a concealed cistern back to wall WC, with the cistern on the other side of the wall. Nice and simple.
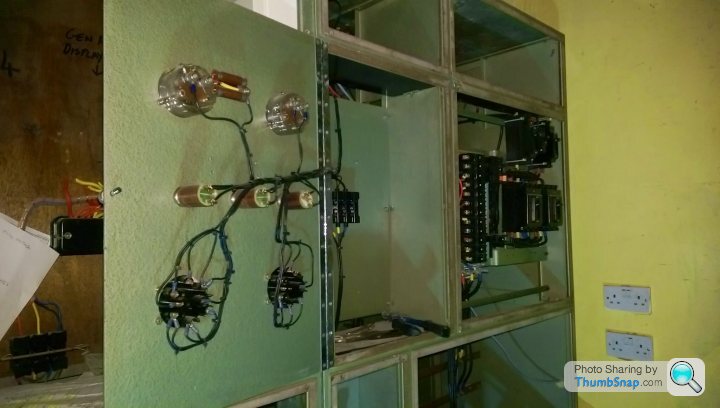
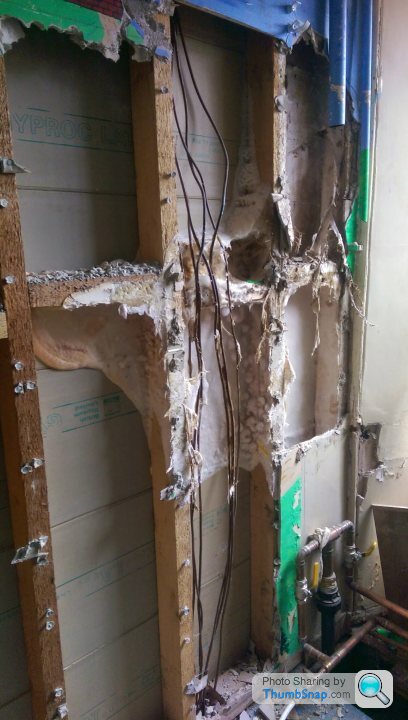
Also spent most of the day, along with my nephew, working on removing the rest of the fuse board downstairs. First we had to strip the rest of the components from inside the frames, everything is based on a modular system and is bolted through from the front face, then hard wired. The buzz bar was about 1m long and must be 50mm x 10mm thick! And there was three of them!
Some of the during dismantling.
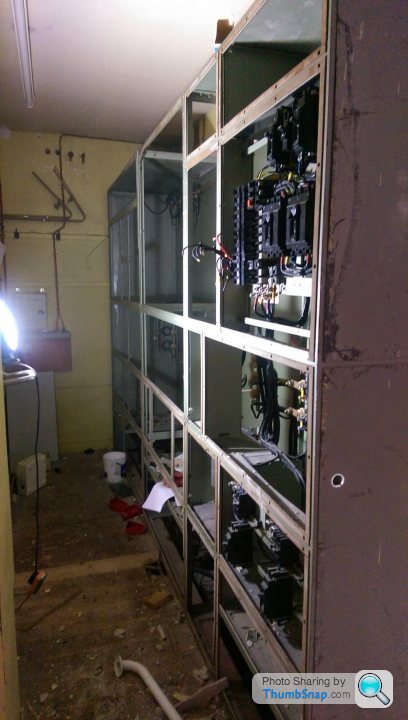
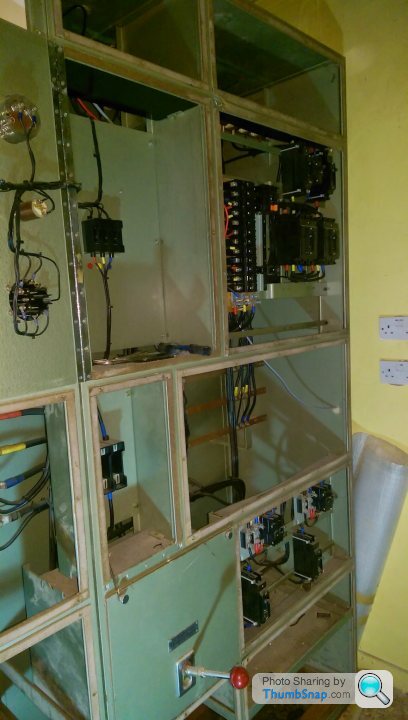
We then realised that the modules ( 2 at 1500 long and 1 at 1200 long) had solid steel back panels bolted on the back, which were hard against the partition wall behind, so only real option was to remove the wall first to get to the panels in order to lighten them to the point we could move them.
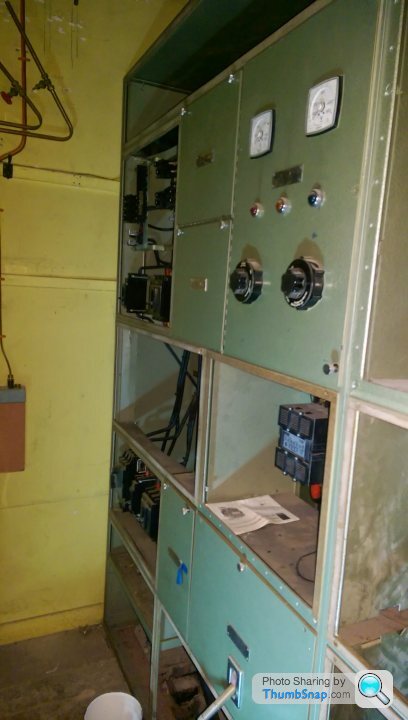
The wall in place from behind the fuse board

Wall removed and the back of the fuse board exposed
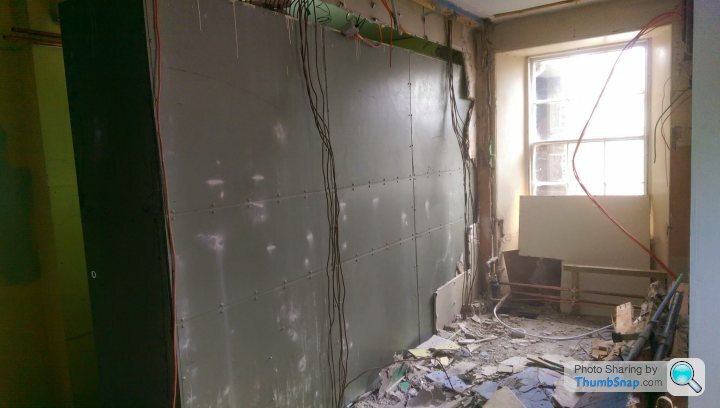
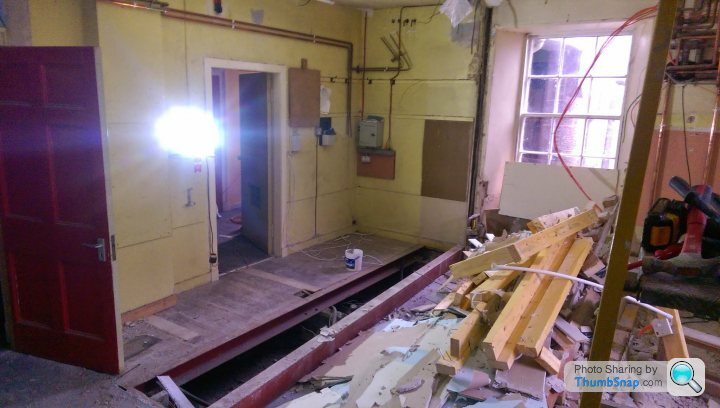
Turns out it was a good thing we were removing this wall, as found some nasty rot behind it! This was directly under the area affected from the blocked gutter left by the council! Thankfully all removed now, and just the wall to strip to be 100% sure! but initial holes revealed that it was just in the stud wall behind the fuse board!
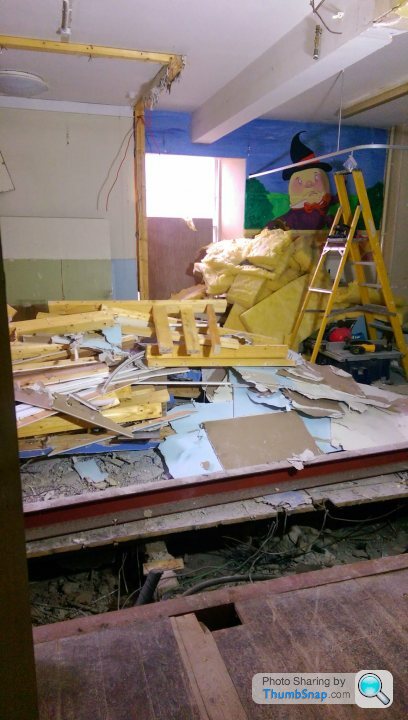
So, wall is down, then we had to grind the metal frames into sections as they were too big and heavy to get out the house, approx 2400mm high and about 650mm deep, weighed a tonne too! Turns out they had to reinforce the floor due to the weight of them, 2 RSJ's set on a block dwarf wall!
So final pictures after demolition, ready for tidy up tomorrow!

Also spent most of the day, along with my nephew, working on removing the rest of the fuse board downstairs. First we had to strip the rest of the components from inside the frames, everything is based on a modular system and is bolted through from the front face, then hard wired. The buzz bar was about 1m long and must be 50mm x 10mm thick! And there was three of them!
Some of the during dismantling.
We then realised that the modules ( 2 at 1500 long and 1 at 1200 long) had solid steel back panels bolted on the back, which were hard against the partition wall behind, so only real option was to remove the wall first to get to the panels in order to lighten them to the point we could move them.
The wall in place from behind the fuse board
Wall removed and the back of the fuse board exposed
Turns out it was a good thing we were removing this wall, as found some nasty rot behind it! This was directly under the area affected from the blocked gutter left by the council! Thankfully all removed now, and just the wall to strip to be 100% sure! but initial holes revealed that it was just in the stud wall behind the fuse board!
So, wall is down, then we had to grind the metal frames into sections as they were too big and heavy to get out the house, approx 2400mm high and about 650mm deep, weighed a tonne too! Turns out they had to reinforce the floor due to the weight of them, 2 RSJ's set on a block dwarf wall!
So final pictures after demolition, ready for tidy up tomorrow!
Two hours of my life reading this in one go, awesome stuff!
Looks like majority of heavy lifting done but if there is a requirement for extra hands for heavy lifting I'd volunteer a day of my time for the mere return of having a nosey round the place.....
Must be moments where it's all very daunting but with what you've achieved so far I imagine that must be less and less now.
Keep up the great work.
Chris
chris_c201 said:
Two hours of my life reading this in one go, awesome stuff!
Looks like majority of heavy lifting done but if there is a requirement for extra hands for heavy lifting I'd volunteer a day of my time for the mere return of having a nosey round the place.....
Must be moments where it's all very daunting but with what you've achieved so far I imagine that must be less and less now.
Keep up the great work.
Chris
Apologies Chris, I missed this post! Looks like majority of heavy lifting done but if there is a requirement for extra hands for heavy lifting I'd volunteer a day of my time for the mere return of having a nosey round the place.....
Must be moments where it's all very daunting but with what you've achieved so far I imagine that must be less and less now.
Keep up the great work.
Chris
Many thanks for the compliments, trust me it's still daunting!
Your more than welcome to pop in for a nosey any time you want, helping isn't mandatory!
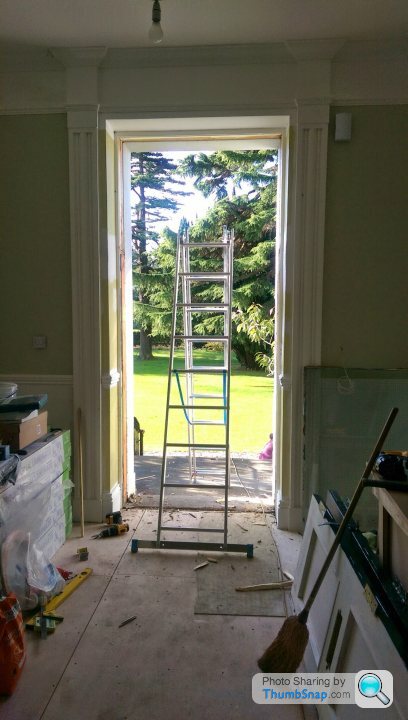
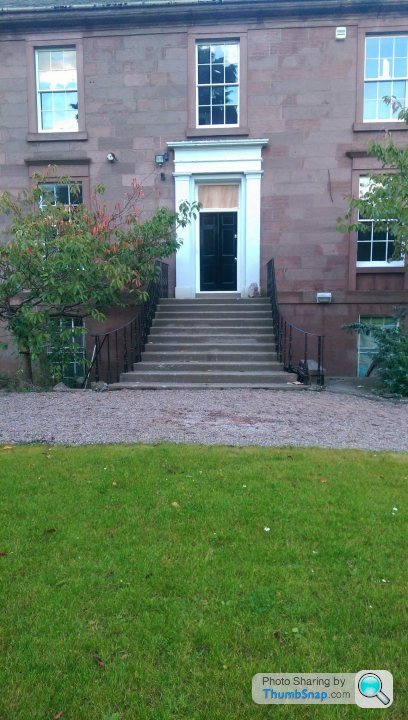
Another update. Been working on the replacement front door recently. When we got the place the building had an old, but not original pair of opening doors as the front doors, they were awful. Had been glazed in wire glass, hardly shut and had about 5 locks drilled in all over the place (and only one with a key!)
So, when I got possession, first job was to make them secure and replace the glass with solid panels, and fit another lock. Apart from a quick coat of paint to protect them, that's all the work they got, as I knew the front door would be seeing a lot of deliveries and there was no point getting a new door damaged!
Above the front door was a large, slightly off proportioned glass top light, again with lovely wired glass.
This is the original door.
Lovely eh?
So first job was to find a reclaimed original door, to try to keep the authenticity as much as possible, fortunately we managed to find a spare huge door in the bowels of the ground floor! It's a monster too, 2190mm high x 1090mm wide x 50mm thick, not to mention it weighed a bloody tonne!
first, I had to make some repairs, patch the old hinge recesses with new timber, fill all the old lock points, strip about 7 layers of paint off, sand, fill, paint, undercoat, prime.... You get the idea!
Of course the new door was about 130mm higher than the old pair of doors, so first job was to remove the top wired glass, and then remove the entire existing frame from the opening. I then formed a new frame with crossbar in 145x45mm dressed timber, made to suit the reclaimed door. New top light looks better, with nicer proportions. Ply filled just now until the stained glass arrives (had to change the sizes of course, which has delayed it..) I made a drip sill bottom rail in the workshop to keep the rain off the front door. New door frame, new hardwood cill and made up some covering facings around the outside of the door. New locks and fire rated ball bearing hinges finished it off nicely!


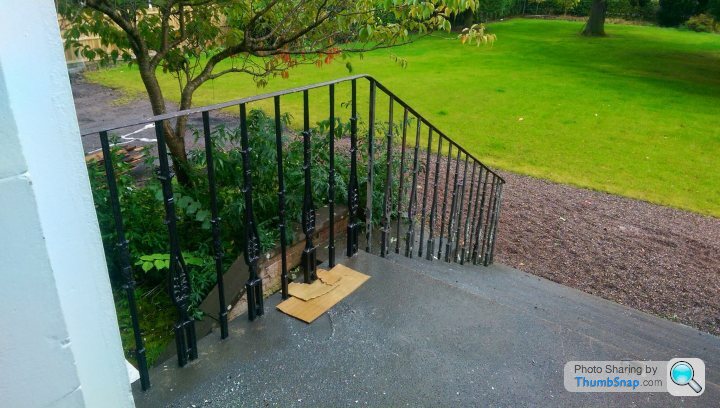
Railings have been stripped and painted as well!
I've also been doing some more work inside, the first floor WC is almost done, second floor guest bathroom is now tiled, waiting for final fixing soon. I'll get some more pictures up soon.
So, when I got possession, first job was to make them secure and replace the glass with solid panels, and fit another lock. Apart from a quick coat of paint to protect them, that's all the work they got, as I knew the front door would be seeing a lot of deliveries and there was no point getting a new door damaged!
Above the front door was a large, slightly off proportioned glass top light, again with lovely wired glass.
This is the original door.
Lovely eh?
So first job was to find a reclaimed original door, to try to keep the authenticity as much as possible, fortunately we managed to find a spare huge door in the bowels of the ground floor! It's a monster too, 2190mm high x 1090mm wide x 50mm thick, not to mention it weighed a bloody tonne!
first, I had to make some repairs, patch the old hinge recesses with new timber, fill all the old lock points, strip about 7 layers of paint off, sand, fill, paint, undercoat, prime.... You get the idea!
Of course the new door was about 130mm higher than the old pair of doors, so first job was to remove the top wired glass, and then remove the entire existing frame from the opening. I then formed a new frame with crossbar in 145x45mm dressed timber, made to suit the reclaimed door. New top light looks better, with nicer proportions. Ply filled just now until the stained glass arrives (had to change the sizes of course, which has delayed it..) I made a drip sill bottom rail in the workshop to keep the rain off the front door. New door frame, new hardwood cill and made up some covering facings around the outside of the door. New locks and fire rated ball bearing hinges finished it off nicely!
Railings have been stripped and painted as well!
I've also been doing some more work inside, the first floor WC is almost done, second floor guest bathroom is now tiled, waiting for final fixing soon. I'll get some more pictures up soon.
Gassing Station | Homes, Gardens and DIY | Top of Page | What's New | My Stuff