New restoration project - what have I done!
Discussion


 a couple of stud walls in there and that's a spacious apartment.
Griff Boy said:
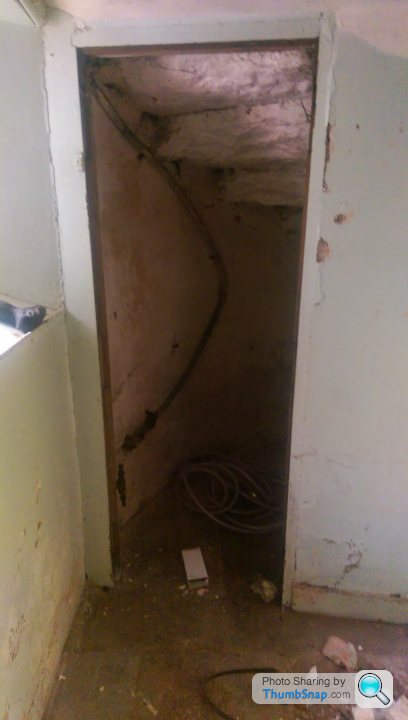
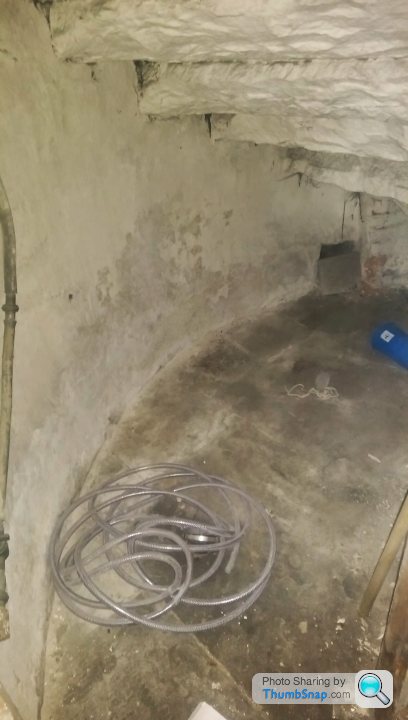
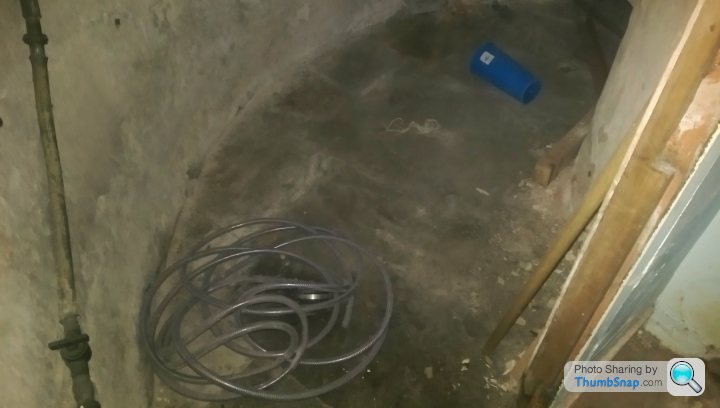
Ok, so I was working down on the ground floor today, ripping up the old carpet and prepping for tiling, focus is to get the stair tower finished.. Anyway, I found a panel in the downstairs cupboard, which when removed revealed another room... The small space under the bottom of the stairs, just about big enough to walk in. Thing is, it had been sealed shut for ages, yet, contained only a rubber hose.... Is this where the really naughty children went? Did the teachers have a little dungeon? Why the rubber hose?
Any ideas?
And the big question,....... Do I need a mate called Dave with a stick and a torch?
A few pictures of the hidden room..
How substantial was the panel?Any ideas?
And the big question,....... Do I need a mate called Dave with a stick and a torch?
A few pictures of the hidden room..
My guess is either sealing in asbestos (less likely) o pr a fire break to protect the staircase.
surveyor said:
How substantial was the panel?
My guess is either sealing in asbestos (less likely) o pr a fire break to protect the staircase.
The panel was a 12mm thick piece of ply, and the stairwell floor, walls and the stairs themselves are all solid stone, no wood in there at all. The staircase was built into the walls as the tower was built around it. With each tread a separate piece of solid stone, which then interlock together, amazing piece of work considering it was done in 1845 and the tower is around 16m high from ground to roof. It certainly looked more of a council "bodge it, cover it up with a bit of ply" type repair, something we've found time and time again around this house.My guess is either sealing in asbestos (less likely) o pr a fire break to protect the staircase.
Managed to get some more time in today, some good, some bad. The commercial gas plumber was supposed to be on site today to re commision and test the boilers, but he didn't turn up...:-( disappointing as we worked through the weekend, to pressure test the system in two floors (not a single leak or nail related issue, bloody amazing to be honest!) the living floor rads are all now filled and good to go, so was hoping to have some heat on in the house for the first time in the last 5 years!
One bit of good news is that the British Gas survey for insulation deals was done, and amazingly we qualify for it! So free insulation for above the lounge( which has it's own 50m2 loft) in the main loft area (90m2) and above the utility and a hallway (25m2) so all in all, around 165m2 of free insulation to 270mm thickness! Result! One a downside, apparently the BG fitters are a bit portly, so the lounge hatch has to be enlarged.... Not ideal. But doable.
Other work has been to carry on with the painting, the stair turret is now 70% wallpapered and painted! with the rest of the papering going on tomorrow. And I've been doing one of the jobs I've been dreading, sorting out the stair rails in the turret....
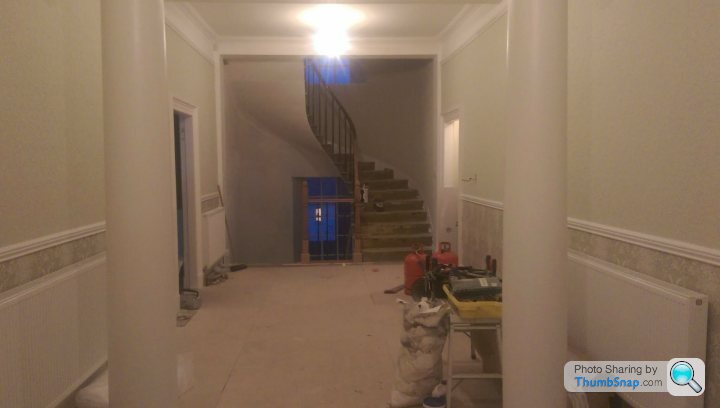
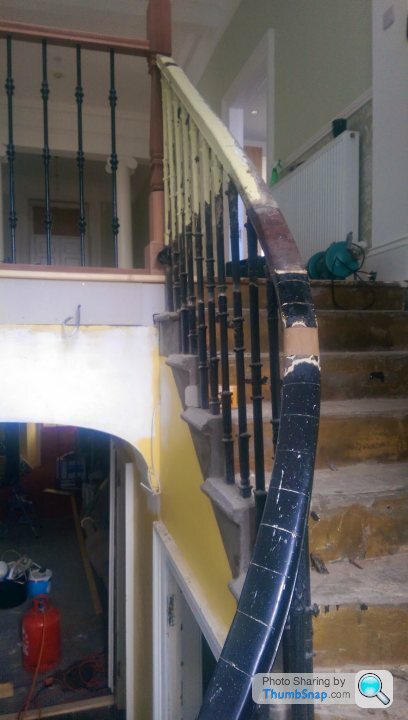
The main area which was an issue is the first floor landing, as there had previously been a wall built over the handrail, and they had semi destroyed it in the process.. We were left with a butchered handrail, missing pieces and a dody victorian style newel post on one side only, and the rest hanging free in the air. So, after getting a quote of £6000 to cnc cut a replacement piece if shaped rail approx 1500mm long we chose plan B, ie to fit two new newel posts, and tie in the old handrail, not my ideal solution, but the only viable one. So first job was to remove the old newel post, which was found to be held in place by silicon onto the stone stair tread... Not even a nail in site, which made removal easier at least. Next job was to try to get a good fix for the two new newel bases, which was the hardest bit as the staircase had never been designed to have a newel base fitted. Each list had to be scribed around the stone tread, checked into the joists underneath and then glued, bolted and screwed not place. Replacement cast iron spindles and a base and top rail finished the look, which seeing as it was my first go at a stair base I was pretty happy with it. I had to form 2 plinths to surround the bases to cover the fixings, but a few minutes rostering the profile and then fitting some spare hardwood boards gave a nice look. Next job is to restore the stair handrail, it all needs rubbing down (all four floors, as it goes right up to the loft floor) and refnishing back up to its original glory. I started rubbing down about 1.5m of it, and the effect is promising, but it's going to take a loooooooong time to finish!
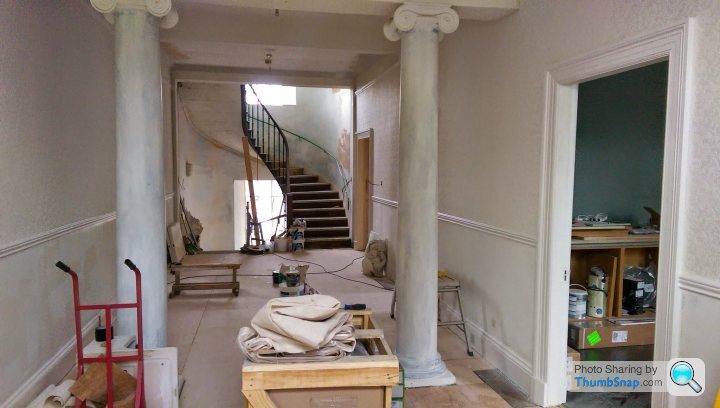
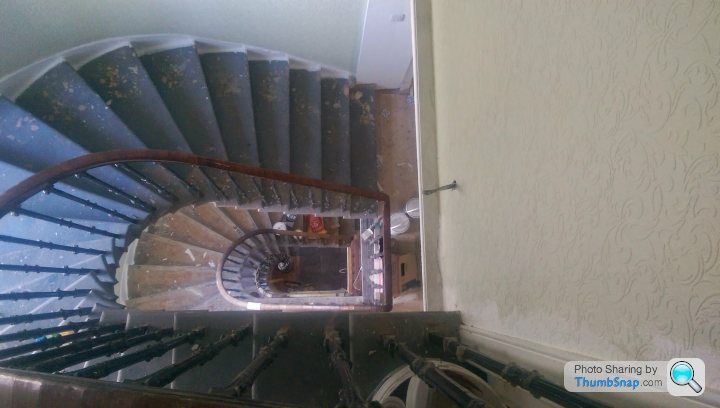
The stairs before the work started.

If you look closely. You can see that handrail cutting through the wall, but completely severed from where it would have gone accross the gap, and the silicon piece of tat on the right hand side.
The stairs with the wall removed, and the left hand side hanging free!
And now, with the new newel posts handrail and spindles fitted ready for finishing to match the handrail.

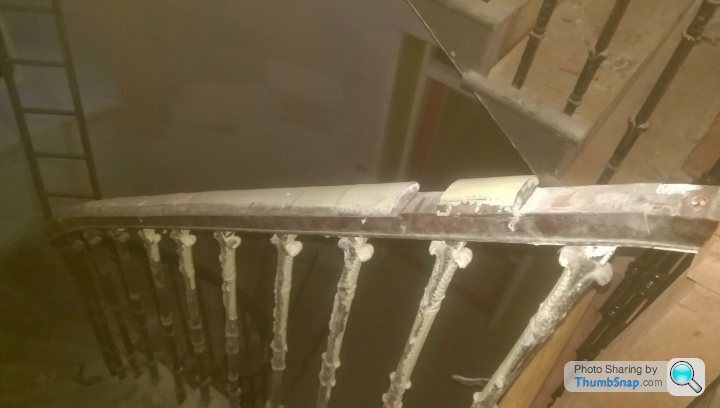
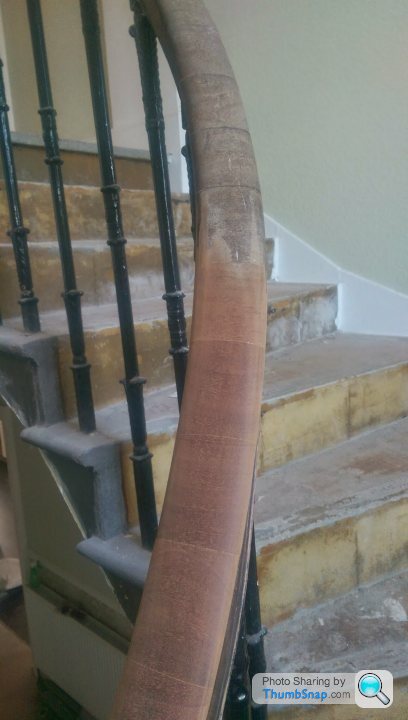
And the state of some of the handrail awaiting restoration!
One bit of good news is that the British Gas survey for insulation deals was done, and amazingly we qualify for it! So free insulation for above the lounge( which has it's own 50m2 loft) in the main loft area (90m2) and above the utility and a hallway (25m2) so all in all, around 165m2 of free insulation to 270mm thickness! Result! One a downside, apparently the BG fitters are a bit portly, so the lounge hatch has to be enlarged.... Not ideal. But doable.
Other work has been to carry on with the painting, the stair turret is now 70% wallpapered and painted! with the rest of the papering going on tomorrow. And I've been doing one of the jobs I've been dreading, sorting out the stair rails in the turret....
The main area which was an issue is the first floor landing, as there had previously been a wall built over the handrail, and they had semi destroyed it in the process.. We were left with a butchered handrail, missing pieces and a dody victorian style newel post on one side only, and the rest hanging free in the air. So, after getting a quote of £6000 to cnc cut a replacement piece if shaped rail approx 1500mm long we chose plan B, ie to fit two new newel posts, and tie in the old handrail, not my ideal solution, but the only viable one. So first job was to remove the old newel post, which was found to be held in place by silicon onto the stone stair tread... Not even a nail in site, which made removal easier at least. Next job was to try to get a good fix for the two new newel bases, which was the hardest bit as the staircase had never been designed to have a newel base fitted. Each list had to be scribed around the stone tread, checked into the joists underneath and then glued, bolted and screwed not place. Replacement cast iron spindles and a base and top rail finished the look, which seeing as it was my first go at a stair base I was pretty happy with it. I had to form 2 plinths to surround the bases to cover the fixings, but a few minutes rostering the profile and then fitting some spare hardwood boards gave a nice look. Next job is to restore the stair handrail, it all needs rubbing down (all four floors, as it goes right up to the loft floor) and refnishing back up to its original glory. I started rubbing down about 1.5m of it, and the effect is promising, but it's going to take a loooooooong time to finish!
The stairs before the work started.
If you look closely. You can see that handrail cutting through the wall, but completely severed from where it would have gone accross the gap, and the silicon piece of tat on the right hand side.
The stairs with the wall removed, and the left hand side hanging free!
And now, with the new newel posts handrail and spindles fitted ready for finishing to match the handrail.
And the state of some of the handrail awaiting restoration!
Ok, so carrying on working on the staircase handrail restoration, but I'm struggling to decide the best way to finish it after it's been rebuilt and sanded. I want to achieve a lovely deep high gloss finish, durable as it's a handrail, but also traditional type look. I've been researching into French polishing, but I've never tried it before, and it looks incredibly complicated and time consuming, and I'm going to struggle to allocate 4-5days purely on the staircase handrail at this stage of the project. That said I'm not keen on just buying a tin of gloss varnish and slapping it on! Anyone have any ideas as to how to go forward with this?
I will probably use a grain filler to start with, then I know it will need a stain on it, but what type? Also, current thought is 3-4 coats of high gloss polyurethane varnish. Anyone reccomend any products worth looking at for all of this?
Any help appreciated.
I will probably use a grain filler to start with, then I know it will need a stain on it, but what type? Also, current thought is 3-4 coats of high gloss polyurethane varnish. Anyone reccomend any products worth looking at for all of this?
Any help appreciated.
Get a professional French polisher in -they are magicians and for such a central to the house thing that you will notice every single time you go up and down the stairs I wouldn't mess about. A guy did our house - two series of mangled stairs restored and a teak butler's tray and it was stunning. Not much money either although admittedly it was 10 years ago now.
It was the sort of money that when viewing how good a job he made of making some old hand rail and some brand new ones look identical and with a finsh llike polished glass and a patina as if hundreds of years of hands had been sliding up and down them then it felt like great value.
Love your project - I'm doing a loft and a back extension on a normal house and that feels mad enough
Cheers guys, some interesting points there. French polishing is a route I'm looking at, as is a polyurethane varnish, not sure on a wax finish as I'm led to believe it's not as durable or water / mark resistant, could be wrong though!
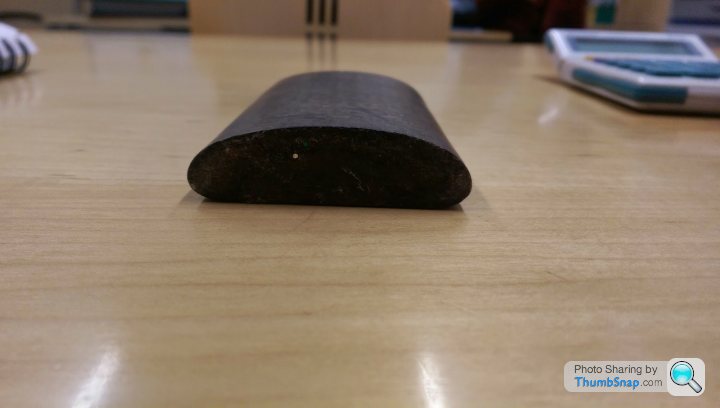
Well today was the chance to start stripping the old stair rail, as well as having a go at forming some replacement parts for the handrail. Unusually, the hand rail is made of hundreds of individual parts, no longer than about 80mm, and all with a horizontal grain, which makes them a nightmare to replicate as everything I found came in long lengths, so the grain going the wrong way.
This is what I've got to try to replicate, as I'm missing about 1.5m of the stuff! I managed to save loads of it from when we first started the work, and found a lot of bits in a plastic bag in the bottom door of a desk!
First job was to glue loads of the existing pieces back onto the base rail, once I worked out which order they might have been in. Loads of them were covered in layers of paint and plaster and looked bloody awful!
First job, try to replicate the missing pieces with some hardwood I had in the workshop. It's meranti not mahogany, but once stained should be pretty close. Again because it's horizontal grain I had to make it in little sections. First job was to rip it down to the right width on the table saw, and then mark up the profile on the end face
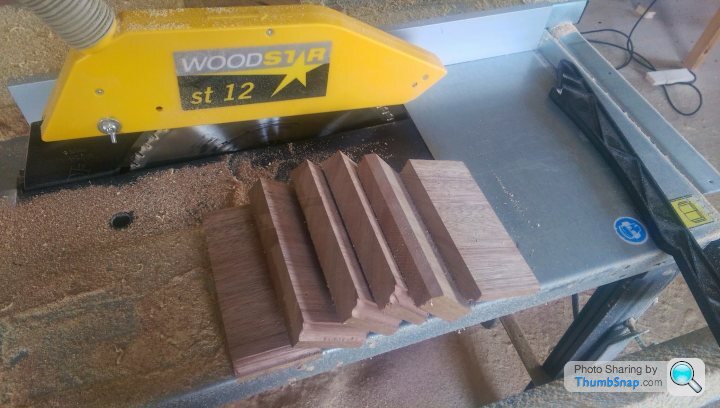
Then, planed them down to a relatively close profile, cross planing against the grain isn't ideal, but heyho!
Then some careful sanding on the belt sander to form the closest match to the profiles. Fixed the belt sander upside down into the bench and used it as a table sander, just got to watch my finger nails with the little pieces of wood!
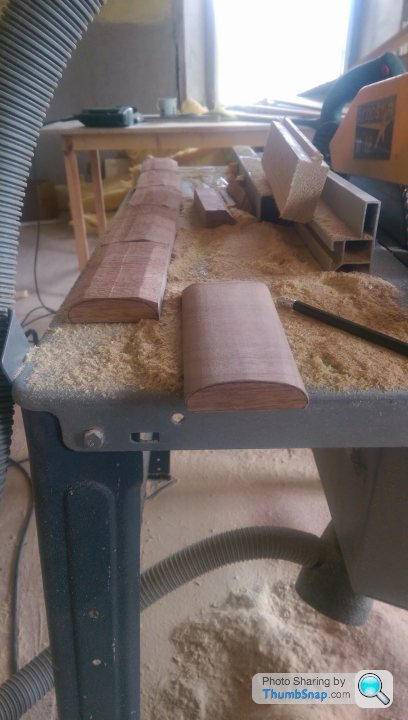
Here's the finished pile of sections, all cut to 150mm long, ready to trim to size.

And set into the gaps in the rail
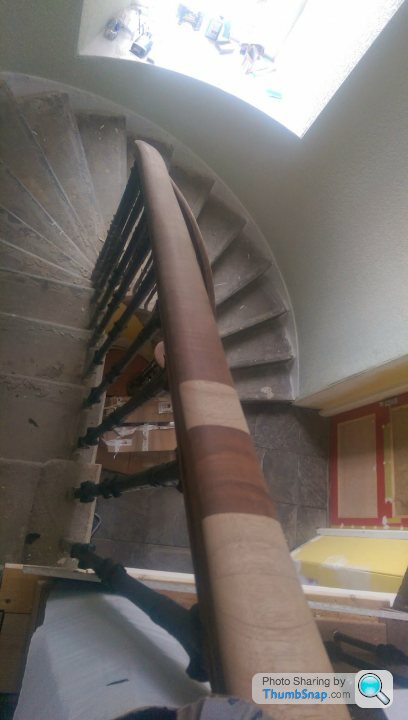
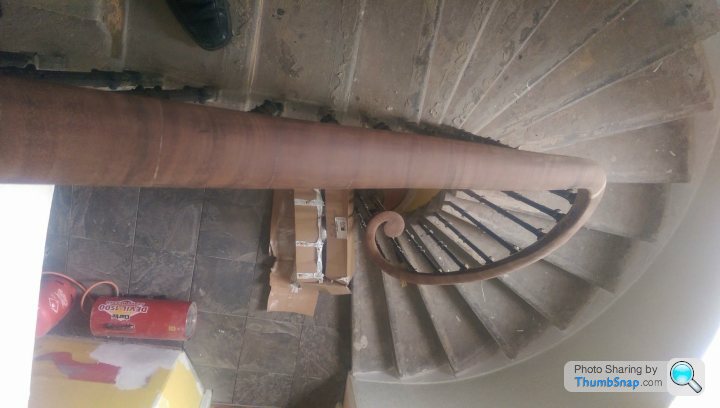
Next job was to sand the handrail from the ground floor to the top floor, got to be 30-35m of it!
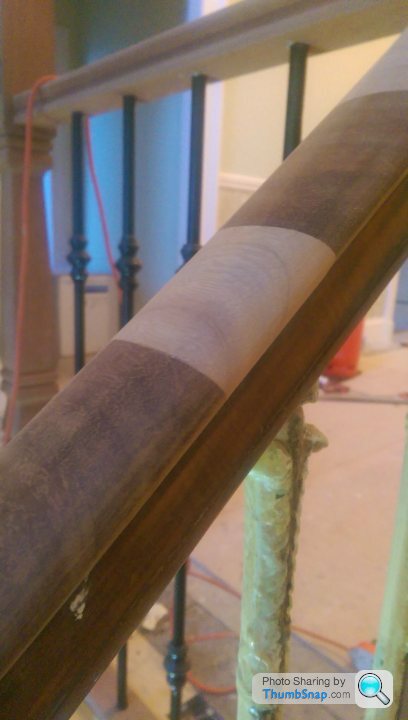
Was good to see the original wood colour starting to come back, as it was very faded in lots of places, and painted in others.
Some pictures of it during the sanding process, shows the difference in the finishes.
The sanding took 8 hours... 8 hours.....

It was too dark when we finished tonight to get pictures of the lower handrail section, as this was the worst bit in the whole system it also took the most work, was starting to look good though, pictures to follow!
Well today was the chance to start stripping the old stair rail, as well as having a go at forming some replacement parts for the handrail. Unusually, the hand rail is made of hundreds of individual parts, no longer than about 80mm, and all with a horizontal grain, which makes them a nightmare to replicate as everything I found came in long lengths, so the grain going the wrong way.
This is what I've got to try to replicate, as I'm missing about 1.5m of the stuff! I managed to save loads of it from when we first started the work, and found a lot of bits in a plastic bag in the bottom door of a desk!
First job was to glue loads of the existing pieces back onto the base rail, once I worked out which order they might have been in. Loads of them were covered in layers of paint and plaster and looked bloody awful!
First job, try to replicate the missing pieces with some hardwood I had in the workshop. It's meranti not mahogany, but once stained should be pretty close. Again because it's horizontal grain I had to make it in little sections. First job was to rip it down to the right width on the table saw, and then mark up the profile on the end face
Then, planed them down to a relatively close profile, cross planing against the grain isn't ideal, but heyho!
Then some careful sanding on the belt sander to form the closest match to the profiles. Fixed the belt sander upside down into the bench and used it as a table sander, just got to watch my finger nails with the little pieces of wood!
Here's the finished pile of sections, all cut to 150mm long, ready to trim to size.
And set into the gaps in the rail
Next job was to sand the handrail from the ground floor to the top floor, got to be 30-35m of it!
Was good to see the original wood colour starting to come back, as it was very faded in lots of places, and painted in others.
Some pictures of it during the sanding process, shows the difference in the finishes.
The sanding took 8 hours... 8 hours.....
It was too dark when we finished tonight to get pictures of the lower handrail section, as this was the worst bit in the whole system it also took the most work, was starting to look good though, pictures to follow!

Griff Boy said:
Cheers guys, some interesting points there. French polishing is a route I'm looking at, as is a polyurethane varnish, not sure on a wax finish as I'm led to believe it's not as durable or water / mark resistant, could be wrong though!
I've used Patina with great success on an oak table I restored - it's a kind of gel that goes on like wax with a cloth, is impossible to over-apply as the excess just wipes off and the finish is somewhere between wax and varnish, but has the durability of polyurethane - it's had all sorts of spills and hot plates and cups on the table I did with no ill effects at all.http://www.marinemegastore.com/product-product-AQU...

Thanks for all the good comments! It's great to have a chance to try to make some of these replica parts up. I'd love to have a proper 'Norm' style workshop, but in the mean time the ground floor will do!
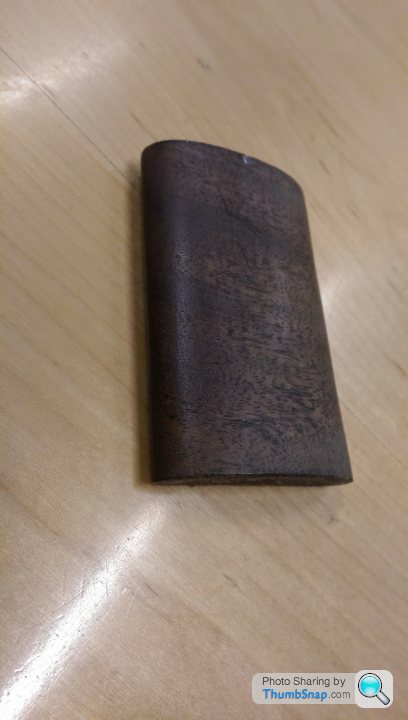
A couple of quick pictures of the rail I pieced back together from odd pieces, stripped and sanded.. Doesn't look too bad.
Before
After
Ready for another sand, down to 120 grit so far, next sand should see it at 240grit, smooth as a baby's bum!
A couple of quick pictures of the rail I pieced back together from odd pieces, stripped and sanded.. Doesn't look too bad.
Before
After
Ready for another sand, down to 120 grit so far, next sand should see it at 240grit, smooth as a baby's bum!
Some good news and some bad news today. Had the gas guy round to try to fire up the twin boilers for the first time in 5 years, was hoping for a good result, as they were only a year old when the council closed the place down, so they only had 12 months use! First one fired up ok, once the jets were cleaned and the thermocouple got some heat, but the other one turned out to have a faulty gas valve inside it. So 1 working now at least.
Problem was I checked the rads on the circuit opened, and they were getting warm, thought I'd leave it on for a couple of hours then pop back and check the place, found them at exactly the same temperature! All TRV's fully open, no air in the system and all rads uniformly warmish, def not hot at all. Any ideas?
Problem was I checked the rads on the circuit opened, and they were getting warm, thought I'd leave it on for a couple of hours then pop back and check the place, found them at exactly the same temperature! All TRV's fully open, no air in the system and all rads uniformly warmish, def not hot at all. Any ideas?
Well, just to set the record straight, the heatings working fine now, minor issue with one of the pumps and some air in the system, first floor and subsequently 2nd floor now nice and toasty warm for the first time in a lot of years! And you know what that means! Happy Wife = Happy Life!
Gassing Station | Homes, Gardens and DIY | Top of Page | What's New | My Stuff