Our Little Durham Restoration Project...
Discussion


Managed to forget to keep you updated the last few weeks, have been working fairly hard on things and have got quite a bit done.
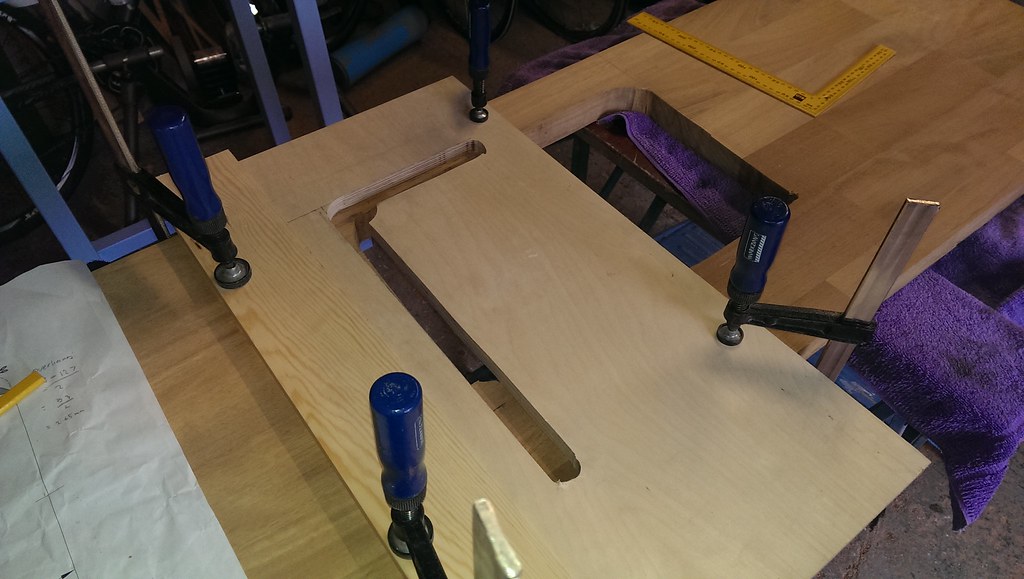
First up I done some maths then bought a hole saw kit. Then I spent four hours making this:
 IMAG0131 by paulrockliffe, on Flickr
It's a sink cut-out template, as you can probably tell. Really pleased with the radius, which matches the sink perfectly.
Clamped in place and ready for the cut:
 IMAG0132 by paulrockliffe, on Flickr
All done, sanded and the edge has been chamfered:
 IMAG0133 by paulrockliffe, on Flickr
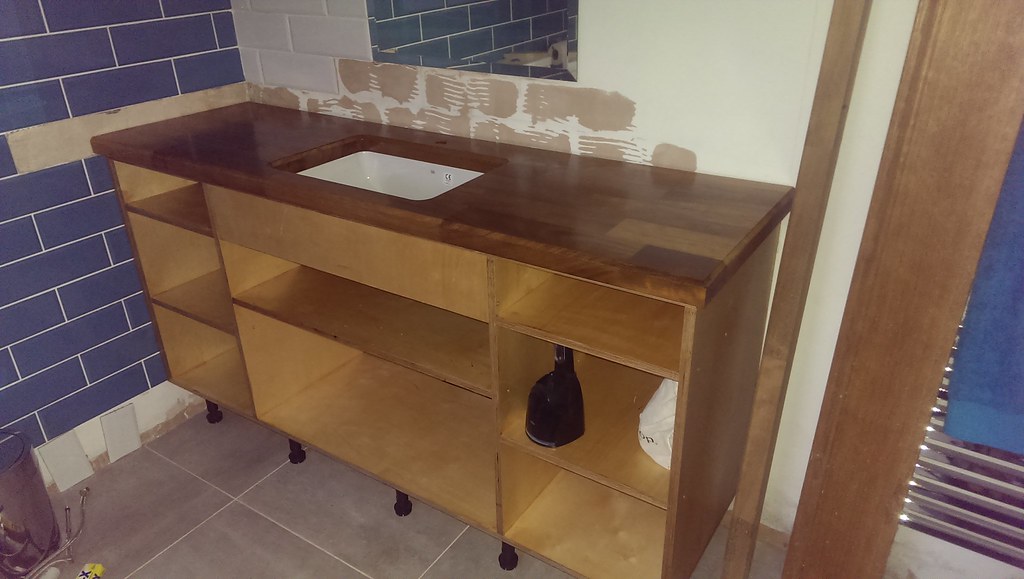
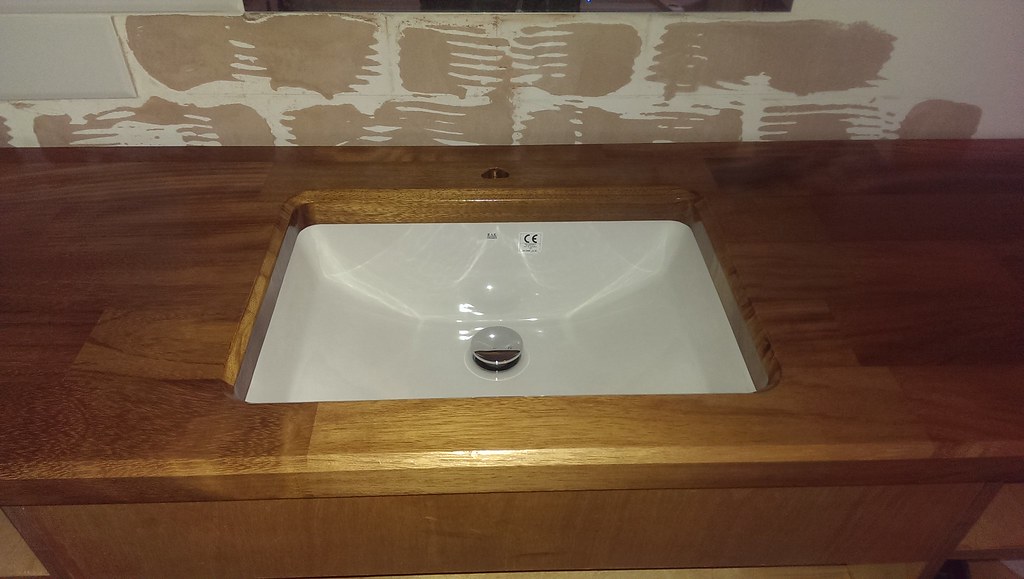
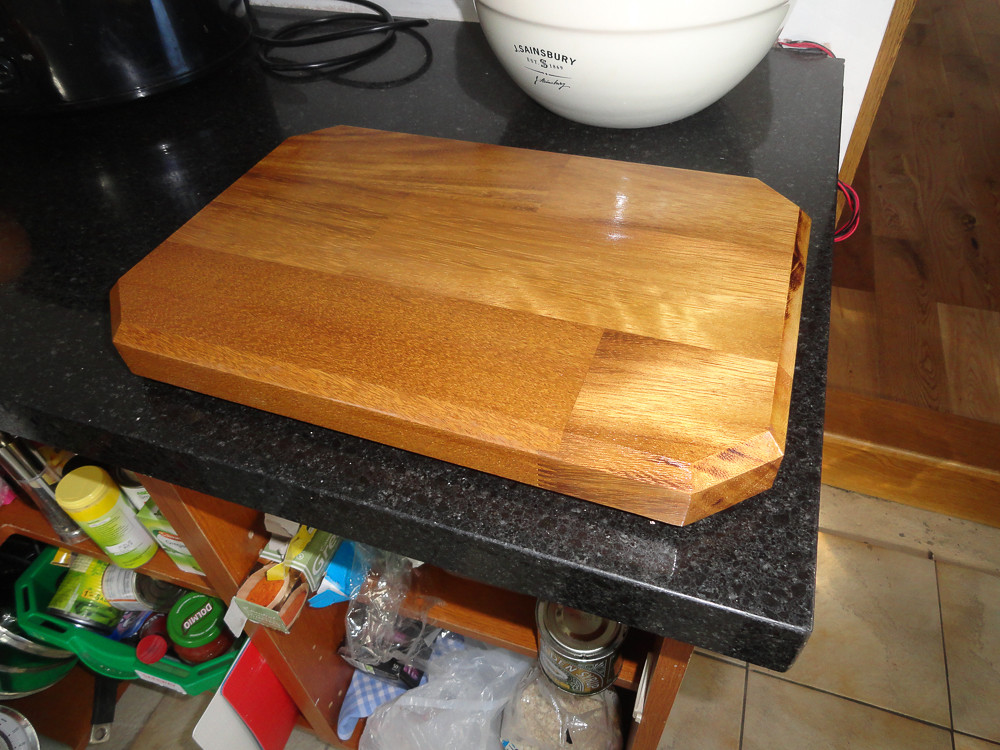
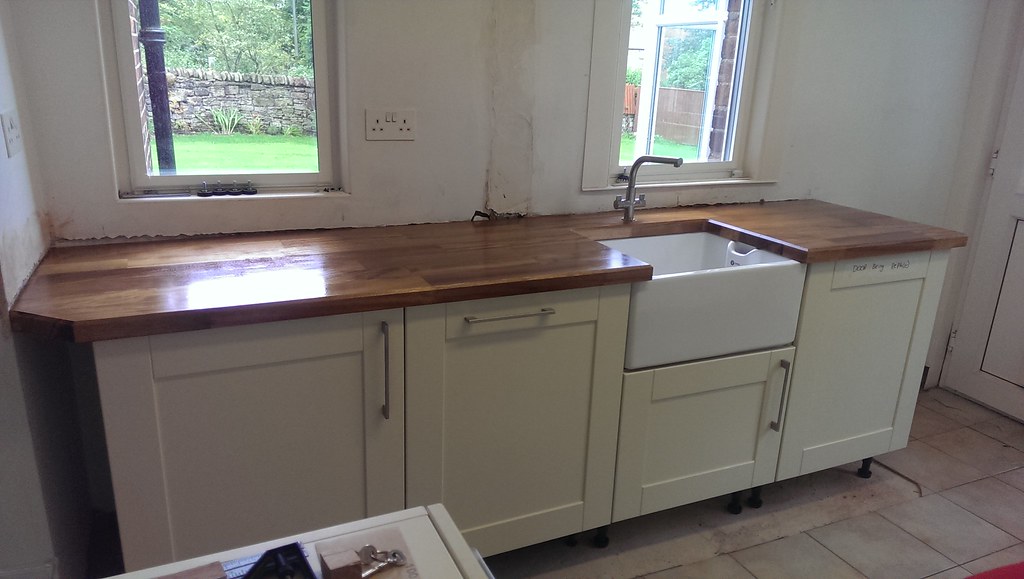
Then I've given it 4 coats of Sadolin IPV67 2-pack varnish, which should keep the water off the wood. Really really pleased with how this has come out, looks superb. It's exactly the same as we'll have in the kitchen eventually.
 IMAG0134 by paulrockliffe, on Flickr
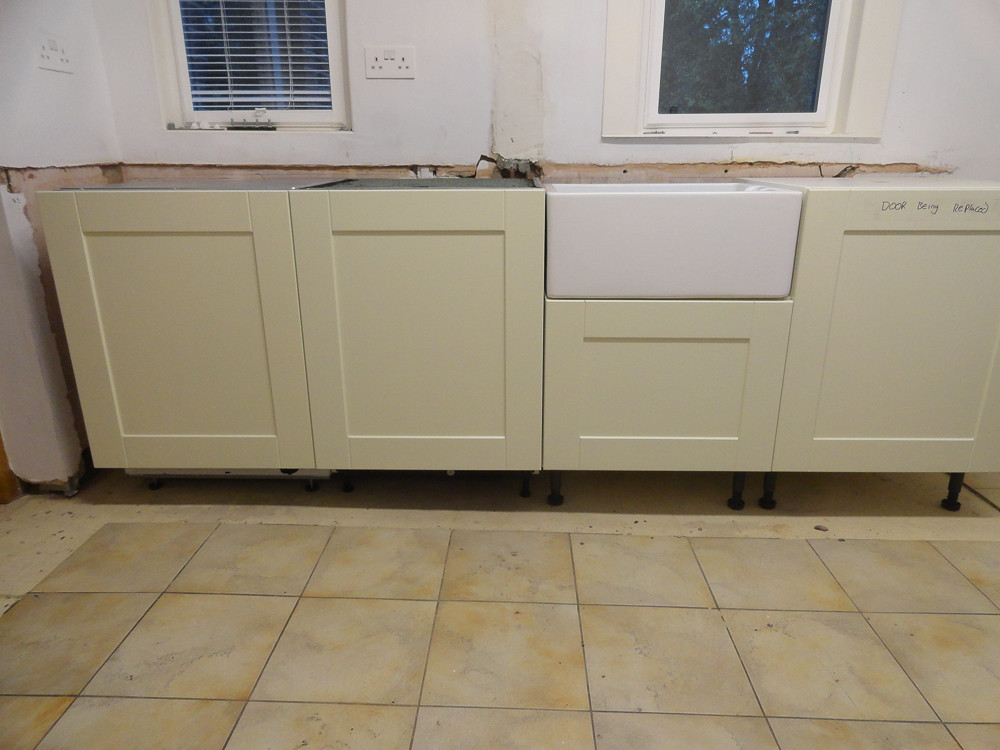
Trial fitted:
 IMAG0135 by paulrockliffe, on Flickr
 IMAG0136 by paulrockliffe, on Flickr
I've used the off-cut from the back to make an upstand, I've got as far as being ready to fix the upstand to the worktop, then fix the worktop to the cabinet, then get the plumbing done. Doors and drawers will arrive with the kitchen and there's an end panel to make and paint. No pics of the upstand today, but will post pics when I get it all fixed in place this week.
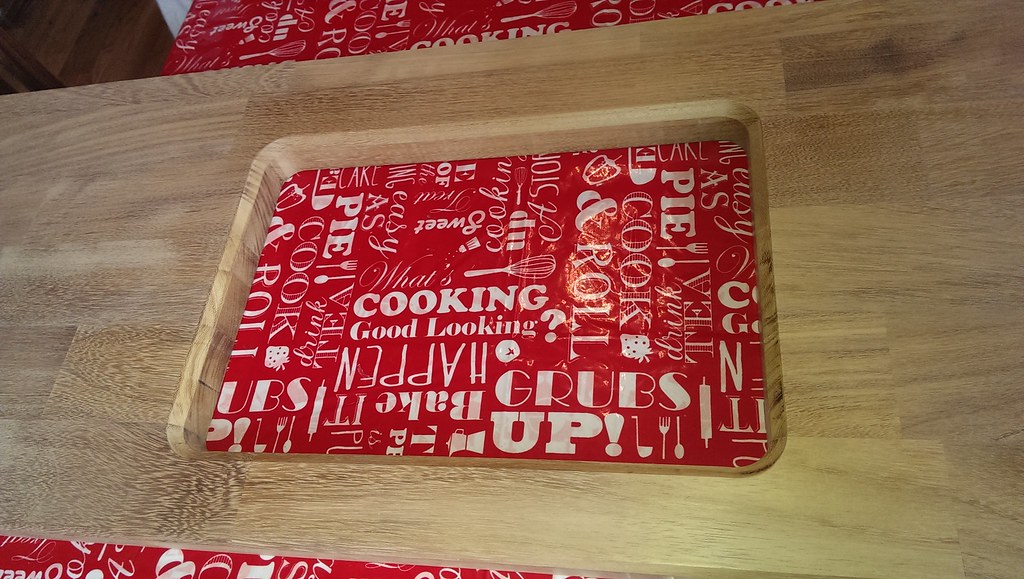
You're probably wondering what happened to the sink cut-out? I think this is called a trivet or something? It was going to be a chopping board, but we have a decent set of boards already and we don't want to be cluttering up the worktop in a small kitchen with this sort of thing, so it'll look good on the dining table with pans etc on. When the kitchen is done I'll have a few more pieces so can make some more.
 20140626-DSC00784.jpg by paulrockliffe, on Flickr
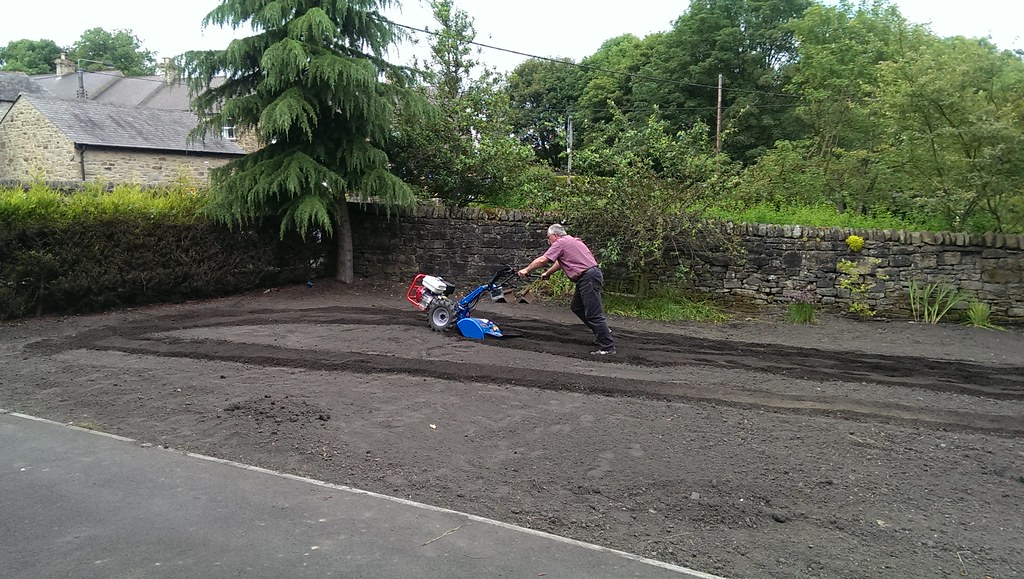
A couple of weekends ago I cleared and rotovated the top half of the garden ready for grass. Then I spent all day on the Sunday dragging a weighted ladder around to give it all a constant gradient, fill in the dips and reduce the height in a few places. I got a bit stuck when Dad's rotovator packed in, I eventually traced it to a chewed bottom-end bearing that was letting the crank move so much that the *something* wouldn't open and the engine wouldn't spark. Returned to owner for repair!
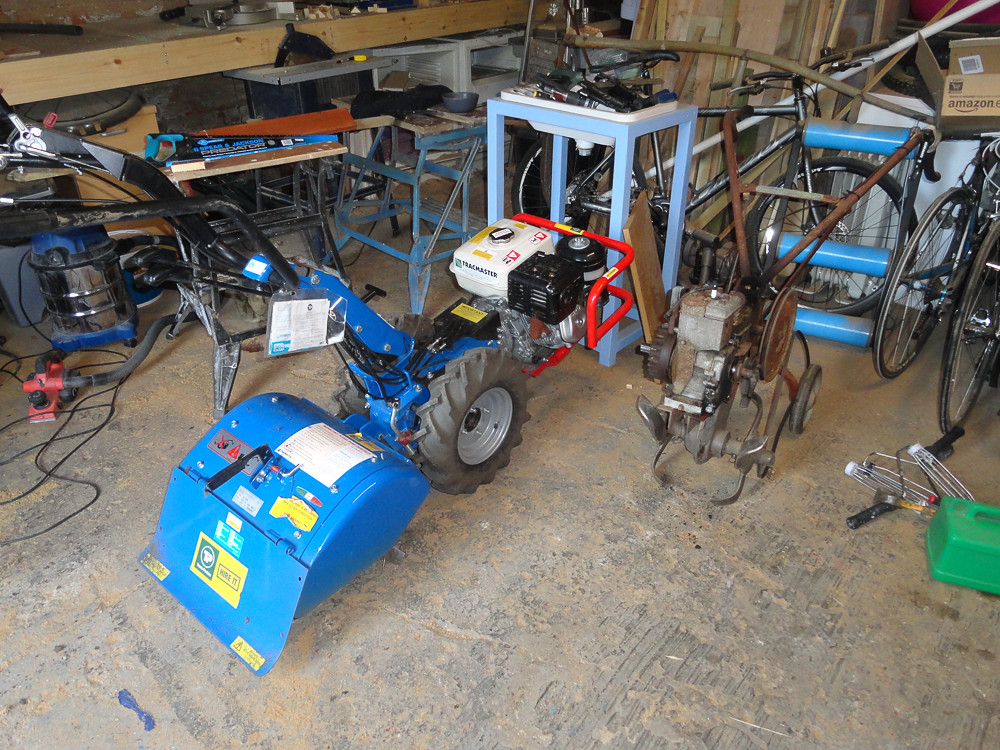
Fortunately my aprents were over the following weekend and Travis Perkins lent me this little number for just £45 for the weekend:
 20140622-DSC00778.jpg by paulrockliffe, on Flickr
Turns out these things are three grand. 8hp engine absolutely ripped the ground to bits!
 IMAG0137 by paulrockliffe, on Flickr
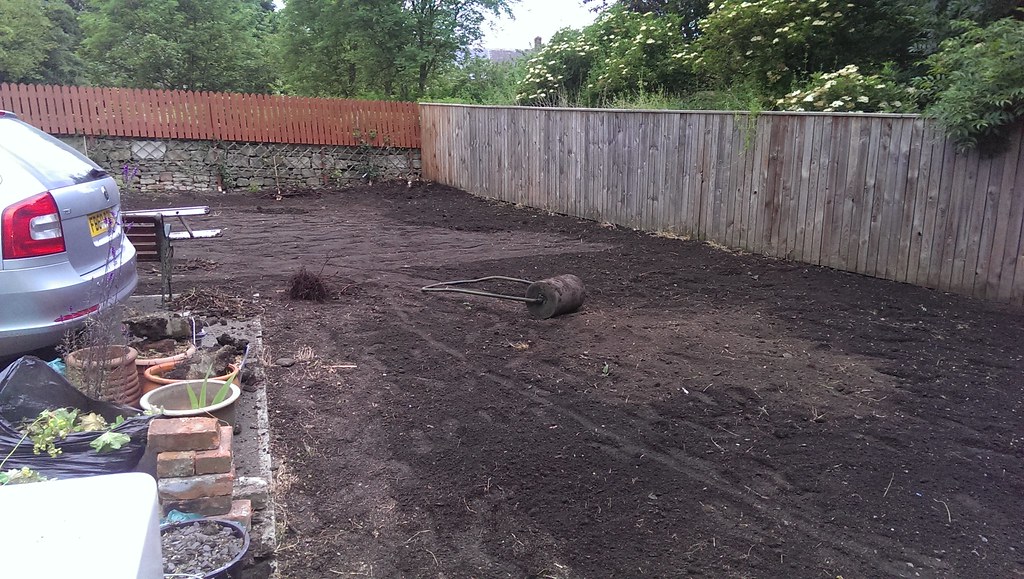
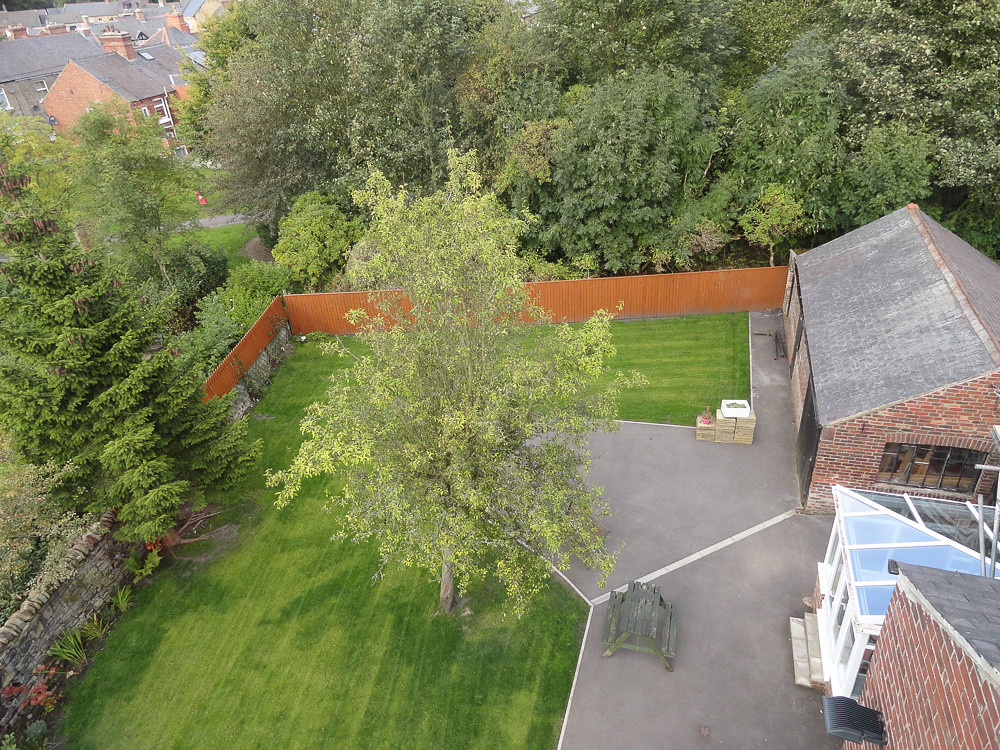
We got the top half lifted again so we could move more soil about and get it levelled again, then got the grass seed in. When we bought the house we were left an iron roller, which came in very handy, but was pretty exhausting! Sunday we did the bottom half and got that seeded, as well as finishing off the fence.
 IMAG0139 by paulrockliffe, on Flickr.
Finished garden:
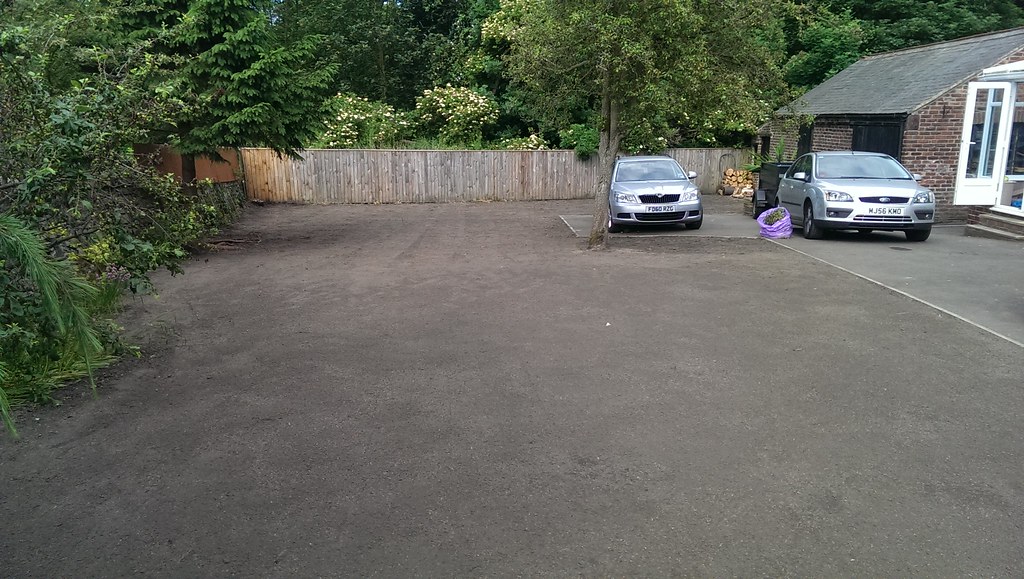 IMAG0140 by paulrockliffe, on Flickr
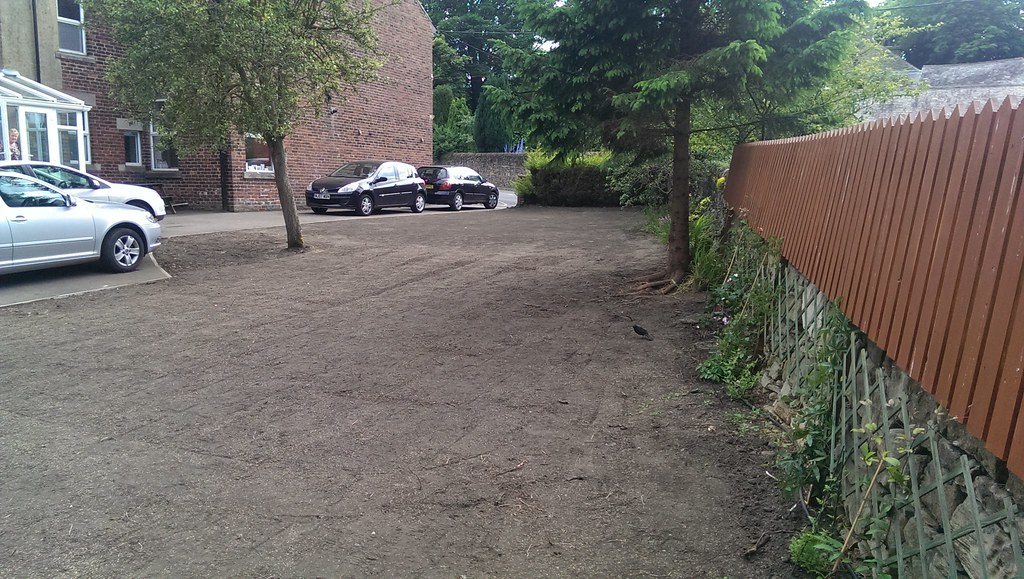 IMAG0141 by paulrockliffe, on Flickr
 IMAG0142 by paulrockliffe, on Flickr
By Friday we had this:
 IMAG0144 by paulrockliffe, on Flickr
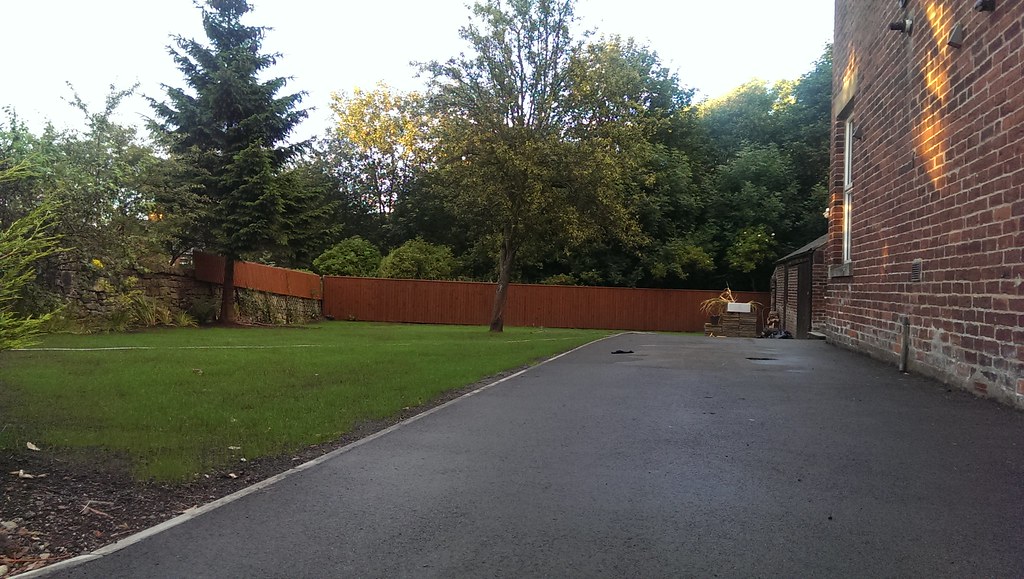
And now we've got a bit of a fuzz over quite a bit of the garden. Again, we're really pleased with how the garden has turned out. It looked like this when we bought it:
 20130422-DSC00282.jpg by paulrockliffe, on Flickr
 20130422-DSC00287.jpg by paulrockliffe, on Flickr
One thing I've learned about myself doing this project is that I love to get stuck in to new tasks, but hate to do all the fiddly finishing off jobs. I hope it's because I'm prioritising jobs on the impact they'll have and will get to the little jobs eventually, but at the moment I've loads of bits that are 80% finished. Need to focus on finishing things off over the next few weeks.
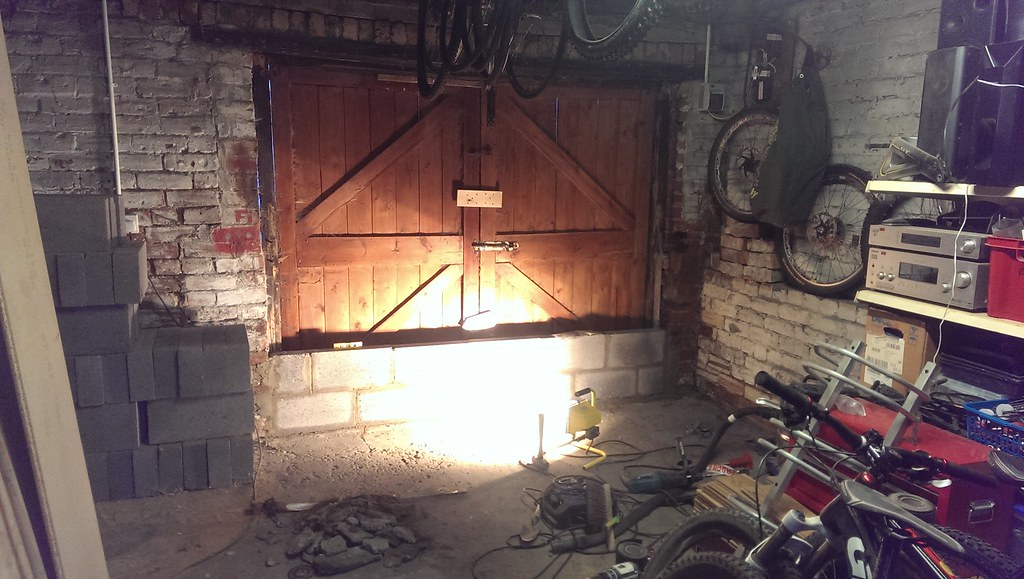
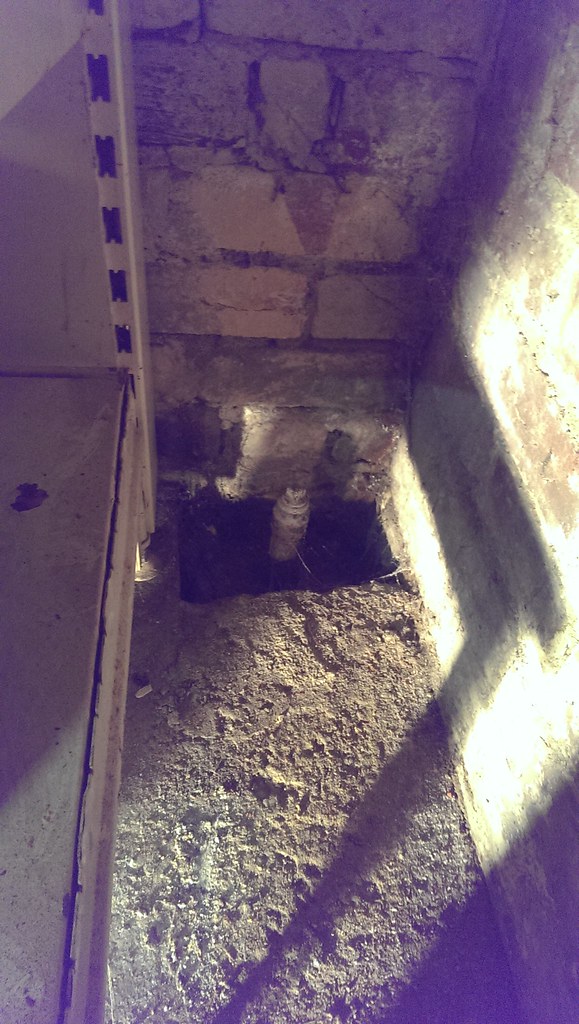
In that vein I spent much of the free time this weekend trying to get my workshop tidy again and ended up starting this:
 IMAG0145 by paulrockliffe, on Flickr
That door exits onto the side road, we don't need it and I need the wall space to hang the bikes off. Those blocks have been sat waiting to be put in that hole for nearly 12 months now!
Plan for the week is to get that wall finished and get the sink operational. Won't get much done next weekend as we've got things on, so need to crack on this week.
First up I done some maths then bought a hole saw kit. Then I spent four hours making this:
IMAG0131 by paulrockliffe, on FlickrIt's a sink cut-out template, as you can probably tell. Really pleased with the radius, which matches the sink perfectly.
Clamped in place and ready for the cut:
IMAG0132 by paulrockliffe, on FlickrAll done, sanded and the edge has been chamfered:
IMAG0133 by paulrockliffe, on FlickrThen I've given it 4 coats of Sadolin IPV67 2-pack varnish, which should keep the water off the wood. Really really pleased with how this has come out, looks superb. It's exactly the same as we'll have in the kitchen eventually.
IMAG0134 by paulrockliffe, on FlickrTrial fitted:
IMAG0135 by paulrockliffe, on FlickrIMAG0136 by paulrockliffe, on FlickrI've used the off-cut from the back to make an upstand, I've got as far as being ready to fix the upstand to the worktop, then fix the worktop to the cabinet, then get the plumbing done. Doors and drawers will arrive with the kitchen and there's an end panel to make and paint. No pics of the upstand today, but will post pics when I get it all fixed in place this week.
You're probably wondering what happened to the sink cut-out? I think this is called a trivet or something? It was going to be a chopping board, but we have a decent set of boards already and we don't want to be cluttering up the worktop in a small kitchen with this sort of thing, so it'll look good on the dining table with pans etc on. When the kitchen is done I'll have a few more pieces so can make some more.
20140626-DSC00784.jpg by paulrockliffe, on FlickrA couple of weekends ago I cleared and rotovated the top half of the garden ready for grass. Then I spent all day on the Sunday dragging a weighted ladder around to give it all a constant gradient, fill in the dips and reduce the height in a few places. I got a bit stuck when Dad's rotovator packed in, I eventually traced it to a chewed bottom-end bearing that was letting the crank move so much that the *something* wouldn't open and the engine wouldn't spark. Returned to owner for repair!
Fortunately my aprents were over the following weekend and Travis Perkins lent me this little number for just £45 for the weekend:
20140622-DSC00778.jpg by paulrockliffe, on FlickrTurns out these things are three grand. 8hp engine absolutely ripped the ground to bits!
IMAG0137 by paulrockliffe, on FlickrWe got the top half lifted again so we could move more soil about and get it levelled again, then got the grass seed in. When we bought the house we were left an iron roller, which came in very handy, but was pretty exhausting! Sunday we did the bottom half and got that seeded, as well as finishing off the fence.
IMAG0139 by paulrockliffe, on Flickr.Finished garden:
IMAG0140 by paulrockliffe, on FlickrIMAG0141 by paulrockliffe, on FlickrIMAG0142 by paulrockliffe, on FlickrBy Friday we had this:
IMAG0144 by paulrockliffe, on FlickrAnd now we've got a bit of a fuzz over quite a bit of the garden. Again, we're really pleased with how the garden has turned out. It looked like this when we bought it:
20130422-DSC00282.jpg by paulrockliffe, on Flickr20130422-DSC00287.jpg by paulrockliffe, on FlickrOne thing I've learned about myself doing this project is that I love to get stuck in to new tasks, but hate to do all the fiddly finishing off jobs. I hope it's because I'm prioritising jobs on the impact they'll have and will get to the little jobs eventually, but at the moment I've loads of bits that are 80% finished. Need to focus on finishing things off over the next few weeks.
In that vein I spent much of the free time this weekend trying to get my workshop tidy again and ended up starting this:
IMAG0145 by paulrockliffe, on FlickrThat door exits onto the side road, we don't need it and I need the wall space to hang the bikes off. Those blocks have been sat waiting to be put in that hole for nearly 12 months now!
Plan for the week is to get that wall finished and get the sink operational. Won't get much done next weekend as we've got things on, so need to crack on this week.
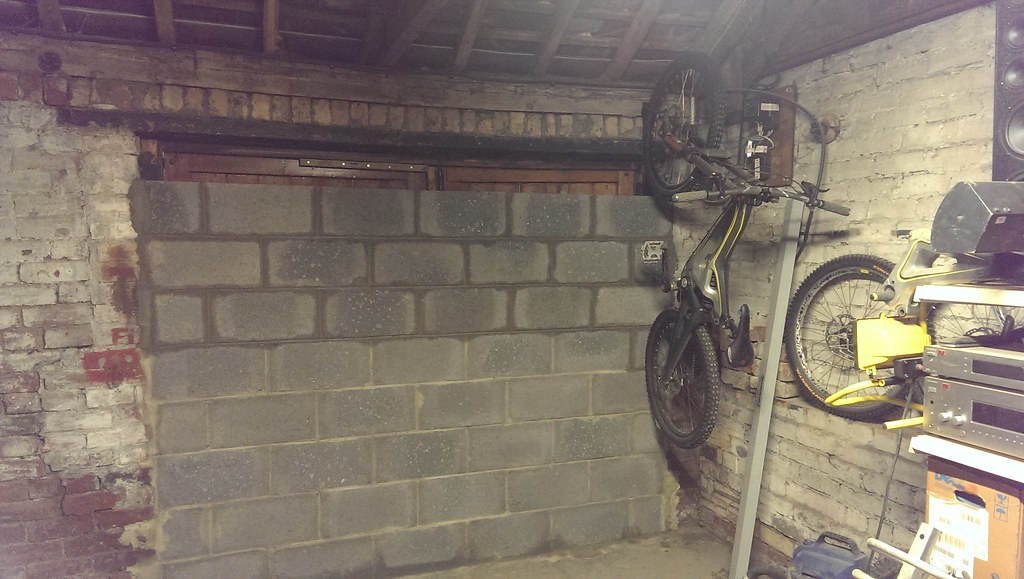
Not a great deal to report this week, have been out at a wedding for most of the weekend. I've been out in the workshop tidying for much of the week, block-work almost finished:
 IMAG0151 by paulrockliffe, on Flickr
I tested the bike hooks I have and then put them all up. Then I decided the bikes were taking up too much room, so I redid them all and I've hung them without the front wheels so the bars can be turned. S-hooks to hang the front wheel off the frames (made from wire coat hangers) and I've managed to half the space required and get the bikes a bit higher. Plan is to build a wheeled chest to sit underneath that can be filled with all my biking kit when I get chance.
I used a bottle jack to support the centre of the lintel and will be straightening the roof out when I put the last row of blocks in. Very surprised how easy it was to jack the lintel!
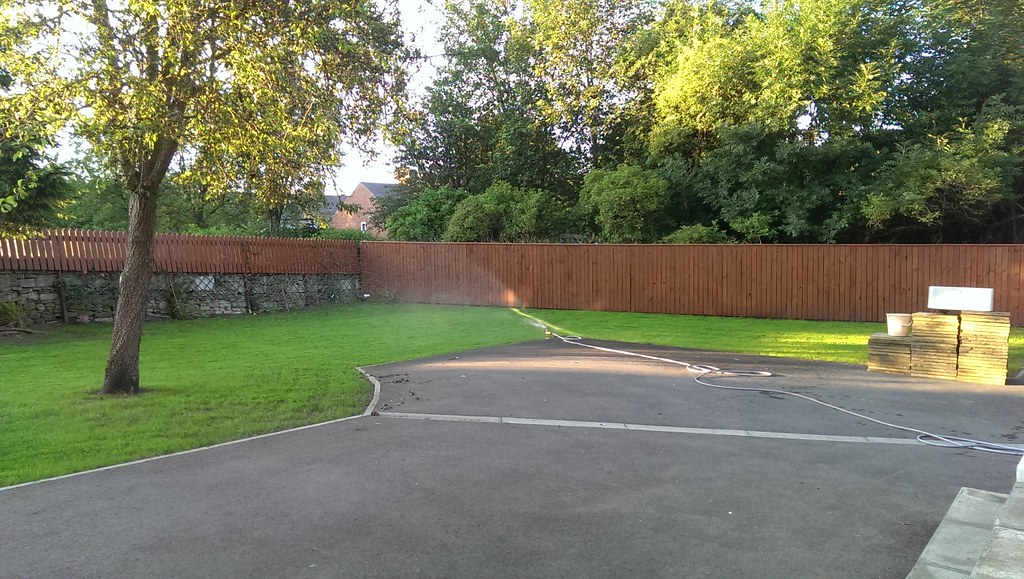
The grass continues to grow at a pace! Two weeks it's been in now. Picture is a bit dishonest as the low angle makes it look much thicker, but looks like it's going to be really nice. Definitely need to go lawn mower shopping this week:
 IMAG0155 by paulrockliffe, on Flickr
Finished and attached the upstand to the bathroom worktop:
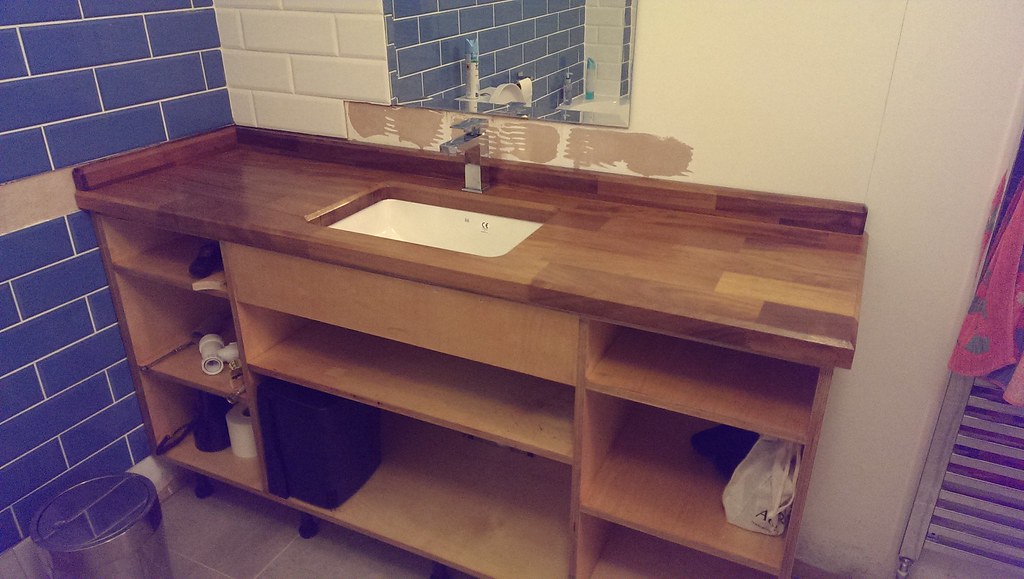 IMAG0156 by paulrockliffe, on Flickr
Need to seal the sink in, fix worktop, attach plumbing and finish off. Hopefully doors will be here soon and it can all be finished off.
IMAG0151 by paulrockliffe, on FlickrI tested the bike hooks I have and then put them all up. Then I decided the bikes were taking up too much room, so I redid them all and I've hung them without the front wheels so the bars can be turned. S-hooks to hang the front wheel off the frames (made from wire coat hangers) and I've managed to half the space required and get the bikes a bit higher. Plan is to build a wheeled chest to sit underneath that can be filled with all my biking kit when I get chance.
I used a bottle jack to support the centre of the lintel and will be straightening the roof out when I put the last row of blocks in. Very surprised how easy it was to jack the lintel!
The grass continues to grow at a pace! Two weeks it's been in now. Picture is a bit dishonest as the low angle makes it look much thicker, but looks like it's going to be really nice. Definitely need to go lawn mower shopping this week:
IMAG0155 by paulrockliffe, on FlickrFinished and attached the upstand to the bathroom worktop:
IMAG0156 by paulrockliffe, on FlickrNeed to seal the sink in, fix worktop, attach plumbing and finish off. Hopefully doors will be here soon and it can all be finished off.
Quick update for you, some decent progress to report for once.
Grass continues to grow and has thickened up nicely, have been weeding most nights and not been able to get on top of them all, so I've treated the lawn tonight. Hopefully just the weeds will die!
 IMAG0171 by paulrockliffe, on Flickr
The last of the carpets went in last Friday, which has made a huge difference to the house. I screwed the s t out of the stairs the day before, so it's now completely solid and squeak-free:
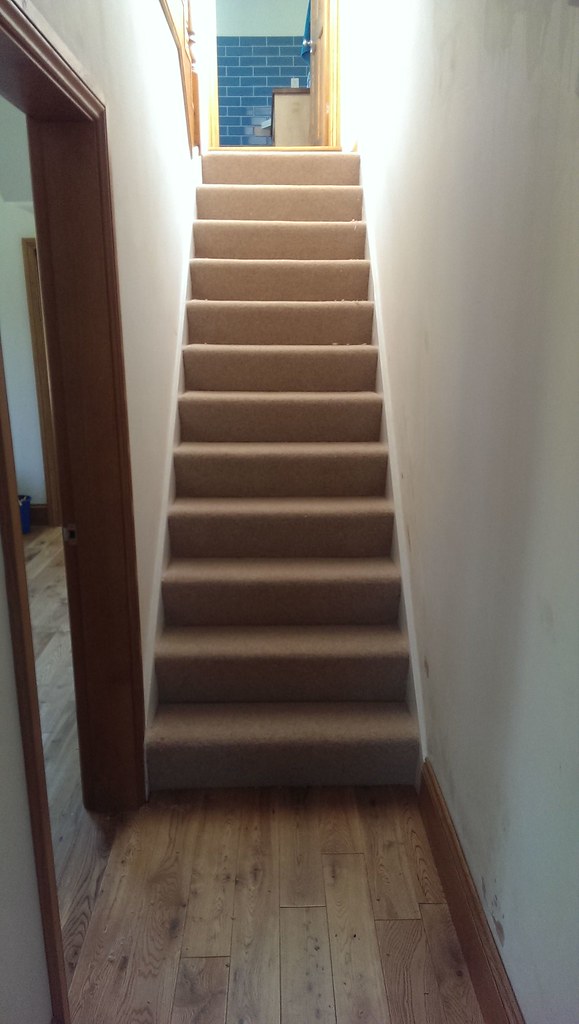 IMG-20140725-WA0024 by paulrockliffe, on Flickr
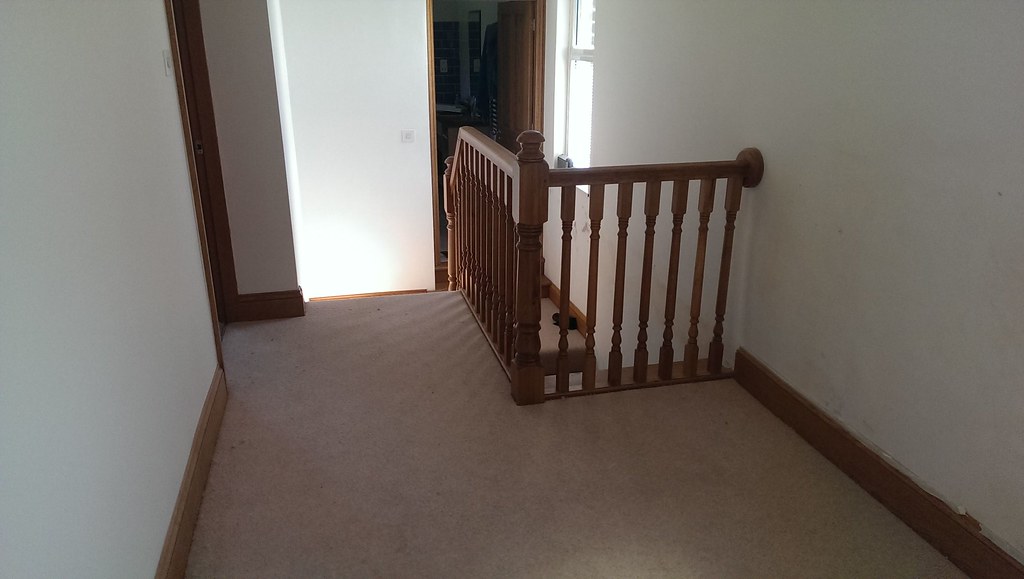 IMG-20140725-WA0026 by paulrockliffe, on Flickr
 IMG-20140725-WA0028 by paulrockliffe, on Flickr
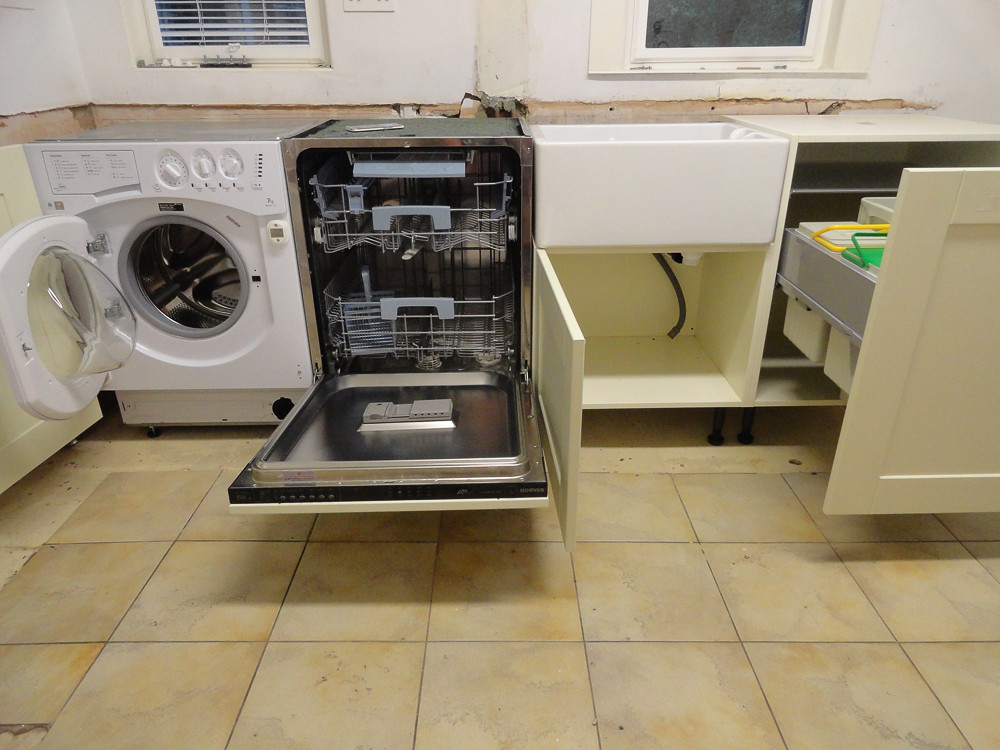
And after 12 months of dialogue, changing specs and not being ready, we finally have a new kitchen...... in the conservatory:
 IMAG0180 by paulrockliffe, on Flickr
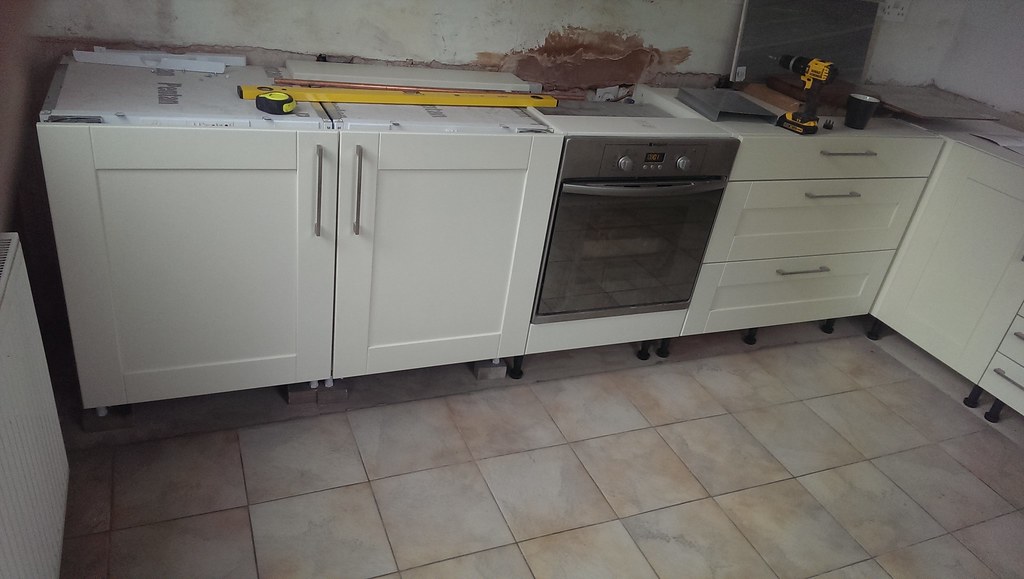
That also arrived on Friday. It came via stabbedrat on here and we're really please with it, the quality appears to be exceptional, everything is rock solid and exactly as we wanted. We gutted the old kitchen on Sunday and made a start and then have been working in the evenings this week. I've mostly got one side of the room in now, it's taken a lot longer than I was hoping!
The first unit went in very quickly, once I'd worked out levels etc:
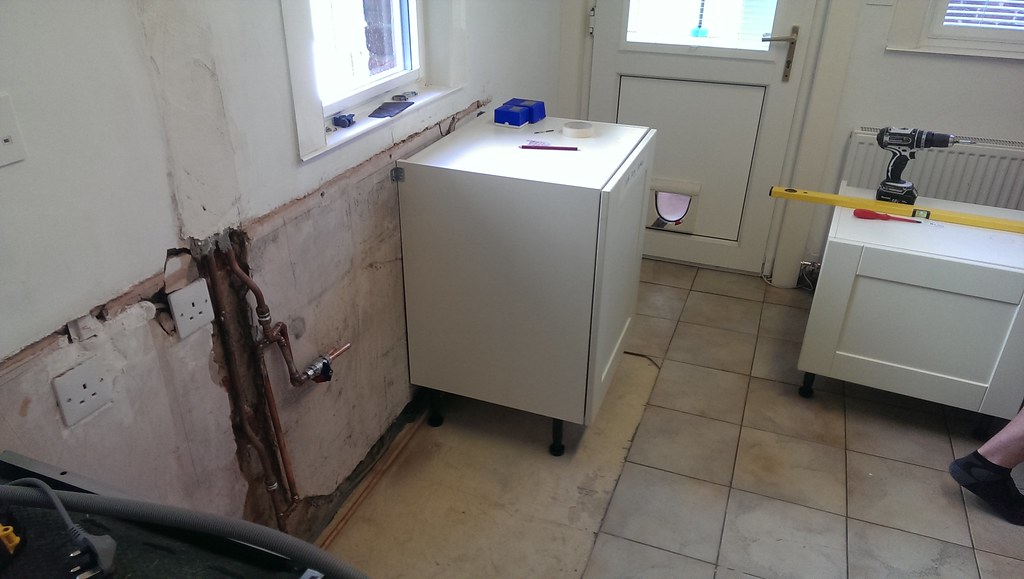 IMAG0182 by paulrockliffe, on Flickr
The problem I've had is that the walls aren't square and the plumbing is a nightmare because we put a kink in a pipe months ago bringing the hot water to the kitchen so that it would connect up to the existing plumbing. Unfortunately I couldn't remove the kink without hacking the wall to bits, so I had to do all sorts to get clearance on the dishwasher. And then the waste pipe had to be run behind the water pipes by recessing into the wall. By the time I was finished I was left with this:
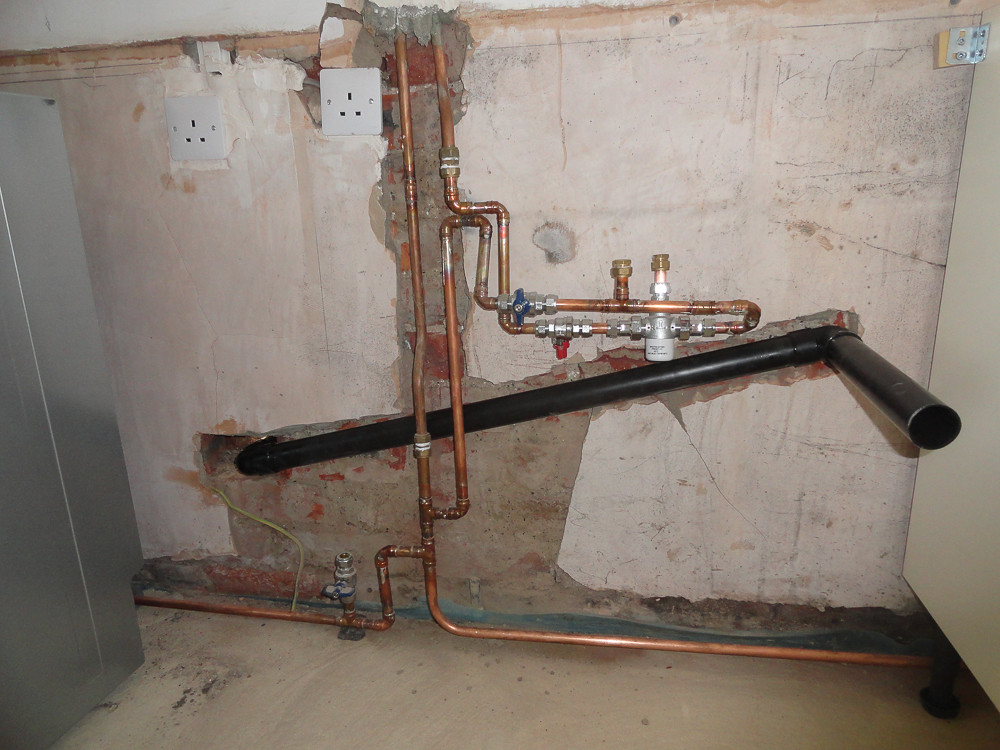 20140728-DSC00788.jpg by paulrockliffe, on Flickr
There's a thermostatic regulator for the hot water so I can set the hot to the right temp without having to dick about with a mixer ever time. The water is turned right up for the shower, so comes out far too hot as standard.
That was compounded by the wall not being square as it makes it impossible to check depths are consistent and that I'll be left with a consistent overhang on the worktops with no gaps at the back. I think I'm there now anyway.
Next problem was fixing the belfast sink unit to the bin unit, the heigh difference and narrow gap meant I couldn't clamp them together at the back, so I spent an hour scratching my head before coming up with this custom clamp, it's all screwed together in-situ:
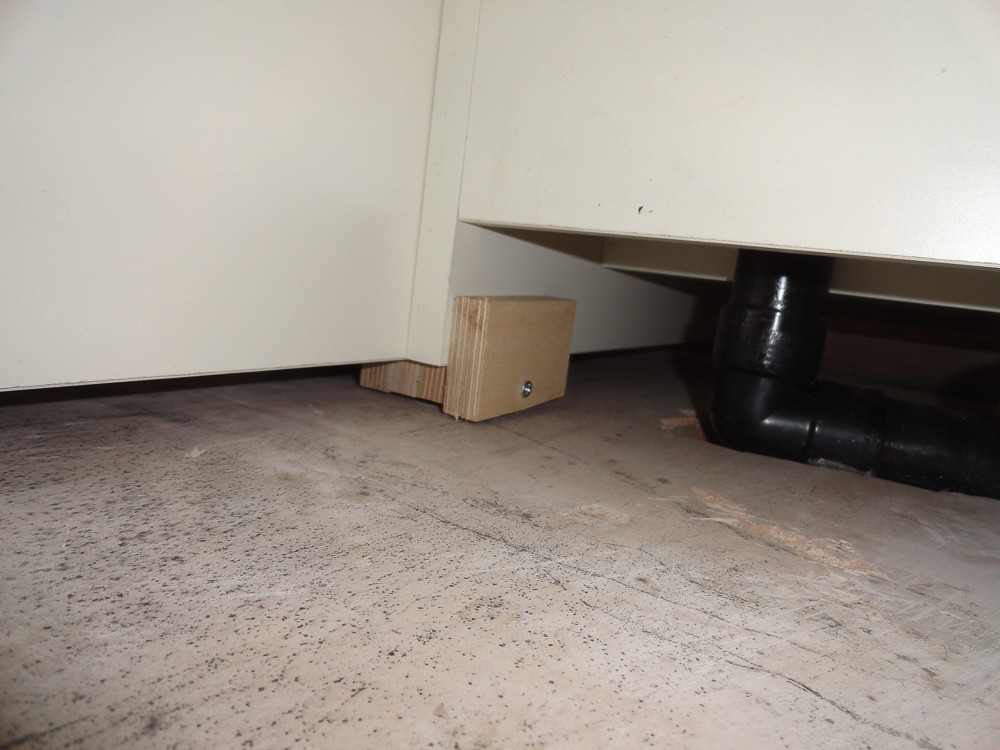 20140728-DSC00789.jpg by paulrockliffe, on Flickr
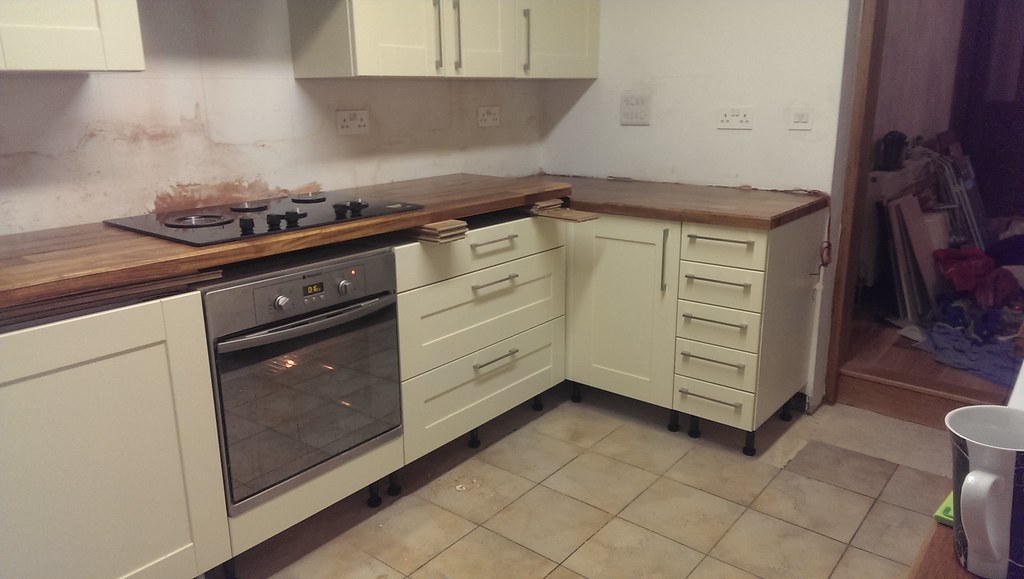
Next issue was getting the appliance doors on so that I could make sure everything will line up right at the front and be far enough back. This meant recessing some hinges with the router without any sort of guide. I surprised myself by getting them all perfect first time and ended up with this by the end of tonight:
 20140730-DSC00791.jpg by paulrockliffe, on Flickr
 20140730-DSC00793.jpg by paulrockliffe, on Flickr
Everything is plumbed apart from the wastes and the tap, everything is level too. I just need to check my worktop is going to be OK, then fix the appliances together/to the wall so they can't move about and mess up my door gaps. That'll be tricky, but I think I know what I'm doing now.
I'm reasonably confident the other side will be much easier as there's no plumbing to cock things up and the four units will all fix together nicely. Wall units will need some sockets recessing and there's an extractor flue to go through the wall, but nothing too complicated compared with what I've done so far. Hoping to get the lot finished by the end of August, but I'm sure something will come up!
Once that's done, inside we've just got the damp gable wall to finish decorating and the hallway to get coving in and decorated, then the entrance floor is to be removed and replaced. After that it's finishing off jobs and shelving, wardrobes etc. The end is vaguely in sight now, at least until we decide to tackle some of the other major projects we have planned.
Last pic; collected this little eBay purchase tonight to replace my hoover that packed in at the weekend. Although I'm sure I can fix the hoover I took the opportunity to justify a new man-device:
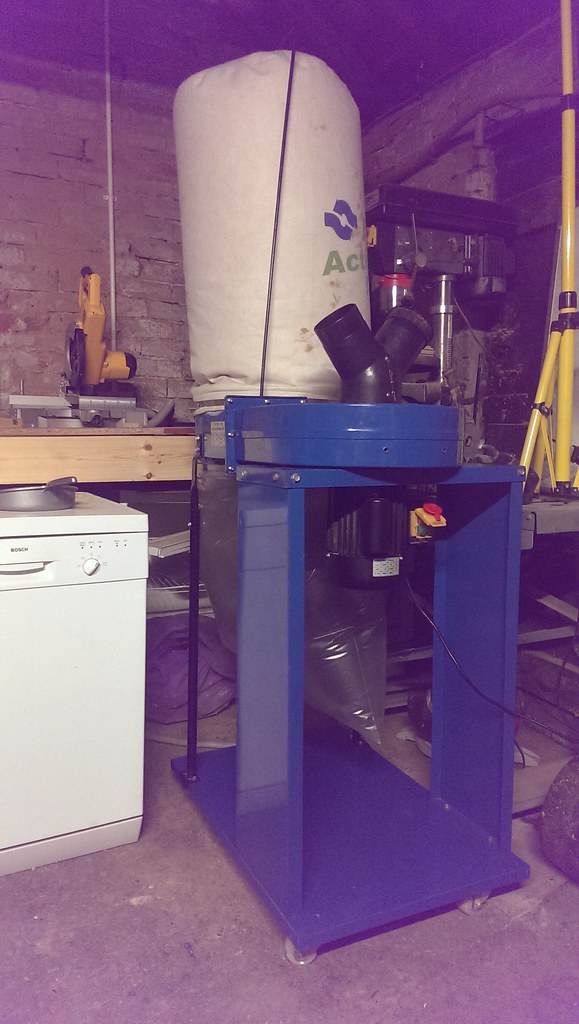 IMAG0184 by paulrockliffe, on Flickr
Total over-kill, but was a complete bargain. Need to find a hose adaptor for it and a length of hose so I can rig it up as a hoover, then keep my eye out for some cheap ducting going on eBay. Poor chap was selling because his neighbours keep complaining about the noise!
Grass continues to grow and has thickened up nicely, have been weeding most nights and not been able to get on top of them all, so I've treated the lawn tonight. Hopefully just the weeds will die!
IMAG0171 by paulrockliffe, on FlickrThe last of the carpets went in last Friday, which has made a huge difference to the house. I screwed the s
t out of the stairs the day before, so it's now completely solid and squeak-free:IMG-20140725-WA0024 by paulrockliffe, on FlickrIMG-20140725-WA0026 by paulrockliffe, on FlickrIMG-20140725-WA0028 by paulrockliffe, on FlickrAnd after 12 months of dialogue, changing specs and not being ready, we finally have a new kitchen...... in the conservatory:
IMAG0180 by paulrockliffe, on FlickrThat also arrived on Friday. It came via stabbedrat on here and we're really please with it, the quality appears to be exceptional, everything is rock solid and exactly as we wanted. We gutted the old kitchen on Sunday and made a start and then have been working in the evenings this week. I've mostly got one side of the room in now, it's taken a lot longer than I was hoping!
The first unit went in very quickly, once I'd worked out levels etc:
IMAG0182 by paulrockliffe, on FlickrThe problem I've had is that the walls aren't square and the plumbing is a nightmare because we put a kink in a pipe months ago bringing the hot water to the kitchen so that it would connect up to the existing plumbing. Unfortunately I couldn't remove the kink without hacking the wall to bits, so I had to do all sorts to get clearance on the dishwasher. And then the waste pipe had to be run behind the water pipes by recessing into the wall. By the time I was finished I was left with this:
20140728-DSC00788.jpg by paulrockliffe, on FlickrThere's a thermostatic regulator for the hot water so I can set the hot to the right temp without having to dick about with a mixer ever time. The water is turned right up for the shower, so comes out far too hot as standard.
That was compounded by the wall not being square as it makes it impossible to check depths are consistent and that I'll be left with a consistent overhang on the worktops with no gaps at the back. I think I'm there now anyway.
Next problem was fixing the belfast sink unit to the bin unit, the heigh difference and narrow gap meant I couldn't clamp them together at the back, so I spent an hour scratching my head before coming up with this custom clamp, it's all screwed together in-situ:
20140728-DSC00789.jpg by paulrockliffe, on FlickrNext issue was getting the appliance doors on so that I could make sure everything will line up right at the front and be far enough back. This meant recessing some hinges with the router without any sort of guide. I surprised myself by getting them all perfect first time and ended up with this by the end of tonight:
20140730-DSC00791.jpg by paulrockliffe, on Flickr20140730-DSC00793.jpg by paulrockliffe, on FlickrEverything is plumbed apart from the wastes and the tap, everything is level too. I just need to check my worktop is going to be OK, then fix the appliances together/to the wall so they can't move about and mess up my door gaps. That'll be tricky, but I think I know what I'm doing now.
I'm reasonably confident the other side will be much easier as there's no plumbing to cock things up and the four units will all fix together nicely. Wall units will need some sockets recessing and there's an extractor flue to go through the wall, but nothing too complicated compared with what I've done so far. Hoping to get the lot finished by the end of August, but I'm sure something will come up!
Once that's done, inside we've just got the damp gable wall to finish decorating and the hallway to get coving in and decorated, then the entrance floor is to be removed and replaced. After that it's finishing off jobs and shelving, wardrobes etc. The end is vaguely in sight now, at least until we decide to tackle some of the other major projects we have planned.
Last pic; collected this little eBay purchase tonight to replace my hoover that packed in at the weekend. Although I'm sure I can fix the hoover I took the opportunity to justify a new man-device:
IMAG0184 by paulrockliffe, on FlickrTotal over-kill, but was a complete bargain. Need to find a hose adaptor for it and a length of hose so I can rig it up as a hoover, then keep my eye out for some cheap ducting going on eBay. Poor chap was selling because his neighbours keep complaining about the noise!
Wow, 3 months without an update! How have you coped with not seeing the finished kitchen???
Just re-read the last couple of posts and remembered the lovely summer sunshine, it's properly dark and cold now, though the grass needs one last cut before winter next time it's dry enough...
Quite a lot has happened, though when I look at what I've not posted I wonder what I've been doing for the last three months!
Anyway, worktop on:
 IMAG0216 by paulrockliffe, on Flickr
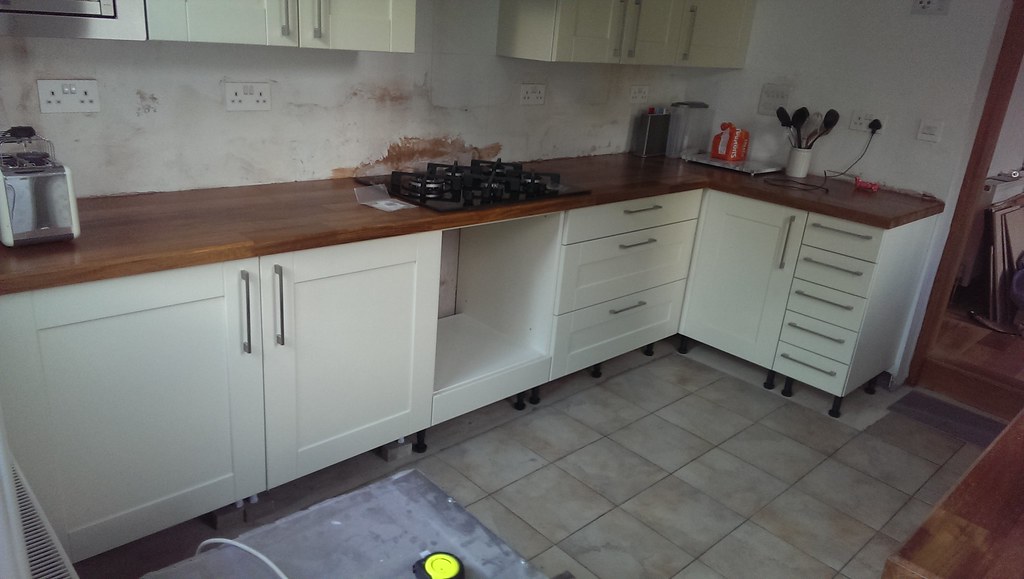
Units all in on the opposite side:
 IMAG0199 by paulrockliffe, on Flickr
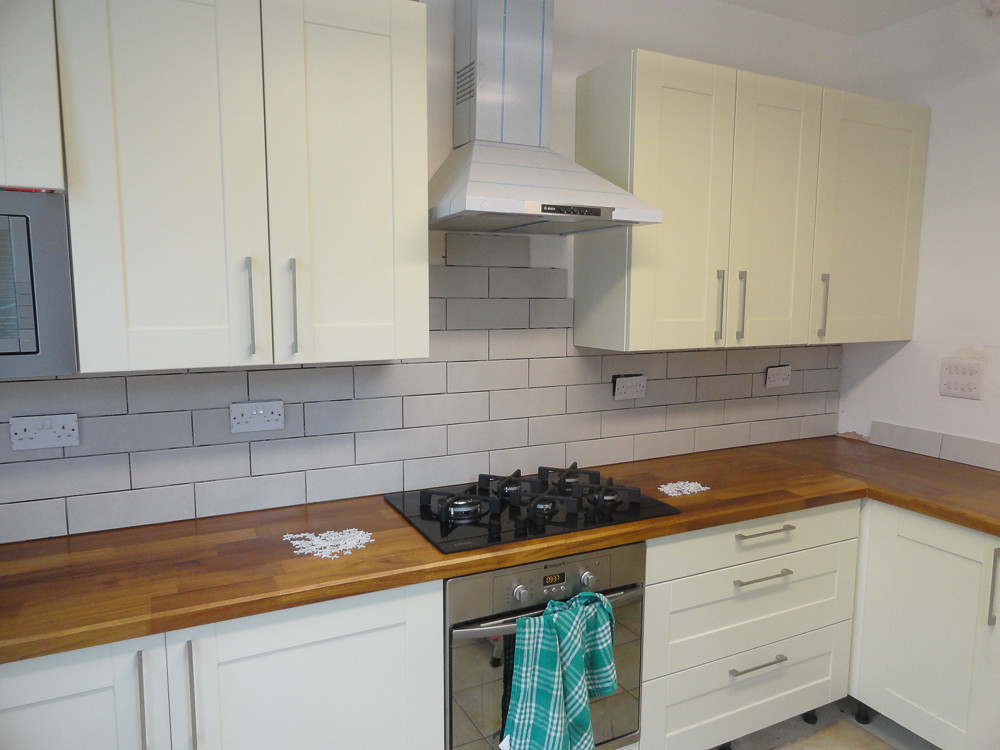
Wall units on and worktop cut:
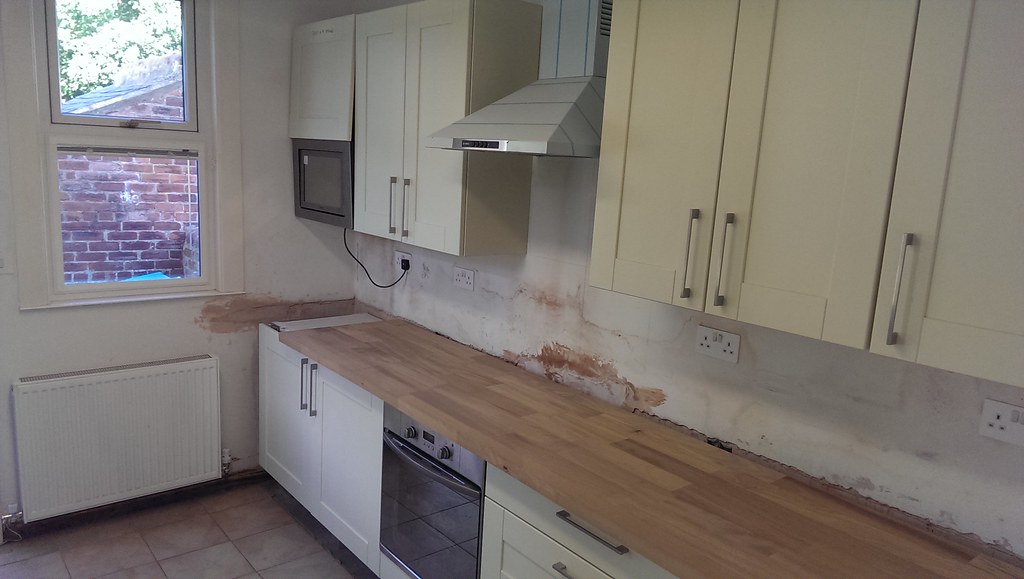 IMAG0208 by paulrockliffe, on Flickr
As you can see, fitting this worktop was a total pain in the arse! I routed out the cutout for the hob, three quarters depth in the conservatory, then lifted into place to finish off to minimise dust. The new dust extractor was brought into the house to help out! The top is jacked up and was raised and lowered several times while the top of the cabinets were adjusted to allow the ob to fit and holes were cut to allow me to bolt the two pieces together in situ:
 IMAG0224 by paulrockliffe, on Flickr
In and jointed:
 IMAG0229 by paulrockliffe, on Flickr
Wall tiles on:
 20140916-DSC00842.jpg by paulrockliffe, on Flickr
And grouted:
 20140917-DSC00844.jpg by paulrockliffe, on Flickr
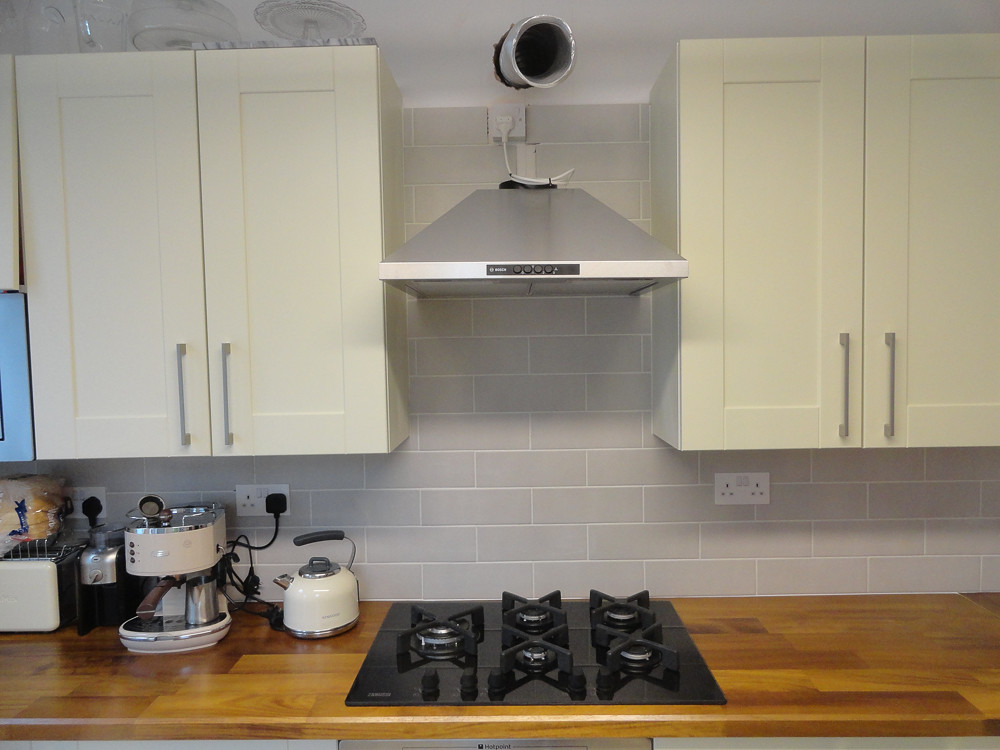
And the otherside:
 IMAG0254 by paulrockliffe, on Flickr
New floor tiles down:
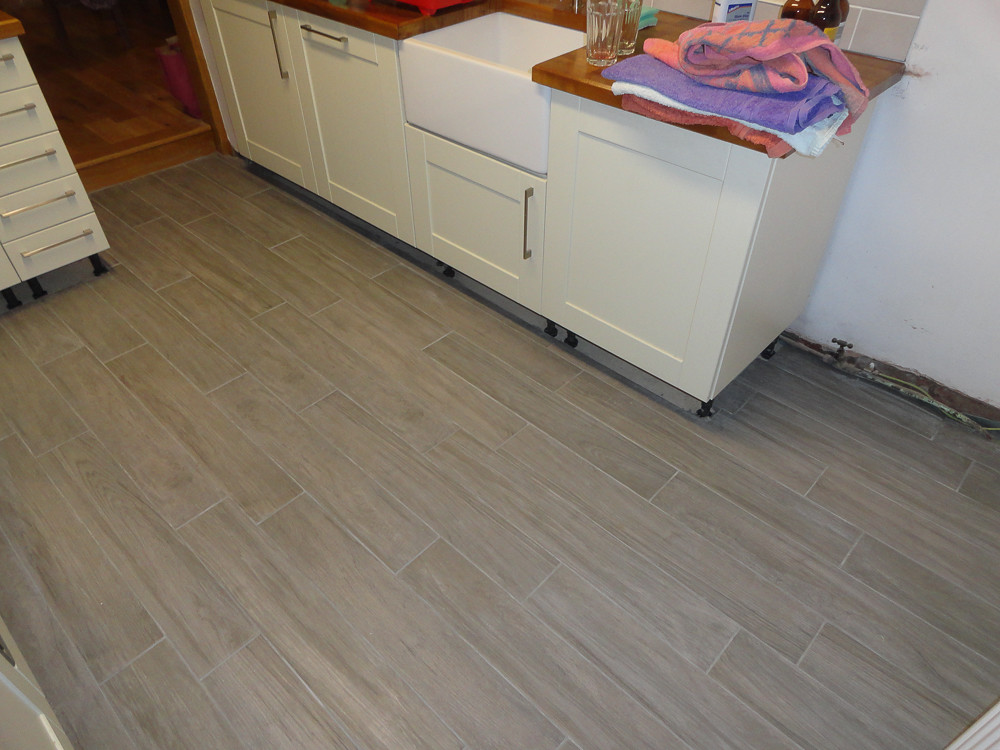 20141022-DSC00854.jpg by paulrockliffe, on Flickr
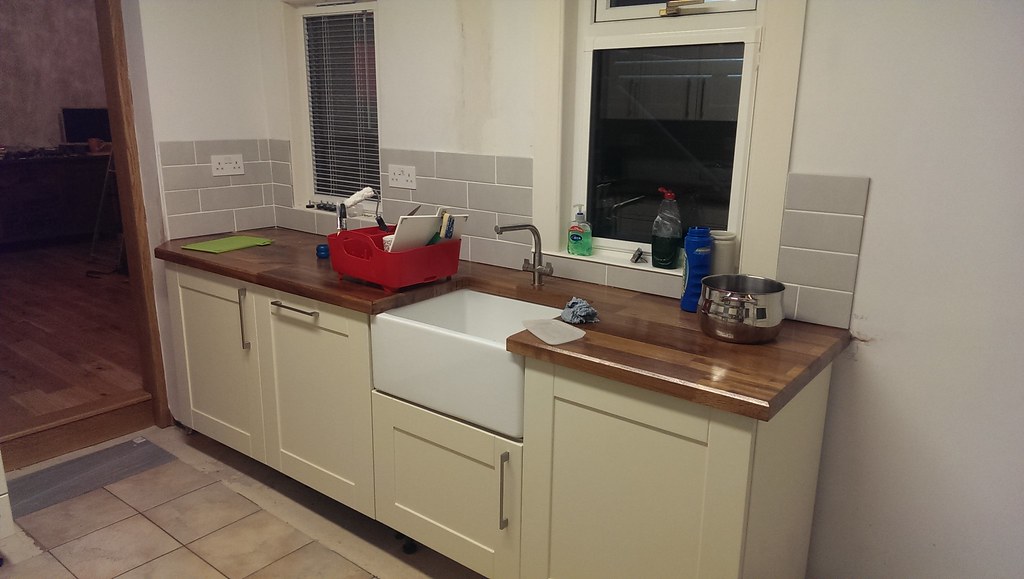
Finished:
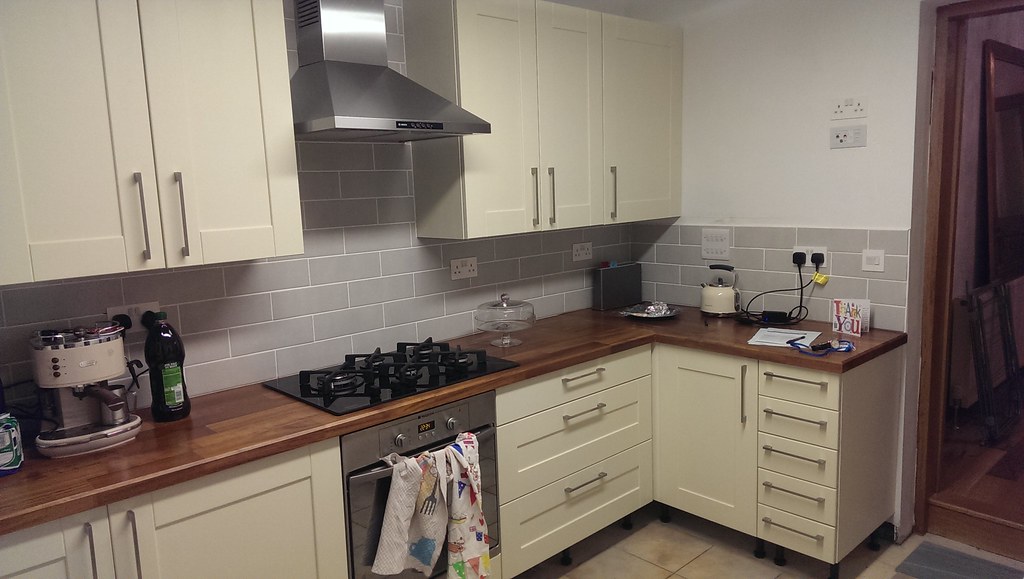 IMAG0253 by paulrockliffe, on Flickr
Well almost anyway, few little jobs to do and plinths and a few bits of skirting/architrave to do. I need to make and paint some MDF end panels and a couple of filler panels, but these aren't hugely important. There's a shelf to go in the gap next to the washing machine that matches the worktop and a couple of shelves for coffee etc to go next to the window, but they can wait as well.
When I fitted the hob I remembered that there's an odd pipe in the workshop, so I had the gas chap look at it while he was here:
 IMAG0231 by paulrockliffe, on Flickr
He thinks it's probably gas and I should open it to see if it still works. I had a look and there's been a replacement of the gas pipe going into the house at some point, so perhaps this was disconnected at the time, but certainly interesting to see if a gas heater could be fitted to warm me up in winter.
I'm working through cosmetic jobs, trying to get the place looking like a home in time for Christmas, so the next job was to cover up the boiler. I've had a pile of oak sat ready for ages, so started cutting lap joints with the router and got this screwed together:
 20140921-DSC00848.jpg by paulrockliffe, on Flickr
Everything is perfectly square as I've planed the bottom to match the slope of the floor. Lifted in place, packed out to the right place and screwed in place. Absolutely rock solid!
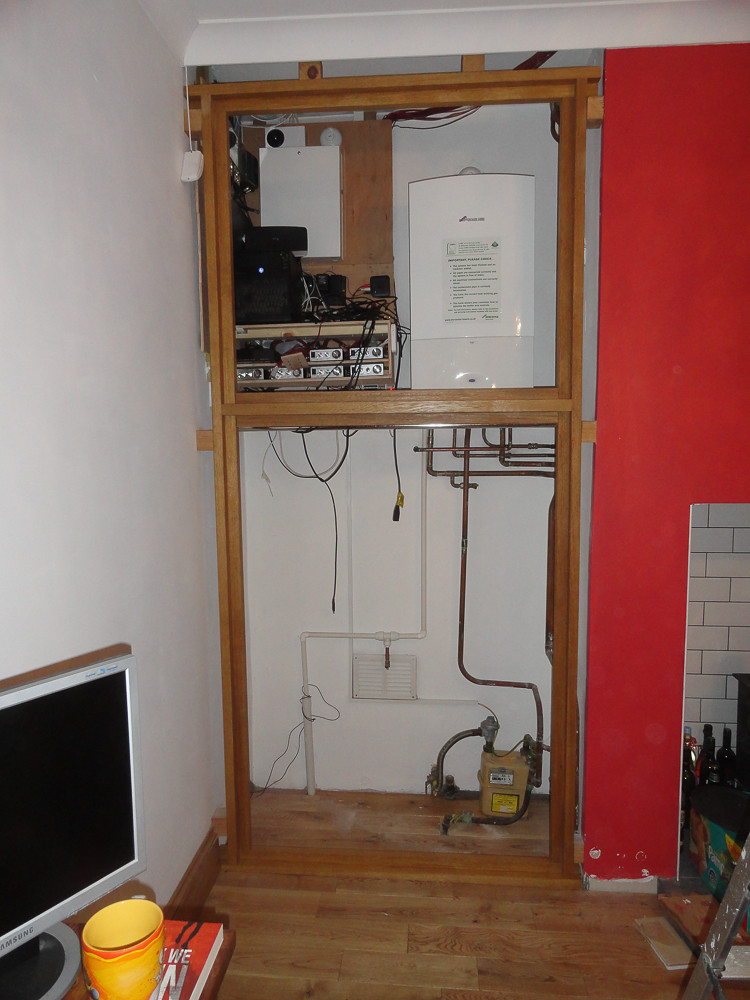 20140922-DSC00849.jpg by paulrockliffe, on Flickr
Architraves on:
url=https://flic.kr/p/p9MgEn]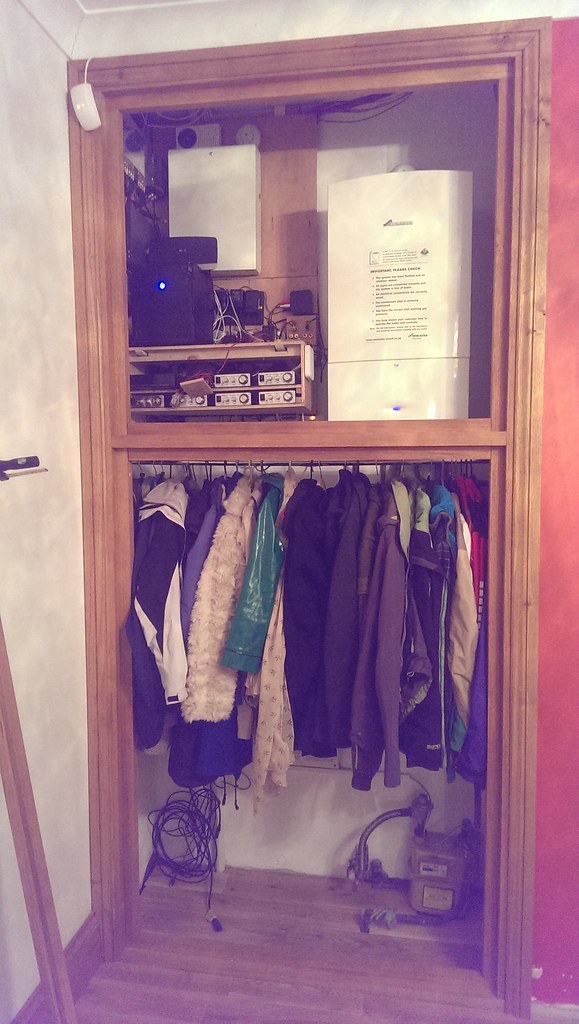 [/url] IMAG0264 by paulrockliffe, on Flickr
Here's the system I made for alp jointing the door frames. The four outer bits are providing support for the router base and the cross piece is the stop. Depth is set and each piece was cut. Need a router table for this stuff in future to speed things up!
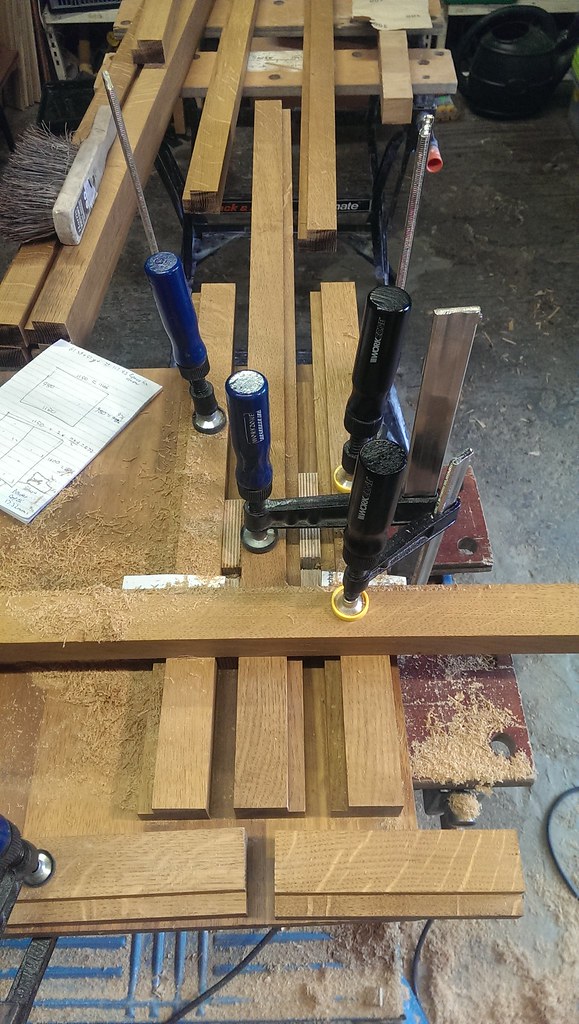 IMAG0262 by paulrockliffe, on Flickr
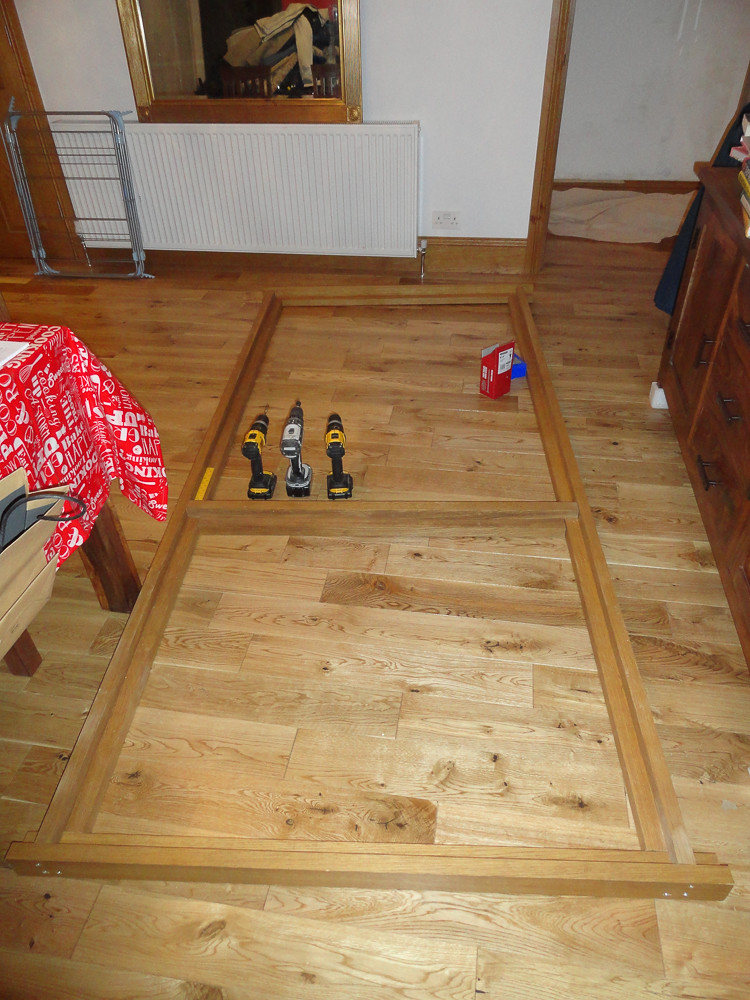
Frame glued and clamped:
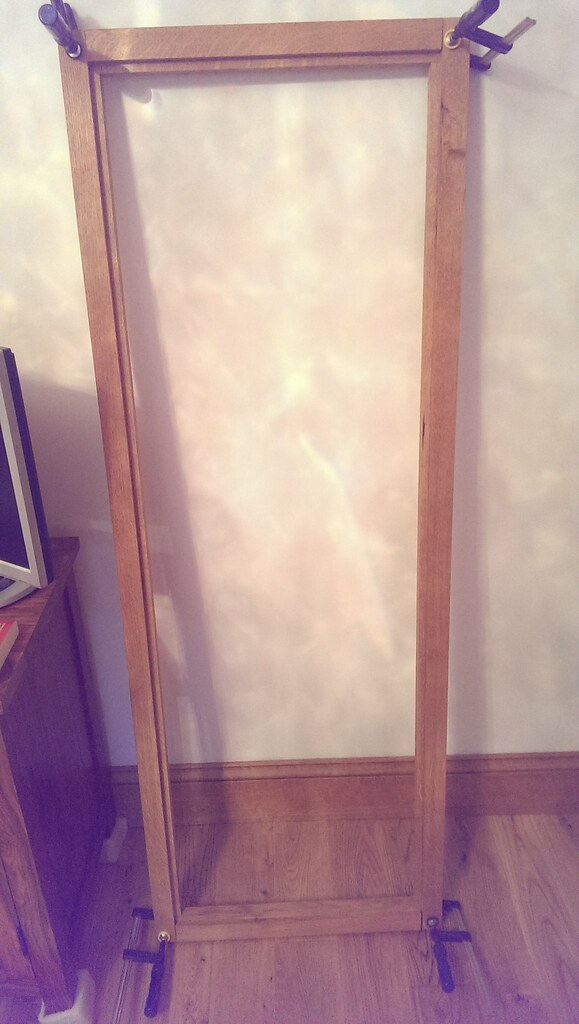 IMAG0263 by paulrockliffe, on Flickr
Door panels are 12mm MDF with an oak veneer and the finished thing looks like this:
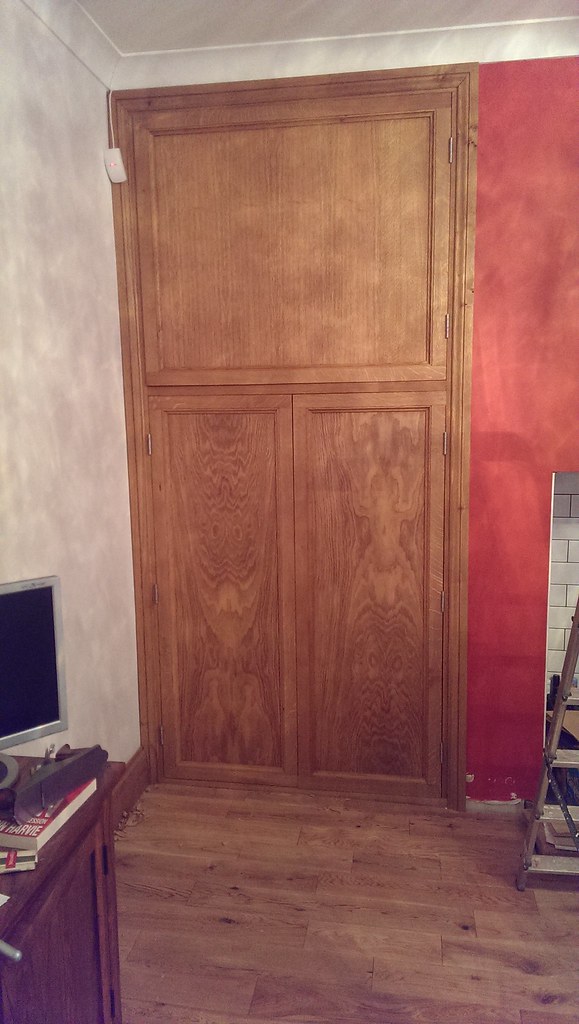 IMAG0267 by paulrockliffe, on Flickr
I've since added handles and catches to the bottom doors and they work great. The top door just has a bolt in the bottom corner to hold it shut as it's only opened occasionally.
I know that the doors are overly big for the framing, but I learned that when the wood was already sat cut and paid for, so we'll see what happens.
Woodburner was fitted in the living room too:
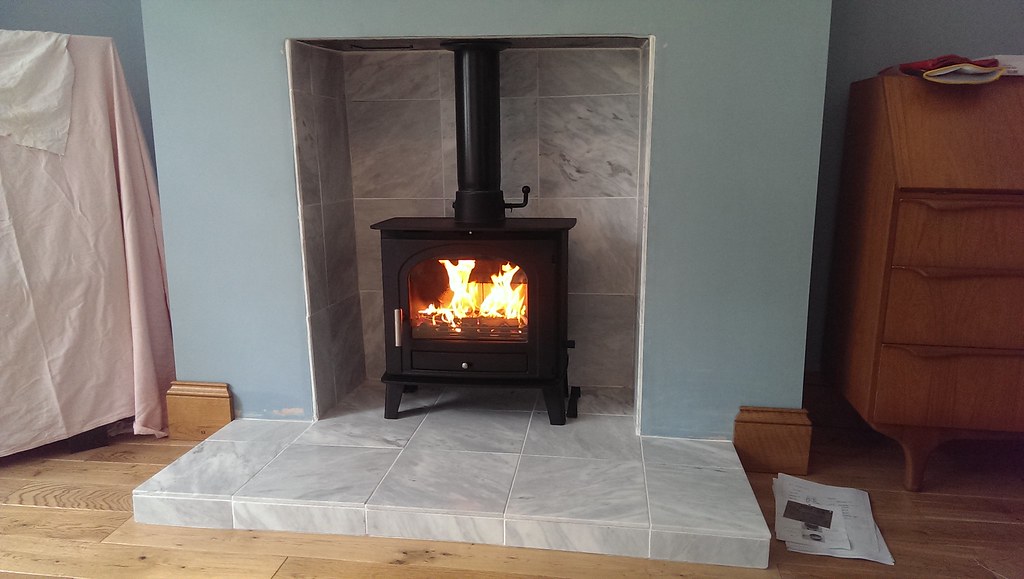 IMAG0249 by paulrockliffe, on Flickr
Really pleased with this, keeps the room toasty and is happy burning smokeless or all the wood I've stripped from the house.
When this went in we had scaffold up the chimney, so I popped up for a look one evening:
 20140902-DSC00815.jpg by paulrockliffe, on Flickr
 20140902-DSC00818.jpg by paulrockliffe, on Flickr
 20140902-DSC00827.jpg by paulrockliffe, on Flickr
I got round to sorting out the wiring to the workshop, so I've got XBMC hooked up in there now, internet and tv signal, so access to New Yankee Workshop that's sat on my server and live sport outside!
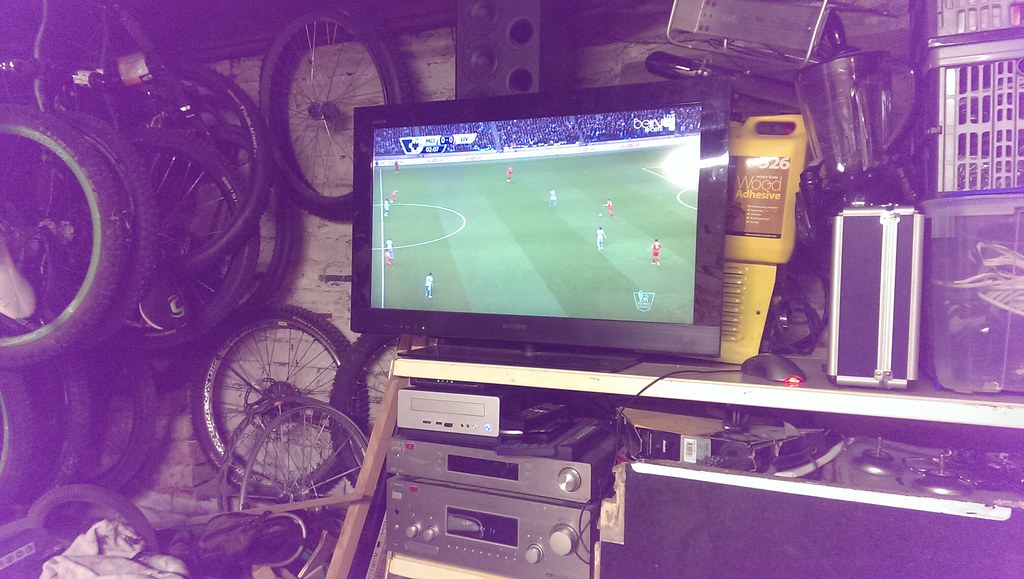 IMAG0237 by paulrockliffe, on Flickr
Made good progress on the alarm system, with it all wired up properly and working now. This was a massive pain in the arse. But I've got laptop access now and it should be fairly easy to fine-tune everything and I may even programme some outputs to some relays so I can put the outside lights on a timer and have the flood lights fire if the alarm goes off
I discovered that old floorboards burn very quickly and are far more valuable to me as kindling, so whenever the F1 or football is on I stand in front of the TV swinging my chopper. I've got 10 sacks full now, this was the result from the F1 at the weekend:
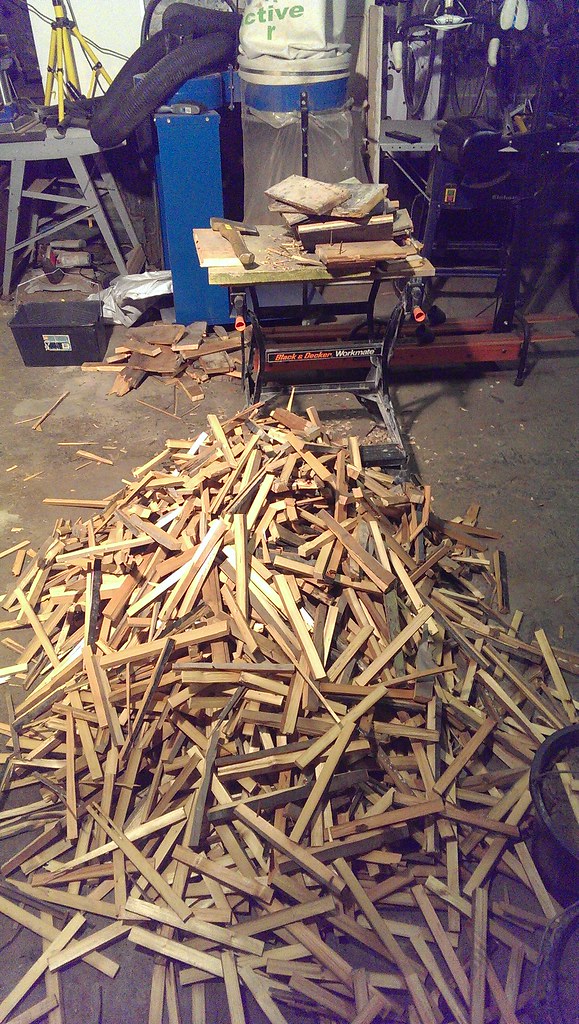 IMAG0274_BURST002 by paulrockliffe, on Flickr
I've ordered more sacks and have started separating out the floorboards when I collect firewood from my pile, think there's going to be years worth when Iv'e worked right through it!
I've also made good progress on clearing my garage space that has been piled up with wood. I've got one last bit to saw up and stack and piles of crap for the tip, then I'll have it back. SHort term I'm going to move my dusty tools in there so the rest of my stuff is kept cleaner. Long term the dividing wall is coming down to give a much bigger space.
The doors for my bathroom cabinet finally arrived, so that's now one step closer to being finished:
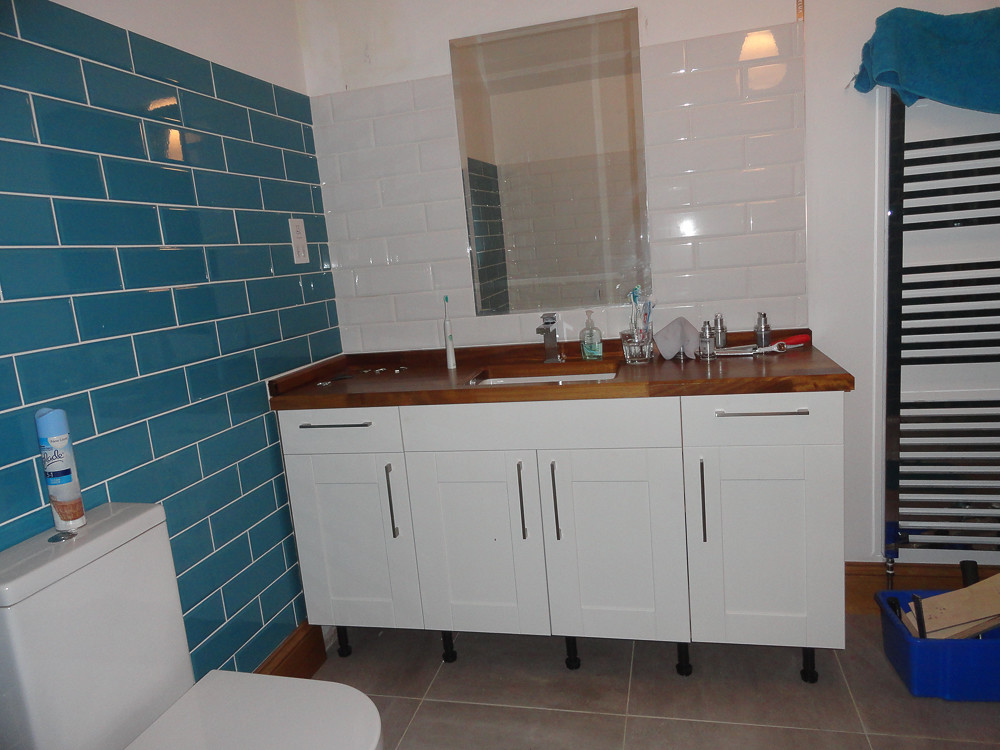 20141024-DSC00855.jpg by paulrockliffe, on Flickr
Plinth and an end panel to make to finish this off.
We've also sealed and repainted the damp walls, though some has come back through, especially downstairs. I've started clearing the cavity again, but think there's another weekends work at least on that one side. I think there's a row of tie bricks at first floor level, so they'll need clearing above too. And there's half of the other gable wall and the rear corner to do as well. Problem is that it rips my hands to shreds and it takes a fortnight for the cuts to heal enough to go again!
I've been instructed that there needs to be a mantlepiece in the lounge ready for Christmas, so I've got some more wood ordered and that'll be my next project. I've also got pantry shelving to do fairly soon, but I've a week off work at the end of the month, so hopefully I'll have more to report shortly. Hopefully I'll do a better job of keeping this up to date too!
Just re-read the last couple of posts and remembered the lovely summer sunshine, it's properly dark and cold now, though the grass needs one last cut before winter next time it's dry enough...
Quite a lot has happened, though when I look at what I've not posted I wonder what I've been doing for the last three months!
Anyway, worktop on:
IMAG0216 by paulrockliffe, on FlickrUnits all in on the opposite side:
IMAG0199 by paulrockliffe, on FlickrWall units on and worktop cut:
IMAG0208 by paulrockliffe, on FlickrAs you can see, fitting this worktop was a total pain in the arse! I routed out the cutout for the hob, three quarters depth in the conservatory, then lifted into place to finish off to minimise dust. The new dust extractor was brought into the house to help out! The top is jacked up and was raised and lowered several times while the top of the cabinets were adjusted to allow the ob to fit and holes were cut to allow me to bolt the two pieces together in situ:
IMAG0224 by paulrockliffe, on FlickrIn and jointed:
IMAG0229 by paulrockliffe, on FlickrWall tiles on:
20140916-DSC00842.jpg by paulrockliffe, on FlickrAnd grouted:
20140917-DSC00844.jpg by paulrockliffe, on FlickrAnd the otherside:
IMAG0254 by paulrockliffe, on FlickrNew floor tiles down:
20141022-DSC00854.jpg by paulrockliffe, on FlickrFinished:
IMAG0253 by paulrockliffe, on FlickrWell almost anyway, few little jobs to do and plinths and a few bits of skirting/architrave to do. I need to make and paint some MDF end panels and a couple of filler panels, but these aren't hugely important. There's a shelf to go in the gap next to the washing machine that matches the worktop and a couple of shelves for coffee etc to go next to the window, but they can wait as well.
When I fitted the hob I remembered that there's an odd pipe in the workshop, so I had the gas chap look at it while he was here:
IMAG0231 by paulrockliffe, on FlickrHe thinks it's probably gas and I should open it to see if it still works. I had a look and there's been a replacement of the gas pipe going into the house at some point, so perhaps this was disconnected at the time, but certainly interesting to see if a gas heater could be fitted to warm me up in winter.
I'm working through cosmetic jobs, trying to get the place looking like a home in time for Christmas, so the next job was to cover up the boiler. I've had a pile of oak sat ready for ages, so started cutting lap joints with the router and got this screwed together:
20140921-DSC00848.jpg by paulrockliffe, on FlickrEverything is perfectly square as I've planed the bottom to match the slope of the floor. Lifted in place, packed out to the right place and screwed in place. Absolutely rock solid!
20140922-DSC00849.jpg by paulrockliffe, on FlickrArchitraves on:
url=https://flic.kr/p/p9MgEn]
[/url] IMAG0264 by paulrockliffe, on FlickrHere's the system I made for alp jointing the door frames. The four outer bits are providing support for the router base and the cross piece is the stop. Depth is set and each piece was cut. Need a router table for this stuff in future to speed things up!
IMAG0262 by paulrockliffe, on FlickrFrame glued and clamped:
IMAG0263 by paulrockliffe, on FlickrDoor panels are 12mm MDF with an oak veneer and the finished thing looks like this:
IMAG0267 by paulrockliffe, on FlickrI've since added handles and catches to the bottom doors and they work great. The top door just has a bolt in the bottom corner to hold it shut as it's only opened occasionally.
I know that the doors are overly big for the framing, but I learned that when the wood was already sat cut and paid for, so we'll see what happens.
Woodburner was fitted in the living room too:
IMAG0249 by paulrockliffe, on FlickrReally pleased with this, keeps the room toasty and is happy burning smokeless or all the wood I've stripped from the house.
When this went in we had scaffold up the chimney, so I popped up for a look one evening:
20140902-DSC00815.jpg by paulrockliffe, on Flickr20140902-DSC00818.jpg by paulrockliffe, on Flickr20140902-DSC00827.jpg by paulrockliffe, on FlickrI got round to sorting out the wiring to the workshop, so I've got XBMC hooked up in there now, internet and tv signal, so access to New Yankee Workshop that's sat on my server and live sport outside!
IMAG0237 by paulrockliffe, on FlickrMade good progress on the alarm system, with it all wired up properly and working now. This was a massive pain in the arse. But I've got laptop access now and it should be fairly easy to fine-tune everything and I may even programme some outputs to some relays so I can put the outside lights on a timer and have the flood lights fire if the alarm goes off
I discovered that old floorboards burn very quickly and are far more valuable to me as kindling, so whenever the F1 or football is on I stand in front of the TV swinging my chopper. I've got 10 sacks full now, this was the result from the F1 at the weekend:
IMAG0274_BURST002 by paulrockliffe, on FlickrI've ordered more sacks and have started separating out the floorboards when I collect firewood from my pile, think there's going to be years worth when Iv'e worked right through it!
I've also made good progress on clearing my garage space that has been piled up with wood. I've got one last bit to saw up and stack and piles of crap for the tip, then I'll have it back. SHort term I'm going to move my dusty tools in there so the rest of my stuff is kept cleaner. Long term the dividing wall is coming down to give a much bigger space.
The doors for my bathroom cabinet finally arrived, so that's now one step closer to being finished:
20141024-DSC00855.jpg by paulrockliffe, on FlickrPlinth and an end panel to make to finish this off.
We've also sealed and repainted the damp walls, though some has come back through, especially downstairs. I've started clearing the cavity again, but think there's another weekends work at least on that one side. I think there's a row of tie bricks at first floor level, so they'll need clearing above too. And there's half of the other gable wall and the rear corner to do as well. Problem is that it rips my hands to shreds and it takes a fortnight for the cuts to heal enough to go again!
I've been instructed that there needs to be a mantlepiece in the lounge ready for Christmas, so I've got some more wood ordered and that'll be my next project. I've also got pantry shelving to do fairly soon, but I've a week off work at the end of the month, so hopefully I'll have more to report shortly. Hopefully I'll do a better job of keeping this up to date too!
Edited by paulrockliffe on Friday 7th November 13:22
Looking good mate, the oak framing in around the boiler is a nice touch and looks well made. I've just bought a dust extractor as well. Should be handy for the workshop! Worktops look great too, lovely finish.
It's frustrating, that as hard as I work your always that little bit further on with your project than I am!
It's frustrating, that as hard as I work your always that little bit further on with your project than I am!
Thanks chaps, it's starting to come together, but were at the point were there's hundreds of little jobs that I don't have a lot of enthusiasm for. Will have to force mysef to push past that this side of Christmas… I always find something more interesting to do, usually chopping up wood or moving things aroudn the workshop.
I think if I did the oak framing again I'd use some cross members on the doors. I always start out trying to keep things simple, then end up thinking I should have made things a bit more ornate! I can always redo them if they warp.
I need to buy some adapters for the extractor so I can use it with 'normal' tools. I tried a step-down adapter but it restricts the airflow so much that it ruins the efficiency. While it still works, the machine doesn't like it and it's barely better than the hoover I was using. I'll work out some sort of manifold so that where a machine has two or three pipes they don't get amalgamated before the vacuum hose and I'll make some stand-alone things I can position near the machine to pick up any extra bits. I did fix the original hoover, but it packed in again when we were working our way through the cavity wall. I've since established that it was the on-off switch that was broken, it had got dust in and worn the rocker away! Fortunately a switch from a computer PSU that tterminated itself 10 years ago fitted exactly, so that's back up and running ready for more cavity walls on Sunday.
The worktop looks good, but the joint has lifted a bit at the rear when screwing it down to the cabinets, so I will have to sand and varnish the joint again at some point.
I'd be very impressed if you managed to overtake me, your house must be getting on for 10 times the size! Your only advantage is that the scale of your projects means you must have the budget to get a lot of trades in to help things progress quickly. I'd get it properly in the neck if the house was much bigger as we're 18 months in now and still a good bit off being properly finished.
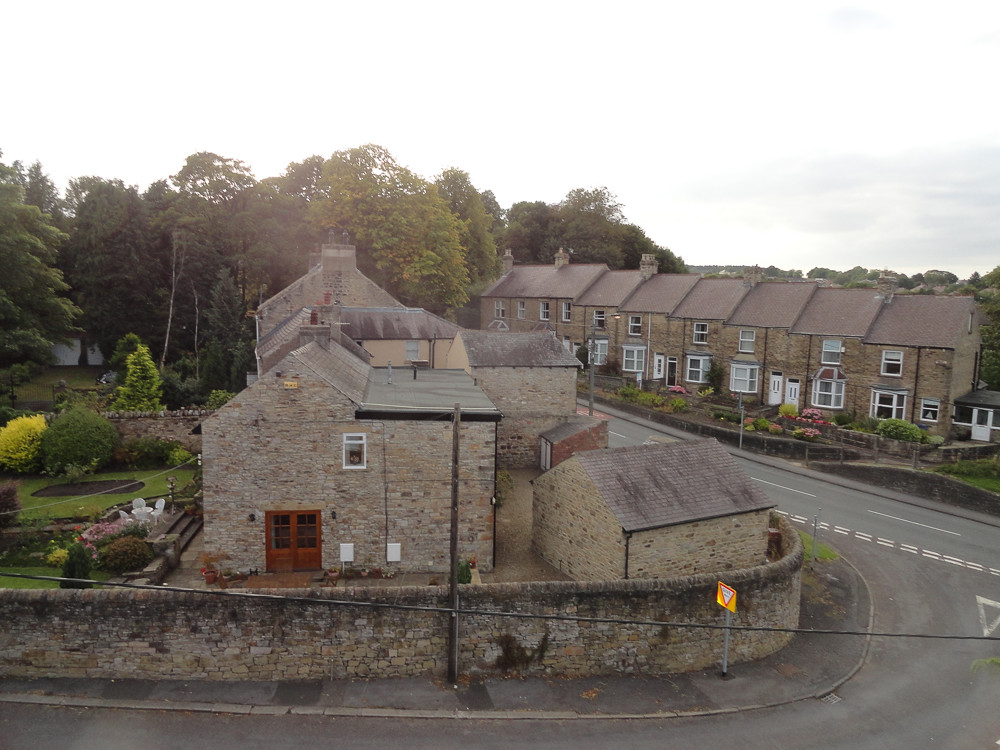
Yes it's Lanchester, are you local as well?
The tiles are from Topps, their Diamante range I think off the top of my head. They're good, btu I found the white ones were a mm shorter, which caused issues getting them to line up!
I think if I did the oak framing again I'd use some cross members on the doors. I always start out trying to keep things simple, then end up thinking I should have made things a bit more ornate! I can always redo them if they warp.
I need to buy some adapters for the extractor so I can use it with 'normal' tools. I tried a step-down adapter but it restricts the airflow so much that it ruins the efficiency. While it still works, the machine doesn't like it and it's barely better than the hoover I was using. I'll work out some sort of manifold so that where a machine has two or three pipes they don't get amalgamated before the vacuum hose and I'll make some stand-alone things I can position near the machine to pick up any extra bits. I did fix the original hoover, but it packed in again when we were working our way through the cavity wall. I've since established that it was the on-off switch that was broken, it had got dust in and worn the rocker away! Fortunately a switch from a computer PSU that tterminated itself 10 years ago fitted exactly, so that's back up and running ready for more cavity walls on Sunday.
The worktop looks good, but the joint has lifted a bit at the rear when screwing it down to the cabinets, so I will have to sand and varnish the joint again at some point.
I'd be very impressed if you managed to overtake me, your house must be getting on for 10 times the size! Your only advantage is that the scale of your projects means you must have the budget to get a lot of trades in to help things progress quickly. I'd get it properly in the neck if the house was much bigger as we're 18 months in now and still a good bit off being properly finished.
Yes it's Lanchester, are you local as well?
The tiles are from Topps, their Diamante range I think off the top of my head. They're good, btu I found the white ones were a mm shorter, which caused issues getting them to line up!

paulwirral said:
I had a house in one of the streets behind about 15 years ago , railway related , stand on the bridge on the track and it's the one extended out in second hand brick .
My in laws live up the road from you , I thought I recognised the area .
Small world! My in laws live up the road from you , I thought I recognised the area .
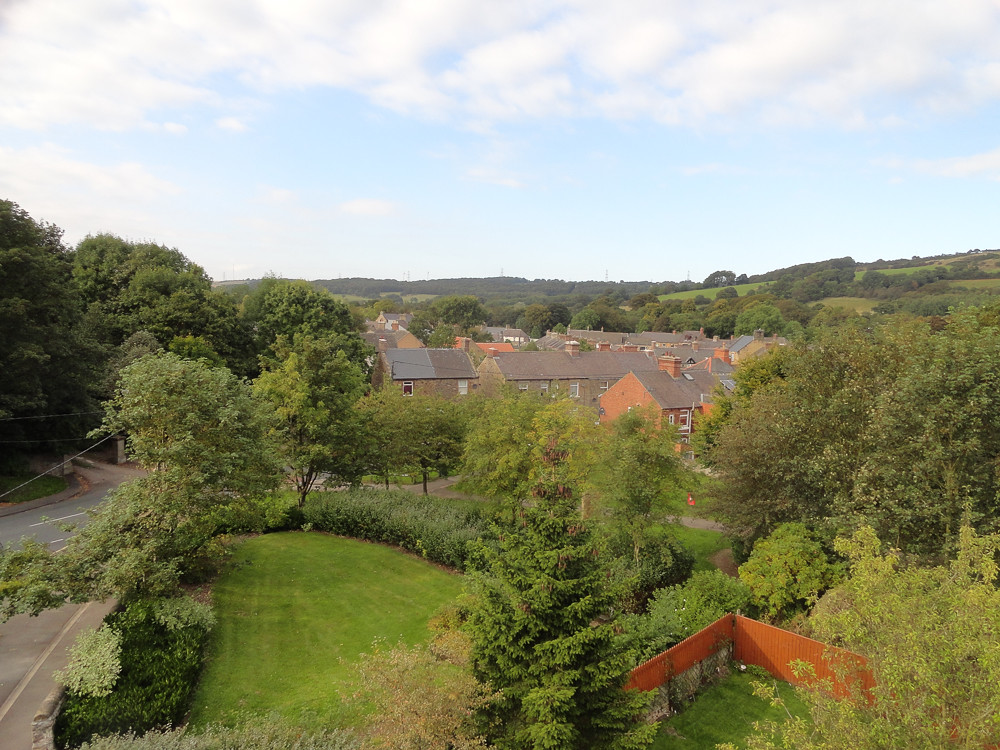
When you stand on that bridge there's a large patch of land that appears to be someone's garden, hugely disproportionate to the size of any of the houses and not directly attached to any, do you know anything about how that came about?
I've never seen a horse on there and it looks like it's been mown regularly these days. There's a couple of wooden sheds at one end, but there's no access from any house that I can see. it looks like someone's lawn, but it's odd that someone would want that without it being attached to the house. I've never seen anyone use the land, but I don't go past all that often really.
On Google Maps you can see a large house that's hidden from the railway and the road that's set in a decent sized garden to the south of that land, if I was in that house or either of the two to the side of it I'd want to buy the land to create a really nice garden, but it's strange as it is at the moment.
Incidentaly I've just noticed that there's a long strip of lawn behind Beck View, that looks as if one of the houses has acquired most of the back gardens there at some point too.
I don't know if it's the same all around the area, but our house was held under Copyhold and had some sort of link or ownership of the small park area to the north of our garden at some point - no real info on that came to light during the purchase. Maybe the Copyhold system led to some random owners of bits of land with restricted options for consolidation in the past.
If your inlaws know anything I'd be interseted to know, just out of interest as mucha s anything else.
Erm..... I just tiled what was there.
I've since learned that this was wrong and the heat is likely to destroy the adhesive. I've been using the living room fireplace for a few months now without any problems, the grout has survived and the whole thing only needs a tiny bit of adhesion to keep the tiles on the wall, so I'm not overly concerned abotu that one.
The dining room, although it looks finished, I only just did the last of the grouting at the weekend and last night was the first time it's been fired up since the tiles went on, so I'll have to see whether it's OK or not.
I'm not sure how you should do it 'properly' as I'm not going to redo it unless they all fall off! I suppose there must be a suitable adhesive, or a cement mortar instead?
The other thing that might be wrong is that I think the plasterer used a fire-proof board behind it, I now think it should have been something else as the fireboard is only to resist actual fire for a period of time, rather than constant heat. Again, I don't know what I should have used but I'm hoping the tiles provide sufficient protection that it all stays up.
Gassing Station | Homes, Gardens and DIY | Top of Page | What's New | My Stuff