Our Little Durham Restoration Project...
Discussion


Gingerbread Man said:
Install the tray. Silicone around the tray to wall joint. Tile the shower and then grout. This makes a waterproof base. Then silicone around the tray to wall joint again. Then you put the screen's profiles onto the tiles, normally running a bead of silicone down the back of the profile. Also putting a smidge of silicone over the screw holes/ plugs. Then screw these to the wall and then mount the shower screen like you have.
You then silicone on the outer edges only, so if water gets behind the profile, the water gets out into the tray and away. Siliconing both sides of the profile never matter how much, water tends to gets in, builds up and then gets away through a small area, normally creating a stain onto a ceiling. This is for 90%, but refer to the instructions.
Tiling up to the screen creates an awkward joint to seal, and if this fails, it's straight onto your base layer.
You have a step down from the tiles to the screen.
Even badly sealed screens onto tiles can leak, you're just increasing the chances of water through the ceiling.
If you ever need to replace the screen, taking one off the tiles and cleaning up before putting a new one in is easy. Finding a new screen the exact same width will be a pain, maybe having to piece in tiles.
Have you siliconed along the back of the profile?
Have you siliconed around the tray to the wall pre-tiling?
Have you siliconed the tray to the wall before fitting the profiles, otherwise there is a wide open gap behind the profiles?
Just trying to help create a better finish and a waterproof one that'll last.
As a bathroom fitter, I'd only ever install the screen onto tiles.
That's interesting, thanks.You then silicone on the outer edges only, so if water gets behind the profile, the water gets out into the tray and away. Siliconing both sides of the profile never matter how much, water tends to gets in, builds up and then gets away through a small area, normally creating a stain onto a ceiling. This is for 90%, but refer to the instructions.
Tiling up to the screen creates an awkward joint to seal, and if this fails, it's straight onto your base layer.
You have a step down from the tiles to the screen.
Even badly sealed screens onto tiles can leak, you're just increasing the chances of water through the ceiling.
If you ever need to replace the screen, taking one off the tiles and cleaning up before putting a new one in is easy. Finding a new screen the exact same width will be a pain, maybe having to piece in tiles.
Have you siliconed along the back of the profile?
Have you siliconed around the tray to the wall pre-tiling?
Have you siliconed the tray to the wall before fitting the profiles, otherwise there is a wide open gap behind the profiles?
Just trying to help create a better finish and a waterproof one that'll last.
As a bathroom fitter, I'd only ever install the screen onto tiles.
The instructions have no silicone behind the profile, and both edges siliconed. The inner edge of silicone will be behind the tiles and there’ll be a second silicone seal there too obviously.
The tray was siliconed to the wall before the screen went on, so there isn’t a gap underneath the profile.
If the screen needs to be replaced then it’s not a huge job to retile completely and it’s not a huge job to replace the plasterboard behind the tiles at the same time if that’s damaged taking tiles off. Given it’s more than likely the screen will out last us in the house, I’m happy with that eventuality. There’s a good bit of adjustability in the width of that screen though, enough to give 20mm of play in the location of each profile.
I think the screen onto tiles approach looks like a bodge, though I accept your reasons for that approach. Don’t take that the wrong way, what I mean is that showers done that way rarely look right with the tiles sticking out of the sides.
Regardless, it’s too late now and I’ll just have to re-do it if there’s a problem.
I’ll admit I hadn’t given it too much thought until recently as my Dad did his showers 20+ years ago the same way and has never had any problems with leaks. It’s only my girlfriend’s Dad tiles that keep falling off that made me look into how water proof grout etc is.
Based on what I’ve read on the internet the plan is to use epoxy grout on the tiles, with the bottom bead being done in a normal grout rather than a silicone so that any water that did get behind the tiles will come out again rather than be trapped there and I’ll know quickly that I’ve got a problem.
What do you think about that approach?
KTF said:
If you tile first then you will get a more even surface to silicone the enclosure to and a better seal. If the walls are slightly off then you can use the tiles to adjust for that as well.
If you already have the tiles then you could have measured it all up and calculated where the tiles needed to be finished so that it ended flush with the enclosure.
The tiles have a bevelled edge, the wall is plasterboard, so that will give a more even surface.If you already have the tiles then you could have measured it all up and calculated where the tiles needed to be finished so that it ended flush with the enclosure.
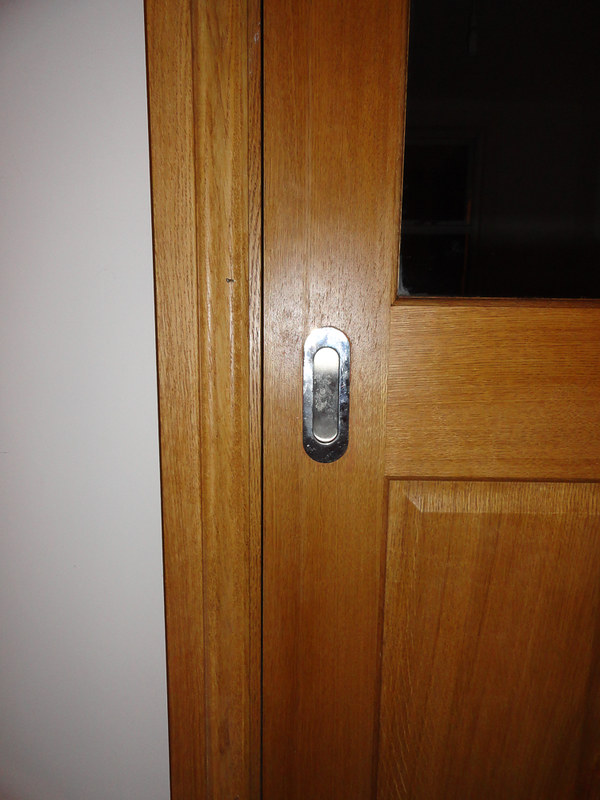
They are longer than standard, they're 72mm I think. The website I picked them up from said exactly that and recommended the 72mm ones, they didn't do bigger. I might have a look at the one that's fitted and see if it would be better moving inwards a bit further, though it doesn't cause you to bash your nuckles off the frame where it is.
I didn't get round to updating the thread last week, so I've two weekends worth of updates for you now. We've made some very good progress on some of the important stuff that we need to be able to move in. We're away next weekend, but planing to do a soft move the following weekend. I'm in Manchester during the week, so we'll both start living there at the weekends, which will make it easier to get more done and without having to drive too and from Durham for meals etc.
It should take the pressure off a bit and let me get out on my bike first thing too, which would be great as I feel like I've hardly ridden at all in the last 6 months and now winter is here I need time to ride weekends as it's more of a pain to get out at night.
Things we have that work that we didn't have a fortnight ago include:
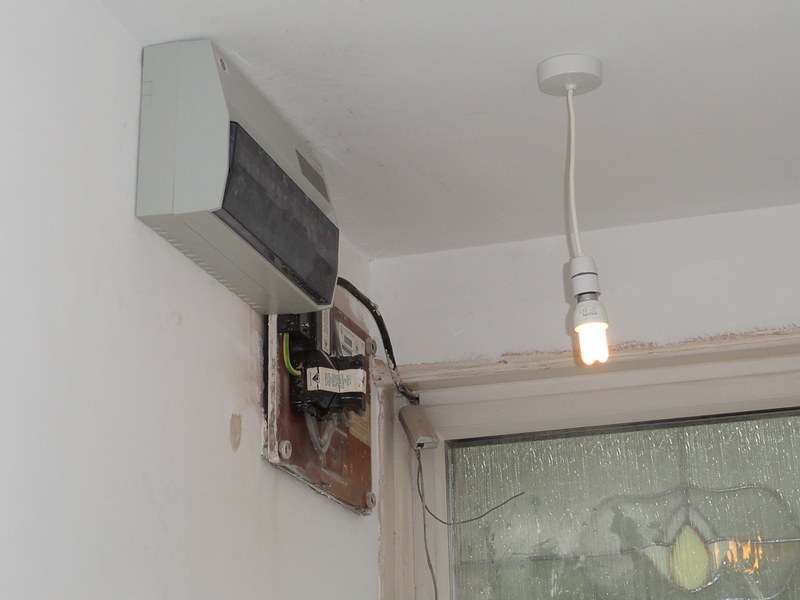
Electricity, all lights, sockets etc all finished and working. We're just waiting for the clip-on face plates to arrive, they're on a slow boat from China, but these are only cosmetic. So we can see in the dark, I can charge my phone and there aren't extension cables running everywhere!
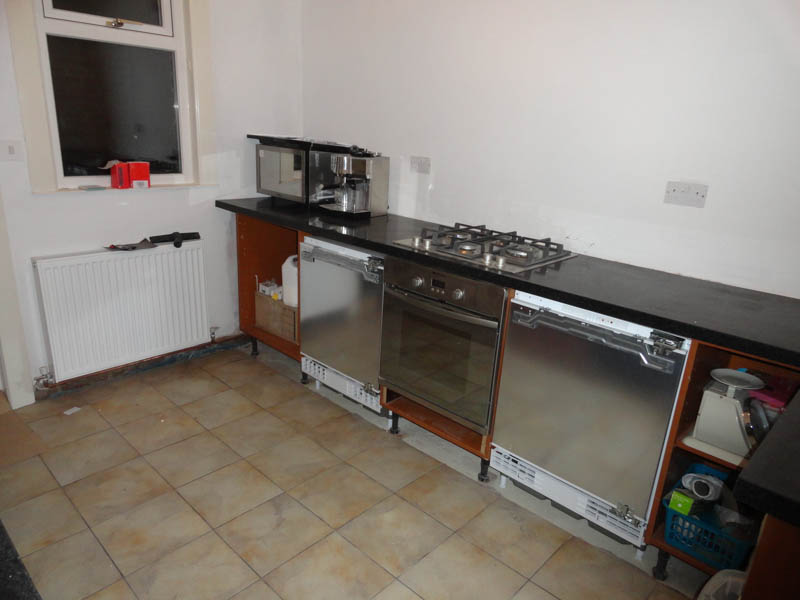
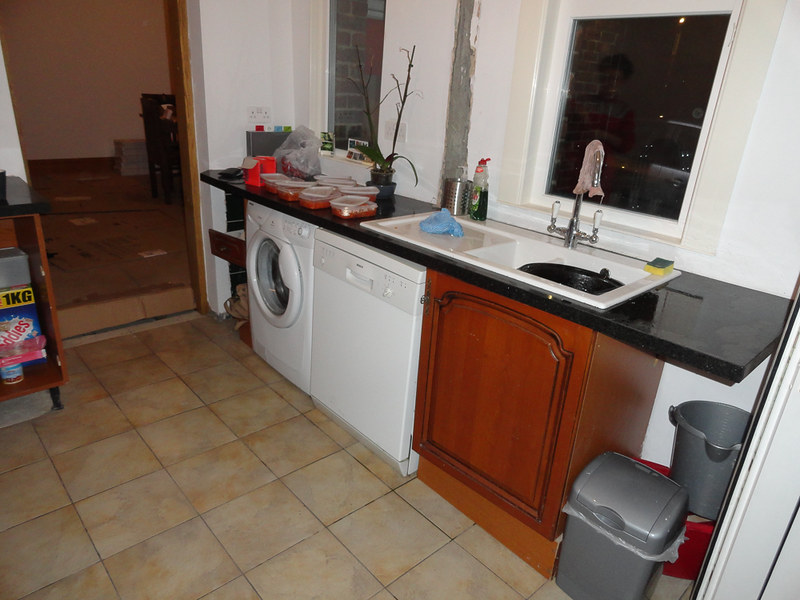
Fridge and Freezer are in, all tools have been moved out to the blacksmith's, the oven and hob are uncovered and working. The microwave is plugged in. In short, we have a kitchen again, so we can get some food in and start living in the house a bit. It'll be great for my parents not to have to bring their camper van whenever they come over too.
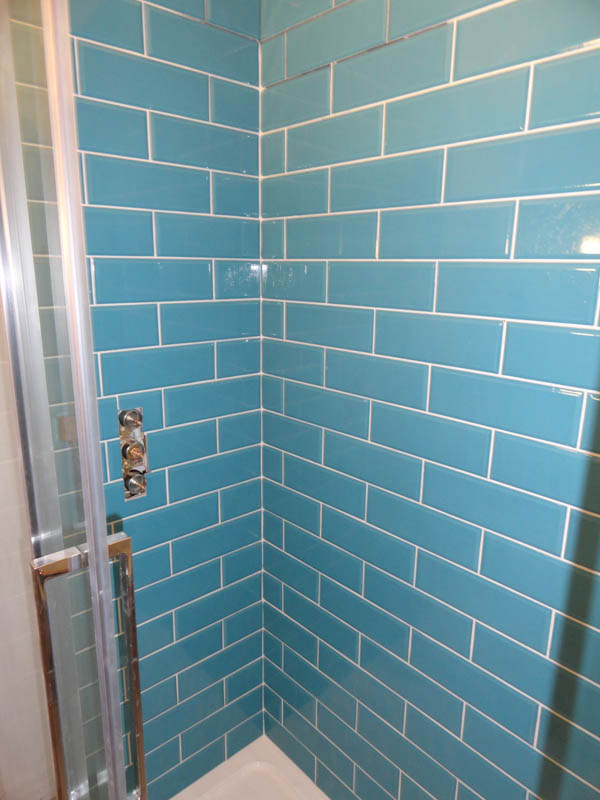
Bathroom has a toilet, a sink and a bath. None of them leak too! I've a few bits of finishing off to do in a couple of weeks, but I can confirm that the bath is very warm and comfortable. The shower is half plumbed, I stripped a thread on a connector on Sunday, so that's to be sorted next time I'm there. I manned up and took on the job I was most worried about taking on yesterday and epoxy grouted the shower tiles. It was pretty nerve-wracking knowing I had 45 minutes to get all the grout on and start getting the tiles cleaned before it set solid, but in the end it was fine. It was hard work emulsifying the excess grout off and cutting it back to the right depth on the bevelled tiles, but because of the way it is it was very easy to get a great finish on it. Would recommend, so long as it lives up to the claimed water-proof-ness.
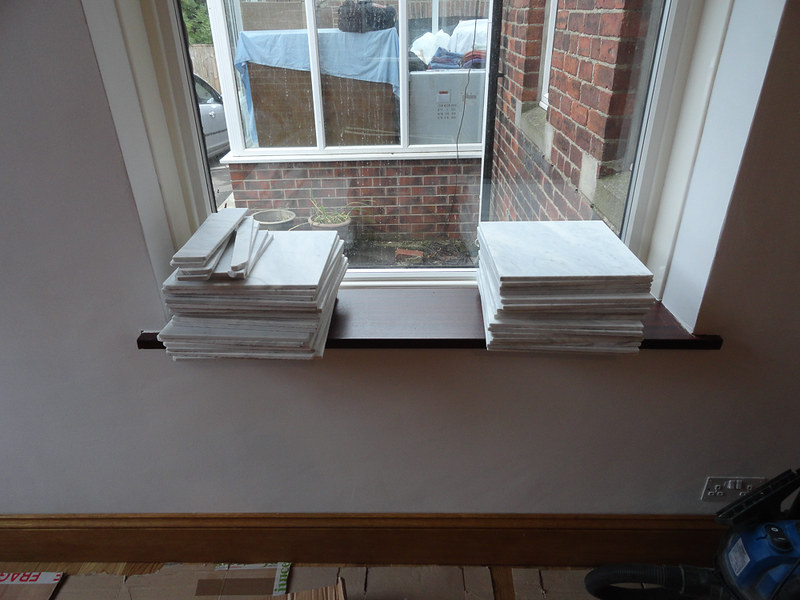
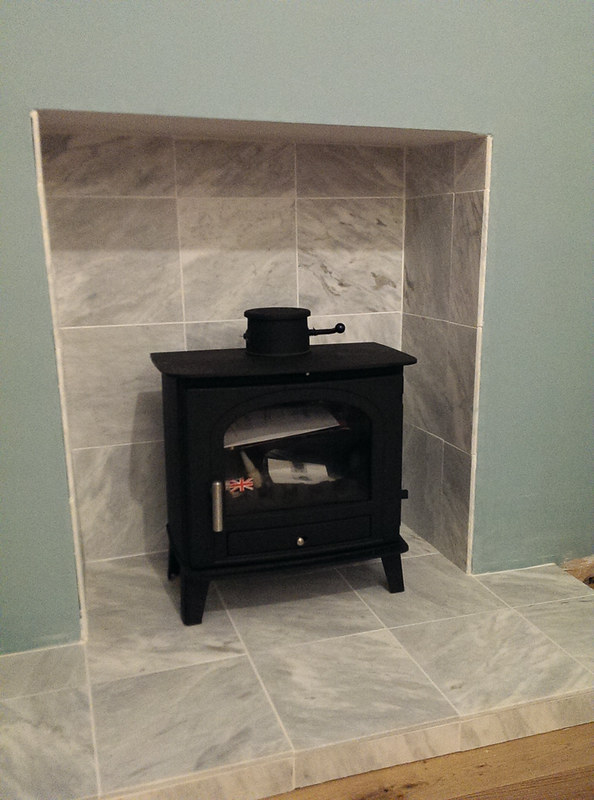
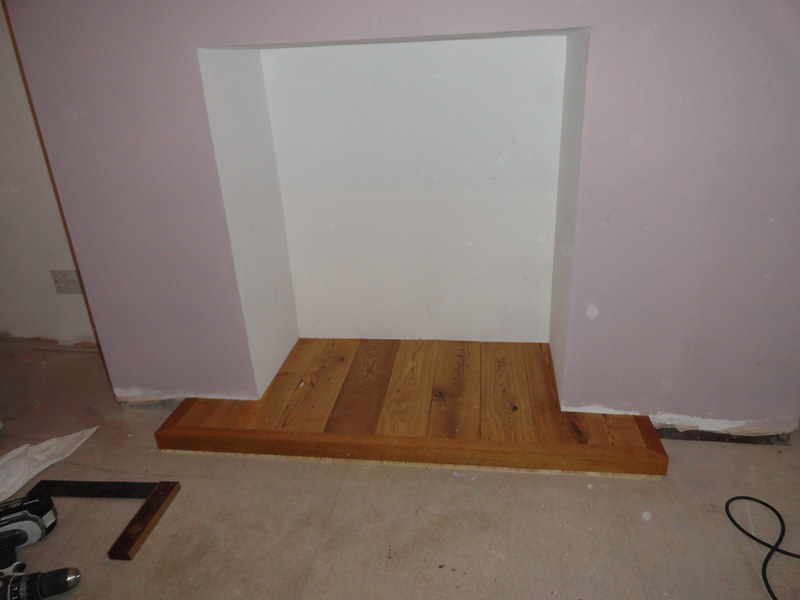
Hearth tiles have been done in the living room, this was delayed several times as tiles kept being delivered with damaged edges. I won't name the offending company, as their customer service has been superb, to the extent that while I needed 15 tiles total with 6 having all perfect edges (others to be cut), I've done the job and been left with 16 spare perfect tiles and a similar number of damaged ones, so I have a load of marble left for some other jobs. I think I'll be tiling the back and sides of the hearth to match, then I need a stove-fitter.
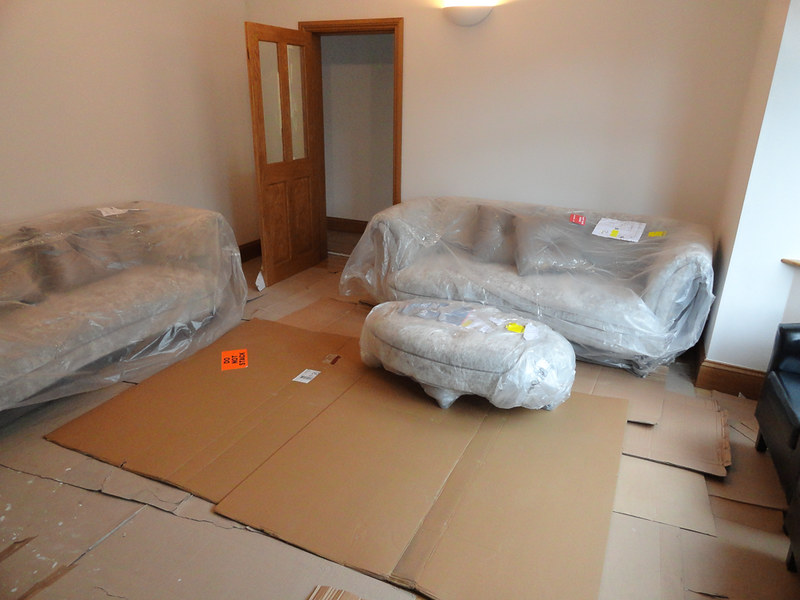
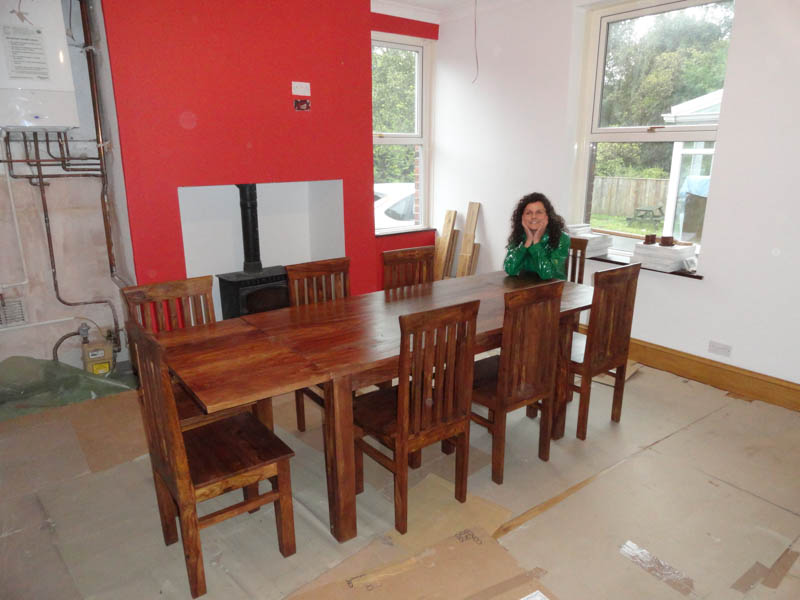
Living room is about done, 5.1 surround speaker wires fitted to skirtings, sofas are in, I've just the hearth to finish, stove to fit and a couple of other minor jobs and I'll be able to remove the cardboard floor and officially open the room for business. There's a bit more to do in the dining room, but I've got the table and chairs out of their box and that's ready to use too. Both rooms were painted by my Mum and look great.
Lastly, I filled up the central heating again, so we can keep warm now that the worst winter in a millennium has been confirmed. Need to sort out a better thermostat for that though as the one we have has a timer program that is a pain to set and doesn't have an over-ride, so you can't actually turn the thing on and off without reprogramming the timers. Need to do some research on that....
Anyway, more pics for you:
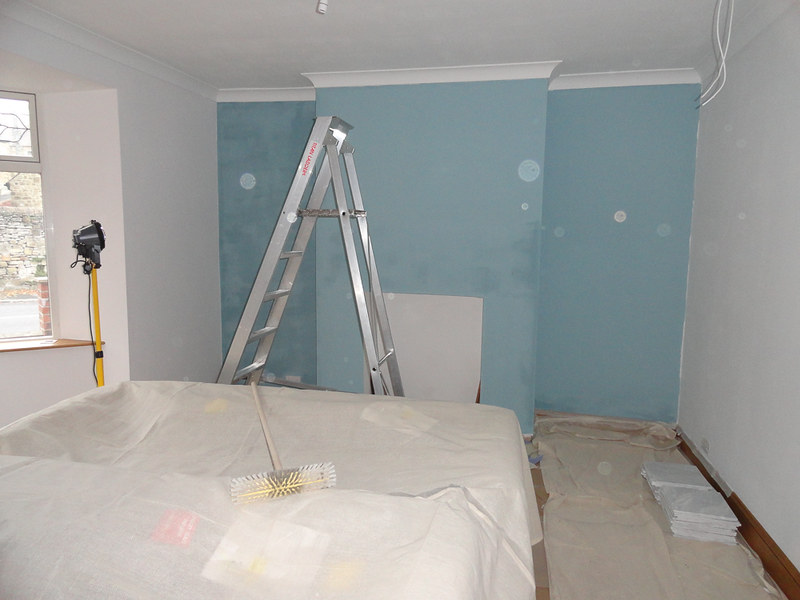
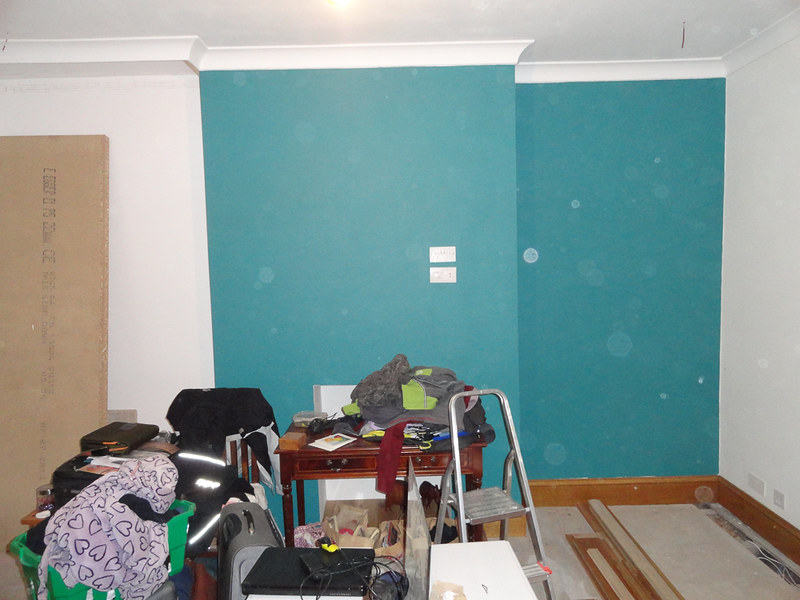
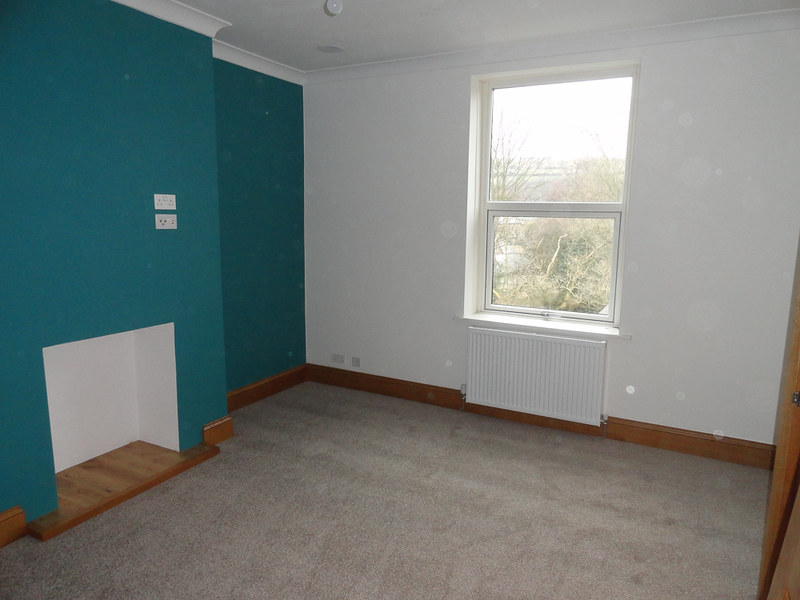
Living room painted:
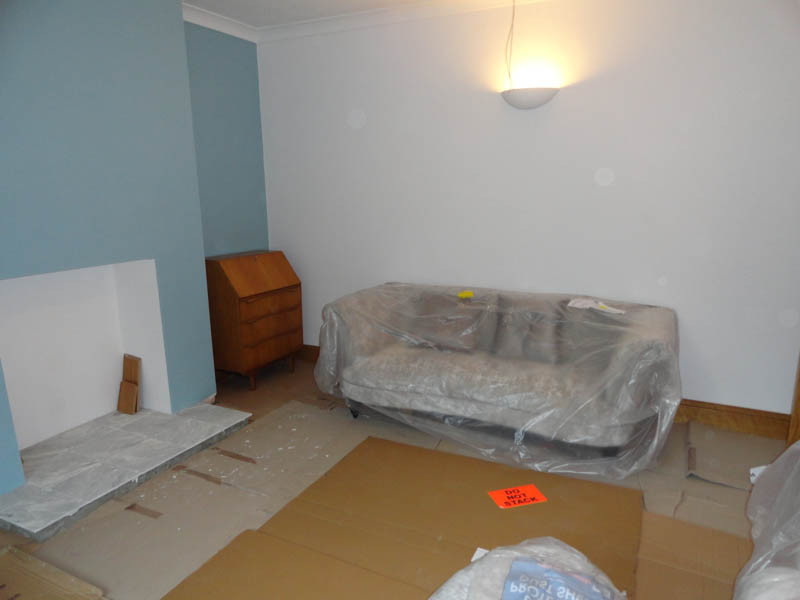
Furniture in:
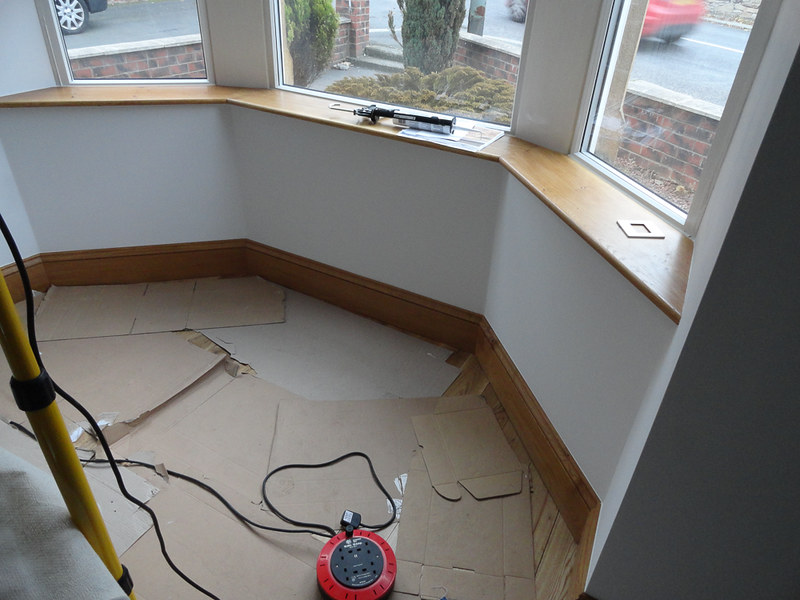
Skirtings and window sills done:
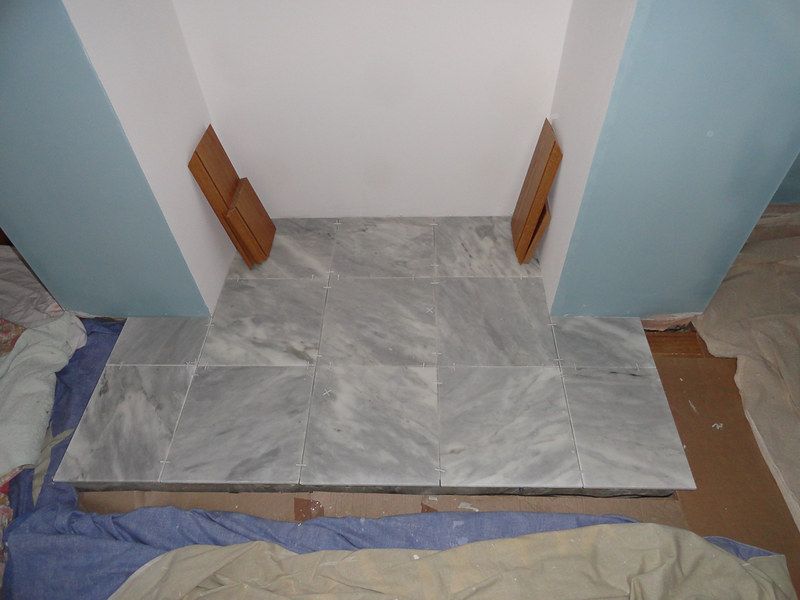
Hearth tiled:
Architrave done, wall light on:

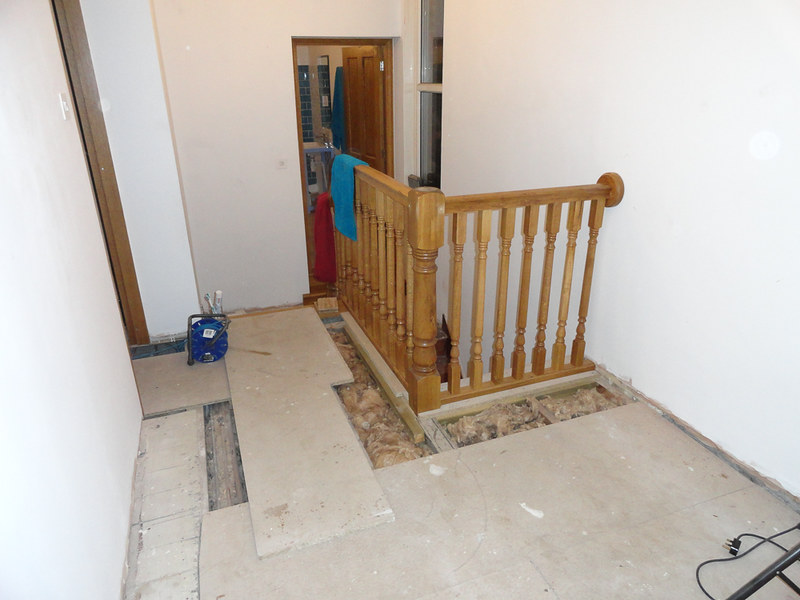
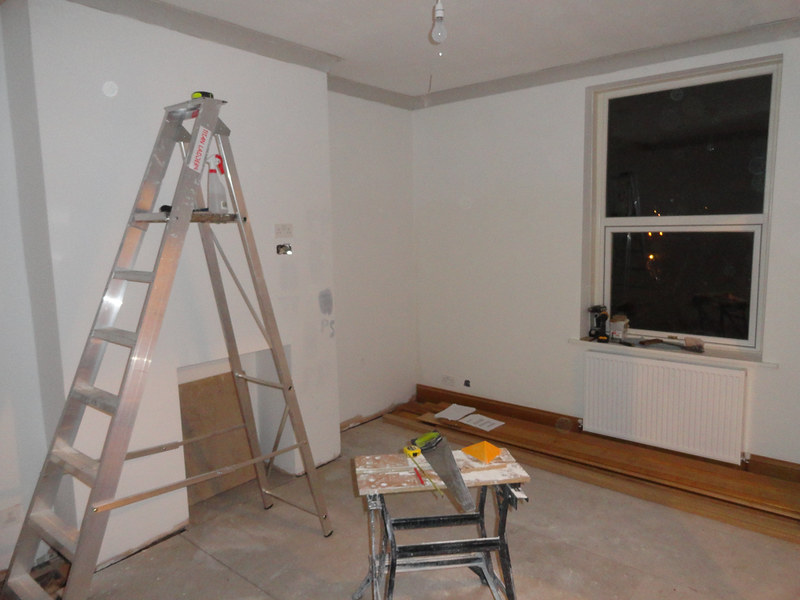
Cardboard floor!
Discreet speaker connections:
Excess marble!
Dining room painted:

And table in ready for dinner!
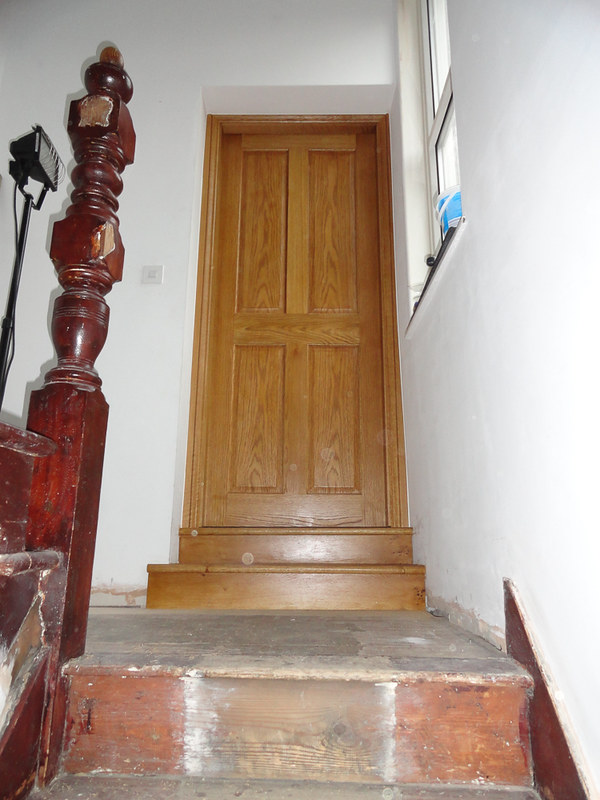
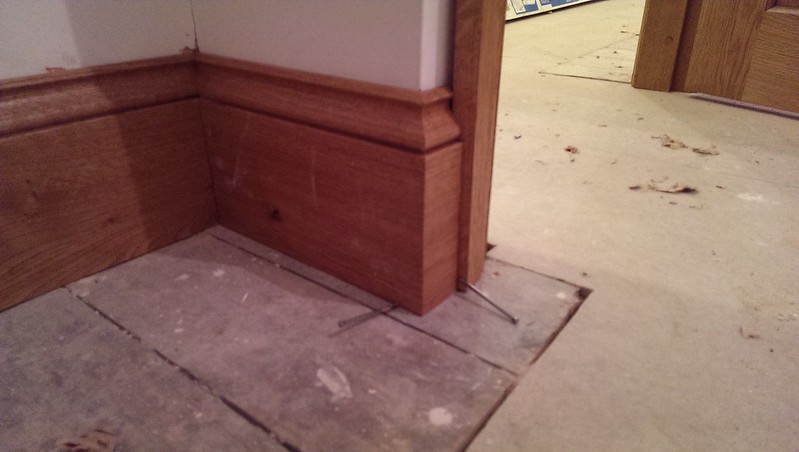
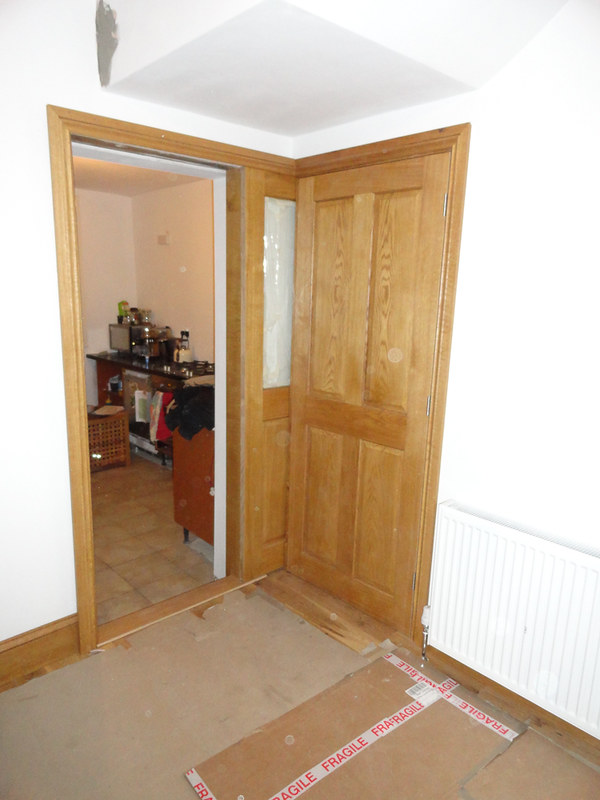
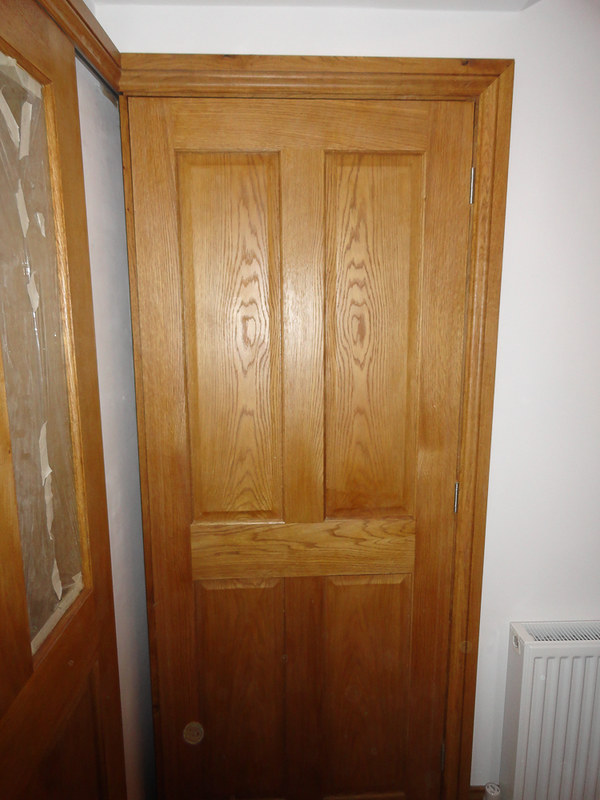
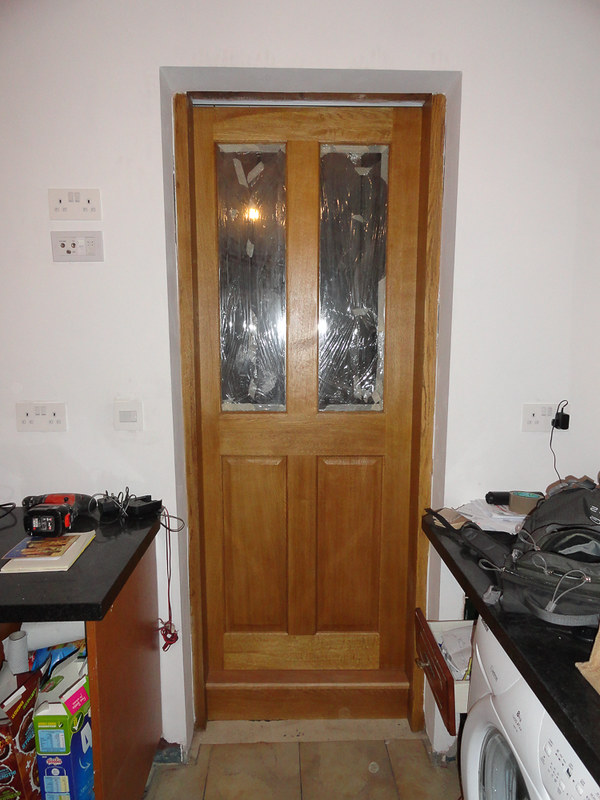
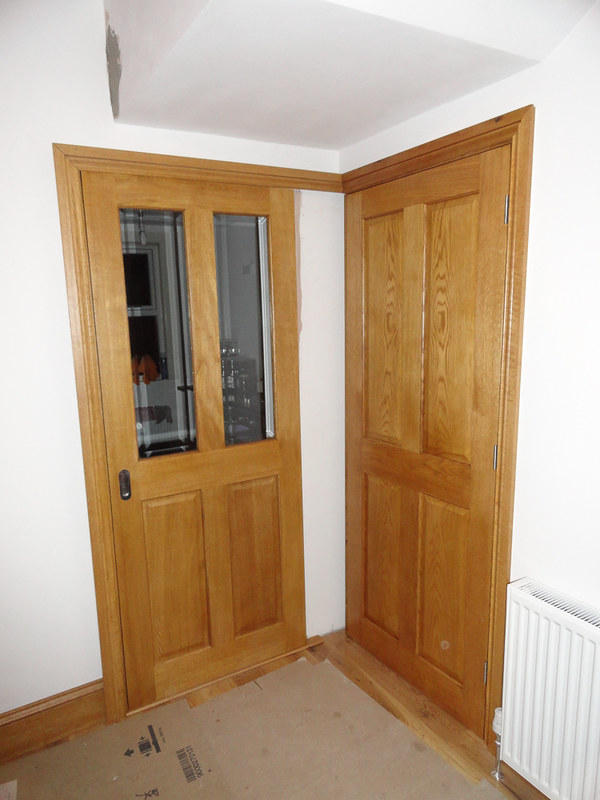
Bathroom steps finished, door on and architraves on, looks fantastic!
Epoxy grout:
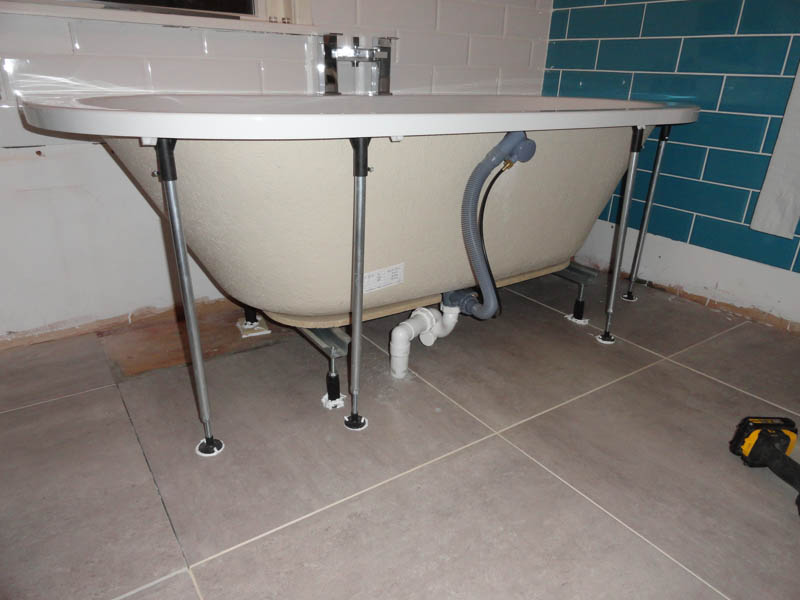
Bath fitted:
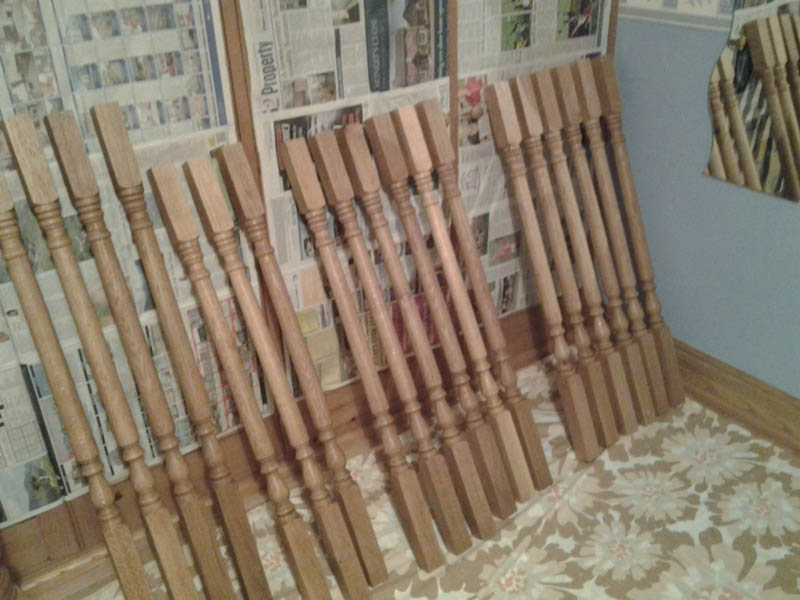
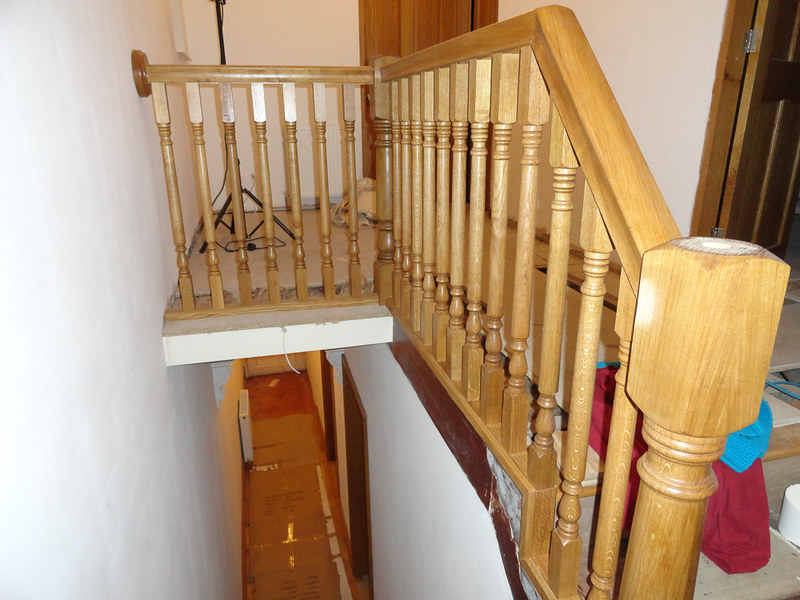
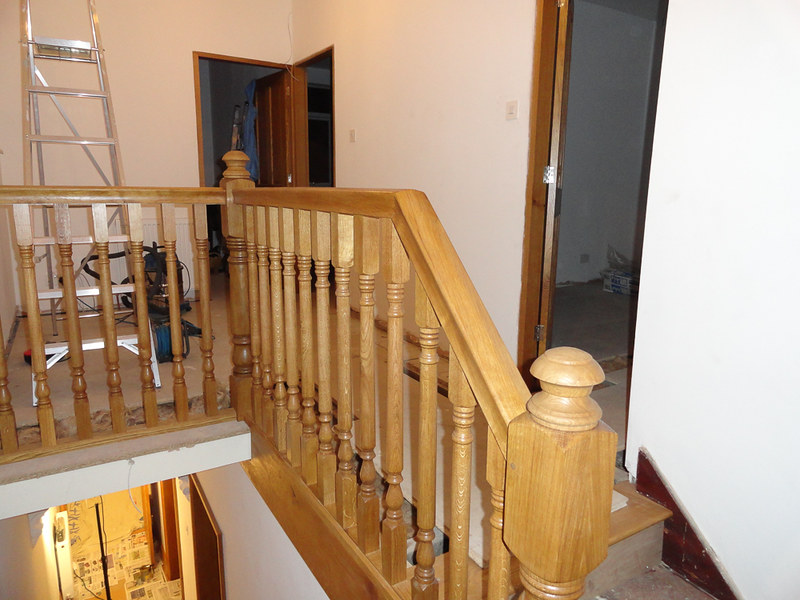
Stair spindles ready to be installed:
Outside sufficiently illuminated!

Functional kitchen!
Electricity!
I think the general plan now is to focus on the downstairs rooms in the main, though we want to get coving up upstairs soonish so that they can be painted by my girlfriend and my Mum when they're around to help. And my Dad will want to fit the banister as soon as he can as I think he's quite excited about that job. Two of the bedrooms are useable, if missing carpets and woodwork etc and we can live with that as we use them for sleeping only. So the next few weeks will be spent sorting out the little jobs downstairs, there's still a few door frames and doors to go in and then a few tidying up jobs and the boiler cupboard needs fitting out for my server, internet, tv etc so it can be hidden away.
Next update in a couple of weeks.....
It should take the pressure off a bit and let me get out on my bike first thing too, which would be great as I feel like I've hardly ridden at all in the last 6 months and now winter is here I need time to ride weekends as it's more of a pain to get out at night.
Things we have that work that we didn't have a fortnight ago include:
Electricity, all lights, sockets etc all finished and working. We're just waiting for the clip-on face plates to arrive, they're on a slow boat from China, but these are only cosmetic. So we can see in the dark, I can charge my phone and there aren't extension cables running everywhere!
Fridge and Freezer are in, all tools have been moved out to the blacksmith's, the oven and hob are uncovered and working. The microwave is plugged in. In short, we have a kitchen again, so we can get some food in and start living in the house a bit. It'll be great for my parents not to have to bring their camper van whenever they come over too.
Bathroom has a toilet, a sink and a bath. None of them leak too! I've a few bits of finishing off to do in a couple of weeks, but I can confirm that the bath is very warm and comfortable. The shower is half plumbed, I stripped a thread on a connector on Sunday, so that's to be sorted next time I'm there. I manned up and took on the job I was most worried about taking on yesterday and epoxy grouted the shower tiles. It was pretty nerve-wracking knowing I had 45 minutes to get all the grout on and start getting the tiles cleaned before it set solid, but in the end it was fine. It was hard work emulsifying the excess grout off and cutting it back to the right depth on the bevelled tiles, but because of the way it is it was very easy to get a great finish on it. Would recommend, so long as it lives up to the claimed water-proof-ness.
Hearth tiles have been done in the living room, this was delayed several times as tiles kept being delivered with damaged edges. I won't name the offending company, as their customer service has been superb, to the extent that while I needed 15 tiles total with 6 having all perfect edges (others to be cut), I've done the job and been left with 16 spare perfect tiles and a similar number of damaged ones, so I have a load of marble left for some other jobs. I think I'll be tiling the back and sides of the hearth to match, then I need a stove-fitter.
Living room is about done, 5.1 surround speaker wires fitted to skirtings, sofas are in, I've just the hearth to finish, stove to fit and a couple of other minor jobs and I'll be able to remove the cardboard floor and officially open the room for business. There's a bit more to do in the dining room, but I've got the table and chairs out of their box and that's ready to use too. Both rooms were painted by my Mum and look great.
Lastly, I filled up the central heating again, so we can keep warm now that the worst winter in a millennium has been confirmed. Need to sort out a better thermostat for that though as the one we have has a timer program that is a pain to set and doesn't have an over-ride, so you can't actually turn the thing on and off without reprogramming the timers. Need to do some research on that....
Anyway, more pics for you:
Living room painted:
Furniture in:
Skirtings and window sills done:
Hearth tiled:
Architrave done, wall light on:
Cardboard floor!
Discreet speaker connections:
Excess marble!
Dining room painted:
And table in ready for dinner!
Bathroom steps finished, door on and architraves on, looks fantastic!
Epoxy grout:
Bath fitted:
Stair spindles ready to be installed:
Outside sufficiently illuminated!
Functional kitchen!
Electricity!
I think the general plan now is to focus on the downstairs rooms in the main, though we want to get coving up upstairs soonish so that they can be painted by my girlfriend and my Mum when they're around to help. And my Dad will want to fit the banister as soon as he can as I think he's quite excited about that job. Two of the bedrooms are useable, if missing carpets and woodwork etc and we can live with that as we use them for sleeping only. So the next few weeks will be spent sorting out the little jobs downstairs, there's still a few door frames and doors to go in and then a few tidying up jobs and the boiler cupboard needs fitting out for my server, internet, tv etc so it can be hidden away.
Next update in a couple of weeks.....
Was away with friends last weekend, but had a reasonably productive weekend this week.
Arrived on Friday night briefly to drop a few things off and had a quick check of a few little jobs my electrician had done during the week. Ended up in one of the bedrooms briefly, then turned to come back downstairs and was confront by this:
WTF! Turns out my Dad and brother had decided to pop over last weekend and surprise me! Looks awesome, can't believe what a good job they've done and it's something I was worried wouldn't get done for Christmas, so we're over the moon!
Here you can see where the original newell post has been mated to the new, looks a lot better than I was expecting, just needs abit of finishing off. The whole thing is rock solid.
Next up I was back in the bathroom, doing the last of the tiling and getting things close to being finished. I've a few jobs left to do then I can start doing the little finishing touches, fit the skirting bits and paint. Need to sort out a proper wash stand though:
Tiling finished, or should I go higher?
Mirror fitted:

Shower fitted and working:
I was worried that the water pressure wouldn't be high enough for the shower, but it's absolutely superb, best shower I've ever had! Just three tiles to cut at funny angles then finish off the grouting and that's sorted.
Bath side fitted, well sort of. It's in and ready to be fitted properly, but I need to finess a couple of bits to get a perfect fit:

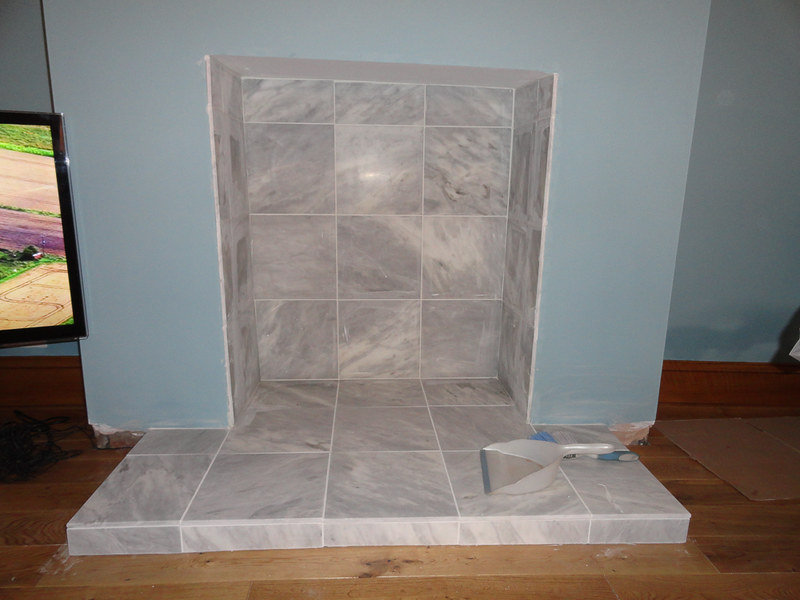
Last job of the weekend was more tiling, getting a bit sick of it to be honest, but not too much more to do now. Hearth looks good though, just needs sealing, grouting and the back and sides doing:
Fitted the dishwasher and mashing machine:
Dishwasher has the 'check water' light on and isn't working. Not sure why but the internet is full of ideas, so I guess that's to come to bits when I get chance.
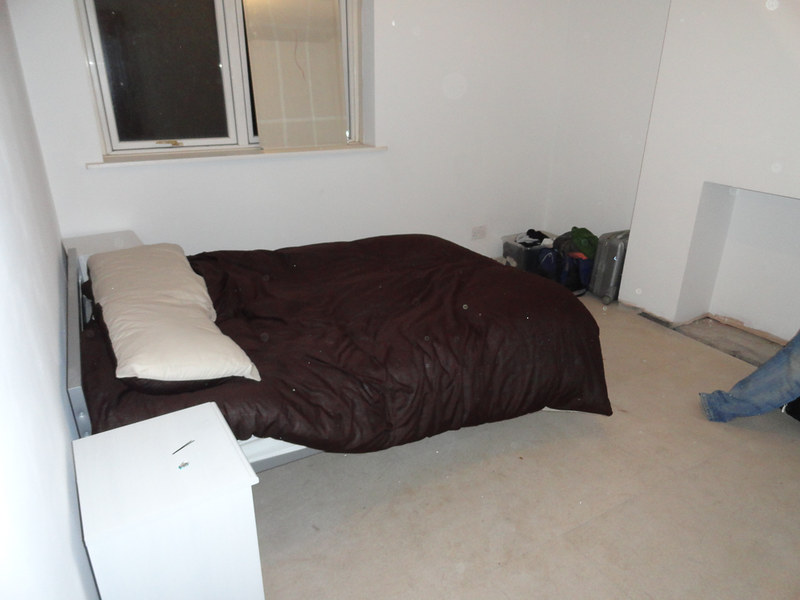
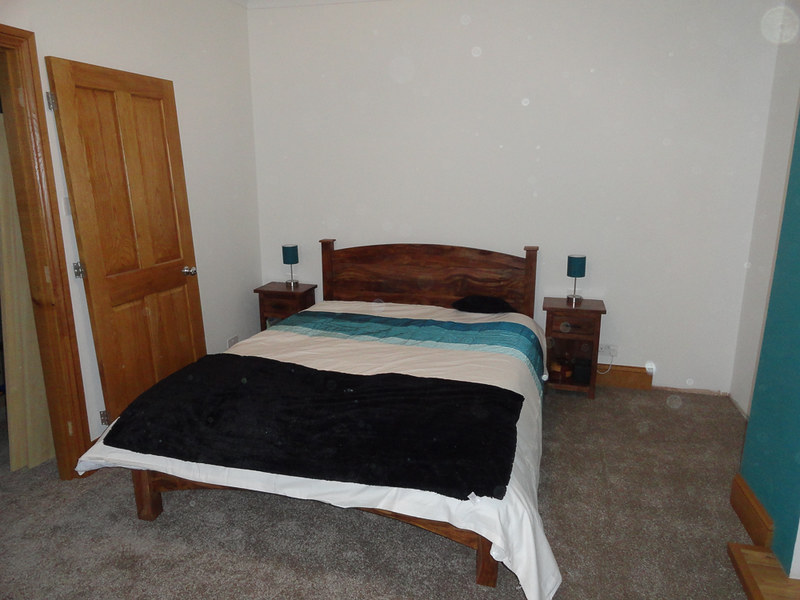
We spent our first night at the house on Saturday, I've officially moved in, though as I'm only there at weekends my girlfriend is still staying with her sister, at least until I move the good bed. Here's our temporary bedroom:
Next weekend I have a few things on, but my Dad is here, so we should get quite a bit done. Might start on the coving upstairs so we can do some more painting and there's still stacks of woodwork to get through.
Arrived on Friday night briefly to drop a few things off and had a quick check of a few little jobs my electrician had done during the week. Ended up in one of the bedrooms briefly, then turned to come back downstairs and was confront by this:
WTF! Turns out my Dad and brother had decided to pop over last weekend and surprise me! Looks awesome, can't believe what a good job they've done and it's something I was worried wouldn't get done for Christmas, so we're over the moon!
Here you can see where the original newell post has been mated to the new, looks a lot better than I was expecting, just needs abit of finishing off. The whole thing is rock solid.
Next up I was back in the bathroom, doing the last of the tiling and getting things close to being finished. I've a few jobs left to do then I can start doing the little finishing touches, fit the skirting bits and paint. Need to sort out a proper wash stand though:
Tiling finished, or should I go higher?
Mirror fitted:
Shower fitted and working:
I was worried that the water pressure wouldn't be high enough for the shower, but it's absolutely superb, best shower I've ever had! Just three tiles to cut at funny angles then finish off the grouting and that's sorted.
Bath side fitted, well sort of. It's in and ready to be fitted properly, but I need to finess a couple of bits to get a perfect fit:
Last job of the weekend was more tiling, getting a bit sick of it to be honest, but not too much more to do now. Hearth looks good though, just needs sealing, grouting and the back and sides doing:
Fitted the dishwasher and mashing machine:
Dishwasher has the 'check water' light on and isn't working. Not sure why but the internet is full of ideas, so I guess that's to come to bits when I get chance.
We spent our first night at the house on Saturday, I've officially moved in, though as I'm only there at weekends my girlfriend is still staying with her sister, at least until I move the good bed. Here's our temporary bedroom:
Next weekend I have a few things on, but my Dad is here, so we should get quite a bit done. Might start on the coving upstairs so we can do some more painting and there's still stacks of woodwork to get through.
Cheers guys, another row of tiles would take it about 15-20mm below the height of the mirror, so it would need two rows to go over the top of the mirror. But cutting into those tiles means there isn't a full row above the mirror, so it would probably look best with a third row to finish it.
It's slightly complicated by the wall falling away at the current tile height, so the mirror sticks out at the top and it won't tile as neatly, but I'm sure I can get that neat either way.
I was too busy to sit down and work it out so decided to just leave it as it is and have a think about it. I won't be doing any more until I'm ready to do the right hand side of the mirror, and I don't want to commit to the length of that run until I've worked out the cabinet that's going there, so I've got a bit of time to work it out.
More progress this weekend, I had a few things on so wasn't able to crack on all weekend, but my parents were here again.
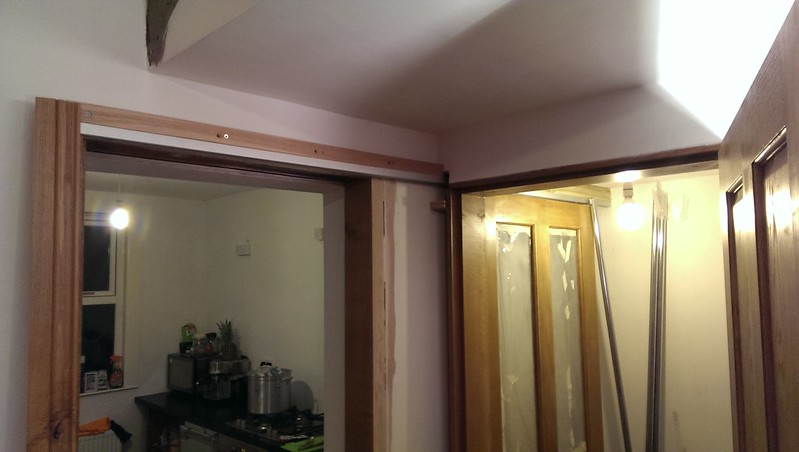
Priority now is getting downstairs neat and tidy, though I have to find some time to put up some coving so my girlfriend can do some more painting. So we started fitting the door frame and door in the hallway. We figured it would take a couple of hours, then we'd get the coving up in the hallway and make a start up stairs. One man job, so I left my Dad too it; took all day. I think he was a bit pissed off with the job by the time he'd finished, but it does look very good!
It was another pain in the arse job, with the frame being set in from the walls by a couple of inches. The packing is set back from the frame by 9mm so a piece of ply will fill the gap and accommodate the architrave, so although it looks rough, it's actually very precise, which is where the day went:

While that was going on I was tiling. Again. I got up very early on Sunday to grout the previous days work as I was due at a party and the hearth now looks like this:
Just needs sealing and the stove fitting and it's finished.
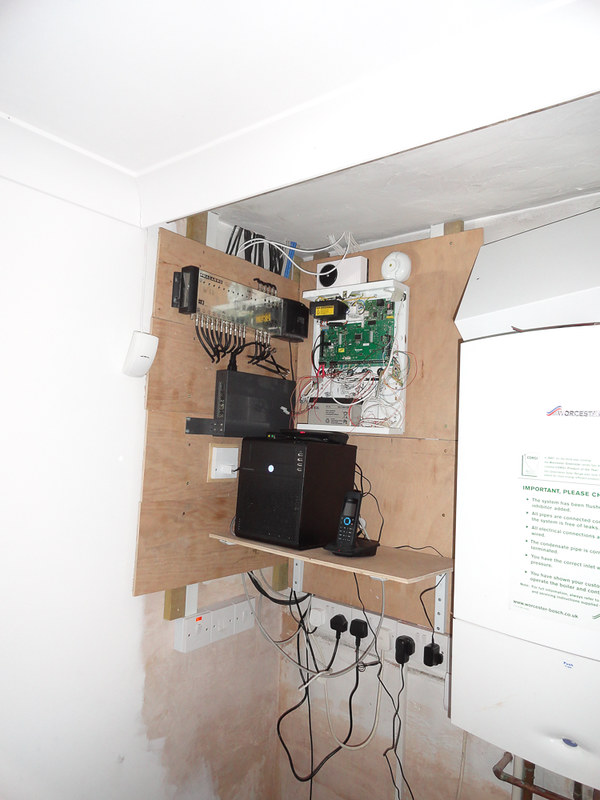
My Mum is staying for a few days this week to varnish everything again, so I decided it would be charitable to sort out the TV so she can watch Strictly. This involved swapping a wire over on the aerial in the loft then untangling the mass of wires in the boiler cupboard. I've run two battons on the wall so I can fix bits of kit to the wall on ply sheets wit hthe wires hidden behind. I've got a multiplexer that takes a feed from 8 satellites and 1 aerial, then outputs the lot to 12 locations. Ply was drilled for the wires entering at the top, though I need another strip for the bottom connections. It'll be quite neat when it's all wired up, you can see the effect on the top row where all the wires are connected:
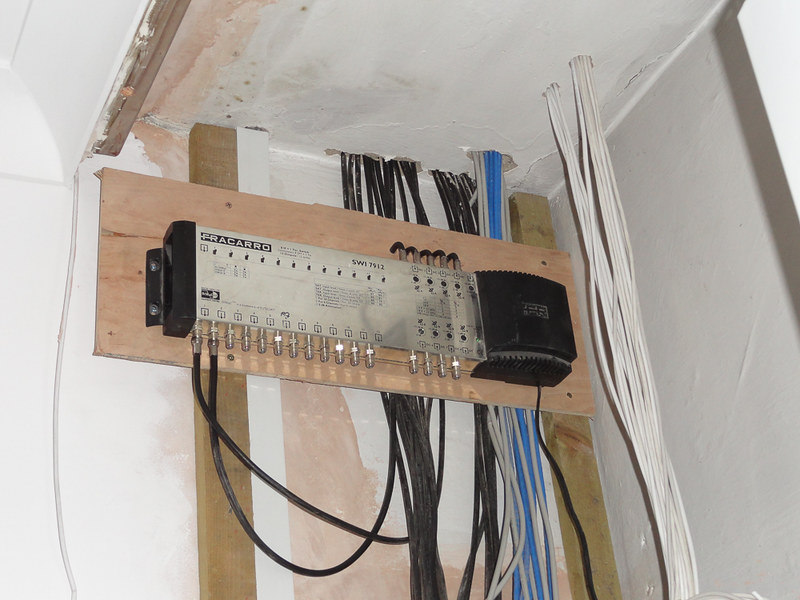
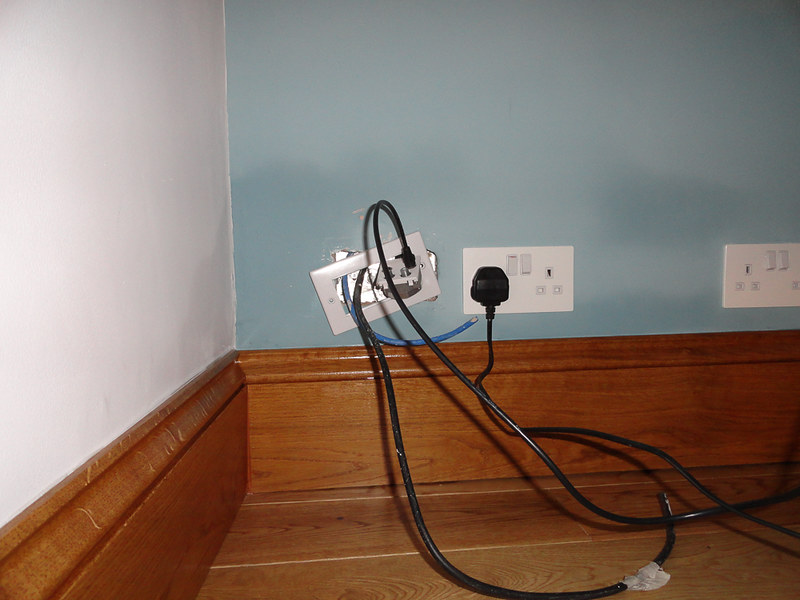
I've not fitted the wires to the satellite dishes yet, so they're not tested. I managed to balls up fitting the wall plate in the living room and now I can connect the outlet to the wires, but only if the plate isn't attached and I can't then fit the box to the plate, so I'm a bit stuck. Might have to break the plate to fit it:
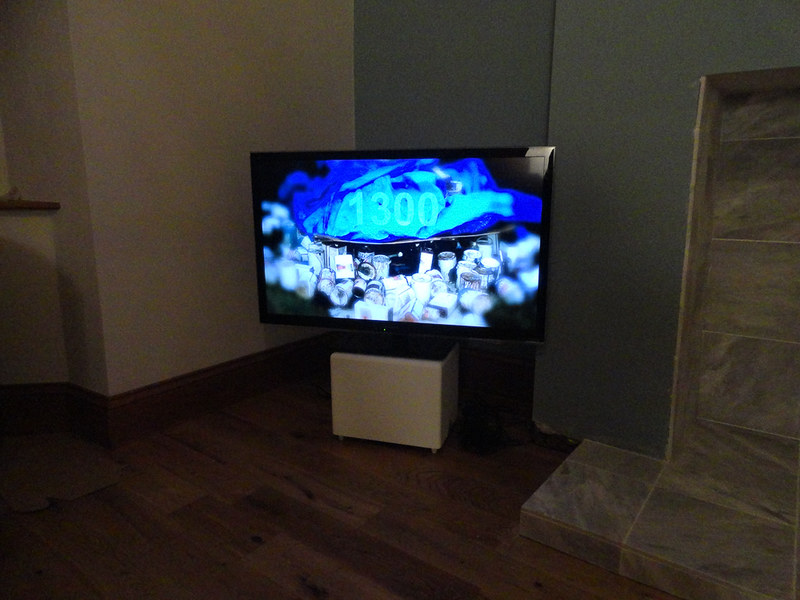
However, the good news is that the TV works with full signal strength:
While I was out, my Dad carried on wit the staircase and templated the stringer before cutting the oak to fit, looks ace:
He also fitted the finials and my Mum stained them:
So that's all the good stuff. Now for the bad news; damp. f k, fk, fk. We had a lot of rain on Saturday with driving winds, on Sunday we had this:
And you can see the same on the photo above with the TV outlet socket on.
My assessment is that it's water that has been forced into the outer skin of brick by the wind, where it's then run down the inside of the cavity. It's then hit debris in the cavity and been able to bridge it and soak through to the inside. Hopefully.
I know that the water table is low and the ground is very dry, so I can't see that it's rising through the DPC, given that it seems to be linked to the rain we had rather than just being there all the time. In addition, when I cleared the airbricks it became apparent that the cavity is full of crap to about that height.
So, provisional approach is likely to be to remove some bricks on the outside and try to clear the cavity manually, but I'm about to start a new thread on this to get some advice.....
FFS!
Priority now is getting downstairs neat and tidy, though I have to find some time to put up some coving so my girlfriend can do some more painting. So we started fitting the door frame and door in the hallway. We figured it would take a couple of hours, then we'd get the coving up in the hallway and make a start up stairs. One man job, so I left my Dad too it; took all day. I think he was a bit pissed off with the job by the time he'd finished, but it does look very good!
It was another pain in the arse job, with the frame being set in from the walls by a couple of inches. The packing is set back from the frame by 9mm so a piece of ply will fill the gap and accommodate the architrave, so although it looks rough, it's actually very precise, which is where the day went:
While that was going on I was tiling. Again. I got up very early on Sunday to grout the previous days work as I was due at a party and the hearth now looks like this:
Just needs sealing and the stove fitting and it's finished.
My Mum is staying for a few days this week to varnish everything again, so I decided it would be charitable to sort out the TV so she can watch Strictly. This involved swapping a wire over on the aerial in the loft then untangling the mass of wires in the boiler cupboard. I've run two battons on the wall so I can fix bits of kit to the wall on ply sheets wit hthe wires hidden behind. I've got a multiplexer that takes a feed from 8 satellites and 1 aerial, then outputs the lot to 12 locations. Ply was drilled for the wires entering at the top, though I need another strip for the bottom connections. It'll be quite neat when it's all wired up, you can see the effect on the top row where all the wires are connected:
I've not fitted the wires to the satellite dishes yet, so they're not tested. I managed to balls up fitting the wall plate in the living room and now I can connect the outlet to the wires, but only if the plate isn't attached and I can't then fit the box to the plate, so I'm a bit stuck. Might have to break the plate to fit it:
However, the good news is that the TV works with full signal strength:
While I was out, my Dad carried on wit the staircase and templated the stringer before cutting the oak to fit, looks ace:
He also fitted the finials and my Mum stained them:
So that's all the good stuff. Now for the bad news; damp. f
k, fk, fk. We had a lot of rain on Saturday with driving winds, on Sunday we had this:And you can see the same on the photo above with the TV outlet socket on.
My assessment is that it's water that has been forced into the outer skin of brick by the wind, where it's then run down the inside of the cavity. It's then hit debris in the cavity and been able to bridge it and soak through to the inside. Hopefully.
I know that the water table is low and the ground is very dry, so I can't see that it's rising through the DPC, given that it seems to be linked to the rain we had rather than just being there all the time. In addition, when I cleared the airbricks it became apparent that the cavity is full of crap to about that height.
So, provisional approach is likely to be to remove some bricks on the outside and try to clear the cavity manually, but I'm about to start a new thread on this to get some advice.....
FFS!
Righto, sorry about the lack of updates, life has got in the way a little bit and I've been too tired to sit down and jot everything down.
First things first, I got to the bottom of the injury to my R2 unit; think my Dad put a hot drill bit down on his chopper while fitting skirtings and melted the poor thing. I'll sort him out with a new one when he gets promoted to running suction for the whole workshop.
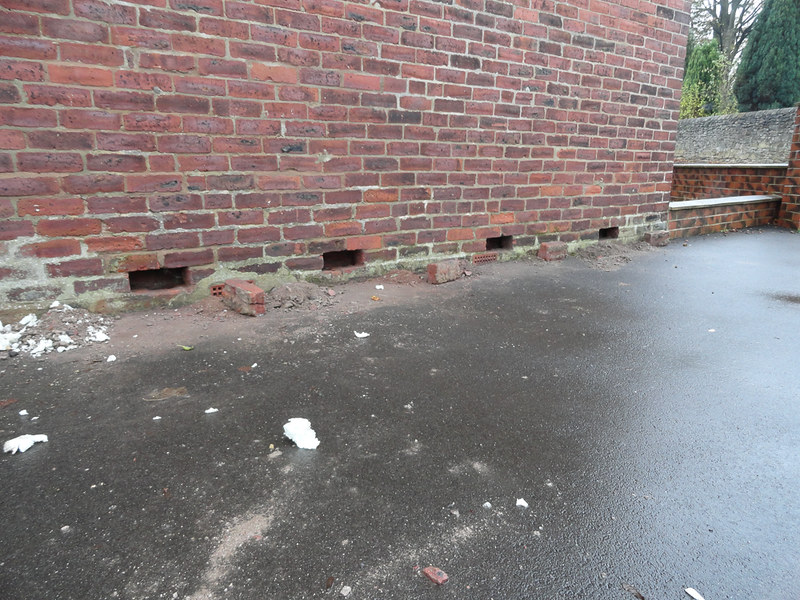
Damp; here's what I done (can't see cavity!):
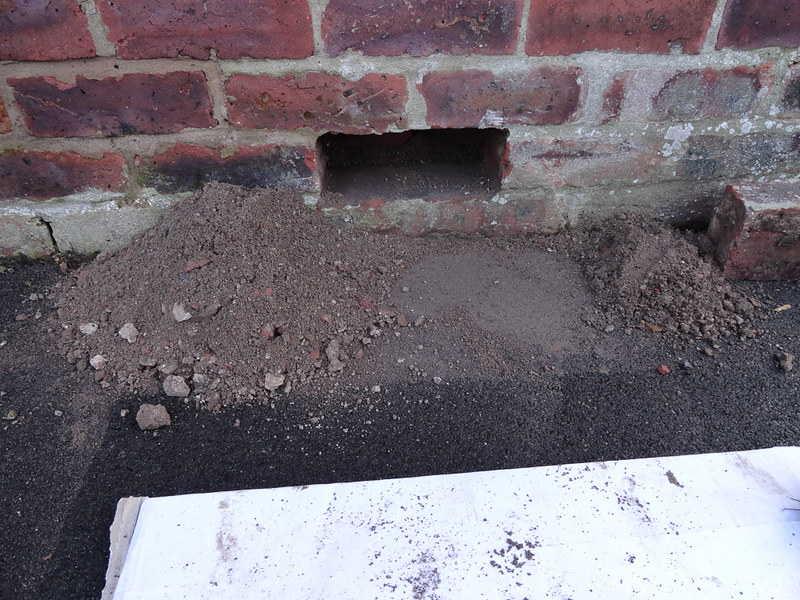
Holes in the wall:
Crap removed:
Holes filled:

I fashioned a couple of scraping tools and got what I could out or broken up and then put the hoover in and sucked out a tonne that way too. Got the cavity cleared down to about an inch below the bricks I removed, where it appears to be solid. The damp patches are still evident, but have cleared up loads, despite some bad weather recently. Impossible to tell if it's solved as the paint could be stained, so will monitor, repaint, then monitor again to assess success. Reasonably confident....
You can probably see that the tarmac is too high and that there is more dampness in the lower part of the wall than there should be as a result. A job for the summer is going to be to cut a trench and add a drainage channel down the side of a design to be determined to keep the wall as dry as possible. This will allow me to remove the drainage pipe running across the front garden, protect the front of the house from water when it's really really wet. Removing the drainage pipe, means I can remove the side wall to the front garden too.
TNT:
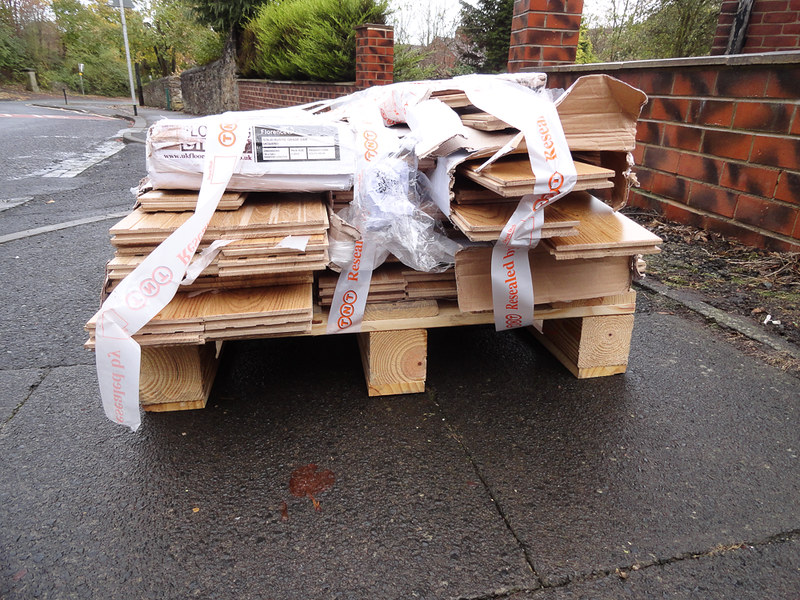
Returned a load of flooring that we didn't need. TNT collected, 10 days later they tried to return it to me claiming that it had been sent back to me by UKFlooring Direct. I didn't see the floor but was told that it was all over the back of the van, so rejected it. Found out that it wasn't rejected by UKFD, that was a lie to try to get me to accept it back after it had been dropped off something and destroyed. Currently in a fight over refunds, compensation and complaints about dishonesty that I won't bore you with. Didn't look like this when I posted it:
I finished wiring up my network, server, phone line, server and TV multiplex:
Most of the alarm is in too now. Really pleased with how it's coming together; internet went live on Friday and we're getting a consistent 17mb/s, which is awesome. XBMC is up and running in the living room and all the remote control stuff works so I can listen to stuff while I'm working. Loads more to do on distributed sound, but that can wait. might ask for some Raspberry Pis for Christmas.
Alarm I'm struggling with a little bit, but I've convinced it to let me in as an engineer now rather than just shout errors at me, so I'm confident I can get it all programmed once I've convinced it to let me in with my laptop. Thanks PH for the instructions!
Popped home to my parents' house last weekend and I'm now the proud owner of a man device:

I'll be taking a load of old radiators, copper pipes, lead pipes, bits of steel etc to the scrappy soon and will then get my storage shed back. Though I'll inevitably then fill it with the trailer, so not sure I gain a great deal. But every man needs a trailer!
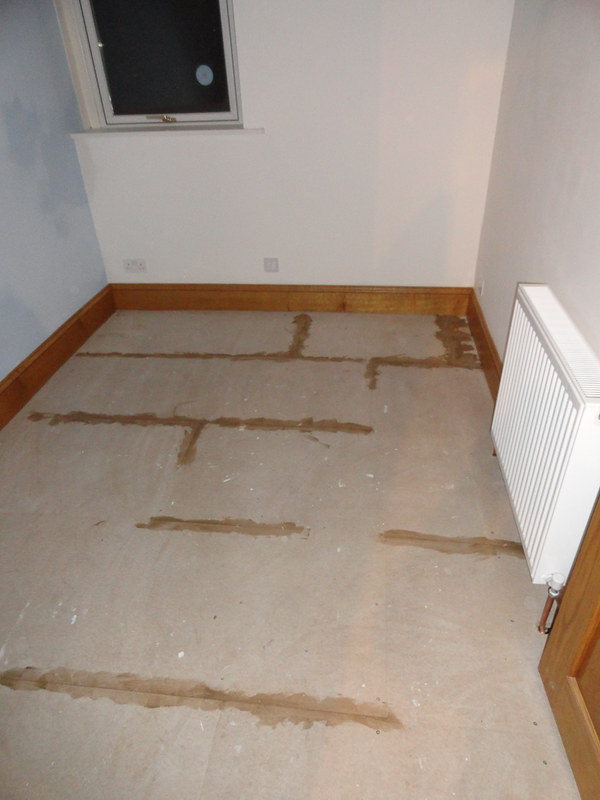
I've got 95% of the flooring down upstairs now, though I won't bore you with pictures of that. Mainly as I didn't take any. Anyway, it's screwed and glued now, there's a few bits that need some frigging to sort out due to studwalls being built on top of the floor boards and there's a few gaps to fill in, but nothing too difficult. I've left an easily removed board above the boiler so I can pop it up to run central heating and water to the loft one day.
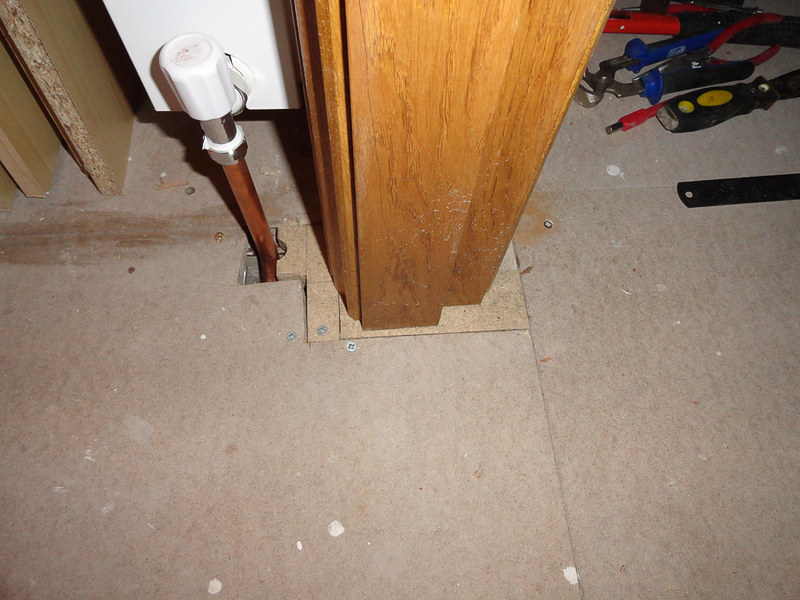
Only issue I had with the flooring was this:
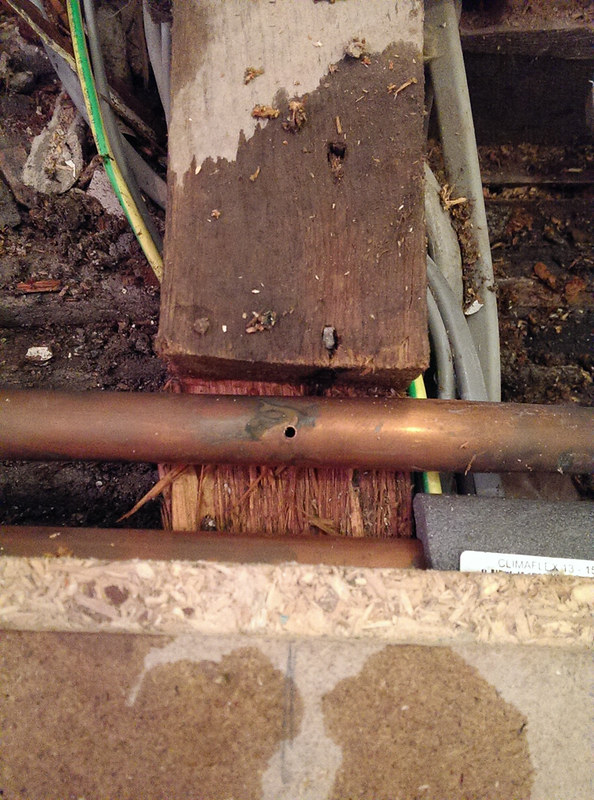
FFS! Entirely my fault, I used a tape measure to mark the pipe, then forgot to use it to make sure I screwed the right point. Direct hit.
Lost central heating, but not a complete disaster as the plan for the day was to drain it, remove radiators, paint behind them and fit skirting behind them before refitting and filling the central heating with some gunk to flush it properly before inhibitor goes in. So while Dad sorted the architraves, I did this:
The DPC is so I can check for leaks as the wood below was too wet to detect small leaks. Was worried that the cut was too close to a bend and I'd have to replace a complicated bit of pipe entirely, but it held great. Heating back on.
In the meantime I used my girlfriend's protestations over painting in the cold to do more man stuff:

First fire! Great draw, lit easily with a blow torch and made the whole house comfortably warm in a few hours. Was surprised at the impact it had on the whole house, it's a 5kw stove so was expecting a lot less. Will be great when both stoves are in as the house will be toasty. Used half a bucket of coal and a few bits of scrap wood and got 8 hours heat out of it. Really really pleased with this!
I checked the rear of the stove; I'm not surprised the plaster was destroyed when we moved in, the plaster was too hot to touch. I've got a load of tiles ready to go in the hearth that I *think* will reflect a lot of the heat out and insulate the plaster, but happy to take advice on this as I really want to get the heat into the room and away from the plaster!
This is what the lounge will look like if I can find a fitter:
While I'm on about putting holes in stuff; fitting the radiator in the little bedroom back on caused the electrics to trip! On inspection there was arc damage between radiator and radiator mount. I'd put a screw through the cable that ran to a socket. I presume it had tripped when the electrician had turned on the mains, but it had fried the wire and removed the short, fitting the skirting below had disturbed it and turned the radiator mount live I diagnosed the problem by by looking at pictures on my camera, removed the screw and removed the short. Going to have to get the cable replaced though.
So thankful that RCDs were fitted.
Here's the screw, you can see the damage:

We got quite a few more architraves done and this bit of the stairs:
Looks great! I've got the designs sorted out for hearths in the bedrooms, so going to order some bits of wood and get started on those as they need to go in before the carpets. I've also got something interesting in the pipeline for mantel pieces, but I won't spoil the surprise...
Upstairs is a bit of a mess now as we moved all the coving and skirting up, but we're going to work through that now and try our best to get some carpet in before Christmas. Likely to be New Year, but I like a tough target to aim for.
Sunday we put coving up in the back bedroom; coving, paint, skirting, finish flooring, carpet, then move on to the next room is the plan. This was the hardest room as it needed 14 separate lengths with corners around an alcove, a chimney and what will be a fitted wardrobe eventually. Took half a day and there's one length left, but we're pleased with it:
Dad made a scratching device to key the walls as there's some adhesion issues downstairs that are being held together with the pins we used, so we needed a better job this time:

Then this is what it looked like done:
I've got Friday evening and two days this weekend, then 5 days the following weekend, so we're going to try to get as near to carpets as possible in that time and then see where we're at.
First things first, I got to the bottom of the injury to my R2 unit; think my Dad put a hot drill bit down on his chopper while fitting skirtings and melted the poor thing. I'll sort him out with a new one when he gets promoted to running suction for the whole workshop.
Damp; here's what I done (can't see cavity!):
Holes in the wall:
Crap removed:
Holes filled:
I fashioned a couple of scraping tools and got what I could out or broken up and then put the hoover in and sucked out a tonne that way too. Got the cavity cleared down to about an inch below the bricks I removed, where it appears to be solid. The damp patches are still evident, but have cleared up loads, despite some bad weather recently. Impossible to tell if it's solved as the paint could be stained, so will monitor, repaint, then monitor again to assess success. Reasonably confident....
You can probably see that the tarmac is too high and that there is more dampness in the lower part of the wall than there should be as a result. A job for the summer is going to be to cut a trench and add a drainage channel down the side of a design to be determined to keep the wall as dry as possible. This will allow me to remove the drainage pipe running across the front garden, protect the front of the house from water when it's really really wet. Removing the drainage pipe, means I can remove the side wall to the front garden too.
TNT:
Returned a load of flooring that we didn't need. TNT collected, 10 days later they tried to return it to me claiming that it had been sent back to me by UKFlooring Direct. I didn't see the floor but was told that it was all over the back of the van, so rejected it. Found out that it wasn't rejected by UKFD, that was a lie to try to get me to accept it back after it had been dropped off something and destroyed. Currently in a fight over refunds, compensation and complaints about dishonesty that I won't bore you with. Didn't look like this when I posted it:
I finished wiring up my network, server, phone line, server and TV multiplex:
Most of the alarm is in too now. Really pleased with how it's coming together; internet went live on Friday and we're getting a consistent 17mb/s, which is awesome. XBMC is up and running in the living room and all the remote control stuff works so I can listen to stuff while I'm working. Loads more to do on distributed sound, but that can wait. might ask for some Raspberry Pis for Christmas.
Alarm I'm struggling with a little bit, but I've convinced it to let me in as an engineer now rather than just shout errors at me, so I'm confident I can get it all programmed once I've convinced it to let me in with my laptop. Thanks PH for the instructions!
Popped home to my parents' house last weekend and I'm now the proud owner of a man device:
I'll be taking a load of old radiators, copper pipes, lead pipes, bits of steel etc to the scrappy soon and will then get my storage shed back. Though I'll inevitably then fill it with the trailer, so not sure I gain a great deal. But every man needs a trailer!
I've got 95% of the flooring down upstairs now, though I won't bore you with pictures of that. Mainly as I didn't take any. Anyway, it's screwed and glued now, there's a few bits that need some frigging to sort out due to studwalls being built on top of the floor boards and there's a few gaps to fill in, but nothing too difficult. I've left an easily removed board above the boiler so I can pop it up to run central heating and water to the loft one day.
Only issue I had with the flooring was this:
FFS! Entirely my fault, I used a tape measure to mark the pipe, then forgot to use it to make sure I screwed the right point. Direct hit.
Lost central heating, but not a complete disaster as the plan for the day was to drain it, remove radiators, paint behind them and fit skirting behind them before refitting and filling the central heating with some gunk to flush it properly before inhibitor goes in. So while Dad sorted the architraves, I did this:
The DPC is so I can check for leaks as the wood below was too wet to detect small leaks. Was worried that the cut was too close to a bend and I'd have to replace a complicated bit of pipe entirely, but it held great. Heating back on.
In the meantime I used my girlfriend's protestations over painting in the cold to do more man stuff:
First fire! Great draw, lit easily with a blow torch and made the whole house comfortably warm in a few hours. Was surprised at the impact it had on the whole house, it's a 5kw stove so was expecting a lot less. Will be great when both stoves are in as the house will be toasty. Used half a bucket of coal and a few bits of scrap wood and got 8 hours heat out of it. Really really pleased with this!
I checked the rear of the stove; I'm not surprised the plaster was destroyed when we moved in, the plaster was too hot to touch. I've got a load of tiles ready to go in the hearth that I *think* will reflect a lot of the heat out and insulate the plaster, but happy to take advice on this as I really want to get the heat into the room and away from the plaster!
This is what the lounge will look like if I can find a fitter:
While I'm on about putting holes in stuff; fitting the radiator in the little bedroom back on caused the electrics to trip! On inspection there was arc damage between radiator and radiator mount. I'd put a screw through the cable that ran to a socket. I presume it had tripped when the electrician had turned on the mains, but it had fried the wire and removed the short, fitting the skirting below had disturbed it and turned the radiator mount live
I diagnosed the problem by by looking at pictures on my camera, removed the screw and removed the short. Going to have to get the cable replaced though.So thankful that RCDs were fitted.
Here's the screw, you can see the damage:
We got quite a few more architraves done and this bit of the stairs:
Looks great! I've got the designs sorted out for hearths in the bedrooms, so going to order some bits of wood and get started on those as they need to go in before the carpets. I've also got something interesting in the pipeline for mantel pieces, but I won't spoil the surprise...
Upstairs is a bit of a mess now as we moved all the coving and skirting up, but we're going to work through that now and try our best to get some carpet in before Christmas. Likely to be New Year, but I like a tough target to aim for.
Sunday we put coving up in the back bedroom; coving, paint, skirting, finish flooring, carpet, then move on to the next room is the plan. This was the hardest room as it needed 14 separate lengths with corners around an alcove, a chimney and what will be a fitted wardrobe eventually. Took half a day and there's one length left, but we're pleased with it:
Dad made a scratching device to key the walls as there's some adhesion issues downstairs that are being held together with the pins we used, so we needed a better job this time:
Then this is what it looked like done:
I've got Friday evening and two days this weekend, then 5 days the following weekend, so we're going to try to get as near to carpets as possible in that time and then see where we're at.

marky911 said:
Great progress there!
Good to hear your thoughts on the stove our 5kw Burley is here and the fitter is starting this week. He can only manage a few hours here or a day there etc, as he's actually booked up til after crimbo, so we are grateful he's even starting.
Can't wait to get some proper heat into the downstairs.
Love the trailer. Do you need a tip pass for one, like you do for a van?
Anyway, lovely job.
The stove that's in is great, amazing how well it heated the whole house and it's much more satisfying having the heat come from scrap oak flooring that you've used reduced to kindling with nothing more than a blunt axe. The other should be pretty much the same, given that they're both iron boxes, but I doubt it'll get fitted this side of Christmas as everyone seems to be busy or not answering their phones. They're both made by Hunter (I think) and both have a riddling grate fitted so I can burn wood or coal without messing. I have a preference for coal as it burns cooler and longer, but I have a garage full of old wood so will do a mixture of the two I expect. hopefully I can use the trailer for collecting wood if I can find someone that needs trees removing.Good to hear your thoughts on the stove our 5kw Burley is here and the fitter is starting this week. He can only manage a few hours here or a day there etc, as he's actually booked up til after crimbo, so we are grateful he's even starting.
Can't wait to get some proper heat into the downstairs.
Love the trailer. Do you need a tip pass for one, like you do for a van?
Anyway, lovely job.
For us these aren't necessary at all, we have gas central heating that's specced way higher than necessary so we have no need to burn stuff to keep warm, it's just more interesting. We'll likely use the central heating during the week then set a fire if we're in at the weekend. I have a hankering for setting one up in the old forge now, but I don't know if that will fly....
Our tip you need permits, but I think I can apply for 12 free goes each year, which will do me perfectly. I could probably get a friend to get me passes for neighbouring Council's too if it became really necessary. I've got a few conifers that can be taken to the tip this way though.
Quick update; had five days at the house last week and got through a lot. Unfortunately it was a lot of the same stuff and I didn't have my camera, so I've only got a few pictures and they're not great quality.
I spent the first three days mostly nailing wood to walls. Christ that's hard to get right when the walls are bent, bowed, not at 90 degrees, not upright etc etc. Some of it's perfect, some of it isn't. Fortunately wood filler sorts most issues out and the corners will mostly be hidden away. Carpenters amongst you might have issues with some of my work, but no one else will notice the 'character' so I'm fairly happy with how it's gone.
This is my best bit, only took me two hours!
Must have walked mile every day between workshop and bedroom cutting all the wood, but all the skirting is in upstairs apart from one piece in the hallway that needs cutting into the wall as it's too bent and the bedroom we're staying in. Plan is to get tow rooms finished, move rooms then start on that room.
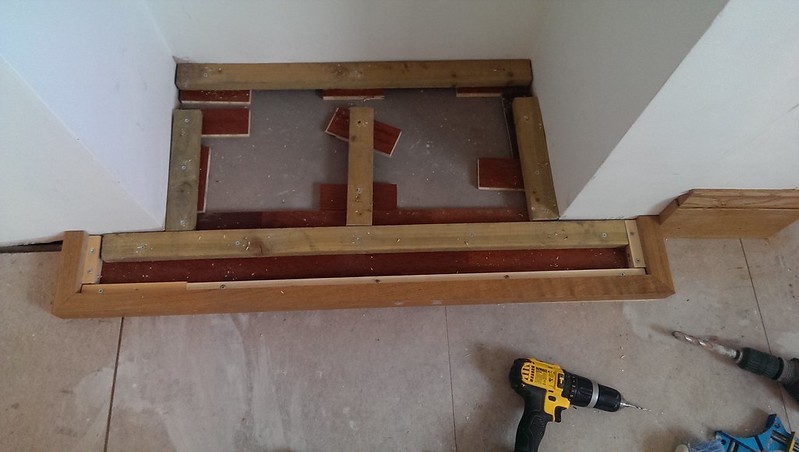
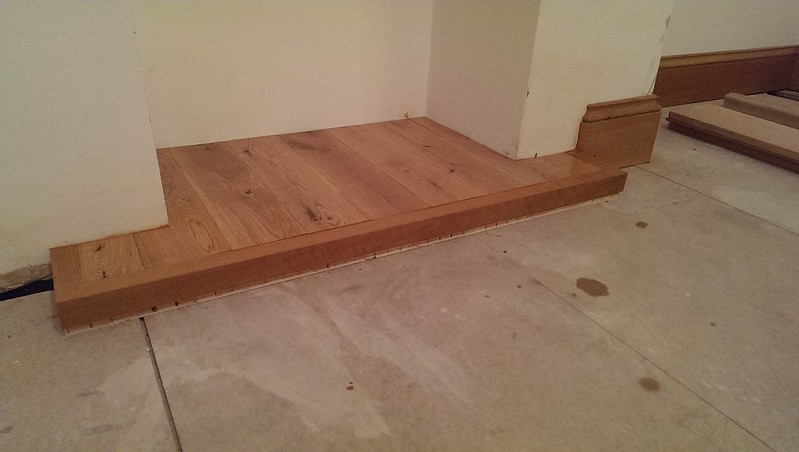
Hearths need fitting in the two upstairs bedrooms before carpets, so I made a recycled hearth. I found a piece of oak that we bought for something, but have forgotten what so I used the to make a frame. I then fixed this to the floor. Then I removed it from the floor when my girlfriend reminded me that the carpet thickness would cover a lot of the hearth. I used the old dining room flooring to raise the hearth by 19mm, then added some supporting frame work using some spare wood from when the roof was replaced a few years ago. Then used off cuts from my flooring downstairs to fill the surface. Looks like this:
Frame in place:
Top finished:
Colonel Hathi and Nelly in their new home:
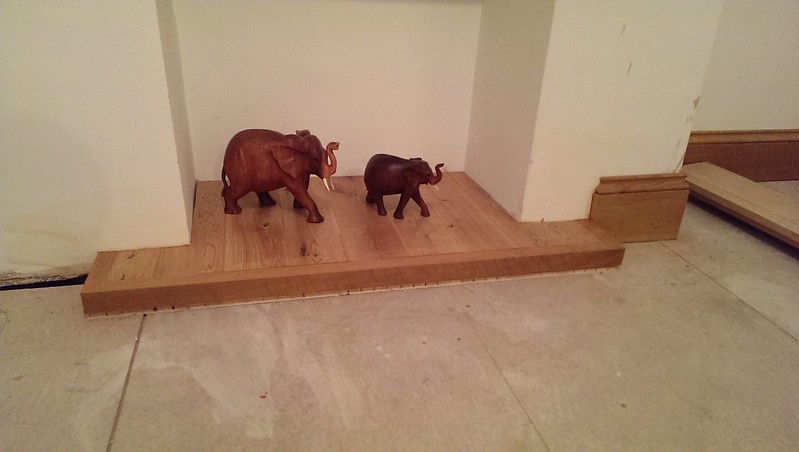
I'm really pleased with how that's turned out! I managed to cut the final piece to exactly the right size (Cheers whoever told me to buy that Dewalt mitre saw!) and tapped it in with a mallet leaving no gaps at all. Budget was £150 a hearth, cost was nothing, took me half a day though!
My Dad came over at the weekend, expecting to do architrave and skirting, but as I've done most of those we decided to tackle one of the last big tidying up jobs downstairs; kitchen and under-stairs cupboard doors. Sounds straightforward, however I had decided that I wanted a sliding door into the kitchen as it's the best solution. You can't hinge the door to the left as it then interferes with the under-stairs cupboard door. You can hinge it to the right, however if fully open it obscures the window and it is inevitable that it'll be open 99% of the time because it's really handy to have easy access between kitchen and dining room.
Problem is that I'm a fussy bd and sliding tracks are ugly. So I wanted the entire mechanism to be behind the architrave and for the installation to look as conventional as possible. The engineering was 'problematic' to say the least!
This is the track installed:
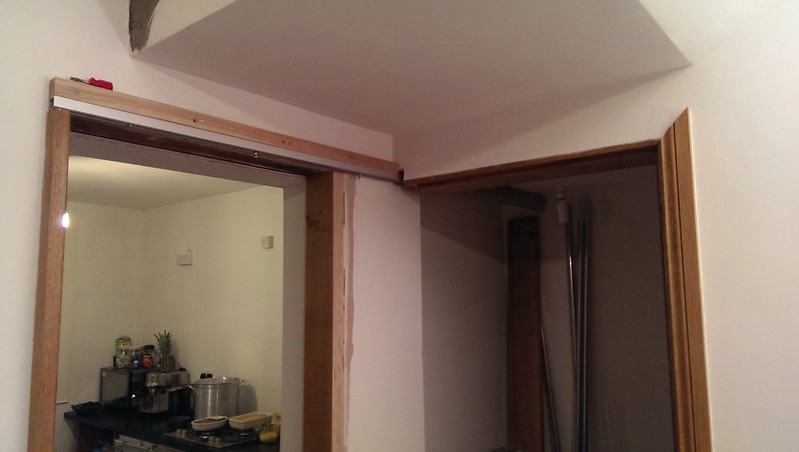
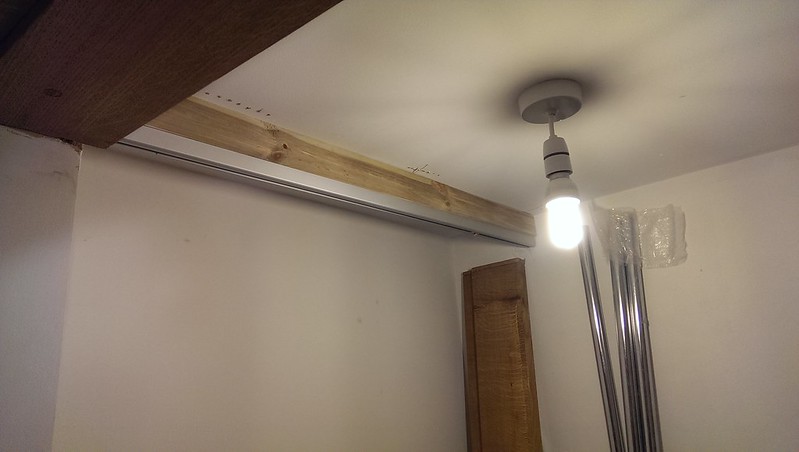
You can probably see the issues here; the left hand door frame has had the rebate rebated to 100% (ie ripped off!) so the door sits in a normal frame, but slides through the rebate. The track then sits on the frame, screwed to the oak above, which is screed into a wooden joist. We haven't fitted a top to the door frame, but there's a finishing piece to sit on the kitchen side so it will look like there is a head to the frame on that side. The frame is stepped forward into the dining room to let the door slide. Architrave will fit as normal, but be run around both doors at once (up-along-90 bend-along-down)
You'll also spot that the door frame into the under-stairs cupboard is missing an upright. Yes, because I'm a fussy bd the door slides between the wall and the missing upright. But it's OK because I measured the gap months ago, that frame is only 18mm thick at the uprights to maximise width, the doors can have 10mm trimmed off each side and that leaves 2mm clearance either side.
The top if fixed in, so putting the missing upright that is only supported top and bottom in requires some consideration. Unfortunately that consideration took place months ago and neither of us could remember how we were doing it. The best I could come up with was that the plan was to remove the top post-plastering so the wood could be screwed together, but that seems unlikely given that we have filled the screw holes with oak plugs that are going nowhere!
Just fitting the track took hours as it needs to be dead level, the support in both sides determines the level and the joist above the under-stairs cupboard required notching. At this point I was starting to regret my choice of doors!
Frame support underneath the stairs:
There's an architrave to run around here too, so it'll be neat inside. There'll be 6 inch shelving behind the sliding door floor to ceiling.
Door on:
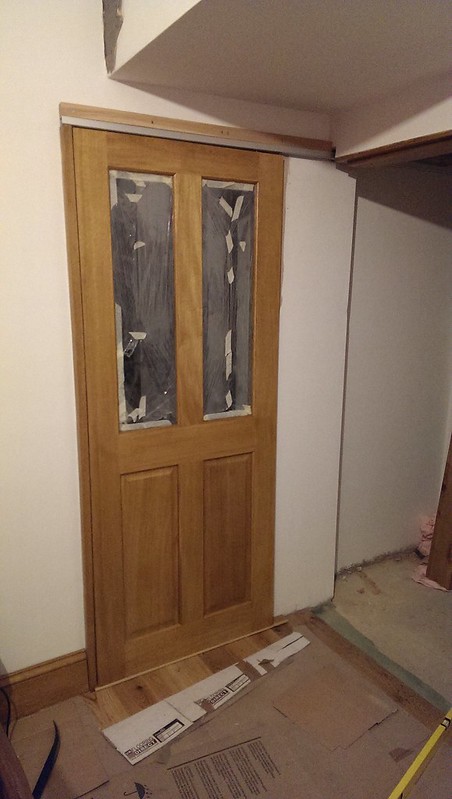
Getting the door on involved recessing the hanging mechanism into the door top and trimming top and bottom. Then two very thin spanners allowed me to wind the door up very close to the track. Mustn't lose those or the door won't ever come off again! Door then trimmed again to get the gap to the threshold perfect.
There's a guide bush recessed into the threshold to guide the door, with another one to go behind the missing upright under the stairs and one in the pantry to seat the door perfectly when slid away.
The missing upright went in by slotting the base with a biscuit jointer to allow a 90 degree bracket to be wedged and glued in, this is screwed into the concrete floor. The wooden floor isn't in the pantry yet, so that gave 20mm of wiggle room to get the frame in. In the end we fitted two dowels at the top and glued these. We also removed a piece from the top of the frame and made a replacement wedge of oak, screed this to the frame, then pinned it back to the top of the frame to make sure it would be solid. We ended up with a very solid join and that piece does nothing other than look pretty and allow the door catch to lock.
Apologise, the picture isn't great, but you can see the uproight in (wedge to be removed when glue dries) and the door slid into position. Cupboard door needs to come off for a final planing to width, but is also on, so a few finishing off bits to do and the architraves and mission accomplished.
Now it's done, it'll probably be one of my favourite jobs that we've done, particularly as everyone said it couldn't be done so that the track was hidden and the door going such a small gap with so little room for the other door!
Next weekend we'll try to get two of the bedrooms ready for carpets and hopefully I can get the architraves on those two doors and some proper pictures.
I spent the first three days mostly nailing wood to walls. Christ that's hard to get right when the walls are bent, bowed, not at 90 degrees, not upright etc etc. Some of it's perfect, some of it isn't. Fortunately wood filler sorts most issues out and the corners will mostly be hidden away. Carpenters amongst you might have issues with some of my work, but no one else will notice the 'character' so I'm fairly happy with how it's gone.
This is my best bit, only took me two hours!
Must have walked mile every day between workshop and bedroom cutting all the wood, but all the skirting is in upstairs apart from one piece in the hallway that needs cutting into the wall as it's too bent and the bedroom we're staying in. Plan is to get tow rooms finished, move rooms then start on that room.
Hearths need fitting in the two upstairs bedrooms before carpets, so I made a recycled hearth. I found a piece of oak that we bought for something, but have forgotten what so I used the to make a frame. I then fixed this to the floor. Then I removed it from the floor when my girlfriend reminded me that the carpet thickness would cover a lot of the hearth. I used the old dining room flooring to raise the hearth by 19mm, then added some supporting frame work using some spare wood from when the roof was replaced a few years ago. Then used off cuts from my flooring downstairs to fill the surface. Looks like this:
Frame in place:
Top finished:
Colonel Hathi and Nelly in their new home:
I'm really pleased with how that's turned out! I managed to cut the final piece to exactly the right size (Cheers whoever told me to buy that Dewalt mitre saw!) and tapped it in with a mallet leaving no gaps at all. Budget was £150 a hearth, cost was nothing, took me half a day though!
My Dad came over at the weekend, expecting to do architrave and skirting, but as I've done most of those we decided to tackle one of the last big tidying up jobs downstairs; kitchen and under-stairs cupboard doors. Sounds straightforward, however I had decided that I wanted a sliding door into the kitchen as it's the best solution. You can't hinge the door to the left as it then interferes with the under-stairs cupboard door. You can hinge it to the right, however if fully open it obscures the window and it is inevitable that it'll be open 99% of the time because it's really handy to have easy access between kitchen and dining room.
Problem is that I'm a fussy b
d and sliding tracks are ugly. So I wanted the entire mechanism to be behind the architrave and for the installation to look as conventional as possible. The engineering was 'problematic' to say the least!This is the track installed:
You can probably see the issues here; the left hand door frame has had the rebate rebated to 100% (ie ripped off!) so the door sits in a normal frame, but slides through the rebate. The track then sits on the frame, screwed to the oak above, which is screed into a wooden joist. We haven't fitted a top to the door frame, but there's a finishing piece to sit on the kitchen side so it will look like there is a head to the frame on that side. The frame is stepped forward into the dining room to let the door slide. Architrave will fit as normal, but be run around both doors at once (up-along-90 bend-along-down)
You'll also spot that the door frame into the under-stairs cupboard is missing an upright. Yes, because I'm a fussy b
d the door slides between the wall and the missing upright. But it's OK because I measured the gap months ago, that frame is only 18mm thick at the uprights to maximise width, the doors can have 10mm trimmed off each side and that leaves 2mm clearance either side. The top if fixed in, so putting the missing upright that is only supported top and bottom in requires some consideration. Unfortunately that consideration took place months ago and neither of us could remember how we were doing it. The best I could come up with was that the plan was to remove the top post-plastering so the wood could be screwed together, but that seems unlikely given that we have filled the screw holes with oak plugs that are going nowhere!
Just fitting the track took hours as it needs to be dead level, the support in both sides determines the level and the joist above the under-stairs cupboard required notching. At this point I was starting to regret my choice of doors!
Frame support underneath the stairs:
There's an architrave to run around here too, so it'll be neat inside. There'll be 6 inch shelving behind the sliding door floor to ceiling.
Door on:
Getting the door on involved recessing the hanging mechanism into the door top and trimming top and bottom. Then two very thin spanners allowed me to wind the door up very close to the track. Mustn't lose those or the door won't ever come off again! Door then trimmed again to get the gap to the threshold perfect.
There's a guide bush recessed into the threshold to guide the door, with another one to go behind the missing upright under the stairs and one in the pantry to seat the door perfectly when slid away.
The missing upright went in by slotting the base with a biscuit jointer to allow a 90 degree bracket to be wedged and glued in, this is screwed into the concrete floor. The wooden floor isn't in the pantry yet, so that gave 20mm of wiggle room to get the frame in. In the end we fitted two dowels at the top and glued these. We also removed a piece from the top of the frame and made a replacement wedge of oak, screed this to the frame, then pinned it back to the top of the frame to make sure it would be solid. We ended up with a very solid join and that piece does nothing other than look pretty and allow the door catch to lock.
Apologise, the picture isn't great, but you can see the uproight in (wedge to be removed when glue dries) and the door slid into position. Cupboard door needs to come off for a final planing to width, but is also on, so a few finishing off bits to do and the architraves and mission accomplished.
Now it's done, it'll probably be one of my favourite jobs that we've done, particularly as everyone said it couldn't be done so that the track was hidden and the door going such a small gap with so little room for the other door!
Next weekend we'll try to get two of the bedrooms ready for carpets and hopefully I can get the architraves on those two doors and some proper pictures.
Did some finishing off this weekend and got some better pictures of the door. Didn't do loads as I was too tired and a new coffee shop has opened in the village.
Architraves on:

And door open!
Can't see much of the sliding track:
Just this bit that needs filling with wood:
There's a few more jobs to do around the step into the kitchen and a bit of tidying up and painting where the door slides. A couple of bits of architrave aren't fully fixed yet as there's a filler piece of wood to go behind one that's not been ordered yet. Then there's the cupboard to extend the floor into, add architraves and fit shelves to. And architraves into the kitchen, but apart from that it's mostly done.
Kitchen door:
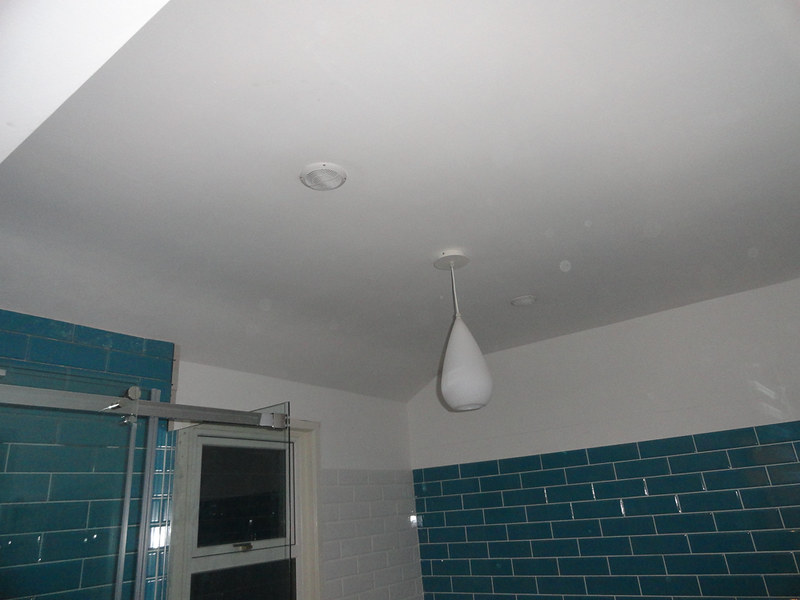
I did a quick job in the bathroom, and fitted some speakers to test. These were £15, so no high hopes but hopefully they'll be good enough for what I need. I've got an amplifier and a PSU on the way, then I'll hook my server up so that XBMC is running and I can select music using my phone.
Opening up a hole meant I was able to confirm that there's no insulation in that roof. It's fairly inevitable that I'm going to have to fit a hatch and get up there to insulate as it gets very cold in there at the moment!
I finished off the coving in what will be our bedroom, so that's ready to be painted now. I didn't take pictures as it doesn't look any different and I want to forget all about that job. I don't know why but I just find it entirely tedious, I'd rather be doing anything but coving!
Which is why we spent most of the day tidying up instead! I spent hours putting tools away and clearing stuff from the workshop as everything was a complete state, then we tidied the house and moved everything out that wasn't needed. We uncovered the dining room floor a bit, for the first time ever as we covered it as we were laying it:

Looks amazing! You can really see the height of the ceilings in that picture; that dresser is a little over 6' tall and looks tiny!
Next weekend the plan is to get our bedroom painted and to finish off the little bedroom. If we can get those rooms ready for carpets then we'll be very happy. If we can get carpets in around New Year then we can start moving the rest of our stuff across and it'll start to be a bit more sorted.
Architraves on:
And door open!
Can't see much of the sliding track:
Just this bit that needs filling with wood:
There's a few more jobs to do around the step into the kitchen and a bit of tidying up and painting where the door slides. A couple of bits of architrave aren't fully fixed yet as there's a filler piece of wood to go behind one that's not been ordered yet. Then there's the cupboard to extend the floor into, add architraves and fit shelves to. And architraves into the kitchen, but apart from that it's mostly done.
Kitchen door:
I did a quick job in the bathroom, and fitted some speakers to test. These were £15, so no high hopes but hopefully they'll be good enough for what I need. I've got an amplifier and a PSU on the way, then I'll hook my server up so that XBMC is running and I can select music using my phone.
Opening up a hole meant I was able to confirm that there's no insulation in that roof. It's fairly inevitable that I'm going to have to fit a hatch and get up there to insulate as it gets very cold in there at the moment!
I finished off the coving in what will be our bedroom, so that's ready to be painted now. I didn't take pictures as it doesn't look any different and I want to forget all about that job. I don't know why but I just find it entirely tedious, I'd rather be doing anything but coving!
Which is why we spent most of the day tidying up instead! I spent hours putting tools away and clearing stuff from the workshop as everything was a complete state, then we tidied the house and moved everything out that wasn't needed. We uncovered the dining room floor a bit, for the first time ever as we covered it as we were laying it:
Looks amazing! You can really see the height of the ceilings in that picture; that dresser is a little over 6' tall and looks tiny!
Next weekend the plan is to get our bedroom painted and to finish off the little bedroom. If we can get those rooms ready for carpets then we'll be very happy. If we can get carpets in around New Year then we can start moving the rest of our stuff across and it'll start to be a bit more sorted.
Quick update for you all; things have been a bit slow for the last month or so. Christmas, then an exam at work has meant the project hasn't been top priority recently. Back on it now though.
Over Christmas I did a few piddly little jobs that are barely worth taking pictures of. But I did anyway:
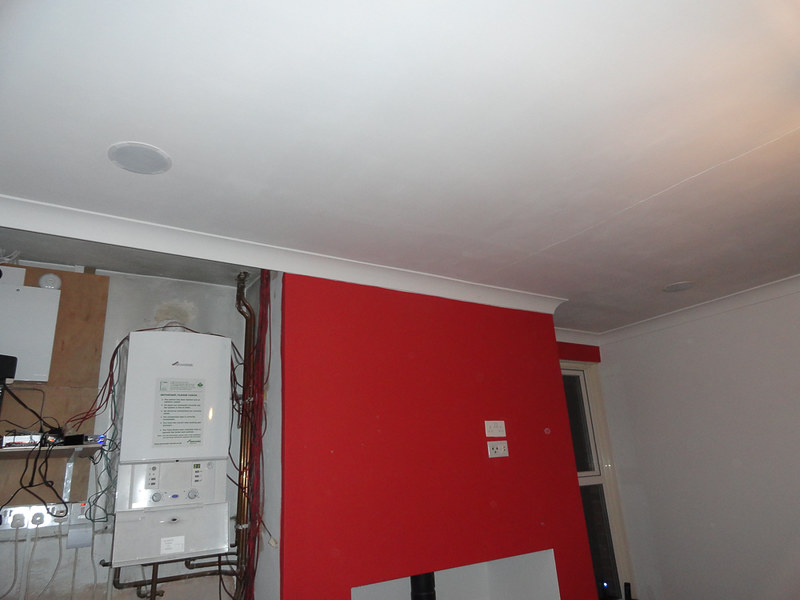
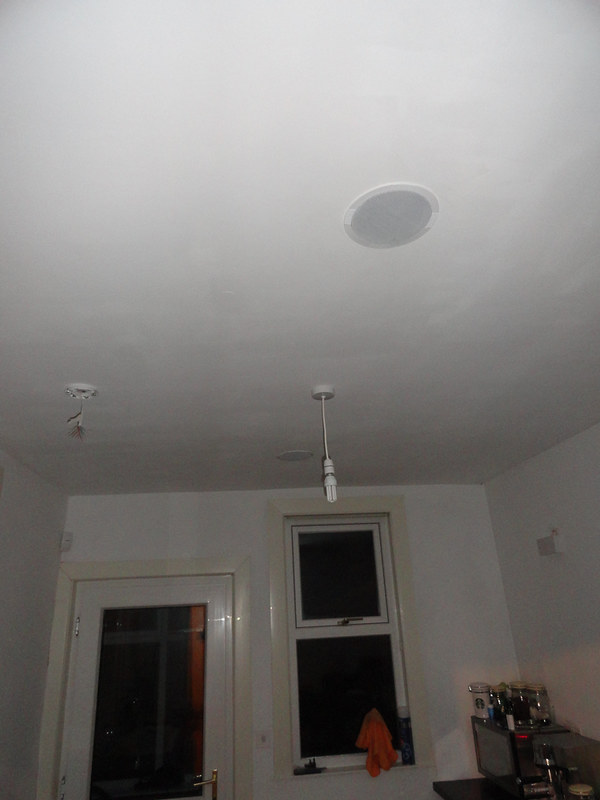
I made a start on the distributed audio system as putting speakers into the ceilings is messy and I don't want to be doing it once the house is tidy. I've fitted speakers in the ceiling in the kitchen, dining room, landing, bathroom and one of the three bedrooms. I've two more to go in another bedroom, I need two wall speakers for the conservatory and I need to install the 5.1 surround speakers in the living room.
The idea is to run XBMC on Raspberry Pis, connected to my server, to supply the tunes and to use Yatse on my phone to interact with the Pis. Yatse pulls the various libraries to the phone, the phone is much more powerful than the Pi, and a convenient way to control everything. I've got a communal feed that can be fed to any of the speakers then I'll be able to plug local sources in in the rooms too if required, these feed the sound back to the central amplifiers and then back to the ceiling speakers. That way, putting a TV in a bedroom for example would let you run XBMC on a Pi on the TV for video as well as music, and still use the ceiling speakers.
I've got all the amps and currently have my server playing music over most of the house, though I need to set up the rest of the kit properly rather than rough setup I've got right now. Only thing I've cocked up is I've not run a communal feed to the living room, I think I'd like to be able to run that through the 5.1 surround as an option. Might have to have a think about that.....
Dining Room Speakers:
Kitchen Speakers:
Whilst bored when revising I knocked this into the slidey door with a chisel:
Surprised how well I managed it, the doors being veneered made it a bit easier to get started though. Finished door looks like this, just a little tidying up to do:
At the weekend me and Dad bashed out the last of the major coving jobs, the bedroom we'd been sleeping in and the landing. Really pleased with these, we did a much better job than the other rooms as practice makes perfect.
Above the stairs, including a very tricky bit, which we painted so we didn't have to do the balance a ladder on a ladder on some blocks trick again:
Other end, speaker visible:
Spare room, coving painted completely and wall paint going on:
Coving done around what will become a fitted wardrobe, speaker in ceiling:
Yes, the colours are a bit of a mess! I've no idea what's gone on here, but when I look into this corner:
It makes me feel a bit sick. Either colour is OK, though nothing special, but not together, they clash well bad. I had no say in any of this and something might have to be changed. The modus-operandi seems to be if anything needs to be repainted, it's the wall with the radiator on, so I suspect the brown will go.
Our bedroom looks good though:
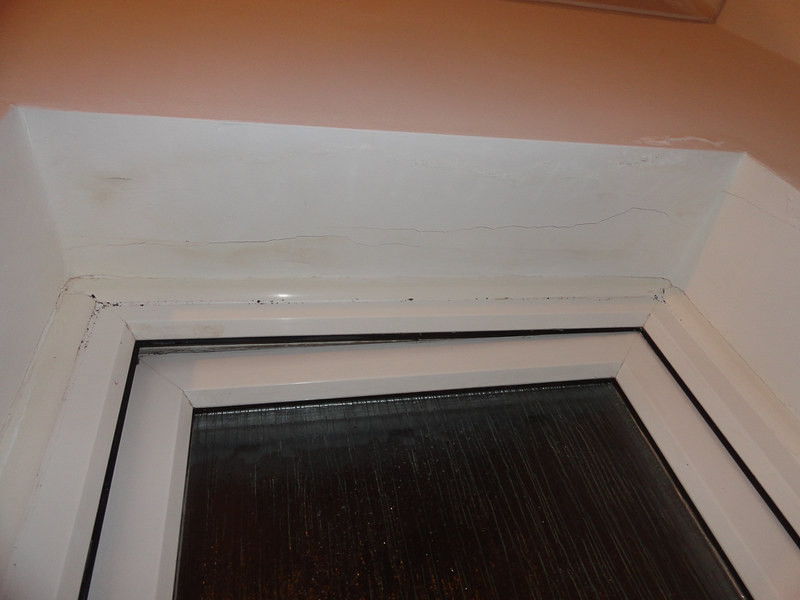
On to more serious matters; damp! With all the wet weather I seem to have sprung a few leaks. All of these pictures are on the south-facing gable wall, the opposite wall to the original damp issues.
Stairs window:
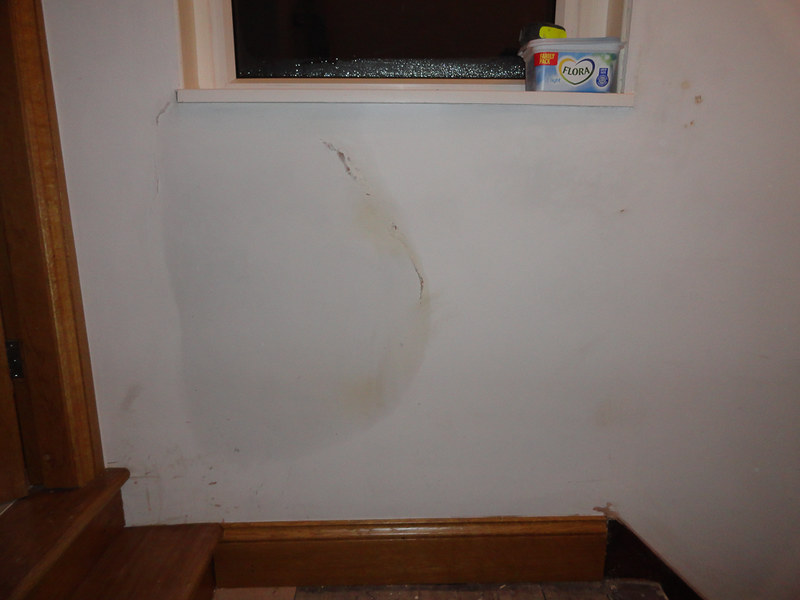
Those spots on the right are where the new plaster has gone soft and lumpy. The old plaster underneath was the same, though damp hasn't come through here. Close-up:

Is this some sort of contamination in the original plaster(salts from the bricks?)? If that's the case, is it unreasonable of me to think that my plasterer should have realised the original plaster was affected and removed it first? Anyway, clearly the window is leaking and I'll put a separate thread up for advice on getting it sorted out when the time comes.
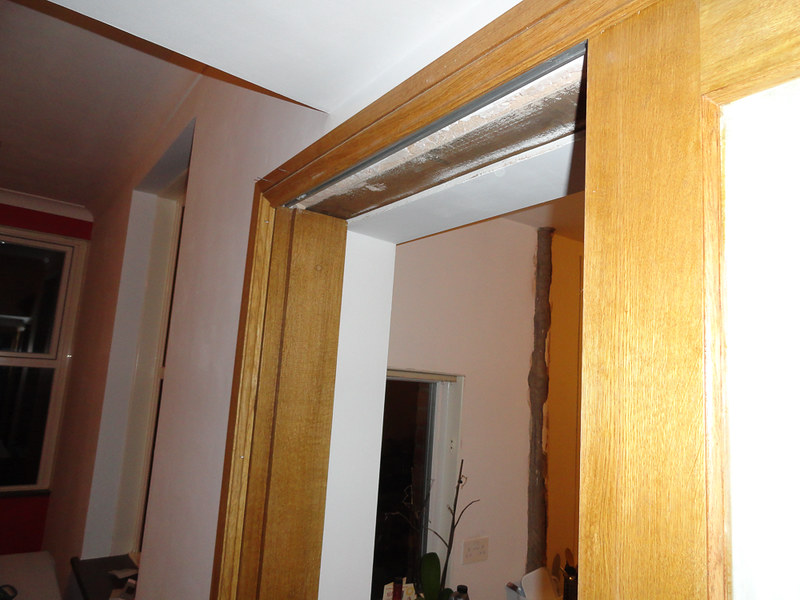
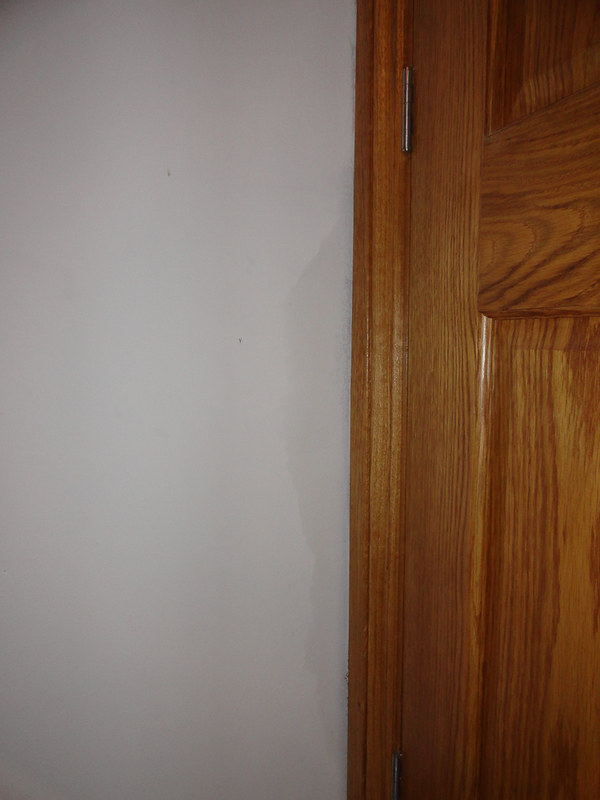
More problems behind the bathroom door frame:
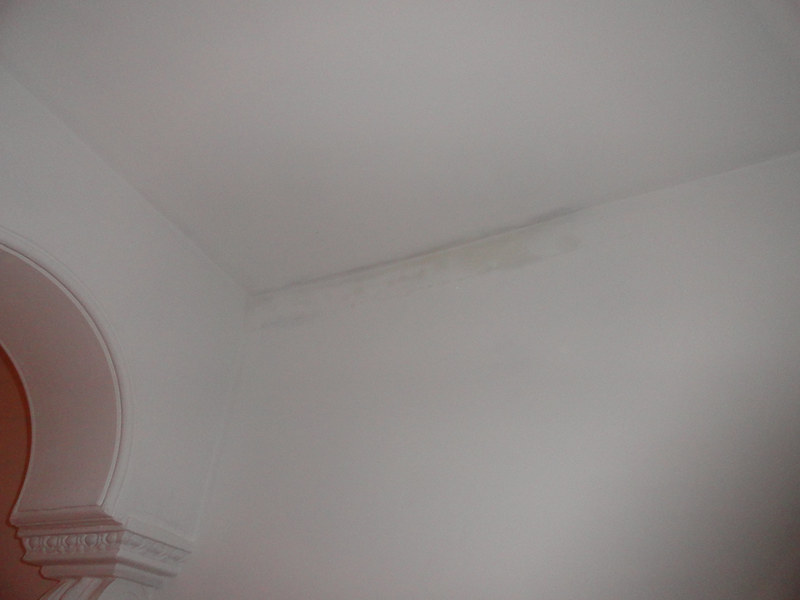
Hallway downstairs:
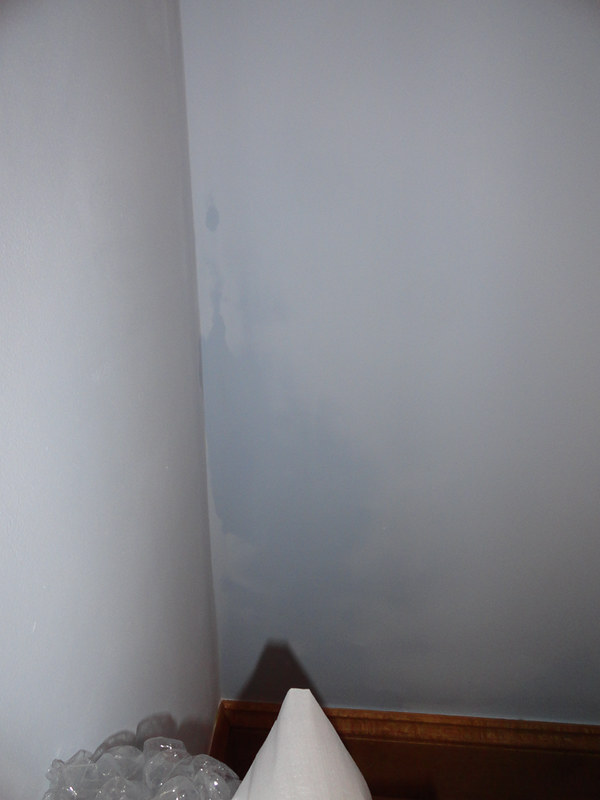
Front bedroom:
Then the landing window is very bad too, although there isn't much of a damp patch here:
There's also a patch in the kitchen, though that's directly below the new bathroom extract, so I suspect that hasn't been sealed properly, one of the few jobs I didn't do. Hopefully there'll be an obvious flaw in the window sealings and fixing them will cure my problems!
Before I do that though, the next weekend or two will be flat-out trying to finish off the bedrooms so that carpets can be fitted. There's a few finishing off jobs to do with the floor, the last of the decorating, one room to fit skirting in, three speakers to fit, a hearth to build and the original stairs stringers need to either be painted white, or sanded back and stained.
Once the carpets are done we'll be into mostly finishing off jobs in a the rooms downstairs and the bathroom, though we should have a kitchen ordered shortly so that'll be to fit too.
Over Christmas I did a few piddly little jobs that are barely worth taking pictures of. But I did anyway:
I made a start on the distributed audio system as putting speakers into the ceilings is messy and I don't want to be doing it once the house is tidy. I've fitted speakers in the ceiling in the kitchen, dining room, landing, bathroom and one of the three bedrooms. I've two more to go in another bedroom, I need two wall speakers for the conservatory and I need to install the 5.1 surround speakers in the living room.
The idea is to run XBMC on Raspberry Pis, connected to my server, to supply the tunes and to use Yatse on my phone to interact with the Pis. Yatse pulls the various libraries to the phone, the phone is much more powerful than the Pi, and a convenient way to control everything. I've got a communal feed that can be fed to any of the speakers then I'll be able to plug local sources in in the rooms too if required, these feed the sound back to the central amplifiers and then back to the ceiling speakers. That way, putting a TV in a bedroom for example would let you run XBMC on a Pi on the TV for video as well as music, and still use the ceiling speakers.
I've got all the amps and currently have my server playing music over most of the house, though I need to set up the rest of the kit properly rather than rough setup I've got right now. Only thing I've cocked up is I've not run a communal feed to the living room, I think I'd like to be able to run that through the 5.1 surround as an option. Might have to have a think about that.....
Dining Room Speakers:
Kitchen Speakers:
Whilst bored when revising I knocked this into the slidey door with a chisel:
Surprised how well I managed it, the doors being veneered made it a bit easier to get started though. Finished door looks like this, just a little tidying up to do:
At the weekend me and Dad bashed out the last of the major coving jobs, the bedroom we'd been sleeping in and the landing. Really pleased with these, we did a much better job than the other rooms as practice makes perfect.
Above the stairs, including a very tricky bit, which we painted so we didn't have to do the balance a ladder on a ladder on some blocks trick again:
Other end, speaker visible:
Spare room, coving painted completely and wall paint going on:
Coving done around what will become a fitted wardrobe, speaker in ceiling:
Yes, the colours are a bit of a mess! I've no idea what's gone on here, but when I look into this corner:
It makes me feel a bit sick. Either colour is OK, though nothing special, but not together, they clash well bad. I had no say in any of this and something might have to be changed. The modus-operandi seems to be if anything needs to be repainted, it's the wall with the radiator on, so I suspect the brown will go.
Our bedroom looks good though:
On to more serious matters; damp! With all the wet weather I seem to have sprung a few leaks. All of these pictures are on the south-facing gable wall, the opposite wall to the original damp issues.
Stairs window:
Those spots on the right are where the new plaster has gone soft and lumpy. The old plaster underneath was the same, though damp hasn't come through here. Close-up:
Is this some sort of contamination in the original plaster(salts from the bricks?)? If that's the case, is it unreasonable of me to think that my plasterer should have realised the original plaster was affected and removed it first? Anyway, clearly the window is leaking and I'll put a separate thread up for advice on getting it sorted out when the time comes.
More problems behind the bathroom door frame:
Hallway downstairs:
Front bedroom:
Then the landing window is very bad too, although there isn't much of a damp patch here:
There's also a patch in the kitchen, though that's directly below the new bathroom extract, so I suspect that hasn't been sealed properly, one of the few jobs I didn't do. Hopefully there'll be an obvious flaw in the window sealings and fixing them will cure my problems!
Before I do that though, the next weekend or two will be flat-out trying to finish off the bedrooms so that carpets can be fitted. There's a few finishing off jobs to do with the floor, the last of the decorating, one room to fit skirting in, three speakers to fit, a hearth to build and the original stairs stringers need to either be painted white, or sanded back and stained.
Once the carpets are done we'll be into mostly finishing off jobs in a the rooms downstairs and the bathroom, though we should have a kitchen ordered shortly so that'll be to fit too.
Craikeybaby said:
That's still some good progress! Damp under new player sucks, although it does look like we've got away lightly compared to you!
The Raspberry Pis for audio sound interesting, we're going to rely on Airplay for sending audio around the house, which is probably flakier and more expensive.
It'll get sorted eventually, I'm not too worried about it, I was just hoping to be able to concentrate on the renovation rather than getting side-tracked by maintenance. I could do with getting the house 95% done before the weather turns as I want to make a start on the garden in the spring and the workshop over the summer.The Raspberry Pis for audio sound interesting, we're going to rely on Airplay for sending audio around the house, which is probably flakier and more expensive.
I know there's a hole to fill where I've got some satellite wires sticking out and the extract duct is a likely cause. There's two old water tank overflow pipes to remove and fill and possibly the old bathroom waste could be a cause of some. The windows are obvious too, so hopefuly if I tackle all that most of the water will be dealt with. My worry is if I can't find the leak I'm looking at repointing random bits of the wall.
I've still got some work to do on the otherside of the house as one of the damp patches hasn't cleared up, but I knew I propbably needed to remove another brick to get the last of the rubbish out of the cavity there. I also need to do the dining room wall the same as, althoguh it was tanked, the hearth slates are gettting damp, so water is still crossing the cavity.
XBMC has got airplay built in BTW, you can also run XBMC on the Apple TV which I presume you're referring to, though the Pi is a better and cheaper option. There's lots of stuff on XBMC that you won't have using airplay alone, though I suspect the apple stuff deals with bouncing stuff from one device to another better. You can use the Pis locally the same way, you don't need to wire everythign back to one point, that's just something I've done to increase flexibility and to allow me to expand the setup in the future.
Bit of an update for you, not had much time during the week recently as I've been trying to get a different job, one where I don't have to commute from Durham to Manchester. We've made some good progress, the last few weeks we were making a last push to get three bedrooms finished and ready for carpets and trying to get the landing ready too. The landing was scuppered by damp issues as it meant we couldn't fit the last of the skirtings, but that'll get done at the same time as the stairs, so it's no big deal.
Fitted the last of my speakers in the bedrooms and on the landing:

Unfortunately one of the laths decided to puncture the ceiling and chuck a lump of plaster out, so I had to replaster this bit and sand it out. All speakers are in now and tested. I've an audio multiplex on the way and need to spend some time wiring up the amplifiers and switches, and other inputs etc. I had a bit of a brain-wave last week; I'm going to try and get a bluetooth input setup so that I can pair my phone to the system, so once I'v worked that out I'll finalise the wiring setup and get everything working properly.
I finished off the door handles as I don't want to be doing messy jobs once carpets are in. From taking 6 hours over the first one I got it down to 70 minutes by the end. Door lock jig first up, then this:
It's a custom jig to restrict movement on the router whilst not interfering with the fence. Fence set for left-right distances, then plunge to full depth running the fence up both sides of the door. Auger bit through for the handle shafte, then auger bit to mash up the remaining depth, tidy up with a chisel inside, fit the lock, fit the handle, then mark and chisel for the catch on the frame. Just one left to do downstairs in the hallway now!
Finished doors:
Fitted a number of 'perfect-fit' blinds:
I say fitted, most need taking off and adjusting as the measuring instructions missed a vital check, so they don't fit where there's a high sill. Easy fix with the mitre saw, but it's going to write-off a blade. Good job I need a new one really. Apart from that, the blinds are pretty good. Nothing flash as they were cheap, but they've sorted a load of privacy issues and delayed having to sort curtains out.
Last bedroom has been painted, the brown has gone, so I don't feel sick in there, but now the girlfriend thinks it looks too purple FFS!!!

Added a mock-hearth to match the design in the other bedroom. Much quicker this time as I built the entire frame onto a piece of old 18mm flooring, added supports for the oak boards, then fixed the old bit of looring in the right place. No messing about getting the joints to match perfectly that way and the boards then went in a bit easier:
Really pleased with these, especially as they cost me nothing!
I had a few bits of the floor to fill in where I'd been scuppered by the old floor supporting stud walls. Cut various bits of wood to size:
Then filled any residual gaps with a wood dust and wood glue mix:
This bit my Dad reckoned I wouldn't be able to fill:
There's an L shaped bit dropped in with string at one end, one bit of the L sits on a joist, the end then interlocked with the board in the room on the right. Bit of ply in the gap underneath straddling the hole, held in place while I screwed it tight, then used that to support the filler piece. Easy. Only took me two hours to get it done.....
I then went back to Manchester and left my Mum touching up the paint, varnishing wood and generally tidying up after me and my Dad fitting skirtings in the last bedroom.
Then last Monday the carpet fitter arrived and I moved the last of our furniture over and sorted out the bedrooms. As I said, there's still the landing to do and I had to take a door off as we cocked up the thickness of carpet when working out what gaps to leave, but they got sorted this weekend and are back on now:
There's a few minor snagging jobs to do in the bedrooms, but the only major job left is the fitted wardrobes.
I was also allowed to remove the cardboard from the living room floor, as the house is now a clean zone! I wasn't allowed to take the covers off the sofas though, they have to stay until the stove is fitted. But I think this is the first time the floor has been visible, looks ace!

So that brings us up to this weekend. This weekend there was no visible progress, but we achieved a lot. I hope. As I mentioned earlier, we've been plagued by damp over the last few weeks, patches appeared and have gradually got bigger, then new patches have joined them. At it's worst most rooms were affected, but it hasn't helped having the boiler set to frost only during the weeks, I think that's 4 degrees, which caused these patches, amongst others:
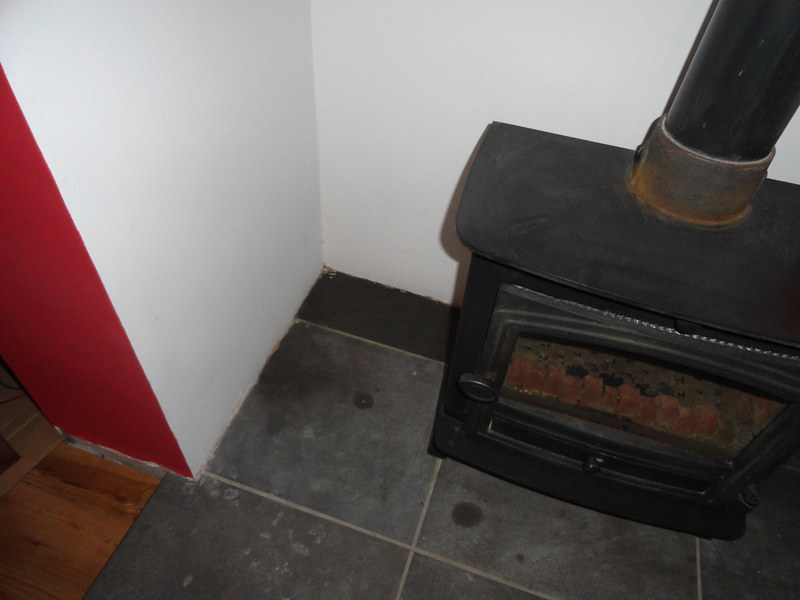
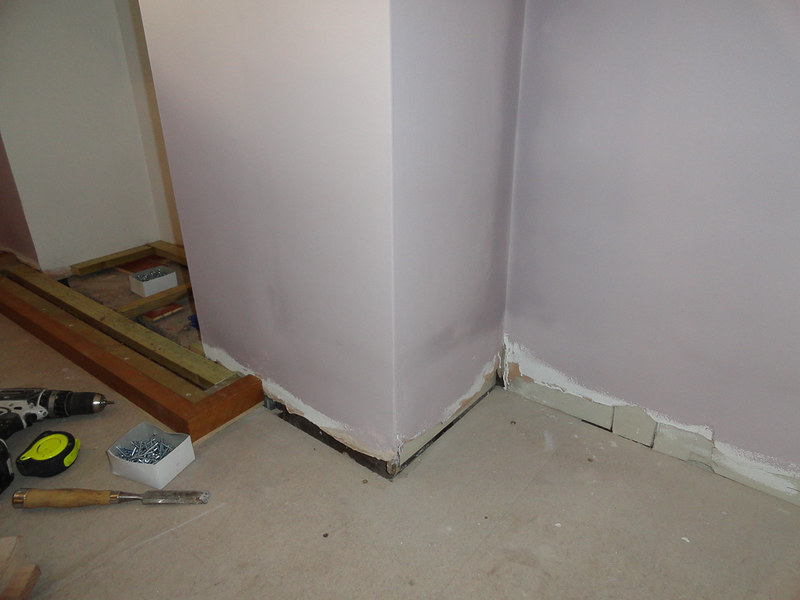
I decided to double the temperature, so it doesn't fall below 8 degrees now and these ones have cleared. I presume they are very very minor and would normally evaporate quicker than they accumulate or something.
Then I had a mattress leant against the wall, which created a pretty pattern:
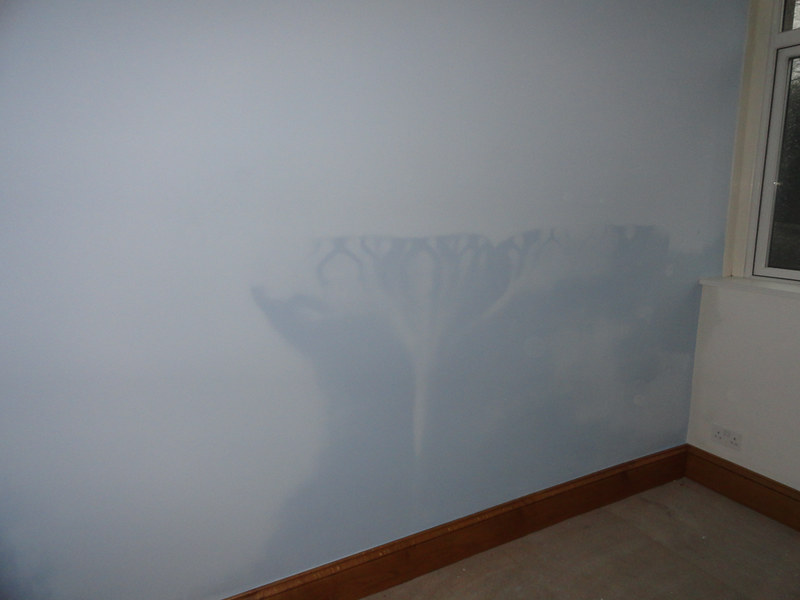
That was removed sharpish, though that wall has remained damp, though to a much lesser extend.
The main problem is the windows on that gable wall. Rain has been coming in the little one quite heavily, and bad patches around the other window too. There's a floor joist very close to the wall there and the gap to the wall was full of sandy plastery crap, so the water was wicking along the joist and generally causing havoc.
Window looking all wet:

Made a mess of the wall:
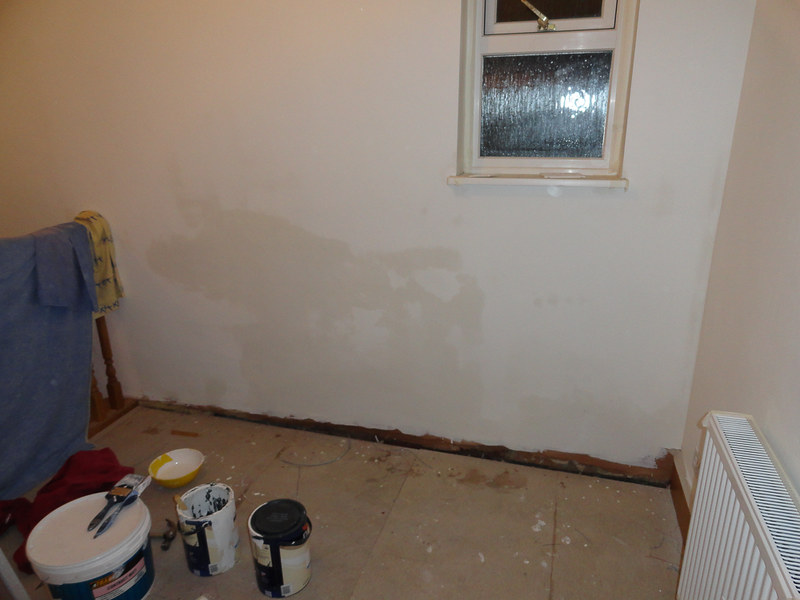
And wicked along into bedroom:
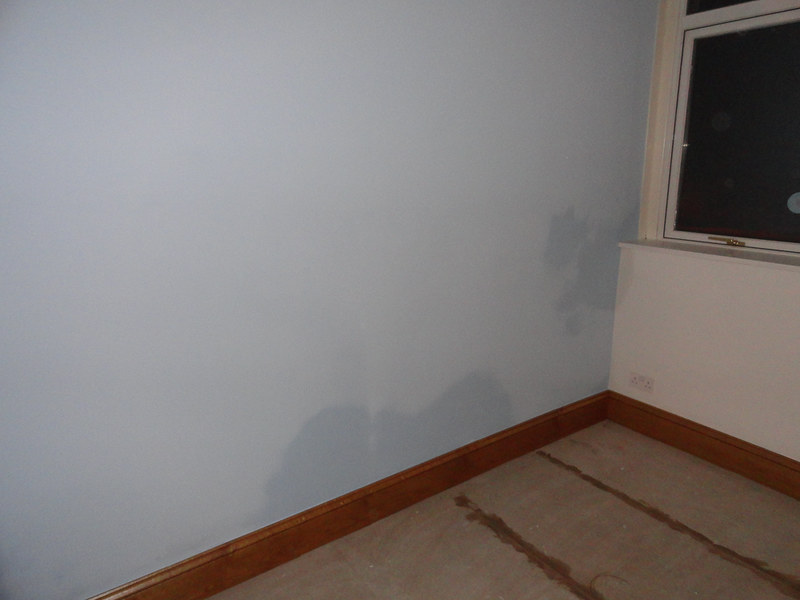
On that picture you can see the corner is also damp, a separate issue.
So over the weekend we hacked out the bricks above the lintels and fitted cavity trays so that water getting in above the windows is channelled out, rather than pissing into the house. The mortar was like mud in places it was so wet inside, it was like angle grinding through clay. Not overly happy about that. The inner leaf was bone dry and I was able to clear some crap in the cavity. We saw some of the newer wall ties which looked great and some of the old ones which had rusted completely.
Trays installed and wall bricked back up and nothing came in through that little window when it rained on Saturday and Sunday afternoons!
We also bricked up the old bathroom extract vent which is above that window and I suspect a cause of water getting in. Removed a few old pipes and filled any holes we could see. Above the second window we went a bit higher and sorted out some dodgy pointing that I suspect was letting water in.
We've also got damp in the kitchen and bathroom which appeared to be linked to a new extractor in the bathroom. My electrician fitted that without being asked, so we decided to inspect his handywork..... The extract pipe wasn't connected to the grill at all, the hole through the wall was angled up instead of down and instead of four screws and a silicone seal holding the grill in place there were four dabs of silicone! Awful job.
The inside of the pipe was soaking! So we made a lip to go inside the hole and used the grinder to add a drainage channel to bring the water out, replaced the grill with one that turns 90 degrees to limit water being blown in and screwed and sealed it. Should sort the kitchen and most of the bathroom.
I think we're left with that one patch in the little bedroom by the front window and part of the bathroom wall. Both are caused by rubbish pointing, so I've got those to sort out. Not sure I can reach one bit off my scaffold, so might have to buy some more to get a bit higher.
So overall I think we've probably got on top of it, though I need to wait and see. Dehumidifyer next weekend and I think I'll draw around the patches to see what happens. Hopefully we can finish the painting and get the carpets done sooner rather than later.....
Fitted the last of my speakers in the bedrooms and on the landing:
Unfortunately one of the laths decided to puncture the ceiling and chuck a lump of plaster out, so I had to replaster this bit and sand it out. All speakers are in now and tested. I've an audio multiplex on the way and need to spend some time wiring up the amplifiers and switches, and other inputs etc. I had a bit of a brain-wave last week; I'm going to try and get a bluetooth input setup so that I can pair my phone to the system, so once I'v worked that out I'll finalise the wiring setup and get everything working properly.
I finished off the door handles as I don't want to be doing messy jobs once carpets are in. From taking 6 hours over the first one I got it down to 70 minutes by the end. Door lock jig first up, then this:
It's a custom jig to restrict movement on the router whilst not interfering with the fence. Fence set for left-right distances, then plunge to full depth running the fence up both sides of the door. Auger bit through for the handle shafte, then auger bit to mash up the remaining depth, tidy up with a chisel inside, fit the lock, fit the handle, then mark and chisel for the catch on the frame. Just one left to do downstairs in the hallway now!
Finished doors:
Fitted a number of 'perfect-fit' blinds:
I say fitted, most need taking off and adjusting as the measuring instructions missed a vital check, so they don't fit where there's a high sill. Easy fix with the mitre saw, but it's going to write-off a blade. Good job I need a new one really. Apart from that, the blinds are pretty good. Nothing flash as they were cheap, but they've sorted a load of privacy issues and delayed having to sort curtains out.
Last bedroom has been painted, the brown has gone, so I don't feel sick in there, but now the girlfriend thinks it looks too purple FFS!!!
Added a mock-hearth to match the design in the other bedroom. Much quicker this time as I built the entire frame onto a piece of old 18mm flooring, added supports for the oak boards, then fixed the old bit of looring in the right place. No messing about getting the joints to match perfectly that way and the boards then went in a bit easier:
Really pleased with these, especially as they cost me nothing!
I had a few bits of the floor to fill in where I'd been scuppered by the old floor supporting stud walls. Cut various bits of wood to size:
Then filled any residual gaps with a wood dust and wood glue mix:
This bit my Dad reckoned I wouldn't be able to fill:
There's an L shaped bit dropped in with string at one end, one bit of the L sits on a joist, the end then interlocked with the board in the room on the right. Bit of ply in the gap underneath straddling the hole, held in place while I screwed it tight, then used that to support the filler piece. Easy. Only took me two hours to get it done.....
I then went back to Manchester and left my Mum touching up the paint, varnishing wood and generally tidying up after me and my Dad fitting skirtings in the last bedroom.
Then last Monday the carpet fitter arrived and I moved the last of our furniture over and sorted out the bedrooms. As I said, there's still the landing to do and I had to take a door off as we cocked up the thickness of carpet when working out what gaps to leave, but they got sorted this weekend and are back on now:
There's a few minor snagging jobs to do in the bedrooms, but the only major job left is the fitted wardrobes.
I was also allowed to remove the cardboard from the living room floor, as the house is now a clean zone! I wasn't allowed to take the covers off the sofas though, they have to stay until the stove is fitted. But I think this is the first time the floor has been visible, looks ace!
So that brings us up to this weekend. This weekend there was no visible progress, but we achieved a lot. I hope. As I mentioned earlier, we've been plagued by damp over the last few weeks, patches appeared and have gradually got bigger, then new patches have joined them. At it's worst most rooms were affected, but it hasn't helped having the boiler set to frost only during the weeks, I think that's 4 degrees, which caused these patches, amongst others:
I decided to double the temperature, so it doesn't fall below 8 degrees now and these ones have cleared. I presume they are very very minor and would normally evaporate quicker than they accumulate or something.
Then I had a mattress leant against the wall, which created a pretty pattern:
That was removed sharpish, though that wall has remained damp, though to a much lesser extend.
The main problem is the windows on that gable wall. Rain has been coming in the little one quite heavily, and bad patches around the other window too. There's a floor joist very close to the wall there and the gap to the wall was full of sandy plastery crap, so the water was wicking along the joist and generally causing havoc.
Window looking all wet:
Made a mess of the wall:
And wicked along into bedroom:
On that picture you can see the corner is also damp, a separate issue.
So over the weekend we hacked out the bricks above the lintels and fitted cavity trays so that water getting in above the windows is channelled out, rather than pissing into the house. The mortar was like mud in places it was so wet inside, it was like angle grinding through clay. Not overly happy about that. The inner leaf was bone dry and I was able to clear some crap in the cavity. We saw some of the newer wall ties which looked great and some of the old ones which had rusted completely.
Trays installed and wall bricked back up and nothing came in through that little window when it rained on Saturday and Sunday afternoons!
We also bricked up the old bathroom extract vent which is above that window and I suspect a cause of water getting in. Removed a few old pipes and filled any holes we could see. Above the second window we went a bit higher and sorted out some dodgy pointing that I suspect was letting water in.
We've also got damp in the kitchen and bathroom which appeared to be linked to a new extractor in the bathroom. My electrician fitted that without being asked, so we decided to inspect his handywork..... The extract pipe wasn't connected to the grill at all, the hole through the wall was angled up instead of down and instead of four screws and a silicone seal holding the grill in place there were four dabs of silicone! Awful job.
The inside of the pipe was soaking! So we made a lip to go inside the hole and used the grinder to add a drainage channel to bring the water out, replaced the grill with one that turns 90 degrees to limit water being blown in and screwed and sealed it. Should sort the kitchen and most of the bathroom.
I think we're left with that one patch in the little bedroom by the front window and part of the bathroom wall. Both are caused by rubbish pointing, so I've got those to sort out. Not sure I can reach one bit off my scaffold, so might have to buy some more to get a bit higher.
So overall I think we've probably got on top of it, though I need to wait and see. Dehumidifyer next weekend and I think I'll draw around the patches to see what happens. Hopefully we can finish the painting and get the carpets done sooner rather than later.....
Thanks chaps, it's coming together nicely now, but I've nto touched the garden or workshop yet, so still loads to do. Then the boss wants a bigger kitchen and a loft conversion doing, so I'll be busy for a while yet!
The damp doen't bother me too much, it's just a bit of water and it doesn't appear by magic. I'm confident that I've matched every bit of damp to a corresponding problem, so sorting it out should be OK. I'll start worrying when it's still there and I've run out of obvious solutions.
Which properties are you thinking of Hedgefinder? There's a few gone on recently, but I've not noticed any that stand out as exceptional value for doing up. I've seen the two new builds on the main street have come on the market today, they don't look too great looking at the plans, 4 beds over two floors which doesn't leave a lot of living space for a couple and their three kids.
I think there are some more going in behind there too. It might be that the developer was told what it had to look like from the front and then the internals have been fitted around that, it does look very in-keeping with the rest of the street from the front. Perhaps the money is in the other properties going behind.
They're better value than the flat that's on at £250 opposite that's sat unsold for about two years now though!
They're better value than the flat that's on at £250 opposite that's sat unsold for about two years now though!
Not a great deal to report from the weekend as not much happened and what did happen took longer than I hoped.
Tiled behind the dining room stove, pic shows just the back, but I've done the two sides too:
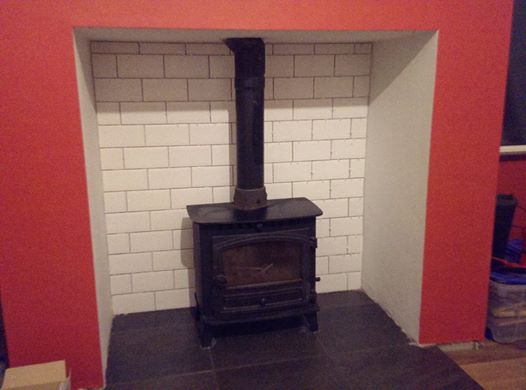
Looks pretty good and I've got some black grout coming this week so I can get it finished off.
I sorted out the last of the skirting in the lounge, needed to solder a few connectors before putting the last bit on; there's 5.1 surround wiring and plugs in the skirting. That's all sorted now and I tidied up the tv/ethernet cables coming in behind the TV, though that still isn't right, too many wires in not enough space!
I fitted the first ceiling rose and the living room light:

Really pleased with this, looks great!
Damp appears to be drying slowly, but it's hard to tell how much is fixed yet. How long is this likely to take to dry, weeks, months?
I'm away next weekend, so back in a fortnight; hopefully there'll be more visible progress on the damp. I'm going to clear the cavity down that side and fix a couple of bits of pointing if the weather is decent. I should also have the last of my AV kit arriving, so should be able to get most of that finished too if I have time.
Tiled behind the dining room stove, pic shows just the back, but I've done the two sides too:
Looks pretty good and I've got some black grout coming this week so I can get it finished off.
I sorted out the last of the skirting in the lounge, needed to solder a few connectors before putting the last bit on; there's 5.1 surround wiring and plugs in the skirting. That's all sorted now and I tidied up the tv/ethernet cables coming in behind the TV, though that still isn't right, too many wires in not enough space!
I fitted the first ceiling rose and the living room light:
Really pleased with this, looks great!
Damp appears to be drying slowly, but it's hard to tell how much is fixed yet. How long is this likely to take to dry, weeks, months?
I'm away next weekend, so back in a fortnight; hopefully there'll be more visible progress on the damp. I'm going to clear the cavity down that side and fix a couple of bits of pointing if the weather is decent. I should also have the last of my AV kit arriving, so should be able to get most of that finished too if I have time.
Gassing Station | Homes, Gardens and DIY | Top of Page | What's New | My Stuff