Our Little Durham Restoration Project...
Discussion


paulrockliffe said:
OK, it's rotating my photos again. I feel like we've been here before. Google Photos has them right, download to Windows has them right, upload they rotate. How do I stop it. I was going to post some more tonight, but I think I'll pause while someone tells me how to fix this?
Are they portrait or landscape?Thumbsnap doesn’t seem to like portrait
Thanks, yeah, they are portrait. We've definitely been here before, I wish I could remember how I stopped it last time! I just realised I went through a period of having motion picture turned on on my phone, so I also need to turn a load of micro videos into .jpegs too. It's never simple!
Anyway, after sorting out all the fire glass, I framed out between the bedroom/office and the second bathroom:
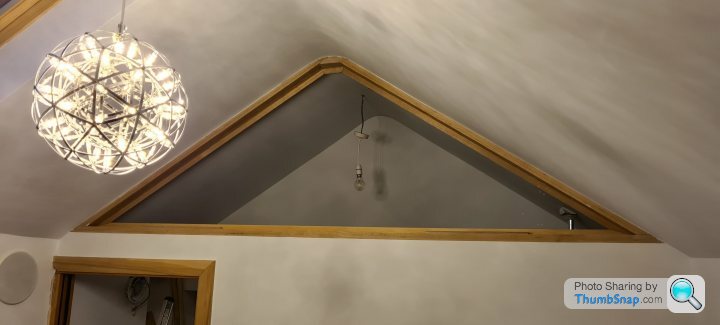
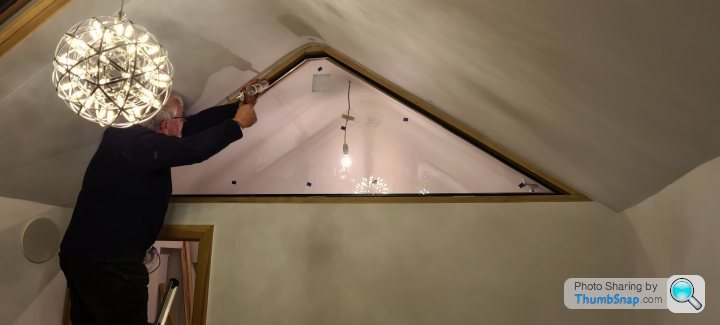
Then we lifted up a big awkward double glazed unit and I had my Dad gun it with some sealant:
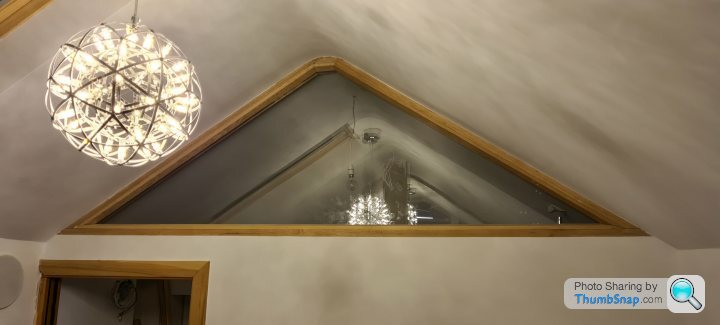
Before I fitted all the framing on the other side. Done:
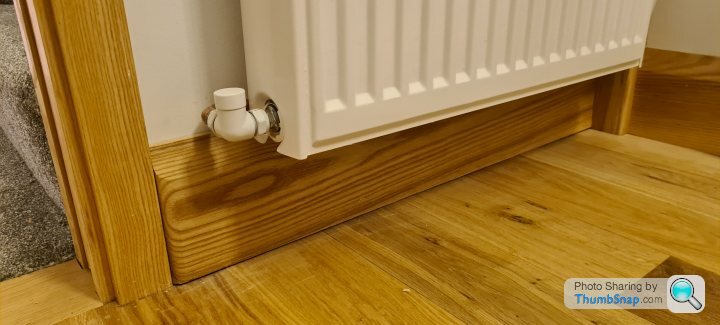
Next I planed in this bit of skirting. I've no idea why this £600 fire resistant pocket door frame comes with a liner that is only 15mm thick. Can you even buy skirtings that are only 15mm thick? Oh well I did a good job on this:
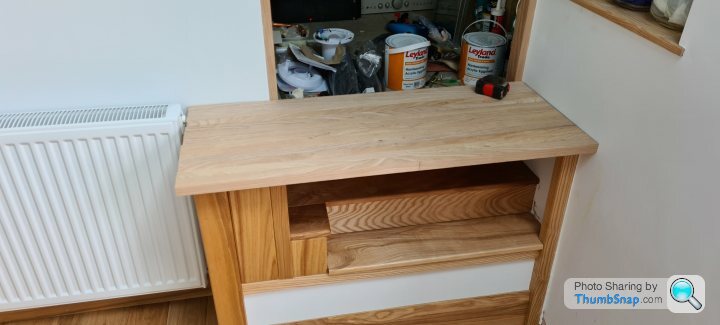
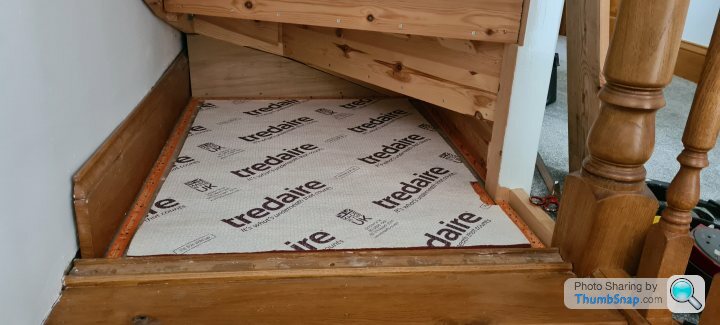
Then I finished off the cupboard steps that aren't steps because Building Regs:
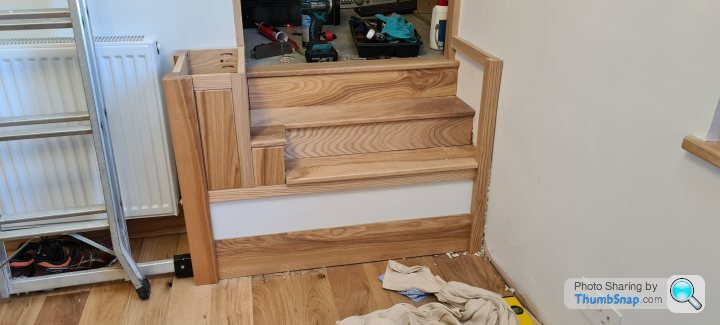
And glued up a load of strips to make a worktop that will sit on top of the steps:
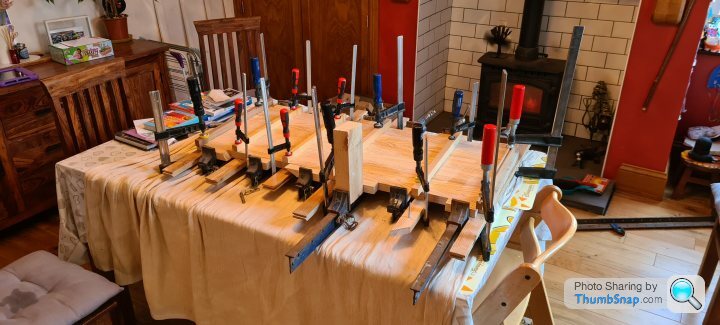
You can never have too many clamps!
Two years later and I was looking at that top only yesterday and thinking I really should trim it, plane it and finish it so it can be fitted.....
The occasional cupboard will be very occasional, the top will hinge up out of the way to access the steps that aren't steps, and provide a useful little surface when the room is used as a bedroom. I have a loose plan to make some little drawers that swing out of the step tread space too, but given how long it's taken me to get this far, this may not happen!
Anyway, after sorting out all the fire glass, I framed out between the bedroom/office and the second bathroom:
Then we lifted up a big awkward double glazed unit and I had my Dad gun it with some sealant:
Before I fitted all the framing on the other side. Done:
Next I planed in this bit of skirting. I've no idea why this £600 fire resistant pocket door frame comes with a liner that is only 15mm thick. Can you even buy skirtings that are only 15mm thick? Oh well I did a good job on this:
Then I finished off the cupboard steps that aren't steps because Building Regs:
And glued up a load of strips to make a worktop that will sit on top of the steps:
You can never have too many clamps!
Two years later and I was looking at that top only yesterday and thinking I really should trim it, plane it and finish it so it can be fitted.....
The occasional cupboard will be very occasional, the top will hinge up out of the way to access the steps that aren't steps, and provide a useful little surface when the room is used as a bedroom. I have a loose plan to make some little drawers that swing out of the step tread space too, but given how long it's taken me to get this far, this may not happen!
paulrockliffe said:
Thanks, yeah, they are portrait. We've definitely been here before, I wish I could remember how I stopped it last time!
I think stripping out all the photo properties and saving as a new image helps in some cases..paulrockliffe said:
I just realised I went through a period of having motion picture turned on on my phone, so I also need to turn a load of micro videos into .jpegs too. It's never simple!
That feature should be cosigned to bin on any phone it's a PITANext we're back into the bathroom, we have friends coming to stay and I've been informed that it's imperative that we have two (working) bathrooms. I don't know why exactly as we've had lots of visitors before and it's never been imperative before, but who am I to question. Also, I learned that outside bathrooms don't count, we still have that. I think it does count because the only reason we've never needed two bathrooms is that I use the one outside if the inside one is in use.
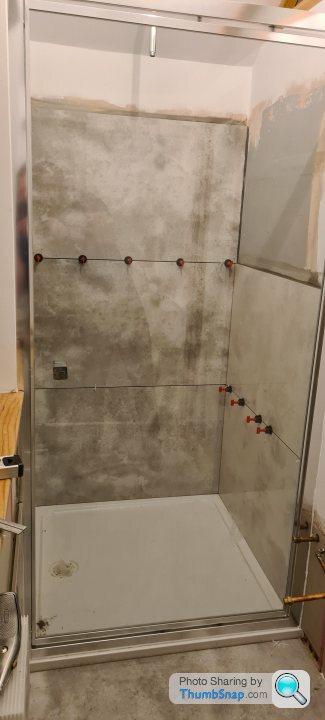
Started chucking tiles on the wall, these weren't as bad to work with as I expected, they mostly just needed to be cut down from 1.2m to about 1.0m and then they went on really easily. Just a pain to back-butter them and then lift them once they were covered in glue!
Floor next:
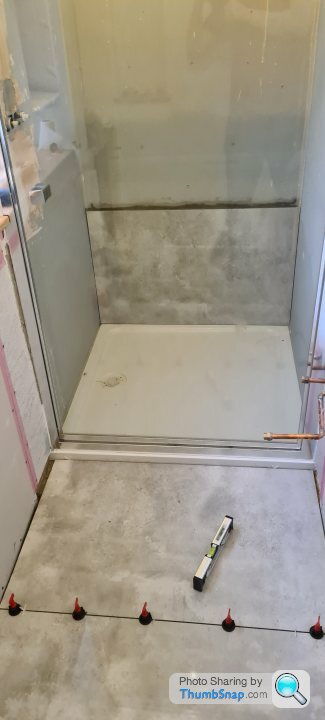
Actually, I guess I did the floor first looking at the pictures!
This was a bit tricker as I had to gauge the glue on the first tile so that the third tile was at the right height for the door threshold, no one likes a wonky floor:
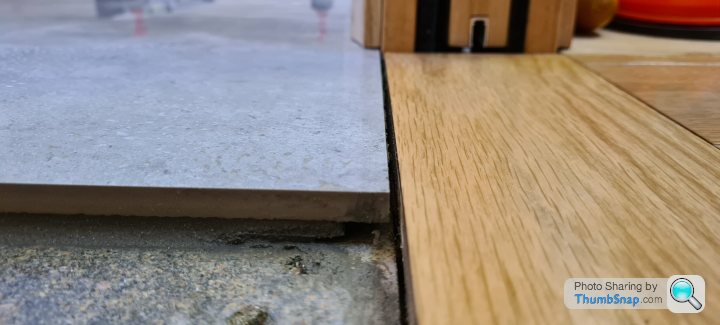
NAILED IT!
Shower controls:
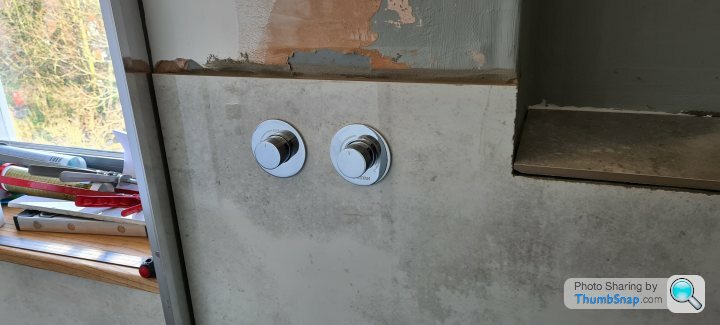
I learned from my first bathroom that the controls go next to the door so you can turn the shower on and off without getting a wet arm and leave the shower to warm up. This one takes a bit too long really to warm up as it's a fairly long run of 22mm, but I did add some extra bonus plumbing so that when next I do the bathroom below i can turn it into a heated return circuit which should help.
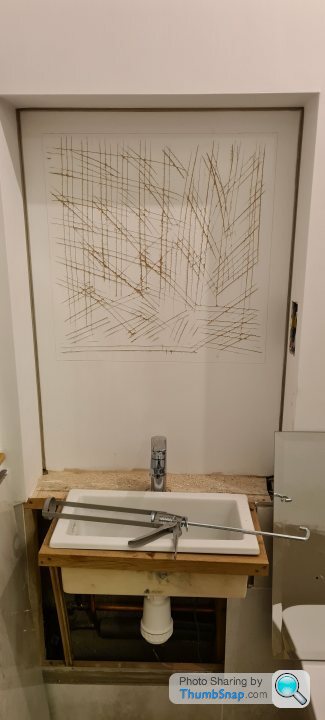
Plumbing for the sink in next:
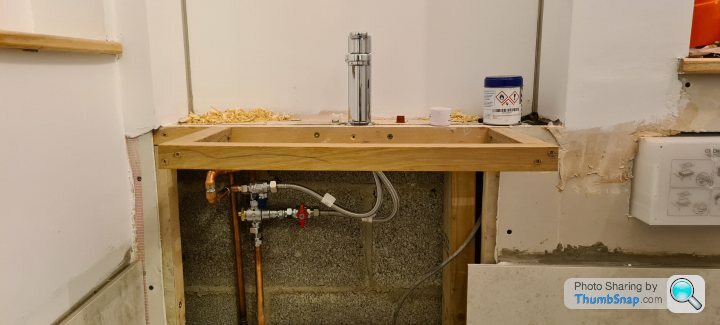
Then the sink itself:
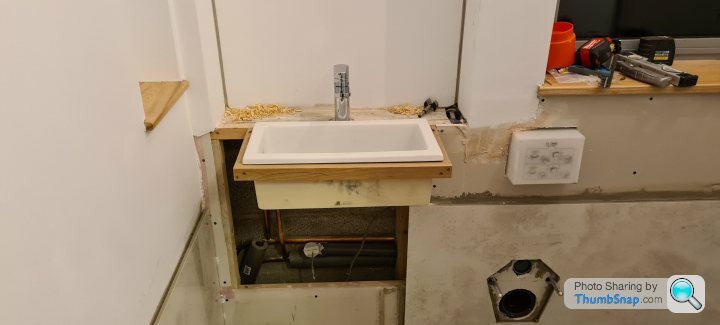
The sink is a laboratory sink, it's key attributes are that it is deep and wide, so you can wash your hands without splashing water everywhere, but it is shallow, so when combined with the recess into the wall the sink protrudes about 250mm into the room, which is only 1m deep. Perfectly functional and quite quirky.
The install is a basic wooden frame for now as I hadn't got around to templating the complicated worktop shape or sorting out a proper top.
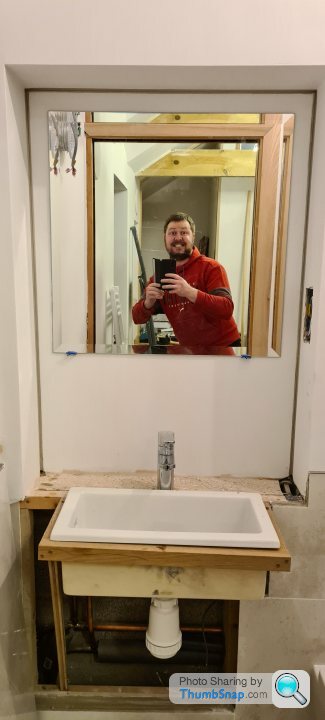
We'll need a mirror, so scratch up the wall:
 [url]
[url]
Two pins in the wall to support it, then glue it on:
 |https://thumbsnap.com/W6jLg2NQ[/url]
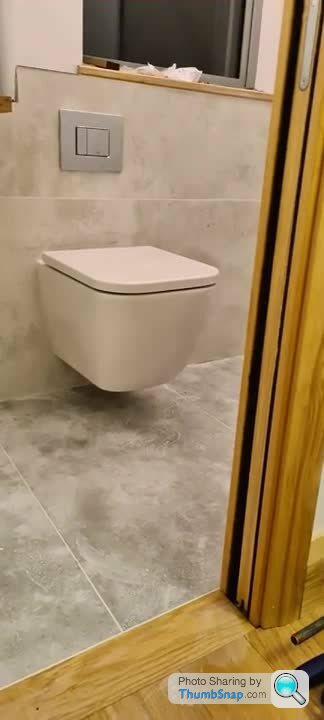
Toilet was next, really surprised how solid this is, I suppose they know what they're doing, but it just didn't look like it would end up absolutely rock-solid. Again to pinch a bit of space, the cistern was recessed into the timber frame and the toilet is a short-projection one, so there's just enough room to step past it into the shower space:
All great progress, I got everything working, all the tiling finish and trim on and it's all fully functional the day before our visitors arrived. So I had a shower......
Started chucking tiles on the wall, these weren't as bad to work with as I expected, they mostly just needed to be cut down from 1.2m to about 1.0m and then they went on really easily. Just a pain to back-butter them and then lift them once they were covered in glue!
Floor next:
Actually, I guess I did the floor first looking at the pictures!
This was a bit tricker as I had to gauge the glue on the first tile so that the third tile was at the right height for the door threshold, no one likes a wonky floor:
NAILED IT!
Shower controls:
I learned from my first bathroom that the controls go next to the door so you can turn the shower on and off without getting a wet arm and leave the shower to warm up. This one takes a bit too long really to warm up as it's a fairly long run of 22mm, but I did add some extra bonus plumbing so that when next I do the bathroom below i can turn it into a heated return circuit which should help.
Plumbing for the sink in next:
Then the sink itself:
The sink is a laboratory sink, it's key attributes are that it is deep and wide, so you can wash your hands without splashing water everywhere, but it is shallow, so when combined with the recess into the wall the sink protrudes about 250mm into the room, which is only 1m deep. Perfectly functional and quite quirky.
The install is a basic wooden frame for now as I hadn't got around to templating the complicated worktop shape or sorting out a proper top.
We'll need a mirror, so scratch up the wall:
[url]Two pins in the wall to support it, then glue it on:
|https://thumbsnap.com/W6jLg2NQ[/url]Toilet was next, really surprised how solid this is, I suppose they know what they're doing, but it just didn't look like it would end up absolutely rock-solid. Again to pinch a bit of space, the cistern was recessed into the timber frame and the toilet is a short-projection one, so there's just enough room to step past it into the shower space:
All great progress, I got everything working, all the tiling finish and trim on and it's all fully functional the day before our visitors arrived. So I had a shower......
And there the good news ended!
I couldn't get the shower temperature to settle properly, no amount of messing with the valve setup helped and I started to regret ignoring the instructions, "Ensure the back of this valve is available for maintenance."
Then there's this: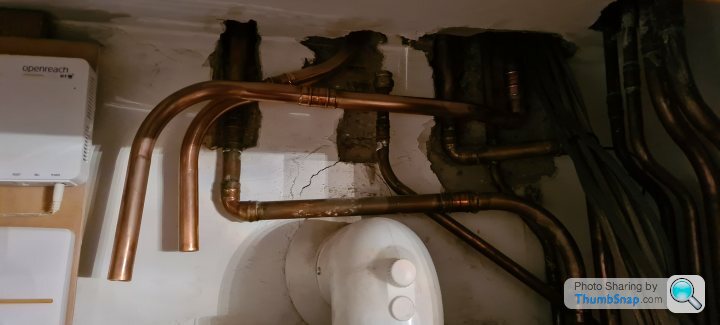
For boring reasons relating to the boiler bursting a heat exchanger and some other things I can't really remember, a lot of the plumbing was done while the new pipes weren't connected to anything. I've never had a solder joint leak before, but let's just say lessons have been learned. Always test your pipes before you cover them up!
Before I could fix the shower temperature, I realised there was water dripping in the bathroom below from under the shower. It could be anything, the valve, the pipes, the waste. FFS.
I put it to one side, it wasn't getting sorted while we had visitors, so I looked at the instructions for the shower valve. Conspicuous by their absence was any instruction on which inlet was hot and which was cold and I'd obviously not given that any thought at the time. Of course it matters, how could it not. The only crumb of consolation was that when I downloaded the instructions they'd been updated to include explicit instructions on how not to screw this up, so I knew I wasn't alone.
Then I took the sink out to template the worktop, put it back in a little enthusiastically and smashed the corner off it. It's not installed in my workshop, wit the corner glued back on, but this was the start of my rapid decline in productivity. I was sick of it and I really couldn't face fixing this leak. It could be anywhere and it was going to be a total pain in the arse to sort.
ferret50 said:
Do not worry about timescale, I'm eight years in and we still have no doors upstairs!

Ha ha, nice work, I was looking at the end of the bathroom cabinet yesterday, I built it 10 years ago. I really do need to make the end panel for that some day soon. It'll take me 30 minutes plus an hour of painting and I have the timber. Actually I'm sure I have a piece of MSF somewhere that was cut to size for it too. LOLI'm not worried about how long this has taken, just annoyed that I have other things I want to get on with now. If I hadn't done it myself I'd still be waiting for a builder.
B'stard Child said:
paulrockliffe said:
Thanks, yeah, they are portrait. We've definitely been here before, I wish I could remember how I stopped it last time!
I think stripping out all the photo properties and saving as a new image helps in some cases..paulrockliffe said:
I just realised I went through a period of having motion picture turned on on my phone, so I also need to turn a load of micro videos into .jpegs too. It's never simple!
That feature should be cosigned to bin on any phone it's a PITAHere's my smashed sink, FFS!

At least all this plumbing works! Though I had to turn all the water off in the loft as testing the shower revealed it was a continuous leak - pipes rather than the shower waste - which I think was better. I had access to the pipes with an endoscope via the toilet, but it revealed nothing, so was fairly confident it was somewhere around the shower valve.
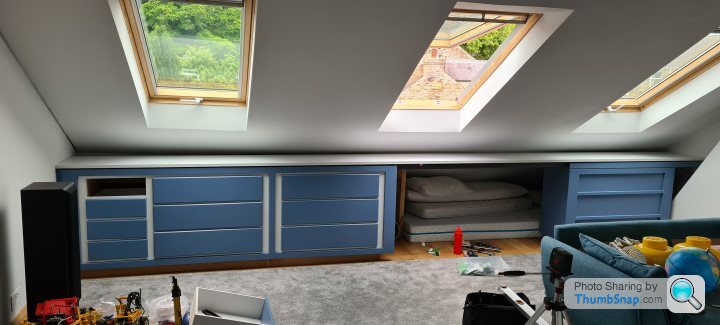
But anyway, visitors came and rooms were tested, the dormer is almost perfect, maybe one day this is where I'll sleep:
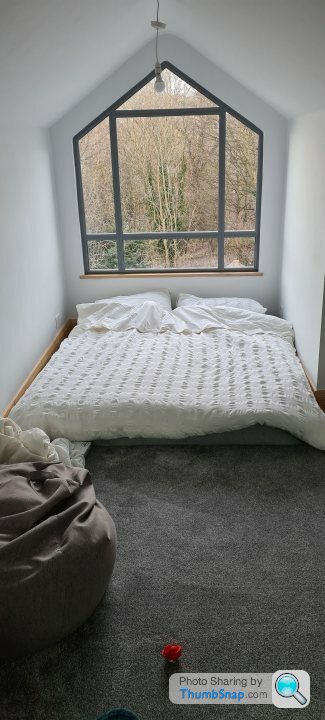
And all the extra work that went into sneaking enough space in the dressing room to allow it to be used as a bedroom has paid off, there's plenty of room to get around the bed when it's in use:
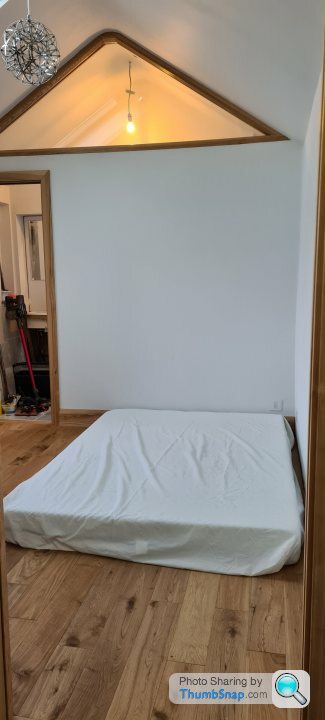
Two years later and we still haven't got the beds for these mattresses!
It's funny that the whole kick-off for this project was my daughter being born and us losing our guest bedroom. She's turning 7 in April and she's still sharing the smallest room in the house with her brother, so we've had the guest room all along. I'm supposed to be sorting her room our properly this year, but we'll see.....
At least all this plumbing works! Though I had to turn all the water off in the loft as testing the shower revealed it was a continuous leak - pipes rather than the shower waste - which I think was better. I had access to the pipes with an endoscope via the toilet, but it revealed nothing, so was fairly confident it was somewhere around the shower valve.
But anyway, visitors came and rooms were tested, the dormer is almost perfect, maybe one day this is where I'll sleep:
And all the extra work that went into sneaking enough space in the dressing room to allow it to be used as a bedroom has paid off, there's plenty of room to get around the bed when it's in use:
Two years later and we still haven't got the beds for these mattresses!
It's funny that the whole kick-off for this project was my daughter being born and us losing our guest bedroom. She's turning 7 in April and she's still sharing the smallest room in the house with her brother, so we've had the guest room all along. I'm supposed to be sorting her room our properly this year, but we'll see.....
Most people would have immediately got on with sorting out that leak, but not me, couldn't face the thought of smashing things up so I left it. We'll see how long when we get to those pictures, but we're in February 2022 when we had visitors and these next pictures are the end of April so I was obviously properly pissed off!
Posh ply and glue:
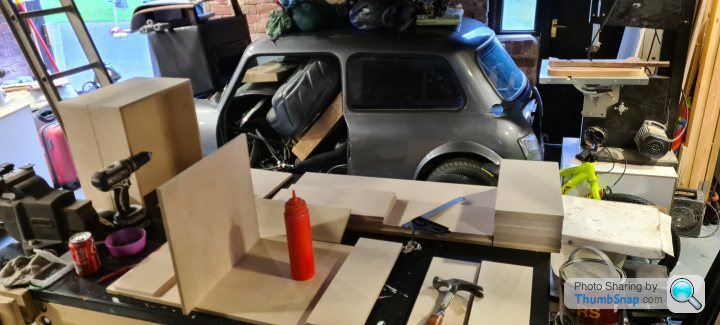
Lots of drawer boxes constructed and painted:
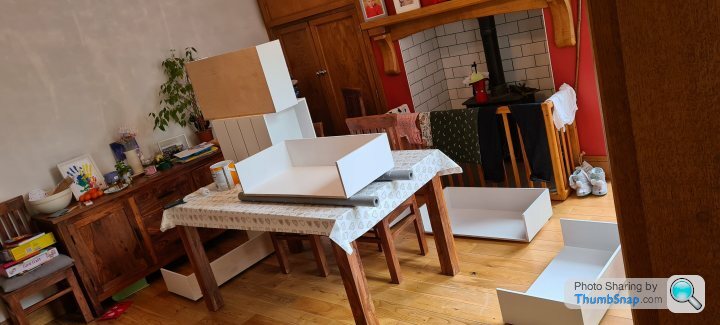
Drawer fronts painted:
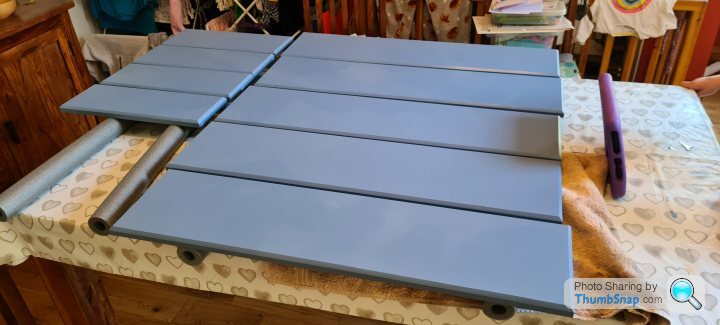
Then onto a bit more construction:
Posh ply and glue:
Lots of drawer boxes constructed and painted:
Drawer fronts painted:
Then onto a bit more construction:

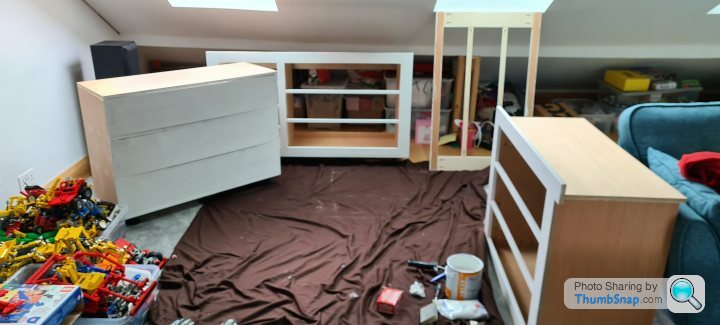
I got the face frames painted up and started fitting things. At this point I realised I wasn't happy with the paint at all. It looked decent when I painted it downstairs, but it's just so much lighter up in the loft that it just isn't dark enough, especially with the white framing. Maybe it'll look better with the drawers in, but deep down I know it's all to paint again.
Next there ensured a whole other level of unnecessary complication, remember I said some of these drawers would slide? Well next up I had to reinforce a pair of sliding door tracks with some angle-steel and mount it all on some blocks of wood to span the gap:
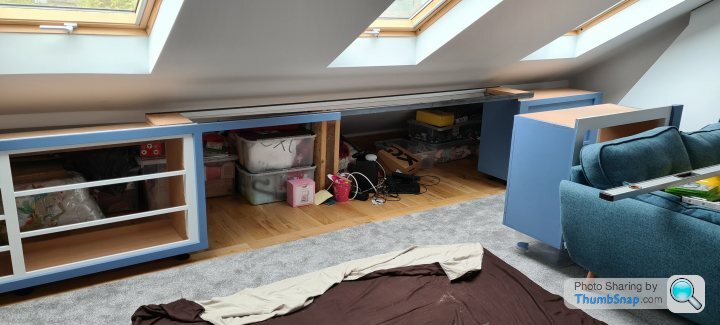
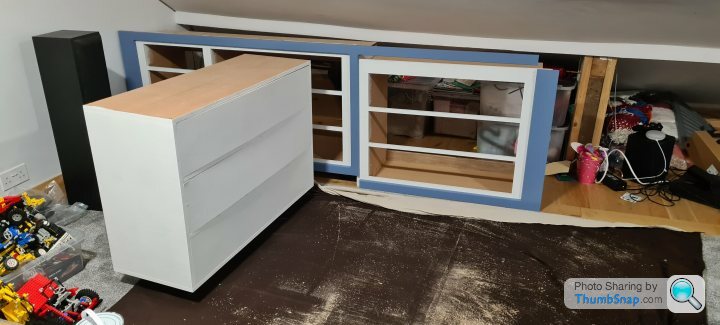
The cabinet goes on like this:
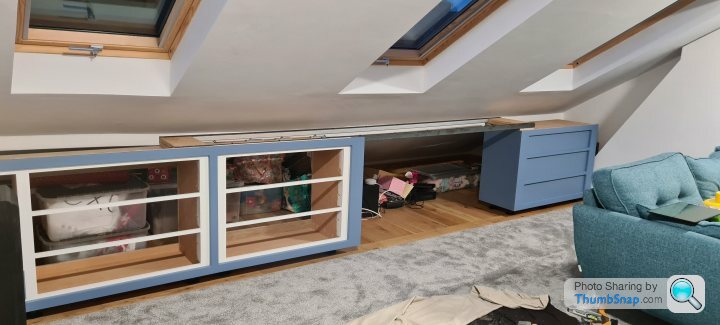
And slides over behind the sofa like this:
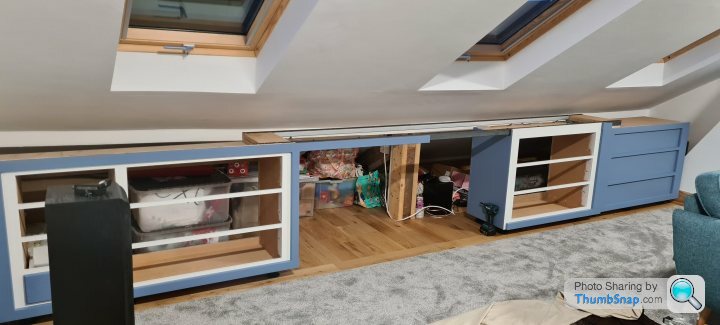
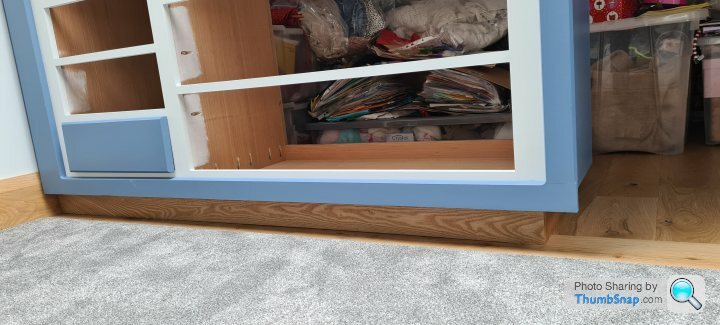
This might be the daftest thing I've ever done, it's certainly one of the coolest. Yes, it would have been easier to just have it pull out into the room, but you would have been able to tell and the drawers would want to move in use. It's ended up being filled with Christmas decorations, so access is sporadic, so I added some kitchen cabinet feet that can be wound out for extra stability and wound up to move it.
You can't tell it is anything other than 3-bay cabinet, there's a slightly more open join where the frames part, but you would just think I'd cut the timber a smidge too short if you noticed that.
Then I added some plinth:
And a kitchen worktop was split down the middle to go over the top and it all looks like this:
100% needs to be repainted, though of course I know that because I've since done it. The sofa covers most of the gap, there's a crawl space left which gets a door over it eventually, with a few bits of extra trim.
You'll notice a few things:
1. There's a drawer missing. Screwed that up a fraction and because I always go way too tight on tolerances it had to have a couple of mm trimmed off its height. I managed to get that drawer fitted......er...... yesterday.
2. There's a mattress under there. Yes it's a double, yes I've slept there, no I didn't die from breathing in my own CO2, yes it's super super comfortable.
Next there ensured a whole other level of unnecessary complication, remember I said some of these drawers would slide? Well next up I had to reinforce a pair of sliding door tracks with some angle-steel and mount it all on some blocks of wood to span the gap:
The cabinet goes on like this:
And slides over behind the sofa like this:
This might be the daftest thing I've ever done, it's certainly one of the coolest. Yes, it would have been easier to just have it pull out into the room, but you would have been able to tell and the drawers would want to move in use. It's ended up being filled with Christmas decorations, so access is sporadic, so I added some kitchen cabinet feet that can be wound out for extra stability and wound up to move it.
You can't tell it is anything other than 3-bay cabinet, there's a slightly more open join where the frames part, but you would just think I'd cut the timber a smidge too short if you noticed that.
Then I added some plinth:
And a kitchen worktop was split down the middle to go over the top and it all looks like this:
100% needs to be repainted, though of course I know that because I've since done it. The sofa covers most of the gap, there's a crawl space left which gets a door over it eventually, with a few bits of extra trim.
You'll notice a few things:
1. There's a drawer missing. Screwed that up a fraction and because I always go way too tight on tolerances it had to have a couple of mm trimmed off its height. I managed to get that drawer fitted......er...... yesterday.
2. There's a mattress under there. Yes it's a double, yes I've slept there, no I didn't die from breathing in my own CO2, yes it's super super comfortable.

paulrockliffe said:
And there the good news ended!
I couldn't get the shower temperature to settle properly, no amount of messing with the valve setup helped and I started to regret ignoring the instructions, "Ensure the back of this valve is available for maintenance."
Then there's this:
For boring reasons relating to the boiler bursting a heat exchanger and some other things I can't really remember, a lot of the plumbing was done while the new pipes weren't connected to anything. I've never had a solder joint leak before, but let's just say lessons have been learned. Always test your pipes before you cover them up!
Before I could fix the shower temperature, I realised there was water dripping in the bathroom below from under the shower. It could be anything, the valve, the pipes, the waste. FFS.
Unfortunately we all learn that same lesson you almost have to do it to realise just how important it is to I couldn't get the shower temperature to settle properly, no amount of messing with the valve setup helped and I started to regret ignoring the instructions, "Ensure the back of this valve is available for maintenance."
Then there's this:
For boring reasons relating to the boiler bursting a heat exchanger and some other things I can't really remember, a lot of the plumbing was done while the new pipes weren't connected to anything. I've never had a solder joint leak before, but let's just say lessons have been learned. Always test your pipes before you cover them up!
Before I could fix the shower temperature, I realised there was water dripping in the bathroom below from under the shower. It could be anything, the valve, the pipes, the waste. FFS.
1. Keep access to stuff like pipework, valves etc
2. Minimise the number of joints in any area where access is going to be tricky
I went thro 6m of 15mm copper pipe making a simple 1.5m section of pipework with only bends to avoid using any solder joints as access was going to be an utter b
 h and I couldn't work out a way to make access easier.
3. When fitting isolators to feeds to make future maintenance easier than turning off whole house water - fit full flow ones
Then it was time. It's July now, so we're a solid 5 months of prevarication and denial further on, I bit the bullet and decided to try to get the shower sorted.
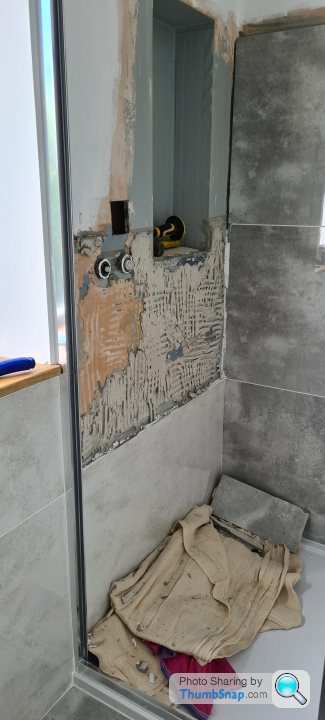
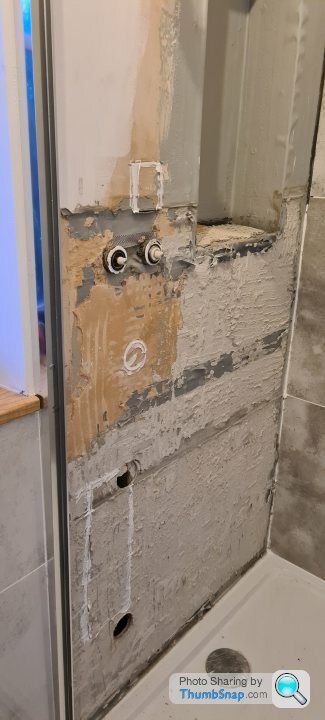
My plan was to basically start with wherever was easiest and hope for the best, so I cut a hole in the cement board just above the tile, maybe it's leaking from the valve? It isn't, but I can get an endoscope down to the pipework and I can see a drip!
Good news, I know what will fix it, the bad new is a couple of tiles are in the way. I order new tiles and get the tools out:
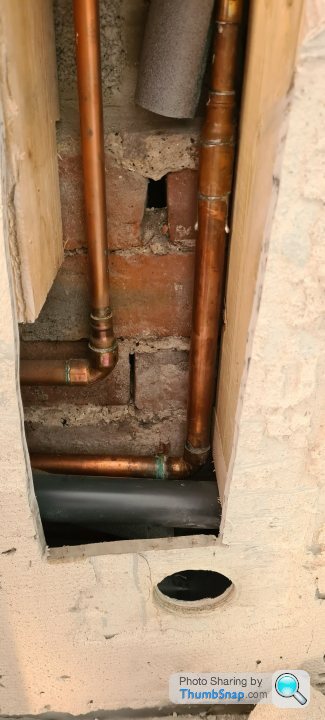
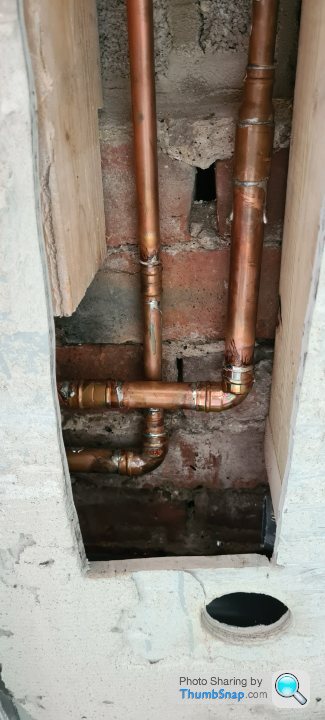
For some reason I drilled a hole a hole in next, I guess I wanted a proper look, maybe I thought I could fix it through the hole or something daft. Then I must have remembered about the shower valve and realised if I swapped the pipes over here I was getting two birds with one stone? You can see the leaky joint here:
Pipes swapped around and joints tested:
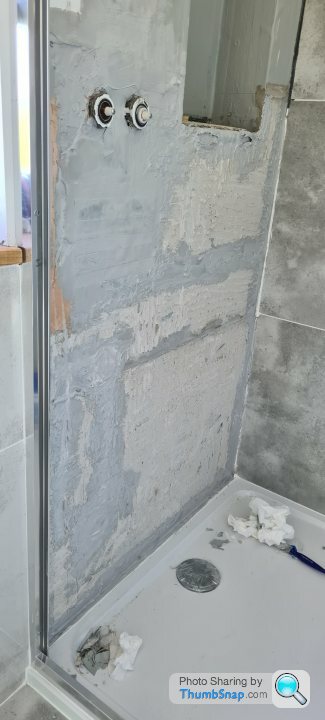
Then I refitted all the bits I'd cut out with silicone:
And went back over it all with tanking stuff. It's like I was never there.....
My plan was to basically start with wherever was easiest and hope for the best, so I cut a hole in the cement board just above the tile, maybe it's leaking from the valve? It isn't, but I can get an endoscope down to the pipework and I can see a drip!
Good news, I know what will fix it, the bad new is a couple of tiles are in the way. I order new tiles and get the tools out:
For some reason I drilled a hole a hole in next, I guess I wanted a proper look, maybe I thought I could fix it through the hole or something daft. Then I must have remembered about the shower valve and realised if I swapped the pipes over here I was getting two birds with one stone? You can see the leaky joint here:
Pipes swapped around and joints tested:
Then I refitted all the bits I'd cut out with silicone:
And went back over it all with tanking stuff. It's like I was never there.....
B'stard Child said:
Unfortunately we all learn that same lesson you almost have to do it to realise just how important it is to
1. Keep access to stuff like pipework, valves etc
2. Minimise the number of joints in any area where access is going to be tricky
I went thro 6m of 15mm copper pipe making a simple 1.5m section of pipework with only bends to avoid using any solder joints as access was going to be an utter bh and I couldn't work out a way to make access easier.
3. When fitting isolators to feeds to make future maintenance easier than turning off whole house water - fit full flow ones
I do usually bend the pipes, but this run goes through a timber frame and around a corner, so there's no way to get the pipes in without putting joints in. I did minimise their use, but I should have at least made sure I could test them.1. Keep access to stuff like pipework, valves etc
2. Minimise the number of joints in any area where access is going to be tricky
I went thro 6m of 15mm copper pipe making a simple 1.5m section of pipework with only bends to avoid using any solder joints as access was going to be an utter b
h and I couldn't work out a way to make access easier.3. When fitting isolators to feeds to make future maintenance easier than turning off whole house water - fit full flow ones
I have full bore isolators, but they turn off the whole bathroom. The sink has it's own, again they're full-bore, the toilet has it's own too. It's just the way the layout works the shower is at the end of the run and the toilet is T-d off the shower cold, so it wasn't really possible to add an isolator that does just the shower and have it accessible.
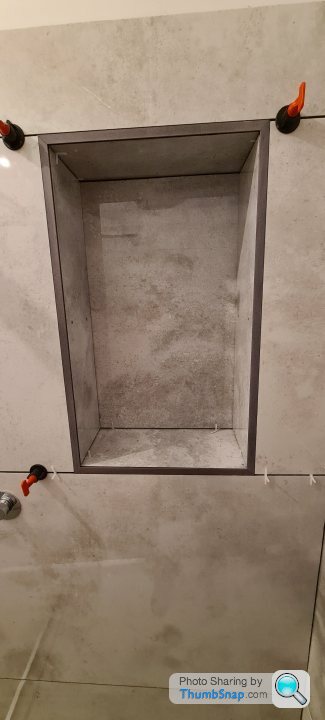
Enthused by my success I cracked on with finishing the tiling:
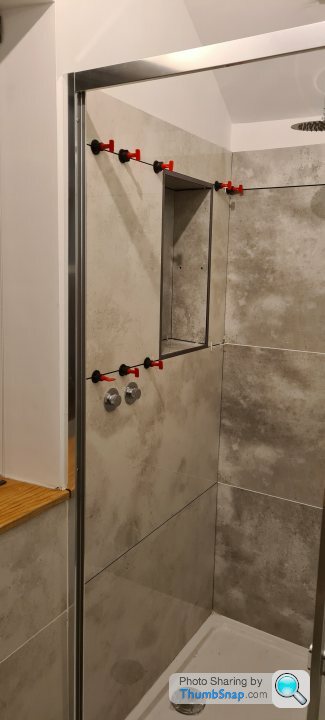
Including this recess that I still haven't ordered the glass shelf for:
The sink had been templates and I popped in to see if the local stone mason had a suitable offcut. They did and this was the result:
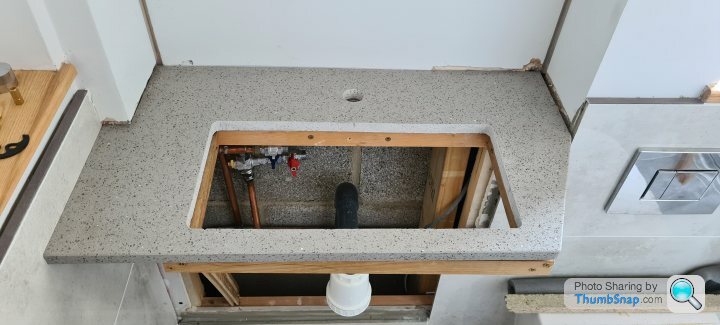
Sink, tap and the first part of the cabinet went in too:
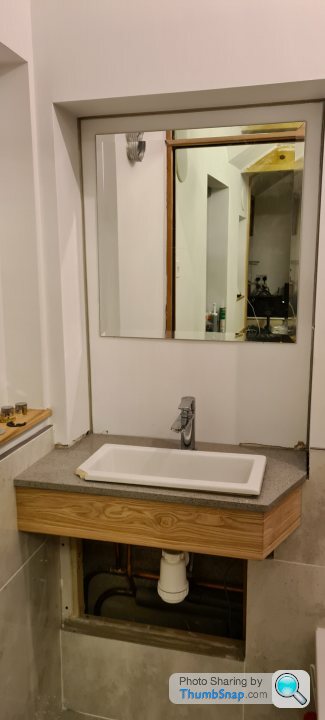
Then I had a shower! And it was the right temperature!
Ironically, we're now almost 2 years on from that time when it was imperative that we had two bathrooms and I'm the only person that has ever used the shower. I don't know why I bother sometimes!
Including this recess that I still haven't ordered the glass shelf for:
The sink had been templates and I popped in to see if the local stone mason had a suitable offcut. They did and this was the result:
Sink, tap and the first part of the cabinet went in too:
Then I had a shower! And it was the right temperature!
Ironically, we're now almost 2 years on from that time when it was imperative that we had two bathrooms and I'm the only person that has ever used the shower. I don't know why I bother sometimes!
Gassing Station | Homes, Gardens and DIY | Top of Page | What's New | My Stuff