Our Little Durham Restoration Project...
Discussion


Lynch91 said:
This looks really good, I initially hadn't realised that those were tiles not floor boards! Any chance you have a link for them?
Just one other thing, unless you chop the skirting you are going to need a lorry as a sprinter lwb has a load bay of 4.5m
The tiles are these:Just one other thing, unless you chop the skirting you are going to need a lorry as a sprinter lwb has a load bay of 4.5m
http://www.betterbathrooms.com/bathroom-tiles/bath...
You should note that although their website (and the order picking software) says there's three in a box, there's actually four. Bear that in mind if you were to order them or you'll end up returning a few boxes! Also, 10 boxes weighs about 300kg and will bottom out the suspension of a Ford Focus. Perhaps the most important advice I can give you is that if you collect from their warehouse in Leigh they'll charge you a price that is a good bit lower than the website; I paid £24 a box rather than the £30 that's on the website and the same thing happened when I went back for matching wall tiles. I didn't ask for a discount either.
The tiles are really very nice. We struggled to find something that was nice and that wasn't slippery, these have a slightly textured surface. We didn't want white or black and a colour wouldn't work because if you decide to redecorate it's new tiles time. These are perfect.
My Dad is cutting the skirting to length as I type and sorting them out for each room according to my spreadsheet, so they will mostly all fit in. There's one length that is 5m long, it'll have to go on the roof of my Dad's camper van I think.
Ha ha, there are spreadsheets for everything, it's the only way to make sure the right hand knows what the left hand is thinking.
Each piece of skirting is laid out on the sheet as a border along some cells so my Dad and the woodman can see exactly where each one goes in the house. The length is then marked and the sheet sums all the lengths by room and gives a total. It means if I get something wrong my Dad should spot it and it means the woodman has made sure all the lengths fit onto the lengths supplied and I won't be making up one wall with a load of off-cuts.
Each piece of skirting is laid out on the sheet as a border along some cells so my Dad and the woodman can see exactly where each one goes in the house. The length is then marked and the sheet sums all the lengths by room and gives a total. It means if I get something wrong my Dad should spot it and it means the woodman has made sure all the lengths fit onto the lengths supplied and I won't be making up one wall with a load of off-cuts.
He's this weeks update for you all. Managed to get quite a lot done, but everything takes so much longer when it's going back in, so sometimes it doesn't seem like I've managed to do all that much. I've still got plenty of pictures for you though!
I'm still working on the bathroom, it's taking longer than I'd hoped. If you've seen my other thread you'll know I've been pratting about trying to fix a couple of weeping connections on my shower. Still not there, but have a few things to try next weekend so hopefully it won't delay me any more. Because of that I've not been able to get the last plasterboard on, so I can't fir the shower screen or start tiling.
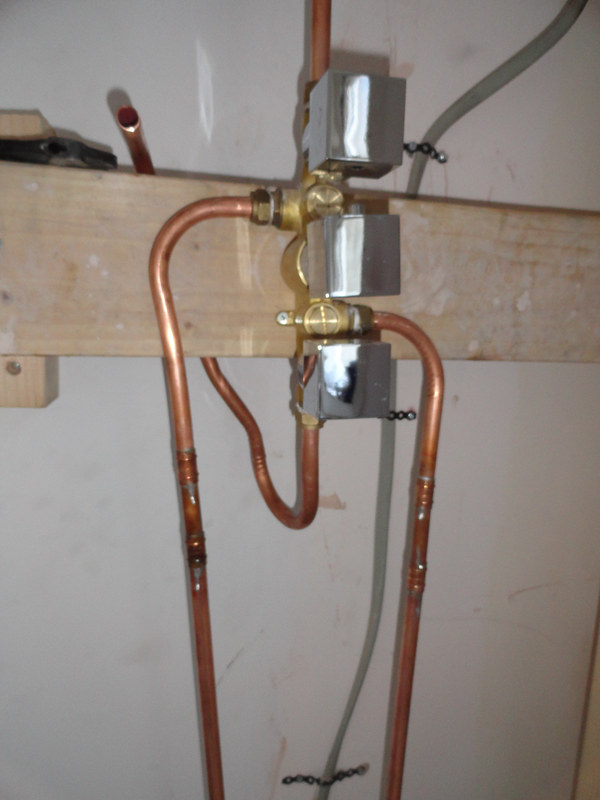
I must have spent three hours bending two bits of pipe to get to this point:
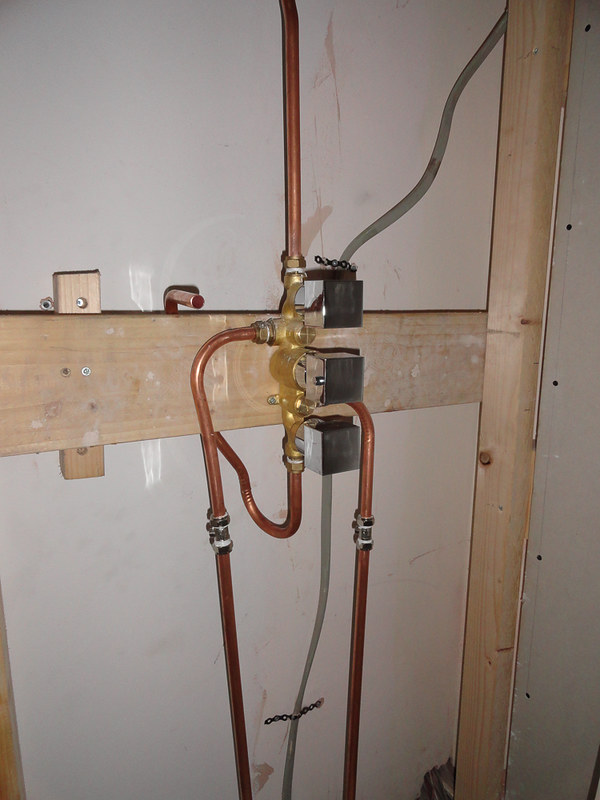
I fired up the boiler and filled a bucket with lovely hot water, so now I'm reasonably confident we'll have good flow to the shower heads. Then someone on here pointed out that those isolators will restrict the flow and given that they're going to be plasterboarded in, I decided to crack out the blowtorch again:
I also did my first ever grouting. Think it went ok, but I guess I won't know for sure for a while. Looks great anyway:
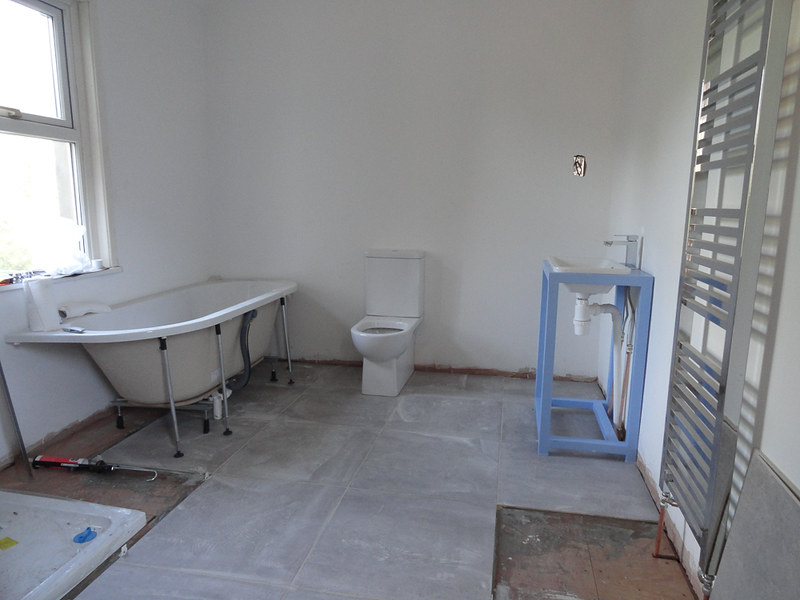
The basin is fully plumbed in, though I need to swap the trap as that one is a 40mm one on a 32mm thread, so it leaks a tiny bit. It was great to hear the water flowing under the floor and see it flying out of the downspout into the drain. A little disconcerting how noisy the waste was, but I'm hoping when the bath is connected it'll be a bit quieter. The toilet isn't plumbed in yet, I need to tile that back wall first....
I ran up the central heating on Saturday as it was a bit cold and I wanted to see what it was like, I had to turn the boiler downs as the towel rails were too hot to touch, so shouldn't have any problems keeping warm.
Still a lot of work to do in the bathroom, but I'm confident it'll be finished in a fortnight now.
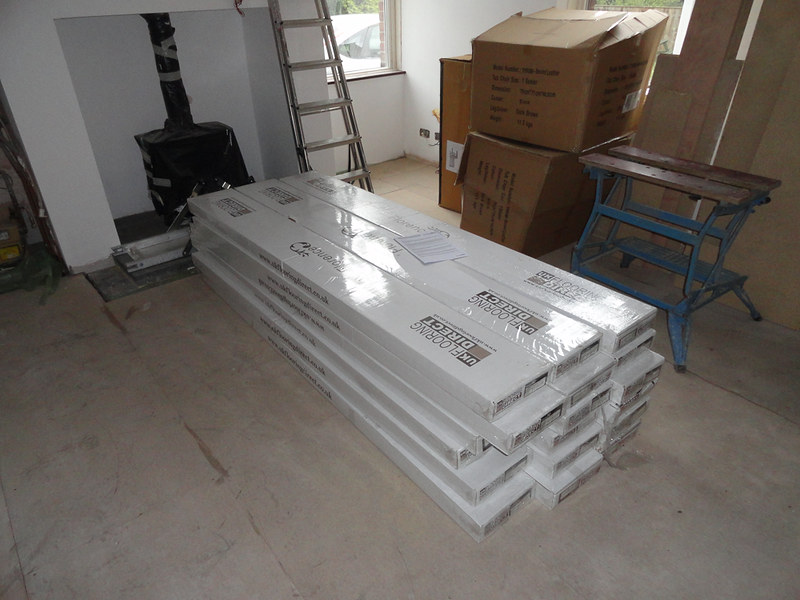
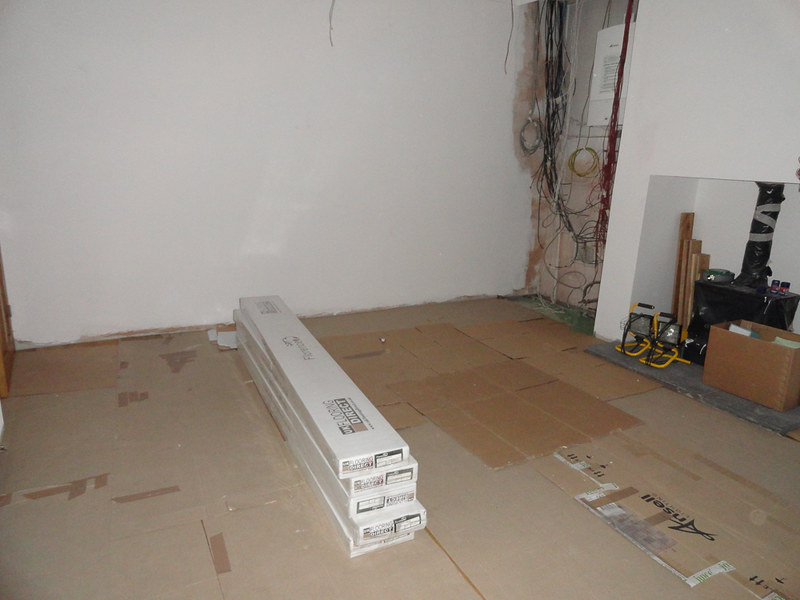
Oak floor has arrived, two days after ordering! We managed to negotiate a decent discount, free Tonguetite screws and free Saturday delivery, so I man-handled a cubic metre of wood into the house and had a play about. If you've never seen a cubic metre of wood, imagine this picture with another 6 packs next to it:
We'd had a sample and really liked it, turns out it wasn't representative and what we've ordered has more detail and better colour and looks absolutely stunning!
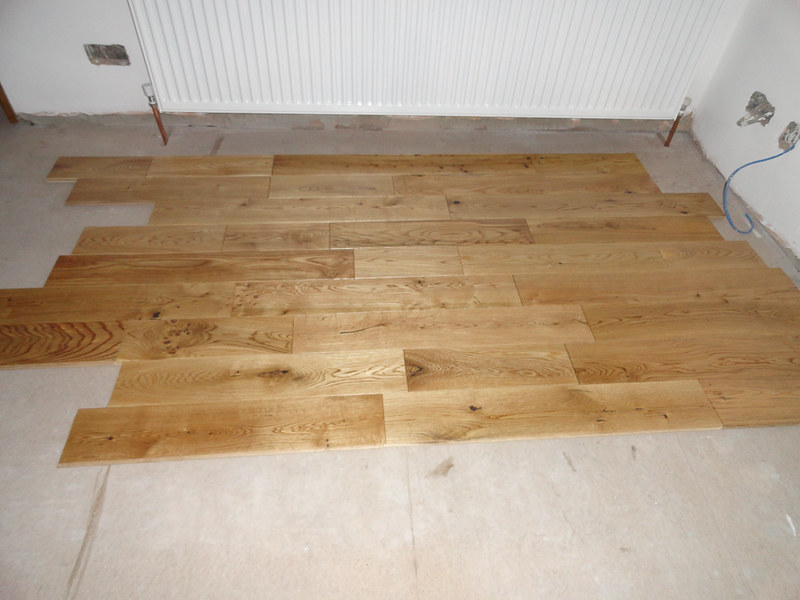
Really pleased with this and looking forward to getting it all fitted.
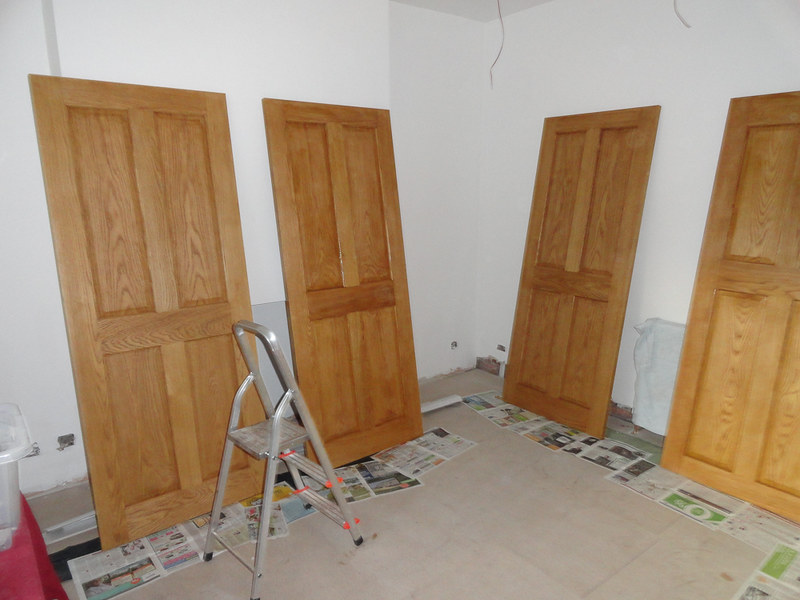
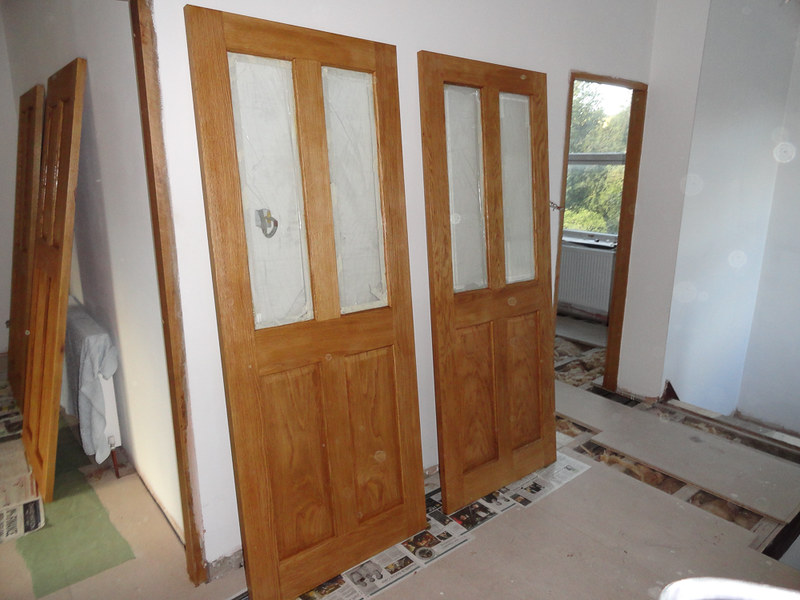
Speaking of wood, my Dad took delivery of 12 cubic feet of Oak last week and has been busy cutting it to approximate length and staining and varnishing. These are going to look stunning, I'm really pleased with them and I've only seen pictures so far.
Some of the architraves (70mm x 1"):
A few of the skirting boards (7" x 1"):

Before the oak floor can out down there were a few little bits of tidying up to do, with some gaps around the two hearths, so I got the shovel out and mixed a couple of barrows of mortar and used some plastic sheeting to seal the holes enough to support the mortar while it sets:
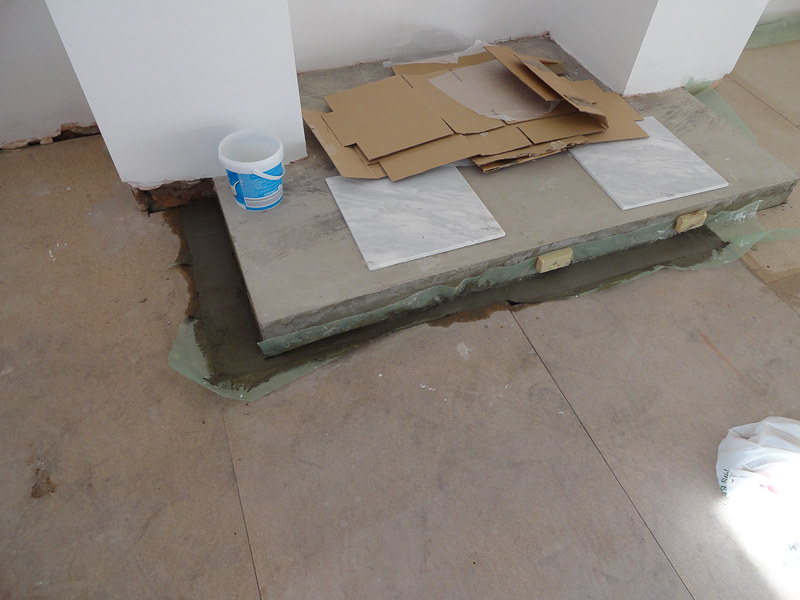
Lastly, the marble tiles arrived for the hearth in the living room. I found time to lay these out and work out which ones to cut where:

Unfortunately and inexplicably, every single one has had a corner damaged:
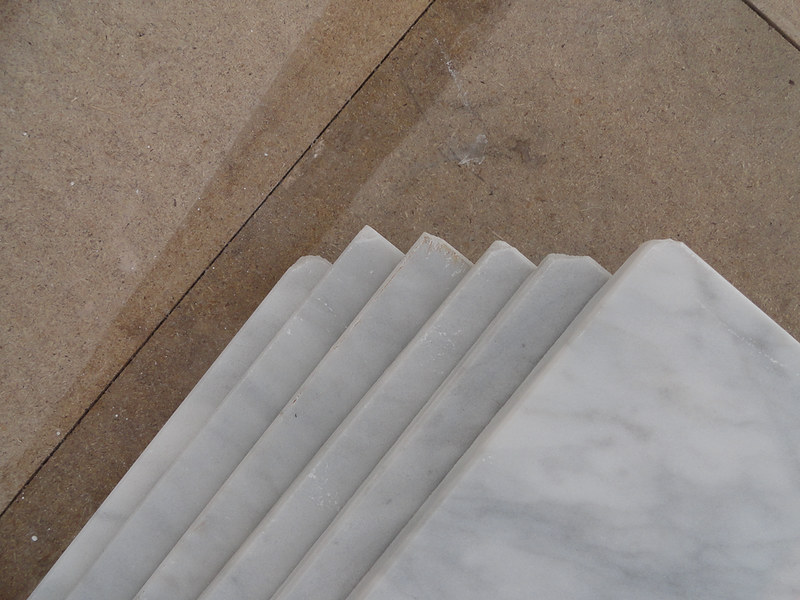
None have two corners done and they weren't done in transit so I've no idea what happened to them. A quick email last night and replacements are being sent out. As it happens a lot of them could still be used as they're being cut, so I'll be able to do the two hearths upstairs as well now too.
Speaking of s te products but great customer service, I had my electrician start second fix last week. Turns out all my sockets and plugs are ste too. But another email last night and I've got a refund. My electrician had already matched them at his suppliers as I needed some intermediate switches, so he's ordering replacements for everything, that actually look a lot better, so I'm happy.
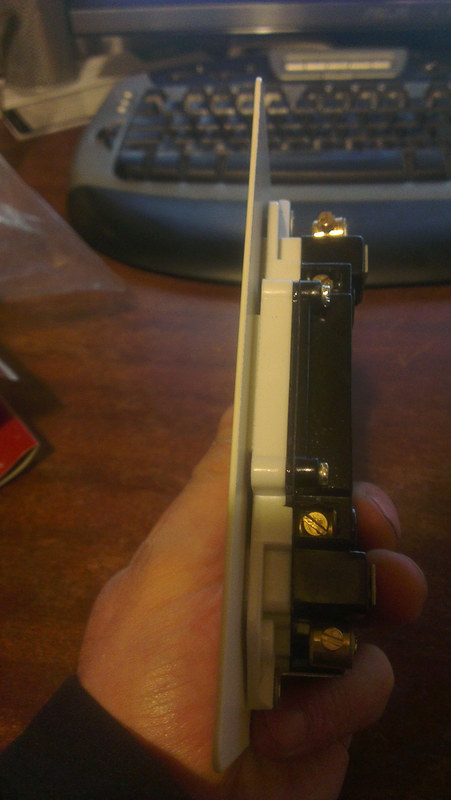
See that gap between switch and face plate? It's caused by the holes in the plates being slightly in the wrong place. By forcing the plates on they can't be fitted to the switch properly. When these are fitted to the wall the plate then curves because the screws are angled inwards. The whole design is reliant on the flat plate being in complete contact with the wall and the switch being in complete contact with the plate. As a result when fitted (Most couldn't be fitted) the socket wobbles in the back box and the switch wobbles in the plate. Id already sent loads back because the rivets had been split and looked really ugly. Complete ste.
Next up; my parents and I have next week off work so we've nine days to break the back of the project; we're going to work a room at a time, coving, architraves, flooring, skirting, door and move onto the next. My Mum can then move in with the finished coat of paint. I'll let my Dad concentrate on those jobs and then while he doesn't need me I'll work on getting the bathroom finished.
Should get downstairs done, then upstairs we won't do the skirting unless I can test my alarm wires as the floor isn't fixed down yet. I've got new banisters, newel posts and steps for the bathroom and kitchen to collect and I expect those will take a bit of time to get fitted.
I'm moving in at the end of the week regardless, though I'm only in Durham at the weekends.
I doubt I'll have time to update you next week, so expect a big update in a fortnight.
I'm still working on the bathroom, it's taking longer than I'd hoped. If you've seen my other thread you'll know I've been pratting about trying to fix a couple of weeping connections on my shower. Still not there, but have a few things to try next weekend so hopefully it won't delay me any more. Because of that I've not been able to get the last plasterboard on, so I can't fir the shower screen or start tiling.
I must have spent three hours bending two bits of pipe to get to this point:
I fired up the boiler and filled a bucket with lovely hot water, so now I'm reasonably confident we'll have good flow to the shower heads. Then someone on here pointed out that those isolators will restrict the flow and given that they're going to be plasterboarded in, I decided to crack out the blowtorch again:
I also did my first ever grouting. Think it went ok, but I guess I won't know for sure for a while. Looks great anyway:
The basin is fully plumbed in, though I need to swap the trap as that one is a 40mm one on a 32mm thread, so it leaks a tiny bit. It was great to hear the water flowing under the floor and see it flying out of the downspout into the drain. A little disconcerting how noisy the waste was, but I'm hoping when the bath is connected it'll be a bit quieter. The toilet isn't plumbed in yet, I need to tile that back wall first....
I ran up the central heating on Saturday as it was a bit cold and I wanted to see what it was like, I had to turn the boiler downs as the towel rails were too hot to touch, so shouldn't have any problems keeping warm.
Still a lot of work to do in the bathroom, but I'm confident it'll be finished in a fortnight now.
Oak floor has arrived, two days after ordering! We managed to negotiate a decent discount, free Tonguetite screws and free Saturday delivery, so I man-handled a cubic metre of wood into the house and had a play about. If you've never seen a cubic metre of wood, imagine this picture with another 6 packs next to it:
We'd had a sample and really liked it, turns out it wasn't representative and what we've ordered has more detail and better colour and looks absolutely stunning!
Really pleased with this and looking forward to getting it all fitted.
Speaking of wood, my Dad took delivery of 12 cubic feet of Oak last week and has been busy cutting it to approximate length and staining and varnishing. These are going to look stunning, I'm really pleased with them and I've only seen pictures so far.
Some of the architraves (70mm x 1"):
A few of the skirting boards (7" x 1"):
Before the oak floor can out down there were a few little bits of tidying up to do, with some gaps around the two hearths, so I got the shovel out and mixed a couple of barrows of mortar and used some plastic sheeting to seal the holes enough to support the mortar while it sets:
Lastly, the marble tiles arrived for the hearth in the living room. I found time to lay these out and work out which ones to cut where:
Unfortunately and inexplicably, every single one has had a corner damaged:
None have two corners done and they weren't done in transit so I've no idea what happened to them. A quick email last night and replacements are being sent out. As it happens a lot of them could still be used as they're being cut, so I'll be able to do the two hearths upstairs as well now too.
Speaking of s
te products but great customer service, I had my electrician start second fix last week. Turns out all my sockets and plugs are ste too. But another email last night and I've got a refund. My electrician had already matched them at his suppliers as I needed some intermediate switches, so he's ordering replacements for everything, that actually look a lot better, so I'm happy.See that gap between switch and face plate? It's caused by the holes in the plates being slightly in the wrong place. By forcing the plates on they can't be fitted to the switch properly. When these are fitted to the wall the plate then curves because the screws are angled inwards. The whole design is reliant on the flat plate being in complete contact with the wall and the switch being in complete contact with the plate. As a result when fitted (Most couldn't be fitted) the socket wobbles in the back box and the switch wobbles in the plate. Id already sent loads back because the rivets had been split and looked really ugly. Complete s
te.Next up; my parents and I have next week off work so we've nine days to break the back of the project; we're going to work a room at a time, coving, architraves, flooring, skirting, door and move onto the next. My Mum can then move in with the finished coat of paint. I'll let my Dad concentrate on those jobs and then while he doesn't need me I'll work on getting the bathroom finished.
Should get downstairs done, then upstairs we won't do the skirting unless I can test my alarm wires as the floor isn't fixed down yet. I've got new banisters, newel posts and steps for the bathroom and kitchen to collect and I expect those will take a bit of time to get fitted.
I'm moving in at the end of the week regardless, though I'm only in Durham at the weekends.
I doubt I'll have time to update you next week, so expect a big update in a fortnight.
I put a huge amount of that exact same flooring down in my mums living room, think it was approaching 40 sqm. Fantastic service by UK flooring direct and it still looks perfect 1 year in. Those tongue tite screws are awesome just make sure you drill pilot holes first as the wood is liable to split.
Edited by dazwalsh on Tuesday 17th September 09:09
dazwalsh said:
I put a huge amount of that exact same flooring down in my mums living room, think it was approaching 40 sqm. Fantastic service by UK flooring direct and it still looks perfect 1 year in. Those tongue tite screws are awesome just make sure you drill pilot holes first as the wood is liable to split.
I've ordered 55sqm of it, it's to do our hallway, living room and dining room, agree the service has been great. The screws say they don't need a pilot hole and my Dad did an identical floor without pilot holes, so I'll see how I go and only drill pilots if necessary.Edited by dazwalsh on Tuesday 17th September 09:09
Right, finally back and have a bit of time to update. Been pretty tired since the weekend as I ended up working 8am to 10pm pretty much every day for 9 days. Things take ages to go back in don't they! The long hours were so we had a chance of getting through everything we had planned, but there's still a lot left to do!
Anyway, we started with the coving in the living room and dining room. Took a while to get up to speed, but once we were into it it went up fairly quickly. Mum has sanded it and painted it and it looks really good now. Obviously nothing was straight, so quite a lot of faffing about was required:
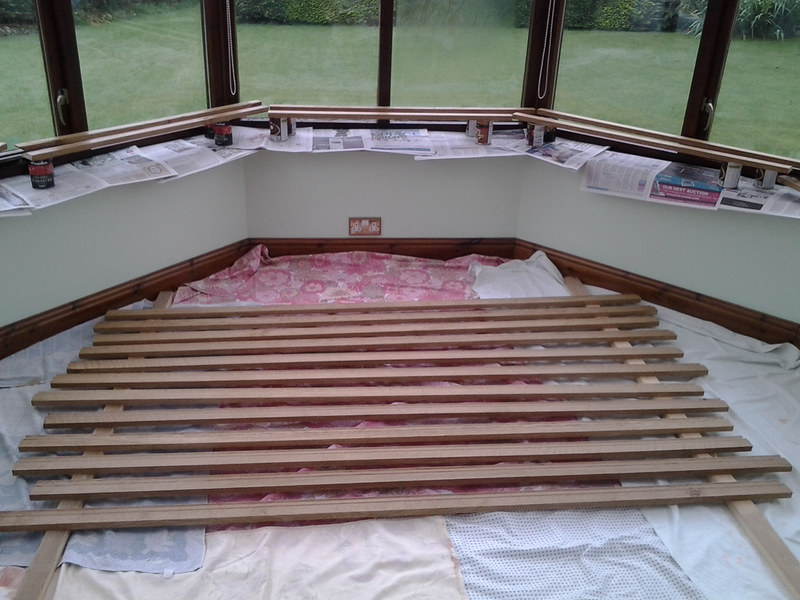
Next up we tackled the floor downstairs. This is 18mm solid oak across the hallway, living room and dining room. We'll be taking it into the pantry too as we've lots of spare. We have laid it as one continuous floor across the three rooms with no thresholds. The intention was to tie the downstairs rooms together aesthetically and I'm really pleased with the way it's turned out!
Floor is fixed with Tonguetite screws, no underlay or glue and the door frames were set for height to allow the floor under. It went in fairly well, though with 37 rows in the two rooms it took the best part of two days for me and my Dad to get it all down! We should have gone for 150mm ratehr than 125mm boards to save some time.
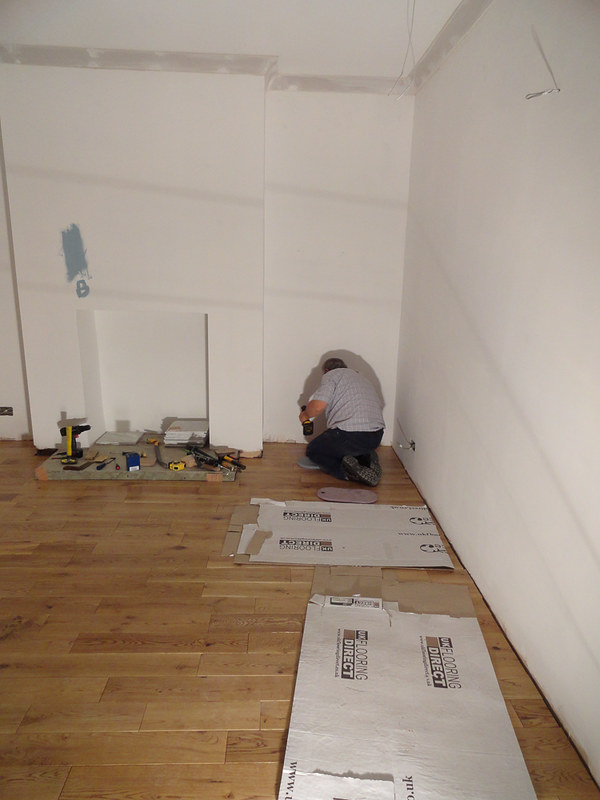
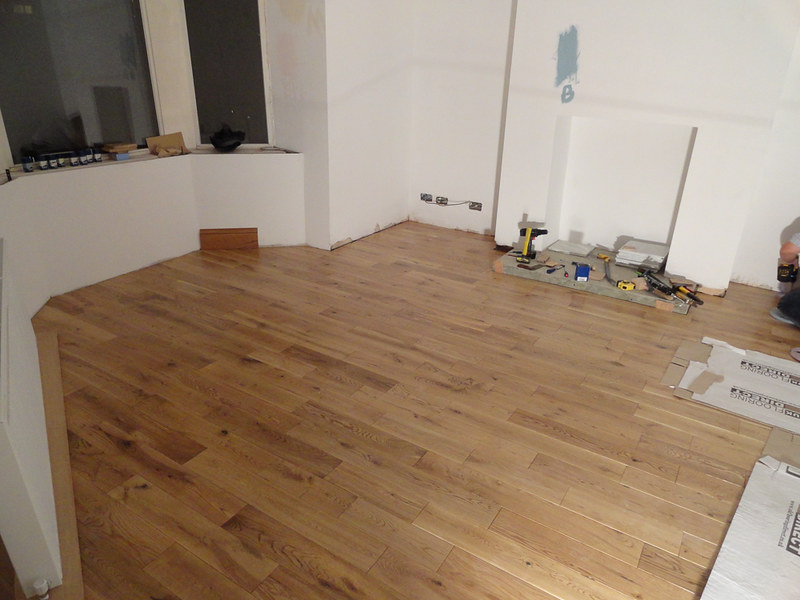
Unfortunately the floor was quickly covered in cardboard to protect it while we're finishing the rooms off, so it'll be a while before we can properly admire the job, it all now looks like this:
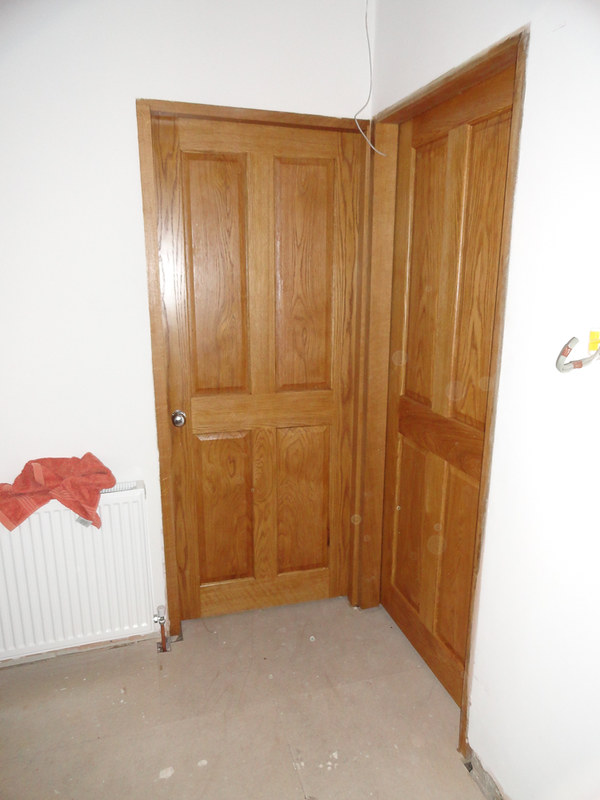
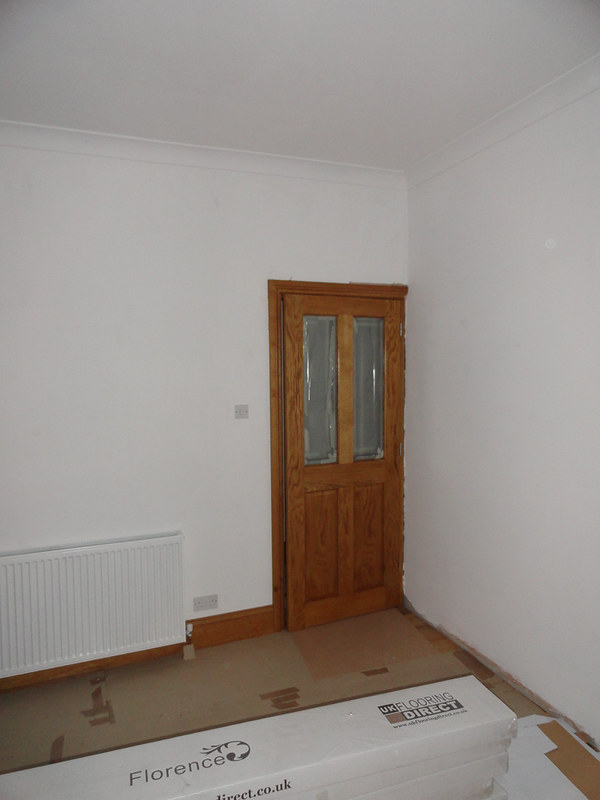
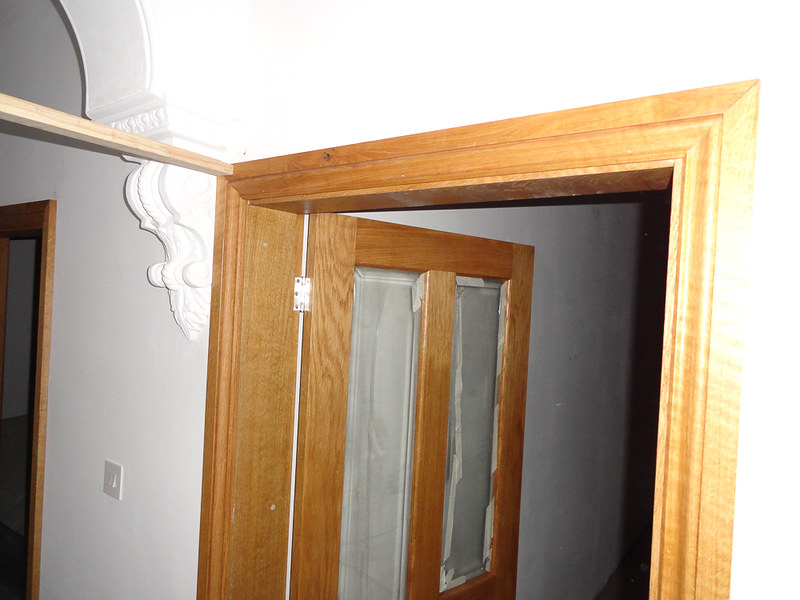
While we were doing the floor, Mum worked her way through all the doors, stained and two coats of varnish, so the next job was to get most of them fitted. I borrowed a couple of routers and a jig, which made things pretty easy. We spent about 90 minutes getting it all set up then about 20 minutes a door getting them hung and then 30 mins adjusting any doors that needed a tweak. 6 doors on, with the bathroom door still to be adjusted once I've stuck the rest of the tiles down. There's still a door under the stairs, a sliding door to the kitchen and the hallway door left to fit but these are all waiting the frames fitting.
My Dad spent 2.5 hours fitting one door knob and then decided that there were better uses of his time. Might need to get a pro in for these as they're a massive faff! Look great though:
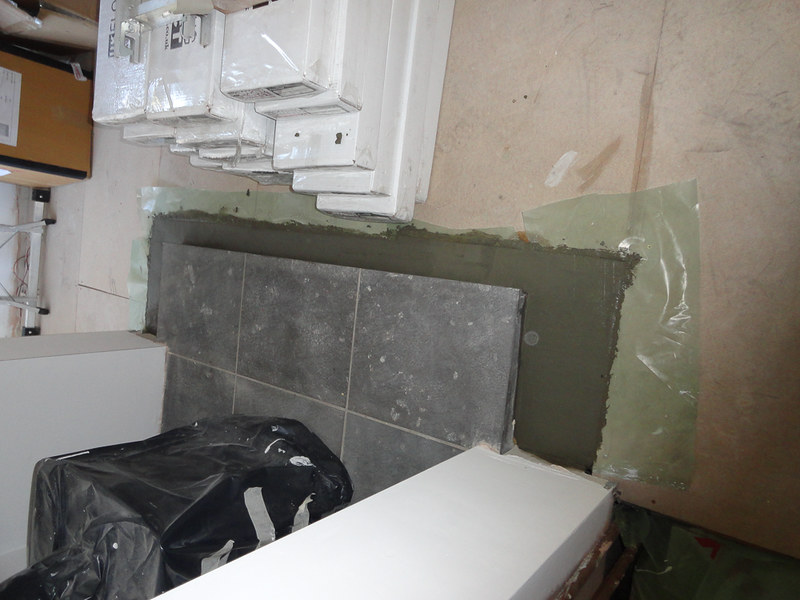
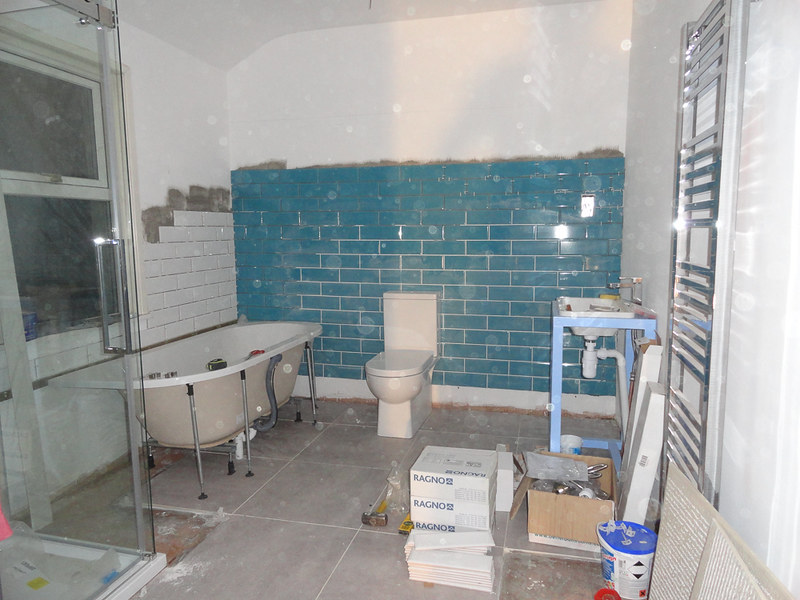
Next job was the bathroom; as things stood everything was still to fit and the floor was only part-tiled. I started by tiling the back wall to allow the toilet to be fitted, then tiled one side wall where the bath will go.

The tiles are level, but the floor falls about an inch across it's width!
Toilet was then fitted and we got the new 110mm waste pipe connected into the old cast-iton stuff. That was a bit of a pain as the cast iron bit wasn't really the right size, but some angle-grinder work and a mallet soon had the two pipes fitted together. They won't be coming apart in a hurry!
I've cut the rest of the floor tiles, after removing towel rails so they could be drilled for the central heating pipes. These are all still to be fixed down as I ran out of time on Sunday, but getting them down will be relatively quick compared to getting them all cut.
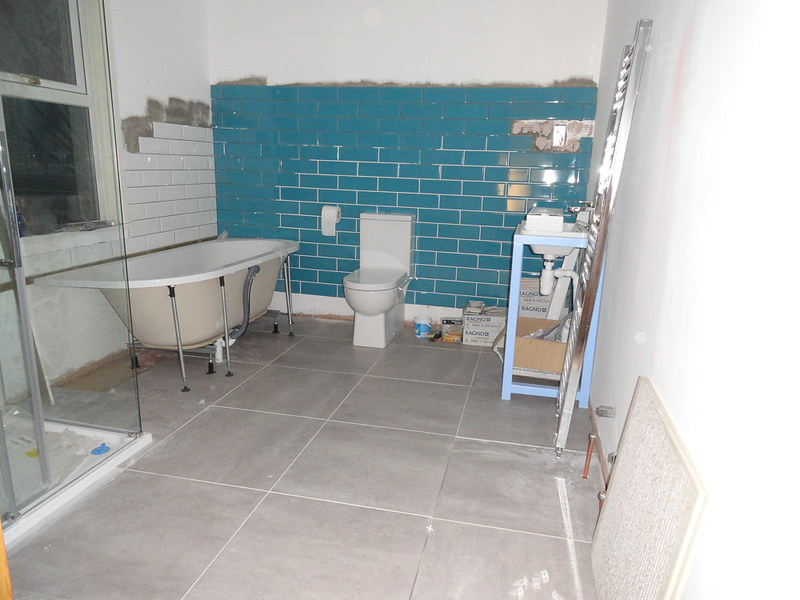
The grouting is still to finish and the tiles are going higher and I need to tile the left hand wall, but I should be able to get through all that over the weekend. The bath is still to fit, but that's not a huge job.
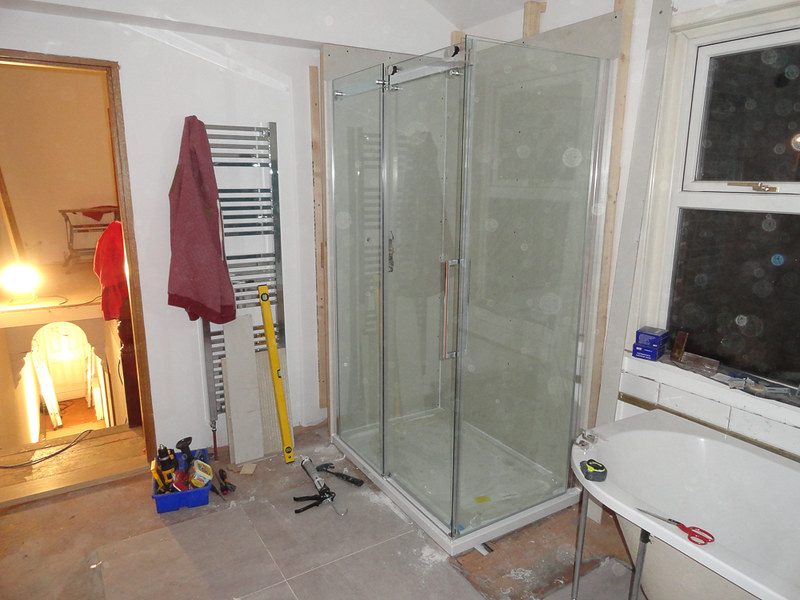
We fitted the shower cubicle and that now just needs tiling, grouting and the shower heads fitting. Took a good bit of time to get that in as every bit needed to be plumb and square etc. The door still needs a bit of adjustment, but we're really pleased with how it's come out:
While I was tiling the bathroom, the electrician was making a start on the second fix and that should be largely finished in the next couple of weeks, so we'll have light and electricity in time for winter too!
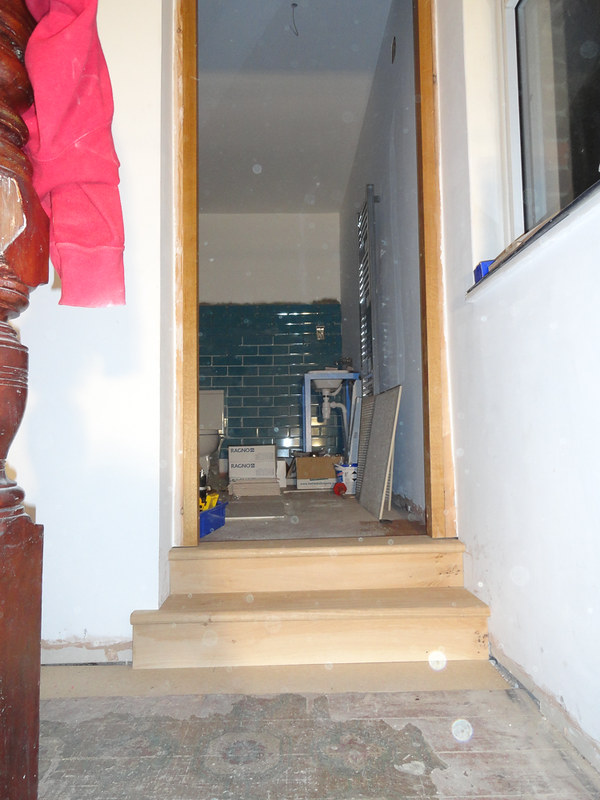
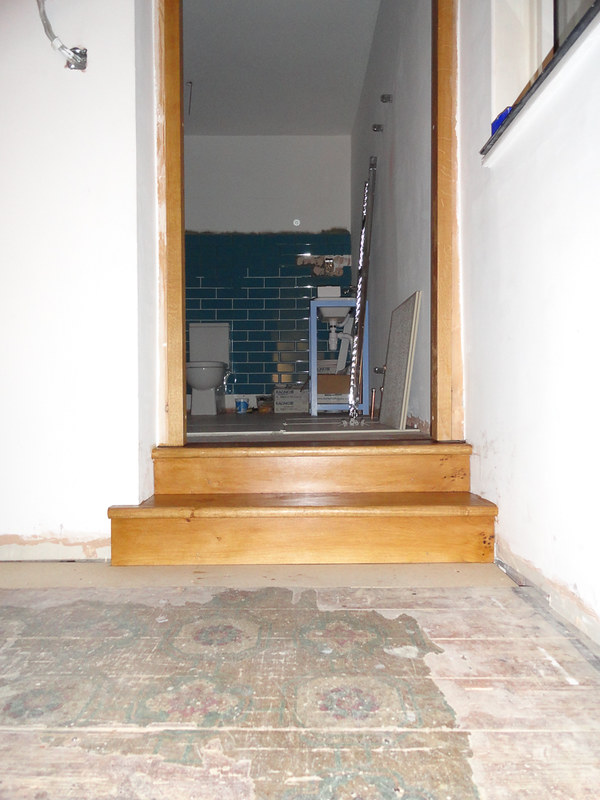
Dad got stuck into his favourite subject; carpentry and we now have a step into the bathroom! This arrived from our sawmill as 4 lengths of oak and two softwood supports. My idea was to run the top step flush with the tiles in the bathroom with a minimal gap, with the back edge sat on the first joist and routed to allow the tiles to sit on top with no threshold.
Dad managed to execute the plan brilliantly, especially as he was dealing with the fact that none of the walls that the step is up to are flat, square or parallel! The main issue was that the step is flush to the back of the door frame, but the front edge is then way off parallel with the outer landing walls. We've ended up with a slight twist on the two steps to take this into account and you can't really tell.
Dad also sorted that window sills in the living room bay window and this too looks fantastic, no picture though as he's taken it home with him to be stained and to have the biscuit joints cut. Should be fixed in at the weekend, so pictures next week.
Some architraves and skirting went in too. Again, we're really pleased with these and we're really looking forward to getting these all finished.
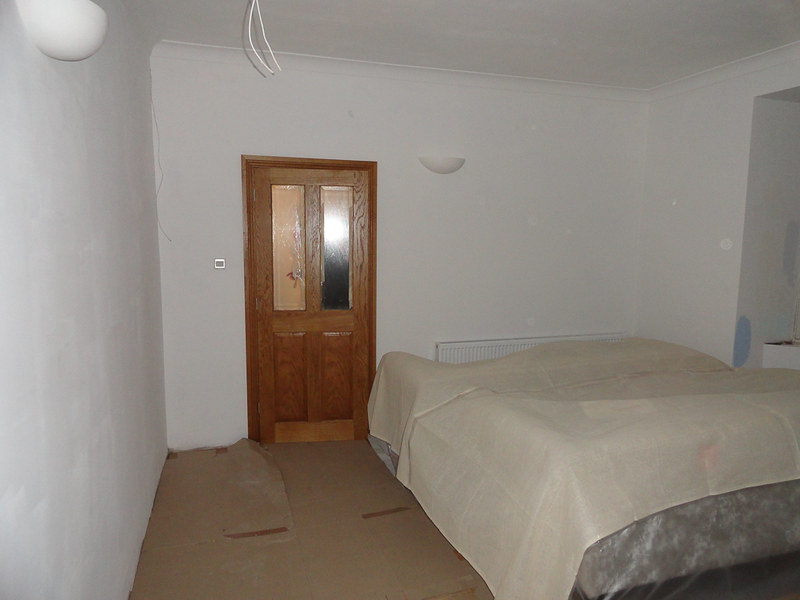
The living room is closest to being finished; it should be painted at the weekend and we'll get the rest of the skirtings in now my surround sound wires have arrived. These are being fitted to the skirting by tapping RCA plugs in and knocking a small hole in the wall behind to accommodate. There's a discrete set of speakers going on (Can anyone recommend a small amplifier, preferably one that'll take it's volume input from a panasonic TV?), but nothing too loud as I've got a proper sound system in the workshop where I can watch movies and Formula 1.
Wall lights are on, sofas were delivered, so I just need second fix completing, sills fitting, paint, skirtings on, hearth and fire fitting and we're done in here.
Unfortunately I managed to fk up the light switch location, it's behind the door. I've done the same in out bedroom, though it was inescapable in there. Solution is going to be to drill through the wall and fit a second switch to the hall lights switch on the outside of the room. This is about the first thing I've got wrong, so I'm a bit annoyed!
The last job we did was to chop down a few conifers next to the Christmas as they were hindering it's even growth.

There were 4 separate things growing here, all competing for the same space. We've managed to recover 2m of land from underneath and I got sign-off to take down the three big Leylandii that are left at some point too, so the garden will be a bit bigger shortly. Will need a suitable replacement if anyone has any ideas?
So, good progress and we're starting to look like a house again. Highlight of the week was going to the toilet INSIDE my own house for the first time in 5 months!
Next weekend I'm hoping to get all the tiling finished in the bathroom and have a working shower and bath. My parents are coming across again, so we should get some painting done and get some more coving, architraves and skirting in. There's an outside chance that the new banister will be ready, so that could go in instead.
Anyway, we started with the coving in the living room and dining room. Took a while to get up to speed, but once we were into it it went up fairly quickly. Mum has sanded it and painted it and it looks really good now. Obviously nothing was straight, so quite a lot of faffing about was required:
Next up we tackled the floor downstairs. This is 18mm solid oak across the hallway, living room and dining room. We'll be taking it into the pantry too as we've lots of spare. We have laid it as one continuous floor across the three rooms with no thresholds. The intention was to tie the downstairs rooms together aesthetically and I'm really pleased with the way it's turned out!
Floor is fixed with Tonguetite screws, no underlay or glue and the door frames were set for height to allow the floor under. It went in fairly well, though with 37 rows in the two rooms it took the best part of two days for me and my Dad to get it all down! We should have gone for 150mm ratehr than 125mm boards to save some time.
Unfortunately the floor was quickly covered in cardboard to protect it while we're finishing the rooms off, so it'll be a while before we can properly admire the job, it all now looks like this:
While we were doing the floor, Mum worked her way through all the doors, stained and two coats of varnish, so the next job was to get most of them fitted. I borrowed a couple of routers and a jig, which made things pretty easy. We spent about 90 minutes getting it all set up then about 20 minutes a door getting them hung and then 30 mins adjusting any doors that needed a tweak. 6 doors on, with the bathroom door still to be adjusted once I've stuck the rest of the tiles down. There's still a door under the stairs, a sliding door to the kitchen and the hallway door left to fit but these are all waiting the frames fitting.
My Dad spent 2.5 hours fitting one door knob and then decided that there were better uses of his time. Might need to get a pro in for these as they're a massive faff! Look great though:
Next job was the bathroom; as things stood everything was still to fit and the floor was only part-tiled. I started by tiling the back wall to allow the toilet to be fitted, then tiled one side wall where the bath will go.
The tiles are level, but the floor falls about an inch across it's width!
Toilet was then fitted and we got the new 110mm waste pipe connected into the old cast-iton stuff. That was a bit of a pain as the cast iron bit wasn't really the right size, but some angle-grinder work and a mallet soon had the two pipes fitted together. They won't be coming apart in a hurry!
I've cut the rest of the floor tiles, after removing towel rails so they could be drilled for the central heating pipes. These are all still to be fixed down as I ran out of time on Sunday, but getting them down will be relatively quick compared to getting them all cut.
The grouting is still to finish and the tiles are going higher and I need to tile the left hand wall, but I should be able to get through all that over the weekend. The bath is still to fit, but that's not a huge job.
We fitted the shower cubicle and that now just needs tiling, grouting and the shower heads fitting. Took a good bit of time to get that in as every bit needed to be plumb and square etc. The door still needs a bit of adjustment, but we're really pleased with how it's come out:
While I was tiling the bathroom, the electrician was making a start on the second fix and that should be largely finished in the next couple of weeks, so we'll have light and electricity in time for winter too!
Dad got stuck into his favourite subject; carpentry and we now have a step into the bathroom! This arrived from our sawmill as 4 lengths of oak and two softwood supports. My idea was to run the top step flush with the tiles in the bathroom with a minimal gap, with the back edge sat on the first joist and routed to allow the tiles to sit on top with no threshold.
Dad managed to execute the plan brilliantly, especially as he was dealing with the fact that none of the walls that the step is up to are flat, square or parallel! The main issue was that the step is flush to the back of the door frame, but the front edge is then way off parallel with the outer landing walls. We've ended up with a slight twist on the two steps to take this into account and you can't really tell.
Dad also sorted that window sills in the living room bay window and this too looks fantastic, no picture though as he's taken it home with him to be stained and to have the biscuit joints cut. Should be fixed in at the weekend, so pictures next week.
Some architraves and skirting went in too. Again, we're really pleased with these and we're really looking forward to getting these all finished.
The living room is closest to being finished; it should be painted at the weekend and we'll get the rest of the skirtings in now my surround sound wires have arrived. These are being fitted to the skirting by tapping RCA plugs in and knocking a small hole in the wall behind to accommodate. There's a discrete set of speakers going on (Can anyone recommend a small amplifier, preferably one that'll take it's volume input from a panasonic TV?), but nothing too loud as I've got a proper sound system in the workshop where I can watch movies and Formula 1.
Wall lights are on, sofas were delivered, so I just need second fix completing, sills fitting, paint, skirtings on, hearth and fire fitting and we're done in here.
Unfortunately I managed to f
k up the light switch location, it's behind the door. I've done the same in out bedroom, though it was inescapable in there. Solution is going to be to drill through the wall and fit a second switch to the hall lights switch on the outside of the room. This is about the first thing I've got wrong, so I'm a bit annoyed!The last job we did was to chop down a few conifers next to the Christmas as they were hindering it's even growth.
There were 4 separate things growing here, all competing for the same space. We've managed to recover 2m of land from underneath and I got sign-off to take down the three big Leylandii that are left at some point too, so the garden will be a bit bigger shortly. Will need a suitable replacement if anyone has any ideas?
So, good progress and we're starting to look like a house again. Highlight of the week was going to the toilet INSIDE my own house for the first time in 5 months!
Next weekend I'm hoping to get all the tiling finished in the bathroom and have a working shower and bath. My parents are coming across again, so we should get some painting done and get some more coving, architraves and skirting in. There's an outside chance that the new banister will be ready, so that could go in instead.
If you tile first then you will get a more even surface to silicone the enclosure to and a better seal. If the walls are slightly off then you can use the tiles to adjust for that as well.
If you already have the tiles then you could have measured it all up and calculated where the tiles needed to be finished so that it ended flush with the enclosure.
If you already have the tiles then you could have measured it all up and calculated where the tiles needed to be finished so that it ended flush with the enclosure.
Install the tray. Silicone around the tray to wall joint. Tile the shower and then grout. This makes a waterproof base. Then silicone around the tray to wall joint again. Then you put the screen's profiles onto the tiles, normally running a bead of silicone down the back of the profile. Also putting a smidge of silicone over the screw holes/ plugs. Then screw these to the wall and then mount the shower screen like you have.
You then silicone on the outer edges only, so if water gets behind the profile, the water gets out into the tray and away. Siliconing both sides of the profile never matter how much, water tends to gets in, builds up and then gets away through a small area, normally creating a stain onto a ceiling. This is for 90%, but refer to the instructions.
Tiling up to the screen creates an awkward joint to seal, and if this fails, it's straight onto your base layer.
You have a step down from the tiles to the screen.
Even badly sealed screens onto tiles can leak, you're just increasing the chances of water through the ceiling.
If you ever need to replace the screen, taking one off the tiles and cleaning up before putting a new one in is easy. Finding a new screen the exact same width will be a pain, maybe having to piece in tiles.
Have you siliconed along the back of the profile?
Have you siliconed around the tray to the wall pre-tiling?
Have you siliconed the tray to the wall before fitting the profiles, otherwise there is a wide open gap behind the profiles?
Just trying to help create a better finish and a waterproof one that'll last.
As a bathroom fitter, I'd only ever install the screen onto tiles.
Craikeybaby said:
For the light switches would it be easier to swap the door opening? I made the same mistake in my office.
Upstairs I can't swap the door round as the other end is a stud wall that sticks into the room about a foot, there's nowhere to put a switch on that side other than the back of the stud wall.Downstairs, I could but I think the door very obviously should be hinged the way it is as it hinges into a dead space rather than against the arm of the sofa. The door can be comfortably left open as it is, but hinging the other way it would intrude into the room.
It would be easier to swap that door round (except the hing would need to be cut on the other edge), but it wouldn't be 'right'.
Gingerbread Man said:
Install the tray. Silicone around the tray to wall joint. Tile the shower and then grout. This makes a waterproof base. Then silicone around the tray to wall joint again. Then you put the screen's profiles onto the tiles, normally running a bead of silicone down the back of the profile. Also putting a smidge of silicone over the screw holes/ plugs. Then screw these to the wall and then mount the shower screen like you have.
You then silicone on the outer edges only, so if water gets behind the profile, the water gets out into the tray and away. Siliconing both sides of the profile never matter how much, water tends to gets in, builds up and then gets away through a small area, normally creating a stain onto a ceiling. This is for 90%, but refer to the instructions.
Tiling up to the screen creates an awkward joint to seal, and if this fails, it's straight onto your base layer.
You have a step down from the tiles to the screen.
Even badly sealed screens onto tiles can leak, you're just increasing the chances of water through the ceiling.
If you ever need to replace the screen, taking one off the tiles and cleaning up before putting a new one in is easy. Finding a new screen the exact same width will be a pain, maybe having to piece in tiles.
Have you siliconed along the back of the profile?
Have you siliconed around the tray to the wall pre-tiling?
Have you siliconed the tray to the wall before fitting the profiles, otherwise there is a wide open gap behind the profiles?
Just trying to help create a better finish and a waterproof one that'll last.
As a bathroom fitter, I'd only ever install the screen onto tiles.
That's interesting, thanks.You then silicone on the outer edges only, so if water gets behind the profile, the water gets out into the tray and away. Siliconing both sides of the profile never matter how much, water tends to gets in, builds up and then gets away through a small area, normally creating a stain onto a ceiling. This is for 90%, but refer to the instructions.
Tiling up to the screen creates an awkward joint to seal, and if this fails, it's straight onto your base layer.
You have a step down from the tiles to the screen.
Even badly sealed screens onto tiles can leak, you're just increasing the chances of water through the ceiling.
If you ever need to replace the screen, taking one off the tiles and cleaning up before putting a new one in is easy. Finding a new screen the exact same width will be a pain, maybe having to piece in tiles.
Have you siliconed along the back of the profile?
Have you siliconed around the tray to the wall pre-tiling?
Have you siliconed the tray to the wall before fitting the profiles, otherwise there is a wide open gap behind the profiles?
Just trying to help create a better finish and a waterproof one that'll last.
As a bathroom fitter, I'd only ever install the screen onto tiles.
The instructions have no silicone behind the profile, and both edges siliconed. The inner edge of silicone will be behind the tiles and there’ll be a second silicone seal there too obviously.
The tray was siliconed to the wall before the screen went on, so there isn’t a gap underneath the profile.
If the screen needs to be replaced then it’s not a huge job to retile completely and it’s not a huge job to replace the plasterboard behind the tiles at the same time if that’s damaged taking tiles off. Given it’s more than likely the screen will out last us in the house, I’m happy with that eventuality. There’s a good bit of adjustability in the width of that screen though, enough to give 20mm of play in the location of each profile.
I think the screen onto tiles approach looks like a bodge, though I accept your reasons for that approach. Don’t take that the wrong way, what I mean is that showers done that way rarely look right with the tiles sticking out of the sides.
Regardless, it’s too late now and I’ll just have to re-do it if there’s a problem.
I’ll admit I hadn’t given it too much thought until recently as my Dad did his showers 20+ years ago the same way and has never had any problems with leaks. It’s only my girlfriend’s Dad tiles that keep falling off that made me look into how water proof grout etc is.
Based on what I’ve read on the internet the plan is to use epoxy grout on the tiles, with the bottom bead being done in a normal grout rather than a silicone so that any water that did get behind the tiles will come out again rather than be trapped there and I’ll know quickly that I’ve got a problem.
What do you think about that approach?
Gassing Station | Homes, Gardens and DIY | Top of Page | What's New | My Stuff