Our Little Durham Restoration Project...
Discussion


With the tiling done and the bathroom operational next was the heated towel rail. In the latest episode of, "nothing is ever simple", the brackets supplied were completely inadequate; some plastic s te with zero stiffness that had to be installed in such a way as to render the thing useless as you couldn't hang anything bigger than a flannel over it without the brakets being in the way.
Partly my fault, the room is tiny, so the radiator has to be small and tucked out the way, so it's only 300mm wide, but still, not much point if it can't be used.
The other complication, which is entirely my fault, is that the brackets can't be mounted more than 200mm from the edge of the shower anyway as there's a pocket door. But at least I realised this when I built the wall and knew that there was a doubled up timber stud at 150mm; fix to that with a stiff enonugh fixing and it won't need them anywhere else and the towels will still work.
Pass me the tools......
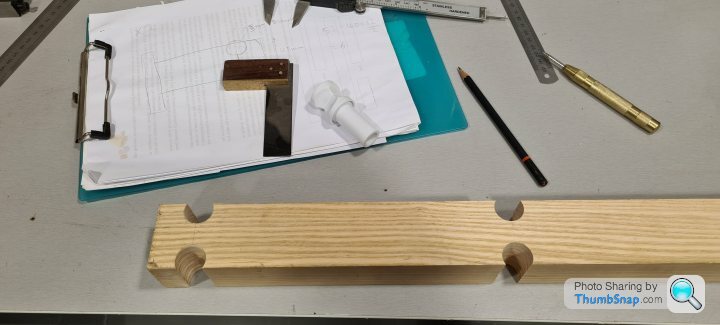
2" square bit of ash, holes where the radiator bars go, ready to be cut into 4 parts:
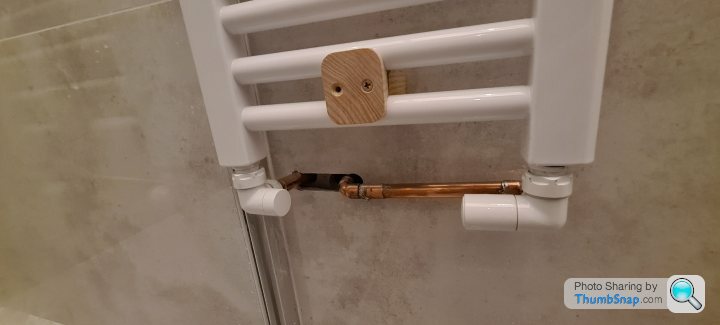
The rear space element is screwed into the wall with a big screw, then the caps are screwed on so the radiator is held nicely:
Then it looks like this:
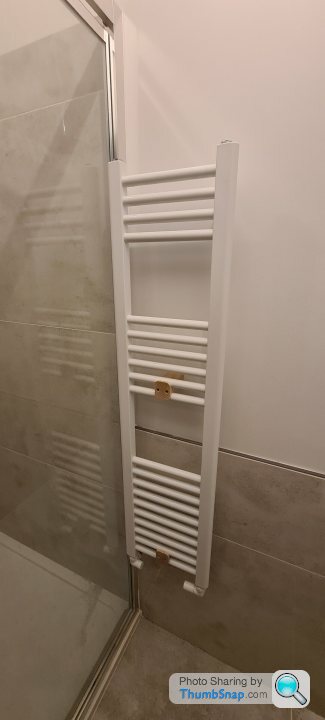
This is before it was clamped up tight, super pleased with the tucked install:
And the shower door opens like this:
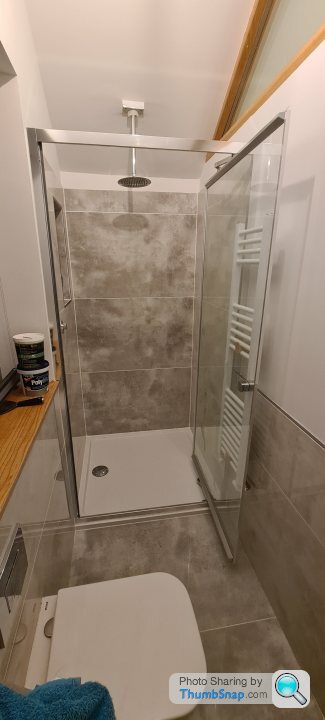
Super pleased with this, the door is superb, the access into the shower is really wide without it intruding on the standing space outside the shower or smacking in to the radiator!
te with zero stiffness that had to be installed in such a way as to render the thing useless as you couldn't hang anything bigger than a flannel over it without the brakets being in the way.Partly my fault, the room is tiny, so the radiator has to be small and tucked out the way, so it's only 300mm wide, but still, not much point if it can't be used.
The other complication, which is entirely my fault, is that the brackets can't be mounted more than 200mm from the edge of the shower anyway as there's a pocket door. But at least I realised this when I built the wall and knew that there was a doubled up timber stud at 150mm; fix to that with a stiff enonugh fixing and it won't need them anywhere else and the towels will still work.
Pass me the tools......
2" square bit of ash, holes where the radiator bars go, ready to be cut into 4 parts:
The rear space element is screwed into the wall with a big screw, then the caps are screwed on so the radiator is held nicely:
Then it looks like this:
This is before it was clamped up tight, super pleased with the tucked install:
And the shower door opens like this:
Super pleased with this, the door is superb, the access into the shower is really wide without it intruding on the standing space outside the shower or smacking in to the radiator!
But.....
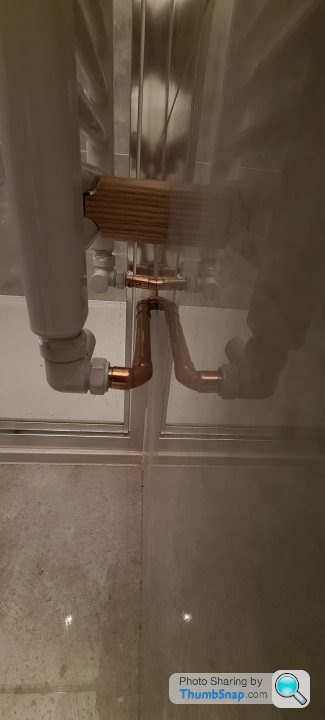
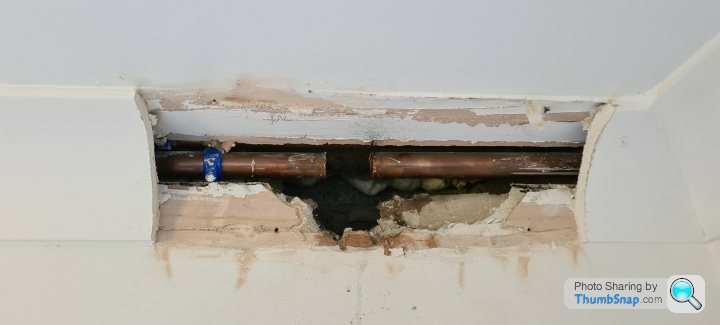
We have another leak! A tiny one, but still. This one we were super lucky with, because of the difficulty in running the pipe through the timber frame, the pipes ended up being tucked in the coving underneath, where they could just about be accessed.
Cut:
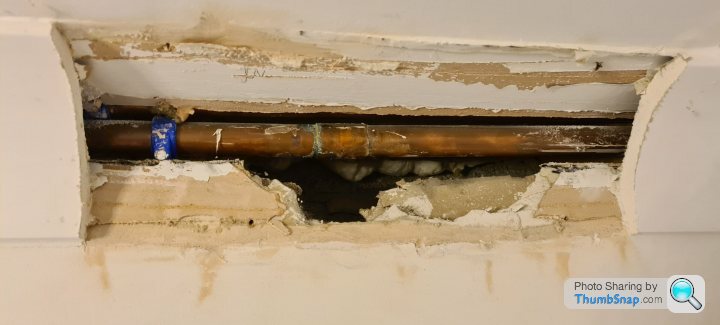
The only problem was there wasn't enough room or enough movement in the pipe to get a pipe cutter around it and if I managed to set something on fire resoldering it I wouldn't find out until it was too late! So a gap was cut with a multitool:
And this big lump of brass got bolted in:
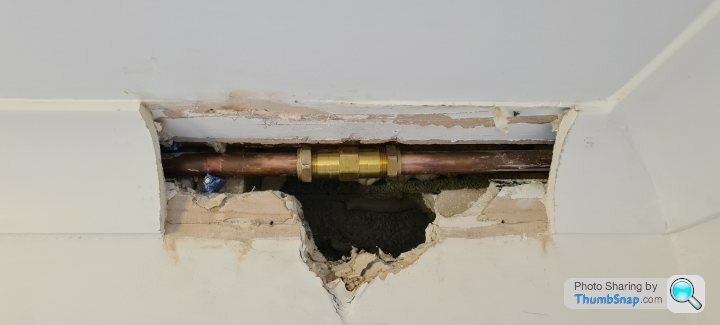
Over a year later, I've fixed the coving, but it's still all waiting to be repainted. My wife is a Saint.
We have another leak! A tiny one, but still. This one we were super lucky with, because of the difficulty in running the pipe through the timber frame, the pipes ended up being tucked in the coving underneath, where they could just about be accessed.
Cut:
The only problem was there wasn't enough room or enough movement in the pipe to get a pipe cutter around it and if I managed to set something on fire resoldering it I wouldn't find out until it was too late! So a gap was cut with a multitool:
And this big lump of brass got bolted in:
Over a year later, I've fixed the coving, but it's still all waiting to be repainted. My wife is a Saint.
Then things really ground to a halt after that, I didn't do much over the rest of the winter and then when the weather turned I just wanted to be outside trying to catch up on all the jobs that have been put off for years because of the loft. I've just been through my photos and then had to go through them a few more times to make sure that I'm not missing some, then I've just been around the loft looking for other jobs I've forgotten to take pictures of, that's how few things have been ticked off!
So, scraping the barrel and to leave the loft fully up to date:
I had an offcut of kitchen worktop going spare, so it was mounted in the cupboard for the amplifiers to sit on and the kids' X-Box, that all works brilliantly with the 7.1 surround and the projector mounted on the ceiling, even though all the kit is hidden away. Somehow the remote controls for the Google Chromecast work through the walls and that can use HDMI pass-through to turn on the projector:
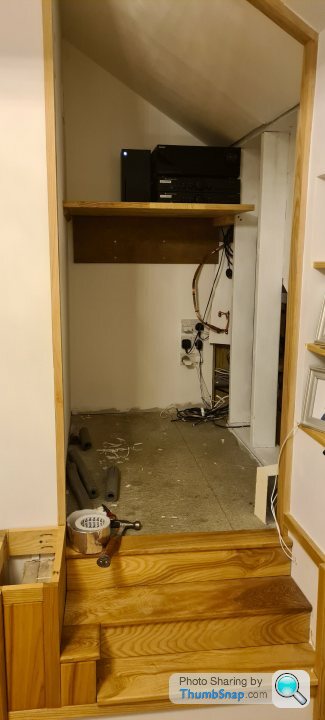
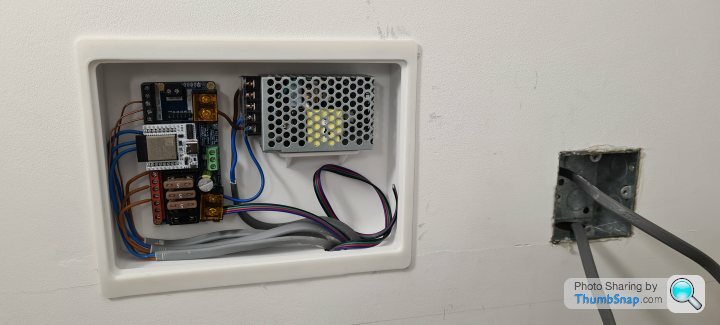
I carpeted the cupboard too, then I used my 3D printer to make some connection boxes and things to tidy up the cables. Now all the amps just plug into these boxes and I have Home Assistant controlling the sockets so if you Cast music, the amps get turned on and it all just works nicely. I've filled the cupboard with car parts now, this pic has reminded me that I haven't wired in the doorbell or the alarm sounds yet:
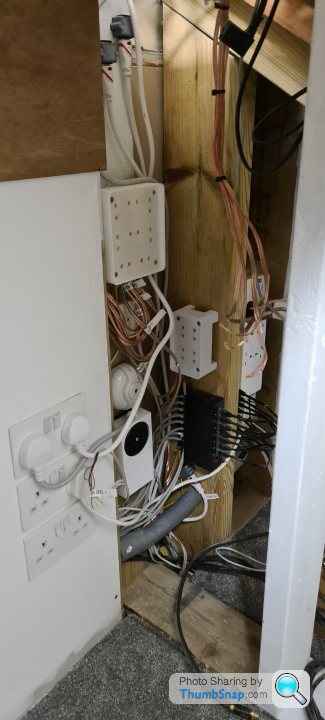
While I was there I setup an ESP32 controller for WLED and wired it up to some unused lighting wires to send signals to the LED strips that are in a few places. This has been a total faff to get and keep working and is still putting up a fight, it's picking up interference somehow and I can't get it all to sync up. Another job to look at someday.....
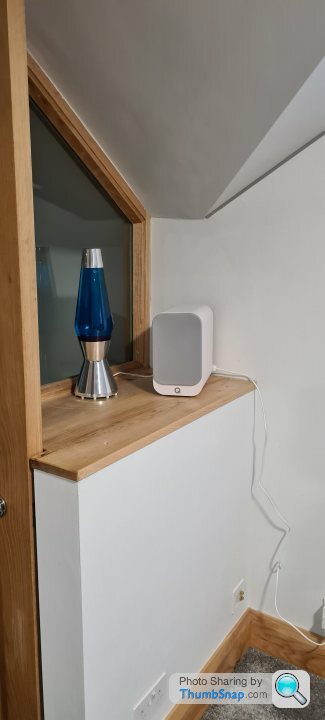
I tweaked one of my speaker outlets by running a wire through the wall to the back of it so I could lose the trailing wire on this speaker:

I should really repeat the trick for the lava lamp and get it properly tidy, but it looks like this now:
I 3D printed this stand for my centre speaker too, just annoyed me having it on the floor:
I'm going to get some wood to make a proper storage shelf thing that will run along from the corner to that speaker and hold it off the floor properly, but I need to order the wood for that and a few other jobs first.

So, scraping the barrel and to leave the loft fully up to date:
I had an offcut of kitchen worktop going spare, so it was mounted in the cupboard for the amplifiers to sit on and the kids' X-Box, that all works brilliantly with the 7.1 surround and the projector mounted on the ceiling, even though all the kit is hidden away. Somehow the remote controls for the Google Chromecast work through the walls and that can use HDMI pass-through to turn on the projector:
I carpeted the cupboard too, then I used my 3D printer to make some connection boxes and things to tidy up the cables. Now all the amps just plug into these boxes and I have Home Assistant controlling the sockets so if you Cast music, the amps get turned on and it all just works nicely. I've filled the cupboard with car parts now, this pic has reminded me that I haven't wired in the doorbell or the alarm sounds yet:
While I was there I setup an ESP32 controller for WLED and wired it up to some unused lighting wires to send signals to the LED strips that are in a few places. This has been a total faff to get and keep working and is still putting up a fight, it's picking up interference somehow and I can't get it all to sync up. Another job to look at someday.....
I tweaked one of my speaker outlets by running a wire through the wall to the back of it so I could lose the trailing wire on this speaker:
I should really repeat the trick for the lava lamp and get it properly tidy, but it looks like this now:
I 3D printed this stand for my centre speaker too, just annoyed me having it on the floor:
I'm going to get some wood to make a proper storage shelf thing that will run along from the corner to that speaker and hold it off the floor properly, but I need to order the wood for that and a few other jobs first.
Like I said, the barrel was scraped for things I did last year! Oh well.
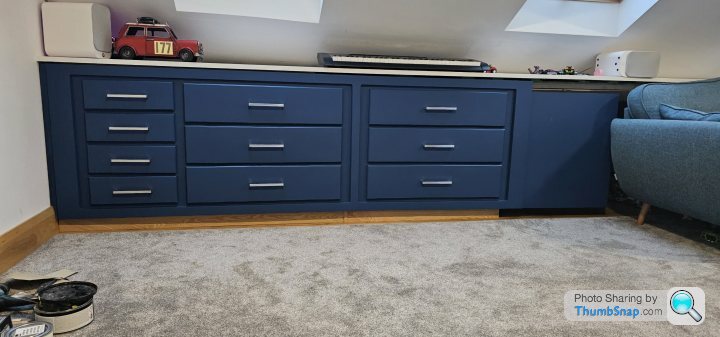
Yesterday, I finally got on with fitting the last couple of drawers to these cabinets and fully repainted everything. I'm really pleased with how these have come out, so much nicer with the darker blue and losing the white. I need to crack on with finishing the trim panels for the door and adding another section to the plinth to get this all properly finished, but at least I can finally fill the drawers!
Over Christmas I had the paint out for a few other projects, so I painted up the panels for my banister and have managed to fit one:

This is another of the jobs that needs a bit of timber to finish off.
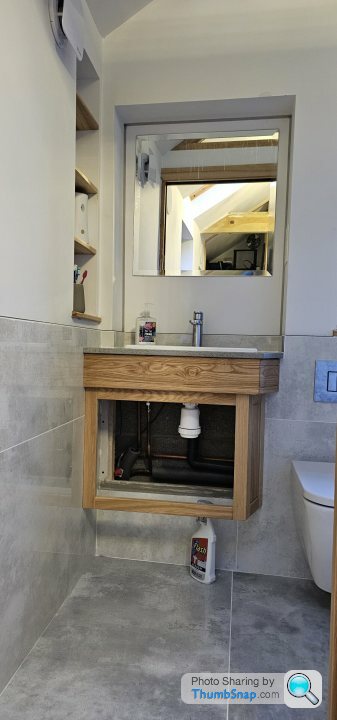
Oh and I did the frame for the bottom of the bathroom cabinet, but no door or shelves yet....
So that's everything up to date on the loft. I'll update with the rest of the stuff I've been on with next, then just go with whatever I'm doing from now on and hopefully keep the thread back on track from now on.........
Yesterday, I finally got on with fitting the last couple of drawers to these cabinets and fully repainted everything. I'm really pleased with how these have come out, so much nicer with the darker blue and losing the white. I need to crack on with finishing the trim panels for the door and adding another section to the plinth to get this all properly finished, but at least I can finally fill the drawers!
Over Christmas I had the paint out for a few other projects, so I painted up the panels for my banister and have managed to fit one:
This is another of the jobs that needs a bit of timber to finish off.
Oh and I did the frame for the bottom of the bathroom cabinet, but no door or shelves yet....
So that's everything up to date on the loft. I'll update with the rest of the stuff I've been on with next, then just go with whatever I'm doing from now on and hopefully keep the thread back on track from now on.........

I always dip into this thread when it appears as I know the house well , I used to live in one of the streets behind and my wife’s family literally lived a dozen or so doors further up the street , I recognised it as soon as the pics appeared as I always had my eyes on the house with a view to buying it if it came up for sale , it’s a lovely old thing with outside space and outbuildings.
Alas , we moved on to other areas and countries due to my wife’s work opportunities but it’s nice to see it’s passed to good hands and it’s looking great .
Alas , we moved on to other areas and countries due to my wife’s work opportunities but it’s nice to see it’s passed to good hands and it’s looking great .
Gassing Station | Homes, Gardens and DIY | Top of Page | What's New | My Stuff