The ebay generator restoration thread
Discussion


creationracing said:
Gingerbread Man said:
What ever happened to the thread starter? Find a generator he couldn't fix?
I was wondering if there's a shed somewhere with a half-fixed generator and a skeleton draped over it... No, I'm still alive
 . Just not bought any lately as they have either been too expensive or too far away. Missed out on a 10KVA unit which went for £78 due to a dodgy internet connection at the wrong time
The red Kipor took a wile to getting running correctly due to blockages in the carburettor, but finally got it sorted.
Sold it in January for about £300 more than I paid for it.
The big Honda is on eBay at the moment, had a few silly offers for it, including the inevitable "I'll give you £150 for it yeah..."

The profits have paid for some of the parts for converting my MKIV Golf R32 from manual to DSG, so that project is taking up most of my time and space. The workshop (aka garden shed) is currently full of gearbox bits so I don't have any space to work.
Might start tinkering again once the Golf is done

Morningside said:
I love this thread and wondering if there was any news on new projects?
ThanksI’m still tinkering with them, I have worked on another 2 since the last update, but I haven’t posted as they have just needed the carburettor cleaning so not very exciting.
I will keep this updated if I get anything interesting.
Blue32 said:
Morningside said:
I love this thread and wondering if there was any news on new projects?
ThanksI’m still tinkering with them, I have worked on another 2 since the last update, but I haven’t posted as they have just needed the carburettor cleaning so not very exciting.
I will keep this updated if I get anything interesting.
Make sure you buy only proper knackers from now on, they've been the best episodes of this show so far! ;-)
SHutchinson said:
Maybe not exciting to you but we are all gripped by this stuff!
Make sure you buy only proper knackers from now on, they've been the best episodes of this show so far! ;-)
As per request, here is the latest I got this one for less than £30!Make sure you buy only proper knackers from now on, they've been the best episodes of this show so far! ;-)
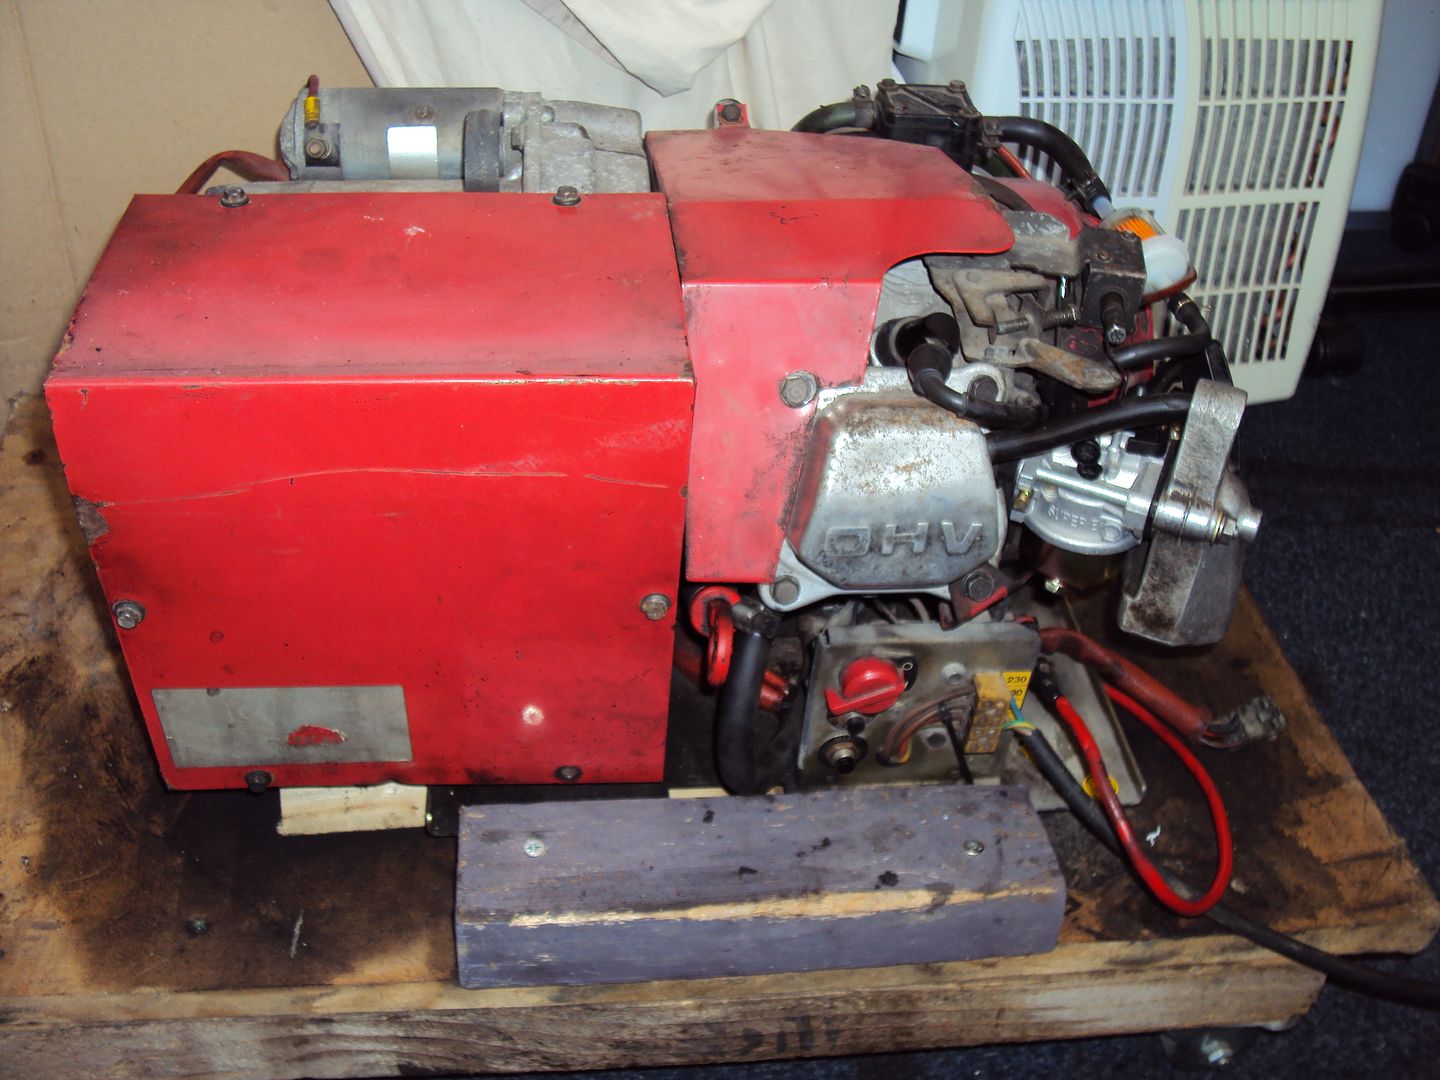
From what I can make out from the faded label it’s a Dometic 2500h which is meant for installation in a motor home, it came with an enclosure but was missing the front cover. It’s a basic capacitor stabilised alternator which is ok for running lights, fridge’s Air conditioners etc but no good for sensitive electronics unless a surge protector is used.
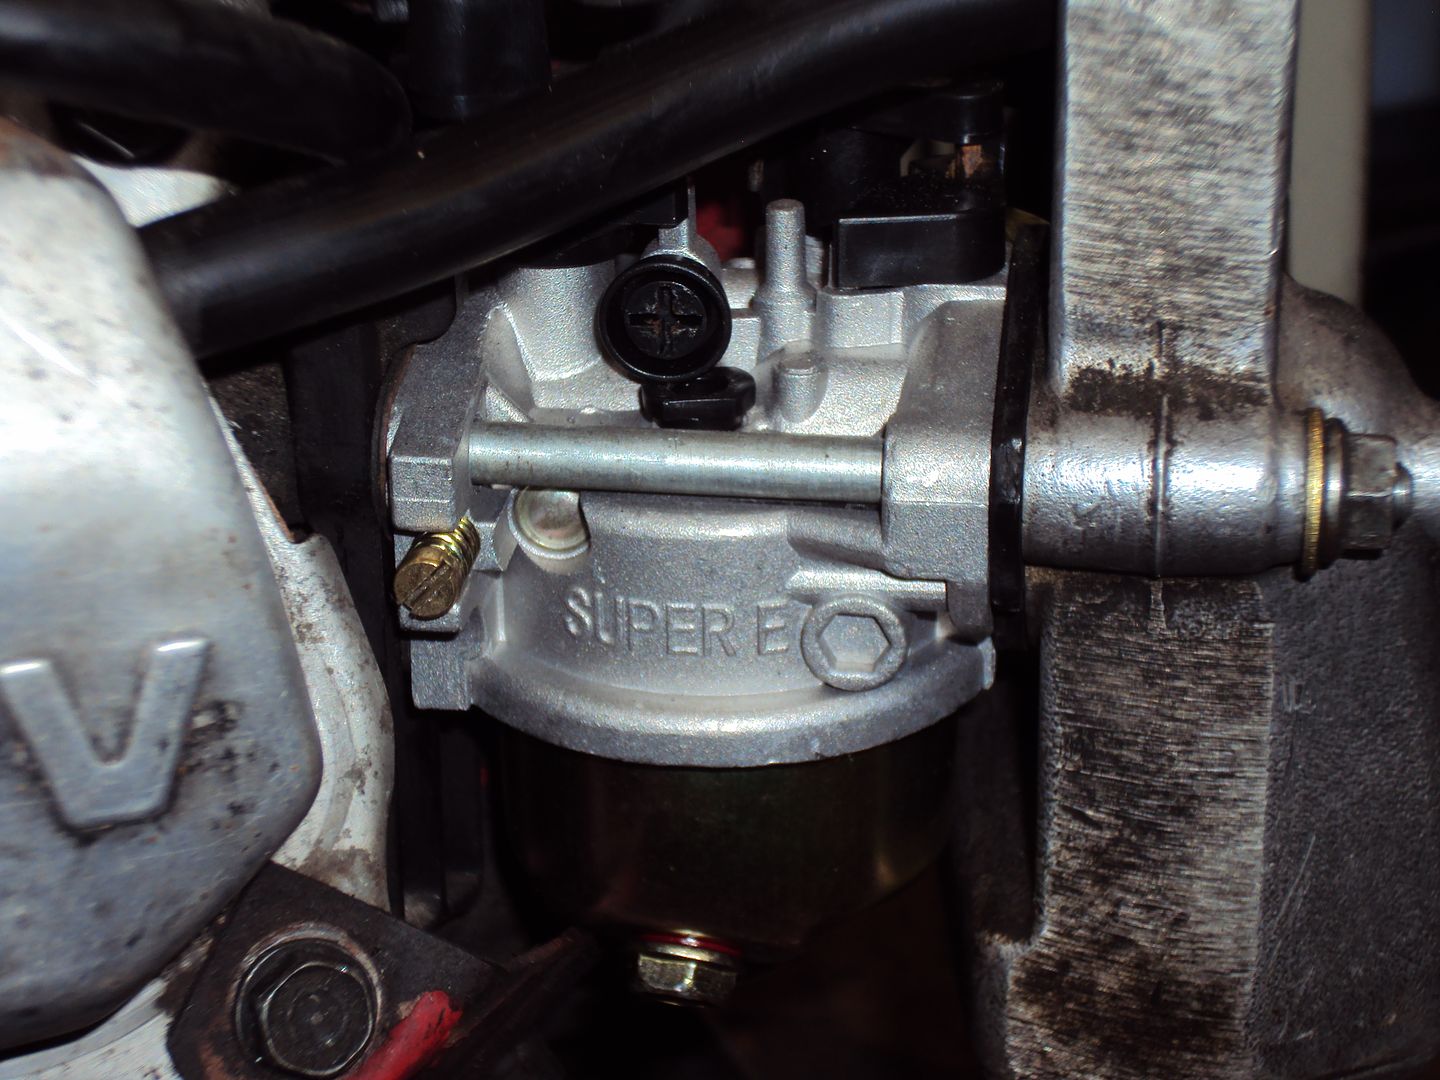
It had the usual problem of the carburettor jest were clogged so the engine wouldn’t run properly. Someone had previously had a go and completely destroyed the screw slot in the main jet making it impossible to remove.

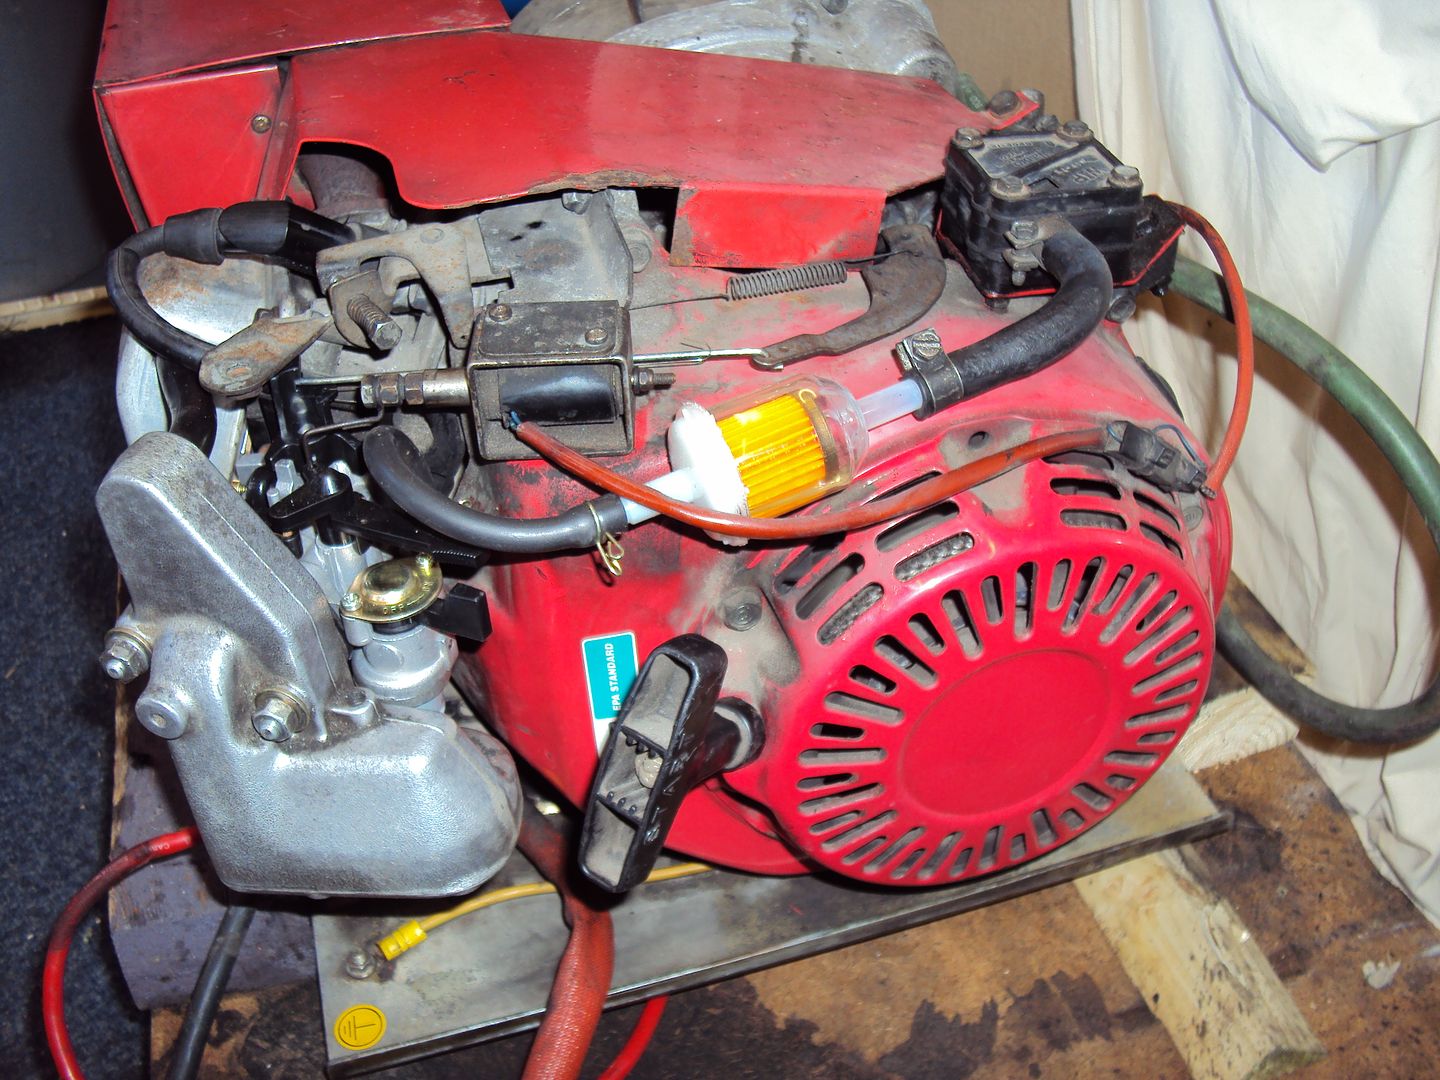
I ended up buying a new carburettor (was only £10!) and got the engine running.
And fitted a fuel filter to protect my £10 investment
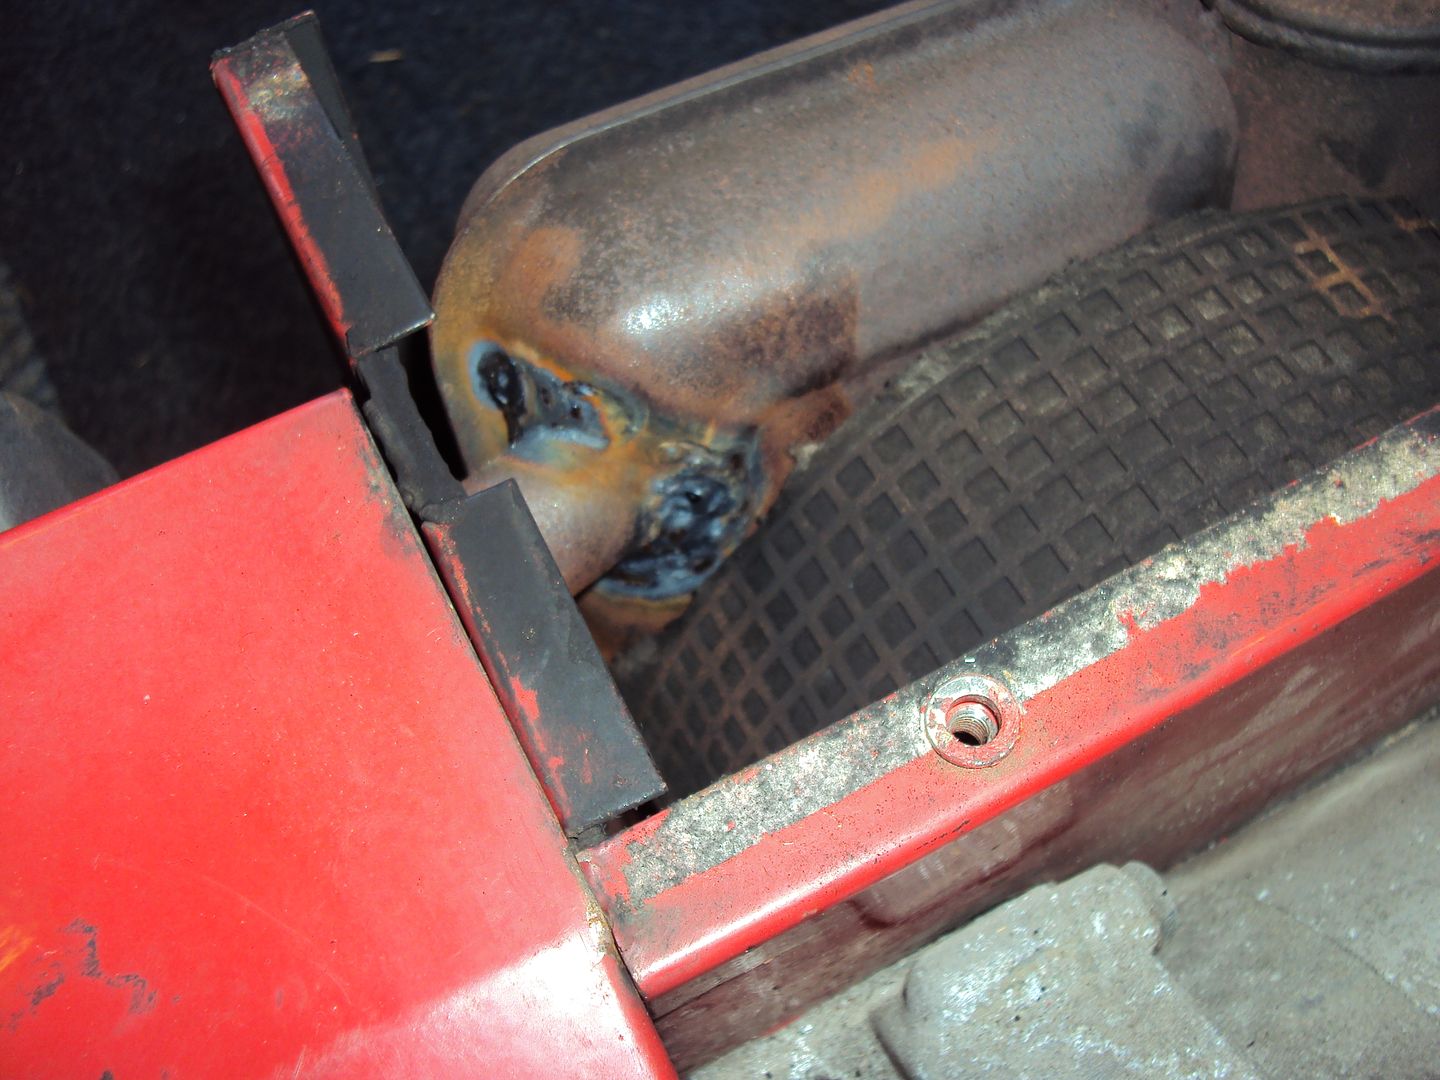
It also needed a bit of welding on the exhaust as weld around the pipe into the silencer had split
When I picked it up it was missing the capacitor and it looked like someone had previously had a go at it (winding resistance written on case).
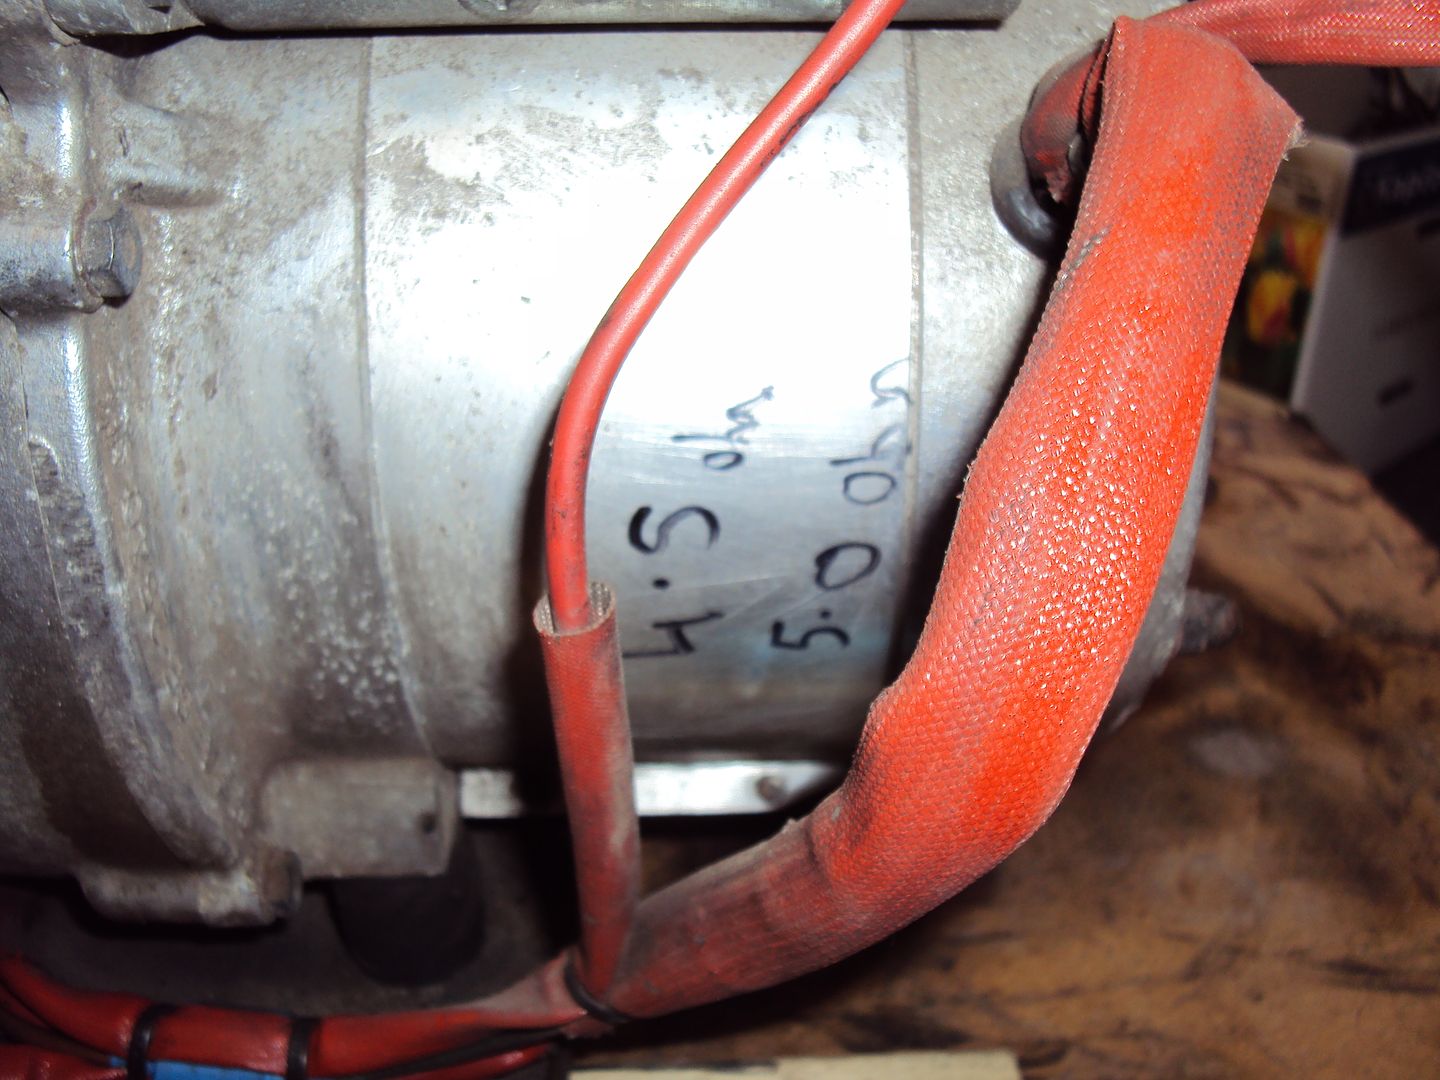
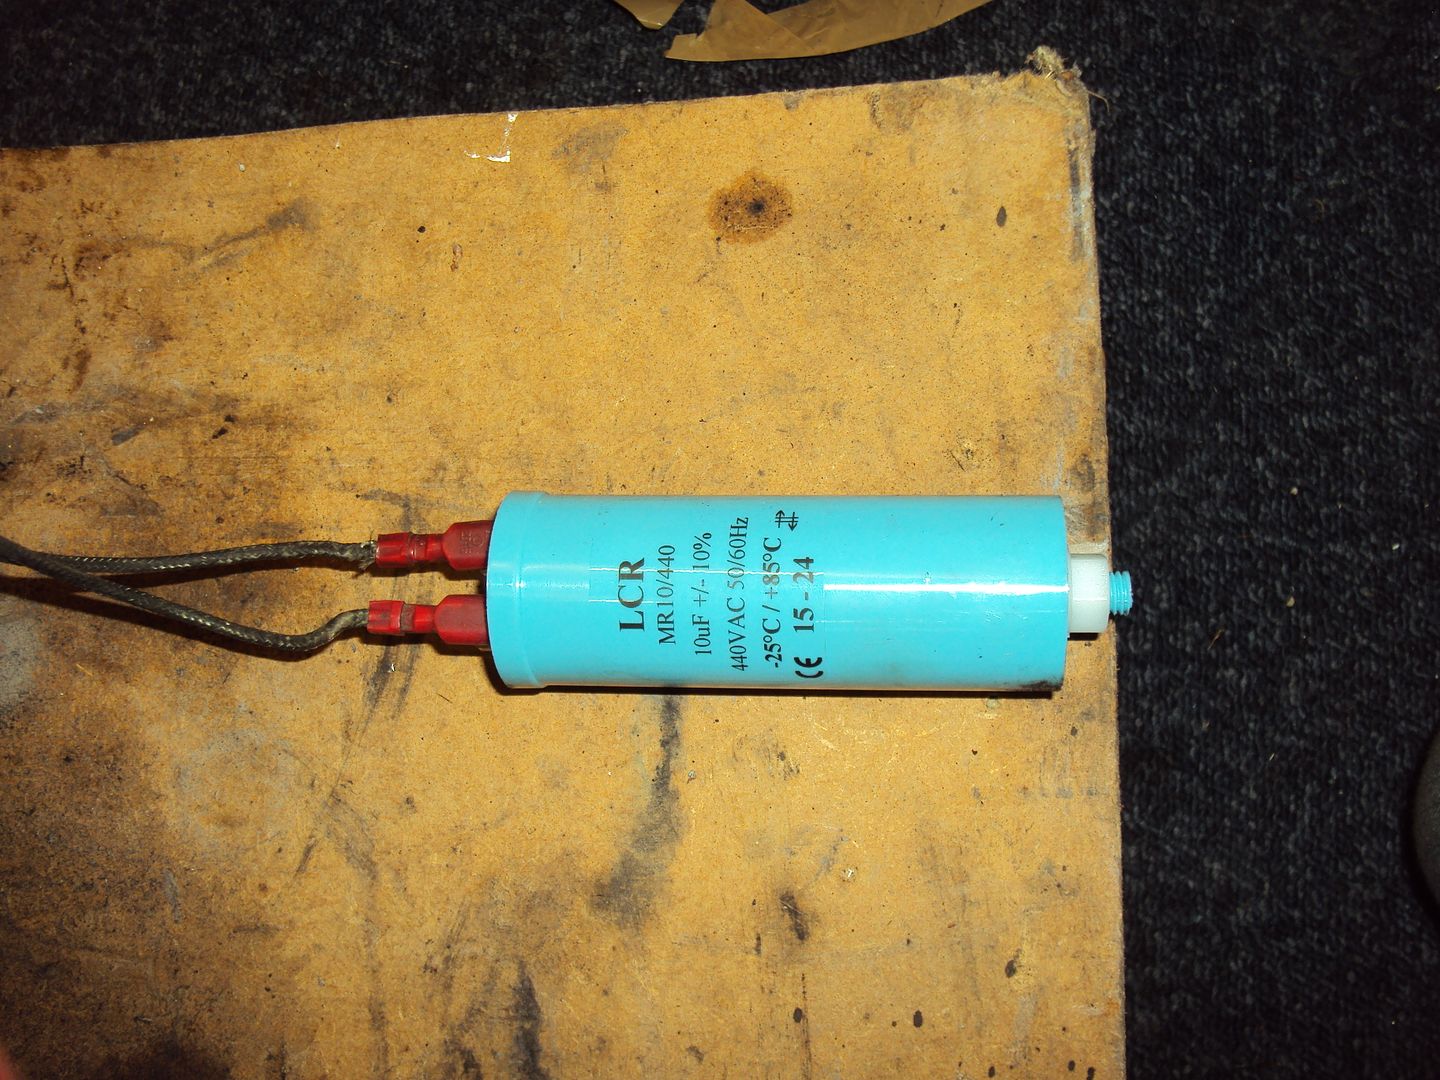
After a bit of digging around I found that it should have a 12.5uf capacitor. I took a chance and picked up a 10uf from Maplin, it was only a couple of quid.
It worked!
Still to do
Get a 12.5uf cap as the voltage is a bit down, currently it’s outputting 205 on load and 215 off load, should be 220 ish
Make a control panel as it’s missing the original control panel so need to build one so the electric start can be used without hotwiring it
richierich37 said:
creationracing said:
Great work man.
But you need to increase your workrate. We need entertained.
^^^^ This! But you need to increase your workrate. We need entertained.

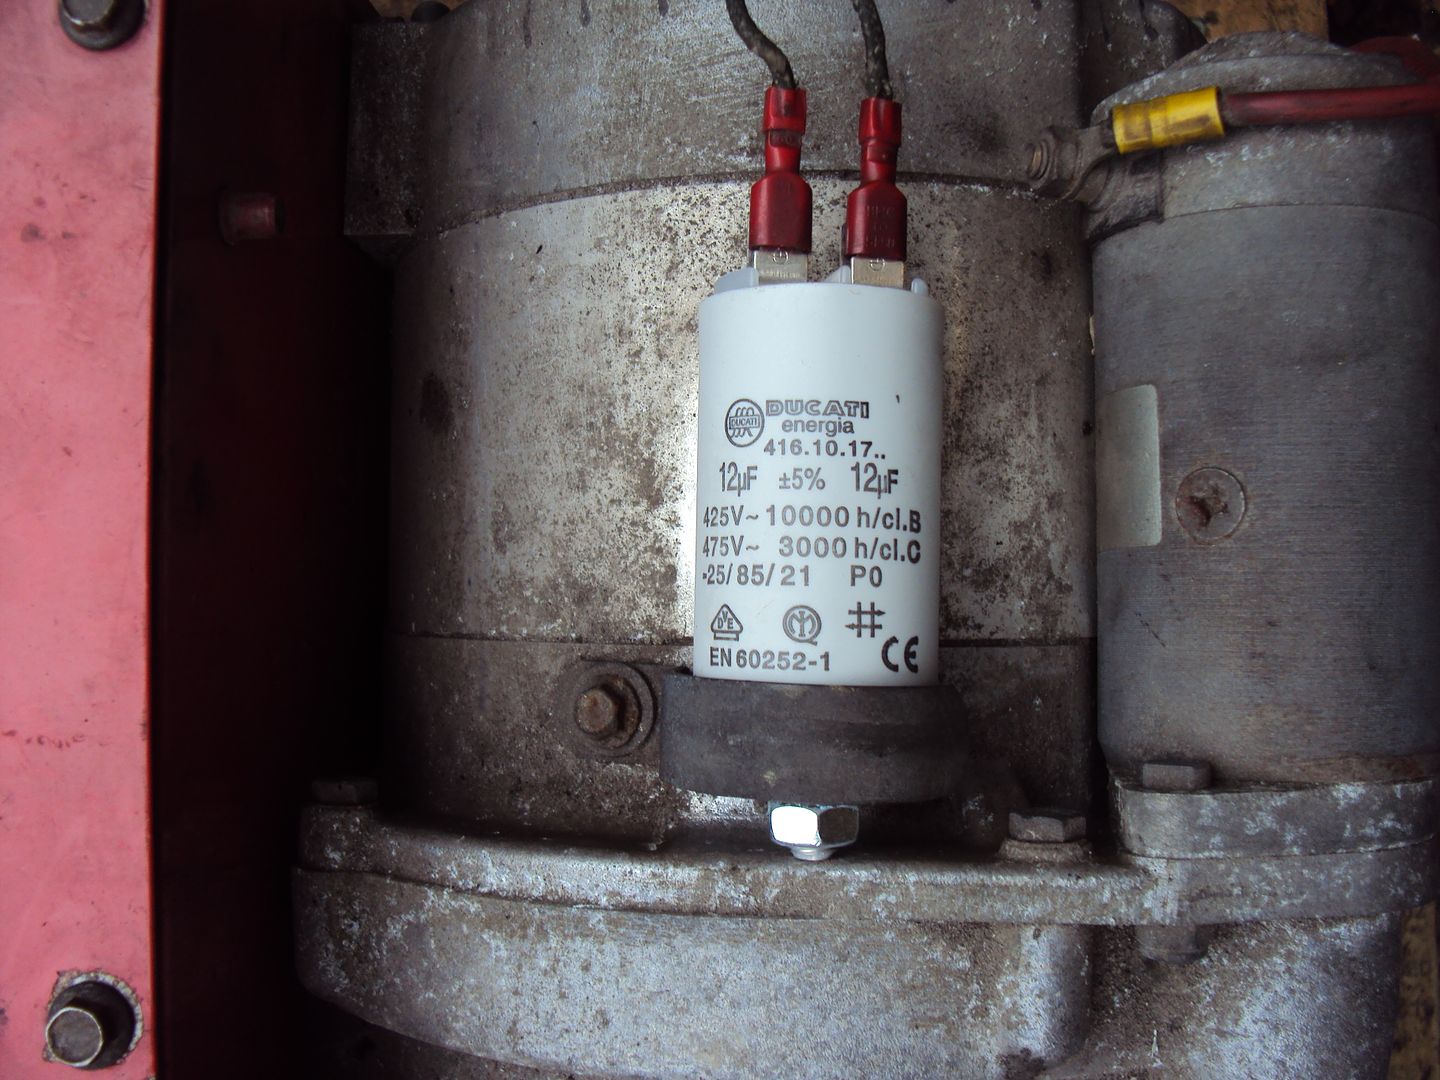
The replacement capacitor has arrived; it’s as close to 12.5uF as I could get.
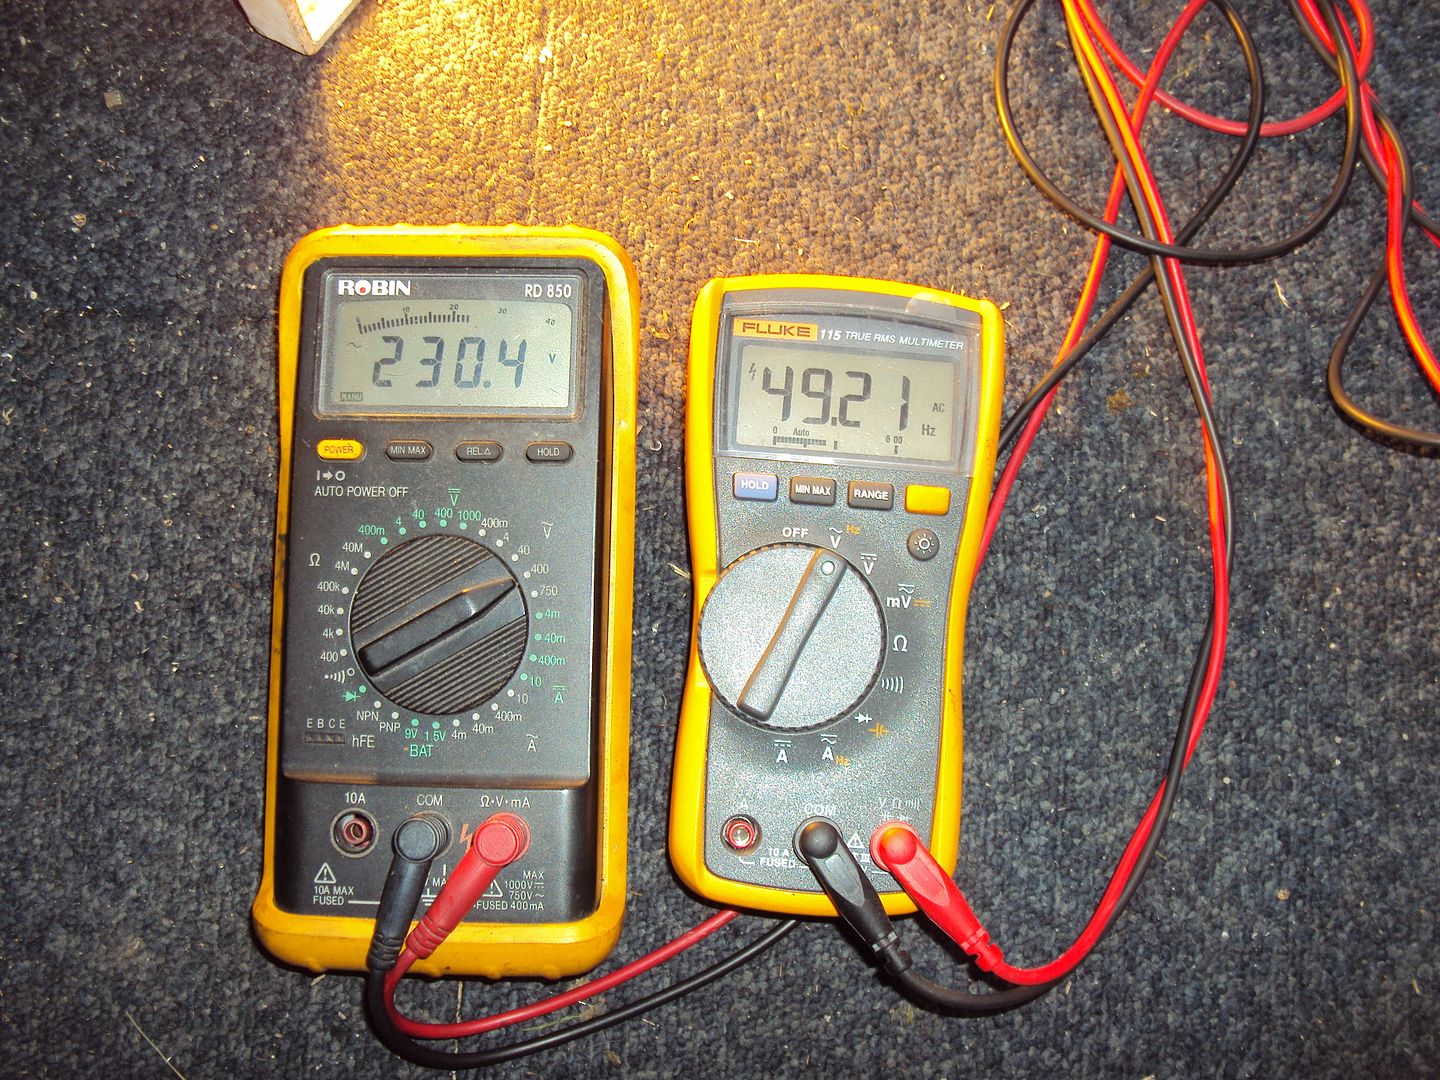
I took some before/after photos to show the difference it made.
Output voltage and frequency with 10uF capacitor and 1400w load

Output voltage and frequency with 12uF capacitor and 1400w load
The parts to for the control panel have arrived, so just need to get it built so the electric start can be used.
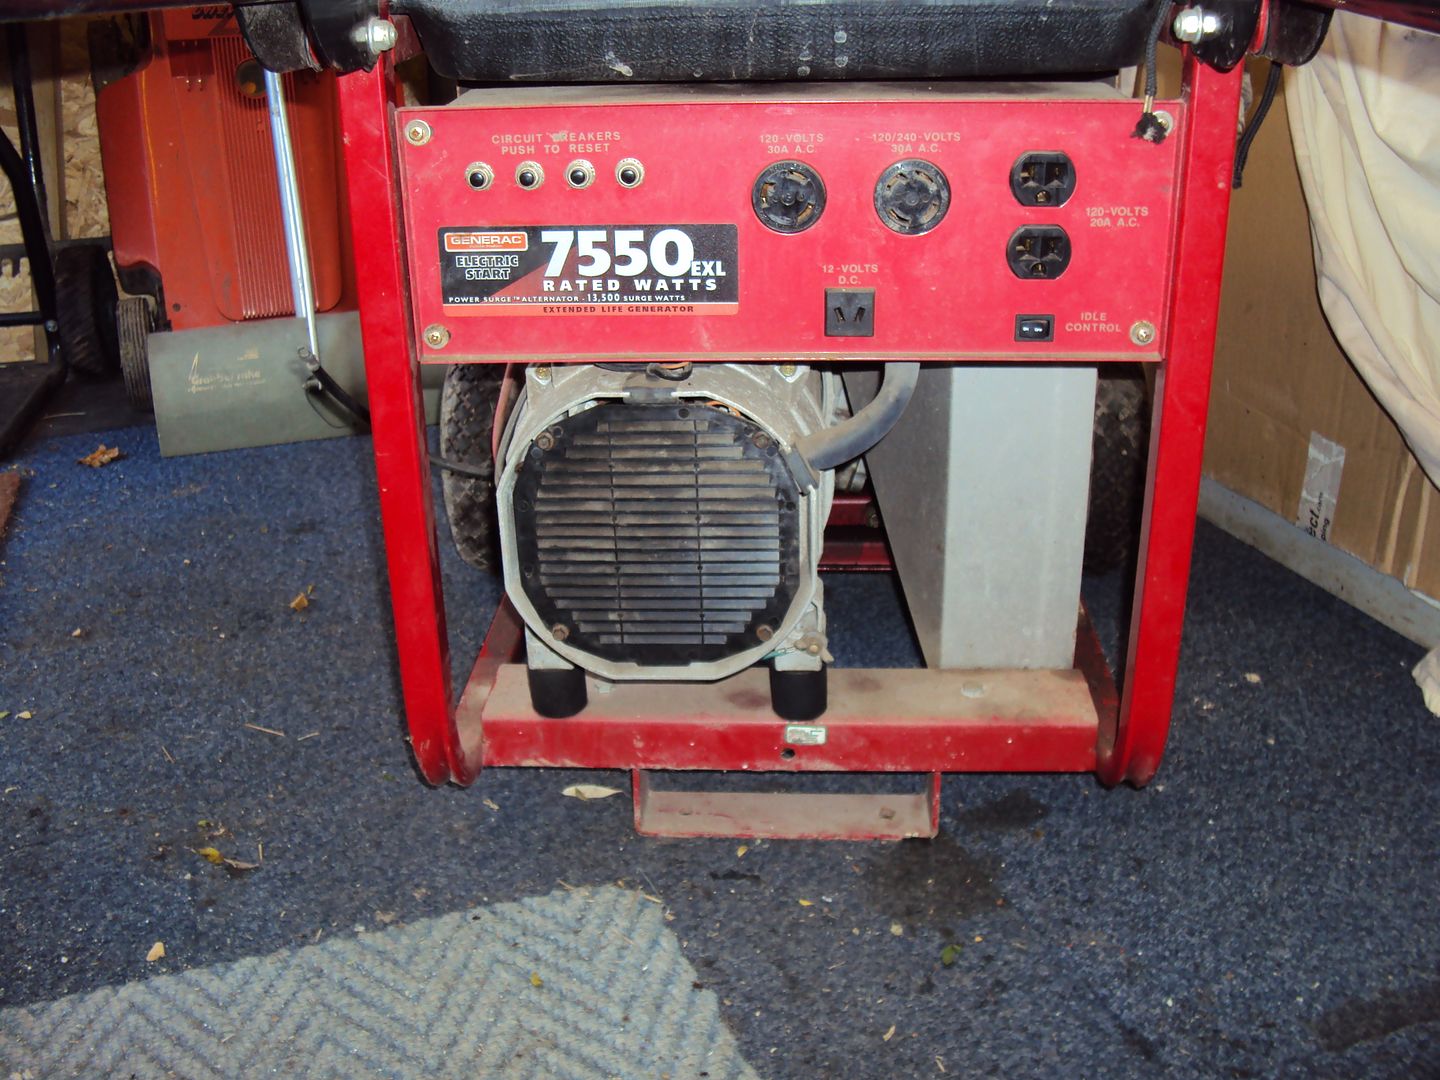
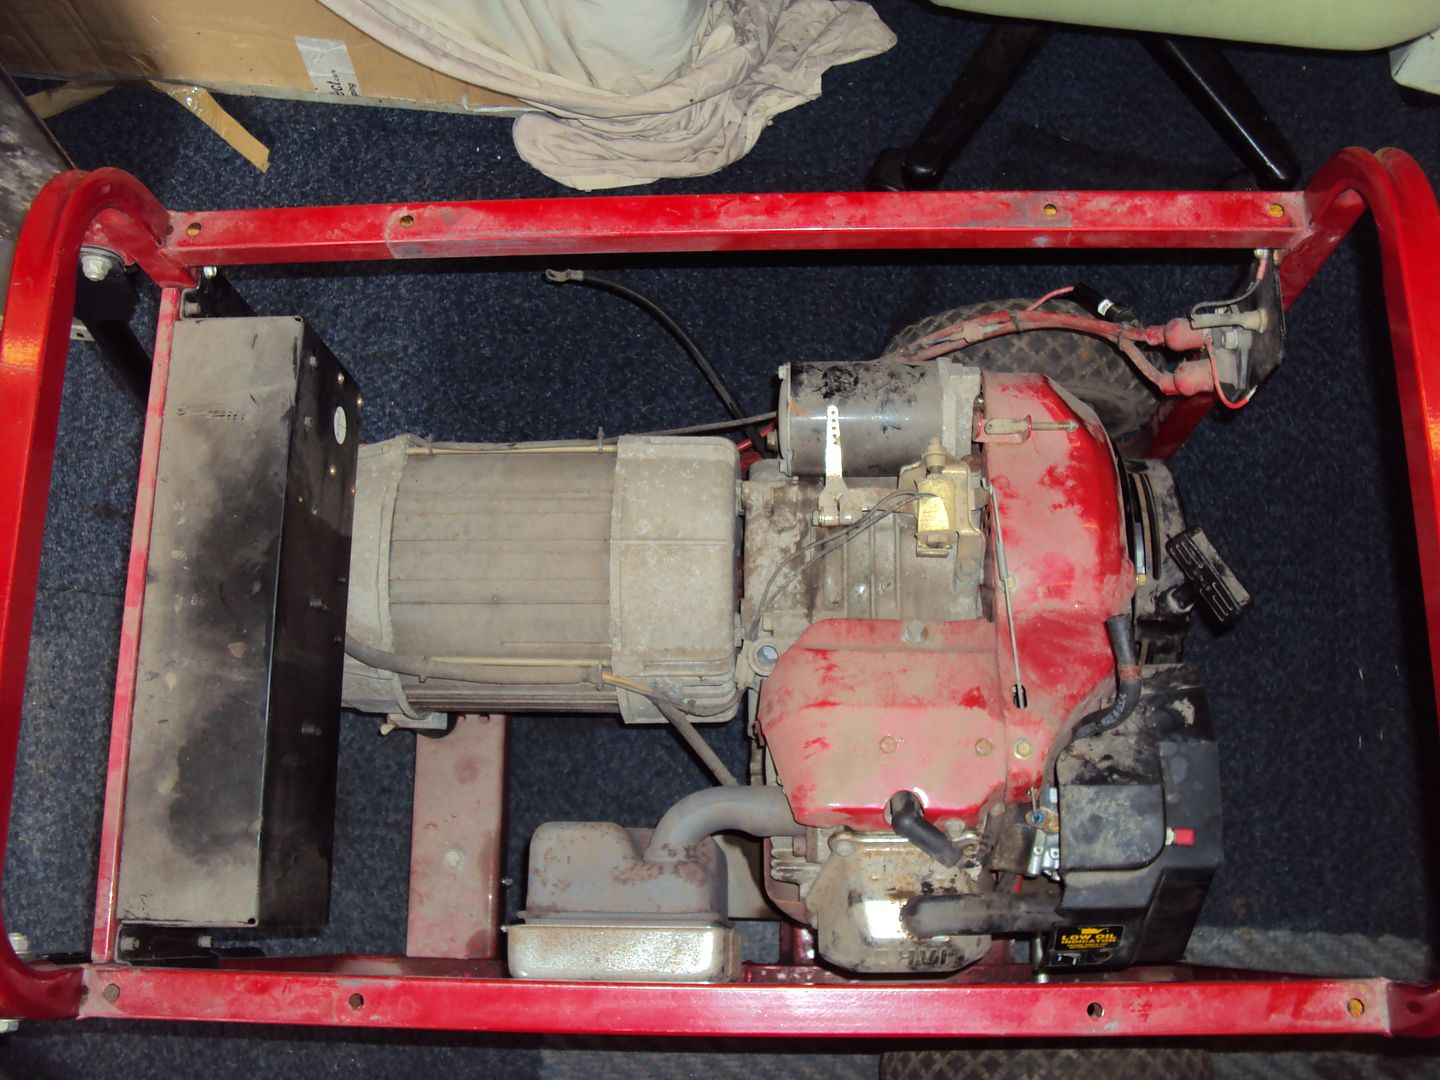
Here is the latest project, It’s a 7.5kW Gernerac so a change from the usual Honda & Kippor generators that I have worked on in the past.
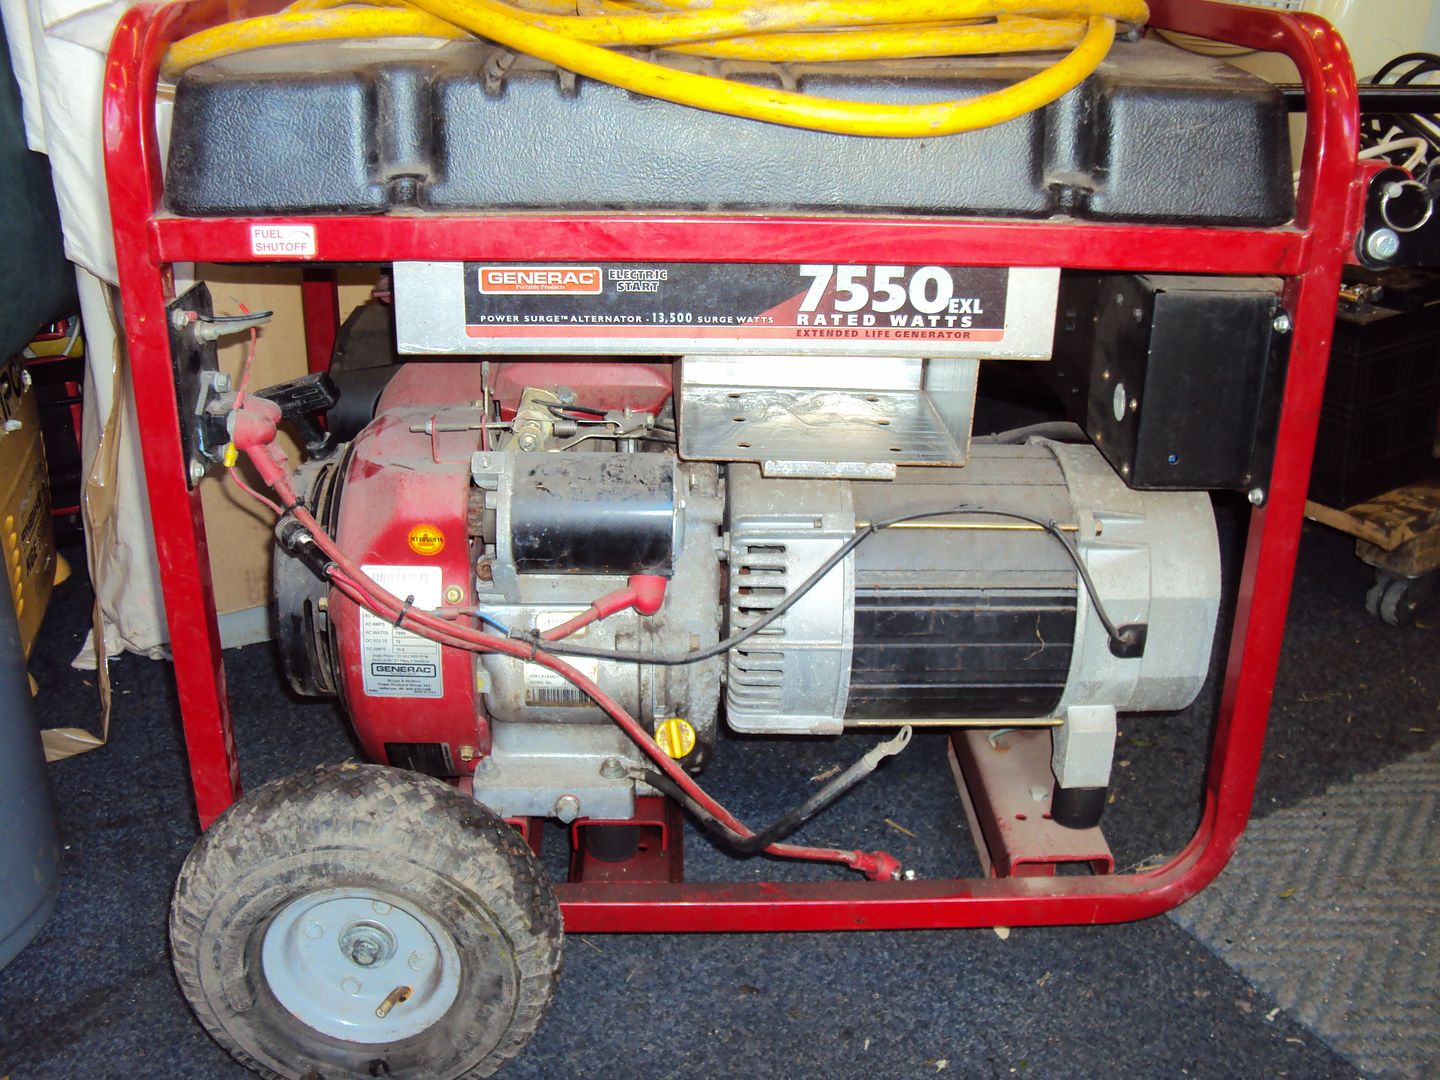
American plugs
Initial testing shows:
No output, when I collected it I was told it worked 2 months ago…. hmmmmm
The engine is seems to be running too fast,
The starter battery is dead
One of the tyres has a slow puncture
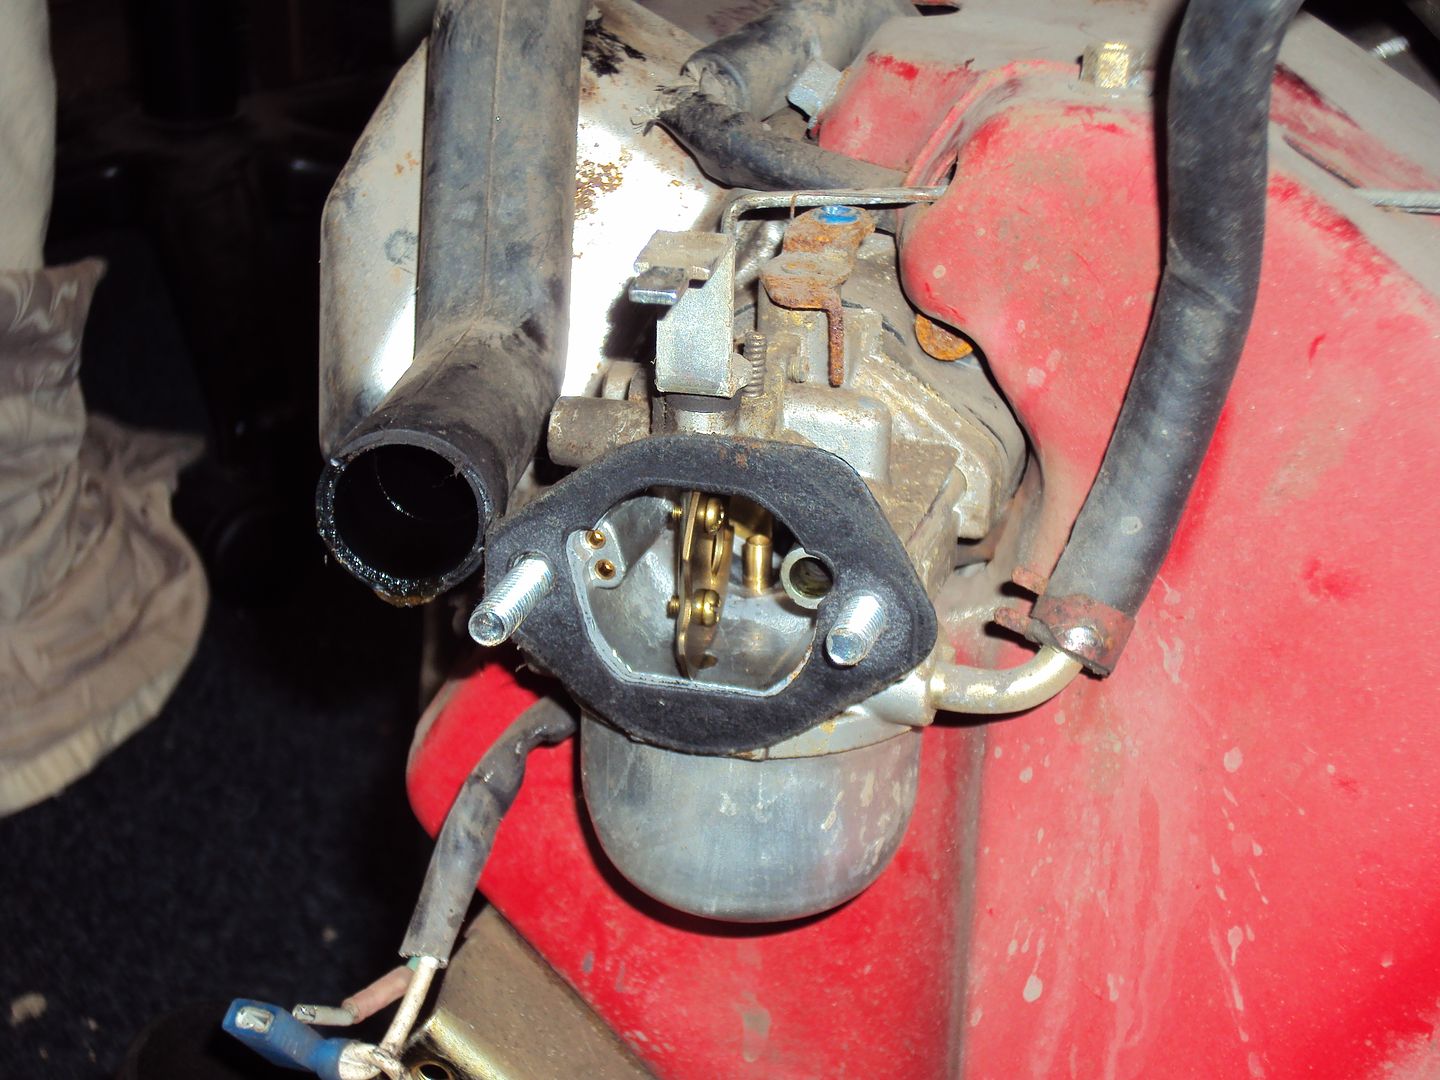
First step was to get the engine running properly, started by removing the carburettor so I can be checked and cleaned
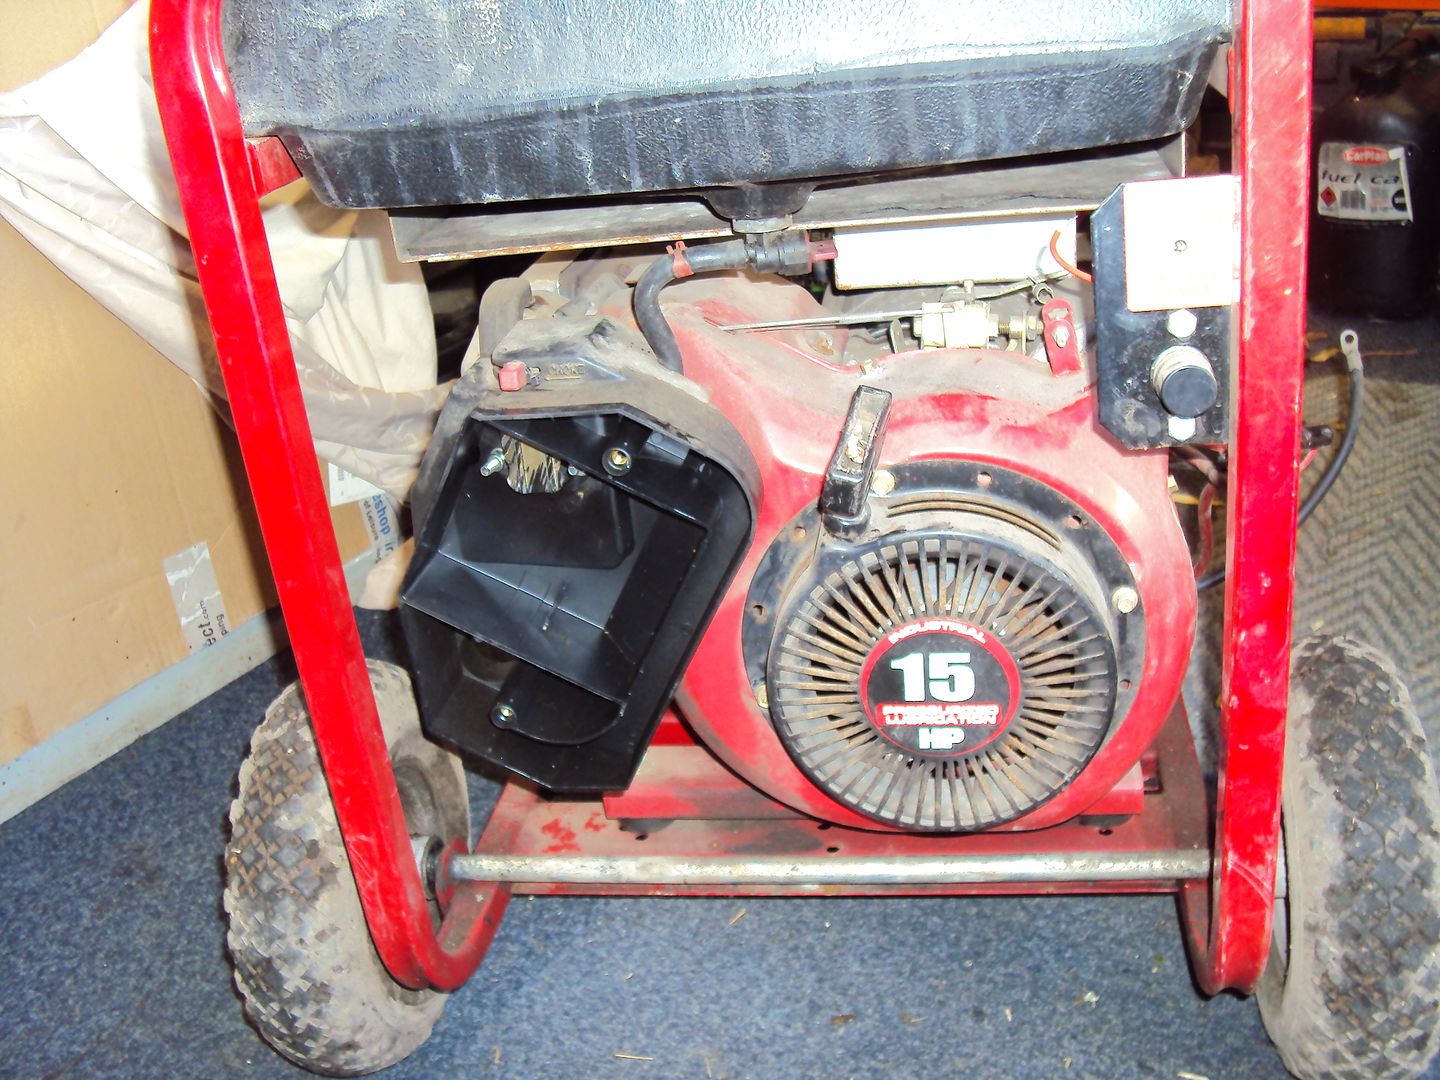
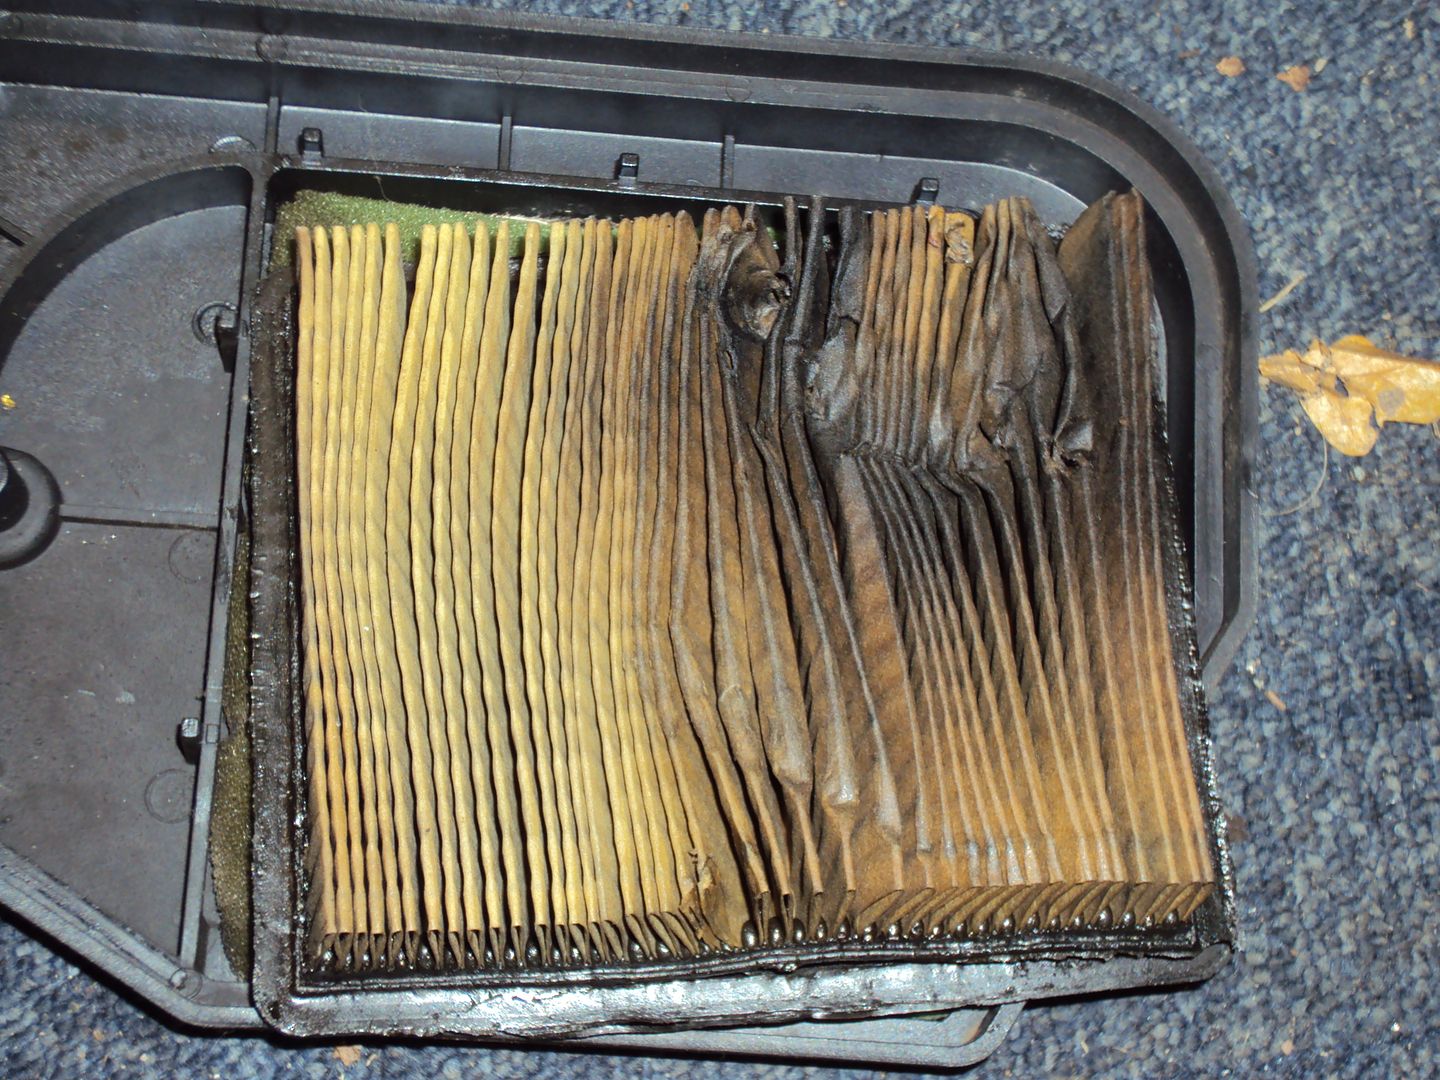
The air filter was soaking with petrol so it looks like it has been running a bit rich
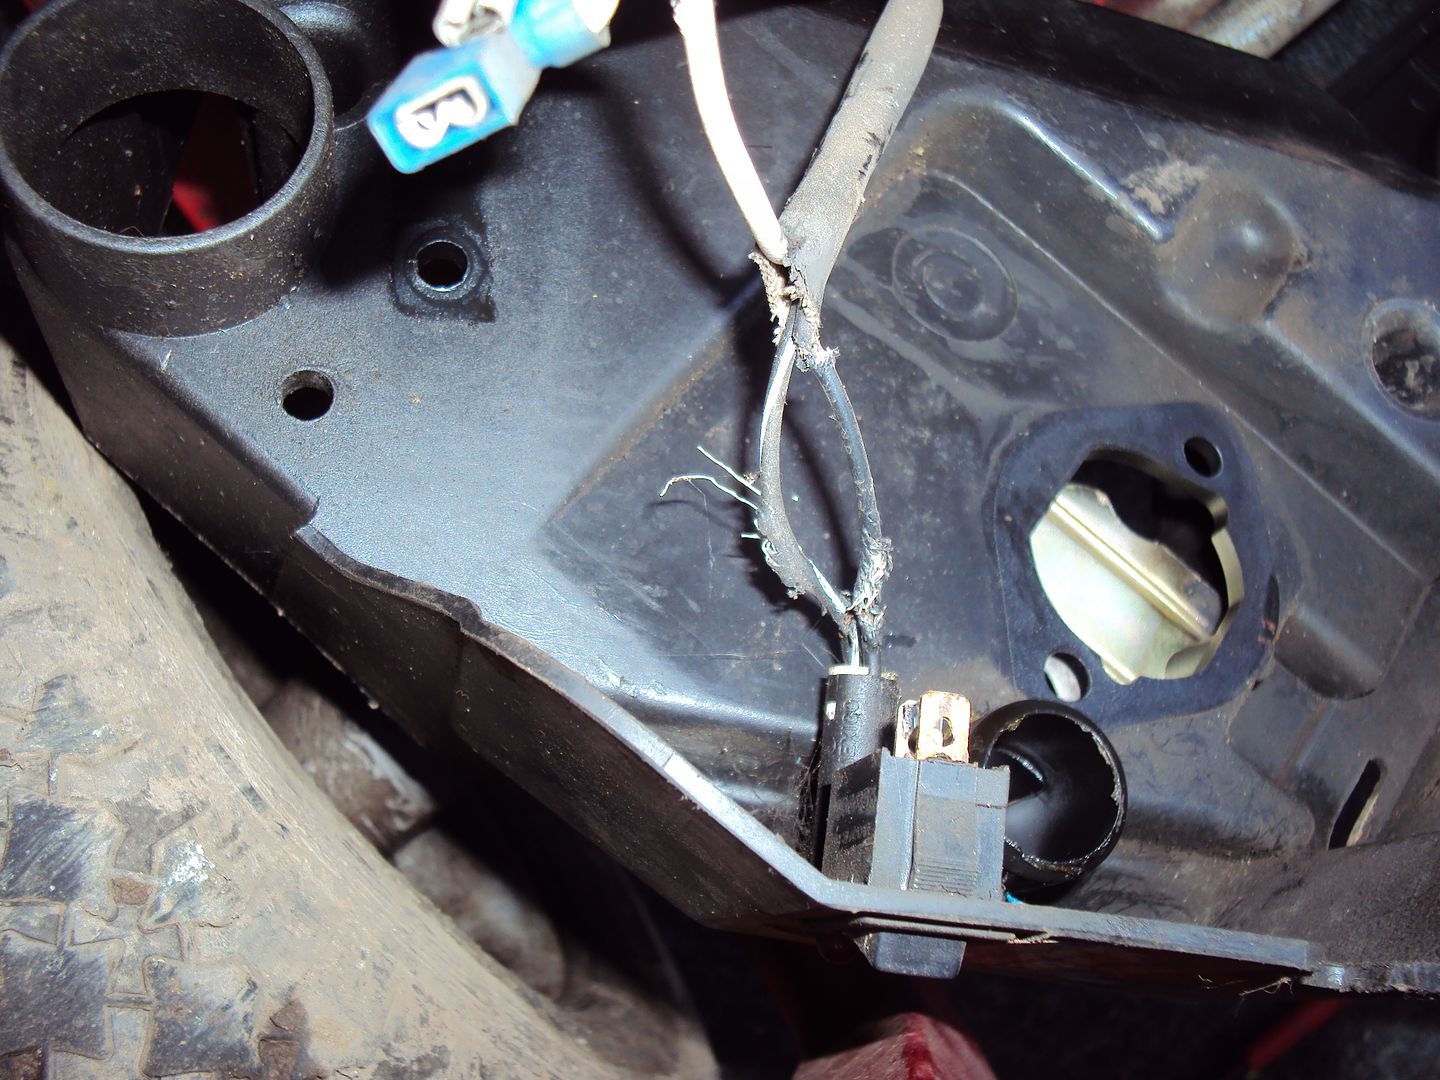
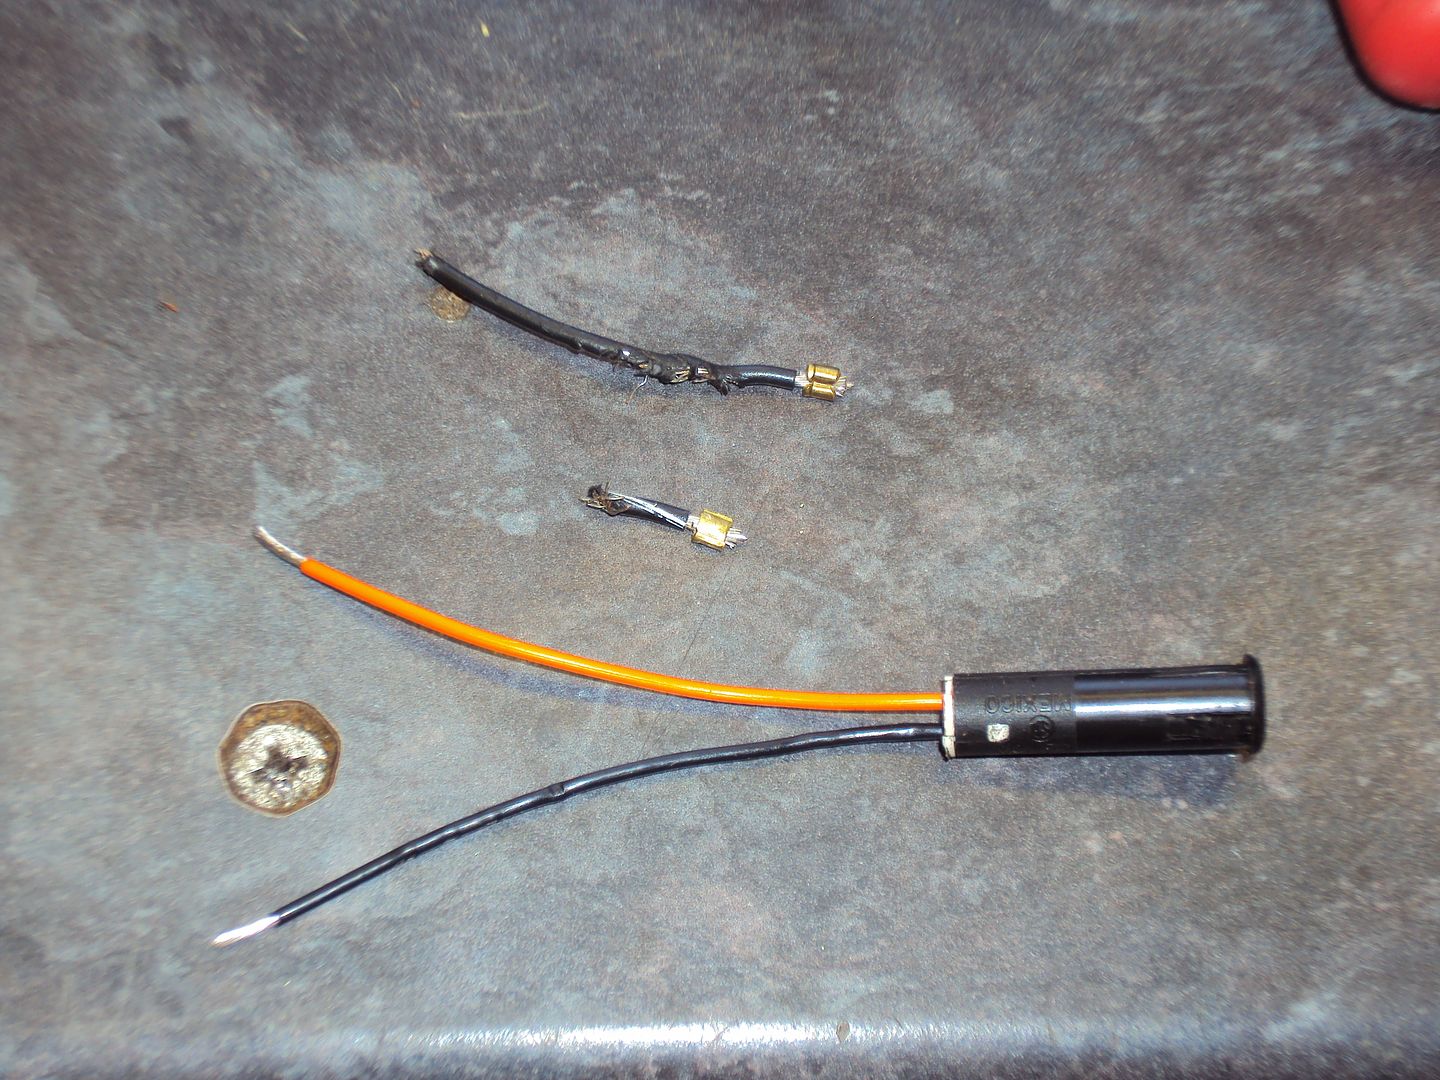
During disassembly I found some visitors had been living in the engine wiring
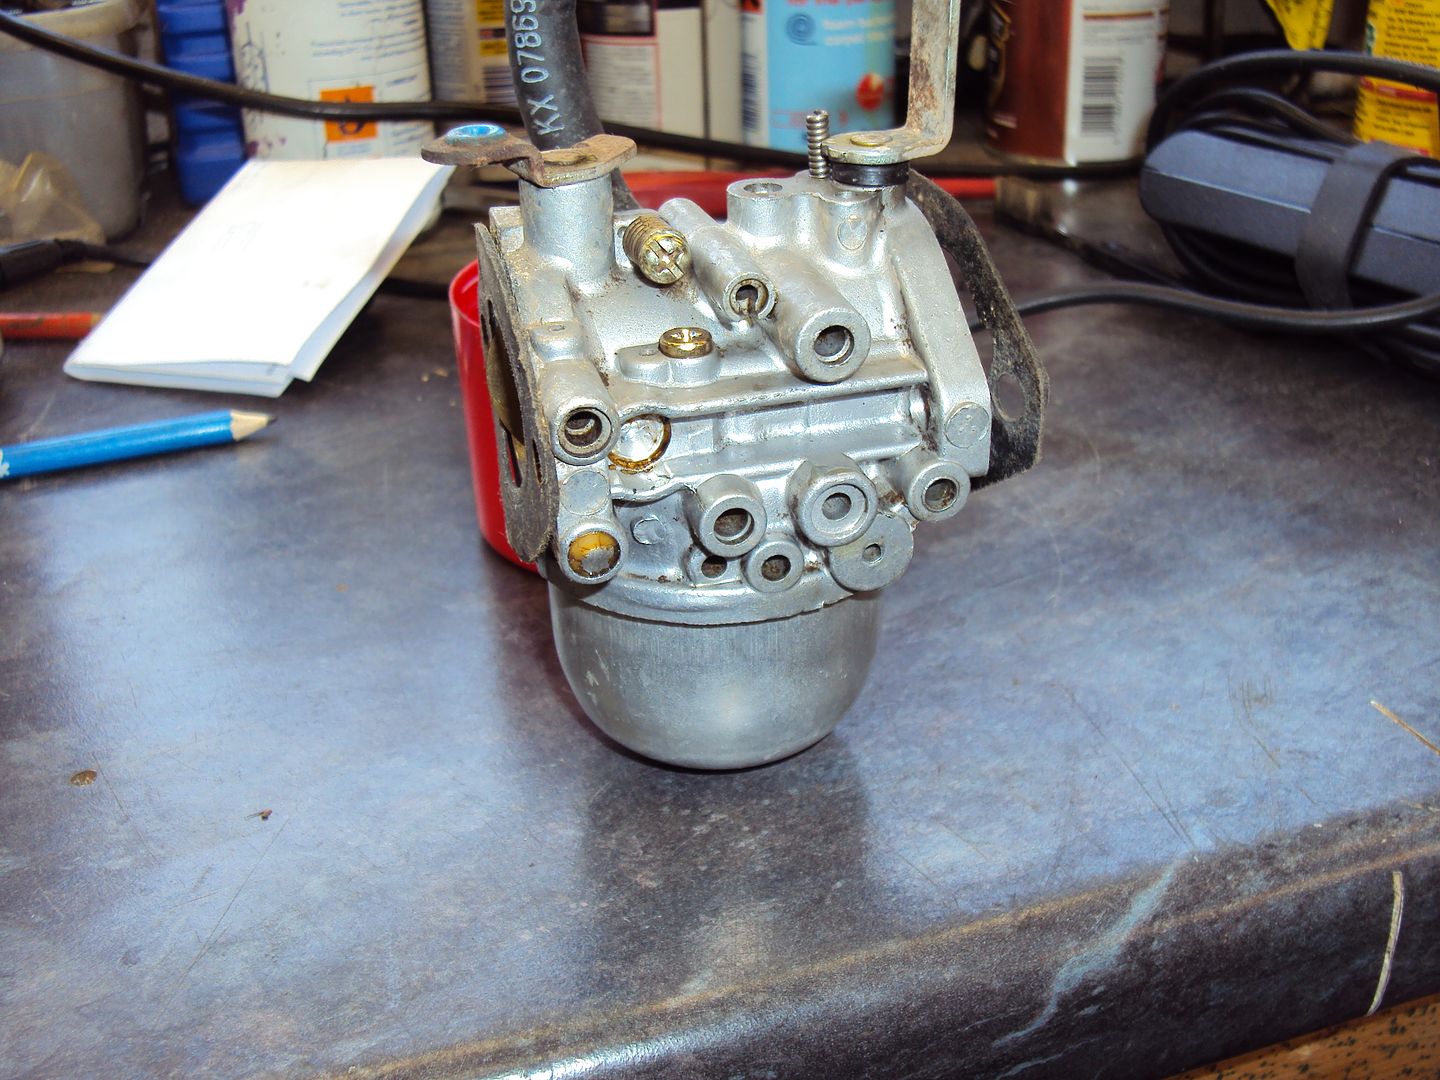
Carburettor
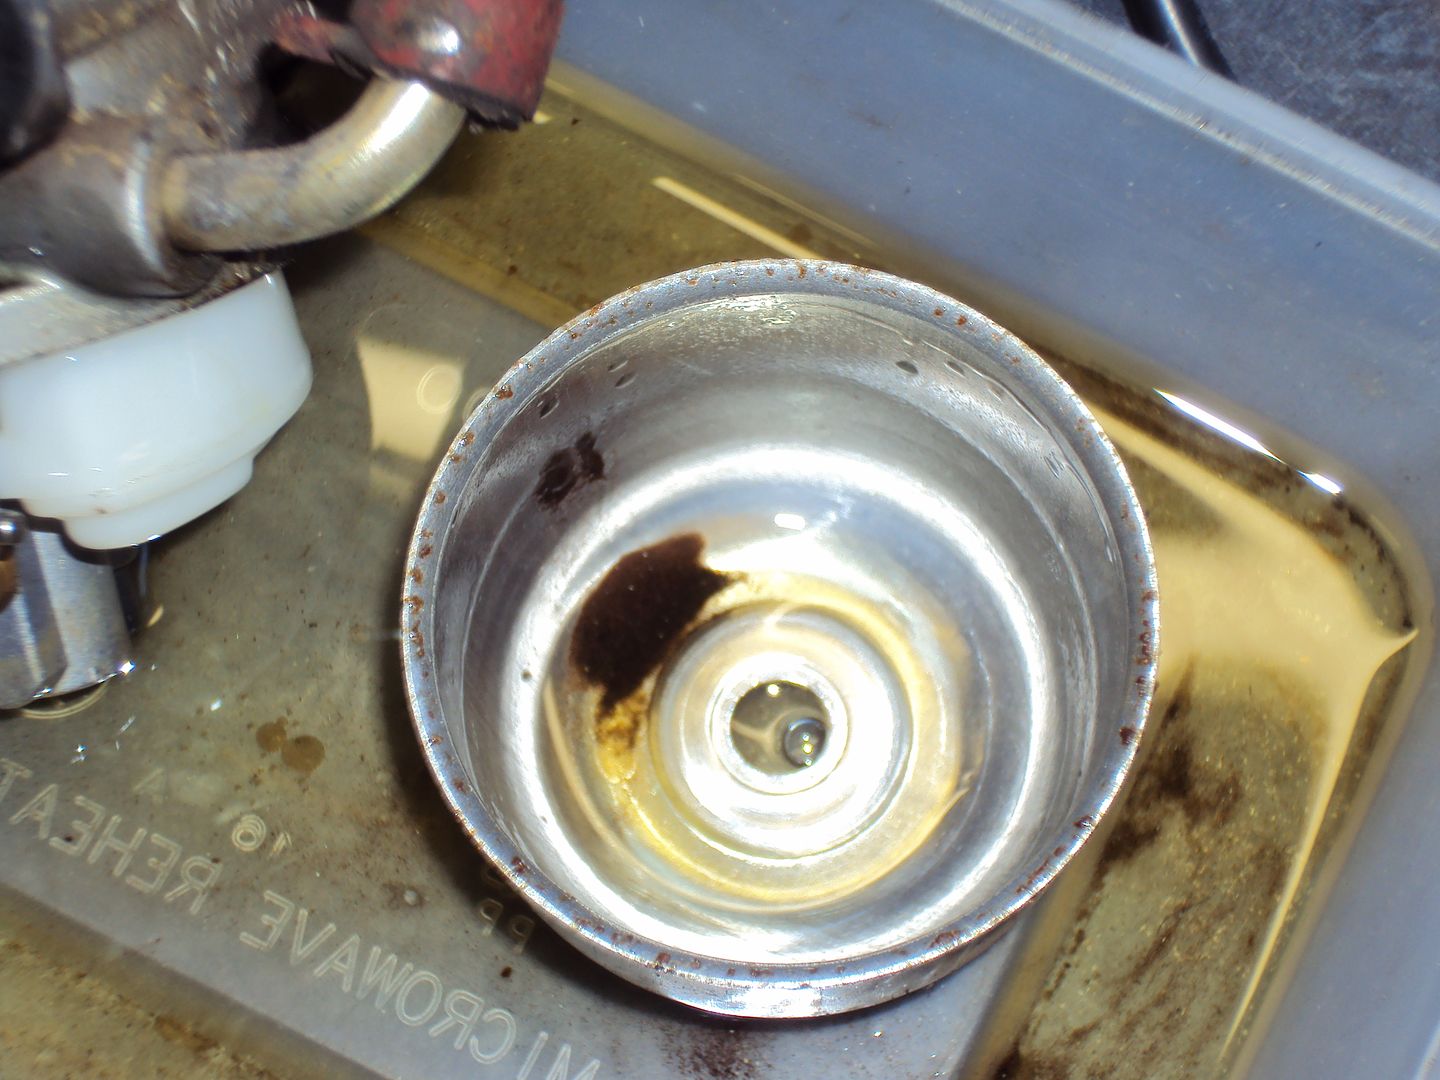
I removed the bowl and found some fine sediment, so not too bad. All the jets and internal passageways were clean so I just reassembled and cleaned it up for the moment.
Repaired the damaged wiring
Once re-assembled I found the engine would only run for a few seconds before cutting out. After a bit of poking around I decided to test the oil pressure as the symptoms pointed to low oil pressure or faulty oil pressure switch.
I replaced the oil pressure switch with a pressure gauge, the yellow wires went to the pressure switch.
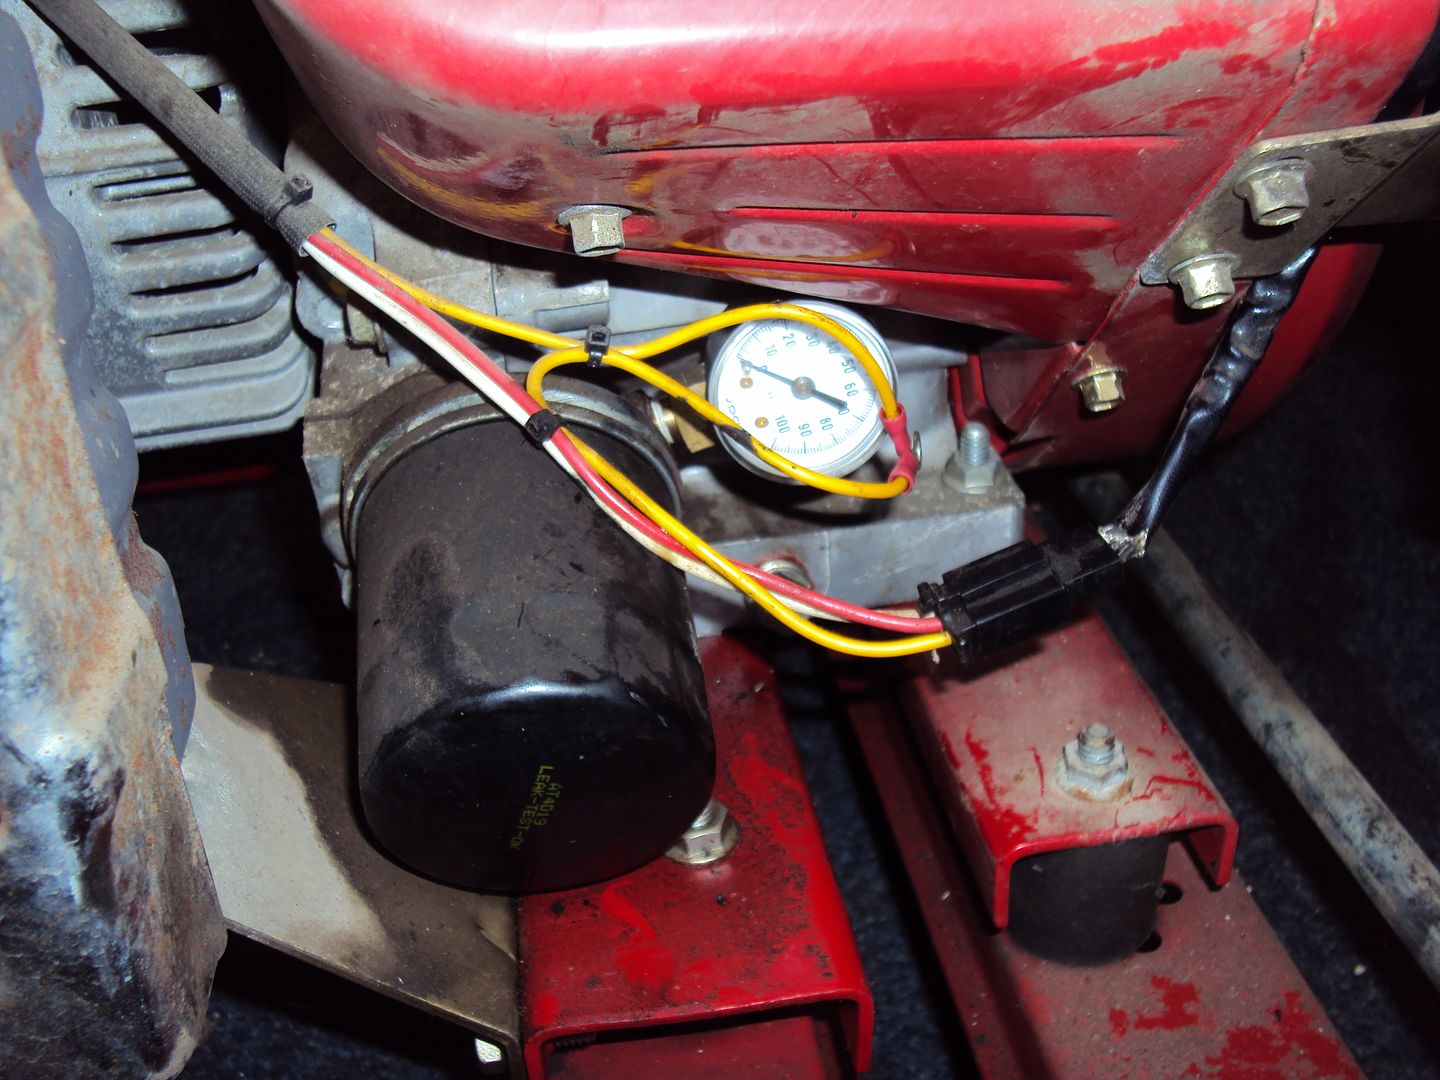
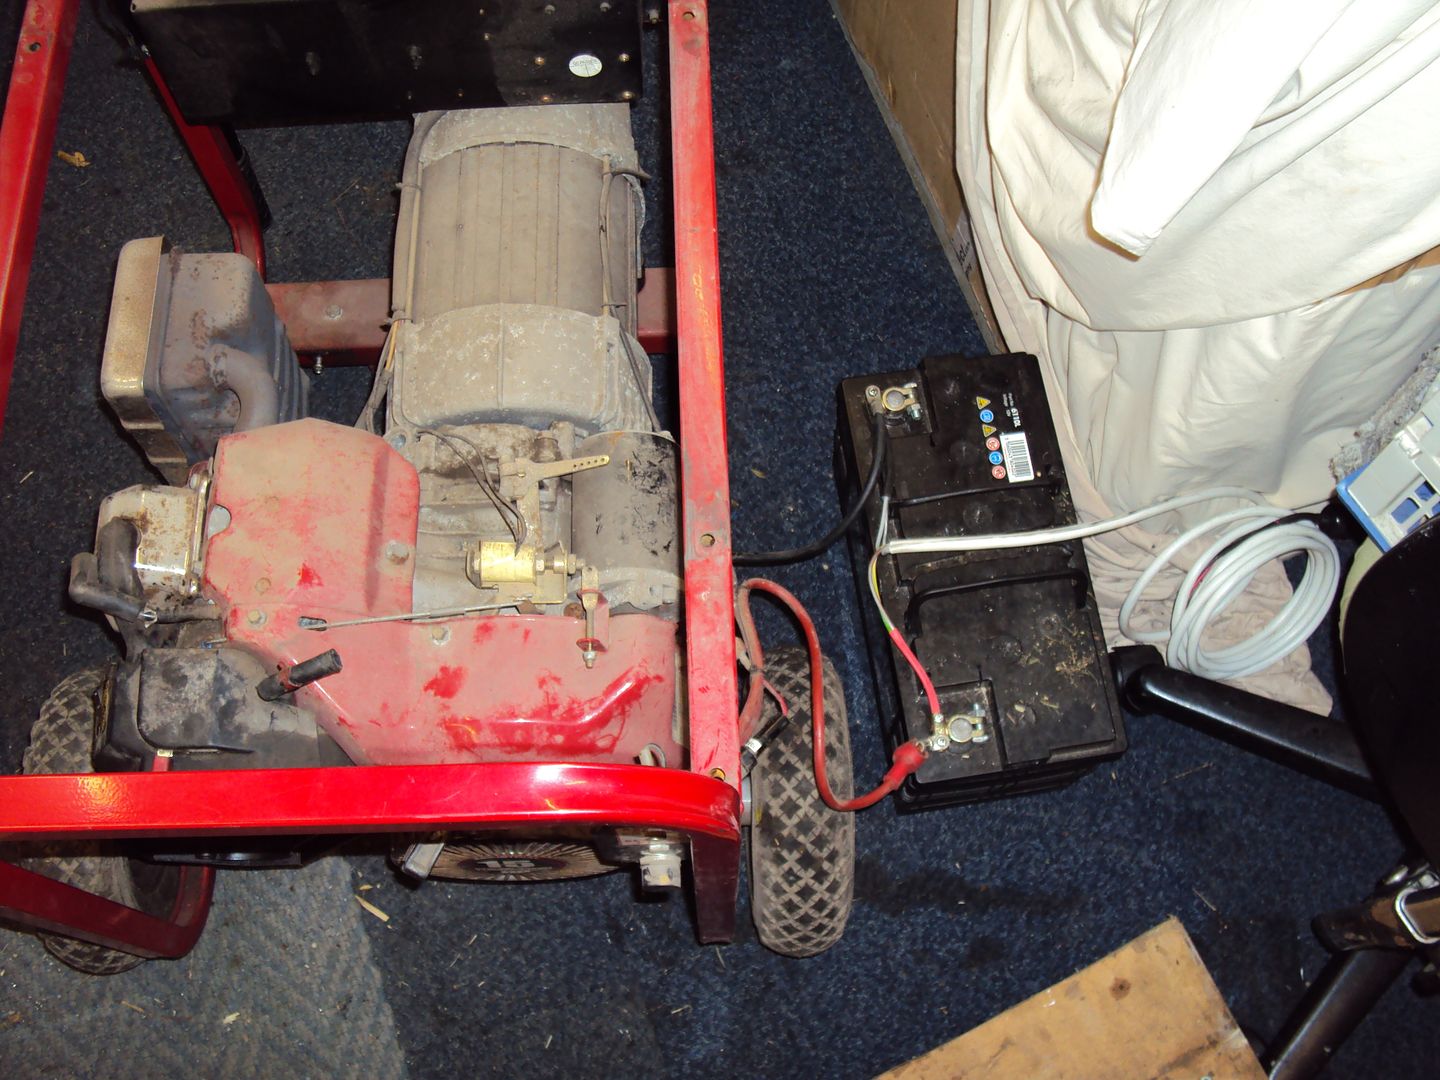
Hooked up a battery so I could crank it with the starter motor (spark plug removed)
Oil pressure with starter motor running

Pressure looks ok, as engine spec says oil pressure switch should cut the ignition when the pressure goes below 8psi.
Looks like the damaged wiring was preventing the oil pressure switch from cutting the ignition, so the repair uncovered the fault.
For the moment I’ll carry on testing with the oil pressure switch disconnected so the engine stays running.
Might start fault finding the lack of output tomorrow
American plugs
Initial testing shows:
No output
, when I collected it I was told it worked 2 months ago…. hmmmmmThe engine is seems to be running too fast,
The starter battery is dead
One of the tyres has a slow puncture
First step was to get the engine running properly, started by removing the carburettor so I can be checked and cleaned
The air filter was soaking with petrol so it looks like it has been running a bit rich
During disassembly I found some visitors had been living in the engine wiring
Carburettor
I removed the bowl and found some fine sediment, so not too bad. All the jets and internal passageways were clean so I just reassembled and cleaned it up for the moment.
Repaired the damaged wiring
Once re-assembled I found the engine would only run for a few seconds before cutting out. After a bit of poking around I decided to test the oil pressure as the symptoms pointed to low oil pressure or faulty oil pressure switch.
I replaced the oil pressure switch with a pressure gauge, the yellow wires went to the pressure switch.
Hooked up a battery so I could crank it with the starter motor (spark plug removed)
Oil pressure with starter motor running
Pressure looks ok, as engine spec says oil pressure switch should cut the ignition when the pressure goes below 8psi.
Looks like the damaged wiring was preventing the oil pressure switch from cutting the ignition, so the repair uncovered the fault.
For the moment I’ll carry on testing with the oil pressure switch disconnected so the engine stays running.
Might start fault finding the lack of output tomorrow
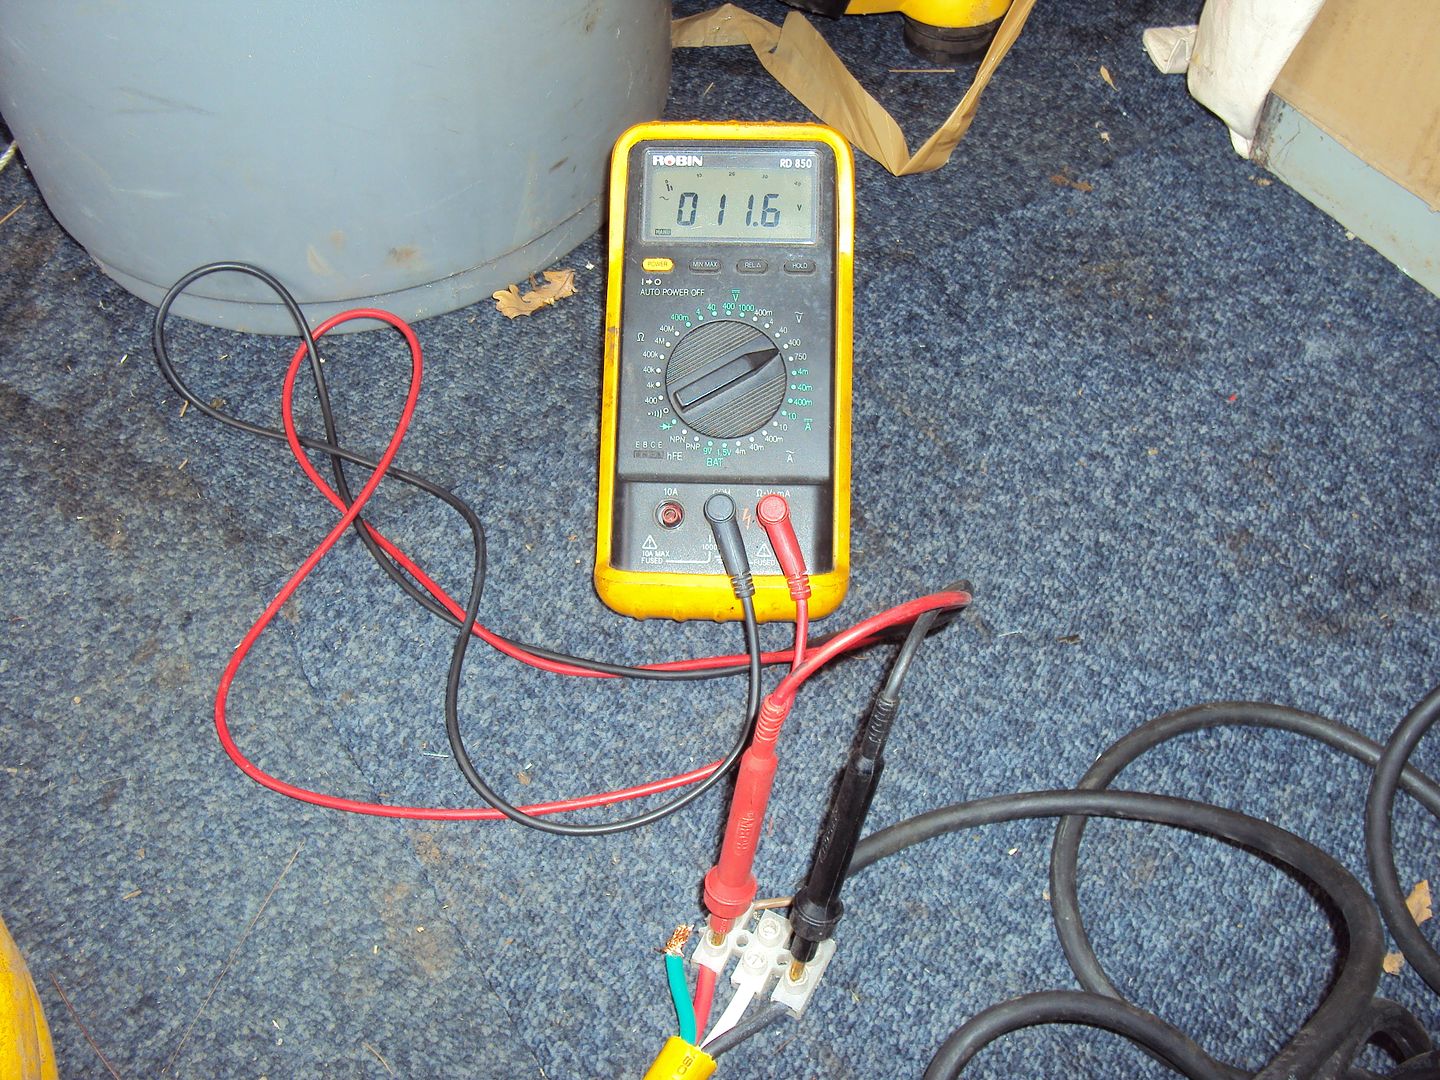
Had a bit more time to tinker with it today now the engine is running properly, I could start diagnosing the lack of output.
I started with measuring the output voltage to see if it was generating at all. There was some voltage however it was a bit low….
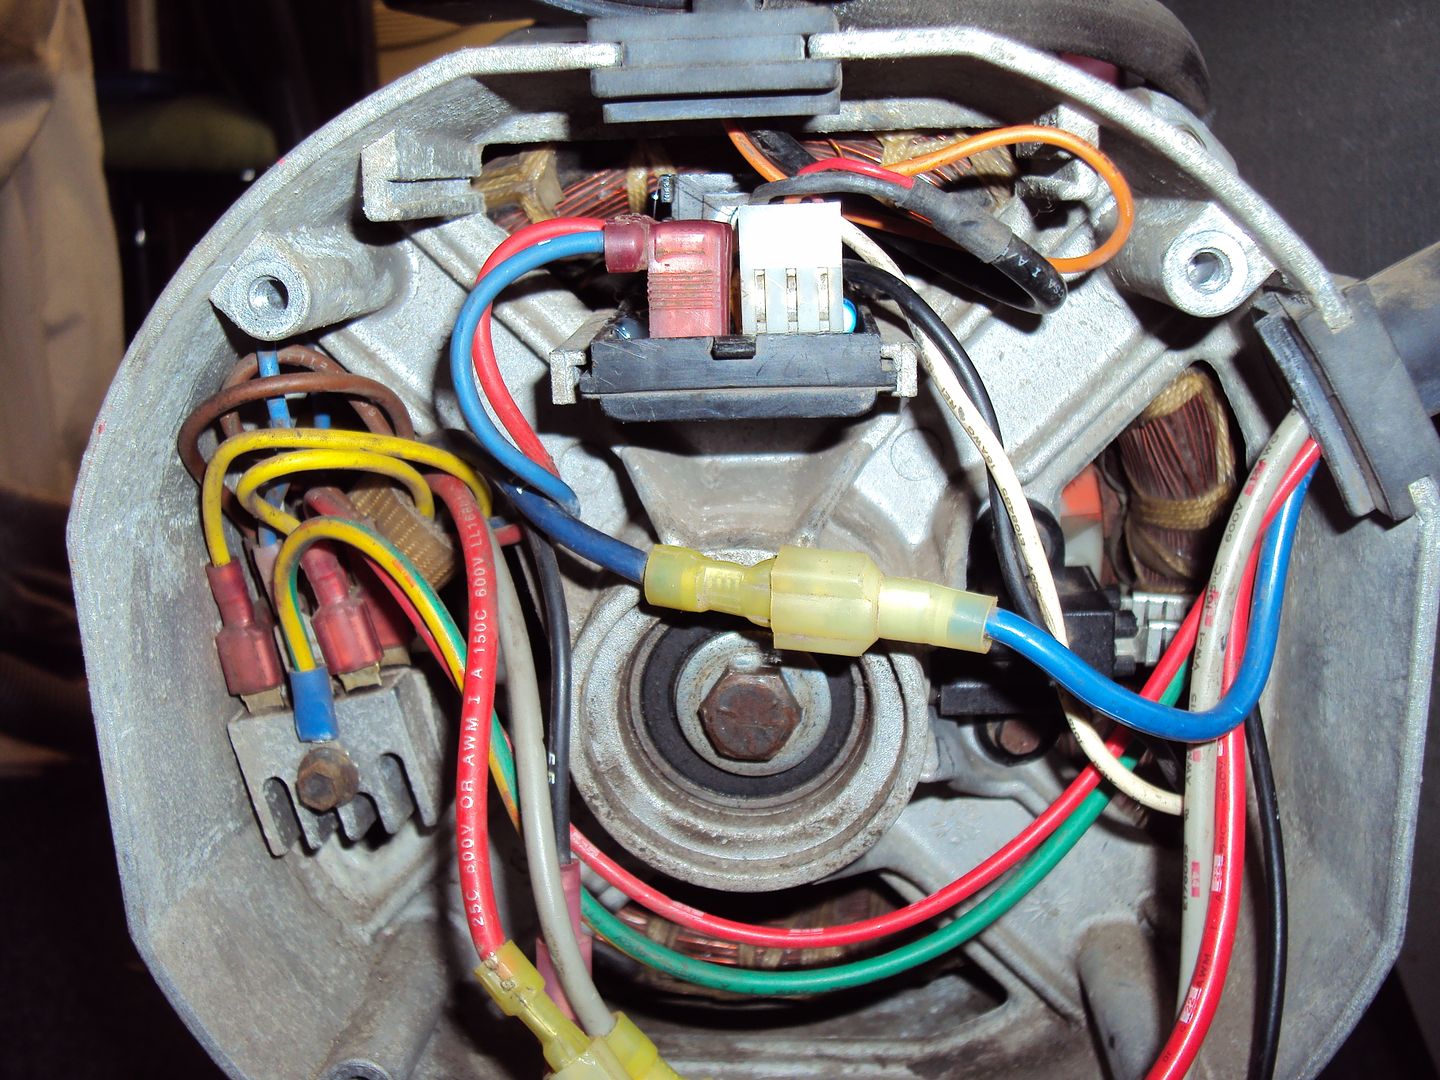
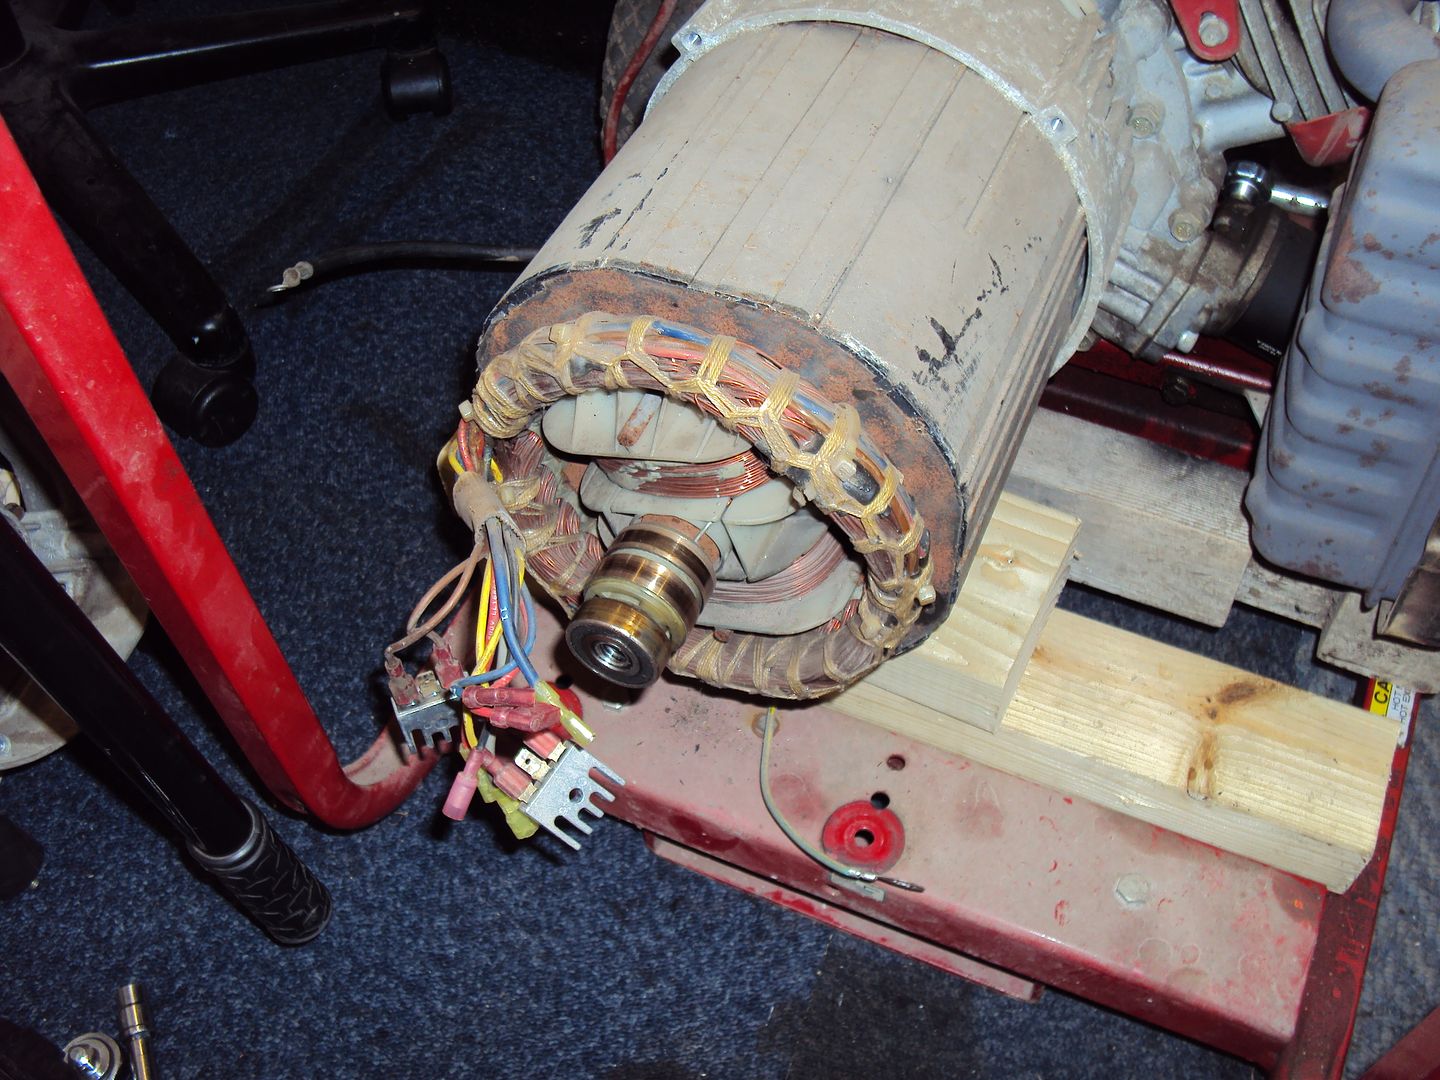
So following the faultfinding guide I downloaded for the generator, the next point to check was the rotor.
The rotor “excites” the main windings, to do this a voltage is applied to a coil via carbon brushes and slip rings to induce a magnetic field in the rotor.
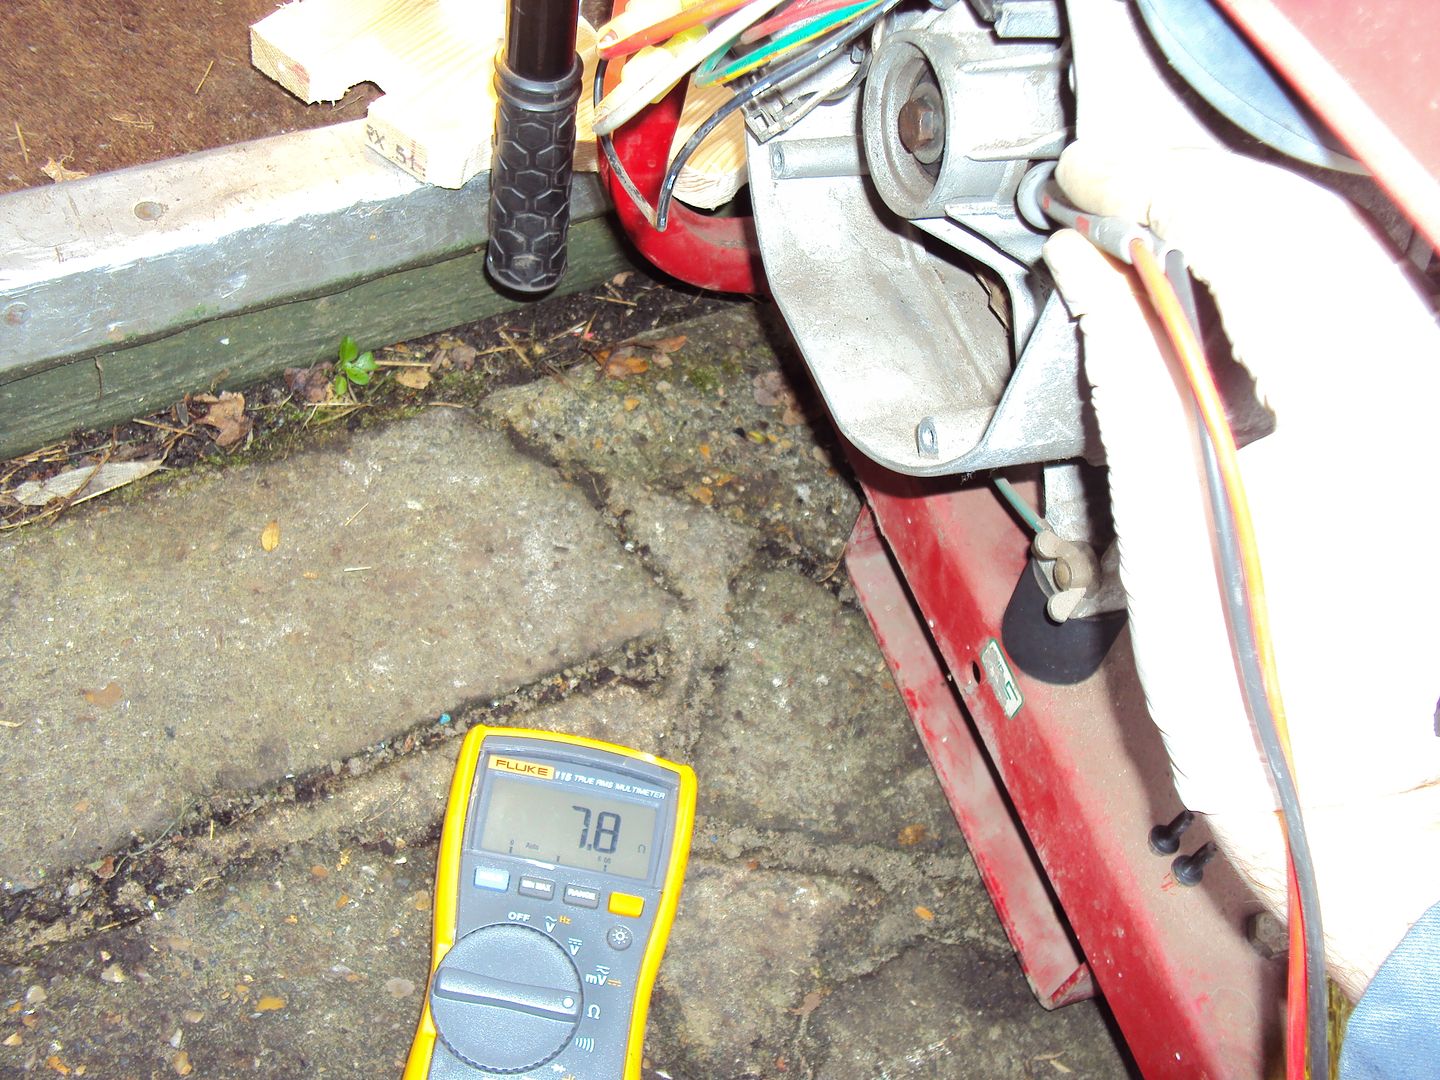
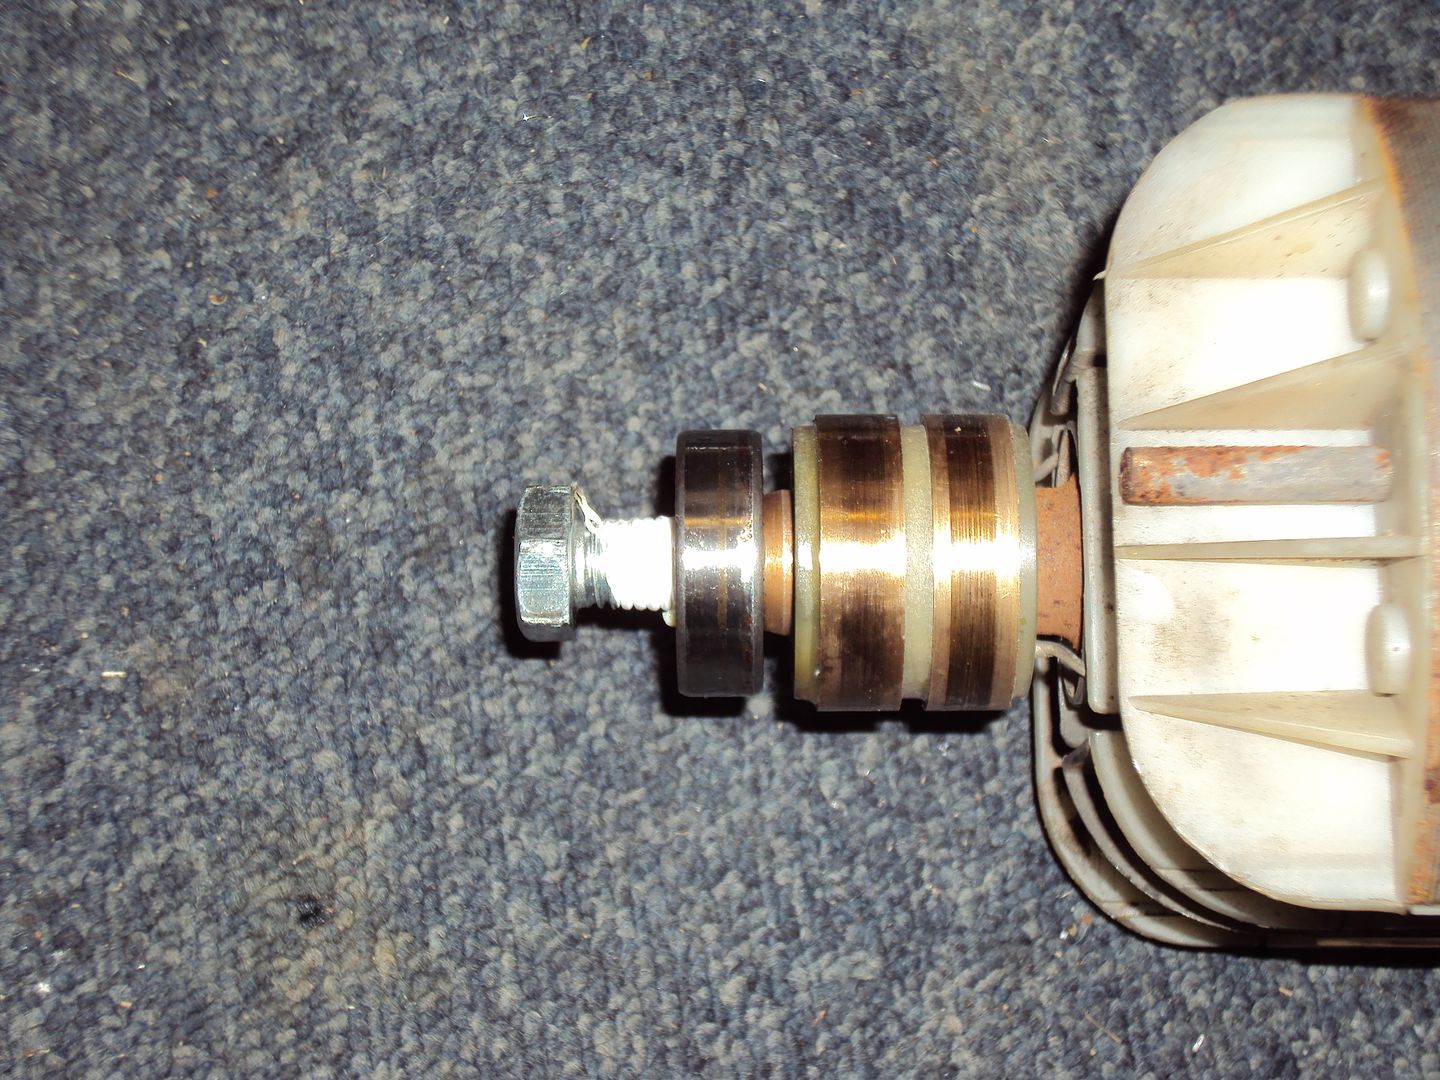
The first step is to check the rotor resistance, which should be between 7 & 9 ohms.
Slip rings, the carbon brushes have been removed for access.
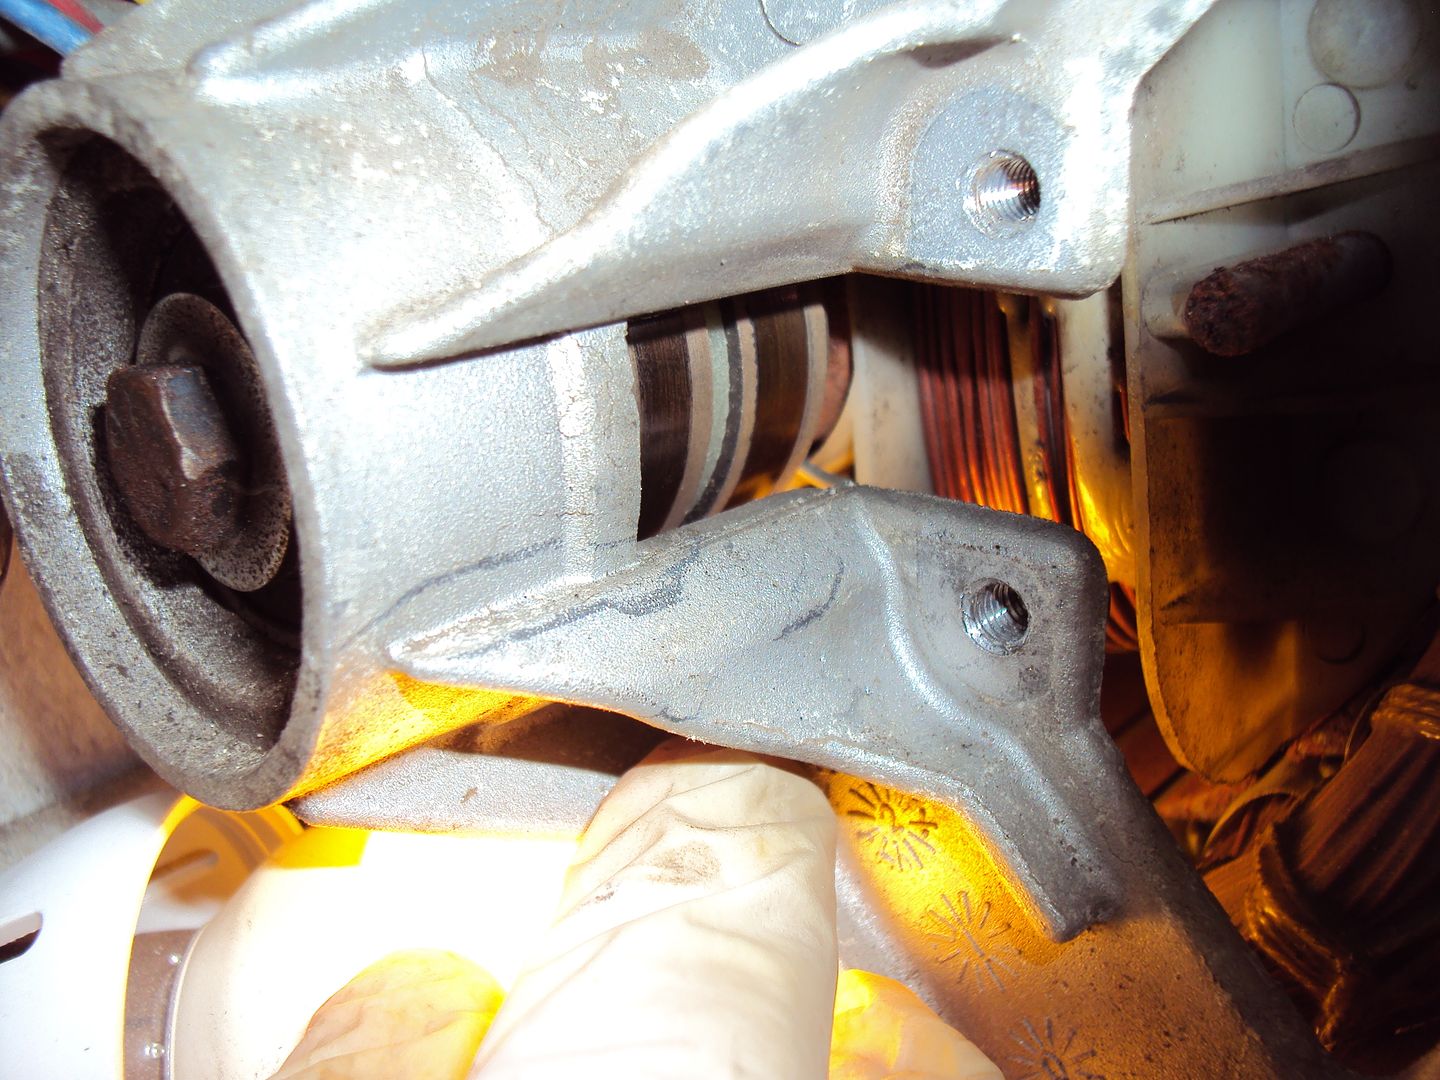
The resistance, seems to be within spec.
When I measured the resistance via the carbon brushes it was 200-300 ohms, so the next step is to clean both the brushes and the slip rings as the reading via the brushes should be 10-12 ohms.
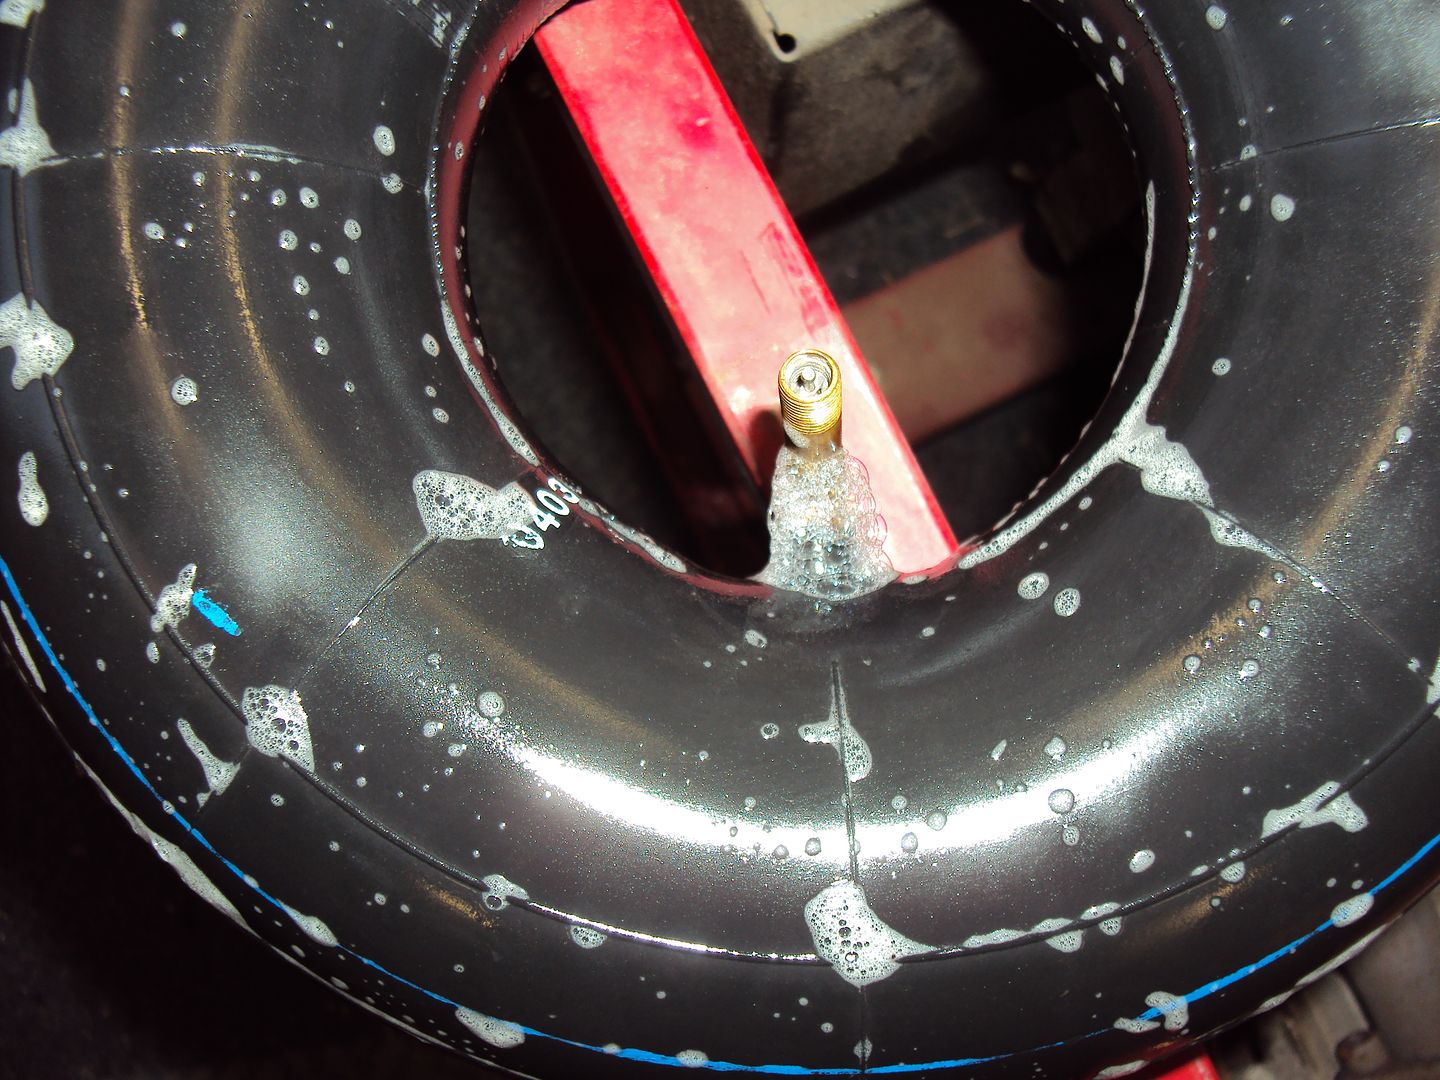
That’s about as far as I got today, on the plus side I found the leak in the tyre inner tube.
I started with measuring the output voltage to see if it was generating at all. There was some voltage however it was a bit low….
So following the faultfinding guide I downloaded for the generator, the next point to check was the rotor.
The rotor “excites” the main windings, to do this a voltage is applied to a coil via carbon brushes and slip rings to induce a magnetic field in the rotor.
The first step is to check the rotor resistance, which should be between 7 & 9 ohms.
Slip rings, the carbon brushes have been removed for access.
The resistance, seems to be within spec.
When I measured the resistance via the carbon brushes it was 200-300 ohms, so the next step is to clean both the brushes and the slip rings as the reading via the brushes should be 10-12 ohms.
That’s about as far as I got today, on the plus side I found the leak in the tyre inner tube
.creationracing said:
Excellent stuff lad. Keep us updated.
I've just changed jobs, new one starting Thursday. Been a UPS service engineer up to now but am now going multi-discipline electrical. So will be playing with, among other things, generators! But probably bigger ones than yours...
Sounds interesting, feel free to post some pics/info of anything you work onI've just changed jobs, new one starting Thursday. Been a UPS service engineer up to now but am now going multi-discipline electrical. So will be playing with, among other things, generators! But probably bigger ones than yours...
I have now got it working (sort of)
I ended up having to ask for help on an American small engine forum (smokestack.com). The guys on there were very helpful and explained how to do some more in depth testing.
One of the tests was to test the DPE windings in the stator, which powers rotor via a regulator board. The test involved connecting a 12v battery to the brushes for the rotor and connecting a light bulb to the DPE windings. The light bulb lit up on test which proved the DPE winding was ok.
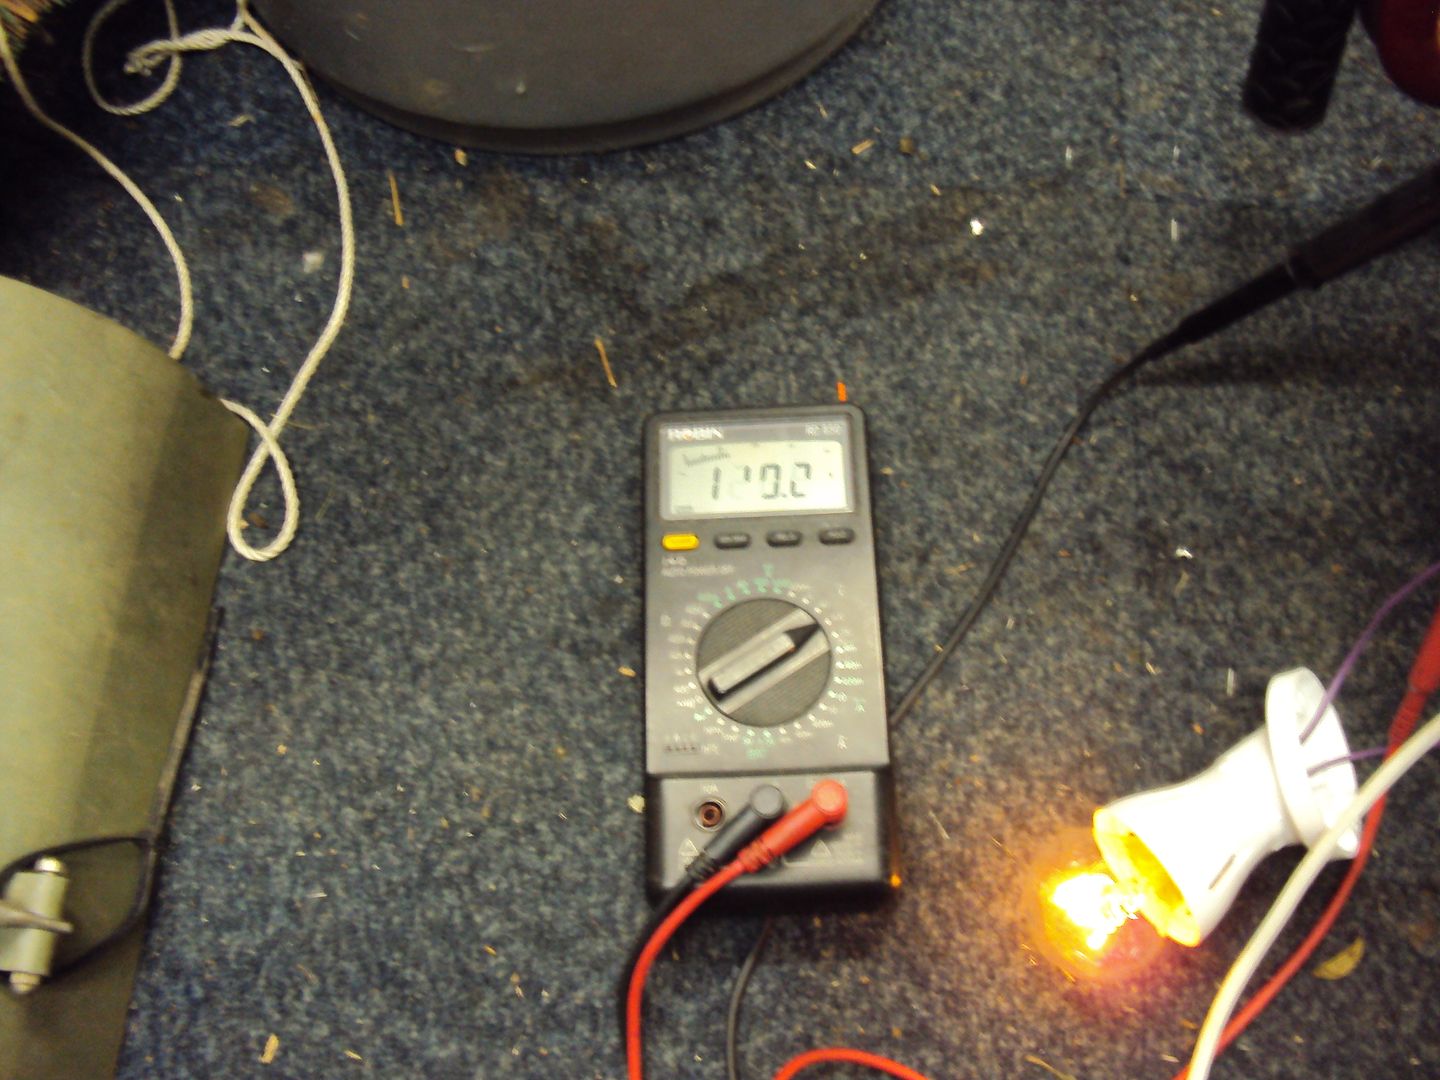
The test had to be done this way to prove the DPE winding can supply current and voltage, as even though the resistances might look ok the winding can brake down.
It turned out the regulator board which lives in the back of the alternator and controls the voltage to the rotor to excite the main windings was at fault.
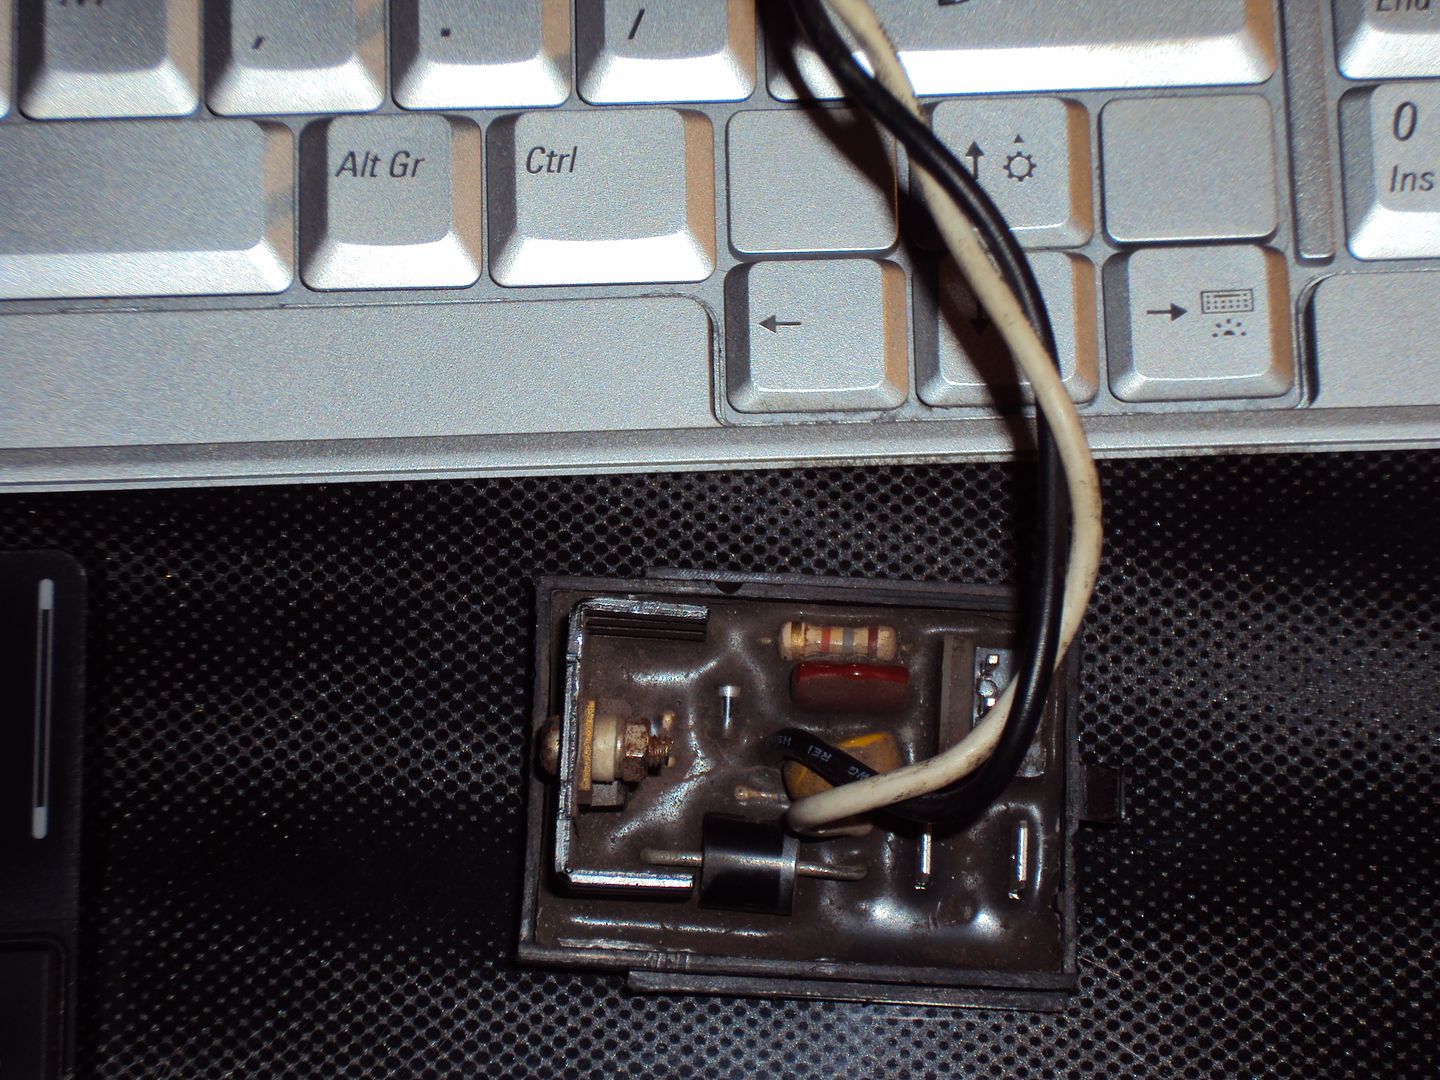
After picking away at the epoxy coating I was able to test the components on the regulator board. It turned out the big 18k ohm resistor (brown, grey, orange stripe) at the top of the board was open circuit

I checked all the other components which were OK. I replaced the 18k resistor and reassembled the regulator board and got it working, now getting 110 & 240v at the outlets
Now having trouble with the engine speed governor, the governor uses spinning weights in a similar set-up as shown on the EX5500 on pages 1 & 2. As the gear turns the weights move to apply pressure on a governor arm. As far as I can tell the weights are not applying pressure to the arm so the arm isn’t adjusting the throttle as the load is increased.
Unfortunately with this engine the governor is inside the engine casing so it has to be completely stripped down so I can open the case.
Oh managed to fix the leak on the innertube, just put some superglue around where the valve meets the rubber.
guindilias said:
Generacs are a bit frowned upon at the Smokstak - you need to get yourself a nice old 1800rpm Onan!
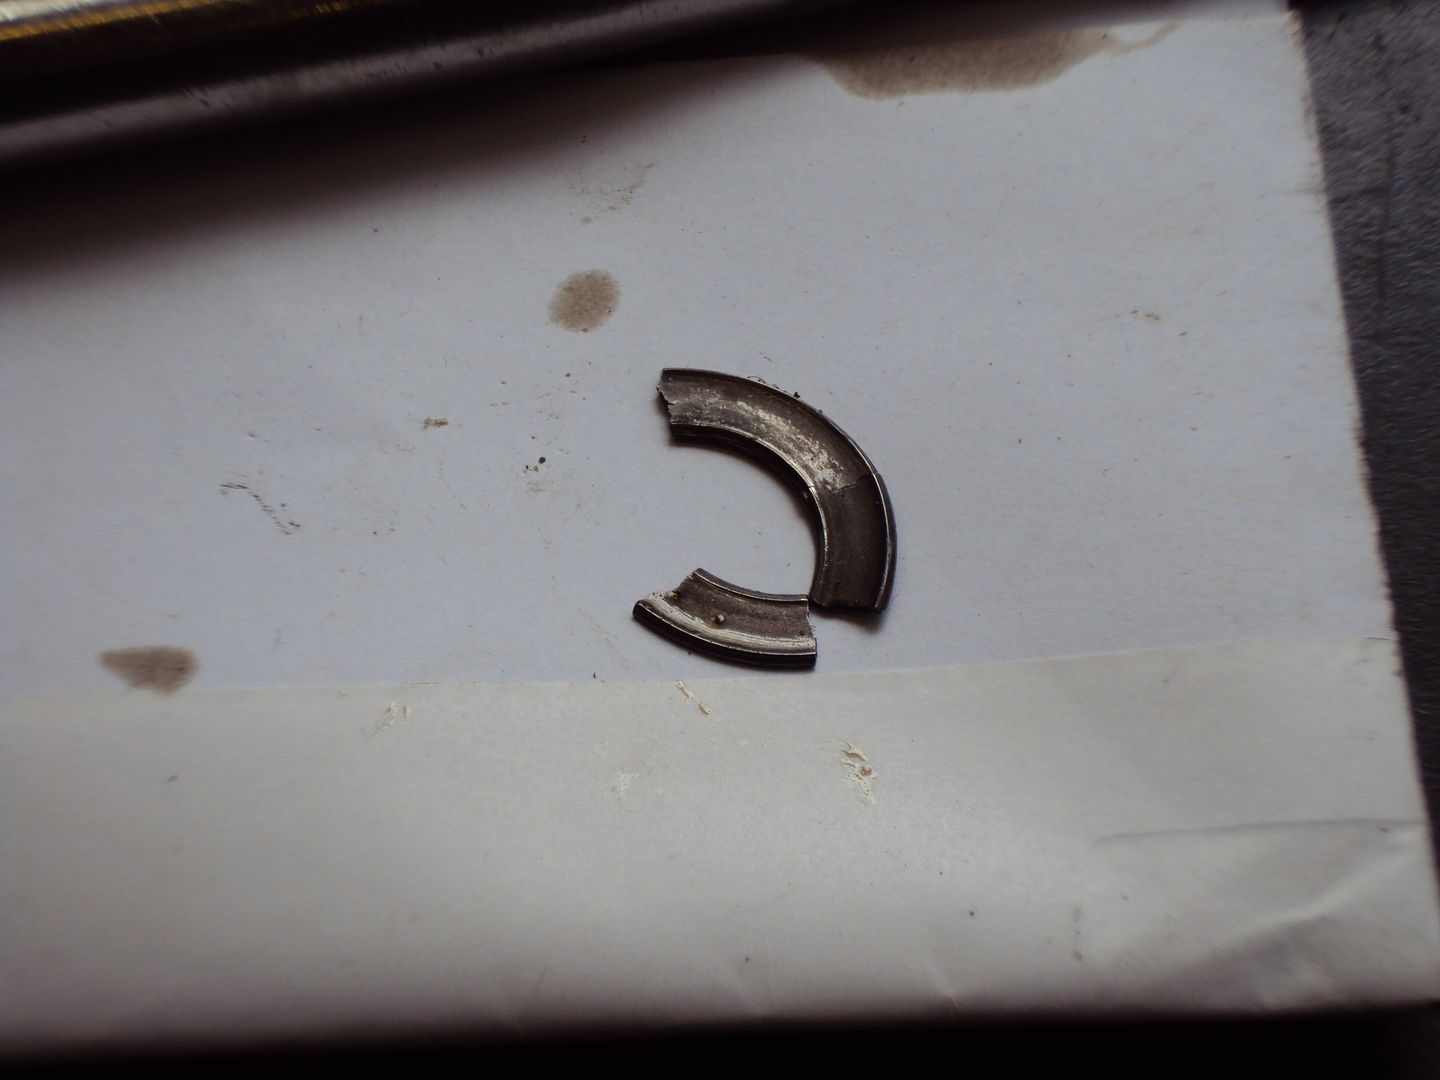
I did look at an Onan a while ago, but was put off by what seemed like a complete lack of information or manuals. It’s a shame I hadn’t found Smokestak at the time as it is a good source of information.Drained the oil from the engine and heard a “clunk” as something fell into the pan, had a route around and found this.
And it sounds like there is another bit sliding around in the engine casing
So disassembly has started….
Couldn’t get any further as I need to cut a thread in the rotor shaft so a bolt can be used to push the rotor off the engine shaft, same as I did with the EX5500.
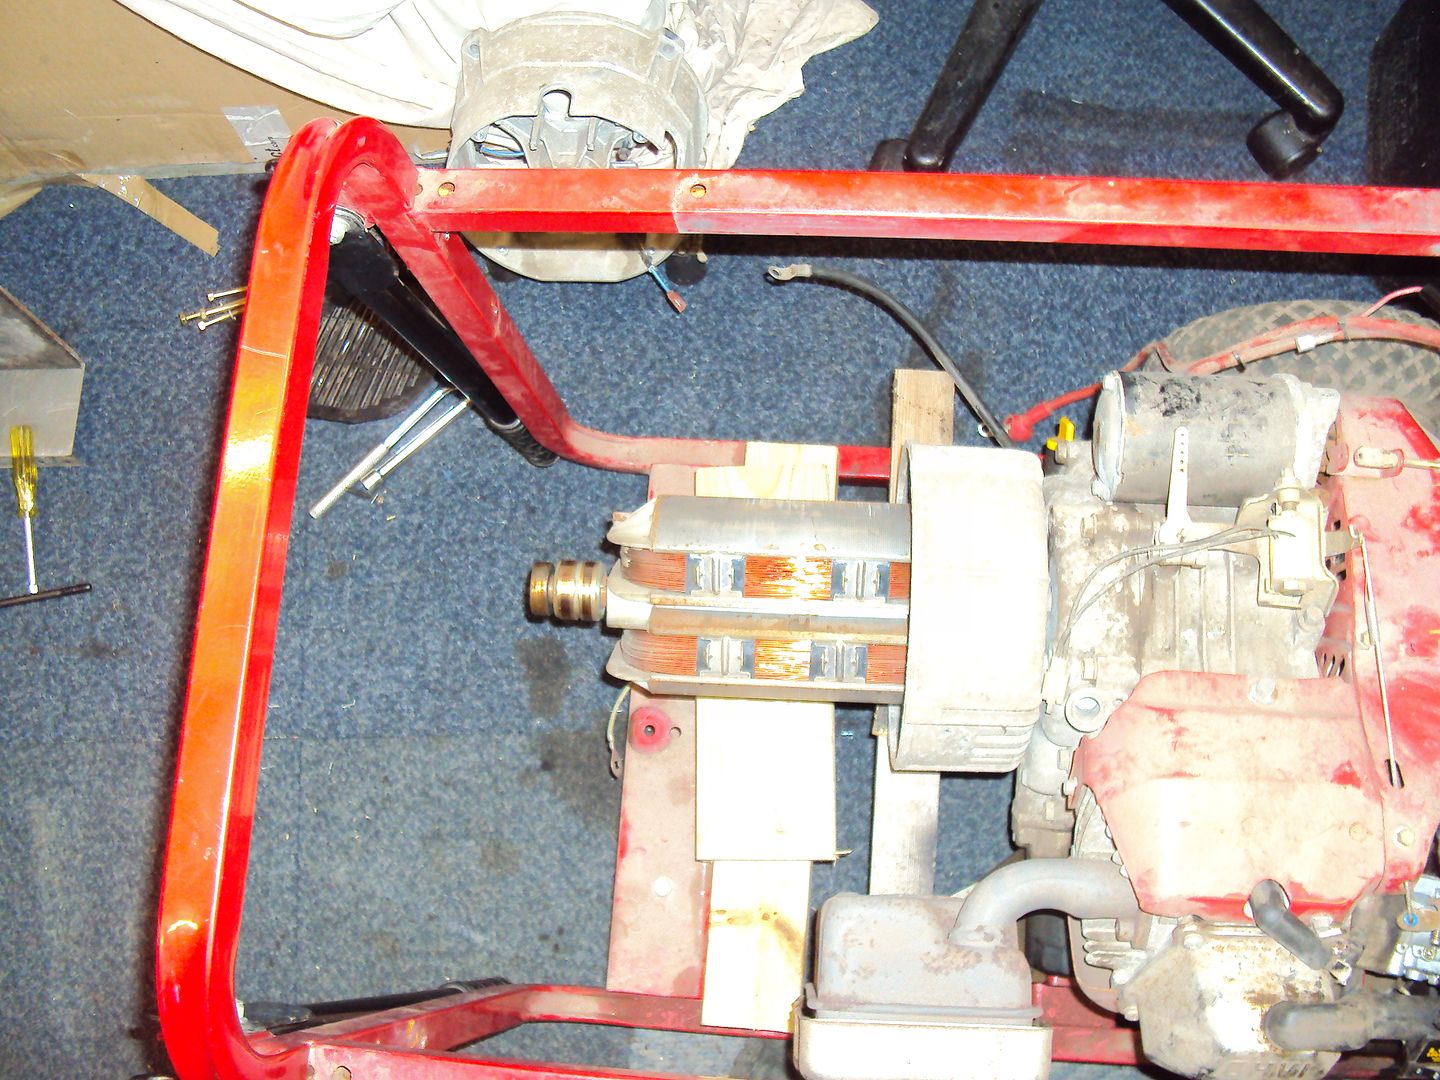
Managed to separate the rotor from the engine, I tried using a rod down the centre of the rotor, same as I did with the big Honda. Unfortunately it didn’t seem to work, so I tried an alternative method based on a suggestion from someone on Smokestack. The suggesting was to fit a grease fitting in the end of the shaft and pump it full of grease. I changed it by filling the shaft up with engine oil and wrapped a bolt with PTFE sealing tape and screwed it in.
The pressure generated popped the rotor off the engine shaft.
Had to use grips to pull the bent up rod out of the rotor shaft
Got the engine opened up
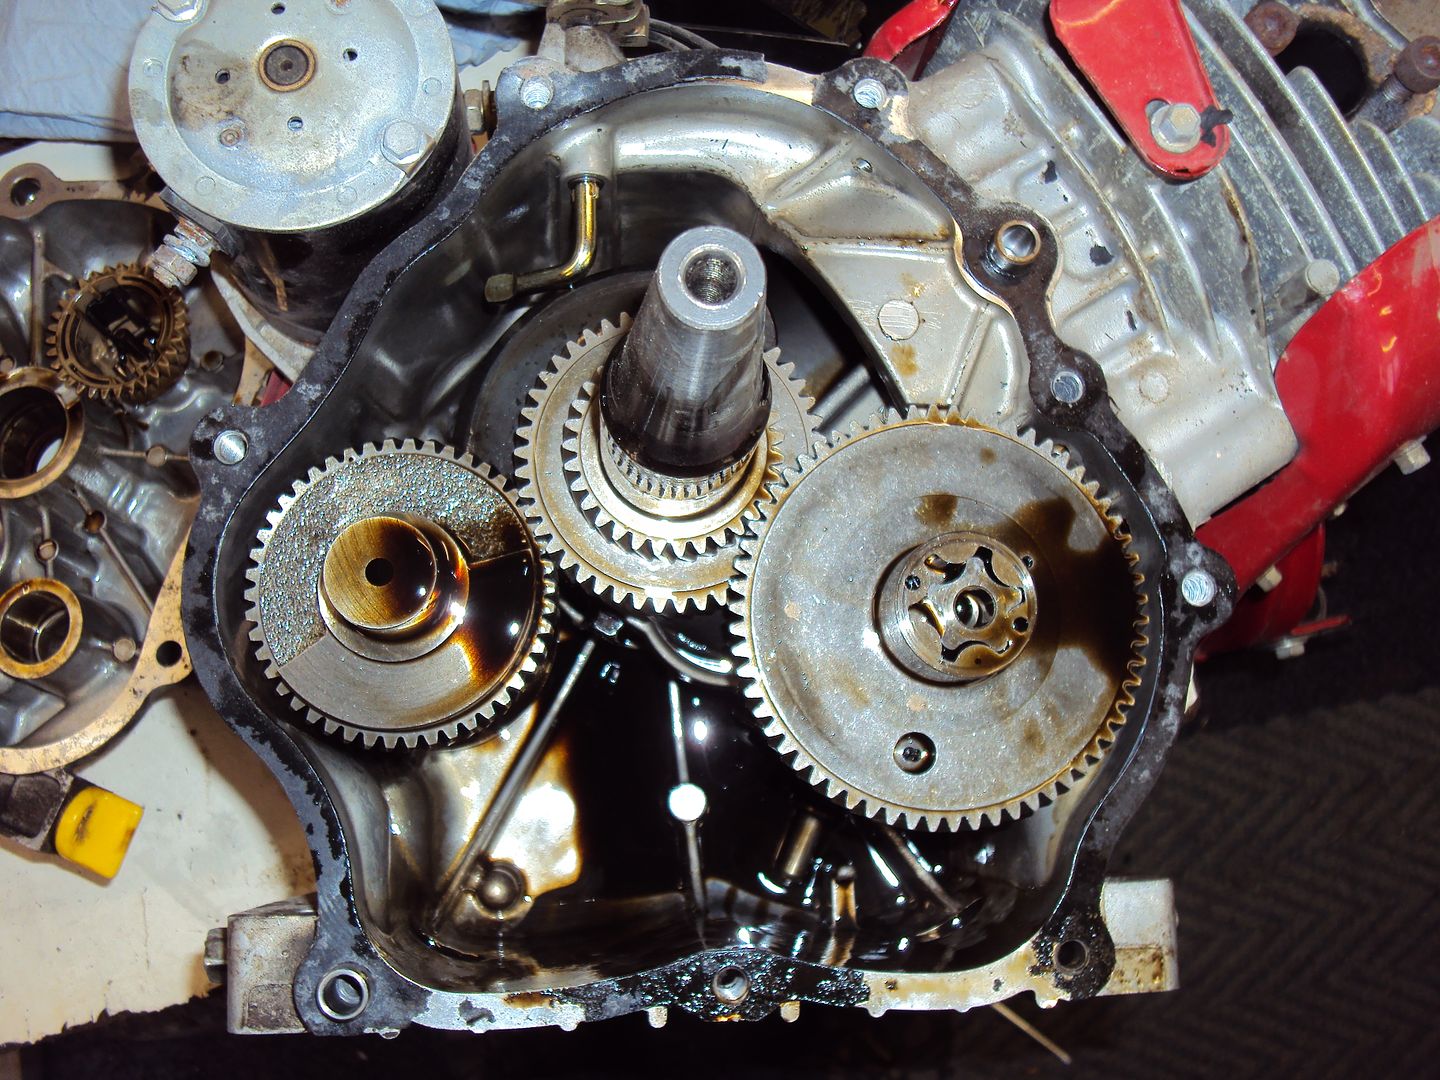
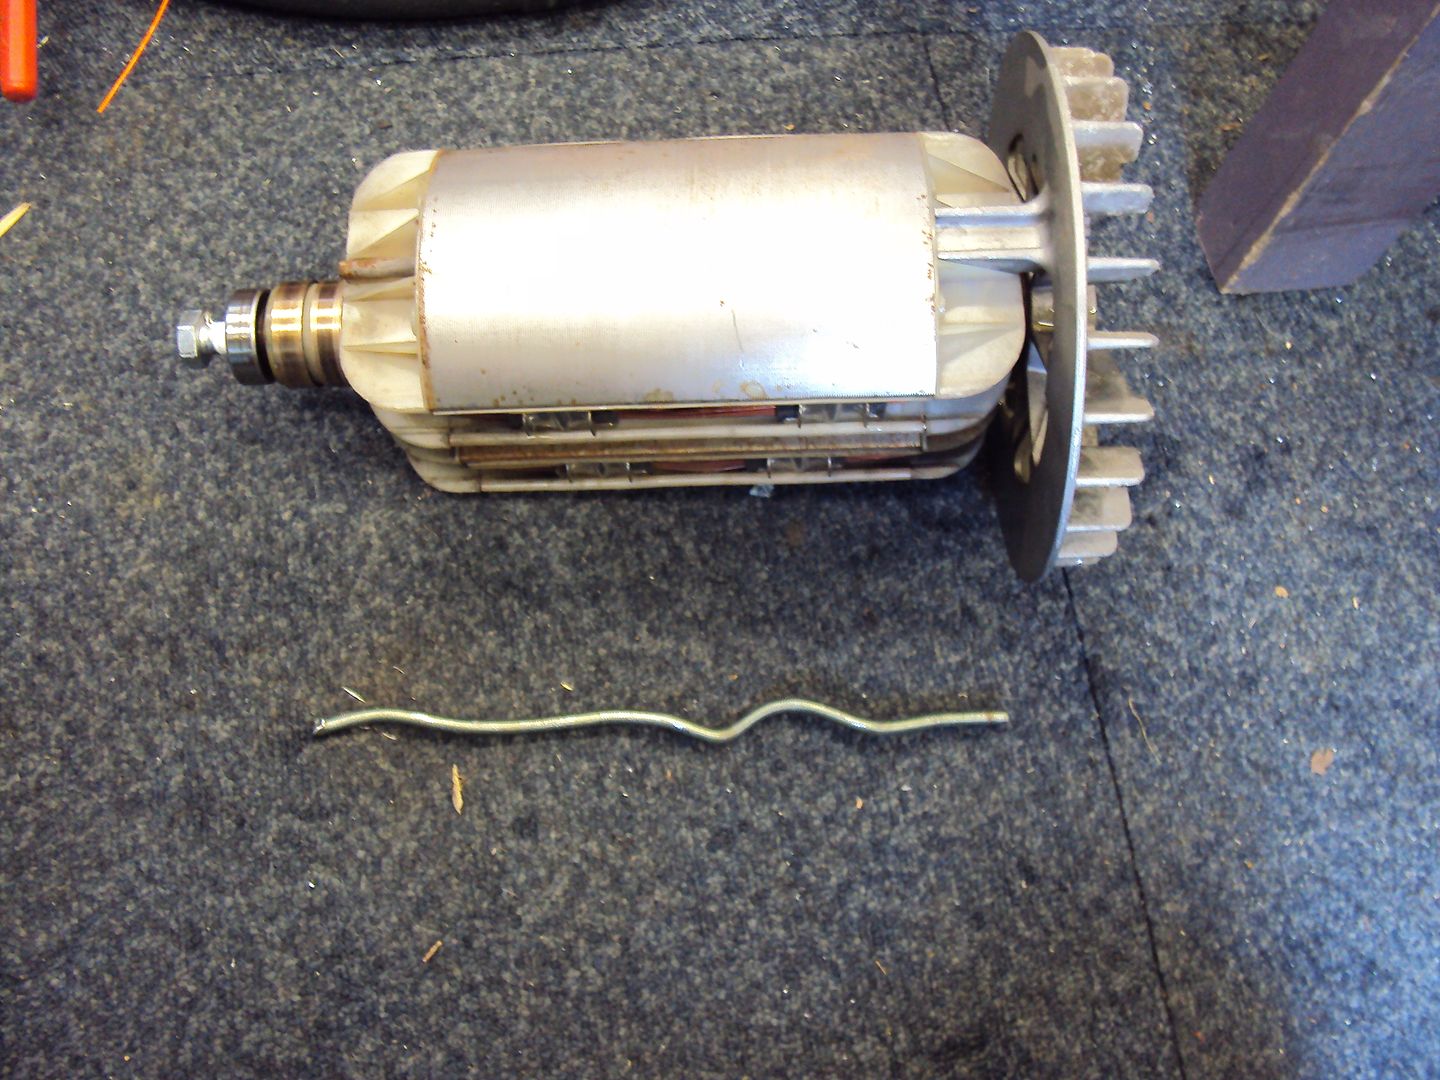
Governor assembly
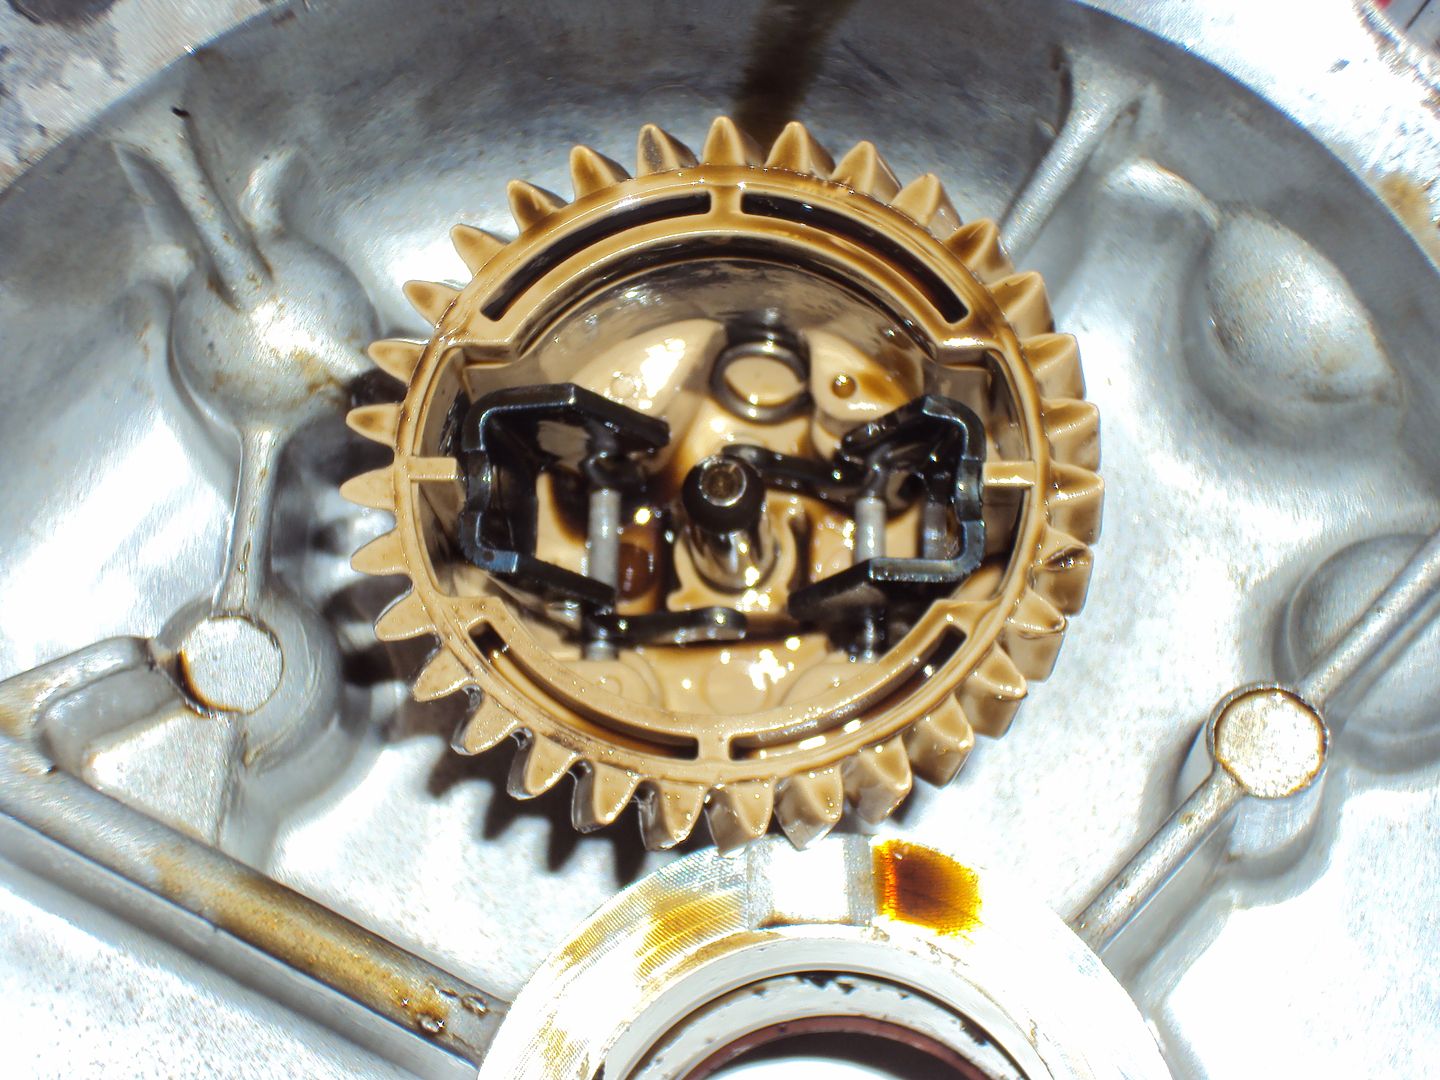
The clip sitting inside the assembly (12 o’clock position) should be on the shaft in the centre.
Parts recovered from sump
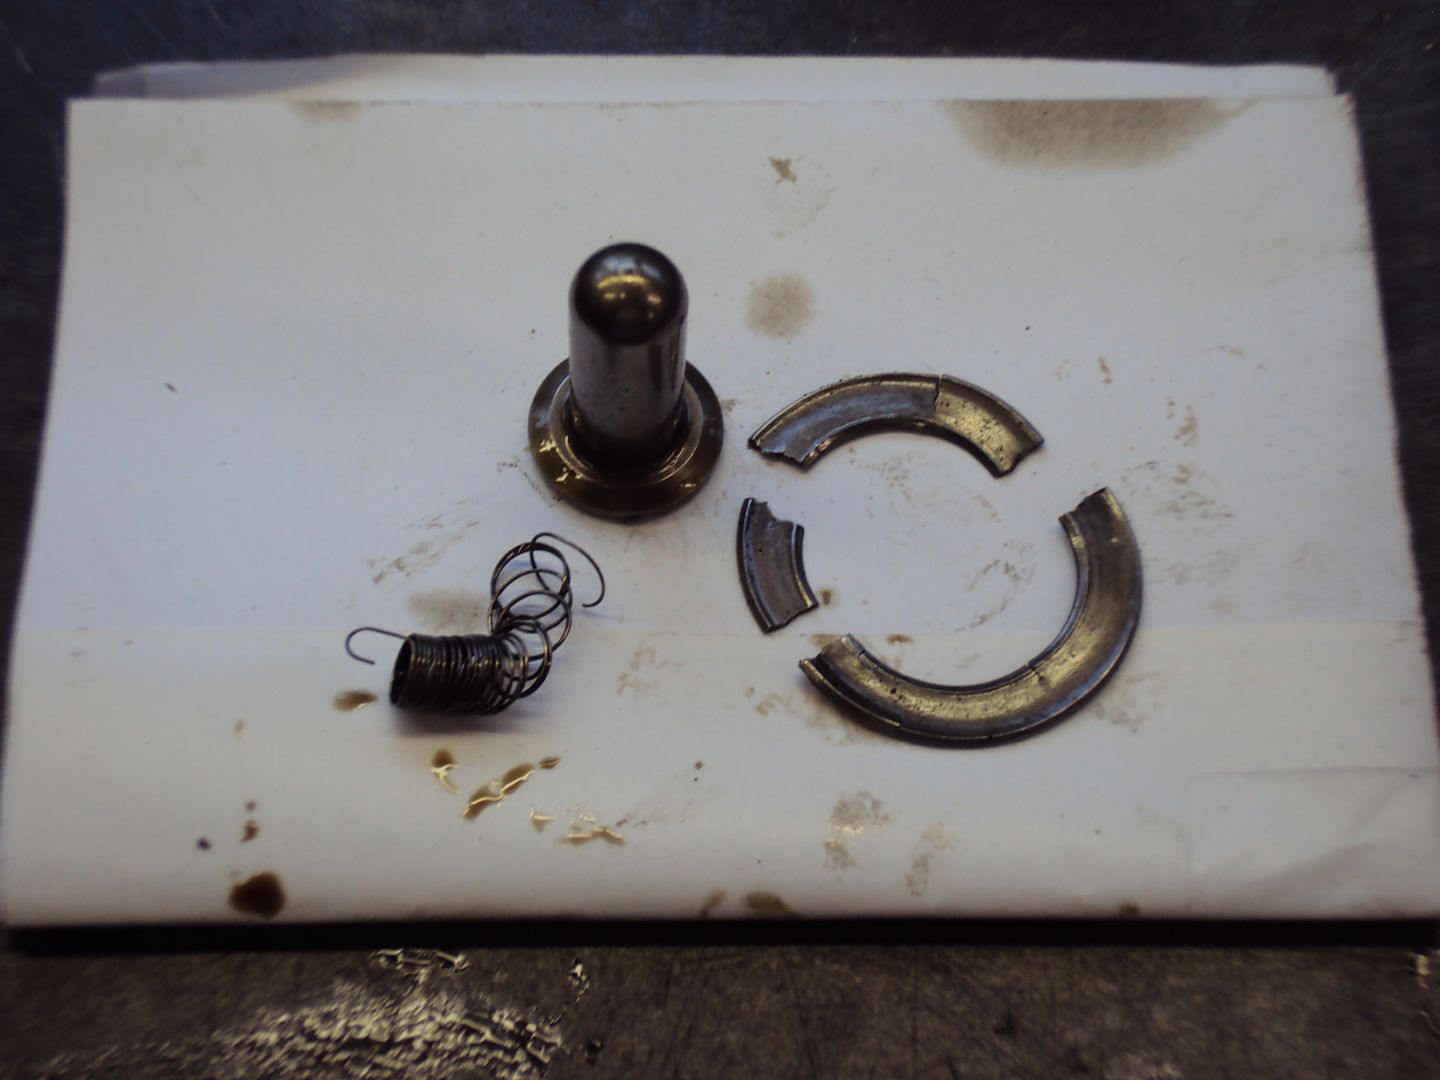
The domed bit should be on the shaft in the governor assembly, the weights push it out to operate the governor arm.
It looks like the governor arm was in the wrong position so the domed bit popped off. The governor arm can be seen in the engine picture (L shape bit) just above the crank. The arm needs to be rotated 180 to get it back in the correct position
The spring looks like it is from the compression release which holds the exhaust valve open slightly to help with starting.
Not sure what the broken washer is from, I can’t see it on any of the engine diagrams I have.
As far as I can see the engine is in good condition inside considering. There are no chips on any of the gears, and inside of cylinder barrel looks fine.
It looks like the only parts I need to get is a new gasket for the engine casing and the washer (assuming I can find out where it’s from) and a replacement spring.
The pressure generated popped the rotor off the engine shaft.
Had to use grips to pull the bent up rod out of the rotor shaft
Got the engine opened up
Governor assembly
The clip sitting inside the assembly (12 o’clock position) should be on the shaft in the centre.
Parts recovered from sump
The domed bit should be on the shaft in the governor assembly, the weights push it out to operate the governor arm.
It looks like the governor arm was in the wrong position so the domed bit popped off. The governor arm can be seen in the engine picture (L shape bit) just above the crank. The arm needs to be rotated 180 to get it back in the correct position
The spring looks like it is from the compression release which holds the exhaust valve open slightly to help with starting.
Not sure what the broken washer is from, I can’t see it on any of the engine diagrams I have.
As far as I can see the engine is in good condition inside considering. There are no chips on any of the gears, and inside of cylinder barrel looks fine.
It looks like the only parts I need to get is a new gasket for the engine casing and the washer (assuming I can find out where it’s from) and a replacement spring.
Gassing Station | Homes, Gardens and DIY | Top of Page | What's New | My Stuff