The ebay generator restoration thread
Discussion


Muncher said:
Is this worth saving?
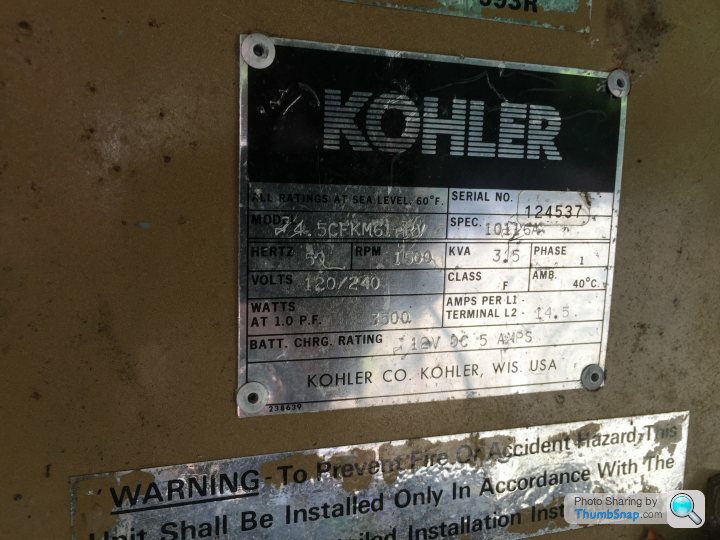
From your previous description it sounds like someone put some effort into installing it, so would be worth getting up and running. Once running it looks like should be reasonably quiet/economical to run as looking at the data plate it runs a 1500 rpm where most generators run at 3000rpm
Is there a changeover switch near your fuse board?
Does it have a fuel tank or run from LPG?
I guess the first thing to do is to see if it works, as it looks like electric start there should be a starter battery, if not you could try jump starting it from your car (assuming you can get the car close enough).
If it’s been sitting for a while the carburettor is probably gummed up, but you can cheat by pouring a bit of petrol (1-2tsp) down the carb to see if it fires.
What I would do:
Step 1:
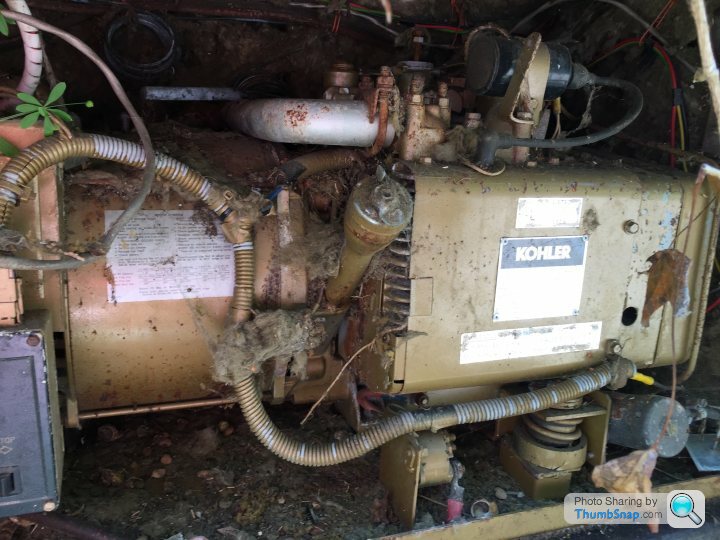
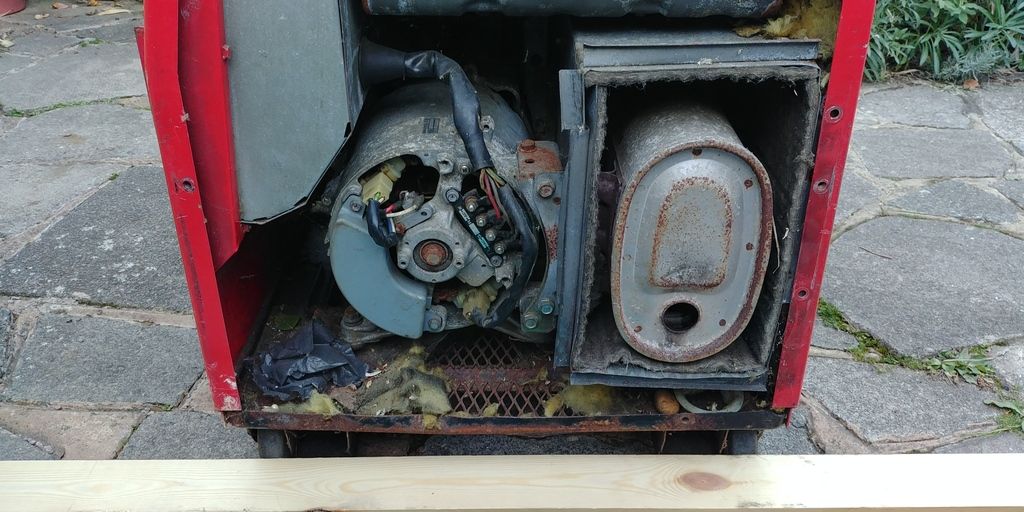
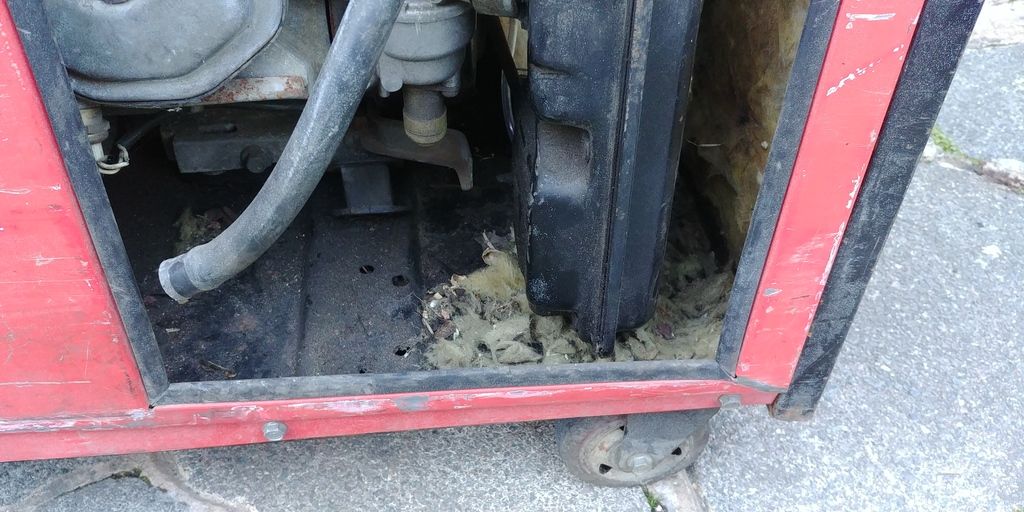
Clear all the rubbish from around the engine, looks like you have disintegrated insulation/rock wool all over it.
If you can pull it out of the enclosure its worth checking inside the alternator to make sure it hasn’t been destroyed by mice or packed with insulation as looking at the photo, the ventilation grills by the oil filler look like they might be blocked from the inside.
Step 2
Check for spark, unscrew the sparkplug put the HT cable (thick black lead) back on the spark plug. Using INSULATED pliers hold the spark plug against a metal part of the engine and try spinning itover with the starter. If the engine is a twin cylinder don’t forget to disconnect the second spark plug.
If you see a spark go to step 3 if not you will need to start digging in to it more in which case you will need to get hold of a manual/wiring diagrams.
Step 3
If spark was OK, screw sparkplug back in and reconnect HT cables, try pouring a bit of petrol down the carb and see if it fires/tries to run.
It’s probably wort adding before trying step 2, find the output leads from the alternator and disconnect (not forgetting where the wires go!) just in case it’s sending power somewhere you are not expecting.
Step 4
If there is a fuel tank, try looking inside to see if it’s clean. If yes check the condition of the fuel pipe between the tank and carburetor as it is likely to have perished. If the fuel pipe is ok try putting a small amount of petrol in the tank and see if it runs. If not it is likely you will need to take the carburetor apart, clean and reassemble.
The above should get you to a point (with minimal expenditure) where you can see if it’s worth pursuing.
The next steps (if it runs) will be electrical testing to see if the output is ok.
Edited by Blue32 on Tuesday 20th June 21:32
Thanks for the detailed reply!
It's located at a development site I own, the original house it was connected to has since been sold, but this remains on our retained land at the bottom of the garden. It's very well installed, in a very solid brick structure with concrete roof. It's possible it was fed by the main oil tank at the house, albeit that is about 60 yards away, I can't see any other visible tank near it.
I probably have no need for it going forward and have far too many other projects that are much higher priorities so I would rather remove it from the site and sell it if it has some value. Is it something you fancy?
Muncher said:
Thanks for the detailed reply!
It's located at a development site I own, the original house it was connected to has since been sold, but this remains on our retained land at the bottom of the garden. It's very well installed, in a very solid brick structure with concrete roof. It's possible it was fed by the main oil tank at the house, albeit that is about 60 yards away, I can't see any other visible tank near it.
I probably have no need for it going forward and have far too many other projects that are much higher priorities so I would rather remove it from the site and sell it if it has some value. Is it something you fancy?
No problemIt's located at a development site I own, the original house it was connected to has since been sold, but this remains on our retained land at the bottom of the garden. It's very well installed, in a very solid brick structure with concrete roof. It's possible it was fed by the main oil tank at the house, albeit that is about 60 yards away, I can't see any other visible tank near it.
I probably have no need for it going forward and have far too many other projects that are much higher priorities so I would rather remove it from the site and sell it if it has some value. Is it something you fancy?

As much as I’d like to say yes, I’d fancy it to tinker with, I don’t really have space for another project
 .
. If you don’t want/need it best thing to do is remove it, take some good photos (all sides) and stick it on ebay as spares repairs with buyer to collect. Also worth including dimensions in the description (to stop silly questions).
Worst case you make 99p best case you could make over £100, someone will buy it.
Muncher said:
Thanks for the detailed reply!
It's located at a development site I own, the original house it was connected to has since been sold, but this remains on our retained land at the bottom of the garden. It's very well installed, in a very solid brick structure with concrete roof. It's possible it was fed by the main oil tank at the house, albeit that is about 60 yards away, I can't see any other visible tank near it.
I probably have no need for it going forward and have far too many other projects that are much higher priorities so I would rather remove it from the site and sell it if it has some value. Is it something you fancy?
I'm interested in taking it on - where's it located?It's located at a development site I own, the original house it was connected to has since been sold, but this remains on our retained land at the bottom of the garden. It's very well installed, in a very solid brick structure with concrete roof. It's possible it was fed by the main oil tank at the house, albeit that is about 60 yards away, I can't see any other visible tank near it.
I probably have no need for it going forward and have far too many other projects that are much higher priorities so I would rather remove it from the site and sell it if it has some value. Is it something you fancy?
I’m now the proud owner of a CEMOUNT TX150 TIG welder for errr welding Tigs.
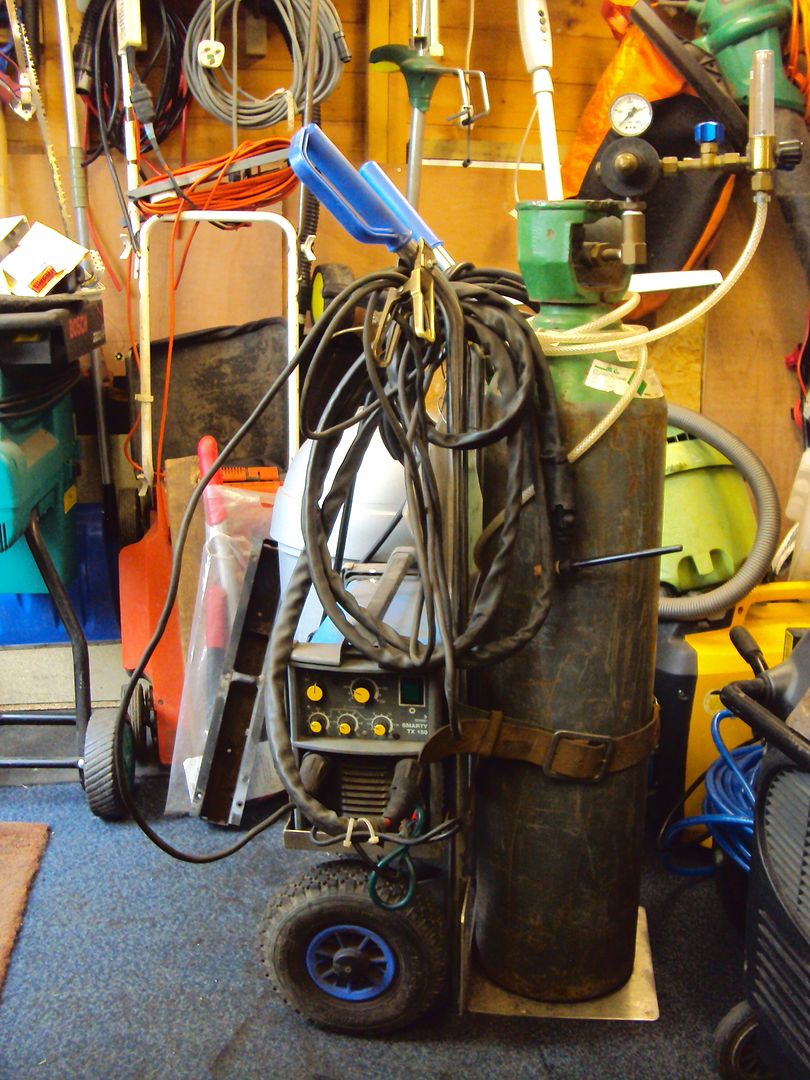
It needs bit of remedial work on the mains lead as the outer insulation has started to split, but apart from that it seems pretty good. The gas cylinder (Argon) is almost full too, still has over 180bar of pressure (230bar when full).
It’s probably not the best thing to start learning with considering I have never welded before, a MIG probably would have been better. However, I want to be able to weld stainless steel in the future (want to make stuff for the R32).
After watching a few how to weld videos and reading some guides I started with a scrap piece of metal to practice on.
First weld with no filler rod, managed to melt a hole (front)
Back
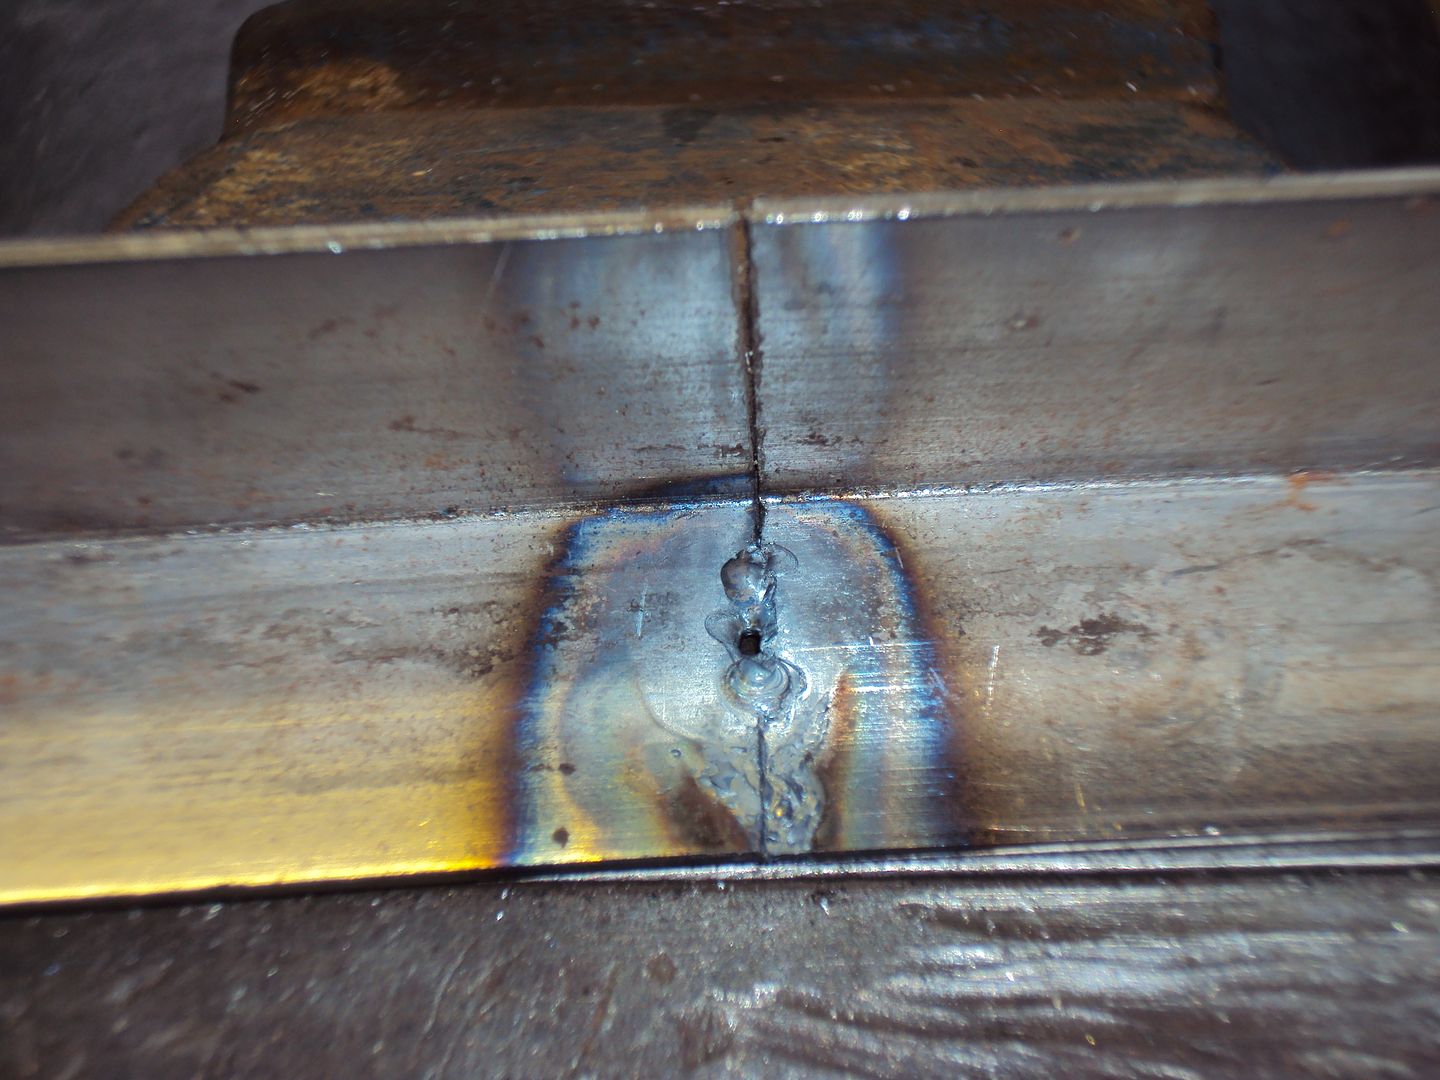
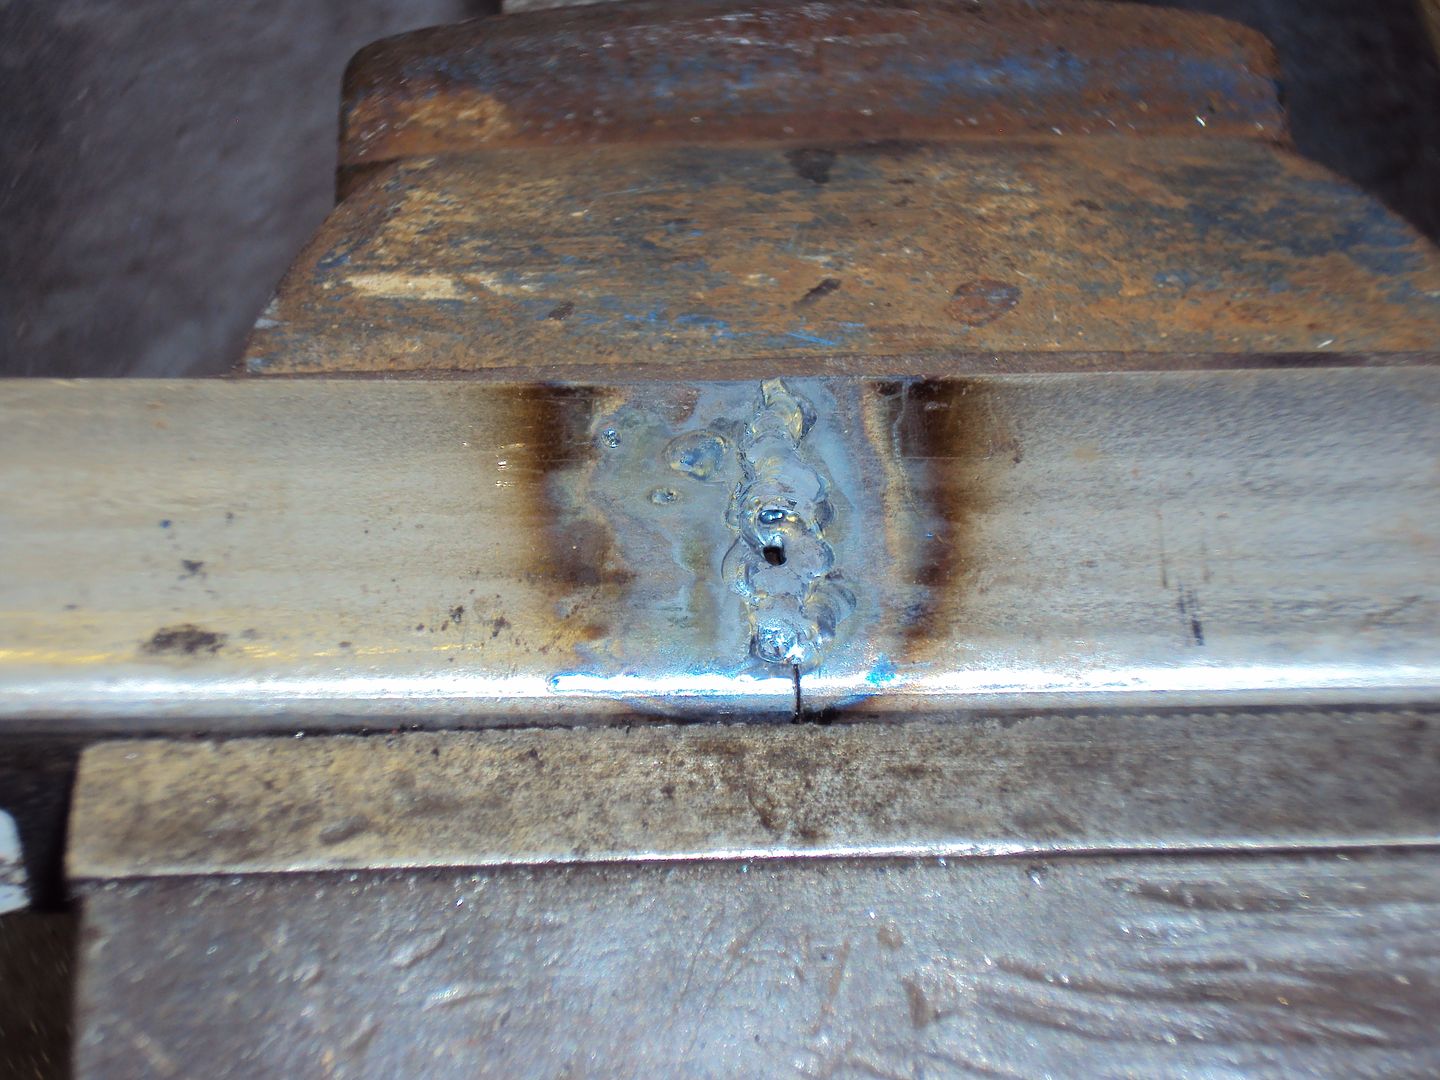
Current turned up a bit (70A I think) with some filler (front)
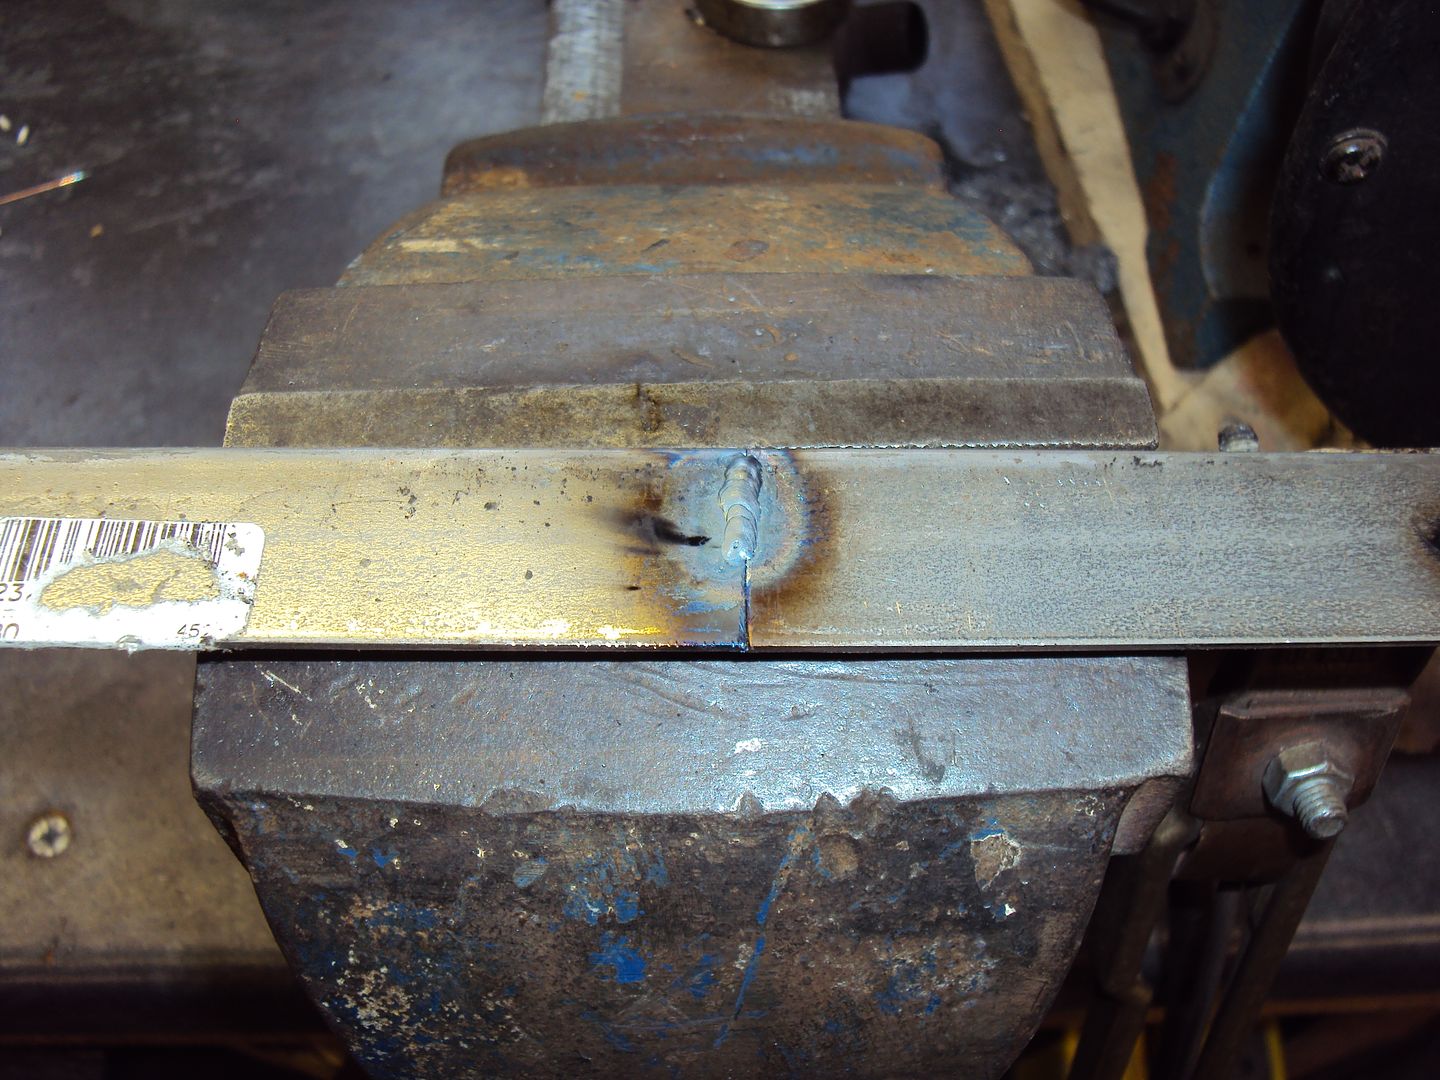
Back
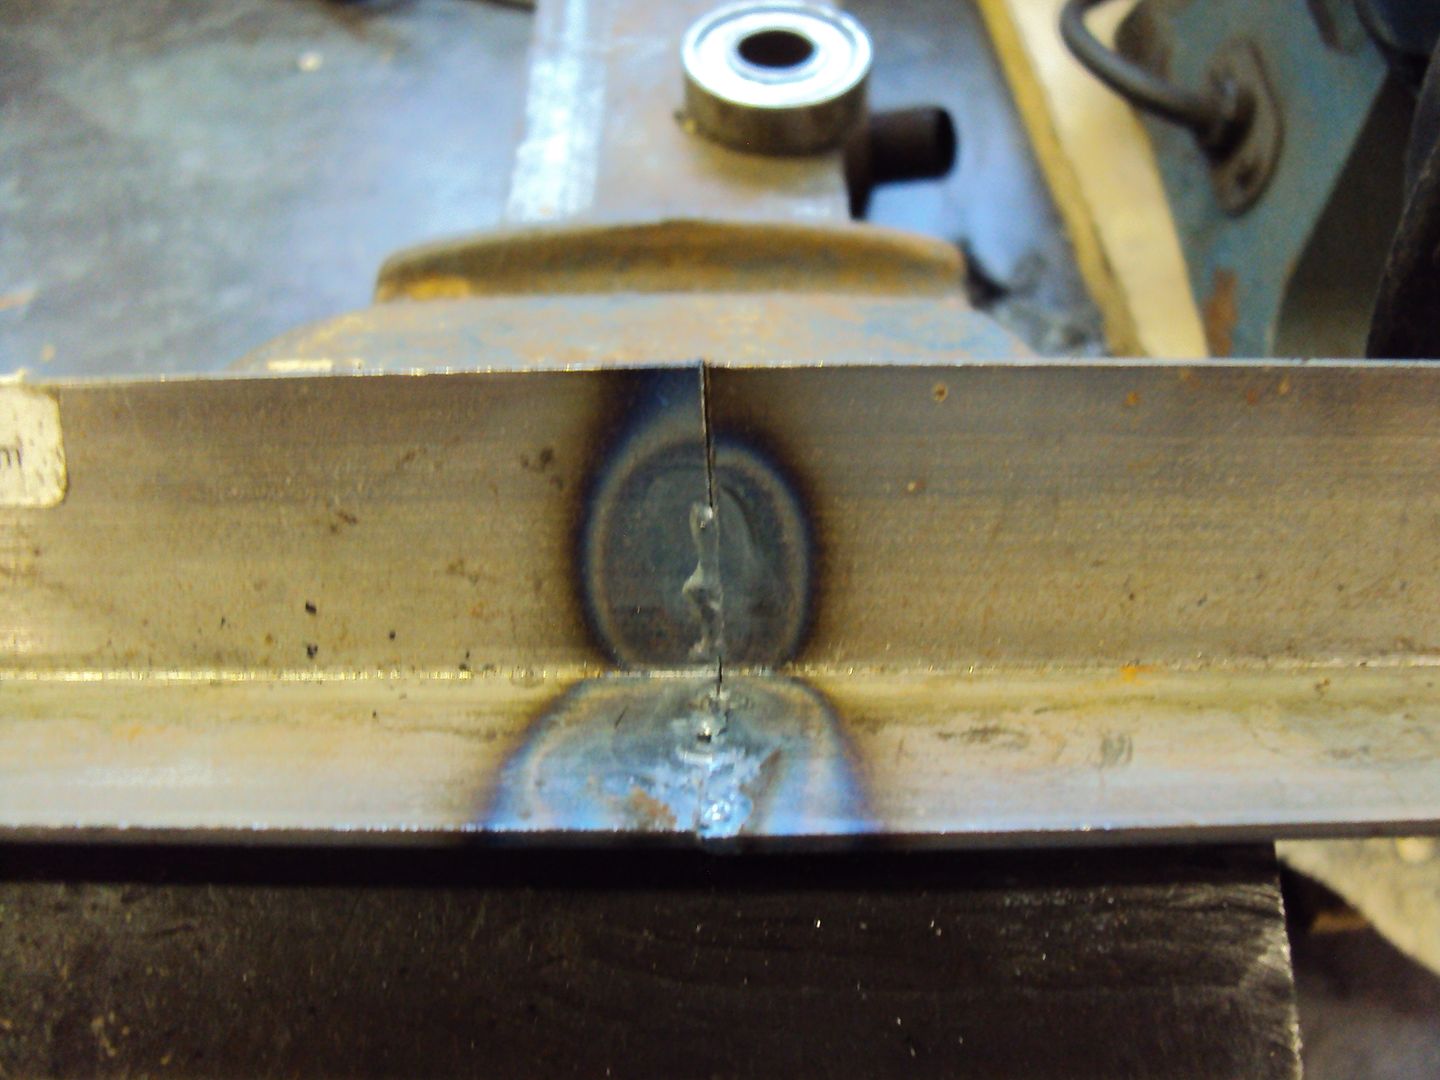
I’m pleased with the first attempts, but more practice is needed as after a while I was just melting holes everywhere so gave up for the day.
Just need to get some more bits of metal and spend some time practicing. Also learnt gloves are a must as left hand feels a bit sunburnt
It needs bit of remedial work on the mains lead as the outer insulation has started to split, but apart from that it seems pretty good. The gas cylinder (Argon) is almost full too, still has over 180bar of pressure (230bar when full).
It’s probably not the best thing to start learning with considering I have never welded before, a MIG probably would have been better. However, I want to be able to weld stainless steel in the future (want to make stuff for the R32).
After watching a few how to weld videos and reading some guides I started with a scrap piece of metal to practice on.
First weld with no filler rod, managed to melt a hole (front)
Back
Current turned up a bit (70A I think) with some filler (front)
Back
I’m pleased with the first attempts, but more practice is needed as after a while I was just melting holes everywhere so gave up for the day.
Just need to get some more bits of metal and spend some time practicing. Also learnt gloves are a must as left hand feels a bit sunburnt
Just keep practicing. TIG is quite easy and forgiving - you can slow down or go over work without piling on more metal like you get with mig.
Read up on which tungstens to use (red's for steels and white for ally) and learn how to grind them.
DC for steel with HF start and AC with HF continuous for ally.
Main thing is to make sure everything is 'clean' - you cant be welding rusty, oily or corroded metals and if your tip touches the weld, then you need to stop and clean it. Best bet is to have a few tungstens ready to swap out rather than letting your job go cold whilst you regrind your tungsten.
eliot said:
Just keep practicing. TIG is quite easy and forgiving - you can slow down or go over work without piling on more metal like you get with mig.
Read up on which tungstens to use (red's for steels and white for ally) and learn how to grind them.
DC for steel with HF start and AC with HF continuous for ally.
Main thing is to make sure everything is 'clean' - you cant be welding rusty, oily or corroded metals and if your tip touches the weld, then you need to stop and clean it. Best bet is to have a few tungstens ready to swap out rather than letting your job go cold whilst you regrind your tungsten.
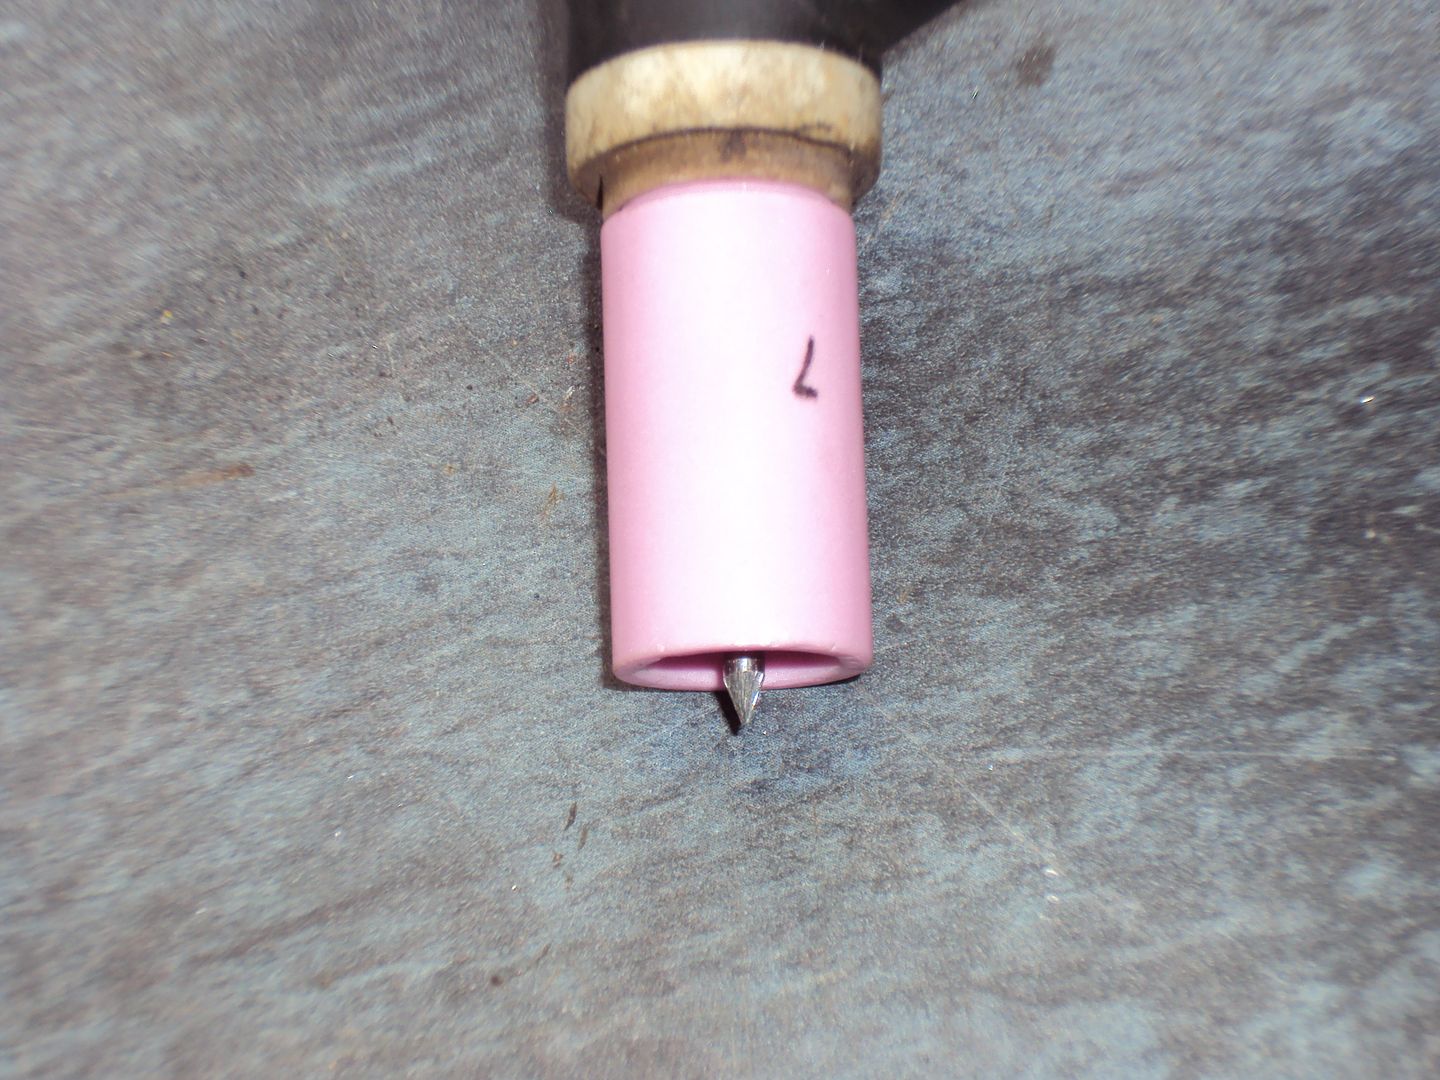
Thanks, I’m not sure what the tungsten is as there is no colour code on it, although I’m guessing it was setup for welding stainless as it originally came from a food processing factory.Read up on which tungstens to use (red's for steels and white for ally) and learn how to grind them.
DC for steel with HF start and AC with HF continuous for ally.
Main thing is to make sure everything is 'clean' - you cant be welding rusty, oily or corroded metals and if your tip touches the weld, then you need to stop and clean it. Best bet is to have a few tungstens ready to swap out rather than letting your job go cold whilst you regrind your tungsten.
Discovered one mistake I made was how I ground he tip, I did it radially instead of in line with the electrode. So first job for tomorrow is to re-grind the tip properly.
I’m going to order up some new electrodes as there isn’t much left on the one that’s in the torch.
Had a productive day building the frame for the wheels yesterday. During the week a set of replacement parts for the torch on the welder turned up, so I now have some new tungsten tips.
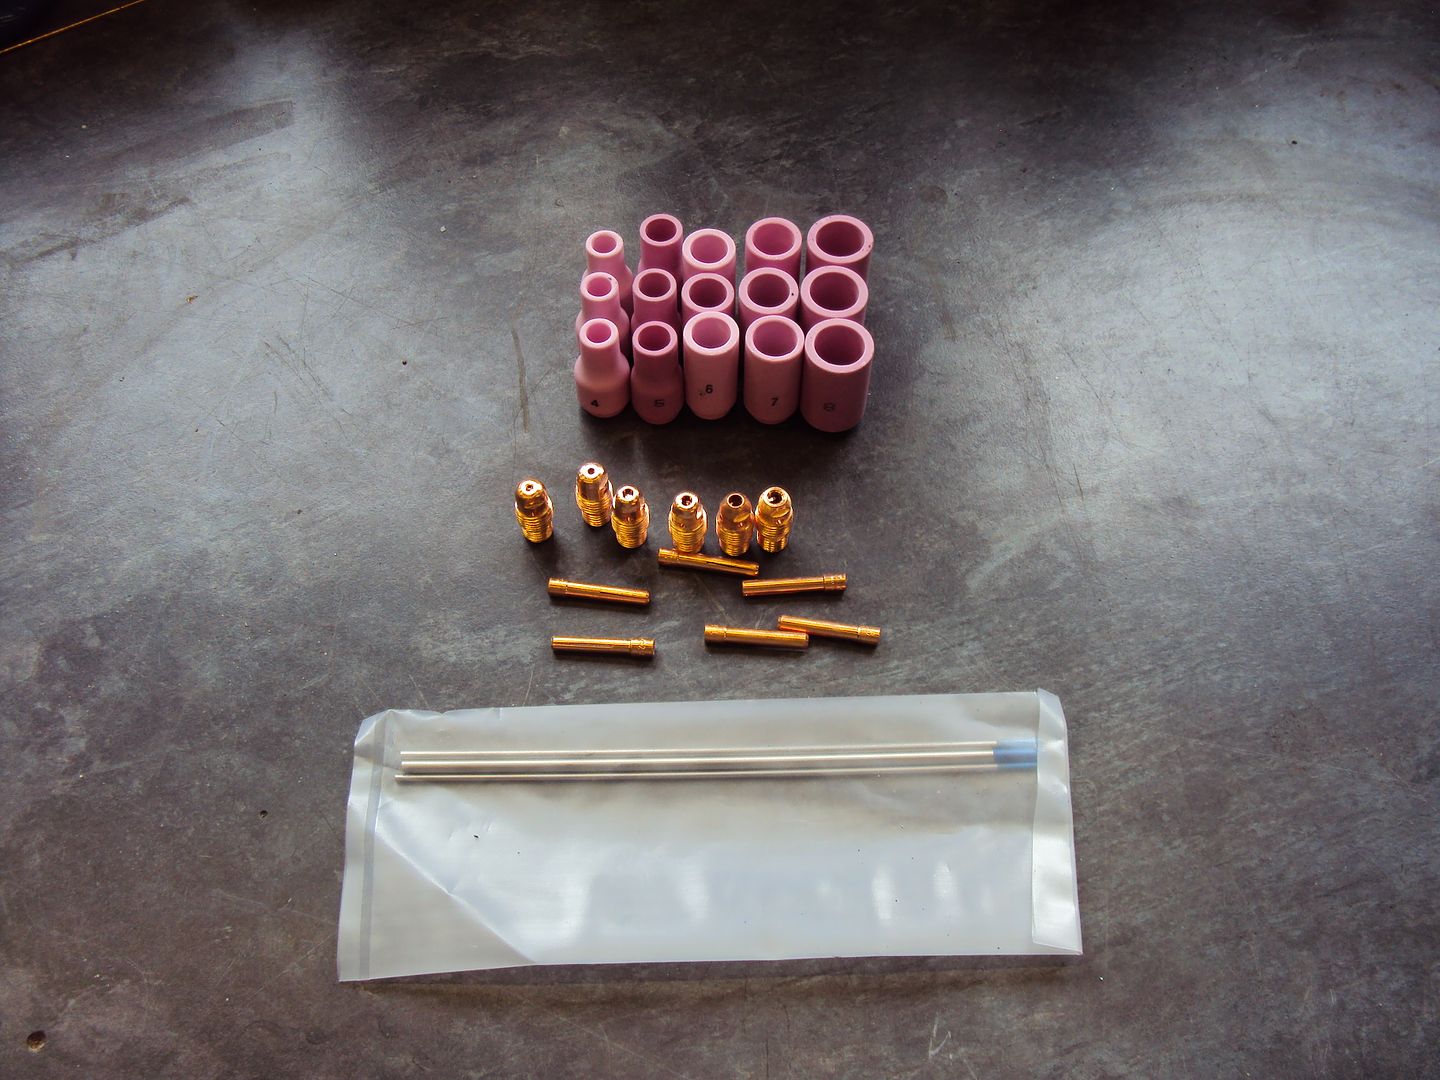
I decided to go with blue Lanthanated tungsten as it good for most metals.
As I was going to be using quite a high current I went with a 2.4mm tip
I’m still working on the best way to grid the point on the tip, so far the best way I have found is to use a drill to spin the tip while holding it against the bench grinder.
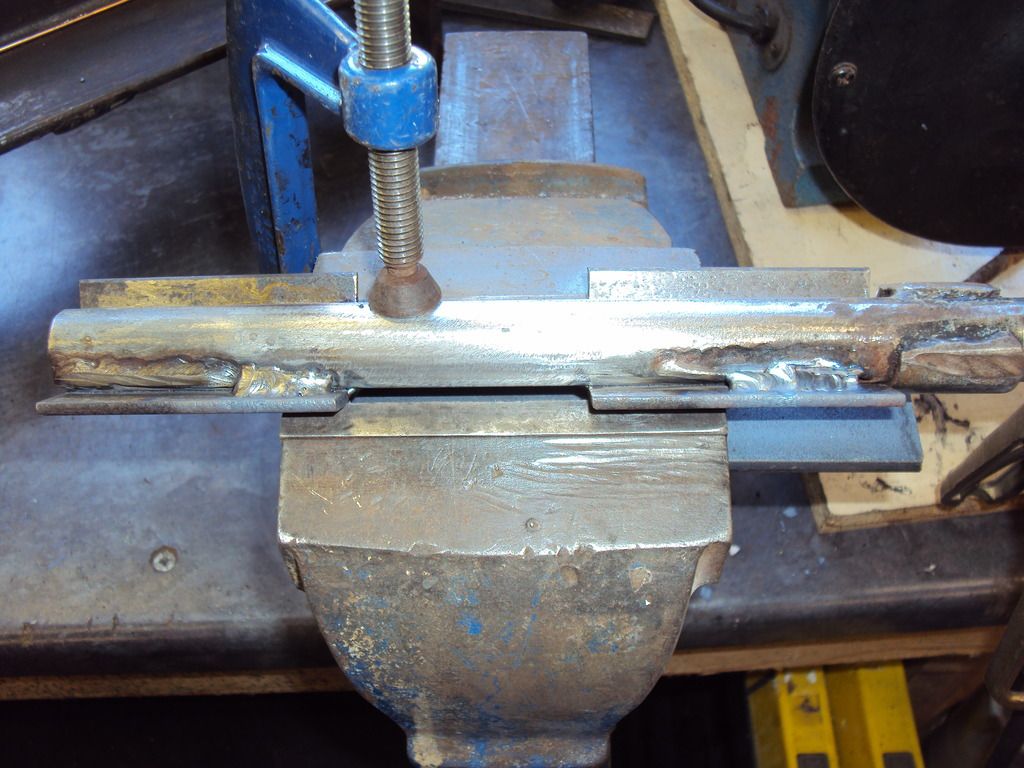
Frame pieces all cleaned up and ready for welding.
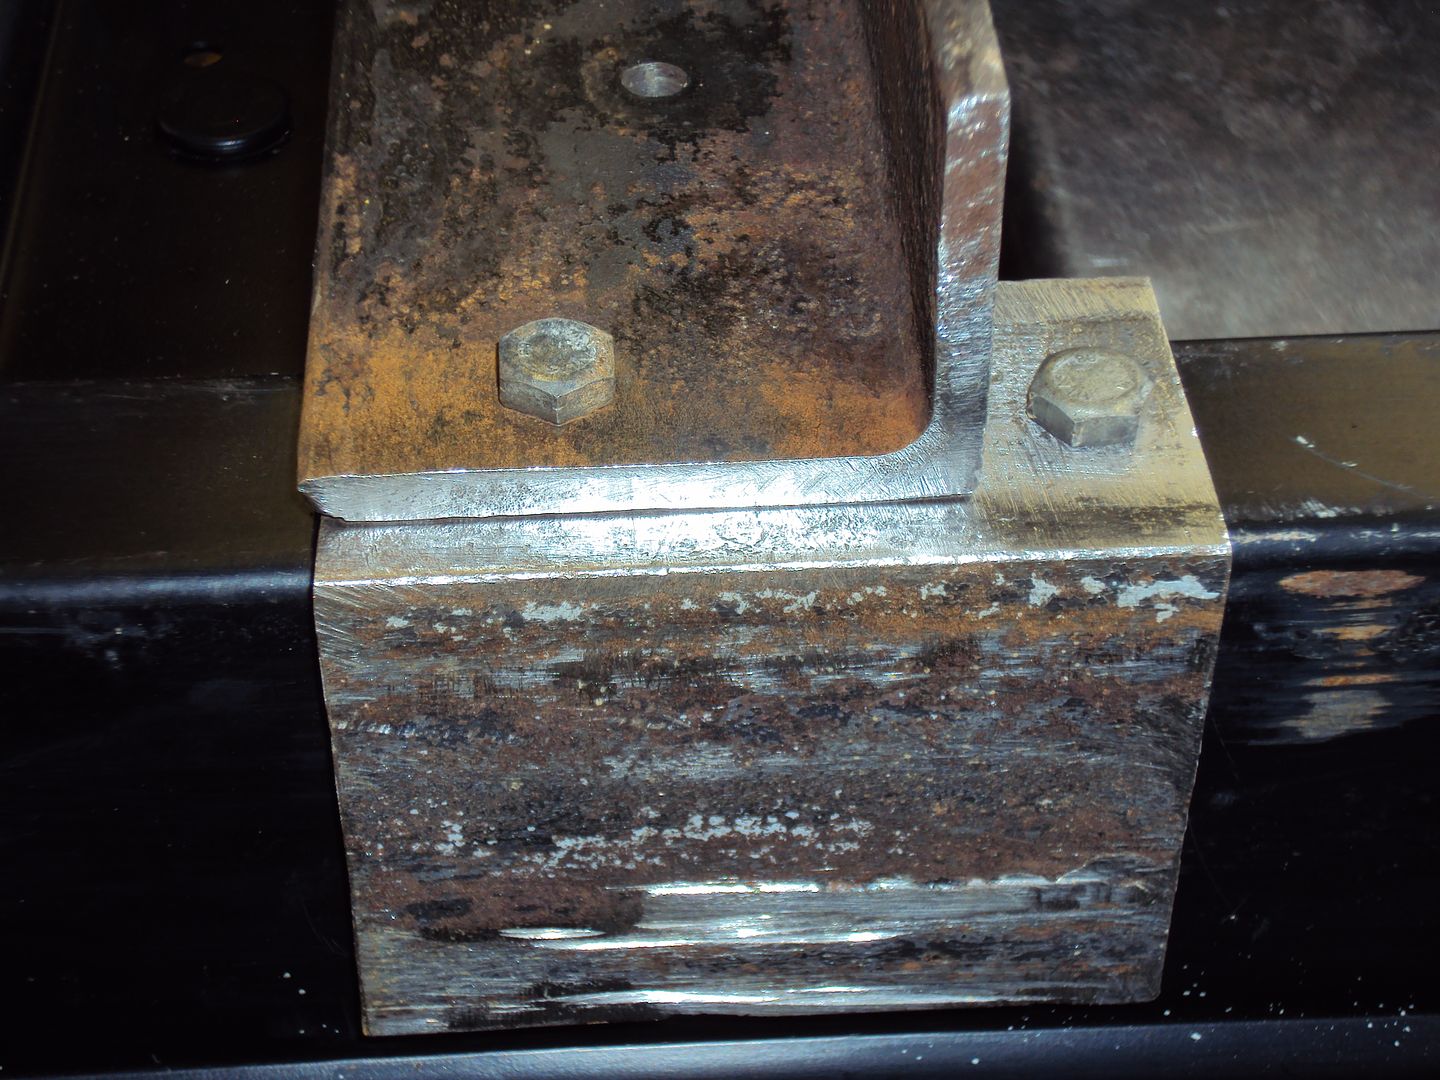
Tacked
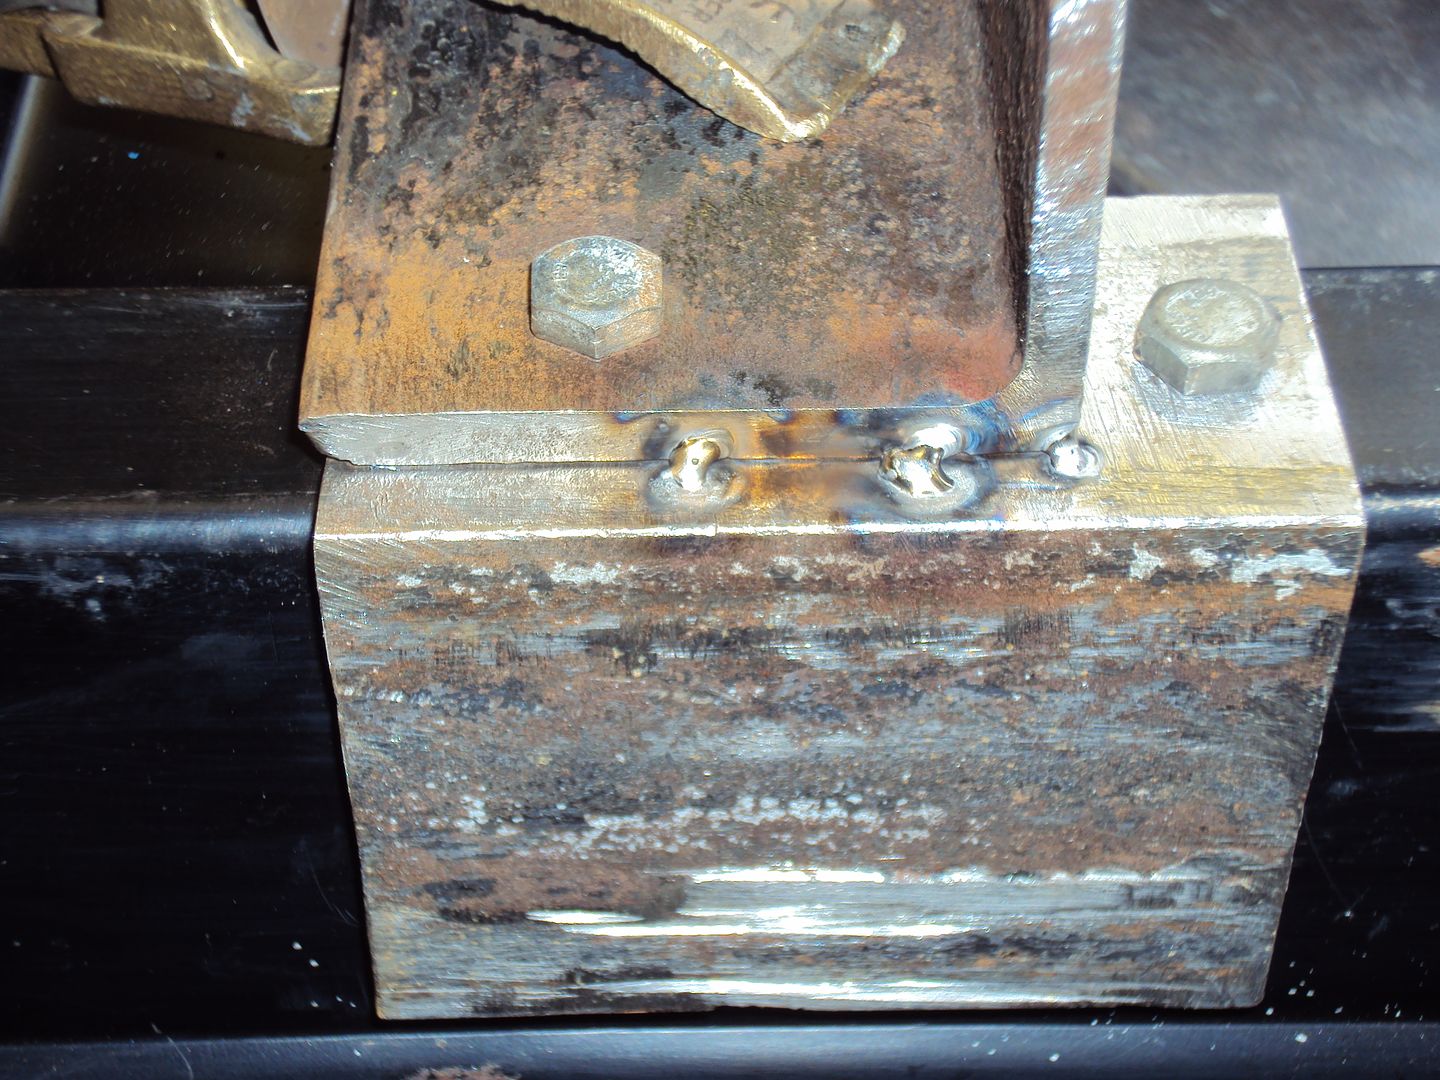
First proper weld

Finished
The welds aren��t pretty but they should be strong
Next step is to clean up the axles and get them mounted.
I decided to go with blue Lanthanated tungsten as it good for most metals.
As I was going to be using quite a high current I went with a 2.4mm tip
I’m still working on the best way to grid the point on the tip, so far the best way I have found is to use a drill to spin the tip while holding it against the bench grinder.
Frame pieces all cleaned up and ready for welding.
Tacked
First proper weld
Finished
The welds aren��t pretty but they should be strong
Next step is to clean up the axles and get them mounted.
Haven’t updated for a while as there hasn’t been any interesting gennys to work on. However, I have (mostly) finished the EX5500
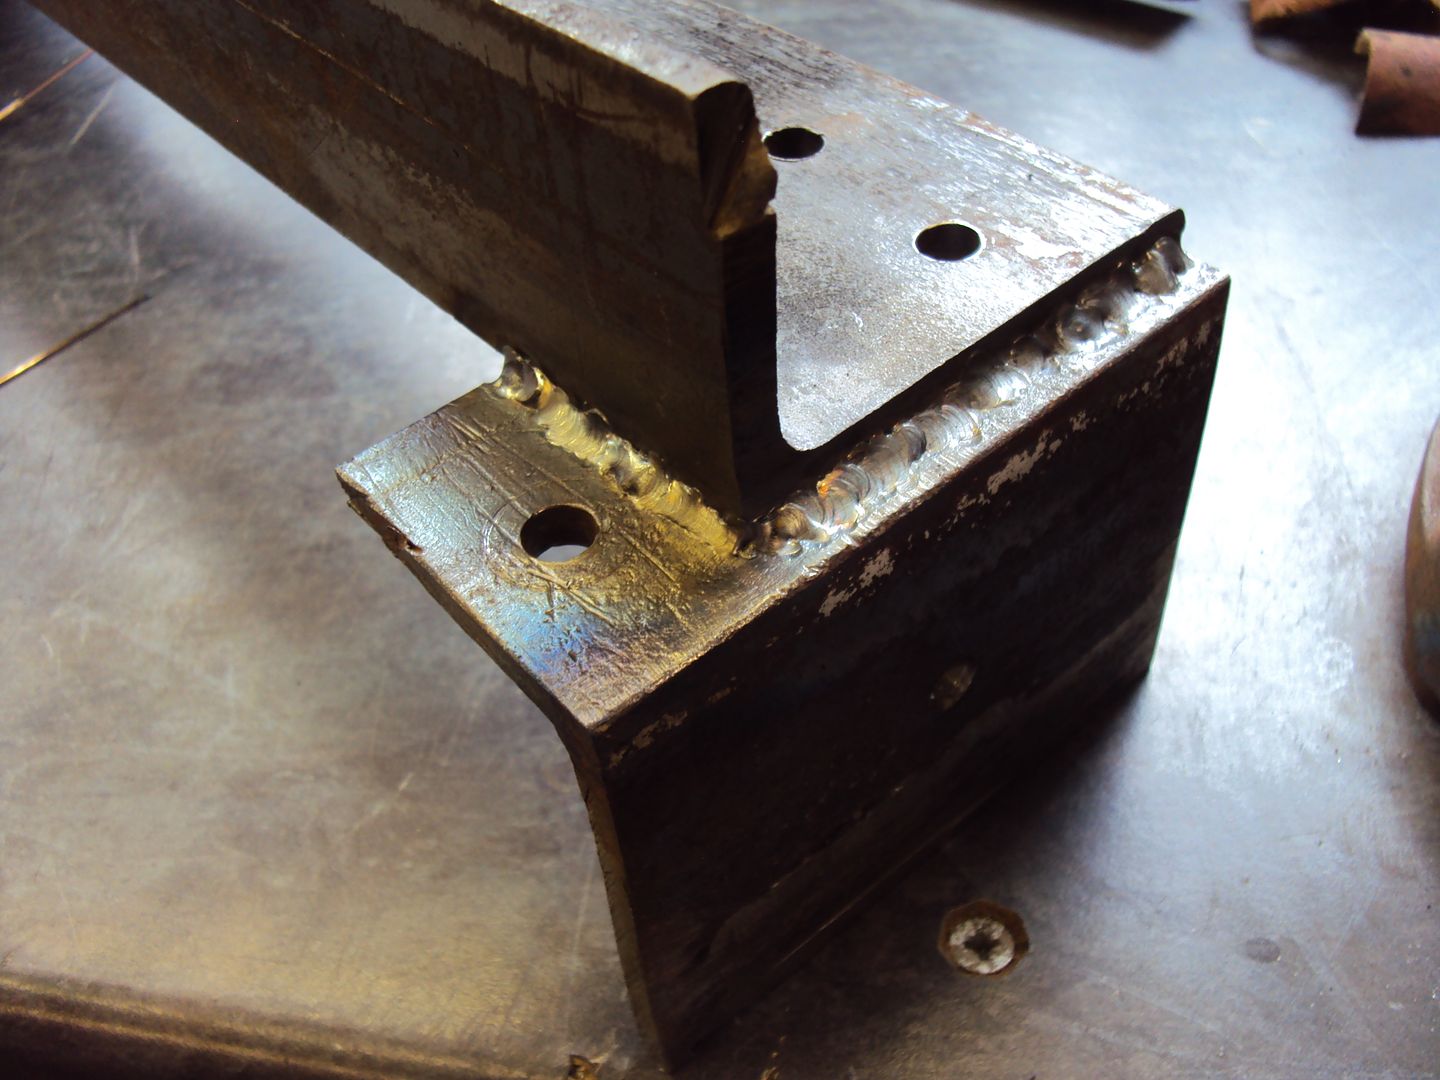
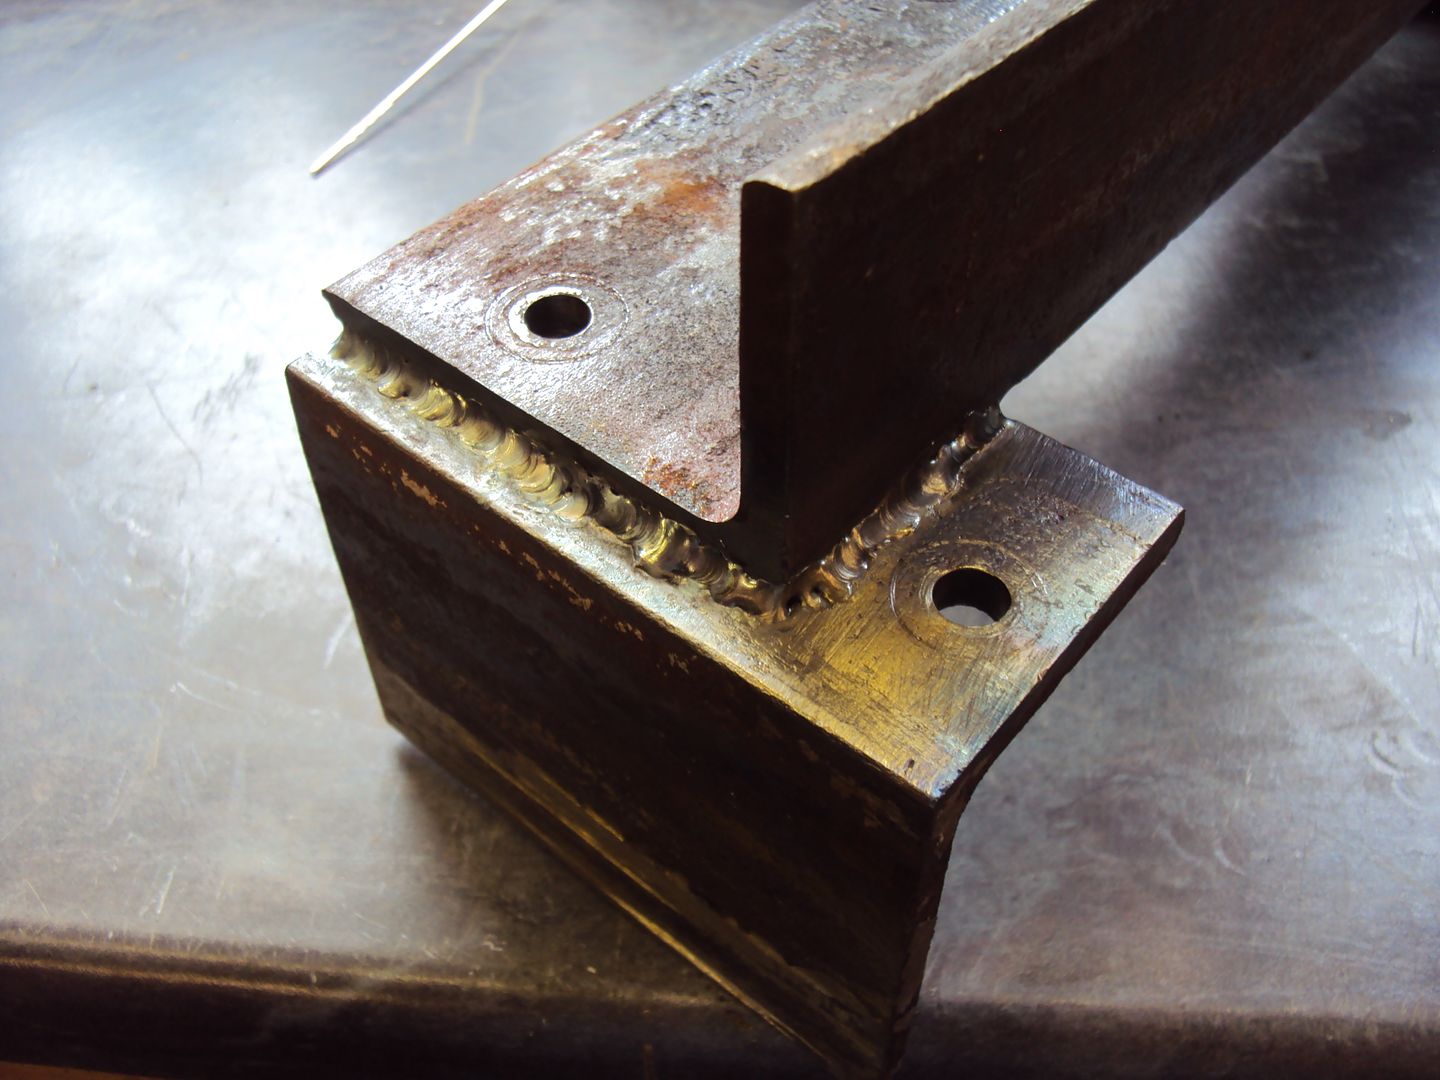
To pick up from where I left off, I have finished the axles. To make the axles I welded the axel shaft to pieces of angle iron so they could be mounted to the frame I made.
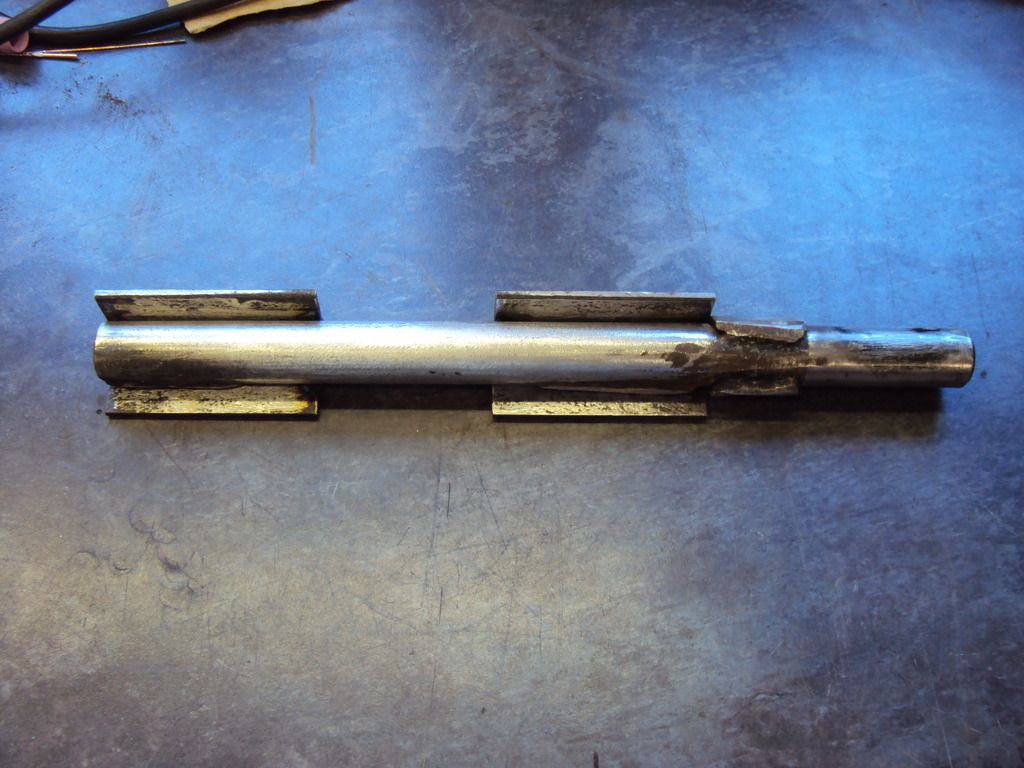
Tacked to hold together
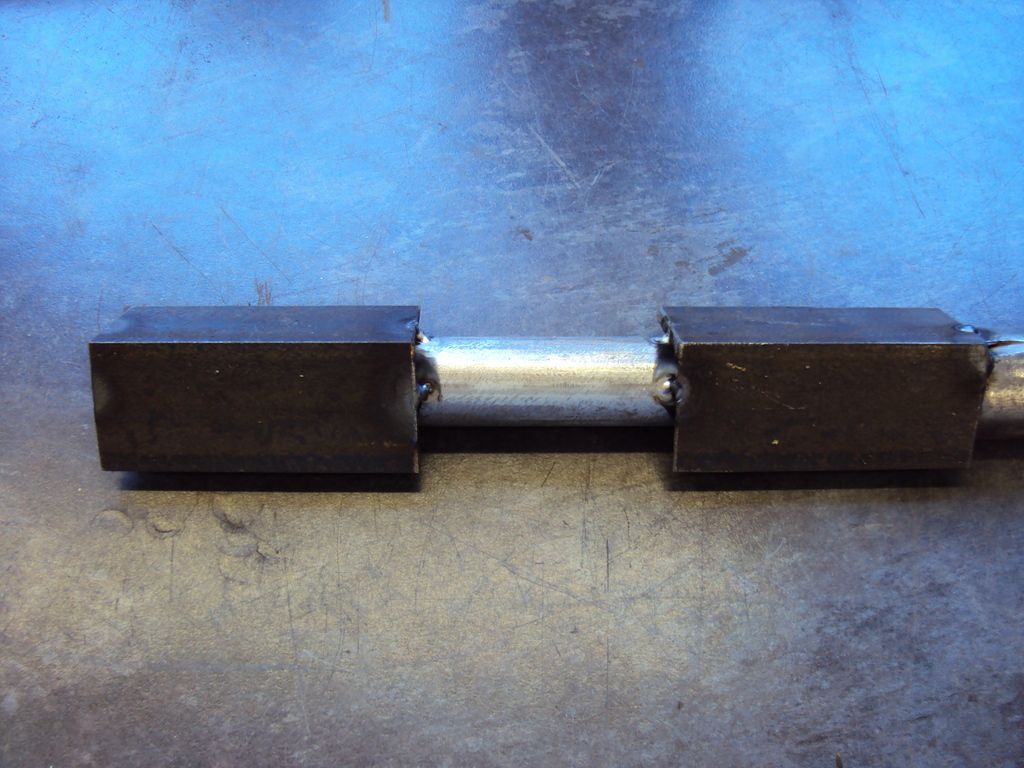
The axles will be welded to the frame like this
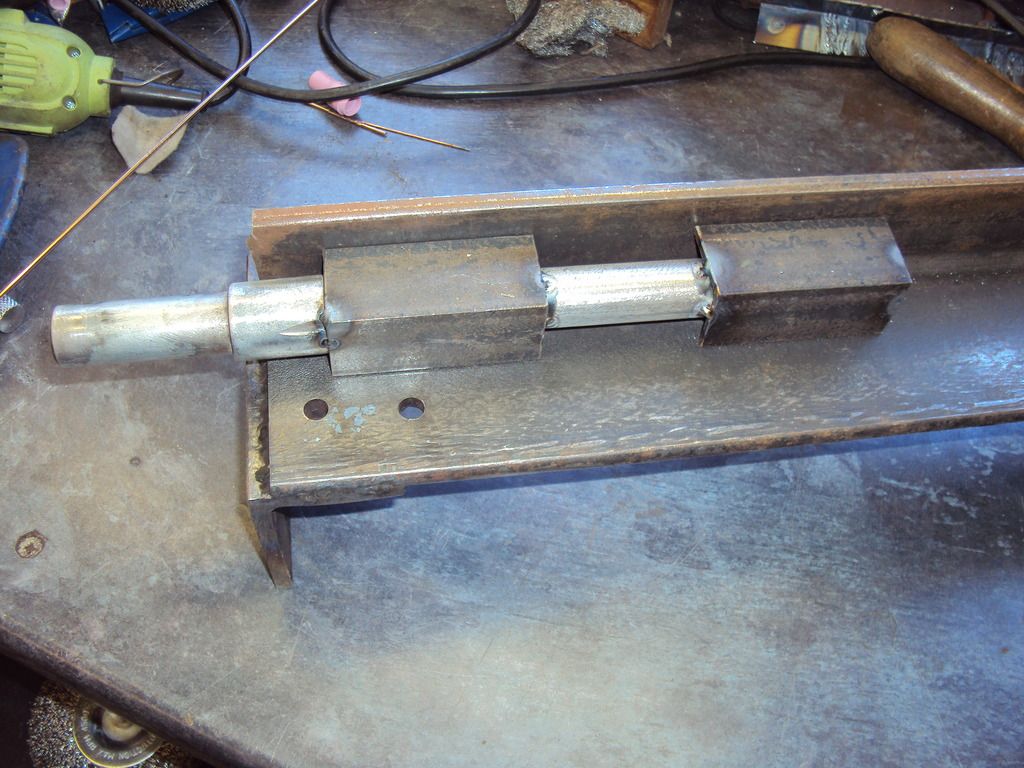
Axle welded to angle iron
A few photos have gone missing so I only have a photo of the completed axle frame after it had been painted
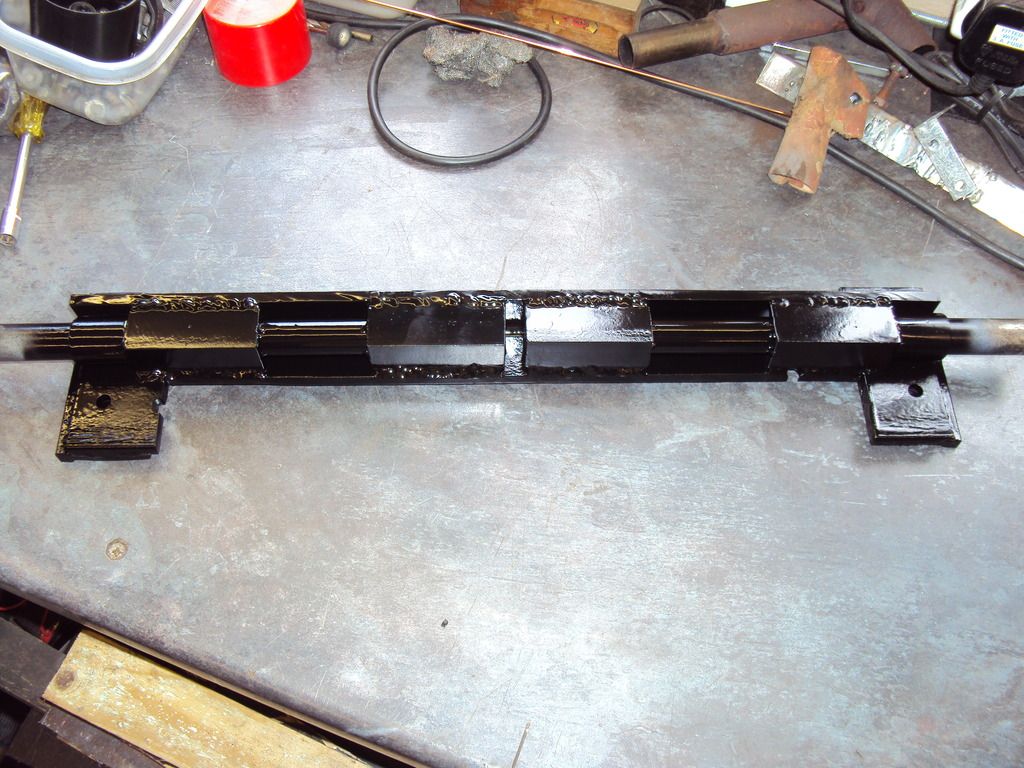
I also cut away a lot of the excess metal to lighten it up a bit.
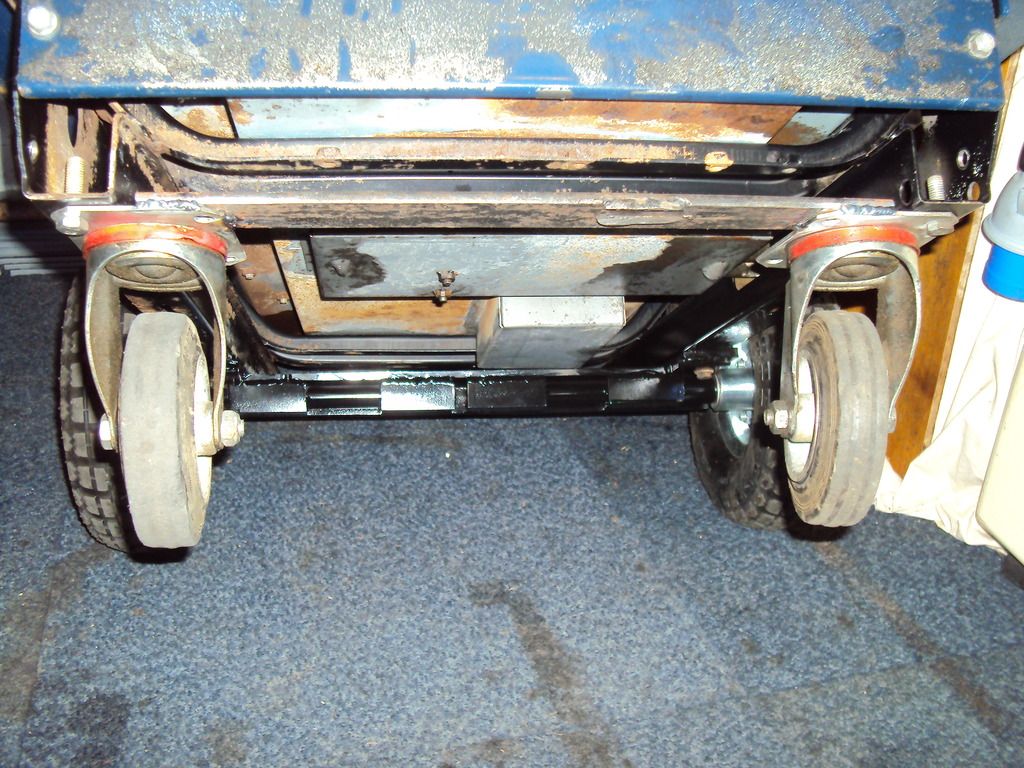
Axle frame bolted to generator chassis
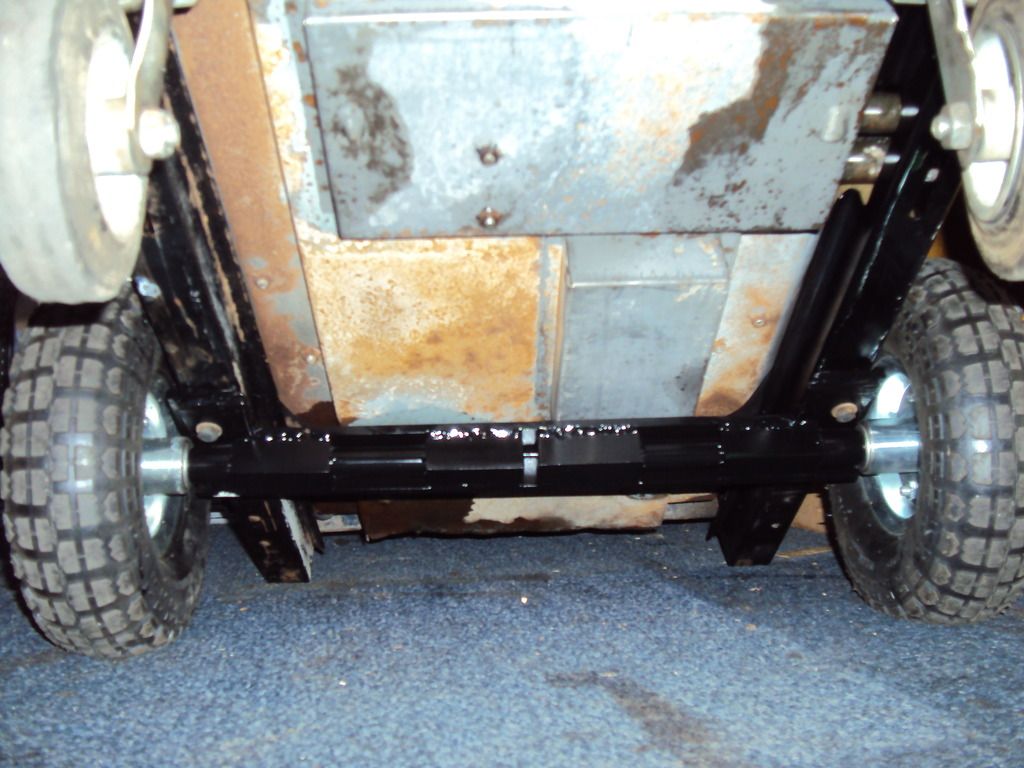
Generator reassembled and sitting on wheels
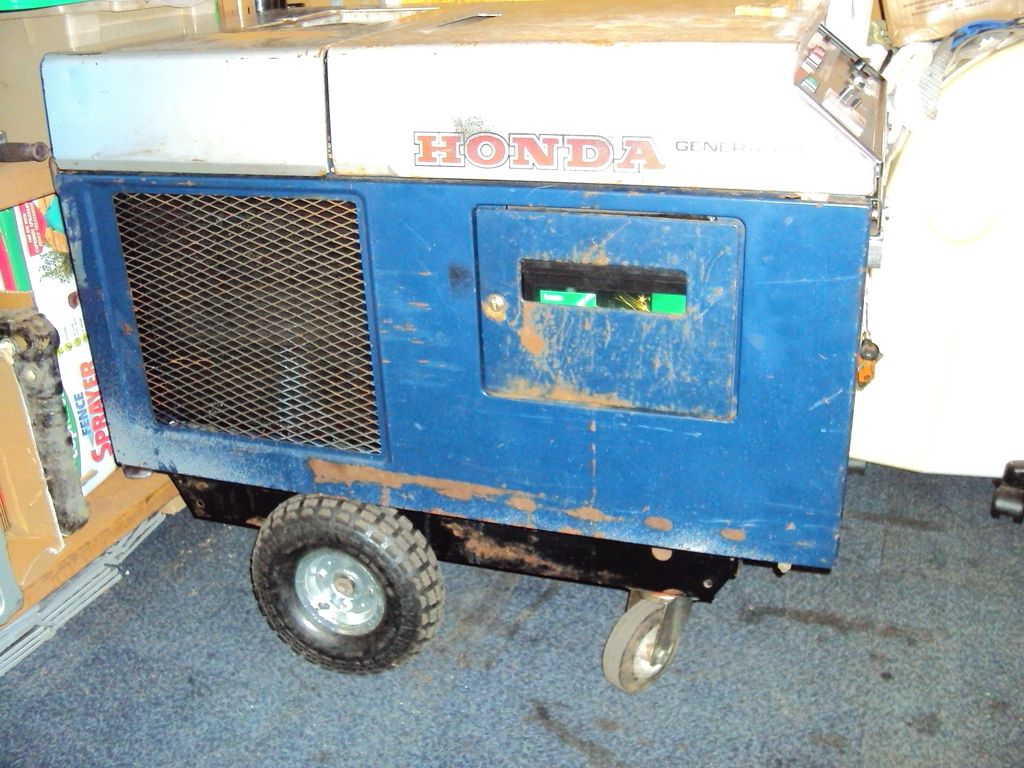
To support the front of the generator I used a pair of castors and braced them with an offcut from the axle frame.
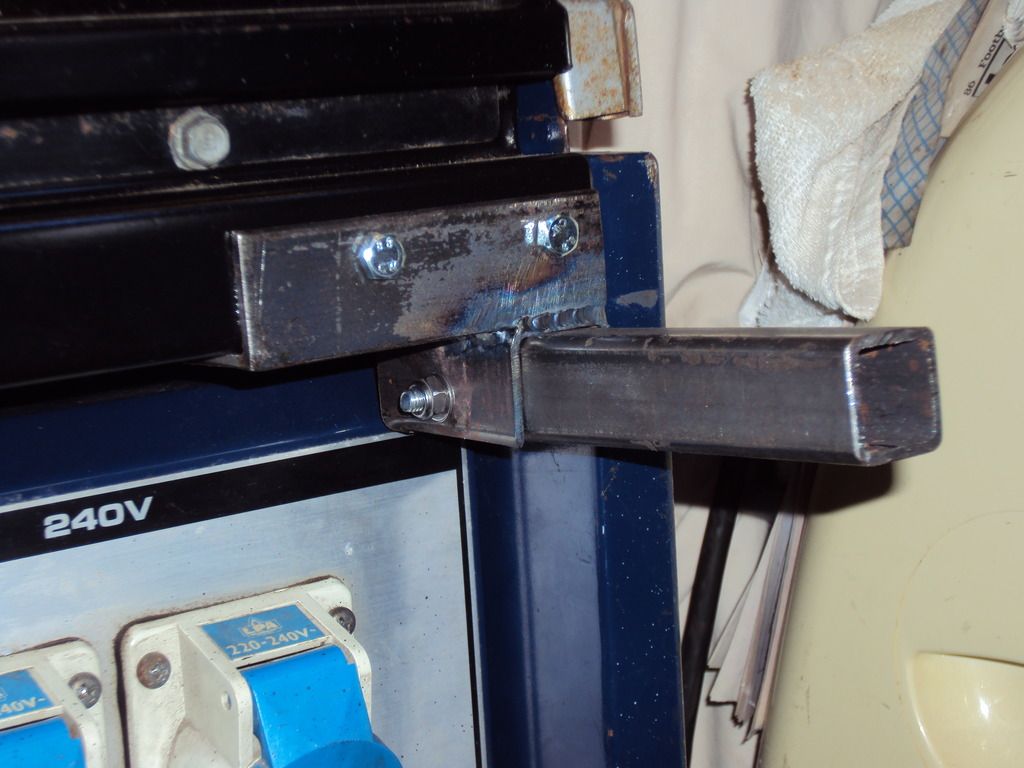
I made a start on lifting handles so the generator can be easily moved around, the handles will be made so they can fold down when not in use.
Once the generator was all back together I ran it up for a couple of hours and found it has an oil leak from the cylinder head.

The leak looks like it is from the head gasket where the oil feed from the pump passes through up to the cam bearings. I managed to reduce the leak by re torqueing the cylinder head bolts while the engine was hot. It is likely I’ll have to change the cylinder head gasket at some point.
As a test I started the gennny this morning to see how it copes with the cold as it is -1 today, after about 8-10 seconds of cranking it burst into life and settled down to a nice constant rpm. Can’t beat a Honda for reliability!
To pick up from where I left off, I have finished the axles. To make the axles I welded the axel shaft to pieces of angle iron so they could be mounted to the frame I made.
Tacked to hold together
The axles will be welded to the frame like this
Axle welded to angle iron
A few photos have gone missing so I only have a photo of the completed axle frame after it had been painted
I also cut away a lot of the excess metal to lighten it up a bit.
Axle frame bolted to generator chassis
Generator reassembled and sitting on wheels
To support the front of the generator I used a pair of castors and braced them with an offcut from the axle frame.
I made a start on lifting handles so the generator can be easily moved around, the handles will be made so they can fold down when not in use.
Once the generator was all back together I ran it up for a couple of hours and found it has an oil leak from the cylinder head.
The leak looks like it is from the head gasket where the oil feed from the pump passes through up to the cam bearings. I managed to reduce the leak by re torqueing the cylinder head bolts while the engine was hot. It is likely I’ll have to change the cylinder head gasket at some point.
As a test I started the gennny this morning to see how it copes with the cold as it is -1 today, after about 8-10 seconds of cranking it burst into life and settled down to a nice constant rpm. Can’t beat a Honda for reliability!
I'm Back
Latest project:
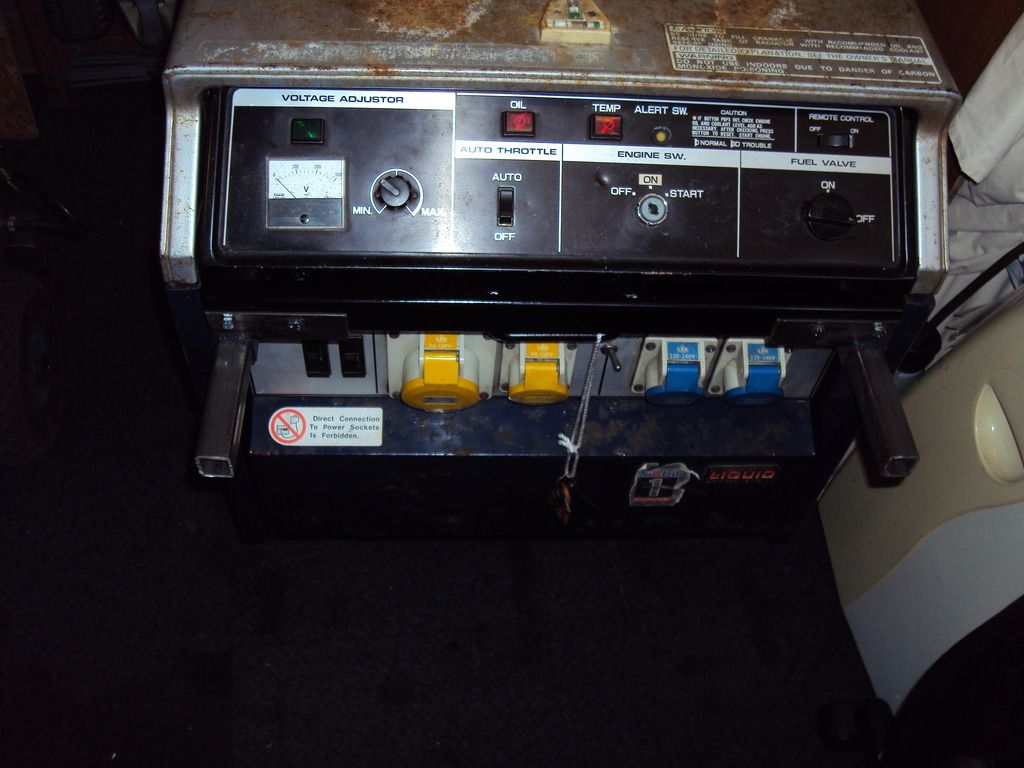
Honda EX4000
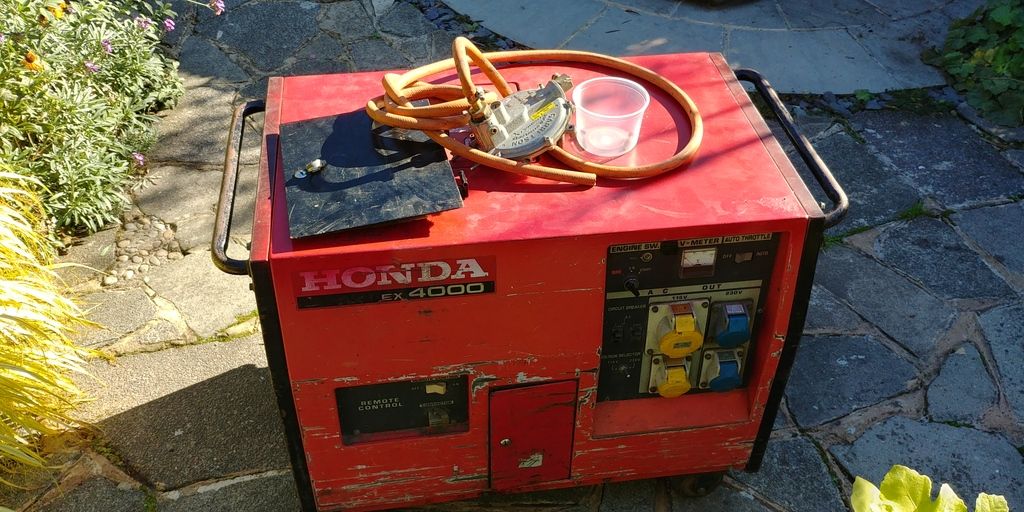
It runs but has no output.... I got this one due to it having a LPG conversion, won it for less than a new LPG kit costs!
I have been after a LPG kit to put on on the EX550 for a while so I don't have to worry about petrol going off and ruining the carburetor.
Plan is to get it working (obviously !) and strip the LPG kit off.
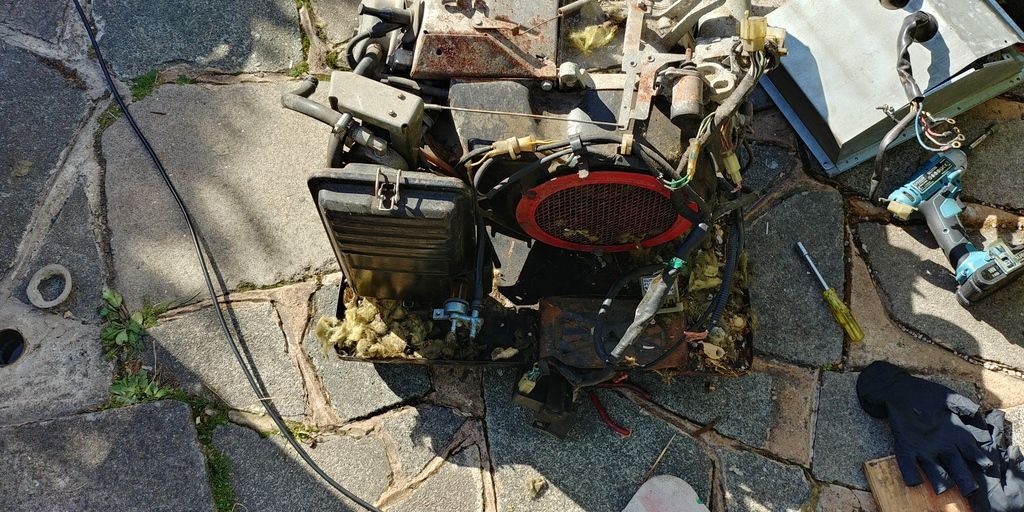
Had a quick poke around and it looks like mice have been having a party so maybe the lack of output is due to chewed wiring
To be continued.......
Latest project:
Honda EX4000
It runs but has no output.... I got this one due to it having a LPG conversion, won it for less than a new LPG kit costs!
I have been after a LPG kit to put on on the EX550 for a while so I don't have to worry about petrol going off and ruining the carburetor.
Plan is to get it working (obviously !) and strip the LPG kit off.
Had a quick poke around and it looks like mice have been having a party so maybe the lack of output is due to chewed wiring
To be continued.......
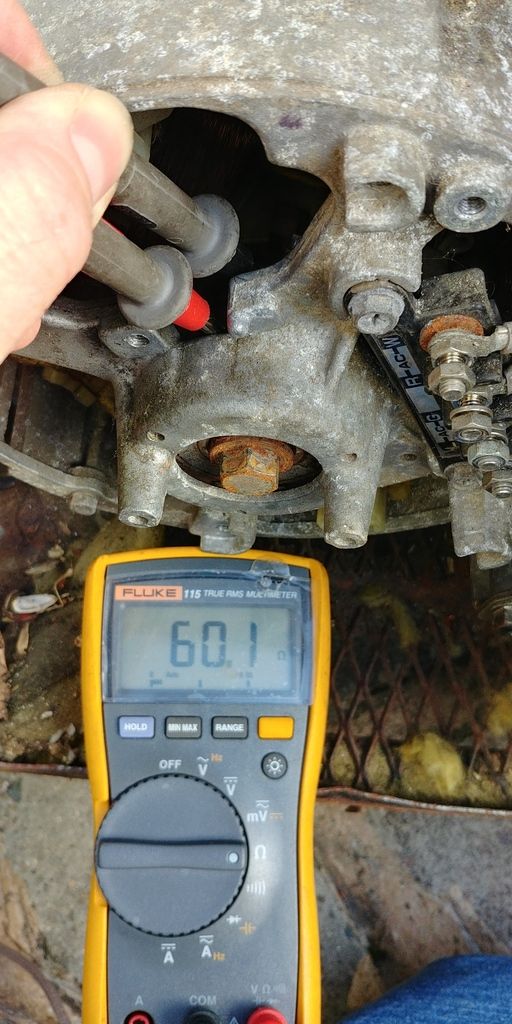
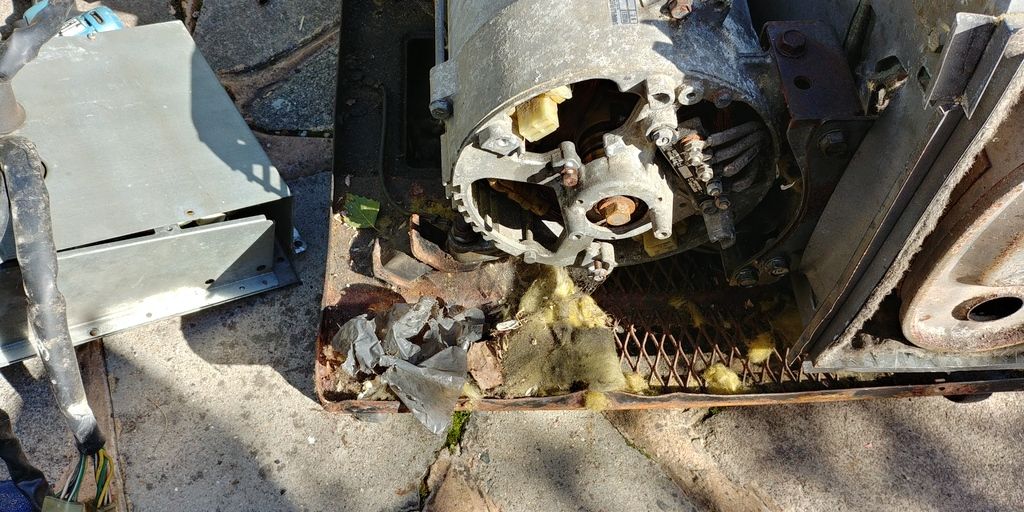
Made a start on the fault finding tody, first thing to check was the sliprings and brushes for the rotor. A test with the multimeter showed the resistance was too high.
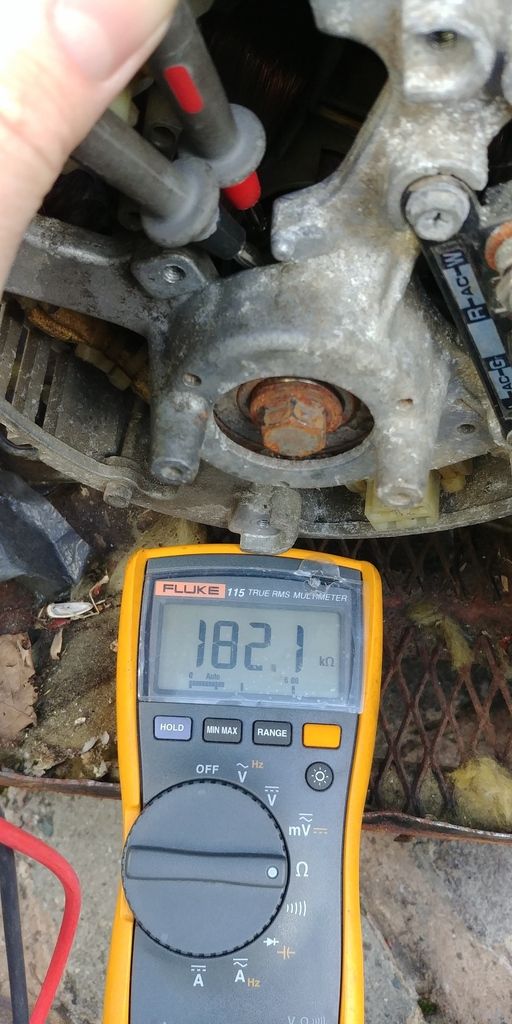
Based on past experience, the resistance should be 60-70 ohms.
I cleaned the sliprings with some scotchbright

Looking better
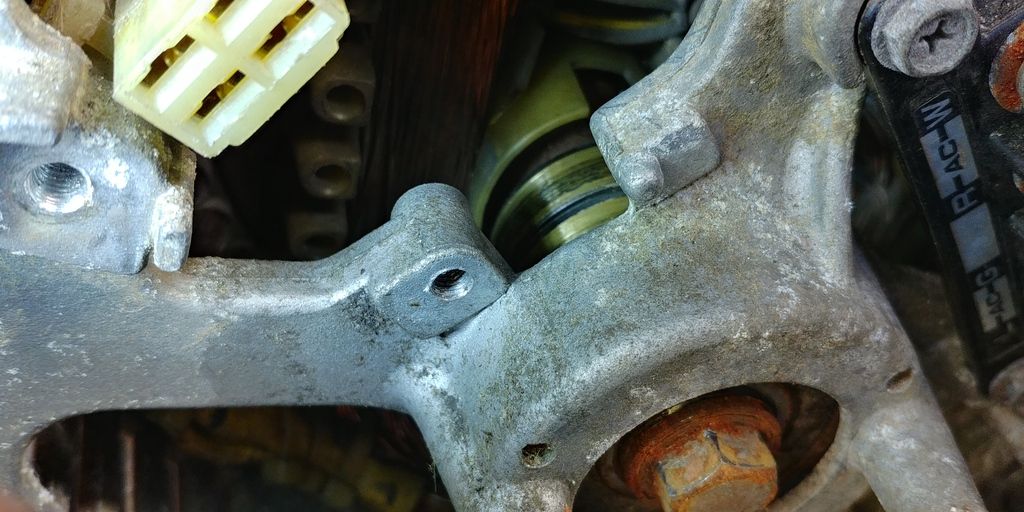
That’s more like it
Refitted the brushes and fired it up and it worked
However it sounded very rattley so decided to strip it down so I could check the engine over. During the disassembly found lots of the sound insulation had been chewed up and there were loads of seeds and leaves. Obviously the generator had been a home to a few mice
Once I had cleared all the chewed-up insulation, I removed the rocker cover to check the valve clearance with a feeler gauge. To correctly set the valve clearance the engine needs to be set to top dead centre (TDC). To find TDC I removed the spark plug and rested a screw driver on the piston and slowly rotated the engine.
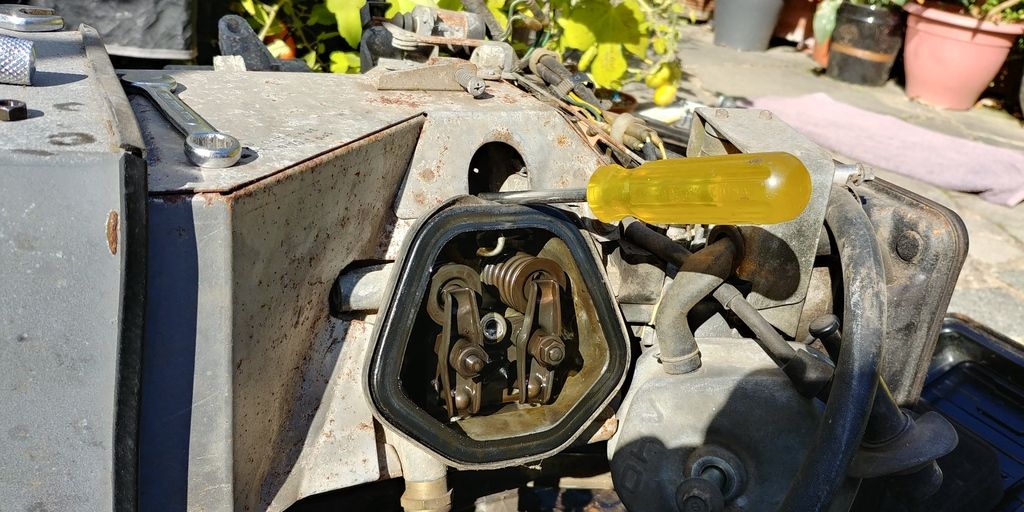
TDC is the highest point the piston reaches, at this point the engine should be on the compression stroke with both valves closed.
Once it is at this point I used the feeler gauge to check the clearance between the valve stem and the rocker.
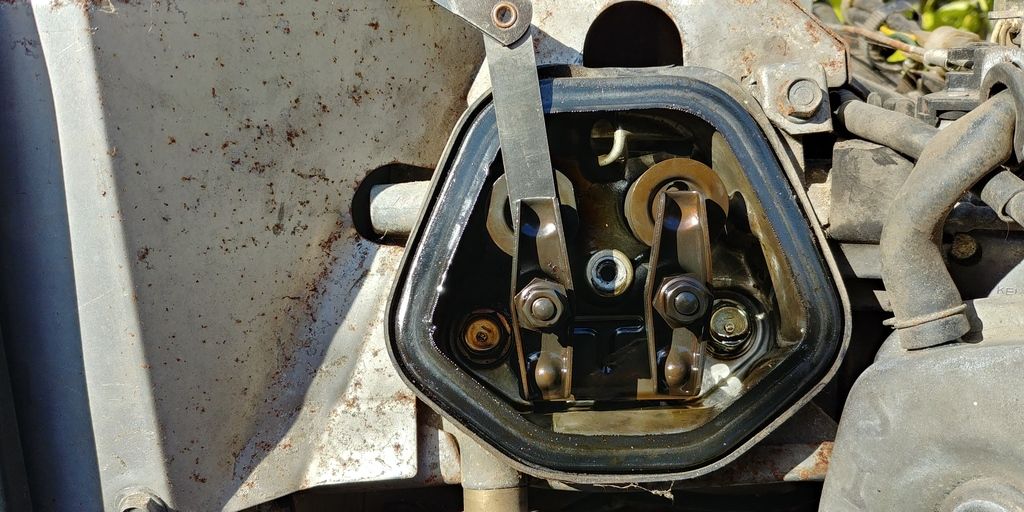
The spec is 0.15mm in the intake and 0.20mm on the exhaust, the measured values were 0.30 on the intake and 0.25mm on the exhaust.
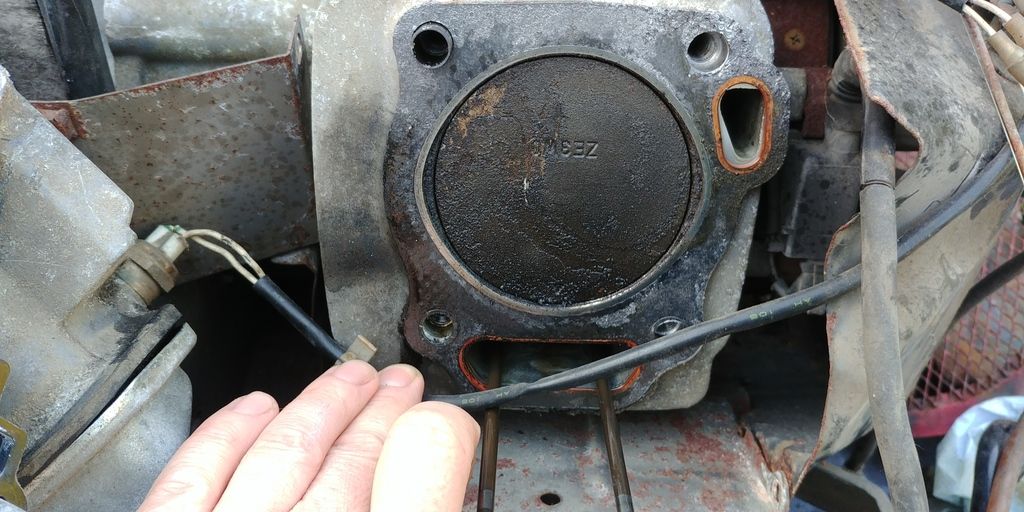
While adjusting the valve clearance I looked into the cylinder and noticed there was lots of carbon on the piston, so decide to remove the cylinder head.
A previous engine I worked (shown earlier in this thread) on had so much carbon it prevented the piston form reaching TDC so the engine wouldn’t turn over. Didn’t want to risk carbon dropping off and jamming the engine while it was running
In the end it wasn’t as bad as I expected. don't think it has spent much time running on LPG as the LPG should be a cleaner burn with no carbon.
Cylinder
Cylinder head
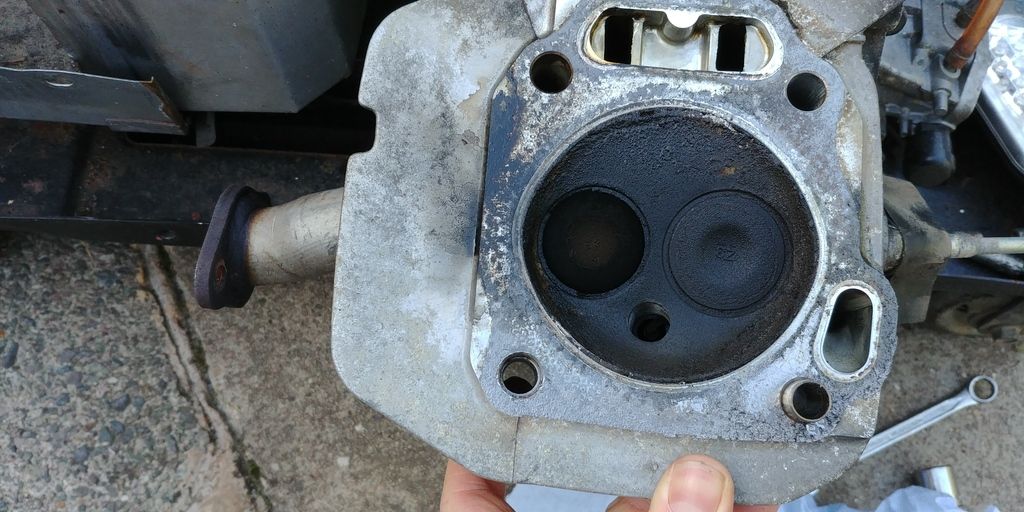
I’ll clean it all up and reassemble to see if the rattle has gone.
Based on past experience, the resistance should be 60-70 ohms.
I cleaned the sliprings with some scotchbright
Looking better
That’s more like it
Refitted the brushes and fired it up and it worked
However it sounded very rattley so decided to strip it down so I could check the engine over. During the disassembly found lots of the sound insulation had been chewed up and there were loads of seeds and leaves. Obviously the generator had been a home to a few mice
Once I had cleared all the chewed-up insulation, I removed the rocker cover to check the valve clearance with a feeler gauge. To correctly set the valve clearance the engine needs to be set to top dead centre (TDC). To find TDC I removed the spark plug and rested a screw driver on the piston and slowly rotated the engine.
TDC is the highest point the piston reaches, at this point the engine should be on the compression stroke with both valves closed.
Once it is at this point I used the feeler gauge to check the clearance between the valve stem and the rocker.
The spec is 0.15mm in the intake and 0.20mm on the exhaust, the measured values were 0.30 on the intake and 0.25mm on the exhaust.
While adjusting the valve clearance I looked into the cylinder and noticed there was lots of carbon on the piston, so decide to remove the cylinder head.
A previous engine I worked (shown earlier in this thread) on had so much carbon it prevented the piston form reaching TDC so the engine wouldn’t turn over. Didn’t want to risk carbon dropping off and jamming the engine while it was running
In the end it wasn’t as bad as I expected. don't think it has spent much time running on LPG as the LPG should be a cleaner burn with no carbon.
Cylinder
Cylinder head
I’ll clean it all up and reassemble to see if the rattle has gone.
Gassing Station | Homes, Gardens and DIY | Top of Page | What's New | My Stuff