The ebay generator restoration thread
Discussion


creationracing said:
Excellent stuff lad. Keep us updated.
I've just changed jobs, new one starting Thursday. Been a UPS service engineer up to now but am now going multi-discipline electrical. So will be playing with, among other things, generators! But probably bigger ones than yours...
Sounds interesting, feel free to post some pics/info of anything you work onI've just changed jobs, new one starting Thursday. Been a UPS service engineer up to now but am now going multi-discipline electrical. So will be playing with, among other things, generators! But probably bigger ones than yours...

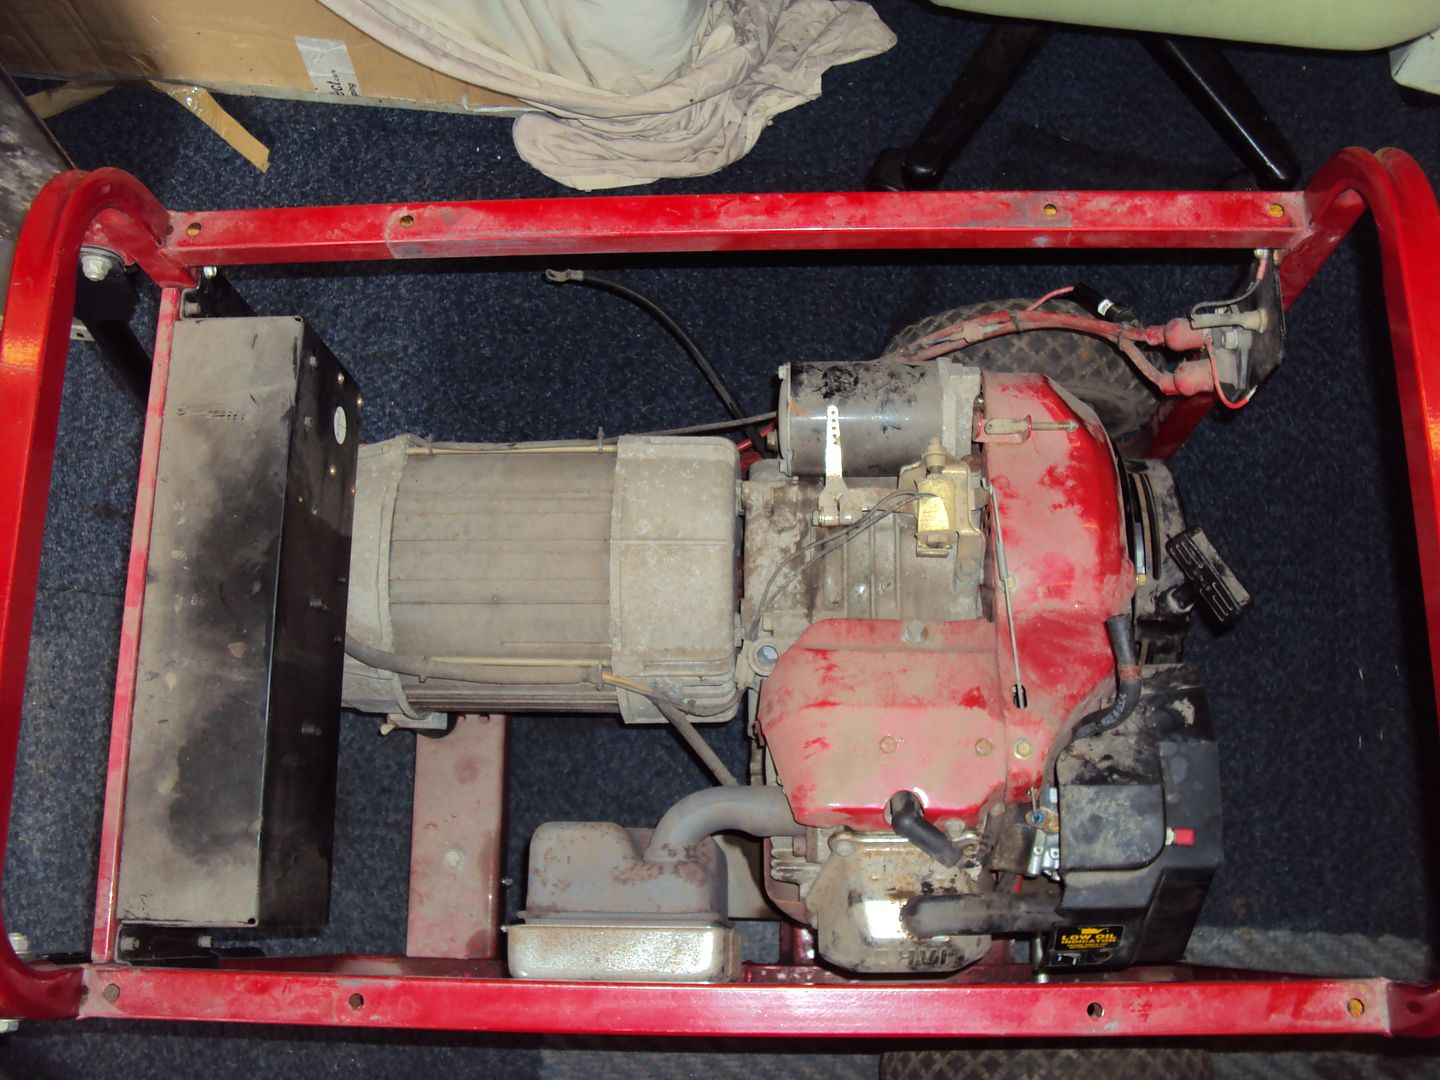
I have now got it working (sort of)
I ended up having to ask for help on an American small engine forum (smokestack.com). The guys on there were very helpful and explained how to do some more in depth testing.
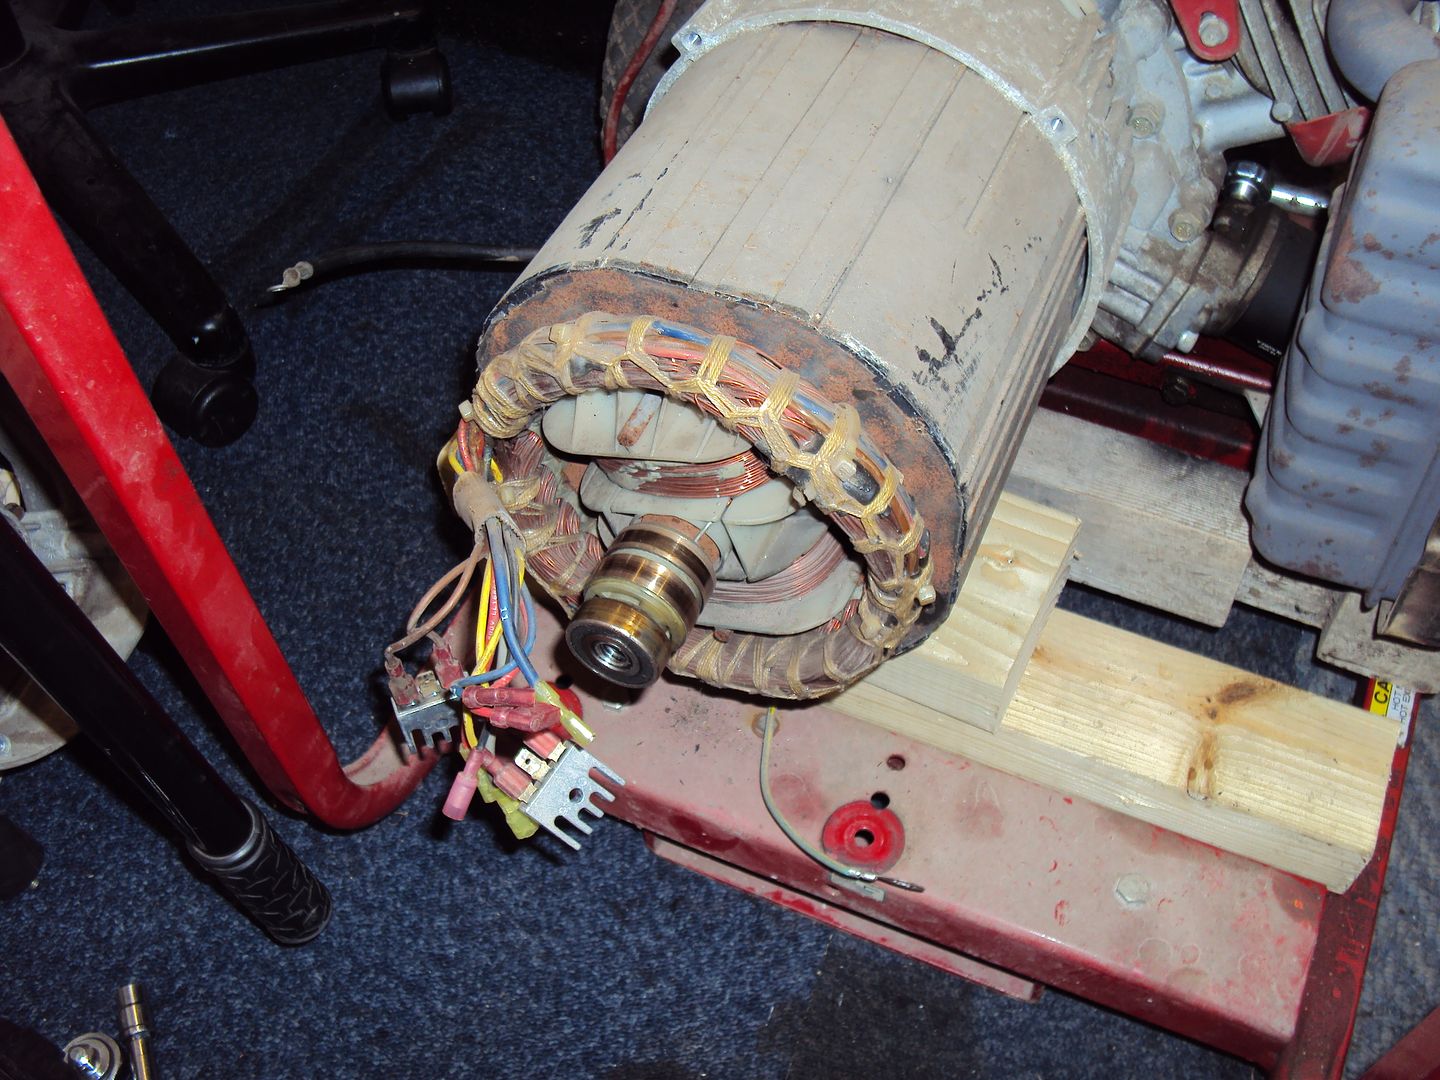
One of the tests was to test the DPE windings in the stator, which powers rotor via a regulator board. The test involved connecting a 12v battery to the brushes for the rotor and connecting a light bulb to the DPE windings. The light bulb lit up on test which proved the DPE winding was ok.
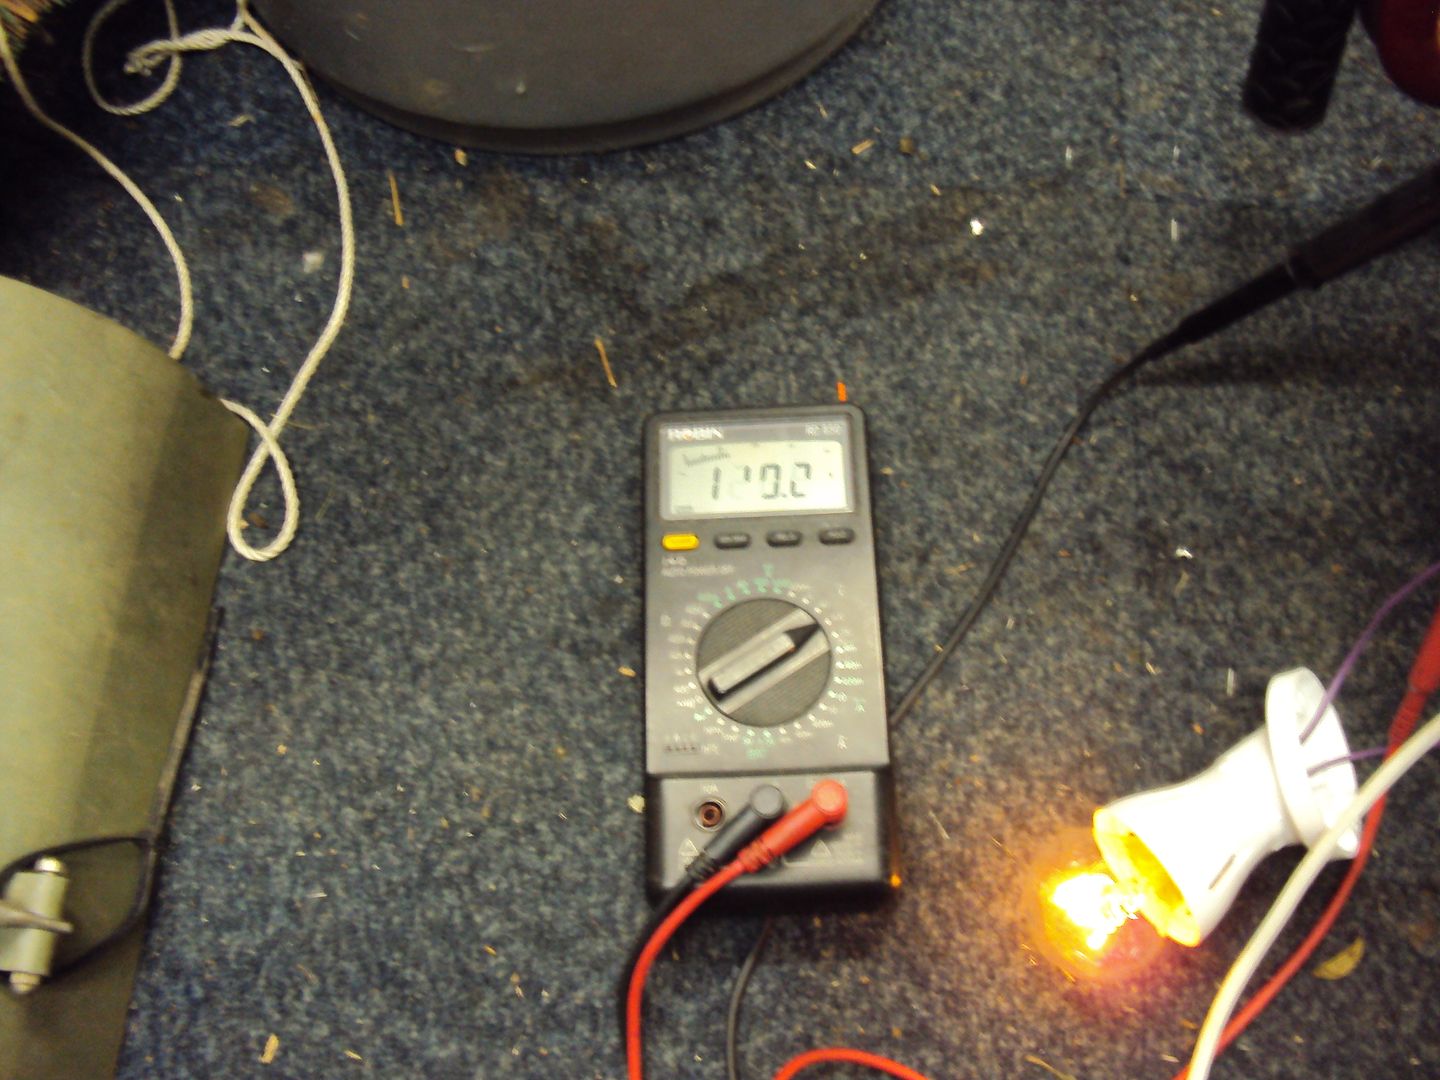
The test had to be done this way to prove the DPE winding can supply current and voltage, as even though the resistances might look ok the winding can brake down.
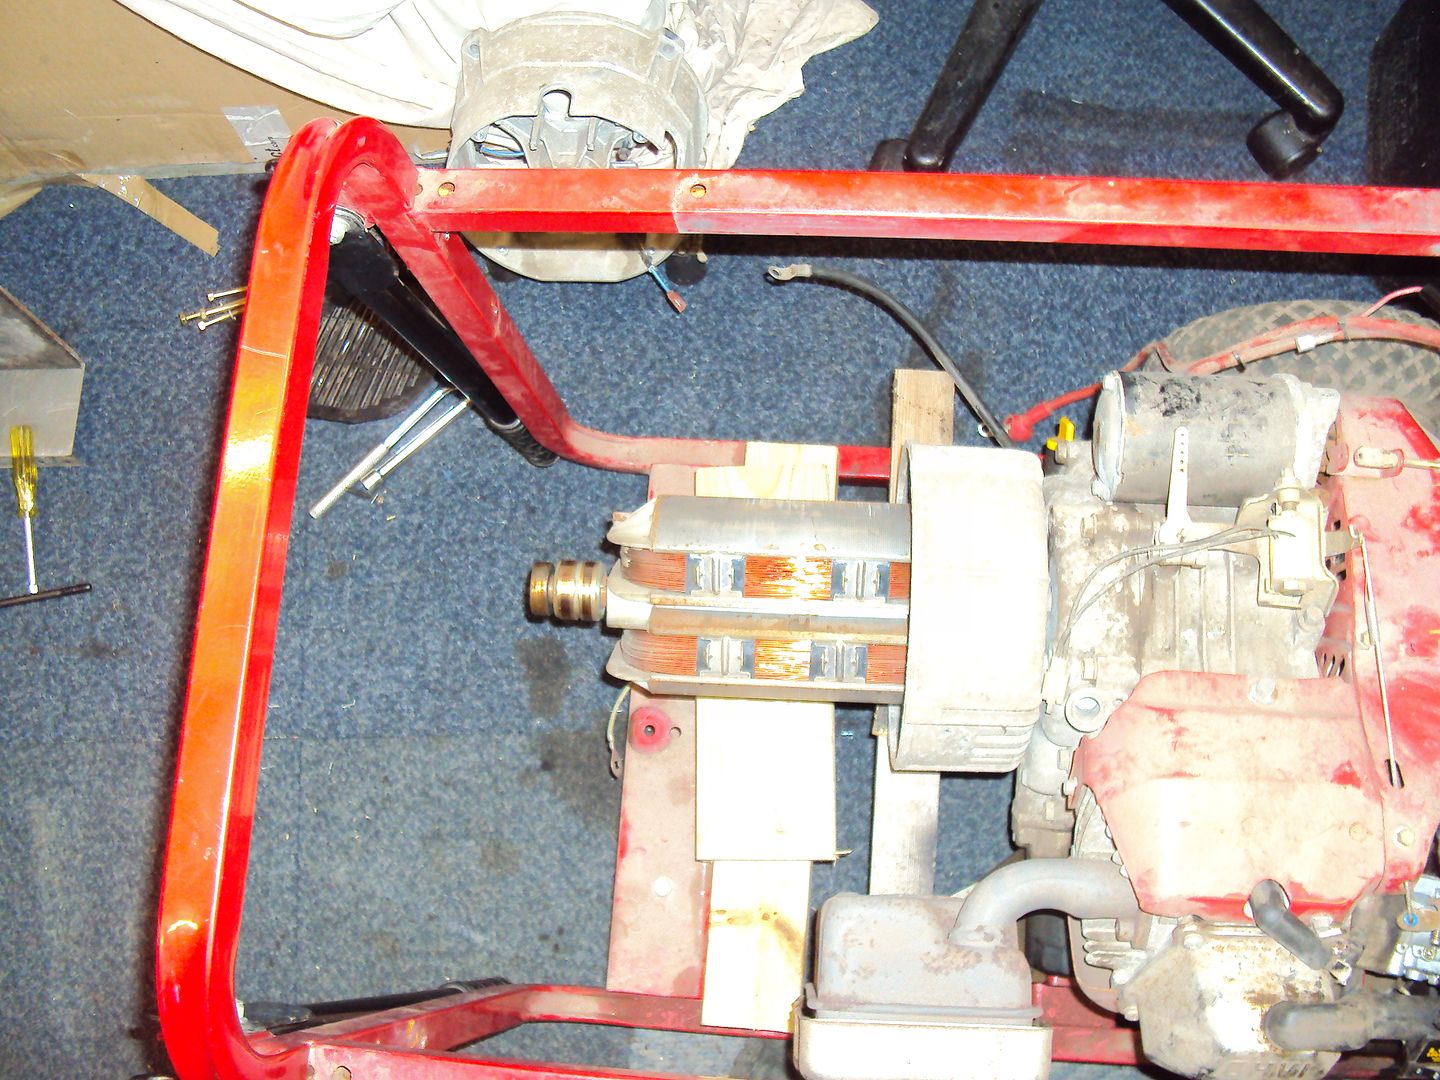
It turned out the regulator board which lives in the back of the alternator and controls the voltage to the rotor to excite the main windings was at fault.
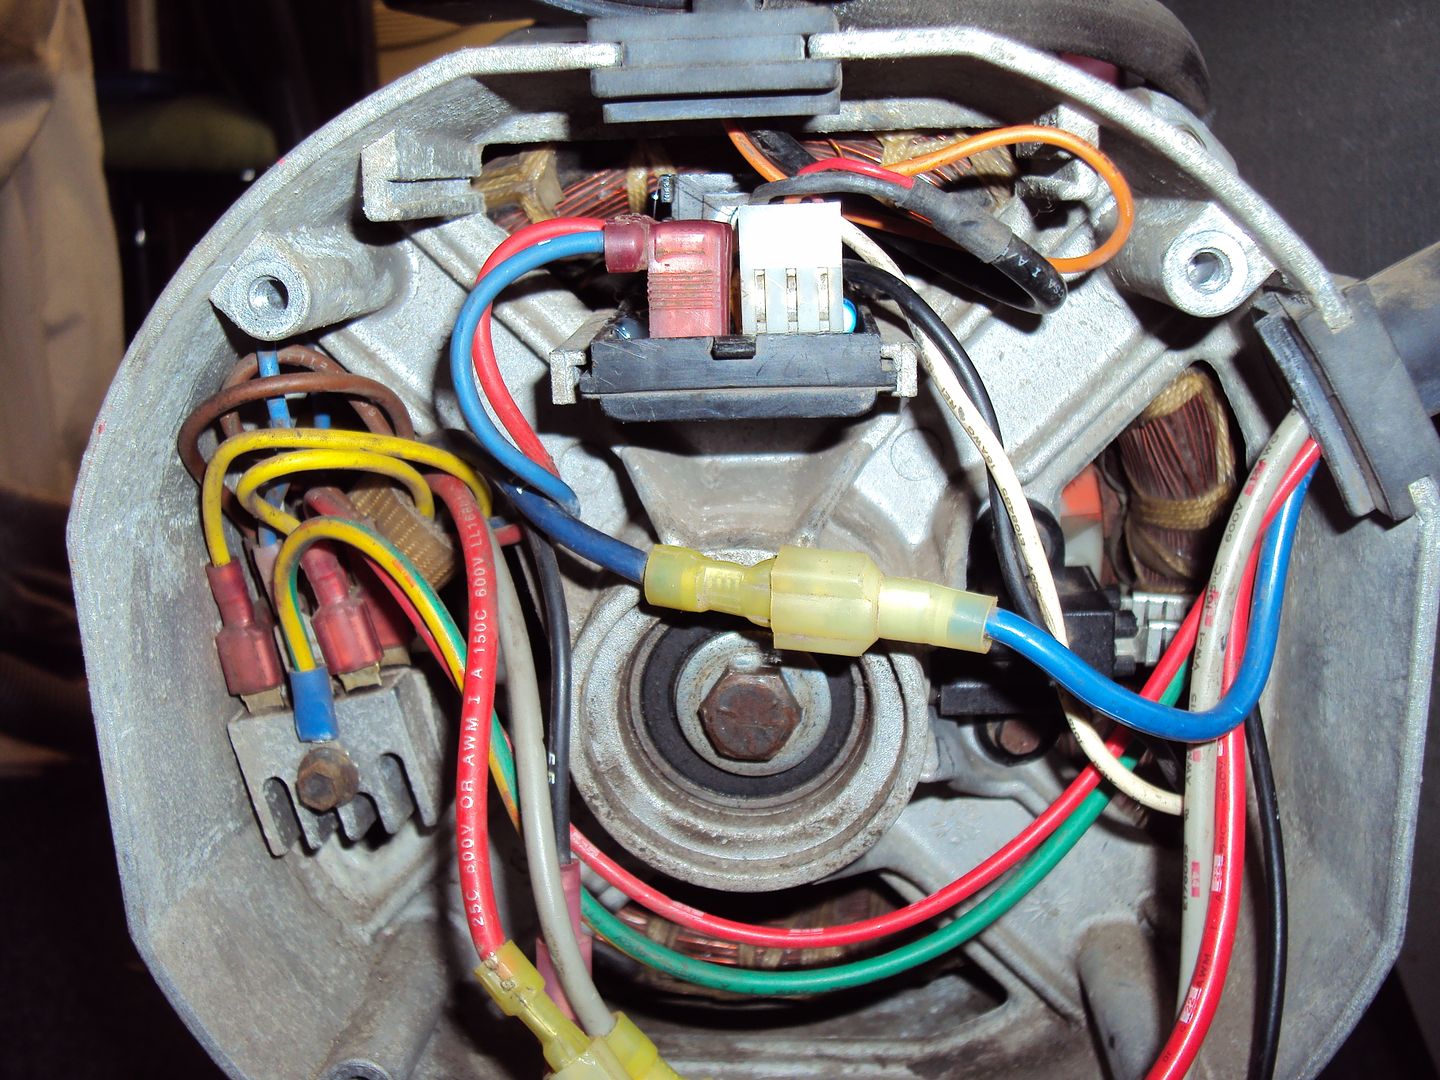
After picking away at the epoxy coating I was able to test the components on the regulator board. It turned out the big 18k ohm resistor (brown, grey, orange stripe) at the top of the board was open circuit

I checked all the other components which were OK. I replaced the 18k resistor and reassembled the regulator board and got it working, now getting 110 & 240v at the outlets
Now having trouble with the engine speed governor, the governor uses spinning weights in a similar set-up as shown on the EX5500 on pages 1 & 2. As the gear turns the weights move to apply pressure on a governor arm. As far as I can tell the weights are not applying pressure to the arm so the arm isn’t adjusting the throttle as the load is increased.
Unfortunately with this engine the governor is inside the engine casing so it has to be completely stripped down so I can open the case.
Oh managed to fix the leak on the innertube, just put some superglue around where the valve meets the rubber.
guindilias said:
Generacs are a bit frowned upon at the Smokstak - you need to get yourself a nice old 1800rpm Onan!
I did look at an Onan a while ago, but was put off by what seemed like a complete lack of information or manuals. It’s a shame I hadn’t found Smokestak at the time as it is a good source of information.Drained the oil from the engine and heard a “clunk” as something fell into the pan, had a route around and found this.
And it sounds like there is another bit sliding around in the engine casing

So disassembly has started….
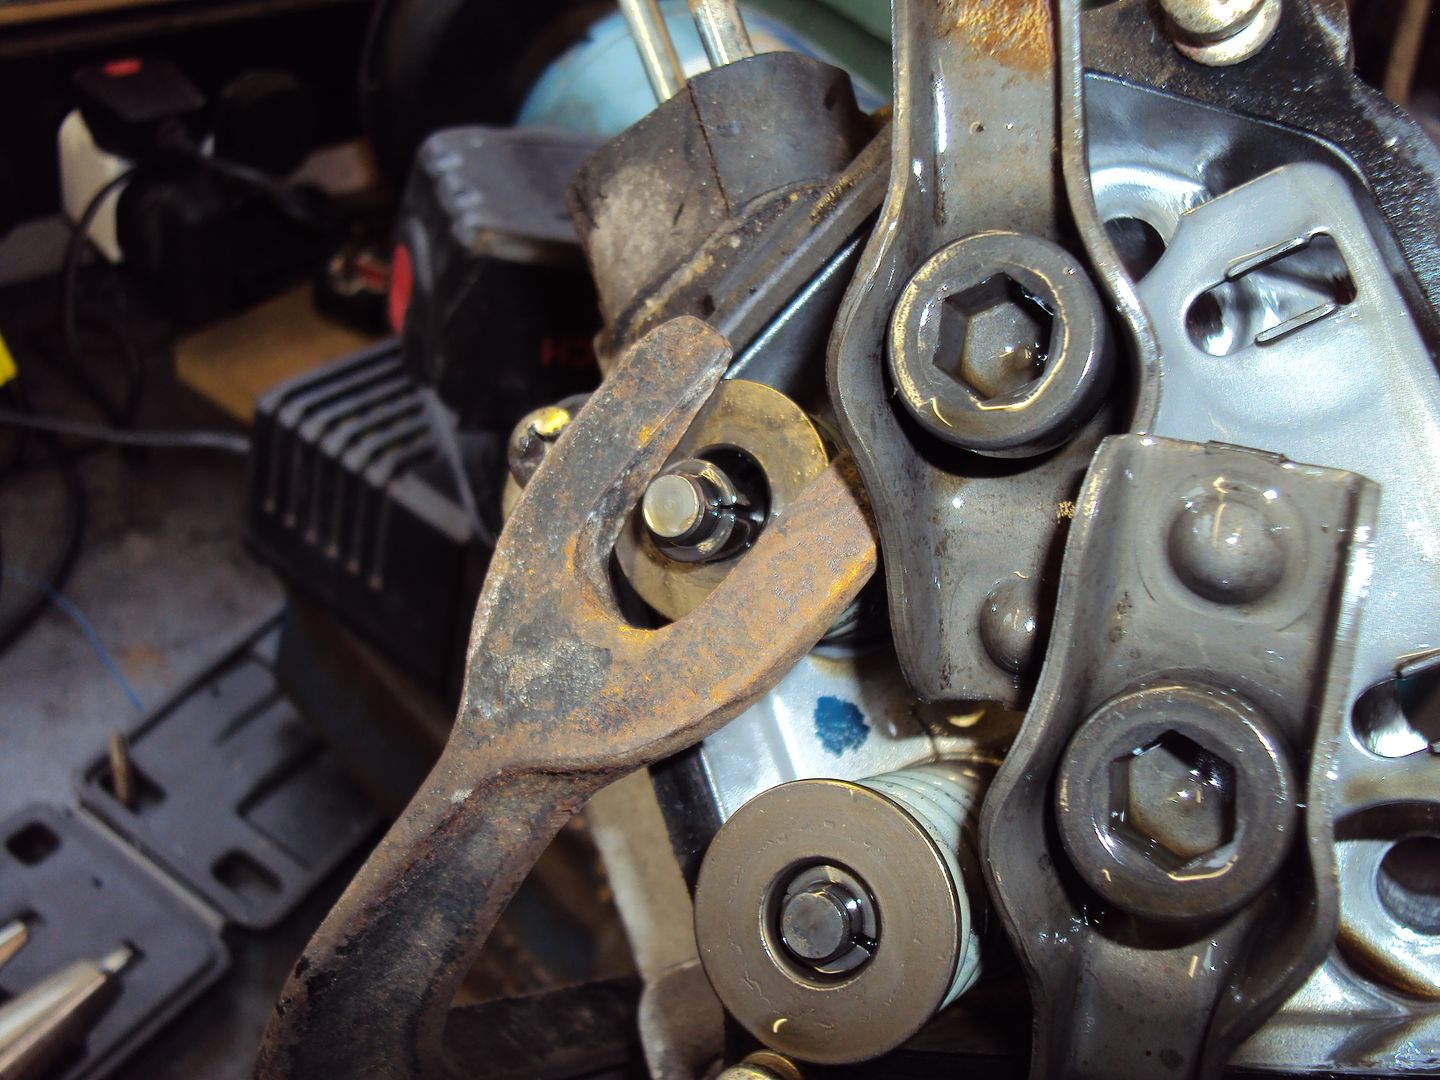
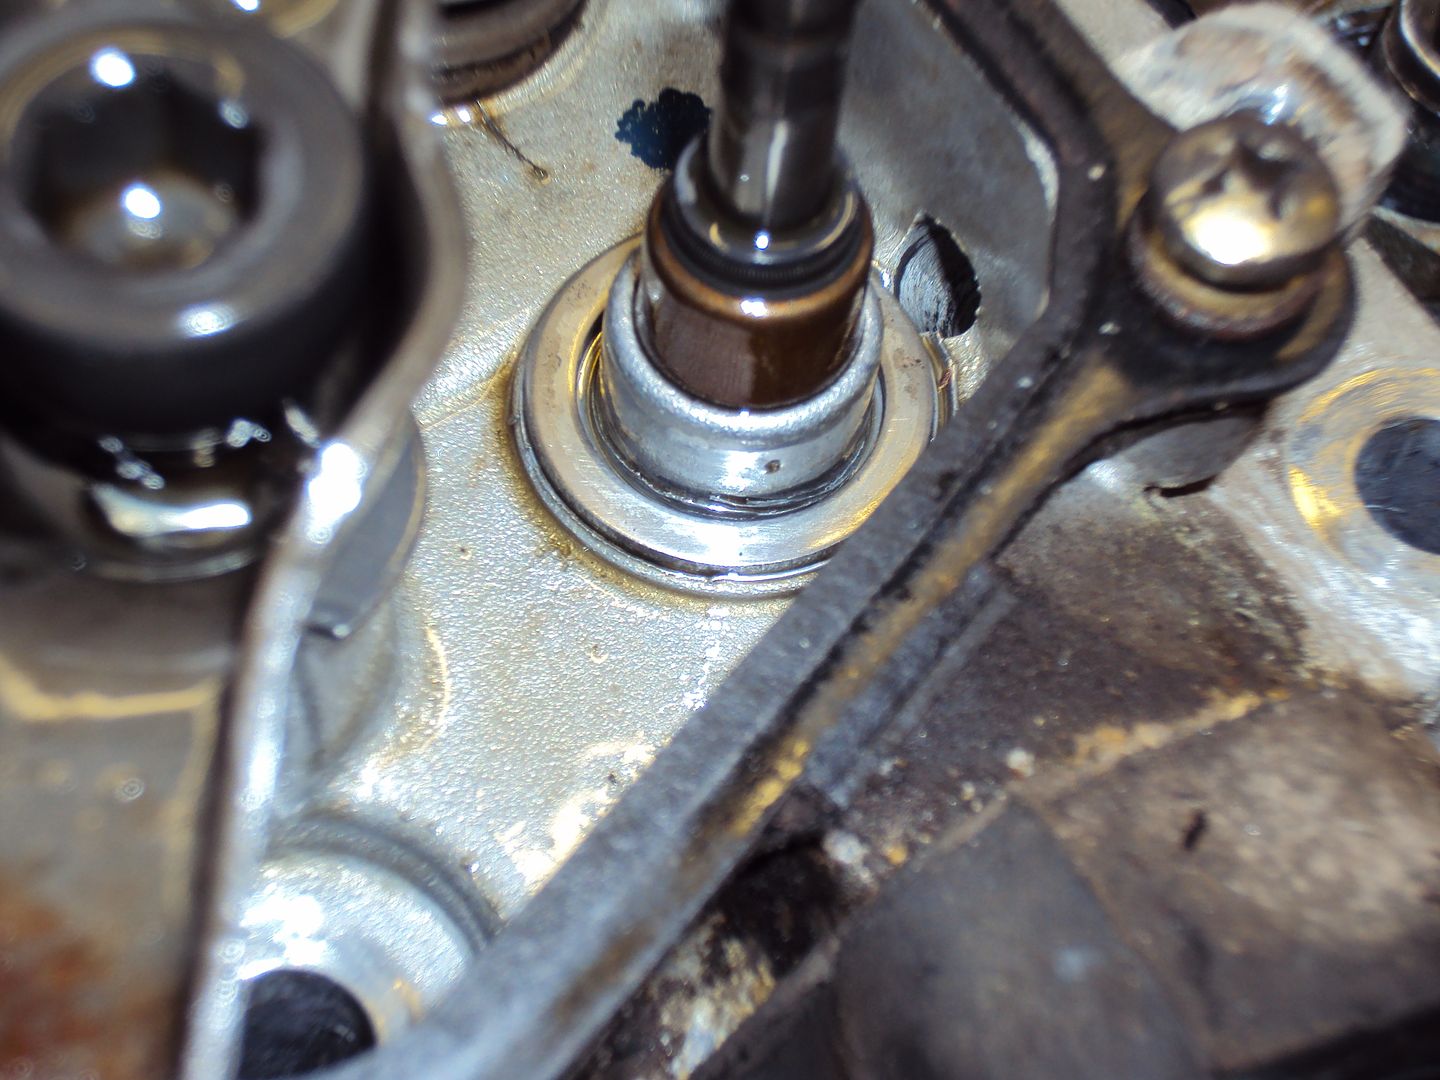
Couldn’t get any further as I need to cut a thread in the rotor shaft so a bolt can be used to push the rotor off the engine shaft, same as I did with the EX5500.
Managed to separate the rotor from the engine, I tried using a rod down the centre of the rotor, same as I did with the big Honda. Unfortunately it didn’t seem to work, so I tried an alternative method based on a suggestion from someone on Smokestack. The suggesting was to fit a grease fitting in the end of the shaft and pump it full of grease. I changed it by filling the shaft up with engine oil and wrapped a bolt with PTFE sealing tape and screwed it in.
The pressure generated popped the rotor off the engine shaft.
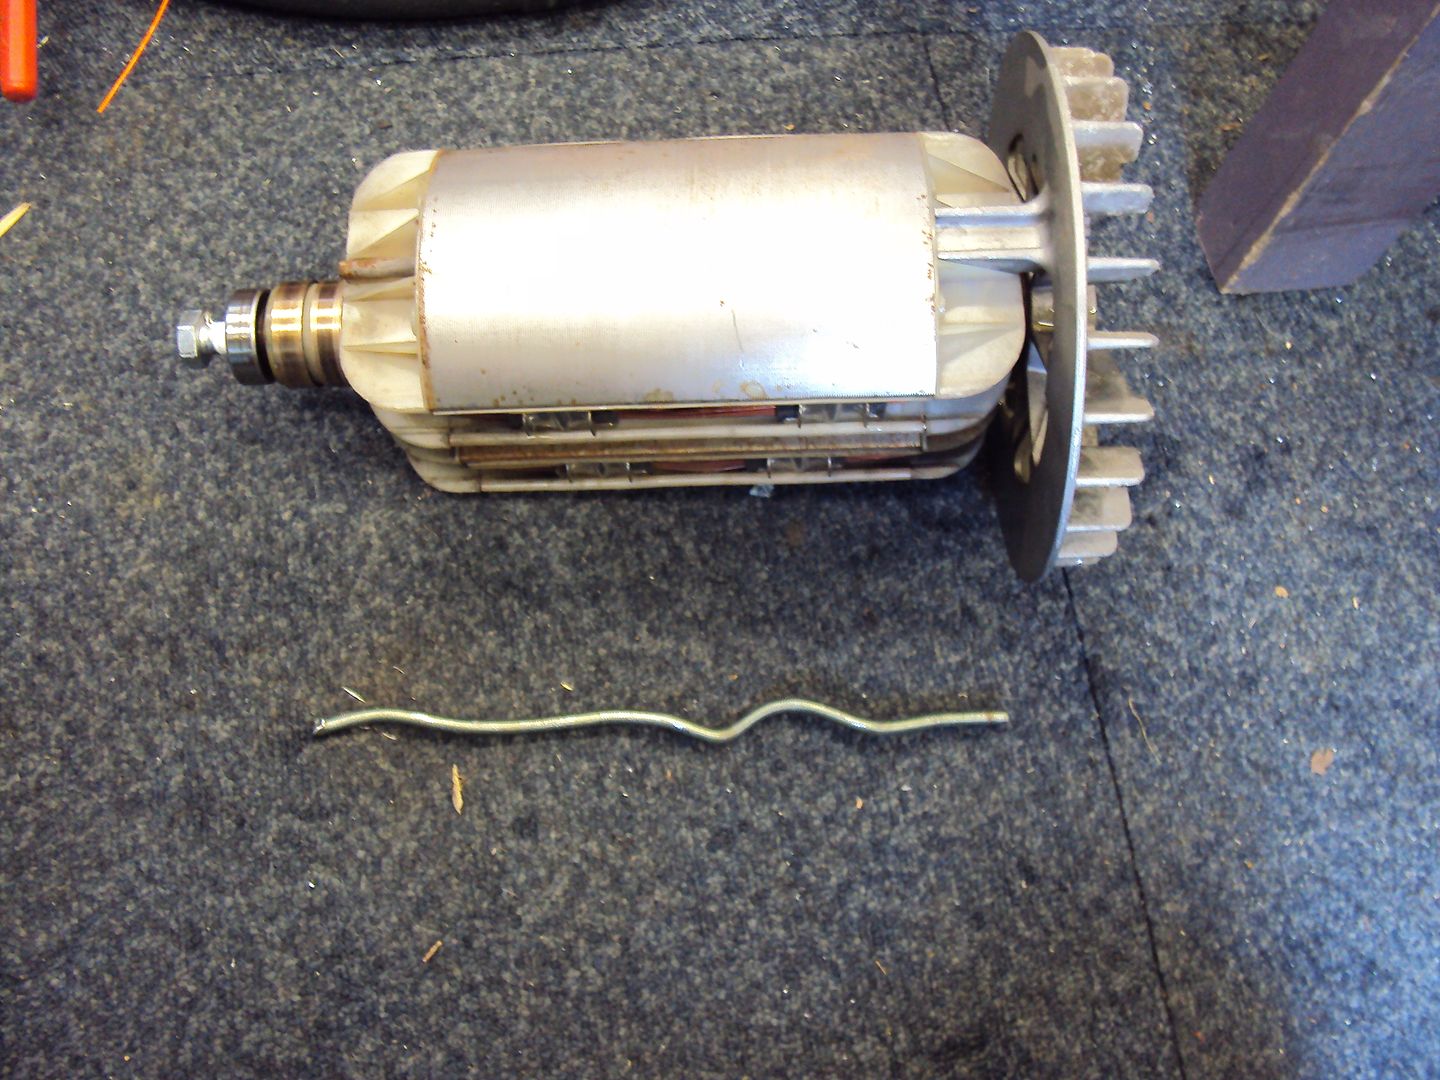
Had to use grips to pull the bent up rod out of the rotor shaft
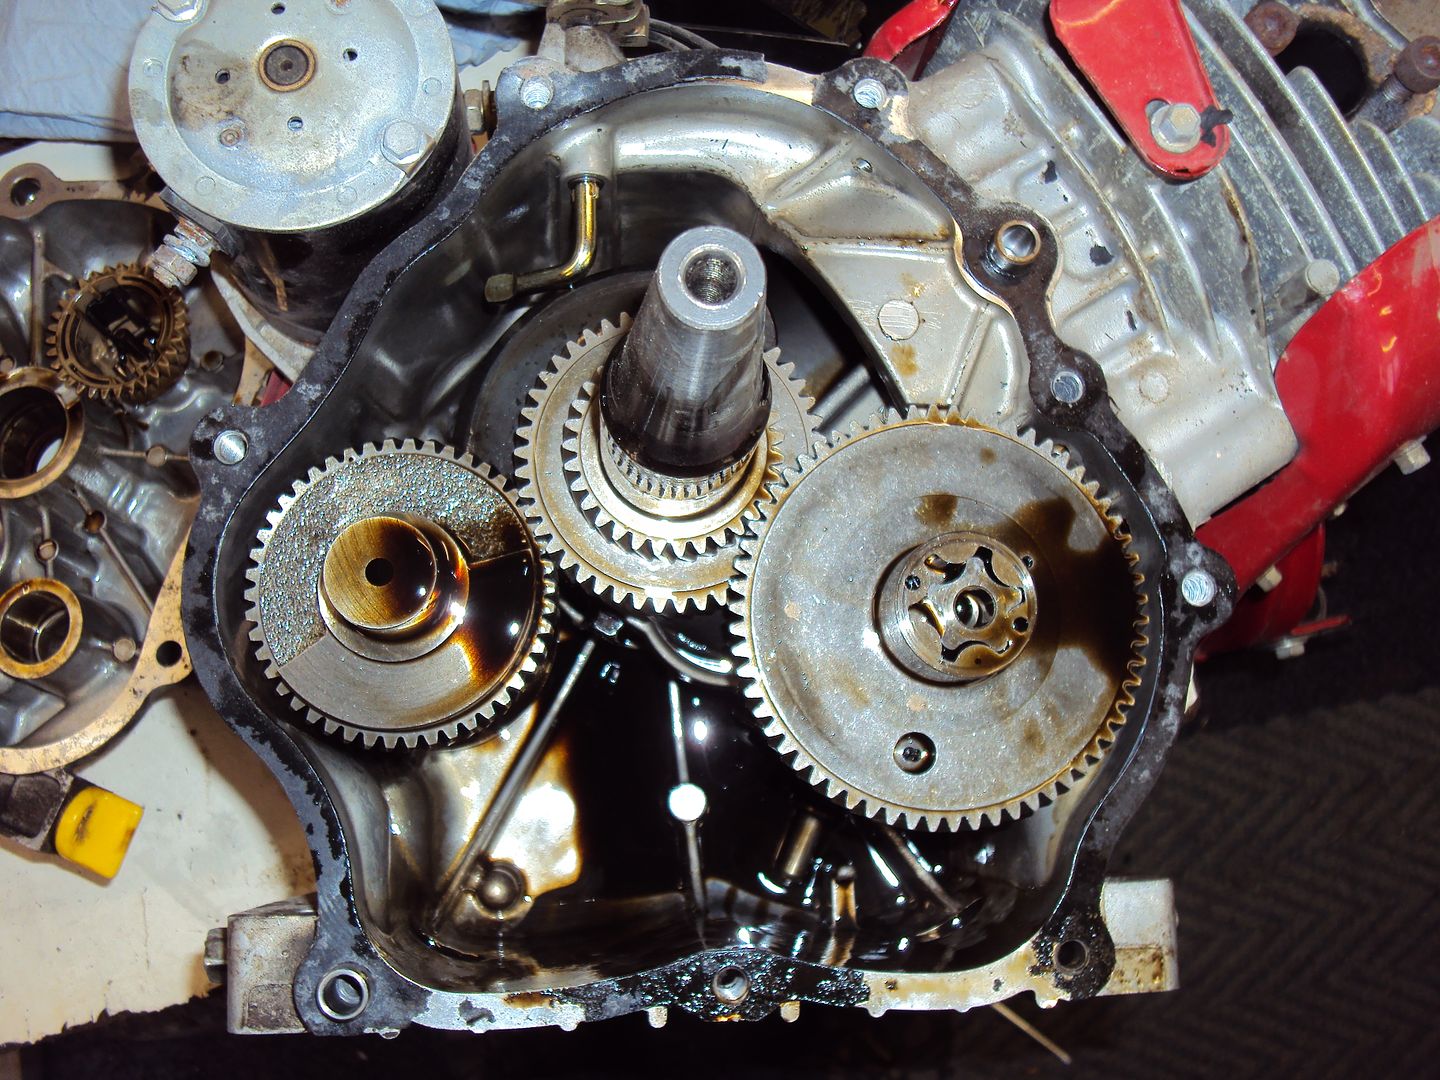
Got the engine opened up
Governor assembly
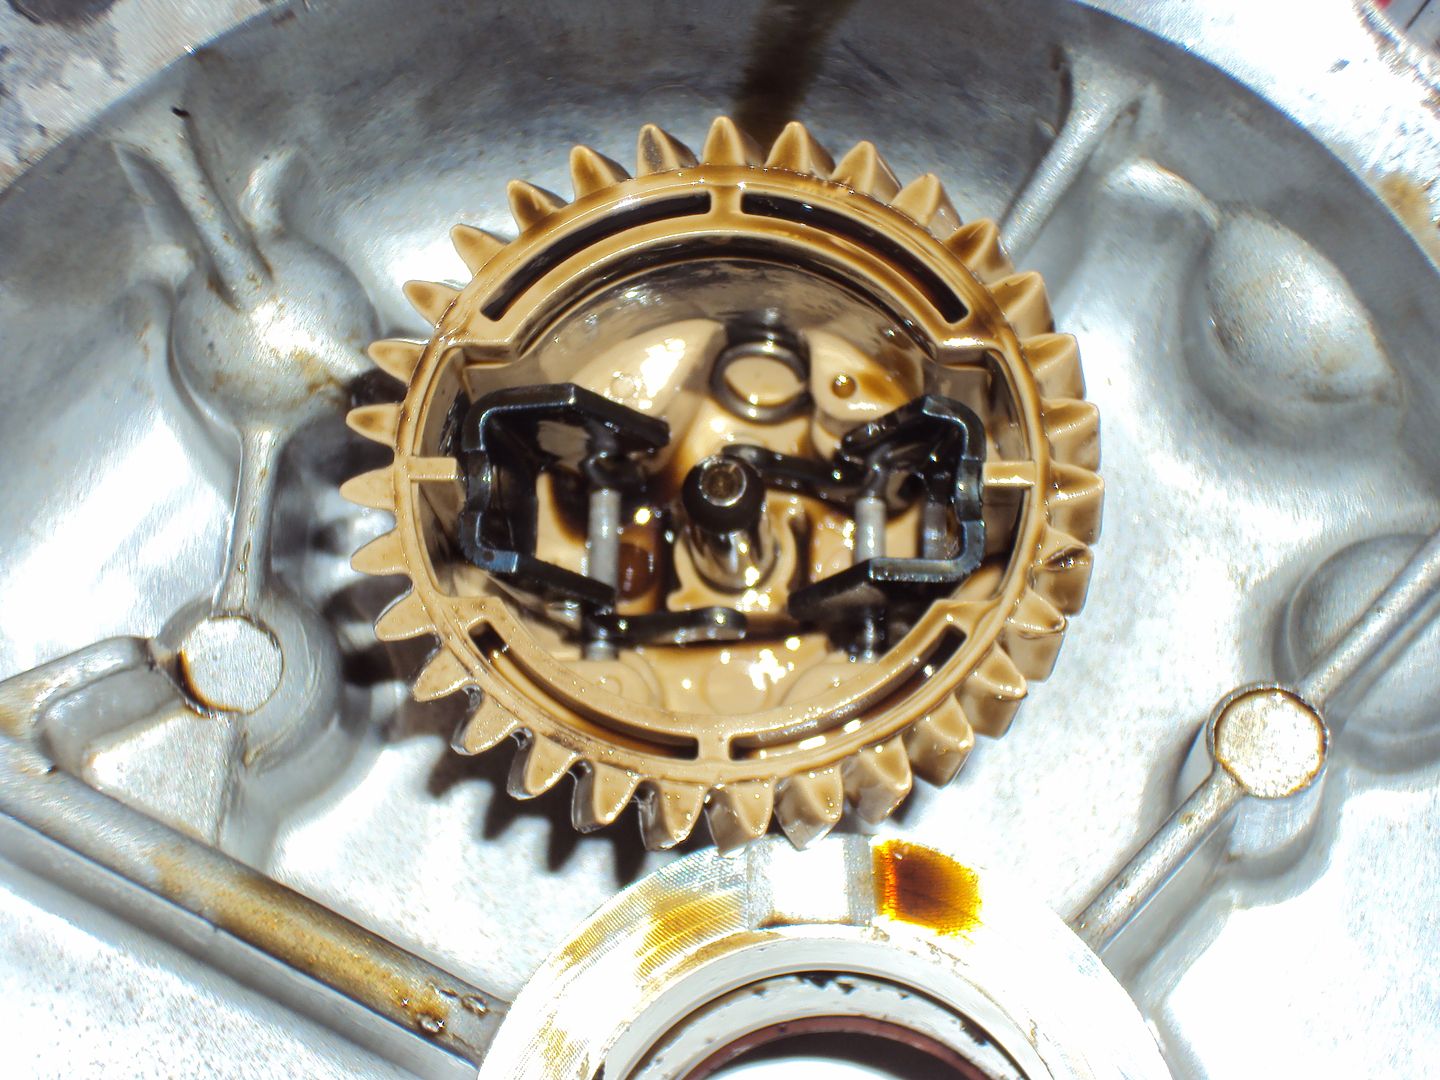
The clip sitting inside the assembly (12 o’clock position) should be on the shaft in the centre.
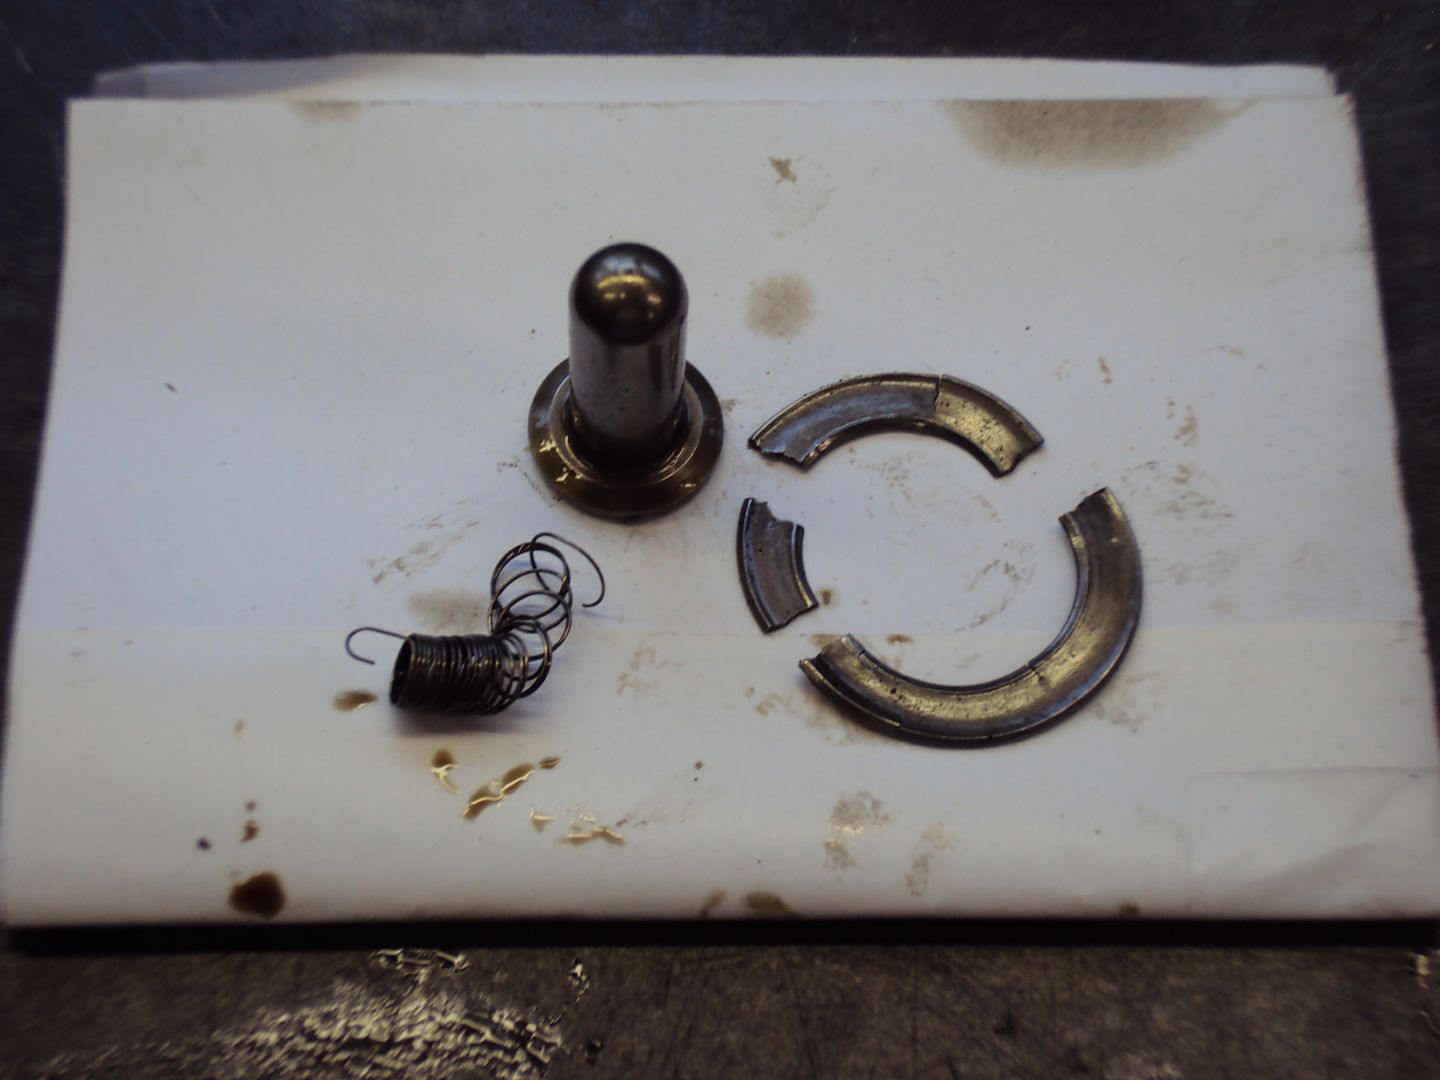
Parts recovered from sump
The domed bit should be on the shaft in the governor assembly, the weights push it out to operate the governor arm.
It looks like the governor arm was in the wrong position so the domed bit popped off. The governor arm can be seen in the engine picture (L shape bit) just above the crank. The arm needs to be rotated 180 to get it back in the correct position
The spring looks like it is from the compression release which holds the exhaust valve open slightly to help with starting.
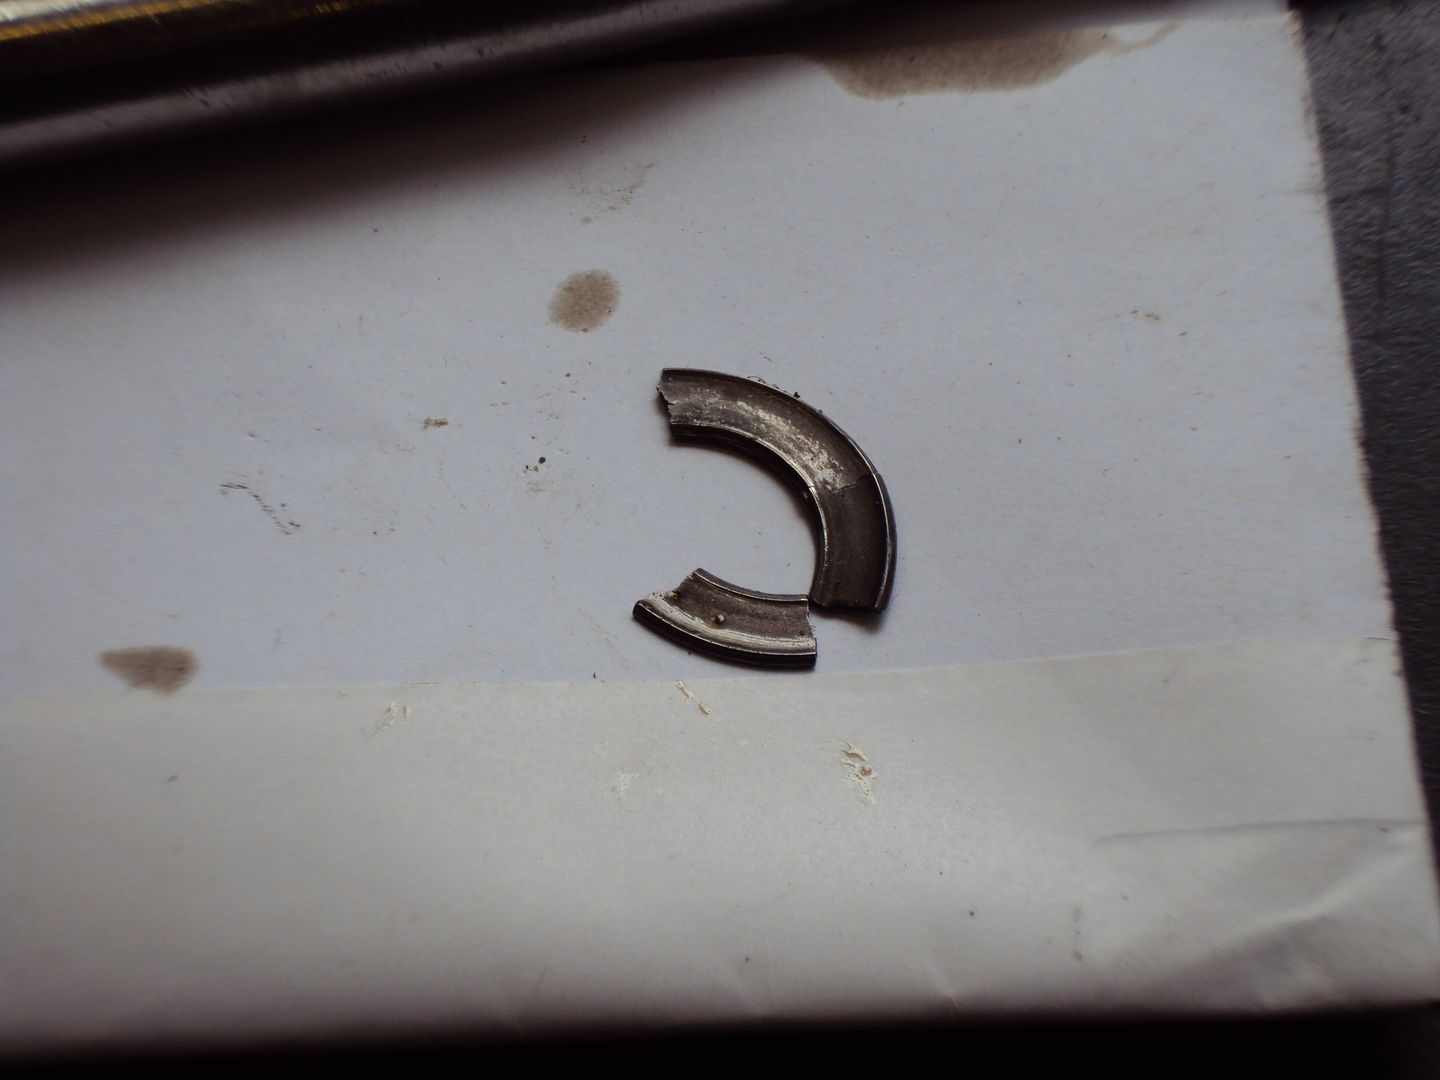
Not sure what the broken washer is from, I can’t see it on any of the engine diagrams I have.
As far as I can see the engine is in good condition inside considering. There are no chips on any of the gears, and inside of cylinder barrel looks fine.
It looks like the only parts I need to get is a new gasket for the engine casing and the washer (assuming I can find out where it’s from) and a replacement spring.
The pressure generated popped the rotor off the engine shaft.
Had to use grips to pull the bent up rod out of the rotor shaft
Got the engine opened up
Governor assembly
The clip sitting inside the assembly (12 o’clock position) should be on the shaft in the centre.
Parts recovered from sump
The domed bit should be on the shaft in the governor assembly, the weights push it out to operate the governor arm.
It looks like the governor arm was in the wrong position so the domed bit popped off. The governor arm can be seen in the engine picture (L shape bit) just above the crank. The arm needs to be rotated 180 to get it back in the correct position
The spring looks like it is from the compression release which holds the exhaust valve open slightly to help with starting.
Not sure what the broken washer is from, I can’t see it on any of the engine diagrams I have.
As far as I can see the engine is in good condition inside considering. There are no chips on any of the gears, and inside of cylinder barrel looks fine.
It looks like the only parts I need to get is a new gasket for the engine casing and the washer (assuming I can find out where it’s from) and a replacement spring.
Latest progress update
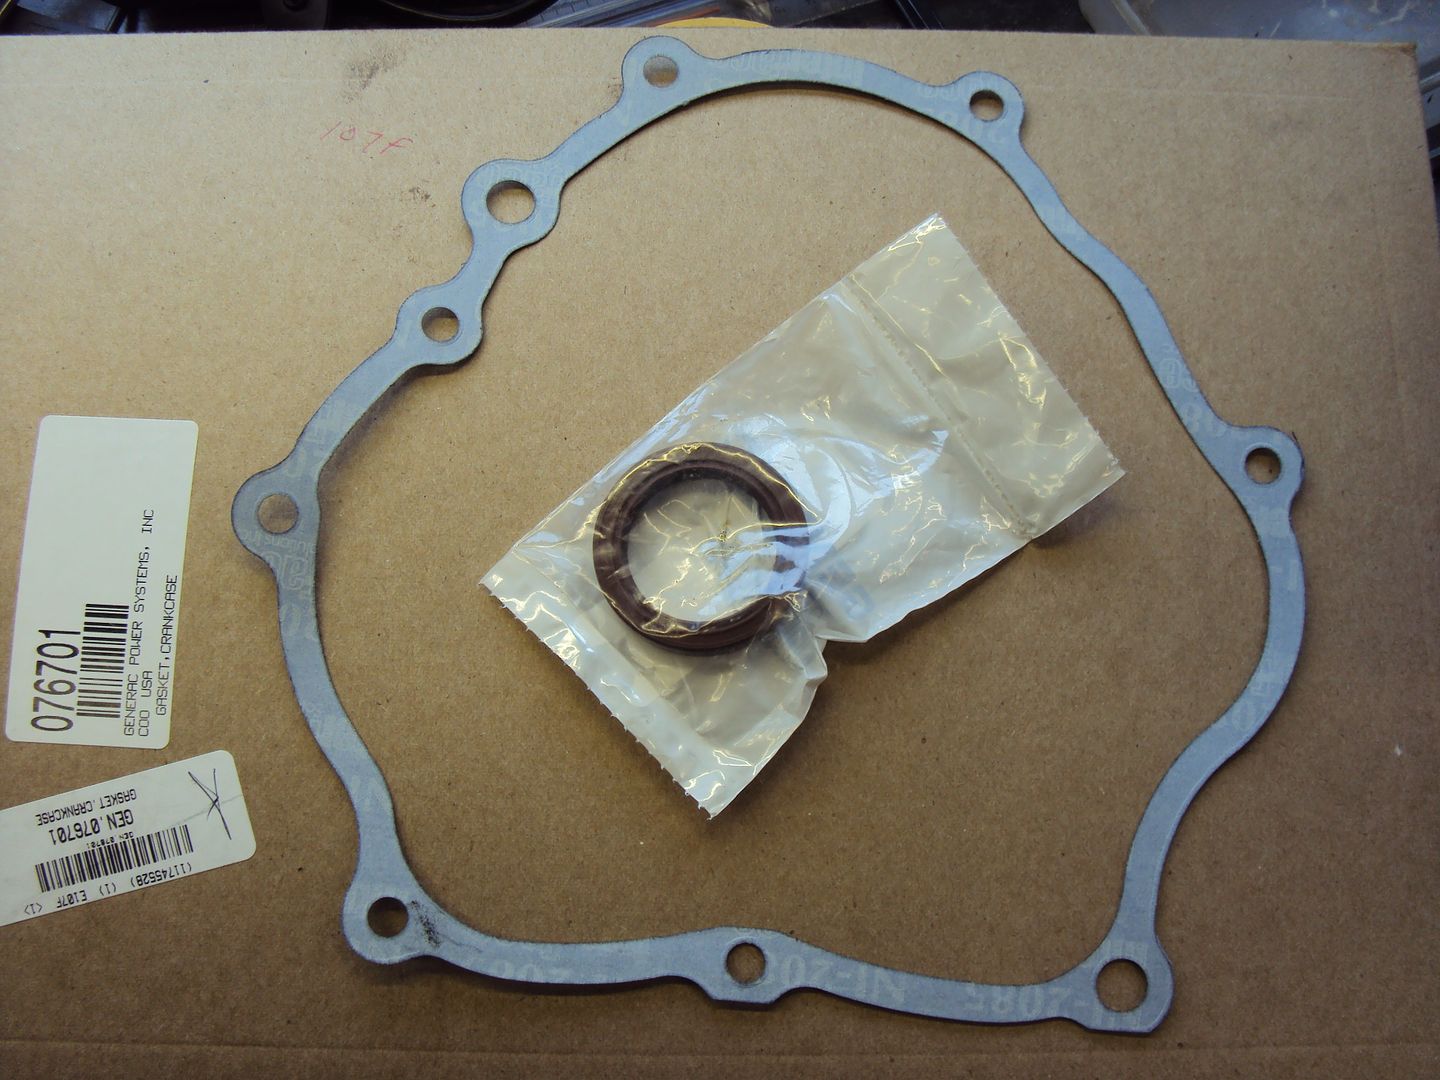
The crankcase gasket and crankshaft seal arrived from the USA
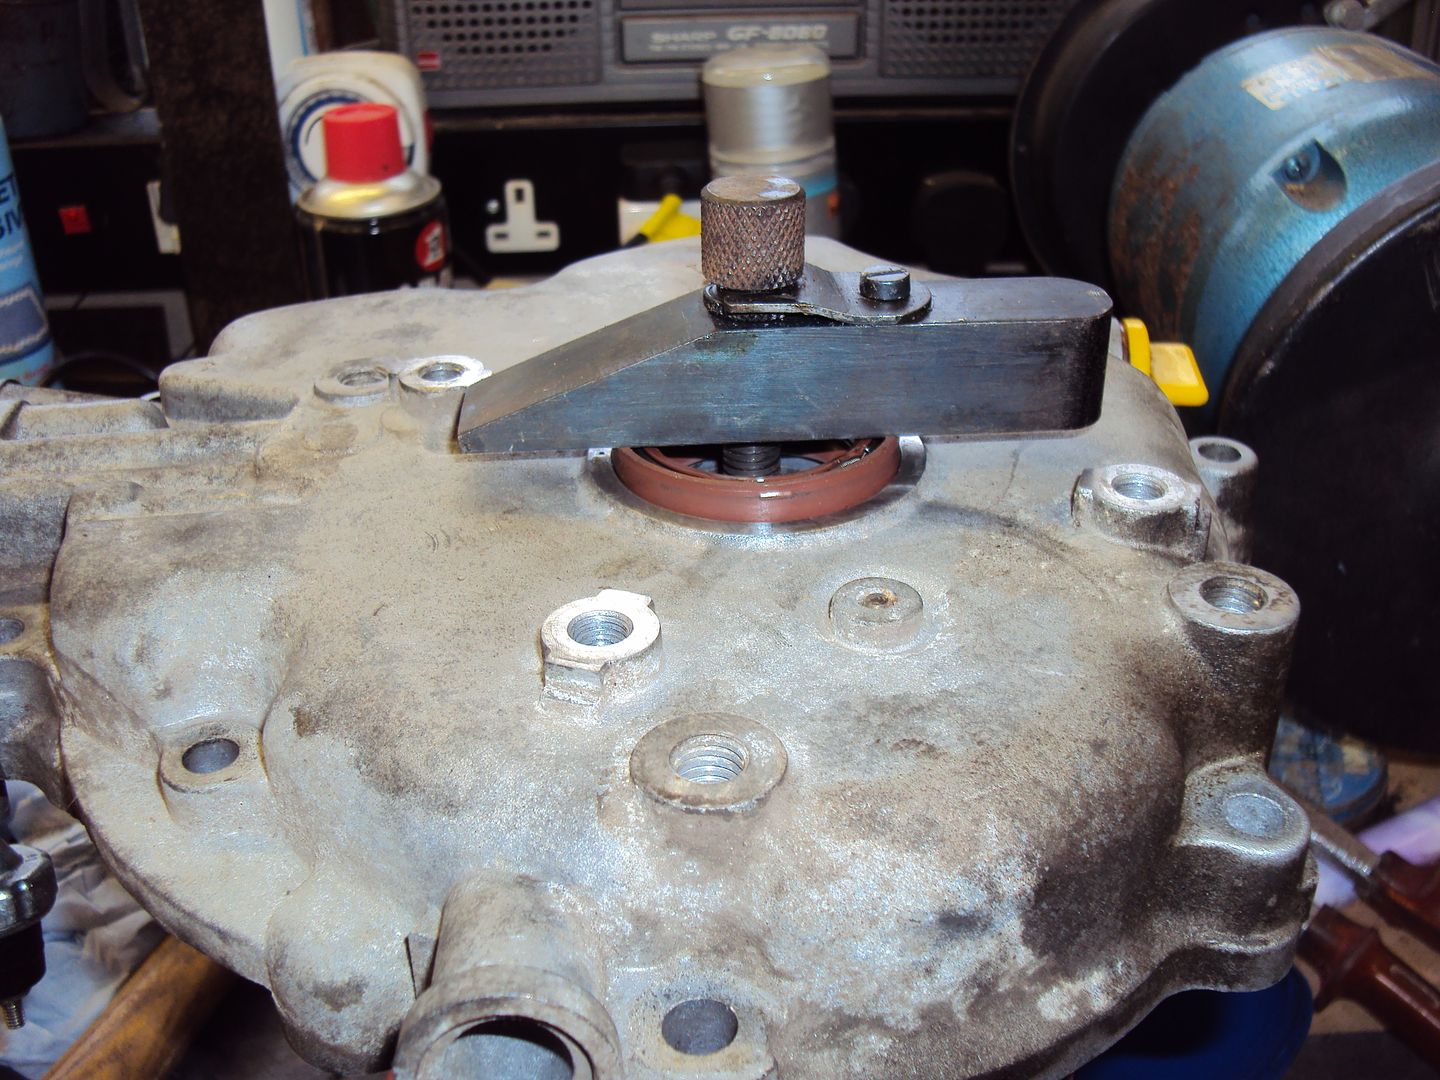
Sorry I didn’t take photos of the whole process (got carried away with the rebuild). I pressed the new crankshaft oil seal into the end casing using a toolmakers clamp. The old seal was placed on top of the new seal to protect it.
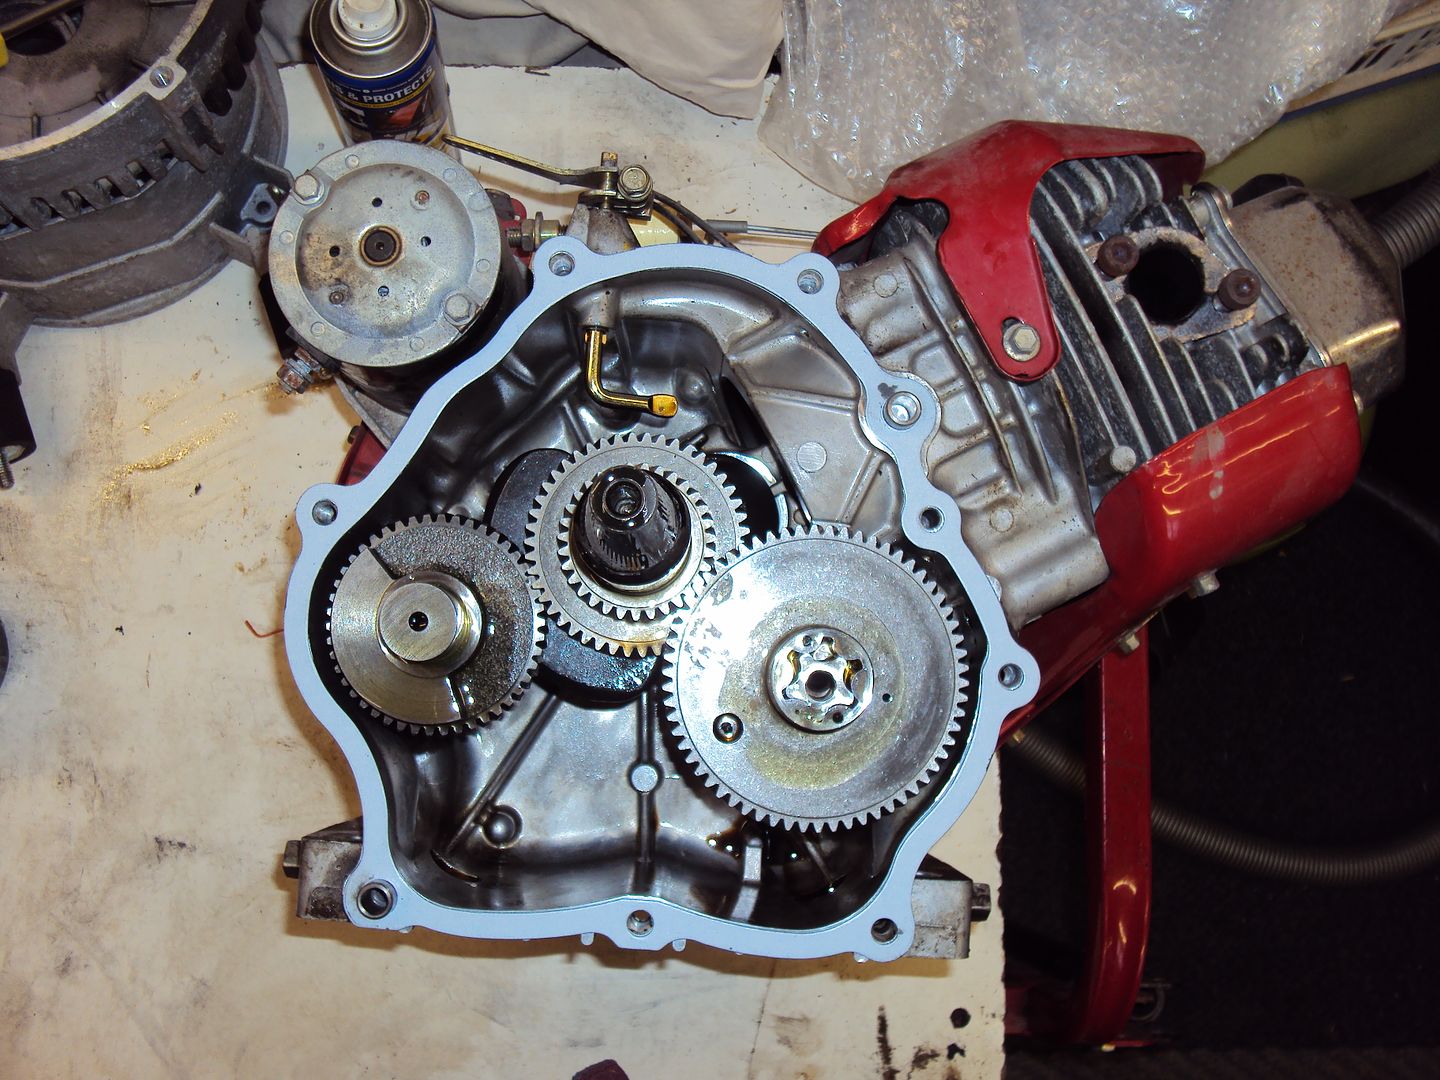
Cleaned up the engine casing and fitted the new gasket and oiled all the shafts so they would slide back into the end casing.
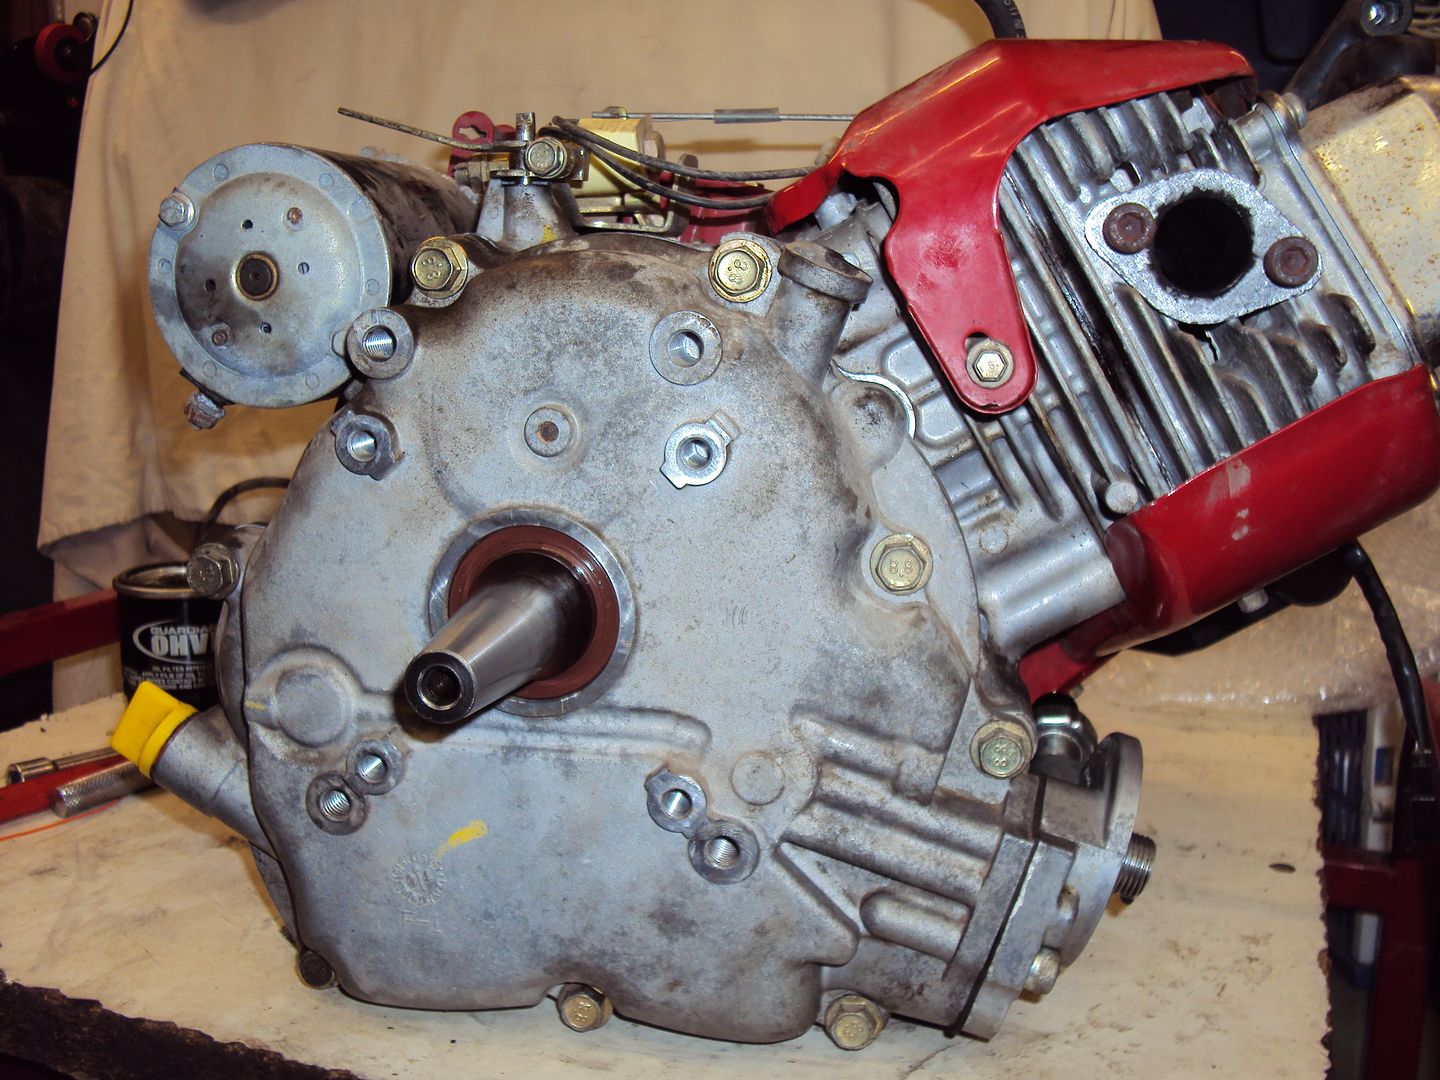
End casing back on and engine assembled
The engine is now back in the frame the alternator and ancillaries have been reassembled and attached to the engine. I was a bit nervous when it came to starting it, but it all went fine. The engine started on the second pull and settled down to a nice idle.
I never found where the broken up washer fitted, its size didn’t match any of the shafts inside the engine. The engine seems to be running fine without it.
Just need to set the running speed to get the correct frequency and build an additional panel so I can fit some 16A sockets.
The crankcase gasket and crankshaft seal arrived from the USA
Sorry I didn’t take photos of the whole process (got carried away with the rebuild). I pressed the new crankshaft oil seal into the end casing using a toolmakers clamp. The old seal was placed on top of the new seal to protect it.
Cleaned up the engine casing and fitted the new gasket and oiled all the shafts so they would slide back into the end casing.
End casing back on and engine assembled
The engine is now back in the frame the alternator and ancillaries have been reassembled and attached to the engine. I was a bit nervous when it came to starting it, but it all went fine. The engine started on the second pull and settled down to a nice idle.
I never found where the broken up washer fitted, its size didn’t match any of the shafts inside the engine. The engine seems to be running fine without it.
Just need to set the running speed to get the correct frequency and build an additional panel so I can fit some 16A sockets.
creationracing said:
Just got back a few days ago - only got to work on the 1000kw set but didn't get to the point where we could start it. Lots of instrument / PLC issues to resolve. Anyway, t'was an MTU 12V 4000 P63 engine with a Leroy Somer alternator attached.
Similar to this but with a remote radiator:

Mmmmm V12, I bet that will sound nice when runningSimilar to this but with a remote radiator:
As I have some spare time over the xmas break I thought I should try and finish the outstanding generator projects.
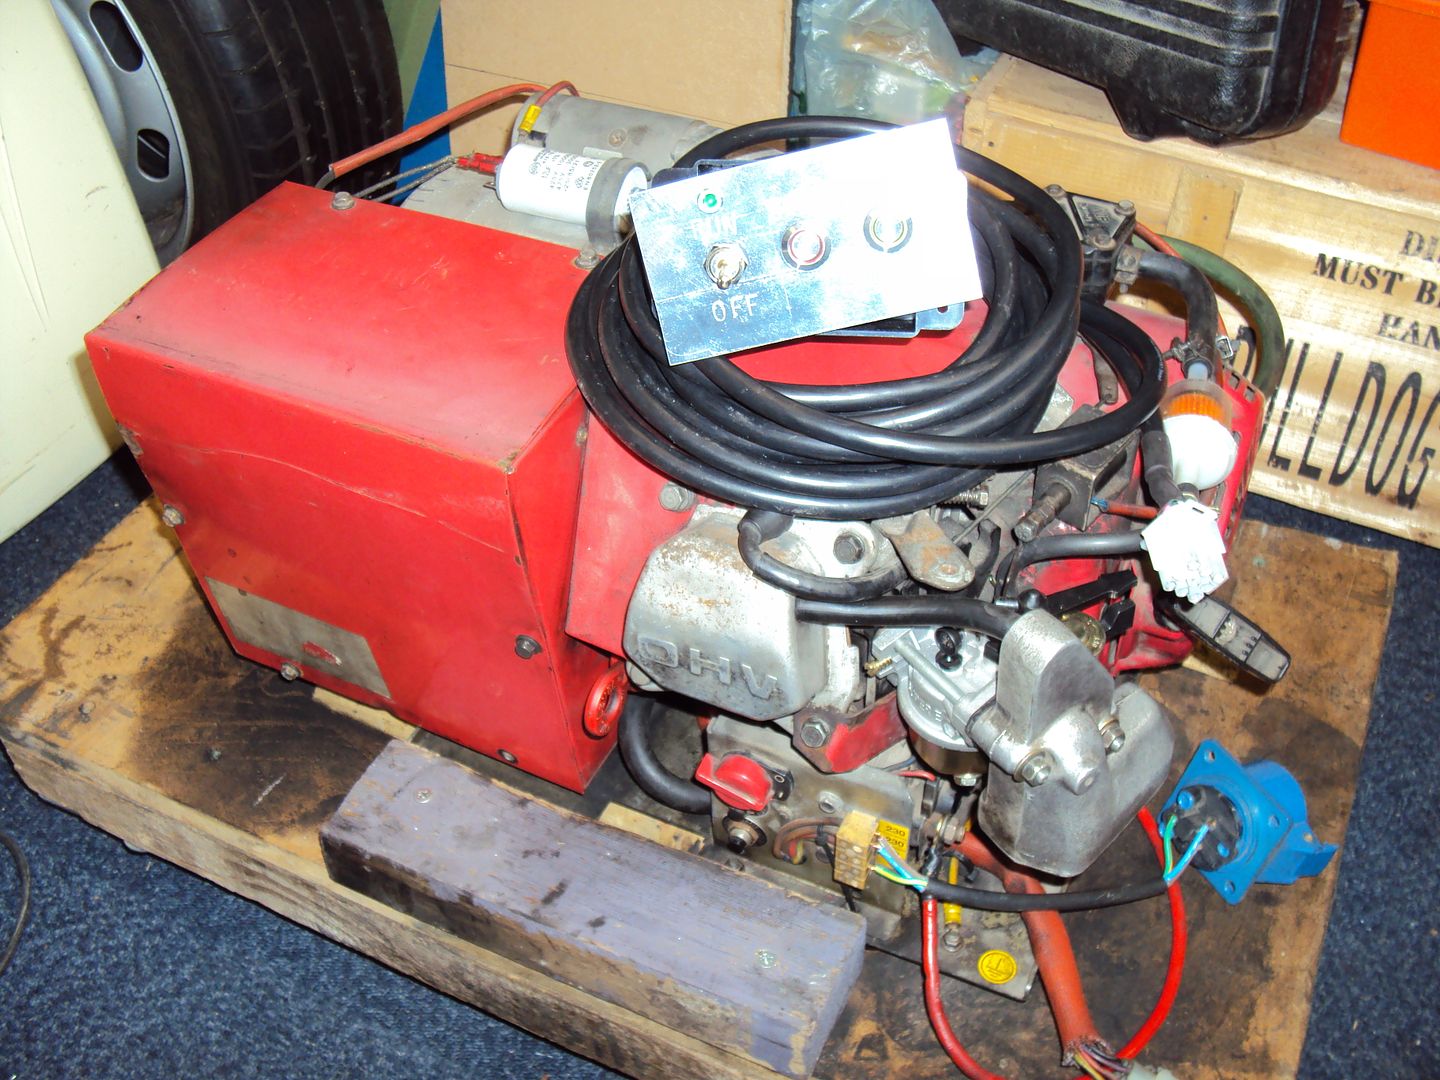
The Dometic generator needed a control panel so the electric start could be used, so I ordered a couple of switches, some multi core cable (trailer lighting cable) and a connector. I polished some aluminium to make the front panel and used metal stamps to label the switch functions.
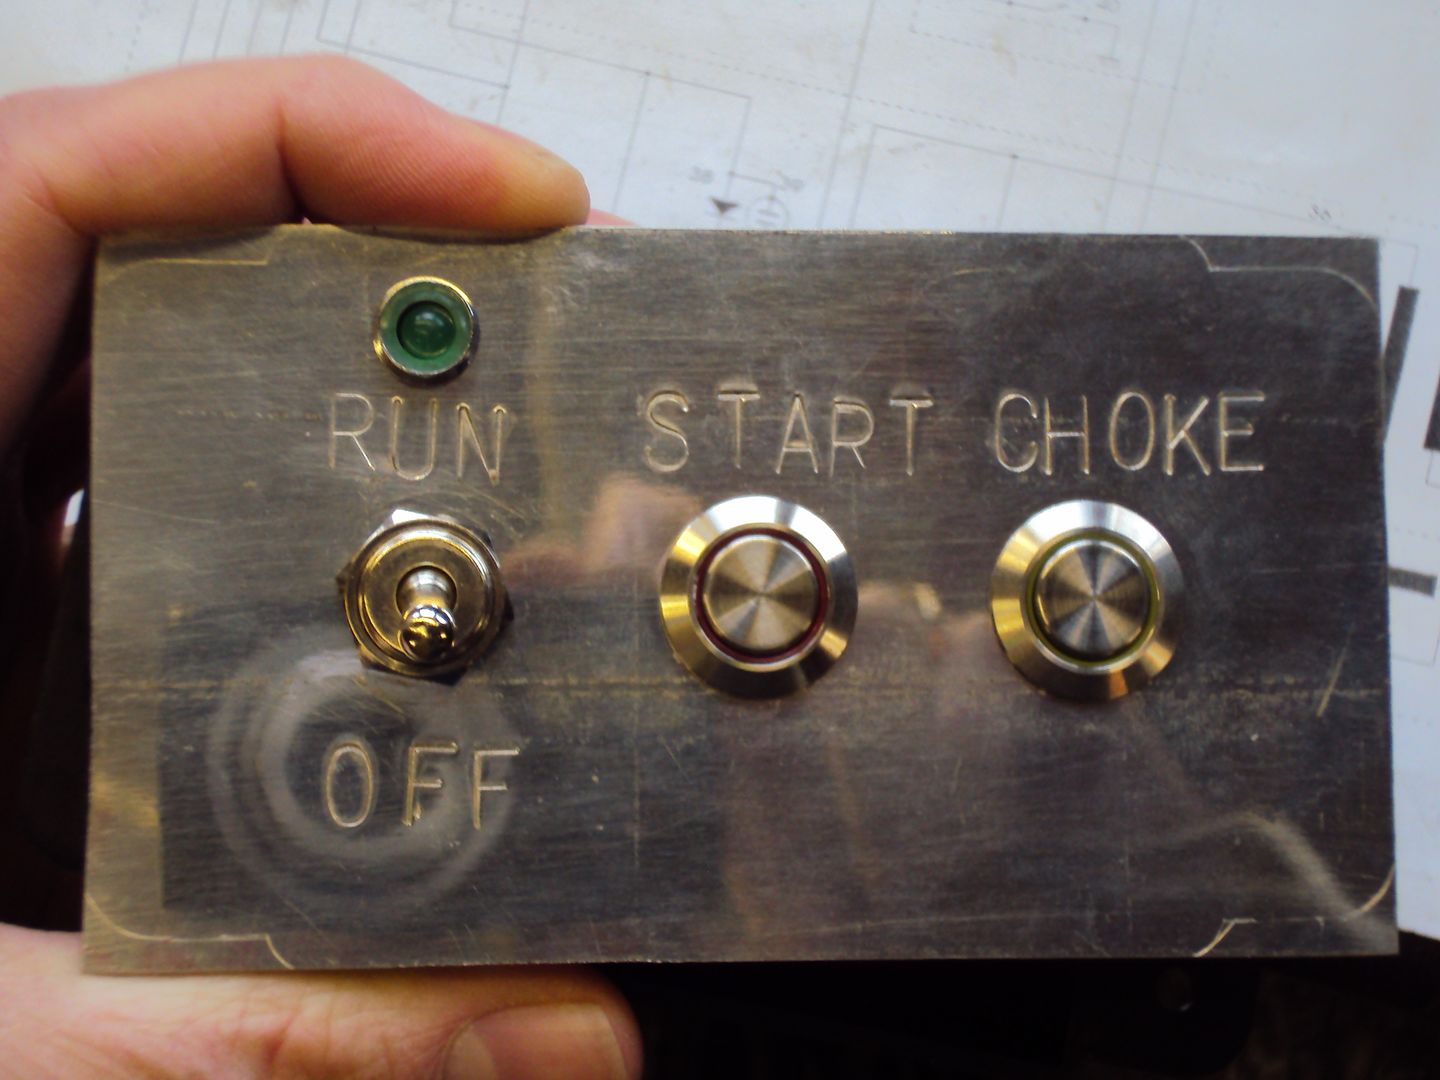
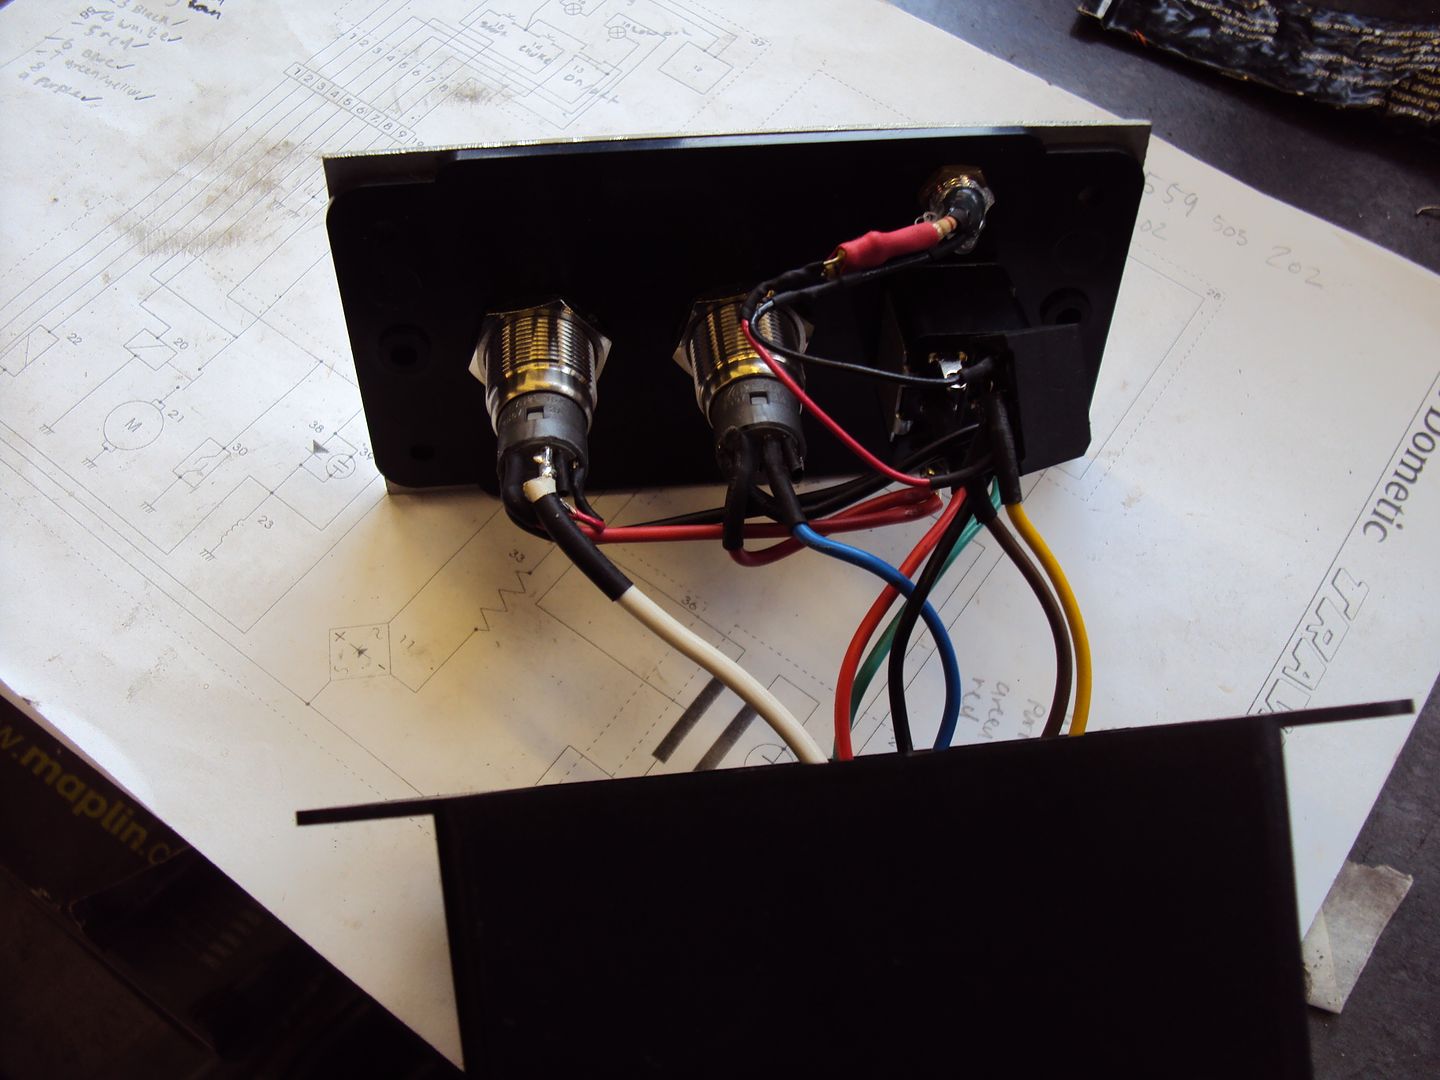
Wiring behind the switches, the run LED needed some additional resistors adding (inside red heat shrink tube), as the supply was 50V which I only discovered after burning a LED and resistor out (I assumed it was 12V).
So that finishes the Dometic generator off, just need to clean it up and find it a new home.
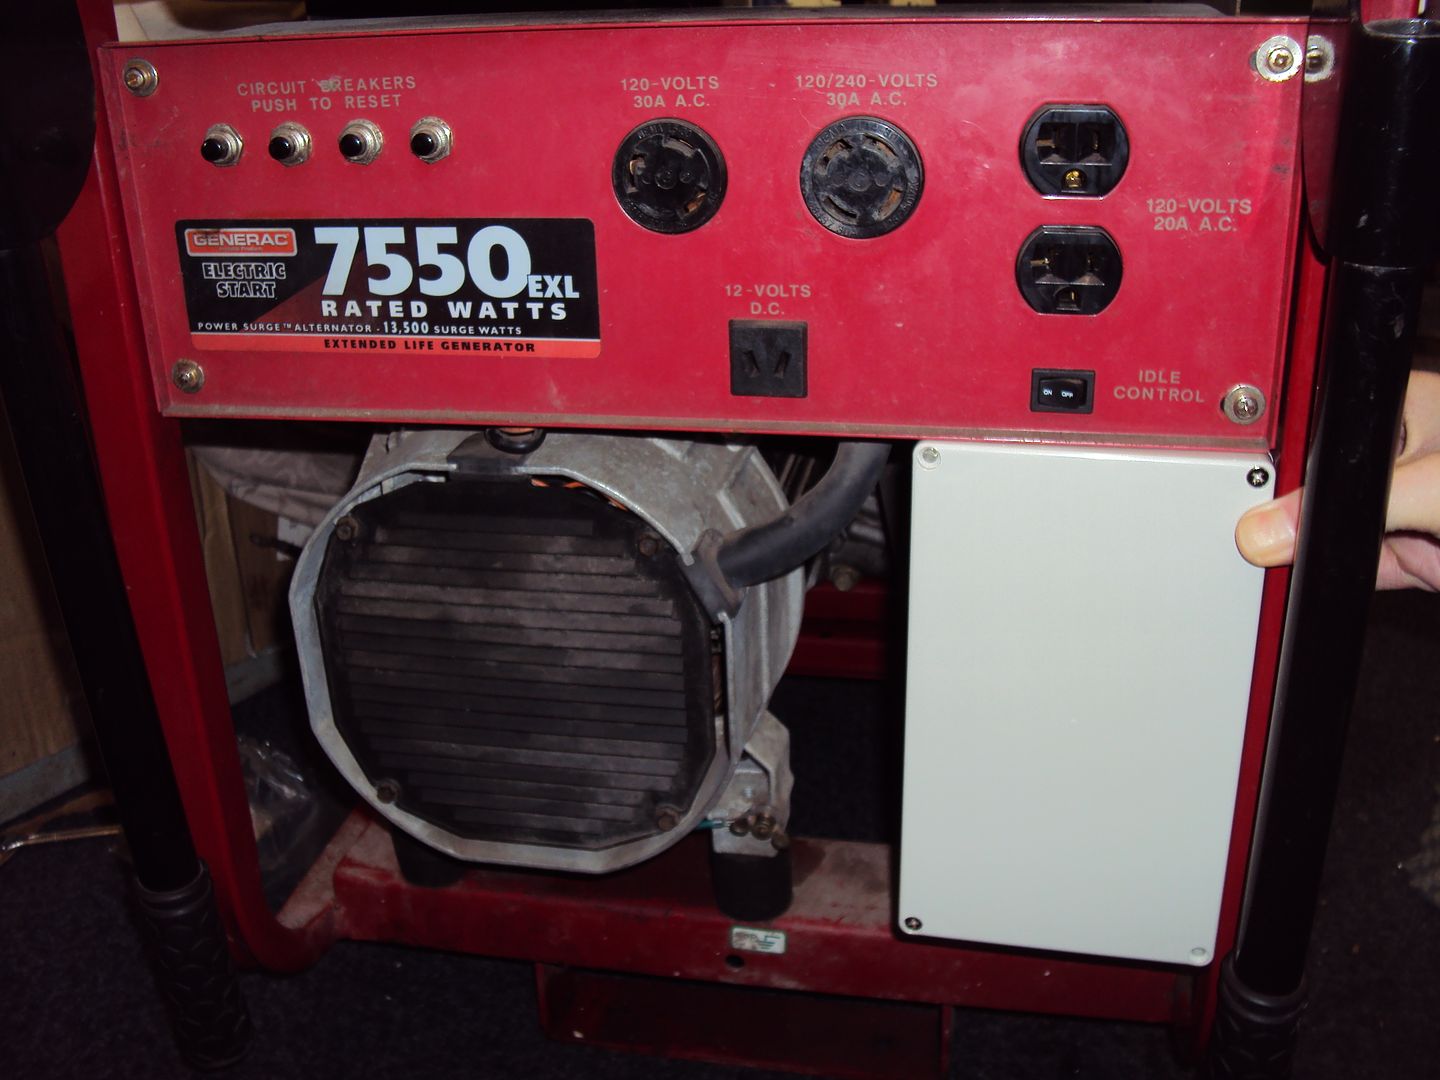
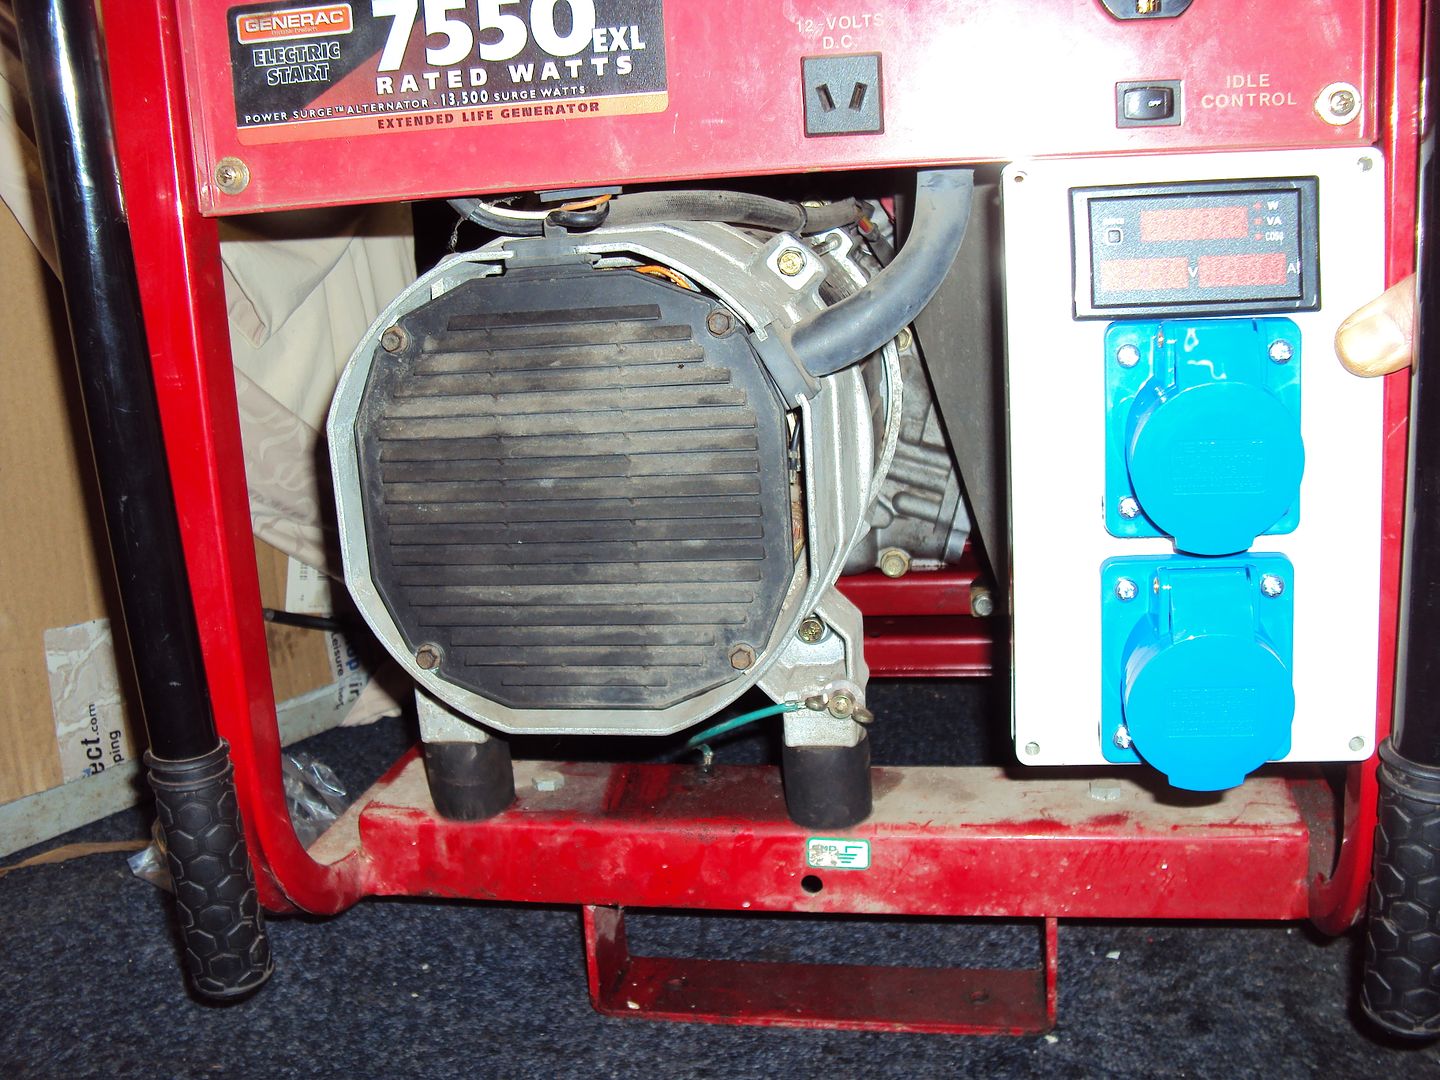
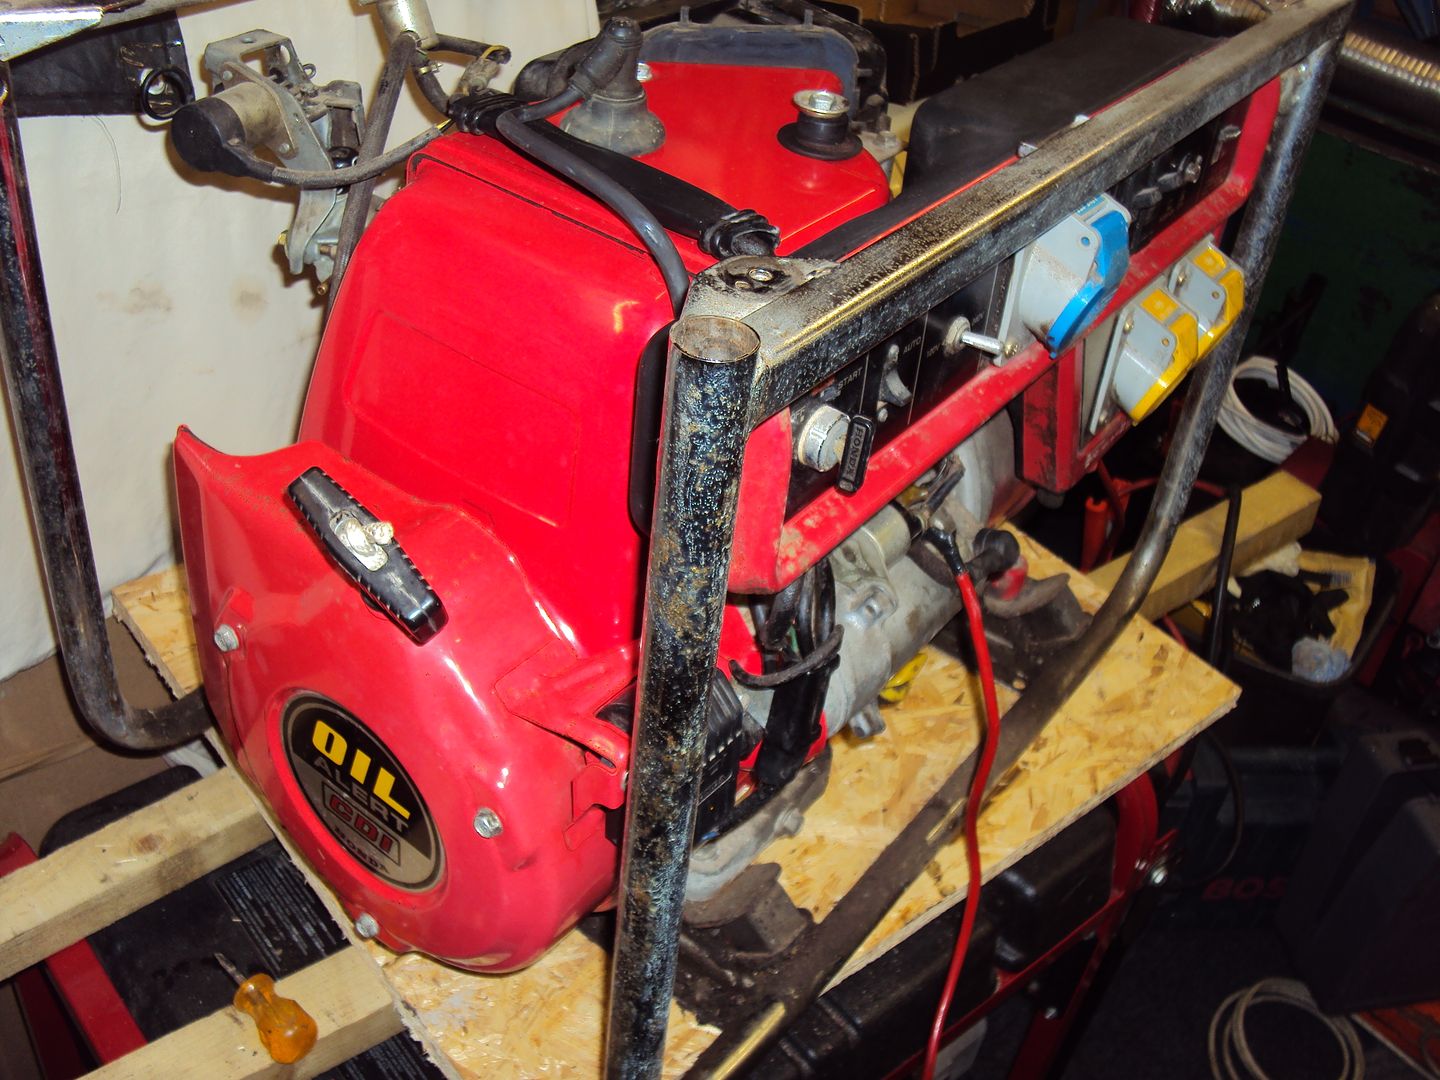
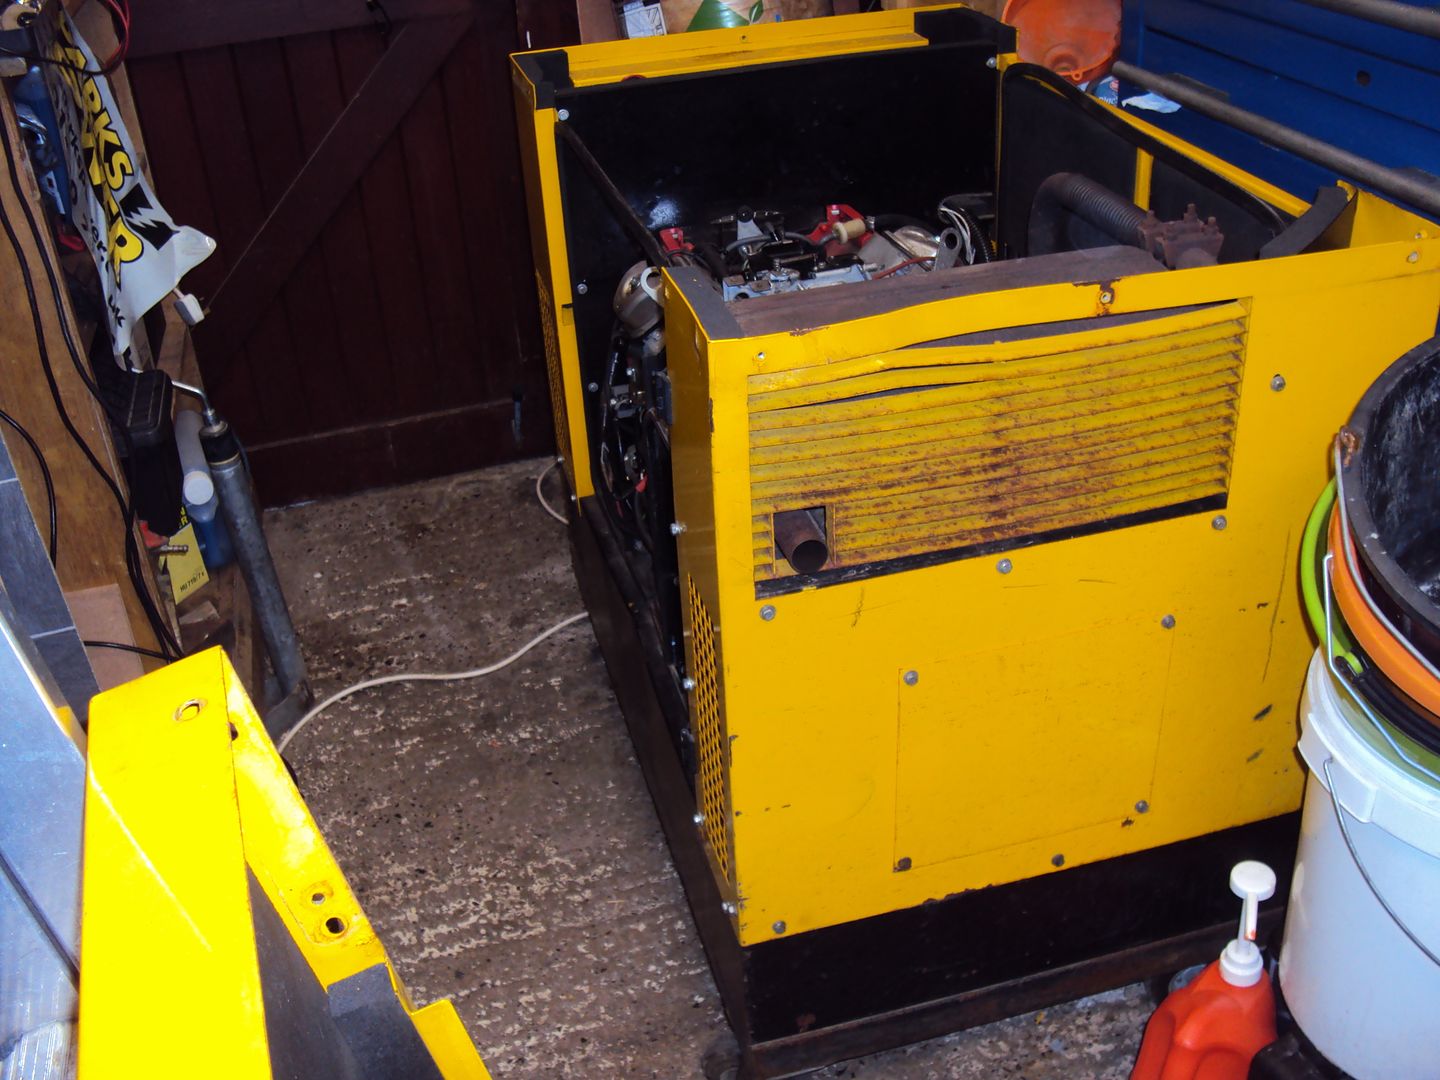
On to the Generac.
As I’m thinking of hanging on to this one I wanted to add some 16A sockets as the Generac only has the American style 3 pin (120V) and 4 pin (120V & 240V) sockets which isn’t much use in the UK.
First thought was to make a replacement front panel with 16A sockets, but that meant I would have had to get new circuit breakers and rewire the whole thing.
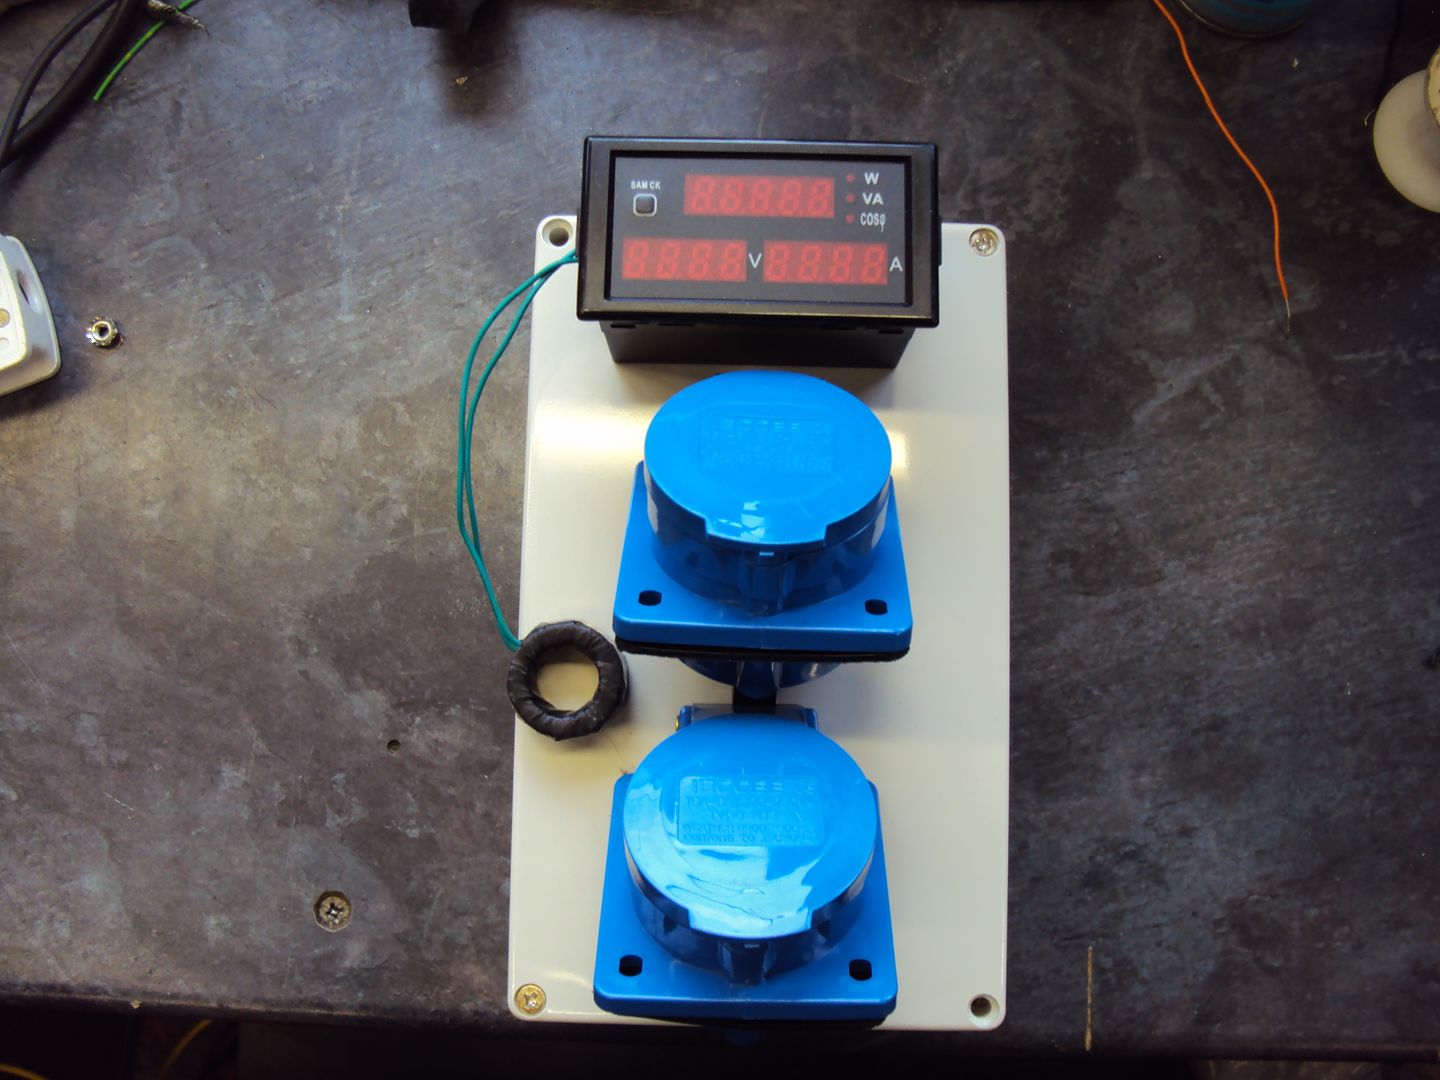
The second option which I went for was to add an additional panel with the sockets so I purchased a plastic box, 2x 16A sockets and a power meter which shows the voltage, current and load in watts (not bad for £12!)
I plan on mounting the box below the existing panel
However with the sockets and power meter it was going to be a tight fit. The next size up box would be too big to fit in the gap so another option was to leave the power meter in the front of the box and mount the plugs on the side.
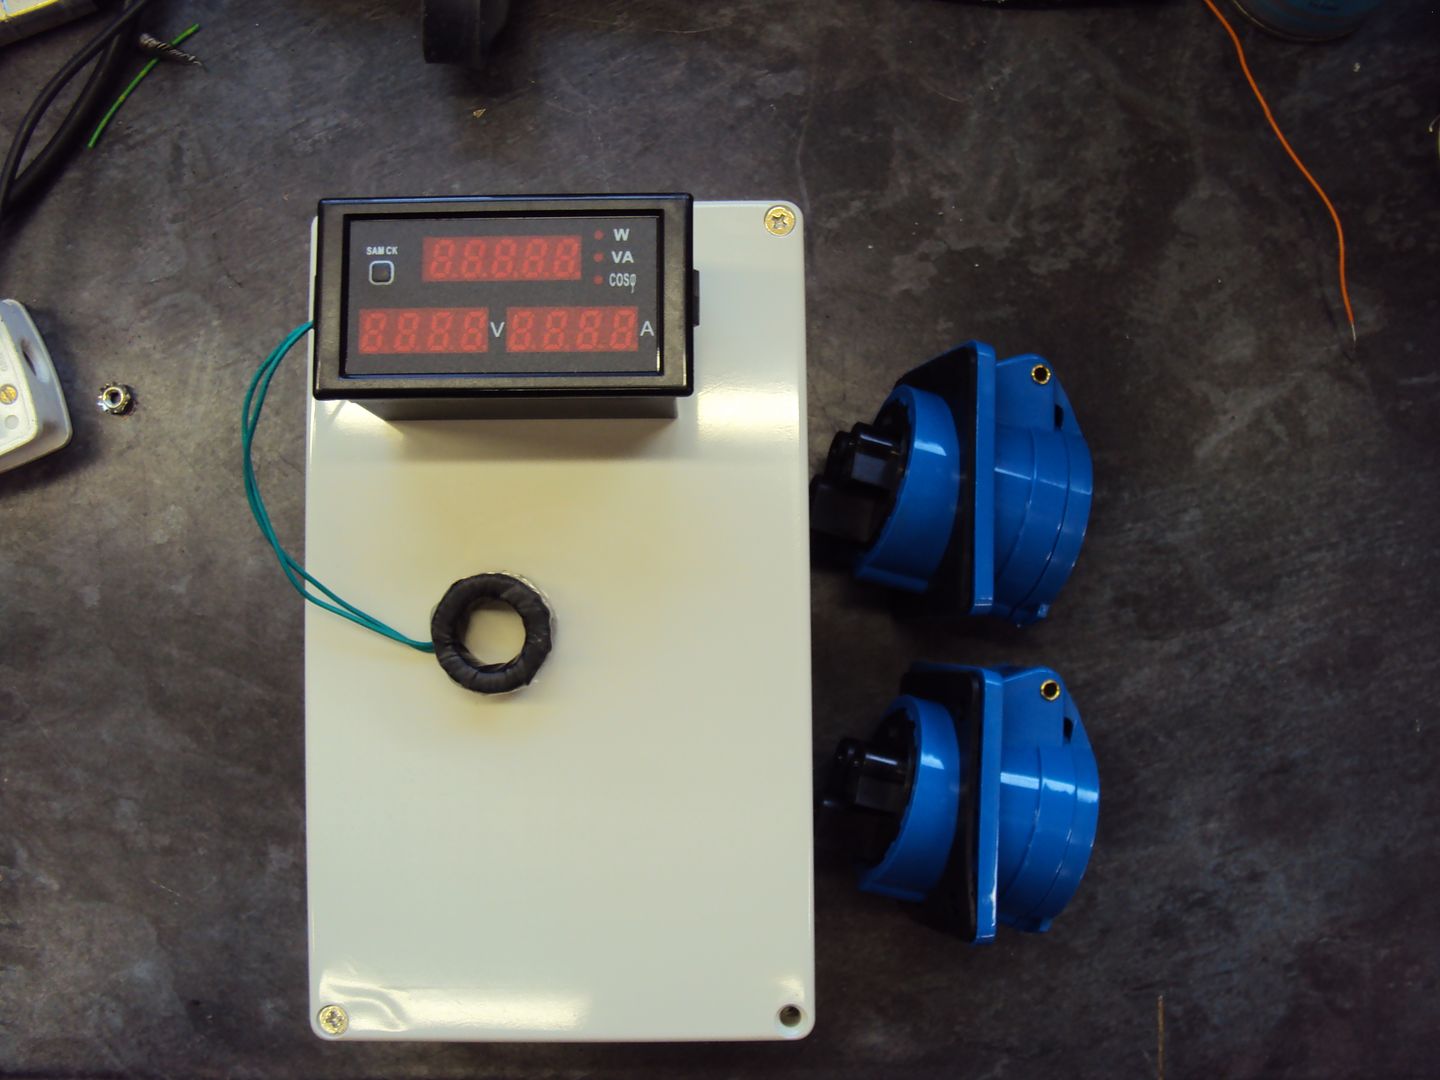
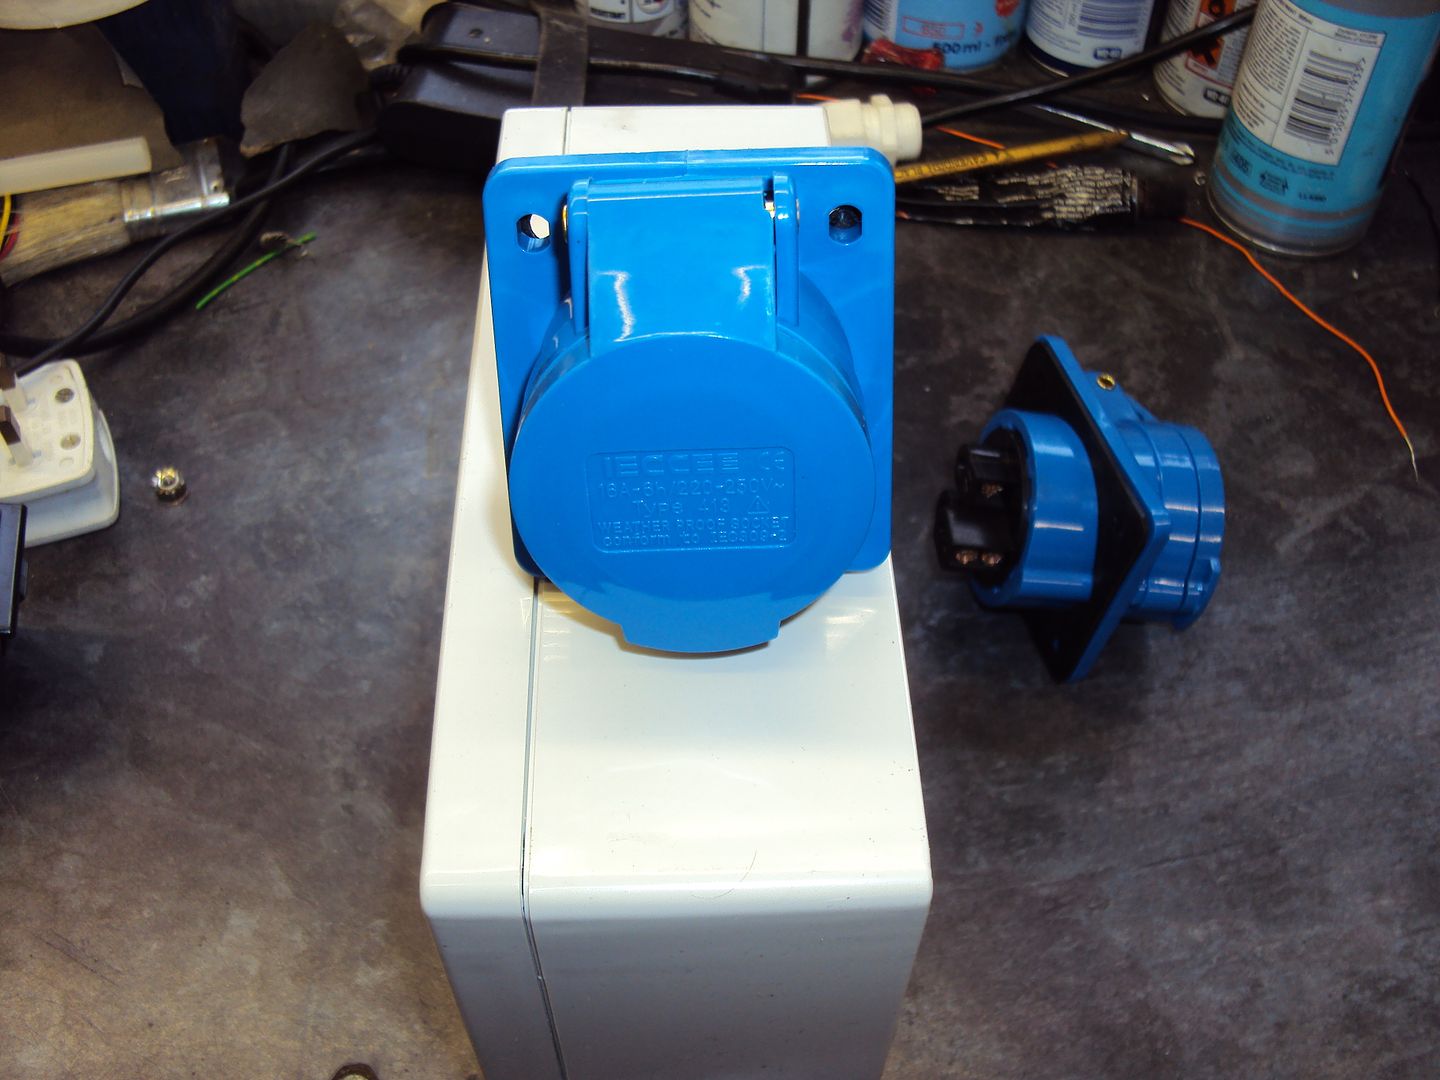
I would prefer to mount the sockets on the front of the box so I marked it out to see if it would fit
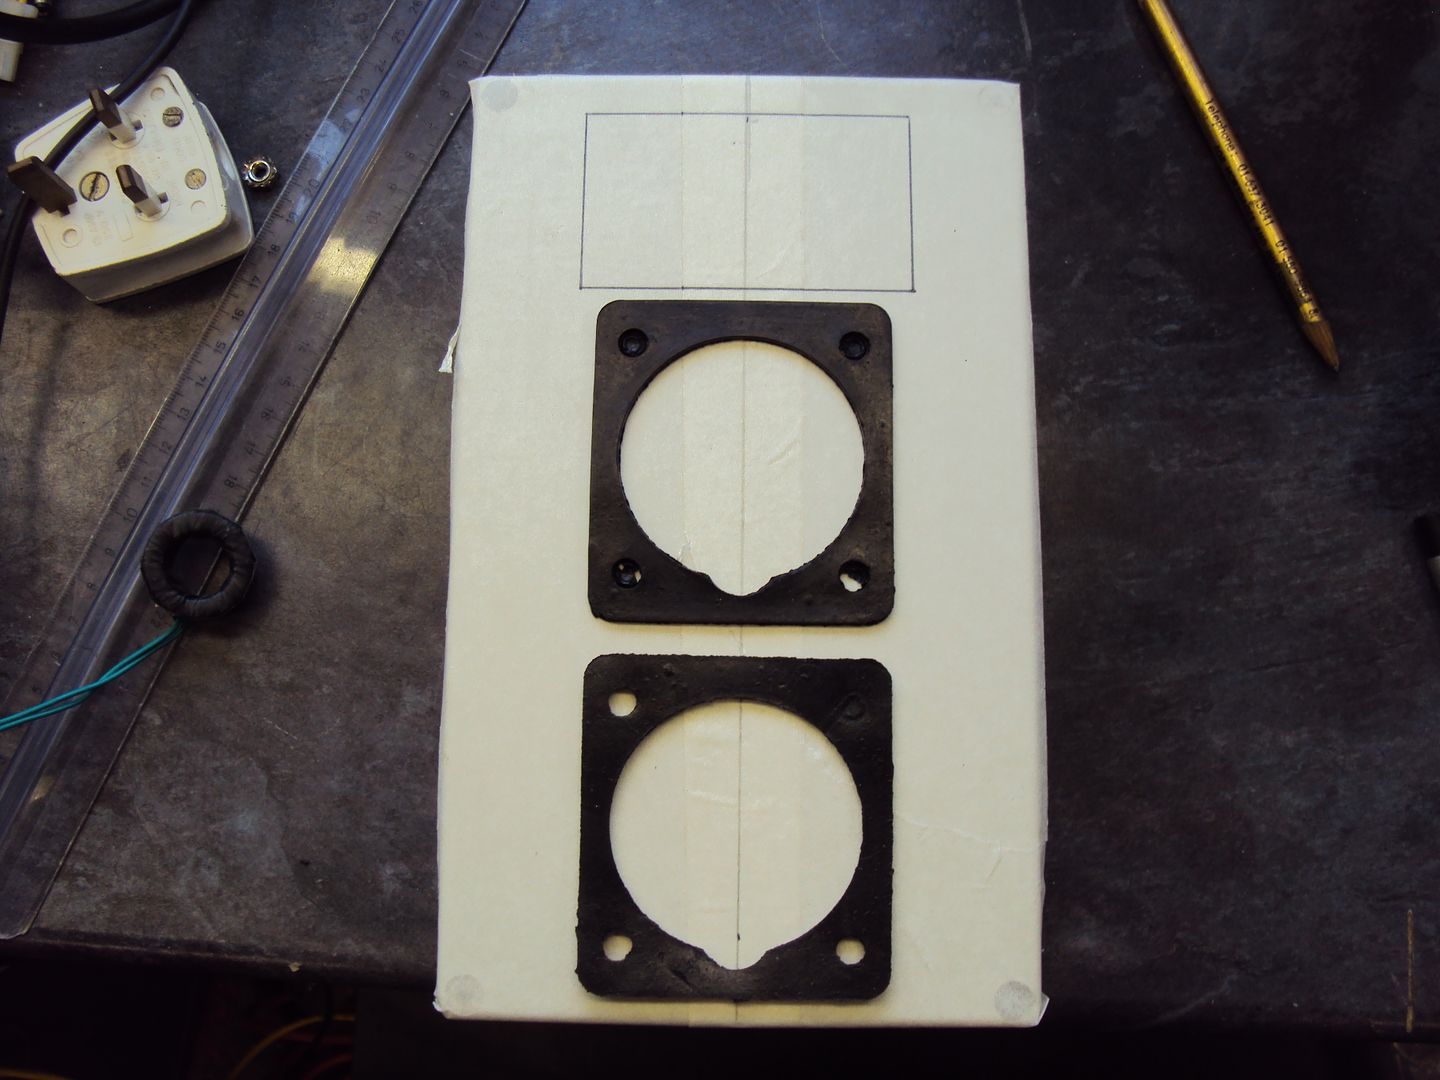
Just to make sure I mounted the plugs on a scrap piece of wood the same distance apart as they would be on the plastic box.
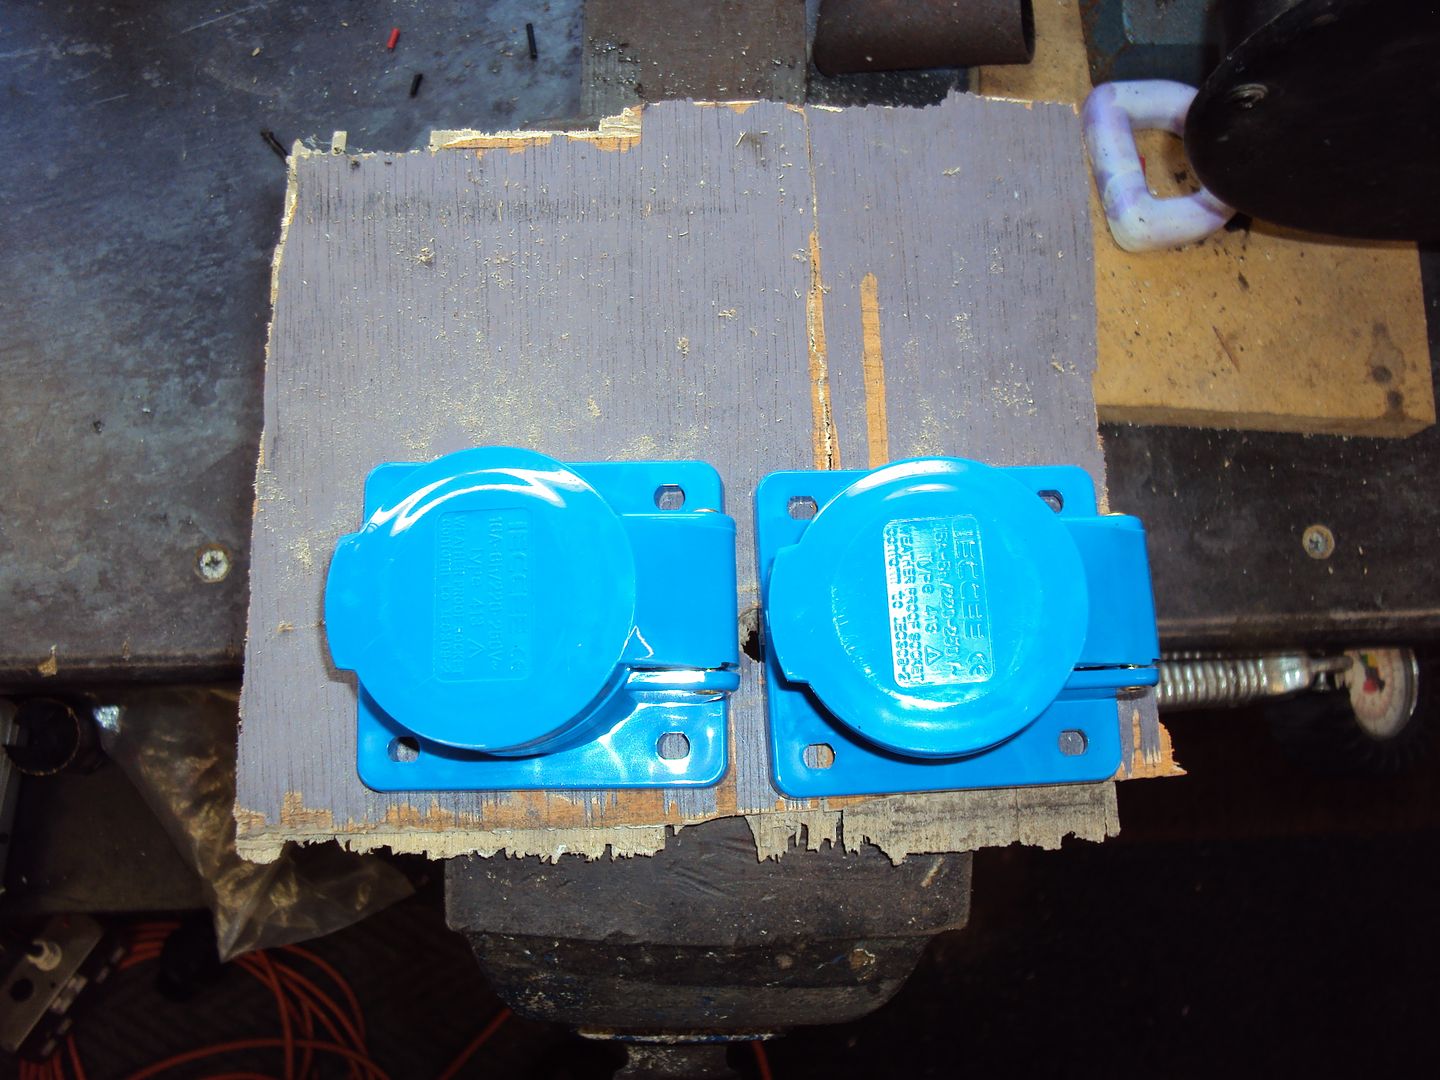
Check spacing with plugs in sockets
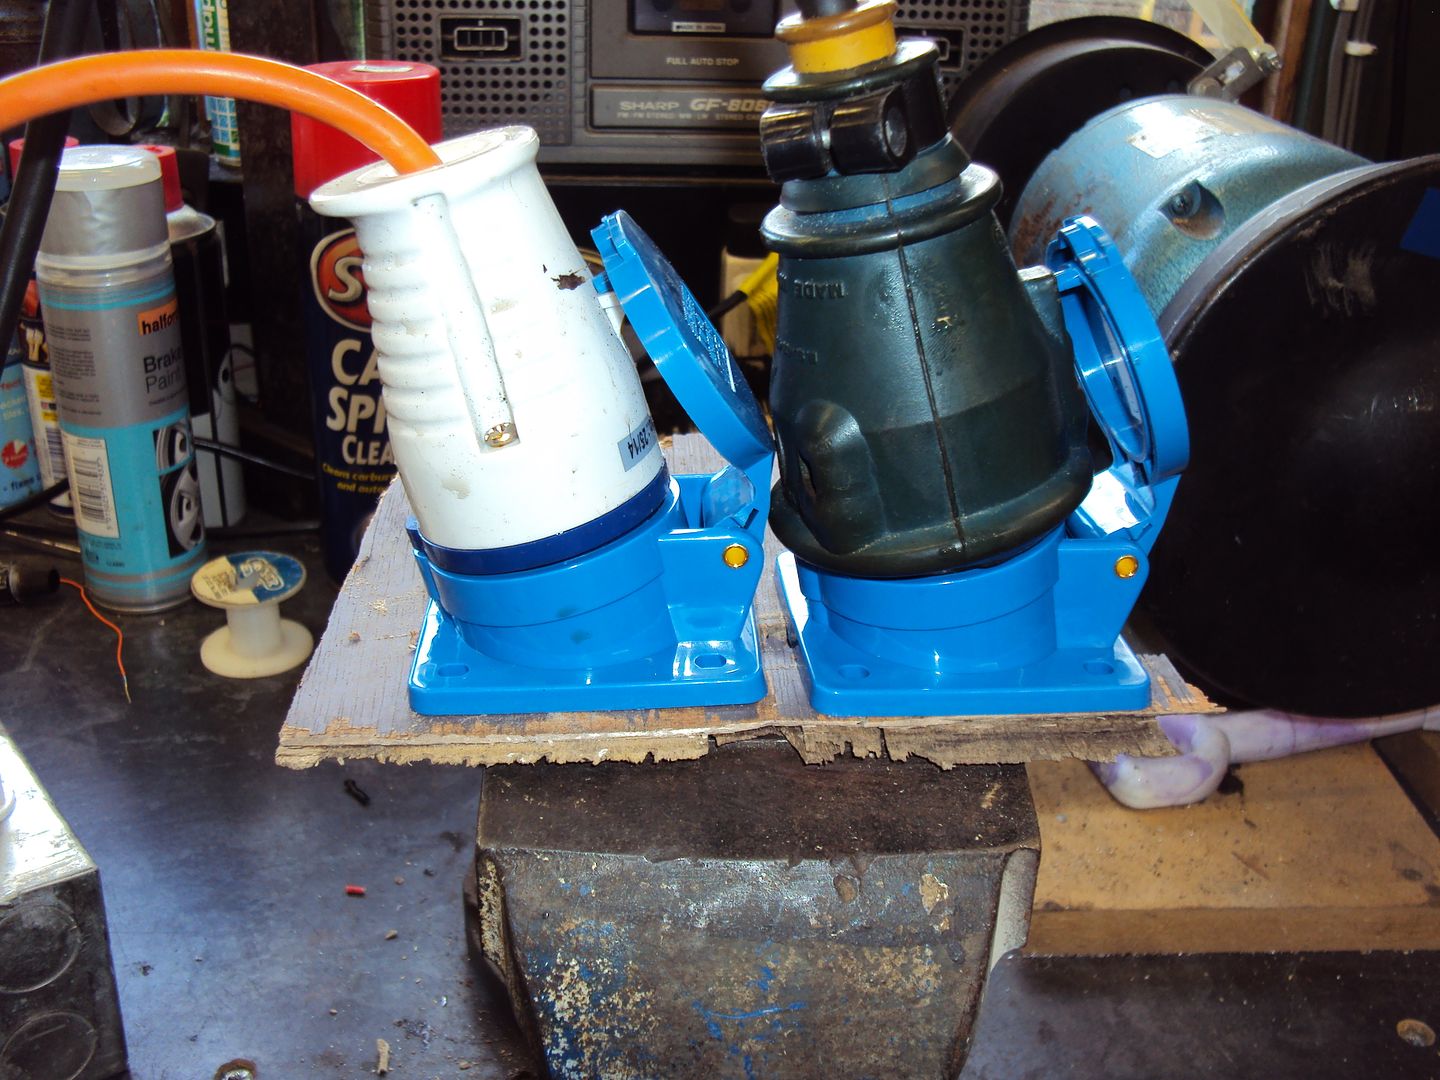
It’s tight but ok , more to follow….
S6PNJ said:
Hi Blue32 - any chance you can let me know where you got the little meter from please? It would be good to add something like that to my little generator.
Here you go http://www.ebay.co.uk/itm/AC80-300V-100A-Mini-LED-...Last update for the year
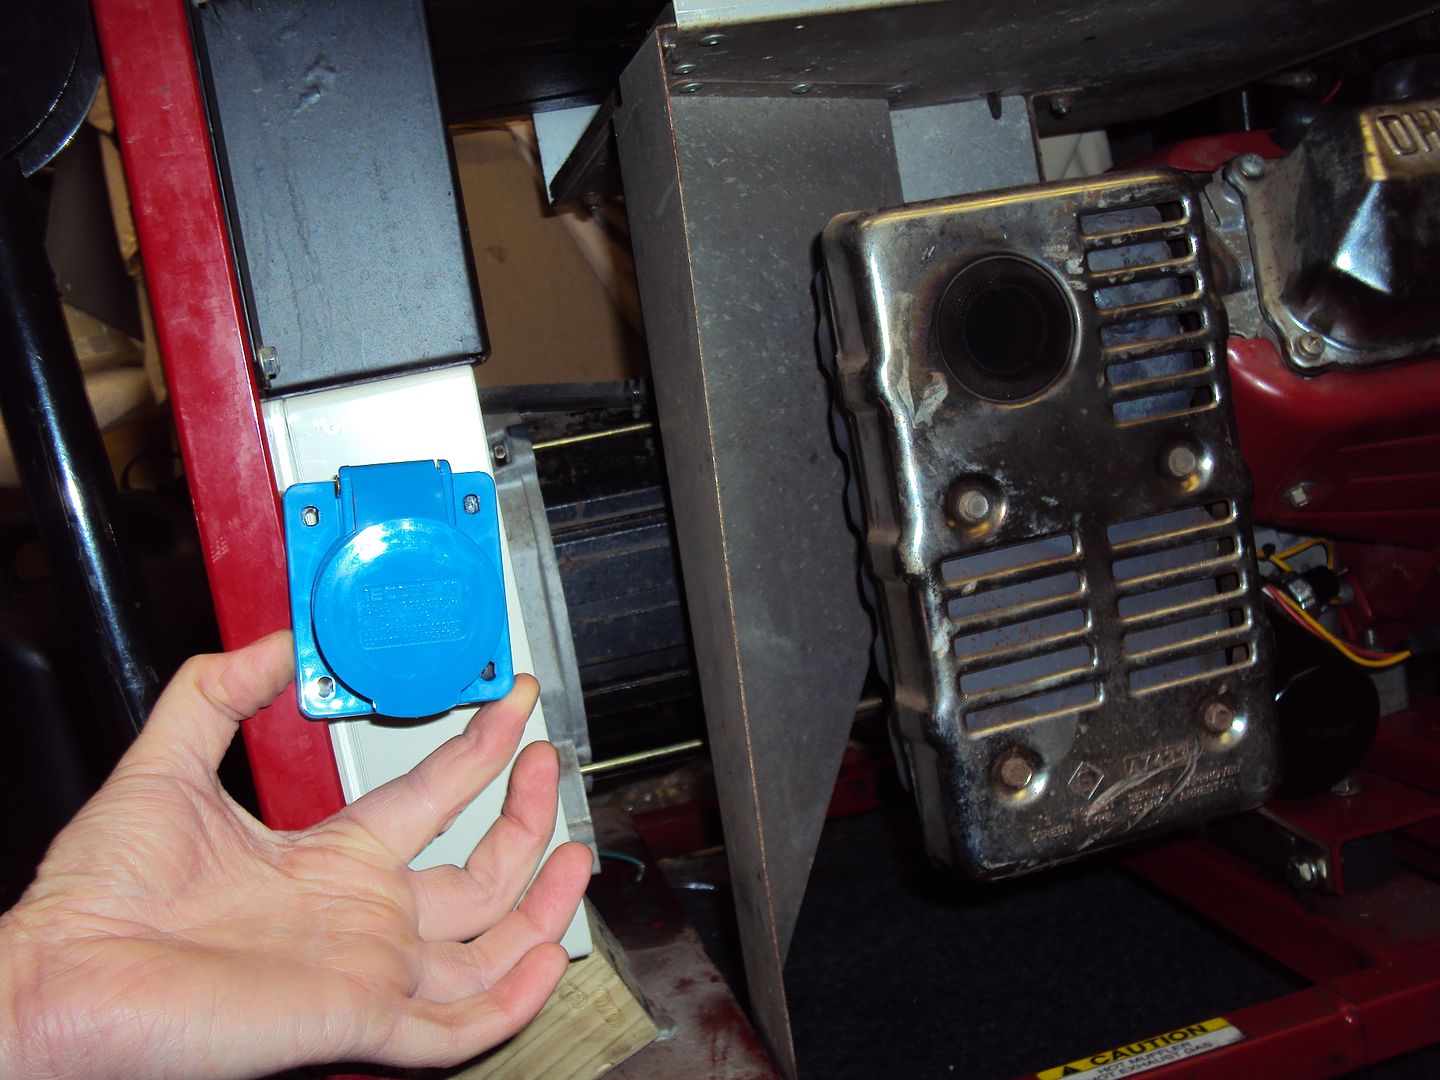
I have finished building the box, sockets and meter mounted
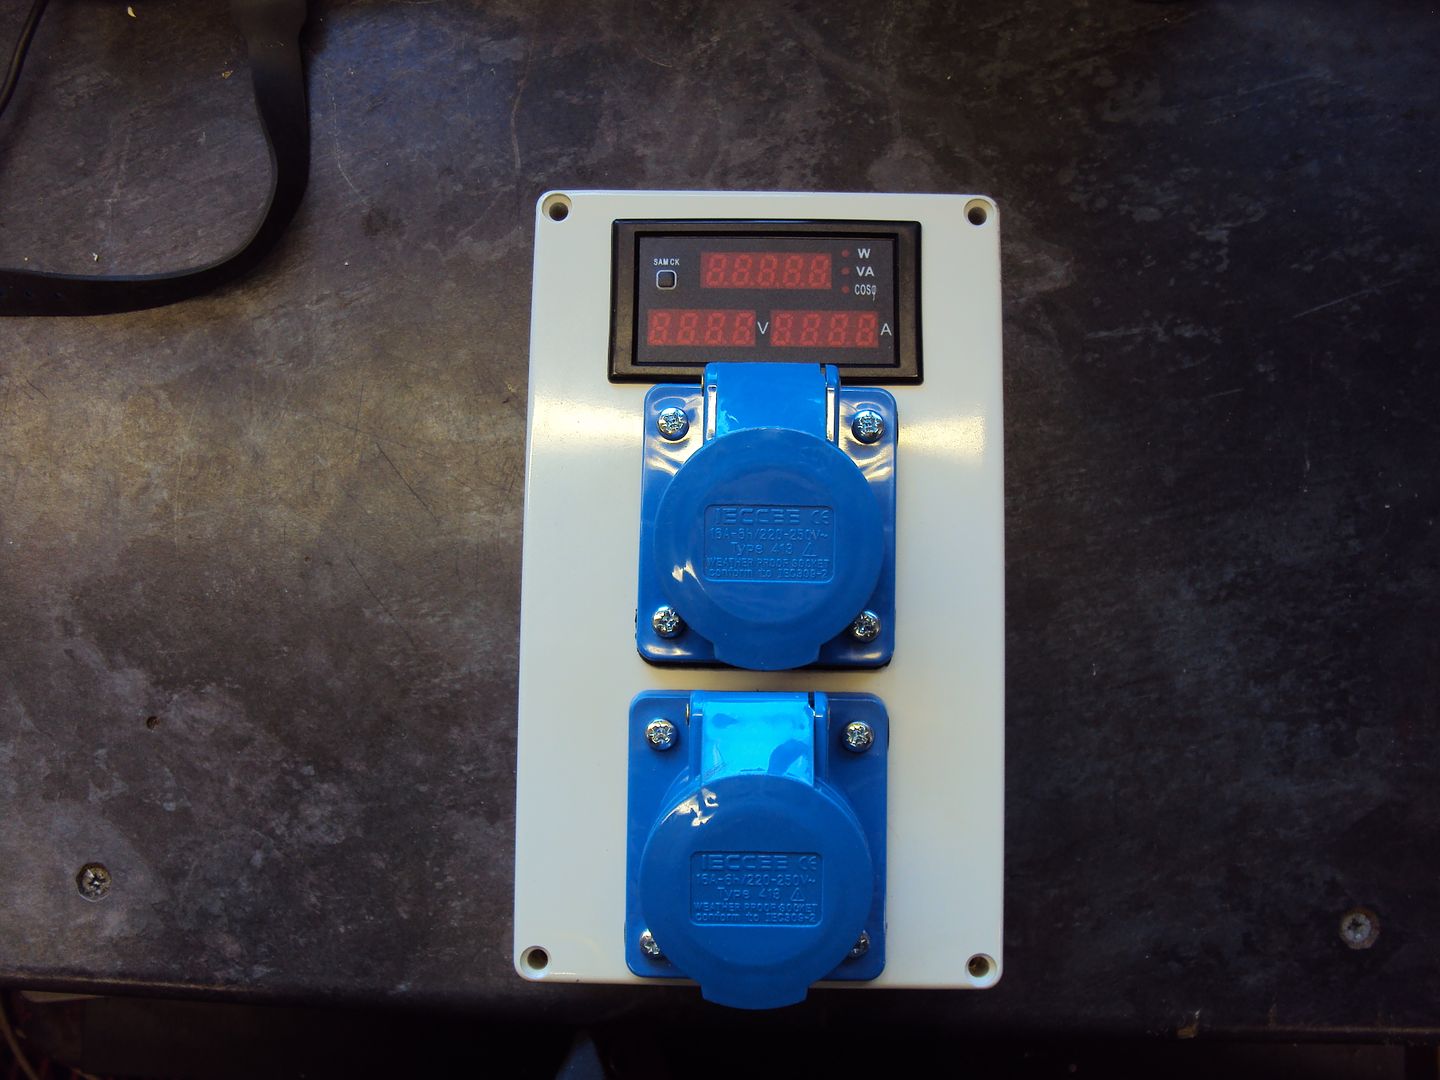
Wiring, just need to connect it to the existing wiring in the generator panel
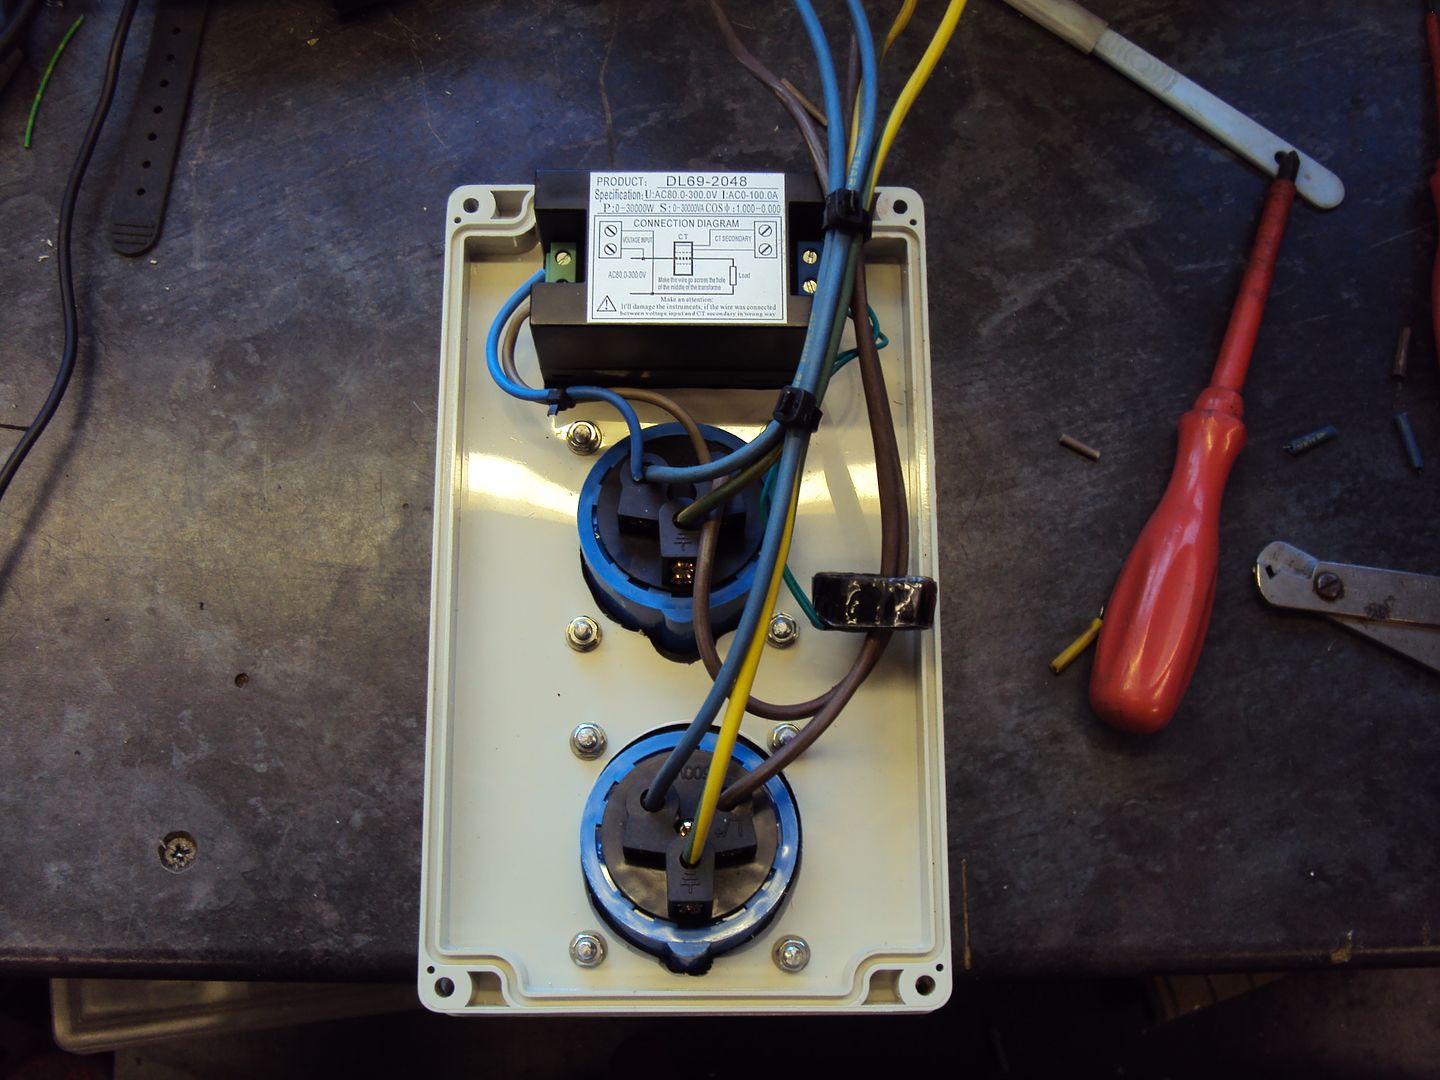
How it should look when completed
Oh and I have worked out where the mystery washer that I found in the sump came from. After looking at the engine diagram I noticed there are washers shown under the valve springs, the washers are there to stop the steel spring wearing into the aluminium head. I took the valve cover off to check
Exhaust valve, washer present under spring
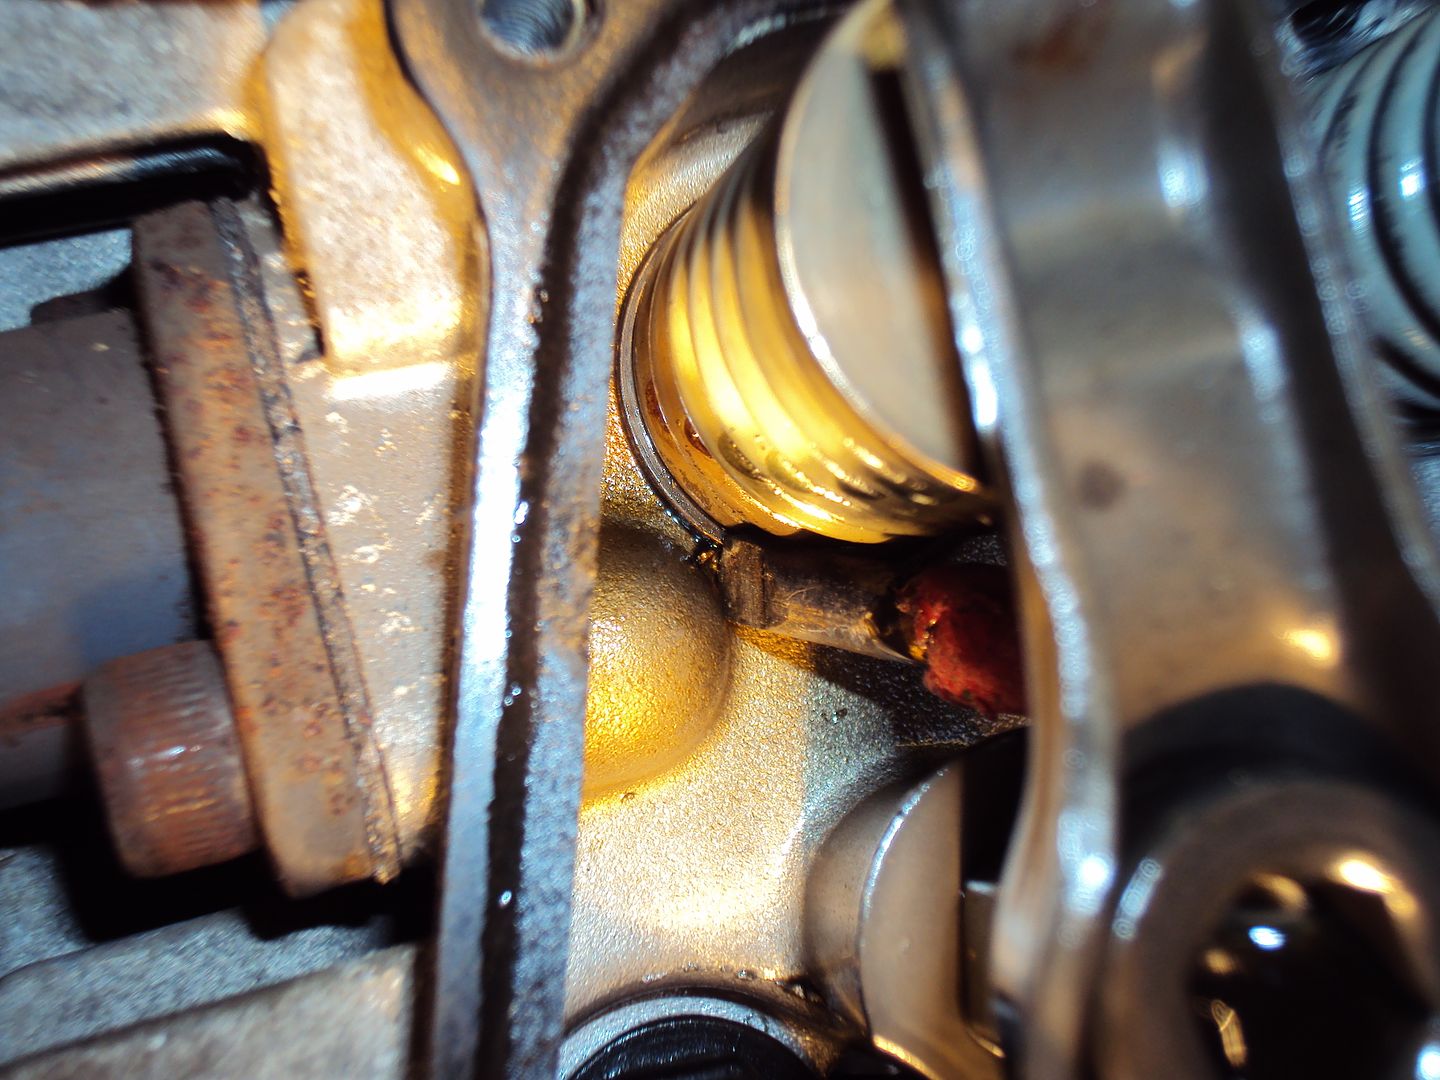
Intake valve, no washer
I levered the spring to one side, there is a visible groove worn into the head
Just to confirm I compared the bit of broken washer against the valve spring
To replace the washer the cylinder head will need to be removed so the valve spring can be released. Something to look forward to next year….
I have finished building the box, sockets and meter mounted
Wiring, just need to connect it to the existing wiring in the generator panel
How it should look when completed
Oh and I have worked out where the mystery washer that I found in the sump came from. After looking at the engine diagram I noticed there are washers shown under the valve springs, the washers are there to stop the steel spring wearing into the aluminium head. I took the valve cover off to check
Exhaust valve, washer present under spring
Intake valve, no washer
I levered the spring to one side, there is a visible groove worn into the head
Just to confirm I compared the bit of broken washer against the valve spring
To replace the washer the cylinder head will need to be removed so the valve spring can be released. Something to look forward to next year….
Amused2death said:
Don't need to go that far. Take spark plug out, turn to BDC, find rope slightly thinner than plughole. Insert end of rope in hole until you can't get any more in, rotate to compress rope inside and up against cylinder head,. This will stop the valve from dropping when you then compress spring, remove collets, remove spring, insert washer and reassemble.
It worked for me on a SAAB 99 many years ago.
Thanks, will give that a try. I don’t really want to strip it down if I don’t have to. It worked for me on a SAAB 99 many years ago.
Managed to put one of my fixed generators to good use yesterday. At about 4pm the mains cable out in the street blew up. It lifted paving slabs and the fire brigade were in attendance until a repair crew turned up. The damaged cable took out the supply to 24 properties.
As the Generac is in need of a repair we used the Kippor seen on page 4 to power the house. It was running continuously from 4:30 until 10:00pm keeping the heating, fridge’s and more importantly TV & internet running.
Power was finally restored at 02:15 this morning.
I had a bit of free time today, so finished off the 16A socket modification (just had to do a final sanity check on the wiring).
Started the generator, and it worked (no load)
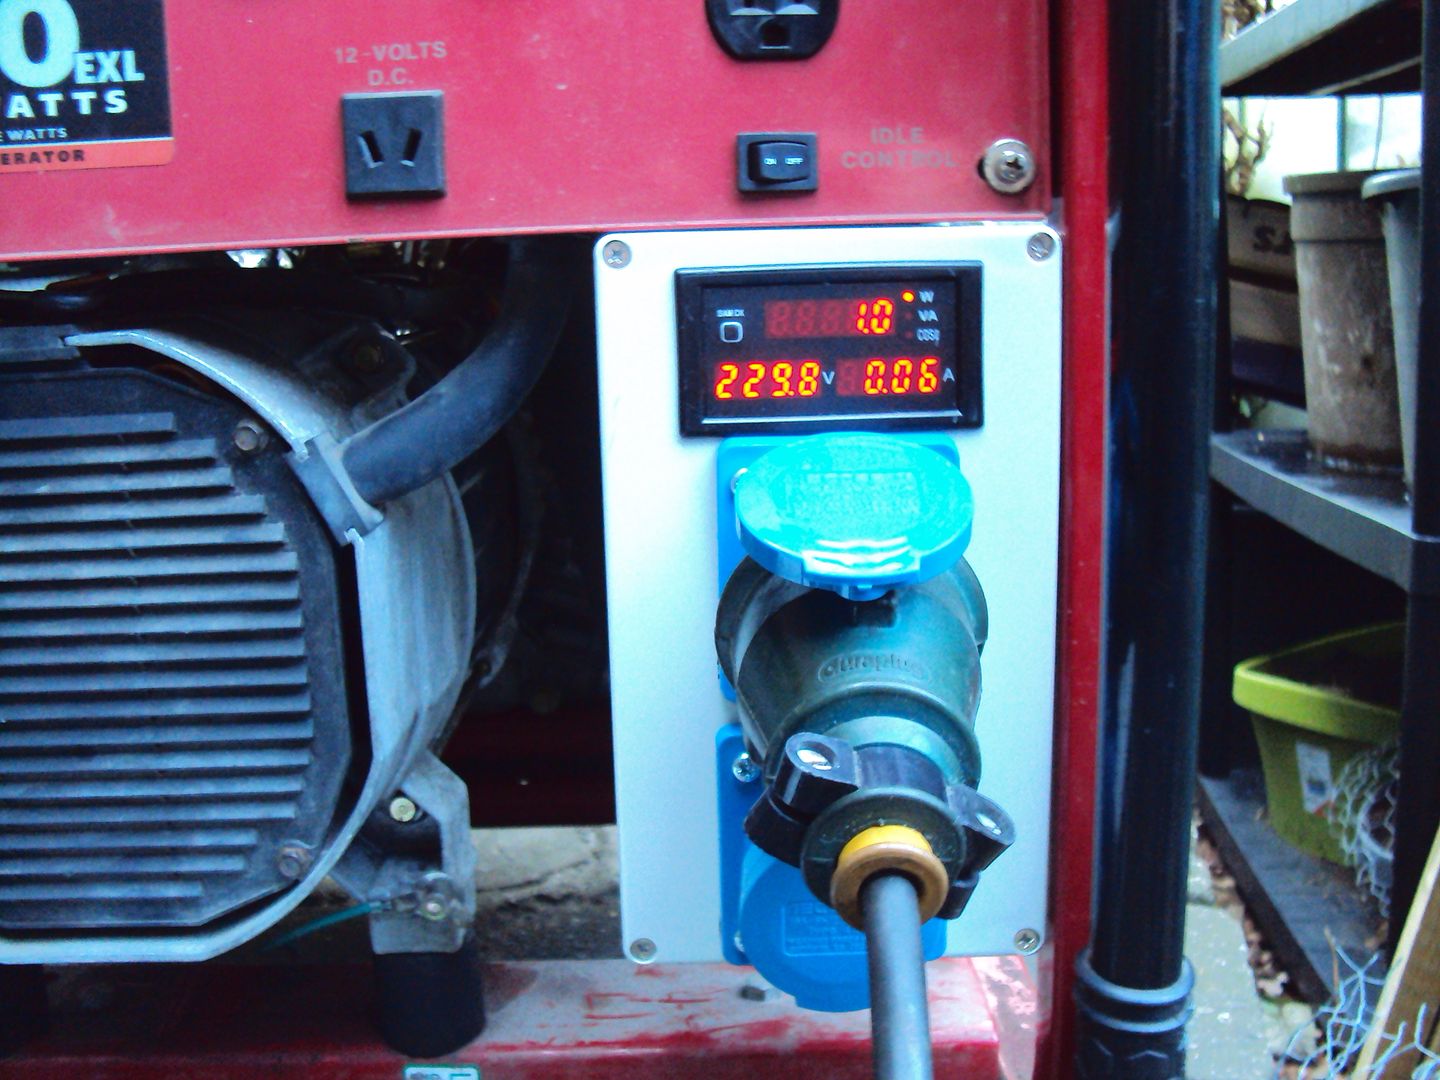
With 2kW heater
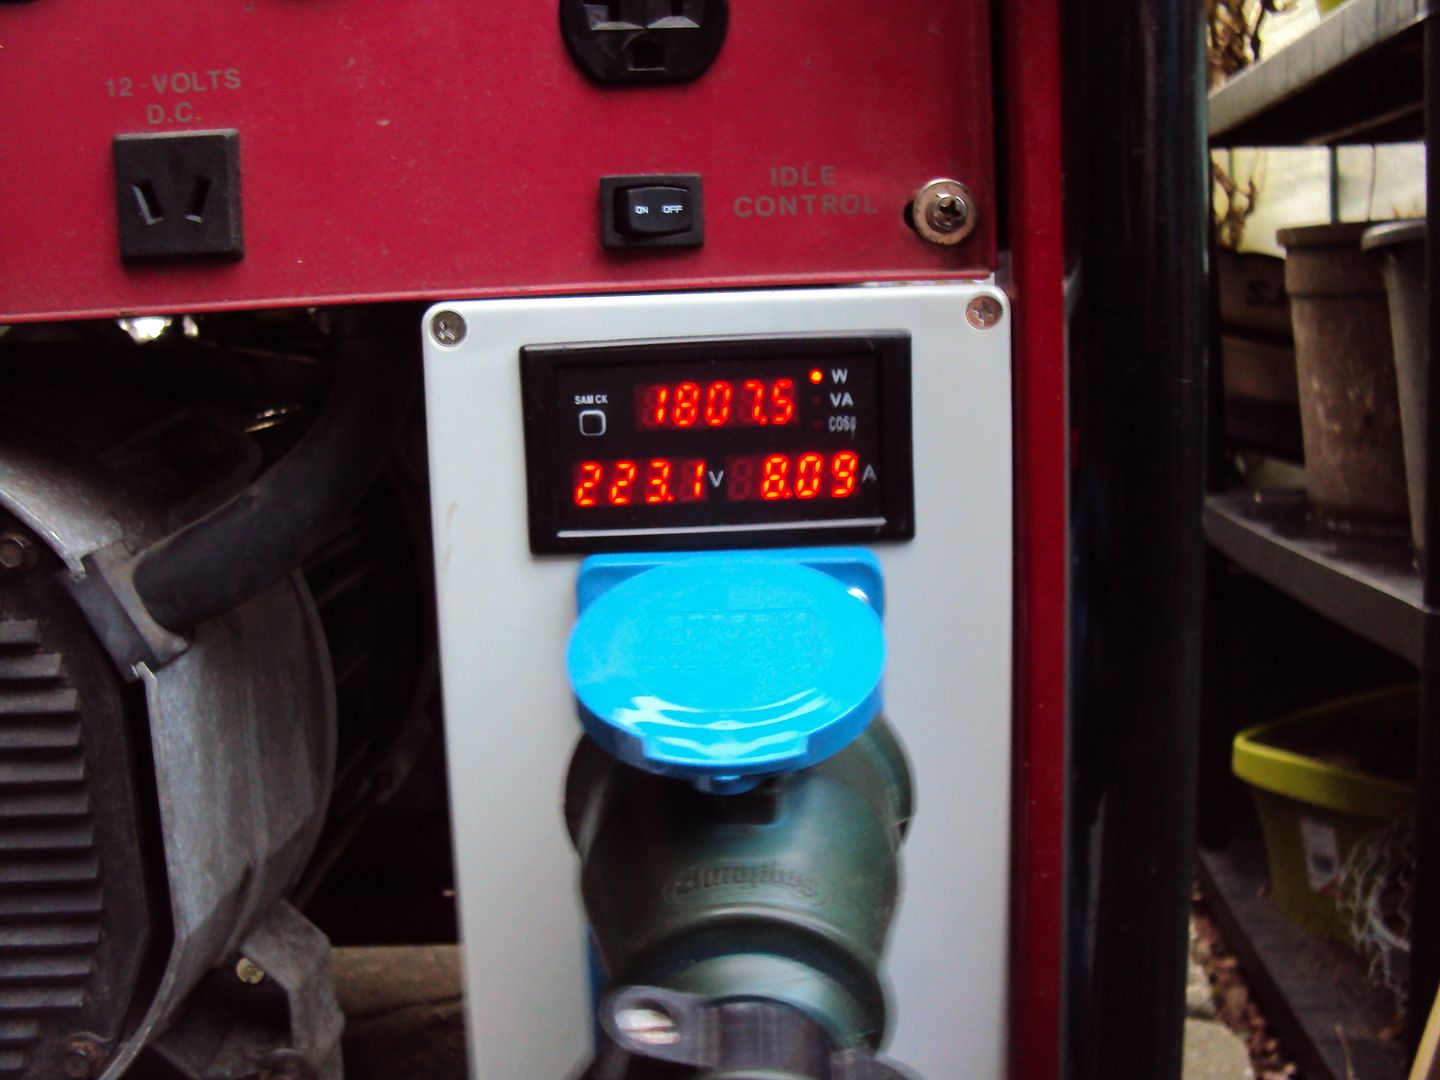
Just need to adjust the voltage so it’s closer to 240V
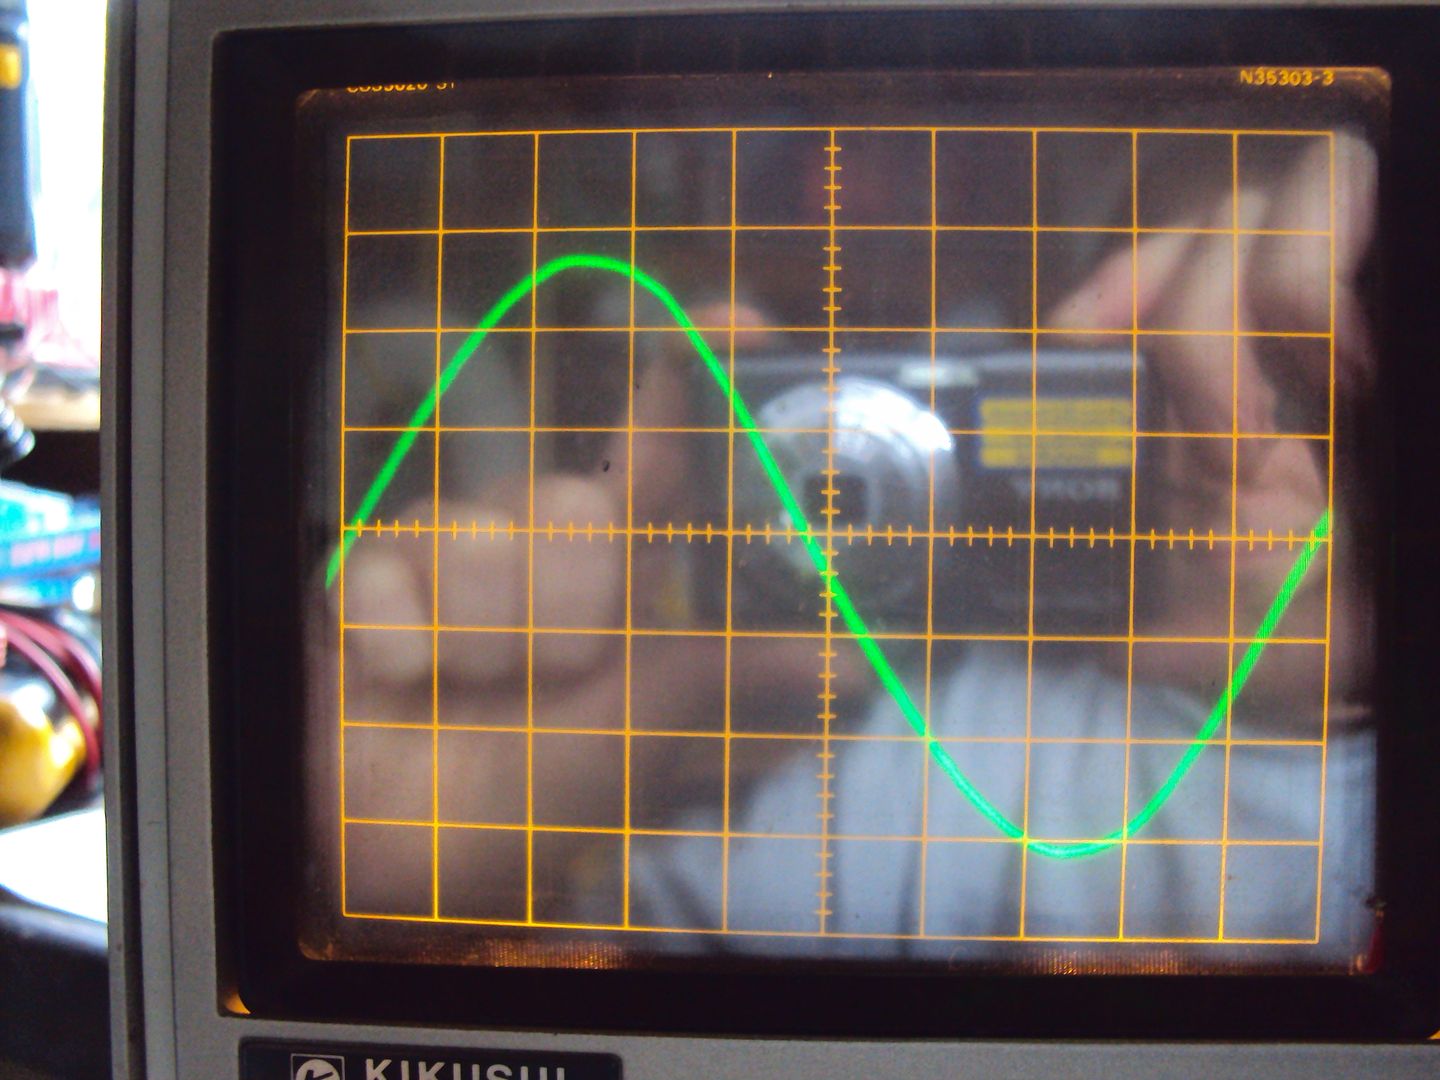
Out of curiosity I dug out the oscilloscope and hooked it up to the output via a transformer (for safety) to have a look at how clean the AC signal was.
AC signal with no load applied

With 2kW load

I was hoping it would be a bit cleaner than that. I guess the AVR/regulator is quite basic as that’s probably the worst output I have seen from a generator. Unless that is sign of another impending component failure?
For reference this is the mains into the shed

Honda EX5500 (no load)

Kippor KGE3000Ti pure sine wave digital inverter (no load)
Still need to sort out the washer under the valve spring.
Oh, and tomorrow I’m off to pick up the next project so stay tuned
Started the generator, and it worked (no load)
With 2kW heater
Just need to adjust the voltage so it’s closer to 240V
Out of curiosity I dug out the oscilloscope and hooked it up to the output via a transformer (for safety) to have a look at how clean the AC signal was.
AC signal with no load applied
With 2kW load
I was hoping it would be a bit cleaner than that. I guess the AVR/regulator is quite basic as that’s probably the worst output I have seen from a generator. Unless that is sign of another impending component failure?
For reference this is the mains into the shed
Honda EX5500 (no load)
Kippor KGE3000Ti pure sine wave digital inverter (no load)
Still need to sort out the washer under the valve spring.
Oh, and tomorrow I’m off to pick up the next project so stay tuned
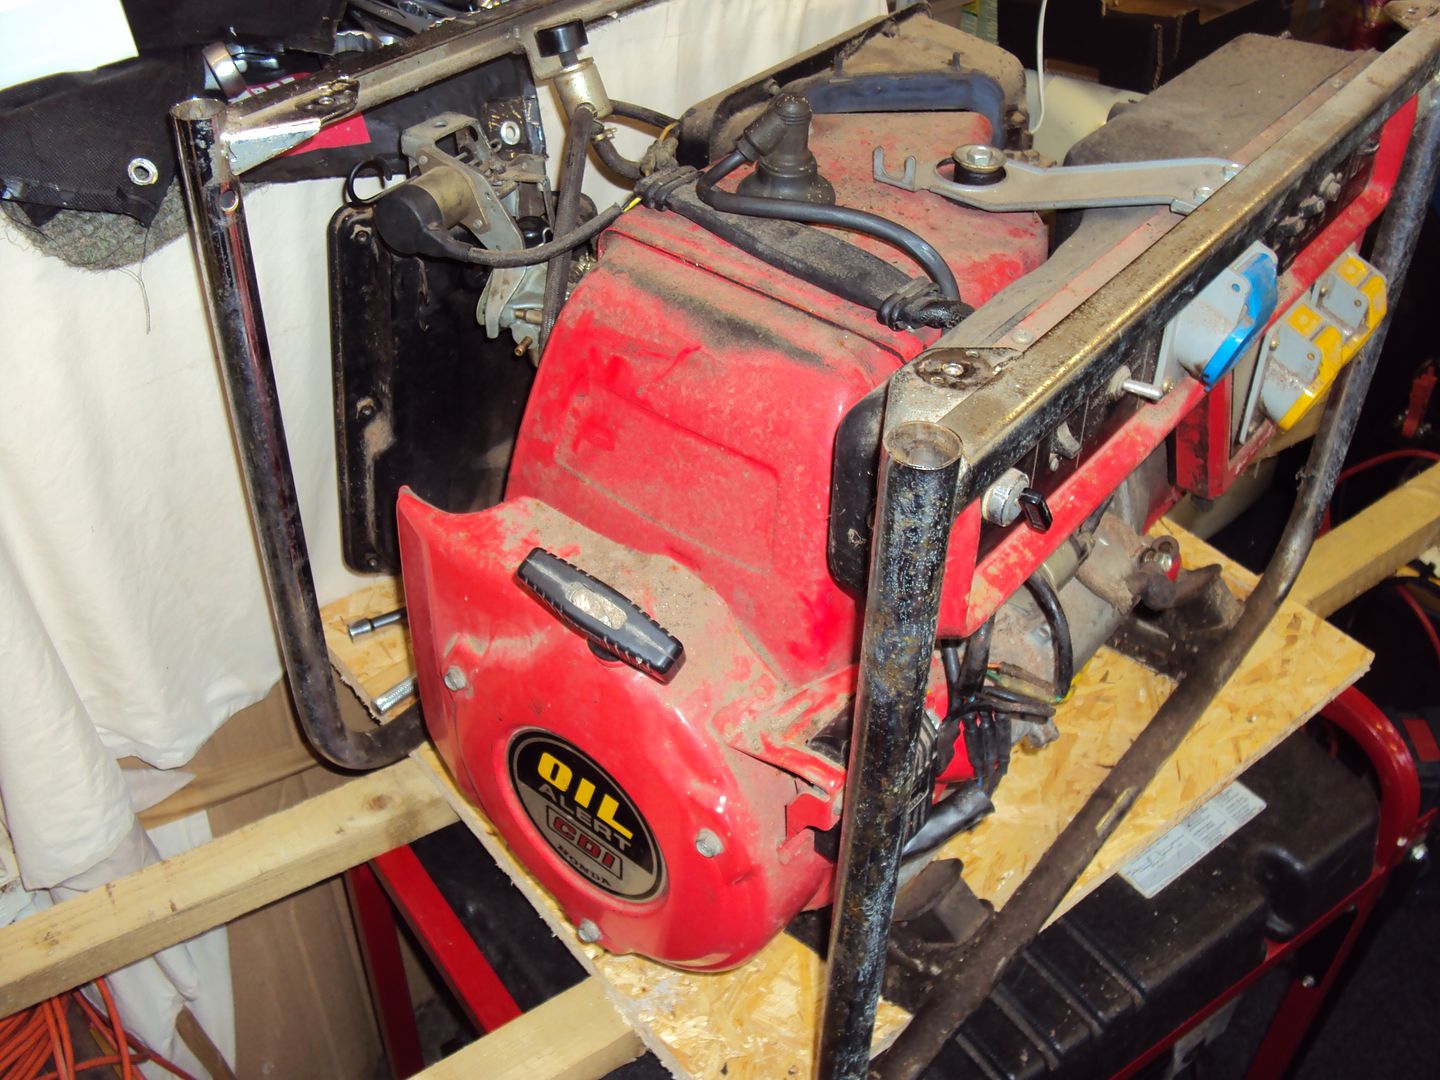
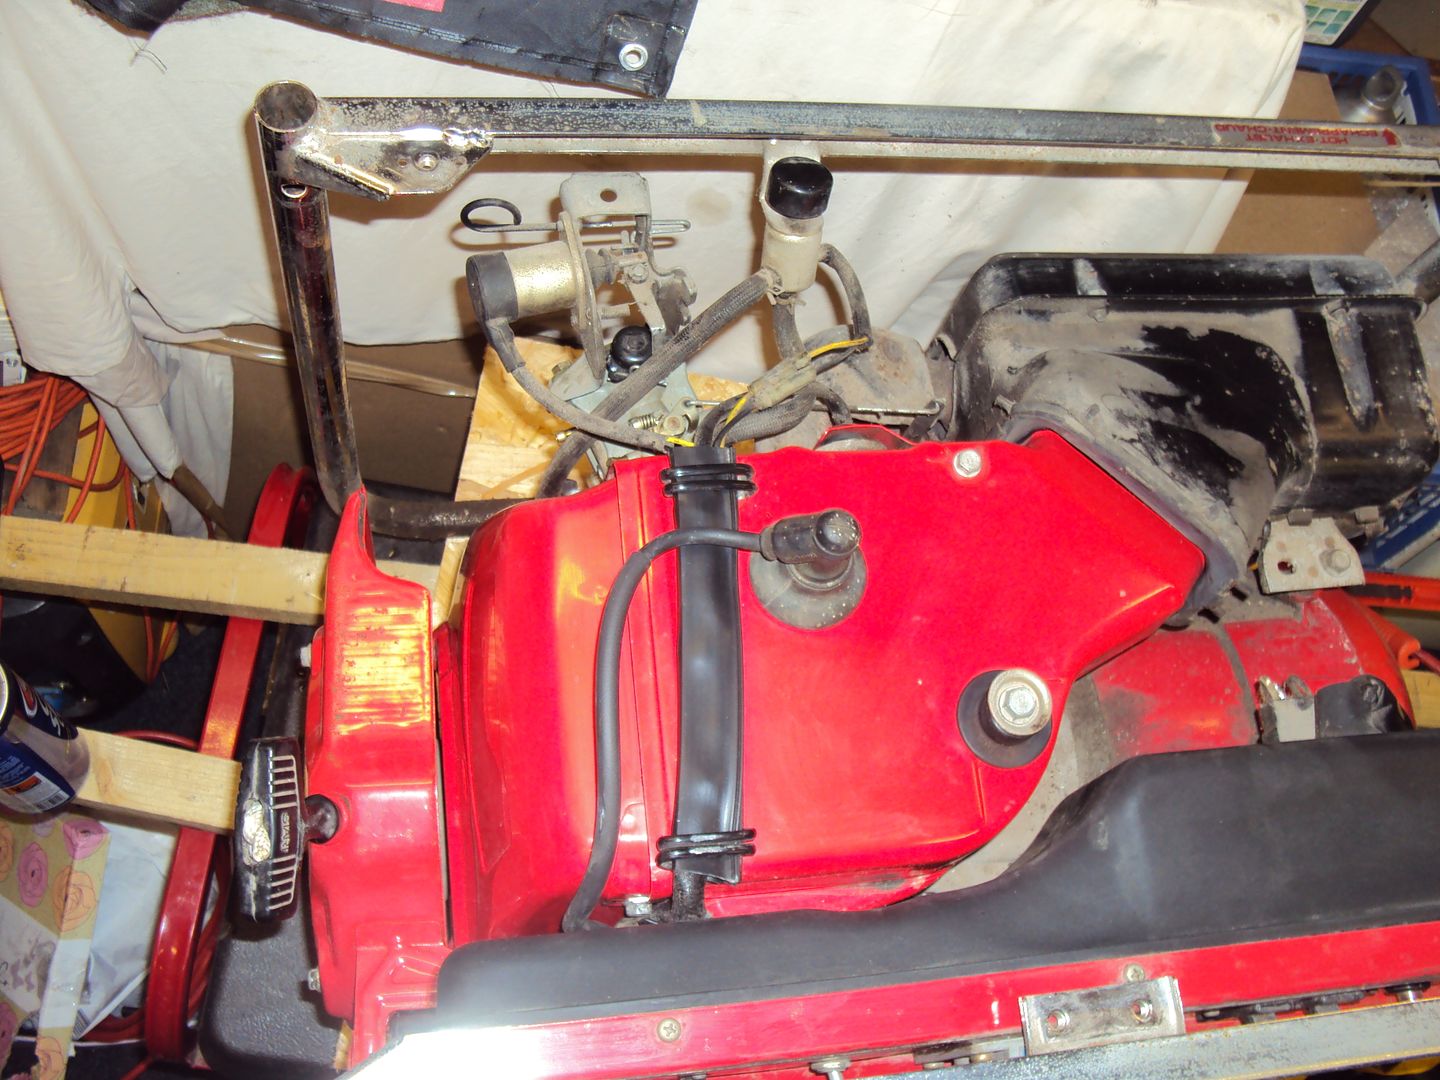
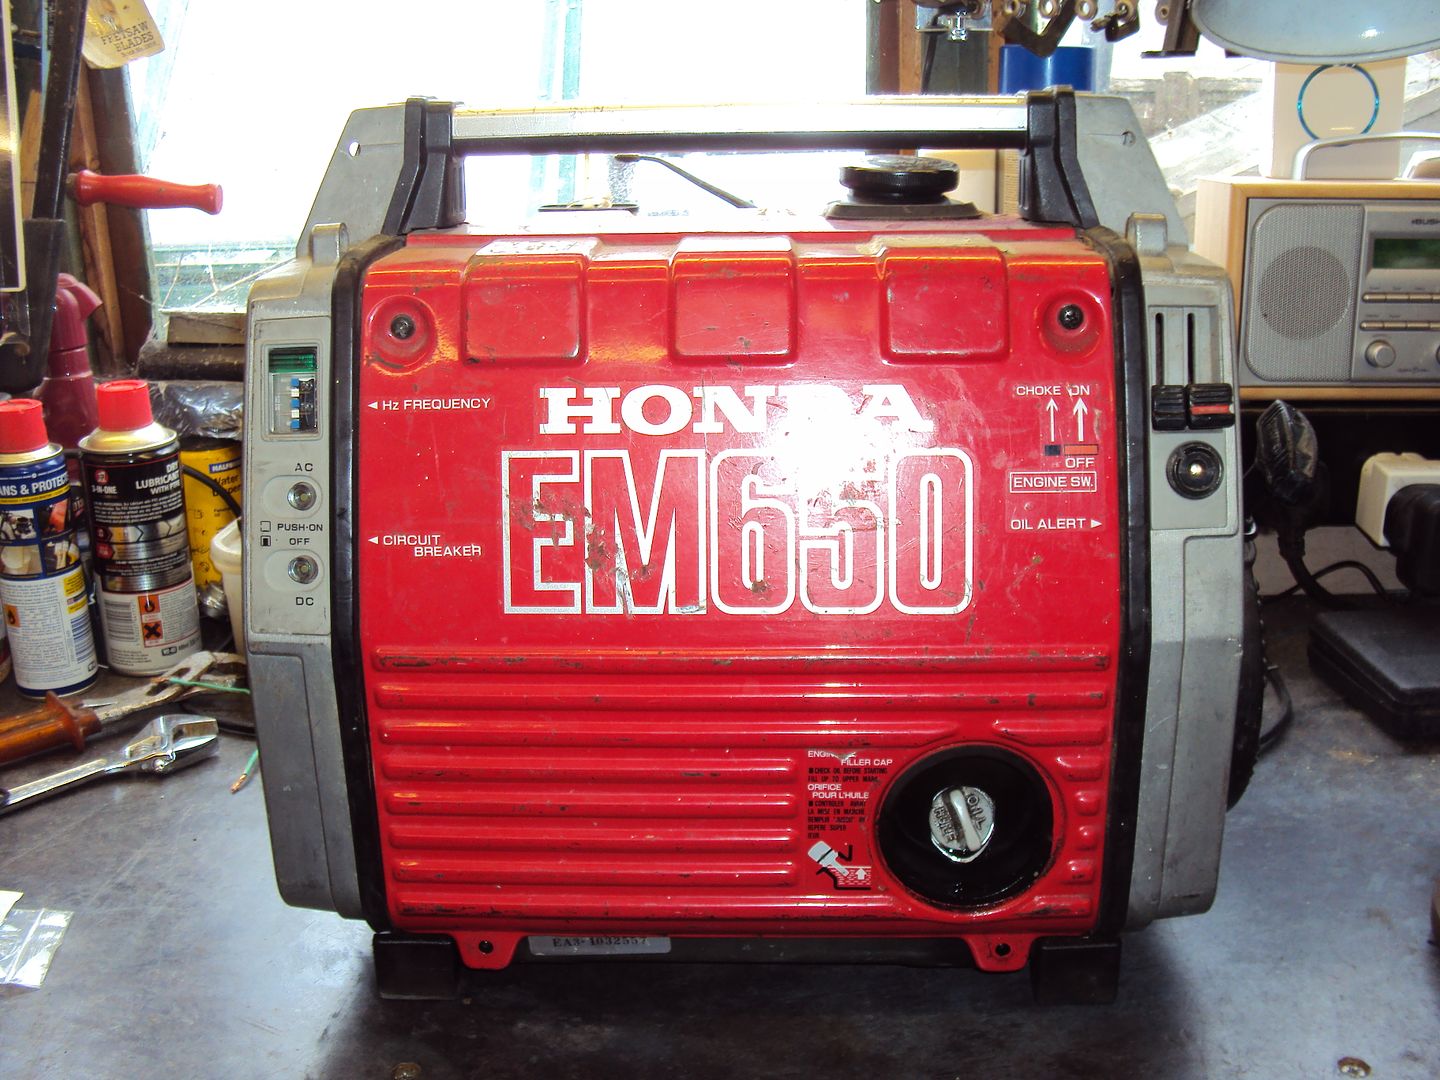
I picked up the latest project earlier, which was a Honda EMS3800, bigger brother to the EMS2800 seen previously on page 5.
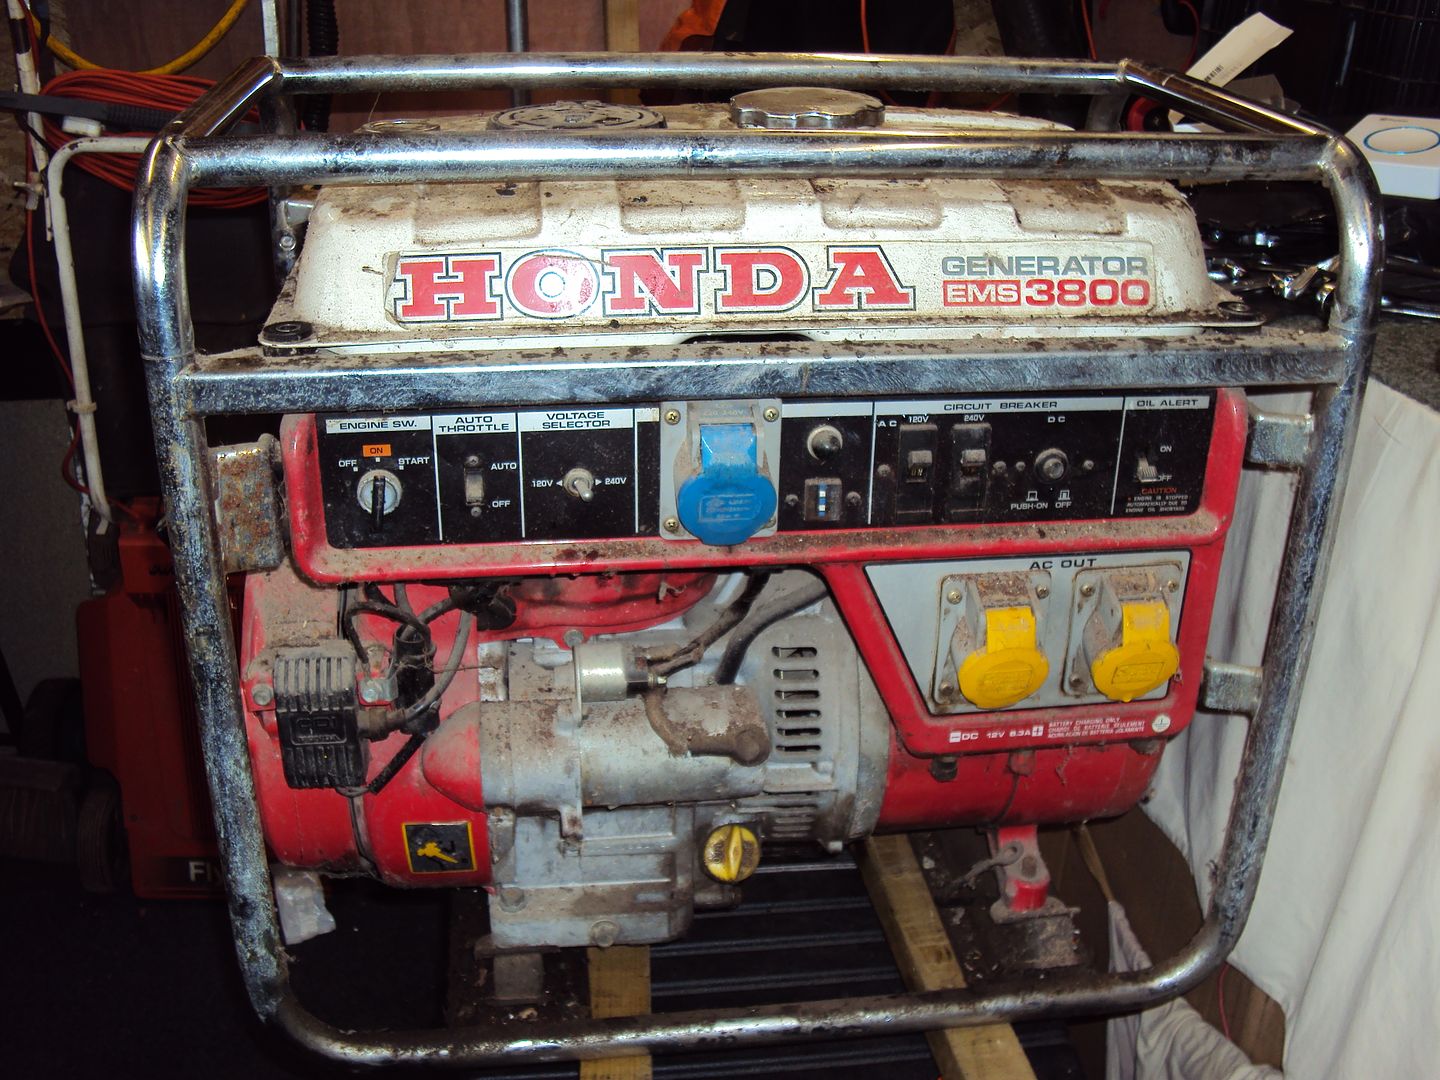
It had the usual problem where it won’t start.
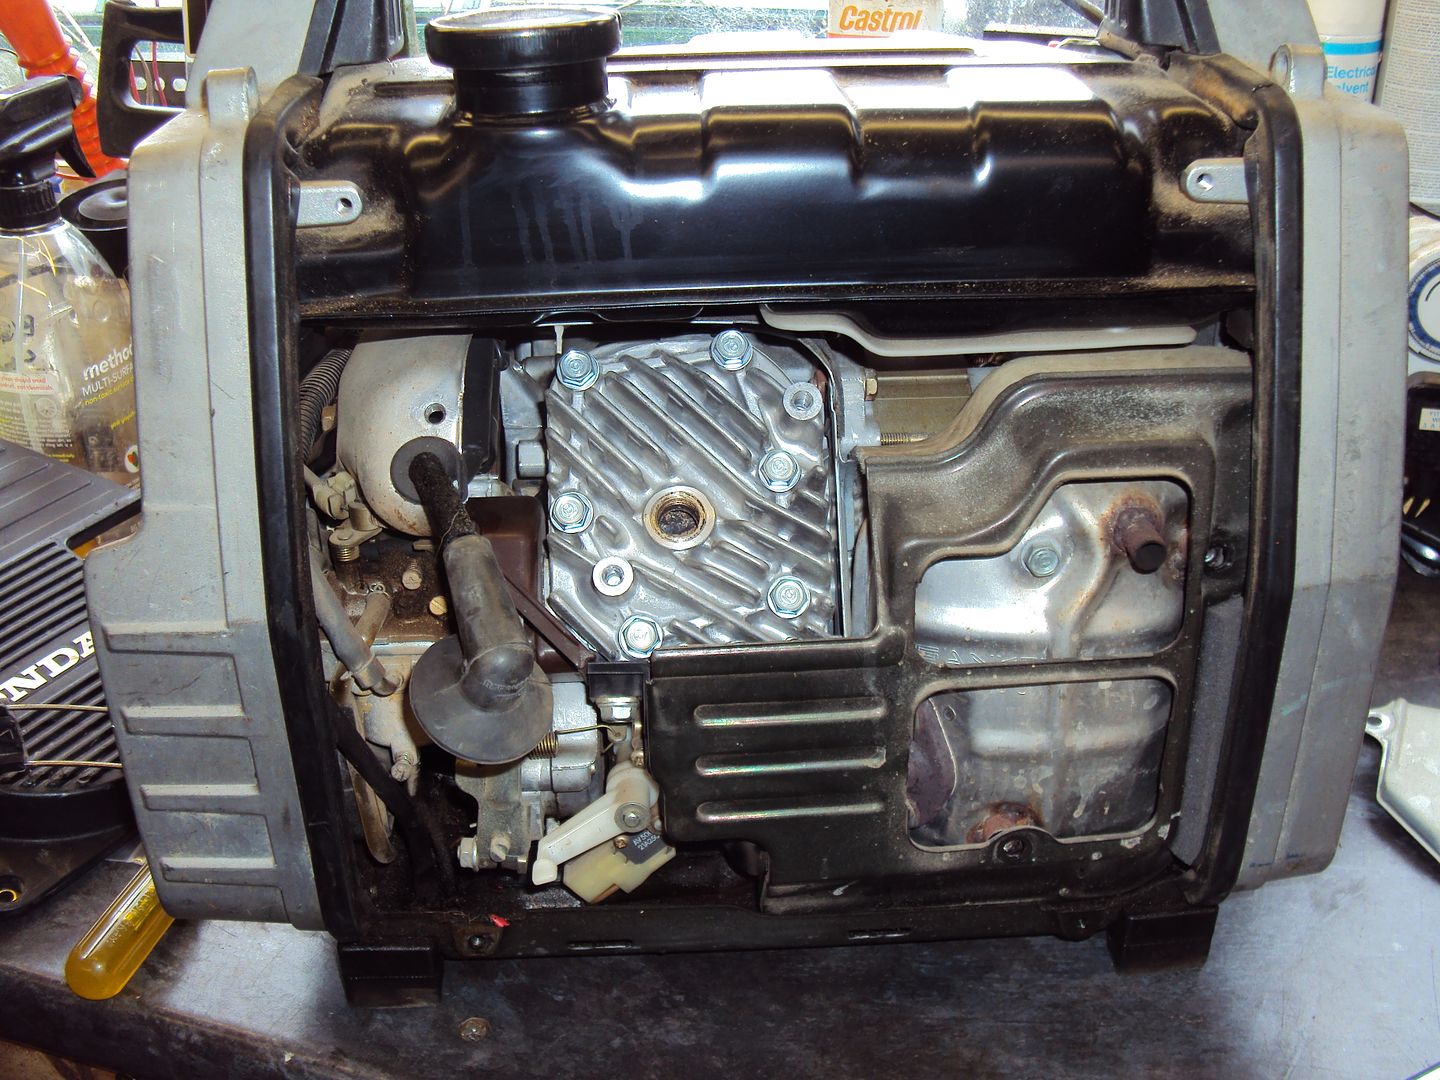
Started with the usual steps, checking for spark & fuel. Initially there was no spark, which was traced to low oil. Once we topped the oil up we had spark.
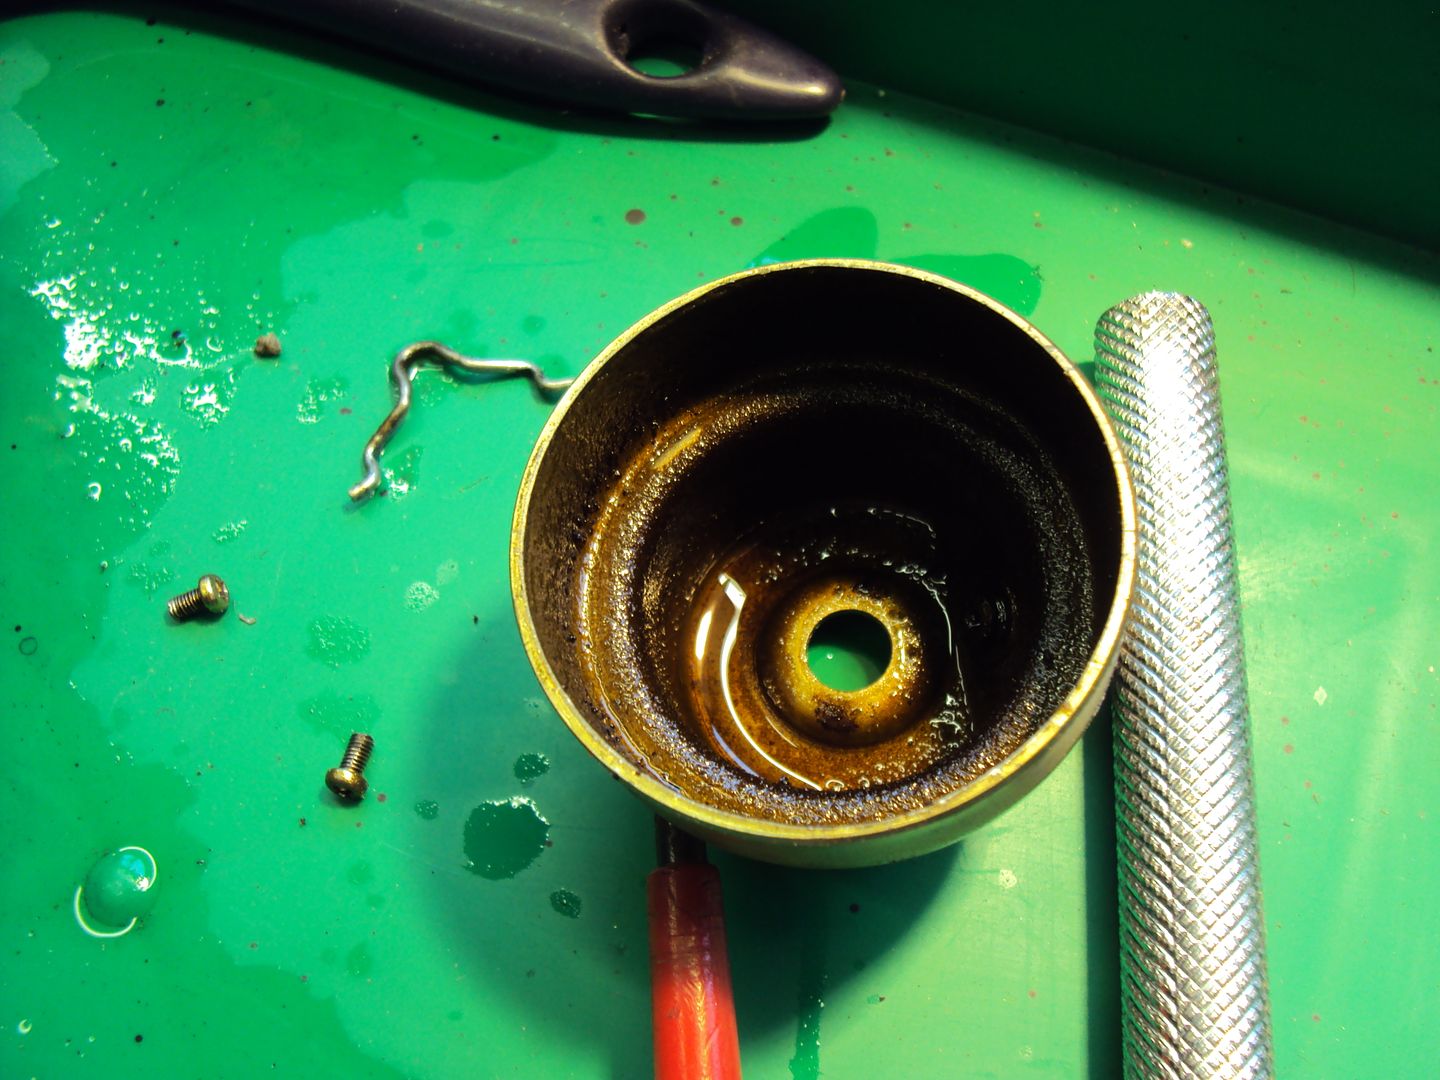
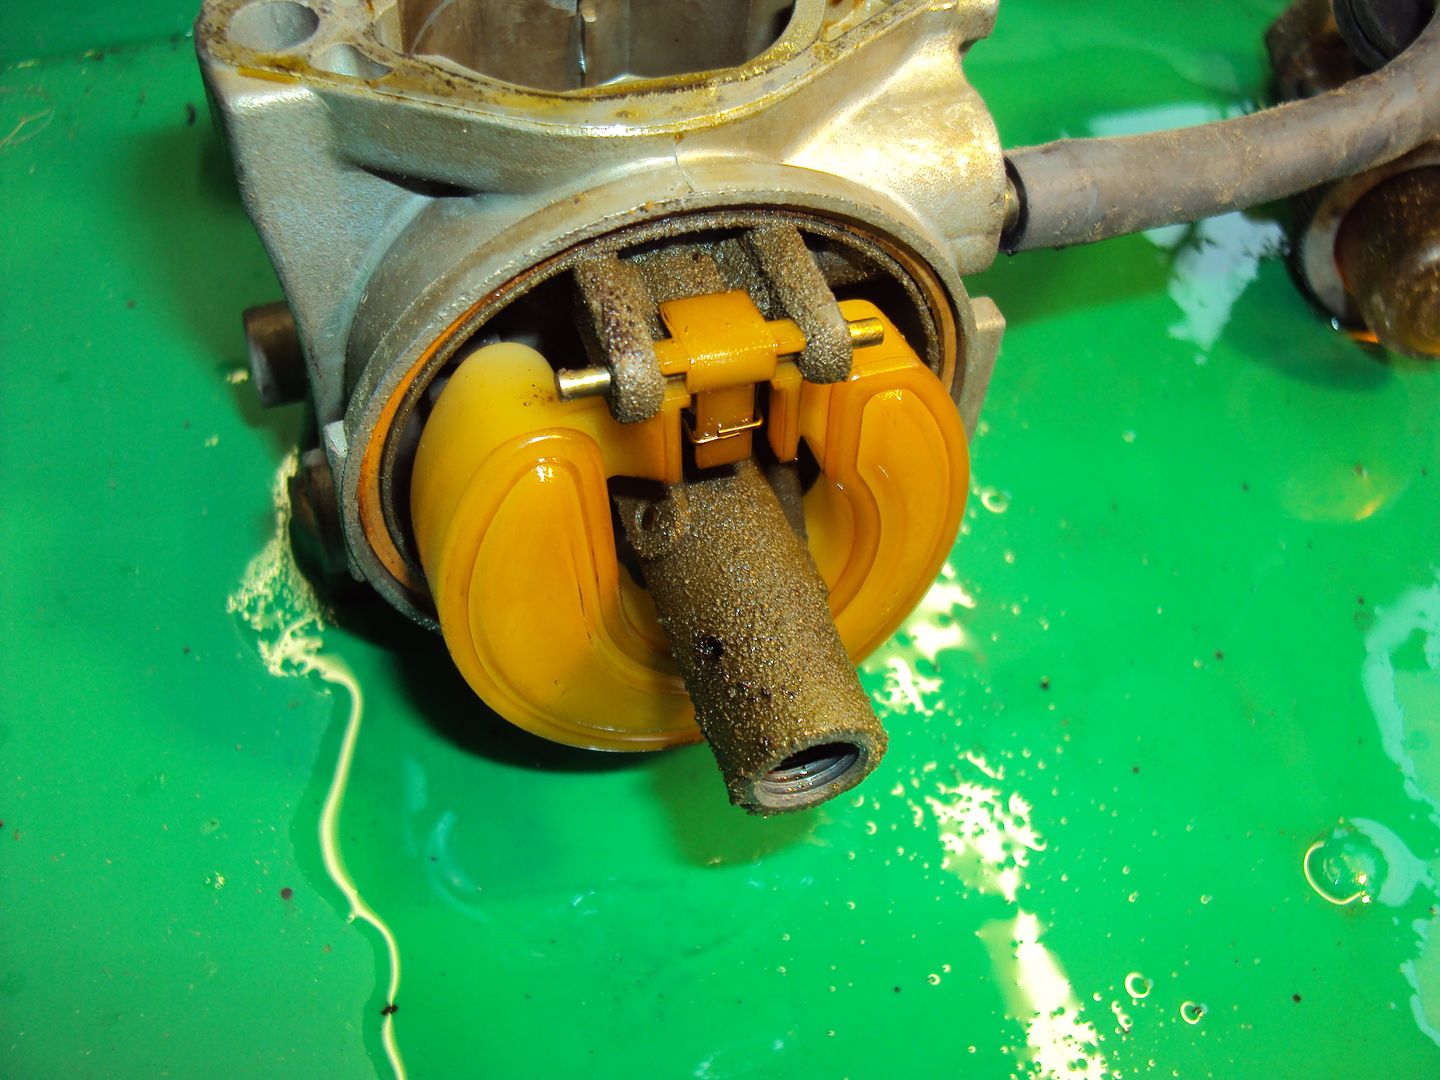
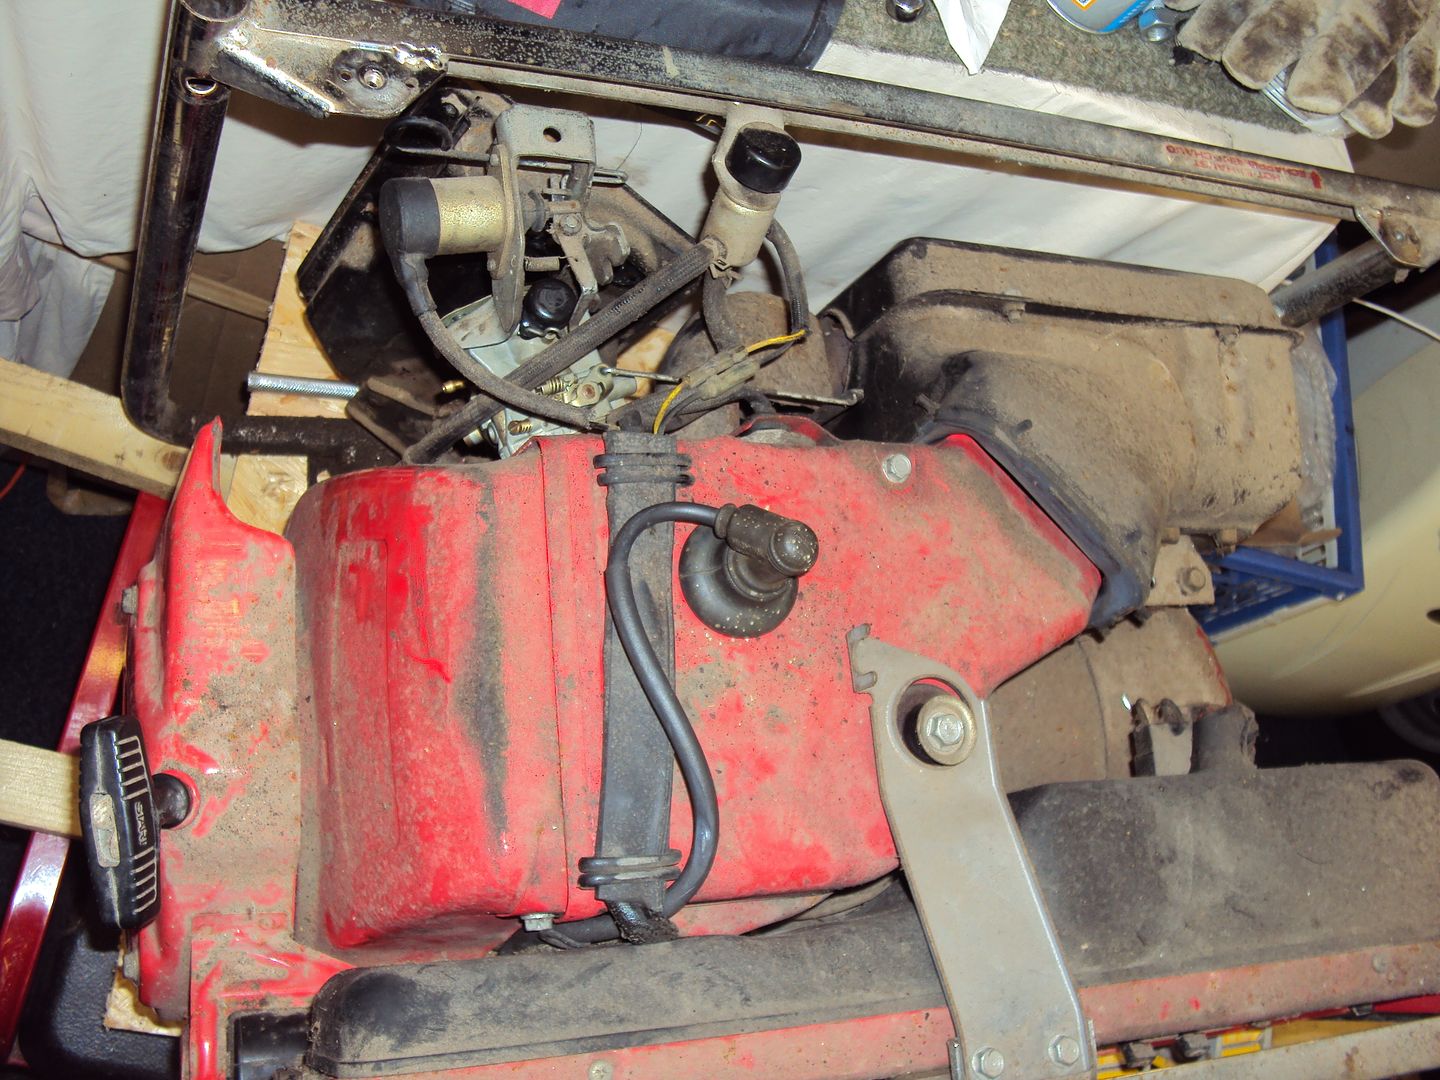
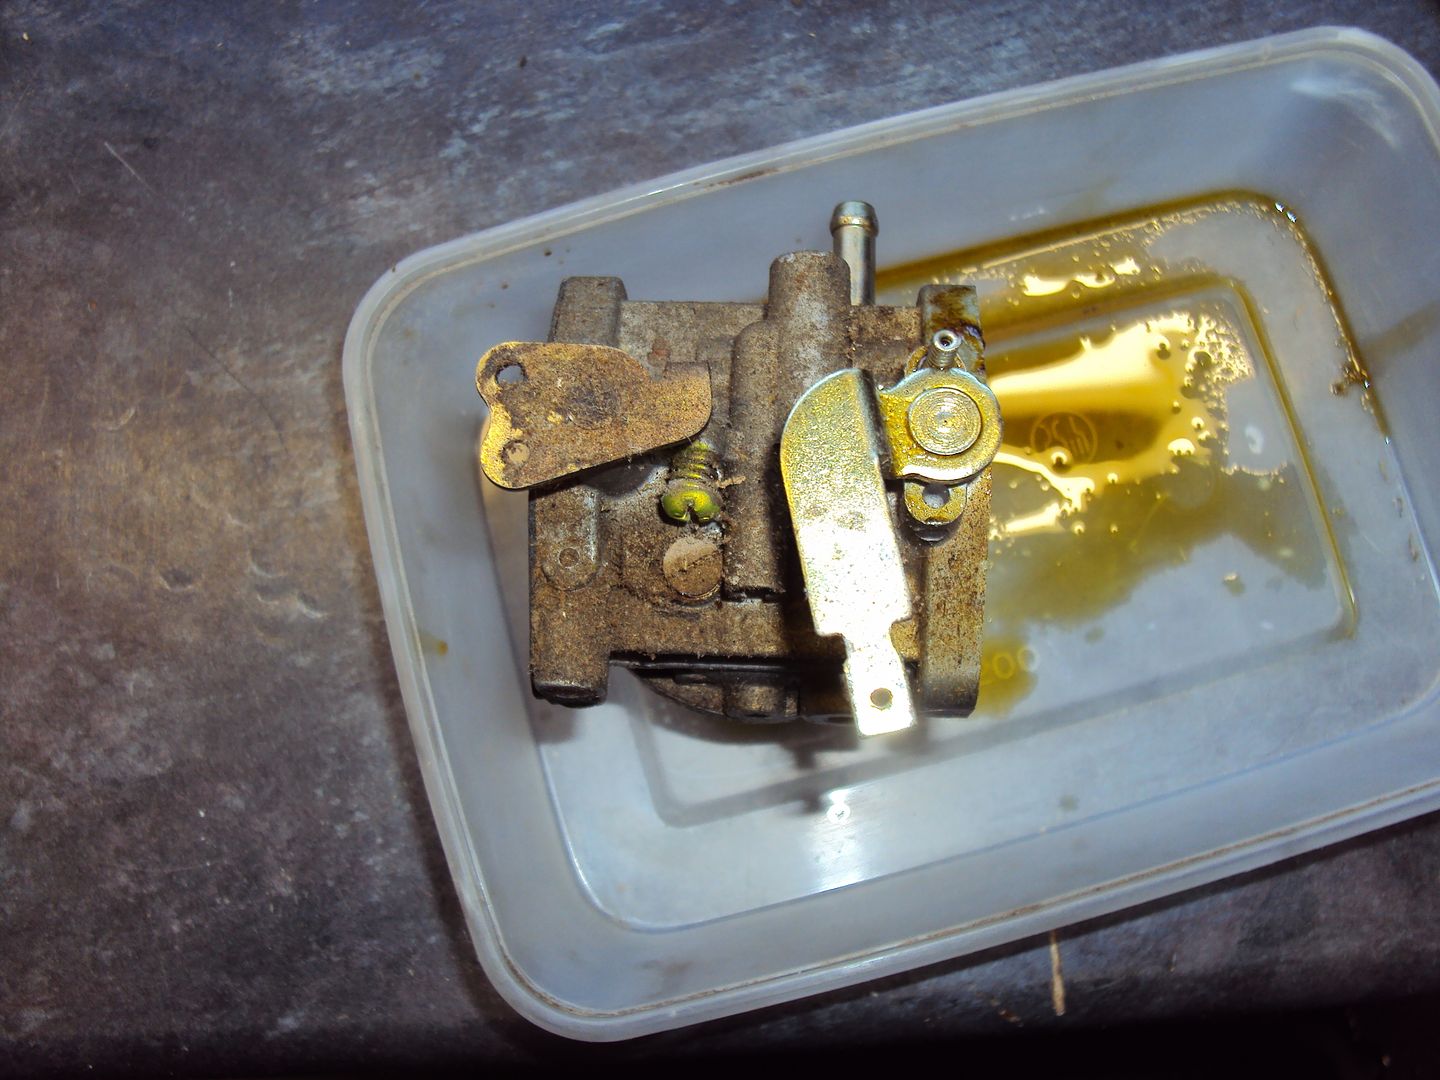
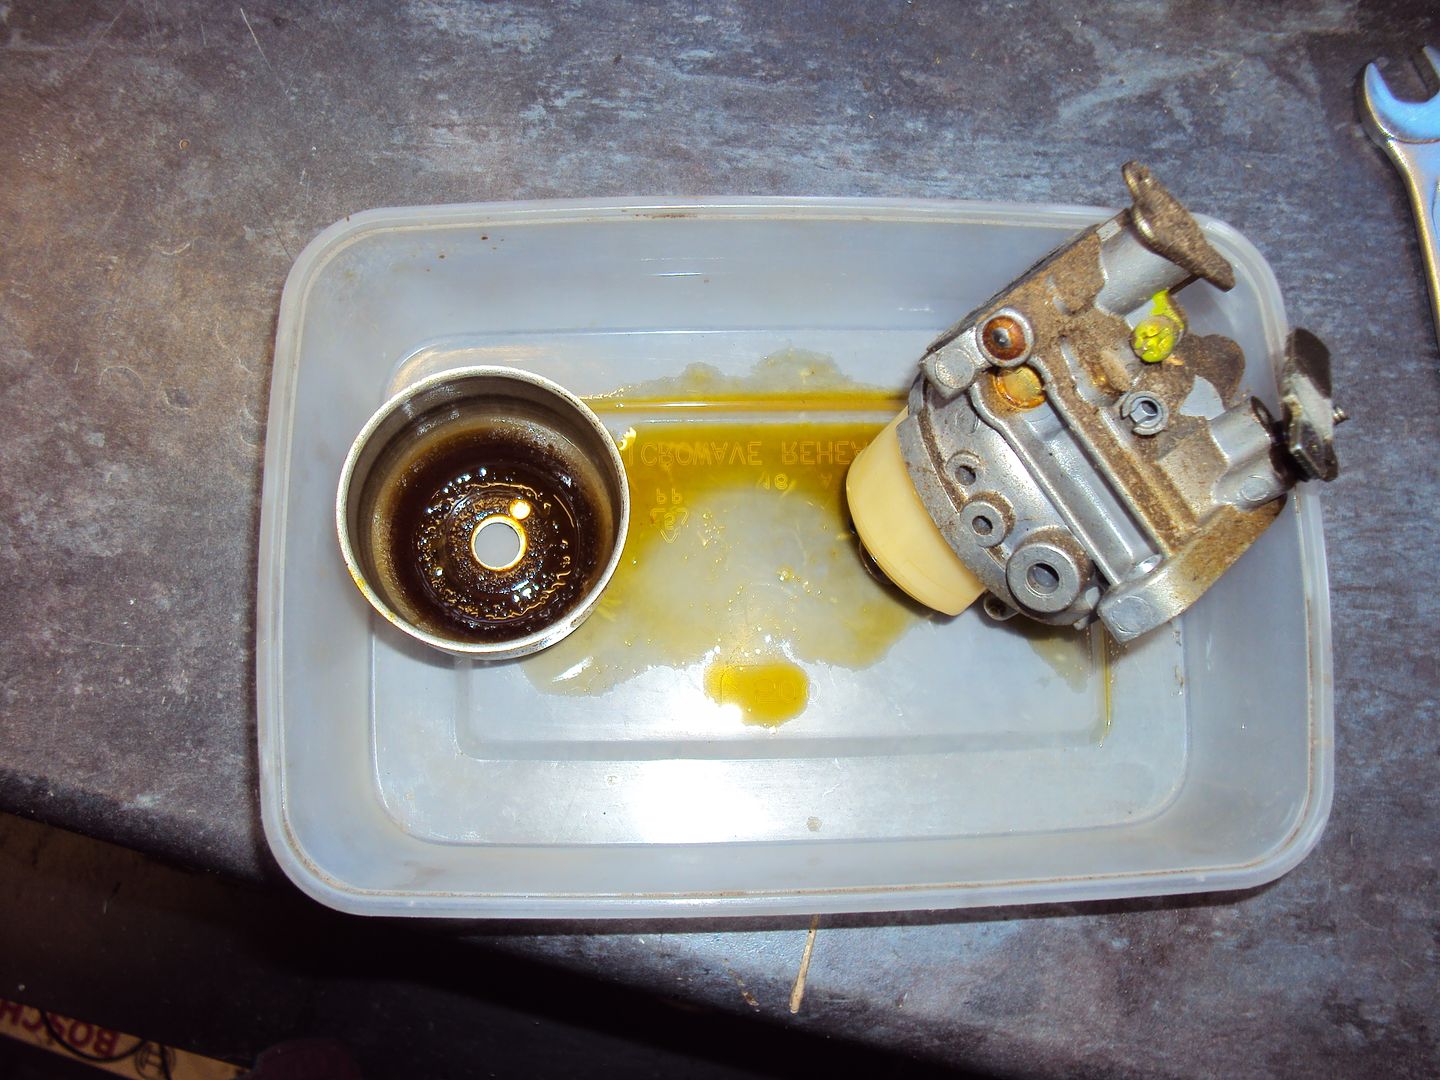
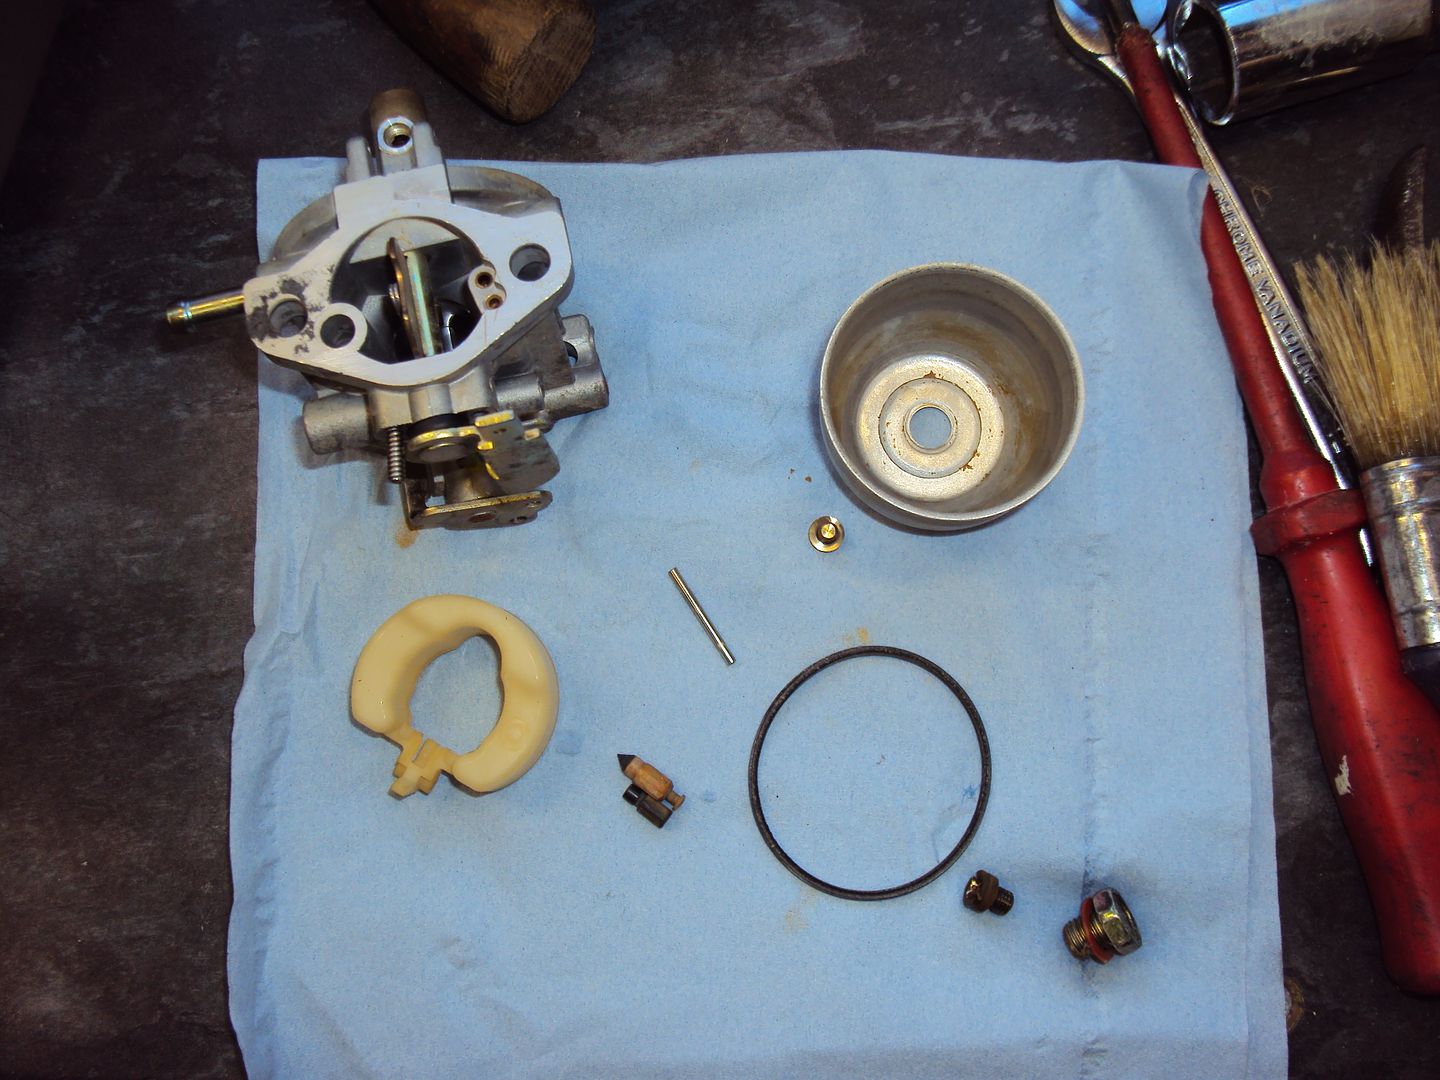
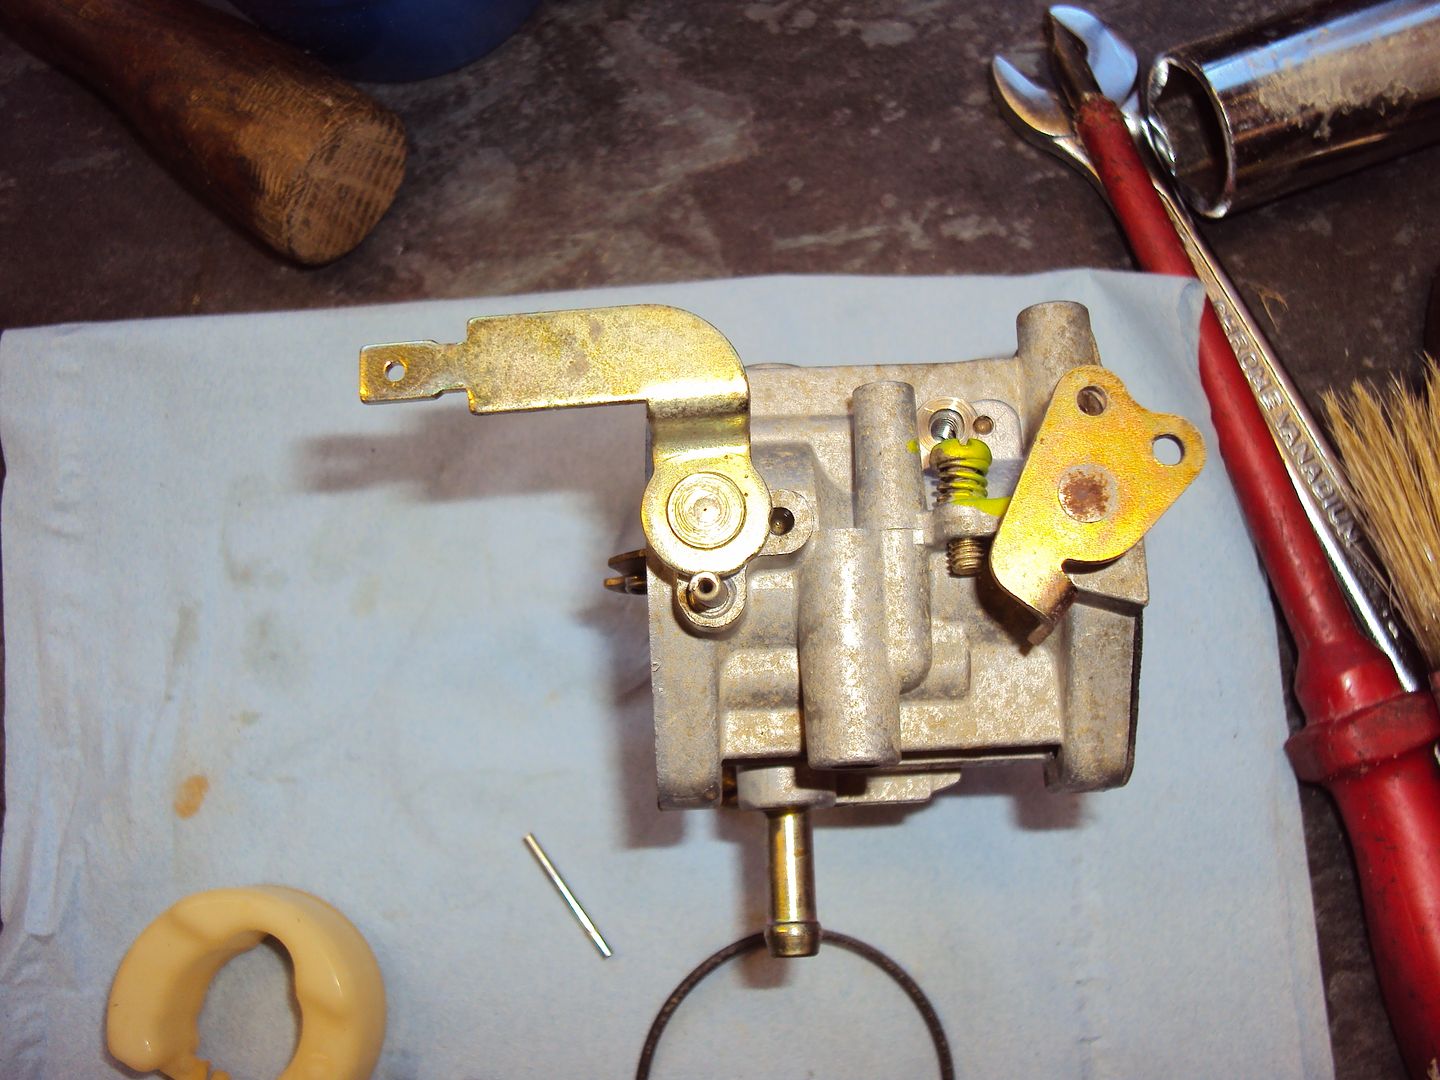
Next was fuel, we stripped the carburettor down and again found the usual problem where it was full of stale fuel and crud.
Float bowl
Main jet tube
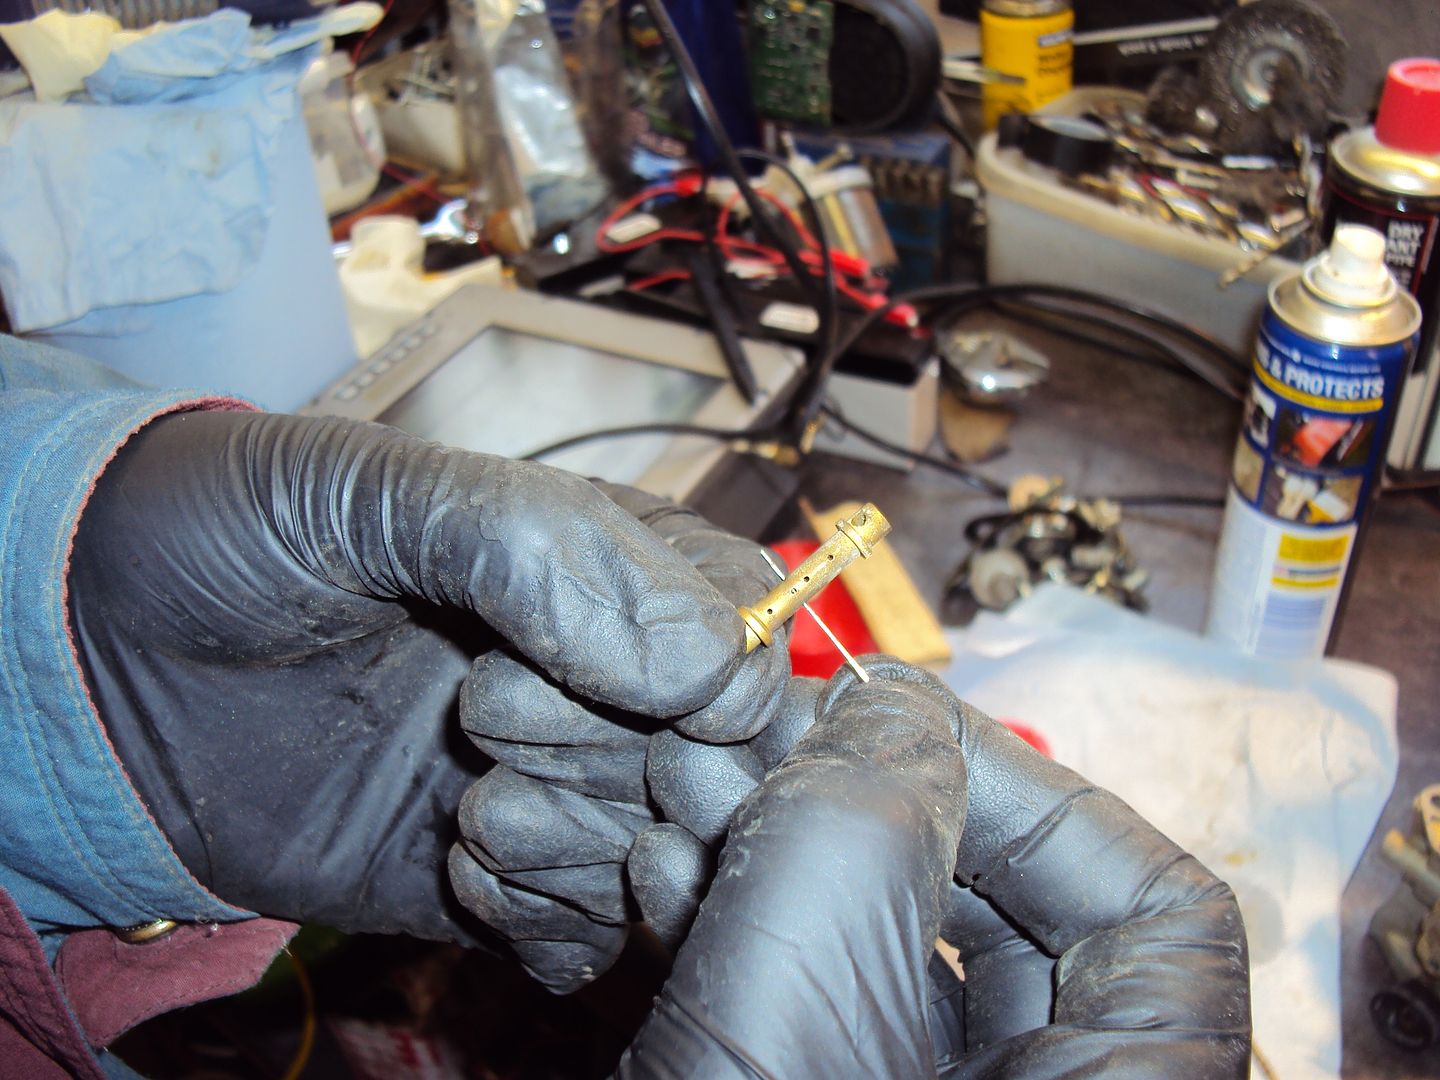
Removing main jet
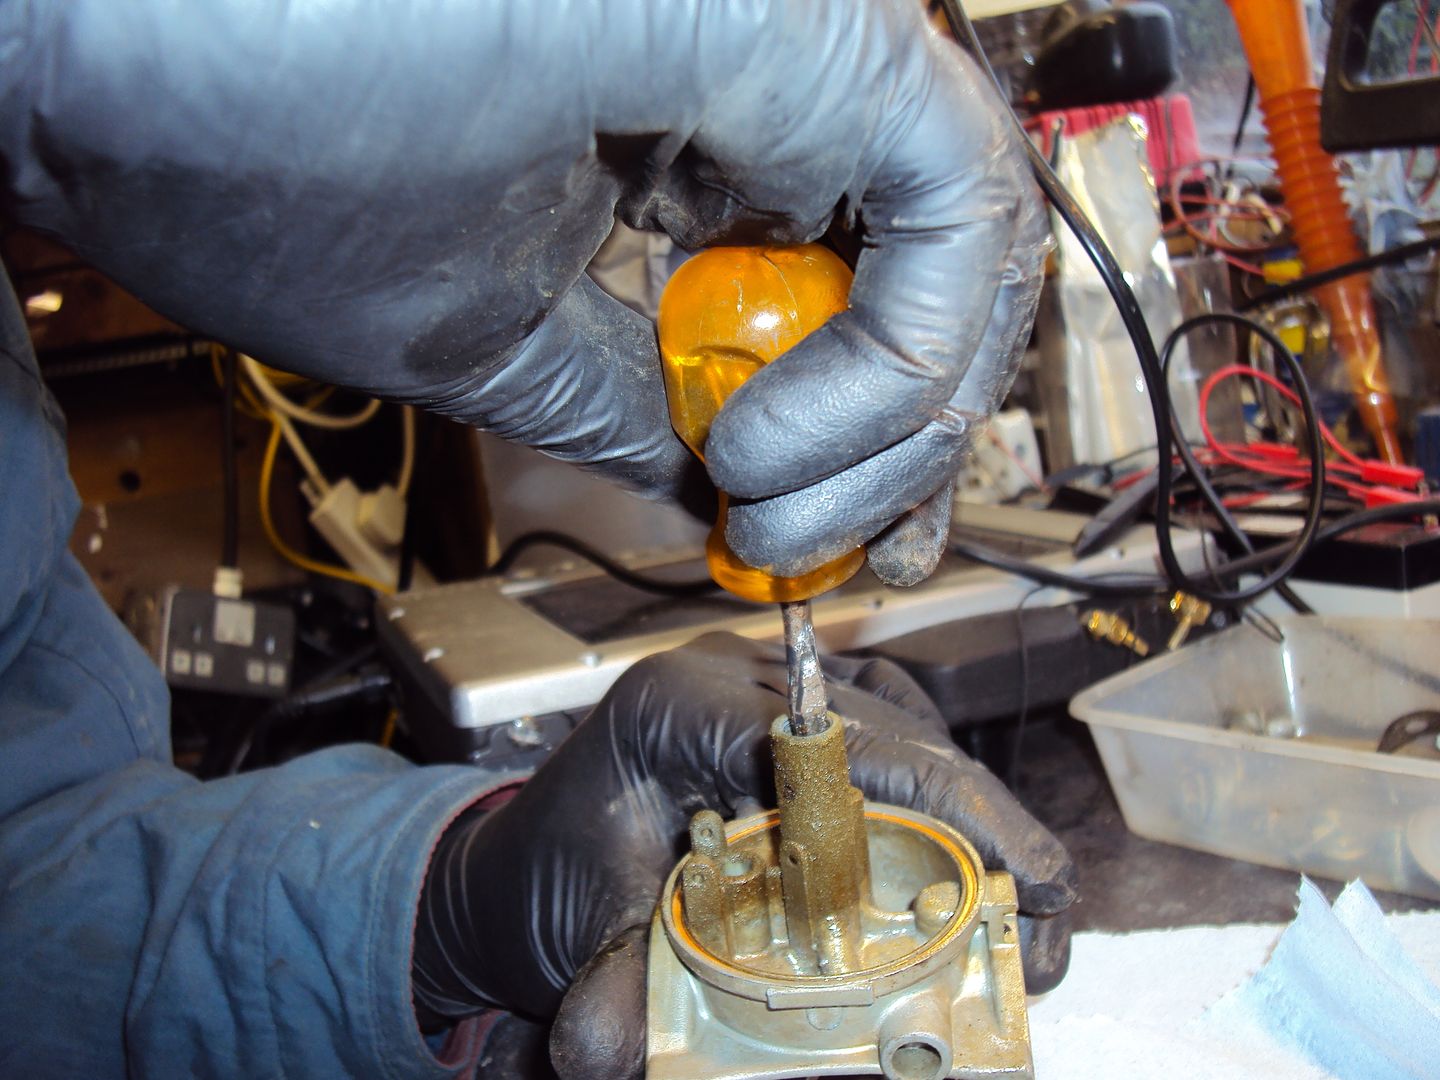
Cleaning the main jet with a pin
Once the carburettor was cleaned up and back together the engine spluttered and almost fired on the first pull, on the second pull it fired into life and settled down to a nice constant speed. It even generated power , I like Honda’s as never had a bad one yet
The 406cc side valve engine in this sounds a lot sweeter and smoother than the 410cc engine in the Generac.
It all starts getting a bit dae ja vue at this point, as this generator also has the electric start which like the 2800 on page 5 wasn’t connected.
I tried hooking up the starter to a battery, but it didn’t work, the motor ran for about a second and gave up. It couldn’t be the same thing again could it?
More to follow (it was too cold In the shed to do any more today)
It had the usual problem where it won’t start.
Started with the usual steps, checking for spark & fuel. Initially there was no spark, which was traced to low oil. Once we topped the oil up we had spark.
Next was fuel, we stripped the carburettor down and again found the usual problem where it was full of stale fuel and crud.
Float bowl
Main jet tube
Removing main jet
Cleaning the main jet with a pin
Once the carburettor was cleaned up and back together the engine spluttered and almost fired on the first pull, on the second pull it fired into life and settled down to a nice constant speed. It even generated power
, I like Honda’s as never had a bad one yetThe 406cc side valve engine in this sounds a lot sweeter and smoother than the 410cc engine in the Generac.
It all starts getting a bit dae ja vue at this point, as this generator also has the electric start which like the 2800 on page 5 wasn’t connected.
I tried hooking up the starter to a battery, but it didn’t work, the motor ran for about a second and gave up. It couldn’t be the same thing again could it?
More to follow (it was too cold In the shed to do any more today)
netherfield said:
Do you ever get rid of any, or have you just got a shed full off generators 
The shed is getting a bit full, current stock:Kippor IG3000, keeping this one as it cost me more to fix than it would sell for.
Dometic/Honda 2.5kvA, this will be on ebay in the spring as it’s for motor homes/horse boxes so might be more popular.
Generac 7500, undecided was thinking of keeping but might still re-sell.
Honda 3800, fix, clean up and sell.
Just waiting for the DailyWail to print another story about running out of electricity and wait for the panic buying of generators to begin

Brother D said:
Loving this thread!
(Small question... How's does low oil prevent spark)?
There is a float switch in the sump which kills the ignition if the oil is too low to prevent engine damage. (Small question... How's does low oil prevent spark)?
These small engines rely on “splash” lubrication where the action of the crank hitting the oil splashes the oil over the inside of the engine. If the level is too low the oil doesn’t get splashed so things start to get damaged.
tamore said:
hi there Blue, i'm in there market for a suitcase genny before mid april. if you get hold of a faulty one and breathe new life into it, i'd be interested.
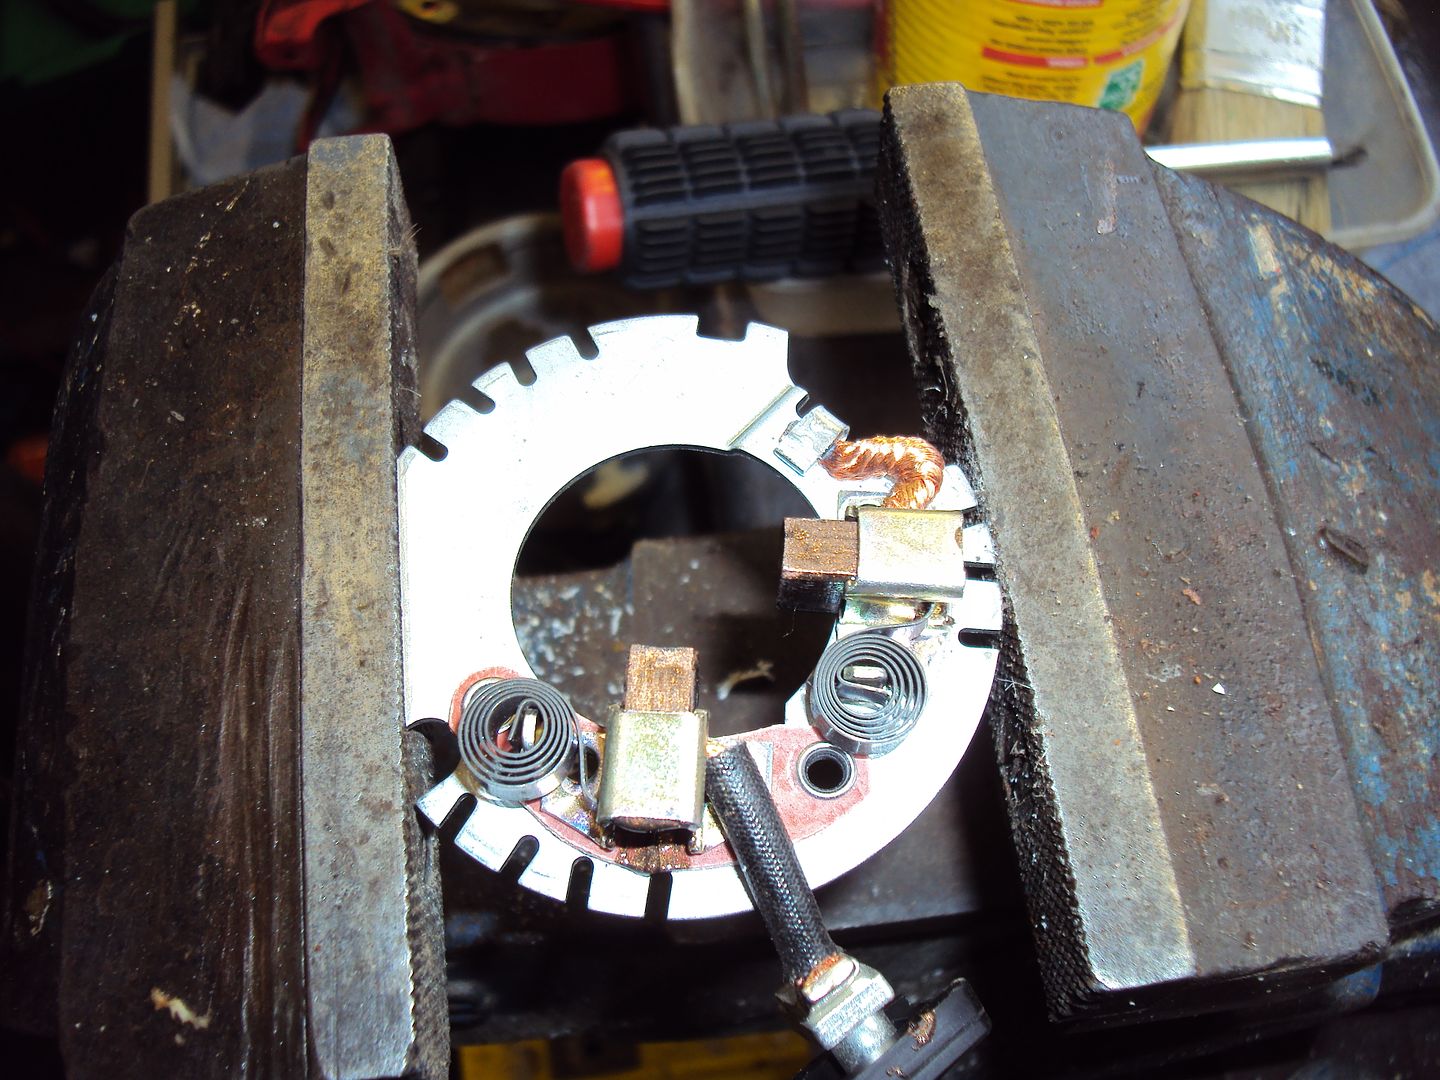
I'll keep an eye out for one.Starter motor fixed today, I had to improvise a hub puller to remove the flywheel to get access to the starter motor bolts.
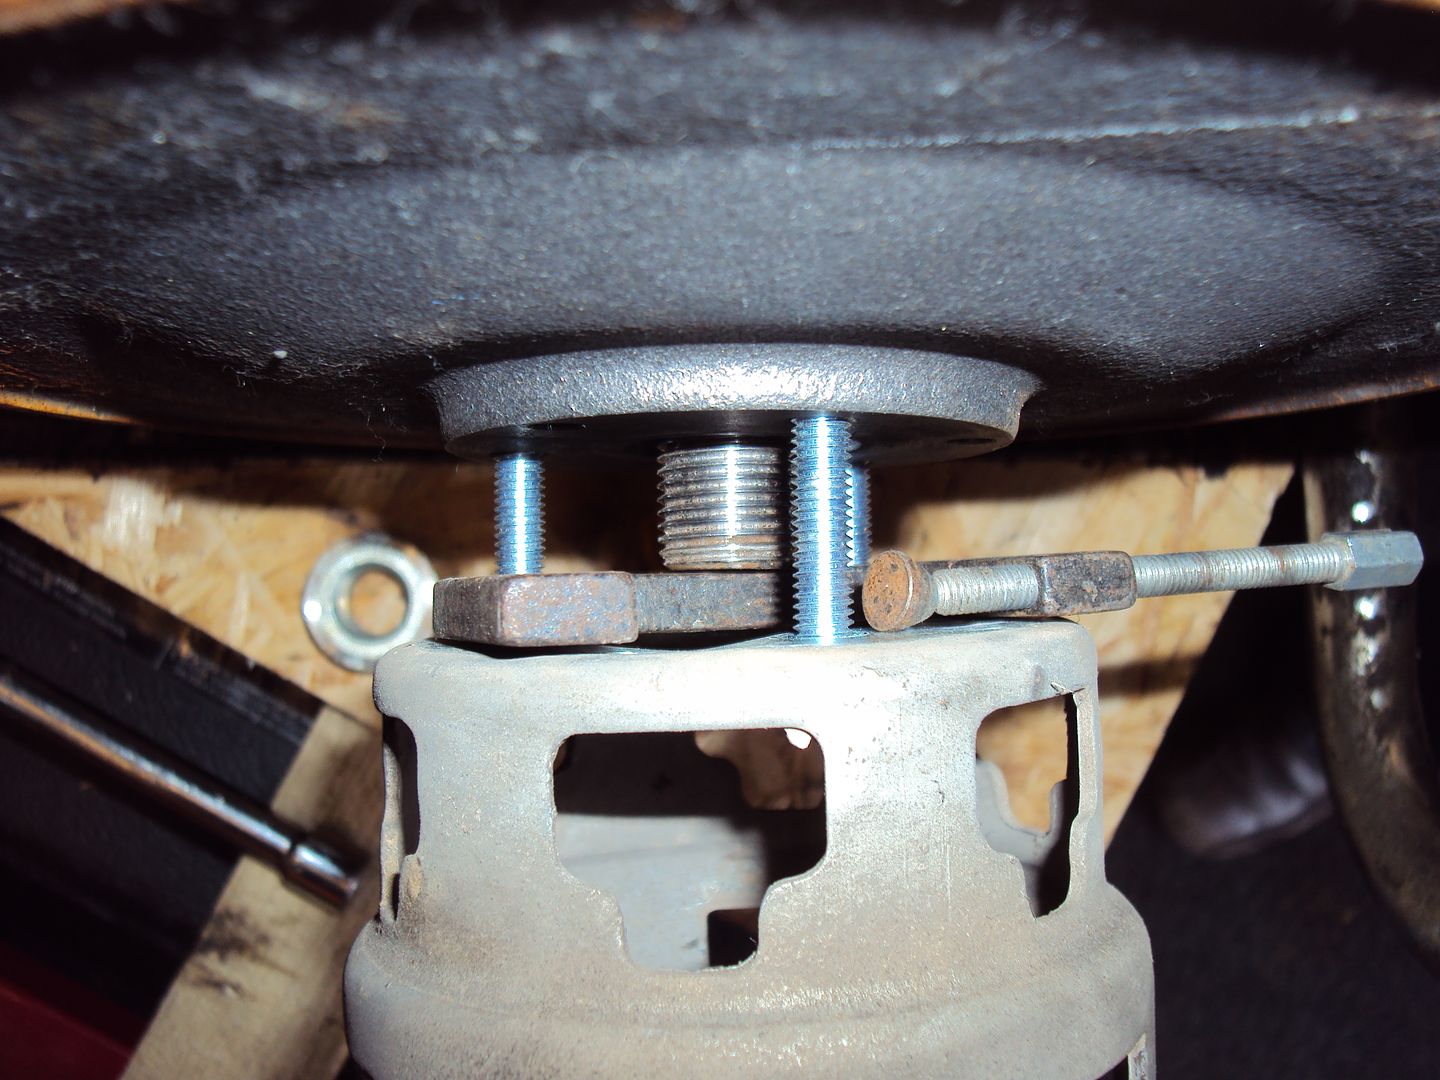
I just used some longer bolts on the dog cup (pull starts engages into the dog cup) and a small g clamp to apply tension on the shaft.
The starter motor had the same problem as before, where the brushes were stuck
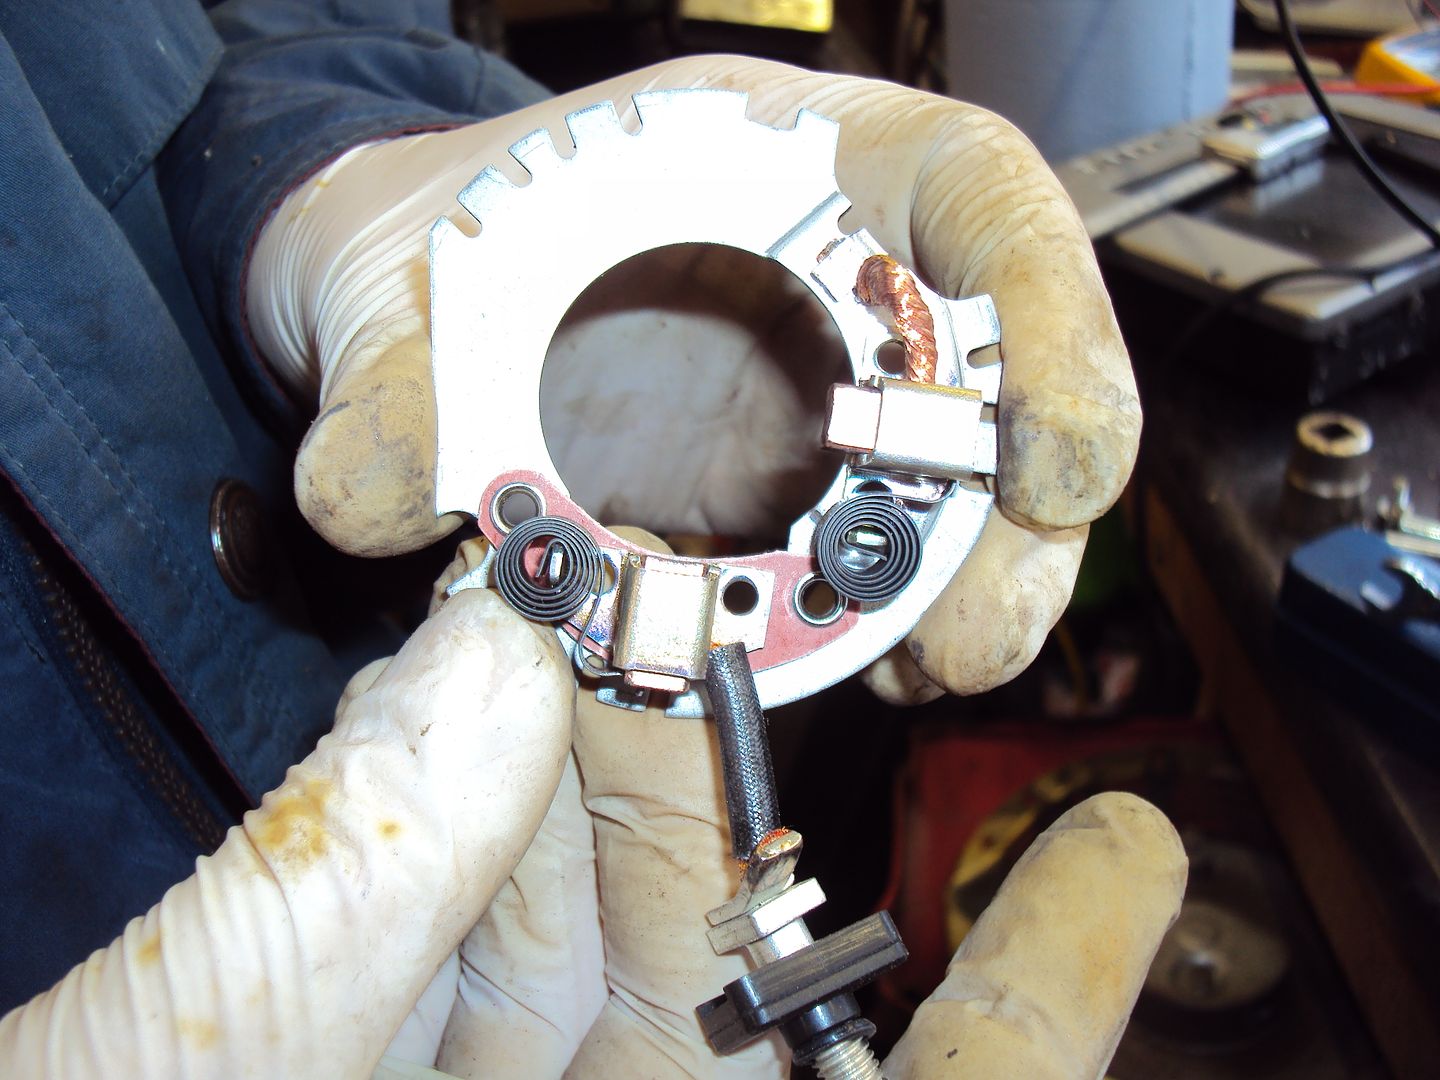
As before the commutator was in good condition.

Brushes freed up with copper grease.
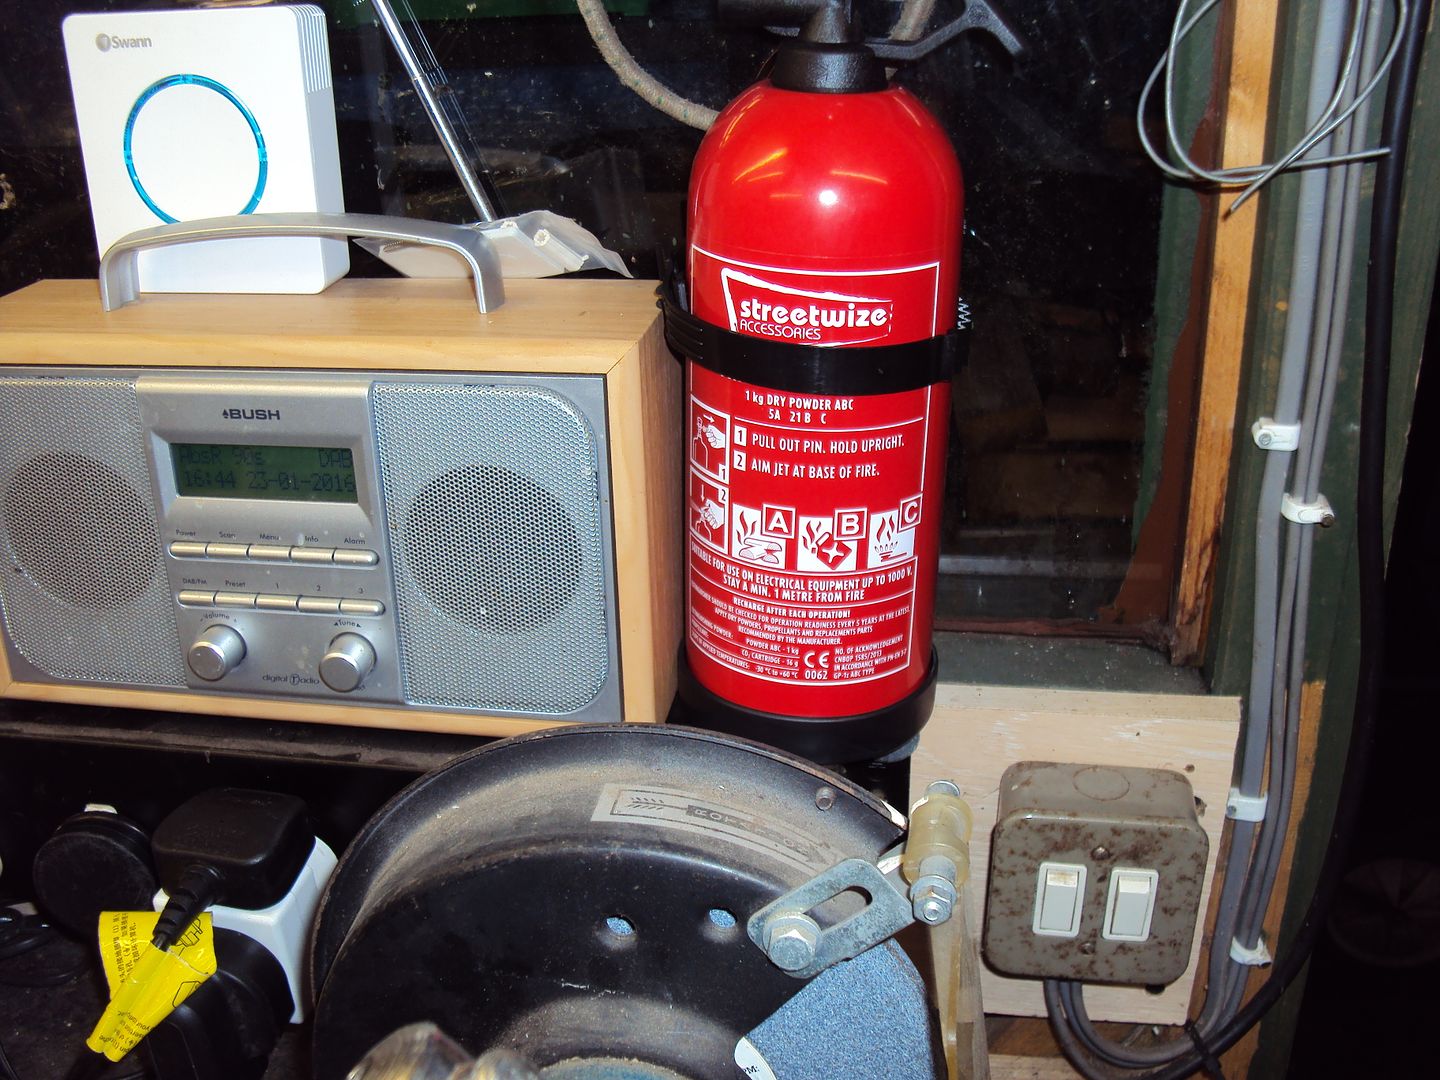
After a near miss involving petrol leaking all over electrical connections I though it would be a good idea to invest in a fire extinguisher. Every workshop/shed should have one.
I also made a start on cleaning the all the covers to make it look a bit more presentable.
Before
After
Regarding the earthing of screws, I had considered it when making the box. I’m thinking of adding a aluminium plate to the inside to take care of the earthing of the screws
Picked up another one today, it was from the same person I got the last Honda from. They had sold it, but the buyer never contacted them to pick it up or pay so they offered it to me.
It was quite dusty

This one doesn’t look to have had much use as the oil was still clean.
It needed the usual carb clean.
However this time I have new toy to help with the cleaning
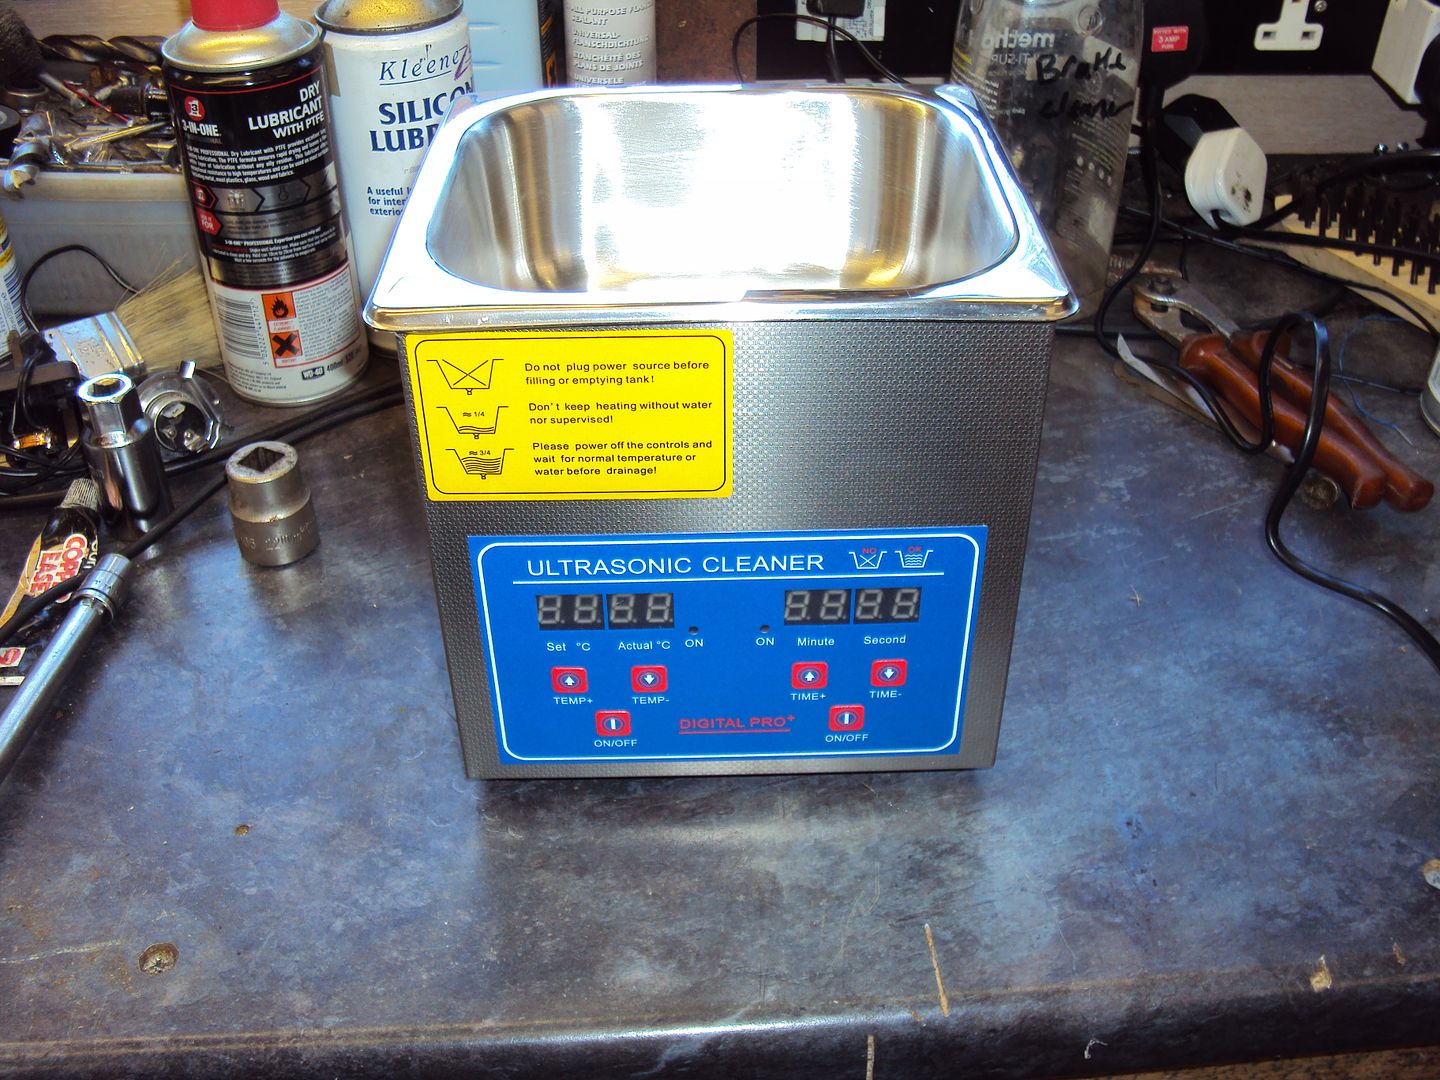
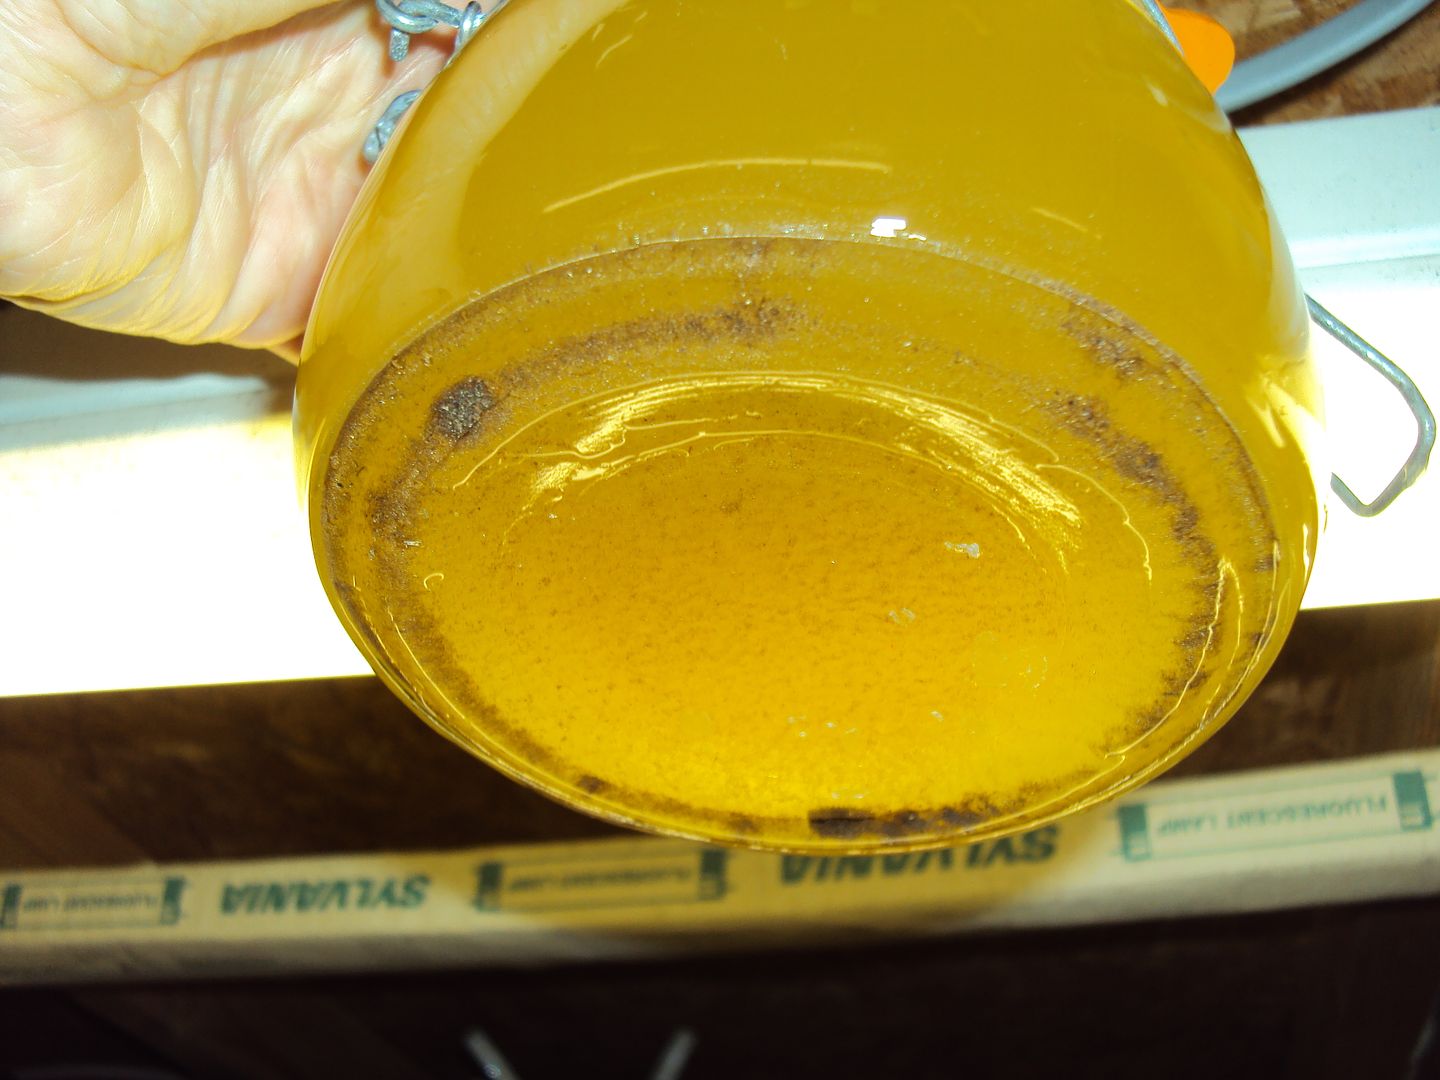
Put all the bits in a jar of brake cleaner and ran for 5 min

All cleaned up, had to scrub the bowl with a brush to get the last of the crud out
Carb body looking much better
Crud in bottom of jar
Engine started after a few pulls and settled to a constant speed, power output was fine.
Picked up another one today, it was from the same person I got the last Honda from. They had sold it, but the buyer never contacted them to pick it up or pay so they offered it to me.
It was quite dusty
This one doesn’t look to have had much use as the oil was still clean.
It needed the usual carb clean.
However this time I have new toy to help with the cleaning
Put all the bits in a jar of brake cleaner and ran for 5 min
All cleaned up, had to scrub the bowl with a brush to get the last of the crud out
Carb body looking much better
Crud in bottom of jar
Engine started after a few pulls and settled to a constant speed, power output was fine.
jet_noise said:
Like shelling peas. Cries of "easy, easy" from the audience
Yeah I know, but the easy fixes give the most profit (no parts to buy), think from start to finish it took me about hour to get it stripped, cleaned and back running. jet_noise said:
How much time does the ultrasonic cleaner save?
And has Mrs B32 (assuming there is one!) used it on her jewellery yet (akthough possibly not using brake cleaner as the fluid!)
regards,
Jet
It doesn’t save much time, but it does get all the small inaccessible passages inside the carburettor clean. And has Mrs B32 (assuming there is one!) used it on her jewellery yet (akthough possibly not using brake cleaner as the fluid!)
regards,
Jet
No Mrs 32 yet, so no jewellery cleaning. Have done a couple of metal watchstraps though.
Finished the big Generac today (actually got to use some spanners), started with replacing the oil pressure switch.
The replacement is actually for a Honda, however it was considerably cheaper than the Generac part which was $21 + $39 for international shipping.
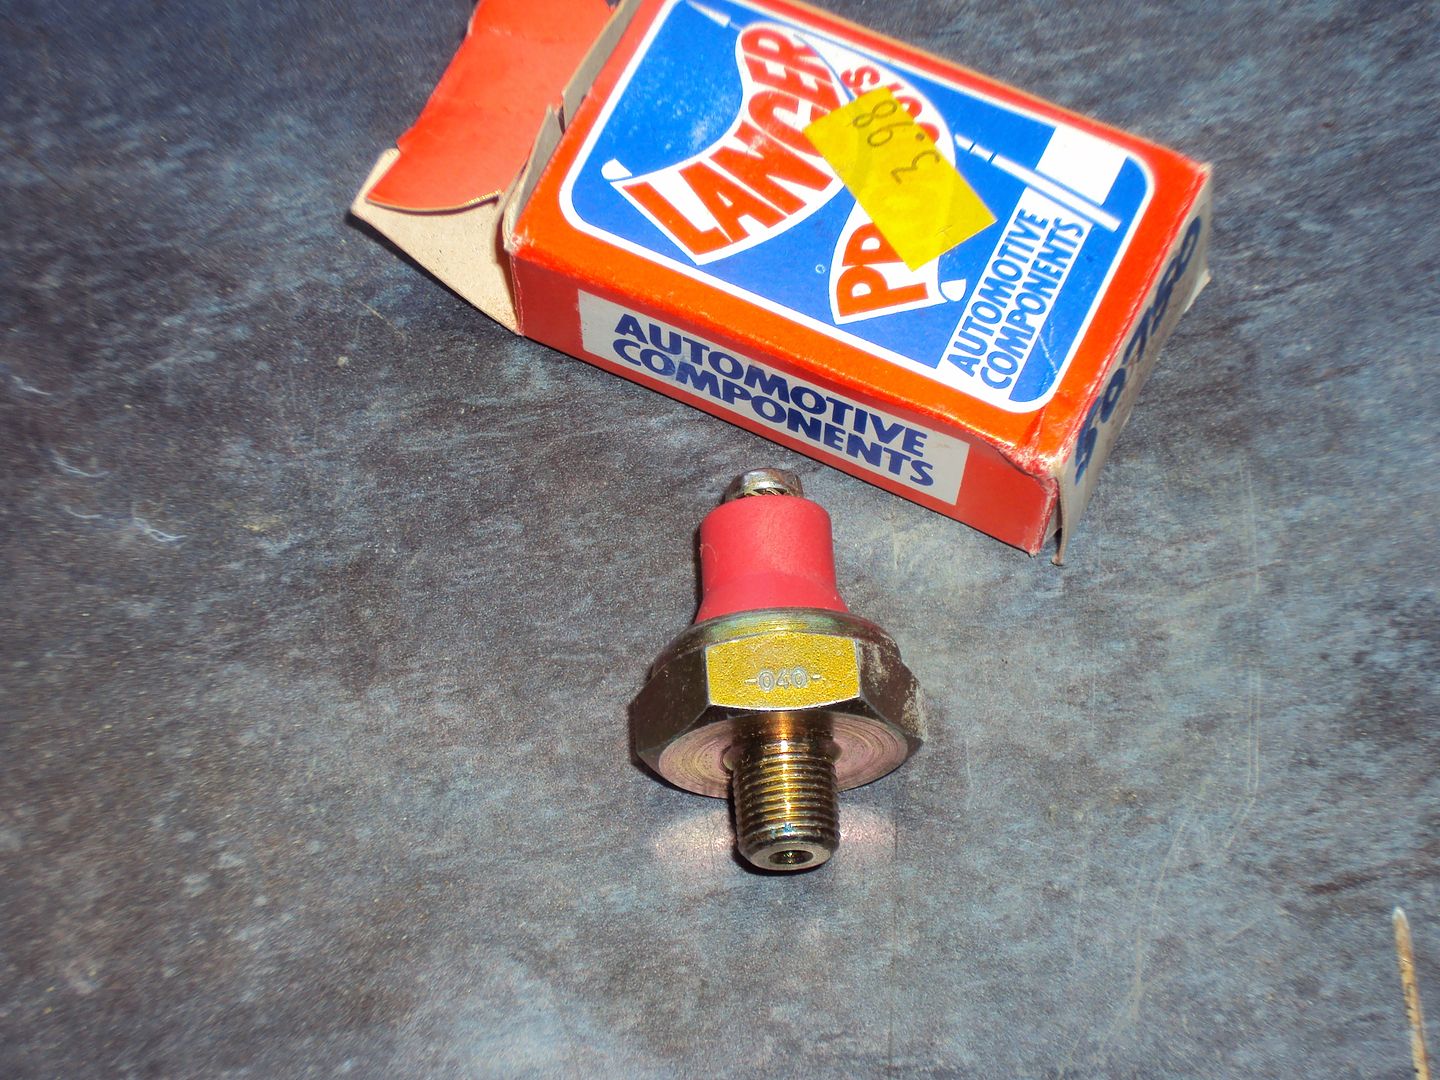
Fitted

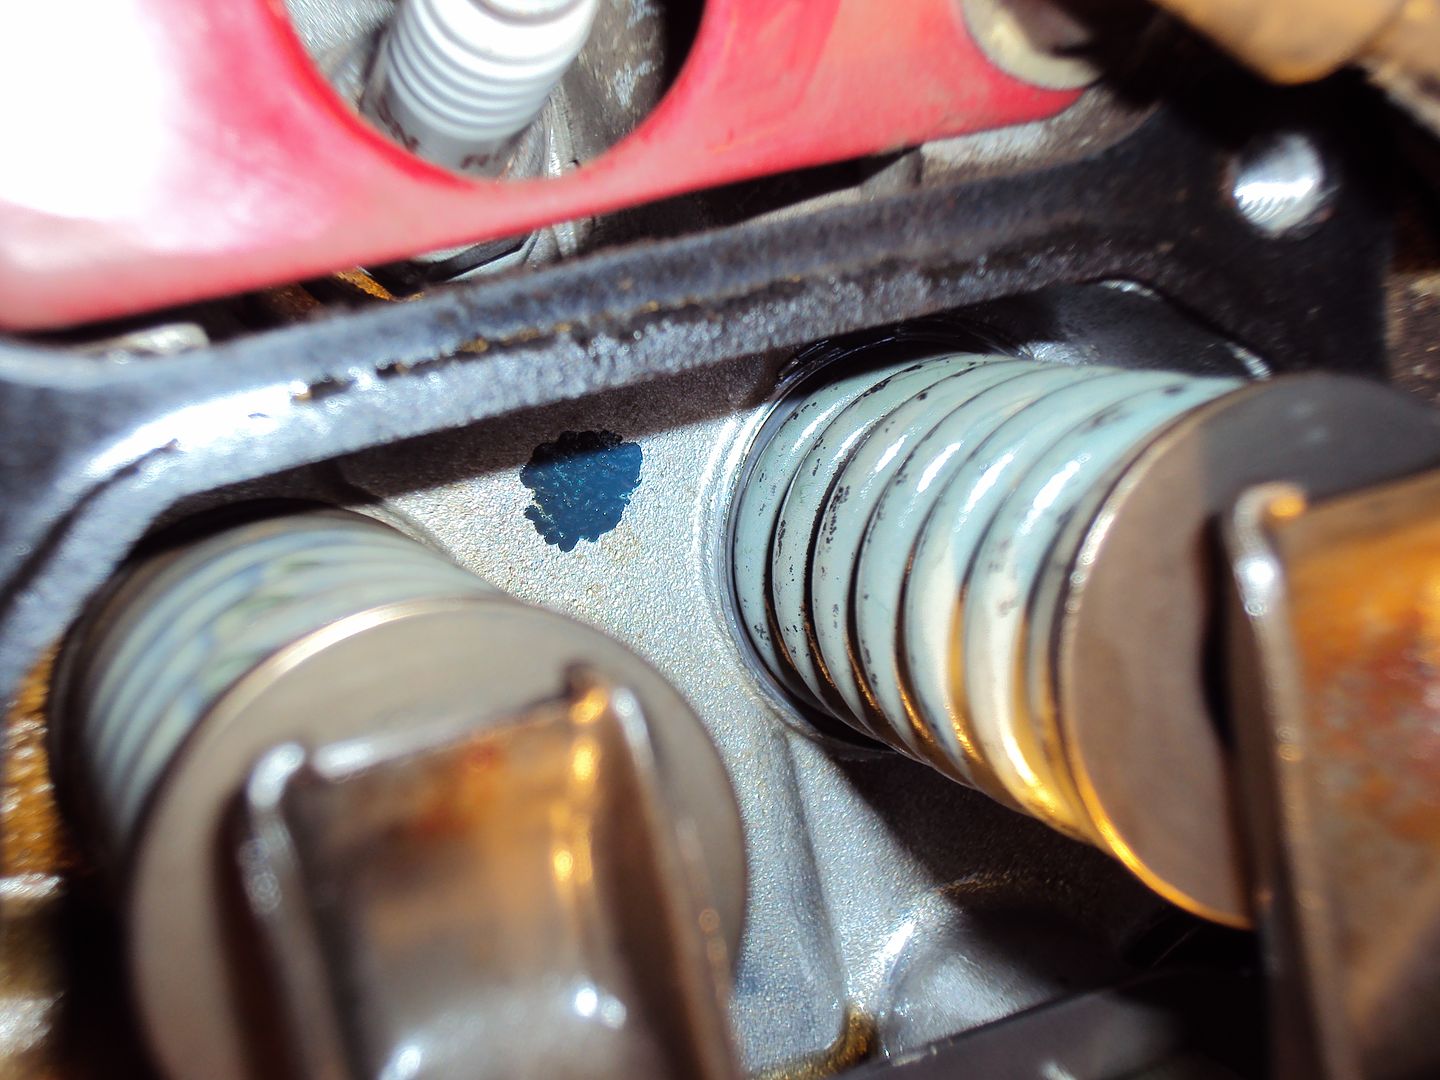
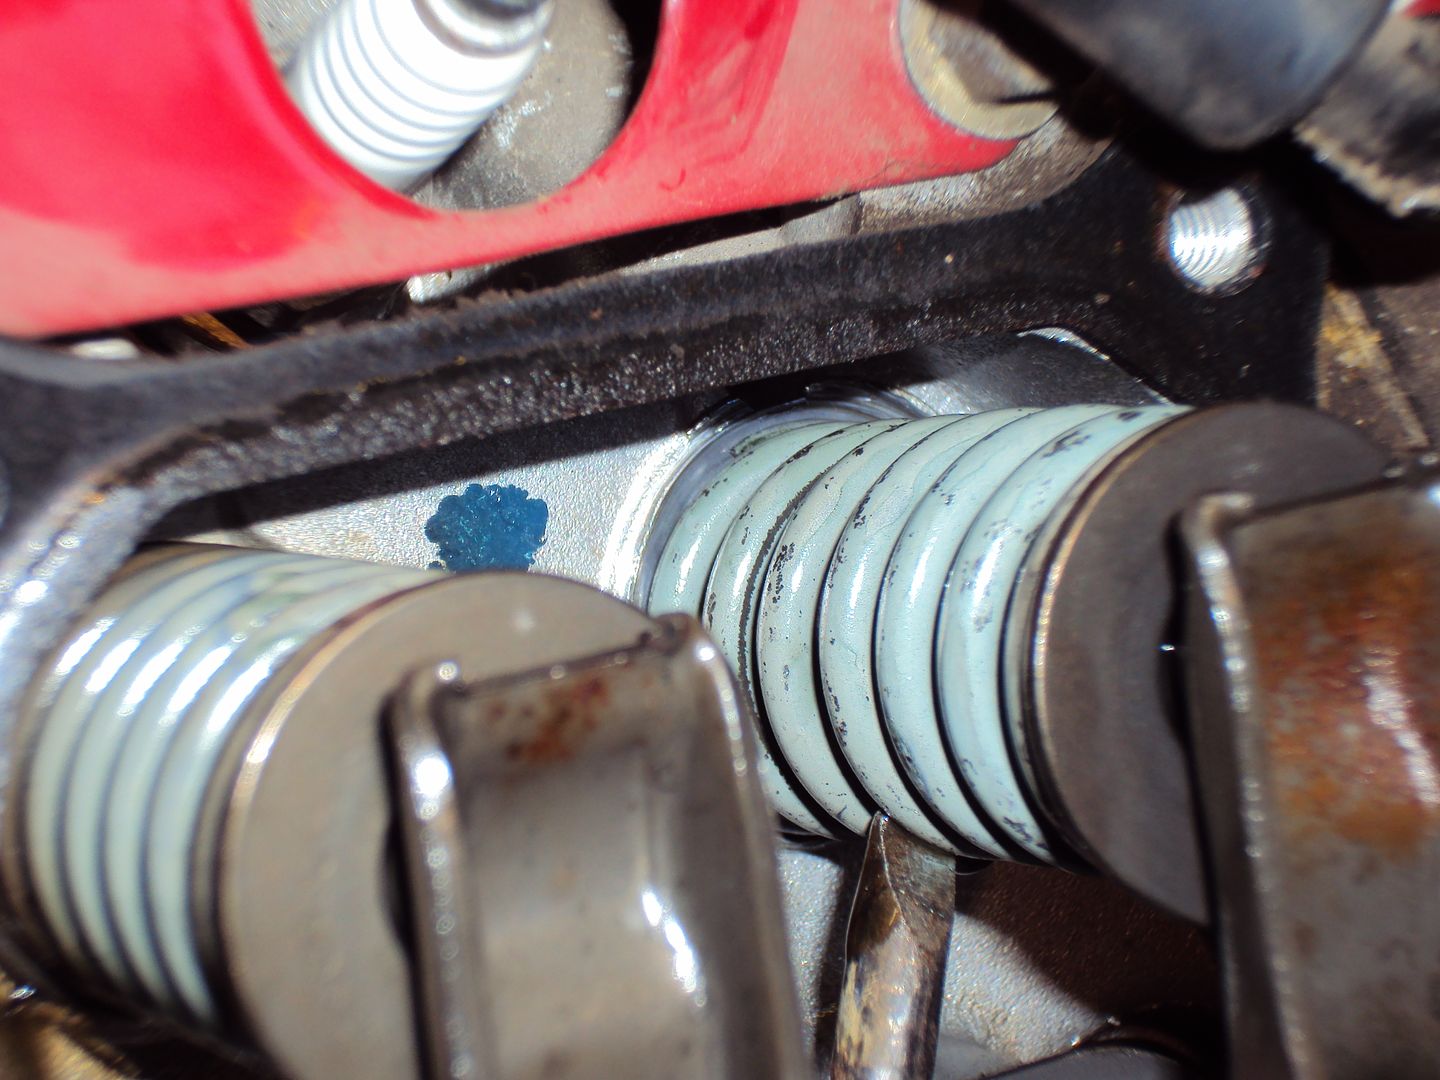
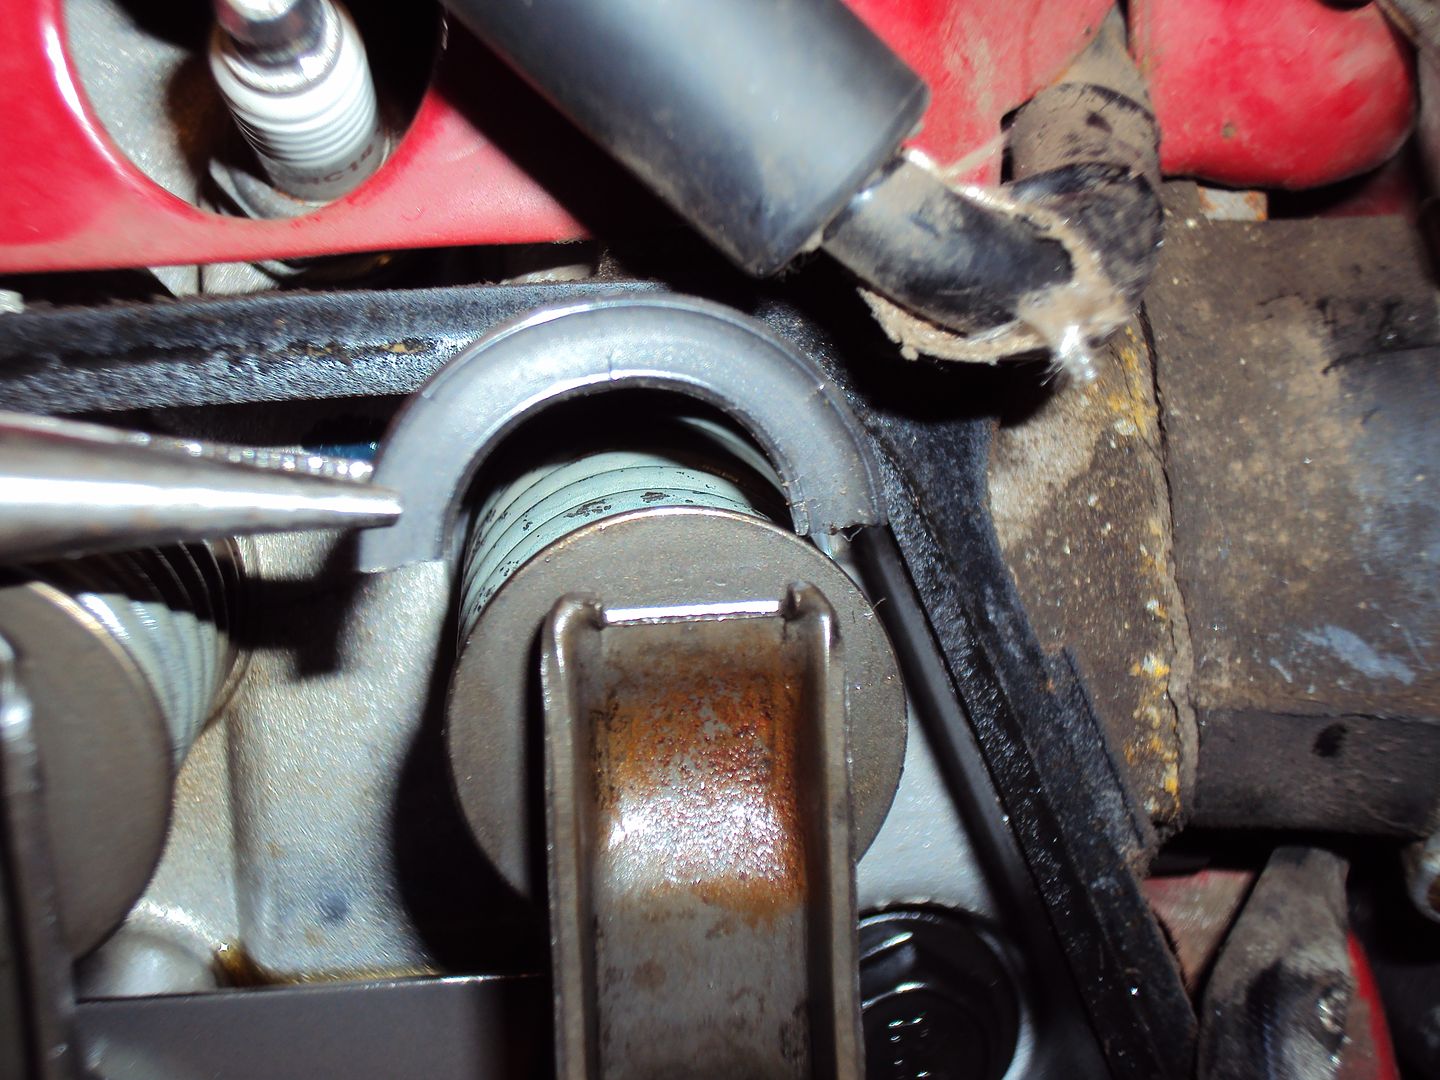
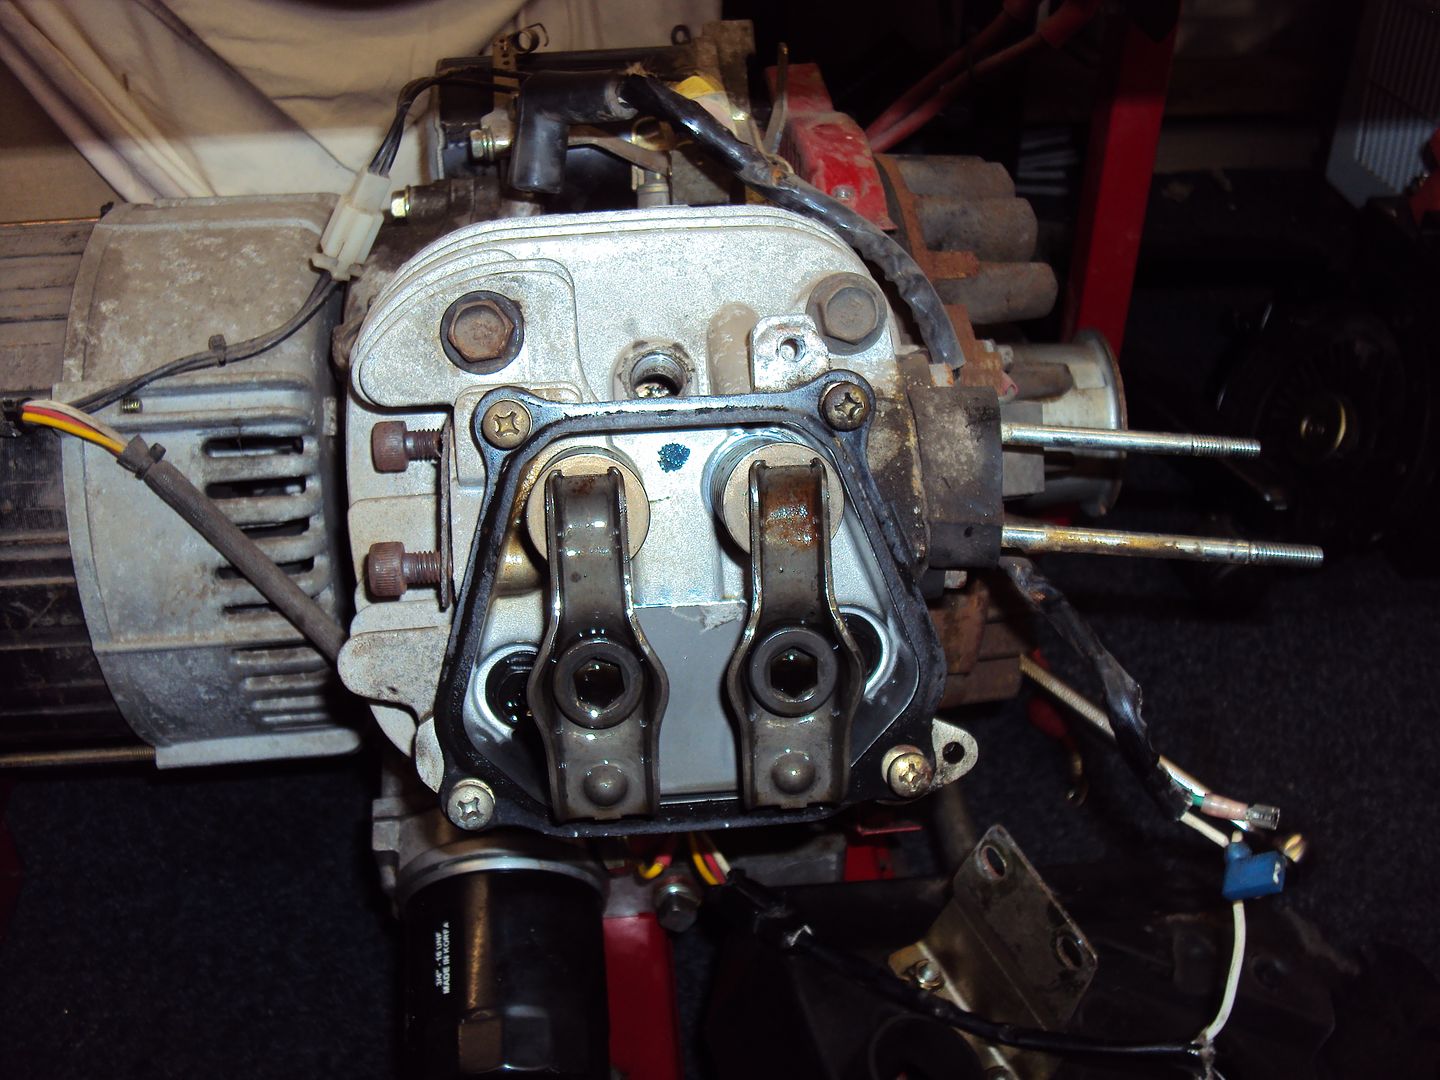
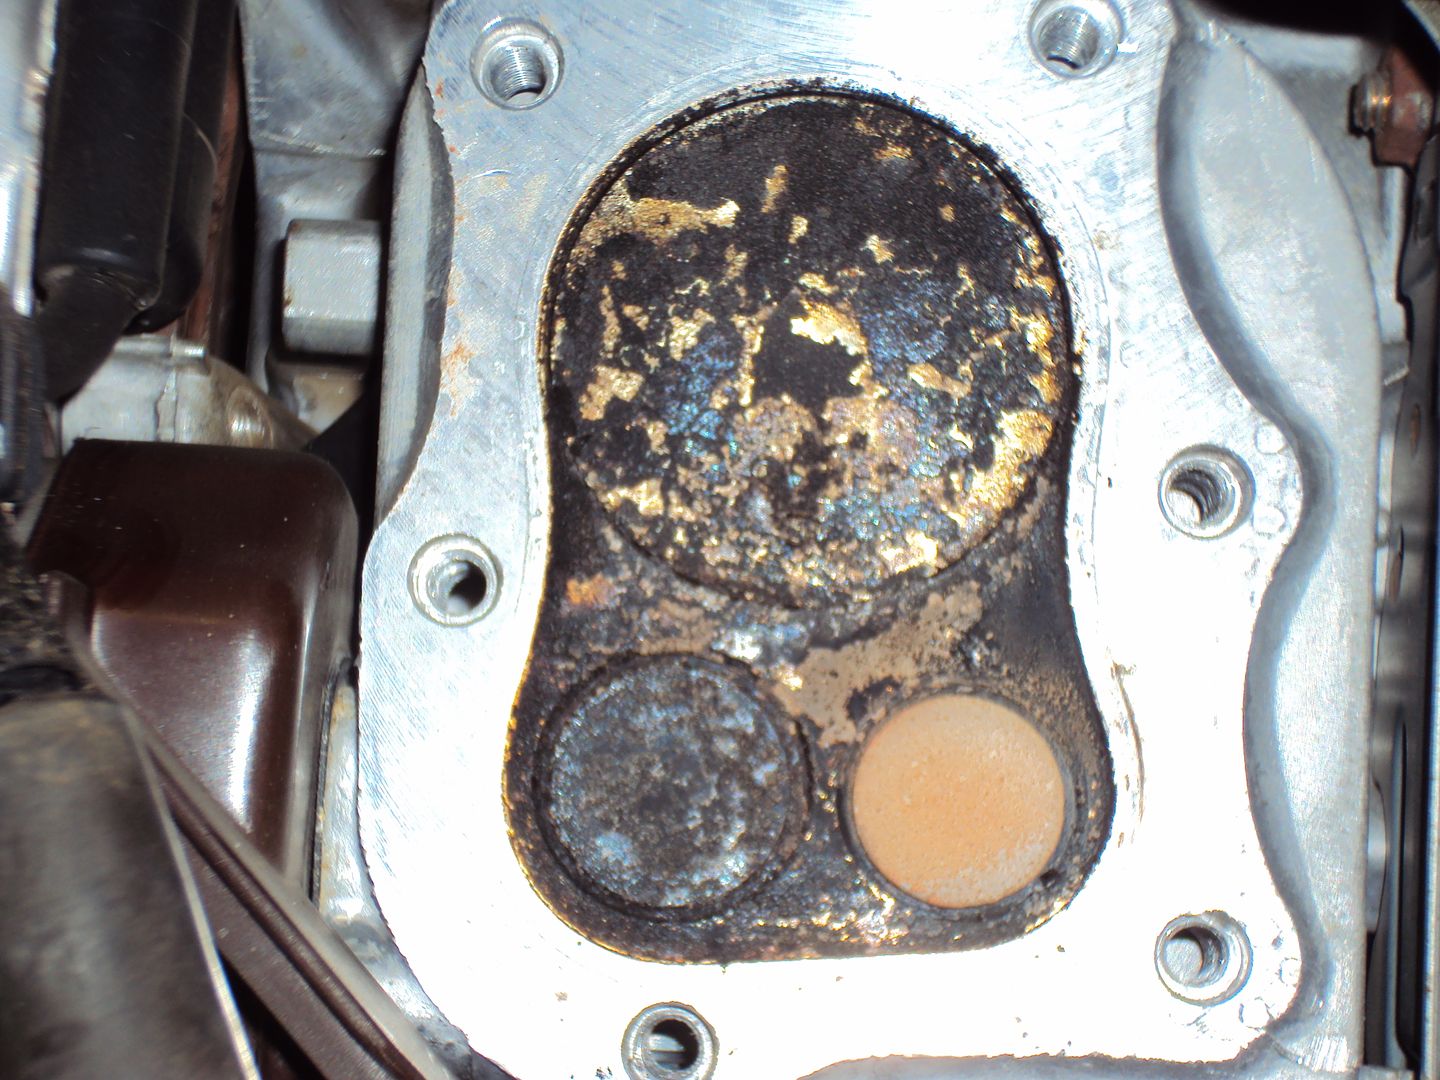
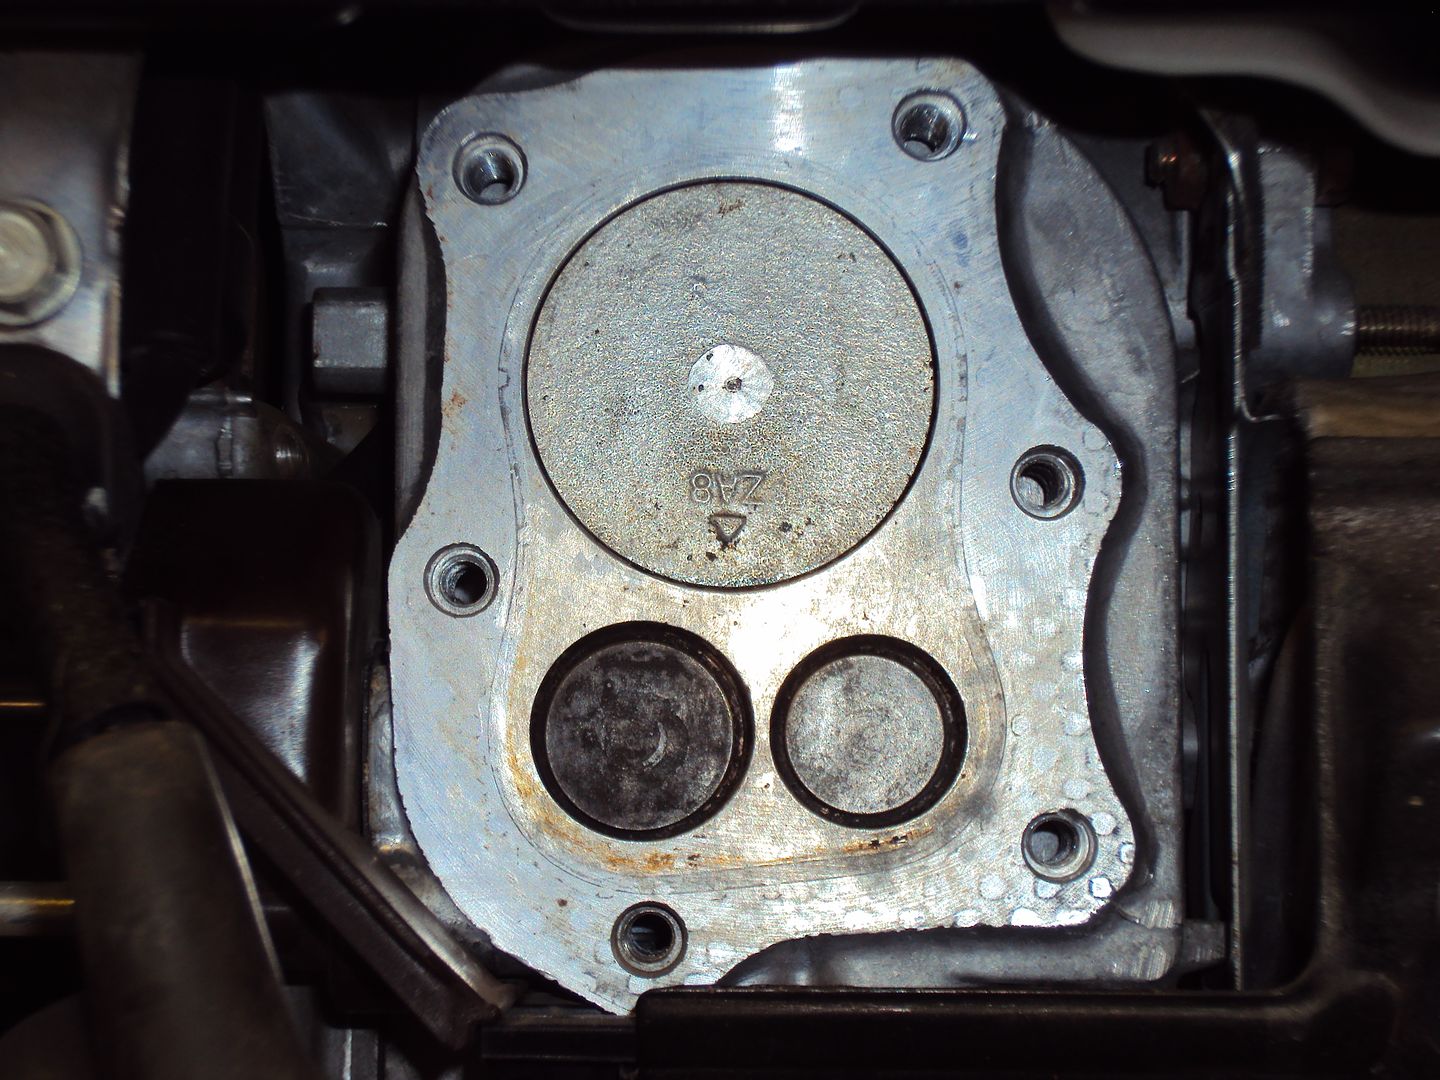
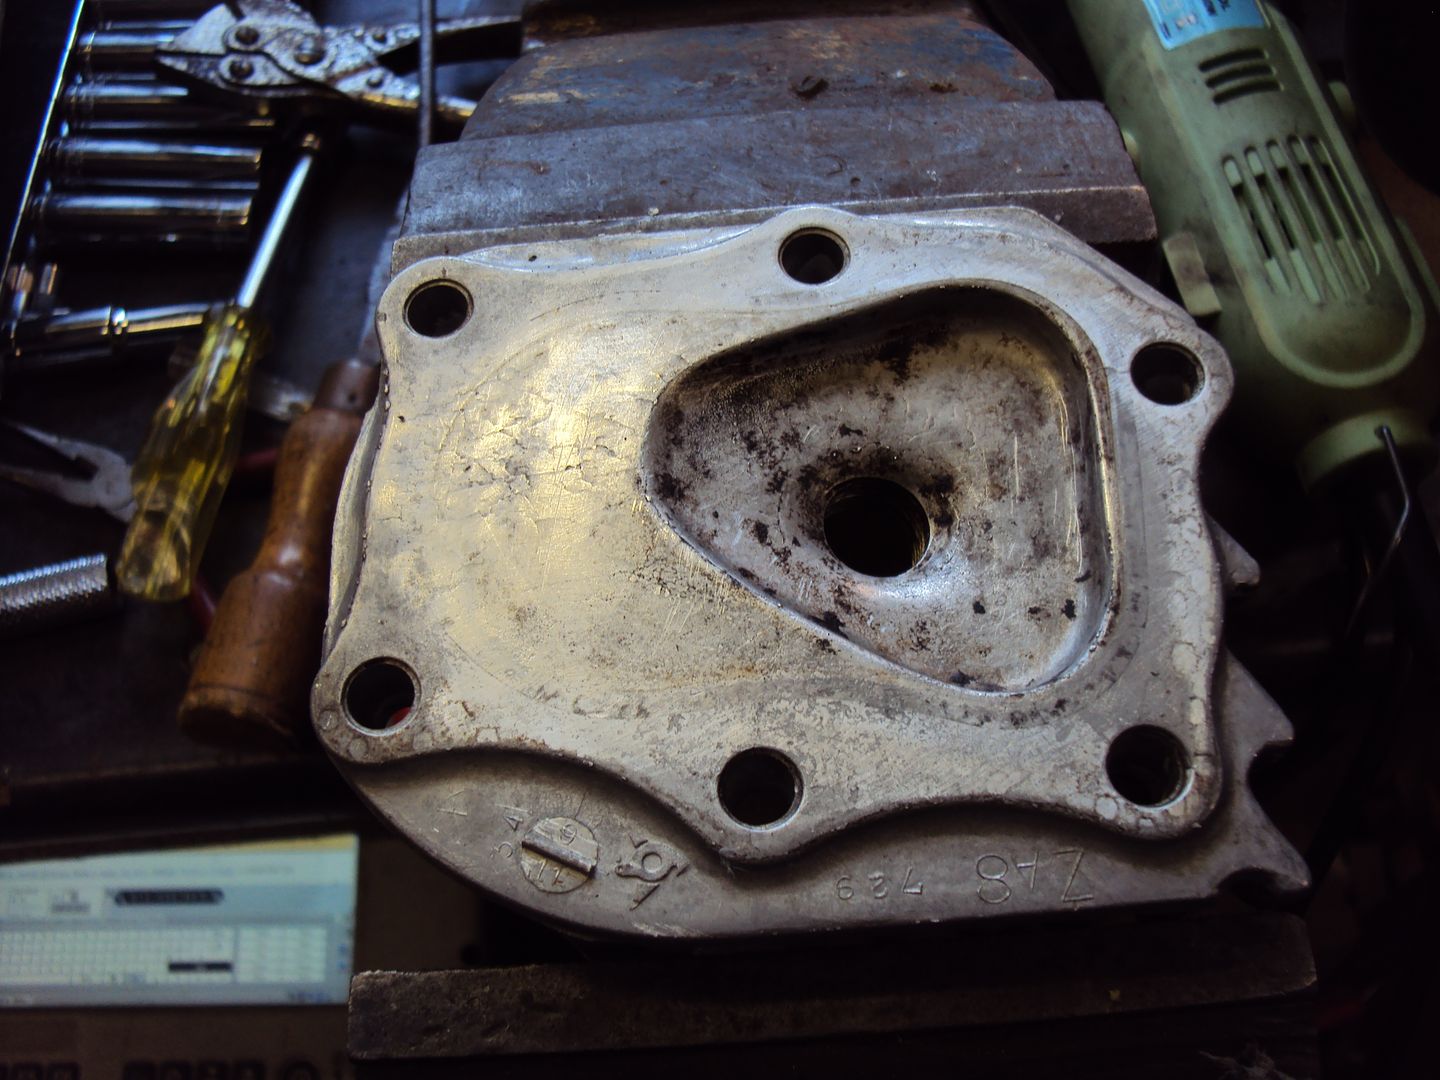
Next I moved on to replacing the washer under the intake valve spring.
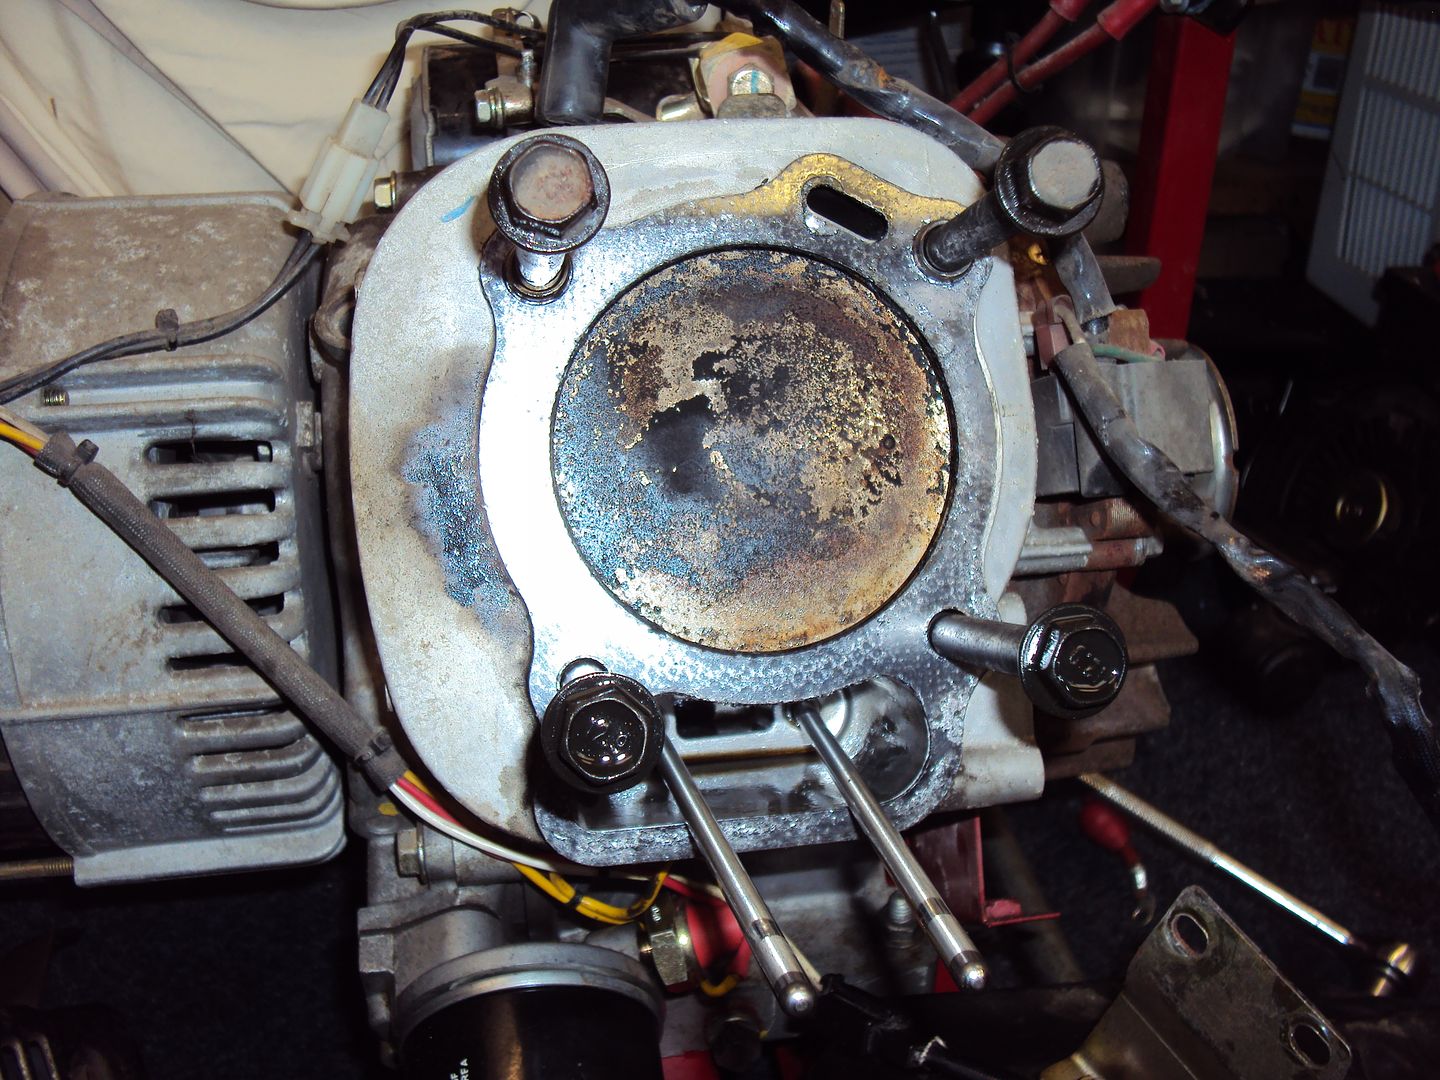
Stripping the head down for removal
Inside of head, only a small amount of carbon
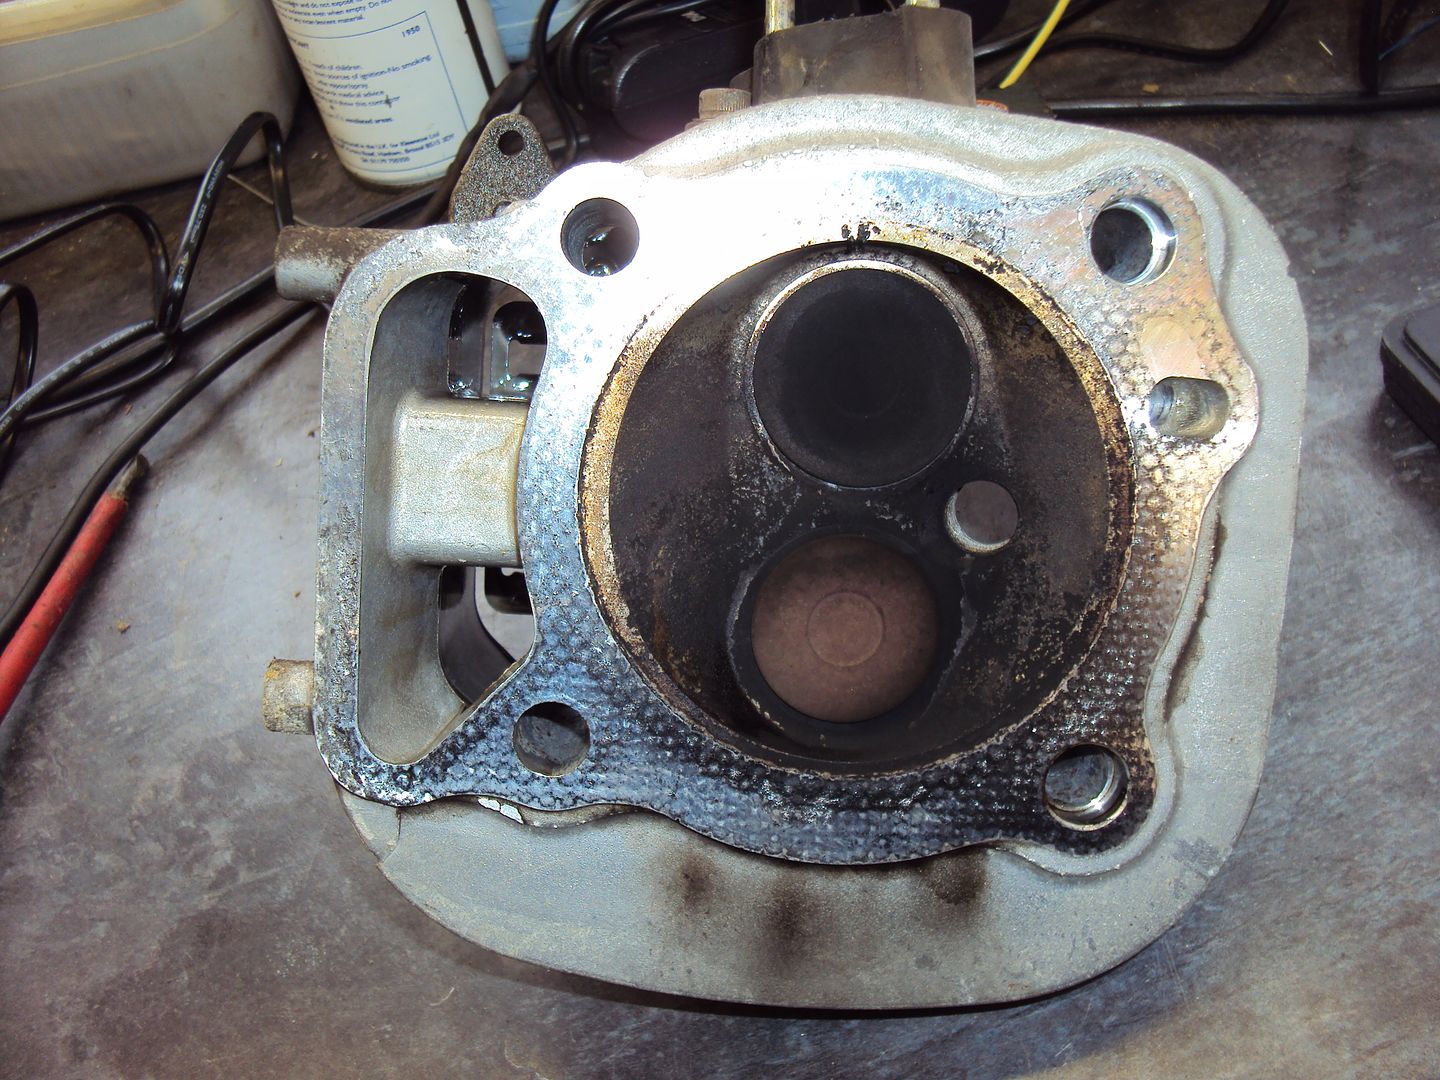
Piston was reasonably clean
I used a valve spring compressor to compress the spring to release the retainers.
The wear to the head is more obvious with the spring removed
Washer in place.
Didn’t take any pics of the re-assembly, but it all went back together with no issues. Engine started on first pull and sounded a bit smoother.
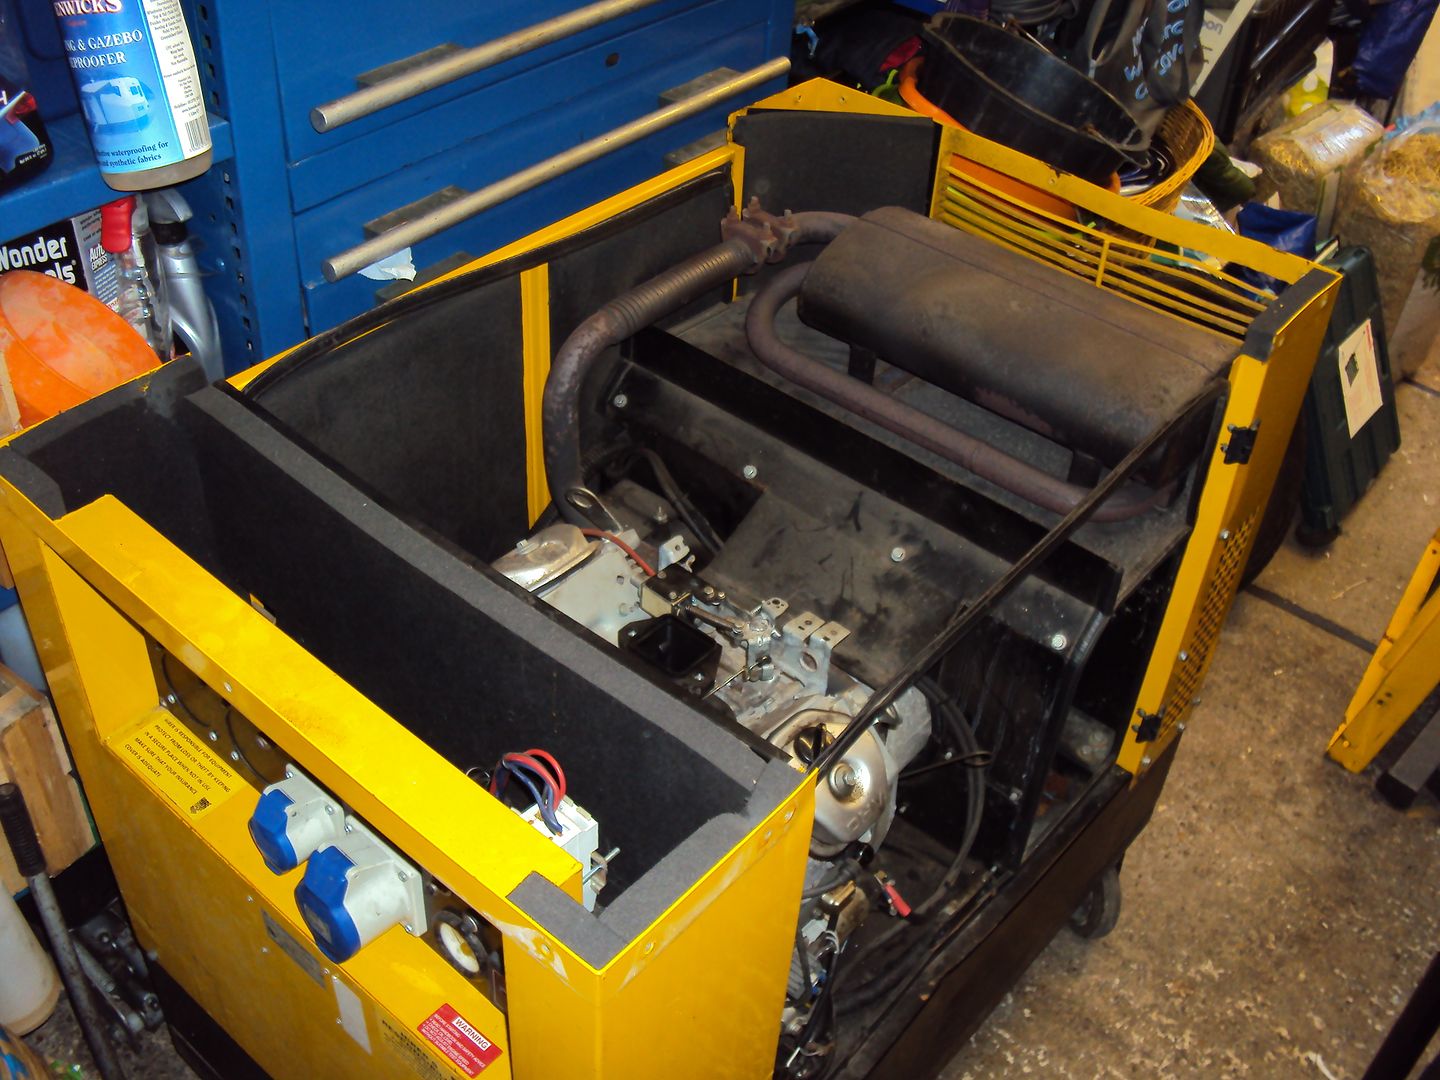
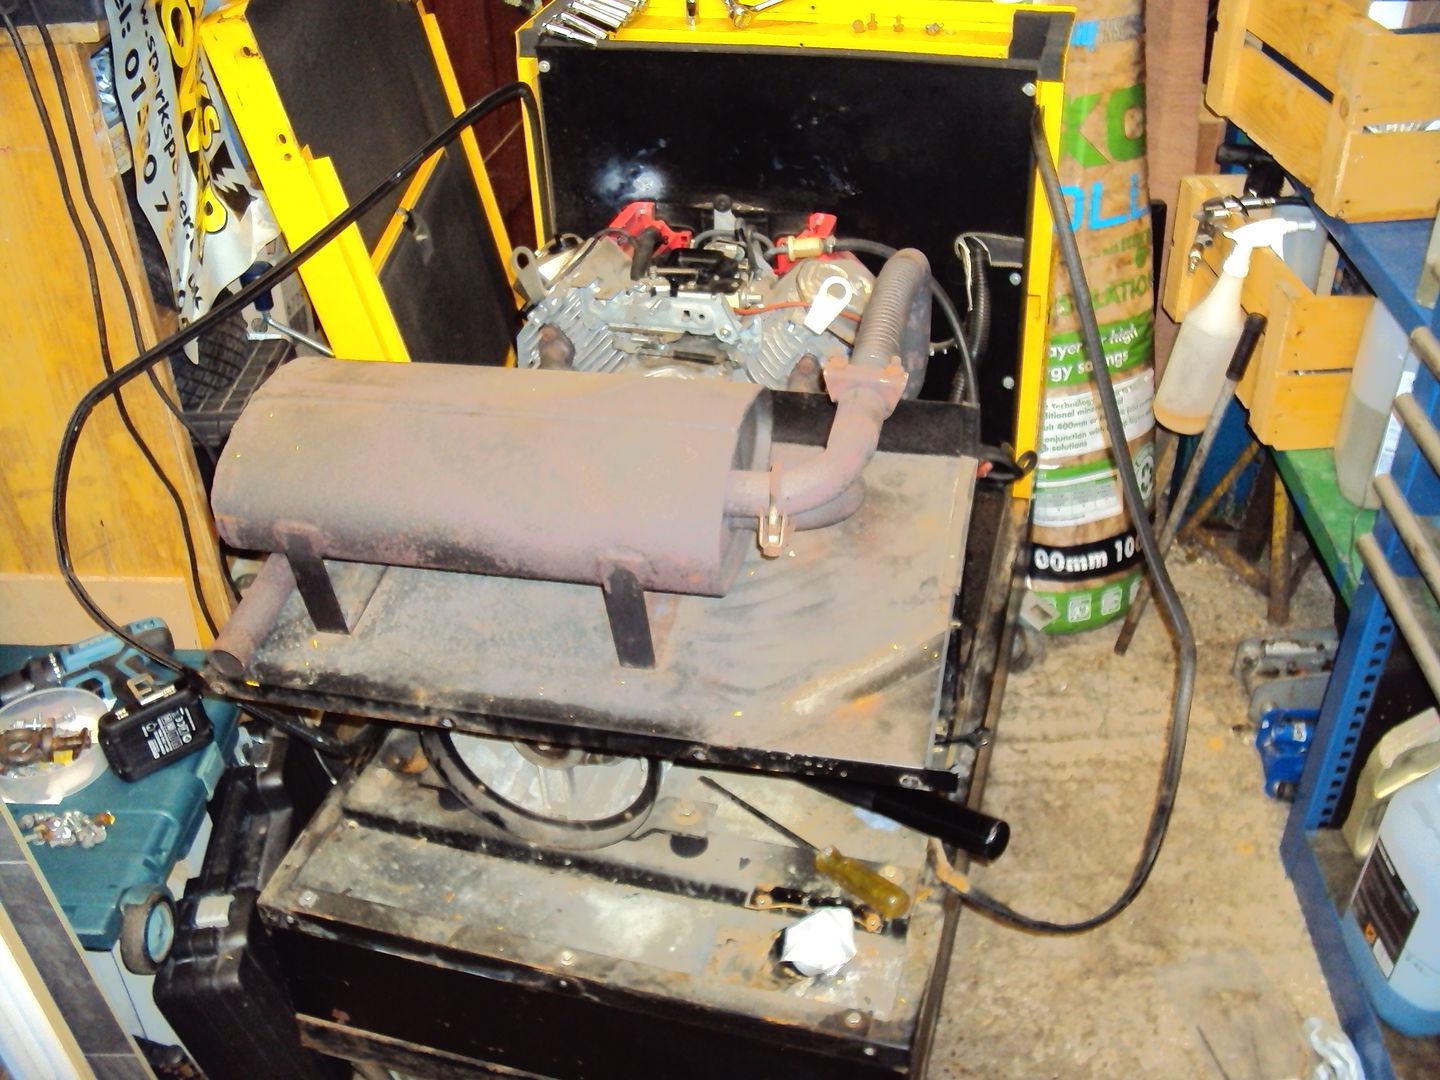
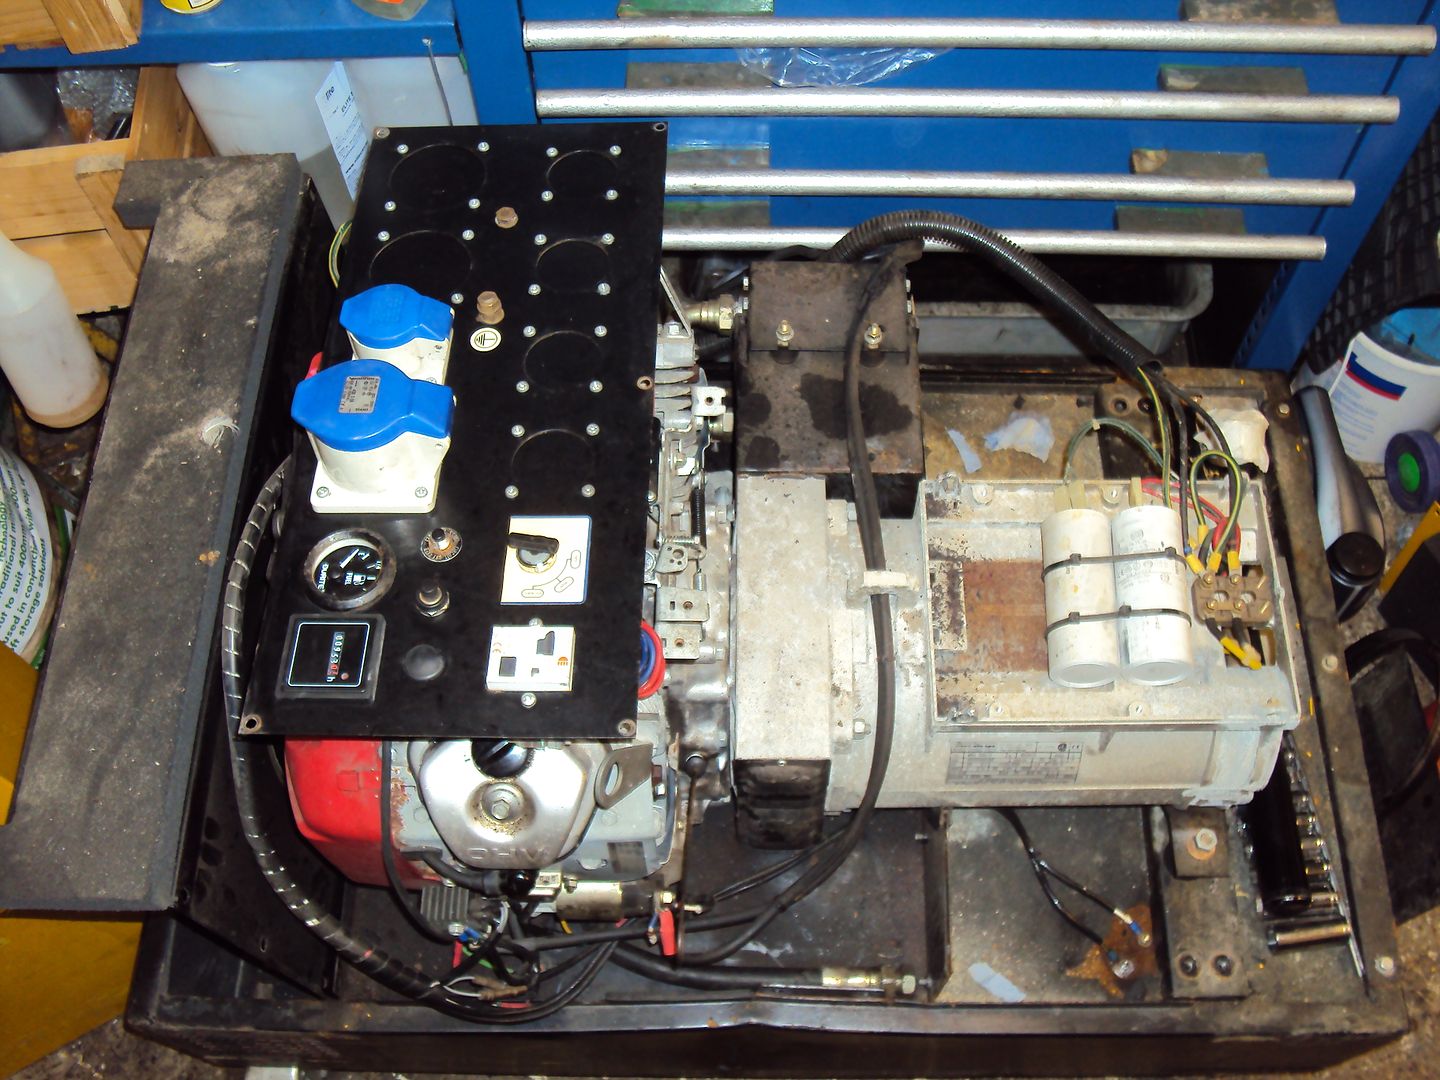
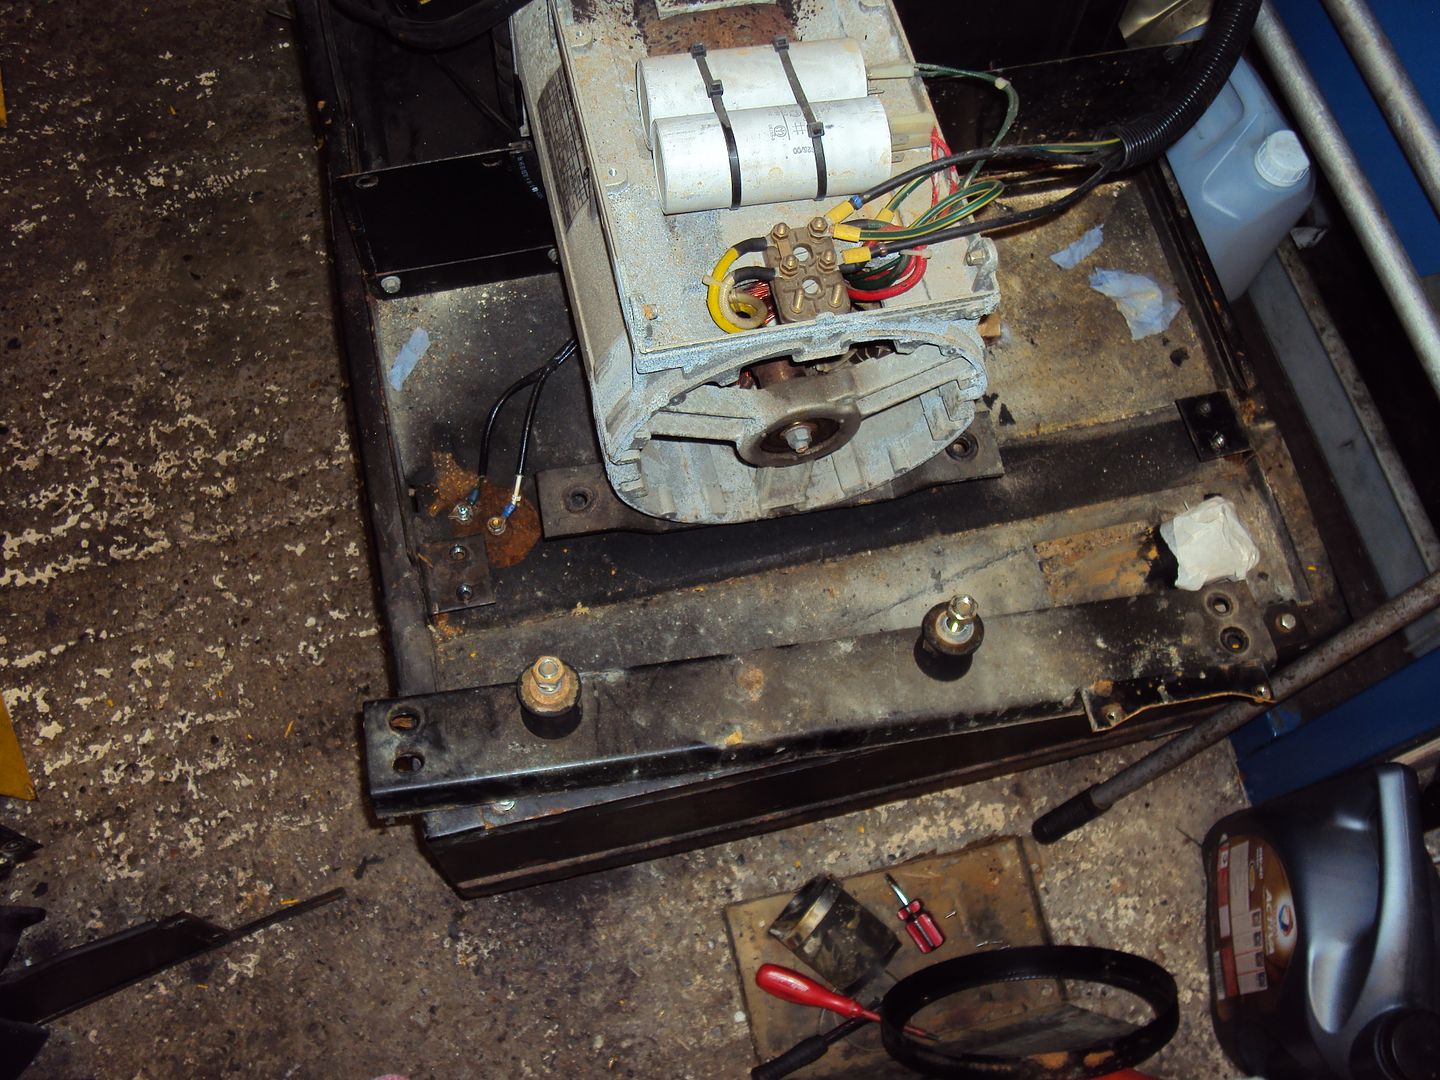
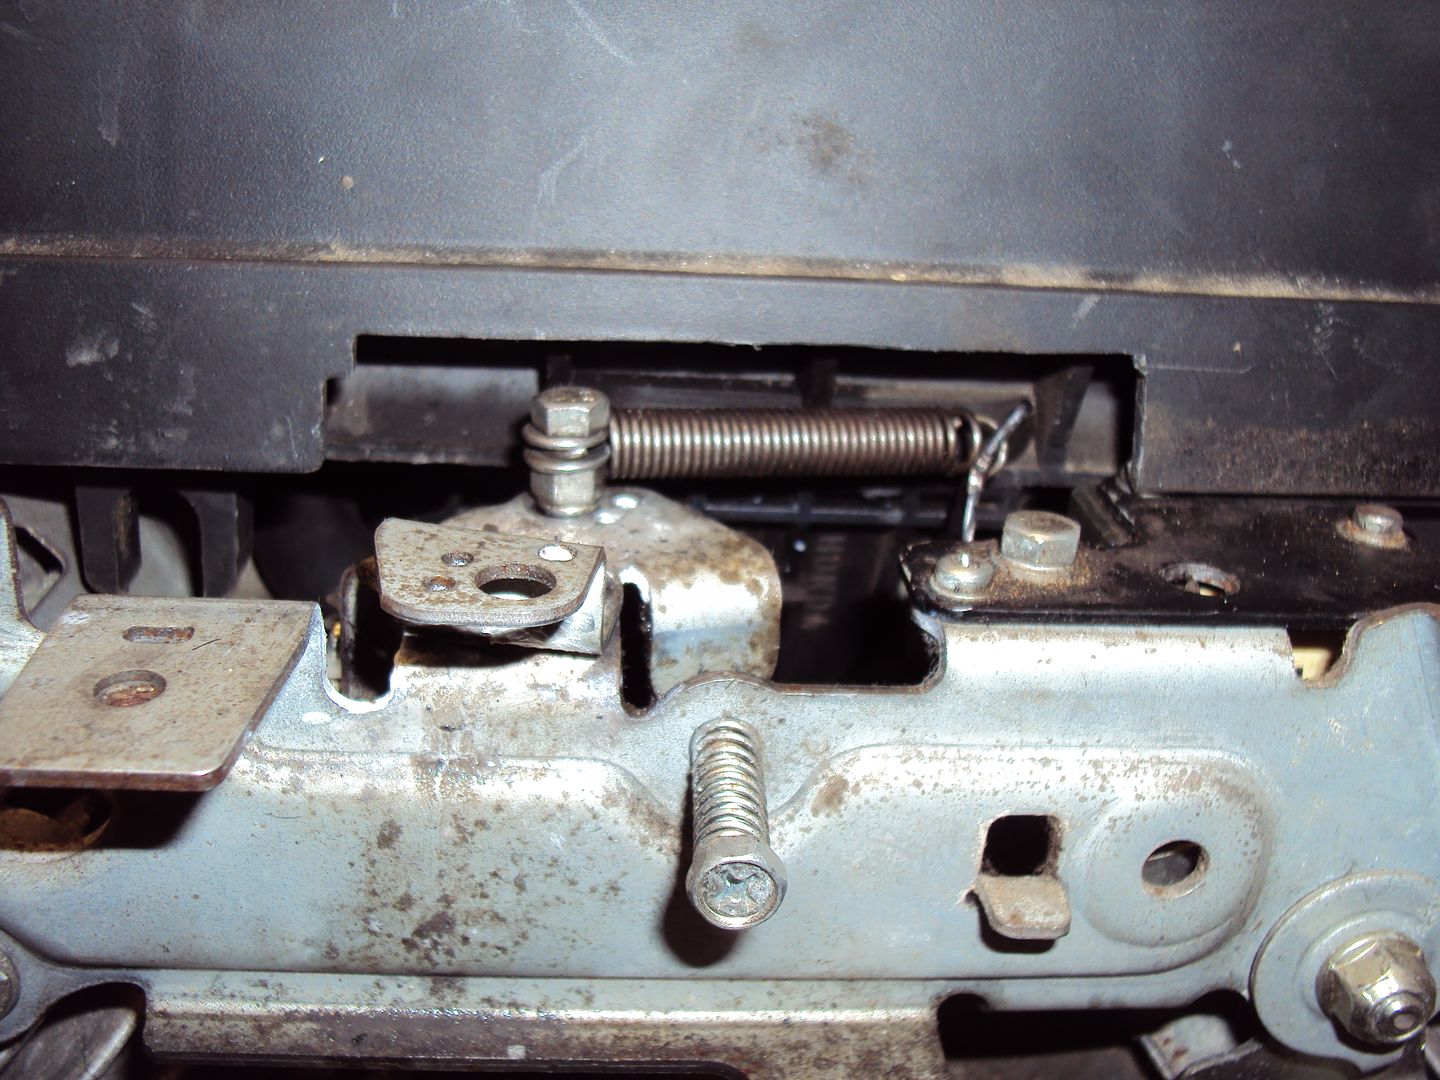
Picked up the latest project, it’s an ex-hire 10kva fitted with a 600cc V-twin. It has problems starting from cold, it would eventually start after a lot of cranking.
The seller had someone look at it but as they were unable to fix it he got fed up with spending money on it.
Due to the size I couldn’t get it up to the usual workshop so had to make do with the garage. Photos show it partially disassembled (was assembled when I got it).
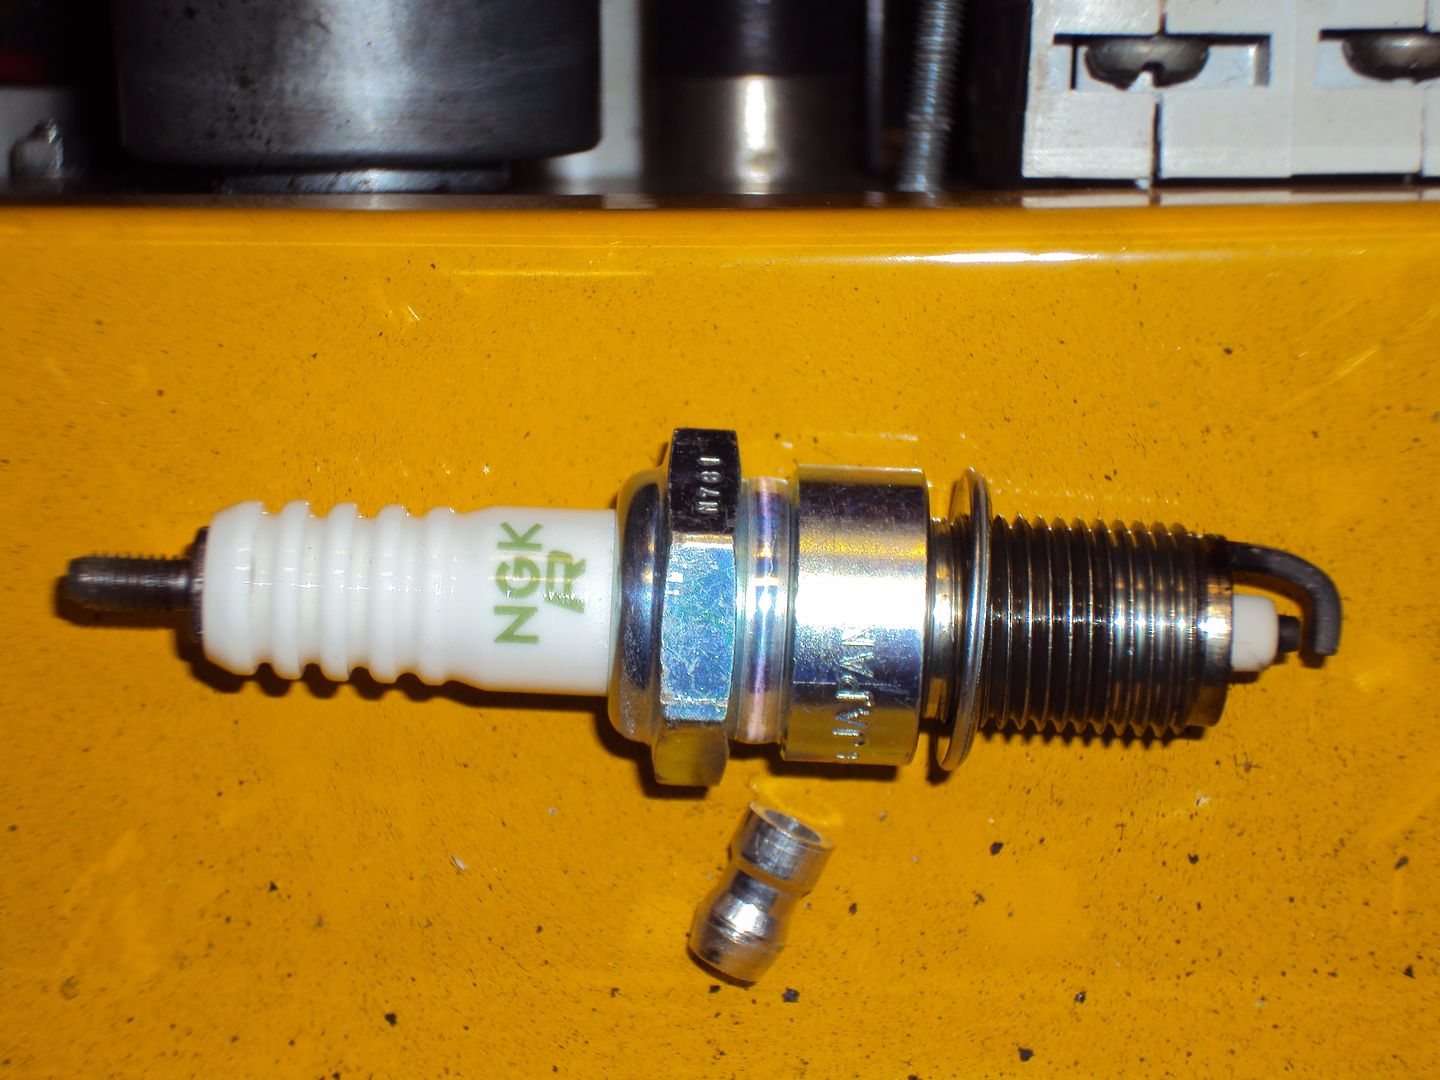
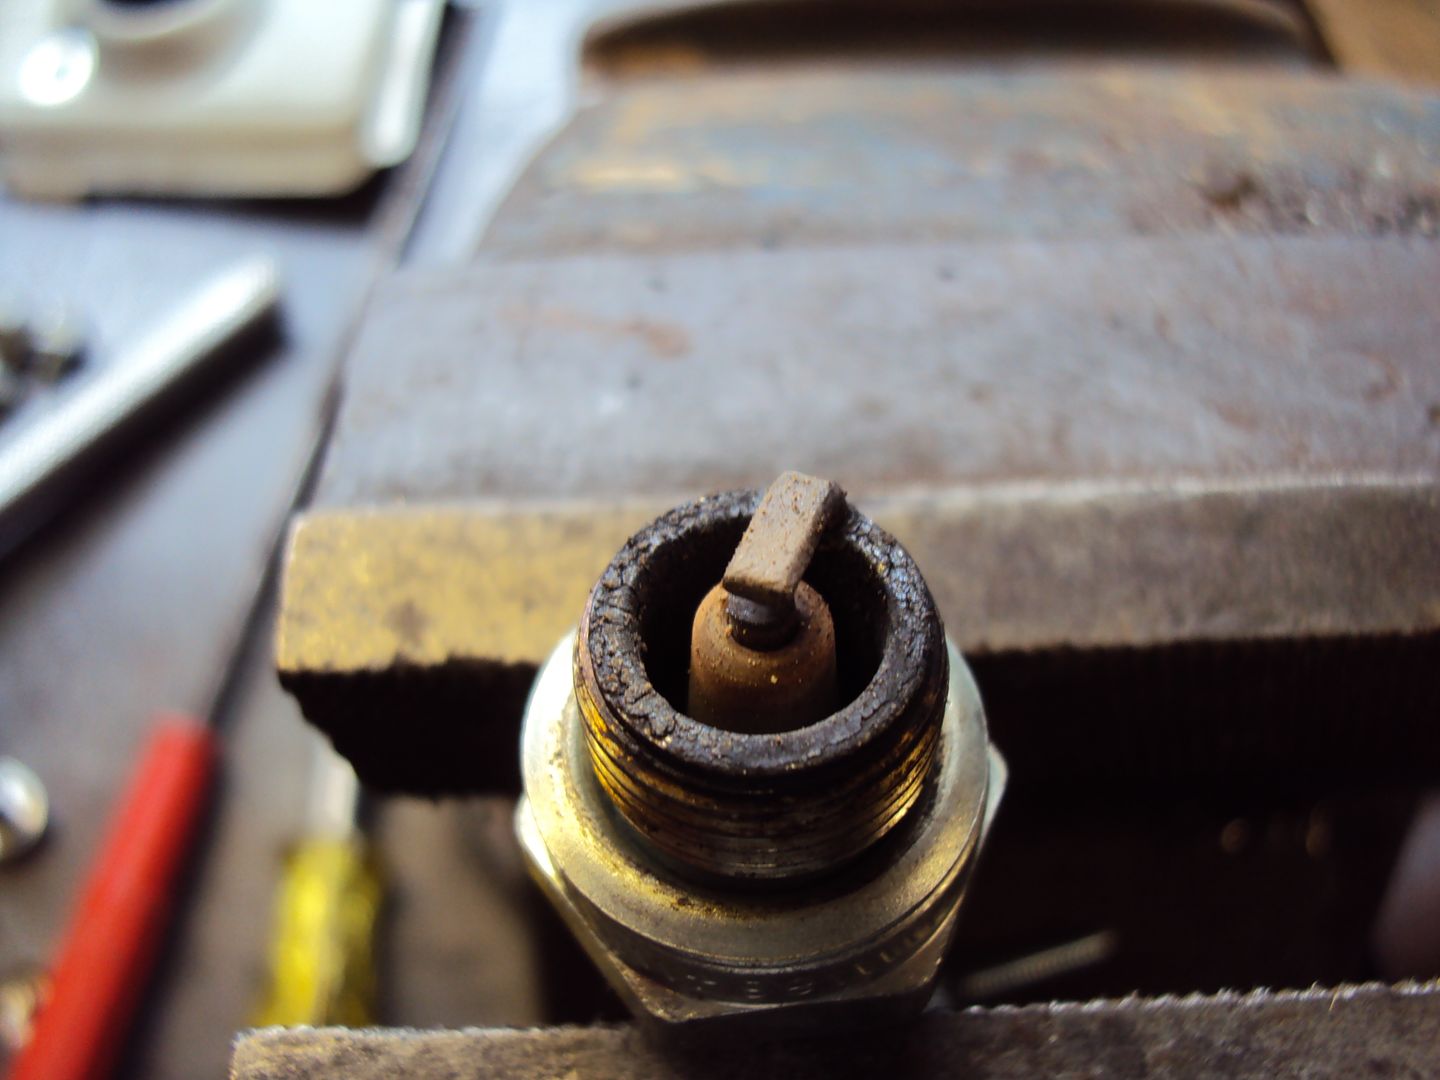
Started with checking the sparkplugs which turned out to be new
Decided the best place was to start with the choke, which is electrically operated, via button on the front panel that controls a solenoid.
It took a fair bit of disassembly to get to the choke mechanism.
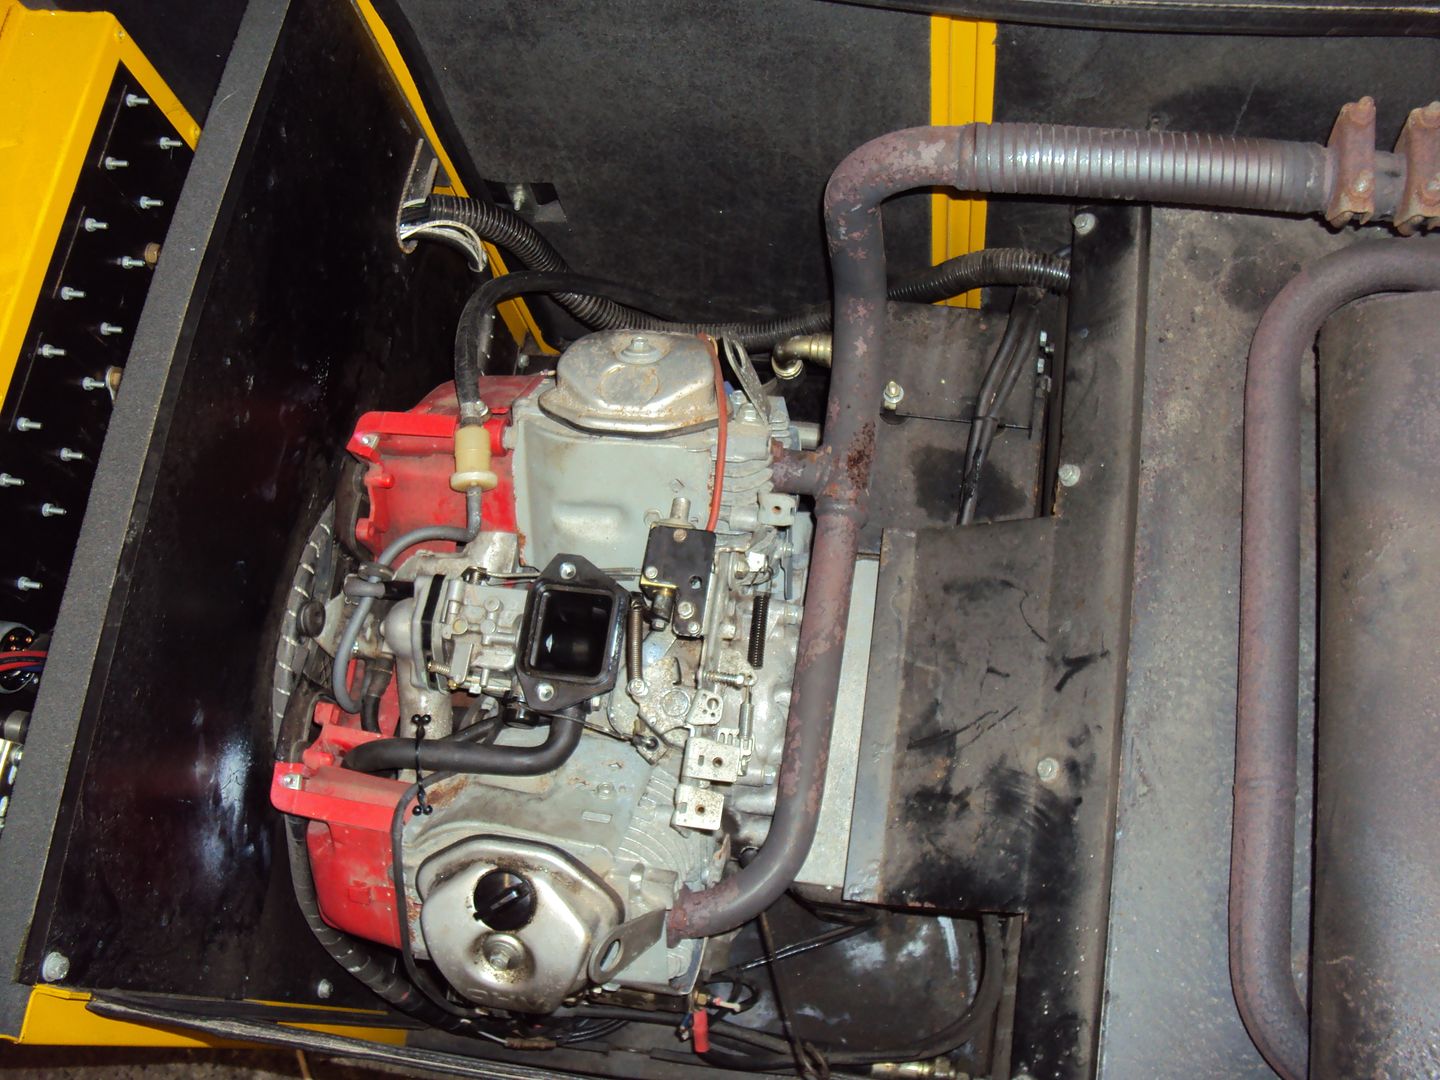
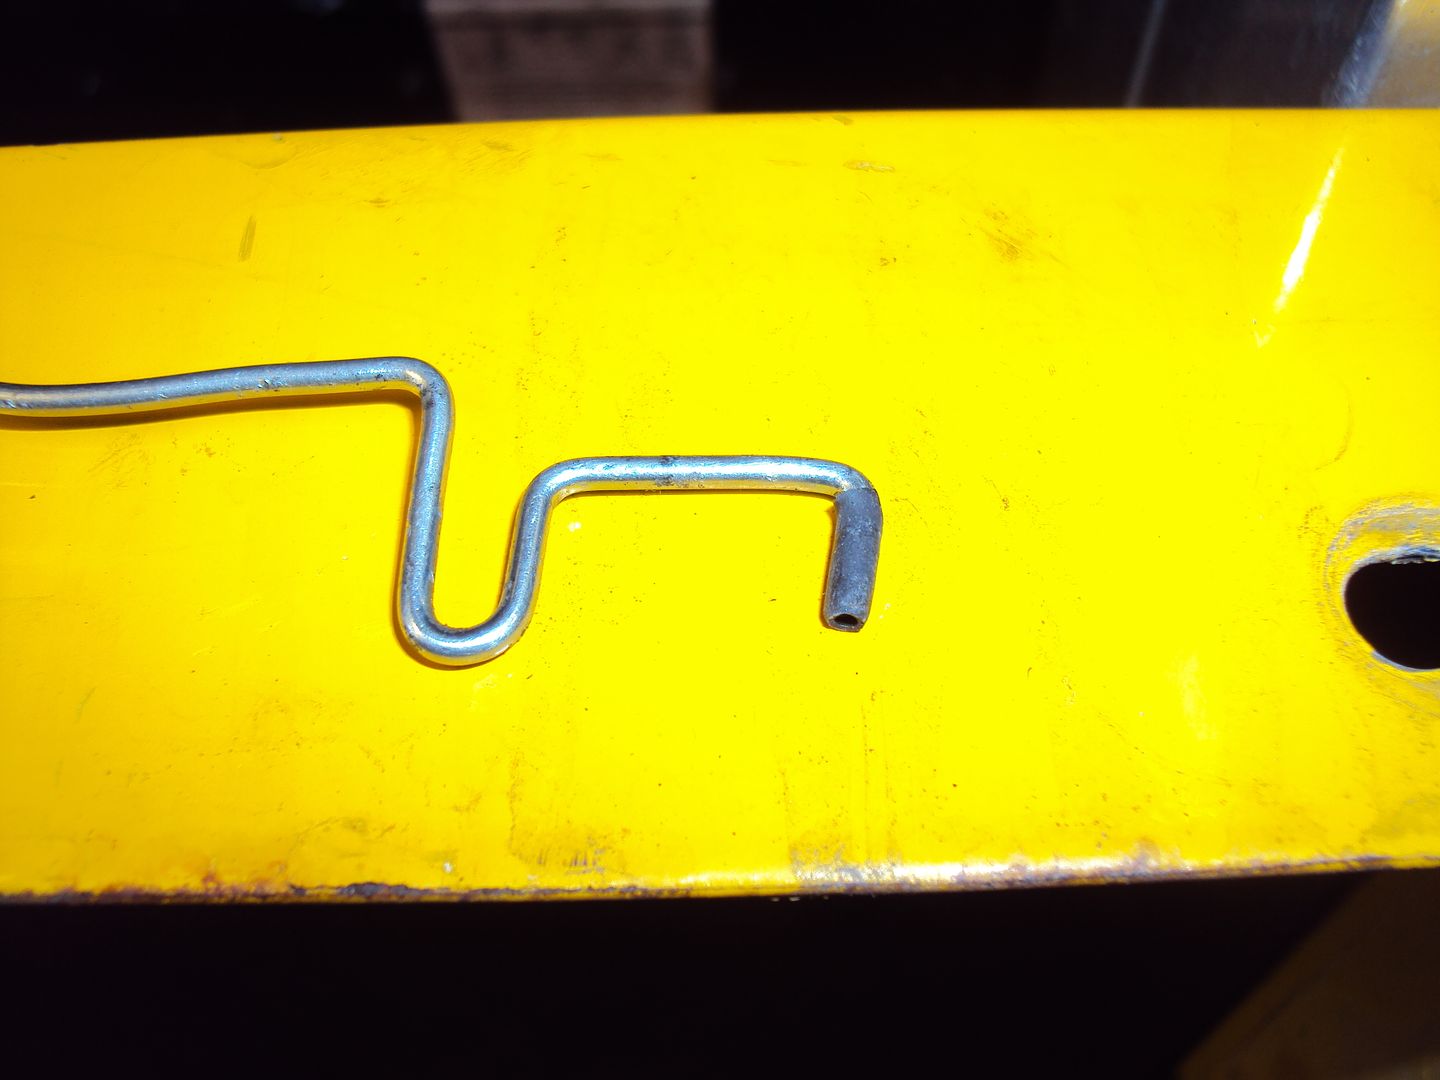
The choke solenoid has the red wire (running parallel with exhaust) going to it.
When the choke button is pressed the choke solenoid pulls on a lever via a spring which operates a rod that opens/closes the choke.
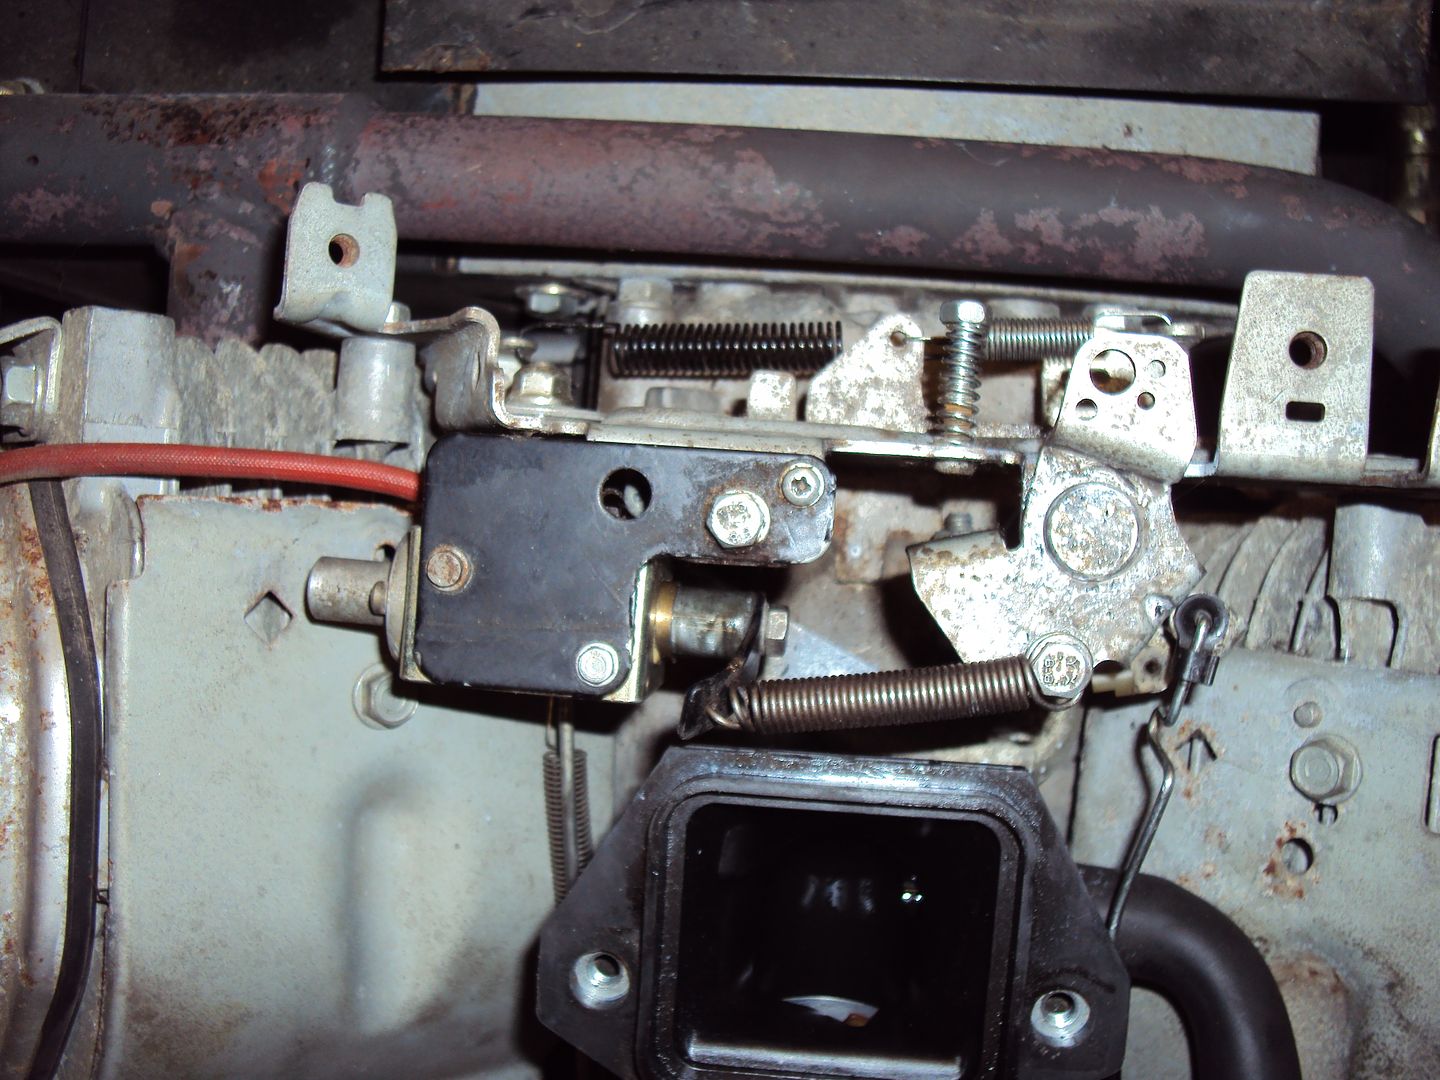
Solenoid works fine, with button pressed it pulls in all the way, but the choke valve wasn’t closing enough.
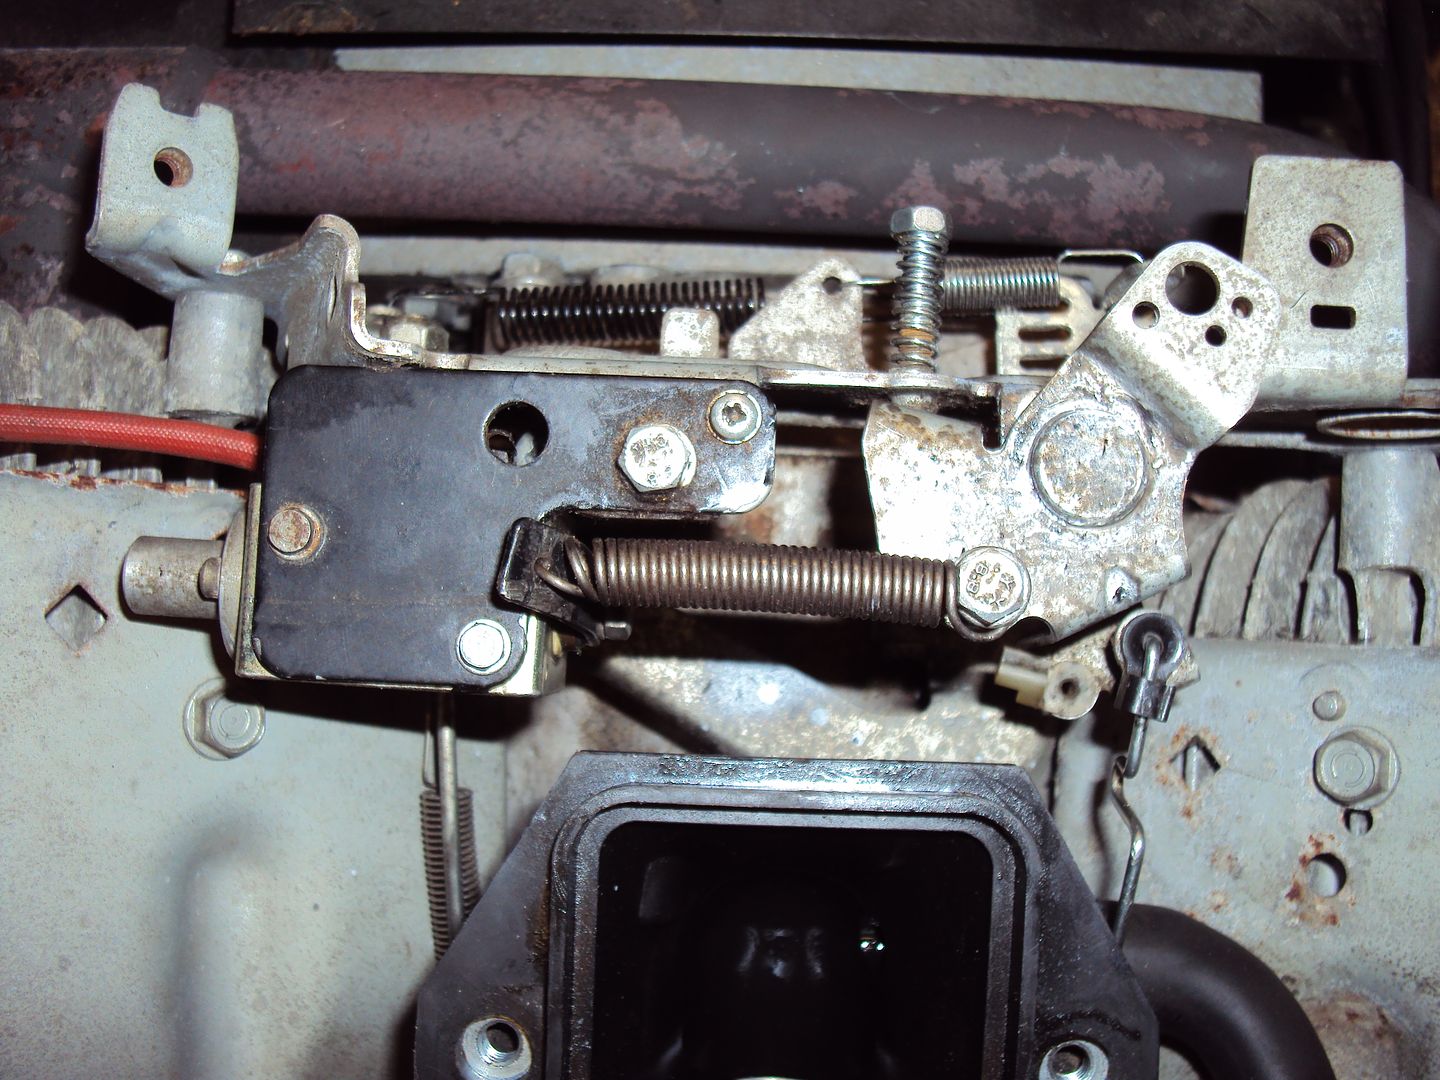
After a lot of poking around we found that a small plastic bush in the lever was worn so the choke rod was loose.

Decided to try a bodge fix by putting some heat shrink on the choke rod.
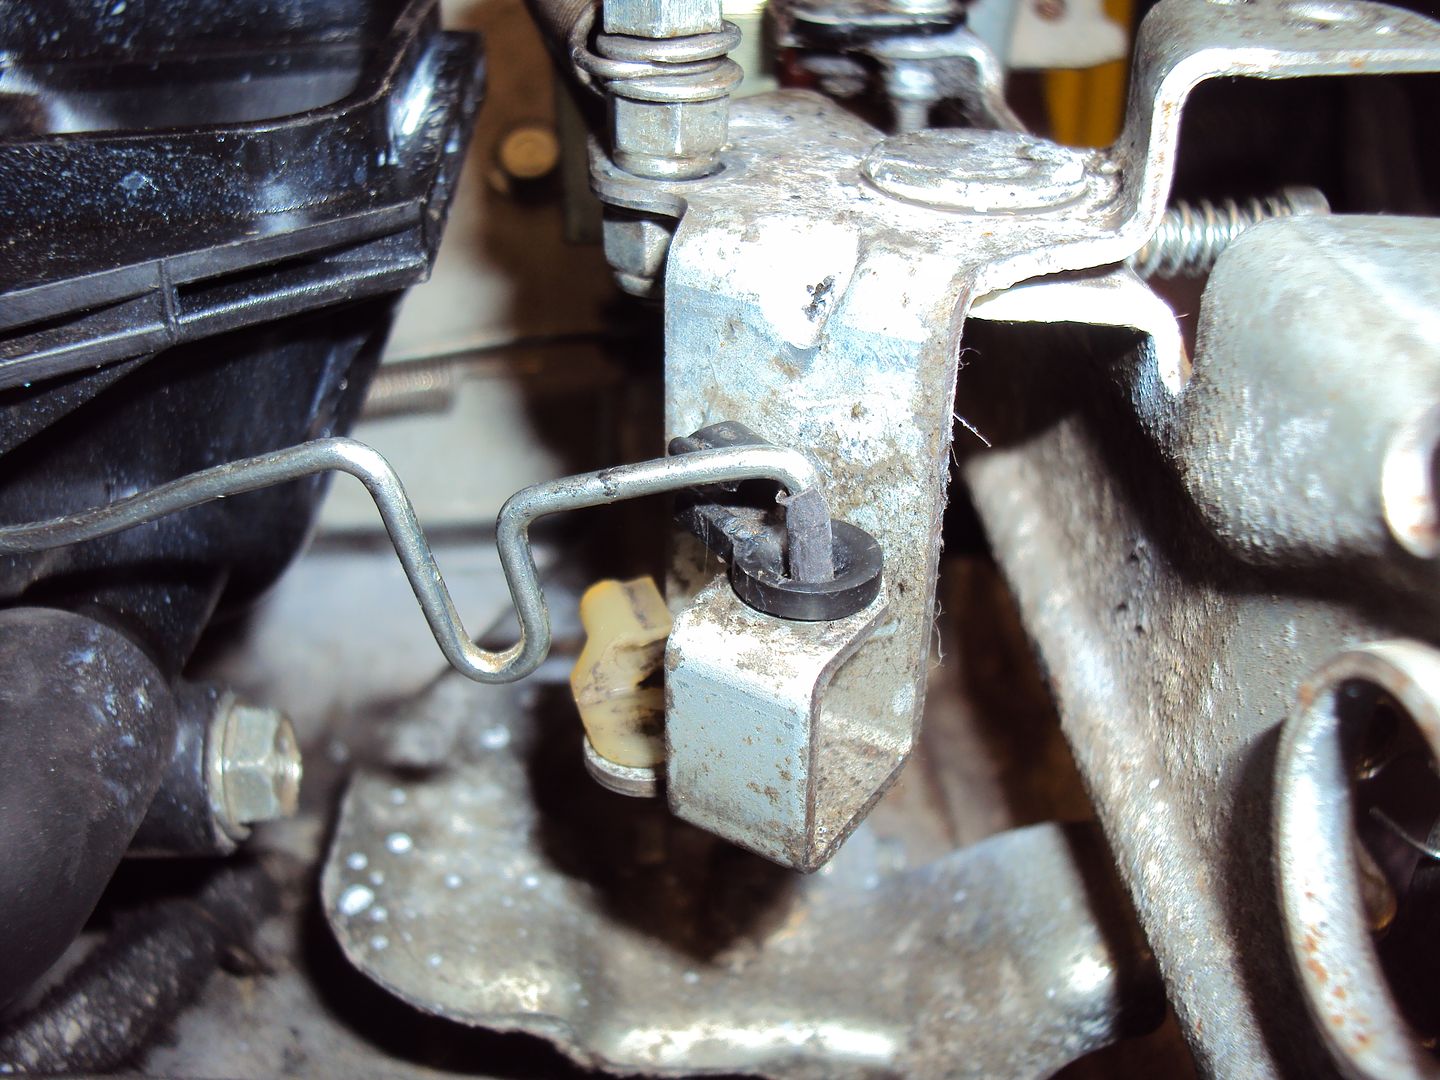
It worked, with the choke button pressed the engine started straight away.
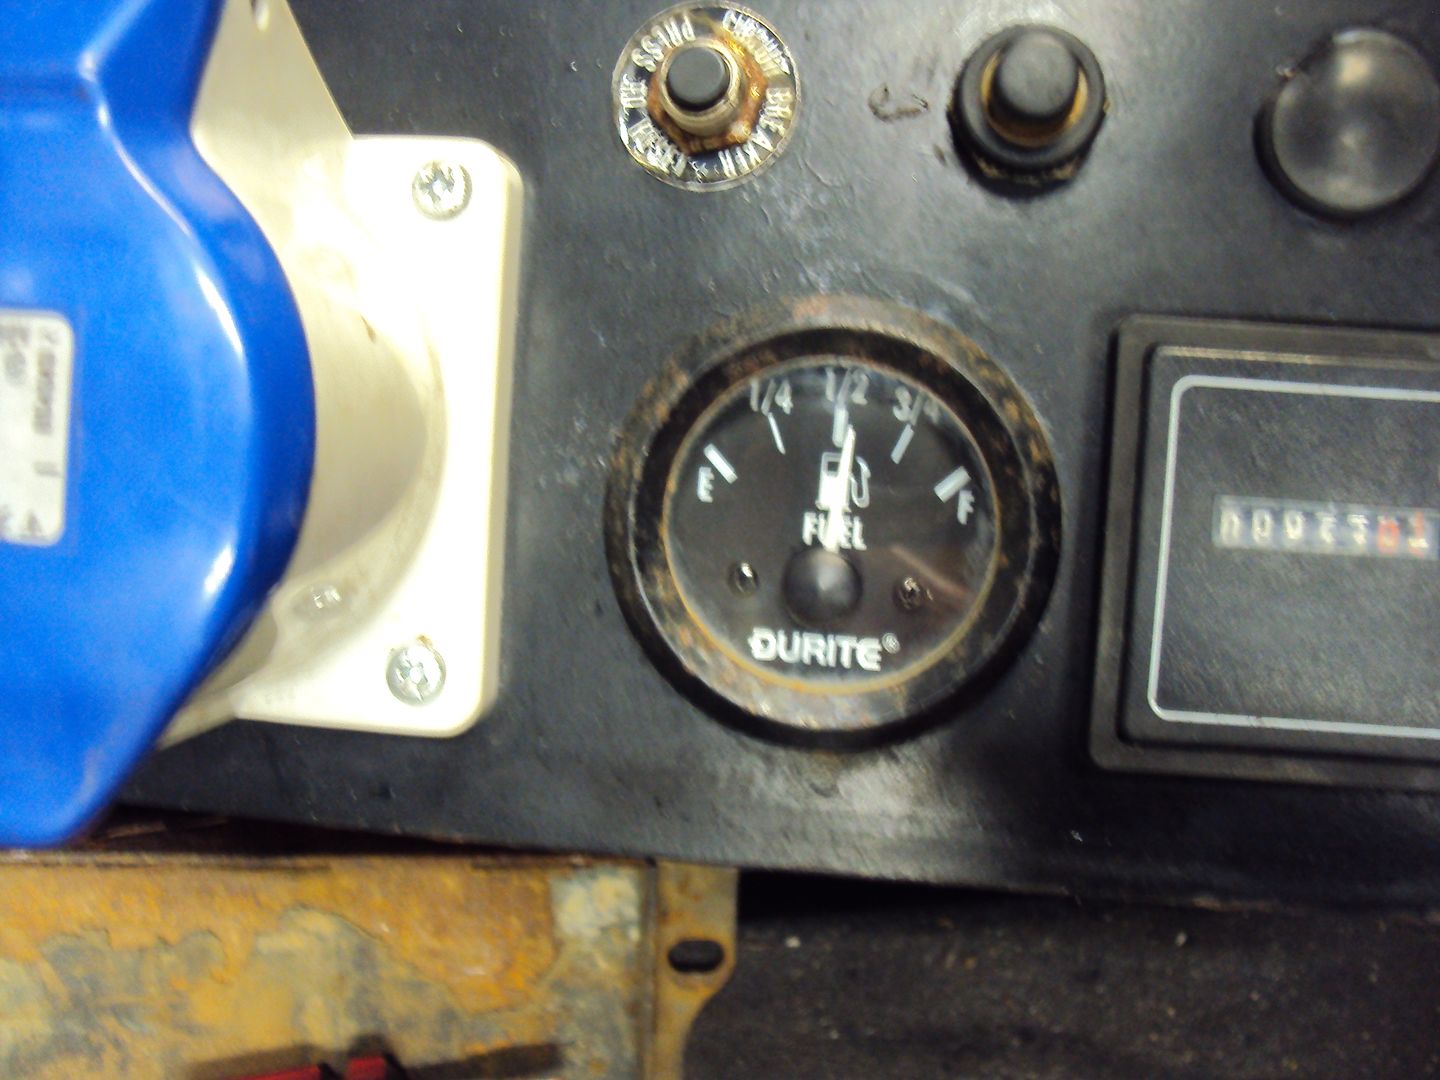
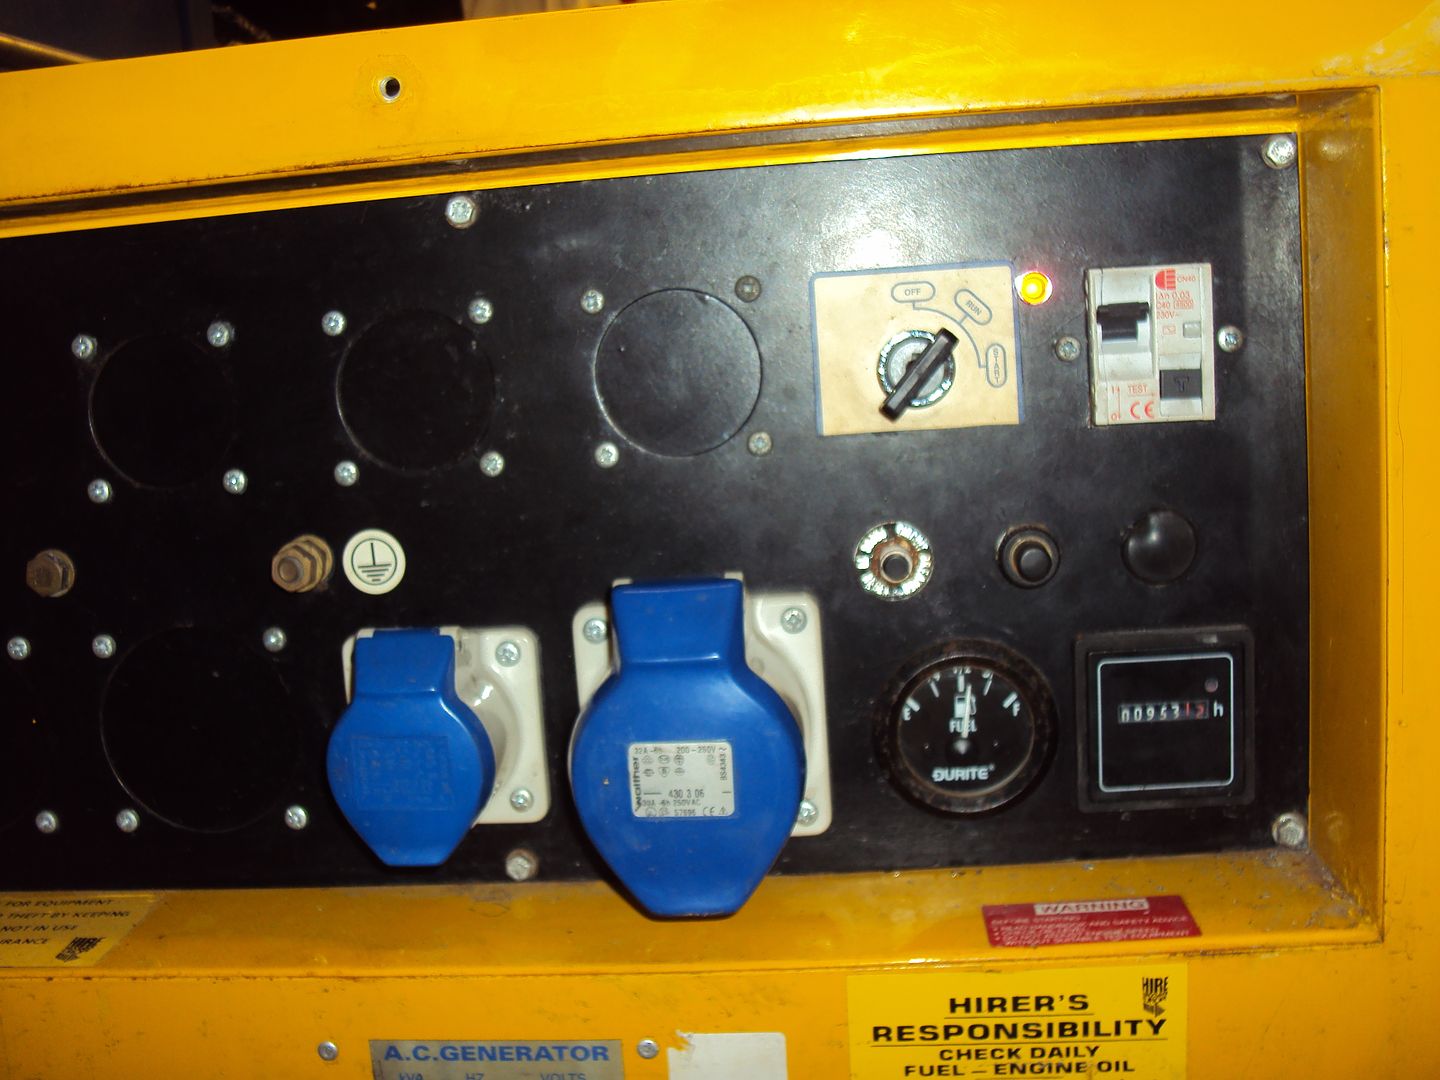
Did all the usual checks, and found the voltage and frequency were a bit high. Also found the fuel gauge wasn’t working.
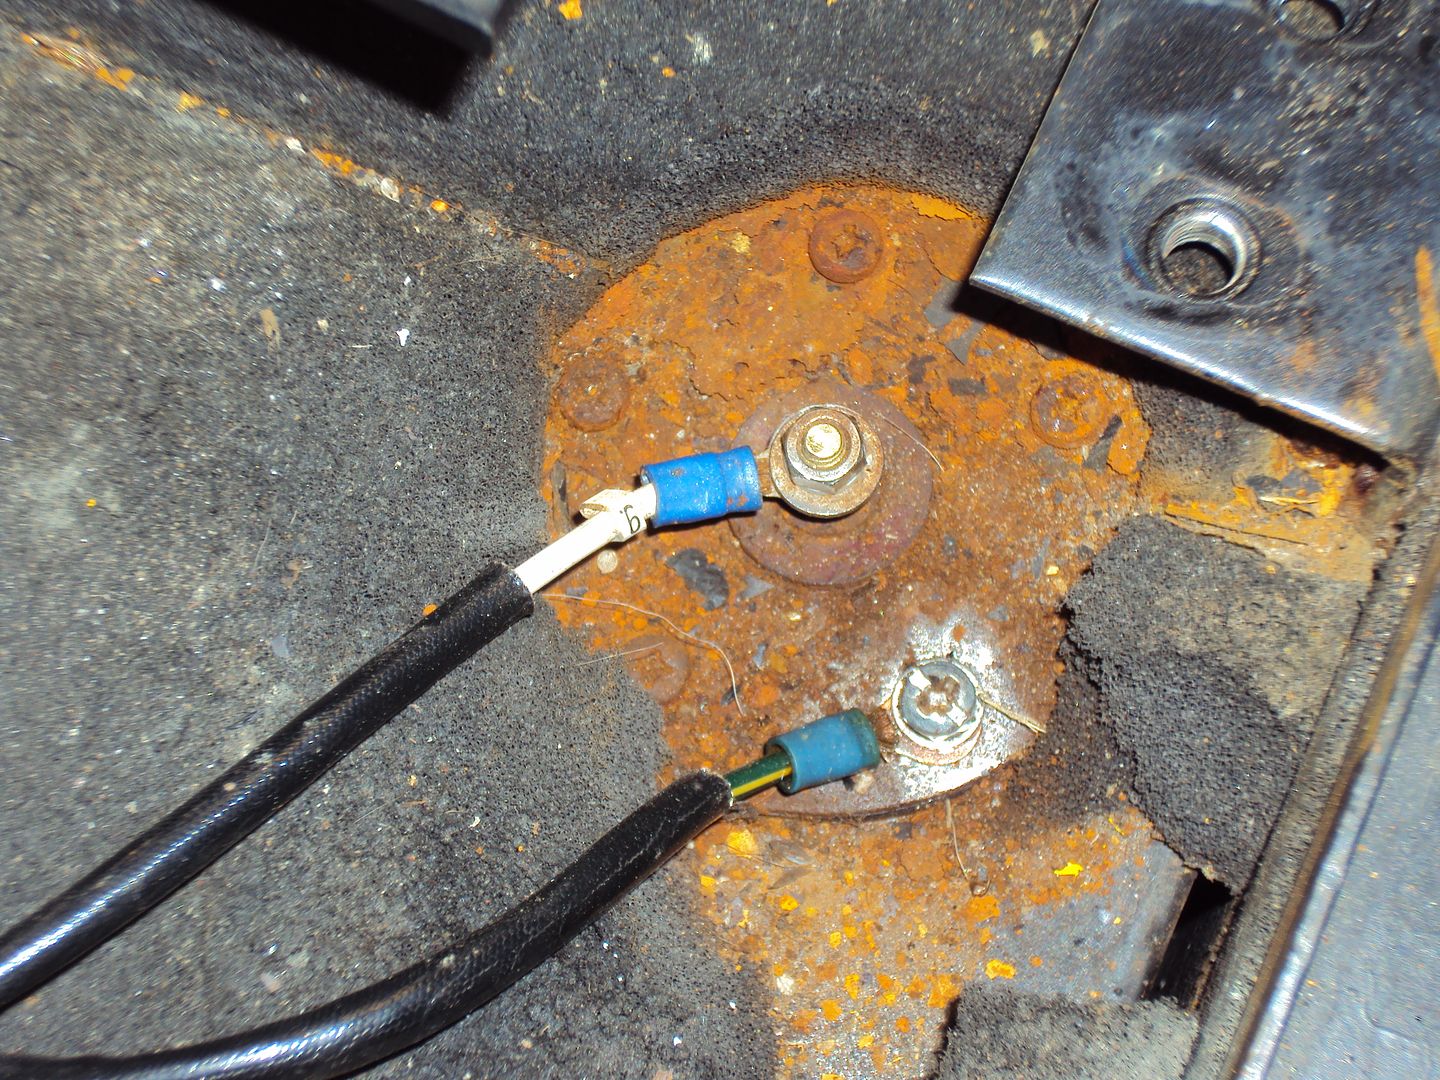
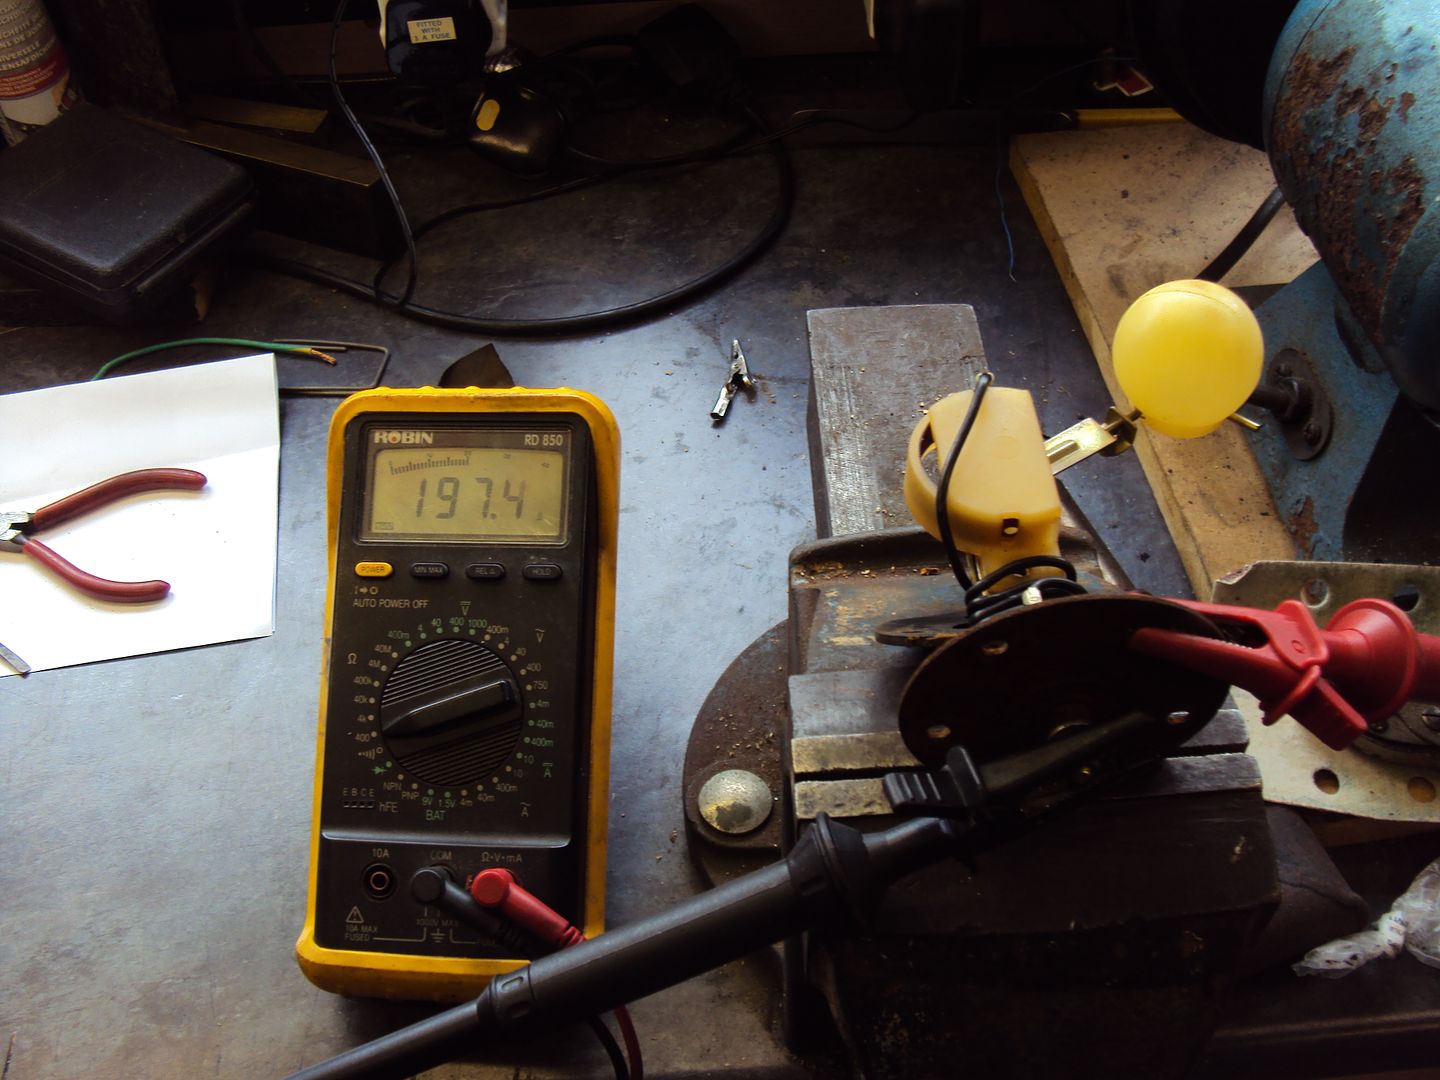
Tested the gauge, which worked so the fault was probably with the sender. The top of the sender unit was covered with rust so I started with cleaning up the earth tag.
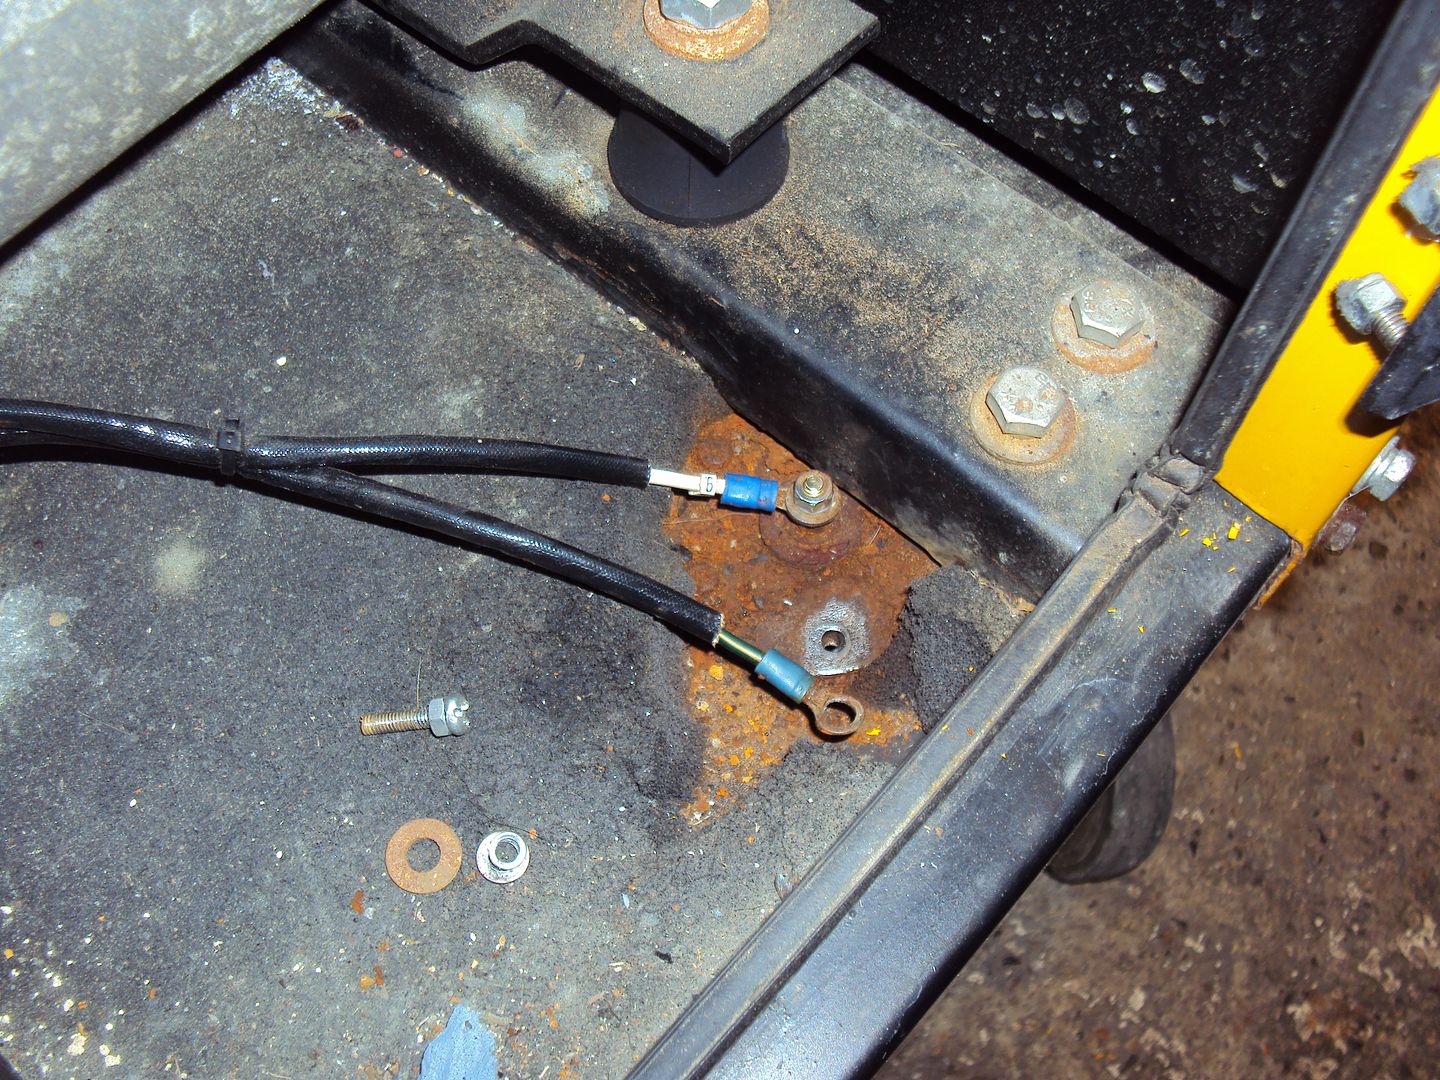
Unfortunately it still didn’t work, so I measured the resistance of the sender and found it to be open circuit.
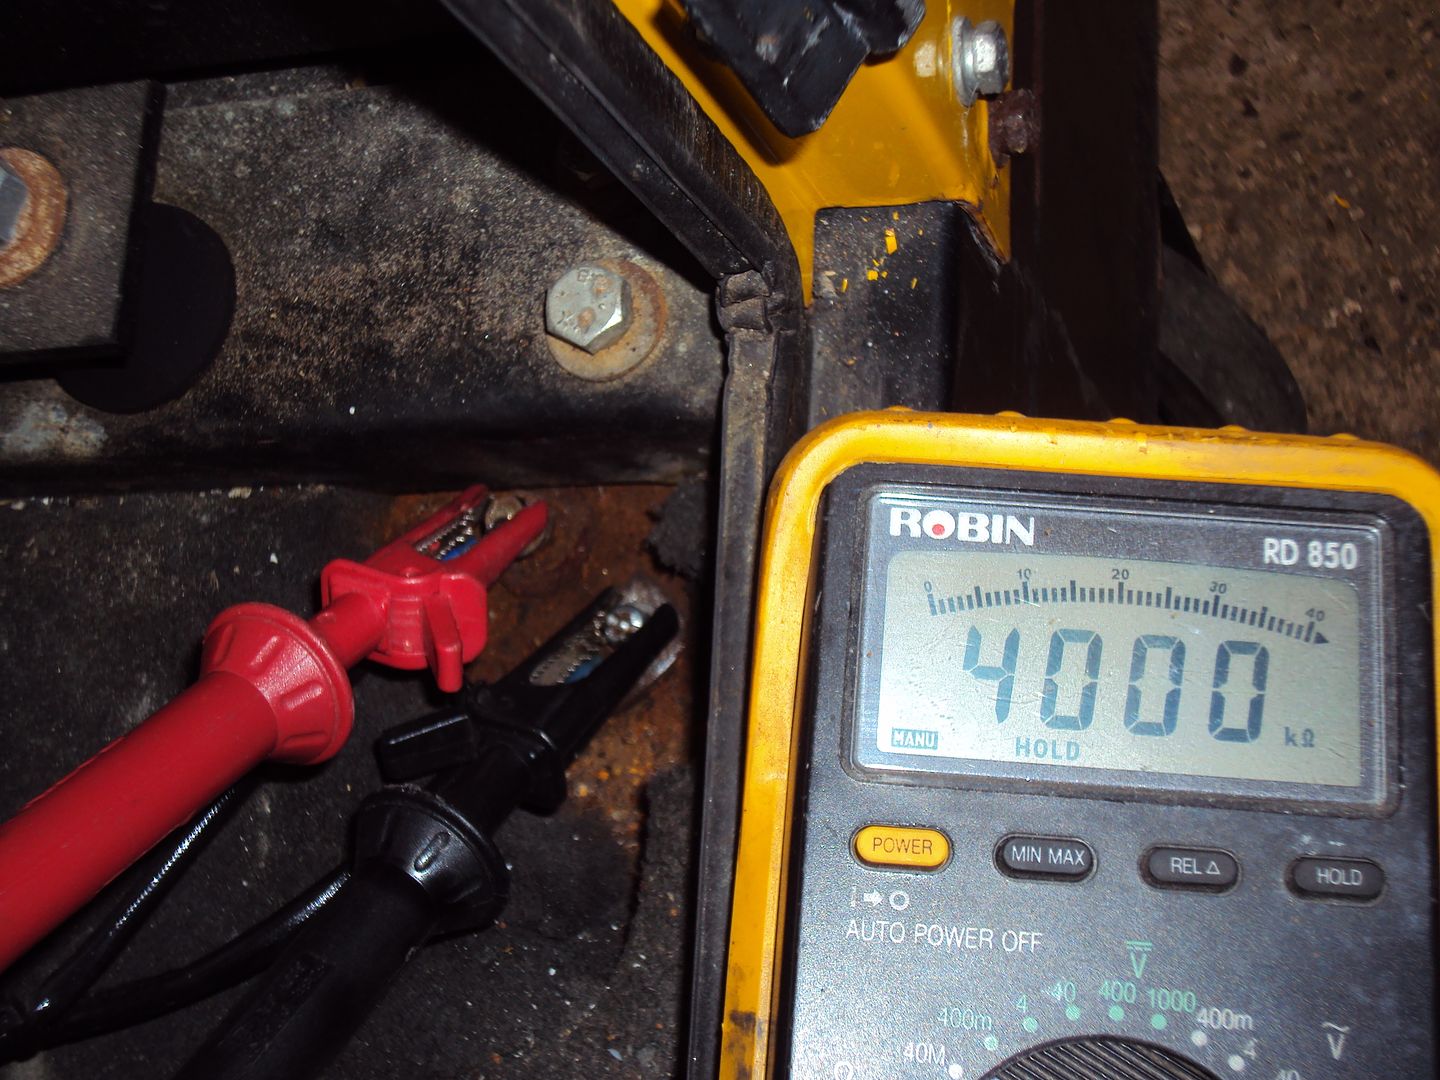
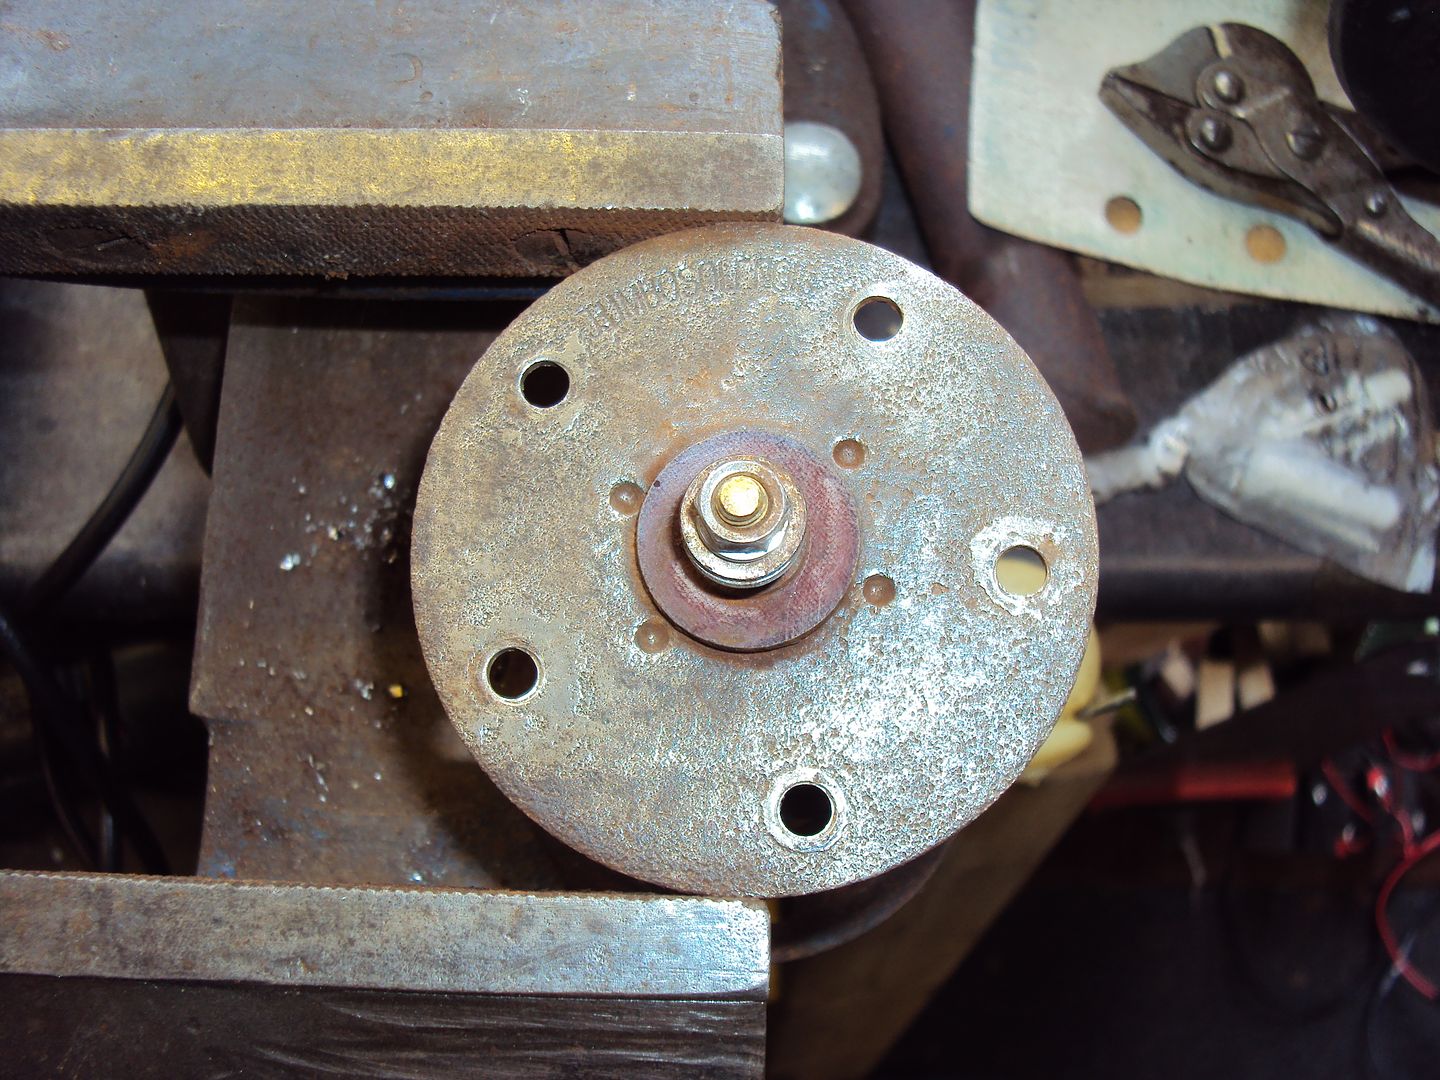
To get the sender out will be a lot of work as is inconveniently located under a cross brace, which supports the alternator.
The plan is to remove the casing and tip the engine & alternator back so the brace can be removed to gain access to the sender. It’s going to be a lot of work!
The seller had someone look at it but as they were unable to fix it he got fed up with spending money on it.
Due to the size I couldn’t get it up to the usual workshop so had to make do with the garage. Photos show it partially disassembled (was assembled when I got it).
Started with checking the sparkplugs which turned out to be new
Decided the best place was to start with the choke, which is electrically operated, via button on the front panel that controls a solenoid.
It took a fair bit of disassembly to get to the choke mechanism.
The choke solenoid has the red wire (running parallel with exhaust) going to it.
When the choke button is pressed the choke solenoid pulls on a lever via a spring which operates a rod that opens/closes the choke.
Solenoid works fine, with button pressed it pulls in all the way, but the choke valve wasn’t closing enough.
After a lot of poking around we found that a small plastic bush in the lever was worn so the choke rod was loose.
Decided to try a bodge fix by putting some heat shrink on the choke rod.
It worked, with the choke button pressed the engine started straight away.
Did all the usual checks, and found the voltage and frequency were a bit high. Also found the fuel gauge wasn’t working.
Tested the gauge, which worked so the fault was probably with the sender. The top of the sender unit was covered with rust so I started with cleaning up the earth tag.
Unfortunately it still didn’t work, so I measured the resistance of the sender and found it to be open circuit.
To get the sender out will be a lot of work as is inconveniently located under a cross brace, which supports the alternator.
The plan is to remove the casing and tip the engine & alternator back so the brace can be removed to gain access to the sender. It’s going to be a lot of work!
hidetheelephants said:
Having cautioned against buying cheapese tat; I've just bought two DOA diesels, preliminary examination reveals an absence of compression and missing/damaged injector seals, so that's the first thing to investigate.
Kraft Tech/ Kraft Hertz? If you haven’t already found it http://www.generatorguru.com/ appears to be a good source of Chinese generator parts. All the generic 5-6kva generators appear to use the 186F diesel engine which is a copy of a Yanmar this site has some manuals for the 186F engine http://www.repairdynamics.com/html/186f_diesel_.ht...
I think I managed to ruin the new battery the previous owner had fitted. The ignition got left on during the week, only discovered when I tried to start the engine today and found it was completely dead. I checked the battery and it was reading 0.6V. Have put it on charge in the hope it will recover.
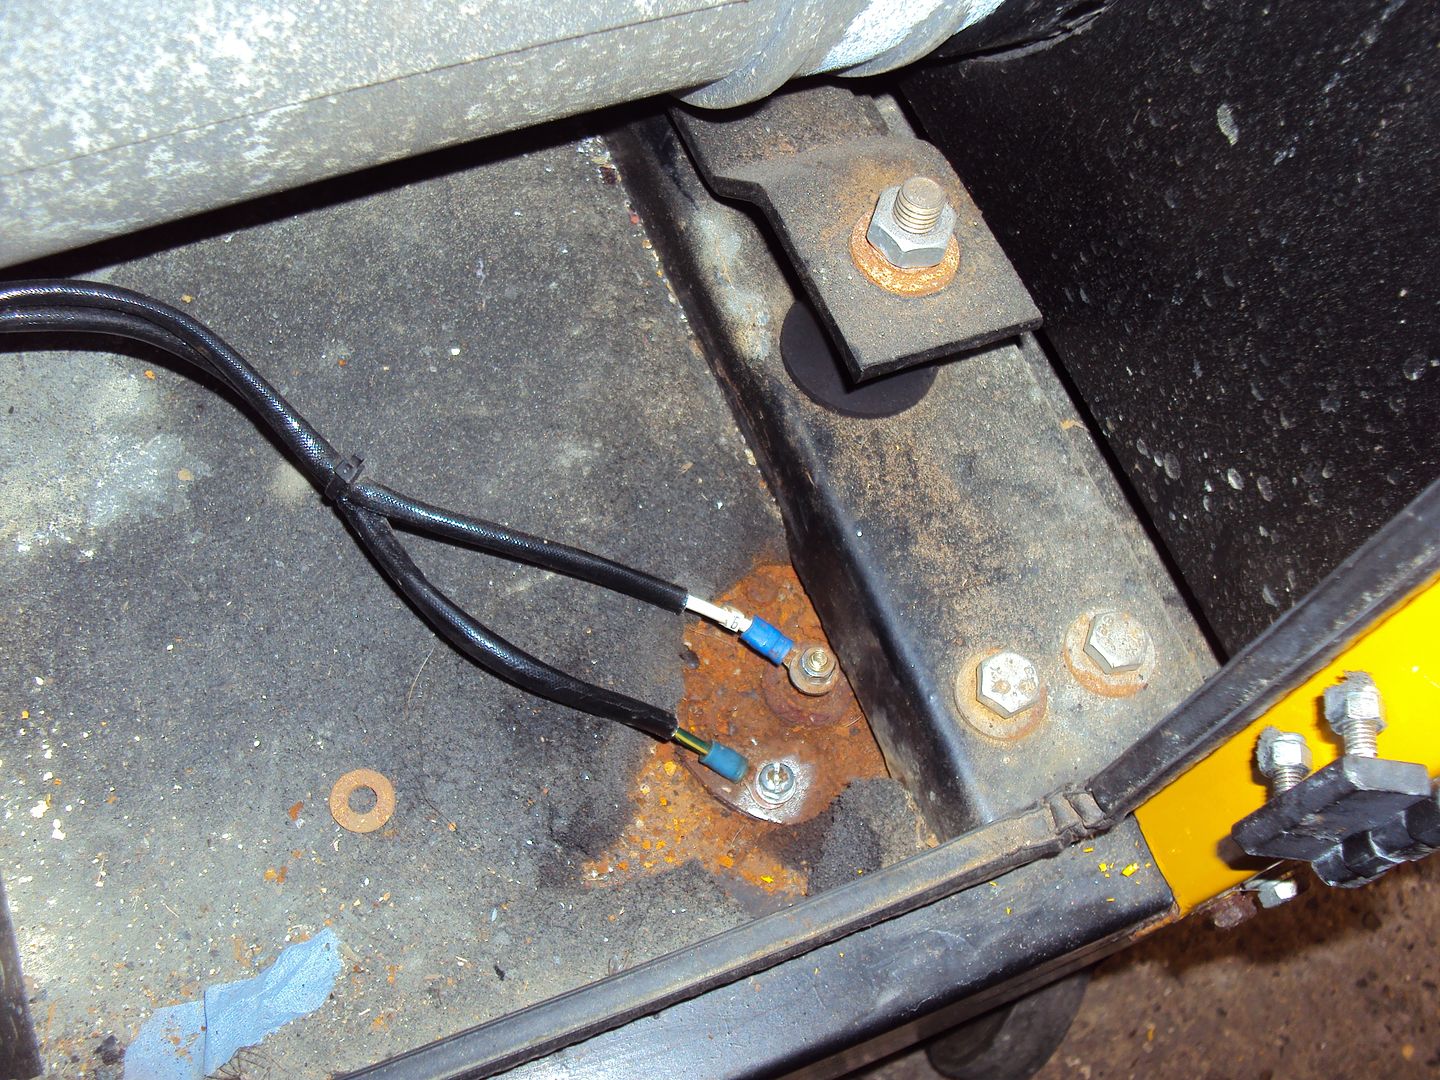
On the plus side, made some progress this afternoon, got all the casing stripped off
Removed the cross brace that supports the alternator
Can now get access to the fuel level sender
Next job it to get the sender out and see if it can be fixed and fit an ignition warning light.
On the plus side, made some progress this afternoon, got all the casing stripped off
Removed the cross brace that supports the alternator
Can now get access to the fuel level sender
Next job it to get the sender out and see if it can be fixed and fit an ignition warning light.
hidetheelephants said:
Woohoo! Partial success; one of the cheapnese diesels lives! All it needed was an injector seal and away it went. It even makes electricity! Oil and filter change and it can go onto Gumtree.

Now for the second one; I might actually remember to take some pictures this time.
Thats great, fun isn't it Partial success; one of the cheapnese diesels lives! All it needed was an injector seal and away it went. It even makes electricity! Oil and filter change and it can go onto Gumtree.Now for the second one; I might actually remember to take some pictures this time.
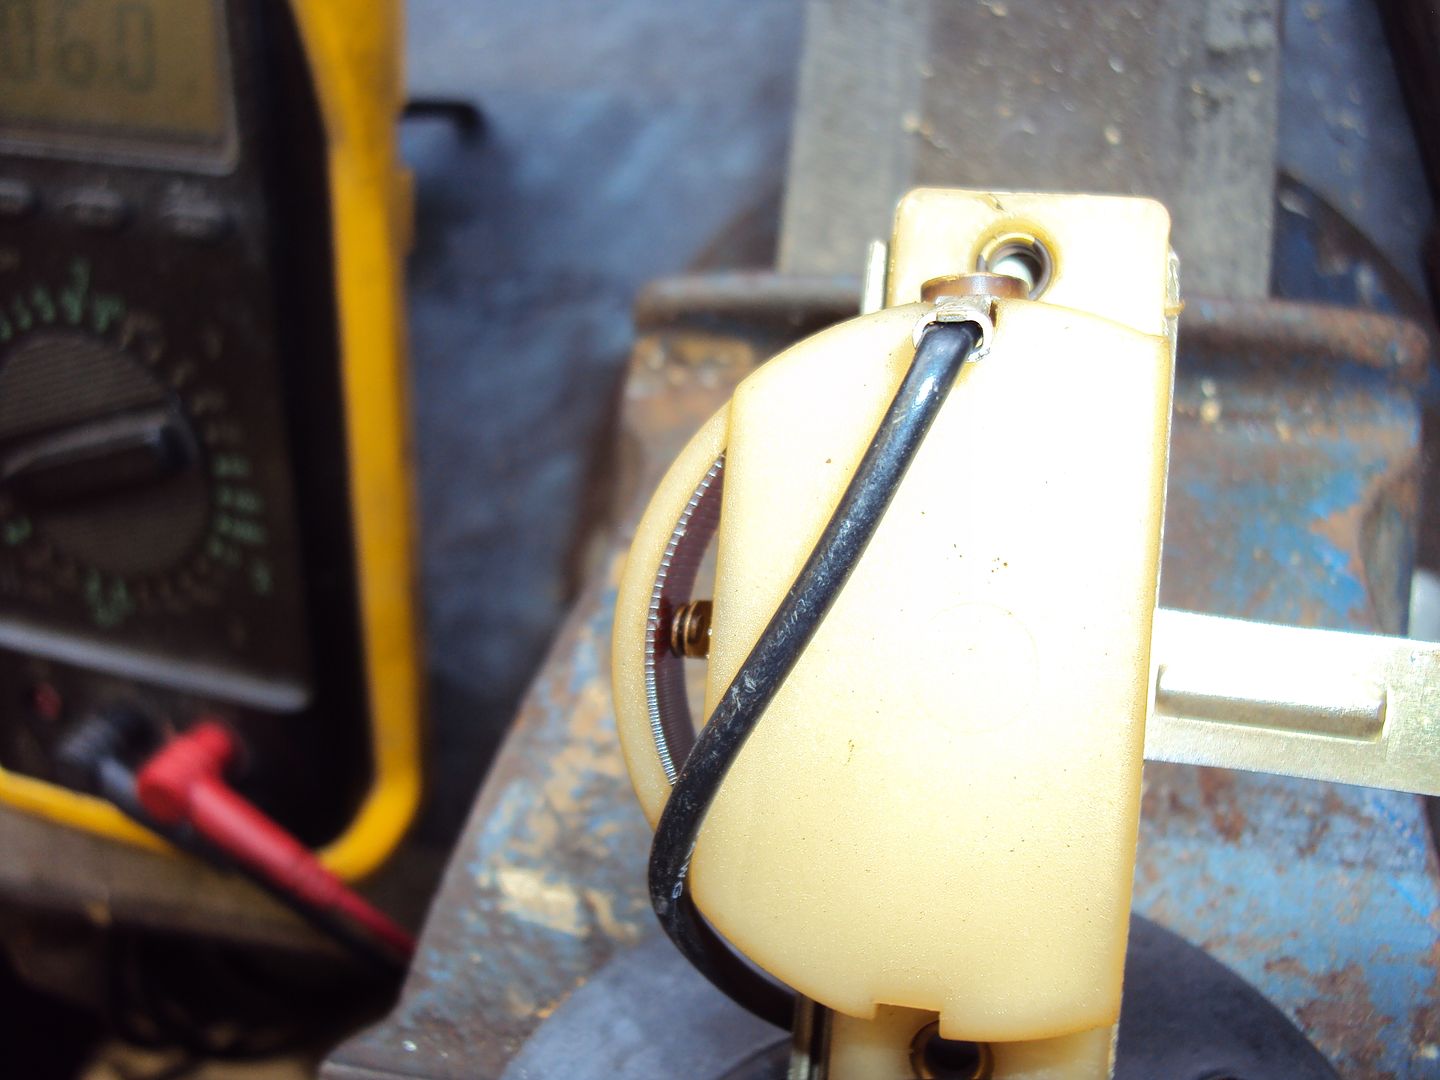
Got the fuel level sender out of the fuel tank
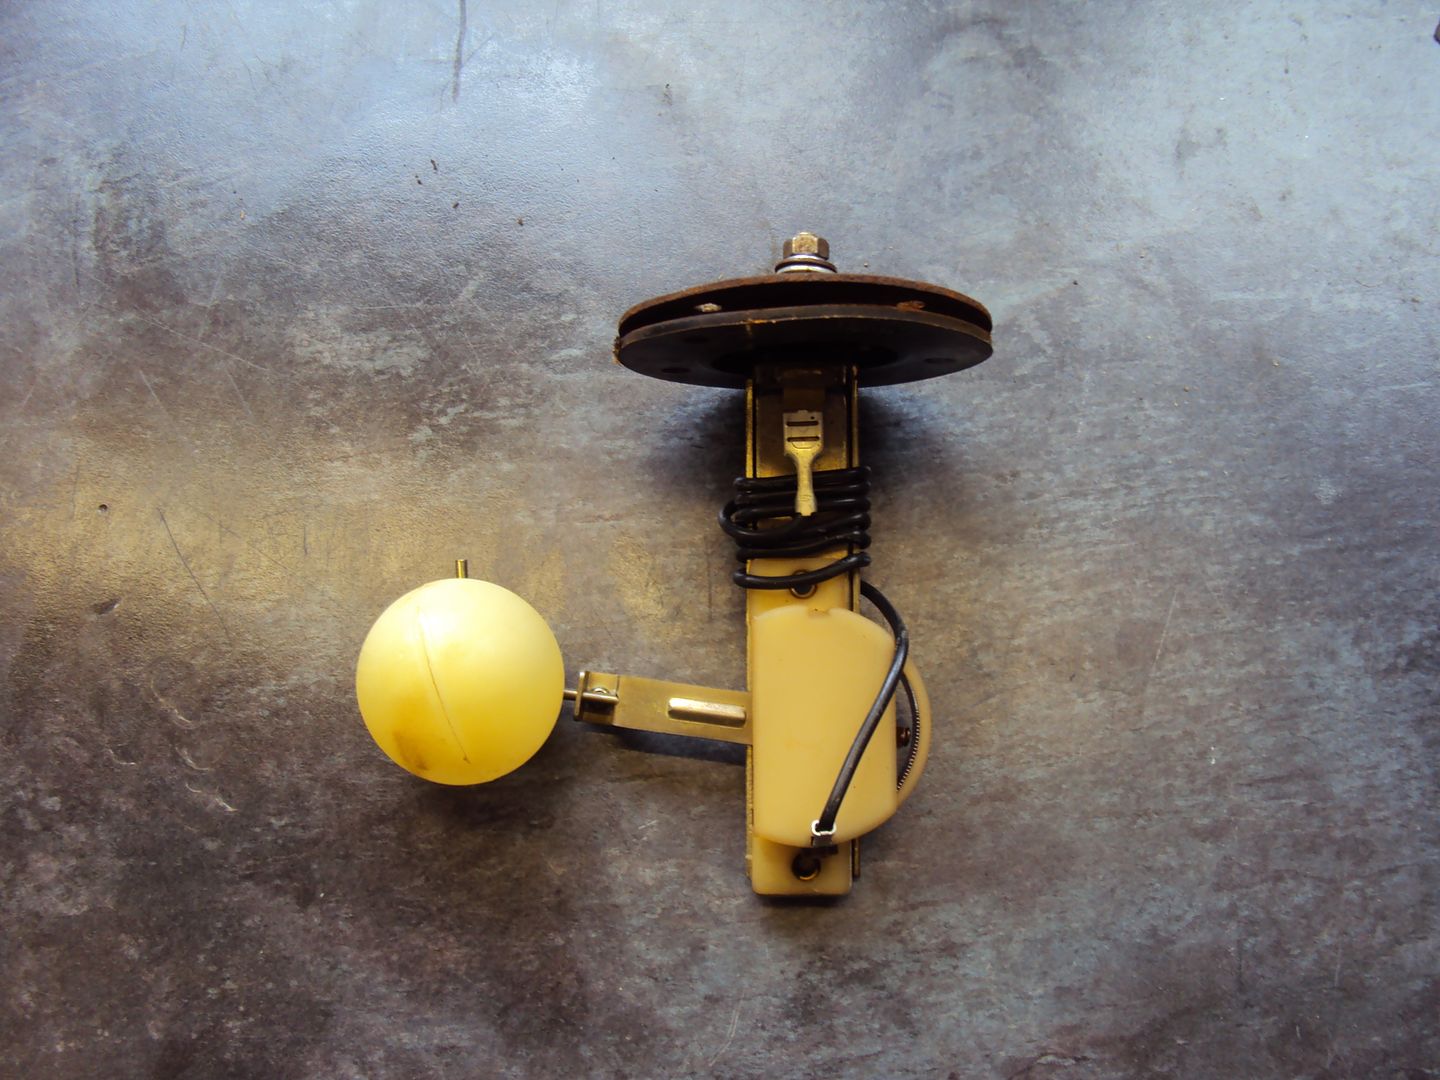
Don’t think there should be a gap, no wonder it shows as open circuit!

The sender is basically a variable resistor, as the fuel level drops the resistance increases. The contact should be touching the coil of wire wrapped around the brown part.
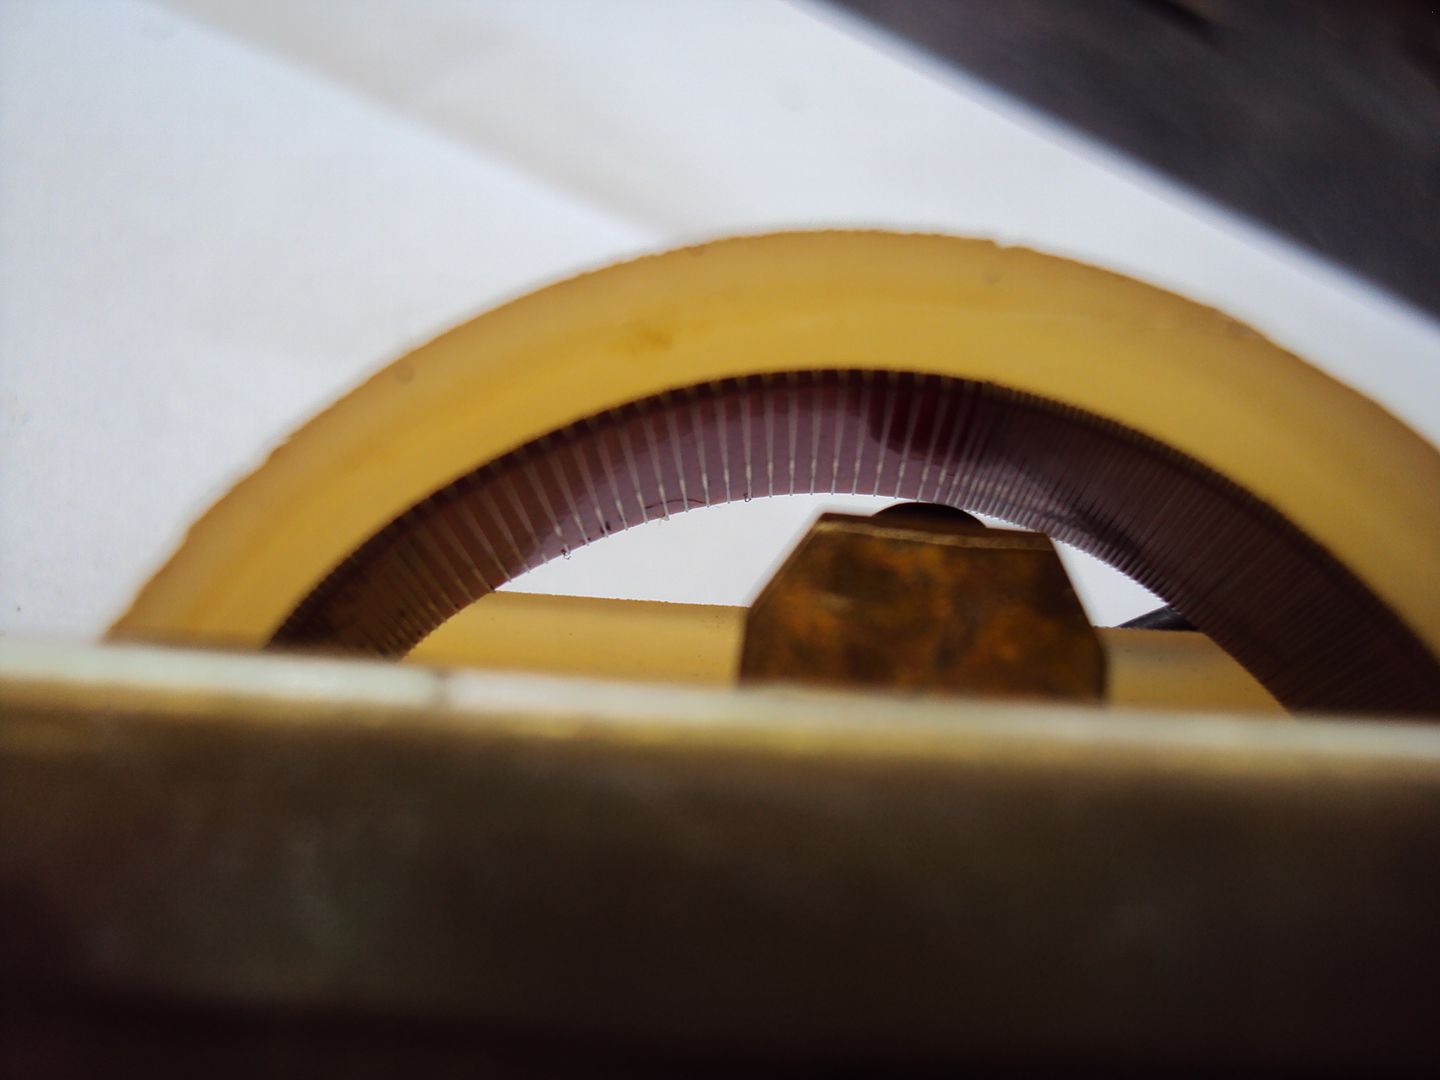
I bent the contact arm so it is touching the coil, now gets a reading.
Cleaned all the rust from the top of the sender and refitted back in the tank.
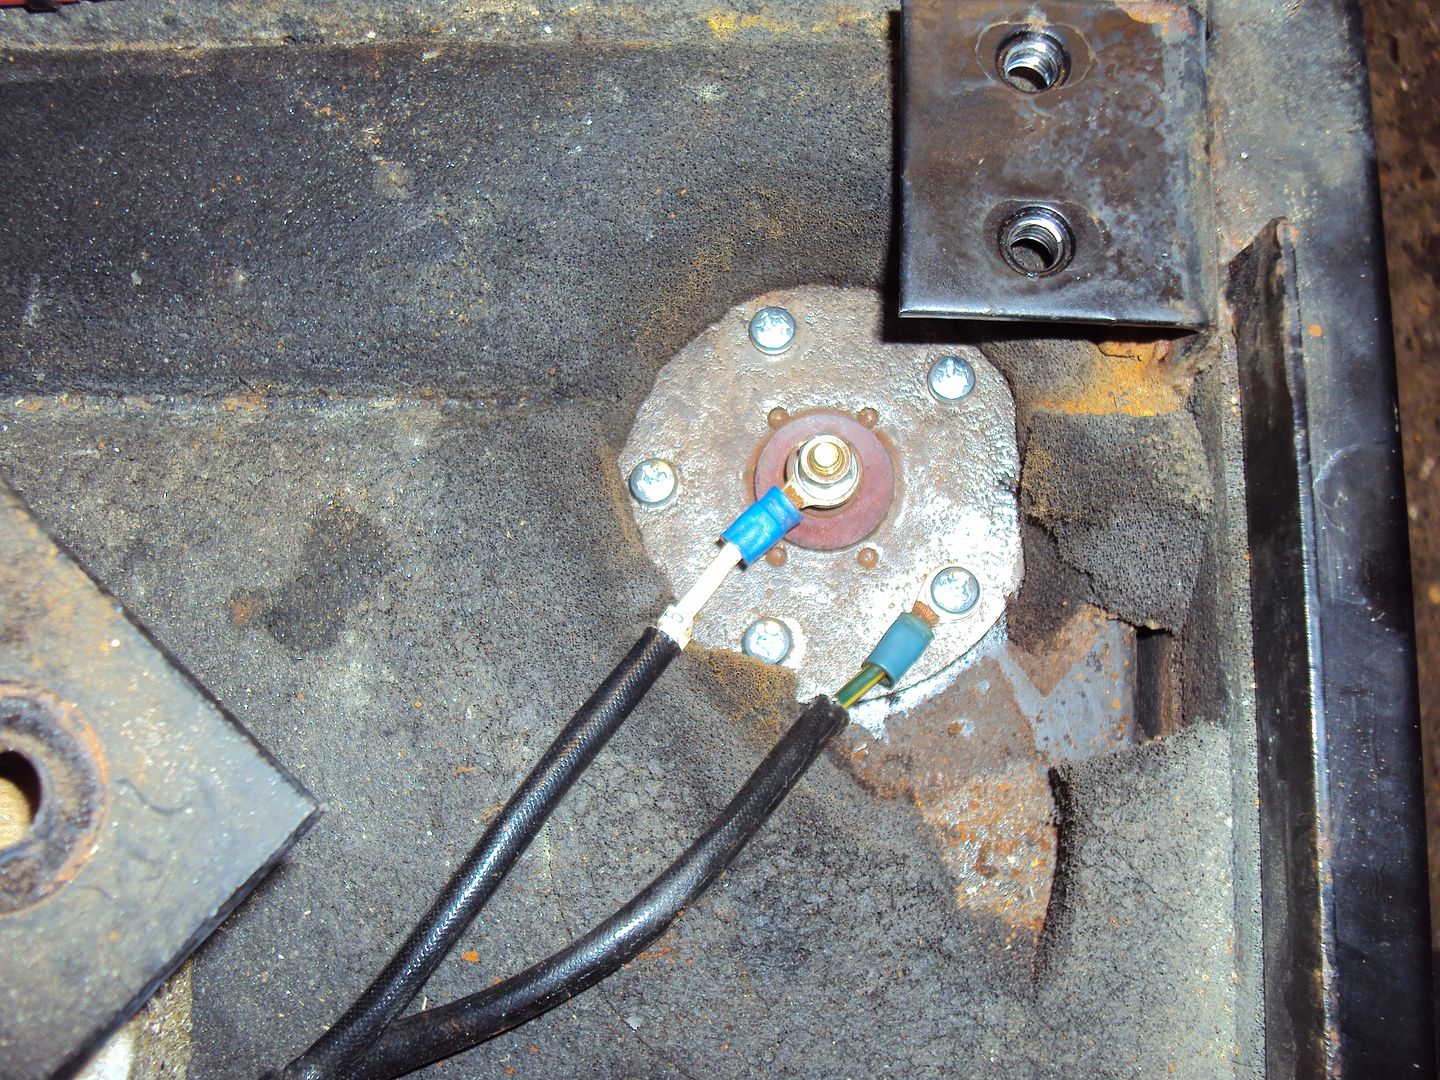
Fuel gauge now working.
During the week what must be the most expensive bit of plastic ever arrived
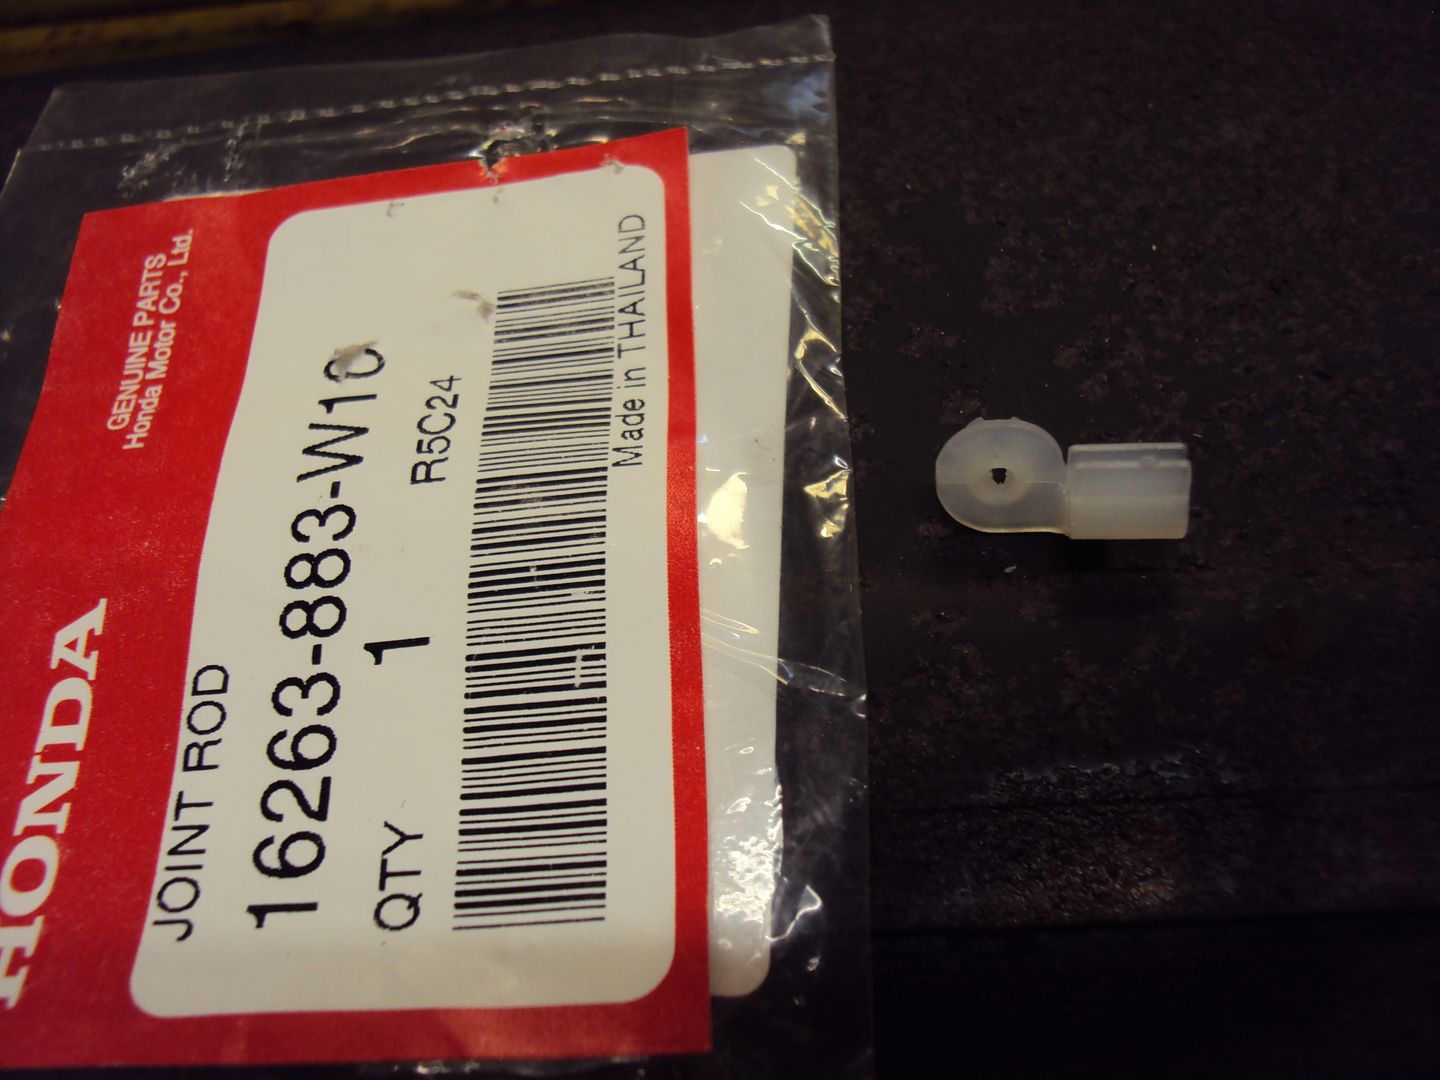
That small piece cost £10.00! On the plus side once fitted it will double the value of the generator
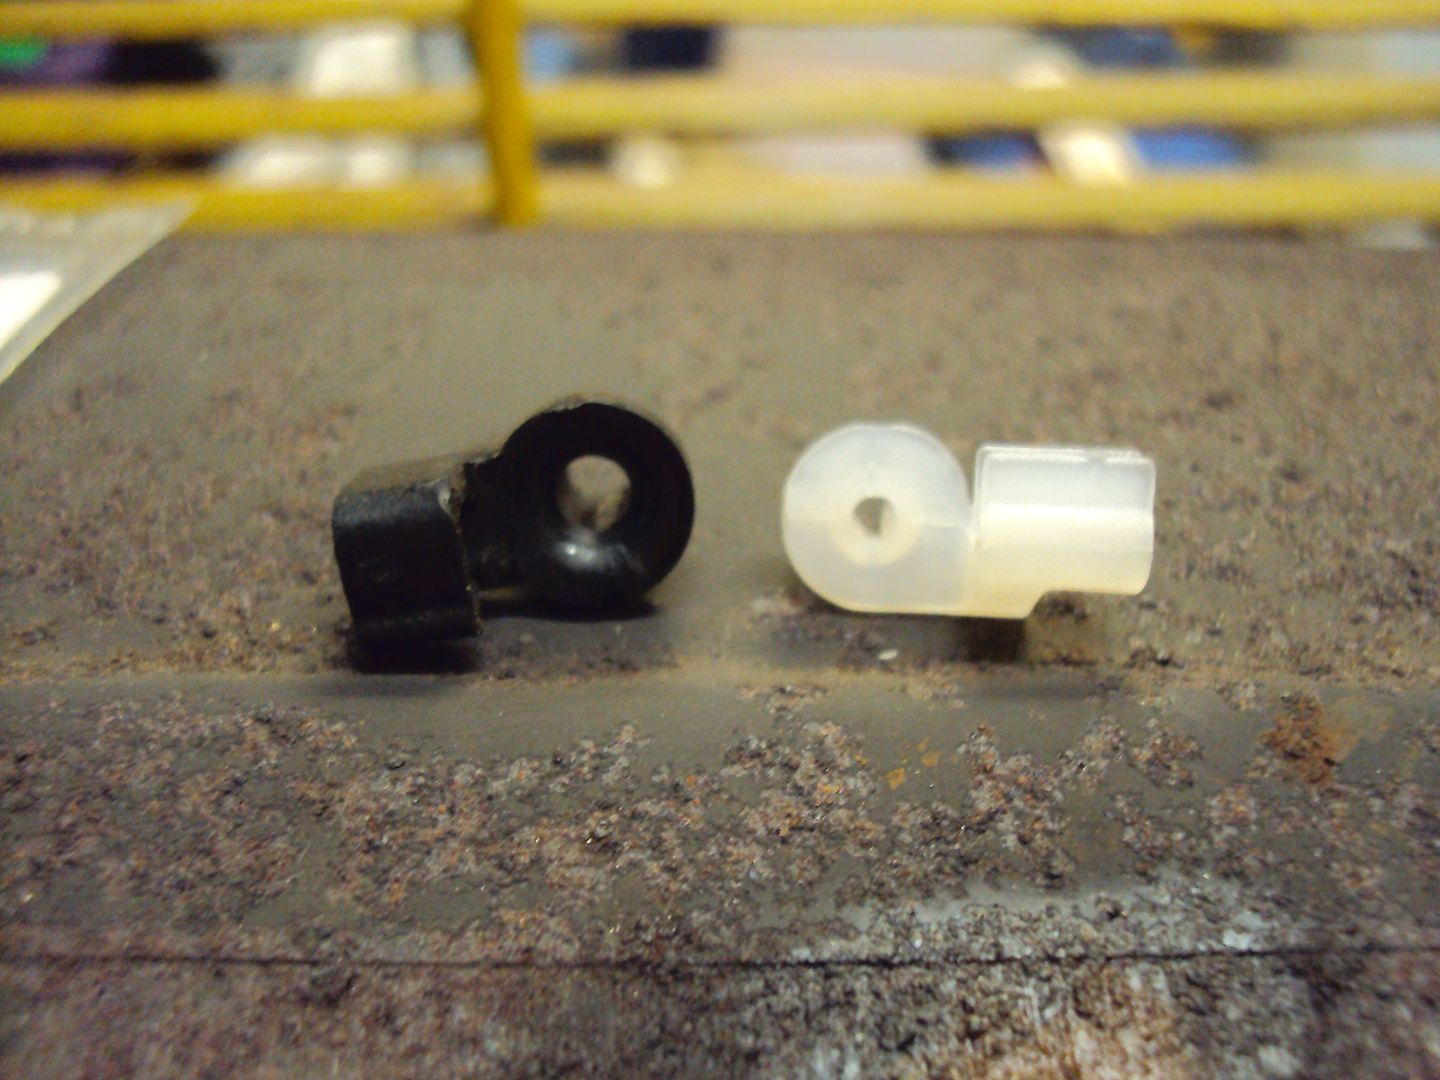
Old (black) vs new
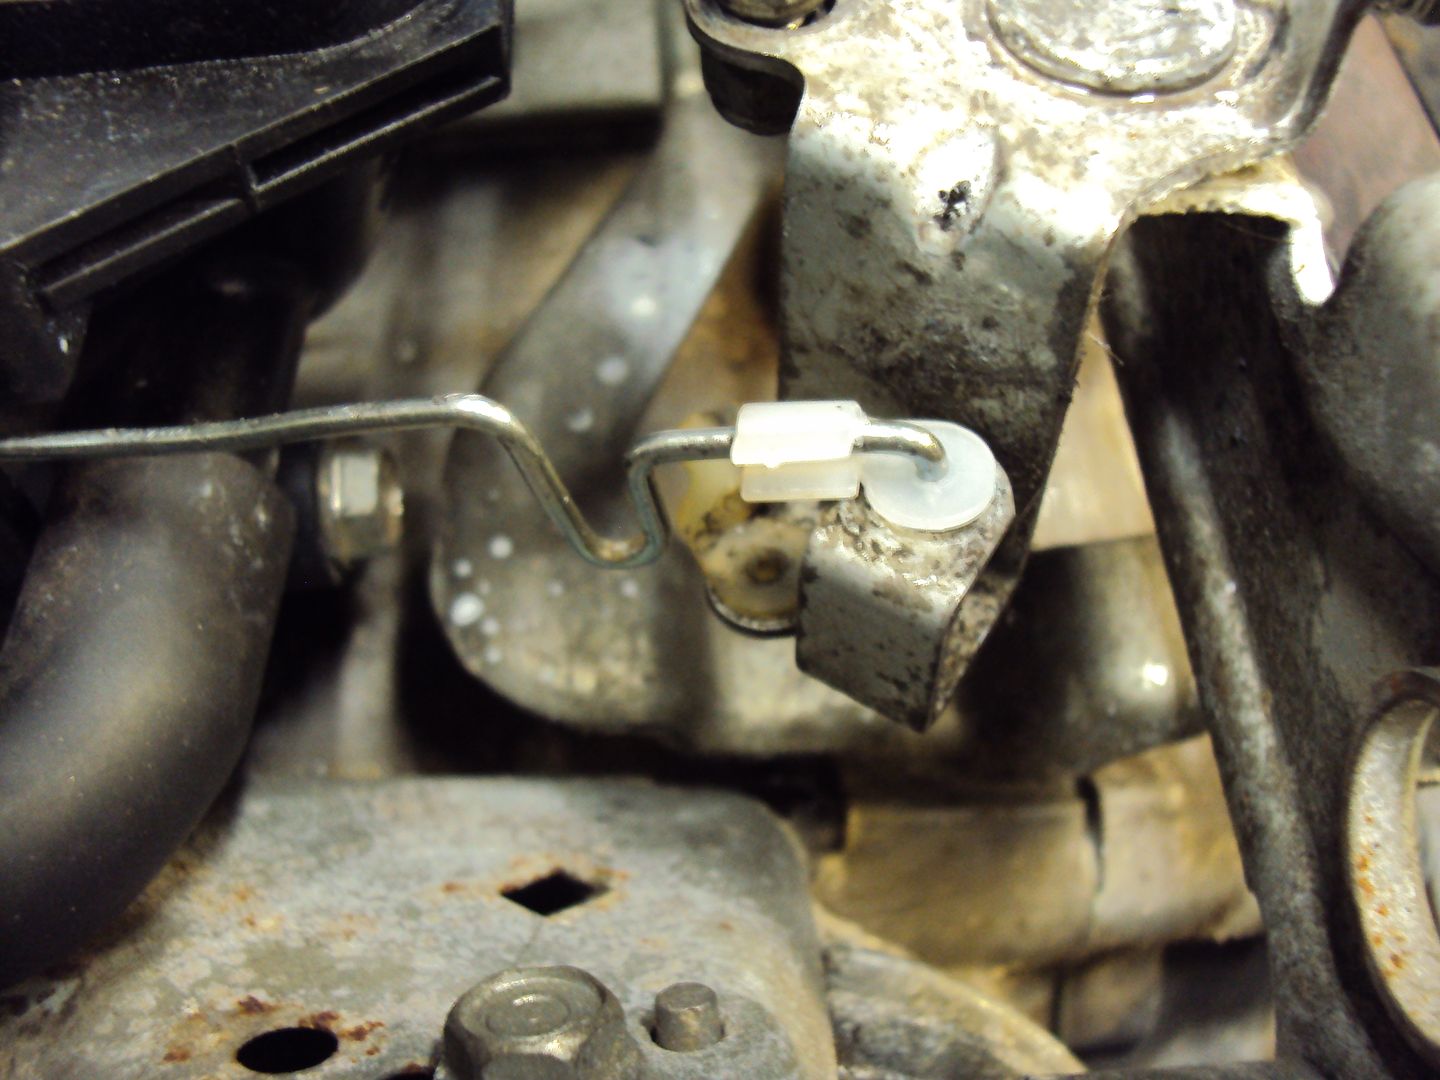
Fitted
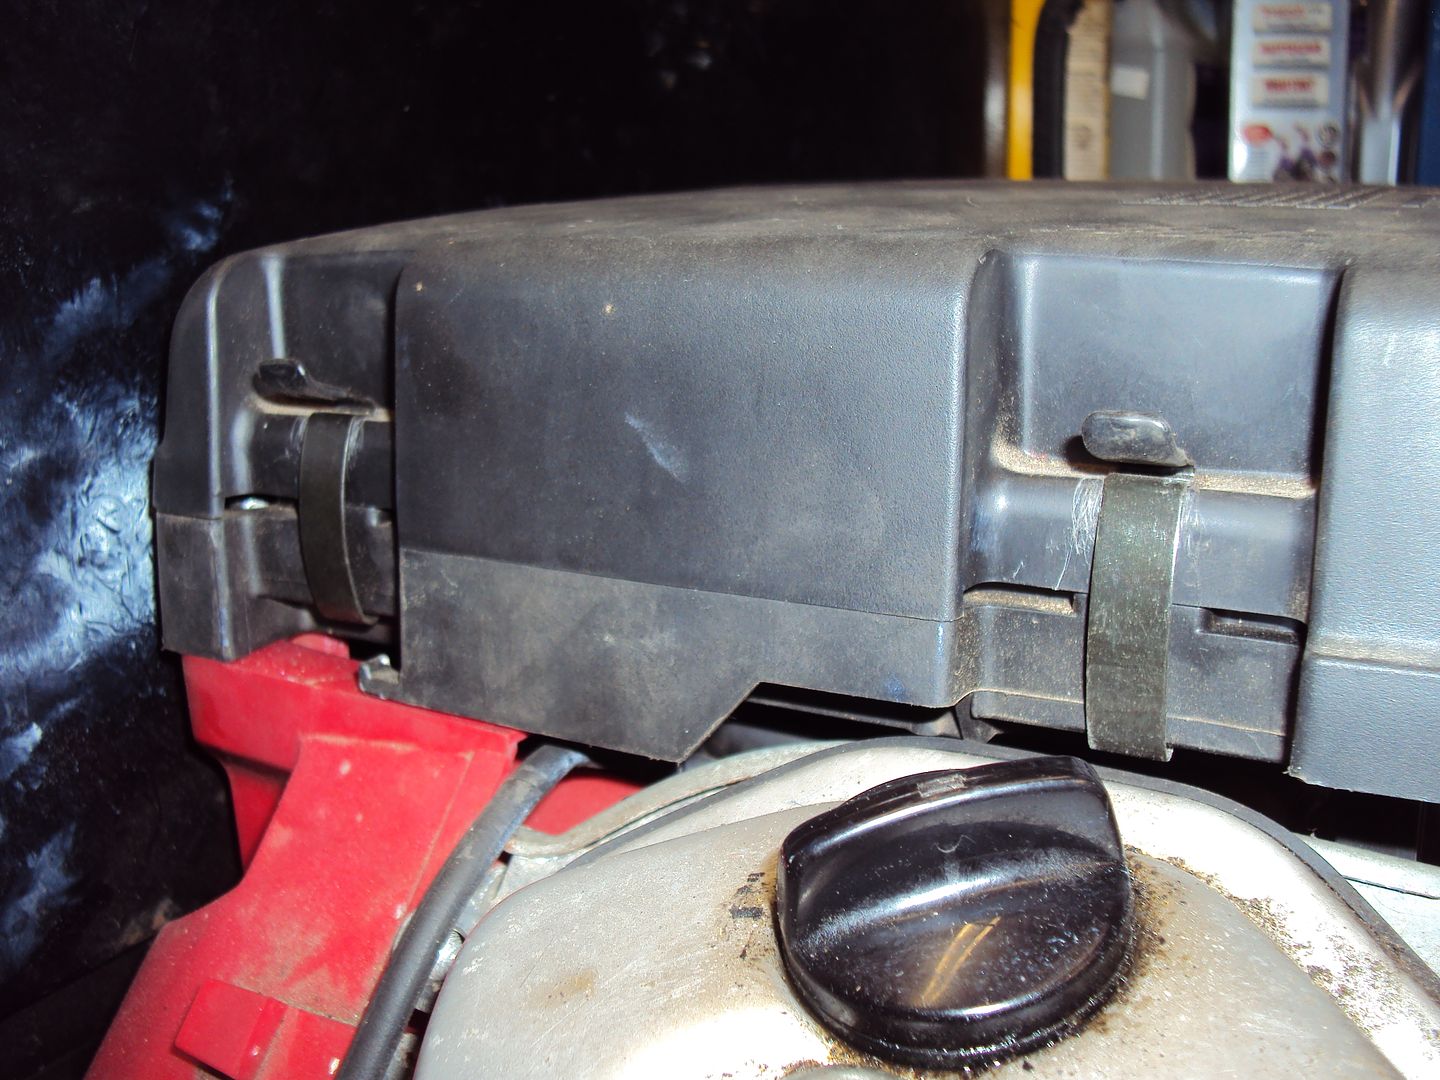
During re-assembly, noticed a problem with fitment of the air filter cover. If fitted how it was when I picked up the generator the clips wouldn’t fit and the cover wouldn’t sit correctly
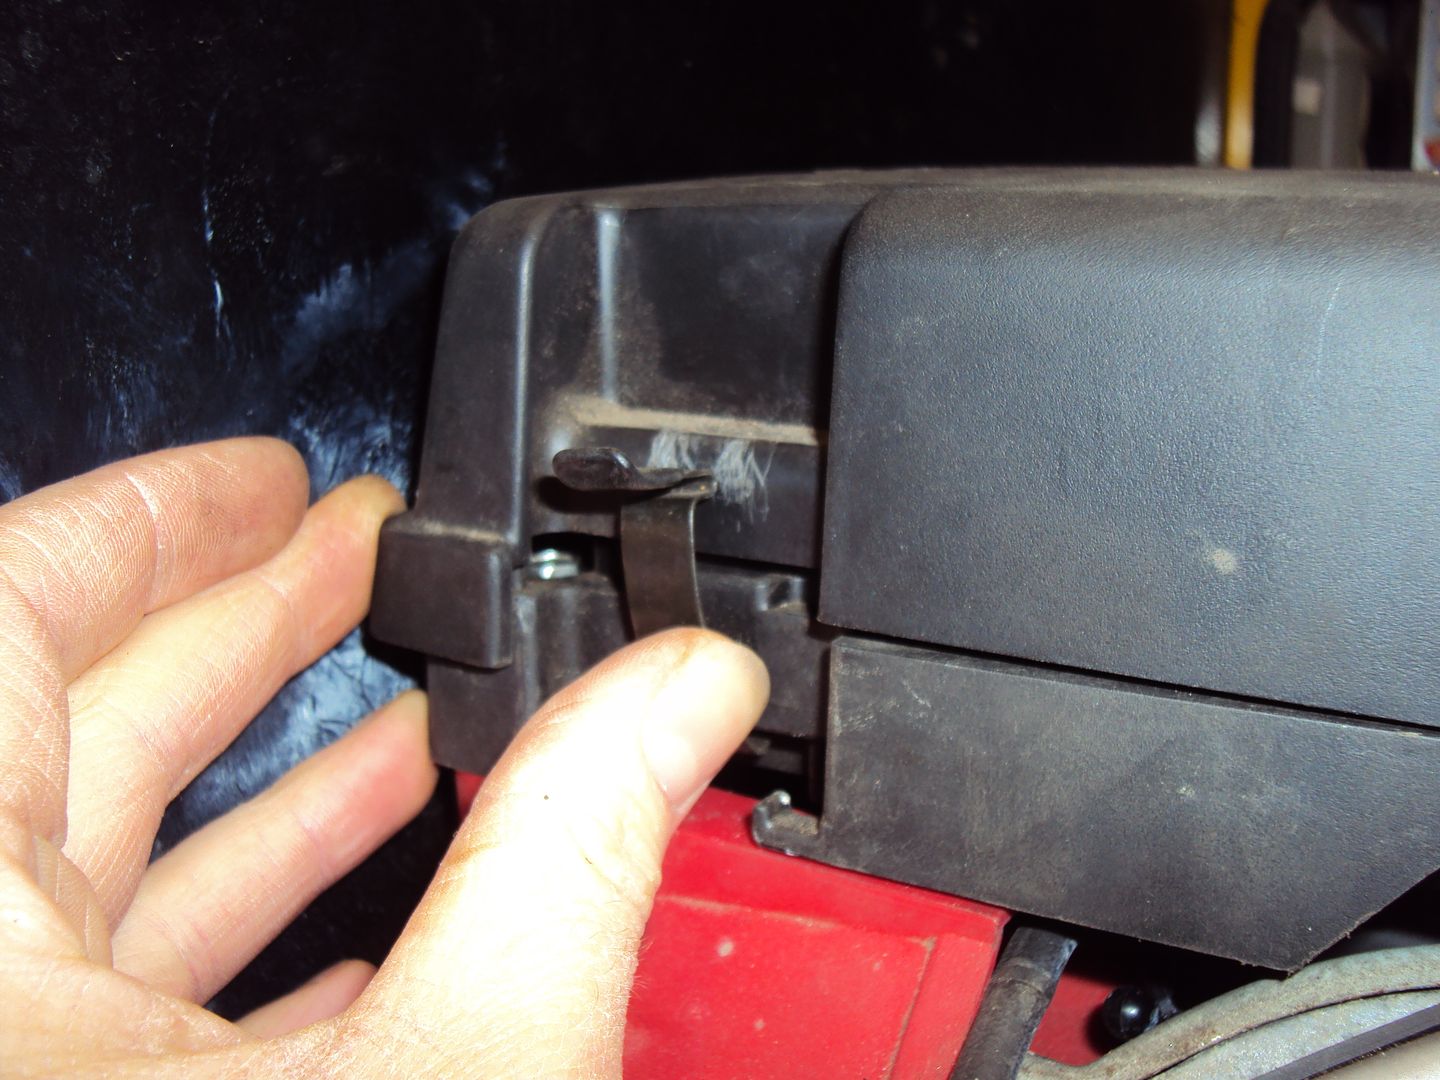
Should be sitting flat
When fitted in what seems the correct way where the clips can be snapped in to place
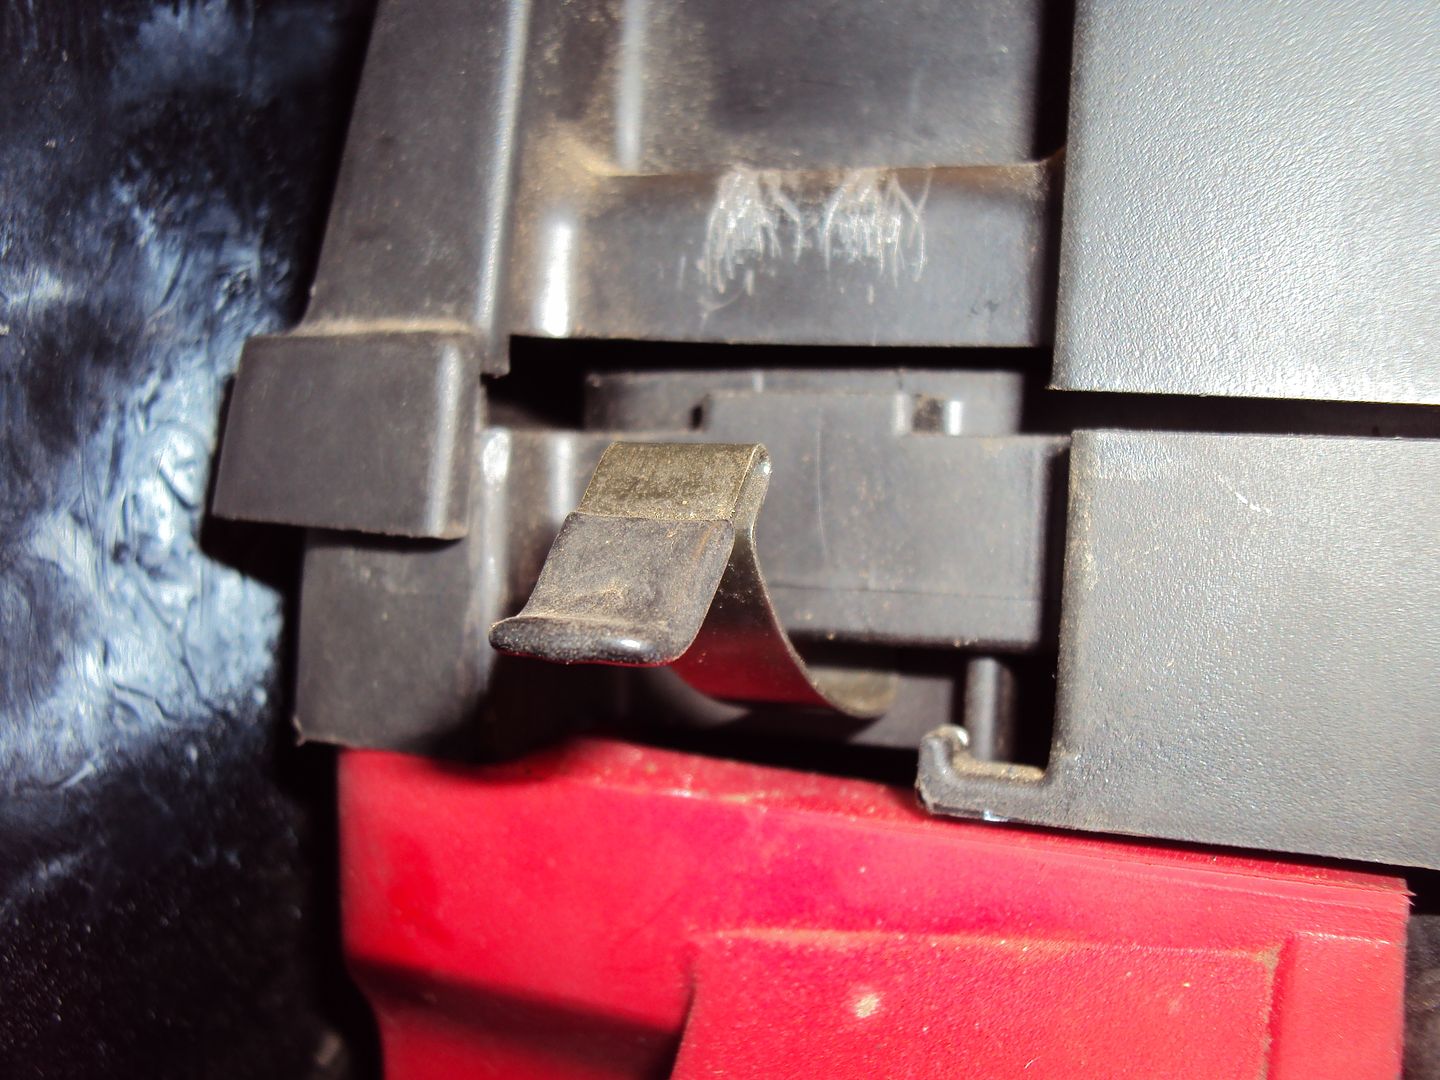
However cover interfered with the choke operation causing it to stick closed. The black tab on the right of the spring should move all the way back in the slot (behind the tab)
To give it more clearance, I made the slot wider
Choke now works correctly.
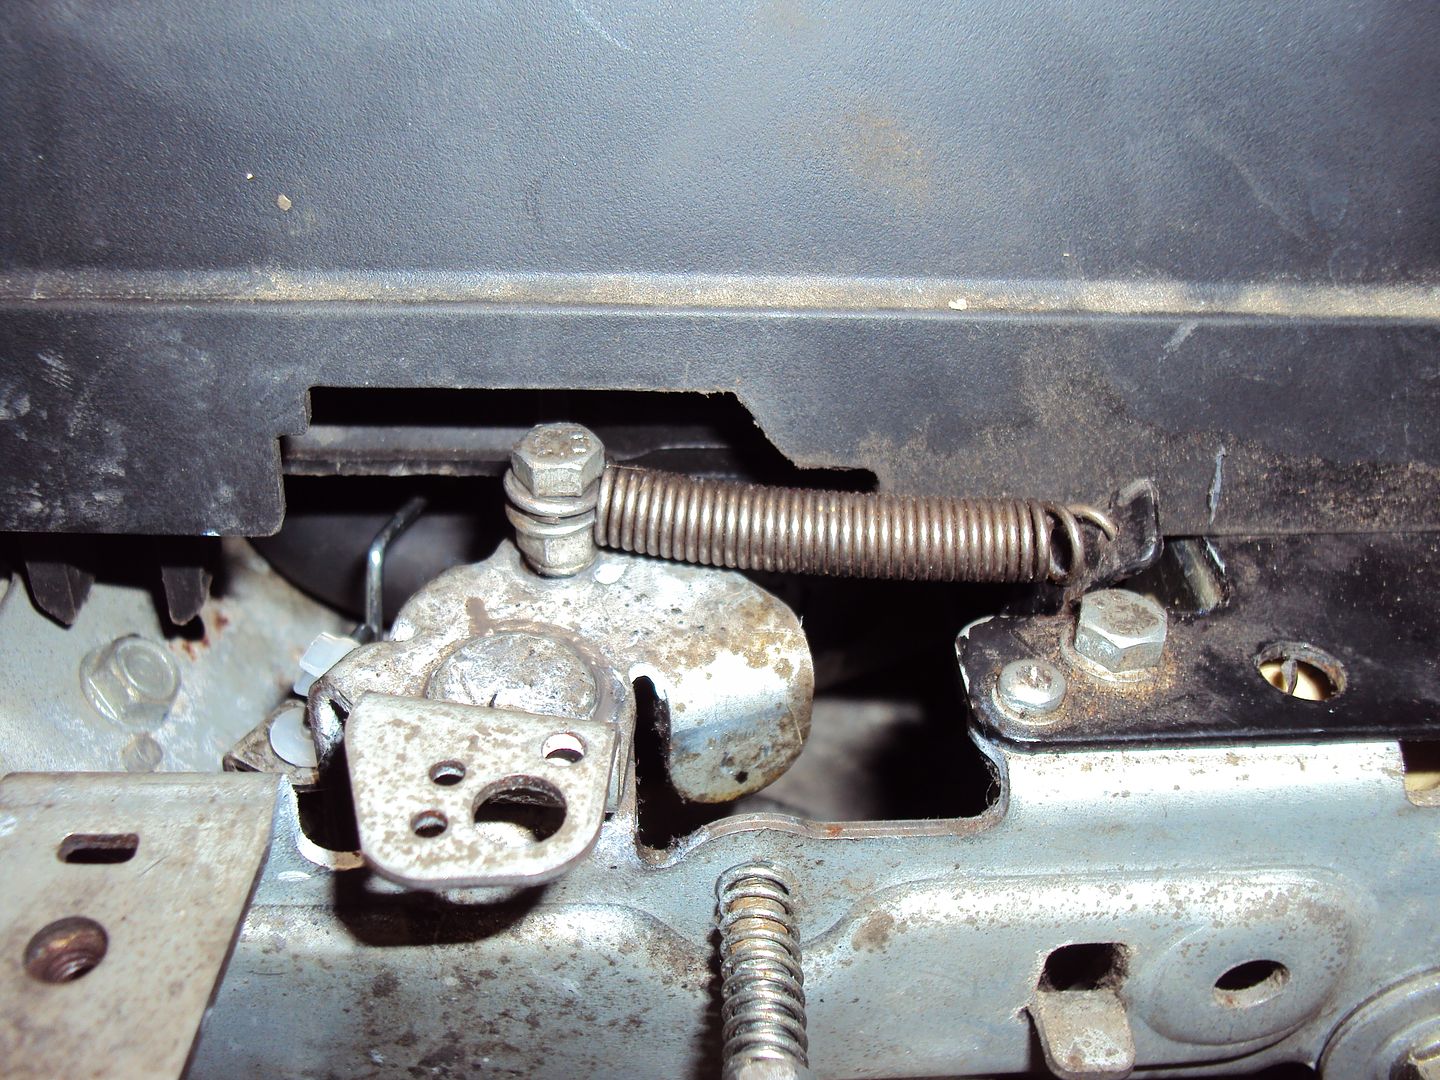
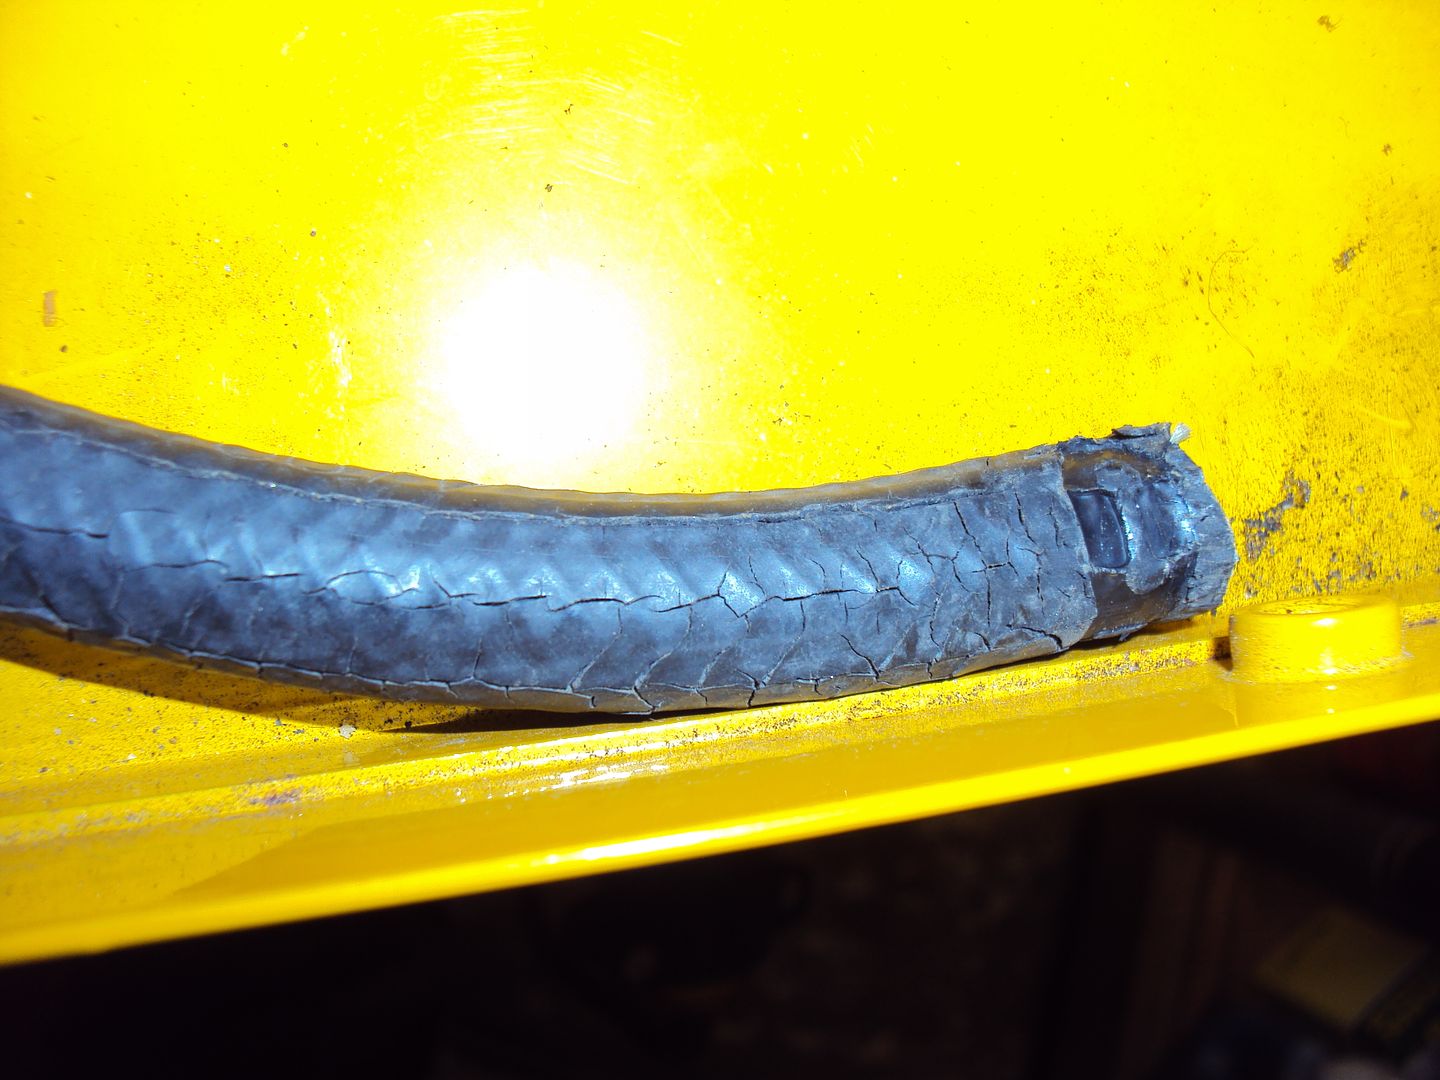
Fitted new fuel hose and filter
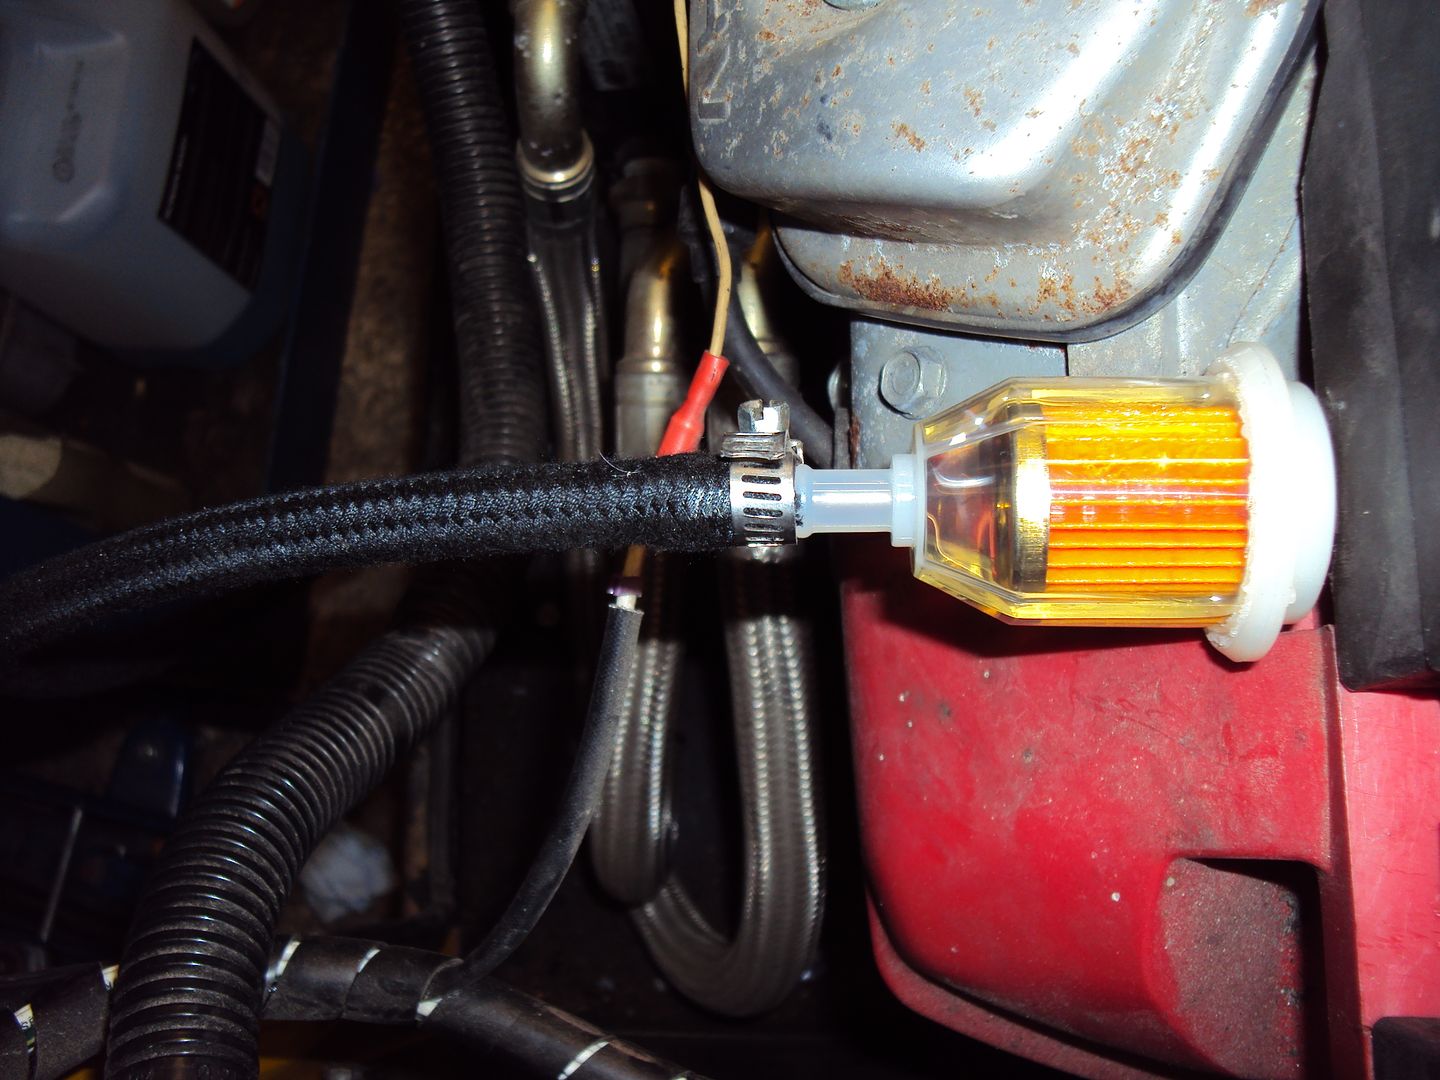
The old hose was starting to crack up
Also fitted a LED to show the ignition is on (so I don’t flatten the battery again)
All I need to do now is to finish re-assembly, change the oil and sell it.
creationracing said:
Probably a bit after-the-fact, but if you need a bit of plastic like that again, just go rip a door card off a few cars at your local scrapper. You'll find something on the end of a central locking rod that you can easily re-purpose.
Cheers, didn’t think of that.The big 10kVA genny is up for sale now.
In the meantime I gave this one a service.
Didn’t buy this one, as it belongs to us. My dad got it about 30 years ago for use as part of his job (electrician) and for using with the caravan. It’s still working although recently it’s been getting a bit difficult to start.
Popped the spark plug out, which was looking a bit carbonised, and noticed there was a fair bit of carbon in the cylinder.
After flicking through the manual it said it should be de-carbonised every 100 hours of operation, so decided to take the cylinder head off.
Strip down started
Quite a bit of carbon in the cylinder
Cylinder head
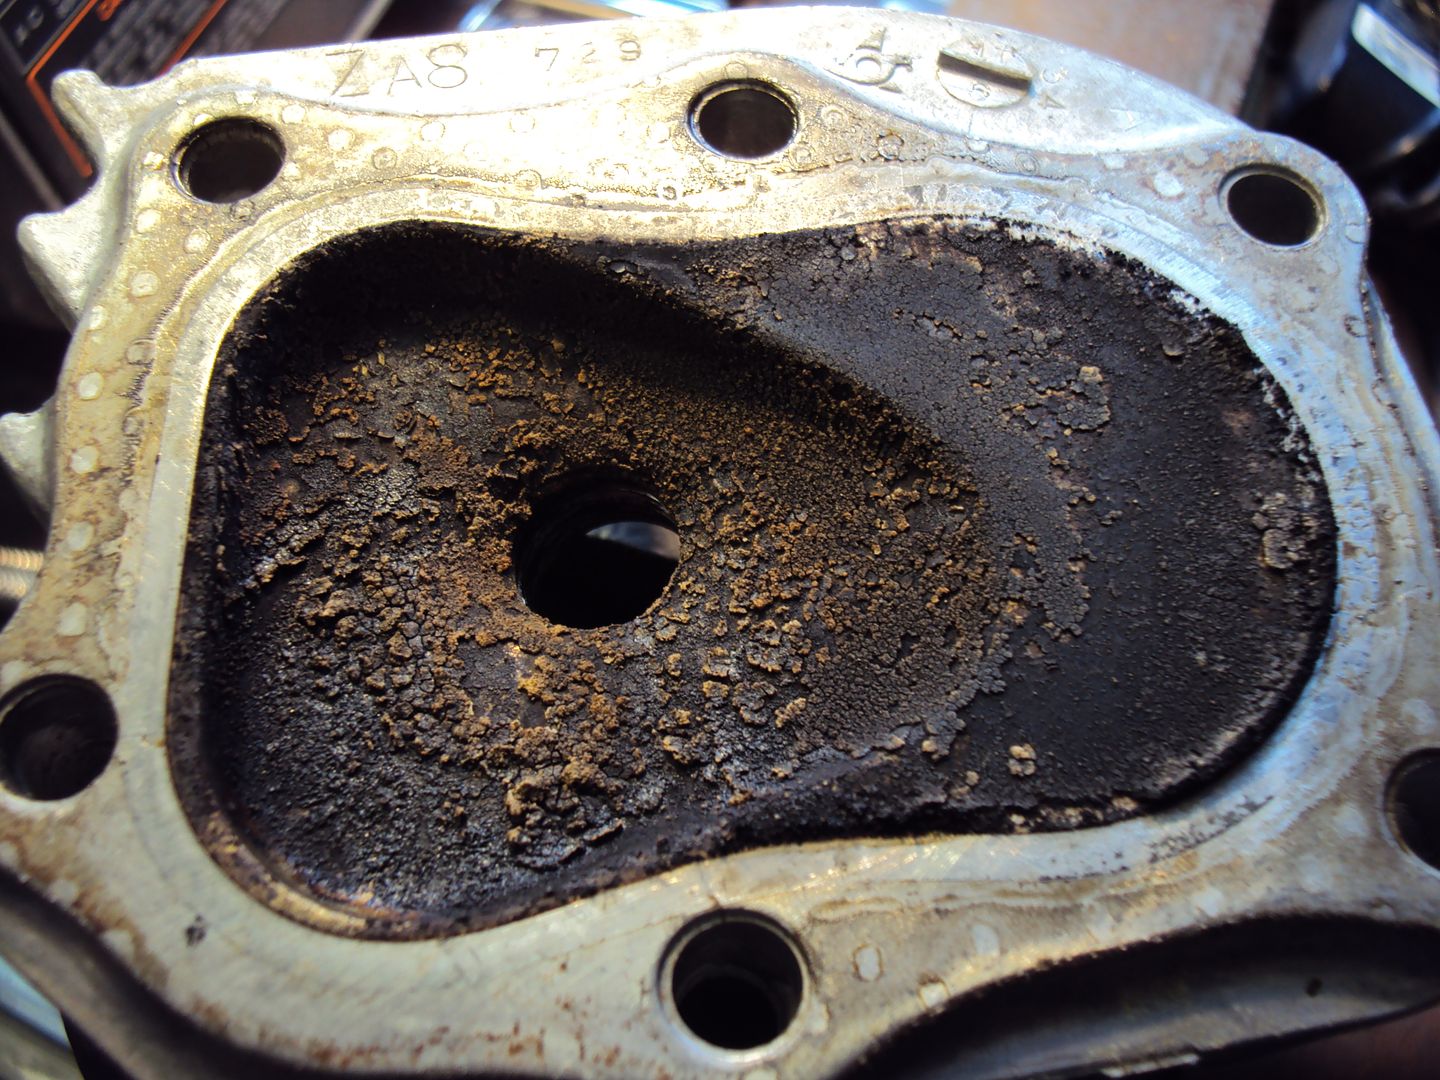
I cleaned up the cylinder and head with a soft wire brush and wire wool
Probably gained one or two of it’s 75cc back by clearing all the carbon. After re-assembly it fired up almost straight away, the carb just needed a bit of tweaking. It now seems a lot happier when running under load.
Gassing Station | Homes, Gardens and DIY | Top of Page | What's New | My Stuff