The ebay generator restoration thread
Discussion


Recently I started buying non running generators on ebay, fixing them and re-selling (bit like Wheeler Dealers) to try and earn a few extra beer tokens and because I enjoy tinkering with engines and things like this.
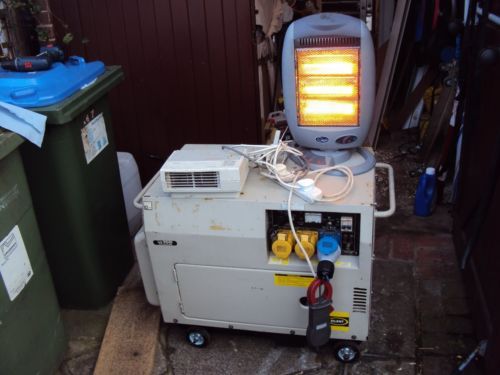
I started off with a single cylinder 5kva Diesel that wouldn’t start. After removing the case I found the problem with the starter motor.

The commutator was completely destroyed.
A new started was fitted and the generator fired up straight away. While replacing the starter motor I noticed the AVR module was also damaged.
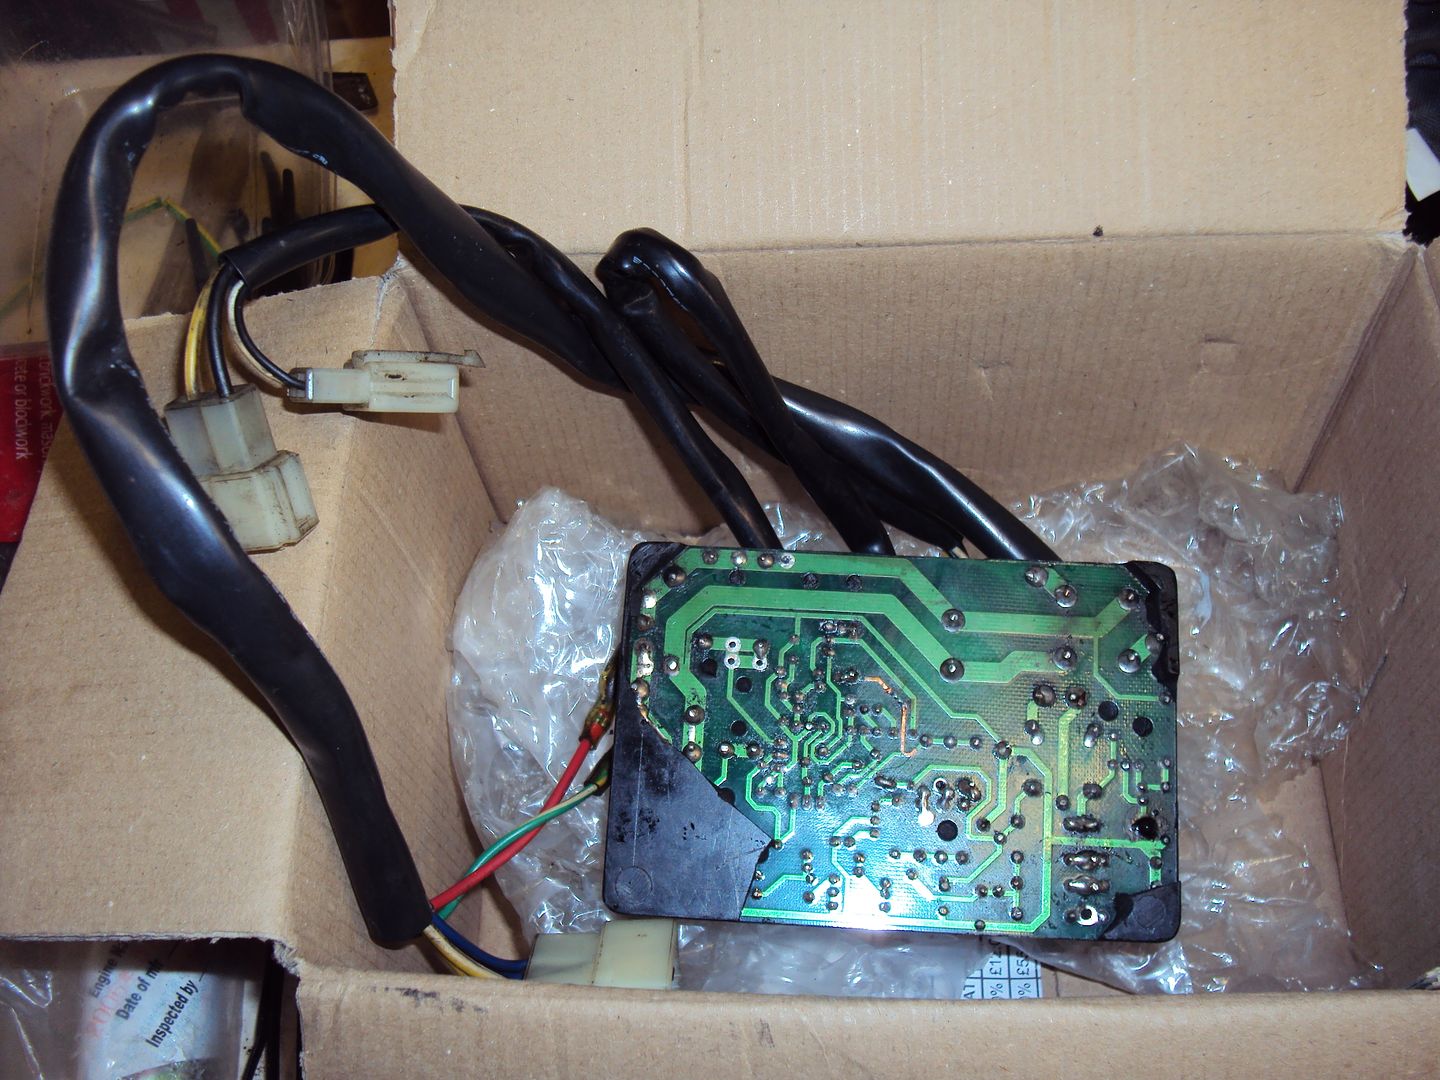
The circuit board should be covered in the black potting to protect it, also there is a damaged track visible. The AVR was working, but I decided to replace it for piece of mind.
The finished working generator
The latest project is 5kva Honda with a 300cc 2 cylinder petrol engine.
Photos from ebay listing:

I contacted the seller and found that they had sent it away for repair but decided not to go ahead so it came back as a kit of parts. I did a bit of research and found this particular model had a weak oil pump, so guessed based on the disassembly that the oil pump was the likely problem.
On collecting it I found that it was missing the key for the starter, fortunately the seller had couple of identical generators, so I took a picture of the keys against one of my keys for scale.
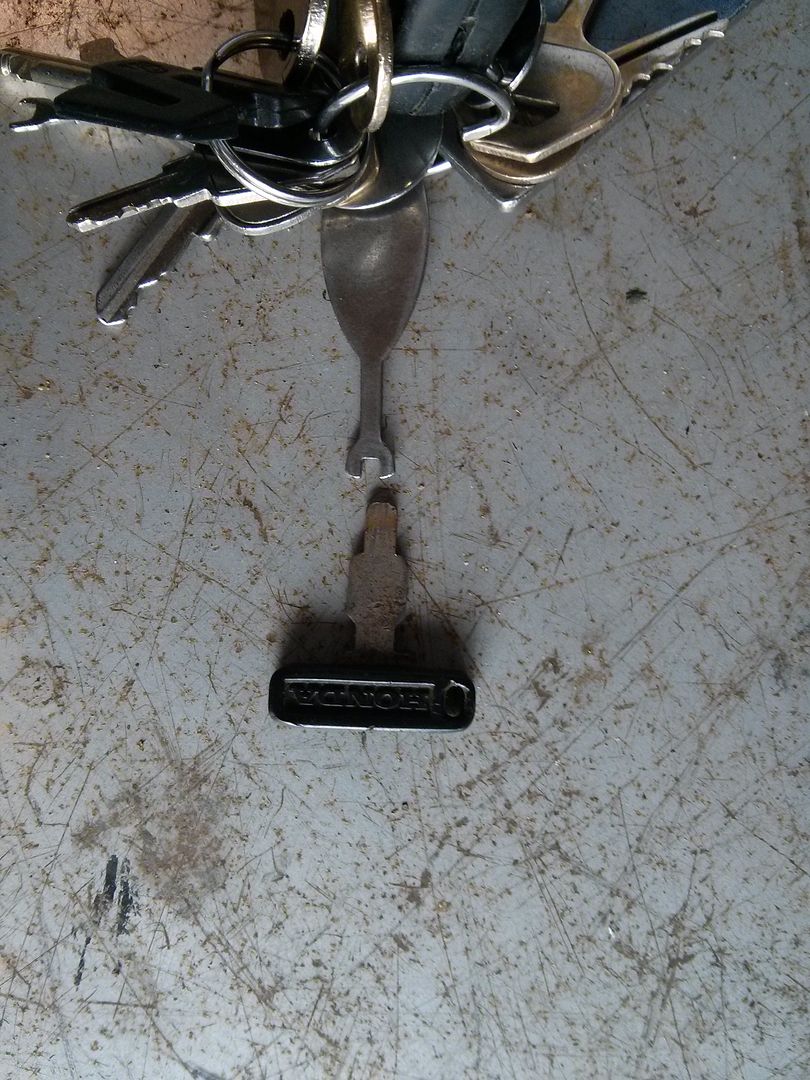
I made a copy of the key out of an old PC expansion slot cover by working the scale from the photo
And it worked

Before I could start the engine to diagnose the fault I had to repair the magneto as someone had helpfully cut the spark plug caps off
I cranked the engine over with the sparkplugs removed to check the magneto still worked, which it did. There was nice healthy spark which jumped about 5mm, this proved the magneto was ok. I managed to get a couple of short spark plug leads from a local motor factors and attached them to what was left of the leads on the magneto.
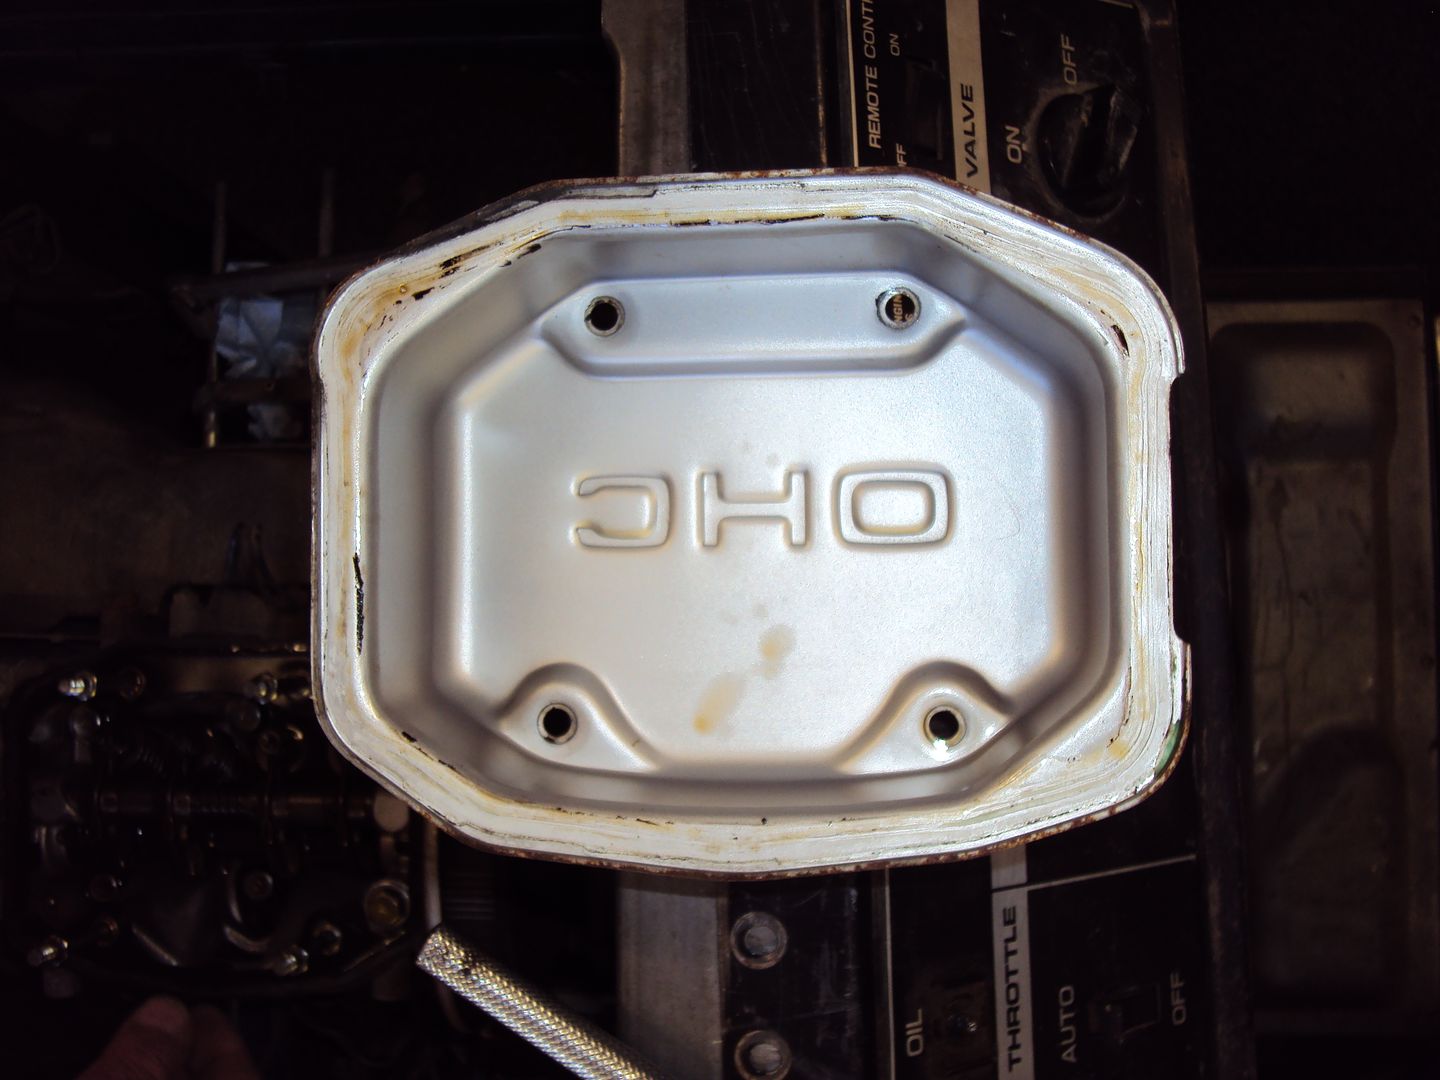
Opened up the rocker cover to check the valve gear, all looked fine.

Inside of rocker cover all nice and clean
After reassembling everything I got the engine started and running for about 10 seconds before it cut out due to low oil pressure. I confirmed the lack of oil pressure by replacing the oil pressure switch with a pressure gauge which read 0 with the engine running.
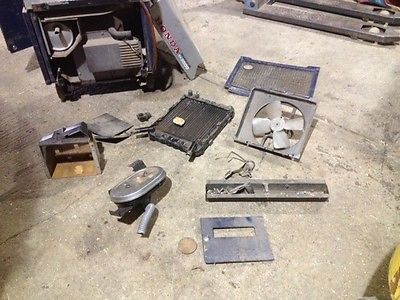
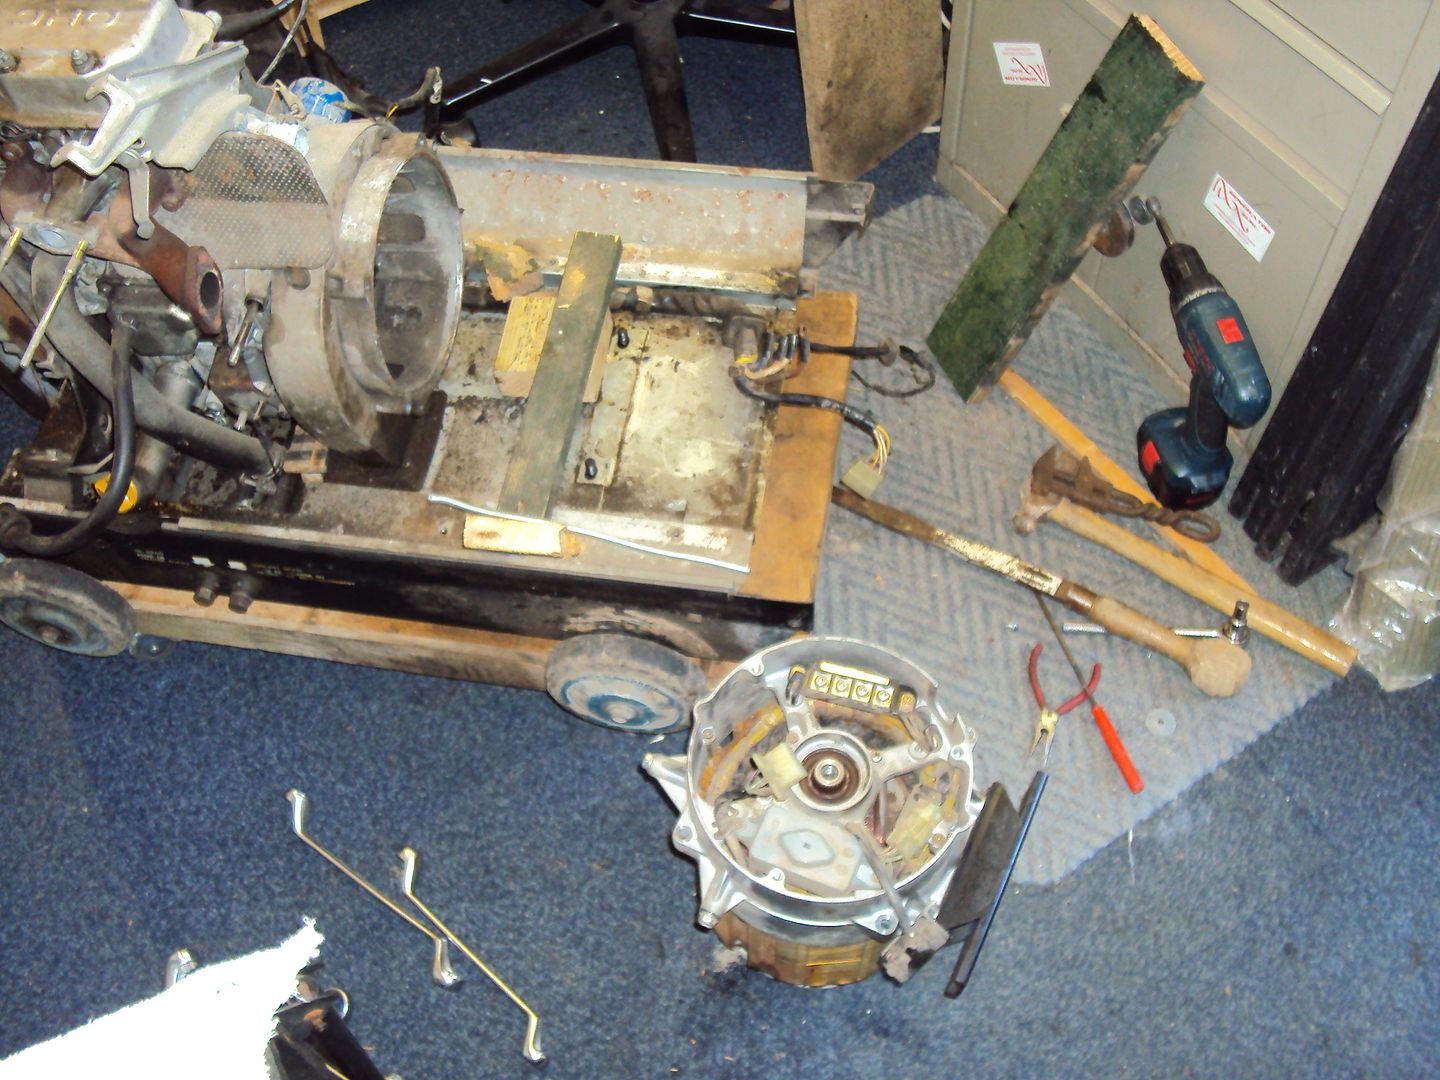
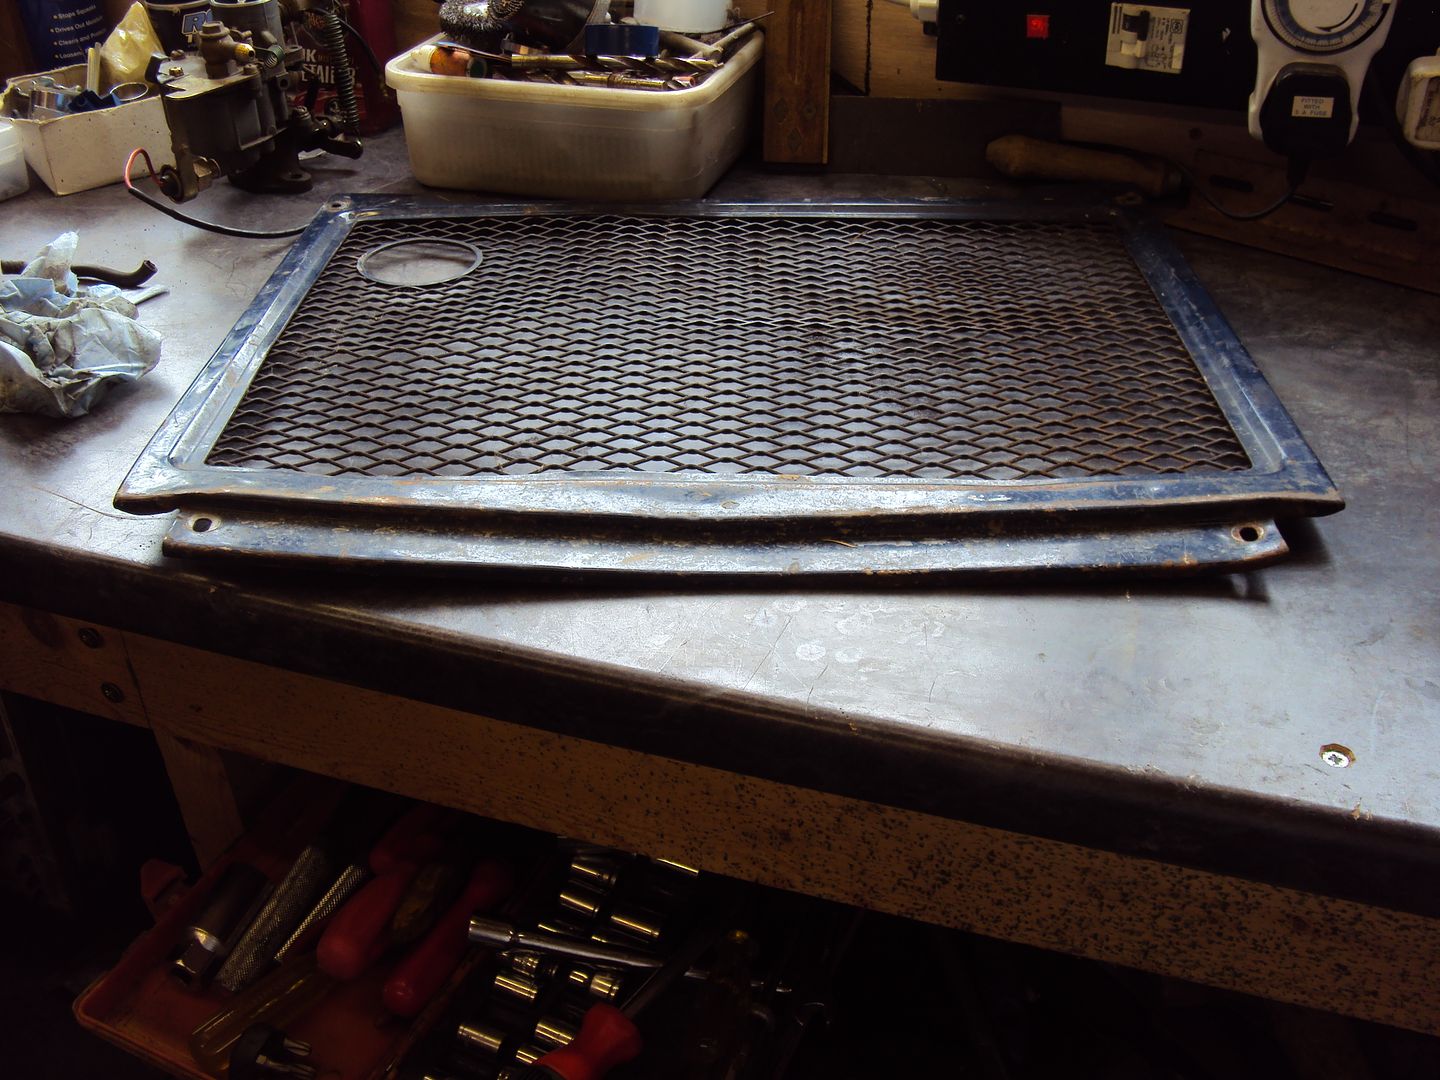
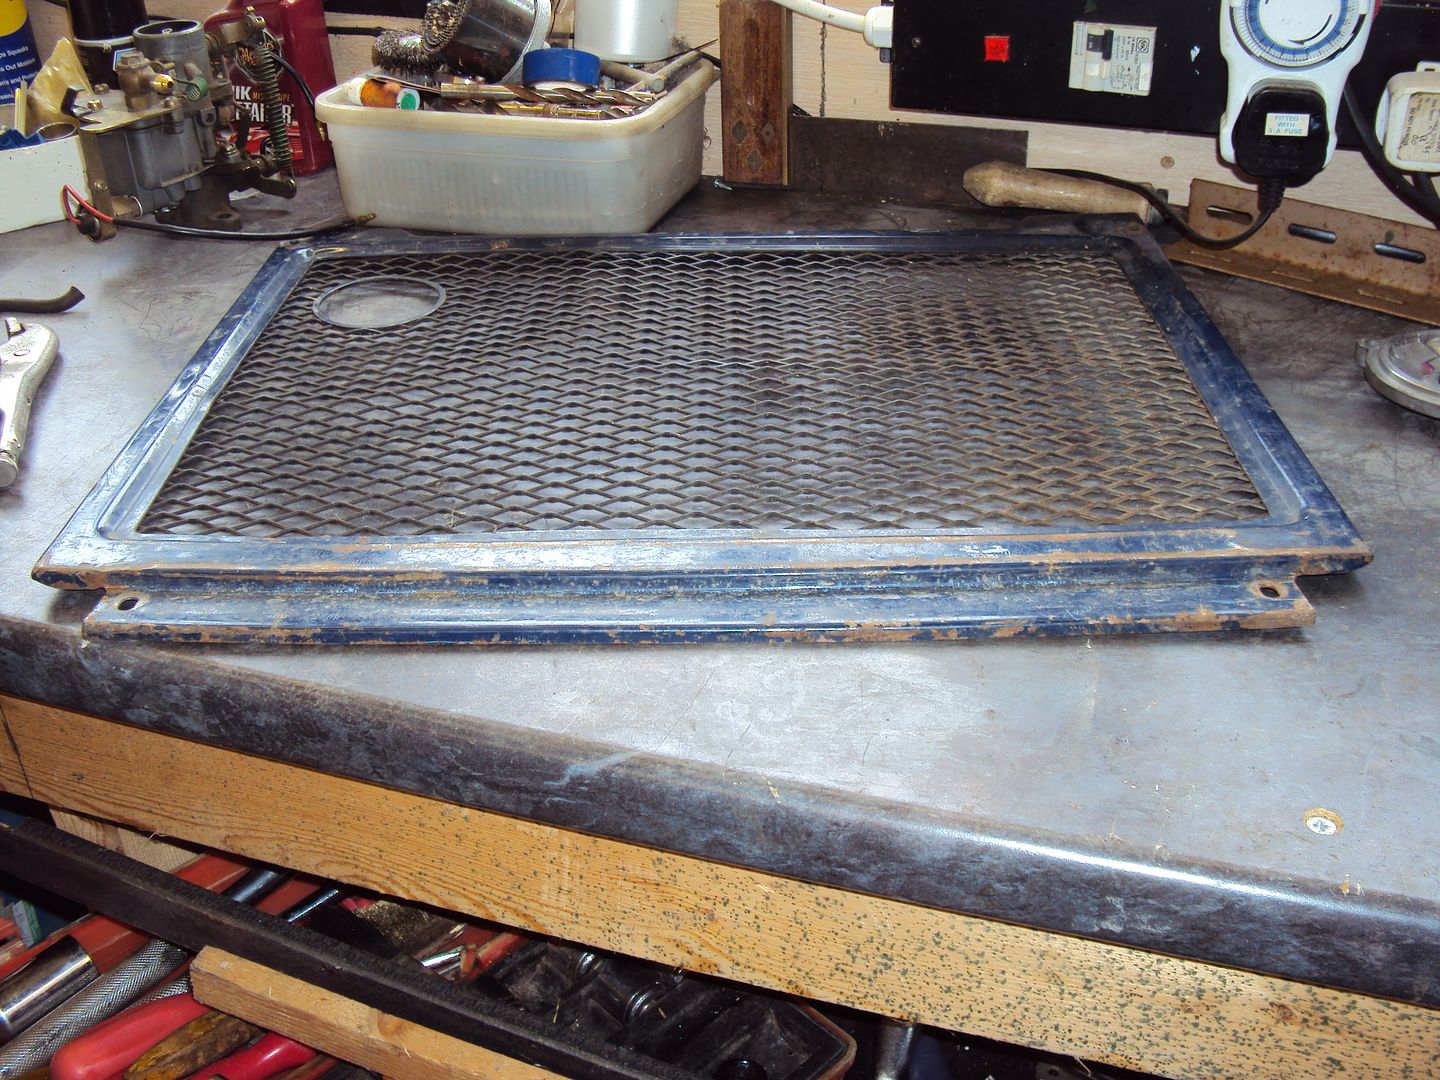
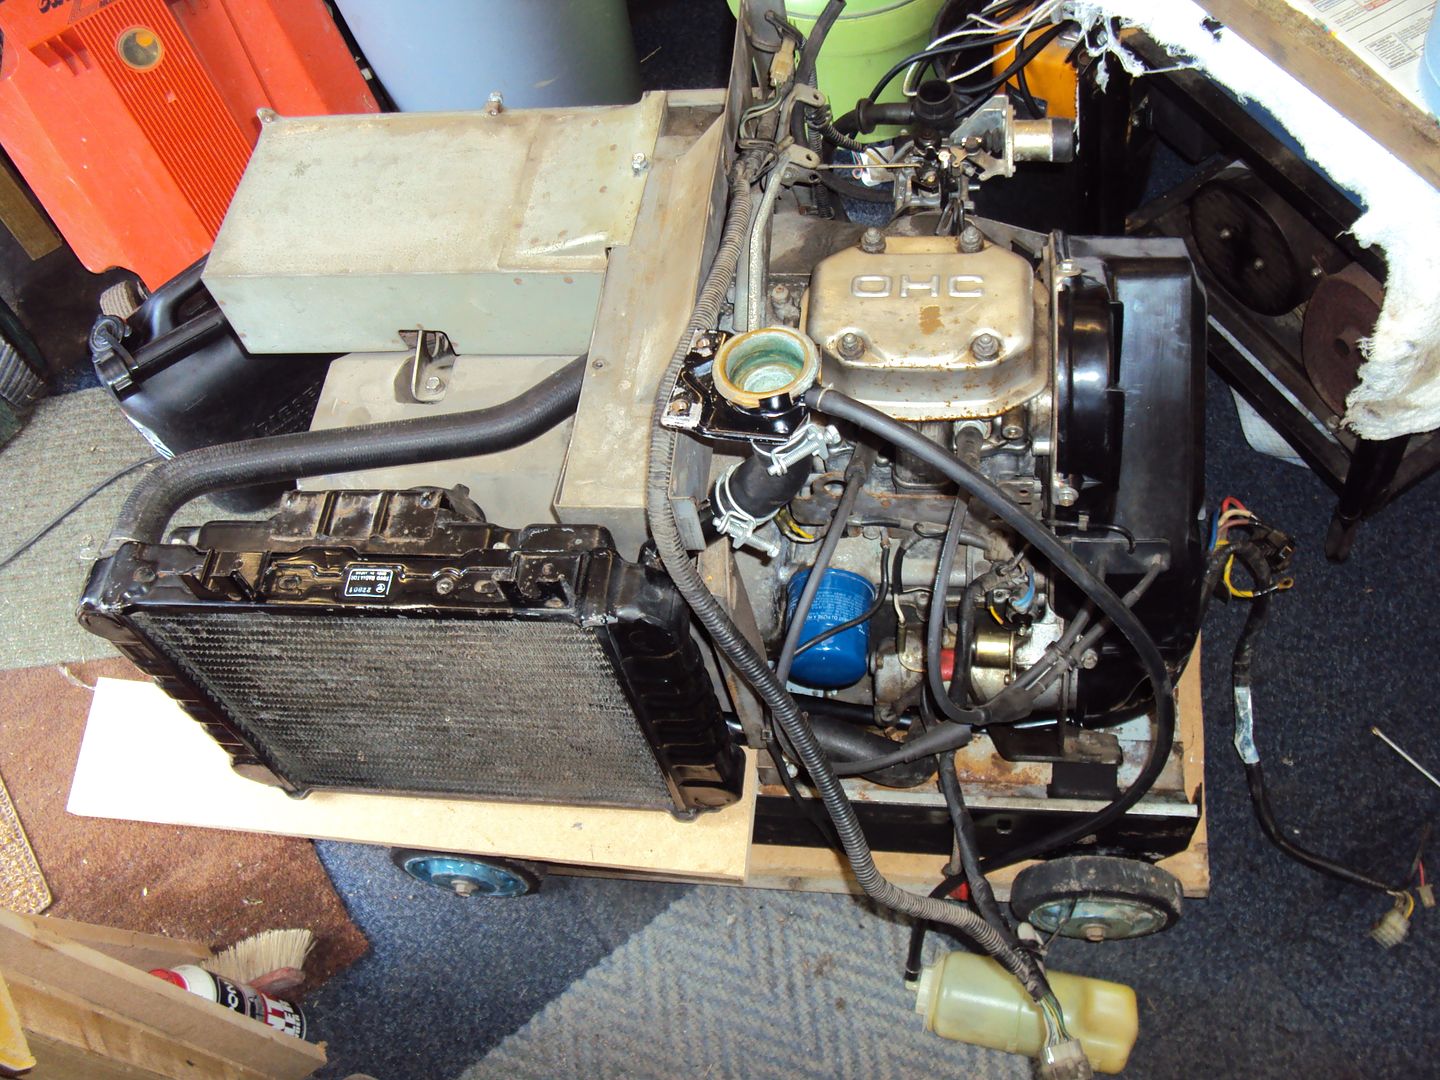
So the disassembly begun with the removal of the outer case
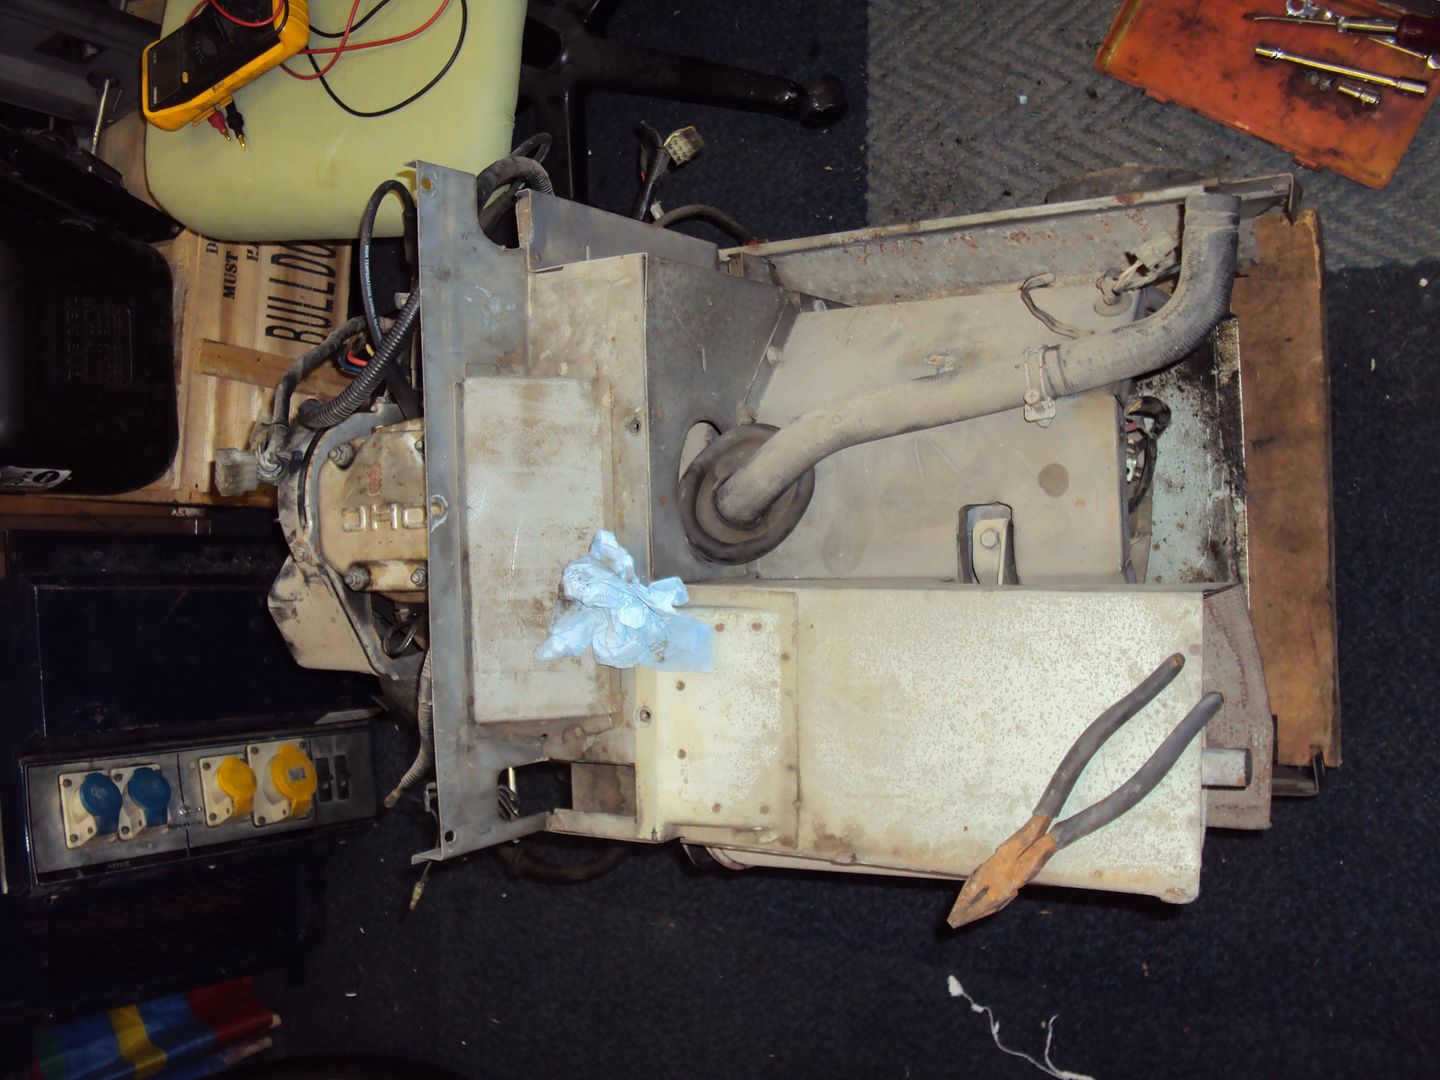
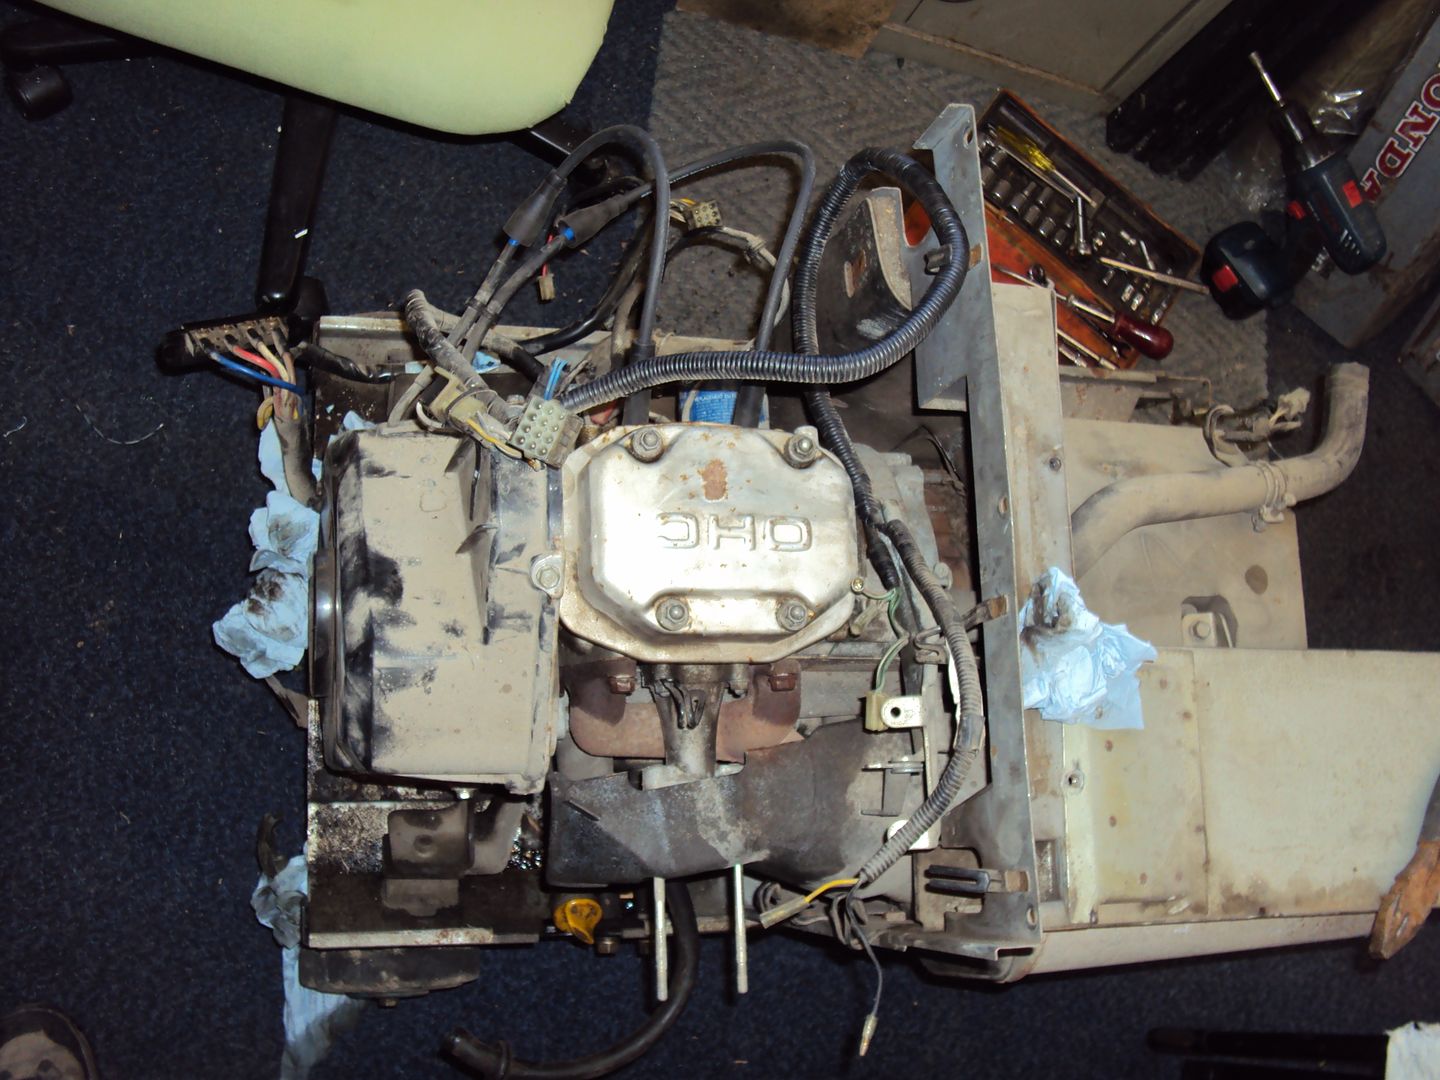
Where it stands today, all covers and exhaust removed
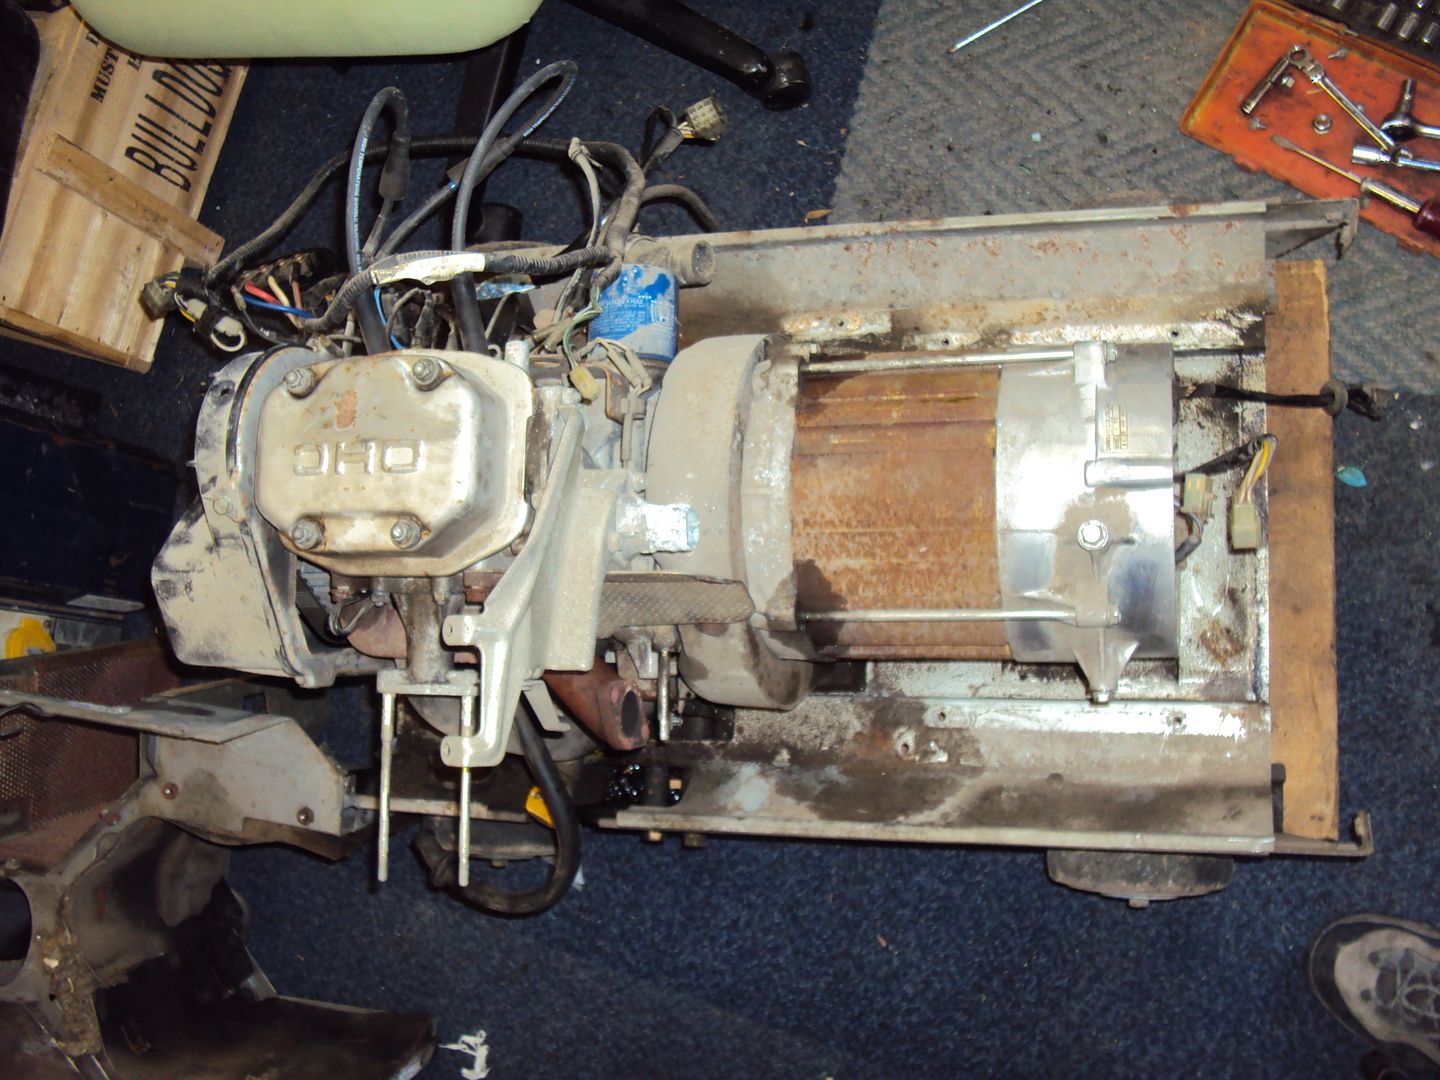
The next step is to disassemble and remove the alternator so I can get access to the oil pump to replace the drive gear.
I started off with a single cylinder 5kva Diesel that wouldn’t start. After removing the case I found the problem with the starter motor.
The commutator was completely destroyed.
A new started was fitted and the generator fired up straight away. While replacing the starter motor I noticed the AVR module was also damaged.
The circuit board should be covered in the black potting to protect it, also there is a damaged track visible. The AVR was working, but I decided to replace it for piece of mind.
The finished working generator
The latest project is 5kva Honda with a 300cc 2 cylinder petrol engine.
Photos from ebay listing:
I contacted the seller and found that they had sent it away for repair but decided not to go ahead so it came back as a kit of parts. I did a bit of research and found this particular model had a weak oil pump, so guessed based on the disassembly that the oil pump was the likely problem.
On collecting it I found that it was missing the key for the starter, fortunately the seller had couple of identical generators, so I took a picture of the keys against one of my keys for scale.
I made a copy of the key out of an old PC expansion slot cover by working the scale from the photo
And it worked
Before I could start the engine to diagnose the fault I had to repair the magneto as someone had helpfully cut the spark plug caps off
I cranked the engine over with the sparkplugs removed to check the magneto still worked, which it did. There was nice healthy spark which jumped about 5mm, this proved the magneto was ok. I managed to get a couple of short spark plug leads from a local motor factors and attached them to what was left of the leads on the magneto.
Opened up the rocker cover to check the valve gear, all looked fine.
Inside of rocker cover all nice and clean
After reassembling everything I got the engine started and running for about 10 seconds before it cut out due to low oil pressure. I confirmed the lack of oil pressure by replacing the oil pressure switch with a pressure gauge which read 0 with the engine running.
So the disassembly begun with the removal of the outer case
Where it stands today, all covers and exhaust removed
The next step is to disassemble and remove the alternator so I can get access to the oil pump to replace the drive gear.
Quite 'niche geeky' but captivating reading nonetheless!
How do you know so much about gennies? Do you work in similar field or just read a few books?
I'd imagine you could make a good few quid on stuff like this, that Honda will be worth what, a grand plus when done?
Post more pics and projects, it's weirdly very interesting!
How do you know so much about gennies? Do you work in similar field or just read a few books?
I'd imagine you could make a good few quid on stuff like this, that Honda will be worth what, a grand plus when done?
Post more pics and projects, it's weirdly very interesting!
s3fella said:
Quite 'niche geeky' but captivating reading nonetheless!
How do you know so much about gennies? Do you work in similar field or just read a few books?
I'd imagine you could make a good few quid on stuff like this, that Honda will be worth what, a grand plus when done?
Post more pics and projects, it's weirdly very interesting!
I’m learning as I go, my background is electronics so a bit smaller than this and a lot cleaner. How do you know so much about gennies? Do you work in similar field or just read a few books?
I'd imagine you could make a good few quid on stuff like this, that Honda will be worth what, a grand plus when done?
Post more pics and projects, it's weirdly very interesting!
When working they tend to go for £4-600, I might tidy up the paintwork with a fresh coat of blue and silver to make it look a bit less beaten up.
Today’s progress
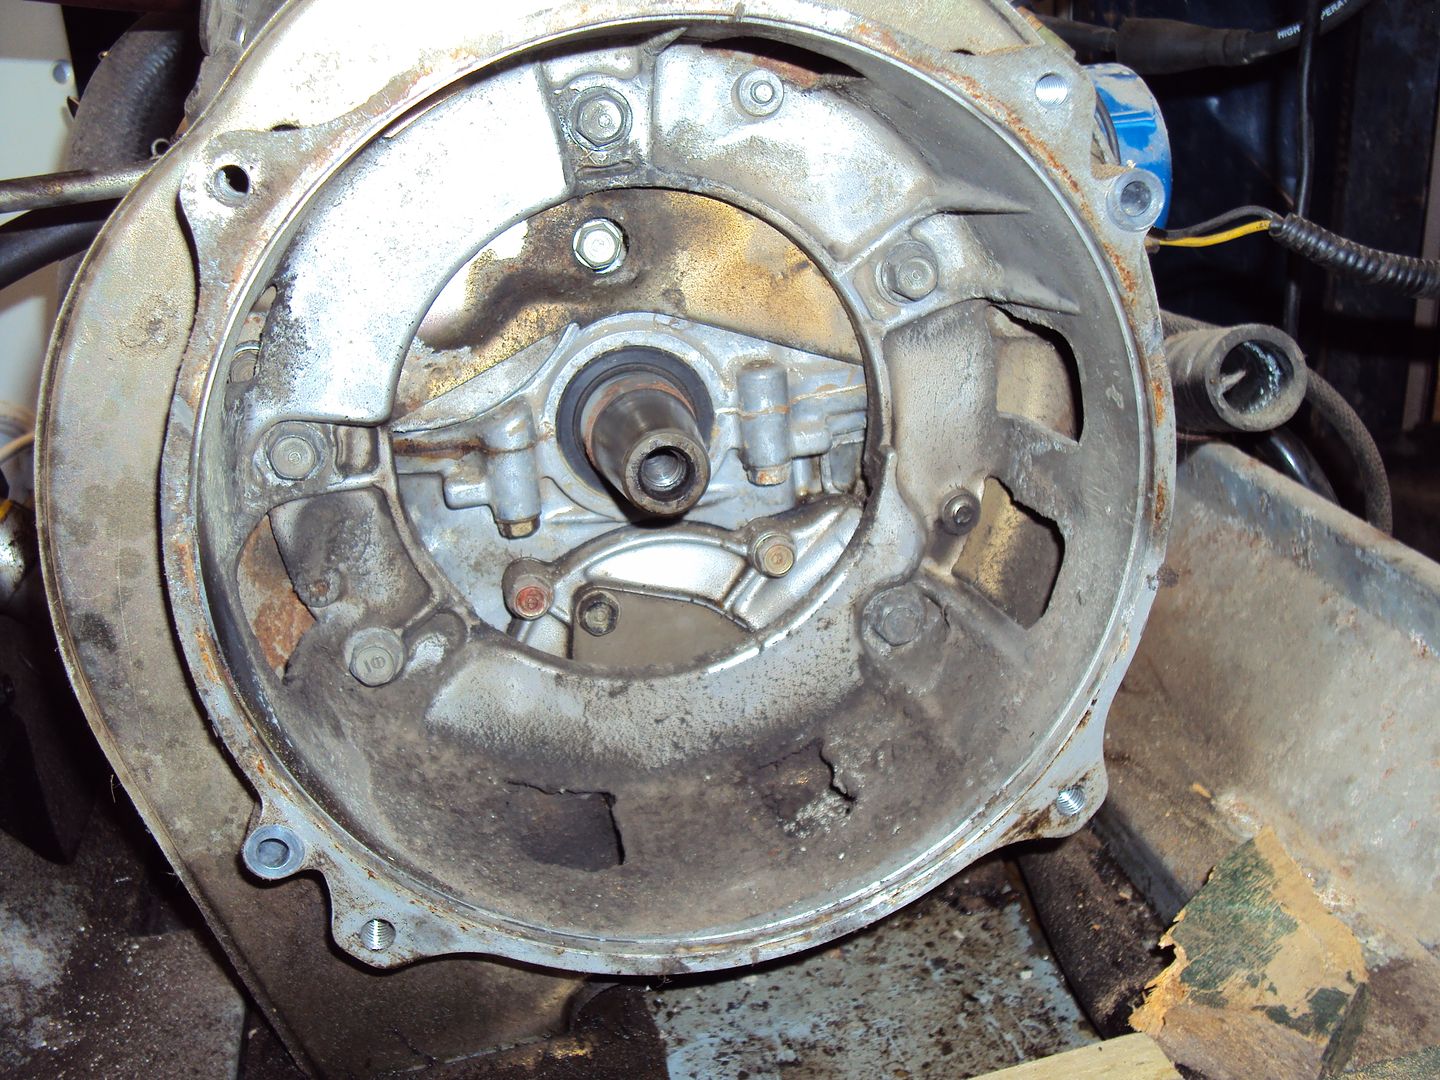
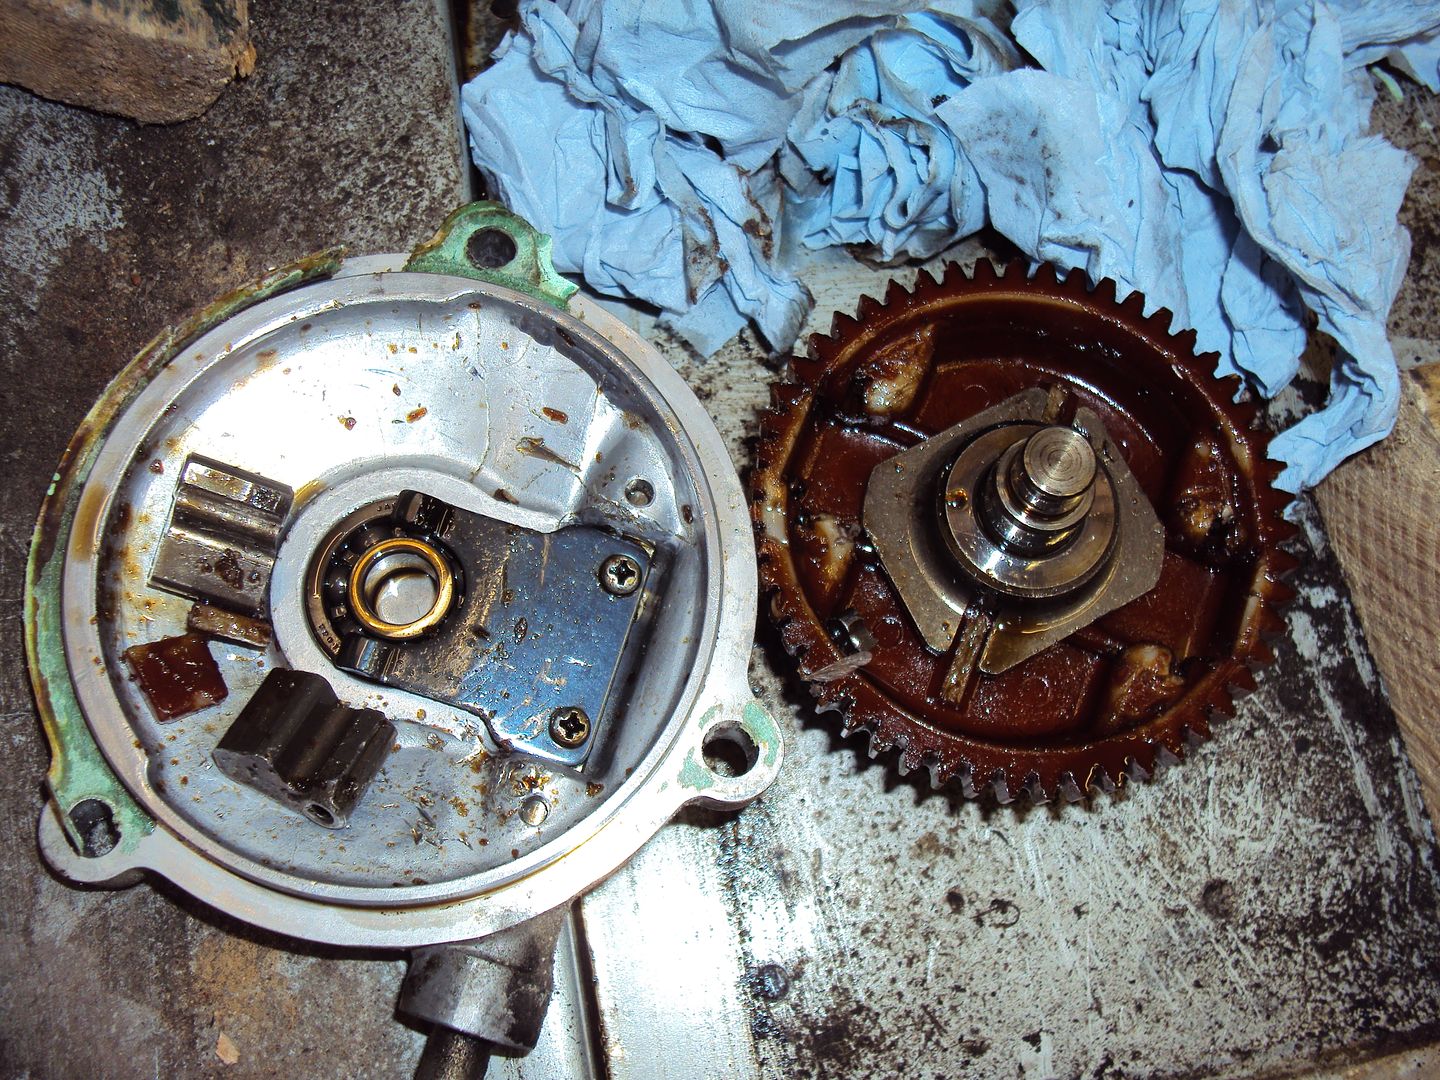
Managed to separate the alternator and engine.
Had push the alternator off the engine shaft using a piece of threaded bar which was placed in a hole which runs through the centre of the alternator shaft. A second bolt was used to push against the rod, had to hammer the rod out of the alternator shaft once it was released as ended up getting a bit bent.
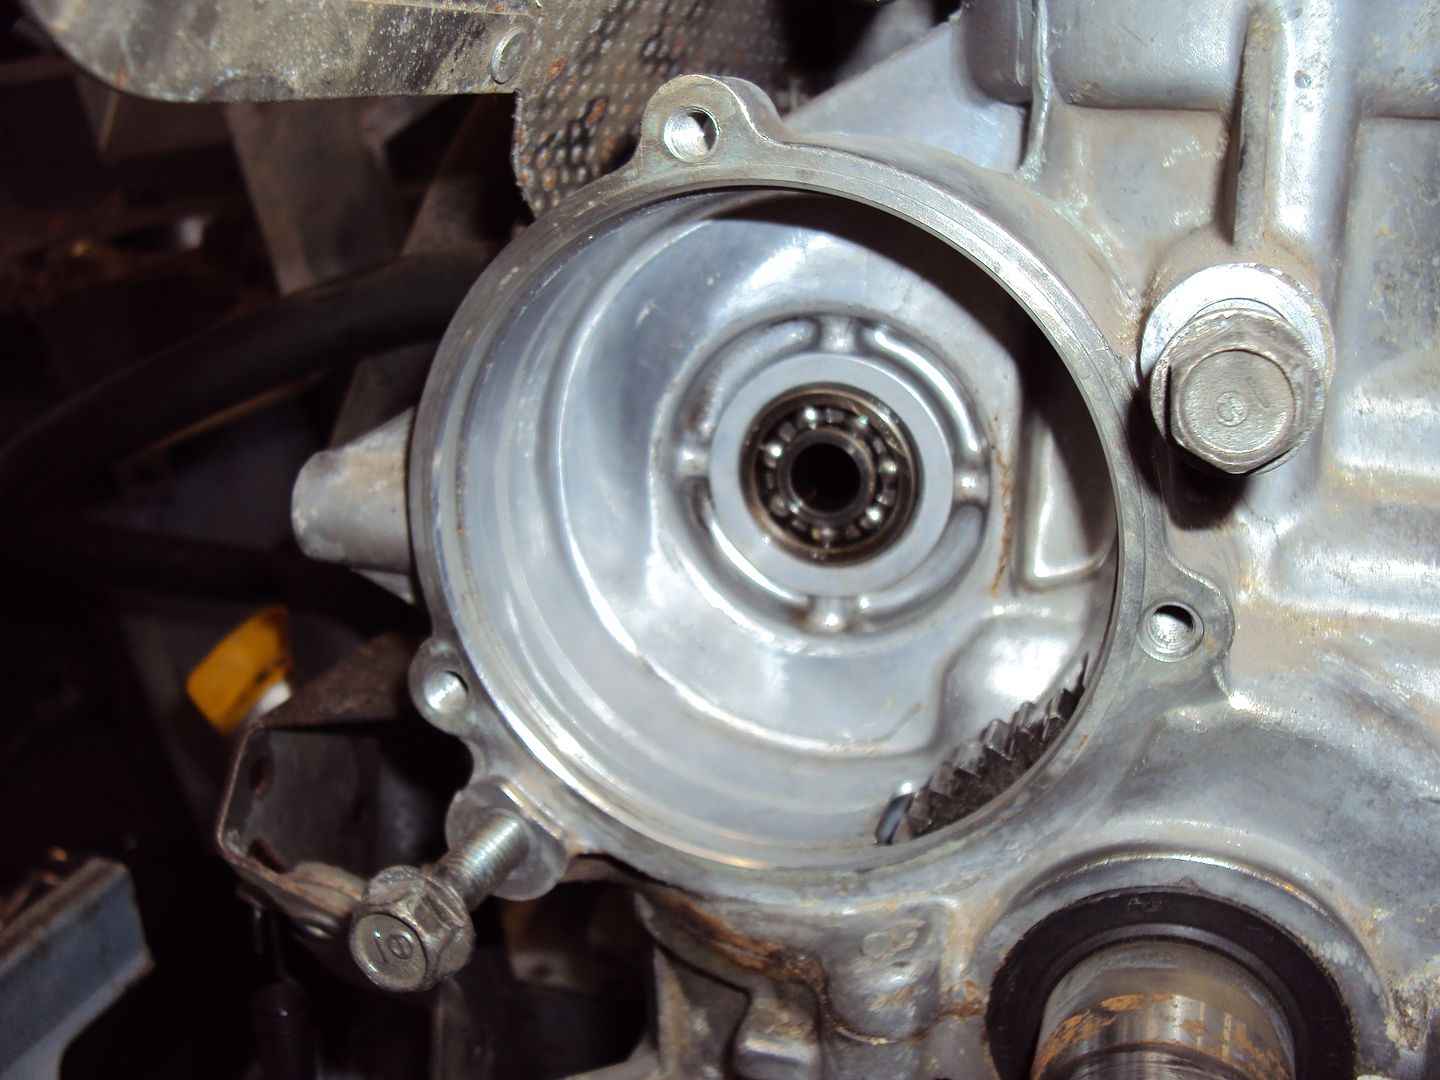
Nearly there, the oil pump is behind the cover just below the engine shaft.
Managed to separate the alternator and engine.
Had push the alternator off the engine shaft using a piece of threaded bar which was placed in a hole which runs through the centre of the alternator shaft. A second bolt was used to push against the rod, had to hammer the rod out of the alternator shaft once it was released as ended up getting a bit bent.
Nearly there, the oil pump is behind the cover just below the engine shaft.

s3fella said:
Threaded rod trick is genius! Remembering that.
Not sure why this thread is so captivating, but it's is, so keep up the detailed progress pics, op.
The threaded rod method came from this guy http://www.petepower.co.uk/ he has been very helpful and is sorting the parts for me.Not sure why this thread is so captivating, but it's is, so keep up the detailed progress pics, op.
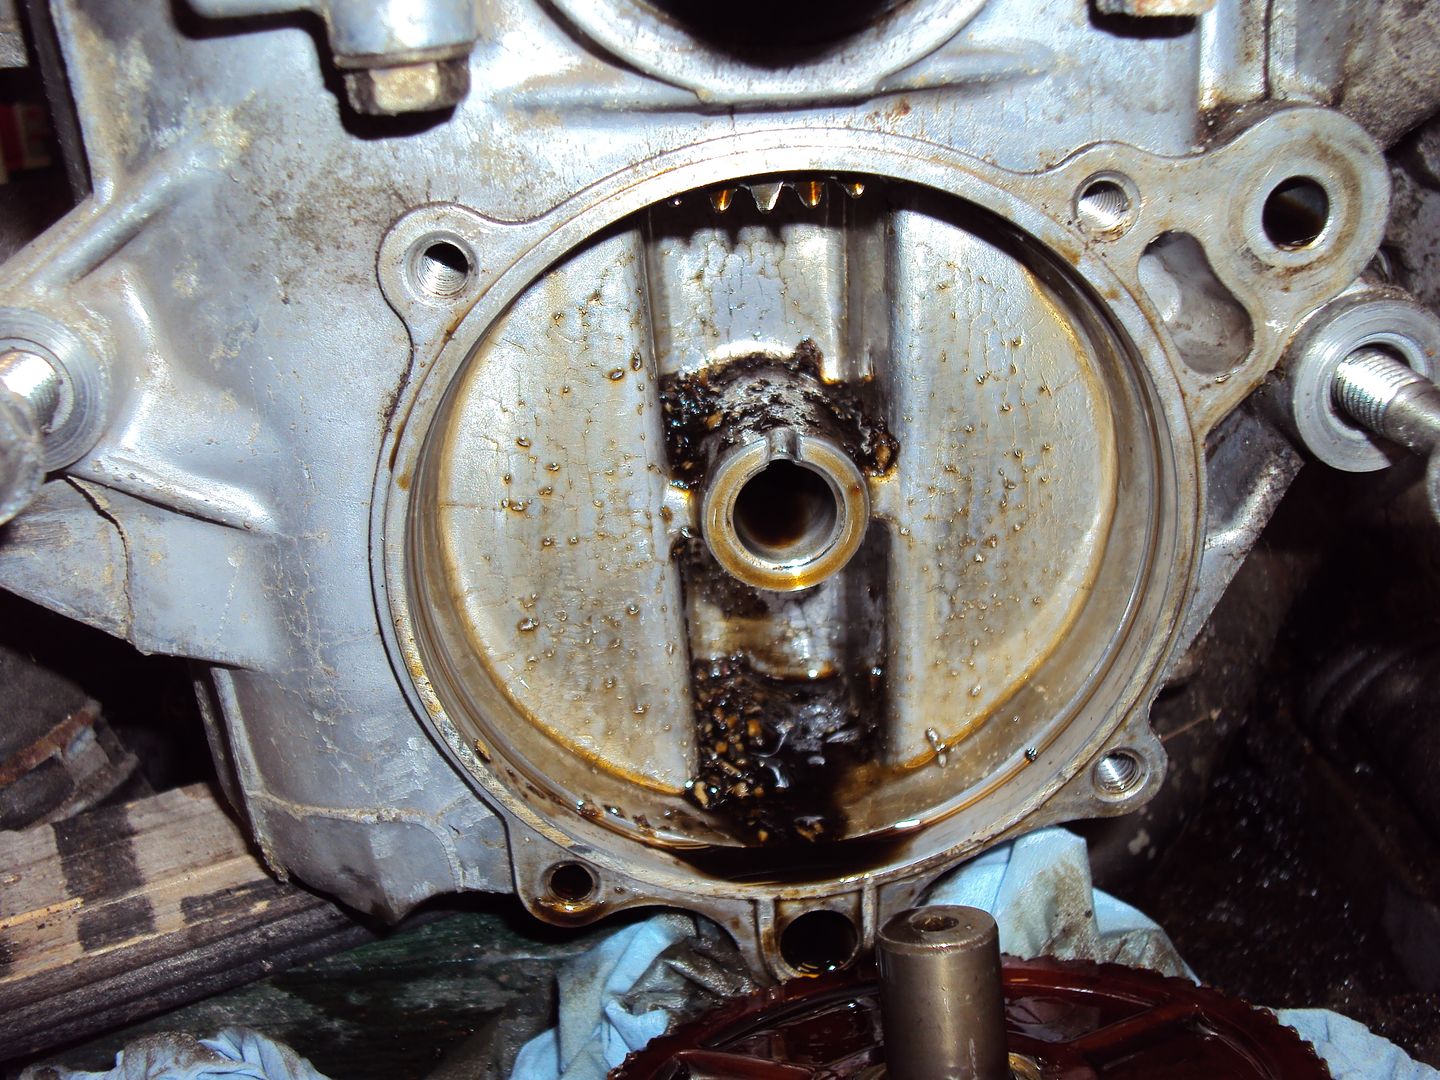
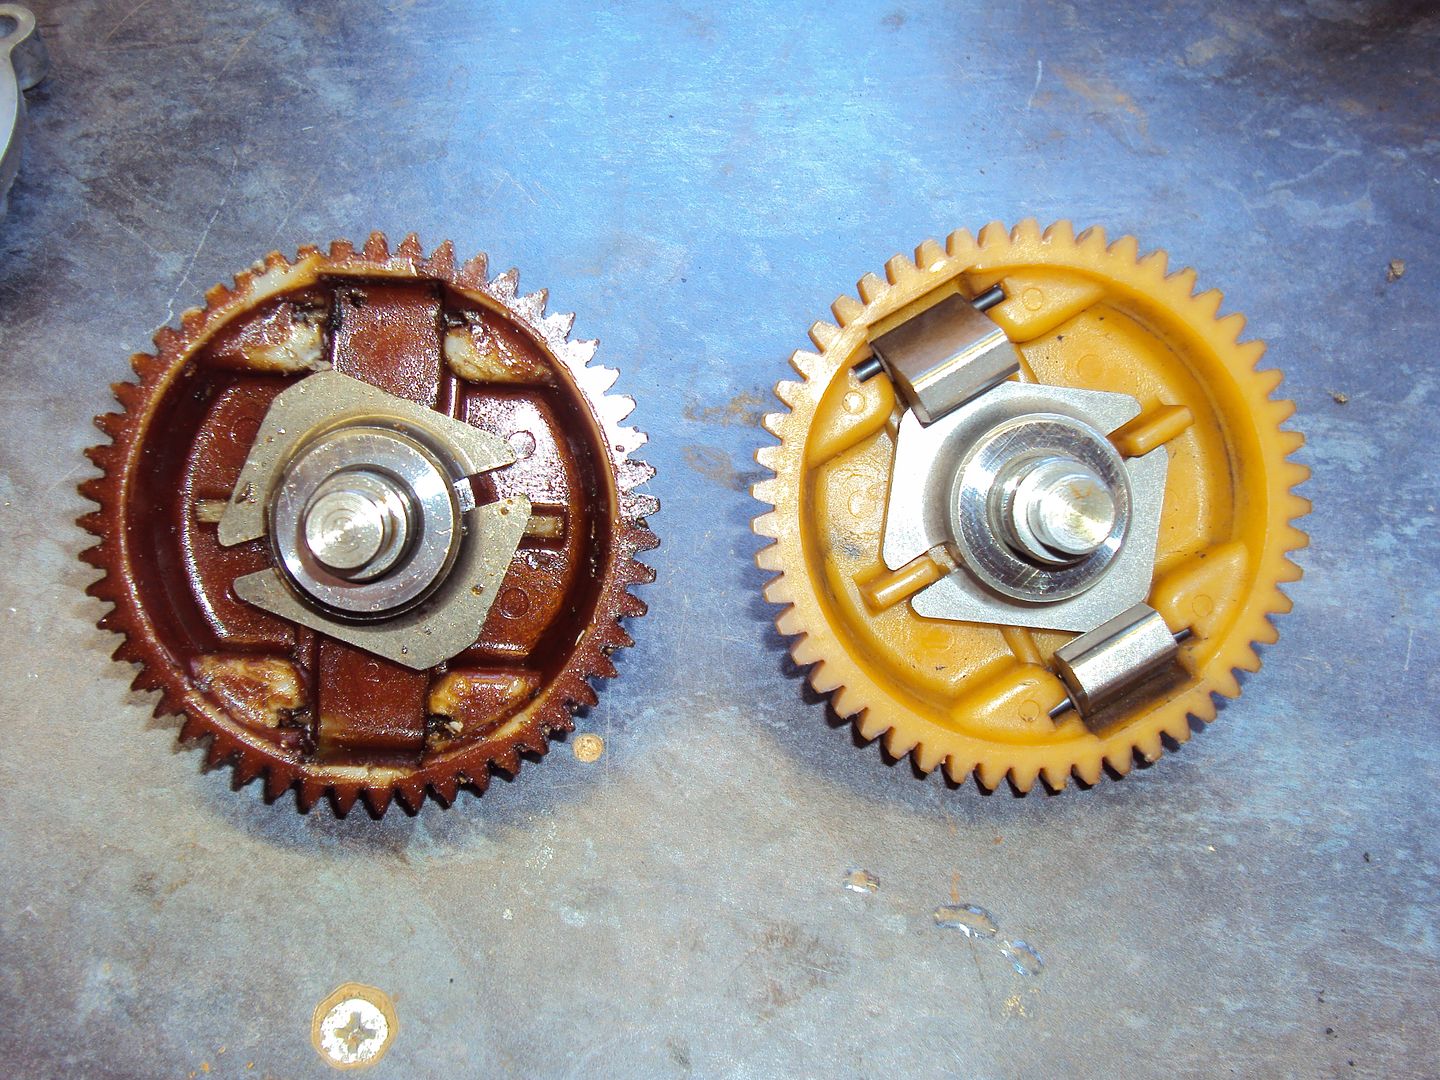
Got to the oil pump drive today, as expected it was completely devoid of teeth.

Lots of bits of teeth in the bottom of the drive gear housing
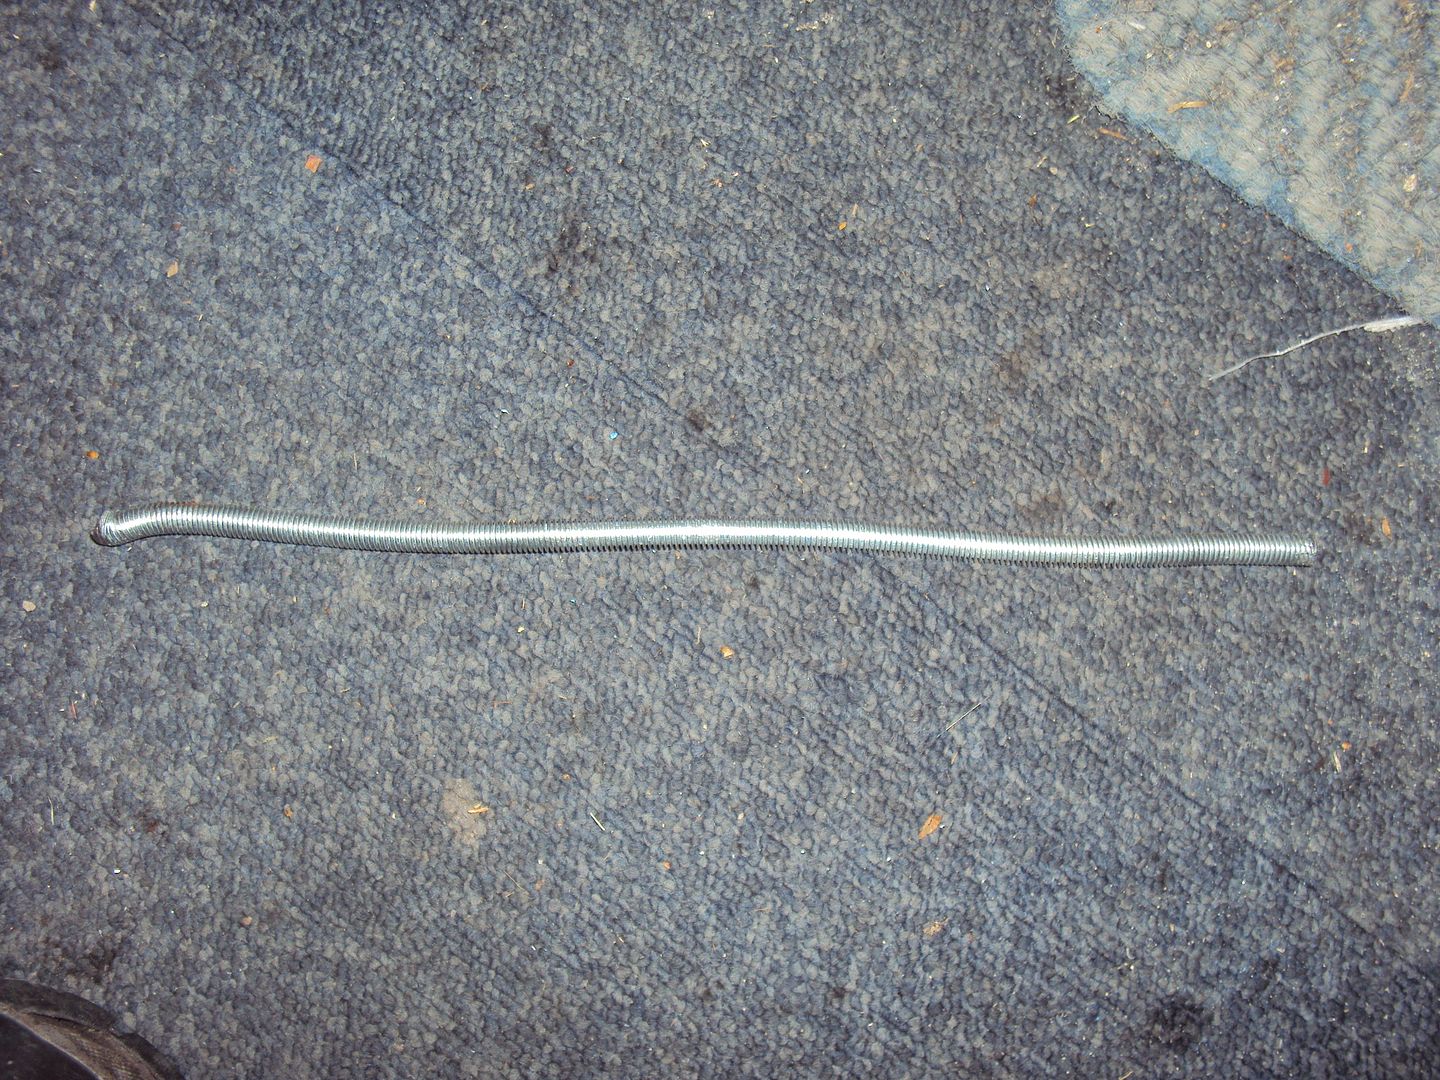
Also found these 2 bent pins, probably what caused the problem.
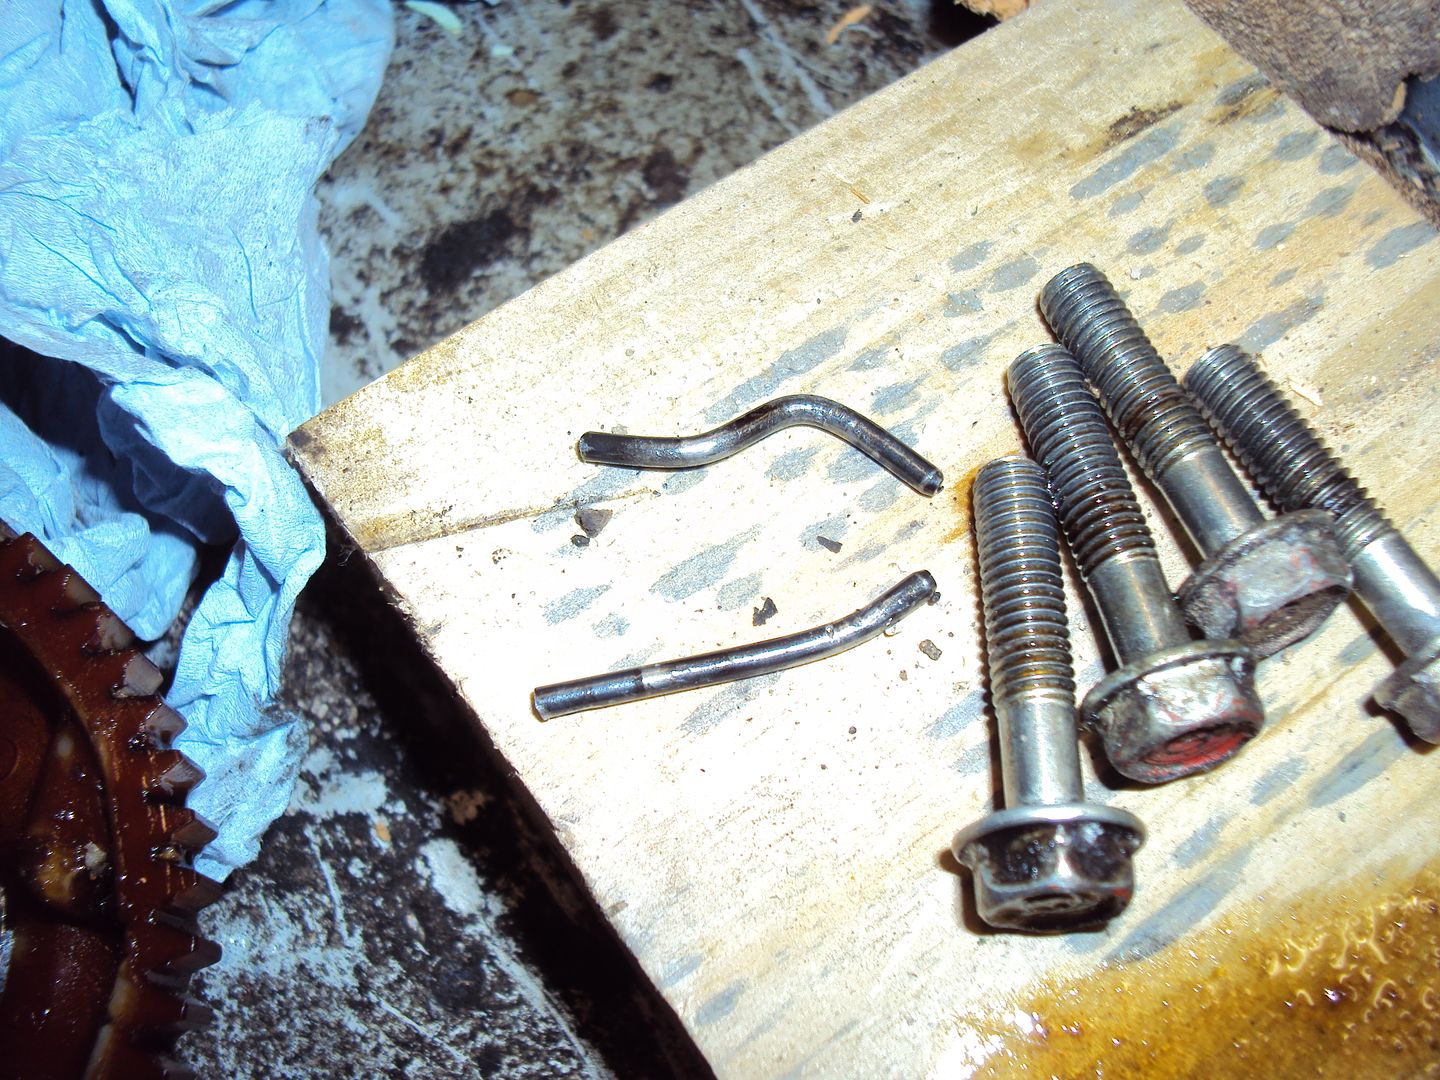
It turns out the pins are part of the governor assembly, the pins support 2 weights which act against a plate which in turn operates the throttle via a lever. The weights in the housing (left) should be attached to the gear (right) with the pins.
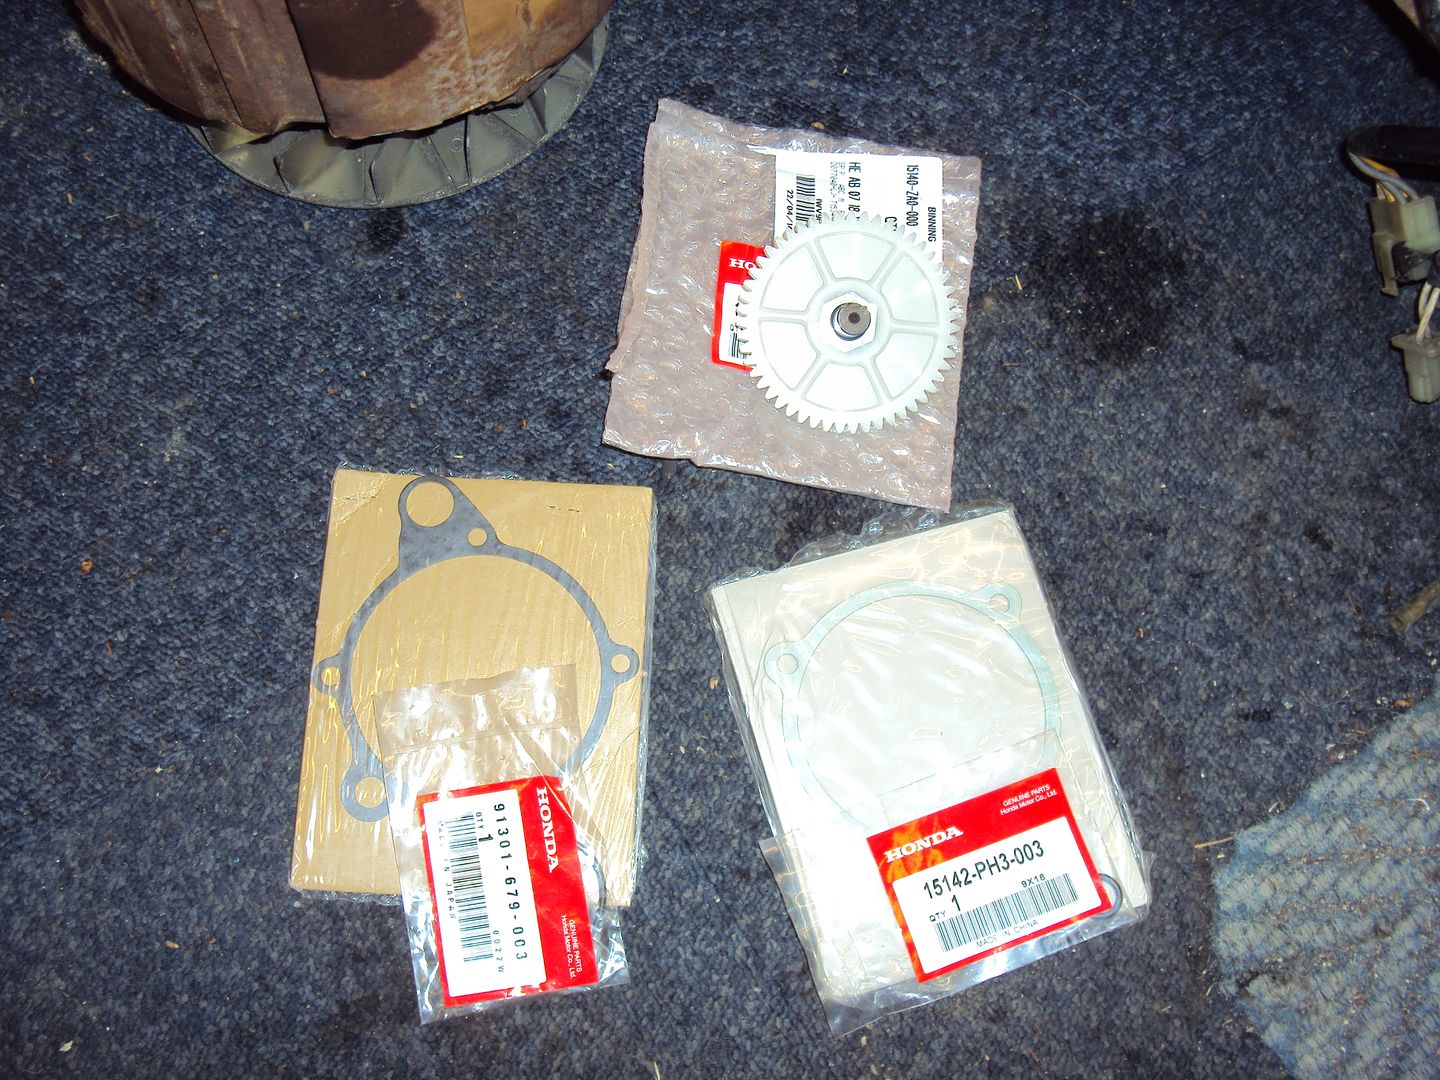
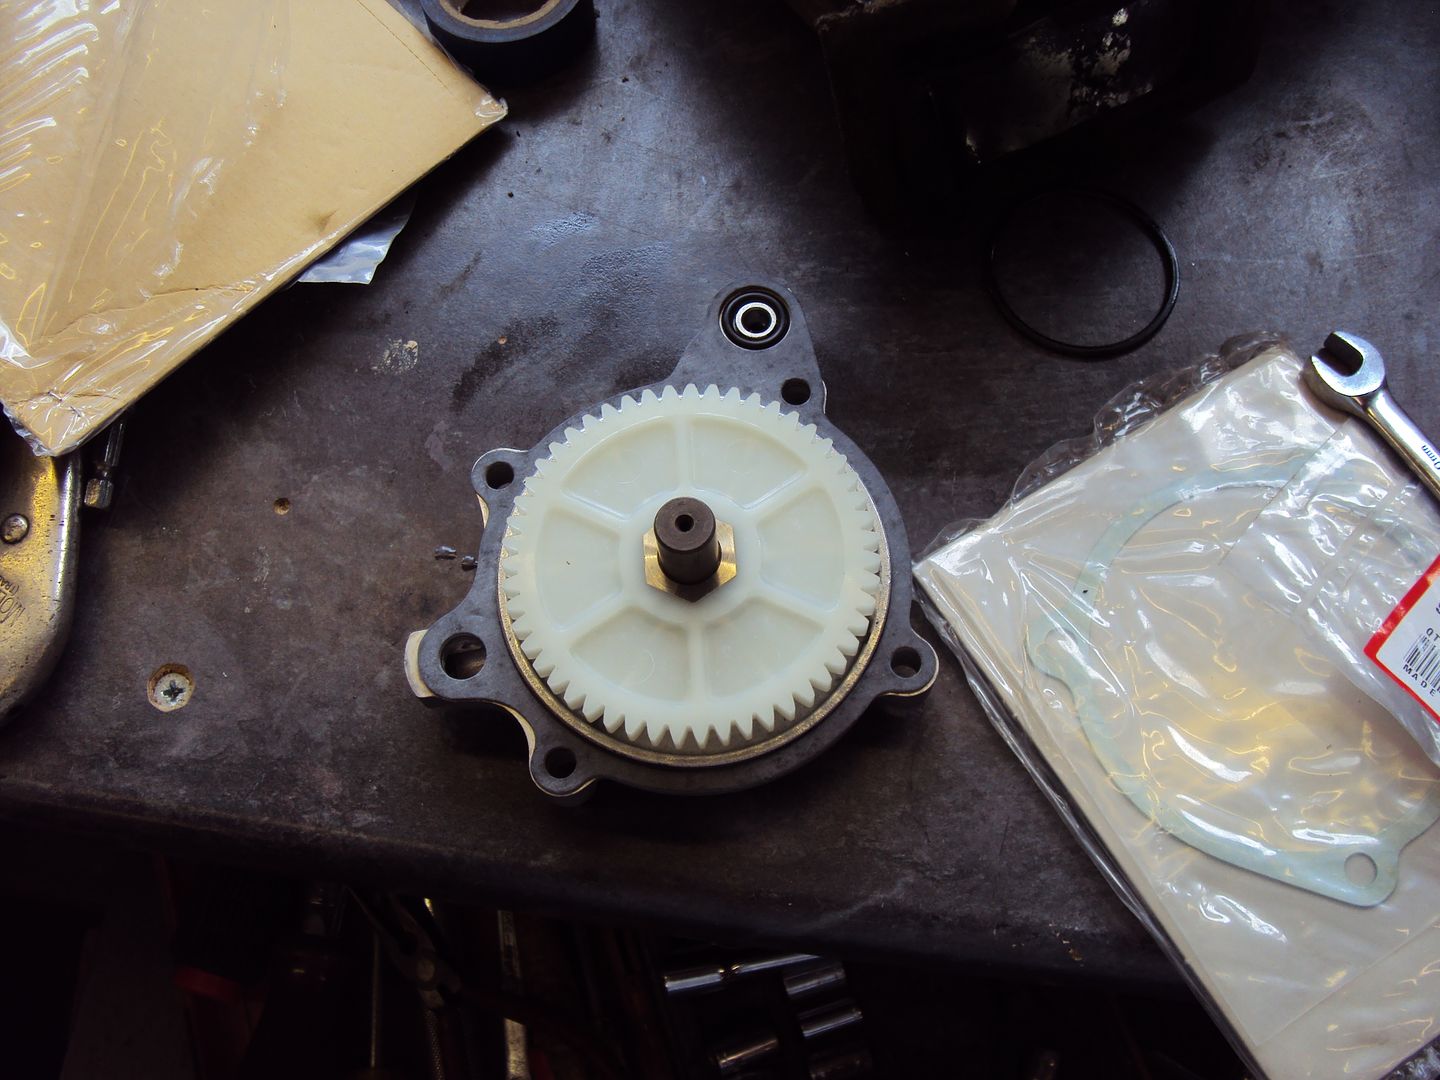
New parts have arrived consisting of oil pump drive gear, 2x O-rings for oil pump, oil pump gasket and governor housing gasket.
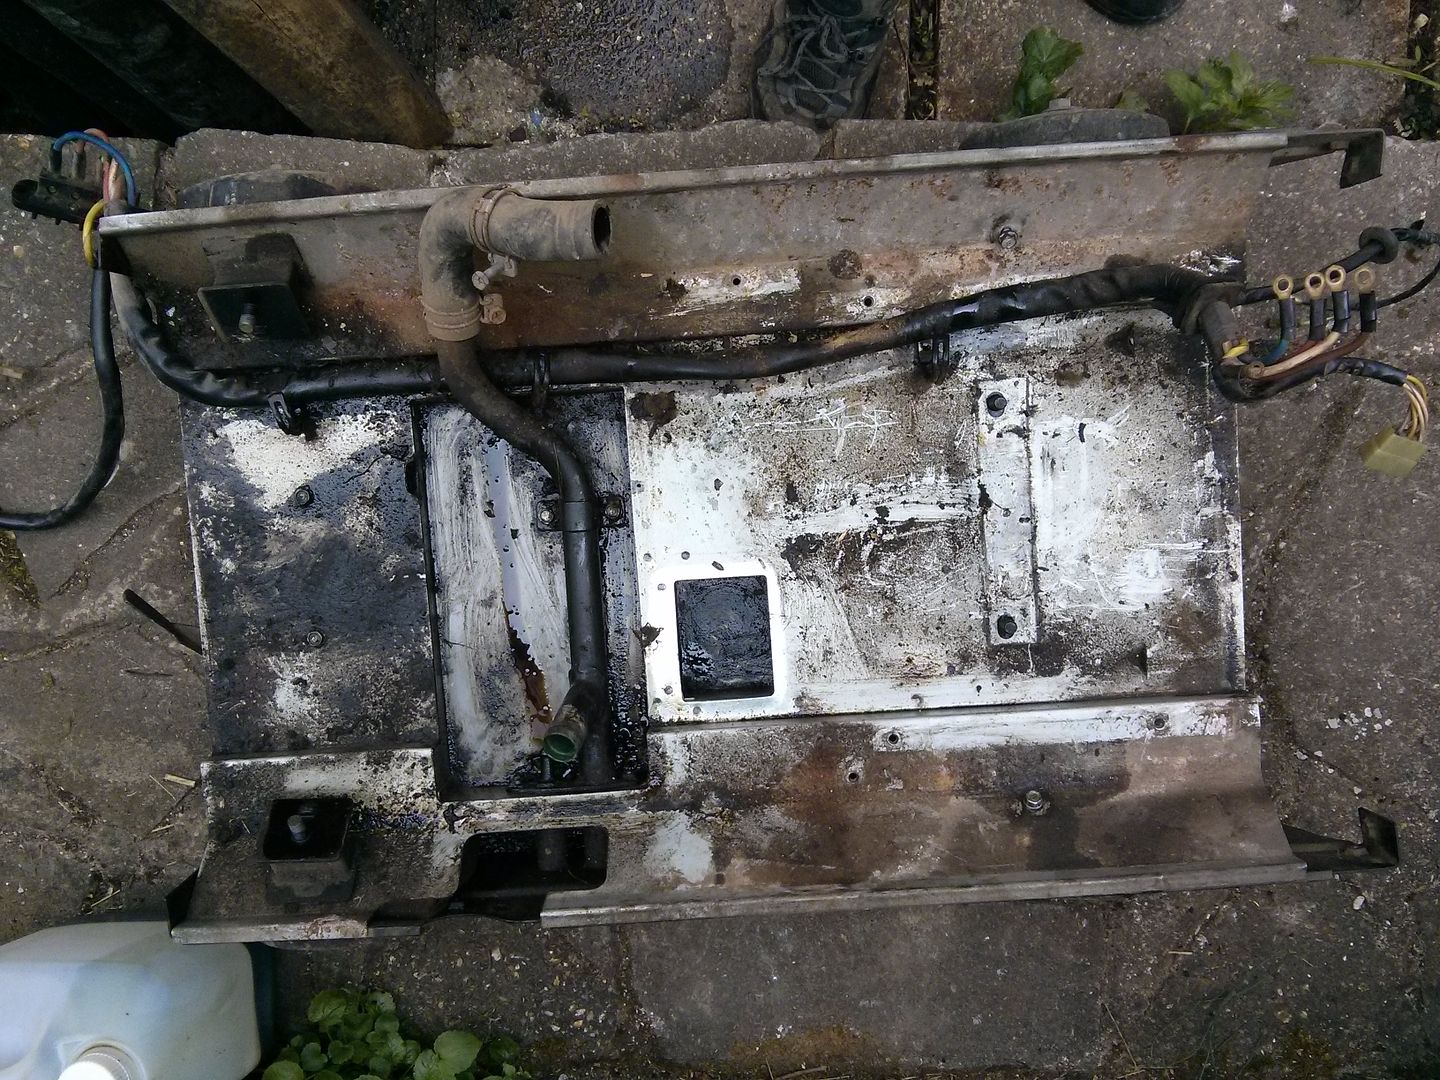
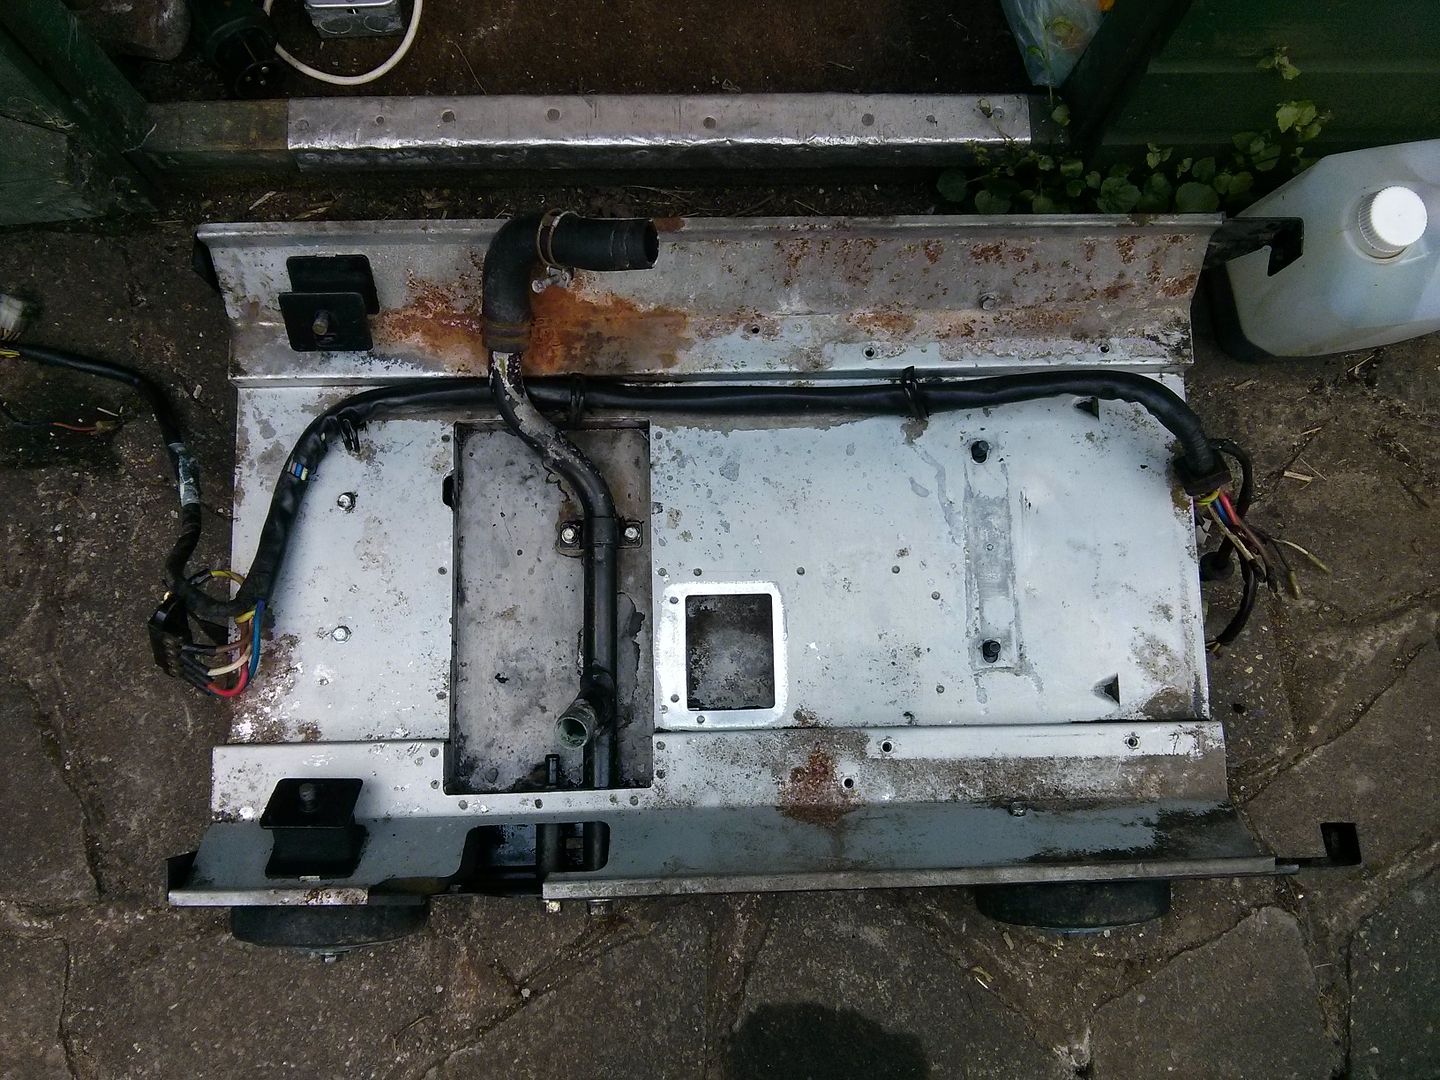
While I was waiting for the parts to arrive, I removed the engine to clean the chassis.
Before
After a bit of work with the power washer & engine and machine cleaner
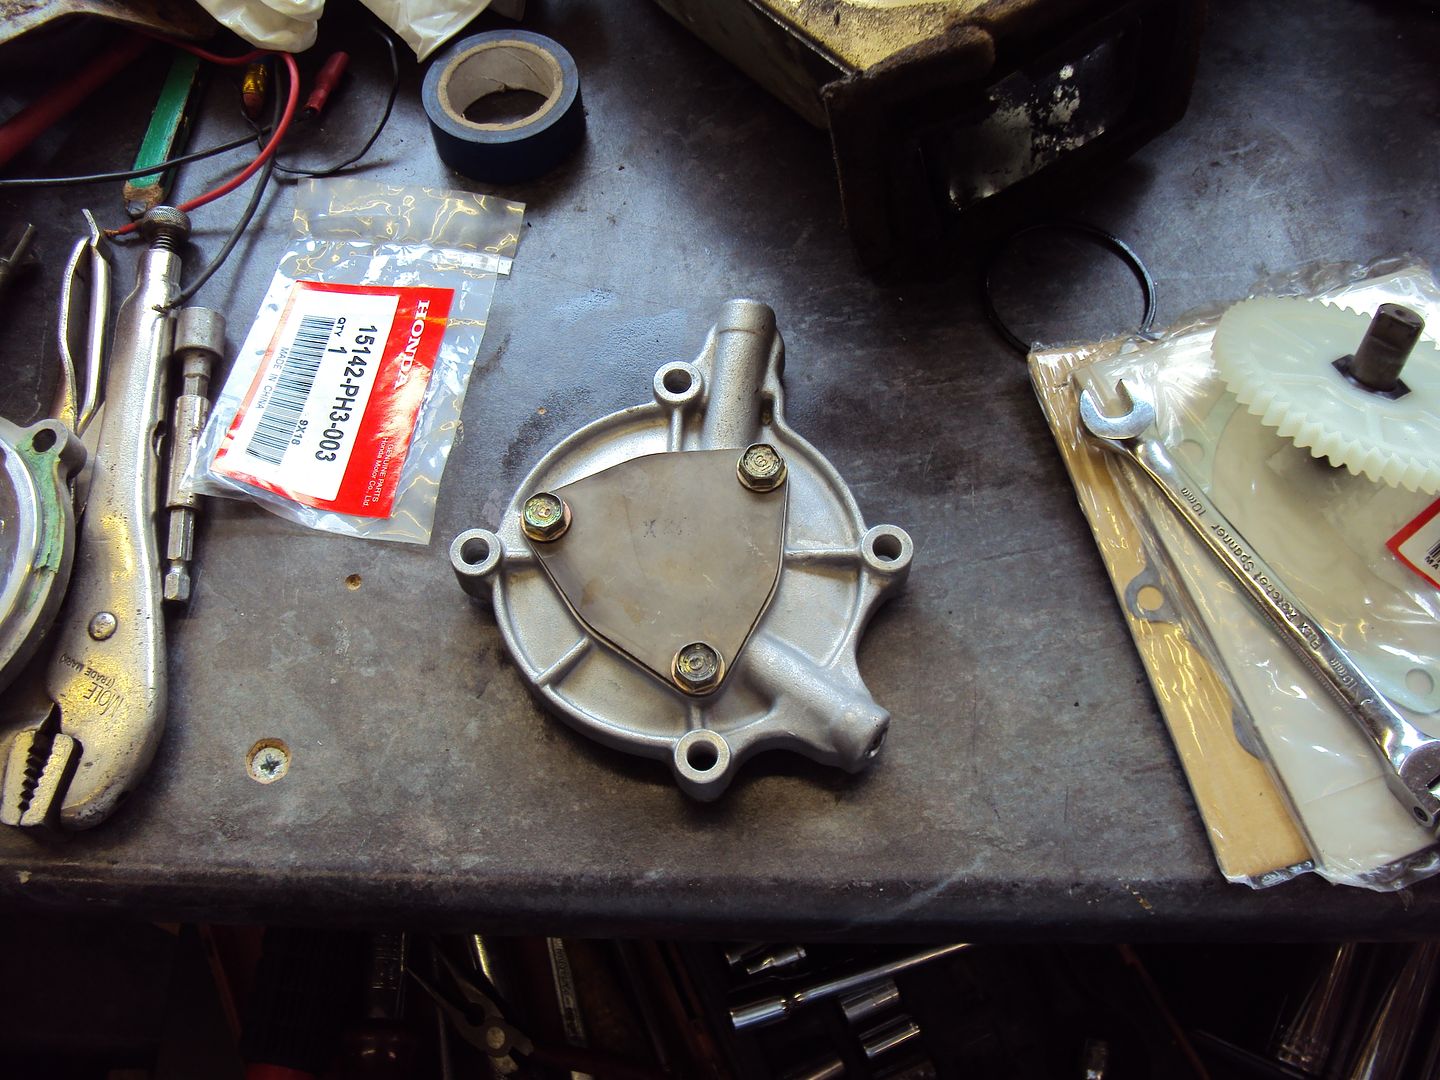
Oil pump cleaned up and re-built with new O-rings
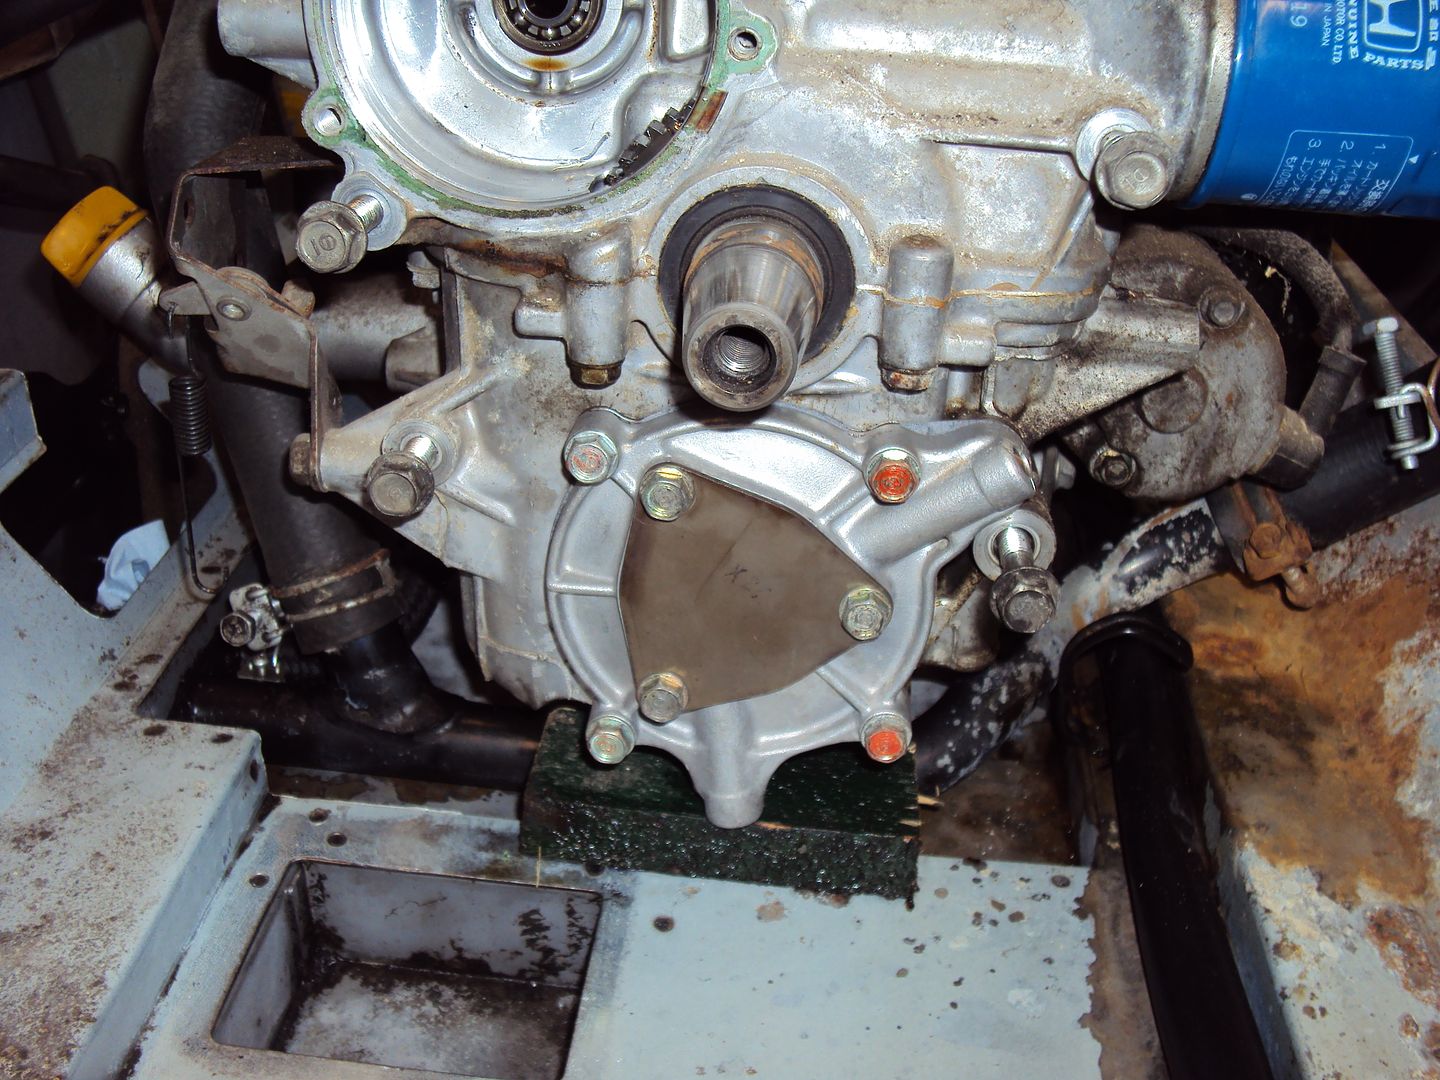
Back on engine
I cranked the engine with the starter, after about 10 second the oil warning light went out, so all is good.
Just waiting on the replacement governor to arrive, managed to find a used one ebay in the USA for 20.38 including shipping!
The last job was to remove the remnants of the governor housing gasket.

All cleaned up
The governor should arrive sometime next week, so hopefully it should be up and running by the following weekend
While I was waiting for the parts to arrive, I removed the engine to clean the chassis.
Before
After a bit of work with the power washer & engine and machine cleaner
Oil pump cleaned up and re-built with new O-rings
Back on engine
I cranked the engine with the starter, after about 10 second the oil warning light went out, so all is good.
Just waiting on the replacement governor to arrive, managed to find a used one ebay in the USA for 20.38 including shipping!
The last job was to remove the remnants of the governor housing gasket.
All cleaned up
The governor should arrive sometime next week, so hopefully it should be up and running by the following weekend
creationracing said:
Great stuff and good bargain hunting!
I'm just away to plumb in one of these to my house:
http://www.cheapmowers.com/acatalog/Briggs---Strat...
So I might come asking for one of your cheap do-er uppers!
Thanks, My Dad has just fitted something similar to his houseI'm just away to plumb in one of these to my house:
http://www.cheapmowers.com/acatalog/Briggs---Strat...
So I might come asking for one of your cheap do-er uppers!
http://www.ebay.co.uk/sch/i.html?_trksid=p3984.m57...
The replacement governor finally arrived after spending 7 days in a US customs warehouse, Looks a bit better than the broken one.
While I was waiting for the governor I cleaned up some of the parts
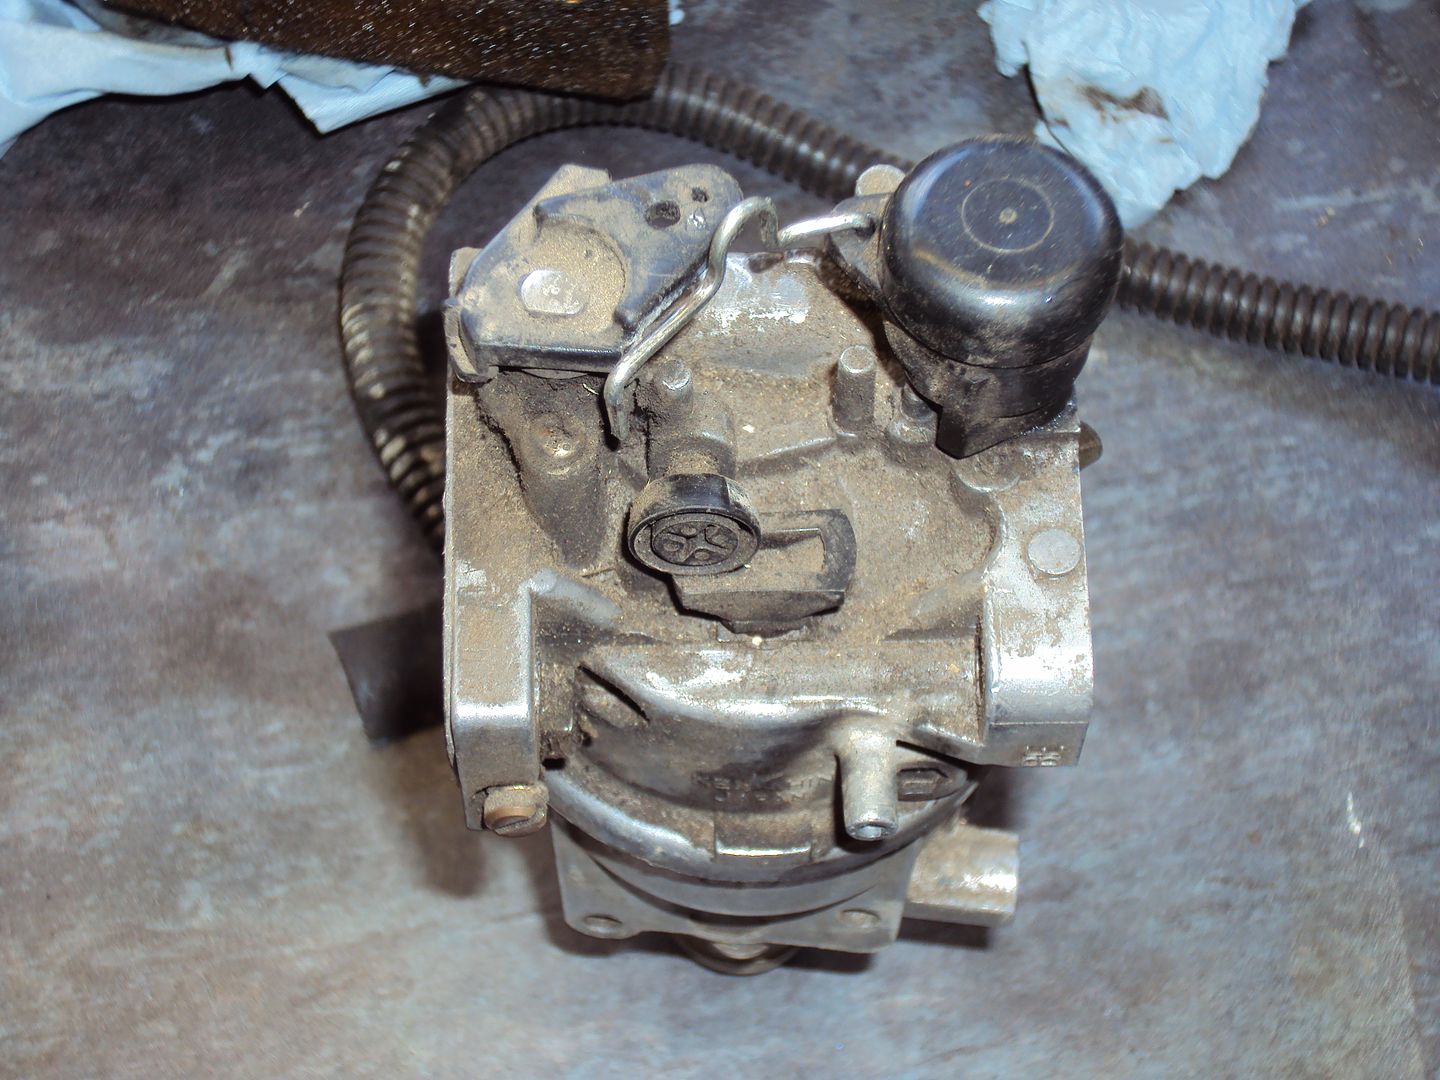
carburettor before:
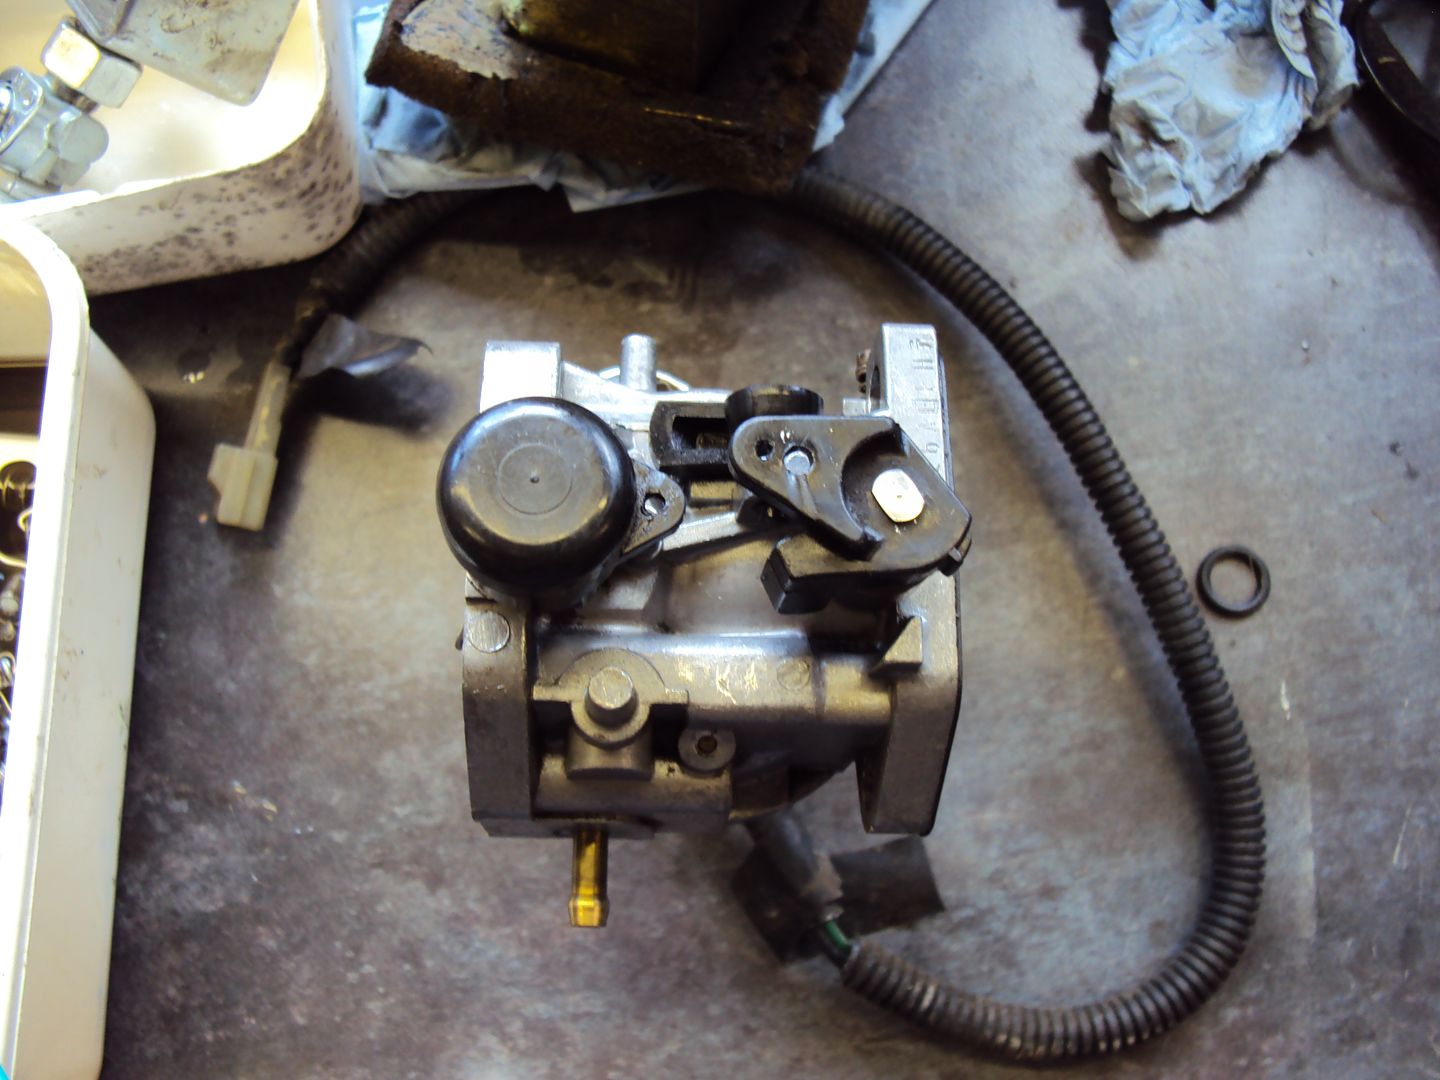
After:
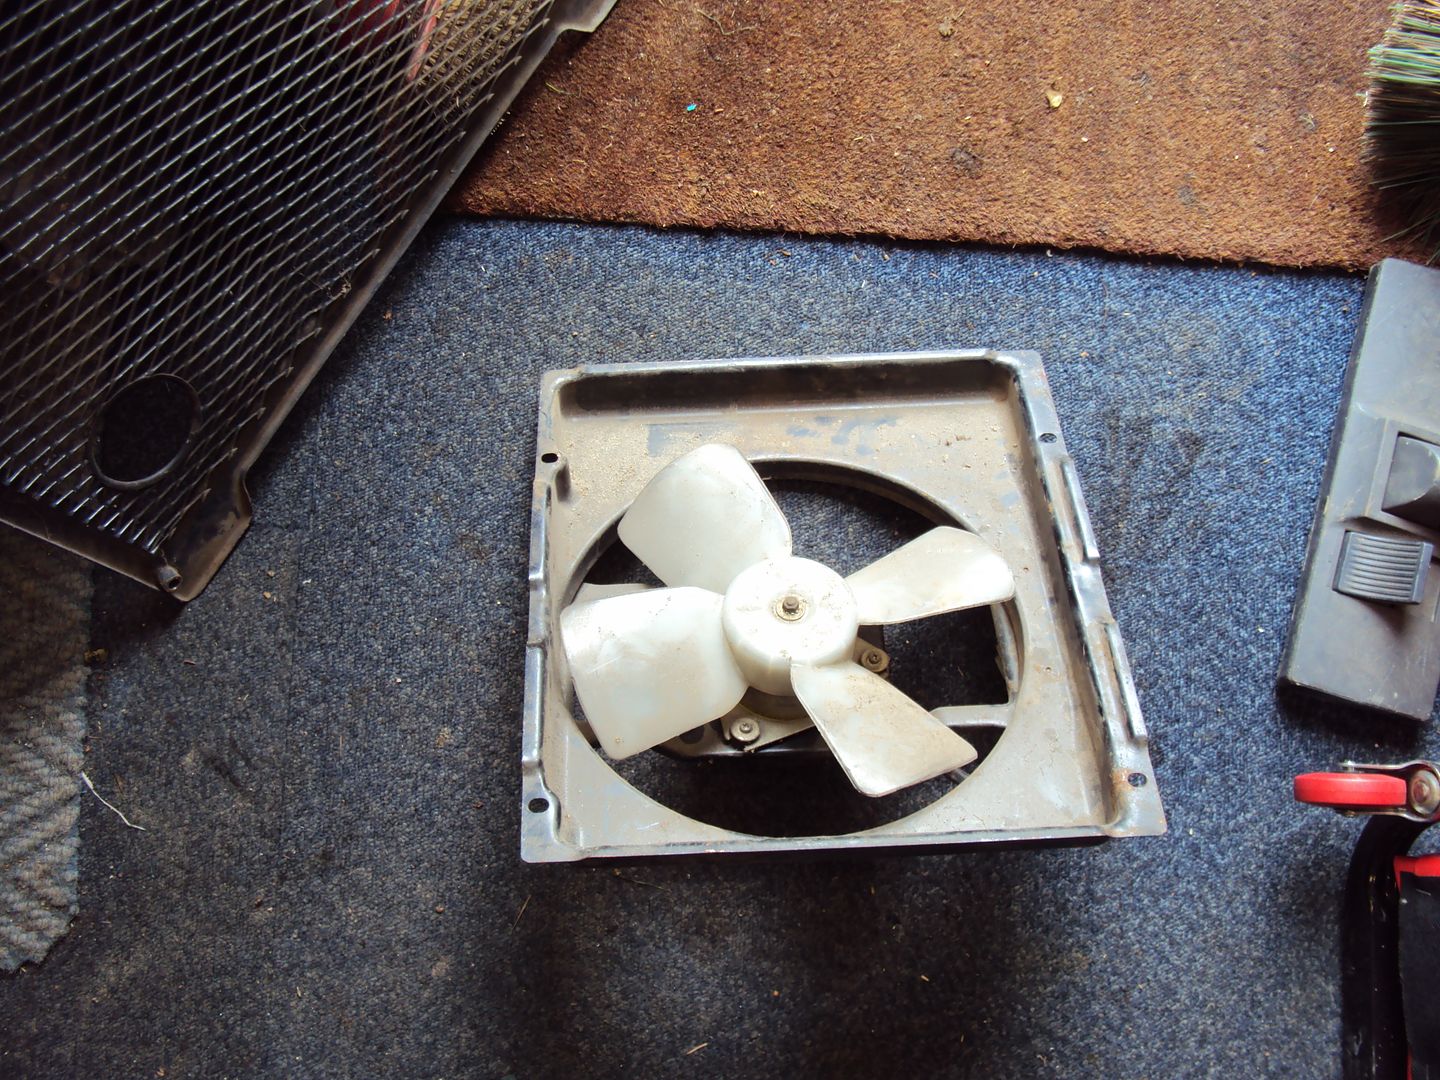
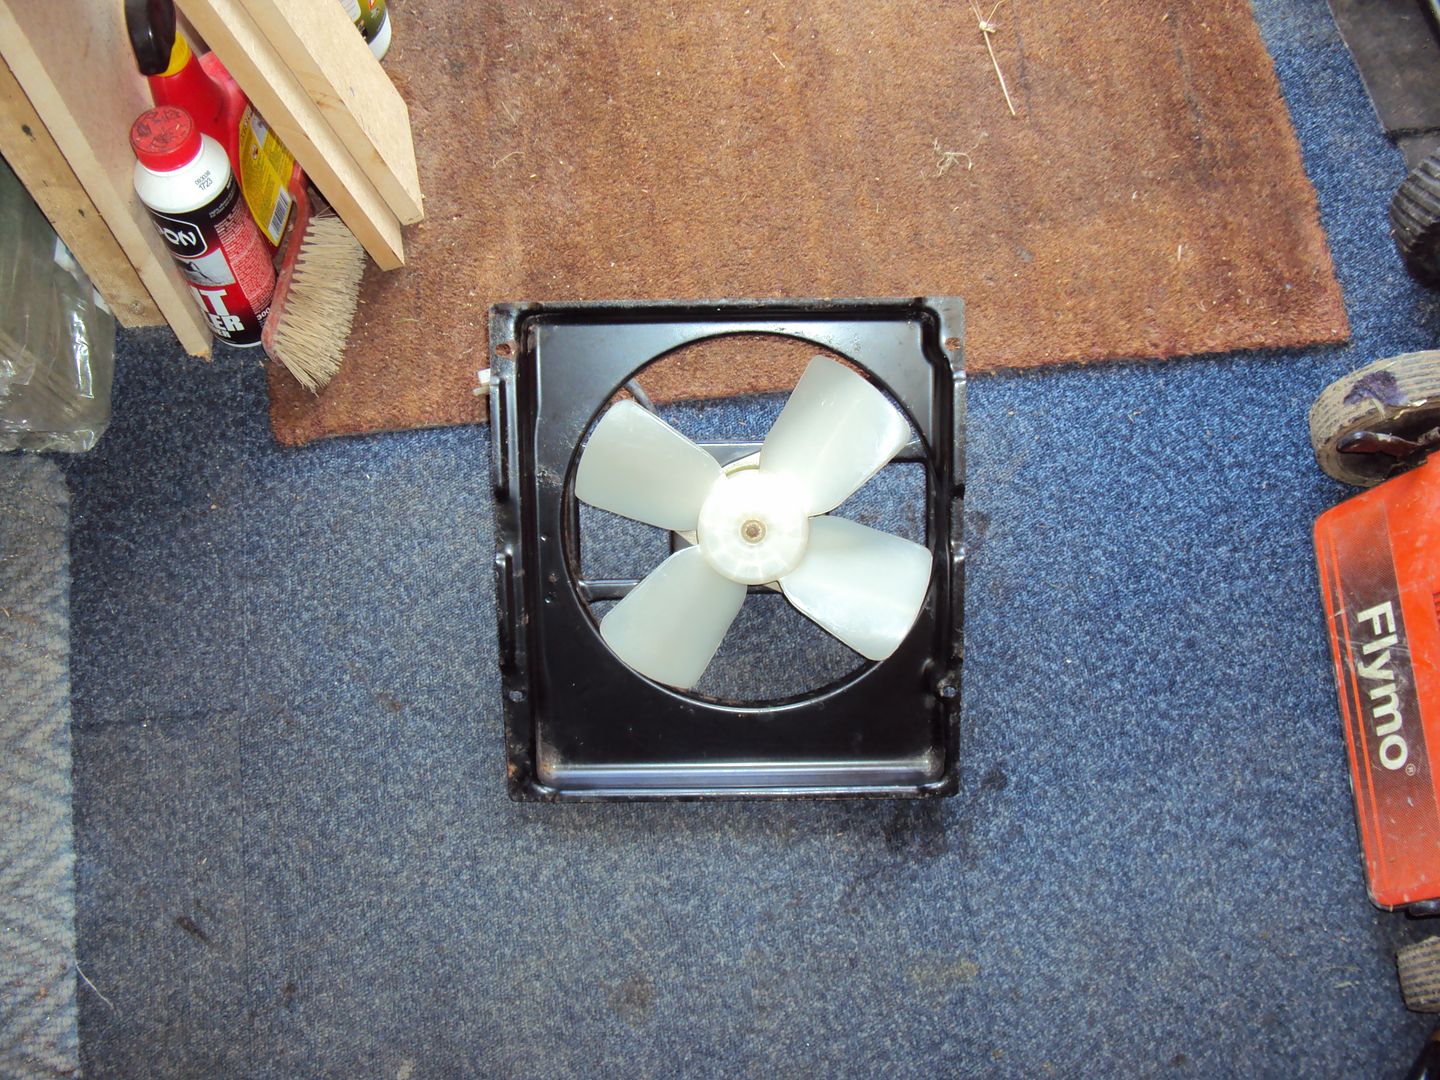
Cooling fan
And straightened out some of the bent bodywork
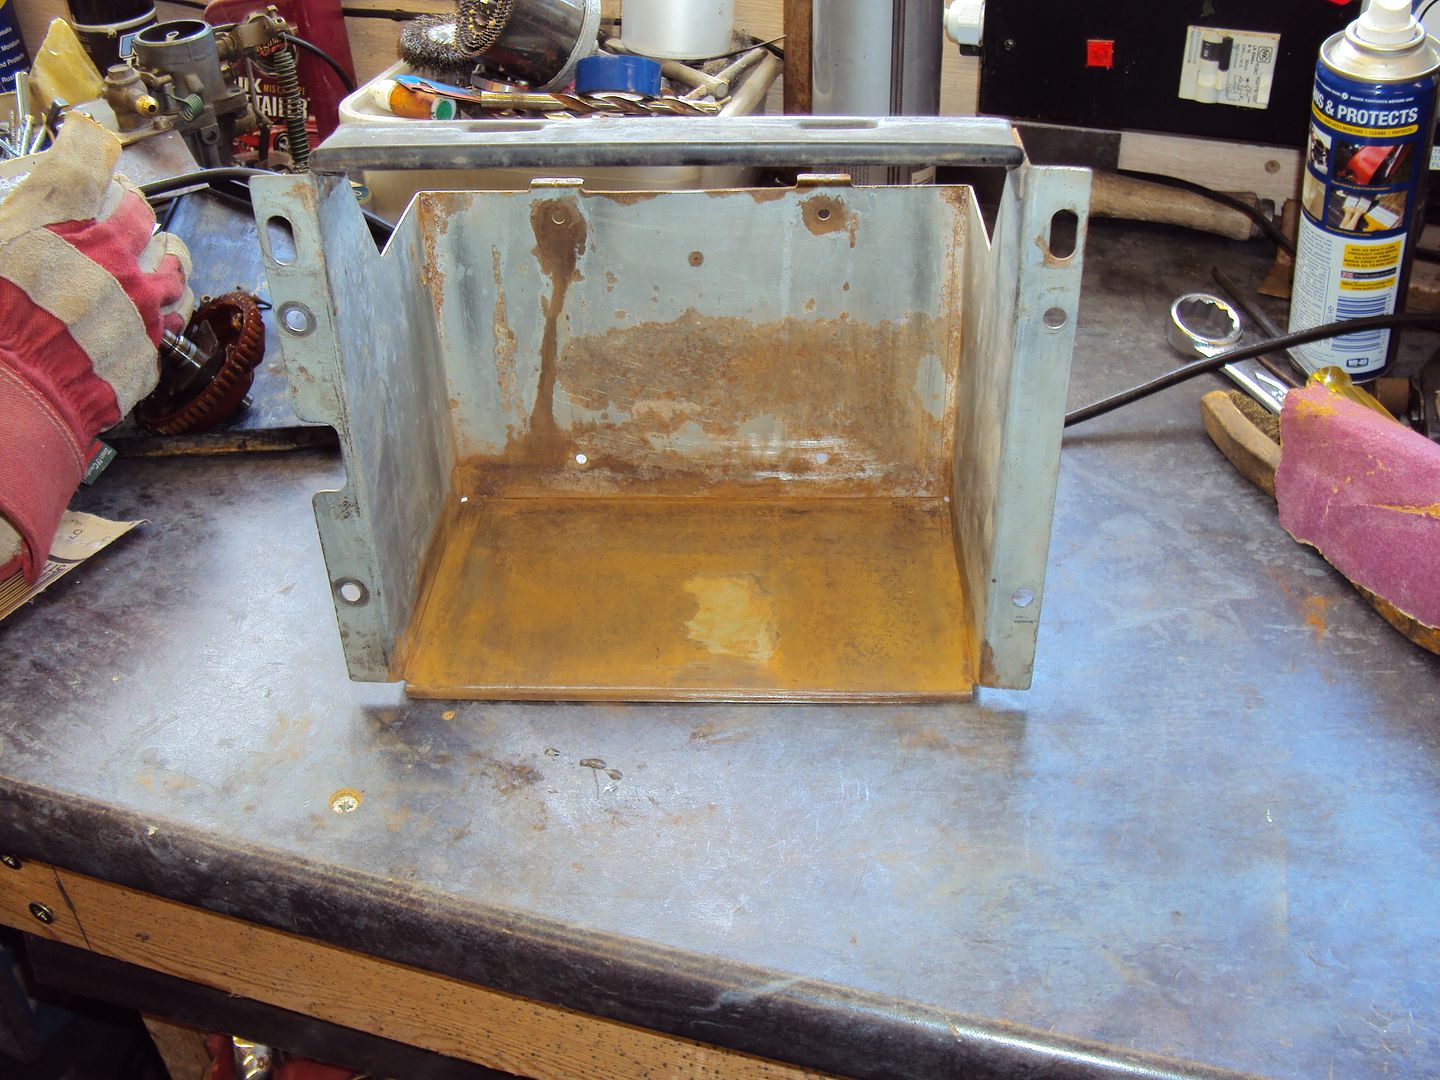
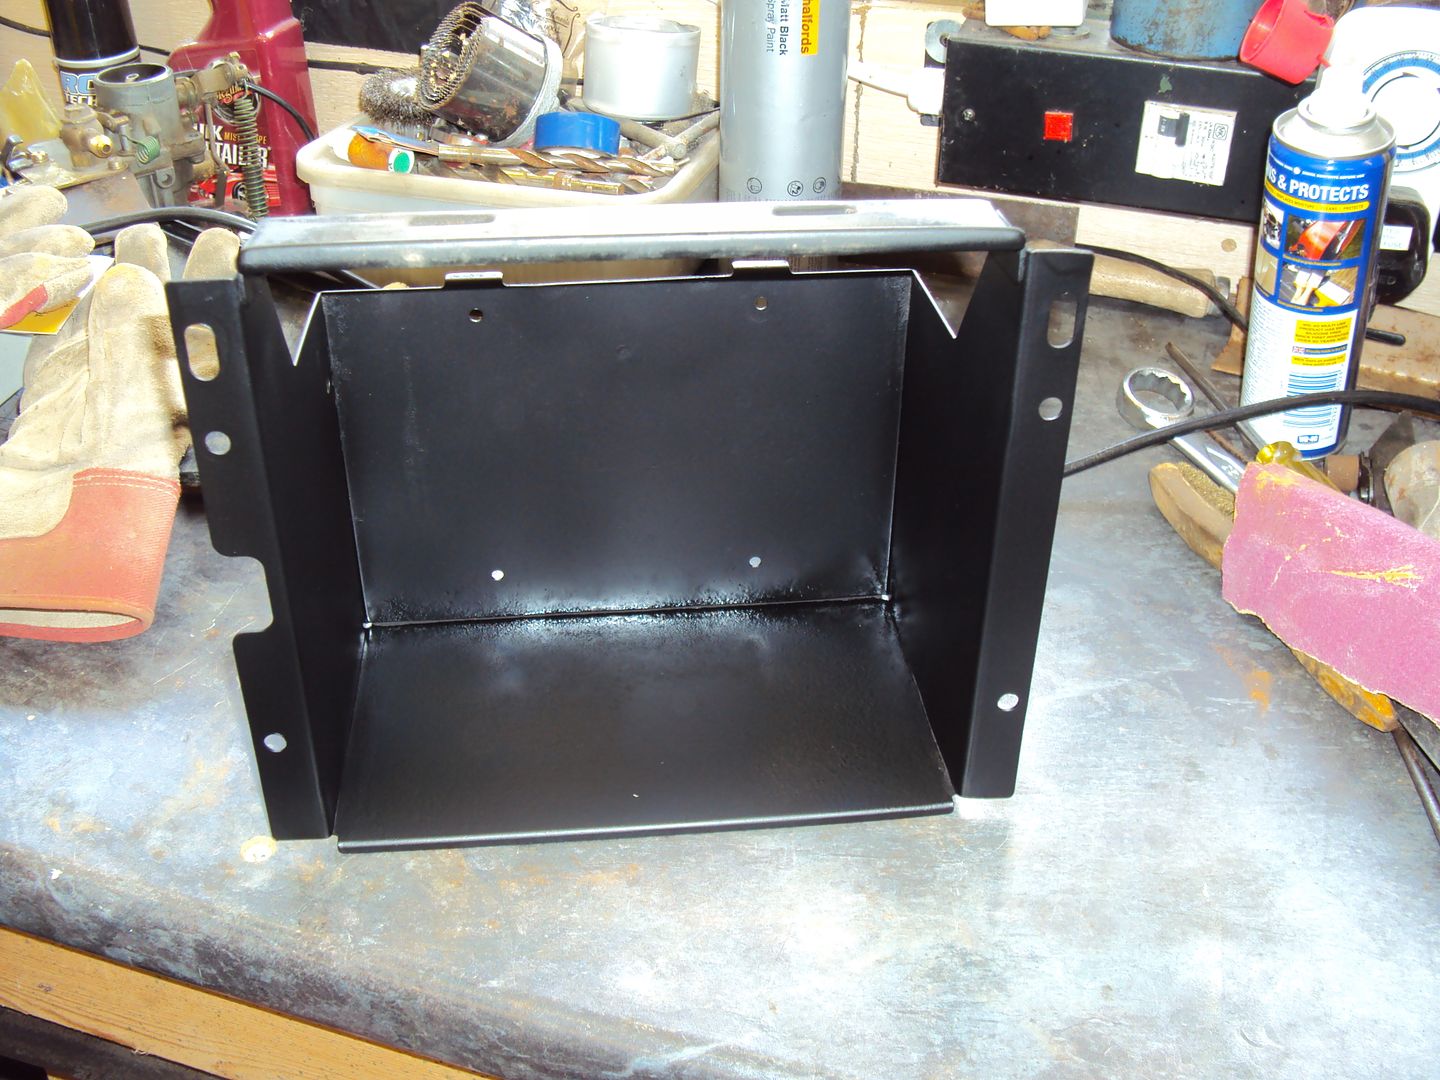
Used the Edd China restoration method on the battery box, if it's rusty, give it a sand and good coat of black satin paint
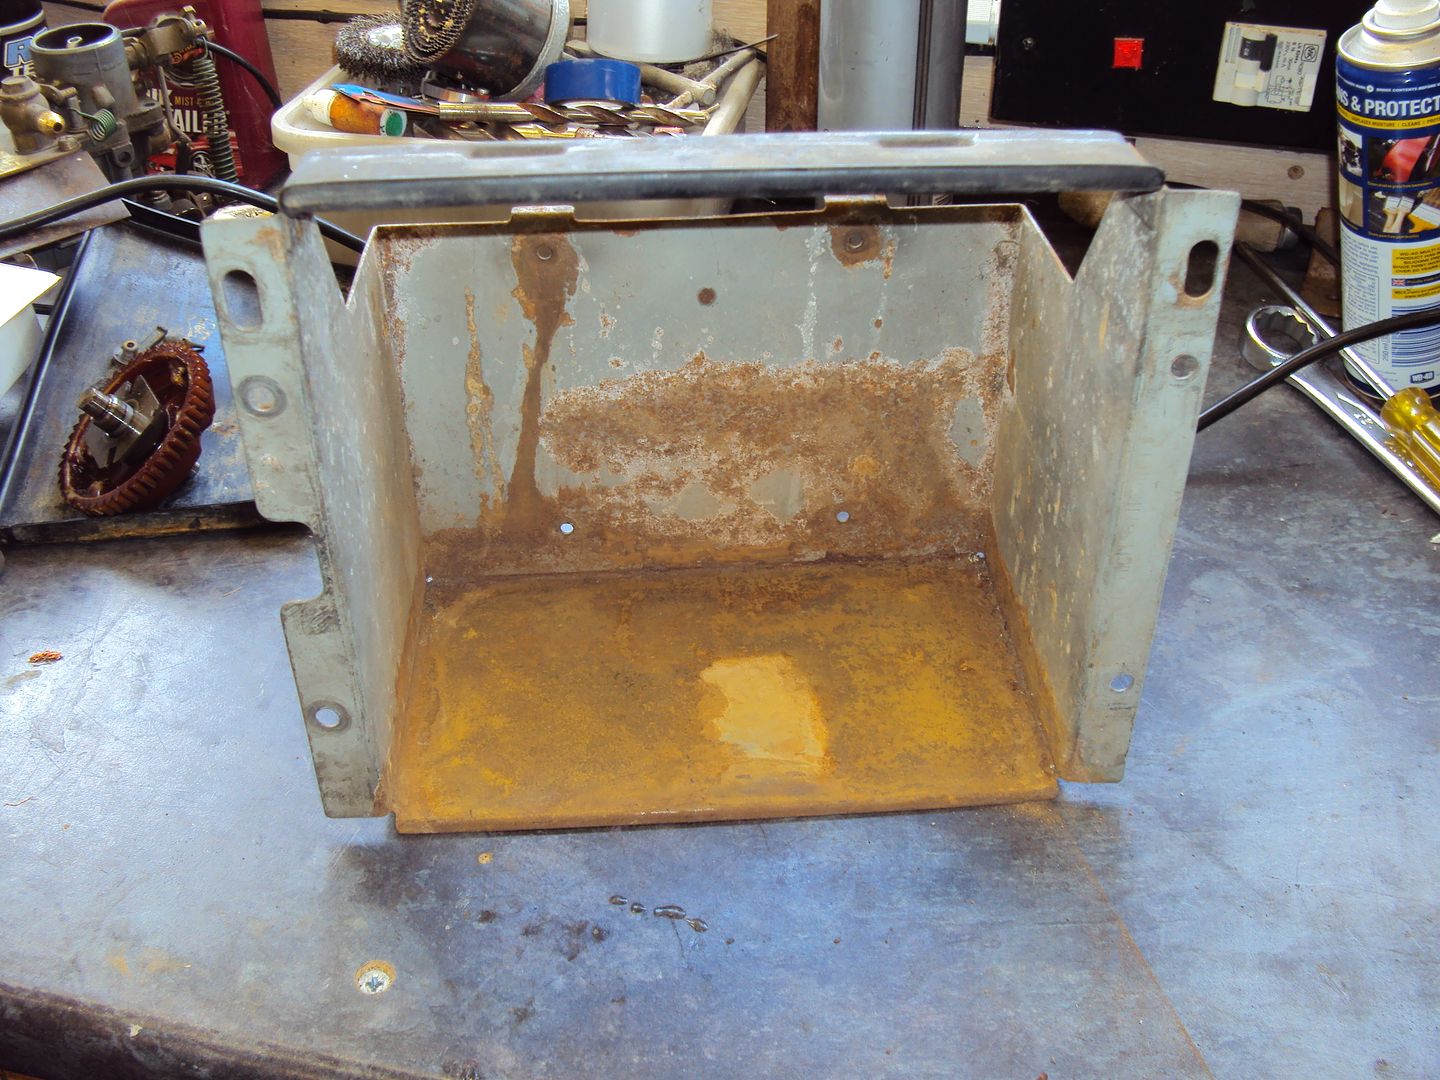
Sanded
Painted
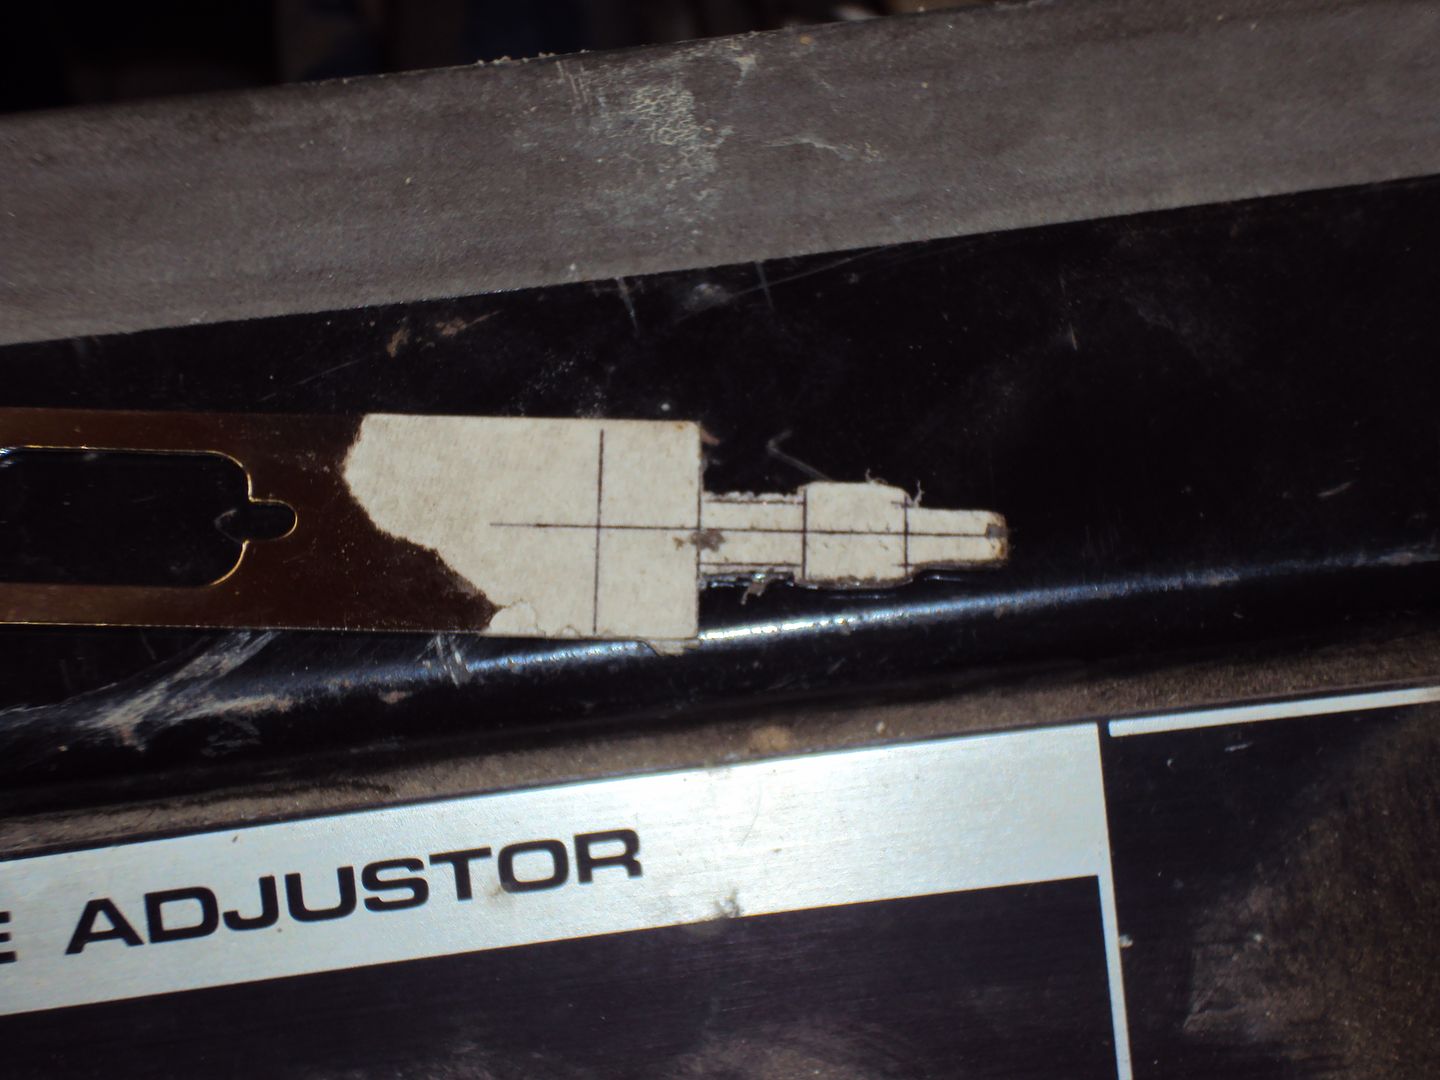
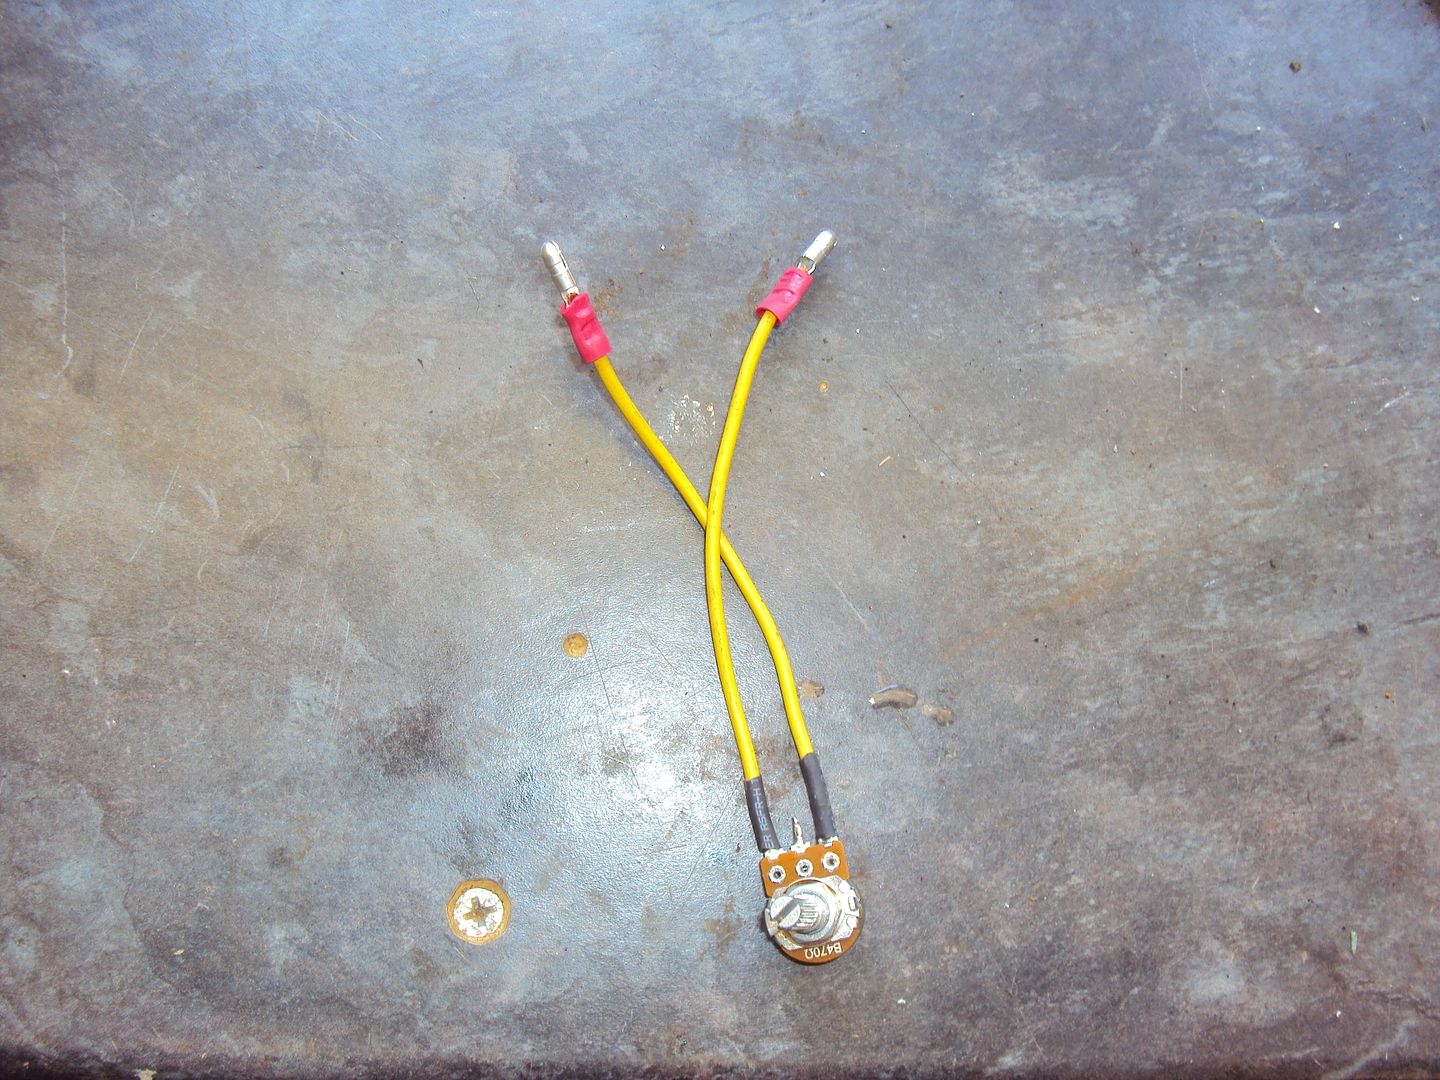
Also replaced the voltage adjuster as it was missing, Honda wanted £60 fortunately the service manual told me it was a 400 ohm pot, so off to ebay and £3 later one replacement voltage adjuster
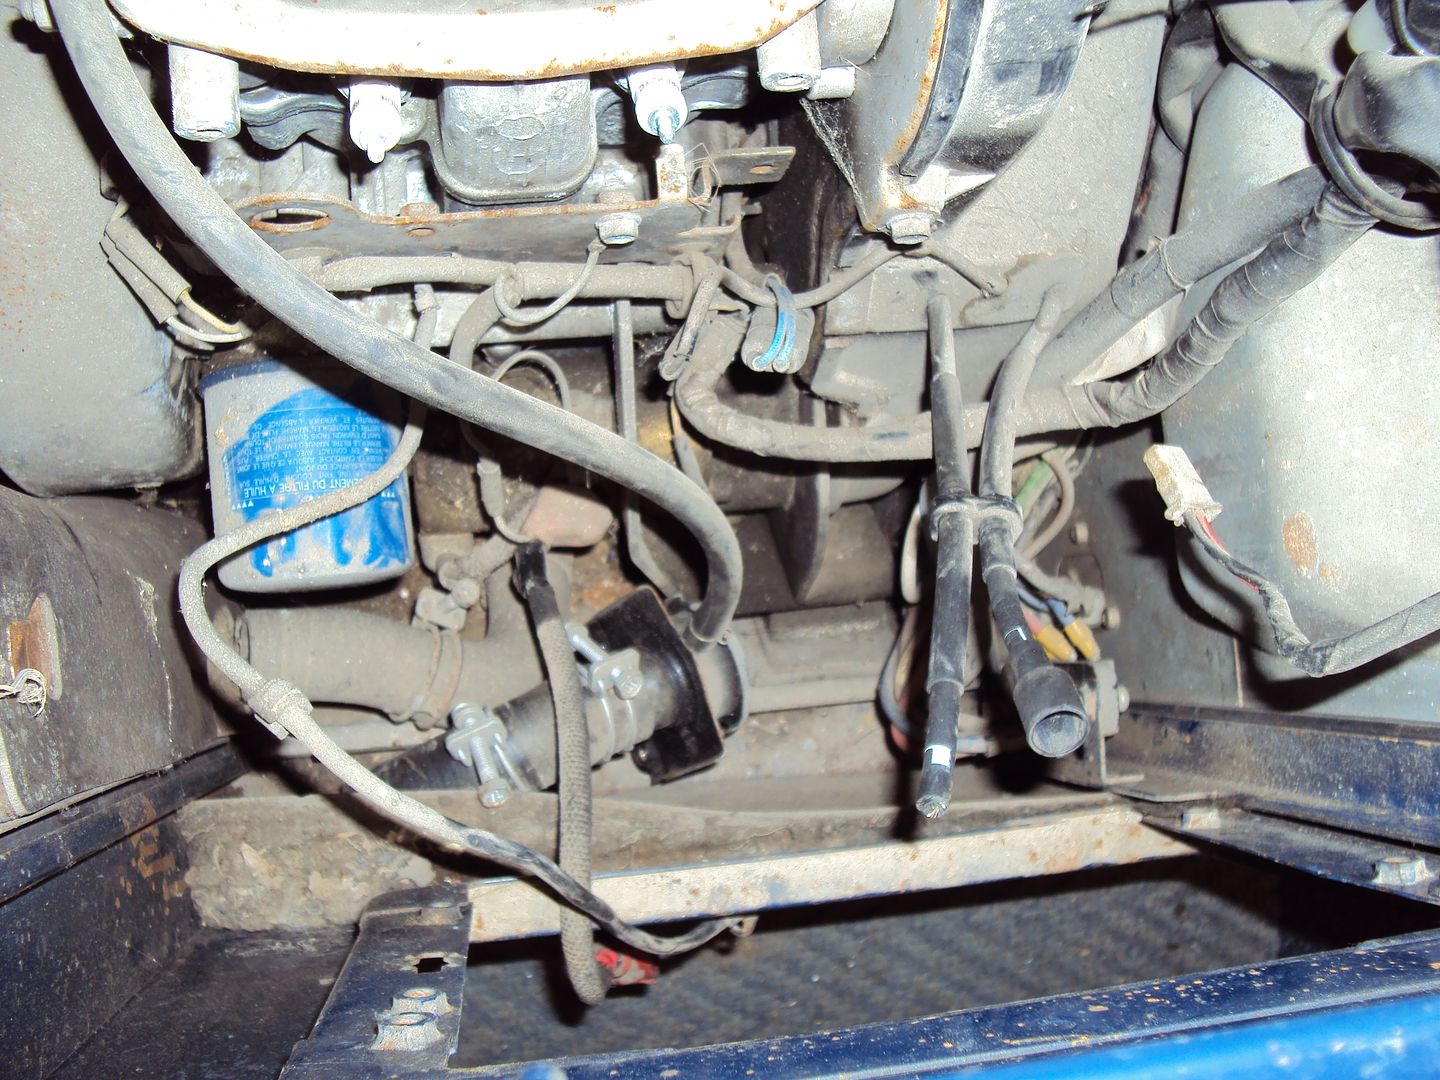
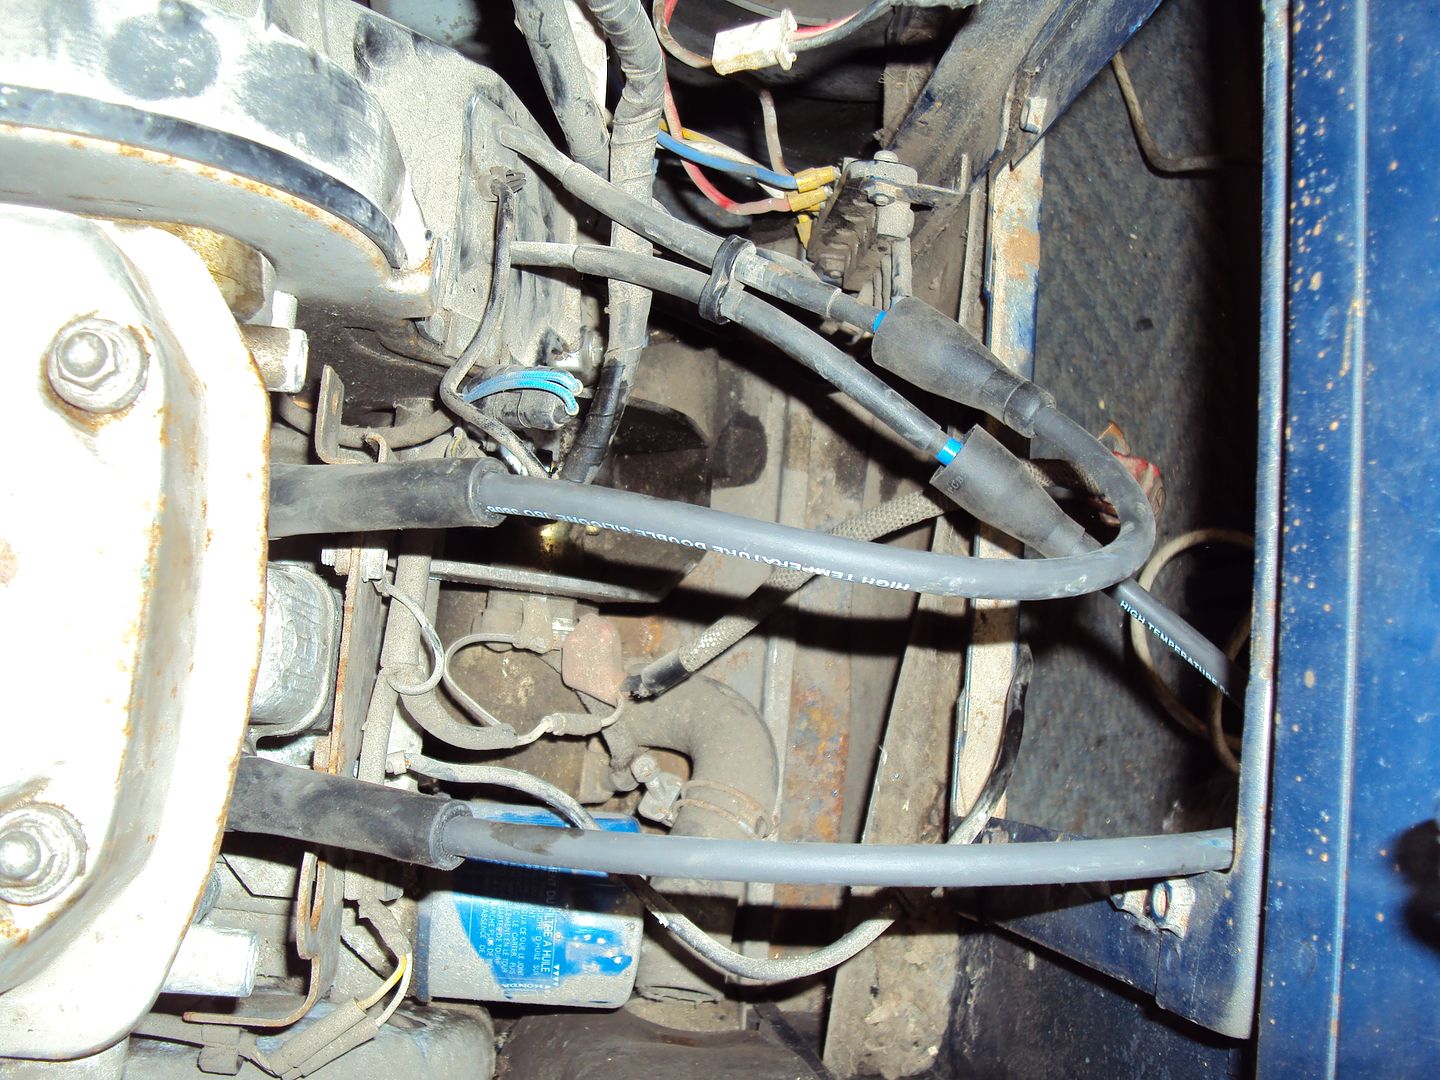
Got the governor fitted and did a lash up assembly to see if it all worked
After a quick turn over with the plugs removed to check for oil pressure, hooked everything up and filled with water, an this was the result (click pic for video)
finally got to test the output of the generator, as up until now I hadn't had it running long enough to test it. Both windings of the alternator were putting out 140v, I was expecting 120v (windings are connected in series to make 240v) so now need to check the engine speed and possibly re-wire the voltage adjuster.
While I was waiting for the governor I cleaned up some of the parts
carburettor before:
After:
Cooling fan
And straightened out some of the bent bodywork
Used the Edd China restoration method on the battery box, if it's rusty, give it a sand and good coat of black satin paint
Sanded
Painted
Also replaced the voltage adjuster as it was missing, Honda wanted £60
fortunately the service manual told me it was a 400 ohm pot, so off to ebay and £3 later one replacement voltage adjusterGot the governor fitted and did a lash up assembly to see if it all worked
After a quick turn over with the plugs removed to check for oil pressure, hooked everything up and filled with water, an this was the result
(click pic for video)finally got to test the output of the generator, as up until now I hadn't had it running long enough to test it. Both windings of the alternator were putting out 140v, I was expecting 120v (windings are connected in series to make 240v) so now need to check the engine speed and possibly re-wire the voltage adjuster.
Gassing Station | Homes, Gardens and DIY | Top of Page | What's New | My Stuff