Funicular goods railway - help!!
Discussion


Just a quick update to this. I am one of the idiots
mugs people helping Oli with this. It is actually quite a big project all together. It involves refurbishing all the working gear, replacing 130 metres or so of drive chain, replacing all the wooden sleepers keeping the track in place, rebuilding the 'car' , re-wiring the entire 'engine room', deciphering the control system and for good measure putting a new roof on the engine room as well!
The railway is not a vanity project or just a gimmick - the access to the house is up a lot of very steep steps and daily life for the family must be pretty difficult just in terms of shopping etc. The original installation was professionally built in the early 90's by a proper (but now defunct) lift company.
Apologies for the poor quality of the following pictures, just taken with my phone.
One of the reasons for updating this thread is to try to show that it is quite possible to do anything if you put your mind to it - what appears at first glance to be a difficult and complex thing is actually pretty straightforward when you break it down.
Firstly, I spent a day with Oli this week replacing sleepers - Oli sourced some PROPER creosote soaked oak sleepers - very very heavy, but should last forever - we have done most of them, about 4 more to go, dug in under the rail supports, spaced where necessary and coachscrewed down - the paler timber is spacing and will be stained in to match.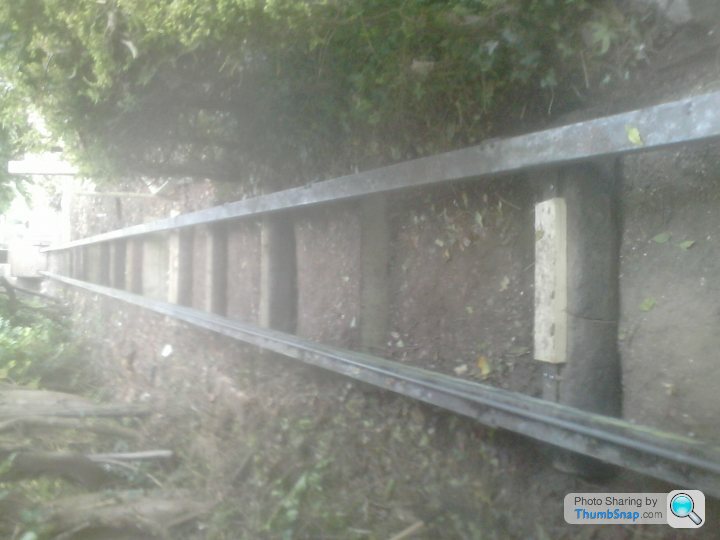
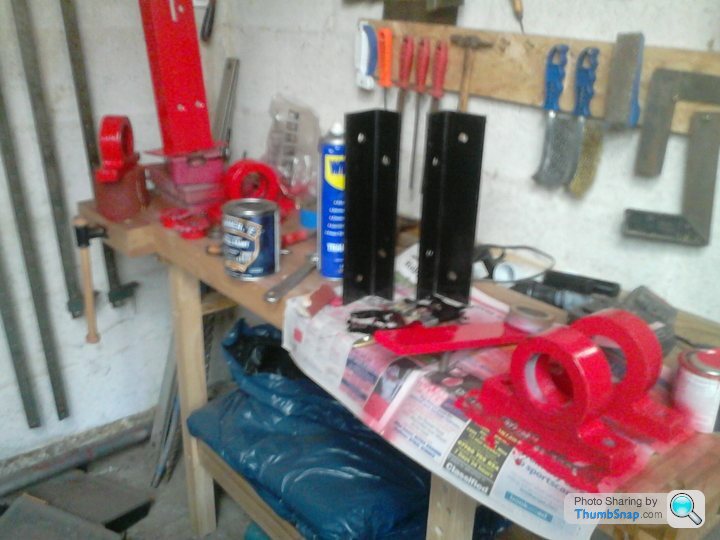
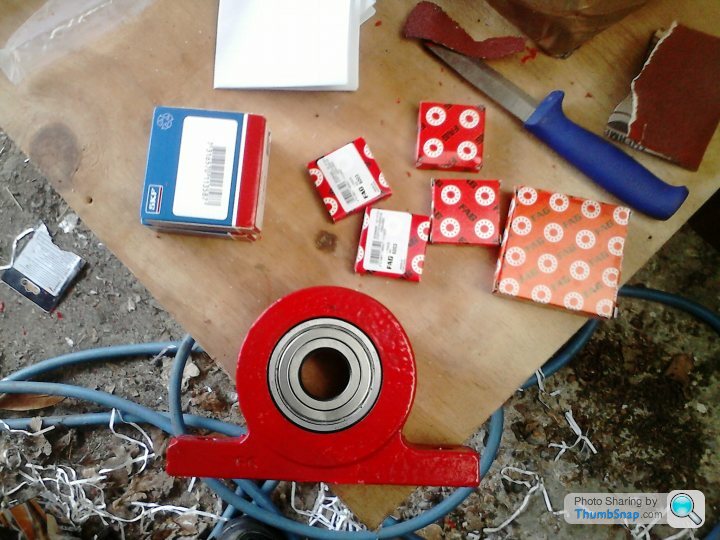
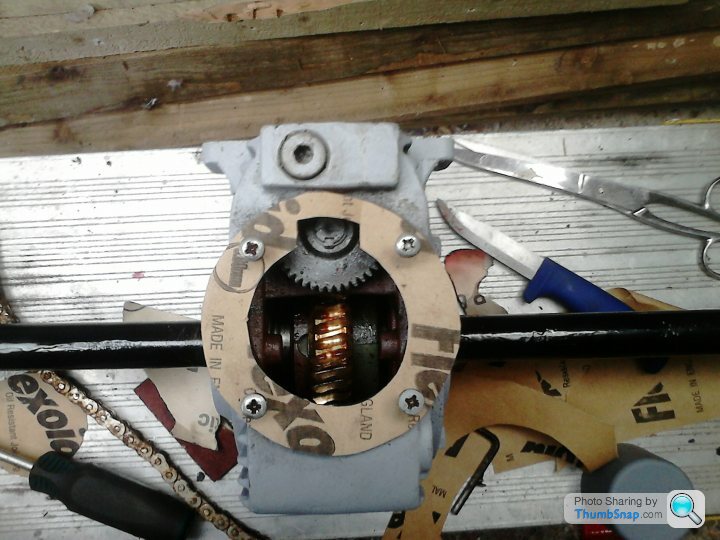
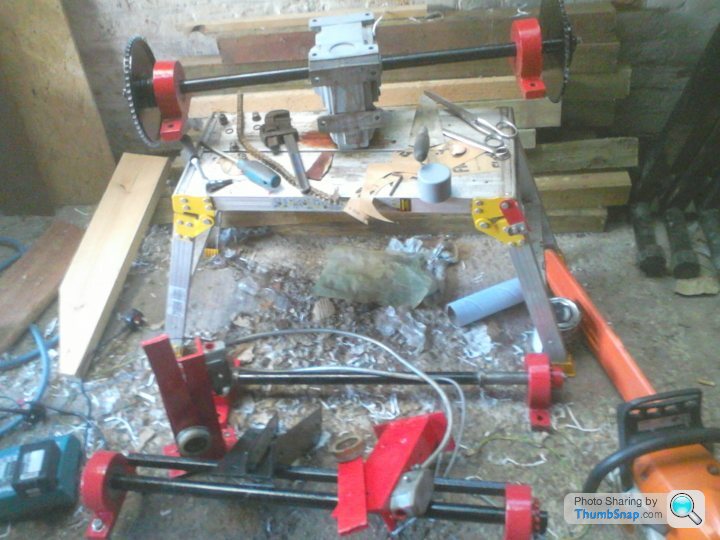
I brought all the working gear back to my place to clean up and refurbish. Cue many hours with the angle grinder, cup brush and some hammerite. New bearings were added where necessary.
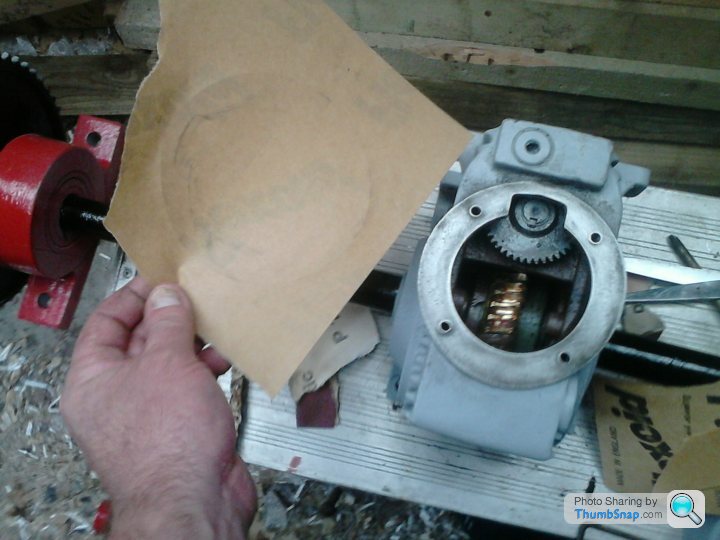
Luckily the gearbox which drives the chains was still in good order, but full of crap and old oil - this has been cleaned out, and a new gasket made for eventual connection back to the motor
The railway is not a vanity project or just a gimmick - the access to the house is up a lot of very steep steps and daily life for the family must be pretty difficult just in terms of shopping etc. The original installation was professionally built in the early 90's by a proper (but now defunct) lift company.
Apologies for the poor quality of the following pictures, just taken with my phone.
One of the reasons for updating this thread is to try to show that it is quite possible to do anything if you put your mind to it - what appears at first glance to be a difficult and complex thing is actually pretty straightforward when you break it down.
Firstly, I spent a day with Oli this week replacing sleepers - Oli sourced some PROPER creosote soaked oak sleepers - very very heavy, but should last forever - we have done most of them, about 4 more to go, dug in under the rail supports, spaced where necessary and coachscrewed down - the paler timber is spacing and will be stained in to match.
I brought all the working gear back to my place to clean up and refurbish. Cue many hours with the angle grinder, cup brush and some hammerite. New bearings were added where necessary.
Luckily the gearbox which drives the chains was still in good order, but full of crap and old oil - this has been cleaned out, and a new gasket made for eventual connection back to the motor
continued....
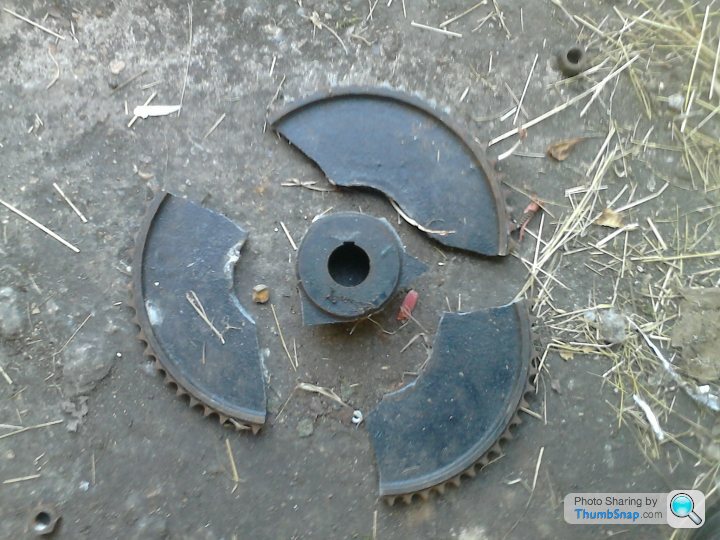
Oops !! These things happen when refurbing, so a replacement platewheel sprocket purchased and fitted...
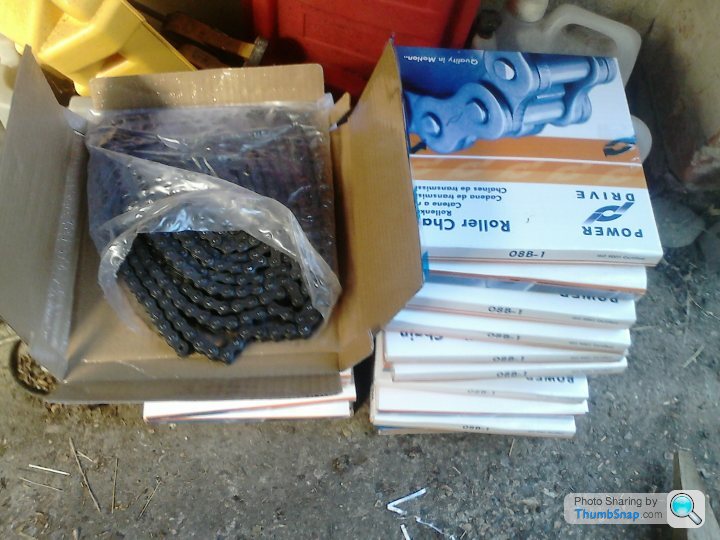
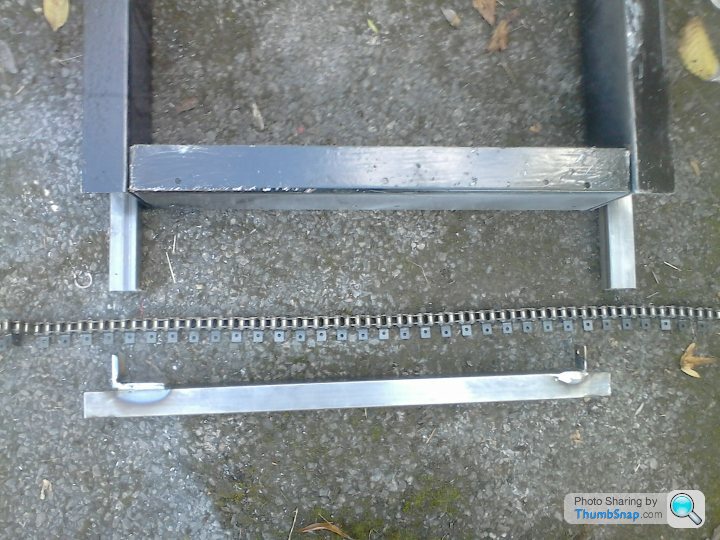
This is what 125 metres of replacement 08B roller chain looks like !
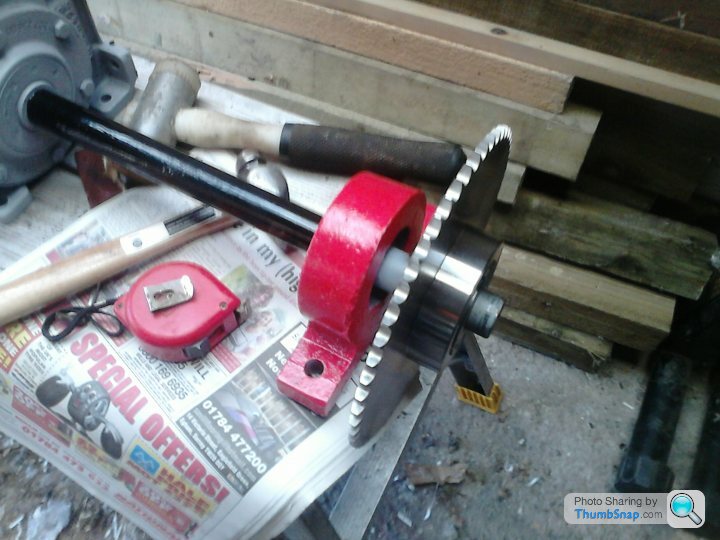
Most of the working gear now fully restored and painted.
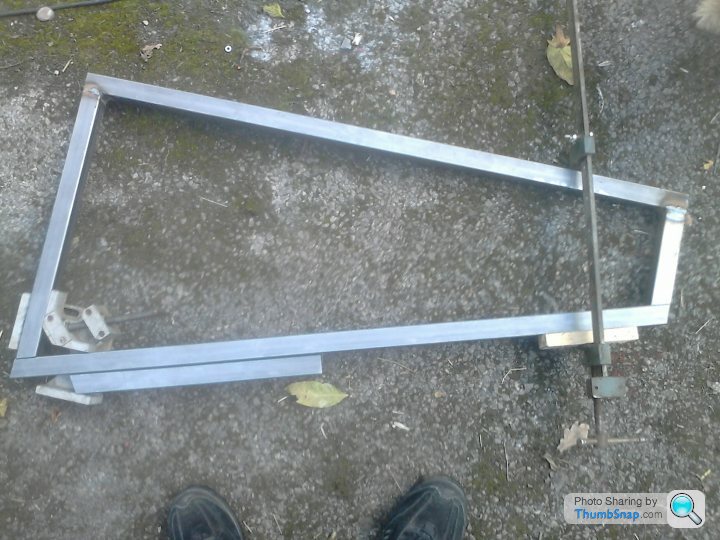
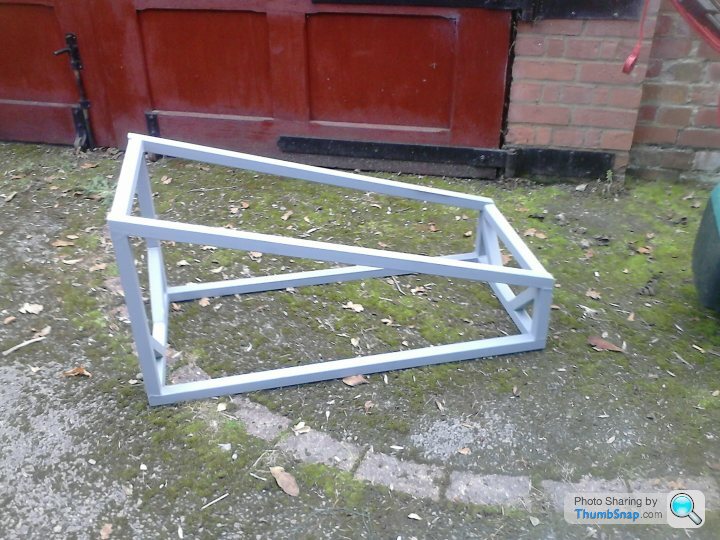
Now time to turn attention to the 'carriage'. Only the chassis of this was left - so it was decided to make a frame which will angle the body to the horizontal, to take into account the fact that the 1 in 3 slope of the track would mean all the shopping would get squashed to the back of the box when going uphill! Time to break out the welder - my welding isn't the best, but it is secure!
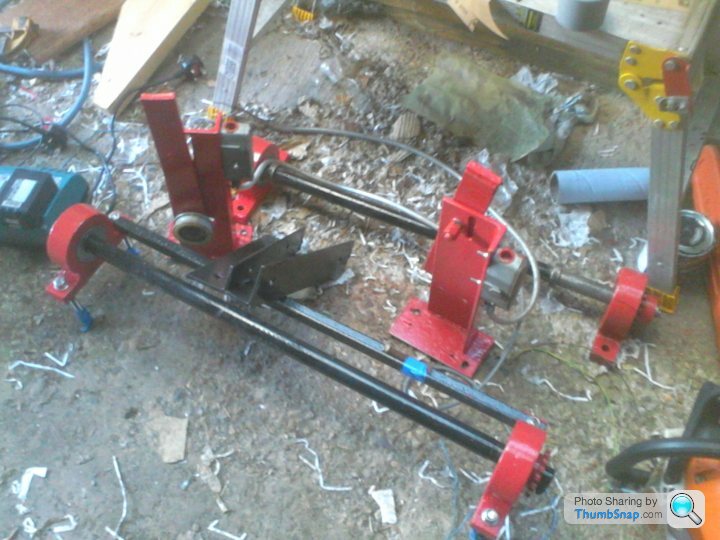
Now one of the tricky bits - making the chain carriers that physically attach the drive chain to the carriage. The original is all missing, so having to make this up as I go. All has to be detachable, as the carriage is actually built 'in situ' between the tracks - the bottom concrete fixing of the track means the carriage cannot be welded up into one piece and slid in. Note the special 'attachment chain' with added drilled lugs that will probably end up being riveted into the carriers.
More to come. Fellow PHer Mark is working on the control panel, and over the next couple of weeks we hope to start re-installing everything.
Oops !! These things happen when refurbing, so a replacement platewheel sprocket purchased and fitted...
This is what 125 metres of replacement 08B roller chain looks like !
Most of the working gear now fully restored and painted.
Now time to turn attention to the 'carriage'. Only the chassis of this was left - so it was decided to make a frame which will angle the body to the horizontal, to take into account the fact that the 1 in 3 slope of the track would mean all the shopping would get squashed to the back of the box when going uphill! Time to break out the welder - my welding isn't the best, but it is secure!
Now one of the tricky bits - making the chain carriers that physically attach the drive chain to the carriage. The original is all missing, so having to make this up as I go. All has to be detachable, as the carriage is actually built 'in situ' between the tracks - the bottom concrete fixing of the track means the carriage cannot be welded up into one piece and slid in. Note the special 'attachment chain' with added drilled lugs that will probably end up being riveted into the carriers.
More to come. Fellow PHer Mark is working on the control panel, and over the next couple of weeks we hope to start re-installing everything.

Late to this thread, only seen it this morning.
Probably the most interesting stuff I've ever read on PH since I discovered it, including the "Bunker one", which frankly I thought was overrated.
Well done to the OP and the two kind PH'ers helping him out.
A video definitely needs uploading, when everything is back in working order.
Probably the most interesting stuff I've ever read on PH since I discovered it, including the "Bunker one", which frankly I thought was overrated.
Well done to the OP and the two kind PH'ers helping him out.
A video definitely needs uploading, when everything is back in working order.

h8tax said:
continued....
More to come. Fellow PHer Mark is working on the control panel, and over the next couple of weeks we hope to start re-installing everything.
Thank you for posting this pic, Its hard to get a perspective of the gradient of this project from the toher pictures, More to come. Fellow PHer Mark is working on the control panel, and over the next couple of weeks we hope to start re-installing everything.
Cracking project and reclaimed railway sleepers will out survive the house!
Love a build thread me, This one is very good, there are loads of great ones around lurking in the sub sections these are some of my fav "in progress" ones. And if you ever look in the scale models section Dr_Gn always has an amazingly detailed build going on in a ridiculously small scale.
the mad bad mini project
http://www.pistonheads.com/gassing/topic.asp?h=0&a...
svip restoration
http://www.pistonheads.com/gassing/topic.asp?h=0&a...
and old wooden boat renovation that ends up being a new boat build
http://www.pistonheads.com/gassing/topic.asp?h=0&a...
the mad bad mini project
http://www.pistonheads.com/gassing/topic.asp?h=0&a...
svip restoration
http://www.pistonheads.com/gassing/topic.asp?h=0&a...
and old wooden boat renovation that ends up being a new boat build
http://www.pistonheads.com/gassing/topic.asp?h=0&a...
Gassing Station | Homes, Gardens and DIY | Top of Page | What's New | My Stuff