Funicular goods railway - help!!
Discussion


yorkieboy said:
Another fan here. This is why I love PH. Btw I really miss reading about CY88 and his secret tunnel, If anybody remembers?
is this the post?http://www.pistonheads.com/gassing/topic.asp?h=0&a...


More updates follow - we have been working on the railway, and most of the site infrastructure work is now complete - all the sleepers have been renewed, and a new handrail installed around the upper platform - just got to make a safety gate, but that's for the next visit.
Anyhow, been busy in the workshop. After a bit of headscratching, I decided my original plan for the chain carriers was too complicated. The chain carriers are the pieces that attach the driving chains to the carriage or 'bogey' I think they call it. The whole process is complicated somewhat by the fact that I am working offsite just from measurements and photo's (and memory!) but also that the bogey and carriage all have to be assembled from 'kit' in between the rails - the original setup was built in such a way that you cant remove the carriage from the end of the track, if that makes sense.
In the end, I just decided to weld the attachment links to the side carriers - once again apologies for welding, but at least its strong!

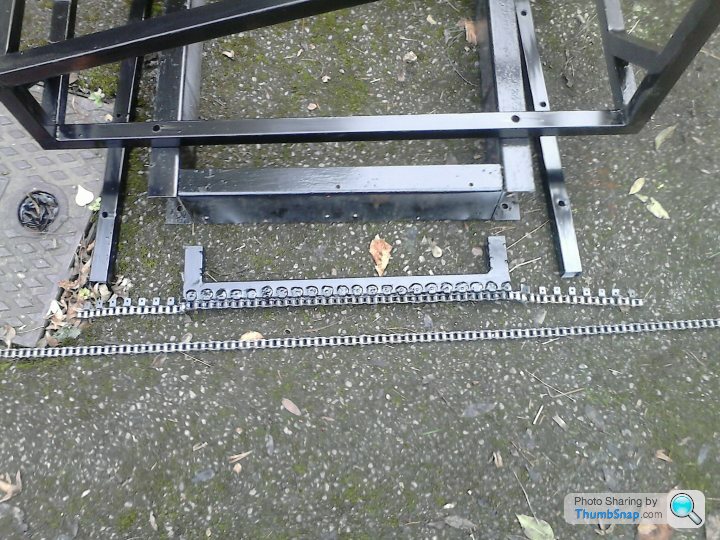
Next I decided to lay out all the finished components in order, so that you can finally see how it works :

From left to right :
Control box for housing the electronics - gearbox and driveplate wheels - chain break safety switches (these cut motor power in the event of a chain break) - machinery safety mesh covers at rear - top alignment sprockets - bogey with support frame - then finally bottom sprockets. This is obviously condensed form - the actual arrangement is some 30 metres long! Where possible all fixings have been replaced with A2 stainless, and all metal parts primed then given 2 coats of Hammerite.
Anyhow, been busy in the workshop. After a bit of headscratching, I decided my original plan for the chain carriers was too complicated. The chain carriers are the pieces that attach the driving chains to the carriage or 'bogey' I think they call it. The whole process is complicated somewhat by the fact that I am working offsite just from measurements and photo's (and memory!) but also that the bogey and carriage all have to be assembled from 'kit' in between the rails - the original setup was built in such a way that you cant remove the carriage from the end of the track, if that makes sense.
In the end, I just decided to weld the attachment links to the side carriers - once again apologies for welding, but at least its strong!
Next I decided to lay out all the finished components in order, so that you can finally see how it works :
From left to right :
Control box for housing the electronics - gearbox and driveplate wheels - chain break safety switches (these cut motor power in the event of a chain break) - machinery safety mesh covers at rear - top alignment sprockets - bogey with support frame - then finally bottom sprockets. This is obviously condensed form - the actual arrangement is some 30 metres long! Where possible all fixings have been replaced with A2 stainless, and all metal parts primed then given 2 coats of Hammerite.
Edited by h8tax on Sunday 26th October 07:52
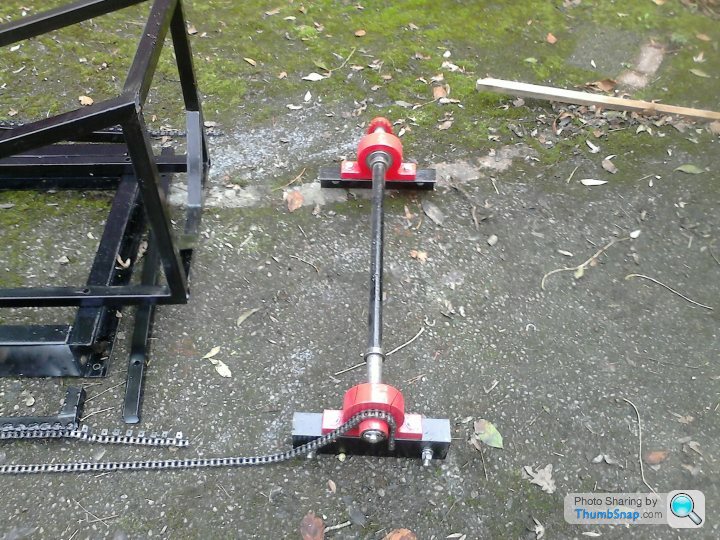
A few extra closer pics :


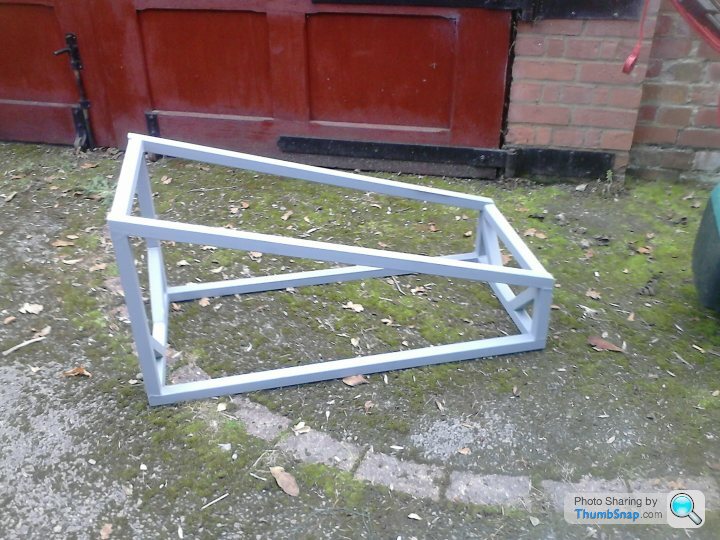
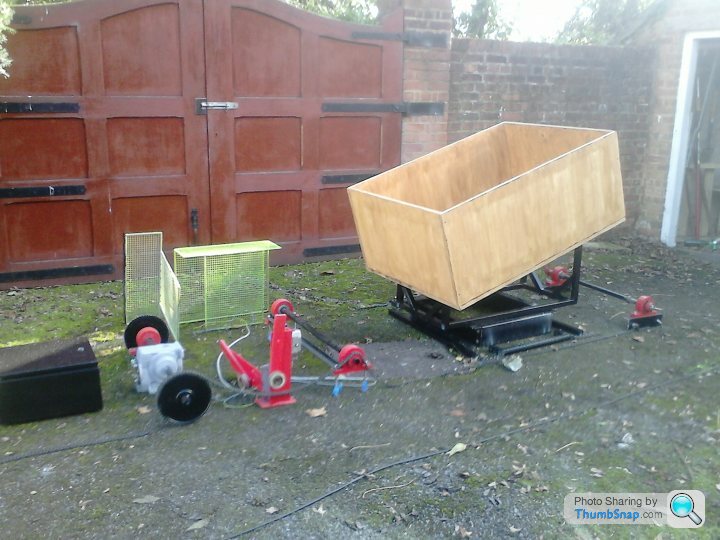
Next I had to make the new carriage box - the thing which the project is all about ! That will contain the shopping/children/whatever that will actually travel up (and down) the railway. We have tried to keep safety in mind, as the family have a young lad, so I decided to make it out of chunky 22mm ply. I have no idea if its bigger or smaller than the original (as that was missing), but it measures 1200 x 900 x 500. Its got a few drainage holes in so it doesn't fill up with water.
I took the next picture deliberately with my phone at an angle, but showing the box horizontal - it gives a really good view of just how steep the slope is, and how it should look in situ - the railway has been built to an exact 1 in 3 slope.

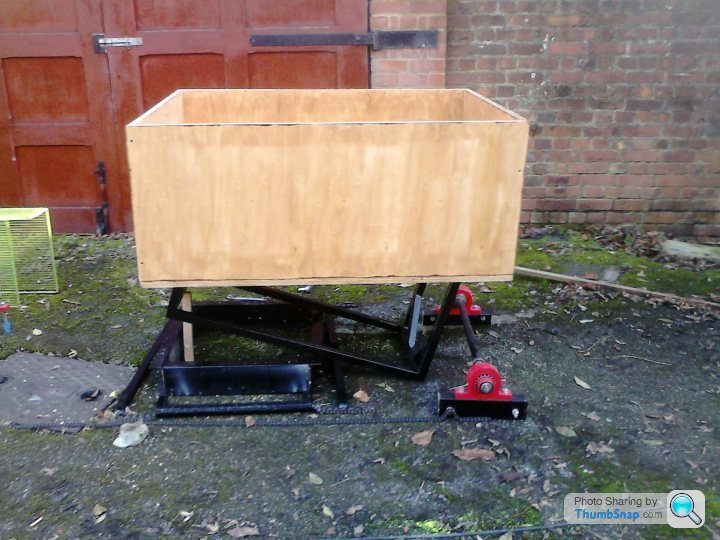
Finally a picture showing it all together :
That is pretty much all the workshop stuff finished - just now got to transport it all back to site, and start installing - of course hoping all my measurements are correct! We are still puzzling over a couple of finer points of the electrical controls (no wiring diagrams!) but PHer Mark is doing sterling work in that department, so I am sure we will get it worked out.
Will of course keep posting pics as we do more work - we have promised Oli and family it will be working in time for Santa to use - should be easily achievable!
Next I had to make the new carriage box - the thing which the project is all about ! That will contain the shopping/children/whatever that will actually travel up (and down) the railway. We have tried to keep safety in mind, as the family have a young lad, so I decided to make it out of chunky 22mm ply. I have no idea if its bigger or smaller than the original (as that was missing), but it measures 1200 x 900 x 500. Its got a few drainage holes in so it doesn't fill up with water.
I took the next picture deliberately with my phone at an angle, but showing the box horizontal - it gives a really good view of just how steep the slope is, and how it should look in situ - the railway has been built to an exact 1 in 3 slope.
Finally a picture showing it all together :
That is pretty much all the workshop stuff finished - just now got to transport it all back to site, and start installing - of course hoping all my measurements are correct! We are still puzzling over a couple of finer points of the electrical controls (no wiring diagrams!) but PHer Mark is doing sterling work in that department, so I am sure we will get it worked out.
Will of course keep posting pics as we do more work - we have promised Oli and family it will be working in time for Santa to use - should be easily achievable!

I'm the lady of the house and whilst I have had very little to do with repairing the Funicular, save for supplying the occasional cup of tea, I am thrilled with the work that is being done. At the moment climbing the 88 steps to the house is a pain but perfectly manageable but that's when it is just me. If I get shopping I have to limit what I can buy based on what I can carry up the steps so we rely on internet deliveries for most things which isn't always convenient. We have a lot of work that we need to do to the garden but getting compost, cement, paving slabs and wood up to the house is so difficult we have mostly put it off. Every time my mother comes over with a a bag of things for my son she moans about how hard it is to carry it up to the house. As Phil previously mentioned this isn't a vanity project, it will have a huge positive impact on living here.
Fixing the Funicular has proved to be a huge undertaking, from clearing what was a completely overgrown slop where you could barely see the track, to replacing all the sleepers (I'm told they are quite heavy), stripping away all the component parts and then reassembling everything. I wasn't sure that we would ever get it working again but it now seems to be a question of when rather than if and frankly we would never have known where to start had it not been for Phil and Mark. They have donated so much time, effort and expertise into this and as an ignorant bystander I am in awe of what has been achieved by them and my husband. I can't believe there are such nice people out there who will volunteer their help so readily.
We will continue to upload updates, photos etc until it is up and running but as someone asked what the lady of the house thought, I figured I would let you know.


Gassing Station | Homes, Gardens and DIY | Top of Page | What's New | My Stuff