Harrogate House Renovation..
Discussion


Pheo said:
Thanks guys - been eyeing up the staircase all night now - will sort some photos tomorrow!
RE the wet room, think I would only go with this option if a thin shower tray wouldn't fit. Would need to check we can even fun the soil pipe, i.e. can we get through the joists?
You could do as was previously done in mine and notch the waste pipe into the bottom of the joists as seen in the pic below. This would however be much easier to do if you drop the ceiling below which is obviously more of a pain unless you plan to re do it anyway. RE the wet room, think I would only go with this option if a thin shower tray wouldn't fit. Would need to check we can even fun the soil pipe, i.e. can we get through the joists?


P4T said:
Pheo said:
Thanks guys - been eyeing up the staircase all night now - will sort some photos tomorrow!
RE the wet room, think I would only go with this option if a thin shower tray wouldn't fit. Would need to check we can even fun the soil pipe, i.e. can we get through the joists?
You could do as was previously done in mine and notch the waste pipe into the bottom of the joists RE the wet room, think I would only go with this option if a thin shower tray wouldn't fit. Would need to check we can even fun the soil pipe, i.e. can we get through the joists?
Seriously bad practice/workmanship and potentially dangerous.
Nice job. Some 'interesting' design decisions but as you're doing it for you, who am I to criticise.
And, as has been said, the workmanship and quality of finish is amazing. Little things like the accuracy of your cuts here...
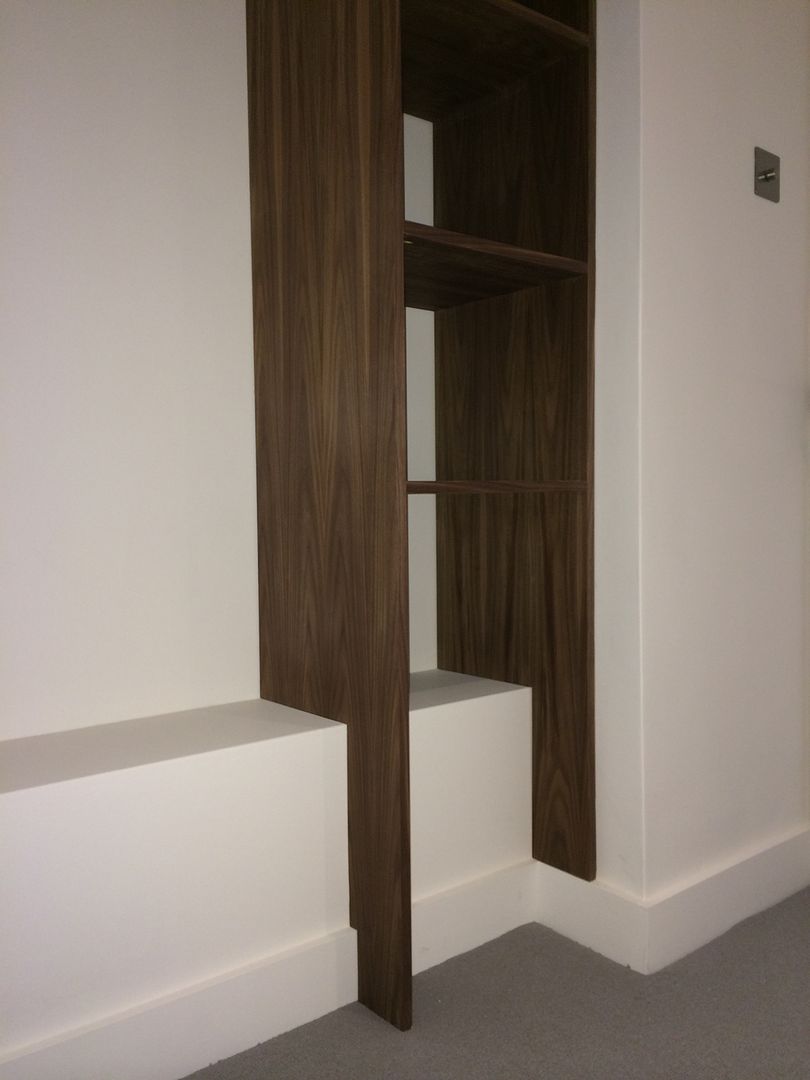 ..really show off the quality of the finish.

And, as has been said, the workmanship and quality of finish is amazing. Little things like the accuracy of your cuts here...
P4T said:
P4T said:
I used to be a cabinet maker once upon a time
Ahh, all makes sense now.P4T said:
All of the internal walls on the top floor of the property have been breeze blocks laid directly onto the chipboard floorboards..
Spudler said:
P4T said:
Pheo said:
Thanks guys - been eyeing up the staircase all night now - will sort some photos tomorrow!
RE the wet room, think I would only go with this option if a thin shower tray wouldn't fit. Would need to check we can even fun the soil pipe, i.e. can we get through the joists?
You could do as was previously done in mine and notch the waste pipe into the bottom of the joists RE the wet room, think I would only go with this option if a thin shower tray wouldn't fit. Would need to check we can even fun the soil pipe, i.e. can we get through the joists?
Seriously bad practice/workmanship and potentially dangerous.
Guys. Let's not over react here (and potentially derail a good thread).
Joists are manufactured to standard dimensions. They are not produced bespoke to that particular application. Instead, the closest off-the-shelf size appropriate to the job will be chosen (hopefully the next size up!).
There are a huge number of other factors that will effect the actual loading on any given joist, and therfore the (FoS) margin they have in the load they can take, will also vary.
Yes, notching 50% of the joists' thickness away would probably not be particularly clever, but there are some instances where a 10mm notch won't, in any way, affect the structural integrity of the building.
Just for the avoidance of doubt, I am not advocating anyone who doesn't know that they are doing start hacking at their joists.
(just pre-empting the straw-man scenario that often plays out on PH)
You are correct I have no knowledge really of notching into joists..
The builder who built my house in the 60's is the person who notched the joists to allow for the waste pipes. I have just tapped into waste pipes already in place. If it is bad practice fair enough..
The house is still standing 50 years later so it can't have been too detrimental.
To clarify I am not a builder. Just a keen DIYer so if anyone spots any obvious mistakes do please let me know!
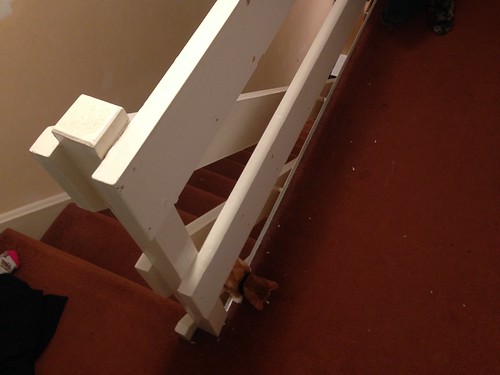
As promised, some stairs picks from my own place:
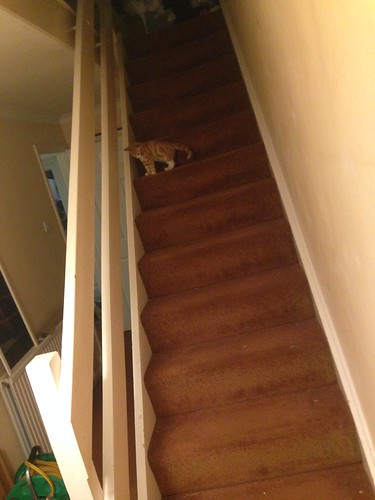 What shall one do with these lovely 60s stairs! by Pheo, on Flickr
 What shall one do with these lovely 60s stairs! by Pheo, on Flickr
What do you recon P4T? The bannisters are out of alignment with the newels on mine, and there isn't a lot to drop any supports onto on the side-plate (can't remember the proper name!).
What shall one do with these lovely 60s stairs! by Pheo, on FlickrWhat shall one do with these lovely 60s stairs! by Pheo, on FlickrWhat do you recon P4T? The bannisters are out of alignment with the newels on mine, and there isn't a lot to drop any supports onto on the side-plate (can't remember the proper name!).
Hi Pheo. Yep, I can see how yours differs from mine. The only thing I could suggest there that might work and also look good would be to have the glass banisters fitted in the same way as the wooden ones currently there. i.e pressed up against the side of the post. This would essentially be securing the glass to the post maybe in 3 or 4 places either end with the type of fittings shown in the below photos.
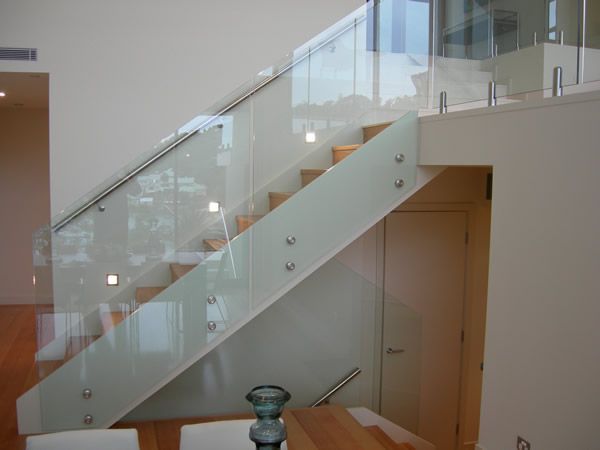
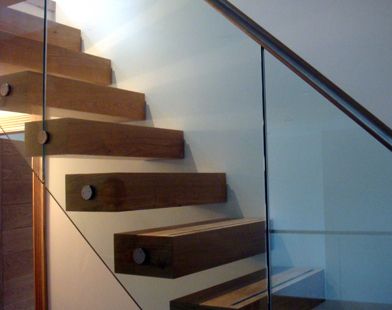
The only issue there could be with this is one post would be supporting the weight of two panes of glass.. One either side.


The only issue there could be with this is one post would be supporting the weight of two panes of glass.. One either side.
Hummm!
I think I could get a thin channel to sit it into on the diagonal, the current banisters run above the outside of the stair so it could go straight down. Or a similar thing with a block of wood. Then on the return upstairs I could probably do a similar thing and then attach either end. Will have to have a think!
I think I could get a thin channel to sit it into on the diagonal, the current banisters run above the outside of the stair so it could go straight down. Or a similar thing with a block of wood. Then on the return upstairs I could probably do a similar thing and then attach either end. Will have to have a think!
monthefish said:
Nice job. Some 'interesting' design decisions but as you're doing it for you, who am I to criticise.
And, as has been said, the workmanship and quality of finish is amazing. Little things like the accuracy of your cuts here...
Good work, you've clearly put a lot into it!
Personally I find that right hand vertical piece of timber stopping on top of the skirting a bit itchy teethy when the left hand piece continues to the floor! That said had you carried the line on through the skirting I'm sure others would object.
Its great to see so much though and care go into a 'DIY' build though bloody good work!
And, as has been said, the workmanship and quality of finish is amazing. Little things like the accuracy of your cuts here...
P4T said:
Personally I find that right hand vertical piece of timber stopping on top of the skirting a bit itchy teethy when the left hand piece continues to the floor! That said had you carried the line on through the skirting I'm sure others would object.
Its great to see so much though and care go into a 'DIY' build though bloody good work!
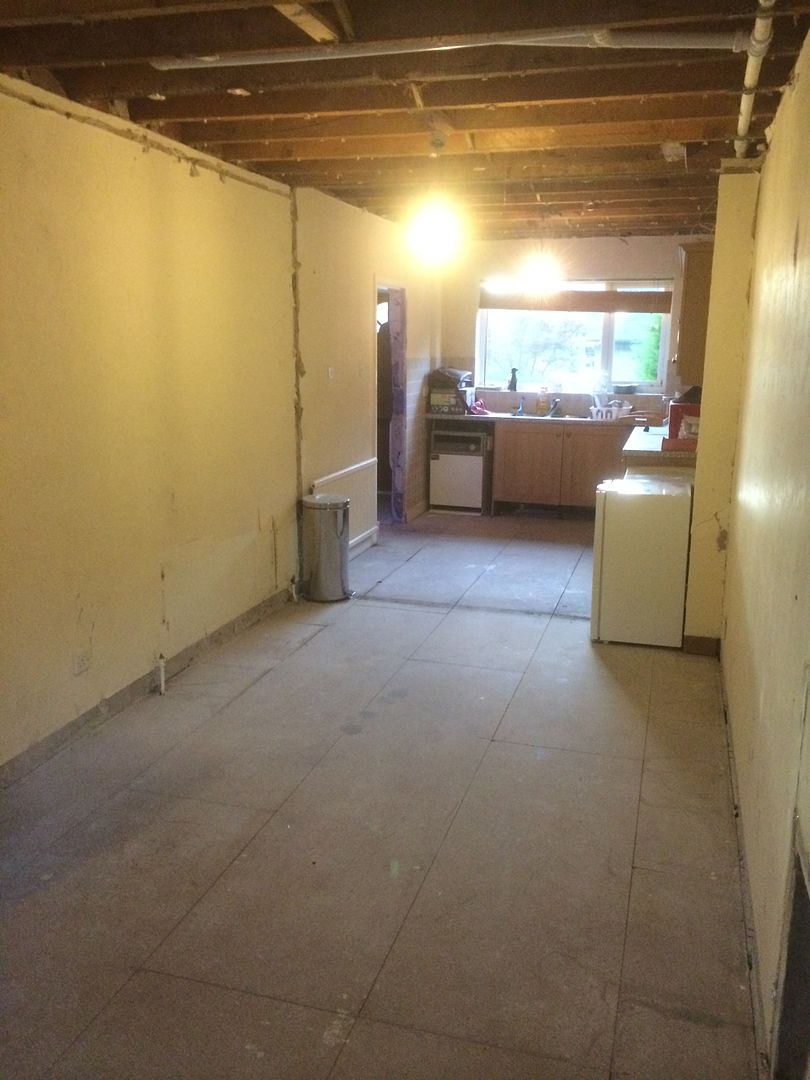
Ok so the last few months have seen some progress happening on the house. The garden was done then the next step was to begin the remodel on the ground floor of the house.. The current layout was as below:
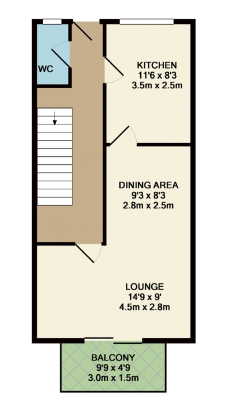
The existing layout just didn't work for me. The kitchen is completely cut off from the lounge/dining area. This is at odds with how I enjoy to use the space when it comes to entertaining and just in general an outdated layout in my opinion. I could have just knocked down the wall between the kitchen and the living room which would have solved the problem however this then leaves you with a dead area of hallway which just serves no purpose. Anyway a plan was hatched and a SE instructed. The wall between the kitchen and living room was non load bearing so this could come straight out however the wall which runs parallel to the staircase supported the joists above and they in turn supported the weight of the internal walls on the first floor which as been previously mentioned are all breeze block built directly onto the floorboards. This meant I would need an RSJ in place of the wall and without running it the whole length of the house I would need another to go across the property to allow the main RSJ to bolt to it. As below:
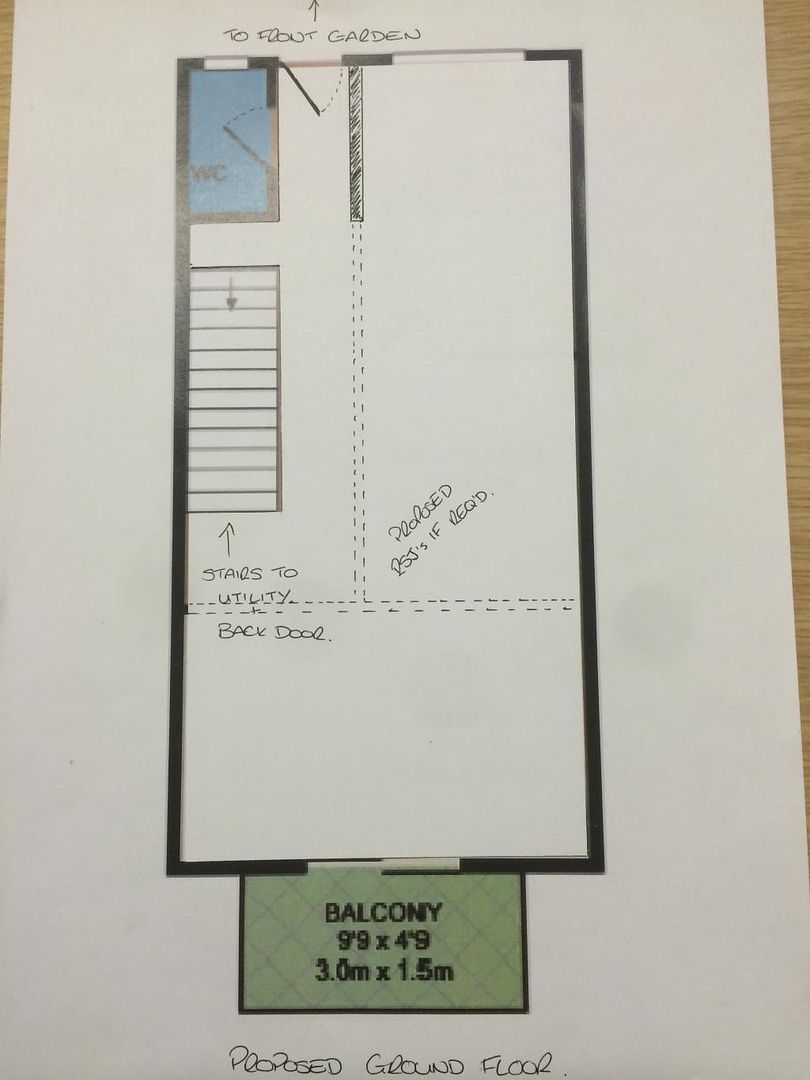
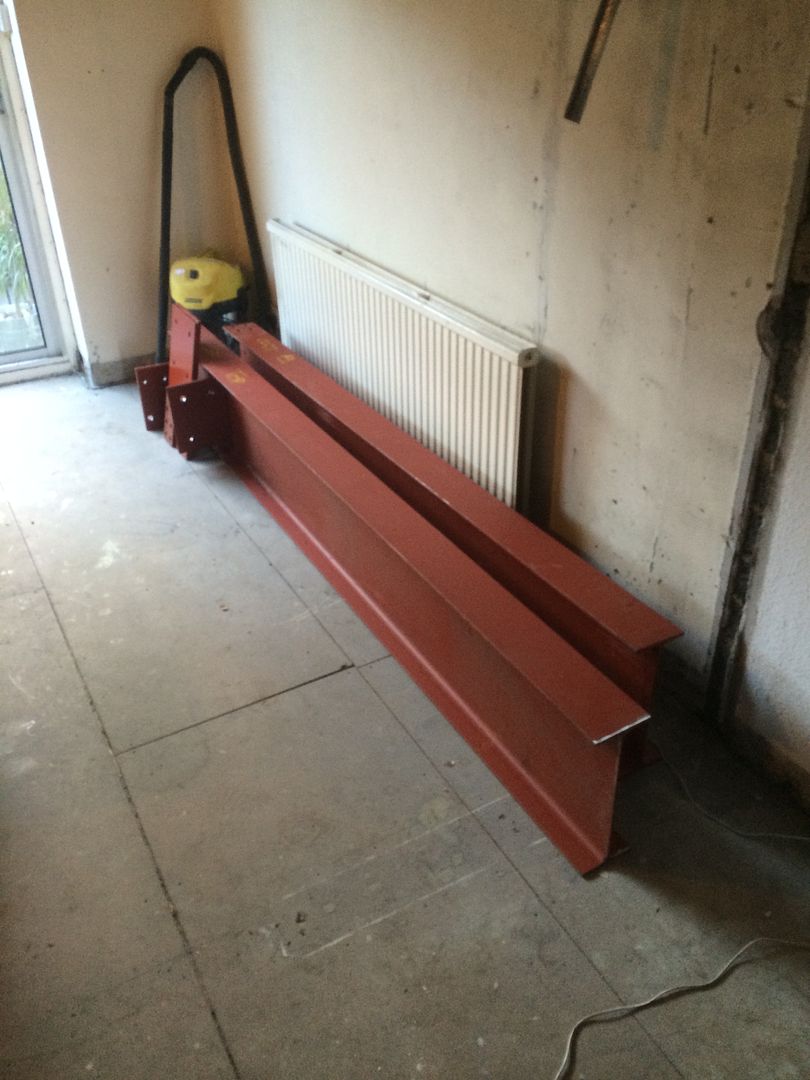
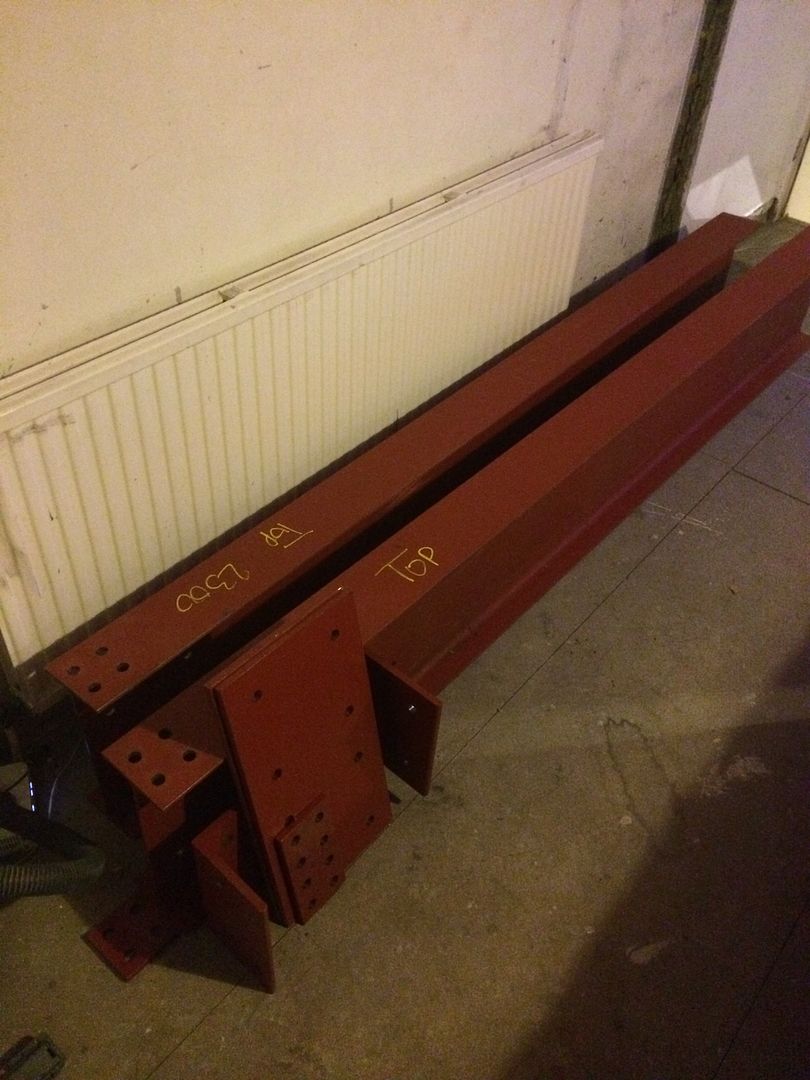
The structural engineer was able to do some drawings on the above basis and the RSJ's were ordered. I can't help but think the beam that was specified was slighty over the required size but I wanted to do it by the book so stuck with his specification. The RSJ's were 357 x 127.
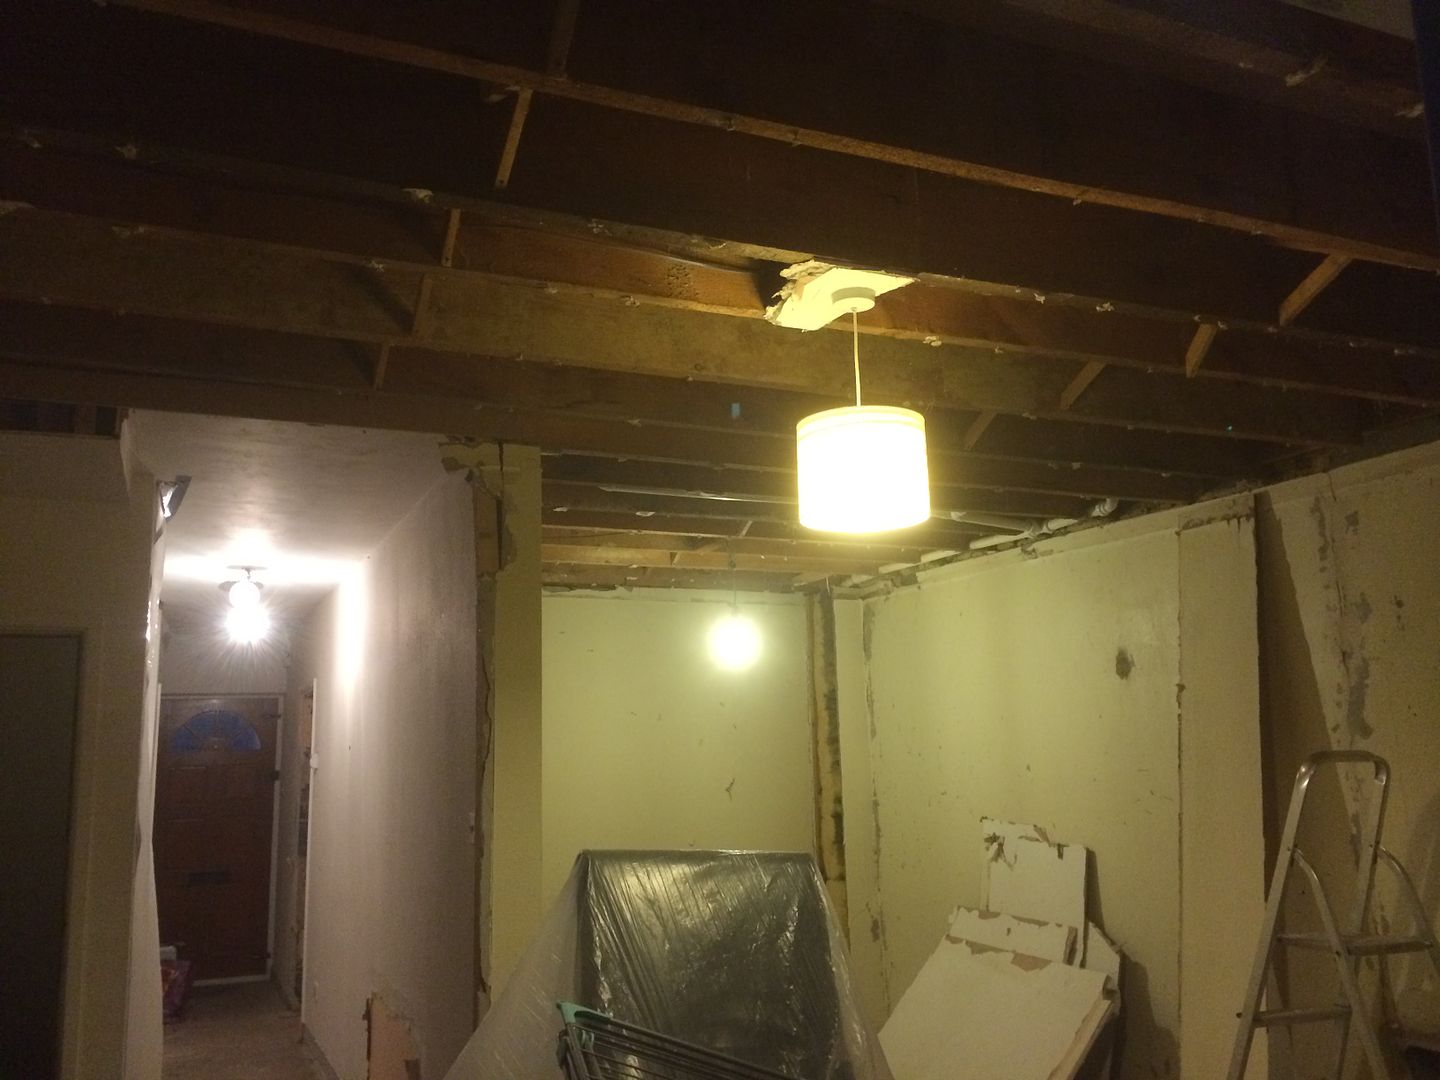
First job was to pull the ceilings down..
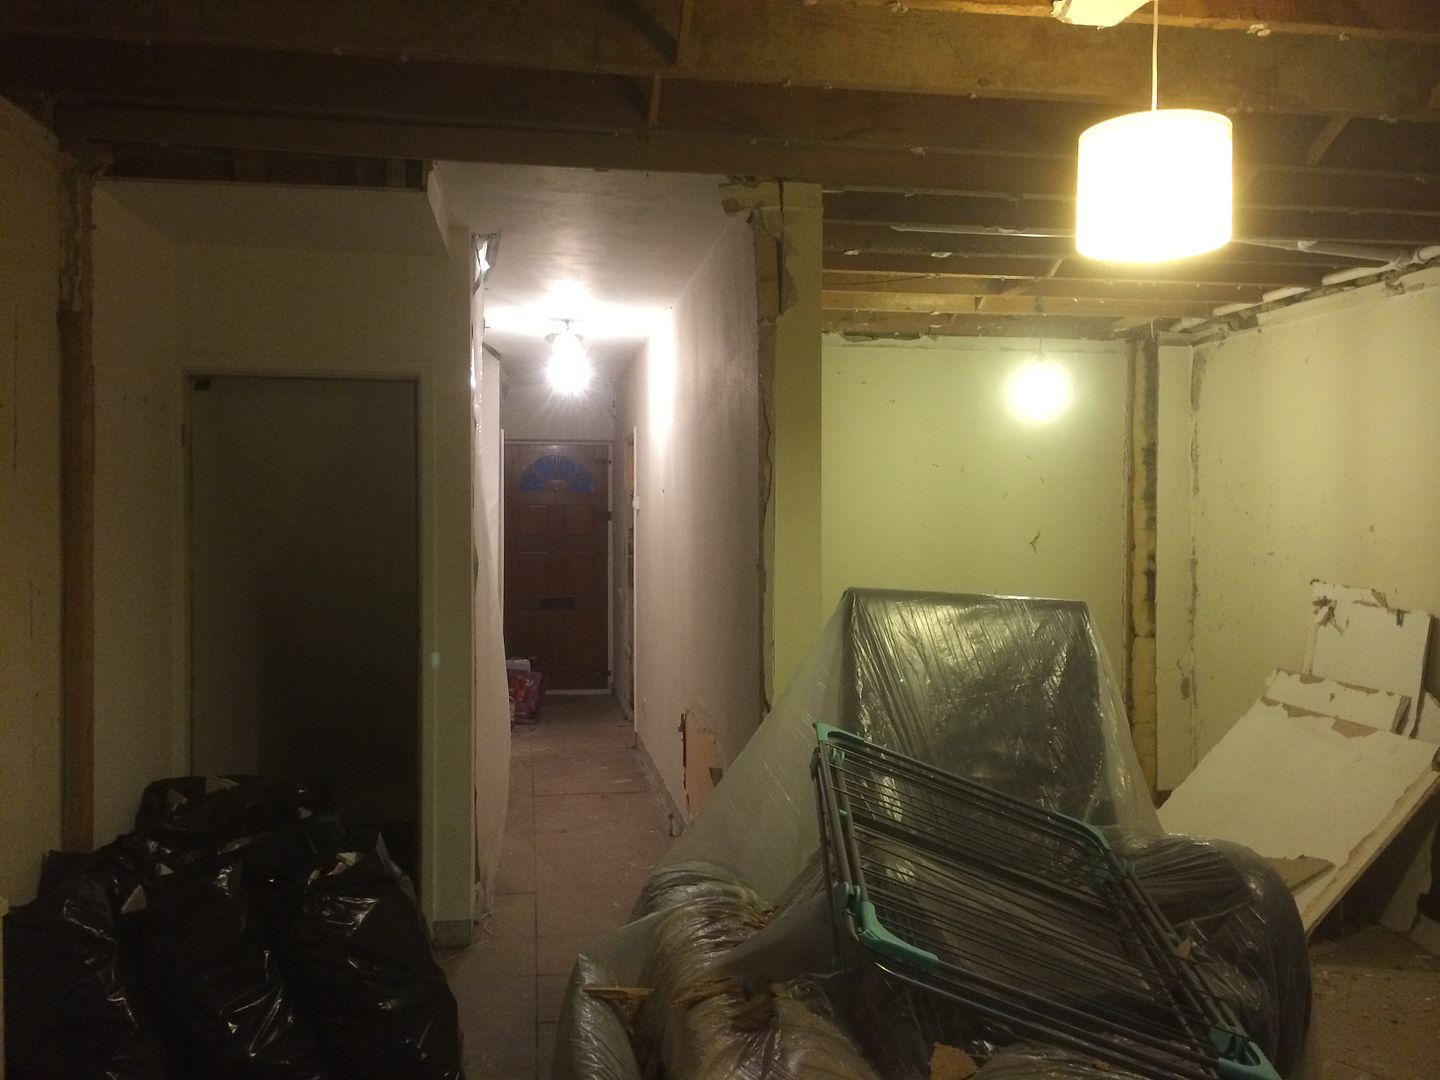
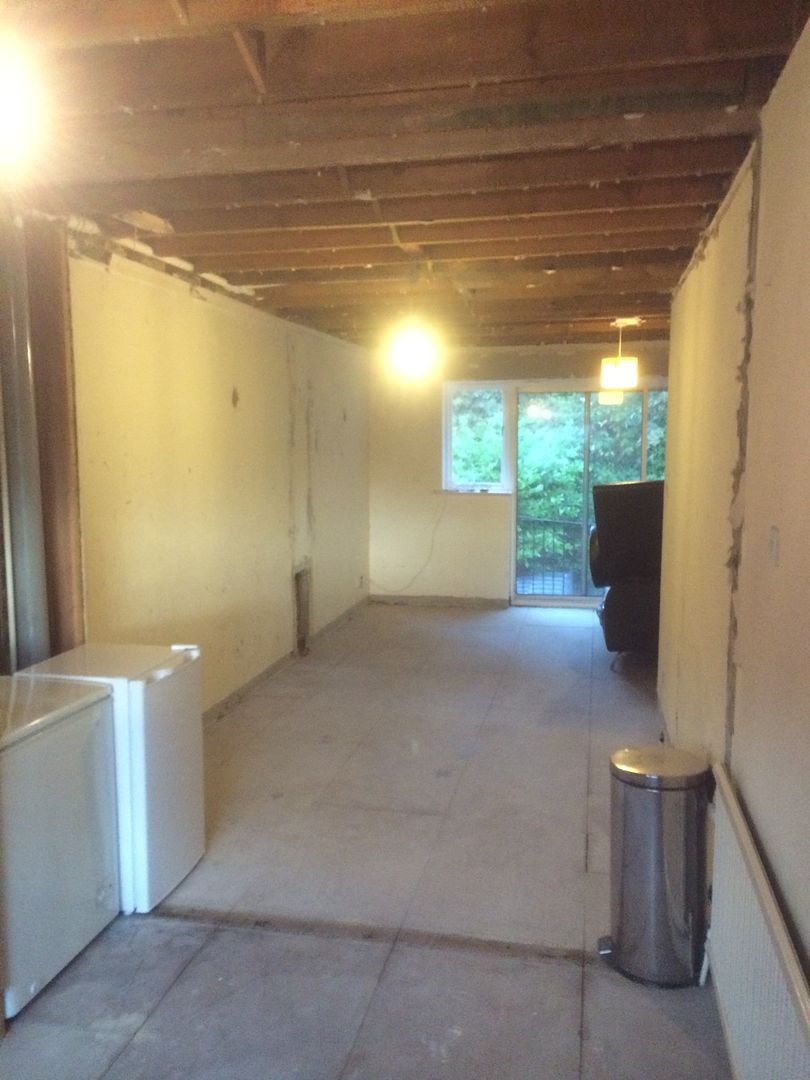
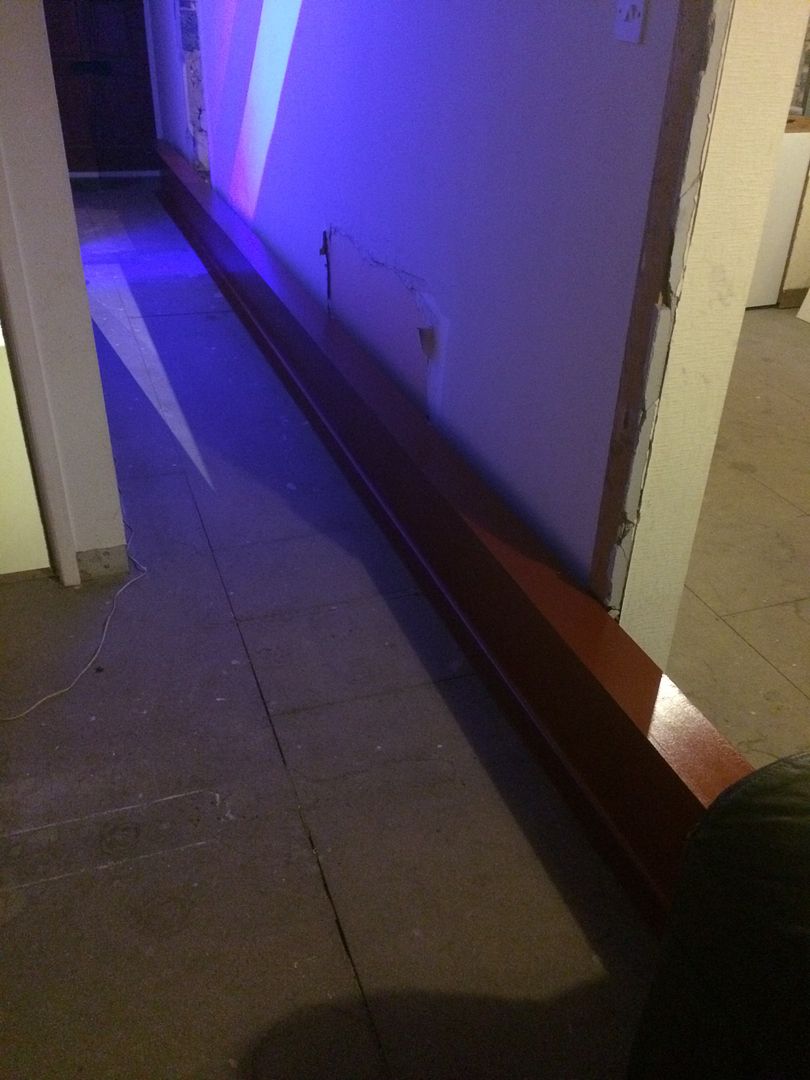
A start was then made on the wall between the kitchen and lounge
With this wall down it already made a huge difference.
There was then a dead week or so whilst I waited for the beams to be delivered. The steel company I used bizarrely didn't have a Hi Ab so the beams had to be lifted off the wagon which was a task in itself.. Fortunately the beams weren't the heaviest at 33kg/m so with the help of a few friends we managed to get them off and carried into the house. The main beam at approx 6.5 metres was about 215kg. Fortunately the SE had given me the tip to get the main beam in place before propping any of the joists above..
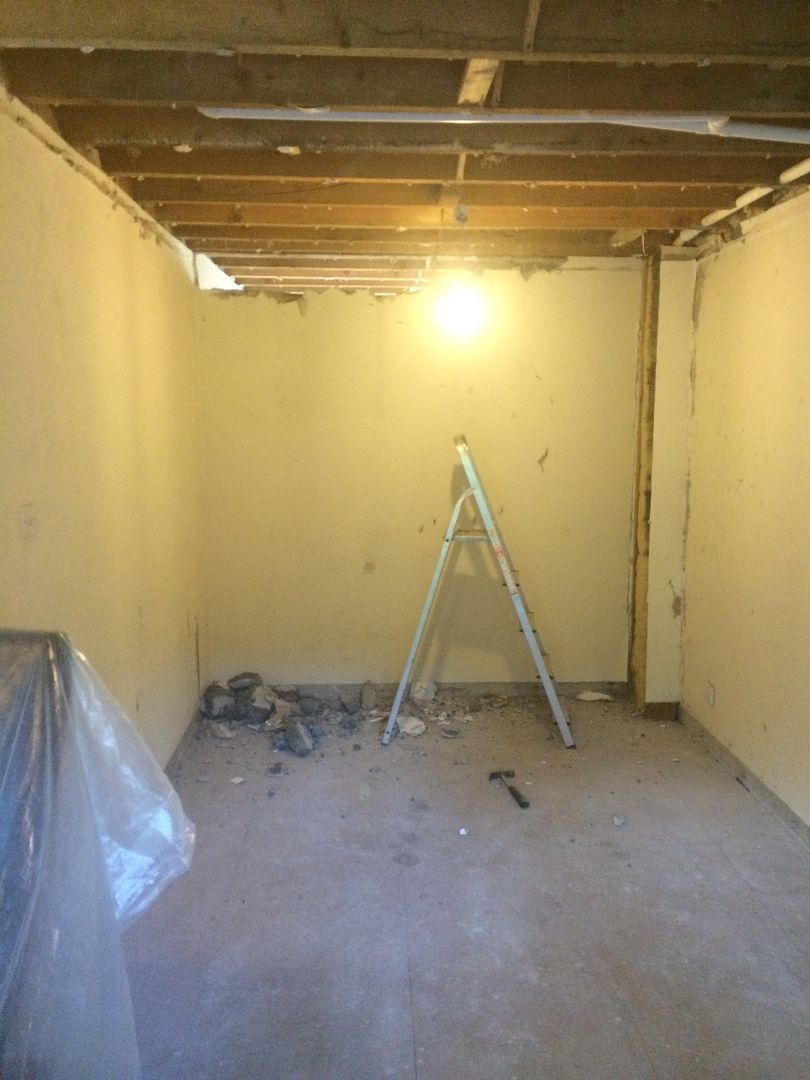
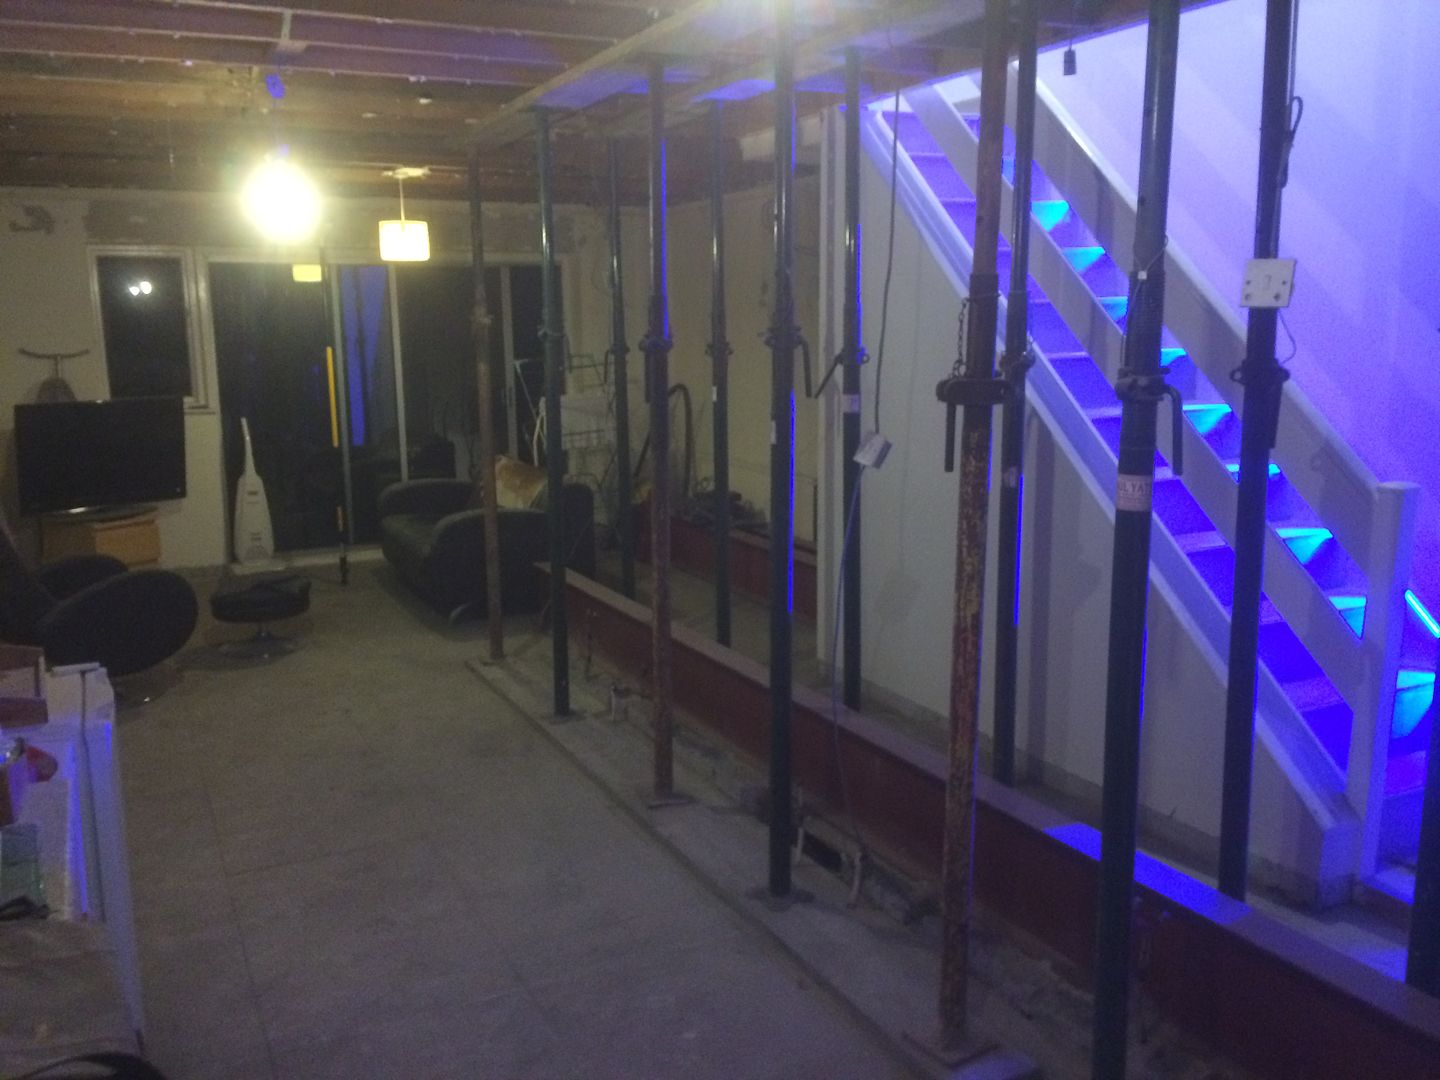
The acro props were then put in place either side of the supporting wall.. This was the first time I had ever done any propping so I hired quite a few.. Some of my builder mates had a laugh as they said I prob had double the amount required.. Oh well never be too careful and all that.
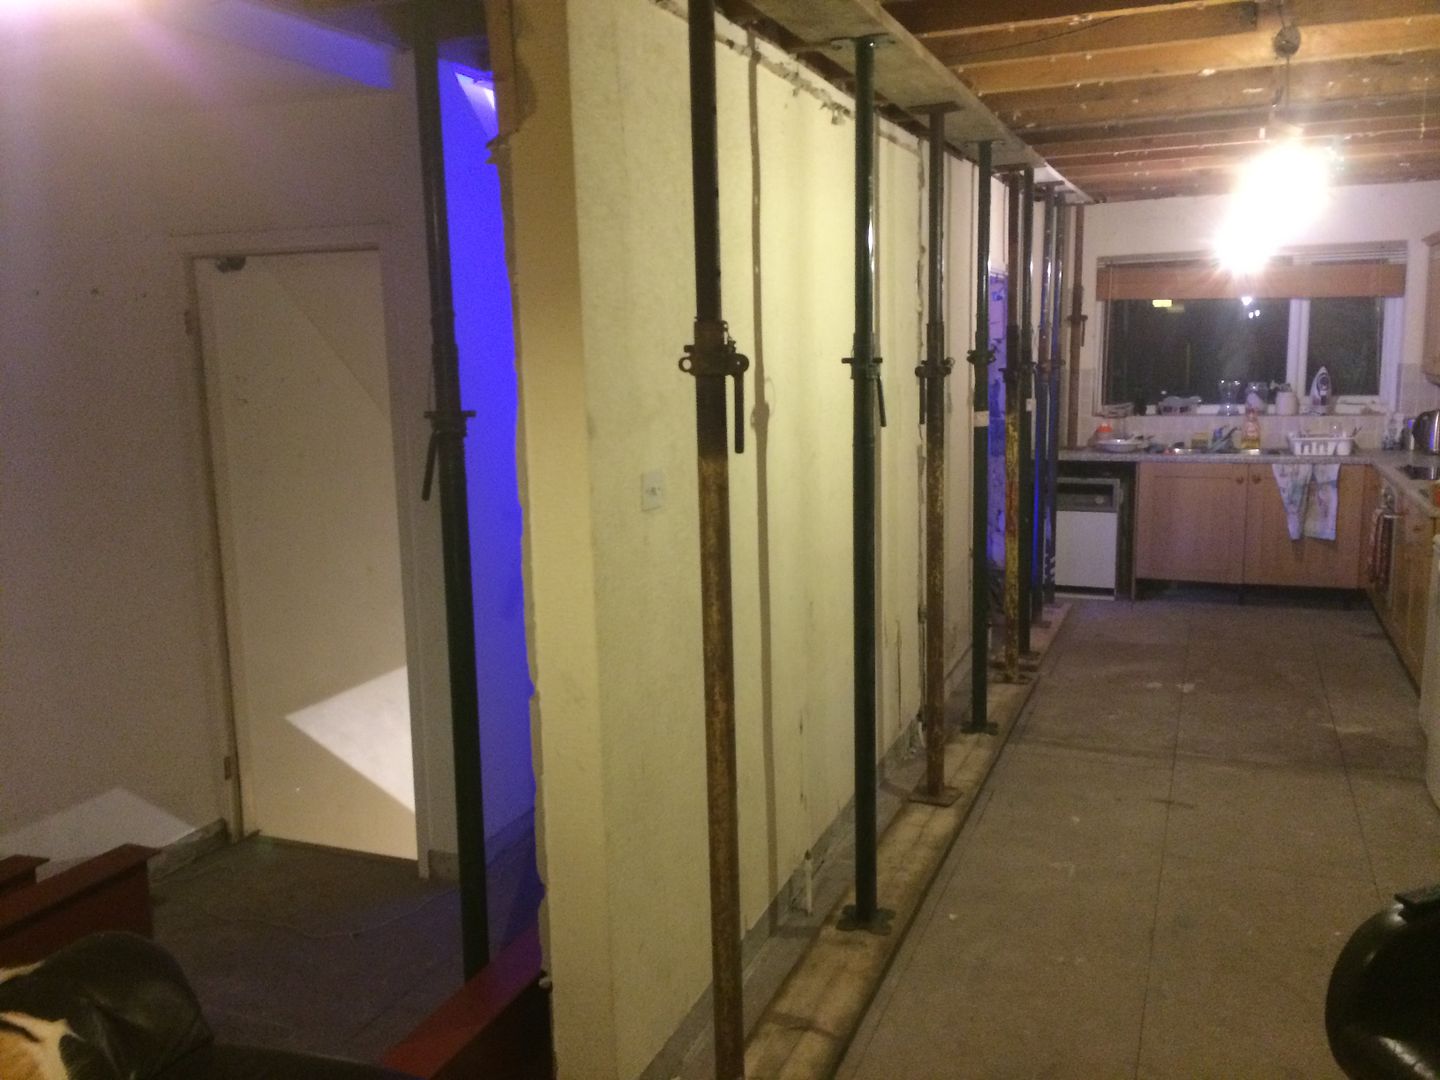
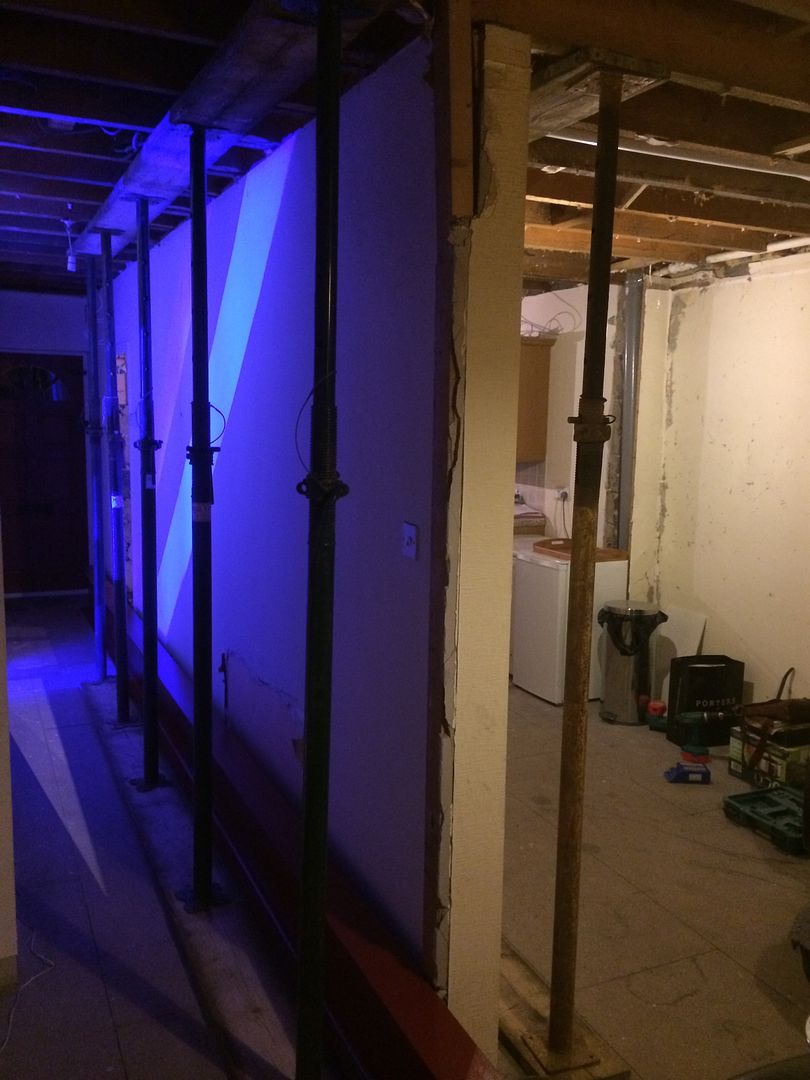
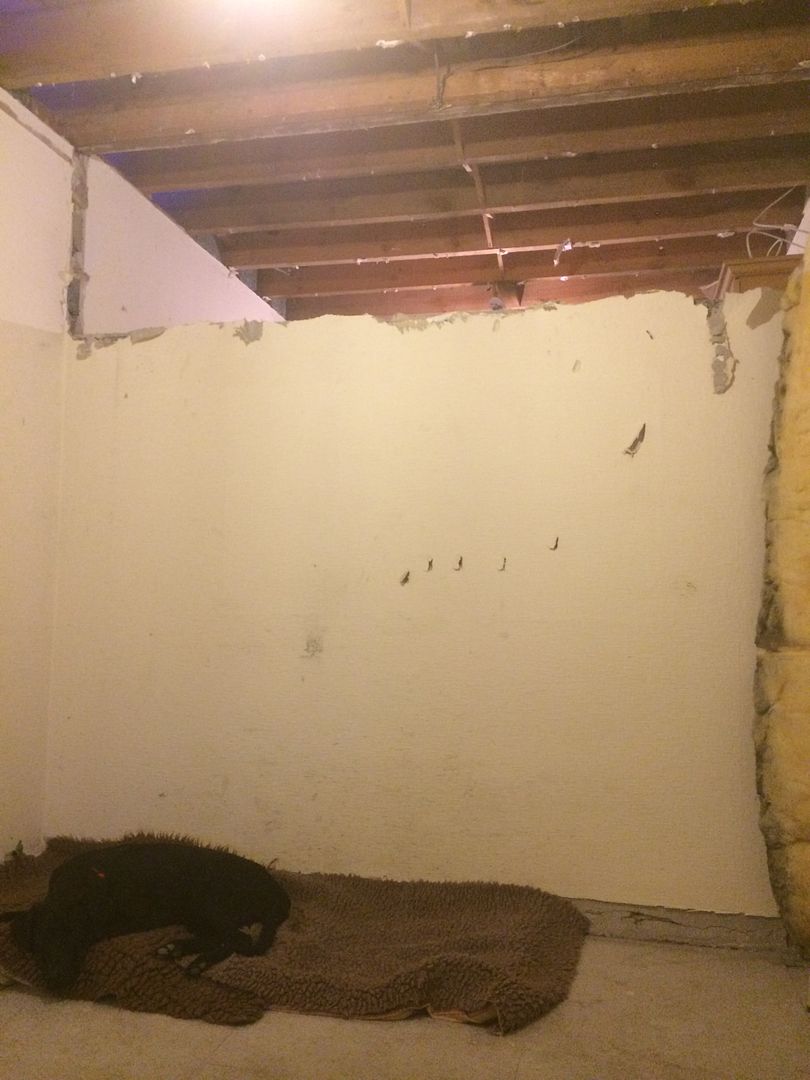
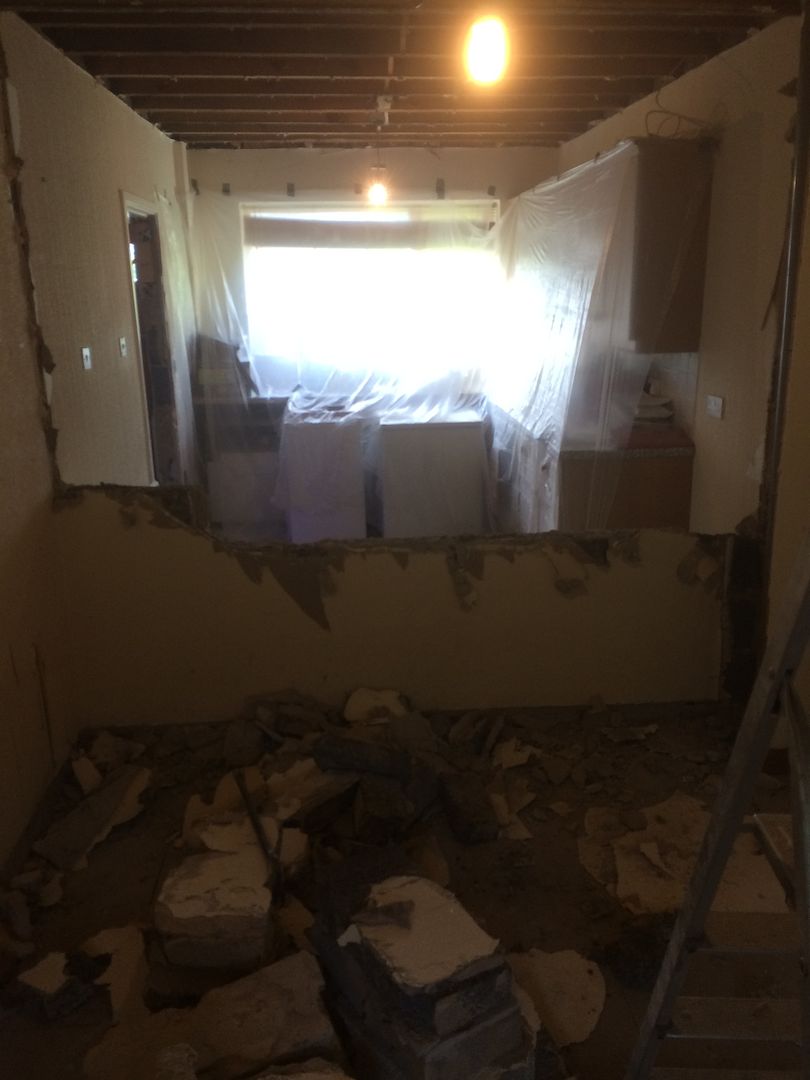
The wall then began to come down..
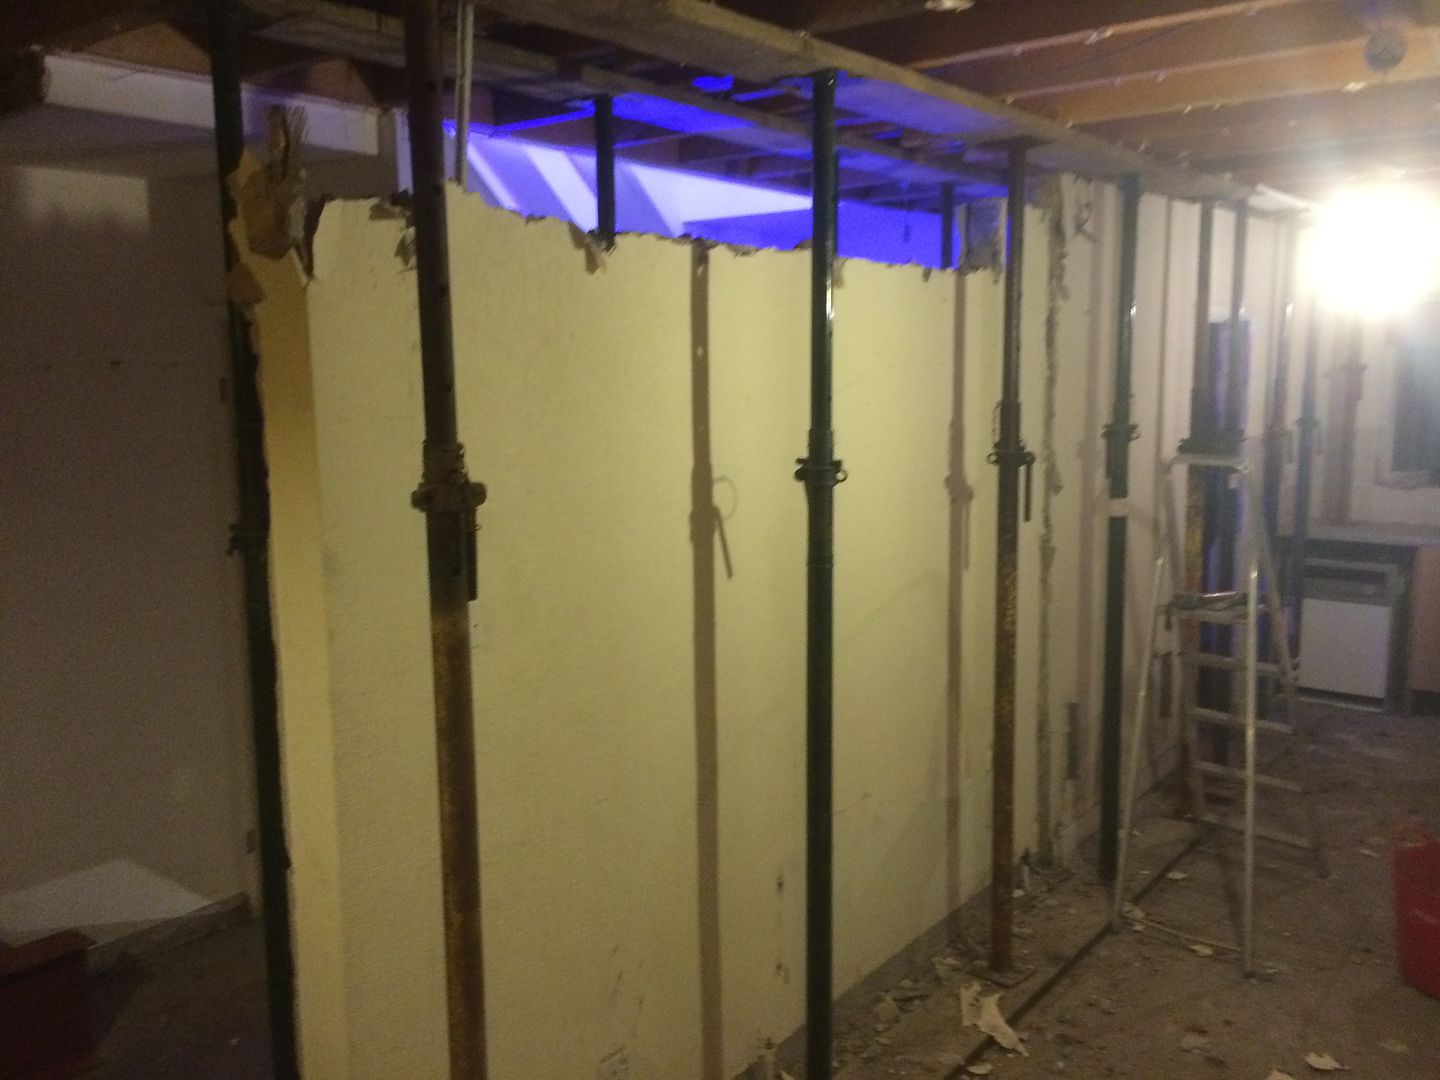
And down..
A reciprocating saw was then used to cut the joists to allow the RSJ to be lifted up level with the floorboards above. The RSJ was to be packed out with timber then joist hangers were to be secured to the RSJ and the weight of the joists supported on them.
Before any of the wall knocking down took place padstones were set into the party walls and the front wall of the house to accept the RSJ's. The main RSJ is supported at one end by the RSJ the crosses the house and at the other end as well as being supported by the front wall of the house it also sits on 1.5 metres of an existing internal wall which goes all the way down to the foundations.
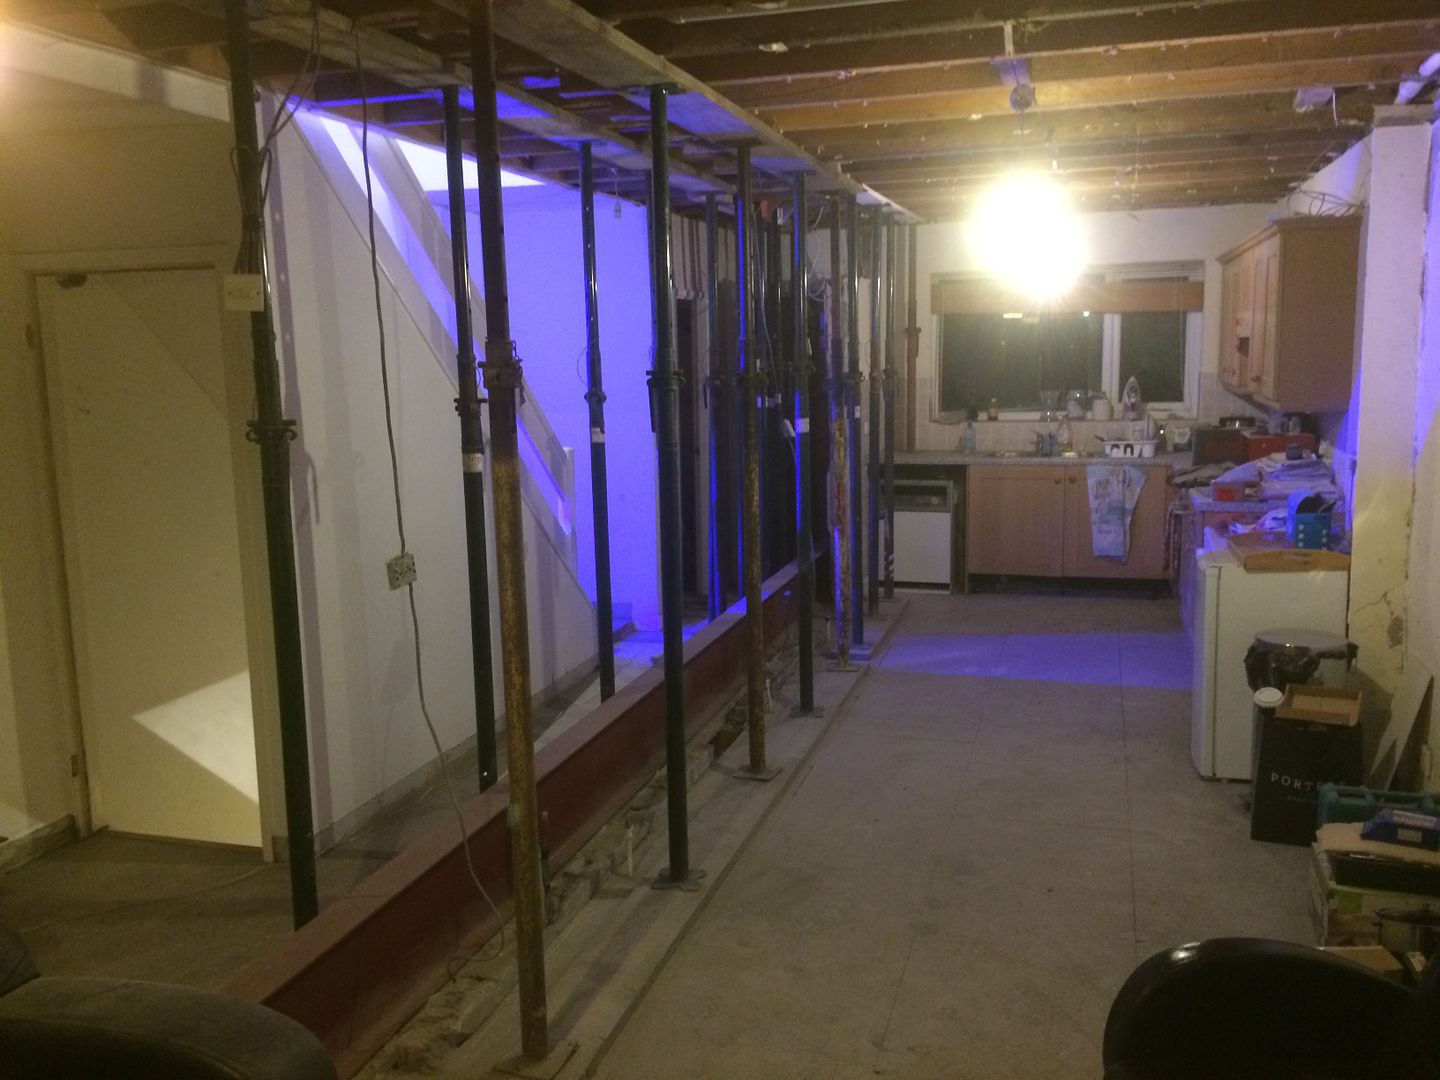
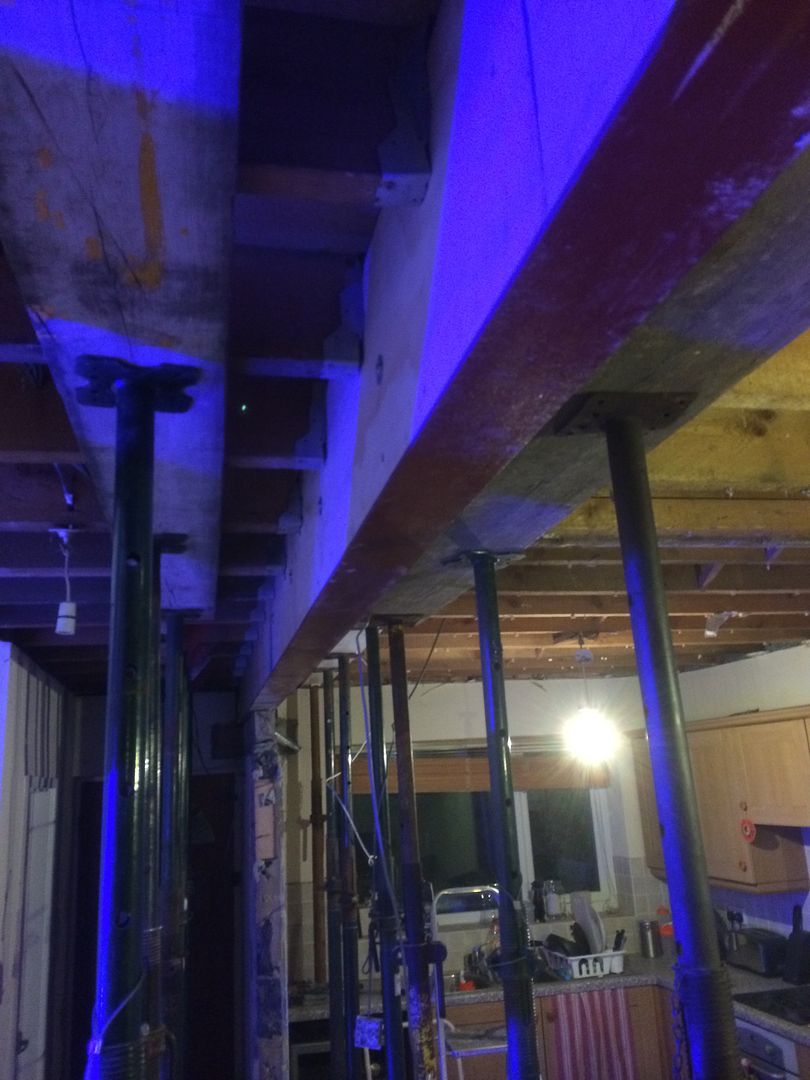
Once all of the walls were down the RSJ which was goes from party wall to party wall was put in place. I had this specified in two pieces with a splice in the middle to make it easier to get in.. I hired a genie lift which proved invaluable.

The next job was the main 6.5 metre beam. The fitting of this failed on the first attempt as I just ran out of time and had to make some fine adjustments.. All the work is being carried out in my spare time as I work 50hrs a week in my day job this can sometimes be limited. I had to keep the genie lift and acro props for another week which meant more money but I didn't think it fair to start angle grinding and banging at 9pm on a Sunday night! The following weekend I managed to get the main beam in without too much drama.
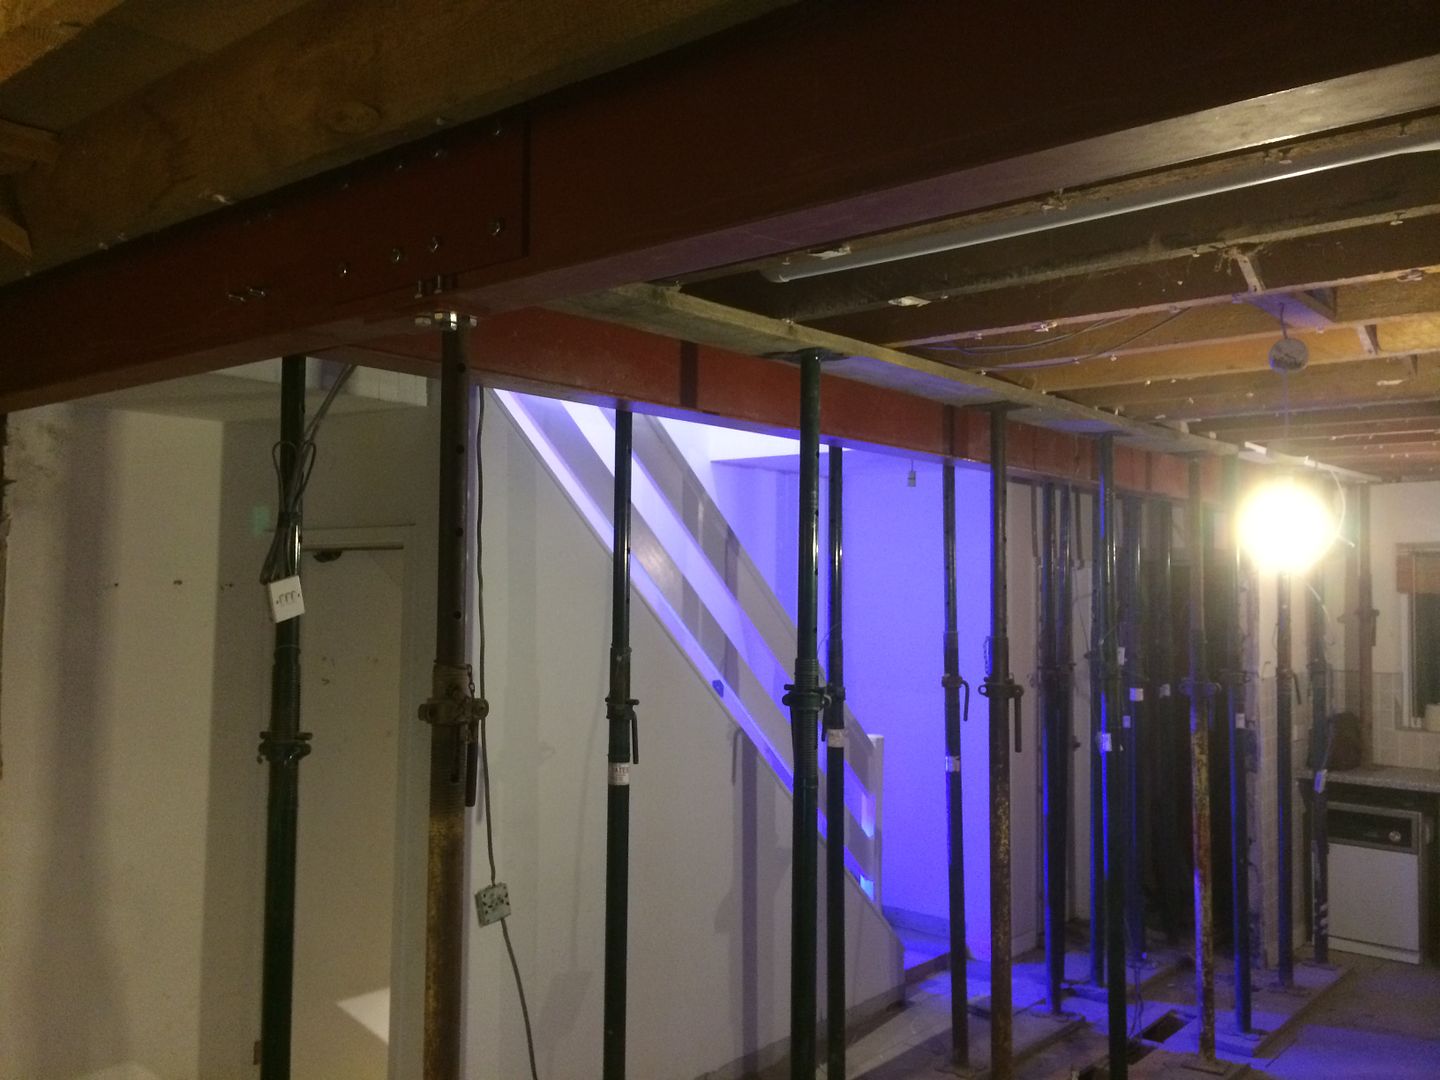
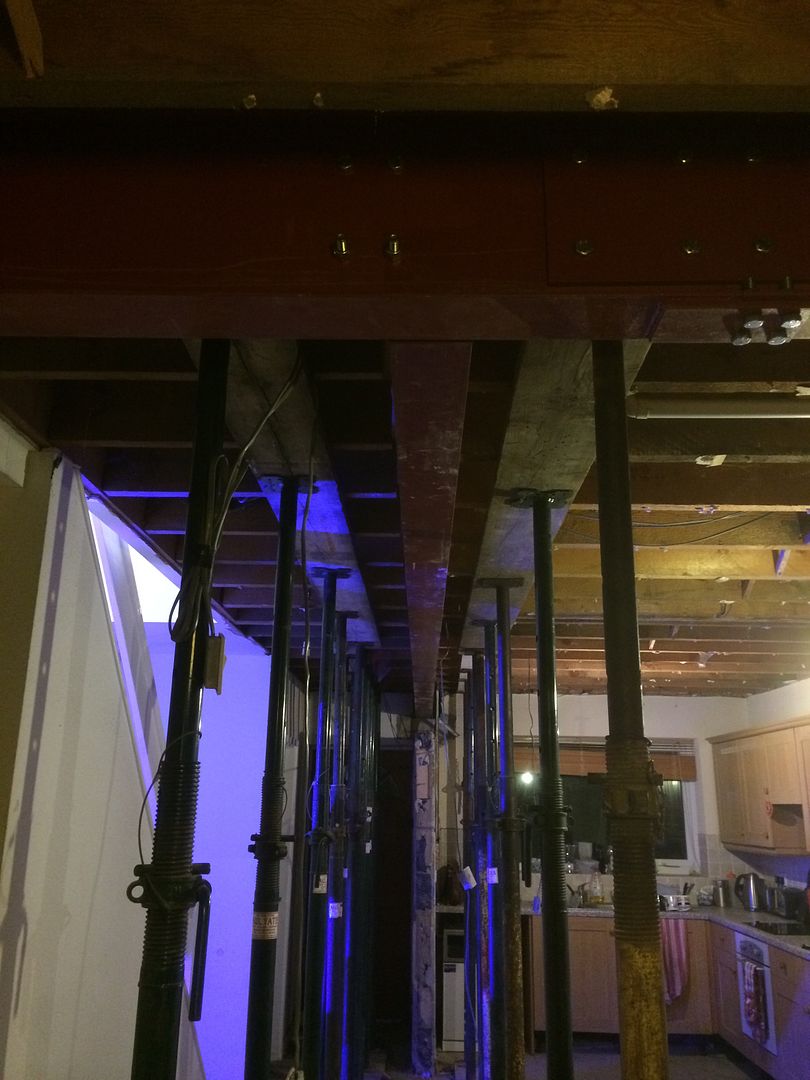
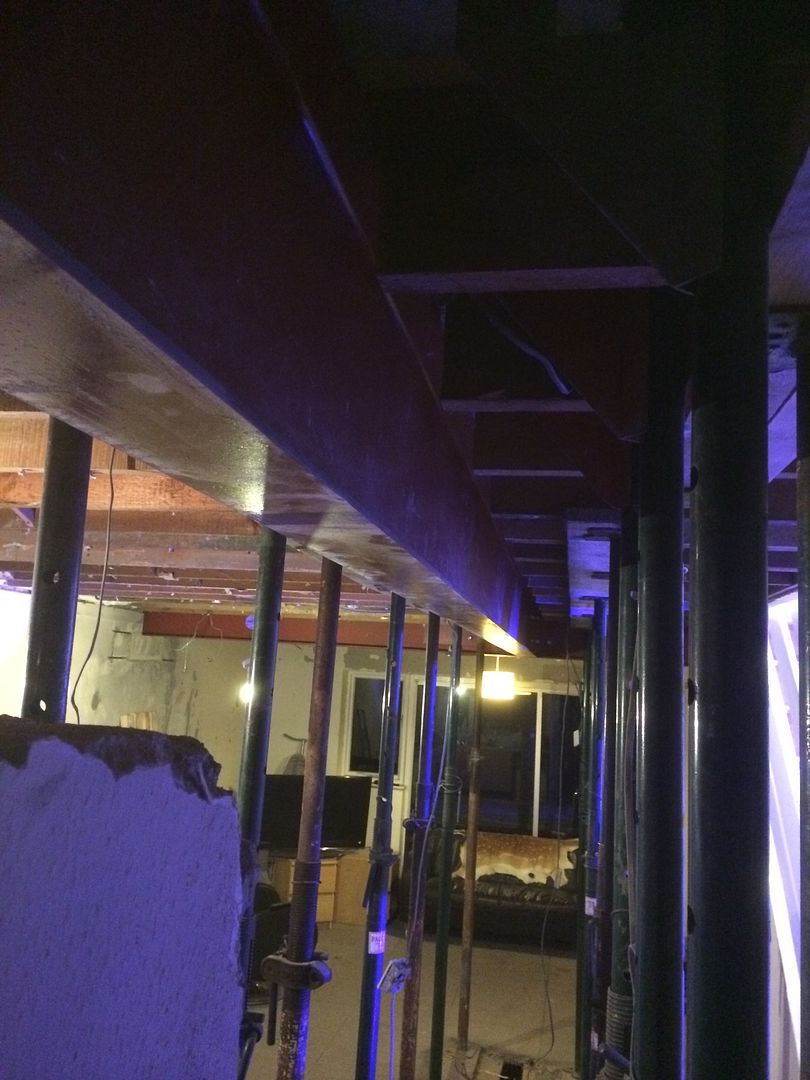
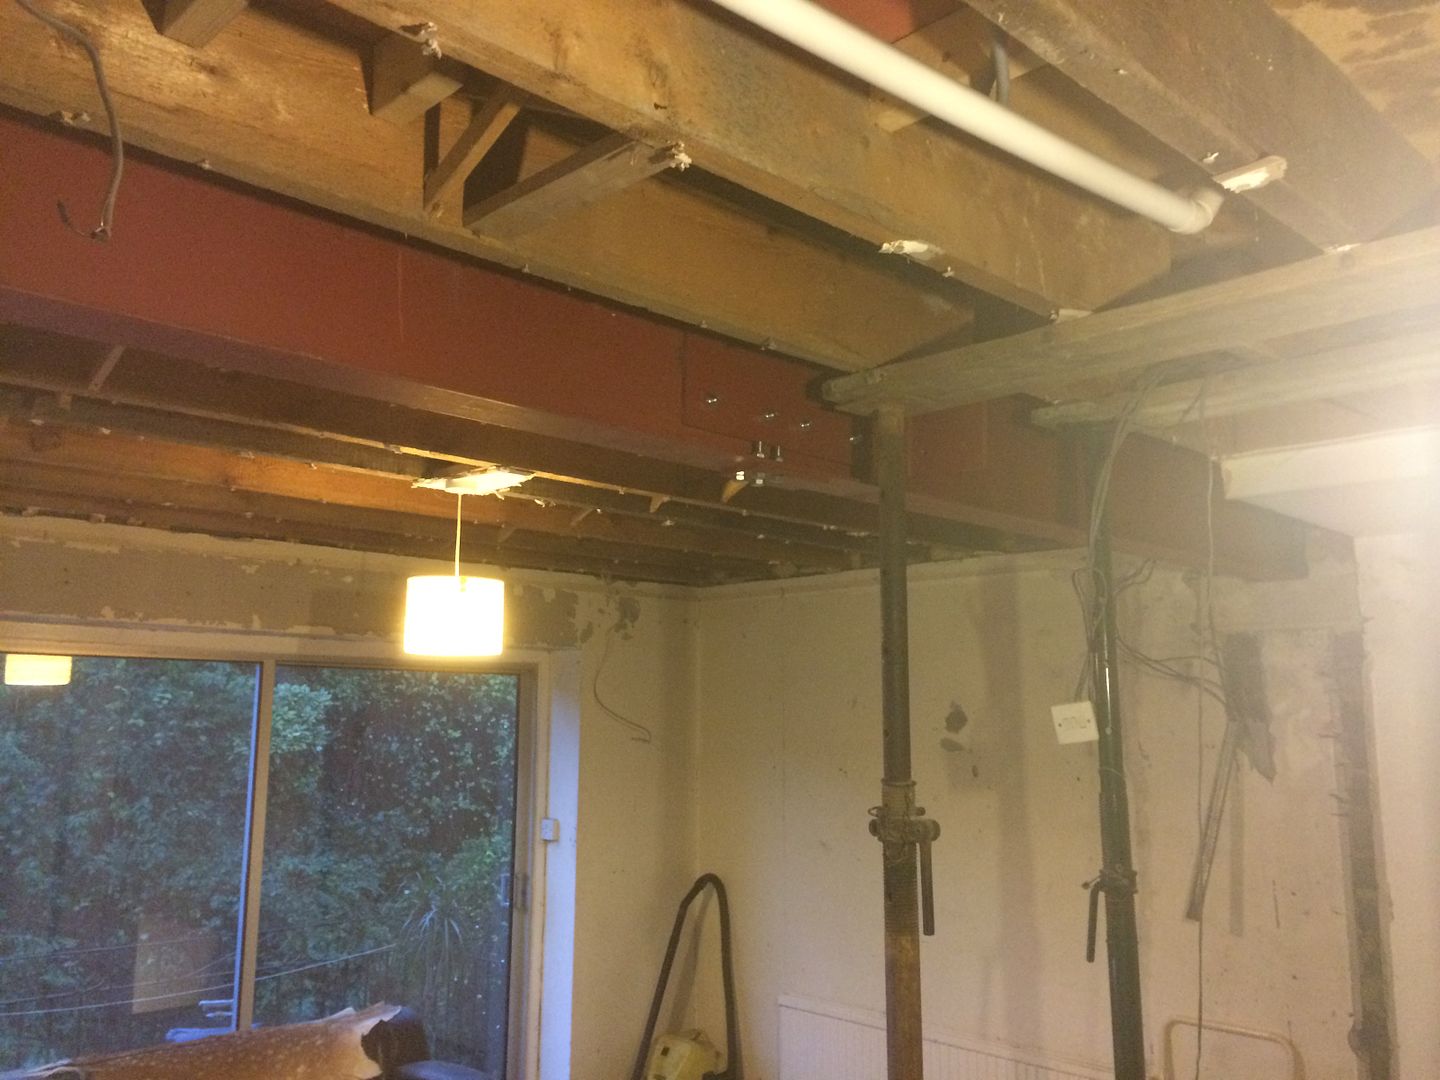
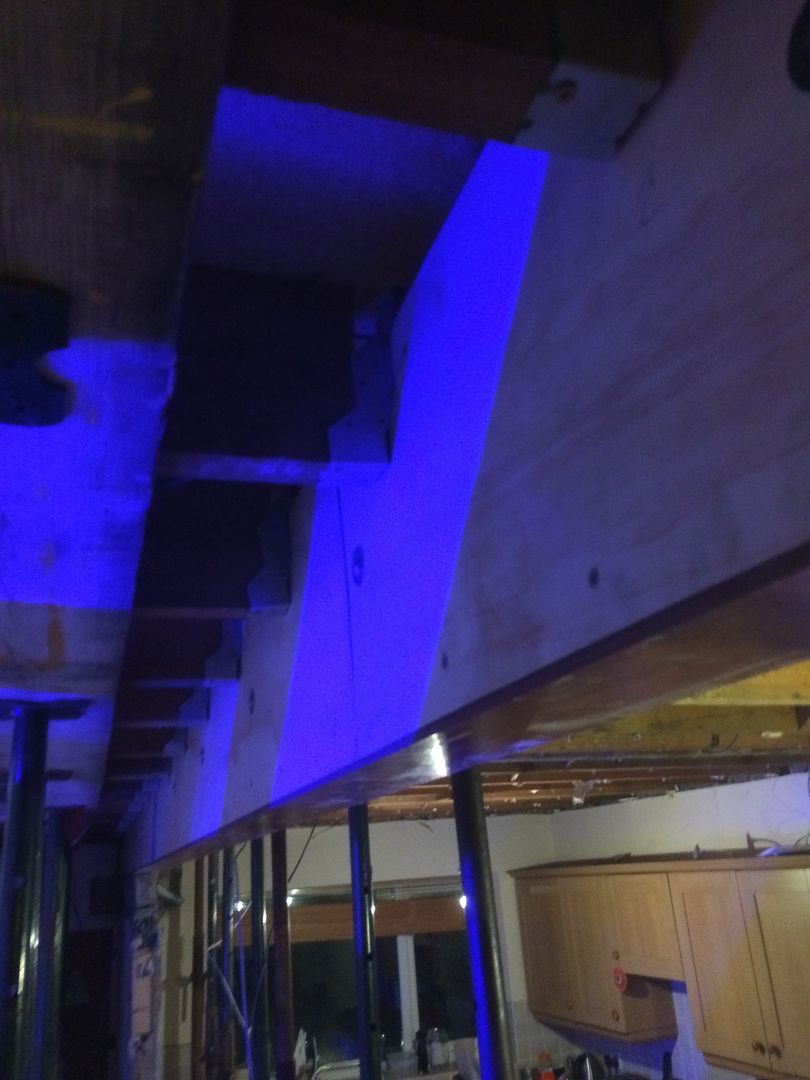
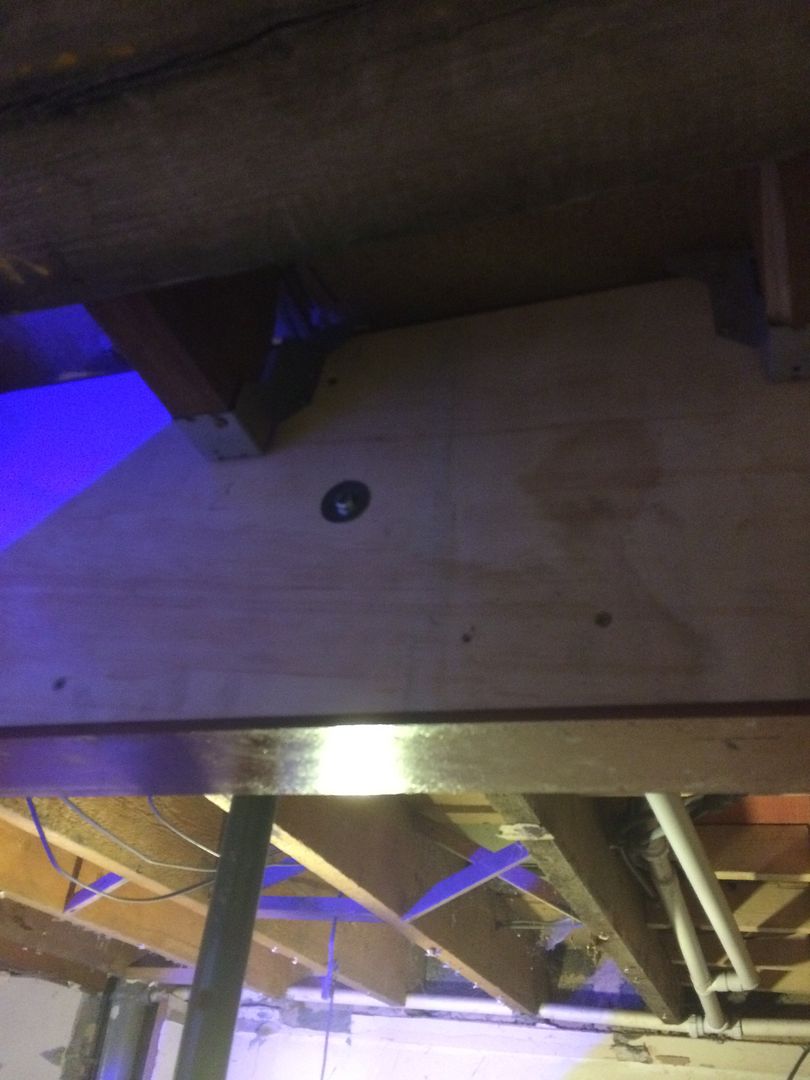
Once the beam was up and supported I had to crack on with the next stage which was packing out the RSJ with timber to allow the joist hangers to go on.. The inner web of the RSJ was a peculiar size which meant it wasn't as simple as it could have been however using some 225x50mm timber along with some 12mm ply sheeting cut down I was able to fill the web out flush. The timber as well as being packed into the web tightly was also bolted through at 500mm intervals as per my SE's specs.. The Joist hangers were then screwed in place on every joist on both sides of the beam which then enabled me to take down the acro props.
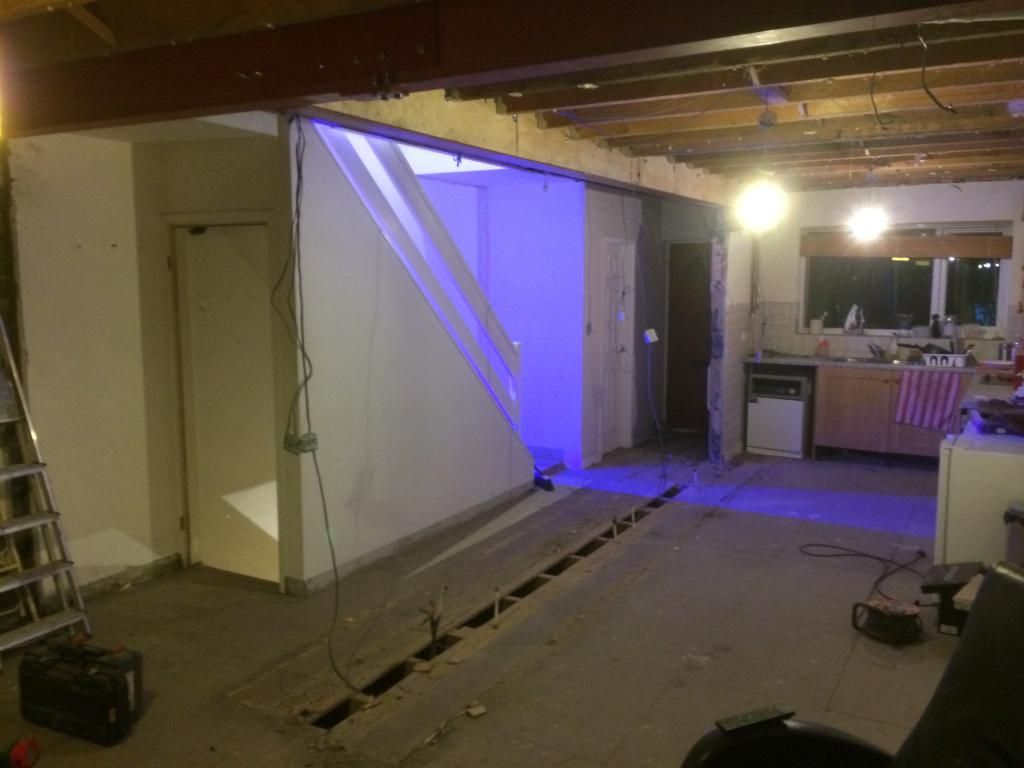
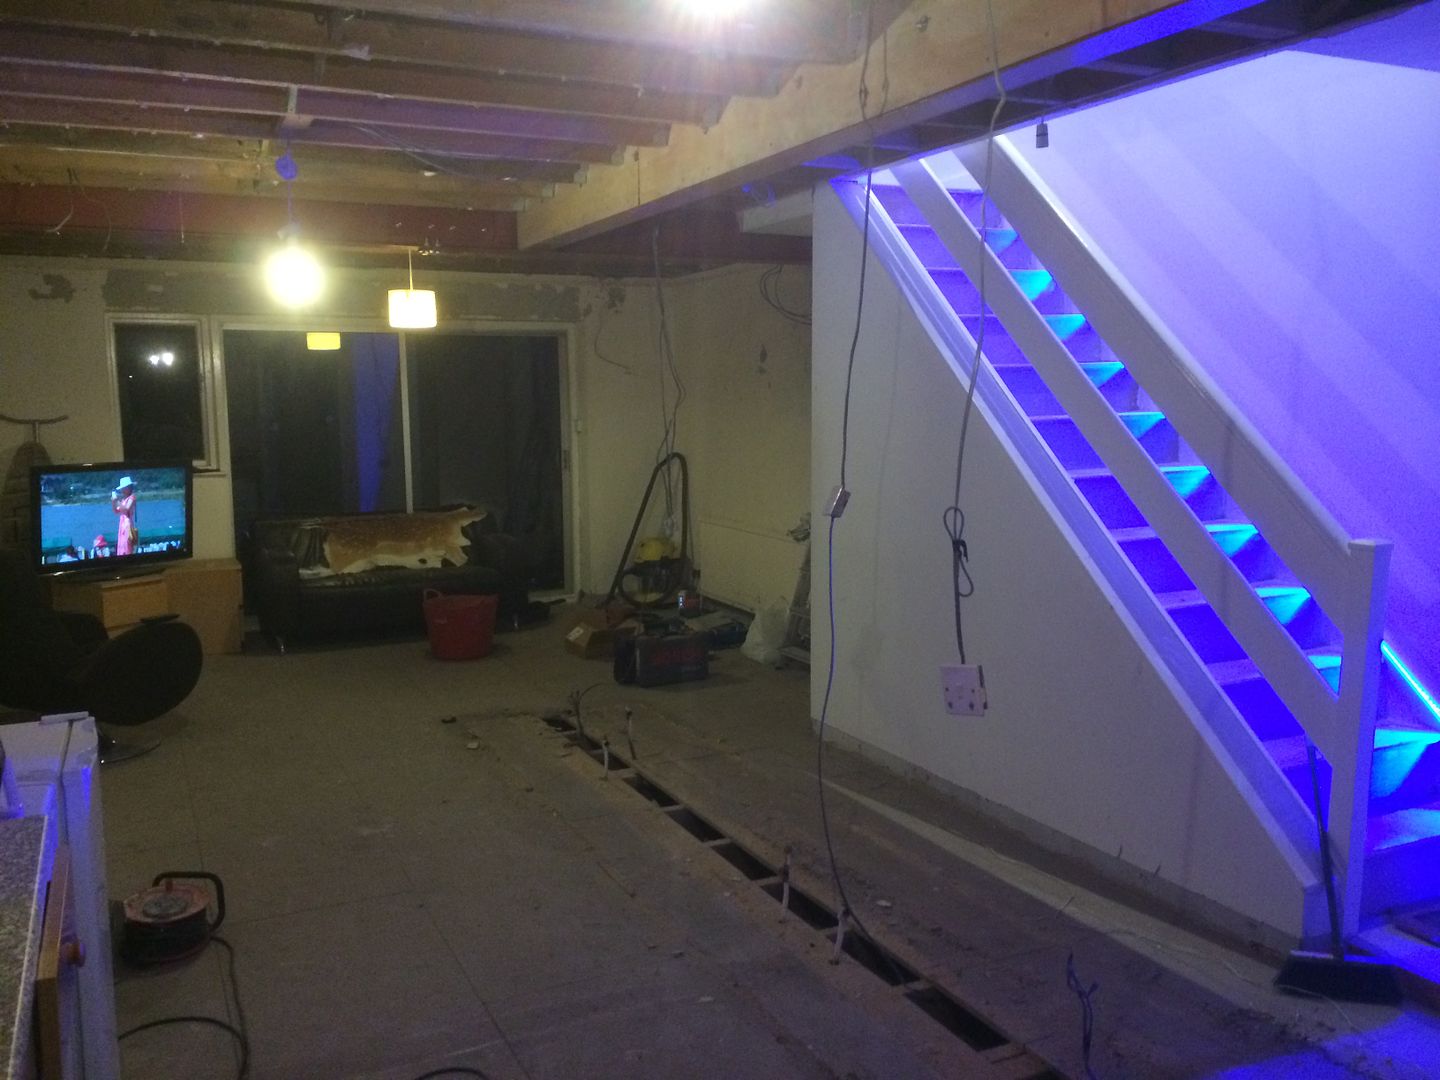
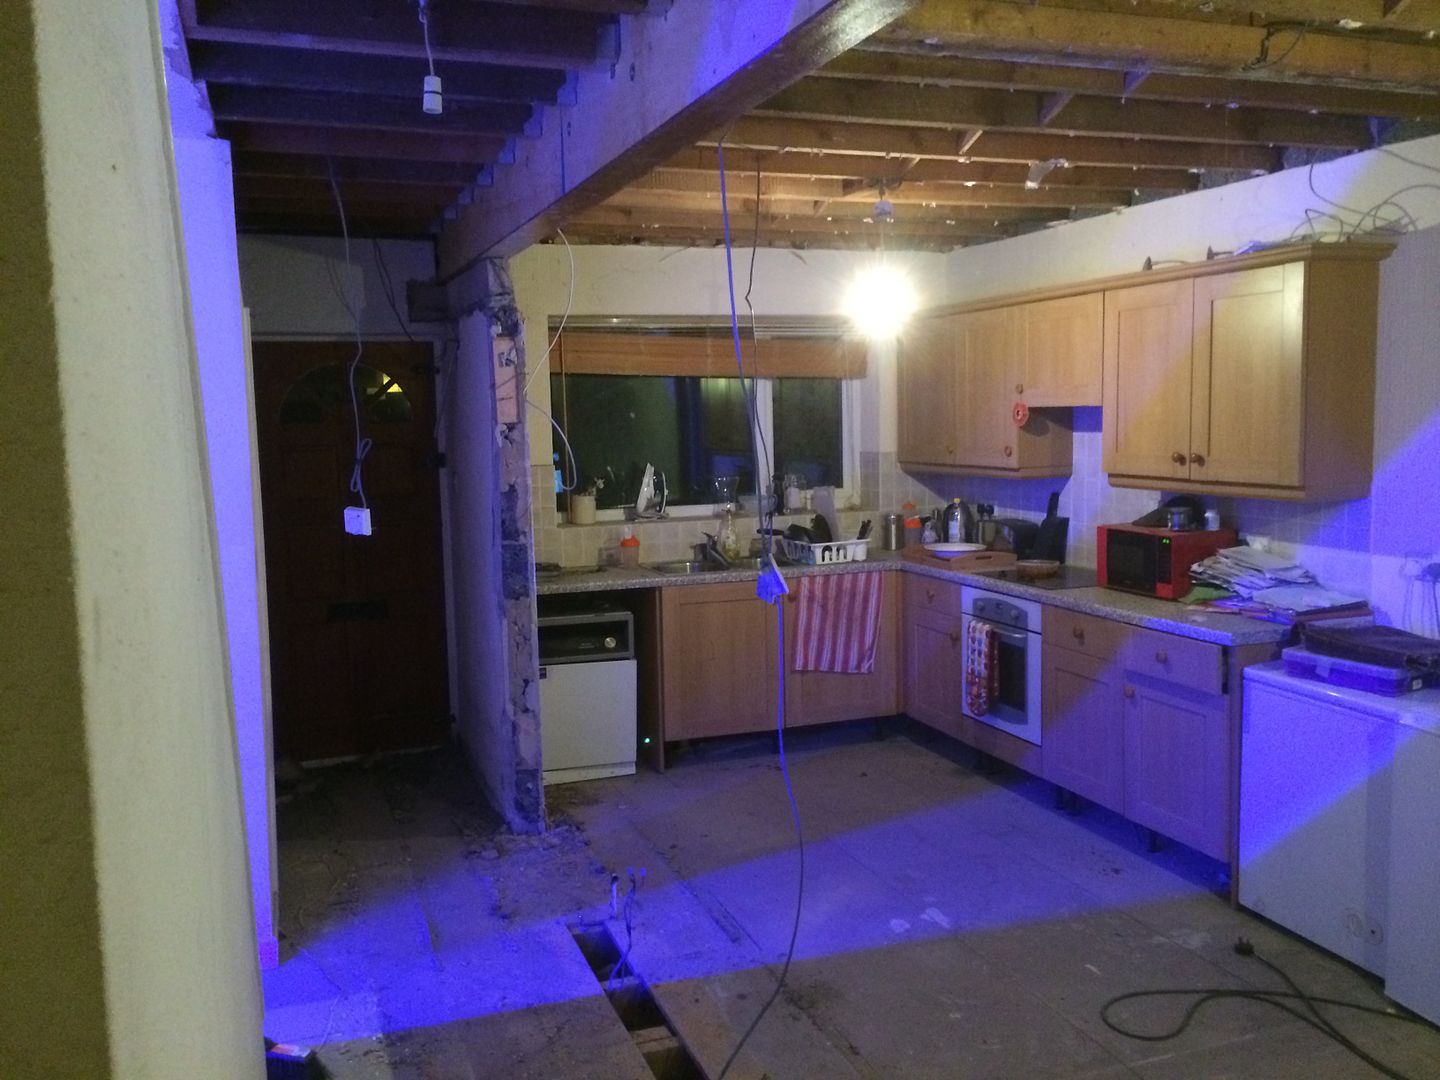
This then revealed the new, completely open plan ground floor. I want to build out the one remaining wall a little further to bring it in line with the bottom of the stairs so as to add a slight hallway where the downstairs loo is..
This now brings me up to date once again. The next jobs are to re route the wiring and plumbing which had been in place on the wall which has been removed and get all the fresh wiring and plumbing in place. I will then be changing both the front and back doors and doing some work in the downstairs utility before plastering.

The existing layout just didn't work for me. The kitchen is completely cut off from the lounge/dining area. This is at odds with how I enjoy to use the space when it comes to entertaining and just in general an outdated layout in my opinion. I could have just knocked down the wall between the kitchen and the living room which would have solved the problem however this then leaves you with a dead area of hallway which just serves no purpose. Anyway a plan was hatched and a SE instructed. The wall between the kitchen and living room was non load bearing so this could come straight out however the wall which runs parallel to the staircase supported the joists above and they in turn supported the weight of the internal walls on the first floor which as been previously mentioned are all breeze block built directly onto the floorboards. This meant I would need an RSJ in place of the wall and without running it the whole length of the house I would need another to go across the property to allow the main RSJ to bolt to it. As below:

The structural engineer was able to do some drawings on the above basis and the RSJ's were ordered. I can't help but think the beam that was specified was slighty over the required size but I wanted to do it by the book so stuck with his specification. The RSJ's were 357 x 127.
First job was to pull the ceilings down..


A start was then made on the wall between the kitchen and lounge


With this wall down it already made a huge difference.


There was then a dead week or so whilst I waited for the beams to be delivered. The steel company I used bizarrely didn't have a Hi Ab so the beams had to be lifted off the wagon which was a task in itself.. Fortunately the beams weren't the heaviest at 33kg/m so with the help of a few friends we managed to get them off and carried into the house. The main beam at approx 6.5 metres was about 215kg. Fortunately the SE had given me the tip to get the main beam in place before propping any of the joists above..


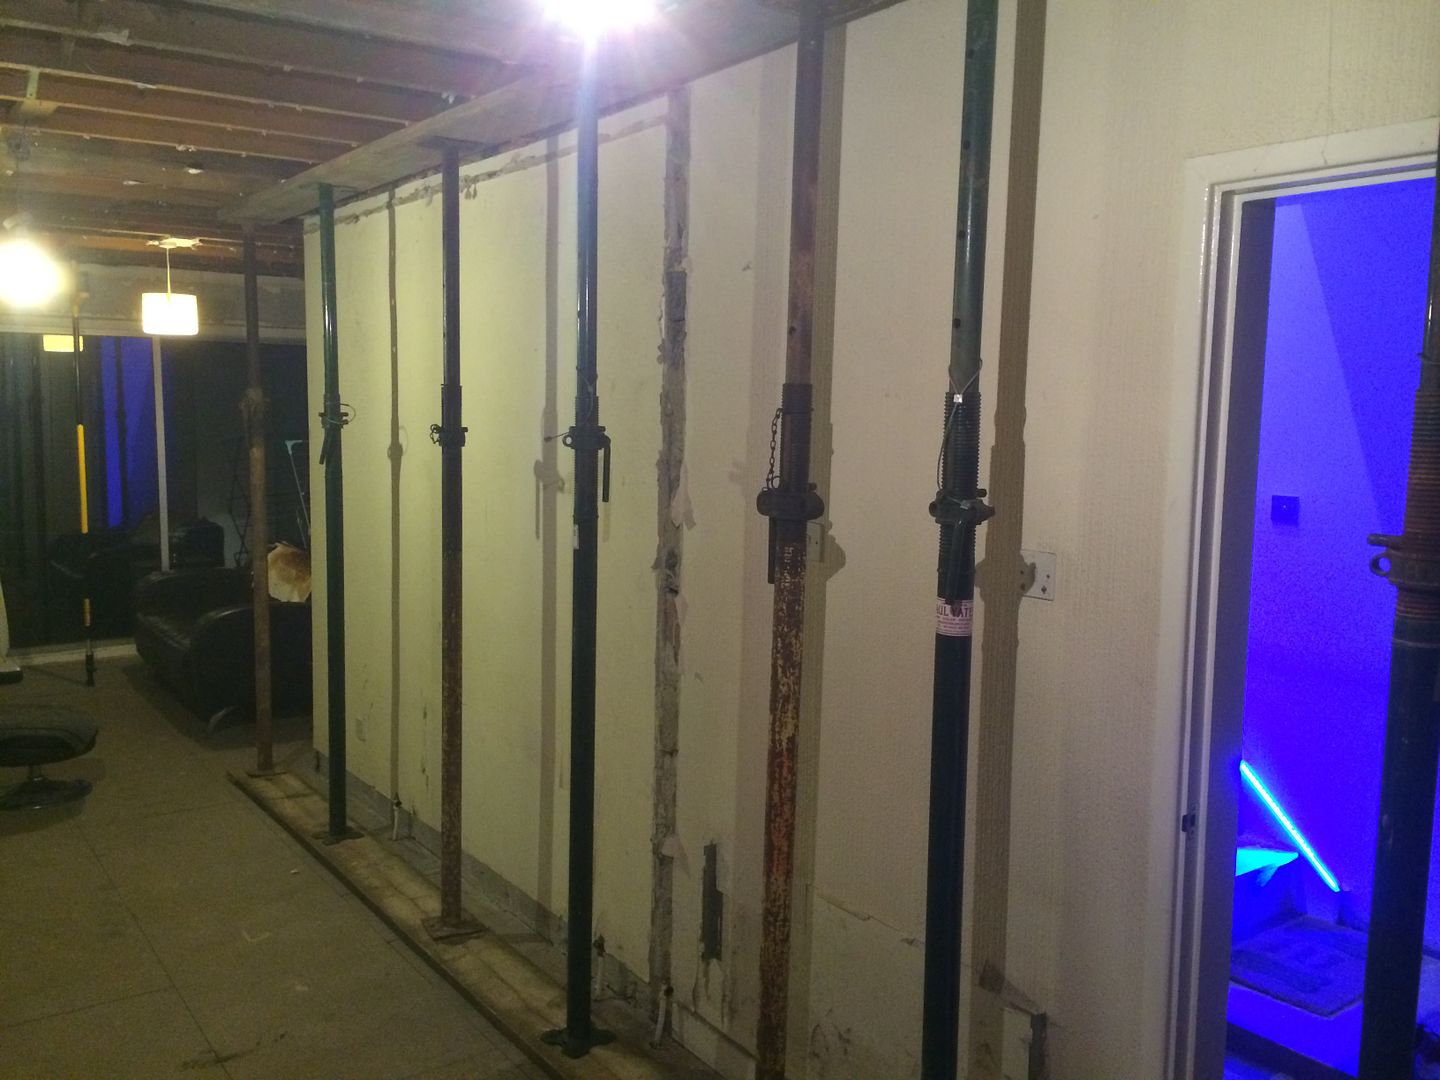
The acro props were then put in place either side of the supporting wall.. This was the first time I had ever done any propping so I hired quite a few.. Some of my builder mates had a laugh as they said I prob had double the amount required.. Oh well never be too careful and all that.


The wall then began to come down..

And down..


A reciprocating saw was then used to cut the joists to allow the RSJ to be lifted up level with the floorboards above. The RSJ was to be packed out with timber then joist hangers were to be secured to the RSJ and the weight of the joists supported on them.
Before any of the wall knocking down took place padstones were set into the party walls and the front wall of the house to accept the RSJ's. The main RSJ is supported at one end by the RSJ the crosses the house and at the other end as well as being supported by the front wall of the house it also sits on 1.5 metres of an existing internal wall which goes all the way down to the foundations.
Once all of the walls were down the RSJ which was goes from party wall to party wall was put in place. I had this specified in two pieces with a splice in the middle to make it easier to get in.. I hired a genie lift which proved invaluable.


The next job was the main 6.5 metre beam. The fitting of this failed on the first attempt as I just ran out of time and had to make some fine adjustments.. All the work is being carried out in my spare time as I work 50hrs a week in my day job this can sometimes be limited. I had to keep the genie lift and acro props for another week which meant more money but I didn't think it fair to start angle grinding and banging at 9pm on a Sunday night! The following weekend I managed to get the main beam in without too much drama.


Once the beam was up and supported I had to crack on with the next stage which was packing out the RSJ with timber to allow the joist hangers to go on.. The inner web of the RSJ was a peculiar size which meant it wasn't as simple as it could have been however using some 225x50mm timber along with some 12mm ply sheeting cut down I was able to fill the web out flush. The timber as well as being packed into the web tightly was also bolted through at 500mm intervals as per my SE's specs.. The Joist hangers were then screwed in place on every joist on both sides of the beam which then enabled me to take down the acro props.


This then revealed the new, completely open plan ground floor. I want to build out the one remaining wall a little further to bring it in line with the bottom of the stairs so as to add a slight hallway where the downstairs loo is..


This now brings me up to date once again. The next jobs are to re route the wiring and plumbing which had been in place on the wall which has been removed and get all the fresh wiring and plumbing in place. I will then be changing both the front and back doors and doing some work in the downstairs utility before plastering.
Gassing Station | Homes, Gardens and DIY | Top of Page | What's New | My Stuff