my ventures into woodworking in the home
Discussion


first off i would like to say hello as this is my first post in the PH forum. i have looked around for a while and decided to start contributing to the various boards within the forum.
My name is Steven (known as koosh to most) and i am from sunny Scotland.
i have recently moved into a semi detatched house with my girlfriend and it was only a couple months ago i started on a couple of house projects involving wood!
i will update this over the next few hours as i have pictures all over the place and need to orgainise them.
firstly we began looking for a tv unit which would be front and centre in the new house. shops came up with nothing, the internet showed us nothing we both liked or the ones we did like were far too costly to justify the money! cue me announcing in my best man tone "i can just build one".... bearing in mind i had never built anything from scratch in wood more than a cd rack in high school and putting up some shevles in a cupboard of my first house...
so after a very quick google i came up with this image and we both agreed we liked it.
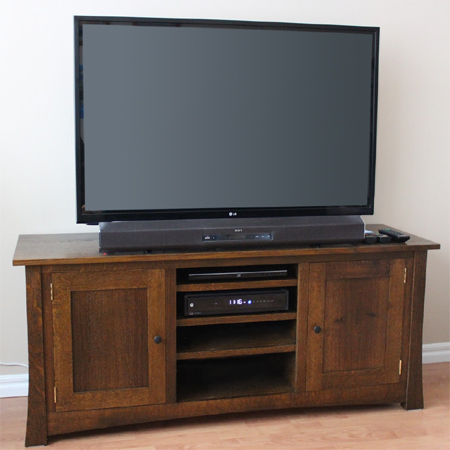
the website ( http://www.home-dzine.co.za/diy/diy-shakertv.htm) had not much more than a couple in progress pictures but it was enough to go on.
so with a month till we moved in and my girlfriend away to england for a few days i made a start. planned out a rough size i would make it on paper, decided it would be pine (the floors of the new house were real wood and light-ish in color and the walls a creamy color), i went off to my local diy superstore and stocked up on a load of pine sheets and the various other bits needed for facings and legs etc.
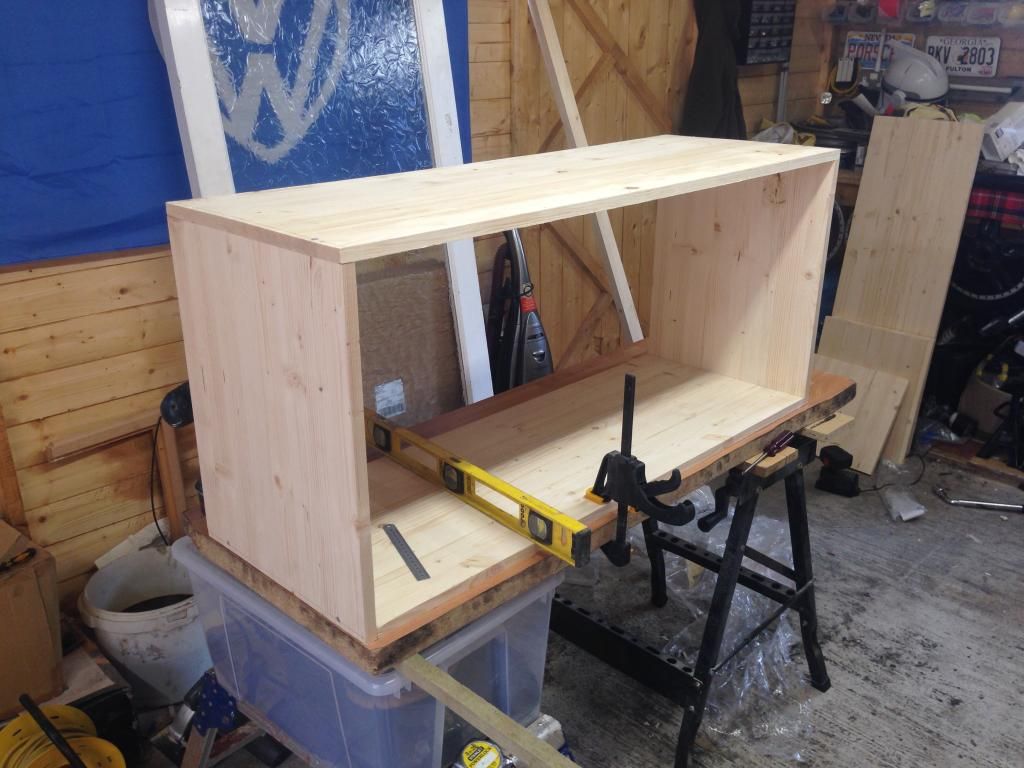
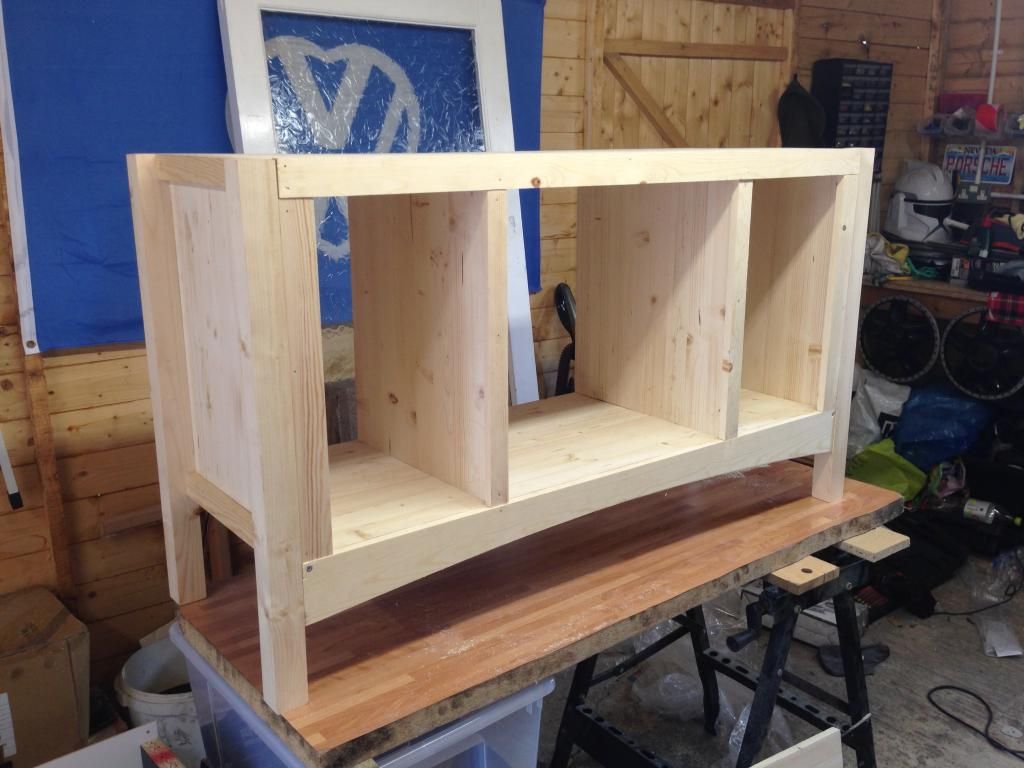
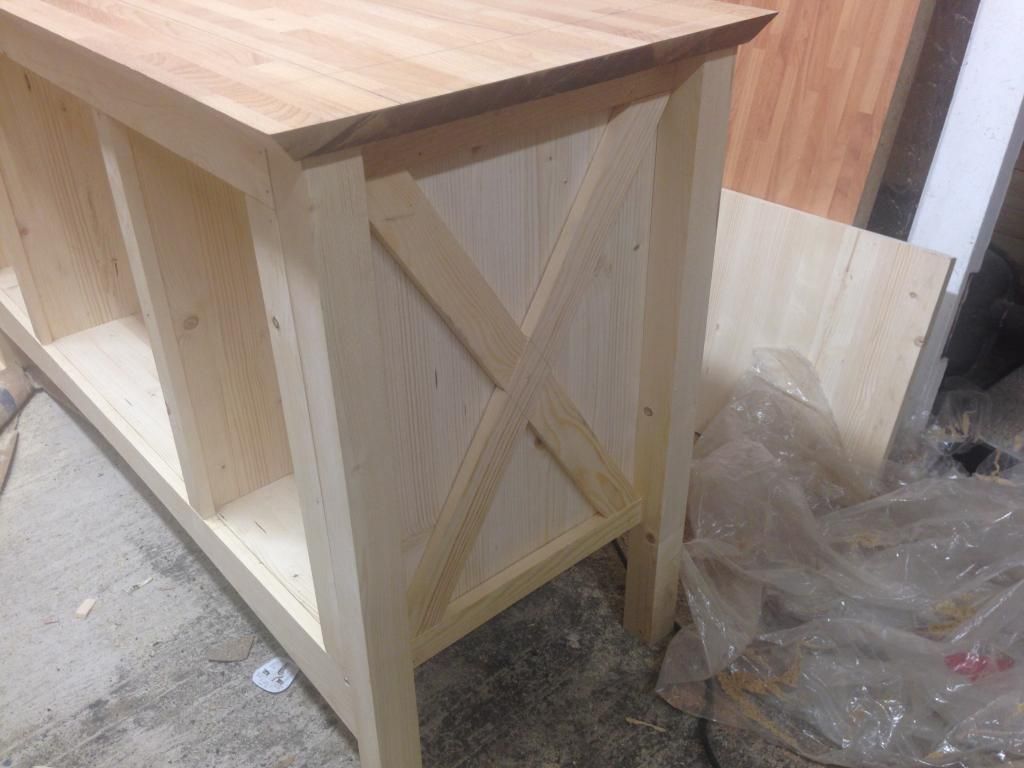
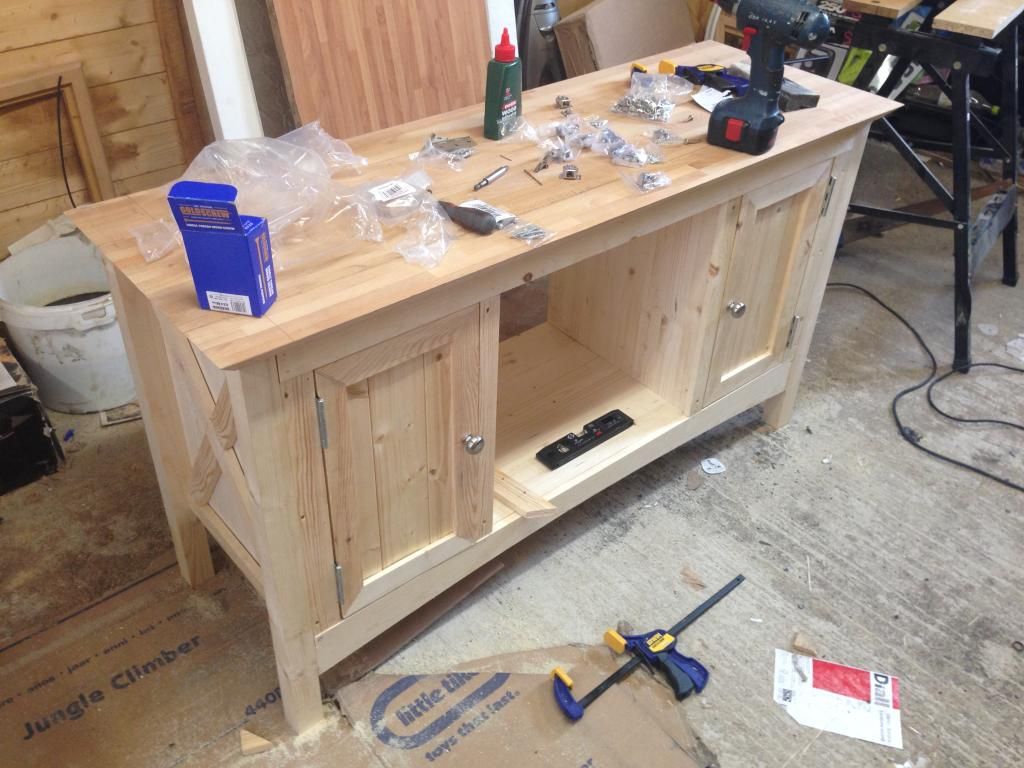
rigged up a ghetto wood workshop in the garage and started off with a basic outer box at a size that made the most of the wood i purchased and a good size for a decent tv in the space we had. the box is roughly 1.2m wide and about 50cm high if i remember correctly?
using my ps3 i gauged how wide the central open section would be and fitted 2 vertical pieces
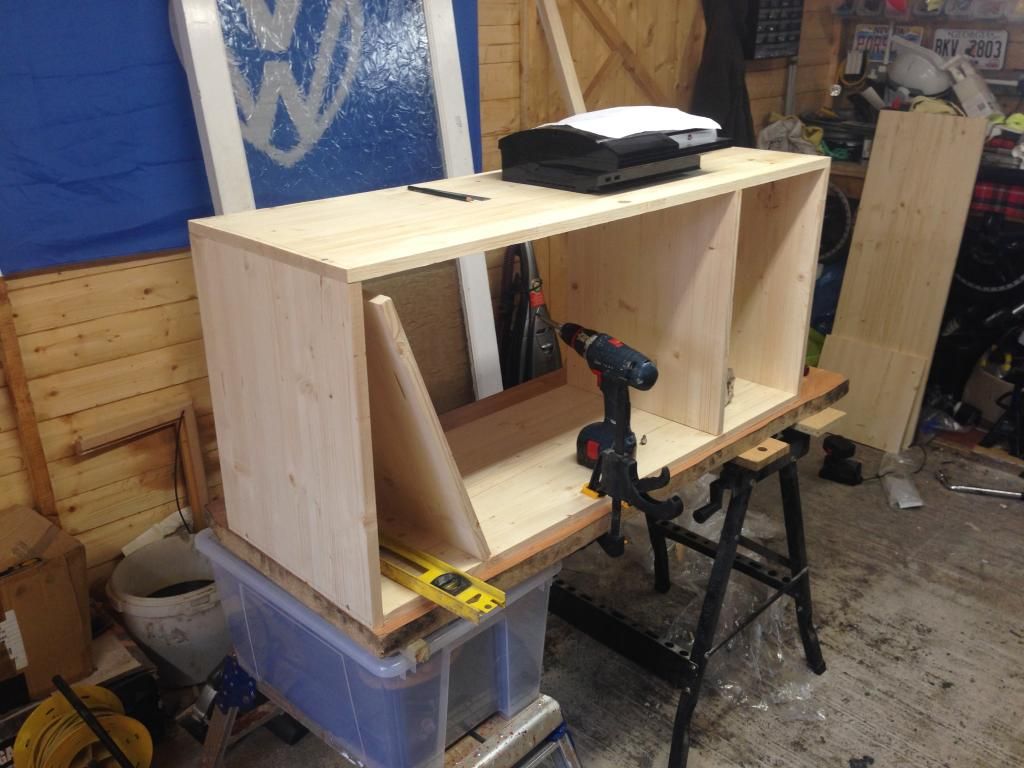
next was to flip it on end and fit 4 44mm x 44mm legs. i cut them to a longer length so i could reduce them in height if need be.
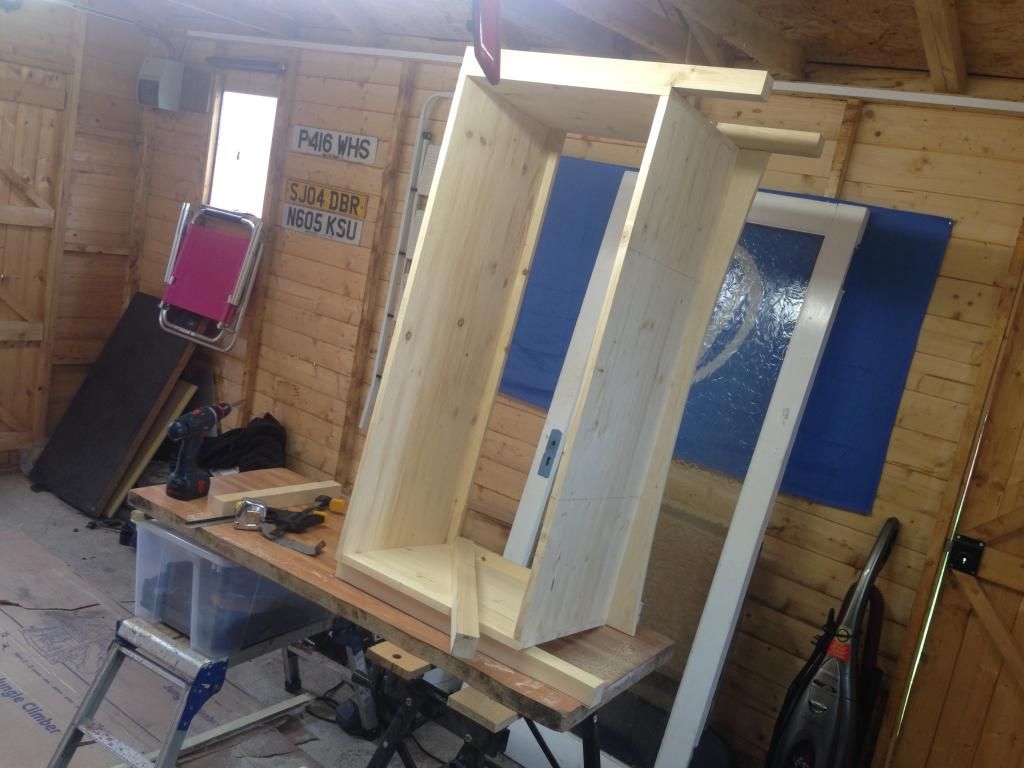
i then attahced facing pieces all over basically to cover all the gaps where joins met as i wasnt the best with the circular saw.... a large curved piece on the bottom edge, faces for all the vertical pieces and 2 horizontal bars for the ends.
that shall do for now and i will update in an hour or 2 once more pics are uploaded and sorted...
i am still learning all the time and using google and youtube to find out how to do certain joins and such likes and i am still doing more projects since i am enjoying it so much so any comments or constructive critisism is greatly appreciated
My name is Steven (known as koosh to most) and i am from sunny Scotland.
i have recently moved into a semi detatched house with my girlfriend and it was only a couple months ago i started on a couple of house projects involving wood!
i will update this over the next few hours as i have pictures all over the place and need to orgainise them.
firstly we began looking for a tv unit which would be front and centre in the new house. shops came up with nothing, the internet showed us nothing we both liked or the ones we did like were far too costly to justify the money! cue me announcing in my best man tone "i can just build one".... bearing in mind i had never built anything from scratch in wood more than a cd rack in high school and putting up some shevles in a cupboard of my first house...
so after a very quick google i came up with this image and we both agreed we liked it.
the website ( http://www.home-dzine.co.za/diy/diy-shakertv.htm) had not much more than a couple in progress pictures but it was enough to go on.
so with a month till we moved in and my girlfriend away to england for a few days i made a start. planned out a rough size i would make it on paper, decided it would be pine (the floors of the new house were real wood and light-ish in color and the walls a creamy color), i went off to my local diy superstore and stocked up on a load of pine sheets and the various other bits needed for facings and legs etc.
rigged up a ghetto wood workshop in the garage and started off with a basic outer box at a size that made the most of the wood i purchased and a good size for a decent tv in the space we had. the box is roughly 1.2m wide and about 50cm high if i remember correctly?
using my ps3 i gauged how wide the central open section would be and fitted 2 vertical pieces
next was to flip it on end and fit 4 44mm x 44mm legs. i cut them to a longer length so i could reduce them in height if need be.
i then attahced facing pieces all over basically to cover all the gaps where joins met as i wasnt the best with the circular saw.... a large curved piece on the bottom edge, faces for all the vertical pieces and 2 horizontal bars for the ends.
that shall do for now and i will update in an hour or 2 once more pics are uploaded and sorted...
i am still learning all the time and using google and youtube to find out how to do certain joins and such likes and i am still doing more projects since i am enjoying it so much so any comments or constructive critisism is greatly appreciated
Pesty said:
Looks great to me.
Only thing I would say is shame about the two screw heads on the shaped bit at bottom. Edit never mind if that's the back.
i kick myself to this day about those! that is actually the front and those screw heads stick out like nothing else! my idea is to redo the bottom curve and the top face as it is just a millimeter too short and now that i have a chop saw i can fix these. it will only cost a tenner or so to remedy these pieces and will finish it off nicely. but then again its home made and you will see in the next few pictures that its by no means perfect but at least i can say i made it... and it looks like i made it too haha!Only thing I would say is shame about the two screw heads on the shaped bit at bottom. Edit never mind if that's the back.
Simpo Two said:
Nice work and welcome. But your next project should be a bench to build things on
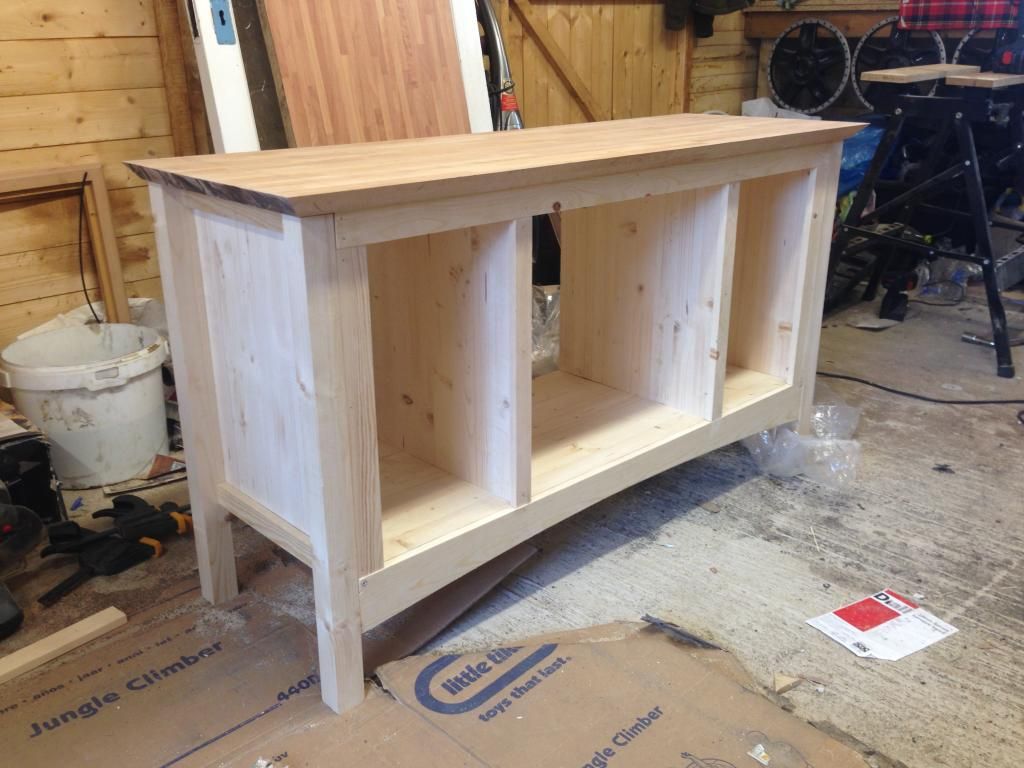
hahah yeah it was a pretty shoddy rig i had set up! i have since moved from that house however so projects now take place in whichever room they are destined for (which annoys my other half no end!)so my next thing to fidure out was the top. i hadn't thought about this fully when i started as the widest pieces of pine i could buy from the store was the width i had used for the box frame and now that i had added faces to the frame if i tried to put a piece of pine on top it wouldnt have been wide enough....
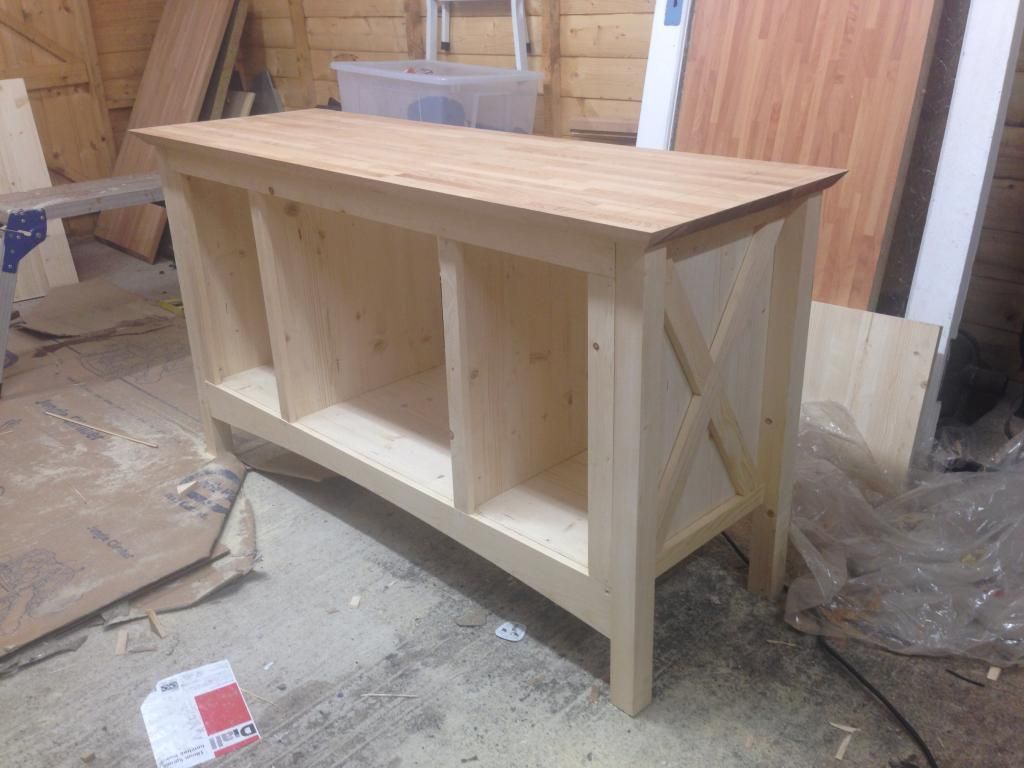
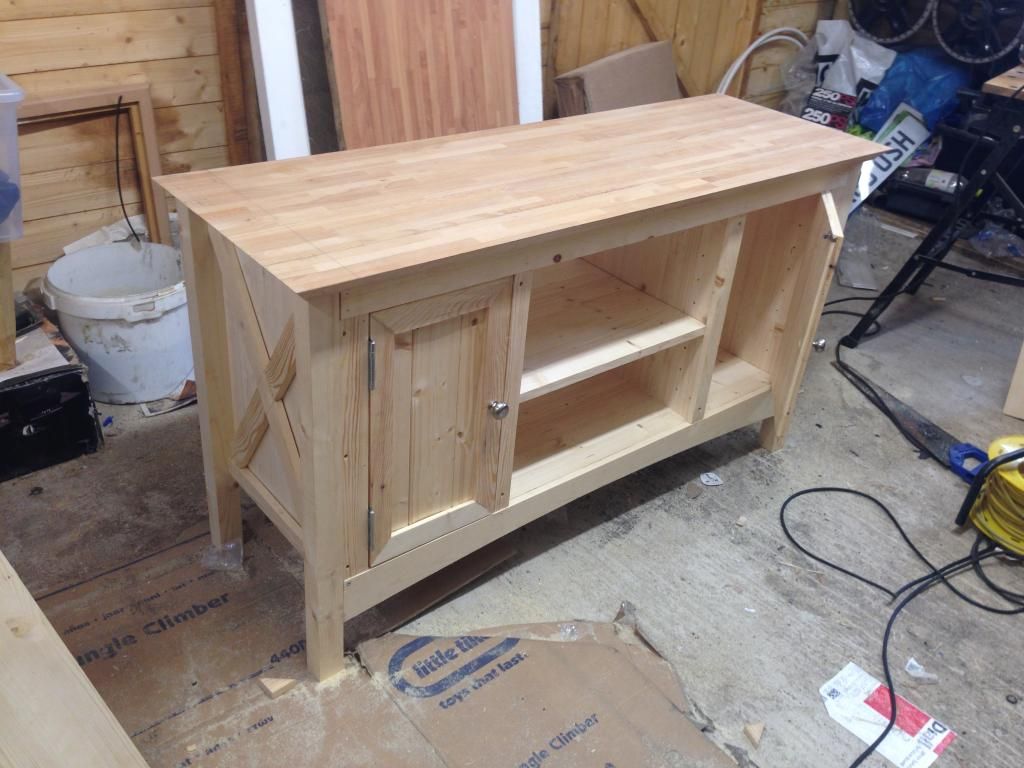
luckily on a chance visit to ikea the previous weekend i noticed they were selling off some kitchen worktops and a brainstorm saw me hop in the car and drive through to pick up a couple. the wood is birch but i like the slight contrast it gives.
so i got the wortop home and measured and cut it up.... didnt realise how hard the wood was and i managed to burn it but again its something i think that adds to the home and hand made feel of it! i also added a 45 dergee angle on it just to be fancy!
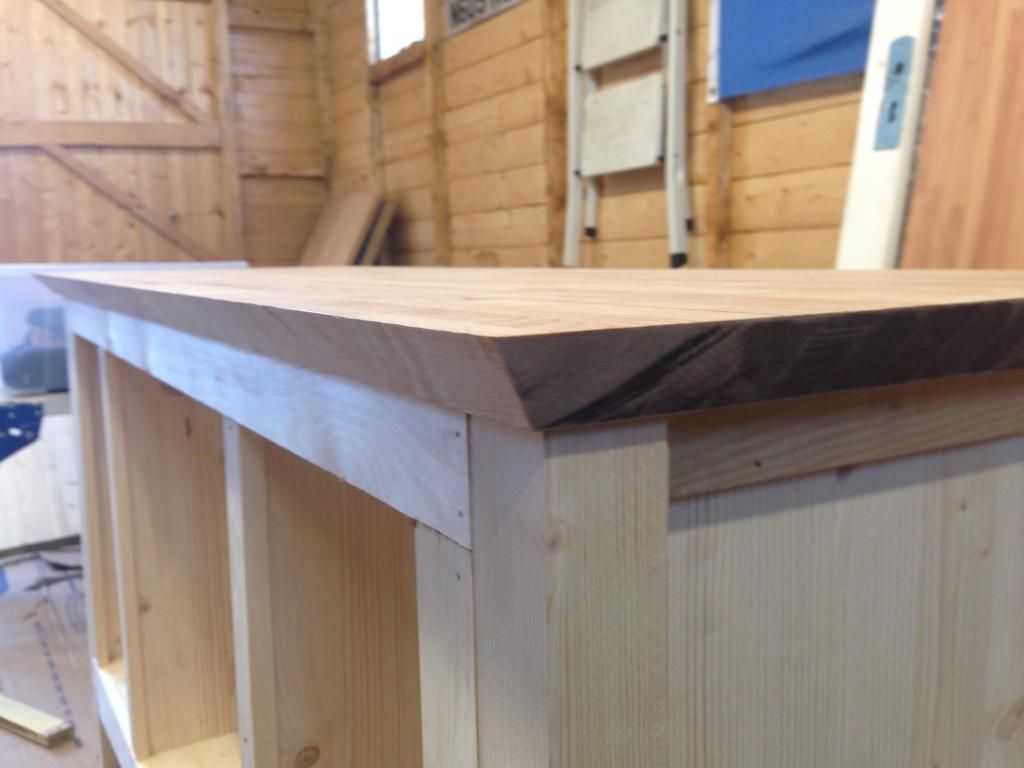
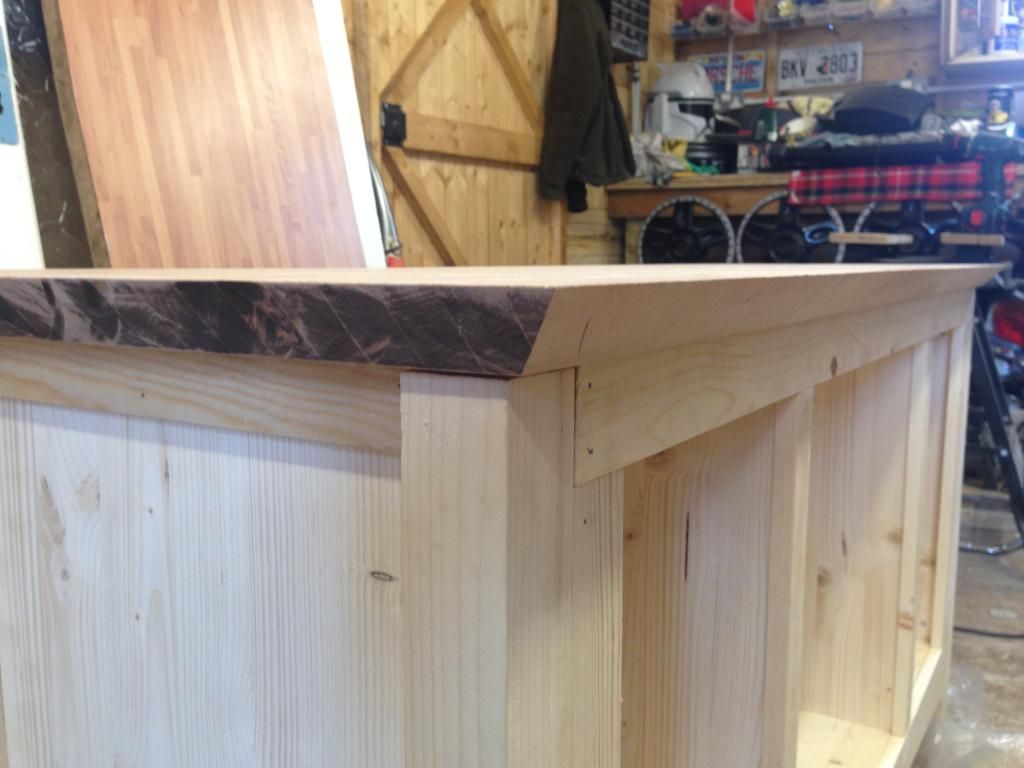
another thing i wanted to try was a "half-lap" joint so with some extra framing i tried to make an X for each end. i marked each bit of wood and cut it with a table saw. again not perfect but lends itself to the nature of the piece.
next up were the 2 side doors. i made a picture frame for the outer frame and i bought a small packet of tongue and groove panelling for the inner panel. the tongue and groove was very cheap and not well made but i persevered and managed to make it look respectable.
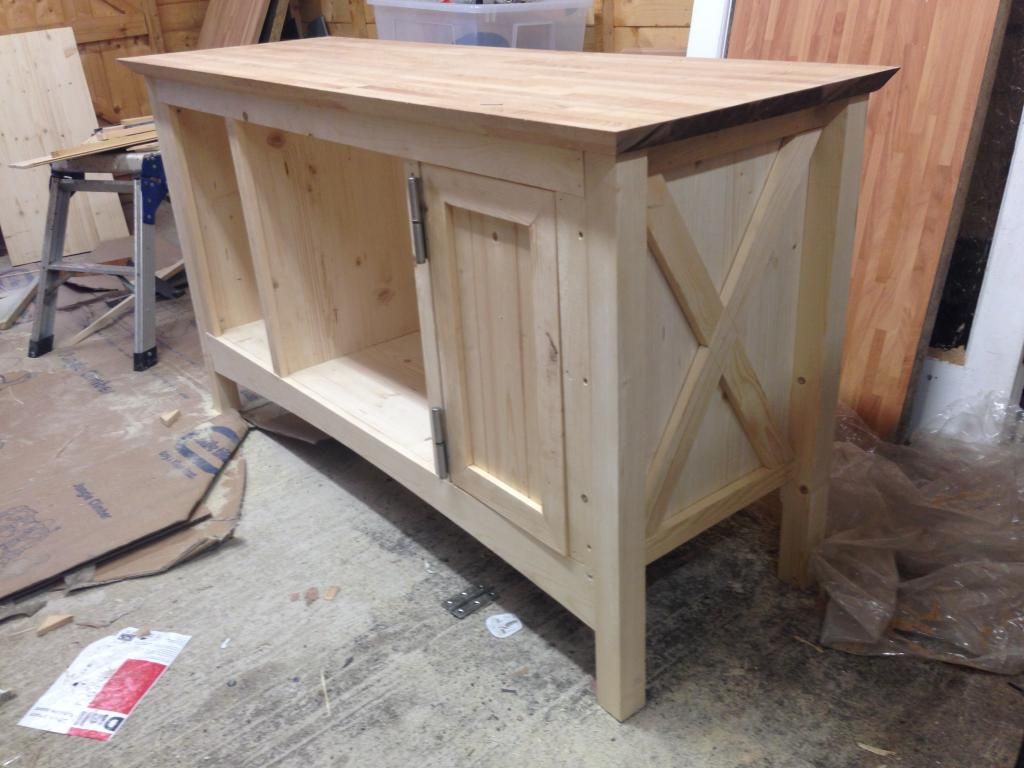
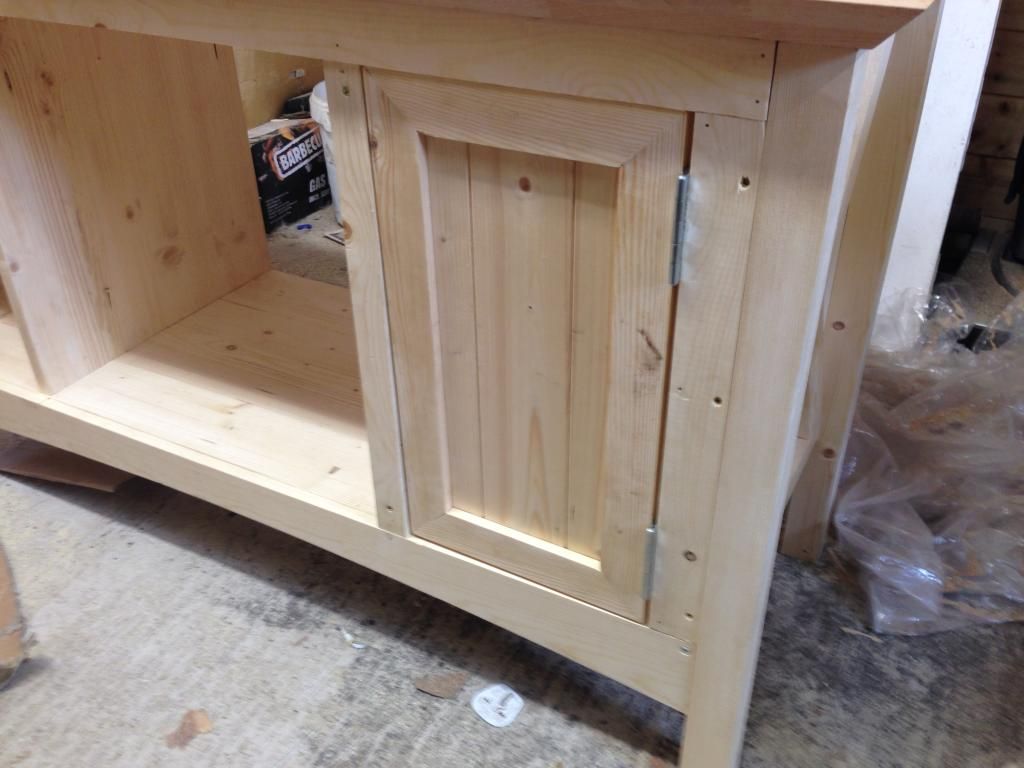
in the above picture i had used very chuncky fire rated lift off hinges and had them pivot towards the centre of the unit but one picture to the missus and she wasnt for them at all... so i changed them to s standard normal sized hinge and had it pivot tothe outside like a "normal" unit...
and thats it for this post more in an hour or so!
luckily on a chance visit to ikea the previous weekend i noticed they were selling off some kitchen worktops and a brainstorm saw me hop in the car and drive through to pick up a couple. the wood is birch but i like the slight contrast it gives.
so i got the wortop home and measured and cut it up.... didnt realise how hard the wood was and i managed to burn it but again its something i think that adds to the home and hand made feel of it! i also added a 45 dergee angle on it just to be fancy!
another thing i wanted to try was a "half-lap" joint so with some extra framing i tried to make an X for each end. i marked each bit of wood and cut it with a table saw. again not perfect but lends itself to the nature of the piece.
next up were the 2 side doors. i made a picture frame for the outer frame and i bought a small packet of tongue and groove panelling for the inner panel. the tongue and groove was very cheap and not well made but i persevered and managed to make it look respectable.
in the above picture i had used very chuncky fire rated lift off hinges and had them pivot towards the centre of the unit but one picture to the missus and she wasnt for them at all... so i changed them to s standard normal sized hinge and had it pivot tothe outside like a "normal" unit...
and thats it for this post more in an hour or so!
Simpo Two said:
It was looking nice until you put those honking great hinges on it... try something inset and rebated.
... and some more screwholes seem to have appeared...?
the smaller of the 2 hinges i like, i bought but wasnt keen on little flush fitting hinges and i was finding it difficult to recess them on the pine since it was so soft. more of a decision based on experiance...... and some more screwholes seem to have appeared...?
also at this point i thought i was going to stain the pine so the screw holes were going to be filled...
Filled with what?
I only ask as if you're filling with stainable wood filler, I can tell you that they'll stick out like a sore thumb - they'll look like what they are because there'll be no grain in the filled bits to pick up the stain. Your approach would work well if you were to paint it. You might get away with it if you really dark stain, but for not much more effort you could hide them more effectively....
I only ask as if you're filling with stainable wood filler, I can tell you that they'll stick out like a sore thumb - they'll look like what they are because there'll be no grain in the filled bits to pick up the stain. Your approach would work well if you were to paint it. You might get away with it if you really dark stain, but for not much more effort you could hide them more effectively....
i wasnt sure what i was going to fill them with, i just thought i would fill the holes with something.
as said this was my first venture into this and there is/was alot of learning as i go and this topic is for anyone with hints and tips so that if there us a next time then i will know what to do and problems to look out for

as said this was my first venture into this and there is/was alot of learning as i go and this topic is for anyone with hints and tips so that if there us a next time then i will know what to do and problems to look out for
EggsBenedict said:
Your missus was right about the hinges!
If you're worried about the strength of some of the hinges that you see, see if you like the look of a piano hinge. Google piano hinge UK, you'll see what I mean. Again, youTube will probably have something on it about using one.
i used the large hinges as thats what i had lying in my garage, it wasnt about strength or rigidness, just purely what was free If you're worried about the strength of some of the hinges that you see, see if you like the look of a piano hinge. Google piano hinge UK, you'll see what I mean. Again, youTube will probably have something on it about using one.
Edited by koosh on Wednesday 22 October 12:52
You can mix up your own filler simply by using sawdust and PVA glue. Just mix the glue into some sawdust to make a paste and fill the hole with it. Once it's dry, sand it flush, it'll be the same colour, more or less, as the surrounding wood and will stain reasonably well.
Alternatively, you could take each screw out, drill the hole out and glue a dowel in place. Make sure it's a tight fit. The dowel can be shaved flush (or sanded) with the surrounding wood, although it'll likely be a slightly different colour as most dowels are, I think, hardwood.
Alternatively, you could take each screw out, drill the hole out and glue a dowel in place. Make sure it's a tight fit. The dowel can be shaved flush (or sanded) with the surrounding wood, although it'll likely be a slightly different colour as most dowels are, I think, hardwood.
Super Slo Mo said:
You can mix up your own filler simply by using sawdust and PVA glue. Just mix the glue into some sawdust to make a paste and fill the hole with it. Once it's dry, sand it flush, it'll be the same colour, more or less, as the surrounding wood and will stain reasonably well.
Alternatively, you could take each screw out, drill the hole out and glue a dowel in place. Make sure it's a tight fit. The dowel can be shaved flush (or sanded) with the surrounding wood, although it'll likely be a slightly different colour as most dowels are, I think, hardwood.
the first one sounds like a very good idea and exactly the kinda help i was hopinh for when i started this thread. a very simple technique which will probably work wonders for my needs!Alternatively, you could take each screw out, drill the hole out and glue a dowel in place. Make sure it's a tight fit. The dowel can be shaved flush (or sanded) with the surrounding wood, although it'll likely be a slightly different colour as most dowels are, I think, hardwood.
so the next part was to duplicate the door on the other side and fit pull handles and those little roller v catches to keep the door shut. doors (along with the whole unit) could have been better but working with my abilities and what i had wood wise i made a good effort.
and that was it complete. i drilled holes all up and down each vertical panel to accept the little shelf pins so i can move and make shelves as i please.
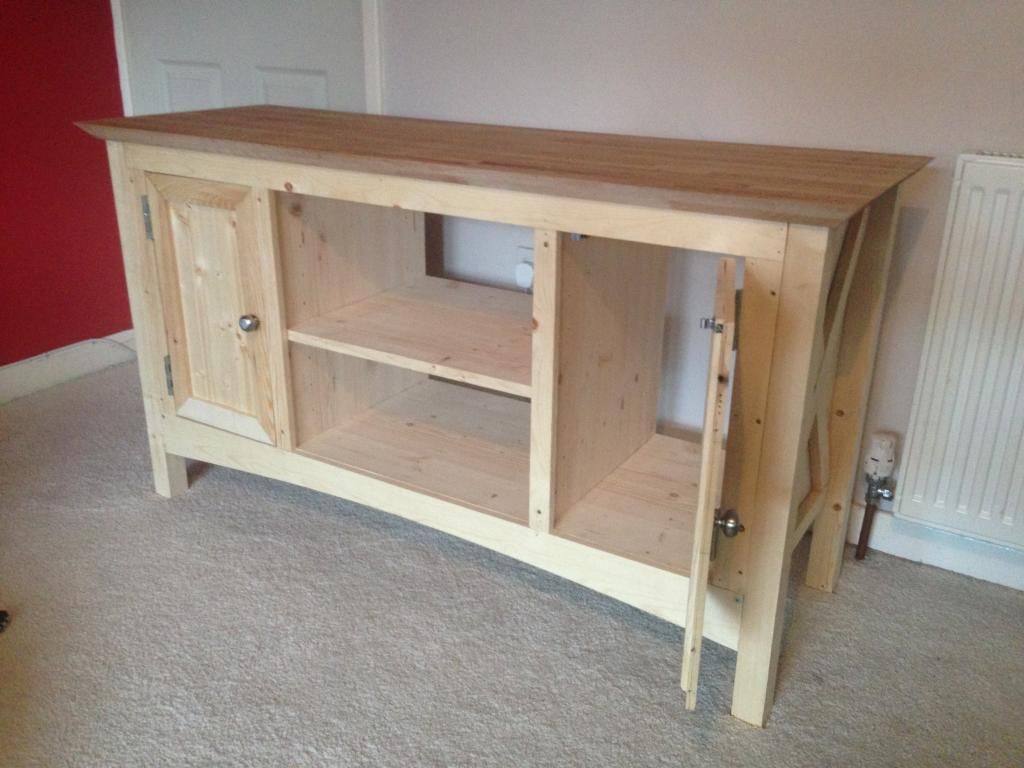
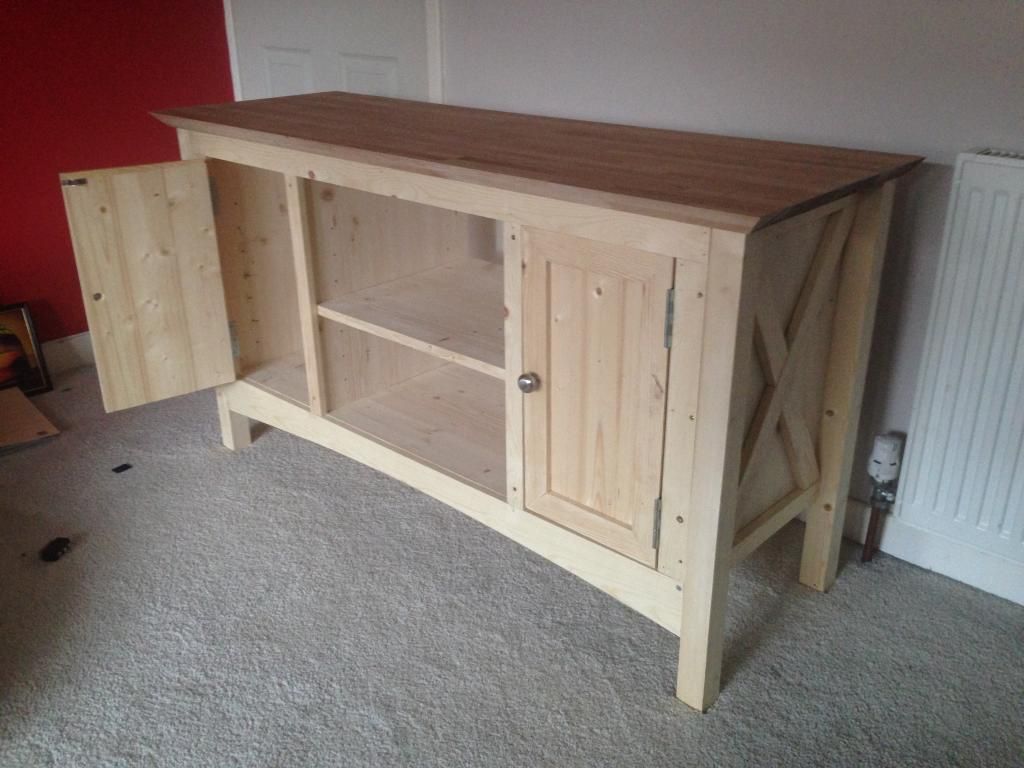
and since moving into the new house a couple months ago i have since moved the unit into its new home next to my new second hand chair!
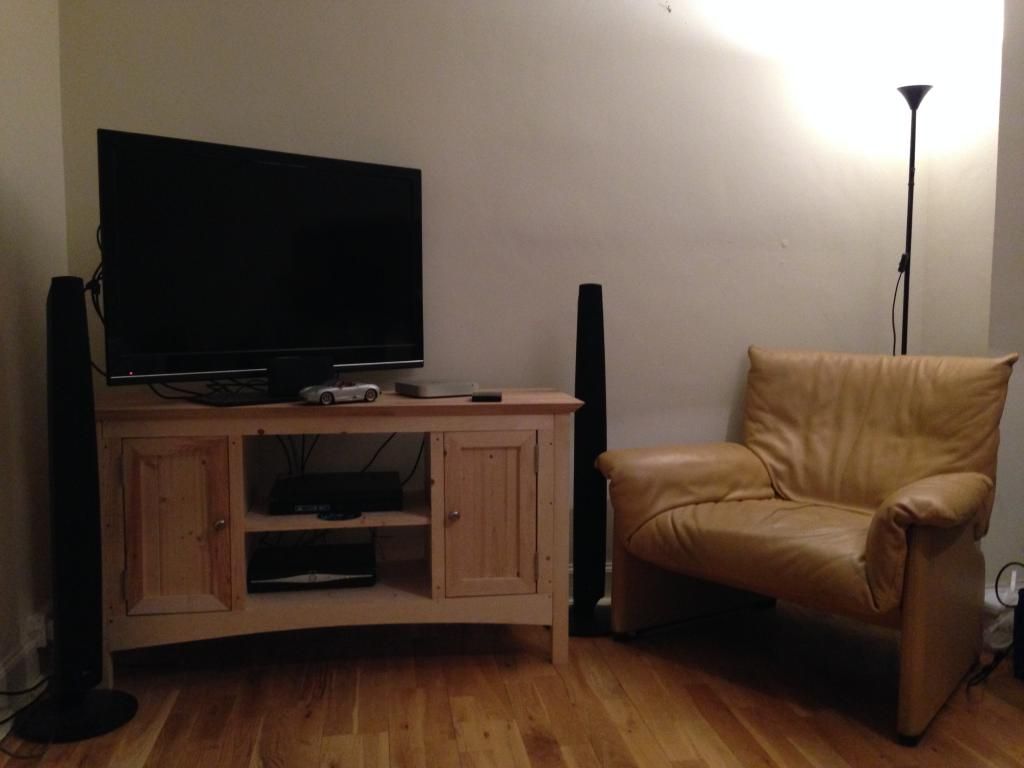
we dedcided not to stain in so the screw holes are fairly prominent in places for the time being but i will either replace these in the near future with new pieces of wood and pin/glue it or do as super slo mo says above and mix up some pva and sawdust! i have loads of that!
another porject will come soon once i orgainise those photos. and thanks for the comments so far!
Pheo said:
Looks very good!
I need to build some under-stairs storage which is more practical than the massive cupboard we have at the moment. This has given me some ideas, thanks!
thanks! my next project may be of some interest to you as well!I need to build some under-stairs storage which is more practical than the massive cupboard we have at the moment. This has given me some ideas, thanks!
i am almost (95%) finished a reading nook which is in my girlfriends room of our house. this will be the next lot of pictures going up!
koosh said:
thanks! my next project may be of some interest to you as well!
i am almost (95%) finished a reading nook which is in my girlfriends room of our house. this will be the next lot of pictures going up!
Ah yes perfect, look forward to it.i am almost (95%) finished a reading nook which is in my girlfriends room of our house. this will be the next lot of pictures going up!
I must admit I keep umhing and ahhing as to whether to tackle it at the moment or not! I'm concerned its beyond my skill level. I've got a couple of ideas for how to go about it. One includes using a wheel away big box to go under the lowest part of the stairs, and profile a door on, and then recreate a similar cupboard at the other end. The other is to create a big drawer which pulls out. I've not decided which one is best yet!
Pheo said:
Ah yes perfect, look forward to it.
I must admit I keep umhing and ahhing as to whether to tackle it at the moment or not! I'm concerned its beyond my skill level. I've got a couple of ideas for how to go about it. One includes using a wheel away big box to go under the lowest part of the stairs, and profile a door on, and then recreate a similar cupboard at the other end. The other is to create a big drawer which pulls out. I've not decided which one is best yet!
both sound like good ideas, i wish i could have something similar but my understairs storage is in a strange place and doesnt allow for much flexability around what is already there unfortunately....I must admit I keep umhing and ahhing as to whether to tackle it at the moment or not! I'm concerned its beyond my skill level. I've got a couple of ideas for how to go about it. One includes using a wheel away big box to go under the lowest part of the stairs, and profile a door on, and then recreate a similar cupboard at the other end. The other is to create a big drawer which pulls out. I've not decided which one is best yet!
you will probably be suprised with your abilities. i hadnt done much more than putting up shelves in a cupboard beforehand. so long as you have a modicome of patience and some lateral thinking you will be fine! after the tv unit i managed to tear down a built in cupboard in the master bedroom which housed the old hot water tank once it was removed and had stud walls built and a proper double cupboard built in no time at all aswell but i wont bore the forum with pictures of such a mundane task!
koosh, that unit looks the nuts ! You obviously knew that it wasn't going to be as good as a shop bought item ,but then again it probably hasn't cost you anywhere near as much . I would say all it needs now is a couple of coats of antique wax ,which will fill minor discrepences and also bring out the grain in the wood. The main thing is it does what you made it for , and that satisfaction of your own work . .
.
. Gassing Station | Homes, Gardens and DIY | Top of Page | What's New | My Stuff