Our School House project
Discussion


Harry - I got them locally, from eBay. As much as I love the 'reclaimed' stuff, I'd go and buy the new solid oak blocks from Eastern Europe if I were doing it again. I think there's only one or two manufacturers over here, so costs are high, but in Poland its pretty common stuff - looked last night and there was good quality and delivered for about £20/sqm.
I made rookie error as checked the back for bitumen (not much) but hadn't spotted the glue on the sides which caused the pattern to lay with huge gaps, que hours cleaning it with a scraper, and it's still not good really! It took me 2 minutes per block to clean, and our room will take about 1600 blocks - I lost the will at one point and paid a labourer to come in and help me scrape blocks for two days solid. Awful job.
Phil
Thought i'd give a little update since I had logged in to reply to Harry.
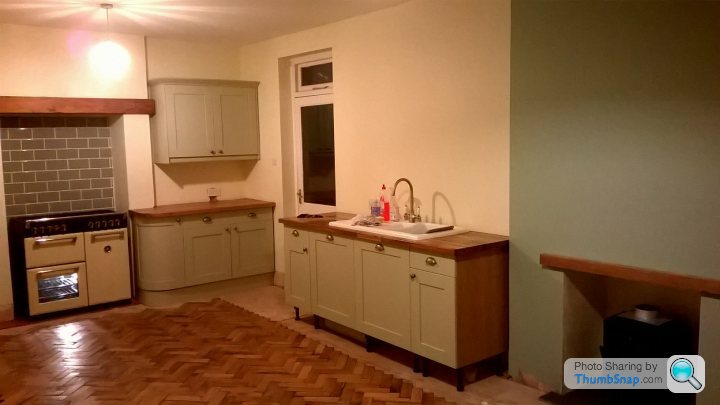
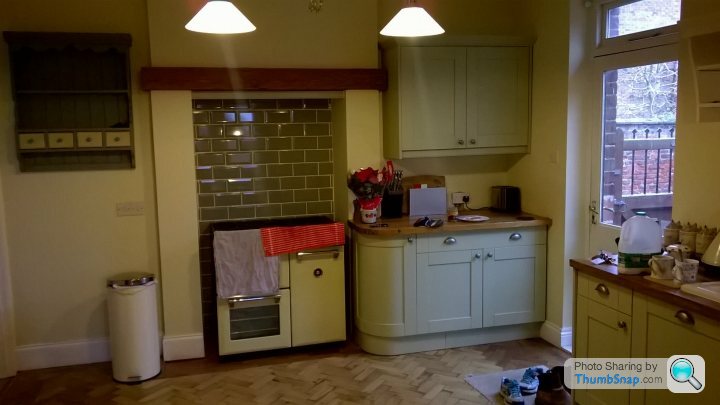
I'm back to work now which means weekends and evenings are where the action is. The plan for this week was to get rid of the built in cooker - the last remnant of the old kitchen - and fit the new one. The gap was 106cm, but we both liked the look of the 90cm range cookers so got this little beauty (below). Will also admit to never having tiled before, so I watched plenty of youtube before having a go. Things i learnt:
An electric tile cutter is very useful
Ready mix grout won't stick quarry tiles
I'm no good using a notched spreader
Slightly sloppy group seems to work better (?!)
To try and minimize huge photos I made this lovely little collage:

I still need to sand the top beam, but after plenty of washing down and sugar soap its still sticky with the last tenant's grime. Ideas to get ride before i sand? Corner cabinet will cover the right hand side chimney wall and cover the mess there, so still plenty to do.
Not long after my last update this arrived from Wren:
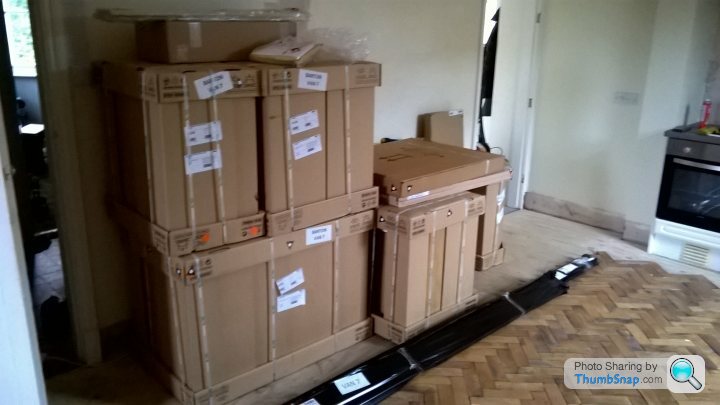
and so far so good. The price was in-line with DIY kitchens after a 'discount' and I'm glad we went for solid wood. Still not unpacked half of it but all seems to be there (touchwoodfingerscrossed).
Also, a friend had picked up a huge load of oak worktops from a bankrupt kitchen supplier; I only found out when I saw it burning on the BBQ! Anyway, he was using as firewood with no use beyond that. Some tops were pretty badly stained and bowed, but we managed to pull out a half decent one and I dropped off with 'pa to have a quick sand down at his place.
Had a little play with the base units - didn't realize just how much the floor sloped in the area, but I think i can overcome it
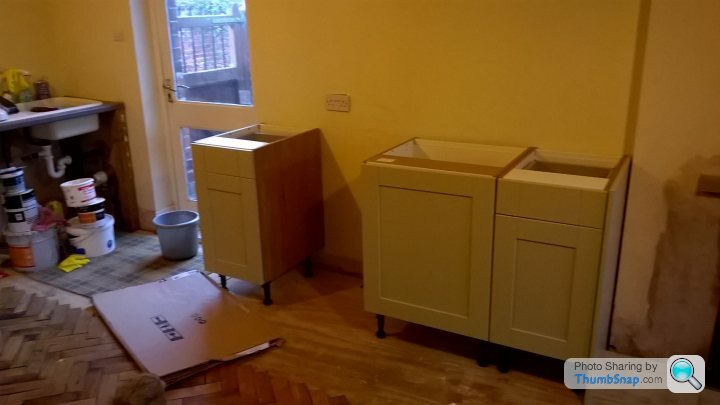
That was Friday evening.
Got up early Saturday AM and grouted the tiles behind the cooker and the plumber from next door sorted the gas connection and put my a hole in the wall for my new sink waste connection. Then my dad came round with (now sanded) worktops which we trail fitted and then cut out for the sink. Also decided to rout a shallow rad onto the edges as they were pretty sharp, even though I was dead against at first Mrs PH convinced me and I'm happy with the result. Quite hairy cutting the hole for the sink as it had to be within a few MM to all fit!
Lunch time trip to Wickes saw this little beauty in the car park:

Anyway, got back and cracked on, now looking something like this:
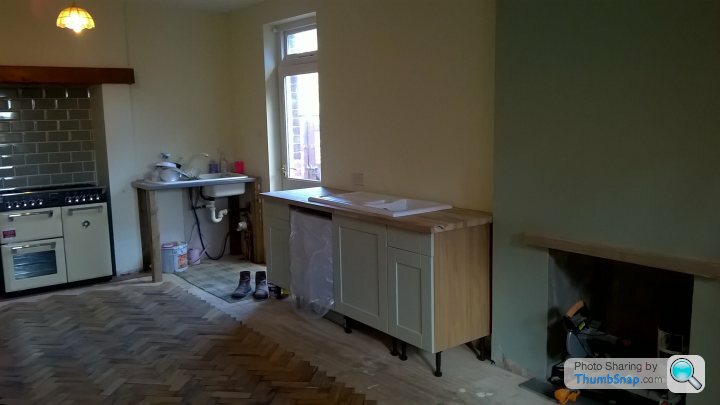
I appreciate I'm still miles off, but it was a big motivator seeing something which resembled a kitchen for the first time. So happy I stayed up late and put some more floor down...

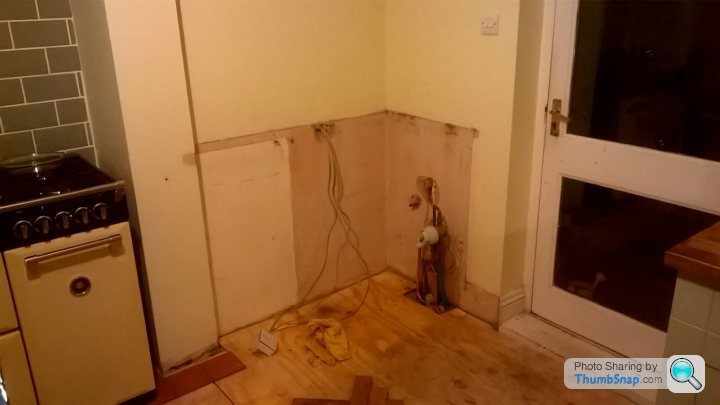
I'm hoping now that once the Sink it fully plumbed in I can more the current temp sink and get some units into there. Everything just takes so much time!
One delay might be with the waste as I'd planned to run the sink and dishwasher waste through the wall into a fall pipe, que plumber next door suggesting that the fall pipe was running into a big cistern underground rather than the drain - anyone had experience of these before? To be sure I'll lift the tarmac in the yard and run a pipe to a definite drain near by if not done already.
Thanks for reading,
Phil
I'm back to work now which means weekends and evenings are where the action is. The plan for this week was to get rid of the built in cooker - the last remnant of the old kitchen - and fit the new one. The gap was 106cm, but we both liked the look of the 90cm range cookers so got this little beauty (below). Will also admit to never having tiled before, so I watched plenty of youtube before having a go. Things i learnt:
An electric tile cutter is very useful
Ready mix grout won't stick quarry tiles
I'm no good using a notched spreader
Slightly sloppy group seems to work better (?!)
To try and minimize huge photos I made this lovely little collage:
I still need to sand the top beam, but after plenty of washing down and sugar soap its still sticky with the last tenant's grime. Ideas to get ride before i sand? Corner cabinet will cover the right hand side chimney wall and cover the mess there, so still plenty to do.
Not long after my last update this arrived from Wren:
and so far so good. The price was in-line with DIY kitchens after a 'discount' and I'm glad we went for solid wood. Still not unpacked half of it but all seems to be there (touchwoodfingerscrossed).
Also, a friend had picked up a huge load of oak worktops from a bankrupt kitchen supplier; I only found out when I saw it burning on the BBQ! Anyway, he was using as firewood with no use beyond that. Some tops were pretty badly stained and bowed, but we managed to pull out a half decent one and I dropped off with 'pa to have a quick sand down at his place.
Had a little play with the base units - didn't realize just how much the floor sloped in the area, but I think i can overcome it
That was Friday evening.
Got up early Saturday AM and grouted the tiles behind the cooker and the plumber from next door sorted the gas connection and put my a hole in the wall for my new sink waste connection. Then my dad came round with (now sanded) worktops which we trail fitted and then cut out for the sink. Also decided to rout a shallow rad onto the edges as they were pretty sharp, even though I was dead against at first Mrs PH convinced me and I'm happy with the result. Quite hairy cutting the hole for the sink as it had to be within a few MM to all fit!
Lunch time trip to Wickes saw this little beauty in the car park:
Anyway, got back and cracked on, now looking something like this:
I appreciate I'm still miles off, but it was a big motivator seeing something which resembled a kitchen for the first time. So happy I stayed up late and put some more floor down...
I'm hoping now that once the Sink it fully plumbed in I can more the current temp sink and get some units into there. Everything just takes so much time!
One delay might be with the waste as I'd planned to run the sink and dishwasher waste through the wall into a fall pipe, que plumber next door suggesting that the fall pipe was running into a big cistern underground rather than the drain - anyone had experience of these before? To be sure I'll lift the tarmac in the yard and run a pipe to a definite drain near by if not done already.
Thanks for reading,
Phil
Evening all (few/some?!),
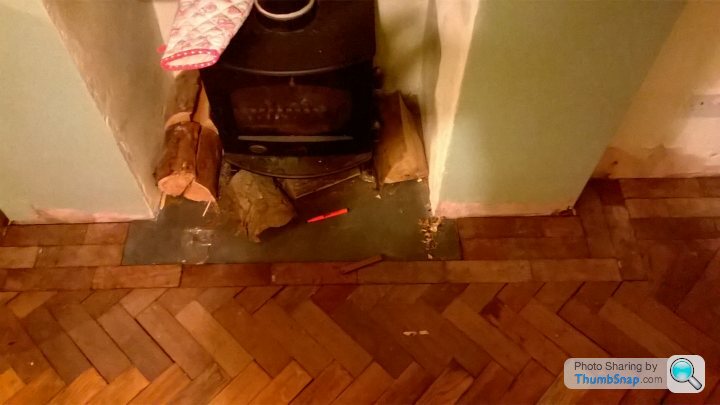
Posting a little update as finally got some work done on the kitchen this weekend. A quick trip to Cleethorpes (wow!) sat AM saw me with a multifuel fire, and then I got cracked on with fitting base and top units. It wen't something a little like this:
Temp sink taken out - to be used in the utility room for now.
And the new sink area sealed and oiled. I'm not sure about this worktop though as it's taken about 12 coats of oil and still isnt perfect. I put the last couple of coats on with a scouring pad which seemed to help, but think it really needs a fine sand and a few more coats to make a good job of it.

New units in - pretty close as it had to be within about 5mm to meet the side of the chimney breast. The only problem was the outside wall (right) isnt quite square with the rear wall, which has left a small gap. Hopefully to be covered with tiling..

Anyway, this left me with a unit cutting problem - how to cut the curve?! Looked on youtube etc and it seemed I needed to either make a template as a router guide, or screw in a length of wood with the right radius which the router would pivot round. I'm not sure about routers so I left these instructions with my dad and went to work.
As all things it turned out not to be quite so easy; I couldn't follow a simple curve because I wanted less overhang on the front than the side. Unsure what resulted but I came home to a worktop corner which began as a beautiful curve, before becoming a big bump. And some jigsaw marks in the wood.
Luckily I bought some rough sanding pads on the way back from Cleethropes and it ended up looking nice. Also spent the day fitting the one and only wall unit we're having:
The tenants who lived here before us were quite frankly filthy; dog piss on carpets, nothing cleaned etc. And one hangover of this was the beam above the fire. Once a lovely piece of (oak?!), it was now so sticky with fat that it blocked up scouring, and sanding, pads to get it off. 2 hours later, with a lot of white spirit and sanding it was unstuck and oiled. You cant tell on the pictures but it looked awful before but actually looks nice now.
Final job for Sat was to watch my father-in-law wall paper. Bedroom = finished!
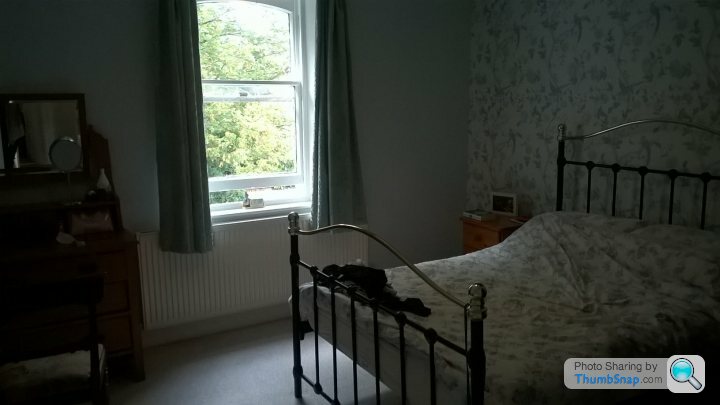
10 weeks in, and it's beginning to look like our house a little more.
Phil
Good evening,
As per usual, a pretty short update. It's over a month since I've updated and it seems like I've done nothing. I'm finding it hard to do much on an evening, so it's all down to weekends now. I did have half term the other week but found myself in darkest Berlin. No floor progress and one broken toe later...
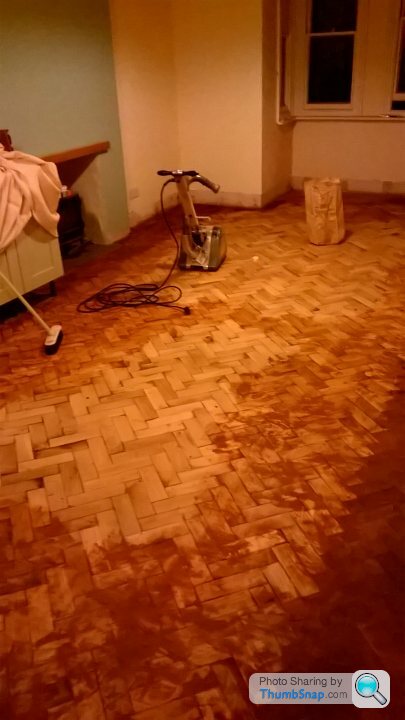
So... I'd ran out of the oak parquet. To be honest I had made a massive mistake when buying it because they had loads of self leveling compound on the bottom, tongue cut off, and there wasn't enough. Bad decision. As a result, I needed to source some more. Found some nice stuff on ebay which (i think?) was described as oak, but the same size. Few emails with the seller and £80 for about 16sqm seemed fair. I headed upto Stockton on tees one morning and filled the 307 tip car - font seat, everything. The drive back featured the smell of tar + the smell of Middlesborough.
The blocks I'd bought were darker, but I was working on the principle that either it was a stain which would sand out, or it would stay darker and make a nice contrasting border. Also, I only needed about half of what i'd bought - this meant I could sort through all the bags I'd carted home, and cherry pick the easiest to clean. These only had tar on anyway, and cleaning was so much better. Average block cleaning time went from 2mins to 1min. I was a happy man! This gave me some motivation. You can see the contrast here:

A fellow Ph'er had given me some cracking advice, not least to mark the boarder on the floor, then lay the blocks just over this. This meant I could get the circular saw and run it in a straight line 150mm from the wall (I screwed a metal guide rail to the floor) - leaving room for a nice straight border.
Marking out:

I forgot to take one when it was cut. But after that I put the border in..
At this point, I took a weekend off. It went like this: Fist I popped down to Beverley Archives, where they had the original 1876 plans for the school. They charge £10 to take a photo, but I managed to sneak this...
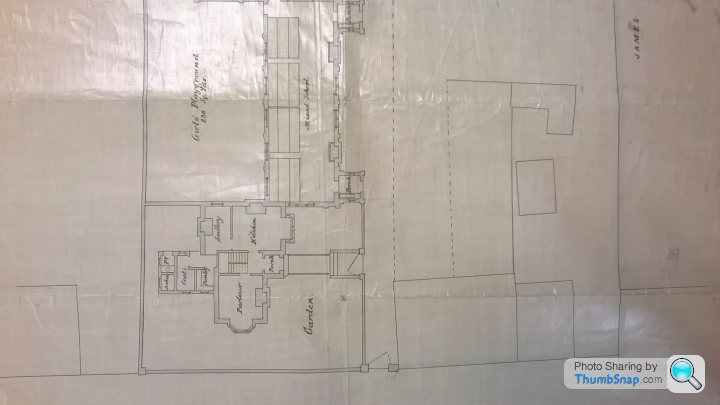
Pretty cool I thought, that's why I love old houses.
Then I polished the three wheeler, got the dog (and wife) and we went to scooter rally at Bridlington. Not before a classic Autumnal shot...

Back to the floor (and this weekend gone) and I bit the bullet and hired a sander. I wont go through the trials and tribulations, but this is a run down....
10 hours sanding!
The bags supplied are rubbish
The border is mahogany (I think)
Resin filler is ace, but almost impossible to use if you're not a pro
I ran out of resin filler very quickly
I got very angry
I filled some remaining gaps with pva/dust (although I dont think you should really)
Here is the pictorial version:
Start

Then

Gap filling
Ready to varnish
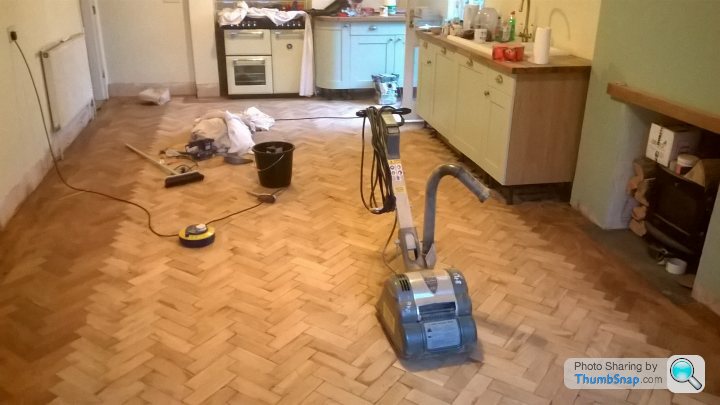
Done! (couple more coats to go actually)


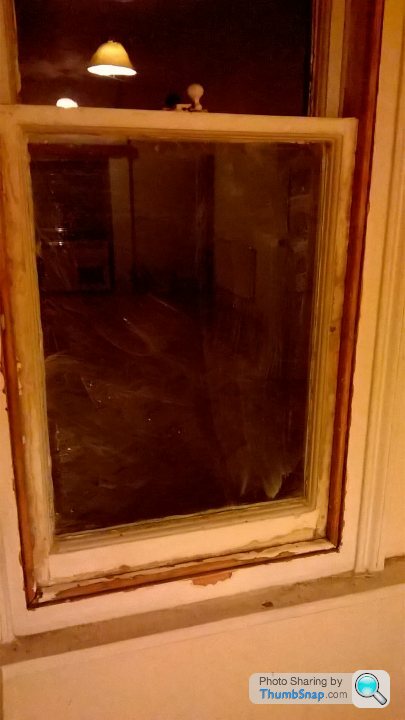
Also managed to get a window open which must have been painted for a good 40 years. Cords have been cut, but I think it's salvageable...
Hopefully I can now get on with skirting, shelving and some lights. We've invited the family for Christmas dinner which has given me some motivation!
Cheers,
Phil
Looks fantastic. Such a characterful house. I feel your pain. We've only tried to do up a normal 3 bed semi and as you say everything takes twice as long as it should! Simple sounding jobs seem to end up taking all your time and it doesn't look like you've done anything.
Good work, keep going it will be ace when finished.
Good work, keep going it will be ace when finished.
Started me thinking about parquet flooring in my next project...
Have you got a link to the cheaper sites you mentioned from eastern Europe please? If not don't worry, I can google.
How long do you think the floors taken in total? Then, if you'd gone new wood, how long do you think it would have taken?
Cheers, looks great by the way.
Have you got a link to the cheaper sites you mentioned from eastern Europe please? If not don't worry, I can google.
How long do you think the floors taken in total? Then, if you'd gone new wood, how long do you think it would have taken?
Cheers, looks great by the way.
Evening, thanks for the comments - much appreciated.
I was only thinking about time the other day. I reckon it went something like this:
50 hours to clean all the blocks (1500 at 2 mins each)
15 hours to lay the main floor (inc marking out etc)
5 hours marking and cutting border
5 hours laying border
10 hours sanding
3 hours cleaning prep and varnishing
7 hours misc (collecting blocks, sorting them out etc)
so about 100 hours in total.
If I'd bought new it would have significantly reduced time. Obviously no cleaning, but also no collecting and sorting. Reduced time sanding, and less mess! You can't imagine the dirt created; my house and car stank of tar for ages, and after a session cleaning the blocks I looked like i'd been down a mine.
I could lay about 120 blocks per hour, so for the same floor think I could get the time down to 35 hours from start to finish. I think price wise it wouldn't be much different really either, and that's before thinking about the time involved.
I've seen these guys on ebay:
http://www.ebay.co.uk/itm/oak-parquet-flooring-22x...
That's £16/sqm for a mix of prime an graded, but they have different options. From what I understand, there is only one company in the UK who make parquet now, and it's pricey. In Poland, parquet is still a big thing. We have family over there and plenty of people can supply and fit cheaply - so shopping around should get you something.
Saying all that - i'd recommend putting it down as it looks great!
Cheers
Evening all,
short update, but I've got a few minutes to kill before heading out this evening so thought i'd post up some pics.
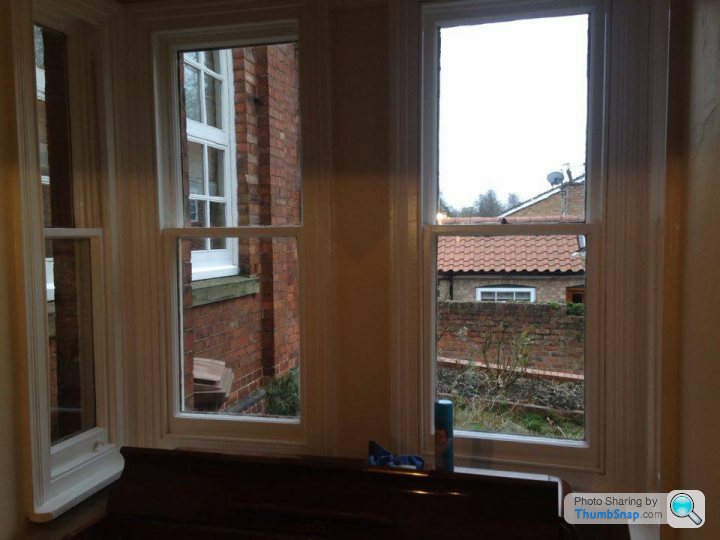
Since finishing the floor, I've found much more motivation to get things done. The skirting is now fitted (thanks to the mitre saw my dad had bought me earlier in the build) and wood work painted. This included recommissioning the sash windows which had so many coats of paint it was unbelievable. We tried a completely matt paint in for other woodwork, but found that unless the surface was perfect it would show the blemishes - hence the choice of an eggshell - which we're pretty pleased with.
I've put some wall units up as well - which only leaves:
Tiling a small splash back
Island (here on the 14th)
Fridge freezer (here on the 10th)
Then I think we'll be done for now and I can move into the utility.
Also managed to get the piano in today. It had been taking up valuable room in the garage and now means I can move some of the crap from the utility to the garage and see what I'm doing. The only problem of today was finding a couple of slipped tiles; one leaving about a 8" square hole in the roof. I've pushed it back up before, but it looks like it needs holding somehow? I'm not particularly knowledgeable on this so will have a google tomorrow (if the rest of the roof can take the current wind!).
Hope the pics explain better than I can:


As you can probably tell, we also manged a trip to Ikea to get some lights and little things. Quality isn't amazing, but for the price we're pretty happy. I always remember working with a high end developer who used to used quality furniture then dress with Ikea accessories - if it's good enough for him...
Cheers,
P
short update, but I've got a few minutes to kill before heading out this evening so thought i'd post up some pics.
Since finishing the floor, I've found much more motivation to get things done. The skirting is now fitted (thanks to the mitre saw my dad had bought me earlier in the build) and wood work painted. This included recommissioning the sash windows which had so many coats of paint it was unbelievable. We tried a completely matt paint in for other woodwork, but found that unless the surface was perfect it would show the blemishes - hence the choice of an eggshell - which we're pretty pleased with.
I've put some wall units up as well - which only leaves:
Tiling a small splash back
Island (here on the 14th)
Fridge freezer (here on the 10th)
Then I think we'll be done for now and I can move into the utility.
Also managed to get the piano in today. It had been taking up valuable room in the garage and now means I can move some of the crap from the utility to the garage and see what I'm doing. The only problem of today was finding a couple of slipped tiles; one leaving about a 8" square hole in the roof. I've pushed it back up before, but it looks like it needs holding somehow? I'm not particularly knowledgeable on this so will have a google tomorrow (if the rest of the roof can take the current wind!).
Hope the pics explain better than I can:
As you can probably tell, we also manged a trip to Ikea to get some lights and little things. Quality isn't amazing, but for the price we're pretty happy. I always remember working with a high end developer who used to used quality furniture then dress with Ikea accessories - if it's good enough for him...
Cheers,
P
Edited by hardcastlephil on Sunday 6th December 10:00
Gassing Station | Homes, Gardens and DIY | Top of Page | What's New | My Stuff