Our School House project
Discussion


Thank you for the comments - Paul I have enthusiastically read through thread over the years so yes, very much although I have serious man cave envy!
So, I've had my cheese on toast and I'll continue with the story...
The Bathroom
Plumbing is not my friend - In fact I don't think there is a single occasion when I've done some plumbing when something hasn't gone wrong. With this in mind we made the decision to enlist the help of some friends on the bathroom build.
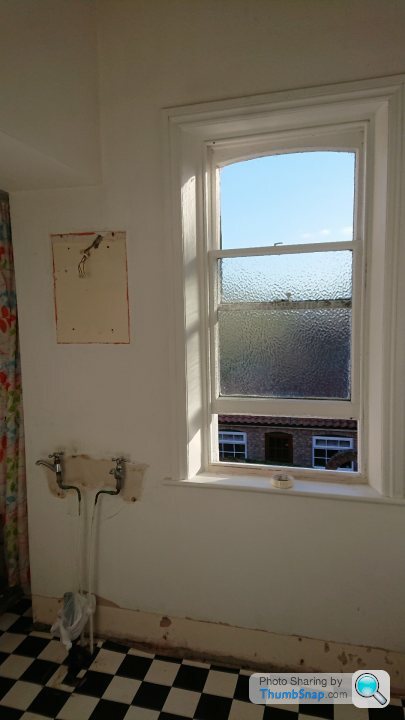
First I got on and ripped the bathroom out. It was 100% trainspotting chic - I had tidied it previously but it was getting to the stage this time when we couldn't have guests round due to the embarrassment...
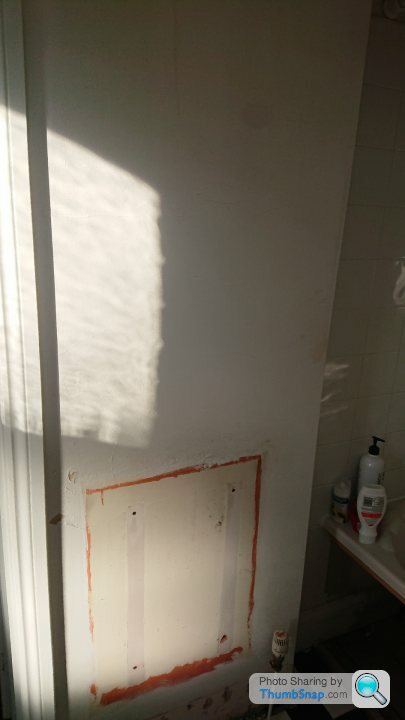

Then a friend came and plastered - one day and a great job. The reason for the plastering was that the wall was full of cracks - absolutely everywhere were hairline cracks which I think had happened because when the house was sold and the school renovated they re-plastered this house (I imagine when fitting the CH and re-write) but it was over the old lime based render and its moved so much. I think the correct way to fix would have been to go back to brick but I didn't have time and agreed with my plastered that we'd tape it up and have a go. No pics of the plaster but you get the idea.
Next up was my next door neighbour who is a plumber. He also agreed (maybe against his better judgement) to do the tiling too - The first workmen in the house in nearly three years. It was nice having a professional in and he did a great job of the tilling. We had a couple of issues with the bath waste as it had to go under existing CH pipes which in the end meant drilling another waste on the outside lower than the current one to get the angle.
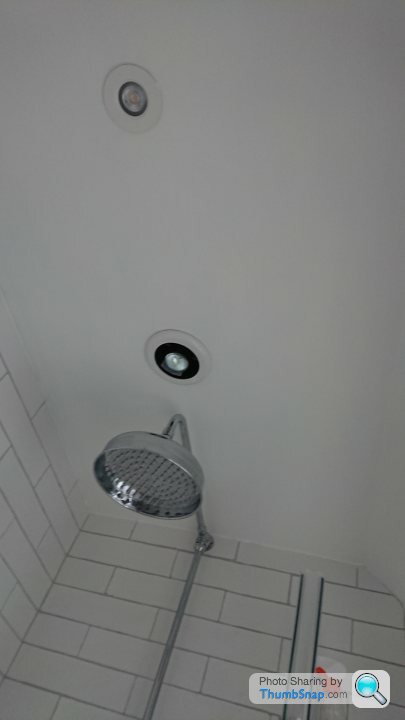
One of the main problems had been condensation and mould- probably not surprising considering there was no working extractor fan. We talked about putting in extra fans but in the end I decided to fit a false roof above the bath and fit a downlighter with extractor in which would take the steam from the shower directly- this turned out to be a good choice. I was lucky with the wiring because there was already a switched live and perm live from a broken ceiling rose/downlighter junction so I used that. I couldn't find any 'finished' shots of the bathroom so just ran up and took one now - it's not exactly a show home shot so apologies. I'll let the pictures do the talking...


I also took the opportunity to hard wire a Sonos one was they are moisture resistant. I couldn't recommend them enough actually; we have a pair in the lounge and another in the kitchen and they (along with apple play) have replaced my separates system and CD collection which says it all. The wiring comes through the ceramic rose (another ebay purchase) and they looks very tidy - I plan to use them in all rooms from now on.
The tower is above the bathroom and I had wanted to knock the roof out completely then re board it with a point and a pendant hanging down. Everyone I spoke to (including Mrs H) felt this would be a bad idea and a moisture collection point and just generally be more hassle than it's worth. I think really they were right and when cutting a hole for the sonos wiring it was such a mess up there that I aborted the mission! The 'chandelier' is a cheap eBay find but the hook is an original 1920's one which I find quite cool.


More to update soon - just heading out!
Phil
That's a really nice job on the bathroom and thanks for the comments on my thread. Building work is kicking off again for me quite soon, so I should have some fun updates over the next year or two or five.
I wired ceiling speakers back to a central point when we did our house, this was when Sonus existed but was too expensive and before Chromecast was a thing. I gambled that someone would invent Chromecast and they did, but I did the whole thing on the cheap because I couldn't afford anything else at the time, £20 a pair of speakers, £15 an amplifier and a load of switches and a bluetooth receiver. I've recently been buying second hand proper amps on eBay, mostly Cambridge Audio things for about £50 a pop. The difference is quite significant, especially as it's removed all the interference from my setup - I can now turn the volume down on the casting device without introducing a load of noise and I don't get loads of static if nothing is playing. I'll buy some better speakers eventually, but still really pleased with how good the sound is considering the acoustics and the cost.
If I did it again I would wire back to a central point again, I like hiding things as much as possible, so don't want amplifiers etc out on display and once the volume is set to about right you can control it with your watch or phone. And I'd add four speakers per room rather than two because I'm sat at my desk with the speakers in the ceiling behind me, they'd be better overhead, so four covers more bases. Luckily I'm upstairs so I can add a couple more.
You were obviously ahead of me technology wise - I'd always planned to wire ceiling speakers back to a bank of central amps when we first bought the house - but without sonos didn't know how to control it all. This was before sonos play existed and you had to use their amps and bridges etc - as you say very expensive but I always liked the idea. The play isn't as tidy as a ceiling speaker but I don't mind the look of them and the sound quality is good for such a small speaker - in all honestly they're used to have the radio one most of the day more than anything else, and they are perfect for that.
My friend has just done a big renovation of a 70s detached place and we did the whole thing with sonos zones and celing speakers - bedrooms, en-suite etc and it's excellent. Saying that he'e been collecting the stuff for about 10 years!
So here we are on the final straight!
I can't really say too much more about the bathroom, just what a good job my neighbour did which helped me out a lot. He is old school and did all the tiling using manual cutters/nibblers etc. I thought my tiling was of a a good quality but its amazing the difference a professional makes - it's the little touches I think.
The ceiling above the shower looked like this in the end:
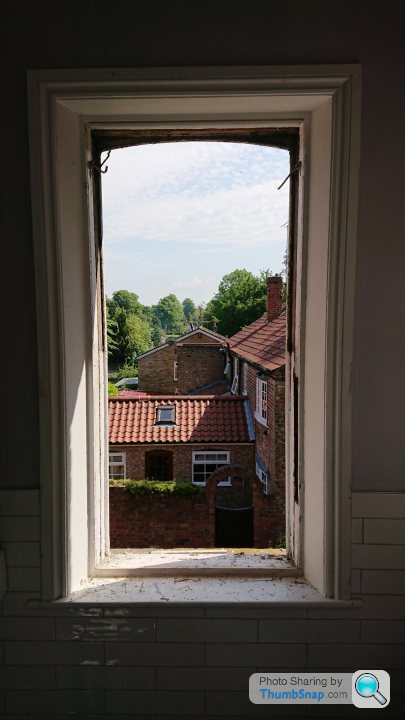
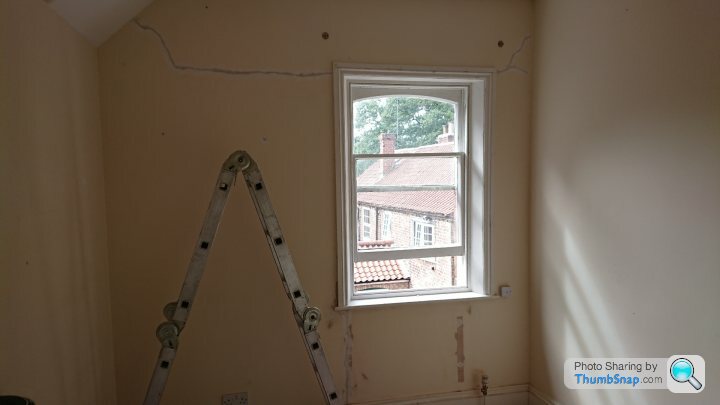
The biggest part of the bathroom project was the windows. In all honestly they need a thread of their own but I'll try and condense it down a little and not bore you all to death! The windows were awful - one was fully painted shut and the other only opened at the bottom. They both had 70's mottled glass in them and were absolutely blathered in gloss paint. There is a picture earlier in the thread somewhere.
The other problem was that I had been so busy with work and lost track of time - the bathroom was pretty much completed before I started on the windows! I'd sort of improved with time when it came to refurbishing the windows. Early on I just got the bottoms to open again, sanded them back and then painted. This was okay but didn't look amazing and anyone with sash windows knows that they only really work when you can open the top - surely people should paint the bottoms shut instead?! The window in the entrance I'd used the heat gun and taken back to wood, but I didn't free it up or take anything apart and I'd already decided that as I wanted new glazing in the bathroom I'd do it properly.
I asked on here about replacing/refurbing and the consensus was to refurb and do a decent job. So I got on with it.
Out came the old frames:

We had a month or so letting the neighbourhood down...

I was interested in other methods than the heat gun so bought some Starchem Synstrip. It is absolutely lethal stuff to be honest - it comes with an actual death hazzard warning! The Synstrip was very good and worked like the old Nitromors, but really there was so much paint it still needed the heat gun. I was also sick as a dog after using it but unusre if there was a connection or it was booze related.


The casings came up well and I cleaned up the runners (which were completely painted up) with basically a lot of hard graft.

We had some more glass sandblasted at Ivy Glass and then I fitted it to the newly painted sash frames. I was new to this and I had thought about using a silicone and beading but decided to use putty and go the traditional route. It took a bit but I was happy with the end result after watching Youtube videos to build up my confidence..

It was then time to buy some new cord and beadings are we were done..

I don't have many pictures of the finished article but they have come up so well I'm amazed. I think though that the final count it took about 30 hours for both windows. Cord and new wood beading came to about £100, new catches £20, paint, brushes and stripper etc. £60, and then the glass I can't remember but it wasn't cheap as it was all stenciled then blasted by hand, I replaced the top pains too - so approx £150. That's 30 hours work and £330 - it makes a whole new box and sash at £700 seem an interesting bet and maybe something to consider next time.
So that about brings me to the end of July. Baby was due on the 1st September which meant I had my 6 weeks summer holiday to put the finishing touches to the bathroom and then get the nursery done. I think he had other ideas though, and on the first day on my holidays (21st July) we welcomed our son. 6 weeks early. Panic time!

Chloe was in hospital with him for 2 weeks as he was in SCBU - this gave me chance to fill some of the cracks (don't have the time to plaster) and get the fireplace stripped back and painted. It had years of gloss on but after the hassle of pulling out and blasting the one in bedroom 2 (it's still not fitted back in very well) I wanted to do it on situ. Paint stripper didnt do enough so I attacked it with the angle grinder and wire wheel..


I wouldn't recommend this unless you either have a death wish or your wife is away. It absolutely covered everything in dust/soot and still smells 2 weeks later. It didn't quite get all the paint out of the cracks so I couldn't use the fireplace black like i'd planned. A bit of screwfix no nonsence matt black though and it was lovely.

One lesson I'd learnt was that although the floorboards might look even, they soon show through the carpet once it's been down for a while. This could be due to cheap underlay but with this room I'm not taking chances and will ply over the top before putting the carpet down. The only downside of this was that I needed to do any jobs under this floor now - bringing my kitchen lighting update forward by a few months. The pendant lights weren't cutting it on their own and downlights were needed. This is the point where I admit to being way behind the curve with lighting - I'm just beginning to learn - but these are just so much better. Even turned off they make the kitchen look more modern somehow.
Before:
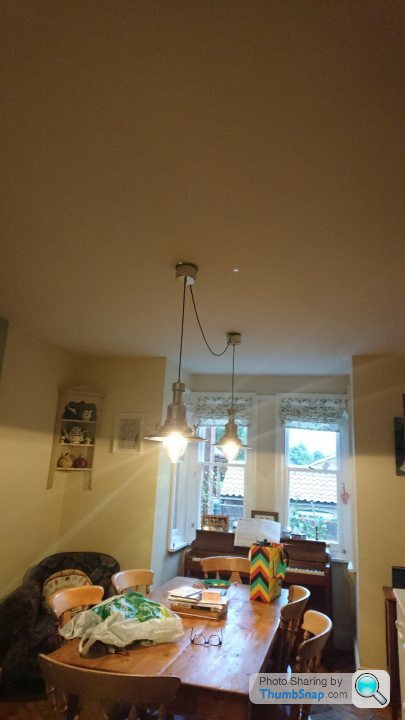
After:

I've not quite decided on the final wiring arrangements - there are two circuits, currently one for the kitchen half and one the dining half. I think I'll swap this so one switch operates the pendants at both sides and the other the downlights at both sides - giving 'low' and 'high' lighting options. I've ran some extra wires so this can be done after I've boarded the nursery. Once all the junk is out of the spare bedroom I'll lift the carpets and fit downlights in the other half of the room.
So I think that's it - two years of updates which has taken me most of the day! So much I've missed out but I think you've had the highlights and I'll try and keep this updated a little better in future.
Best,
Phil
Is that sloping ceiling in your bathroom OK? I ask because I have the same and it's been slowly shedding paint and plaster. There's nothing between plaster and tiles other than some battens, so I think it suffers from condensation. It's all along the edge, but particularly bad above the shower. Mind you it's not the shower as it was bad along there before we had it replastered when it was a bedroom. not sure if it's linked to a gutter discharging onto the roof above, possibly cooling the area more, I don't know.
Anyway, total pain in the backside as you can't easily fix it. Fortunately mine will be sorted indirectly as the roof is coming off, but hopefully yours has been done properly!
Anyway, total pain in the backside as you can't easily fix it. Fortunately mine will be sorted indirectly as the roof is coming off, but hopefully yours has been done properly!
paulrockliffe said:
I wired ceiling speakers back to a central point when we did our house, this was when Sonus existed but was too expensive and before Chromecast was a thing. I gambled that someone would invent Chromecast and they did, but I did the whole thing on the cheap because I couldn't afford anything else at the time, £20 a pair of speakers, £15 an amplifier and a load of switches and a bluetooth receiver. I've recently been buying second hand proper amps on eBay, mostly Cambridge Audio things for about £50 a pop. The difference is quite significant, especially as it's removed all the interference from my setup - I can now turn the volume down on the casting device without introducing a load of noise and I don't get loads of static if nothing is playing. I'll buy some better speakers eventually, but still really pleased with how good the sound is considering the acoustics and the cost.
If I did it again I would wire back to a central point again, I like hiding things as much as possible, so don't want amplifiers etc out on display and once the volume is set to about right you can control it with your watch or phone. And I'd add four speakers per room rather than two because I'm sat at my desk with the speakers in the ceiling behind me, they'd be better overhead, so four covers more bases. Luckily I'm upstairs so I can add a couple more.
I have this job to do shortly and am trying to confirm the route I take. Currently I have three amps, one per room each running a pair of speakers, from a Chromecast Audio, which works but is a mess of amps and cables.If I did it again I would wire back to a central point again, I like hiding things as much as possible, so don't want amplifiers etc out on display and once the volume is set to about right you can control it with your watch or phone. And I'd add four speakers per room rather than two because I'm sat at my desk with the speakers in the ceiling behind me, they'd be better overhead, so four covers more bases. Luckily I'm upstairs so I can add a couple more.
I can see the attraction to Sonos type systems, but when the cost is still £350 a pair for the speakers, or the same for a box to hook up to an existing amp, I think I will stick with 'conventional' units and a collection of chromecasts. At least then as well when the hardware changes I still have the cables from the speakers to a central location.
I think now the only question left is if I also run a network cable to each speaker location, but without running mains as well you are limited to PoE limitations or tapping into the ring main. Unless I run 2.5 T&E for the speaker cables, in which case it could be re-appropriated if required.
Current kit:
Cambridge Audio A5 and A500 £50 off ebay, and an old Marantz AV amp
Pair of B&W 603 S3 of ebay, two pair Wharfedale 9.1's (only new kit). Kef 30B sub £10 of ebay.
Daniel
hardcastlephil said:
Then I had a conversation with Mrs H in that she wanted a new bathroom and I wanted a baby. So we made a deal and I got cracking at that too...
Mrs H with child:

I'll get onto the bathroom next after some lunch.
I do really hope the joke I took from this was intended, if so I would like you to know that I laughed incredibly hard!Mrs H with child:
I'll get onto the bathroom next after some lunch.
Morgan concept looks great, as does the garden. Good luck, keep it up and please do keep us posted!
Camoradi said:
I started making a log store last night but have to start again with a combined log and bin store. Fantastic idea and just what we need. Nice work!
What page is this on? I've followed the thread from the start but now need a log store and am looking for inspiration. I'm on 40 posts/page by the way if anyone's able to give a page number.
Gassing Station | Homes, Gardens and DIY | Top of Page | What's New | My Stuff