First time refurbishment 1960's flat
Discussion


Not quite but the van is booked for Saturday 
You posted just as I was taking some update photo's....all is on track with the exception of the paint - after the first coat of colour I just don't like the finish, looks like the roller has had too much paint on it/not dried correctly
Unfortunately its like this in almost every room so I have a lot of sanding ahead of me! (unless somebody knows another way?):
Small bit toward the mid-bottom left of the picture with the paint gone completely in the bottom right is the small part I've test-sanded which gives an acceptable smoothness....

rest looks a little like this (most not as bad but this is the worst -like orangepeel!):

Not brilliant for freshly plastered walls!
Other than that everything is coming on well - sparky was in yesterday doing some of the lighting which has changed the look of almost everything! - for the better!
One run of lights was working and then stopped whilst I was in, strange so that's being looked at later today
Other than the paint issues above I've just got some grouting to finish off, the doors to put back on/furniture to build and then the handles/shelves to put on the kitchen! Also have the final gas connections/thermostat/taps to put on although the friend doing this has been pretty busy recently so I hope it won't be too much longer here.
Moving the stuff out of storage this weekend into one of the bedrooms to save some cash however, especially as it should only be a matter of weeks, especially with light to work with. some gratuitous current status shots below (please ignore the dust from paint sanding! - gets bloody everywhere but comes off without issue):
Kitchen area, my own tiling effort with full 45* cuts - just needs cleaning and grouting:

Kitchen at front looking toward living:

Main bedroom:


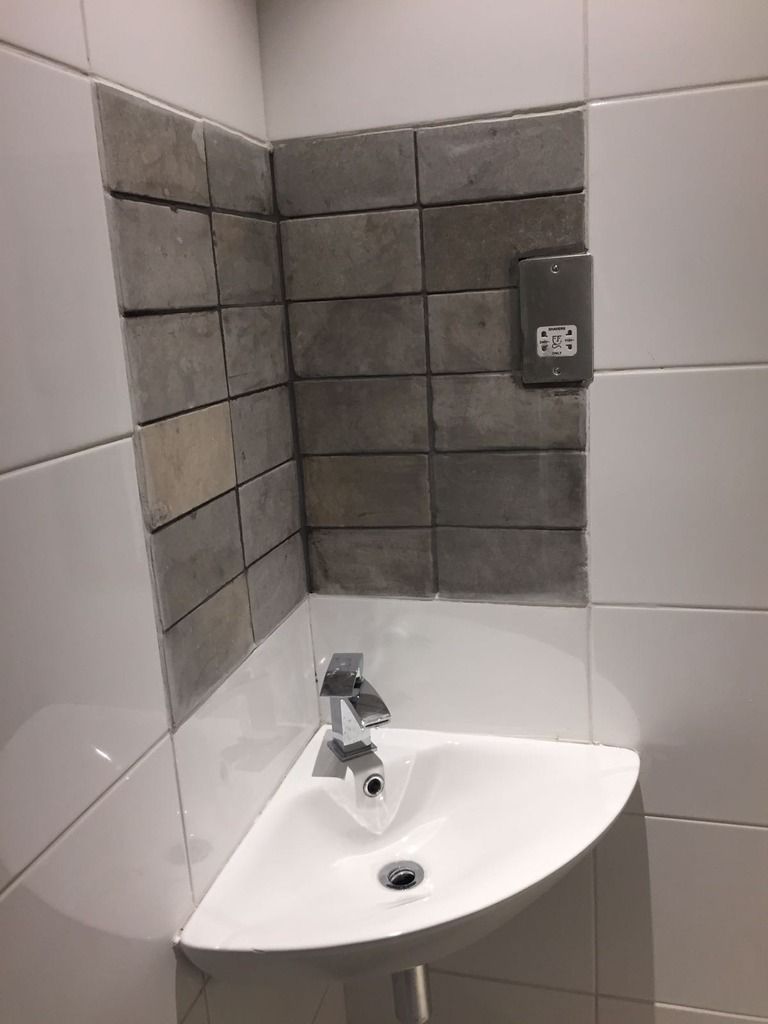
En-suite basin area:

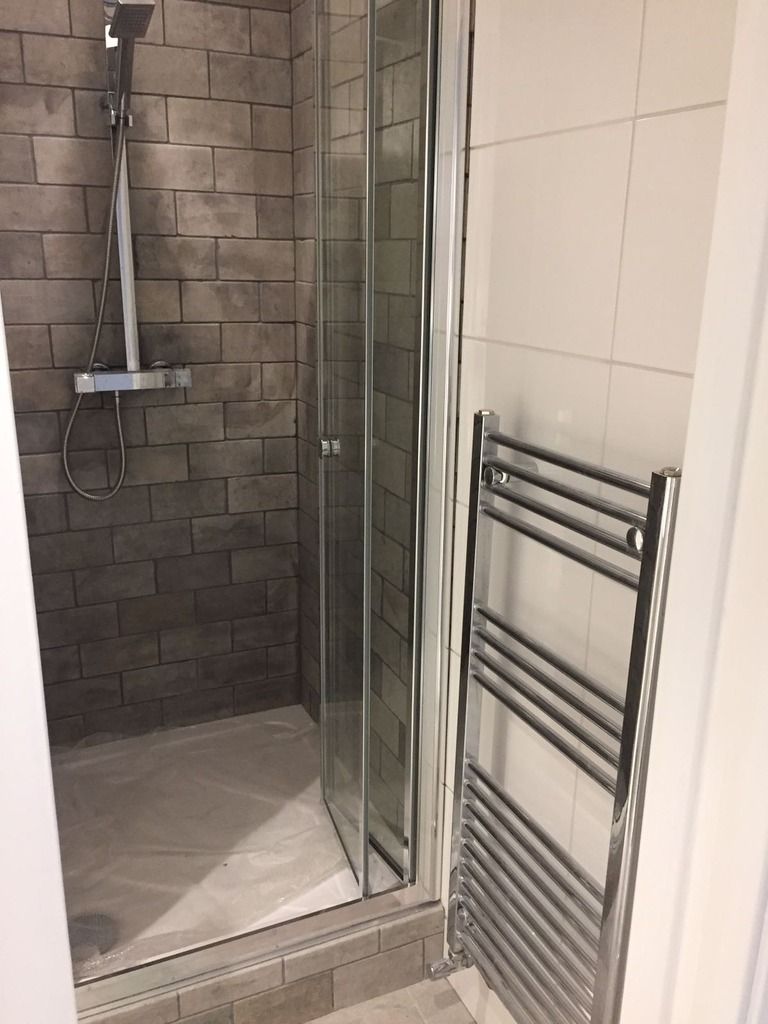
En suite shower: (had to build the boxing above the bog this weekend so still needs to be finished properly....)

Second bedroom:

You posted just as I was taking some update photo's....all is on track with the exception of the paint - after the first coat of colour I just don't like the finish, looks like the roller has had too much paint on it/not dried correctly
Unfortunately its like this in almost every room so I have a lot of sanding ahead of me! (unless somebody knows another way?):
Small bit toward the mid-bottom left of the picture with the paint gone completely in the bottom right is the small part I've test-sanded which gives an acceptable smoothness....

rest looks a little like this (most not as bad but this is the worst -like orangepeel!):

Not brilliant for freshly plastered walls!
Other than that everything is coming on well - sparky was in yesterday doing some of the lighting which has changed the look of almost everything! - for the better!
One run of lights was working and then stopped whilst I was in, strange so that's being looked at later today
Other than the paint issues above I've just got some grouting to finish off, the doors to put back on/furniture to build and then the handles/shelves to put on the kitchen! Also have the final gas connections/thermostat/taps to put on although the friend doing this has been pretty busy recently so I hope it won't be too much longer here.
Moving the stuff out of storage this weekend into one of the bedrooms to save some cash however, especially as it should only be a matter of weeks, especially with light to work with. some gratuitous current status shots below (please ignore the dust from paint sanding! - gets bloody everywhere but comes off without issue):
Kitchen area, my own tiling effort with full 45* cuts - just needs cleaning and grouting:

Kitchen at front looking toward living:

Main bedroom:


En-suite basin area:

En suite shower: (had to build the boxing above the bog this weekend so still needs to be finished properly....)

Second bedroom:

Edited by kiethton on Thursday 24th November 11:04
Yeah, walls were mist coated with Leyland contract white, with another coat of white on top.
I then spent a good weekend sanding it all back to a baby bum finish before the colour - which has gone on and looks like the above.
Only thing I can maybe think of is heating/overloading the roller/wrong type of roller - there is no heating at present but it isn't horrendously cold being the filling in the sandwich for the block, admittedly given the time the paint was being applied there was a definite case of "just get the paint on and go home..." - the stuff applied by brush isn't anywhere near as bad
Edited by kiethton on Thursday 24th November 11:04
What roller sleeve did you use? You should be able to use a really short pile on freshly plastered wall.
The shorter the pile, the less texture you usually get. And usually a microfibre one is good for bare plaster and a smooth finish.
That looks like a combination of a few things - a long pile roller sleeve, too much paint (especially if you can send it back flat and not get to the undercoat) or dust getting rolled over.
If you are gunna sand it all back, I'd invest in a sander with some dust port and hook it up to a hoover whilst you do it. That'll make soo much really fine dust, you'll be forever hoovering it up.
http://www.screwfix.com/p/no-nonsense-knitted-roll...
Are the roller sleeves used
I can sand it back a decent amount and not break though the paint - think that's 100% the cause
I have a sander and even with the bag attached dust gets everywhere - evidenced by the covering on all surfaces, especially visible on the kitchen worktops in the pictures above - a little more is irrelevant now given we'll have it fully cleaned before we move in proper (I'm sealing and fully cleaning one room to hold our stuff!)
kiethton said:
http://www.screwfix.com/p/no-nonsense-knitted-roll...
Are the roller sleeves used
I can sand it back a decent amount and not break though the paint - think that's 100% the cause
I have a sander and even with the bag attached dust gets everywhere - evidenced by the covering on all surfaces, especially visible on the kitchen worktops in the pictures above - a little more is irrelevant now given we'll have it fully cleaned before we move in proper (I'm sealing and fully cleaning one room to hold our stuff!)
I would sack those sleeves off and get some - http://www.screwfix.com/p/no-nonsense-woven-roller...Are the roller sleeves used
I can sand it back a decent amount and not break though the paint - think that's 100% the cause
I have a sander and even with the bag attached dust gets everywhere - evidenced by the covering on all surfaces, especially visible on the kitchen worktops in the pictures above - a little more is irrelevant now given we'll have it fully cleaned before we move in proper (I'm sealing and fully cleaning one room to hold our stuff!)
But I think they are a different size, so you might need a 1.75" roller frame as well.
Those along with rolling the paint out some more should do the trick.
Yeah, the dust collectors that come with them are rubbish. On mine, you can take that collector off and hook up a hose to it. I just use a normal Henry Hoover and tape it up. It's not completely dust free, but it does get about 90% of it. It'a lot easier than having to go and hoover after, as the dust gets everywhere.
If I was you I'd wait til the temperature normalises, different heats do weird things to paint. Found that out painting a freshly plastered room myself with no heat and a missing window in winter. After radiators on it all dried out, looked odd and then fine after becoming fully dry.
How diluted was the mist coat, Paint//water?
I'm no decorator so may be totally wrong, just an experience of mine that may be relevant if the walls and paint are cold and still a bit damp if they haven't dried out fully.
B&Q do a super roller I think it's about £8 which just blasts the stuff on well and with a nice finish.
looking good and taking shape. little observation in the en-suite. the shaver socket would have looked so much better turned on its side between 1 tile. or at least spaced equally. same as the floor tiles, would look so much better lined up with the wall tiles ( look the same size ).
MDMA . said:
looking good and taking shape. little observation in the en-suite. the shaver socket would have looked so much better turned on its side between 1 tile. or at least spaced equally. same as the floor tiles, would look so much better lined up with the wall tiles ( look the same size ).
I wish I could have done this but the shaving point had already been run and the tiler had tiled over the live wire!Had to cut back the tiles and thought to use these to break up the sea of white. Was thinking to arrange the tiles in the gap ala brickwork but decided against it - didn't think it would work with the white tiles which aren't? - the tiles are a different size unfortunately - 100 x 200 on the wall vs. 200 x 300 on the floor.
Paint across all rooms (barring ceilings which is top notch dulux stuff) has been the premium Velspar stuff
I do admit, vs the white which is very thick and went on in a very flattering way the coloured paints are very thin, so much so it was a nightmare to use as the paint just wouldn't spread easily/stay on the tip of the brush for touching in.
I do admit, vs the white which is very thick and went on in a very flattering way the coloured paints are very thin, so much so it was a nightmare to use as the paint just wouldn't spread easily/stay on the tip of the brush for touching in.
Thanks also, used those other sleeves previously with better (if not flawless) results. Half thinking to use a sponge mini-roller as it's given perfect results on the doors etc and I have a good few of the heads left.
If i had the opportunity to heat the place/paint in the summer I would but it's just not practical - not ideal i know...
If i had the opportunity to heat the place/paint in the summer I would but it's just not practical - not ideal i know...
A bit more work has happened - walls were fully stripped in the main bedroom and re-painted, looking multiple times better now thankfully
Now to do the same in the other bedroom and living room.....
The plumber friend has been back to finish the last jobs and has encountered a few issues...
- The dishwasher won't pull out to check that the kitchen fitter installed it correctly
- The clearance around the boiler inside the cupboard isn't certifiable (easily resolved by putting the cupboard on afterwards, with a vent/service hatch cut)
- The kitchen sink (ENKI square undermount 1.0) was supplied without the bloody overflow pipe! - need to try and find a universal jobby as I can't seem to track one online. Also the drainage pipe is 50mm, the waste pipework is 40mm....we have a reducer but it doesn't seem to work 100%....another one for me to try and resolve this evening!
Plan now is to get the main bedroom and en-suite fully finished and sealed off so atleast I can say two rooms are fully done and out of action. I'll repeat the process for the other bedroom and cupboards, hopefully done by this weekend leaving just the living room and last bathroom (plus hallway) to finish - we will get there shortly!!!!
Other than this the electrician has been busy, nearly all lights are now in but with a random niggle in the Living room, hopefully resolved soon!
Beyond that its just the last stages - painting the last coat on a couple of the doors which aren't up to my standards (trying to be an OTT perfectionist in Cindy's words)
We will be in for Xmas!!! - only issue is I'll get little done this weekend due to my DAS course.....fun (or cold if today is anything to go by!) and if I pass I think I'll spend every hour ragging the new CBR600 around! - not that productive for building work!!!!
Well it's true what they say...the last 10% of jobs take 30% of the time!
Oh so nearly there now....much to my GF's annoyance I insist on re-doing jobs/fixing things that aren't correct (primarily removing overspray/drips from doors and door frames) and in her words adding time/doing work that doesn't have to be done.....
Only things left are a thermostat to be connected to the boiler, the grouting of the tiles in the kitchen, cleaning and making good the new grout in the bathrooms then just installing things like shower screens and kitchen door handles followed by the final beads of silicone around the bath etc plus the last bits of touching up (as per the above) and the final edging in each room and we're done!
The place will be fully and finally cleaned to an inch of its life before we bring in anything however as it's totally full of dust and fine bits of building material at the moment!
The end, however, is in sight!
Pictures to follow when there is some natural light....
And for the millionth time we should finally be moving in this weekend!!!!
Only a few very minor bits still left to do:
Connect 2 lights in the bathroom
Sealant around the top of the bathrooms/bath/shower
Grout the kitchen tiles
Touch up a few minor snagging bits
fit the kitchen handles & plinth lights
Thermostat and inhibitor for the CH system
Paint the front door and fit new locks when all trades are done
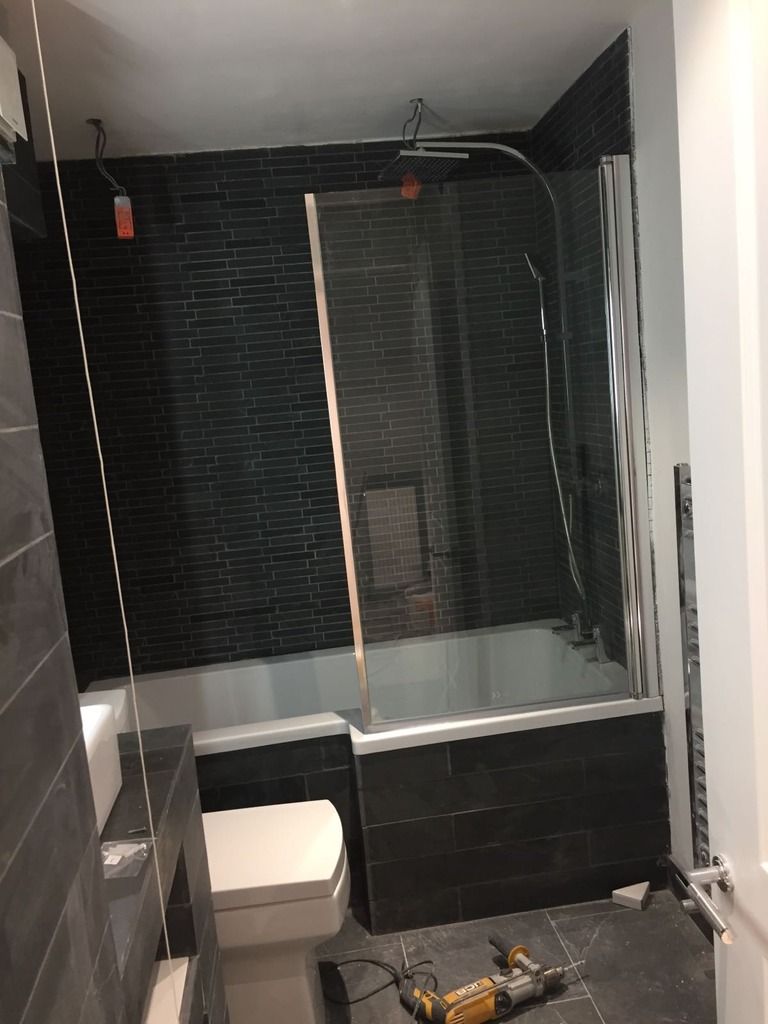
Then a case of just carrying the furniture up and assembling it! Some updated bathroom pictures:
En-suite:
Main bathroom:
And also got the utility cupboard fully installed and wired in:

The end is in sight!
The budget has been exceeded though....currently sitting @ ~£24k (+£4K) and I owe trades another £2k or so...gulp!
Only a few very minor bits still left to do:
Connect 2 lights in the bathroom
Sealant around the top of the bathrooms/bath/shower
Grout the kitchen tiles
Touch up a few minor snagging bits
fit the kitchen handles & plinth lights
Thermostat and inhibitor for the CH system
Paint the front door and fit new locks when all trades are done
Then a case of just carrying the furniture up and assembling it! Some updated bathroom pictures:
En-suite:


Main bathroom:

And also got the utility cupboard fully installed and wired in:

The end is in sight!
The budget has been exceeded though....currently sitting @ ~£24k (+£4K) and I owe trades another £2k or so...gulp!
Edited by kiethton on Tuesday 10th January 18:53
It's on one of these systems:
https://www.amazon.co.uk/gp/aw/d/B00ZA6URIY/ref=mp...
Should work well to minimise the space taken up.
Yeah I'm not too worried about the overspend given the spec of the place, rather do it right as we'll be here for a year or 2
https://www.amazon.co.uk/gp/aw/d/B00ZA6URIY/ref=mp...
Should work well to minimise the space taken up.
Yeah I'm not too worried about the overspend given the spec of the place, rather do it right as we'll be here for a year or 2
Just had the electritian in for the final snagging and all is well except....
The oven - the b d doesn't seem to fit under the hob (although it doesn't seem like he's lifted the hob when trying to fit the oven...if that would make any difference)
Going to take a look this evening but the oven is a NEFF - B44S32N3GB and the hob NEFF - T22S36N0GB
Says there is a ~10mm issue - worktops are 30mm quartz so not easy to change hob/oven locations!
The oven - the b
d doesn't seem to fit under the hob (although it doesn't seem like he's lifted the hob when trying to fit the oven...if that would make any difference)Going to take a look this evening but the oven is a NEFF - B44S32N3GB and the hob NEFF - T22S36N0GB
Says there is a ~10mm issue - worktops are 30mm quartz so not easy to change hob/oven locations!
Gassing Station | Homes, Gardens and DIY | Top of Page | What's New | My Stuff