Our French farmhouse build thread.
Discussion


dxg said:
Yes, problem solving is far more interesting than the end result, in my view. Lessons can be learnt from them for our own eventual projects...
There has been plenty of problems to solve and multiple solutions too. We have had lots of different options laid out to us and have tried several, but most of the time our electrician has the most practical solutions. I agree it is more interesting and I am sure when we reach the conclusion of all of this, there is going to be a massive void that will need filling. We do have another barn over the road that we have no plans for as yet.....
Thanks for all the comments from everyone, I enjoy reading them and it keeps me energised.
LivingTheDream said:
Great project OP - very jealous!
Nice area too - we holidayed just outside Dompierre-sur-Charente last year.
You weren't far from us at all. It is a lovely area and wasn't really on our initial search area as was the wrong side of the A10 motorway. So glad we came this side and still under an hour to the beach.Nice area too - we holidayed just outside Dompierre-sur-Charente last year.
Good luck with it all. Looks like a nice project . Not to sure about using a borrowed chainsaw to cut 10 cube though.
If you don't know those wood bundles are called Faggot,s(not sure of the spelling).
They are the outside wood of the oak trunks that can't be used in barrel making. You may have been lucky and bought some mature ones but I doubt it.
If you buy 2 years worth you can then start having mature/dried wood in the future. Much less tar in the chimney flues and will burn better with more heat.
The locals tend to mix it with actual oak logs.
Looks like you done well with the roofing company and the sparky.
Rememember you can never have enough insulation!
If you want any lime/cement/ plaster advice give me a shout. I'm not to far away.
magooagain said:
Good luck with it all. Looks like a nice project . Not to sure about using a borrowed chainsaw to cut 10 cube though.
If you don't know those wood bundles are called Faggot,s(not sure of the spelling).
They are the outside wood of the oak trunks that can't be used in barrel making. You may have been lucky and bought some mature ones but I doubt it.
If you buy 2 years worth you can then start having mature/dried wood in the future. Much less tar in the chimney flues and will burn better with more heat.
The locals tend to mix it with actual oak logs.
Looks like you done well with the roofing company and the sparky.
Rememember you can never have enough insulation!
If you want any lime/cement/ plaster advice give me a shout. I'm not to far away.
Thanks for the offer. It wasn't a chainsaw it was one of the 600mm circular saws that we borrowed. Have 2 chainsaws of my own now. Wood was chestnut that was delivered but collected 5 stere of 10 year old oak after Christmas when our stock was not looking good.If you don't know those wood bundles are called Faggot,s(not sure of the spelling).
They are the outside wood of the oak trunks that can't be used in barrel making. You may have been lucky and bought some mature ones but I doubt it.
If you buy 2 years worth you can then start having mature/dried wood in the future. Much less tar in the chimney flues and will burn better with more heat.
The locals tend to mix it with actual oak logs.
Looks like you done well with the roofing company and the sparky.
Rememember you can never have enough insulation!
If you want any lime/cement/ plaster advice give me a shout. I'm not to far away.
The big barn will be insulated to within an inch of its life! Our house just has to wait.
This year we are covered for wood with all the old beams and planks removed from the roof. If you are ever in this area come and have a coffee.
Edited by Neilsfirst on Thursday 22 October 17:42
Neilsfirst said:
mikees said:
Bon effort Neil. I so want to do after pvapour thread. Have you looked and contacted him?
I know the area quite well due to 15 years of family holidays. Where are you?
Ps looks great
Mike
We are between Saintes and Cognac. Thanks, it looks a lot better now, but still a long way to go.I know the area quite well due to 15 years of family holidays. Where are you?
Ps looks great
Mike
Edited by mikees on Sunday 18th October 22:51
Haven't read his thread and had a brief exchange with him on one of the forum posts.
Edited by Neilsfirst on Sunday 18th October 23:15

With the floors now having to set I have time on my hands, so naturally my mind turns to finishing the whole project and the garage that I will end up with. Off to Bricodepot as they have a special on consumer units. One purchased and now time to run some more electrics. I decided I needed one in the garage as when finished I want to learn to weld and the father in law has given me an arc welder, so would be really easy to run a 32amp feed and cost less in wire as we needed a couple of outside plugs and numerous plugs would be required for bloke stuff. Once this was in I started cutting out the rotten first floor. Had a plan in my head to re-use the joists and flooring from the big barn to replace it all. Unfortunately cargeekswife had earmarked these to make a mezzanine in the maison d’ami, so I started ripping the floor out of that. Many saw blades later I had 3/4’s of it finished and more wood for burning when it dries out. The last part is still awaiting removal as stopped at this point to continue work in the barn.
With the floor set hard enough to put a ladder up, it was time to rake out the mortar for re-pointing on the double height interior wall. We are just having this as exposed stone as stone has no insulating properties and we wanted a place that was comfortable all year round.
It might look great when you see it on A Place in the Sun or whatever, but they rarely show people around in the winter. This was a messy job and my shoulders knew about it in the evenings. Once completed I blew it out with an airline to make sure there was no residue left.
Now we had one of the guys back to lay another layer on the kitchen floor as this is going to be covered in travertine stone. This should stop any movement being transmitted from the slab and cracking our flooring.
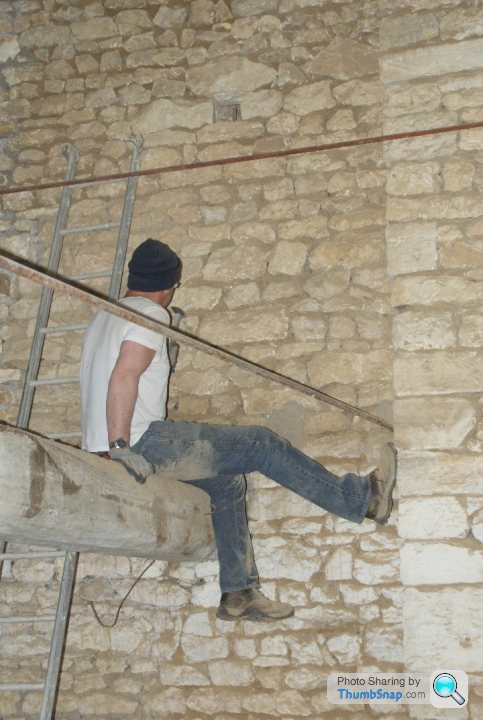
Another week for that to set and then time to remove the old central beams. The one in the kitchen side was rotten and only good for burning. So with it supported out came the chainsaw to carve it up a metre at a time.


Carried out and dropped under the hangar for storage. The main beam in the other side of the barn is made of oak, 25cm square and 8 metres long. All up very heavy. Our builders dropped off a couple more supports and asked me to support it underneath and make the first cut so we could use it in the kitchen side.
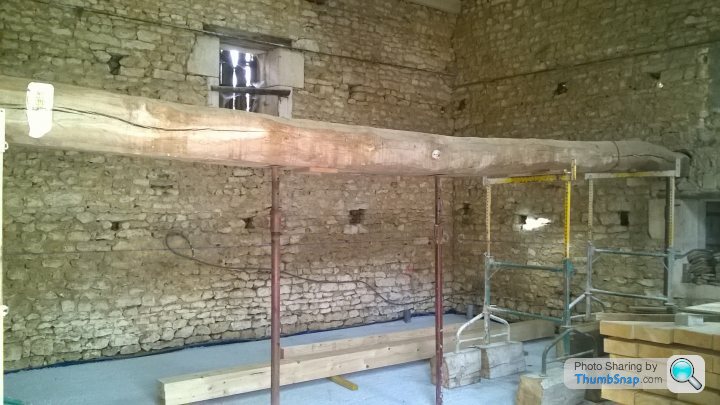
I cut a chunk out of one end so it could be manoeuvred out of the hole in the wall. The team turned up and with 6 of us and the Manitou arm through the doorway we got it down and halfway through into the kitchen. Now we had to carry it the rest of the way. Once in the right side of the barn a frame was setup to winch one side up and then the other.

Looks great in place and nice to use an original part of the barn. From building around it aspect though it is a pain in the proverbial as not one part is straight or at right angles.
With the new beams and joists having already been delivered, the 2 beams on the other side of the barn were fitted too.


With the floor set hard enough to put a ladder up, it was time to rake out the mortar for re-pointing on the double height interior wall. We are just having this as exposed stone as stone has no insulating properties and we wanted a place that was comfortable all year round.
It might look great when you see it on A Place in the Sun or whatever, but they rarely show people around in the winter. This was a messy job and my shoulders knew about it in the evenings. Once completed I blew it out with an airline to make sure there was no residue left.
Now we had one of the guys back to lay another layer on the kitchen floor as this is going to be covered in travertine stone. This should stop any movement being transmitted from the slab and cracking our flooring.
Another week for that to set and then time to remove the old central beams. The one in the kitchen side was rotten and only good for burning. So with it supported out came the chainsaw to carve it up a metre at a time.
Carried out and dropped under the hangar for storage. The main beam in the other side of the barn is made of oak, 25cm square and 8 metres long. All up very heavy. Our builders dropped off a couple more supports and asked me to support it underneath and make the first cut so we could use it in the kitchen side.
I cut a chunk out of one end so it could be manoeuvred out of the hole in the wall. The team turned up and with 6 of us and the Manitou arm through the doorway we got it down and halfway through into the kitchen. Now we had to carry it the rest of the way. Once in the right side of the barn a frame was setup to winch one side up and then the other.
Looks great in place and nice to use an original part of the barn. From building around it aspect though it is a pain in the proverbial as not one part is straight or at right angles.
With the new beams and joists having already been delivered, the 2 beams on the other side of the barn were fitted too.
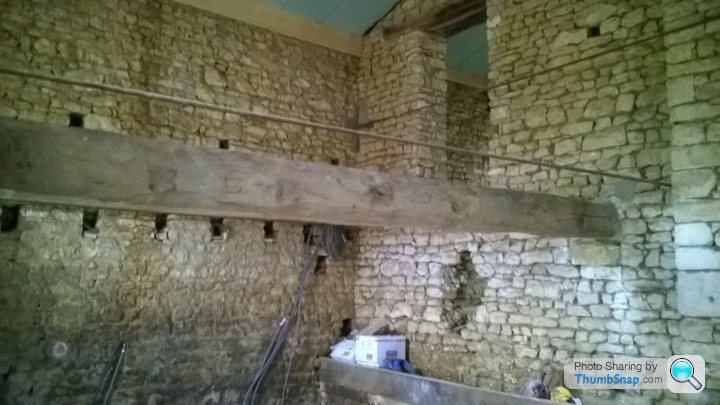
Now we are on our own for a while. We need to get all the joists in and level to start. As it is an old building, none of the holes in the walls for joists where in the right place. First big problem as joists need suspending at both ends, and to cap this we can’t nail the ties to the beam as it isn’t straight at any point.

Cue Mr Beaumatin, our window man. His solution is to cement metal T-pieces of 50mm section into the wall and rest a beam along that to attach our ties to. Genius, off to find some T-pieces. Best we could find was 40mm, and as he had specified 50mm and we are very safety conscious for others this wouldn’t cut it. Not good, but as luck would have it we ran into Mr Beaumatin in the next village over and asked where he suggested we could find some. He had just come from his supplier which is where he was parked. Introductions to the owner done and explanation supplied we all went off to find it. No T-pieces! Solution was to cut down an I beam and the closest he could offer was 66mm. Even safer so all good and he also supplied it ready cut into 25cm sections.
Back in my workshop I drilled 2 holes in each for attaching the beam. Now to source 2 six metre straight bits of wood to use as a level. Attached this to the wall at the correct height to rest the T-pieces on as I cemented them into the wall. Nice and easy or so you would think. Drilling the holes to attach my level is not so easy when you don’t have a flat faced wall. 7 holes later when I only needed 4, I was ready to place my T-pieces. Now you would imagine that out of the 13 holes in the wall that pre-existed for the joist I could find 6 that were the right height and depth. 1 was and the others had to be made deeper, lower or both. First side was then cemented in and checked with the level.
Nailed it and on to the other side. Much the same tribulations but also had one of the end holes this time too deep so had to build up to the correct level. Both outside walls were now done.

Now for the central beam. The joist were to sit on a shelf screwed to it by means of coach bolts and screws. Very strong but once again not so easy as the beam wasn’t straight. One half of the room was now ready to have joist done. On to the other side. Got the first 9 joists supported with this method, but the last part of the beam was just all the wrong angles to use this method. What the hell do we do now?
We had the kitchen fitter coming in to measure to make sure the kitchen we had ordered fitted. Posed our little problem to him and his solution was to route out three places for the joists to sit in. Crisis averted once again and out with the router the next day and making our holes for the joists. Made a guide up to cut the right size and screwed it to the beam. This should be easy but as the beam was at a 45 degree angle it just wouldn’t work, so a freehand cut had to be done. Not sure how I managed it but they all sat at the right height. Looking back I think I would use this method for the whole lot, but hopefully I never have to.
Cue Mr Beaumatin, our window man. His solution is to cement metal T-pieces of 50mm section into the wall and rest a beam along that to attach our ties to. Genius, off to find some T-pieces. Best we could find was 40mm, and as he had specified 50mm and we are very safety conscious for others this wouldn’t cut it. Not good, but as luck would have it we ran into Mr Beaumatin in the next village over and asked where he suggested we could find some. He had just come from his supplier which is where he was parked. Introductions to the owner done and explanation supplied we all went off to find it. No T-pieces! Solution was to cut down an I beam and the closest he could offer was 66mm. Even safer so all good and he also supplied it ready cut into 25cm sections.
Back in my workshop I drilled 2 holes in each for attaching the beam. Now to source 2 six metre straight bits of wood to use as a level. Attached this to the wall at the correct height to rest the T-pieces on as I cemented them into the wall. Nice and easy or so you would think. Drilling the holes to attach my level is not so easy when you don’t have a flat faced wall. 7 holes later when I only needed 4, I was ready to place my T-pieces. Now you would imagine that out of the 13 holes in the wall that pre-existed for the joist I could find 6 that were the right height and depth. 1 was and the others had to be made deeper, lower or both. First side was then cemented in and checked with the level.
Nailed it and on to the other side. Much the same tribulations but also had one of the end holes this time too deep so had to build up to the correct level. Both outside walls were now done.
Now for the central beam. The joist were to sit on a shelf screwed to it by means of coach bolts and screws. Very strong but once again not so easy as the beam wasn’t straight. One half of the room was now ready to have joist done. On to the other side. Got the first 9 joists supported with this method, but the last part of the beam was just all the wrong angles to use this method. What the hell do we do now?
We had the kitchen fitter coming in to measure to make sure the kitchen we had ordered fitted. Posed our little problem to him and his solution was to route out three places for the joists to sit in. Crisis averted once again and out with the router the next day and making our holes for the joists. Made a guide up to cut the right size and screwed it to the beam. This should be easy but as the beam was at a 45 degree angle it just wouldn’t work, so a freehand cut had to be done. Not sure how I managed it but they all sat at the right height. Looking back I think I would use this method for the whole lot, but hopefully I never have to.
Full speed ahead with getting the joists in as we had a date for the kitchen to be fitted and we needed half the kitchen boarded out for this.


With the joists in we had to put the framework up to hang the ceiling. Once again we had multiple opinions about whether we should have 40 or 60cm centres. We had started with 60cm centres, then had another tradesman in who said we really ought to be doing 40cm.

Quick change and re-hanging at 40cm to have our electrician turn up and laugh at us. We have now come to trust his opinion and is our go to man. He isn’t just an electrician but runs big projects and his own renovating and letting empire. We were just very lucky with him and due to our slow progress he can just fit us in with the odd day here and there. So back up to 60cm centres. I do get very nervous as when I am working and he stops and watches me, you think what am I doing wrong now. Apparently he learns from my way of doing things (I would say confirms the way not to do things).
With the framework in place and level we can start putting the ceiling boards up. A couple of weeks before we went to buy a plasterboard lifter from an English couple. We arrived and agreed on it, loaded up on the truck and then had coffee. Our dog, having not been near a swimming pool pushed past me and trod on the liner to fall in and I had to drag him out. Now I had a wet leg and apologising profusely for the dog while they thought it was funny. Then spent the next 3 hours there with Millie going in the pool and eating their stock of biscuits.
The boards went up quite quickly and very satisfying to see quick progress. With the odd board being cut wrong, it is not so easy turning your measurements upside down and back to front, measure twice and cut once was in use but not perfected as yet.
With one side of the kitchen ceiling in we could do the walls to allow the kitchen to be fitted. Metal studwork is very quick to put up in straight lines, but we have obstacles all over the place so was busy with the laser level to get everything lined up on the floor. Ceiling rails were a nice straight run though. We had followed the walls and it looked great all nicely framed.

In comes the electrician and tells us it’s wrong. Why seems so obvious but we hadn’t thought of it. You need right angles for the corner where the work surface goes into. The part that had to be changed was the longest wall, so we have about a 20cm gap at the end between the inside and outside wall. A very valuable lesson about the usefulness of a large square to get the angles right. Frame now ready for insulation and boards.

Insulation cut and pushed into the frame, with holes cut and electric cables pulled through. Boards measured and cut, holes drilled for sockets and screwed in.

The idea was to have a pull up sockets tower in the corner so we had the electrical outlet in the corner near the floor. Having viewed quite a few at varying price points we felt they were all a bit flimsy so scrapped that idea. Now I needed to pull the wire up from the floor to come out above the work surface. I finally managed to get a bit of hosepipe with a glass fibre rod shoved through it to join the 2 holes up so I could get some string through to yank the wire up to its new location.
Time for us to stop now while the windows and doors are fitted.
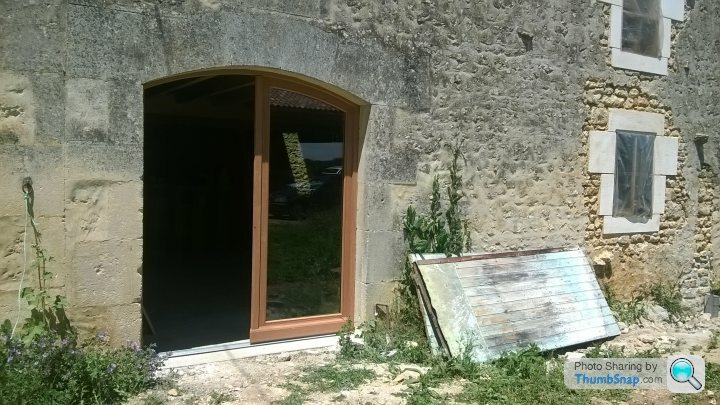


This makes us watertight! During the run up to the windows being fitted we had squatters in and raising a family.
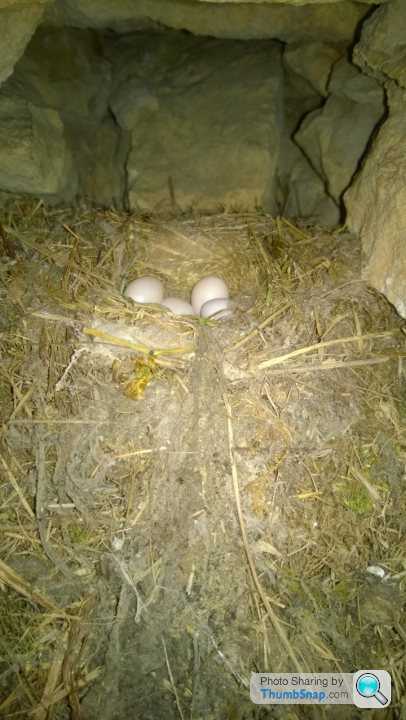

Luckily enough they hatched and fledged just a couple of day before. I did have to discourage 2 more loving couples from nesting in the run up to windows. With everything now secure, we didn’t need to remove all the tools every night.
With the joists in we had to put the framework up to hang the ceiling. Once again we had multiple opinions about whether we should have 40 or 60cm centres. We had started with 60cm centres, then had another tradesman in who said we really ought to be doing 40cm.
Quick change and re-hanging at 40cm to have our electrician turn up and laugh at us. We have now come to trust his opinion and is our go to man. He isn’t just an electrician but runs big projects and his own renovating and letting empire. We were just very lucky with him and due to our slow progress he can just fit us in with the odd day here and there. So back up to 60cm centres. I do get very nervous as when I am working and he stops and watches me, you think what am I doing wrong now. Apparently he learns from my way of doing things (I would say confirms the way not to do things).
With the framework in place and level we can start putting the ceiling boards up. A couple of weeks before we went to buy a plasterboard lifter from an English couple. We arrived and agreed on it, loaded up on the truck and then had coffee. Our dog, having not been near a swimming pool pushed past me and trod on the liner to fall in and I had to drag him out. Now I had a wet leg and apologising profusely for the dog while they thought it was funny. Then spent the next 3 hours there with Millie going in the pool and eating their stock of biscuits.
The boards went up quite quickly and very satisfying to see quick progress. With the odd board being cut wrong, it is not so easy turning your measurements upside down and back to front, measure twice and cut once was in use but not perfected as yet.
With one side of the kitchen ceiling in we could do the walls to allow the kitchen to be fitted. Metal studwork is very quick to put up in straight lines, but we have obstacles all over the place so was busy with the laser level to get everything lined up on the floor. Ceiling rails were a nice straight run though. We had followed the walls and it looked great all nicely framed.
In comes the electrician and tells us it’s wrong. Why seems so obvious but we hadn’t thought of it. You need right angles for the corner where the work surface goes into. The part that had to be changed was the longest wall, so we have about a 20cm gap at the end between the inside and outside wall. A very valuable lesson about the usefulness of a large square to get the angles right. Frame now ready for insulation and boards.
Insulation cut and pushed into the frame, with holes cut and electric cables pulled through. Boards measured and cut, holes drilled for sockets and screwed in.
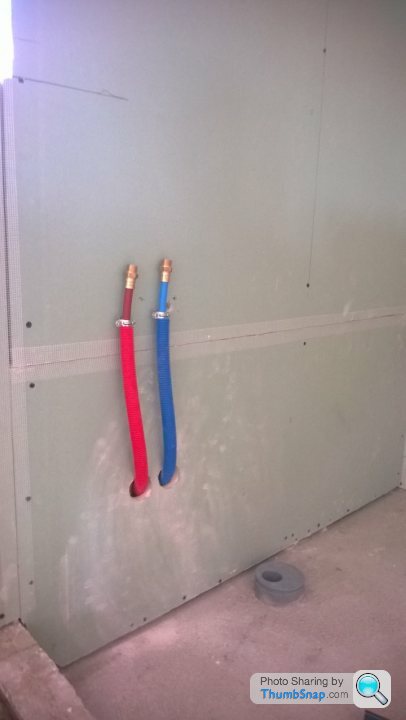
The idea was to have a pull up sockets tower in the corner so we had the electrical outlet in the corner near the floor. Having viewed quite a few at varying price points we felt they were all a bit flimsy so scrapped that idea. Now I needed to pull the wire up from the floor to come out above the work surface. I finally managed to get a bit of hosepipe with a glass fibre rod shoved through it to join the 2 holes up so I could get some string through to yank the wire up to its new location.
Time for us to stop now while the windows and doors are fitted.
This makes us watertight! During the run up to the windows being fitted we had squatters in and raising a family.
Luckily enough they hatched and fledged just a couple of day before. I did have to discourage 2 more loving couples from nesting in the run up to windows. With everything now secure, we didn’t need to remove all the tools every night.
While doing the ceilings and wall for the kitchen we also needed to do plumbing. This was the thing I was looking forward to the least. The DIY store had a special on 16mm PER pipe. Off we trundled to pick loads up to get everything done. Pipes laid out all emanating from where our water heaters are going to site. Attached to the walls and just lying on top of the joists on the other side until we got over there.

The electrician came in once all this was done to tell us we were wrong. What a surprise. To maintain pressure we only needed the 16mm to the showers, all the rest needed to be 12mm. So had to pull most of it up again, go and get 12mm and lay that down. All this living and learning is standing us in good stead for the next barn we do though.

Now the kitchen fitter can come in. We bought the kitchen from Hygena, and over here VAT runs at 20% unless you get a tradesman in to fit it and then it is only 10%. So for the sum of about €50 we had the kitchen fitted. No cupboards or wall units. Just drawers all the way. We did however have to build all the units beforehand. So we moved all the plasterboards out of the kitchen and built the units. The only thing we need to do now it is fitted is drill and fix the handles on and try and line up the drawers as the kitchen fitter was too lazy to do this.

The electrician came in once all this was done to tell us we were wrong. What a surprise. To maintain pressure we only needed the 16mm to the showers, all the rest needed to be 12mm. So had to pull most of it up again, go and get 12mm and lay that down. All this living and learning is standing us in good stead for the next barn we do though.
Now the kitchen fitter can come in. We bought the kitchen from Hygena, and over here VAT runs at 20% unless you get a tradesman in to fit it and then it is only 10%. So for the sum of about €50 we had the kitchen fitted. No cupboards or wall units. Just drawers all the way. We did however have to build all the units beforehand. So we moved all the plasterboards out of the kitchen and built the units. The only thing we need to do now it is fitted is drill and fix the handles on and try and line up the drawers as the kitchen fitter was too lazy to do this.
A bit later on this update as cargeekswife fell off a ladder so has curtailed progress and writing to get up to date. This is one gripe I do have with this country. We are here without health cover as we do not work and the UK pulled the reciprocal healthcare the week we moved over.
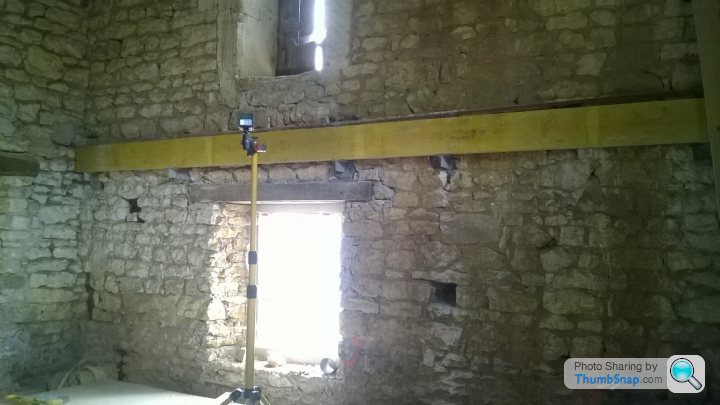
With the kitchen side as far along as we can get it we moved over to the other side of the barn to do the joists and ceiling. This was so much easier as we were working with straight beams. So all the joist ties could be placed really quickly and the joists cut to the right length. The only thing extra we had to do on this side was place supports in the centre of the 2 main beams as they are an 8 metre span each. We really didn’t want to break the space up but to have wood beams that would work without support we would have lost way too much head height.
First job was to cut the support post in half for the 2 beams. Out came the circular saw and then the reciprocating saw to finish the cut. We then measured and made the cuts. Outside to the Ranger to get the bottle jack and we cranked the beam up to put the supports in. I was really chuffed with their fit and the relative straightness of my cuts.


Once again the electrician come in and we can’t just put the wood straight onto the slab due to possibility of moisture and rotting. B******s. We need to get a metal support for it to sit on. This did not go down well with cargeekswife as it would spoil the look. The supports are 11cm tall which would mean protruding above the floor level. Out with the router that is a €25 test to see how I got on with one. Now had to route out a 5cm deep hole to sit the support into and so hide it. The plunge lock on the router is rubbish and doesn’t lock so kept on having to reset it. Now had to cut the top deeper to make up the other 6cm. Not such tight tolerances on it now but at least it won’t rot.
Joists and supports in ceiling up and we can now insulate. This provides great sound deadening and changes the acoustics and feel of the building. It is now starting to feel more like a house than a barn.


With the kitchen side as far along as we can get it we moved over to the other side of the barn to do the joists and ceiling. This was so much easier as we were working with straight beams. So all the joist ties could be placed really quickly and the joists cut to the right length. The only thing extra we had to do on this side was place supports in the centre of the 2 main beams as they are an 8 metre span each. We really didn’t want to break the space up but to have wood beams that would work without support we would have lost way too much head height.
First job was to cut the support post in half for the 2 beams. Out came the circular saw and then the reciprocating saw to finish the cut. We then measured and made the cuts. Outside to the Ranger to get the bottle jack and we cranked the beam up to put the supports in. I was really chuffed with their fit and the relative straightness of my cuts.
Once again the electrician come in and we can’t just put the wood straight onto the slab due to possibility of moisture and rotting. B******s. We need to get a metal support for it to sit on. This did not go down well with cargeekswife as it would spoil the look. The supports are 11cm tall which would mean protruding above the floor level. Out with the router that is a €25 test to see how I got on with one. Now had to route out a 5cm deep hole to sit the support into and so hide it. The plunge lock on the router is rubbish and doesn’t lock so kept on having to reset it. Now had to cut the top deeper to make up the other 6cm. Not such tight tolerances on it now but at least it won’t rot.
Joists and supports in ceiling up and we can now insulate. This provides great sound deadening and changes the acoustics and feel of the building. It is now starting to feel more like a house than a barn.
Gassing Station | Homes, Gardens and DIY | Top of Page | What's New | My Stuff