Help! Newly skimmed ceiling unpaintable...
Discussion


Having a bit of nightmare with the lounge ceiling, consider this a bit of a cry for help on the off chance anyone has a solution!
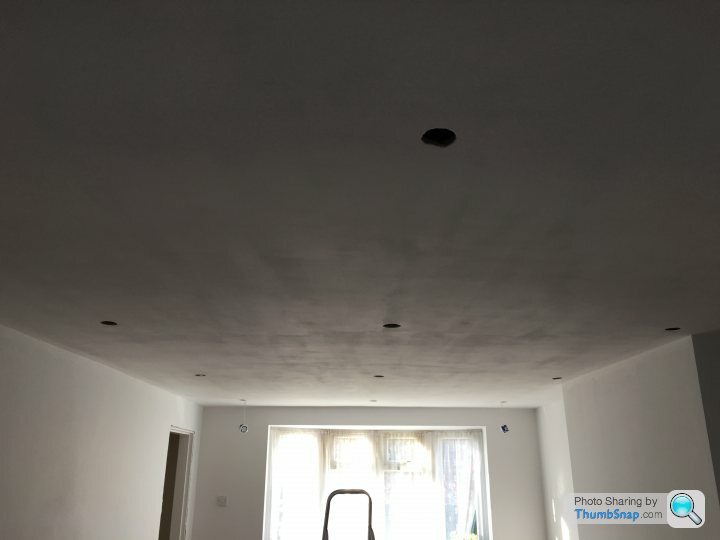
Decorating the lounge and the cowling is turning out to be a right PITA. I'm not new to painting fresh plaster (must cost etc) and every other room in the house has been fine (the lounge is the last room to be done). However any paint I roll onto the ceiling drys with awful roller marks etc - it's like the paint doesn't stick or something (picture below).
I've now tried 3 different paints (johnstones vinyl Matt, johnstones normal Matt, deluxe supermatt) and the end fruit is the same!!!
I ever tried rolling some vinsser stain cover - but alas no improvement...
Any ideas what I can do to give the curling some kind of decent finish?
Hello mate, when painting new plaster you commonly apply a milk coat first.
This is just normal paint thinned with water until it's thin like milk. You paint that on, let it dry and then paint as normal.
Might be worth checking the ceiling is t covered in dust/loose material. If it is get that off first.
HTH
This is just normal paint thinned with water until it's thin like milk. You paint that on, let it dry and then paint as normal.
Might be worth checking the ceiling is t covered in dust/loose material. If it is get that off first.
HTH
Shouldn't need pva, cheapest Matt emulsion you can get, dilute 50/50 with water and paint a coat. This will dry quick, half hour or so for next coat, add some more paint to the dilution to thicken it up, paint again. Do this 4 or 5 times with a stronger paint dilute each time then use your preffered top coat.
Joe M said:
Shouldn't need pva, cheapest Matt emulsion you can get, dilute 50/50 with water and paint a coat. This will dry quick, half hour or so for next coat, add some more paint to the dilution to thicken it up, paint again. Do this 4 or 5 times with a stronger paint dilute each time then use your preffered top coat.
+1 I have learnt this the hard way.If some of your previous coats have dried with roller marks etc, these will have to be sanded out before you attempt another coat, otherwise they'll show through again.
If the Johnsons paint is quite thick, which it probably is as it's decent quality stuff, you need to be a good painter to make it all nice and smooth. It may be worth trying an 80/20 watered down mix, just to give you a bit more drying time to remove roller marks. Or get a decorator in an make it his/her problem.
I honestly thought that if you can shît, you can paint, but occasionally there's some skill involved
If it makes the OP feel any better, as a builder (in my previous life) I've had several experiences involving the painting of new ceilings ending up a complete mess. Towards the end of a job, the householder has been bled dry by my invoices for all the extras and variations occurred along the way. To claw back some of the costs, and so his kids can still eat, he decided to pop off down to Wickes, buy some of their own brand emulsion and a cheap roller and get painting.
They spend every night for the next week rollering the same ceiling and ending up with a result not unlike the OP's. Look at it in the daylight and there's very noticeable and prominent build ups of paint caused by poor technique and, oddly, the fact that Wickes own brand emulsion is actually quite a good quality and hence quite thick and therefore awkward to apply.
Some of the householders asked us to rectify which, as above, involved sanding down the imperfections and re-rollering. We used to use the Leyland contract matt stuff usually on offer in Screwfix and B&Q: A good mix between opacity, ease of application and cost.
If the marks are from excess paint then I'd use a pole sander and give it a quick sand, then a very thin mist coat to see what it looks like before adding any further paint.
I presume you are doing coats at 90 degrees to each other ?
All the painters I've worked with have added at least 10% water to decent paint.
I presume you are doing coats at 90 degrees to each other ?
All the painters I've worked with have added at least 10% water to decent paint.
Once the soaking issues are sorted, for the very best finish:
Always roll in the same direction. Don't criss-cross.
If there's only one window or main light-source in the room, roll parallel to the window, not perpendicular. (Roll in the direction the light shines)
Don't turn the roller over (i.e. keep the handle entry side of the roller on the left, or right, but don't swap).
Edited by TartanPaint on Friday 29th April 12:09
rb5er said:
Chainsaw Rebuild said:
Hello mate, when painting new plaster you commonly apply a milk coat first.
This is just normal paint thinned with water until it's thin like milk.
You mean a mist coat I assume. Never heard anyone call it a milk coat before.This is just normal paint thinned with water until it's thin like milk.

Chainsaw Rebuild said:
rb5er said:
Chainsaw Rebuild said:
Hello mate, when painting new plaster you commonly apply a milk coat first.
This is just normal paint thinned with water until it's thin like milk.
You mean a mist coat I assume. Never heard anyone call it a milk coat before.This is just normal paint thinned with water until it's thin like milk.
Mist, yes, but not milk....
Gassing Station | Homes, Gardens and DIY | Top of Page | What's New | My Stuff