Georgian House Renovation Up North - 5 Years and Counting
Discussion


Outside again for a short stint on the potting shed, I’m scraping the barrel for 2x4 but managed to get enough pieces for the majority. Will need to buy one length to do the width and then whack in some triangular corners so the frame doesn’t wobble around.
Most of the time was spent playing Tetris with the old york stone flags to make the floor without cuts, some of them are inches thick and certainly gave me a workout dragging them around.
I also made use of an old pub sign the wife bought and left languishing in the garage
Waste not, want not, etc.


Most of the time was spent playing Tetris with the old york stone flags to make the floor without cuts, some of them are inches thick and certainly gave me a workout dragging them around.
I also made use of an old pub sign the wife bought and left languishing in the garage
Waste not, want not, etc.
Once all of the floor had final set, we gave the house keys to the plasterer to stud out the wall to allow for 50mm of insulation and a 25mm gap.
The walls in the kitchen are simple two skins of brick with no cavity so have the thermal performance of a pair of silk knickers.
To get up to standard it would have required 100mm of Kingspan but the listed status means building control and conservation work together so they allowed us to go for 50mm, it’s still a night and day improvement over previous performance.
Room was quite a bit off square in places.

The walls were generally plumb, the thing most out of plumb was (you’ve guessed it) the new block work used to infill the old back door.
Framing up


The wall between the old house and kitchen obviously didn’t need insulating but as it was likely to hold shelves or cupboards, etc. We battened off and put a giant sheet of thick ply up so all it will take to fit things are good wood screws.

Steels and chimney breast were fireboarded over and one of the old window lintels I’d cut to size and oiled was inserted as a false lintel for the chimney.

The walls in the kitchen are simple two skins of brick with no cavity so have the thermal performance of a pair of silk knickers.
To get up to standard it would have required 100mm of Kingspan but the listed status means building control and conservation work together so they allowed us to go for 50mm, it’s still a night and day improvement over previous performance.
Room was quite a bit off square in places.
The walls were generally plumb, the thing most out of plumb was (you’ve guessed it) the new block work used to infill the old back door.
Framing up
The wall between the old house and kitchen obviously didn’t need insulating but as it was likely to hold shelves or cupboards, etc. We battened off and put a giant sheet of thick ply up so all it will take to fit things are good wood screws.
Steels and chimney breast were fireboarded over and one of the old window lintels I’d cut to size and oiled was inserted as a false lintel for the chimney.
After framing it was a case of getting the sparky to fit the sockets I’d marked up, me fitting the insulation and vapour barrier and then leaving the plasterer to board over.


Except I realised after boarding the sockets were wrong and there were some missing.

I confess to blaming the sparky first as I had a plan drawn out but when I took the board off the wall, there were no markings to fit one so it was my mistake with the rattle can and I put my hands up.
Rather than get him back I added the sockets myself by taking the board down, but rather than take it off all the way to the previous socket o the ring, I took off one board and rather stupidly added some junction boxes and ran new cables from there until someone pointed out if anything went wrong I’d have to knock out the wall to fix it.
The obvious better solution (that they also suggested) was to stick an extra socket in place of the junction box.
Took photos of the wiring to show sparky it was all done properly with vertical runs up and down to sockets and added into the ring, rather than spurred and he was happy enough with my efforts when he came back for second fix.

Then plastering could start and we even had a ‘sink’ downstairs for the first time in months

Except I realised after boarding the sockets were wrong and there were some missing.
I confess to blaming the sparky first as I had a plan drawn out but when I took the board off the wall, there were no markings to fit one so it was my mistake with the rattle can and I put my hands up.
Rather than get him back I added the sockets myself by taking the board down, but rather than take it off all the way to the previous socket o the ring, I took off one board and rather stupidly added some junction boxes and ran new cables from there until someone pointed out if anything went wrong I’d have to knock out the wall to fix it.
The obvious better solution (that they also suggested) was to stick an extra socket in place of the junction box.
Took photos of the wiring to show sparky it was all done properly with vertical runs up and down to sockets and added into the ring, rather than spurred and he was happy enough with my efforts when he came back for second fix.
Then plastering could start and we even had a ‘sink’ downstairs for the first time in months
Additional menial update that I’ve just sorted as I noticed it and had one of the kids Xmas crafty brushes to hand...
The horror! New window in minor damage shocker.

Spare RAL touch up they left with us and a very professional looking brush

Wife will never know/Have to admit she damaged it/find an excuse to pin it on me, etc.

The horror! New window in minor damage shocker.
Spare RAL touch up they left with us and a very professional looking brush
Wife will never know/Have to admit she damaged it/find an excuse to pin it on me, etc.
Yes and no, the issue at Grenfell as I understand it was somewhat less about the medium and more about the way the cladding was applied externally, in effect creating an air gap between the cladding and building that created a chimney effect that accelerated the fire.
In the place it’s been used in the house, there will be no constant draw of air and no vertical escape like Grenfell and building control approved so I’m not concerned.
Worst case, it’s at the kitchen end of the house, the bedrooms are the other and all the fire/smoke alarms are networked.
Most modern houses will have some form of insulation like this, necessary evil. I could have got the same u values by using sheepswool but would have needed 150mm of insulation.
If you want a practical example to see the difference of how installation affects things like fire, squash a loo roll middle and wang it on a fire, then get another loo roll middle and stand it upright (like a chimney) on the flame and see how quickly it goes up.
On the house front, not updated as had a busy few days, the other thing perhaps alleviating my concern of fire is the fact that in one of the kids bedrooms I discovered a load of water on the windowsill leaking in.
The wife mentioned “Oh it’s been doing that for years, I just wipe it up”
It at least ended my long-standing puzzlement at why the hinge on this window had rusted...
So outside I went to investigate. I don’t have a drone so used an old phone, tape and 3m length of waste pipe...
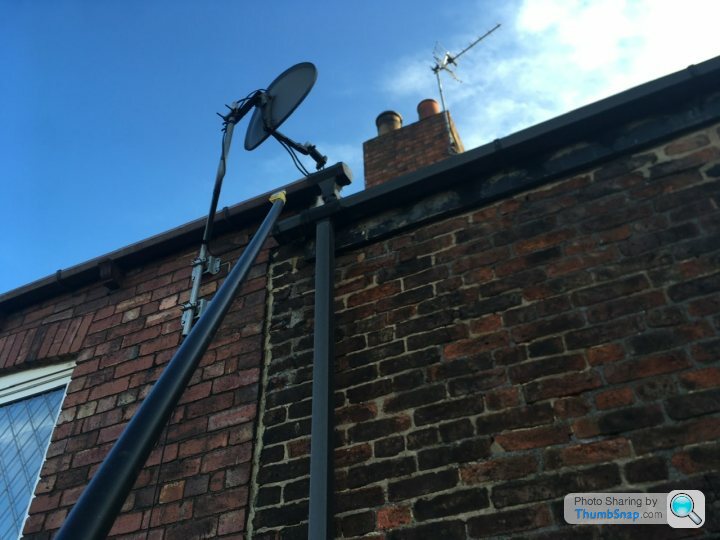
I discovered this bugger above the window.

Popped down to local MKMBS and although it turns out they don’t do roof tiles, they had some trade samples someone had dropped in so gave me one for free as it was a 13” inch although not the same brand but worth a punt.
Back home, I borrowed a ladder and stand-off from my neighbour and clambered up for a nosey.

Sadly the tile didn’t fit properly with the others as the overlap was slightly too much, and there was a sag in the batten so I propped up the tile that was allowing driving rain in and sealed it all up with a spare tube of roof sealant.
I need to get in and fix it properly in summer, I feel the tiles may well need to come off...I found out from a previous owner they re-roofed it in these concrete tiles (compete with sealing the eaves and stopping the roof breathing :/ - I’ve put extra vents in to help flow for now) in place of the original Yorkshire stone that was on there and sagging, I still think these are too heavy for the roof and will have a think about longer term solutions.


Not the finished solution but the phone ran out of charge and I’m not b king up and down a ladder loads of times just for the internet people

I also had tired of waiting for trades and put the mixer to use to start building the wall myself.
The wife mentioned “Oh it’s been doing that for years, I just wipe it up”
It at least ended my long-standing puzzlement at why the hinge on this window had rusted...
So outside I went to investigate. I don’t have a drone so used an old phone, tape and 3m length of waste pipe...
I discovered this bugger above the window.
Popped down to local MKMBS and although it turns out they don’t do roof tiles, they had some trade samples someone had dropped in so gave me one for free as it was a 13” inch although not the same brand but worth a punt.
Back home, I borrowed a ladder and stand-off from my neighbour and clambered up for a nosey.
Sadly the tile didn’t fit properly with the others as the overlap was slightly too much, and there was a sag in the batten so I propped up the tile that was allowing driving rain in and sealed it all up with a spare tube of roof sealant.
I need to get in and fix it properly in summer, I feel the tiles may well need to come off...I found out from a previous owner they re-roofed it in these concrete tiles (compete with sealing the eaves and stopping the roof breathing :/ - I’ve put extra vents in to help flow for now) in place of the original Yorkshire stone that was on there and sagging, I still think these are too heavy for the roof and will have a think about longer term solutions.
Not the finished solution but the phone ran out of charge and I’m not b
king up and down a ladder loads of times just for the internet people I also had tired of waiting for trades and put the mixer to use to start building the wall myself.
Not tried my hand at proper important wall building outside of a bit of patching up but I figured I could give it a go.
Builder had told me the mix to use and to add enough water and mix for 15 mins until I get porridge like consistency in the lime mortar.
I’d been out and bought a new brick line, some thermal lined gloves (why have I never got these before - a bloody god send) and then got cracking.


Trick is to leave the mortar to harden off a bit before brushing it off to leave a decent mortar joint.
Happy with the results, after a day off, I did some more...
It was really windy and rain predicted so perversely, I ended up both protecting the mortar from rain at the same time as popping out to wet it down as the wind was drying it too fast to allow carbonation to occur
It still needs to mortar brushing off in the next photo.
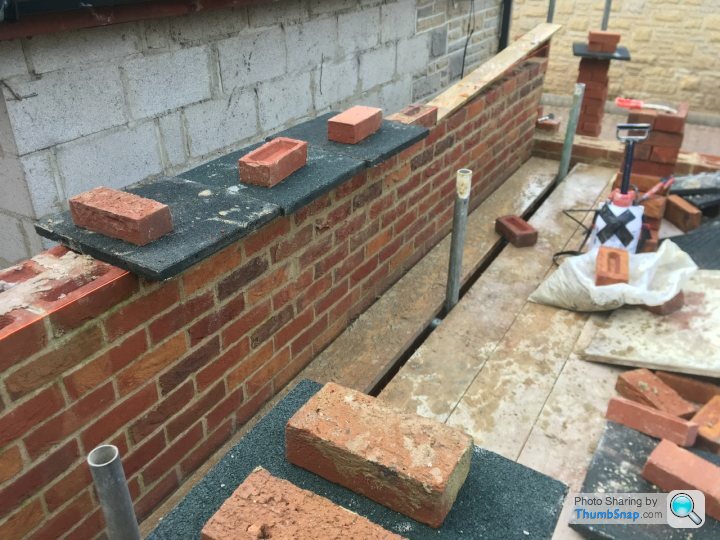
Wife took photo of me hard at graft...would have preferred her getting me a cuppa tbh.

Builder had told me the mix to use and to add enough water and mix for 15 mins until I get porridge like consistency in the lime mortar.
I’d been out and bought a new brick line, some thermal lined gloves (why have I never got these before - a bloody god send) and then got cracking.
Trick is to leave the mortar to harden off a bit before brushing it off to leave a decent mortar joint.
Happy with the results, after a day off, I did some more...
It was really windy and rain predicted so perversely, I ended up both protecting the mortar from rain at the same time as popping out to wet it down as the wind was drying it too fast to allow carbonation to occur
It still needs to mortar brushing off in the next photo.
Wife took photo of me hard at graft...would have preferred her getting me a cuppa tbh.
RoverP6B said:
Isn't Kingspan basically the same stuff used on the outside of Grenfell Tower? PIR - not exactly fireproof and very toxic when it goes up. Not sure I'd be happy with ply/stud walling and that stuff behind it in a kitchen...
Better throw my Pringles out of the cupboard too! https://www.bbc.co.uk/news/uk-england-derbyshire-5...
I'm not a bricklayer, but that wall is looking damn good to my eyes.
Sometimes relying in trades gives you the impetus to give things a go yourself. I mean how hard can it be? If it goes well you don't need the trade. If it doesn't go well, then you are no worse off for trying.
Shame about the roof tiles, look pretty ugly compared to what I imagine was on previous. Big money to change though........


Great thread. OP is a proper grafter, and learning lots of useful skills (he can use when his kids need him).
My only suggestion looking at your chisel work on the potting shed window, try a multi tool...they’re fab as you can plunge saw, detail sand etc. and add to a decent collection of power tools.
Also your V70 is identical to mine save for yours having a blower. Not jealous. Much.
My only suggestion looking at your chisel work on the potting shed window, try a multi tool...they’re fab as you can plunge saw, detail sand etc. and add to a decent collection of power tools.
Also your V70 is identical to mine save for yours having a blower. Not jealous. Much.
The Don of Croy said:
Great thread. OP is a proper grafter, and learning lots of useful skills (he can use when his kids need him).
My only suggestion looking at your chisel work on the potting shed window, try a multi tool...they’re fab as you can plunge saw, detail sand etc. and add to a decent collection of power tools.
Also your V70 is identical to mine save for yours having a blower. Not jealous. Much.
The stupid thing is that I have a multi blade tool but forgot I had it My only suggestion looking at your chisel work on the potting shed window, try a multi tool...they’re fab as you can plunge saw, detail sand etc. and add to a decent collection of power tools.
Also your V70 is identical to mine save for yours having a blower. Not jealous. Much.
The downside of being able to do most things to an ok standard is the wife seems to think I can ‘just’ make stuff and expects me to fix/magic everything up.
Secretly, I love it though...I’m also building this drill powered car on the side too...someone else built most of the frame, I just need to finish steering, power and bits.

stewjohnst said:
Still waiting for the final permission to come through on LBC so not tempting fate but we’ve started on the things we can do without permission and find out for the rest on the 17th December...
Clearing out the soon to be downstairs toilet and as is the way, found a few new beams and bits and pieces. Really a puzzle trying to read the layout, I think there may have been another servants door to the old dining room here, hence the beam but unless I chip off the plaster in the dining room, I won’t know.
The brickwork also looks like bodge job in filling too but I’m loath to start taking out as the wife doesn’t have the patience for my investigations she once had...
We’ve agreed to leave the back wall as exposed brick so I have visions of me chipping away at the mortar and disposing of it Great Escape style every time I use the facilities until I find the answer.
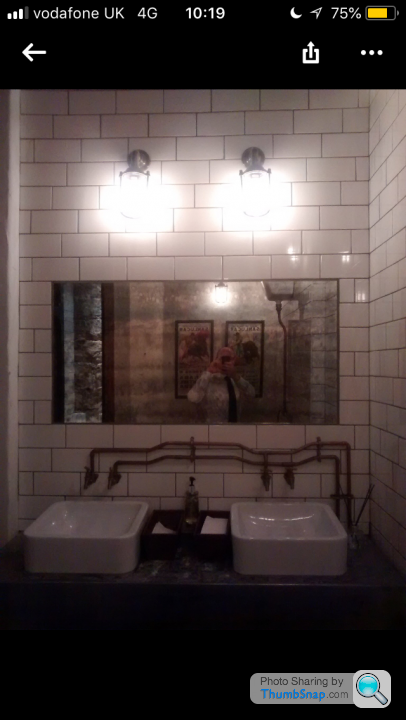
This is the kind of look we’re going for, V&A tiles and an old fixed mirror but uncovering so much wood has made us opt for warmer cream tiles as they go better with the dark wood we have everywhere.
Floor will be stone with underfloor heating too.
Right, suppose I better update what I’d done about this bit of the house then...Clearing out the soon to be downstairs toilet and as is the way, found a few new beams and bits and pieces. Really a puzzle trying to read the layout, I think there may have been another servants door to the old dining room here, hence the beam but unless I chip off the plaster in the dining room, I won’t know.
The brickwork also looks like bodge job in filling too but I’m loath to start taking out as the wife doesn’t have the patience for my investigations she once had...
We’ve agreed to leave the back wall as exposed brick so I have visions of me chipping away at the mortar and disposing of it Great Escape style every time I use the facilities until I find the answer.
This is the kind of look we’re going for, V&A tiles and an old fixed mirror but uncovering so much wood has made us opt for warmer cream tiles as they go better with the dark wood we have everywhere.
Floor will be stone with underfloor heating too.
We had a small room (in the loosest sense of the word) off the entrance hallway that was being used for shoes and coats.

The floor was just a thin pour of cement on bare earth and I suspected there was a false roof.

Careful investigation in progress.
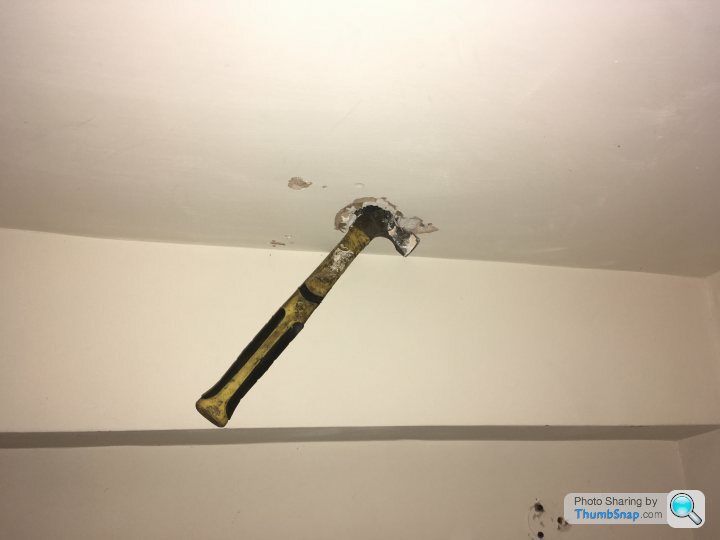
Oooh!

Double oooh!

I decided that I’d bring some of these features back to life so my mind was set to strip back to the wood and oil it where I could and to at least leave one wall with exposed brickwork on show.
You may recall ages ago that I built a simple door for this cupboard out of a lt and pine. It flattered to deceive as up close it wasn’t great and obviously in this house it sat in the frame with a somewhat casual interpretation of square. As a cupboard, it didn’t matter but as a means of shielding the great unwashed from ablutions, it would never do and had to go.

They don’t make them like they used to, etc. If only I had a door that was almost a perfect fit that was period correct...
Ah yes, the one I found earlier.

The door wasn’t a perfect fit so I had to use a circular saw and some clamped guides to trim the bottom of the door to a shorter size and to get it square. It was also about 1cm too narrow so I just added a filler strip of wood to the frame and blended it in with filler and painted the whole frame.

Edited by Vanity Projects on Sunday 19th January 09:02
Old builder was also tasked with core drilling through for a toilet waste and extractor, I’d marked out where things would go in terms of sink and toilet but stupidly left his choice of location for the waste exit up to him. He exited square through the wall to get the shortest distance through the wall. This had the added bonus of making fitting the toilet a tt, but more on that later.


Next job was to leave him to fit the UFH mat, not a big job.
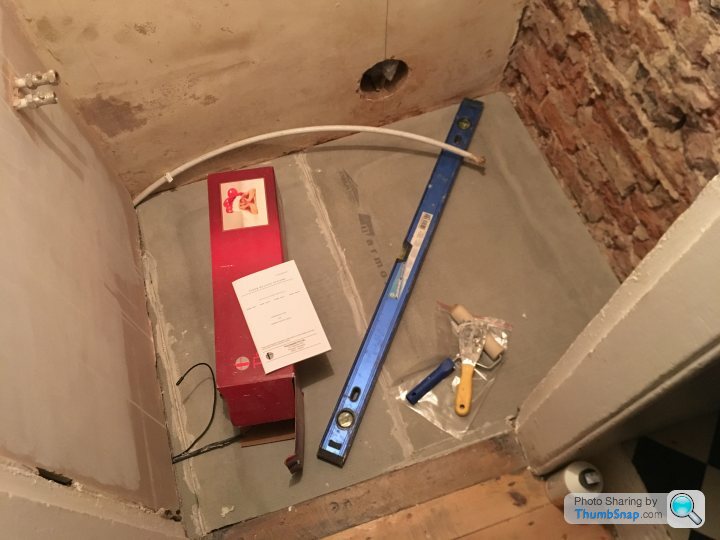
I got a phone call saying it was too big and didn’t fit. I arrived home to find he’d laid the mat out with the cable overlapping and given up. As I had the sparky coming back the next day, I sat down with a roll of tape and did it properly by taking it off the mat, as per the box instructions.

Sparky signed off my work no problem, what was more worrying was builder had told me he’d done someone else’s floor the other week so god only knows what happened to theirs as he’d laid their slabs
t, but more on that later.Next job was to leave him to fit the UFH mat, not a big job.
I got a phone call saying it was too big and didn’t fit. I arrived home to find he’d laid the mat out with the cable overlapping and given up. As I had the sparky coming back the next day, I sat down with a roll of tape and did it properly by taking it off the mat, as per the box instructions.
Sparky signed off my work no problem, what was more worrying was builder had told me he’d done someone else’s floor the other week so god only knows what happened to theirs as he’d laid their slabs
Building regs requires extraction but it would somewhat spoil the aesthetic so a cunning plan was hatched.

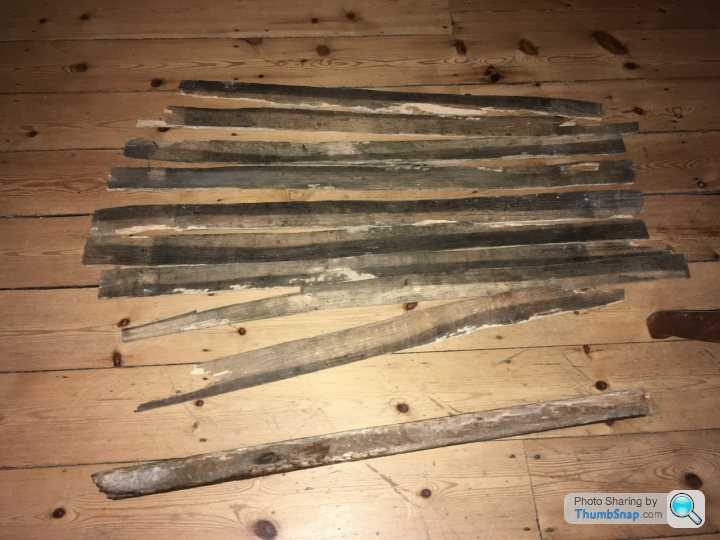
When stripping the ceiling down and wall, I’d kept some lathes behind as I’d always wanted to leave an area of the lathe and plaster exposed to show the old construction methods. I hadn’t found anywhere I could do it without it looking a bit like a hole in the wall but the toilet gave me an opportunity to experiment.
Dusty old lathes
Hoovering, wiping and oiling them


Then took to the fan and cowl with plasti-kote


Fin.

When stripping the ceiling down and wall, I’d kept some lathes behind as I’d always wanted to leave an area of the lathe and plaster exposed to show the old construction methods. I hadn’t found anywhere I could do it without it looking a bit like a hole in the wall but the toilet gave me an opportunity to experiment.
Dusty old lathes
Hoovering, wiping and oiling them
Then took to the fan and cowl with plasti-kote
Fin.
Gassing Station | Homes, Gardens and DIY | Top of Page | What's New | My Stuff