Georgian House Renovation Up North - 5 Years and Counting
Discussion


I’ll stop referencing ‘old builder’ as it will get repetitive suffice to say the battened out wall in the toilet wasn’t square and the pipe exit for the sink meant the tap tails either didn’t reach or if I put the sink on the wrong wall, they fouled the waste...oh and because I had to feck about hanging the sink location, the core drill for the sink waste is in the wrong place so it’s off centre.
Now, ignoring all that, I had a crack at tiling. The two walls I’d put in, no bother, the one someone else had put in...concave as a b d, as well as not square - it was only a 1000mm of a span but by the time I realised it was a mile off flat, it was skimmed and so I had to try and tile it out.


You’ll notice I changed the position of the top two rows of tile slightly to improve the aesthetic on the bit people would really notice but the break isn’t noticeable as I had a plan for the ridge you can see in the photo.
Now, ignoring all that, I had a crack at tiling. The two walls I’d put in, no bother, the one someone else had put in...concave as a b
d, as well as not square - it was only a 1000mm of a span but by the time I realised it was a mile off flat, it was skimmed and so I had to try and tile it out.You’ll notice I changed the position of the top two rows of tile slightly to improve the aesthetic on the bit people would really notice but the break isn’t noticeable as I had a plan for the ridge you can see in the photo.
Edited by Vanity Projects on Sunday 19th January 20:26
When we took the old windows out, I kept the old wooden lintels as experience has taught me, old wood, a bit of tlc and tung oil makes a very attractive finish.
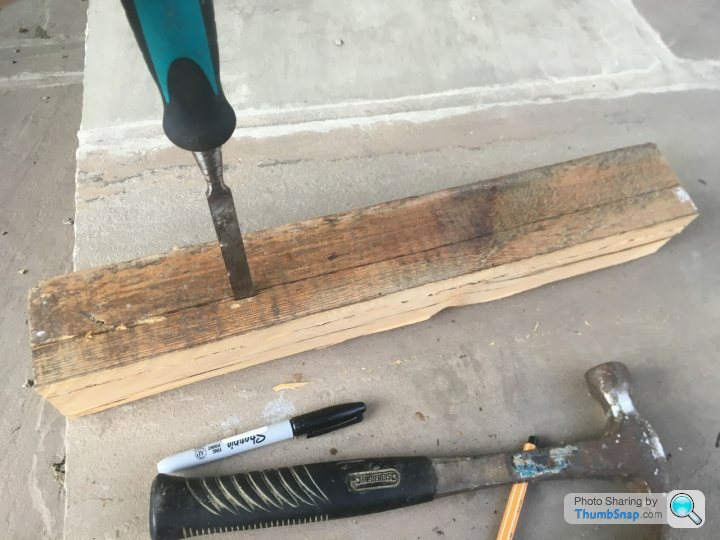
I needed something to fix the loo roll holder in anyway so I set to with chisel and table saw.


You can also see in those shots how I built a false wall to house the flush cistern, space is a massive premium as it’s is very ‘bijou’ in there so I shortened the cistern to pan connector as much as I dare to claw back another 10cm.
I needed something to fix the loo roll holder in anyway so I set to with chisel and table saw.
You can also see in those shots how I built a false wall to house the flush cistern, space is a massive premium as it’s is very ‘bijou’ in there so I shortened the cistern to pan connector as much as I dare to claw back another 10cm.
The top for the cistern block was an old floorboard that we’d previously varnished your (warts and all) as a shelf in the kitchen. It needed a small trim and a hole saw to make space for the flush button and I had a removable shelf top that fits in the look too.

There was a bit of an issue with a huge gap behind the large beam pictured as crap would keep falling down, as it wasn’t well lit there, I figured an ingenious/heinous (depends on your point of view) solution would be to use expanding foam and then cut it back once set and paint it black.
It might sound like a stupid thing to do but there is so much old woodworm on the beam, that the pores of expanding foam when cut away and painted black are a reasonably good match. You can be the judge tbh.


Excuse the potato phone.

There was a bit of an issue with a huge gap behind the large beam pictured as crap would keep falling down, as it wasn’t well lit there, I figured an ingenious/heinous (depends on your point of view) solution would be to use expanding foam and then cut it back once set and paint it black.
It might sound like a stupid thing to do but there is so much old woodworm on the beam, that the pores of expanding foam when cut away and painted black are a reasonably good match. You can be the judge tbh.
Excuse the potato phone.
I had painted the wall that has it all scraped off above, it started life with paint on it and I figured I’d just over paint...I’d just done the whole wall and was feeling chuffed with myself when I looked down and saw it had split and peeled away in a big sheet.
Previous occupiers had obviously skimmed and then not done a watered down coat so when my paint wet theirs it just came off like a manky scab after a swim in the pool.

The wife stepped in and redid it properly as I was too annoyed to do it again, and really the wall needed filling a it as there were the odd dents and lumps but she went away to fleabay to find an old mirror to cover the wall and spare our blushes.

Easy enough to hang into the timber with a couple of hooks and some adjustment of the chains with pliers.

Ta-da!

In the meantime I needed to cover the unsightly tap valves and hide the extended tap hoses I’d had to use so it was out with the wood and saws again.


The idea was to cut out the section so it looked like a solid block but despite my obviously precision planning, I cut the wrong end of the timber so would have had a newly sawn face showing that would spoil the look.
Cue some quick cutting of a new end to stick over and cover up the mistake.
Balls...


Secured it to the wall with CT1 so the valves are hidden under the shelf (with their service valve facing down so I can easily isolate if needed) and the bulk of the tap tails hidden.

If you’re all thinking, Jesus that wood will all rot away, it’s sealed with a load of tung oil and then it actually has a coat of satin finish floor seal that’s for stone floors...It’s waterproof and gives a slightly darker/wet/old look to the wood and so far is holding up perfectly.
I also did something similar to hide the soil pipe, again useful having something that prevents liquids soaking into wood in the ‘splash zone’ as it were.

Other highlights (you mean you haven’t heard enough about the toilet yet?).
How out of square can that new wall be? Take care to note the sink and how much the wall is curving away from the trim!

For reference, when the plasterer studded out the kitchen and I checked it with the laser, he was under 5mm out over 6.5metres, this was over 10mm out in a metre.
I added a tag to the old servants bell that we uncovered, obviously no staff at the end of it anymore

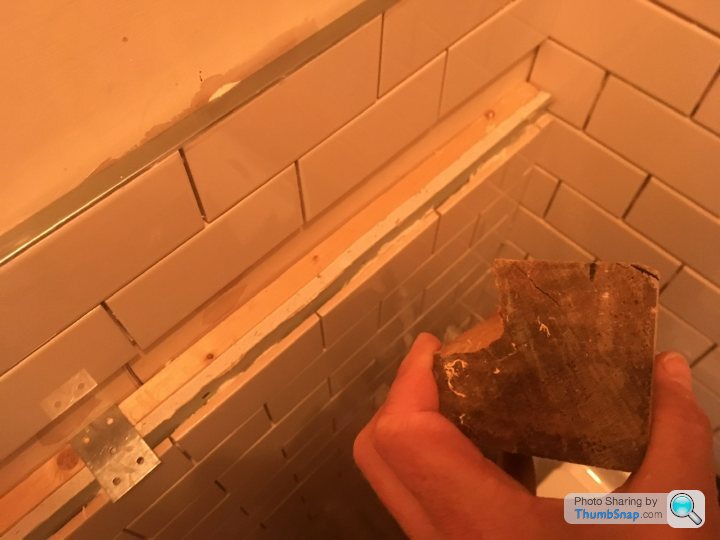
The only thing I’m unhappy with is the budget waste I’ve had to use as I couldn’t recore the hole. And the state of my toiling on the concave wall the builder put in, I was packing out so much adhesive it was a joke and I didn’t want a massive gap on the wall at the trim too so I had to work in a bit of a curve.
It has not been successful but it’s done now.
Fixing the waste is not major and I will sort a solution to fix/hide it at some point, the tiles will stay as is.
Safe to say, in between all the other building st, the time and attention on this room has been my little Zen labour of love.
I even wrote a poem!


Previous occupiers had obviously skimmed and then not done a watered down coat so when my paint wet theirs it just came off like a manky scab after a swim in the pool.
The wife stepped in and redid it properly as I was too annoyed to do it again, and really the wall needed filling a it as there were the odd dents and lumps but she went away to fleabay to find an old mirror to cover the wall and spare our blushes.
Easy enough to hang into the timber with a couple of hooks and some adjustment of the chains with pliers.
Ta-da!
In the meantime I needed to cover the unsightly tap valves and hide the extended tap hoses I’d had to use so it was out with the wood and saws again.
The idea was to cut out the section so it looked like a solid block but despite my obviously precision planning, I cut the wrong end of the timber so would have had a newly sawn face showing that would spoil the look.
Cue some quick cutting of a new end to stick over and cover up the mistake.
Balls...
Secured it to the wall with CT1 so the valves are hidden under the shelf (with their service valve facing down so I can easily isolate if needed) and the bulk of the tap tails hidden.
If you’re all thinking, Jesus that wood will all rot away, it’s sealed with a load of tung oil and then it actually has a coat of satin finish floor seal that’s for stone floors...It’s waterproof and gives a slightly darker/wet/old look to the wood and so far is holding up perfectly.
I also did something similar to hide the soil pipe, again useful having something that prevents liquids soaking into wood in the ‘splash zone’ as it were.
Other highlights (you mean you haven’t heard enough about the toilet yet?).
How out of square can that new wall be? Take care to note the sink and how much the wall is curving away from the trim!
For reference, when the plasterer studded out the kitchen and I checked it with the laser, he was under 5mm out over 6.5metres, this was over 10mm out in a metre.
I added a tag to the old servants bell that we uncovered, obviously no staff at the end of it anymore
The only thing I’m unhappy with is the budget waste I’ve had to use as I couldn’t recore the hole. And the state of my toiling on the concave wall the builder put in, I was packing out so much adhesive it was a joke and I didn’t want a massive gap on the wall at the trim too so I had to work in a bit of a curve.
It has not been successful but it’s done now.
Fixing the waste is not major and I will sort a solution to fix/hide it at some point, the tiles will stay as is.
Safe to say, in between all the other building s
t, the time and attention on this room has been my little Zen labour of love.I even wrote a poem!
Edited by Vanity Projects on Sunday 19th January 21:18
Edited by Vanity Projects on Sunday 19th January 21:22
Edited by Vanity Projects on Sunday 19th January 21:24


Gingerbread Man said:
A chrome or black bottle trap would be the go for that basin.
Agree but because it’s offset, I need to do some jiggery pokery to coax it into the hole, I don’t really want to fabricate one that’s double width or it will look weird so it’s one to ponder as I get on with other jobs!We had the windows restored a few years back as chunks of the frame were rotten so when we had the scaffolding up reporting, the joiner turned up on site with five lads and spent a week taking out and restoring each frame, I watched what they did and made mental notes in case I ever needed it again, quite handy.
We got lucky as we caught the windows in time so we’re able to get them all refurbed and repaired for about £4,000 in 2016, we didn’t need new frames, just a few bits of glazing and a lot of sanding and sectional repair to the frames, all the weights and cords were checked and replaced where needed too (not a lot of them). Another year and the windows would have been too far gone, so a good save.
That was a few years back and turned out they missed a bit as when we had the painter round to paint them in September 2019, he spotted a patch that was ‘a bit squidgy’.
I found this out when I got home from work and as he was coming back next day, I had to quickly get it sorted before the daylight vanished so it was off to the garage to find what I could make do and mend with.
Hmmm...

How bad could it be?

Told you I had a multi tool!

Time to cut out the rot, quite a bit

Tidied up, someone has been here before (observe the foam)

Get wood

Chop wood

Clamp wood (some ct-1 used)
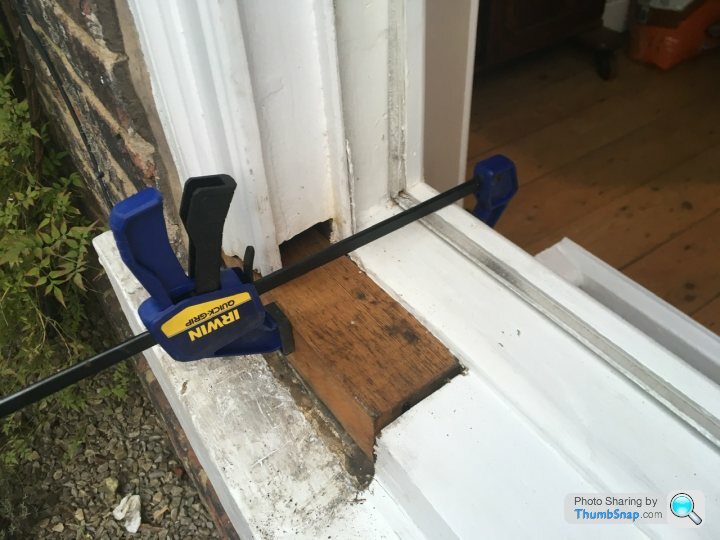
Create a fall to avoid re-rot

Infill piece

Wob it

Next day after painter - happy with it to say repair was two hours work start to finish in fading light. Painter was pretty impressed I’d done a ‘proper’ repair.

We got lucky as we caught the windows in time so we’re able to get them all refurbed and repaired for about £4,000 in 2016, we didn’t need new frames, just a few bits of glazing and a lot of sanding and sectional repair to the frames, all the weights and cords were checked and replaced where needed too (not a lot of them). Another year and the windows would have been too far gone, so a good save.
That was a few years back and turned out they missed a bit as when we had the painter round to paint them in September 2019, he spotted a patch that was ‘a bit squidgy’.
I found this out when I got home from work and as he was coming back next day, I had to quickly get it sorted before the daylight vanished so it was off to the garage to find what I could make do and mend with.
Hmmm...
How bad could it be?
Told you I had a multi tool!
Time to cut out the rot, quite a bit
Tidied up, someone has been here before (observe the foam)
Get wood
Chop wood
Clamp wood (some ct-1 used)
Create a fall to avoid re-rot
Infill piece
Wob it
Next day after painter - happy with it to say repair was two hours work start to finish in fading light. Painter was pretty impressed I’d done a ‘proper’ repair.
Edited by Vanity Projects on Saturday 25th January 00:14
Have read this thread in its entirety over the last week or so. Some astonishing work OP!
My future wife is eyeing up a property like this (I am secretly hoping it isn't listed) for our move out of the south east. I've thoroughly enjoyed reading about your successes and trials throughout.
Please keep us all updated with it!
My future wife is eyeing up a property like this (I am secretly hoping it isn't listed) for our move out of the south east. I've thoroughly enjoyed reading about your successes and trials throughout.
Please keep us all updated with it!
Original builder was here today so we cracked on with getting the wall up higher, including building the wall back true to vertical after my few courses in the last weeks 

I was the lackey today, mixing the mortar and tidying the final mortar finish.
Cables for the lights are also in the wall now. Soon have this scaffolding down at this rate.
Also did the neighbourly thing and cleaned neighbours gutter for his outbuilding as I had a spot of downtime between mixing and pointing.

Thanks, it is one of those houses that keeps you busy (money pit? )
Wouldn’t want to create the impression it’s just me doing the graft though...here’s the wife planting some new fruit trees.
Ground needed a bit of persuasion to move...

Weekend of work on the wall with improvised rain cover held up well.

Oh and that lovely stone floor we’ve laid outside? Darling wife wants to lift some along the edge by the wall to create a border and planting space.
Added the job to the list, I know better than to argue with a lady with a pickaxe
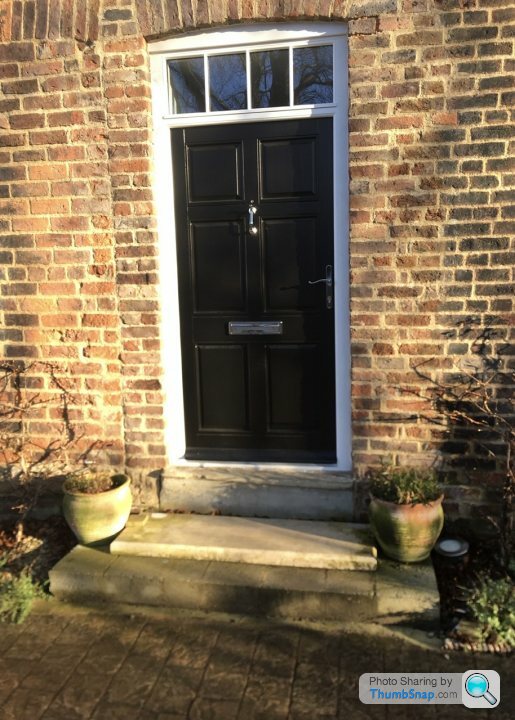
Some other jobs outstanding, front doorstep - The fireplace hearth is probably not doing much for that fabled kerbside appeal
And this circle in the gravel is where a water feature is to go, I think that can wait till spring.

The tree stump you see below is where a tower/folly is to go (no prizes for guessing who gets to build that) I have stated that since I have to build it I will be making the top into an observatory as we have nice open sky (if a bit too much light pollution).

Artist’s impression, I think I’m my own worst enemy sometimes.

)Wouldn’t want to create the impression it’s just me doing the graft though...here’s the wife planting some new fruit trees.
Ground needed a bit of persuasion to move...
Weekend of work on the wall with improvised rain cover held up well.
Oh and that lovely stone floor we’ve laid outside? Darling wife wants to lift some along the edge by the wall to create a border and planting space.
Added the job to the list, I know better than to argue with a lady with a pickaxe
Some other jobs outstanding, front doorstep - The fireplace hearth is probably not doing much for that fabled kerbside appeal
And this circle in the gravel is where a water feature is to go, I think that can wait till spring.
The tree stump you see below is where a tower/folly is to go (no prizes for guessing who gets to build that) I have stated that since I have to build it I will be making the top into an observatory as we have nice open sky (if a bit too much light pollution).
Artist’s impression, I think I’m my own worst enemy sometimes.
Edited by Vanity Projects on Monday 27th January 11:00
A brilliant thread. I started reading it yesterday afternoon, and like a good book, I could not put it down. I have just finished the lot.
A huge undertaking and I doff my hat to you. The sheer amount of work you have done and learned is incredible.
Your work ethic and humor has had me riveted, and I look forward to what comes next.
A huge undertaking and I doff my hat to you. The sheer amount of work you have done and learned is incredible.
Your work ethic and humor has had me riveted, and I look forward to what comes next.

Next time you have a rotten window section I may point you in the direction of a 2 pack resin product formerly provided by Window Care (now Repair Care). Awesome stuff and lasts longer than your window would. I've specified it many times on clients properties (chartered building surveyor and no connection with the company!) and it makes windows look like new. If the rot is extensive you need not lose the window, just cut out all the rot back to sound timber, insert new piece of timber (as you did) and pack the resin around it. Leave it to 'go off' and rub down as you would with timber. As new, ready to decorate.
JM
JM
Gassing Station | Homes, Gardens and DIY | Top of Page | What's New | My Stuff